
Floral Embroidered Lampshade using Heavyweight Threads
Floral Embroidered Lampshade
by Aimee Davis of DaisyEyes Handmade

Create an embroidered lampshade that has a retro vibe using Sulky Filaine™ thread for texture. This is a great project to add a touch of vintage to any room. Plus, use the cute embroidered lampshade designs to create coordinating linens for a table, curtain borders or even on a denim jacket or jeans.
It’s National Sewing Month, so we’re inviting you to try something new and expand your skills! This month, we’ll bring you fun projects using different threads, materials and specialty notions that you may have never heard of before. Celebrate sewing by adding new techniques to your repertoire and products to your stash. Let’s begin with the embroidered lampshade from DaisyEyes Handmade.
Embroidered Lampshade Supplies
- Embroidery needle
- 10” embroidery hoop
- Sulky Filaine™ thread in these colors:
- Sulky Stick ’n Stitch™
- Thread conditioner (such as Thread Magic)
- 1/2 yard Robert Kaufman Essex linen cotton blend in WHITE
- DIY Lampshade Kit from I like that lamp
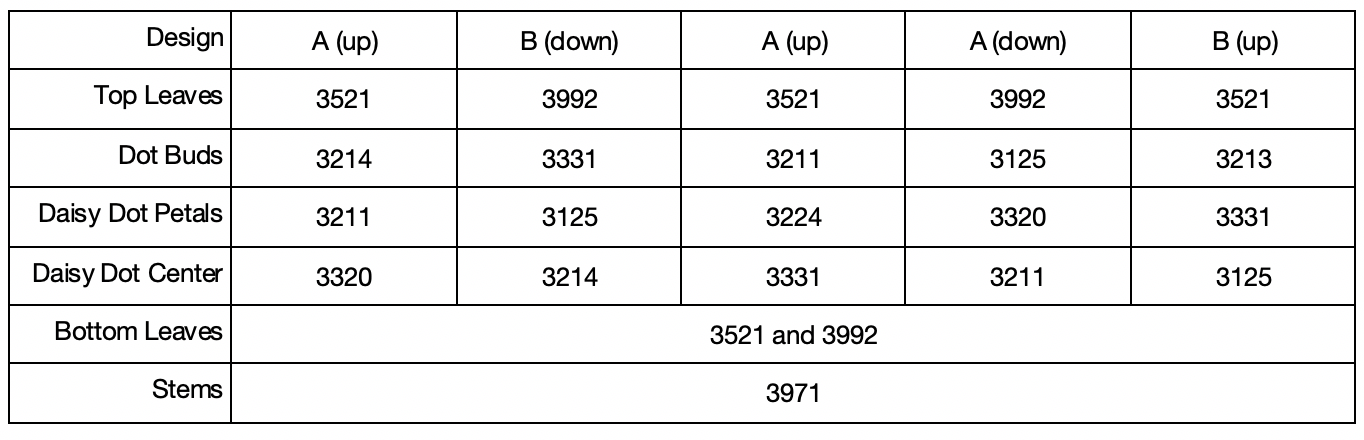
Design Order & Color Chart
Embroidery Instructions
Download the Floral Embroidered Lampshade pattern.
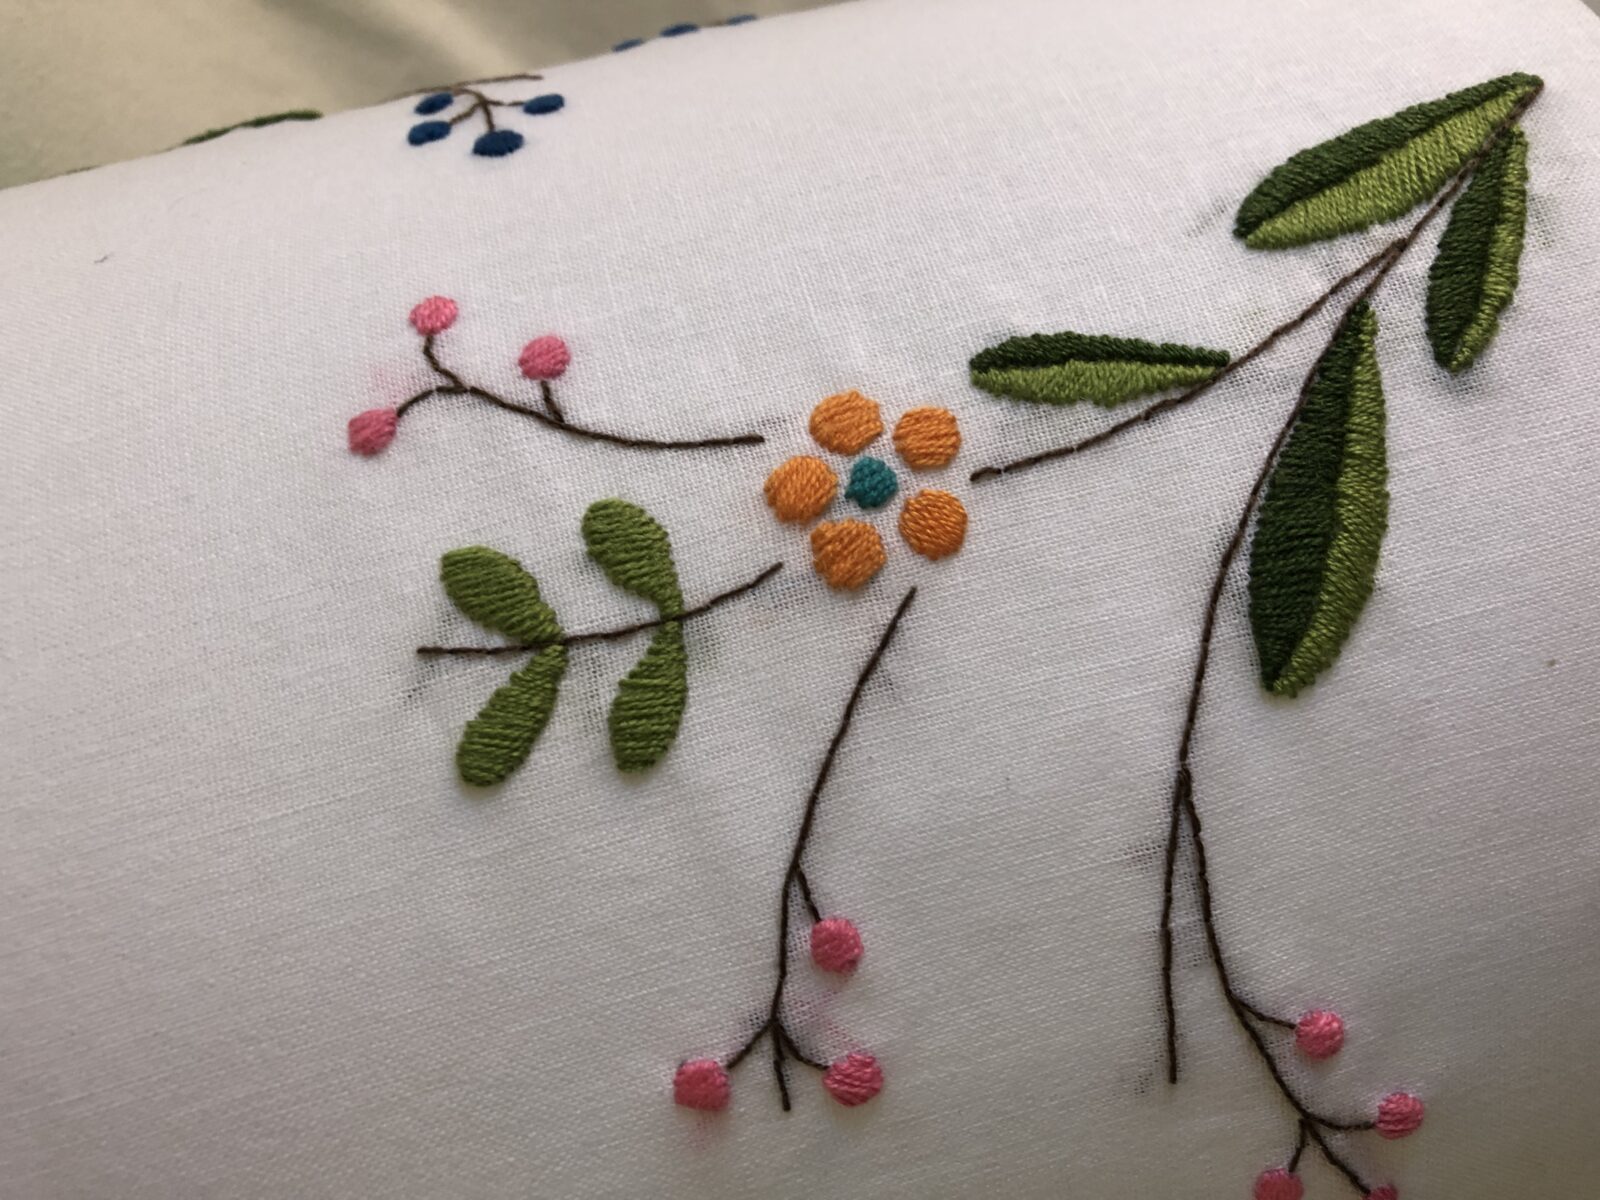
All of the stems are stitched with a backstitch using a single strand of brown #3971 Filaine.
The rest of the embroidery design is stitched using a satin stitch.
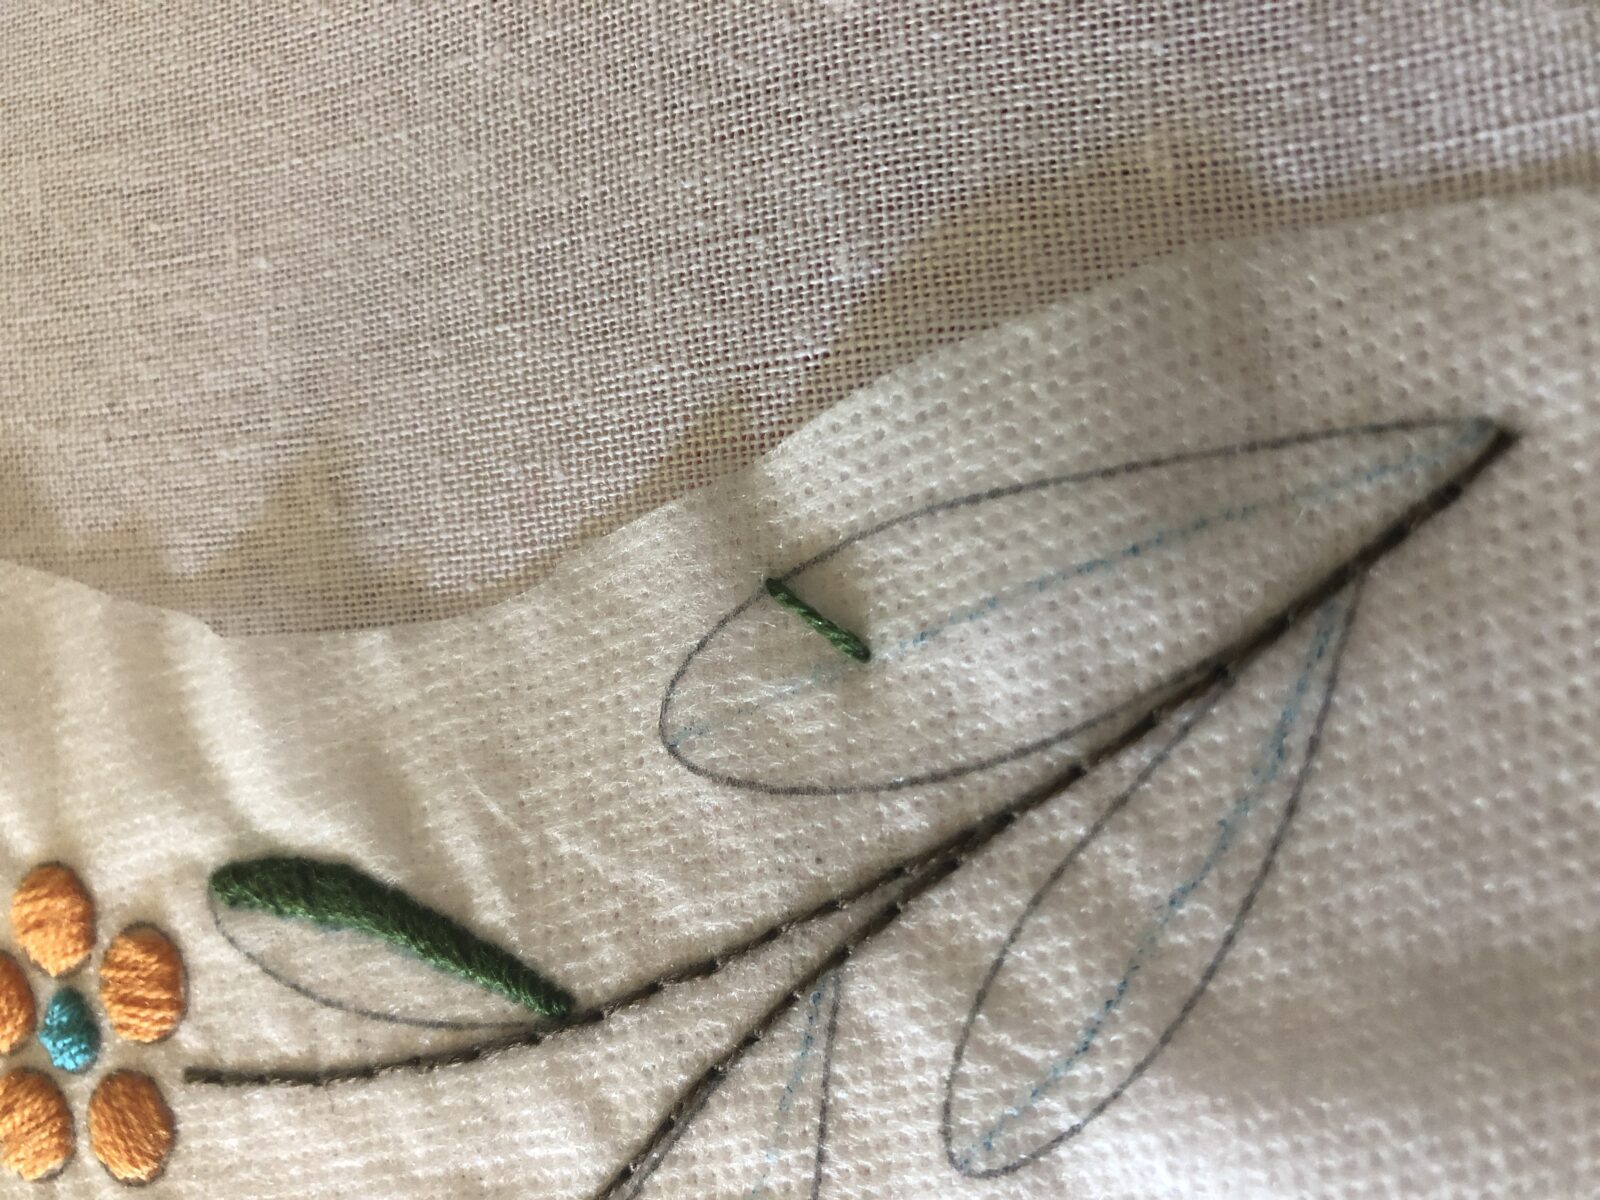
For the bottom leaves: Draw a line from top to bottom down the center of the leaves. Using 2 strands of #3992 Pistachio Filaine, sew the right half of the side of the leaf with a satin stitch. Begin on the outside, in the middle of the leaf at an angle pointing down.
Bring the needle up just to the outside of that stitch and repeat sewing right next to each stitch.
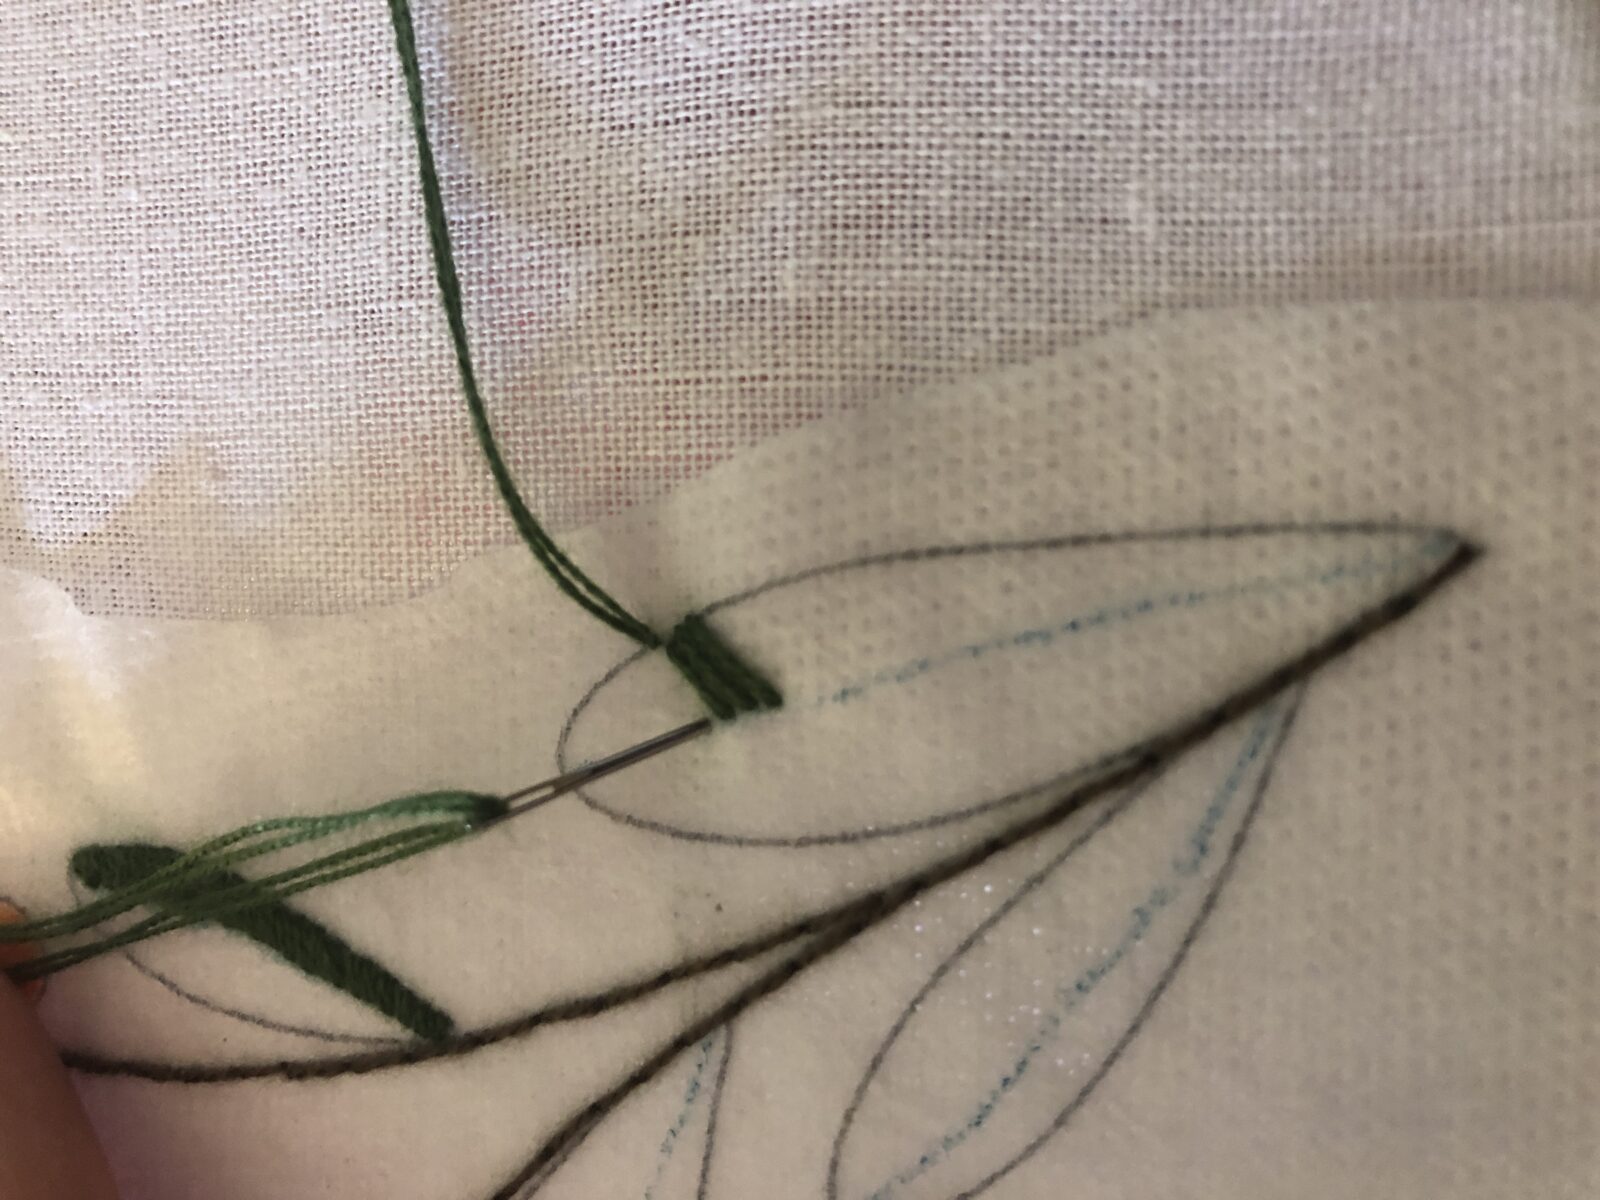
Continue. Then repeat on the left side using #3521 Avocado.
For each circle bud/petal: Using two strands of Filaine, sew a stitch, starting in the center of the circle from one end of the circle to the other.
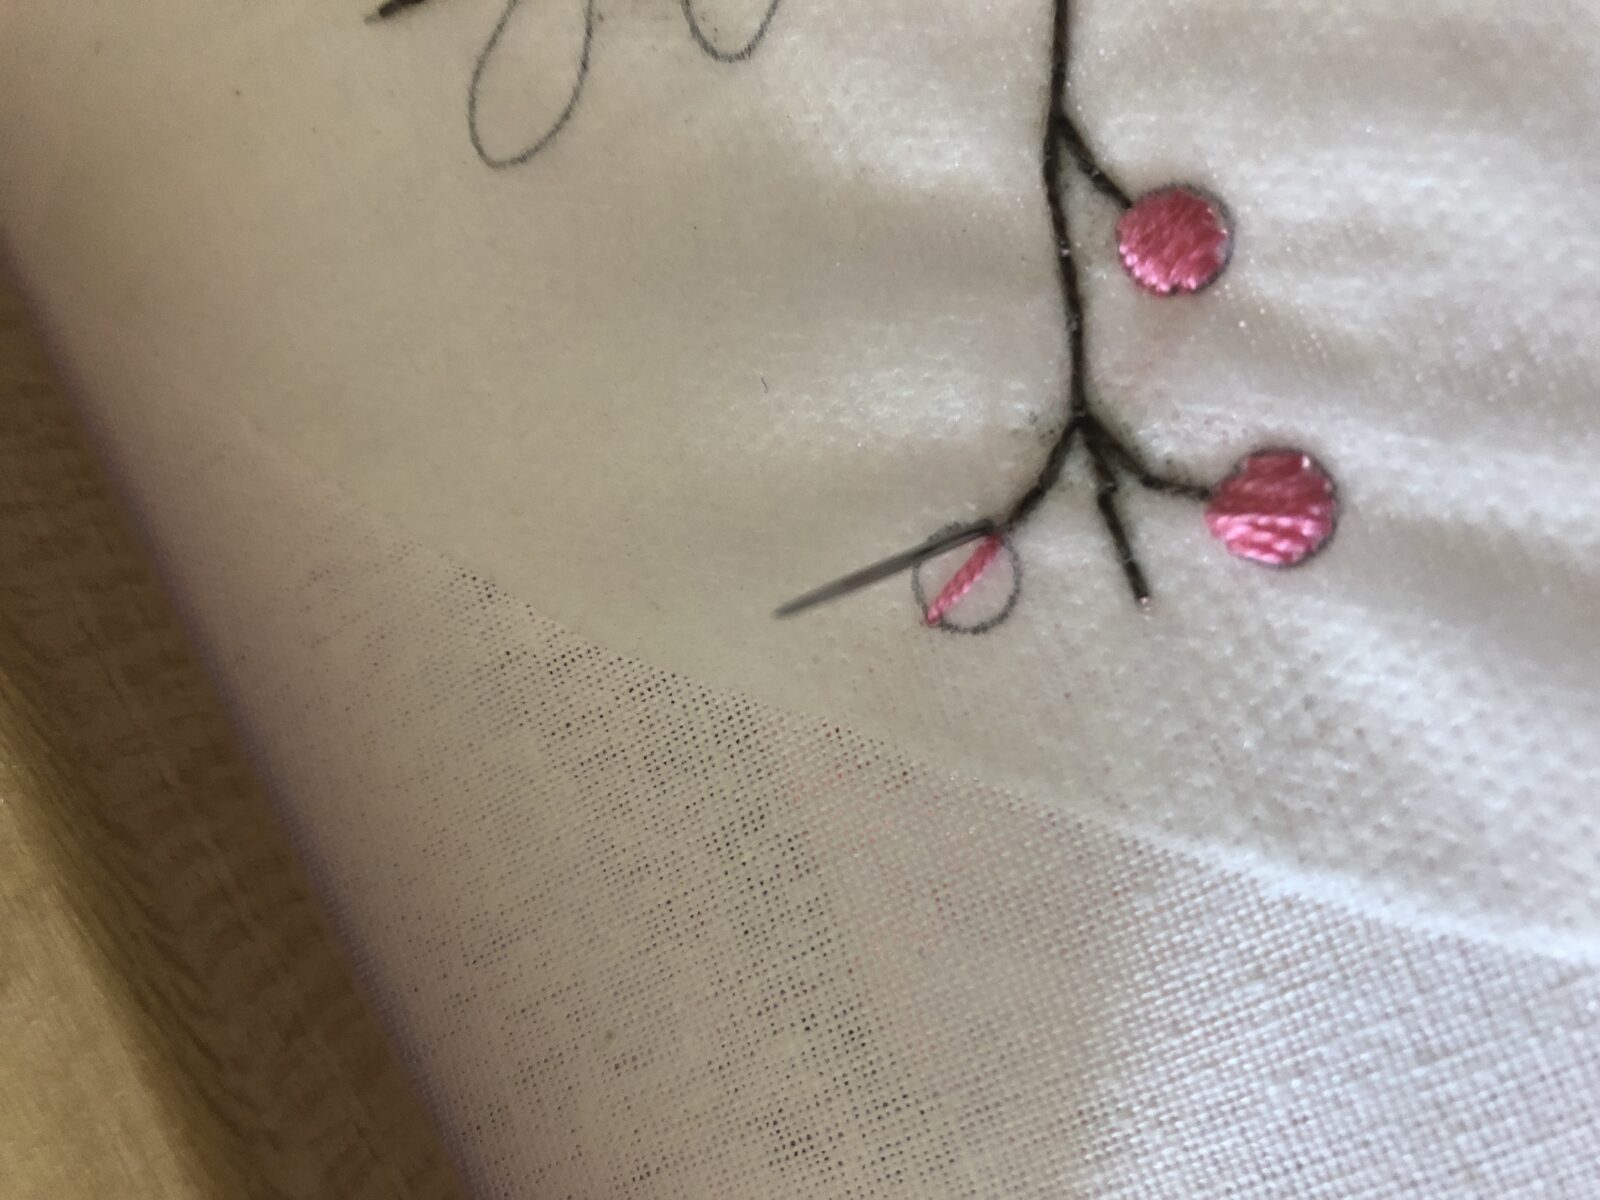
Bring up your needle next to that first stitch and repeat sewing a stitch right next to the one you just stitched. Fill in the circle all the way to the right and then to the left.


The top leaves are stitched with a satin stitch going up and down (not at an angle)
Embroidered Lampshade Construction
Print 3 copies of the pattern onto Stick n’ Stitch sheets. Cut out each flower section; leaving the paper intact.
Cut the fabric into a 36”x12” rectangle; press
Mark 2″ from each fabric short end and 1” from the upper and lower edges.
Place the printed patterns as noted in the Pattern Design and Color Chart above.

The design alternates with the flowers going up and the flowers coming down. Each end should be just inside the upper and lower marks. Once happy with the design, remove the backing and stick the patterns onto the fabric.
Follow the embroidery instructions and color chart above.
When finished stitching, dissolve the Sulky Stick ‘n Stitch following the package directions.
Dry and press the fabric from the wrong side, avoiding the thread.
Follow the instructions included in the DIY kit to finish constructing the embroidered lampshade.
TIP: To avoid show-through of thread ends. weave the tails into the back of the designs. If desired, fuse a bit of Sulky Tender Touch to the embroidery wrong side to seal the thread ends and ensure they don’t unravel.
Filaine Stitching Tips
Filaine thread is amazing to work with. It has a nubby texture that gives a unique vintage look to the embroidered lampshade. It does have a slight tendency to knot up if the threads are too long, but it easily untangles. You do need to watch your threads underneath when stitching because of this tendency to knot. Make sure that the threads are pulling all the way through when you come through the top of the hoop.
Use a thread conditioner when working with the Sulky Stick n’ Stitch and the Filaine for best results.
To use “two strands”, here’s what I do: I pull a long length of thread from the spool and then fold it in half. I thread the two ends through my needle and then snip the middle apart at the bottom loop and voila! “two strands”.
The threads are colorfast and handle the dissolving of the Stick n’Stitch very well. They don’t pile up or fray at all.
From Aimee: “This is hands down the best thread I’ve worked with in a long time. When doubling up the strands, it gives your project the dimension and appearance of a wool thread without the hassle of working with wool. Wool thread tends to knot up super easily and also frays if it’s handled too much.”

Ellen March
I am the Director of Content for Sulky of America. The former Editor in Chief of Sew News and Creative Machine Embroidery magazines, I hosted Sew it All TV on PBS for nine seasons. I've appeared on It's Sew Easy on PBS, DIY Network's Uncommon Threads, Hallmark's Marie Osmond Show, MacPhee Workshop and more! Come sew with me!


3 Comments
Gail Beam
Love your lampshake! Thanks for the pattern and tutorial
Nikki
Thank you! And thanks for reading!
Lynn
This is wonderful. I wish I knew about it sooner. I just machine embroidered a lampshade onto netting with your water soluble stabilizer. I did not embroider onto fabric because I didn’t want to change the color of the existing fabric lampshade. But in retrospect, this looks way easier. At least now I have an idea of how to adhere the netting to the shade – using tacky glue. (I dove into the project before I thought it all the way through!). Now I’ll be able to admire it when it’s finished instead of with the clothespins I used to hold it onto the lampshade. Haha!