
Fabric Food Tent for Summer Picnics & More
Fabric Food Tent
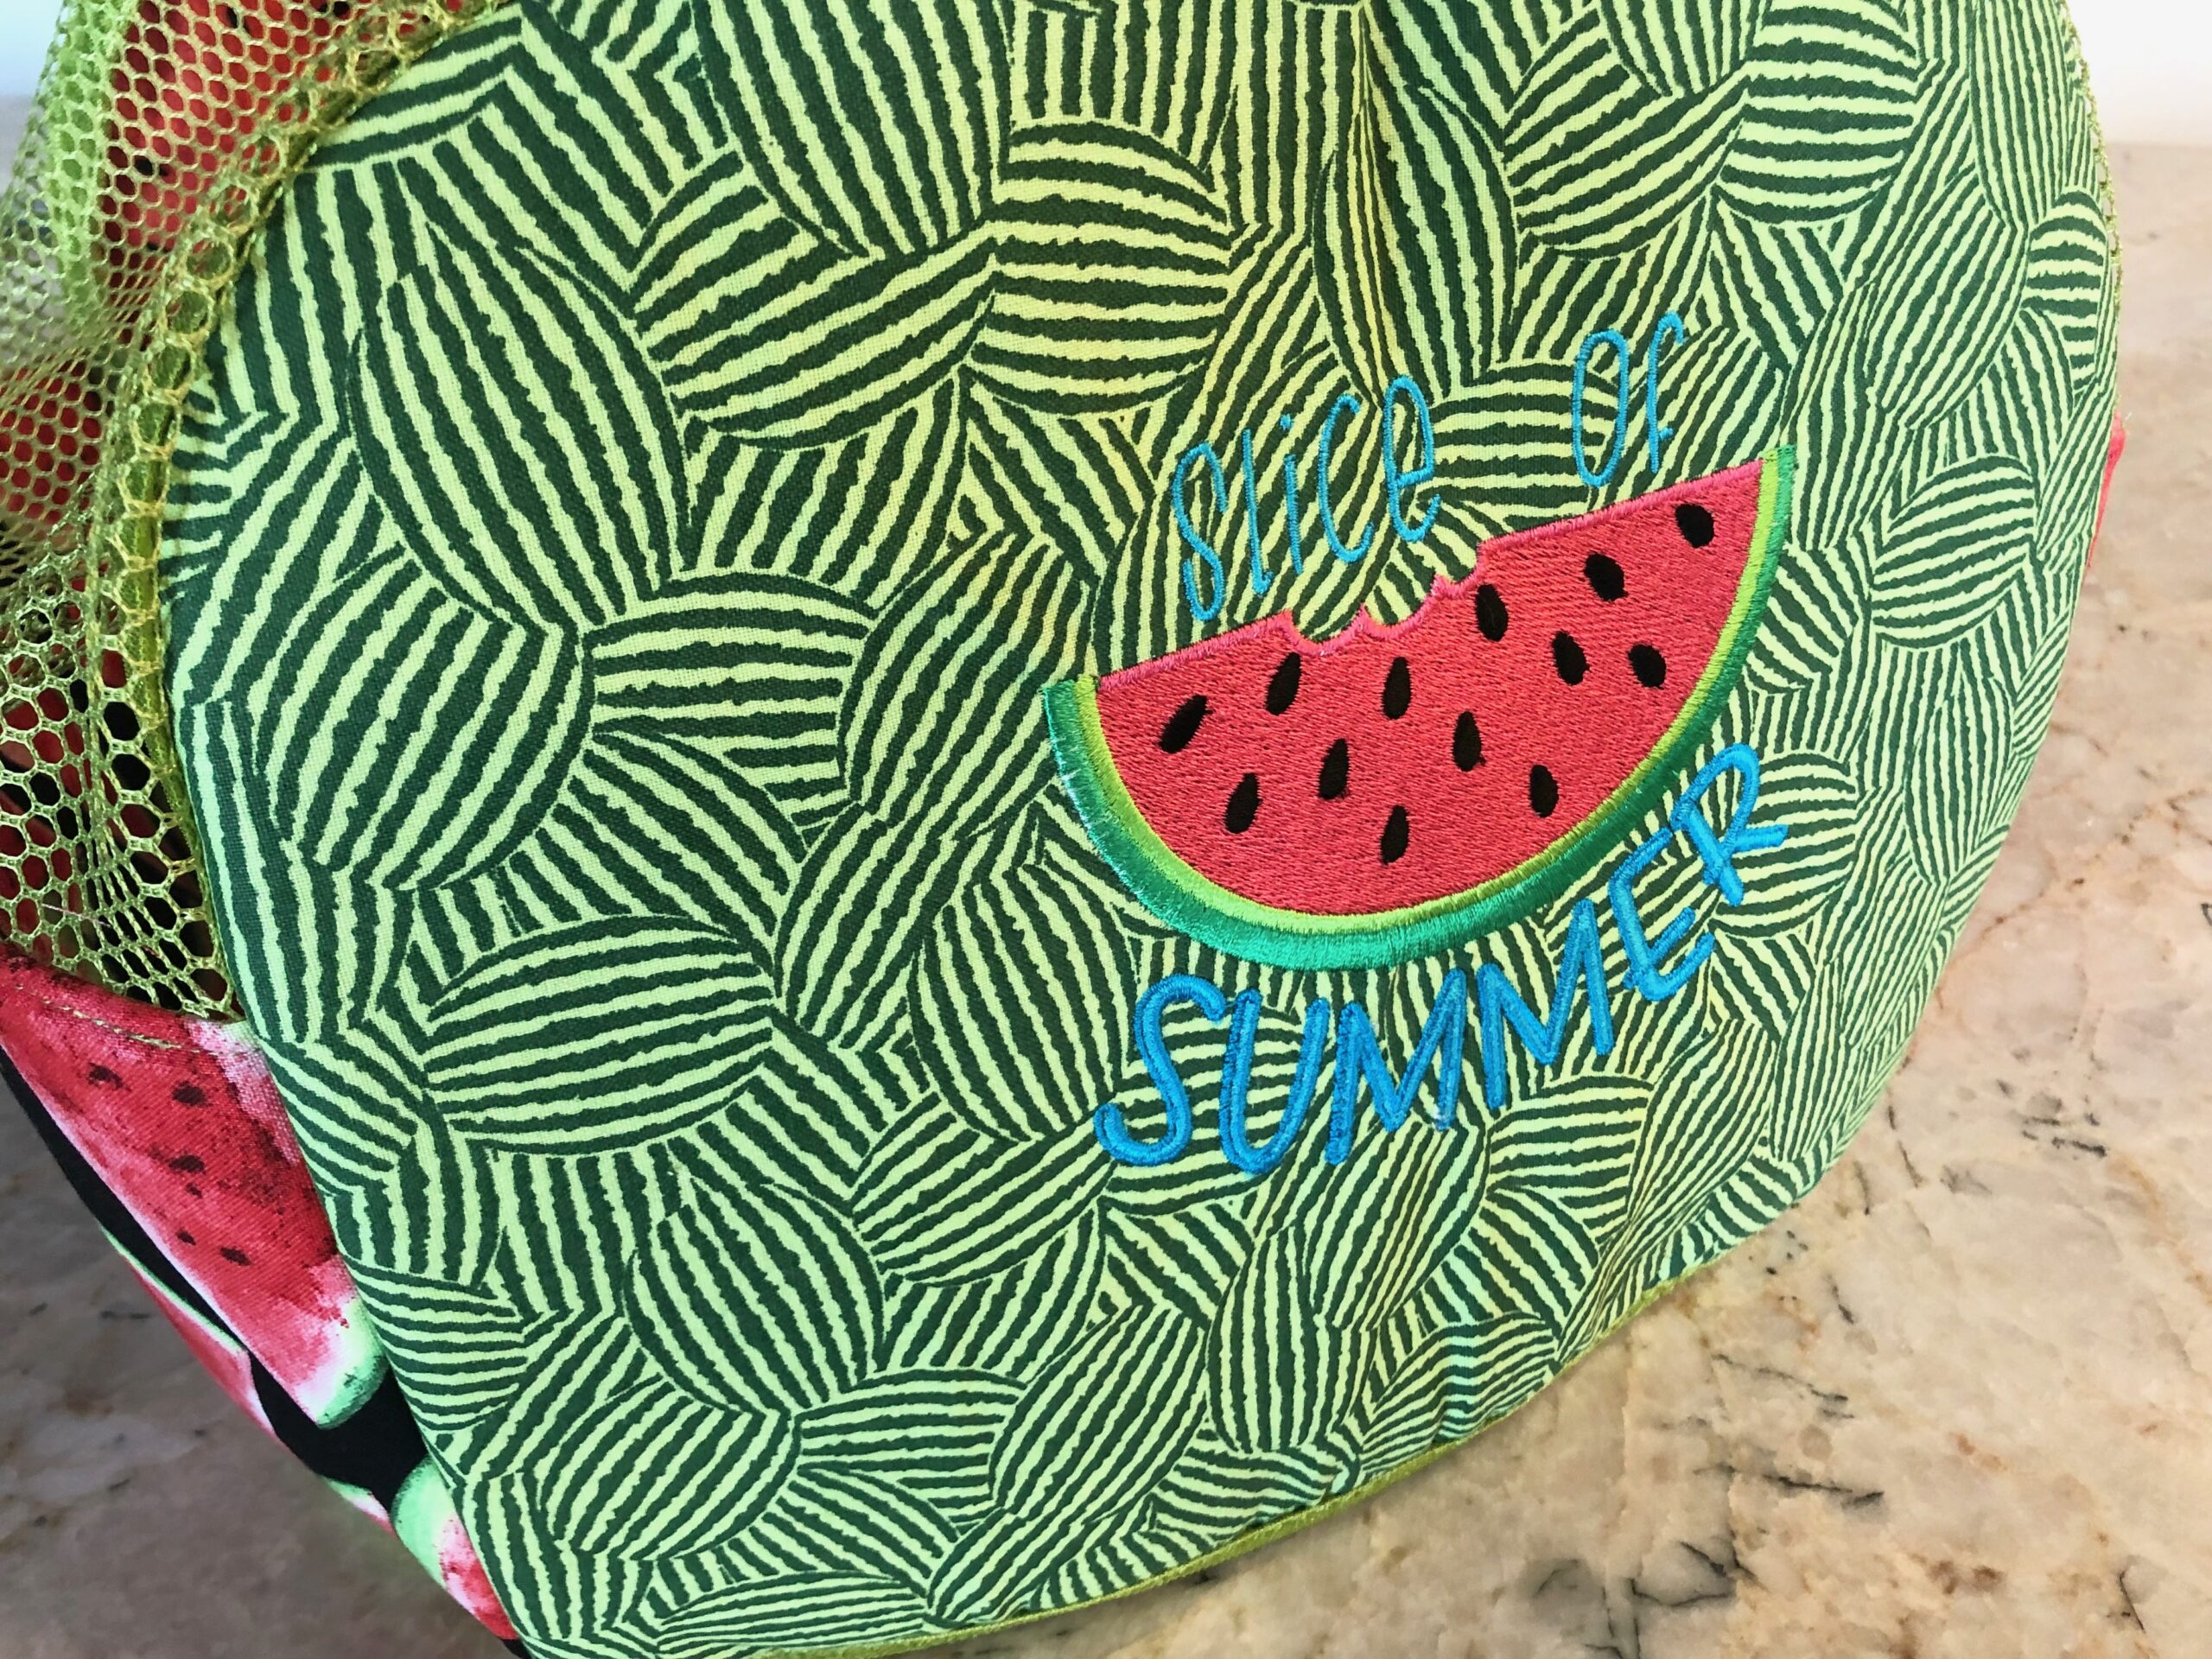
Create a fabric food tent to protect picnic foods from the elements. A mesh fabric gusset allows the food to “breathe” without critters having access inside. And fun machine embroidery personalizes the food tent and adds pops of color. The project was inspired by the Sallie Tomato Cora teapot cozy pattern.
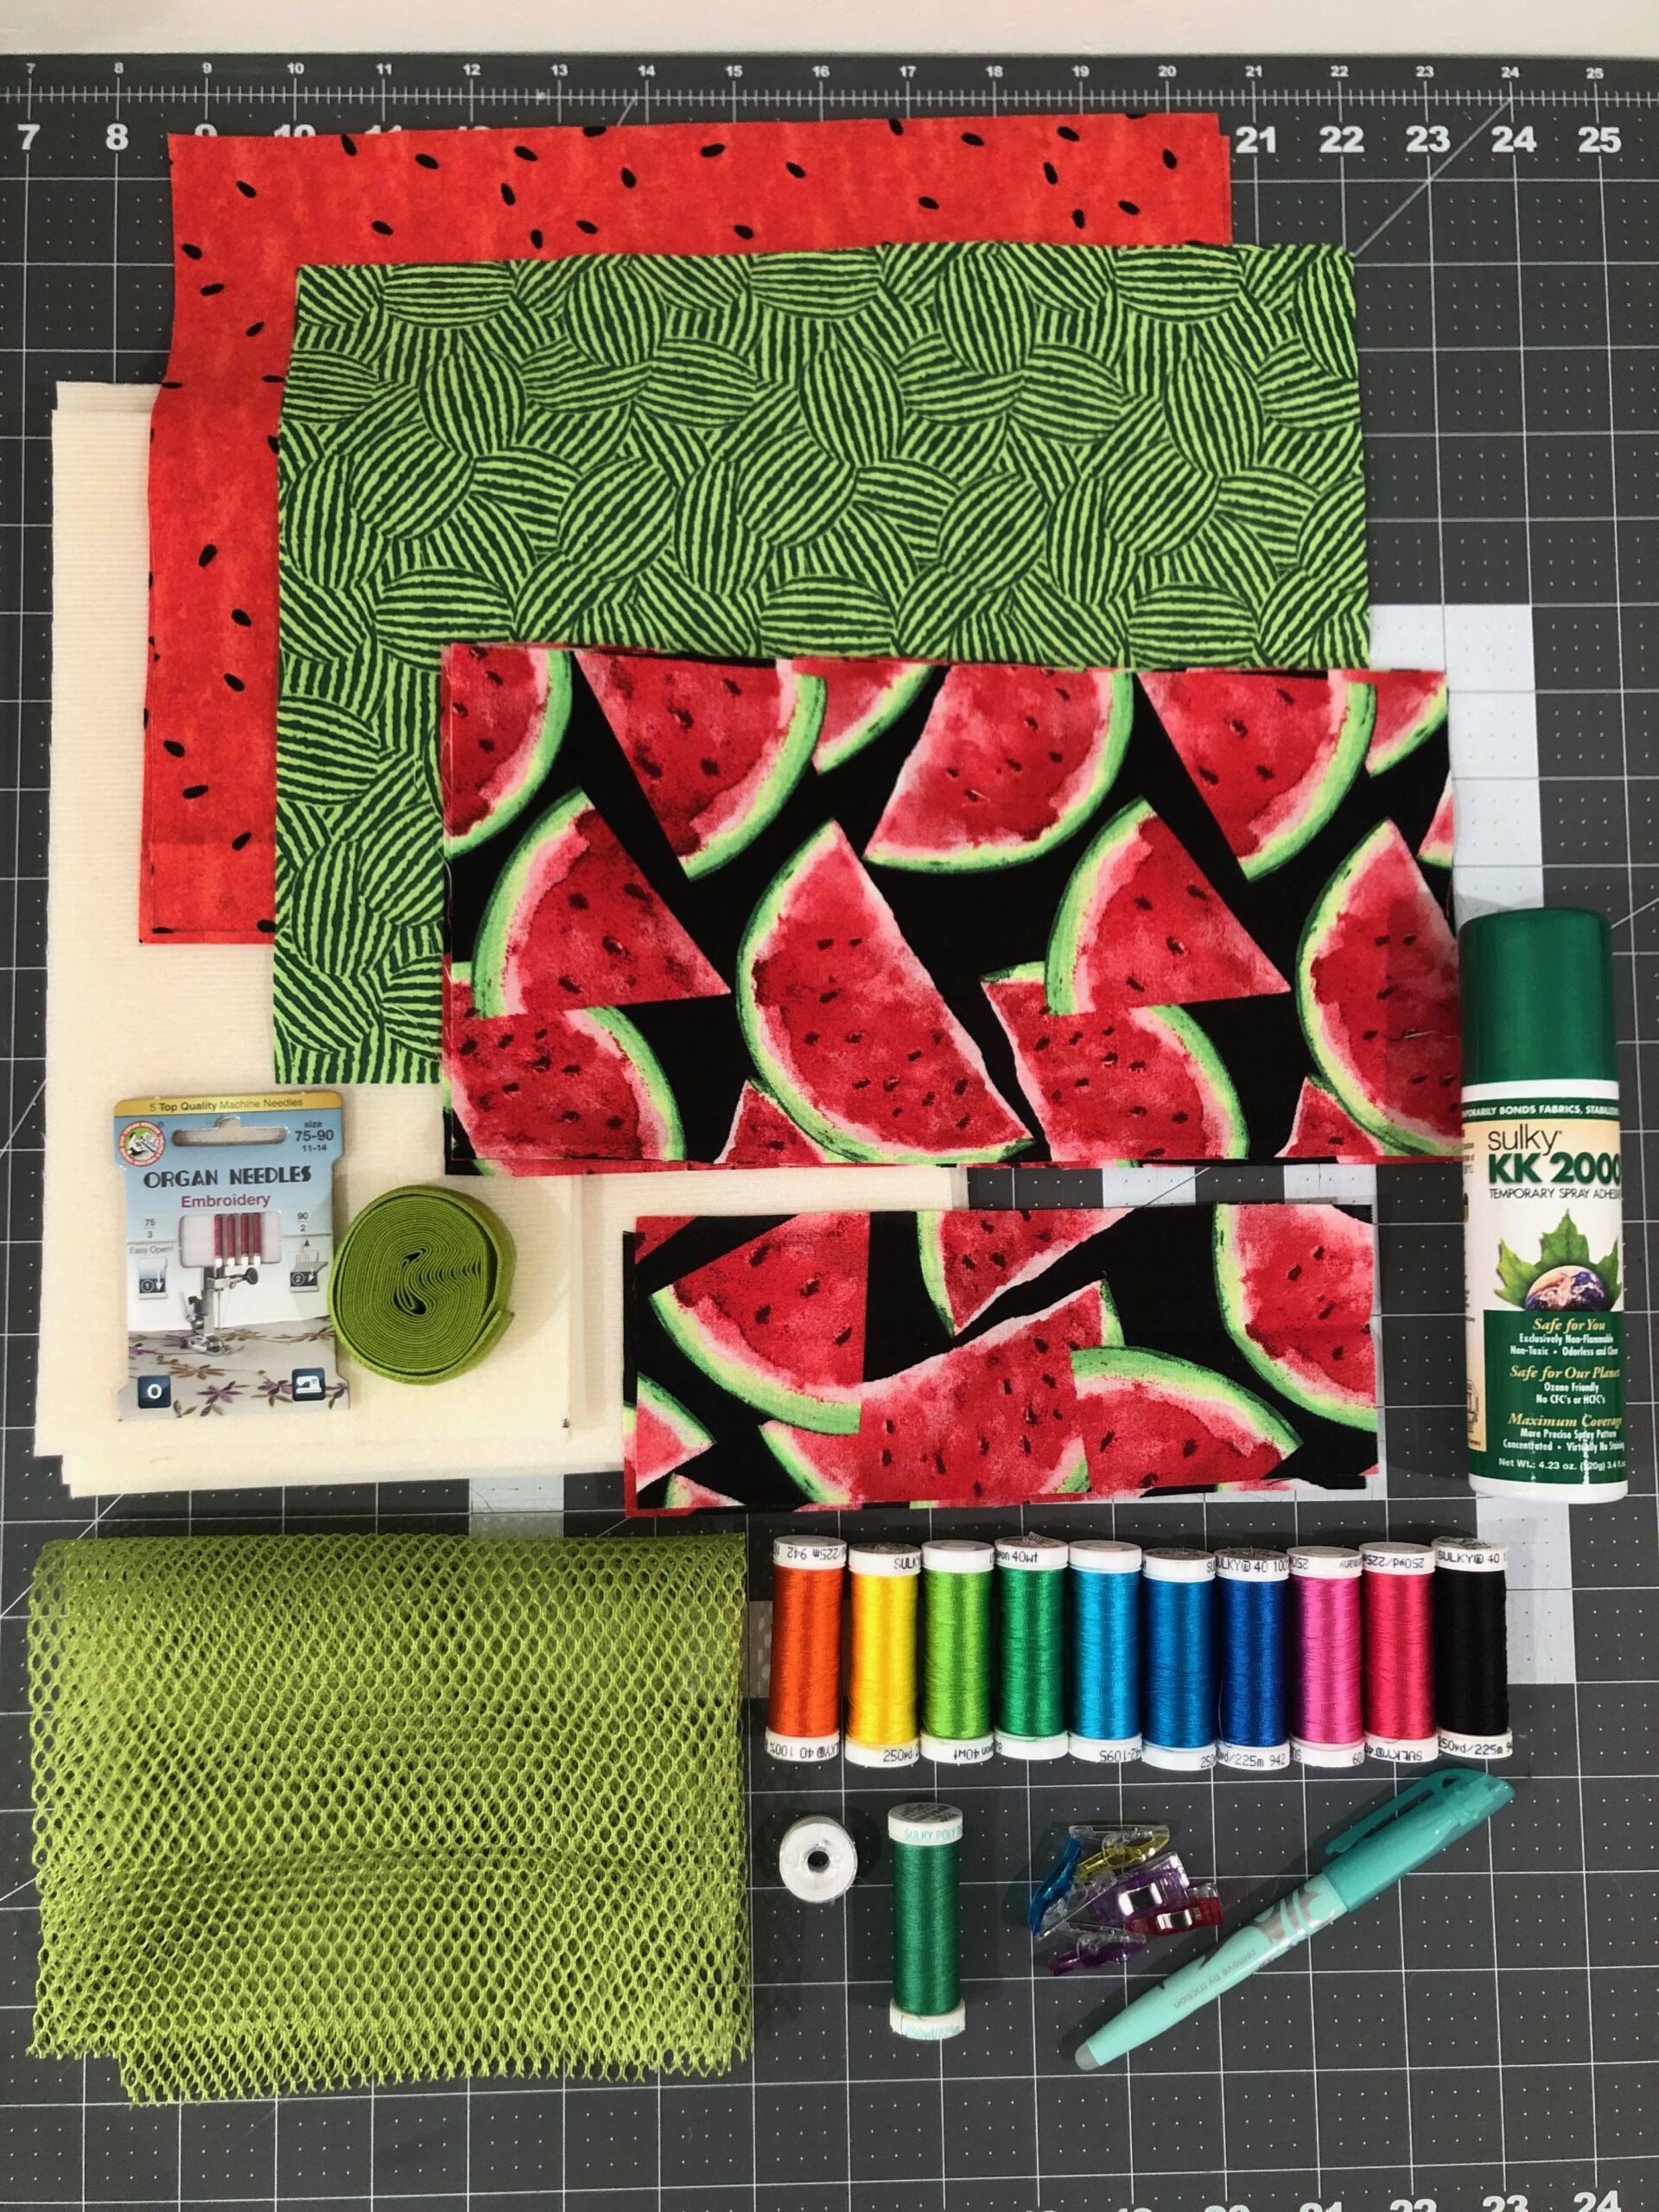
FOOD TENT SUPPLIES
- Sulky Thread: Poly Deco™ Thread (construction) & Bobbin (machine embroidery)
- Hello Summer Machine Embroidery Palette (includes 10 spools of Sulky Rayon Thread & 6 machine embroidery designs in 3 sizes)
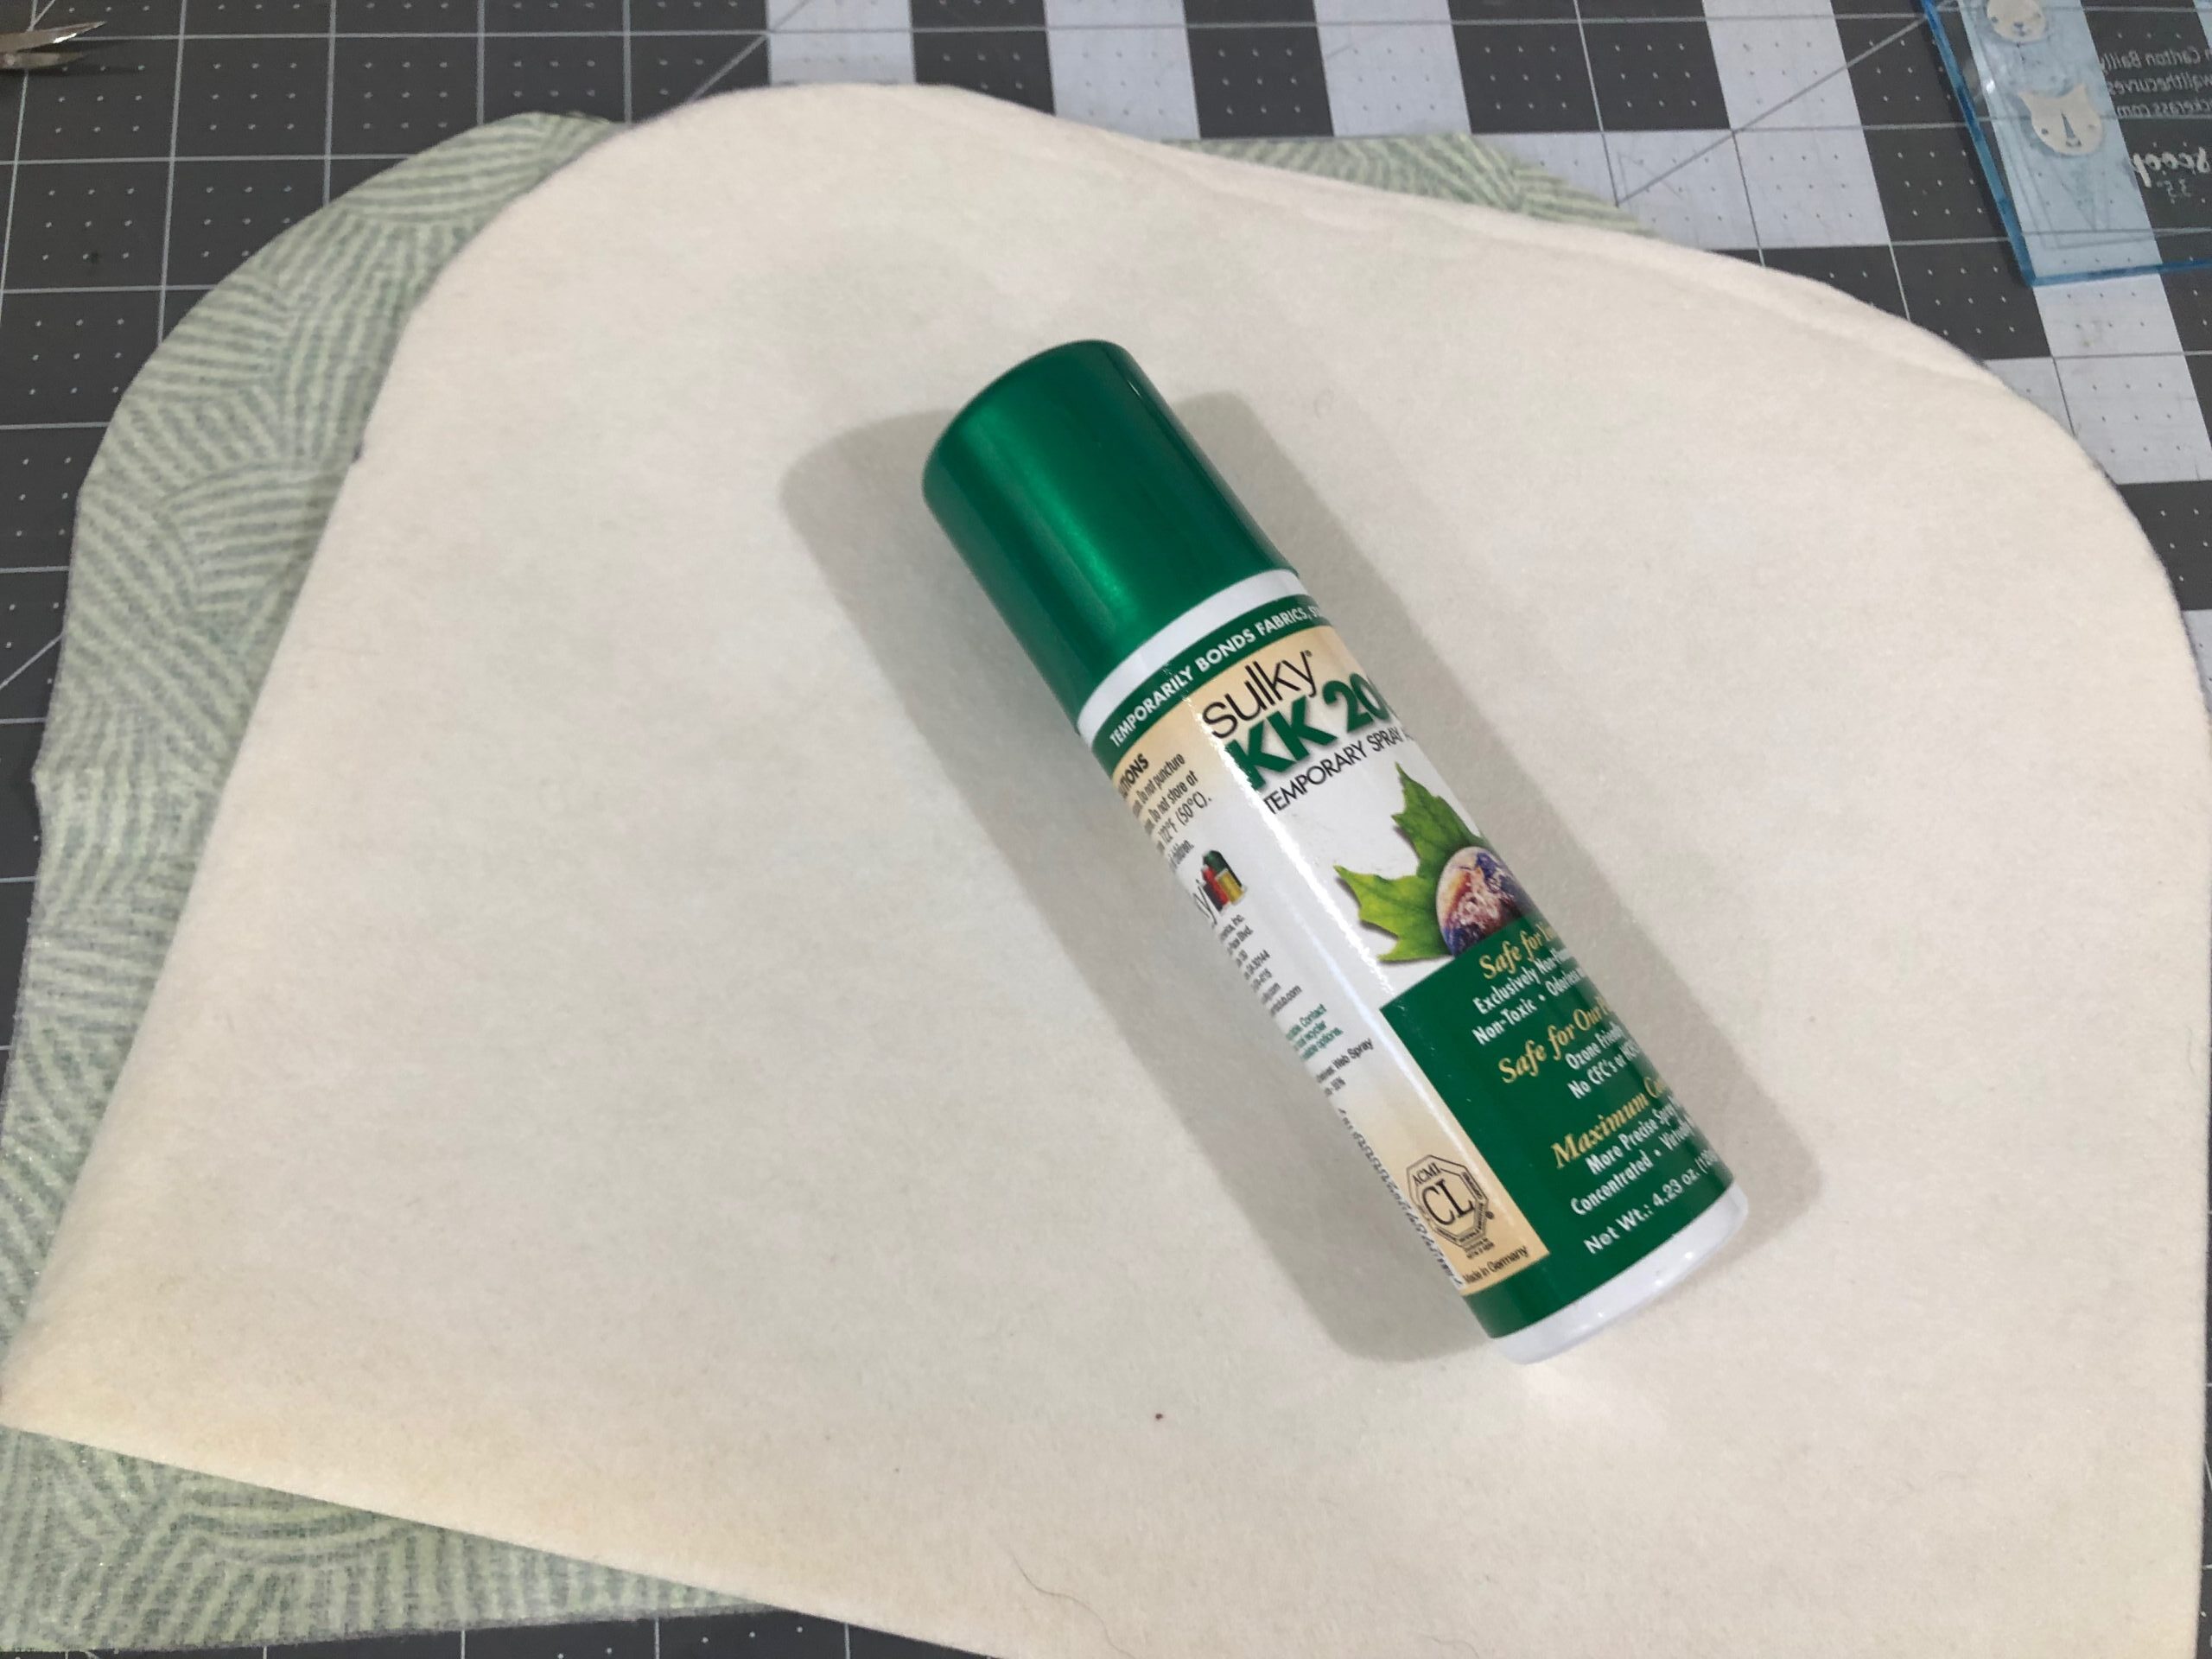
- KK 2000™ Temporary Spray Adhesive
- Soft ’n Sheer™ Extra Stabilizer
- (2) coordinating fat quarters of quilting cotton fabric (outer & lining)
- (1) fat quarter of coordinating quilting cotton fabric (handles & gusset borders)
- 1/3 yard of lightweight polyester mesh fabric (gusset)
- Sew-in or fusible foam interlining
- Matching or contrasting FOE (foldover elastic)
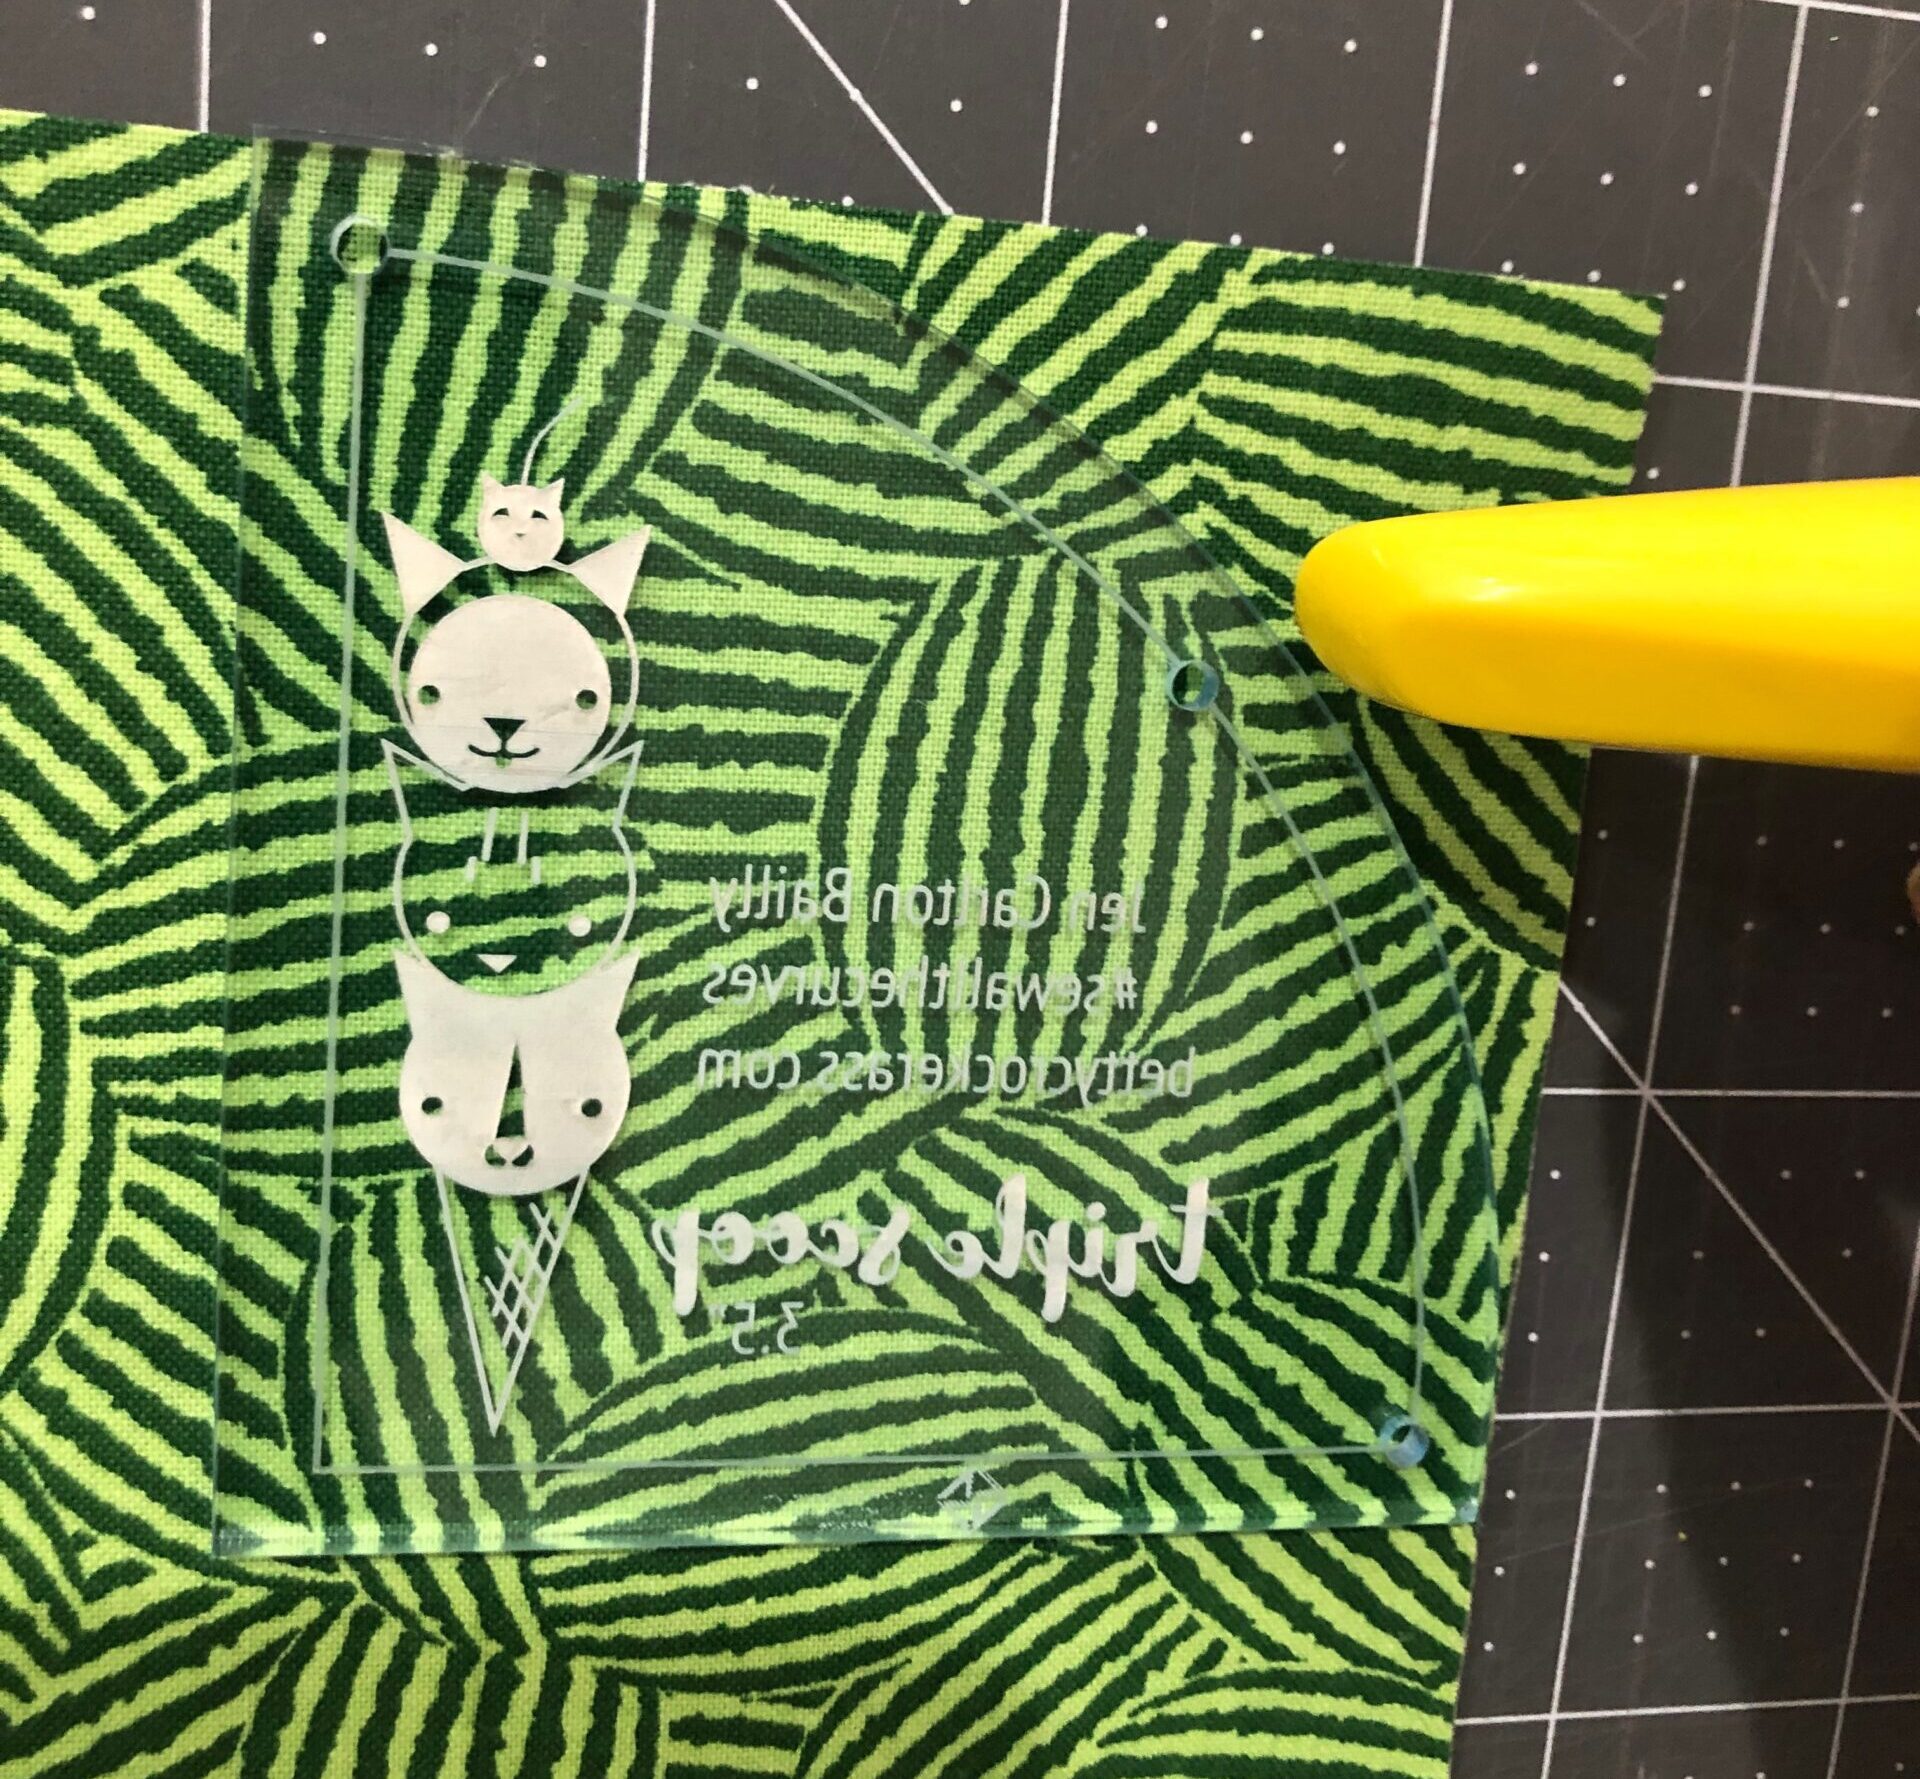
- 3½” curved ruler (such as the “Triple Scoop” by Jen Carlton Bailly), plate or other round object
- Fabric marker or chalk
- Wonder Clips or pins
MACHINE EMBROIDERY
Fuse a stabilizer rectangle to the wrong side of one outer rectangle.
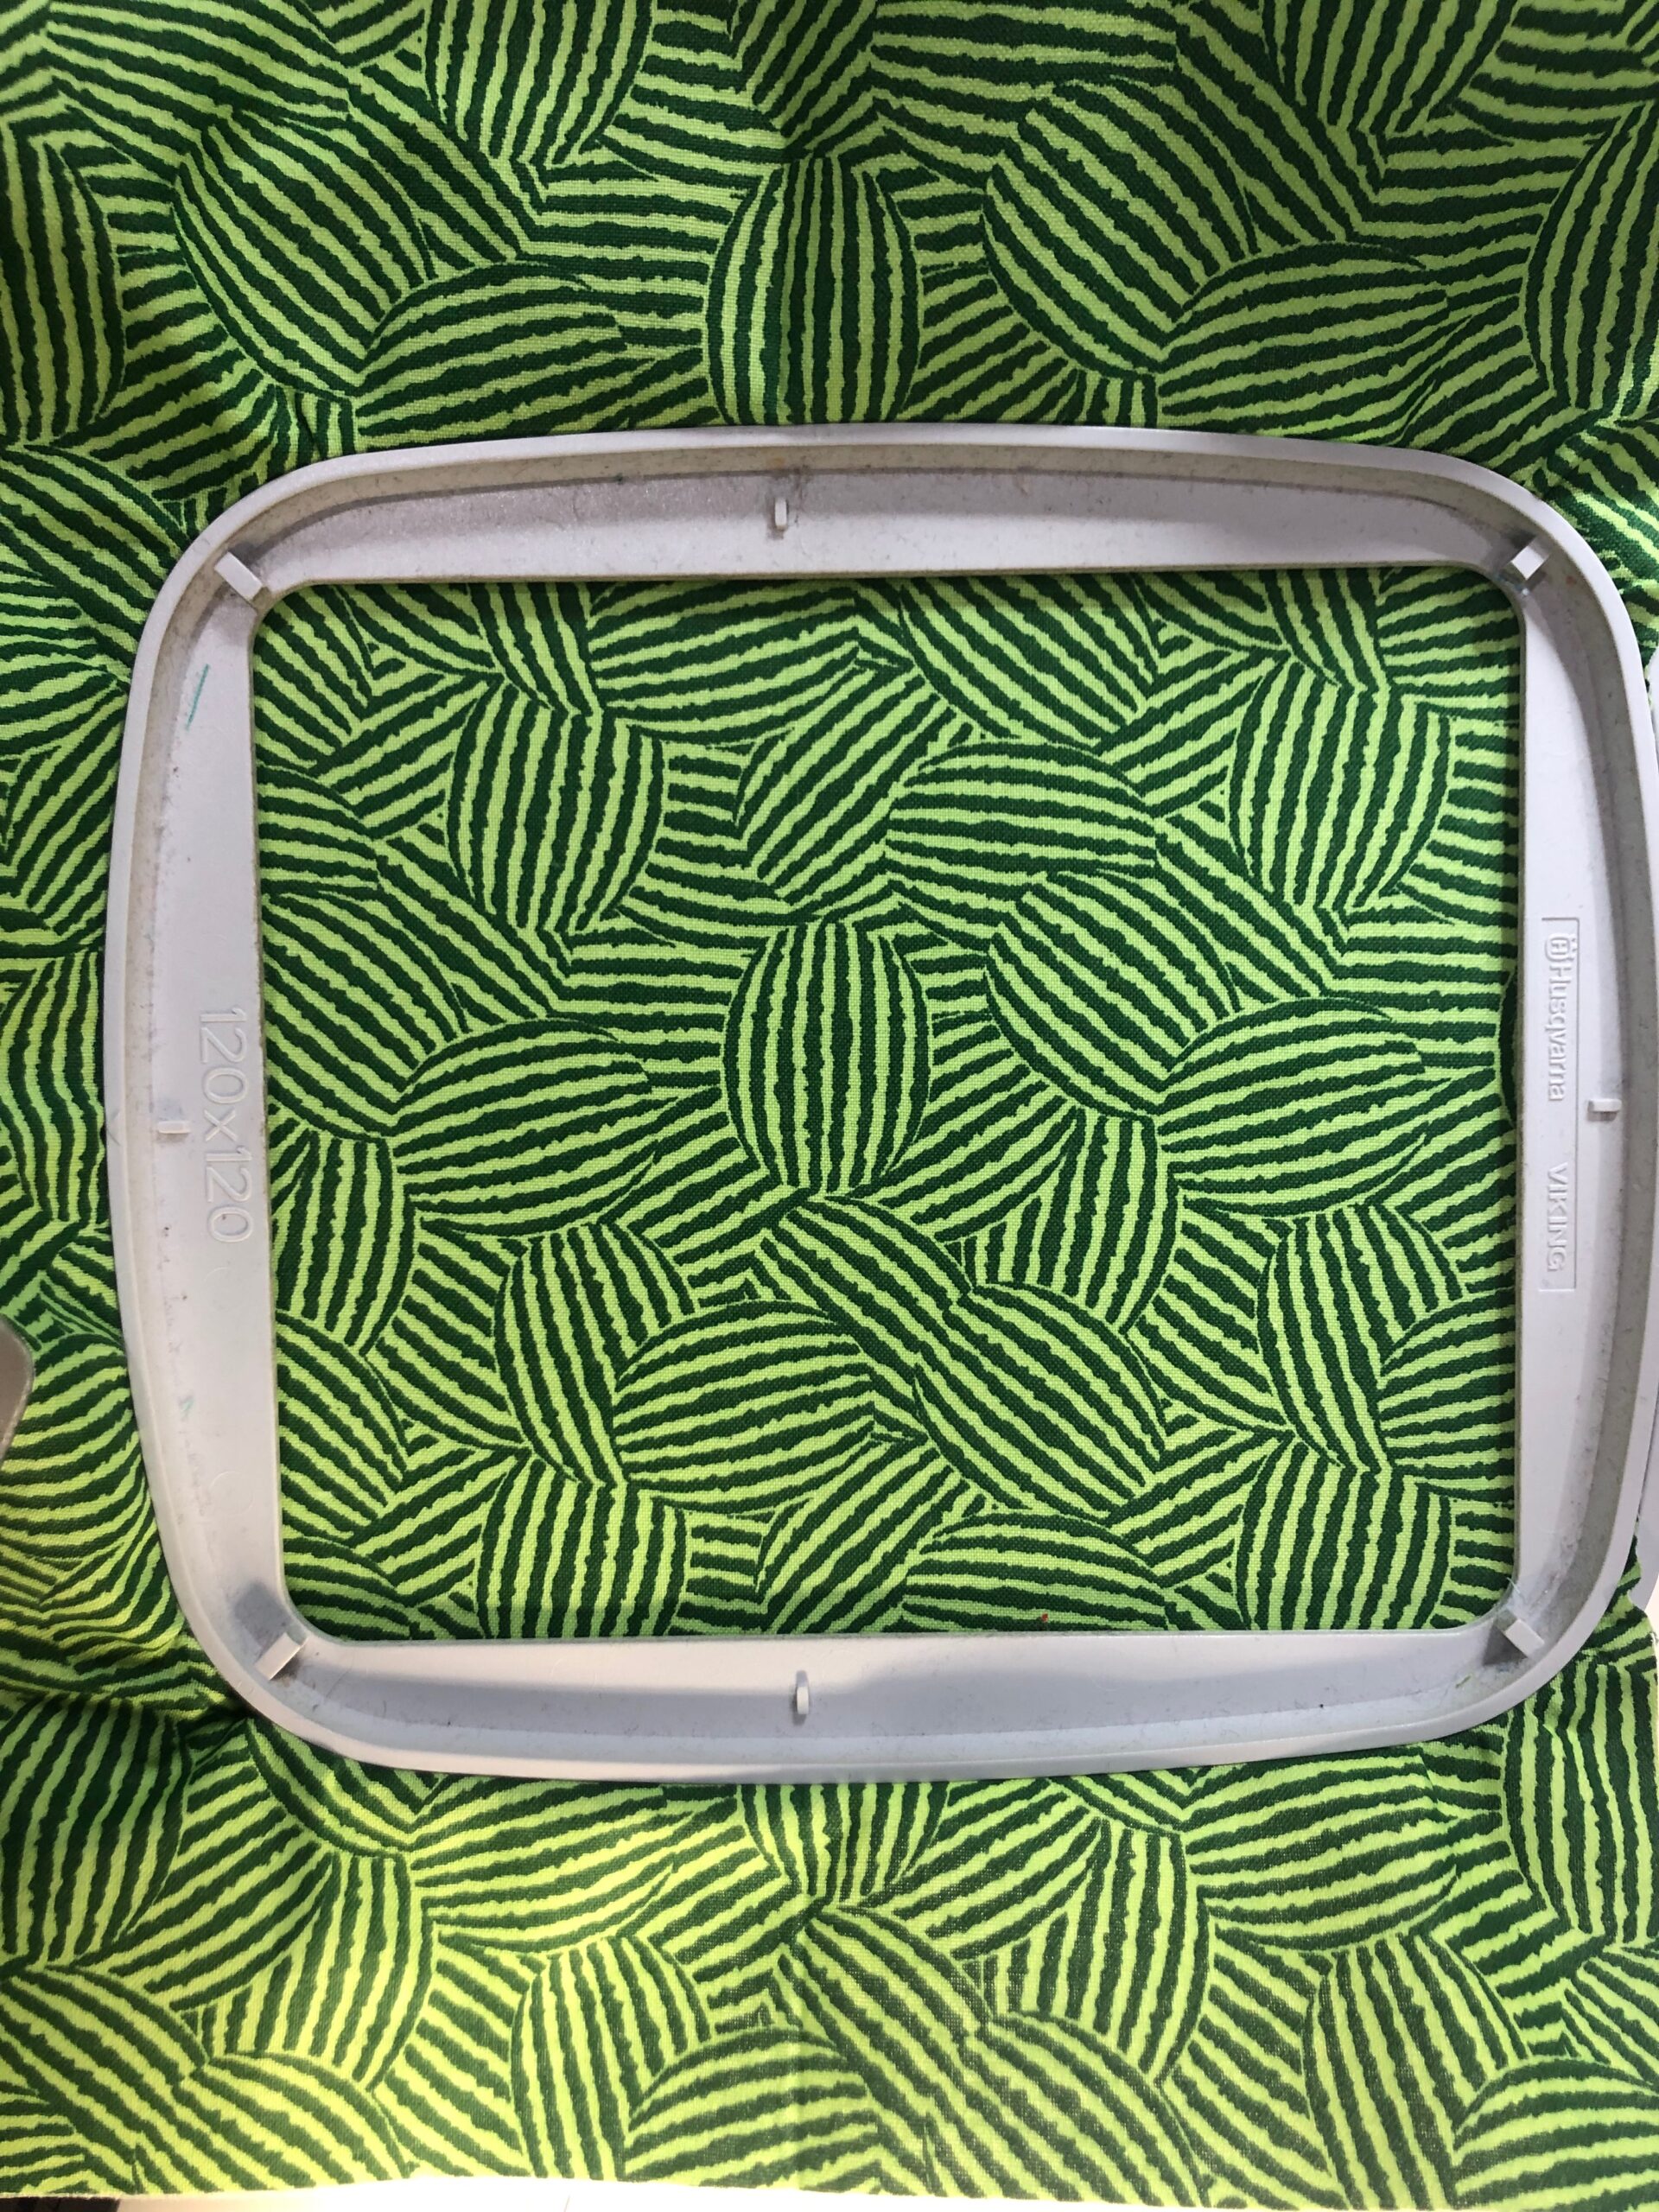
Load the chosen embroidery design in the desired size into the embroidery machine. Select the recommended hoop. The featured design is Hello Summer: Watermelon in the 5×7 hoop size.
Hoop the stabilized rectangle, centering the desired design placement in the hoop using your preferred placement method.
Embroider the design, clipping jump threads with each thread change.
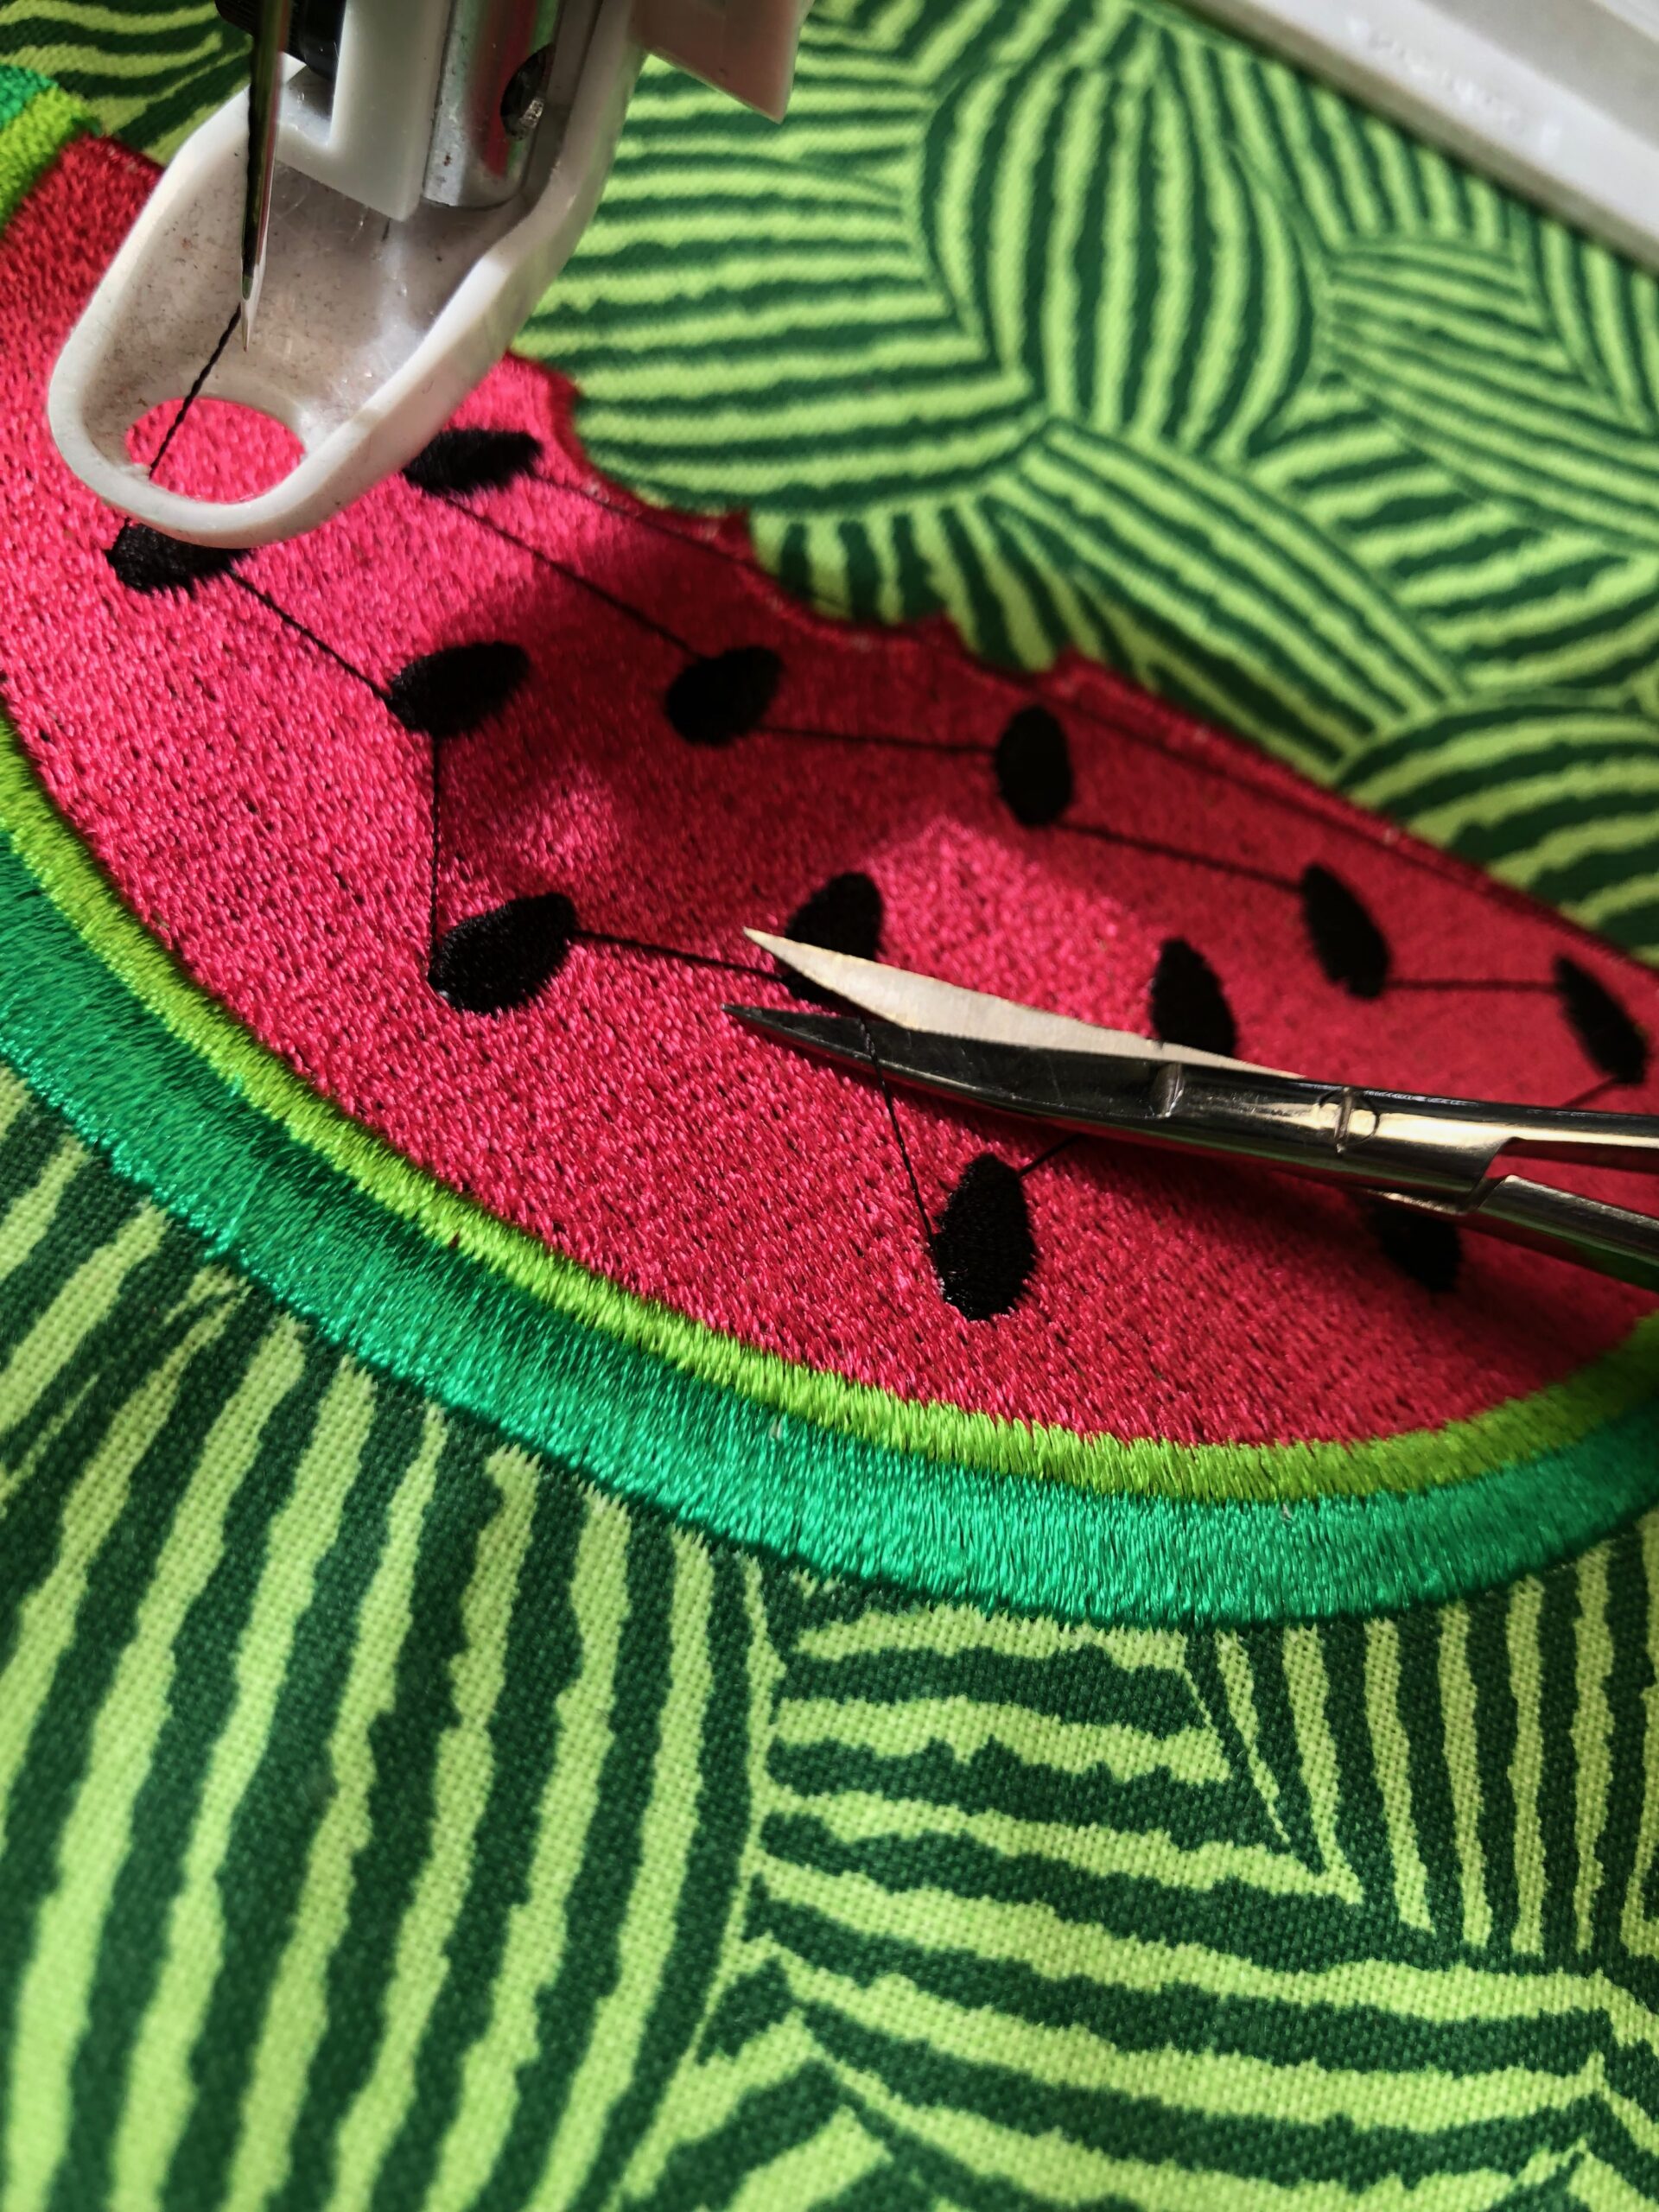
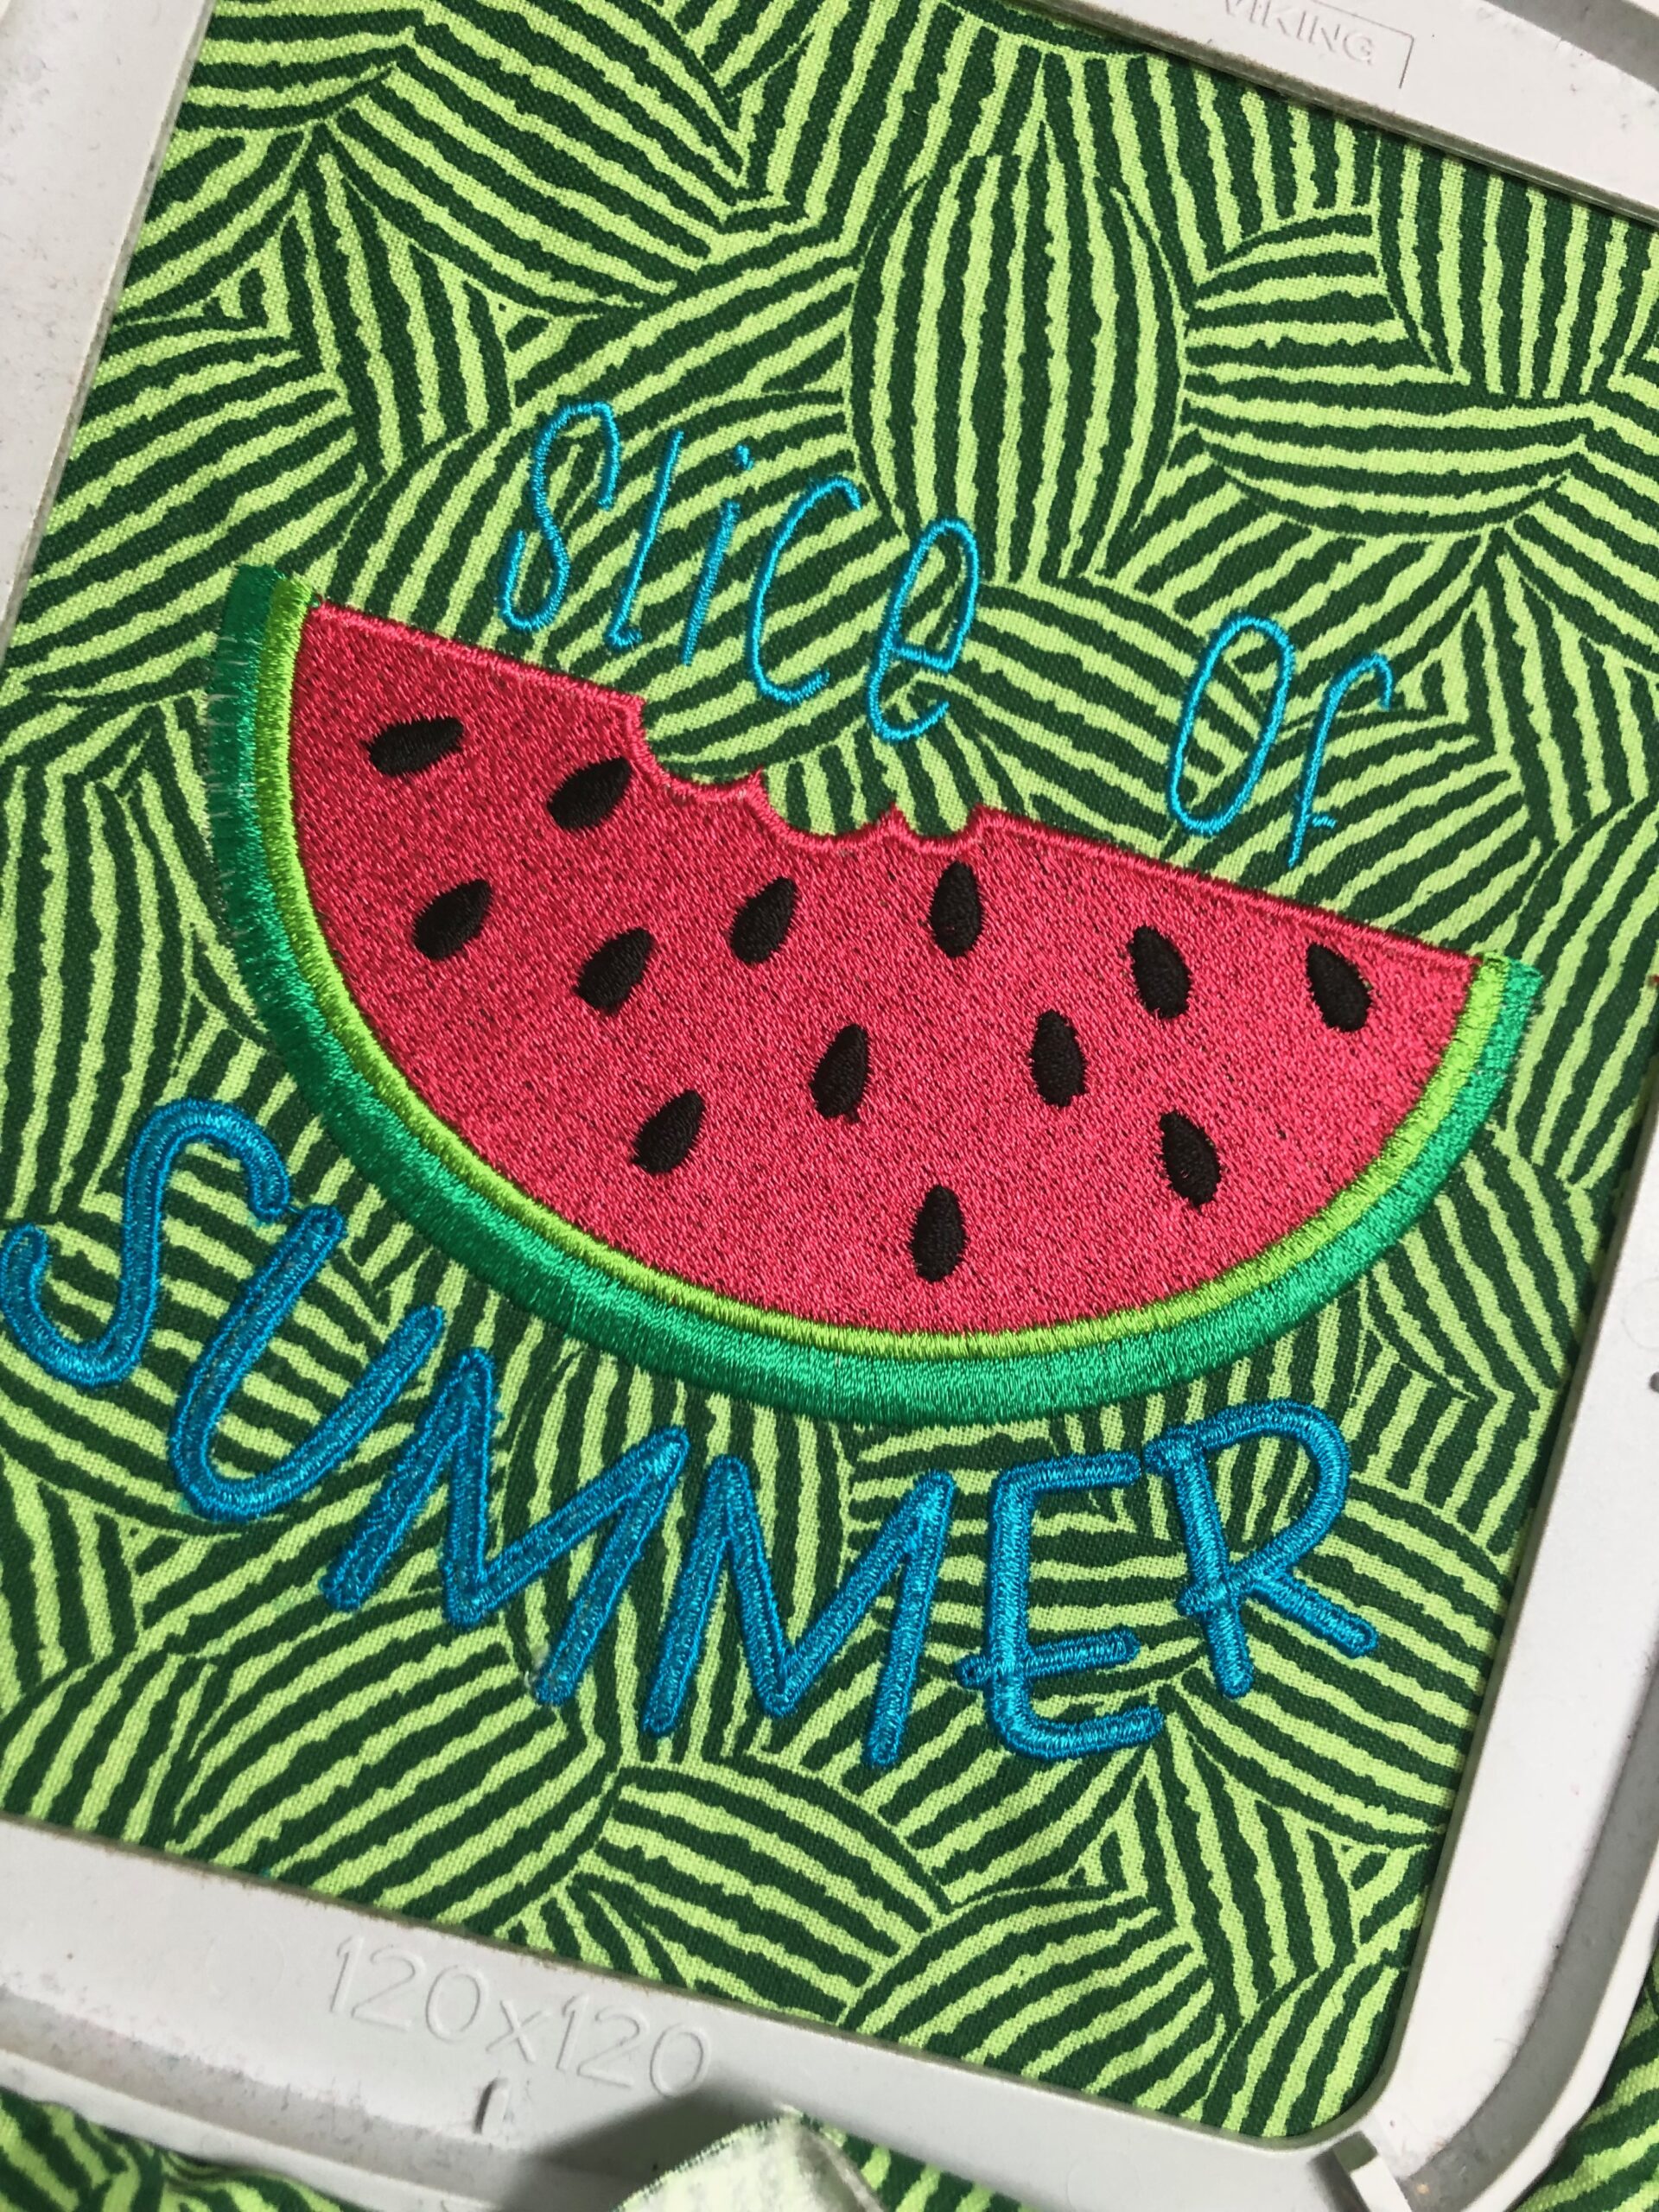
When the embroidery is complete, remove the hoop from the machine and the fabric from the hoop. Press the fabric from the wrong side to remove any hoop markings.
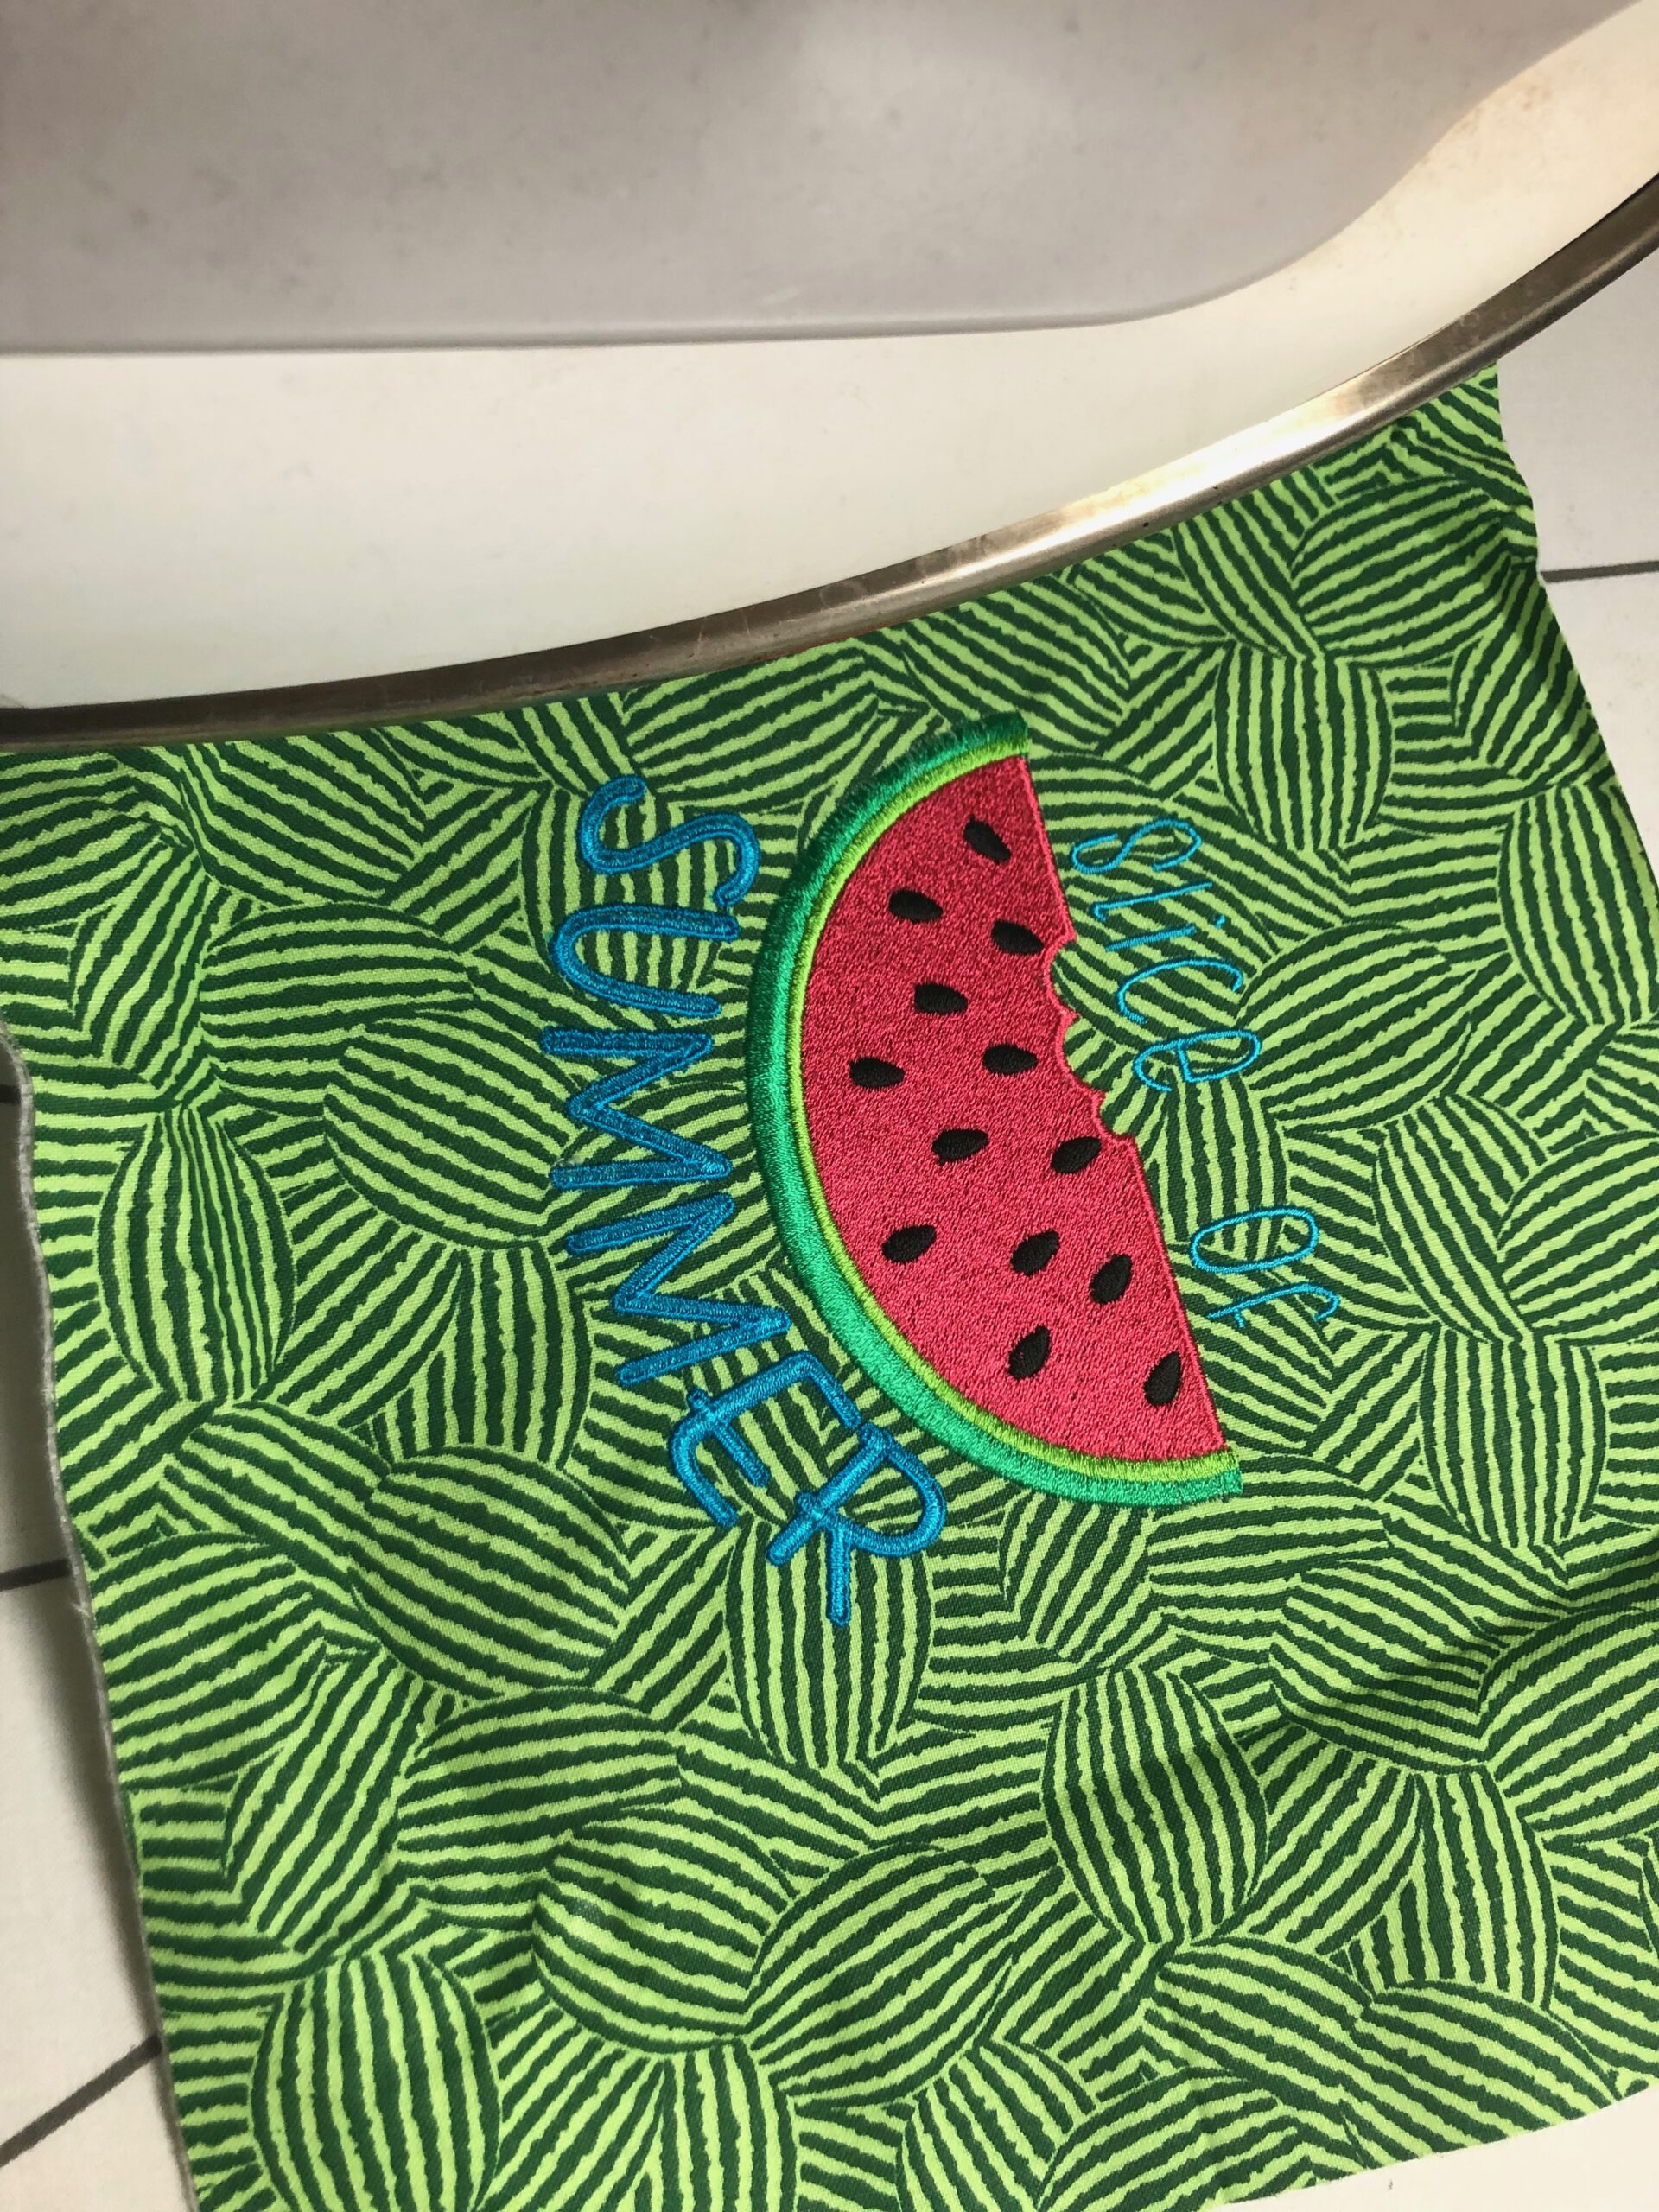
Fuse a stabilizer rectangle to the wrong side of the matching outer rectangle to act as interfacing for the food-tent back.
CUTTING
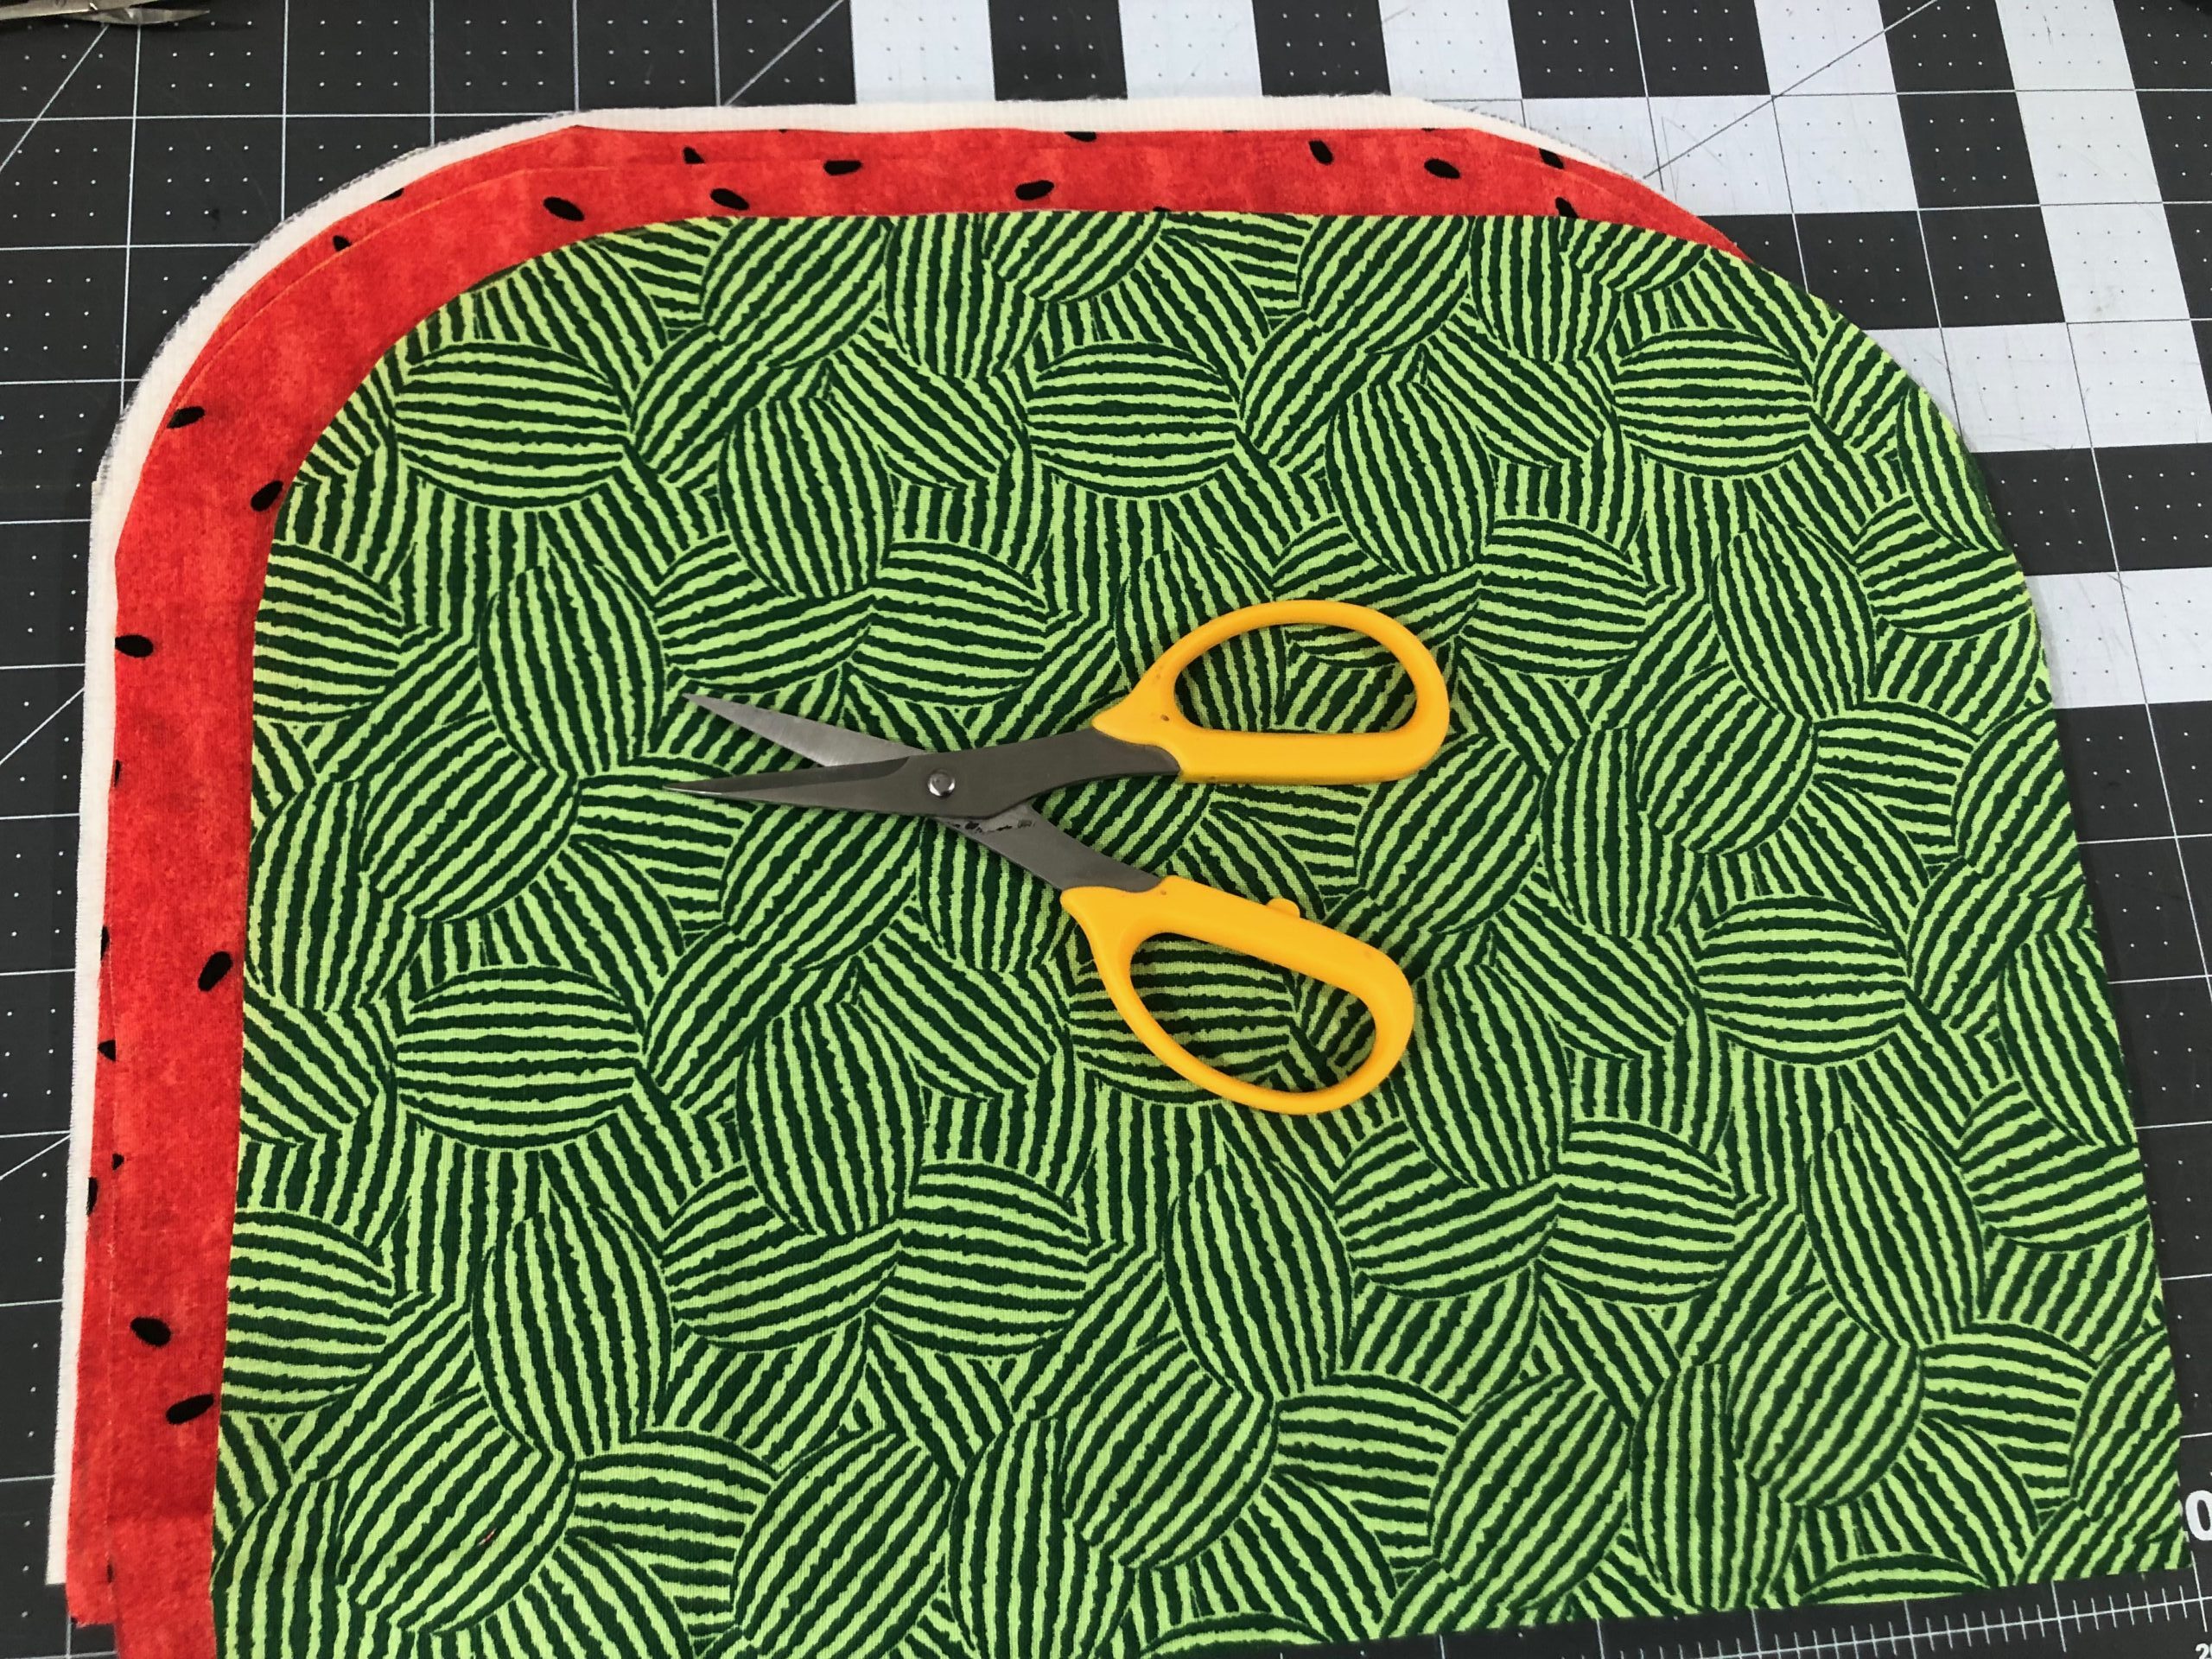
From the fat quarters, cut two 9½” x 12” rectangles each for the outer and lining.
From the coordinating cotton fabric, cut four 11” x 5½” rectangles for the gusset borders and two 3” x 8” rectangles for the handles.
From the mesh fabric, cut one 11” x 18” rectangle.
From the foam interlining, cut two 9½” x 12” rectangles and two 11” x 5½” rectangles.
Round the upper-edge corners of the large outer, lining and foam rectangles. Use a 3 1/2” curved ruler, plate or another round object to trace equal curves, and them cut along the traced lines.
PREPPING PIECES
Center the foam pieces on the wrong side of each outer and gusset-border piece. Use KK 2000 to secure the foam to the fabrics.
Position each lining piece right side up over the outer-piece wrong side (facing the foam). Use KK 2000 to secure the lining to the foam.
Baste the perimeter of each piece 1/8” from the edge. Alternatively, serge-finish the perimeter using a narrow 3-thread overlock stitch.

Fold the outer pieces in half lengthwise to find the upper-edge center; mark. Then measure 1¼” from the mark on either side; mark.
Fold each handle in half lengthwise with wrong sides together; press to set the foldline. Unfold, and then meet each long edge along the foldline with wrong sides together; press. Then refold along the first foldline to conceal all raw edges. Topstitch along both long edges.


Position one handle along one outer piece, matching the handle ends with the outer-piece upper edge and matching the inner handle edges with the 1¼” markings. Pin or clip the handle ends in place, and then baste.

Repeat to secure the remaining handle to the remaining outer piece.
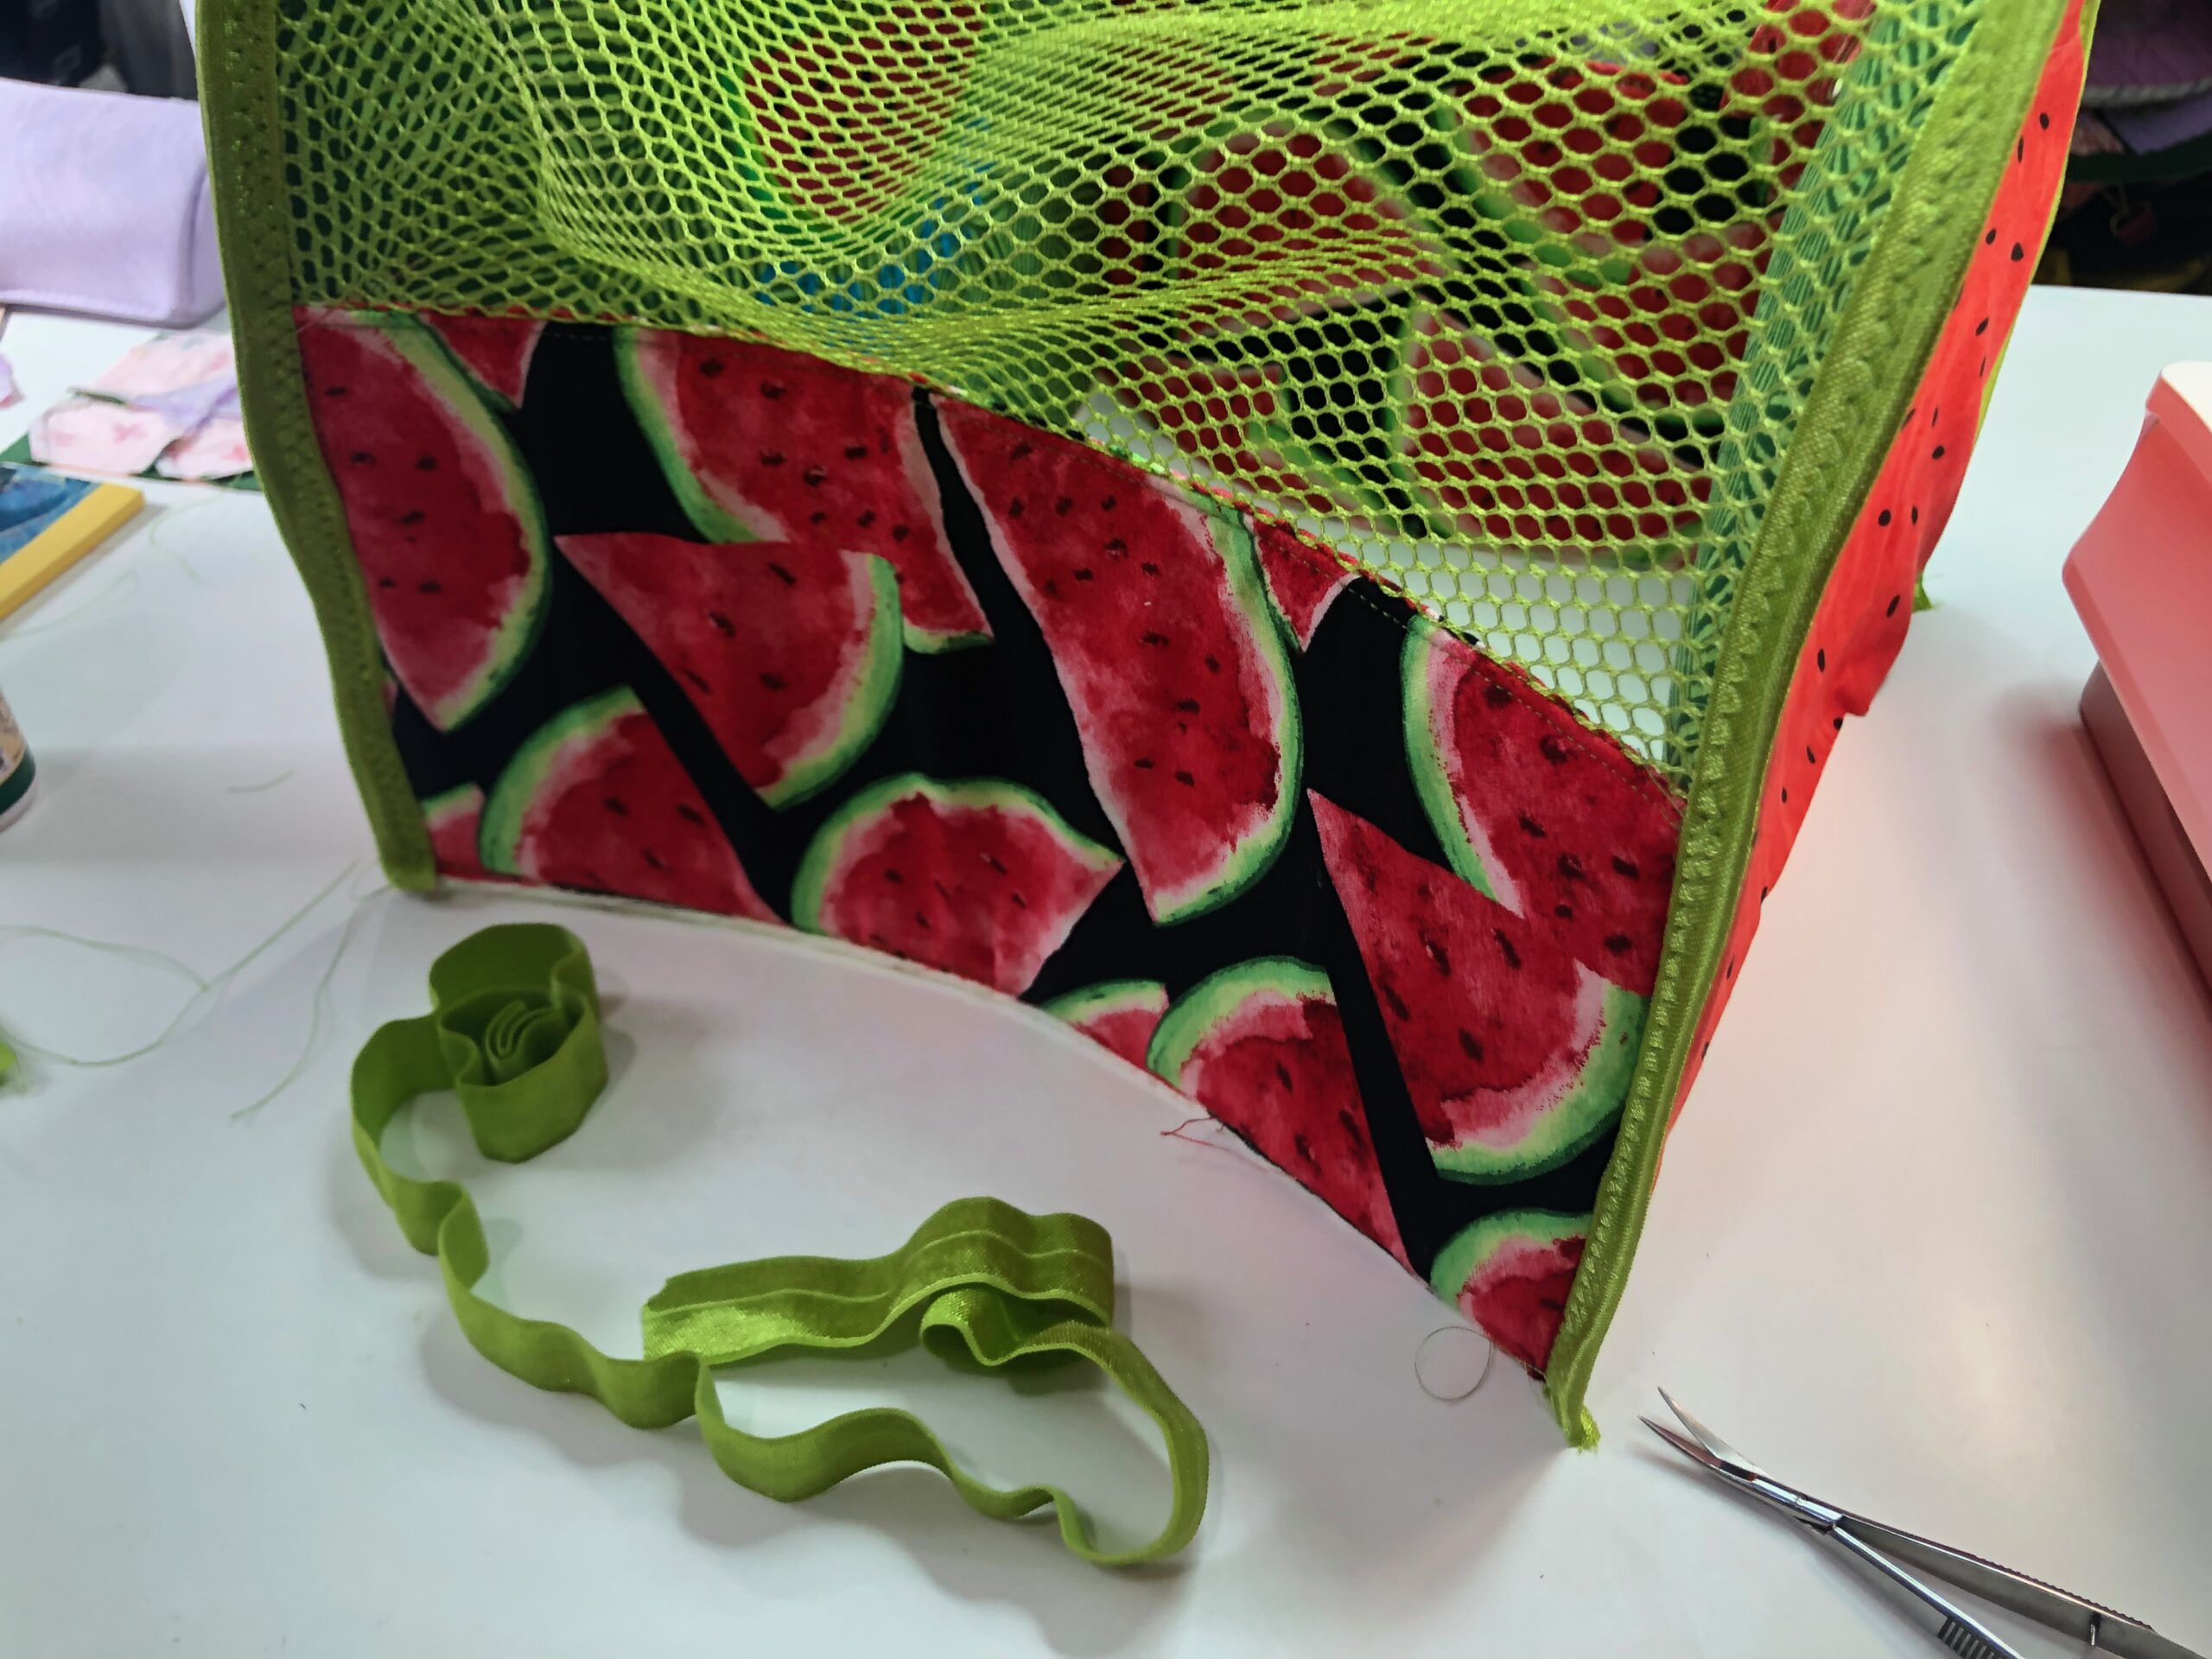
ASSEMBLE GUSSET
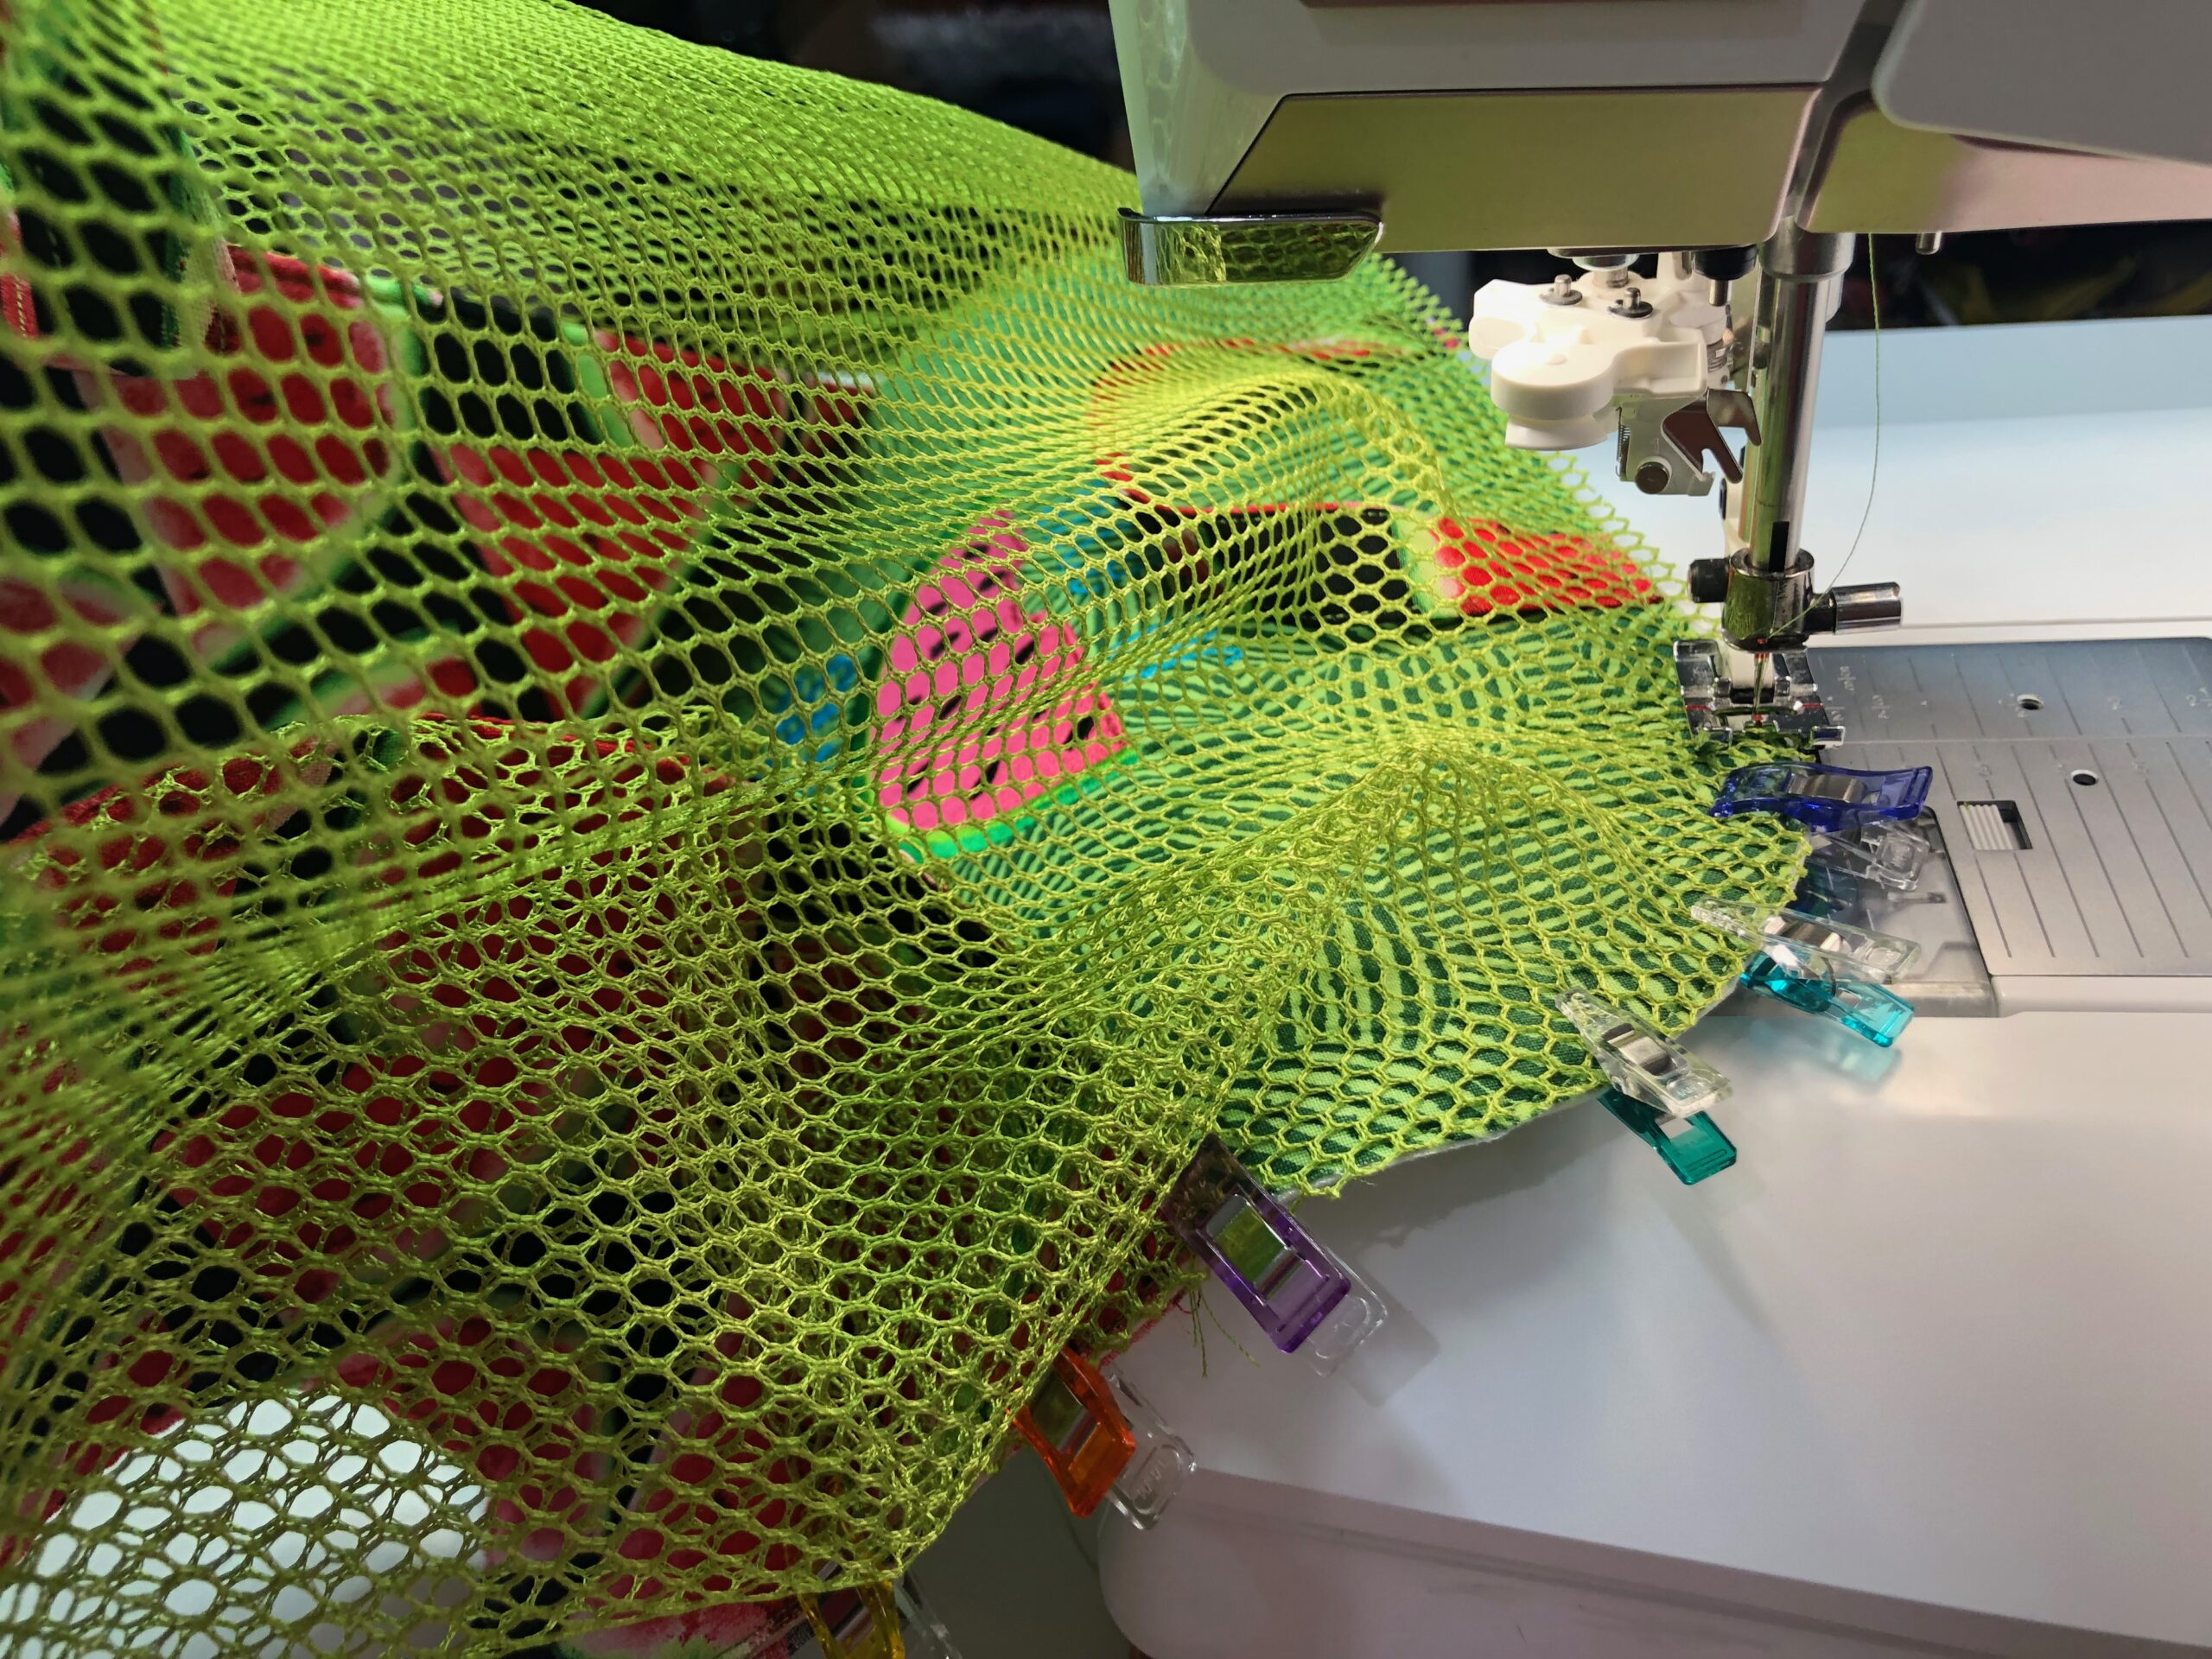
Place the mesh-fabric gusset wrong side up on a flat surface (there is no real “right” or “wrong” side of this fabric; choose a side and stick with it).
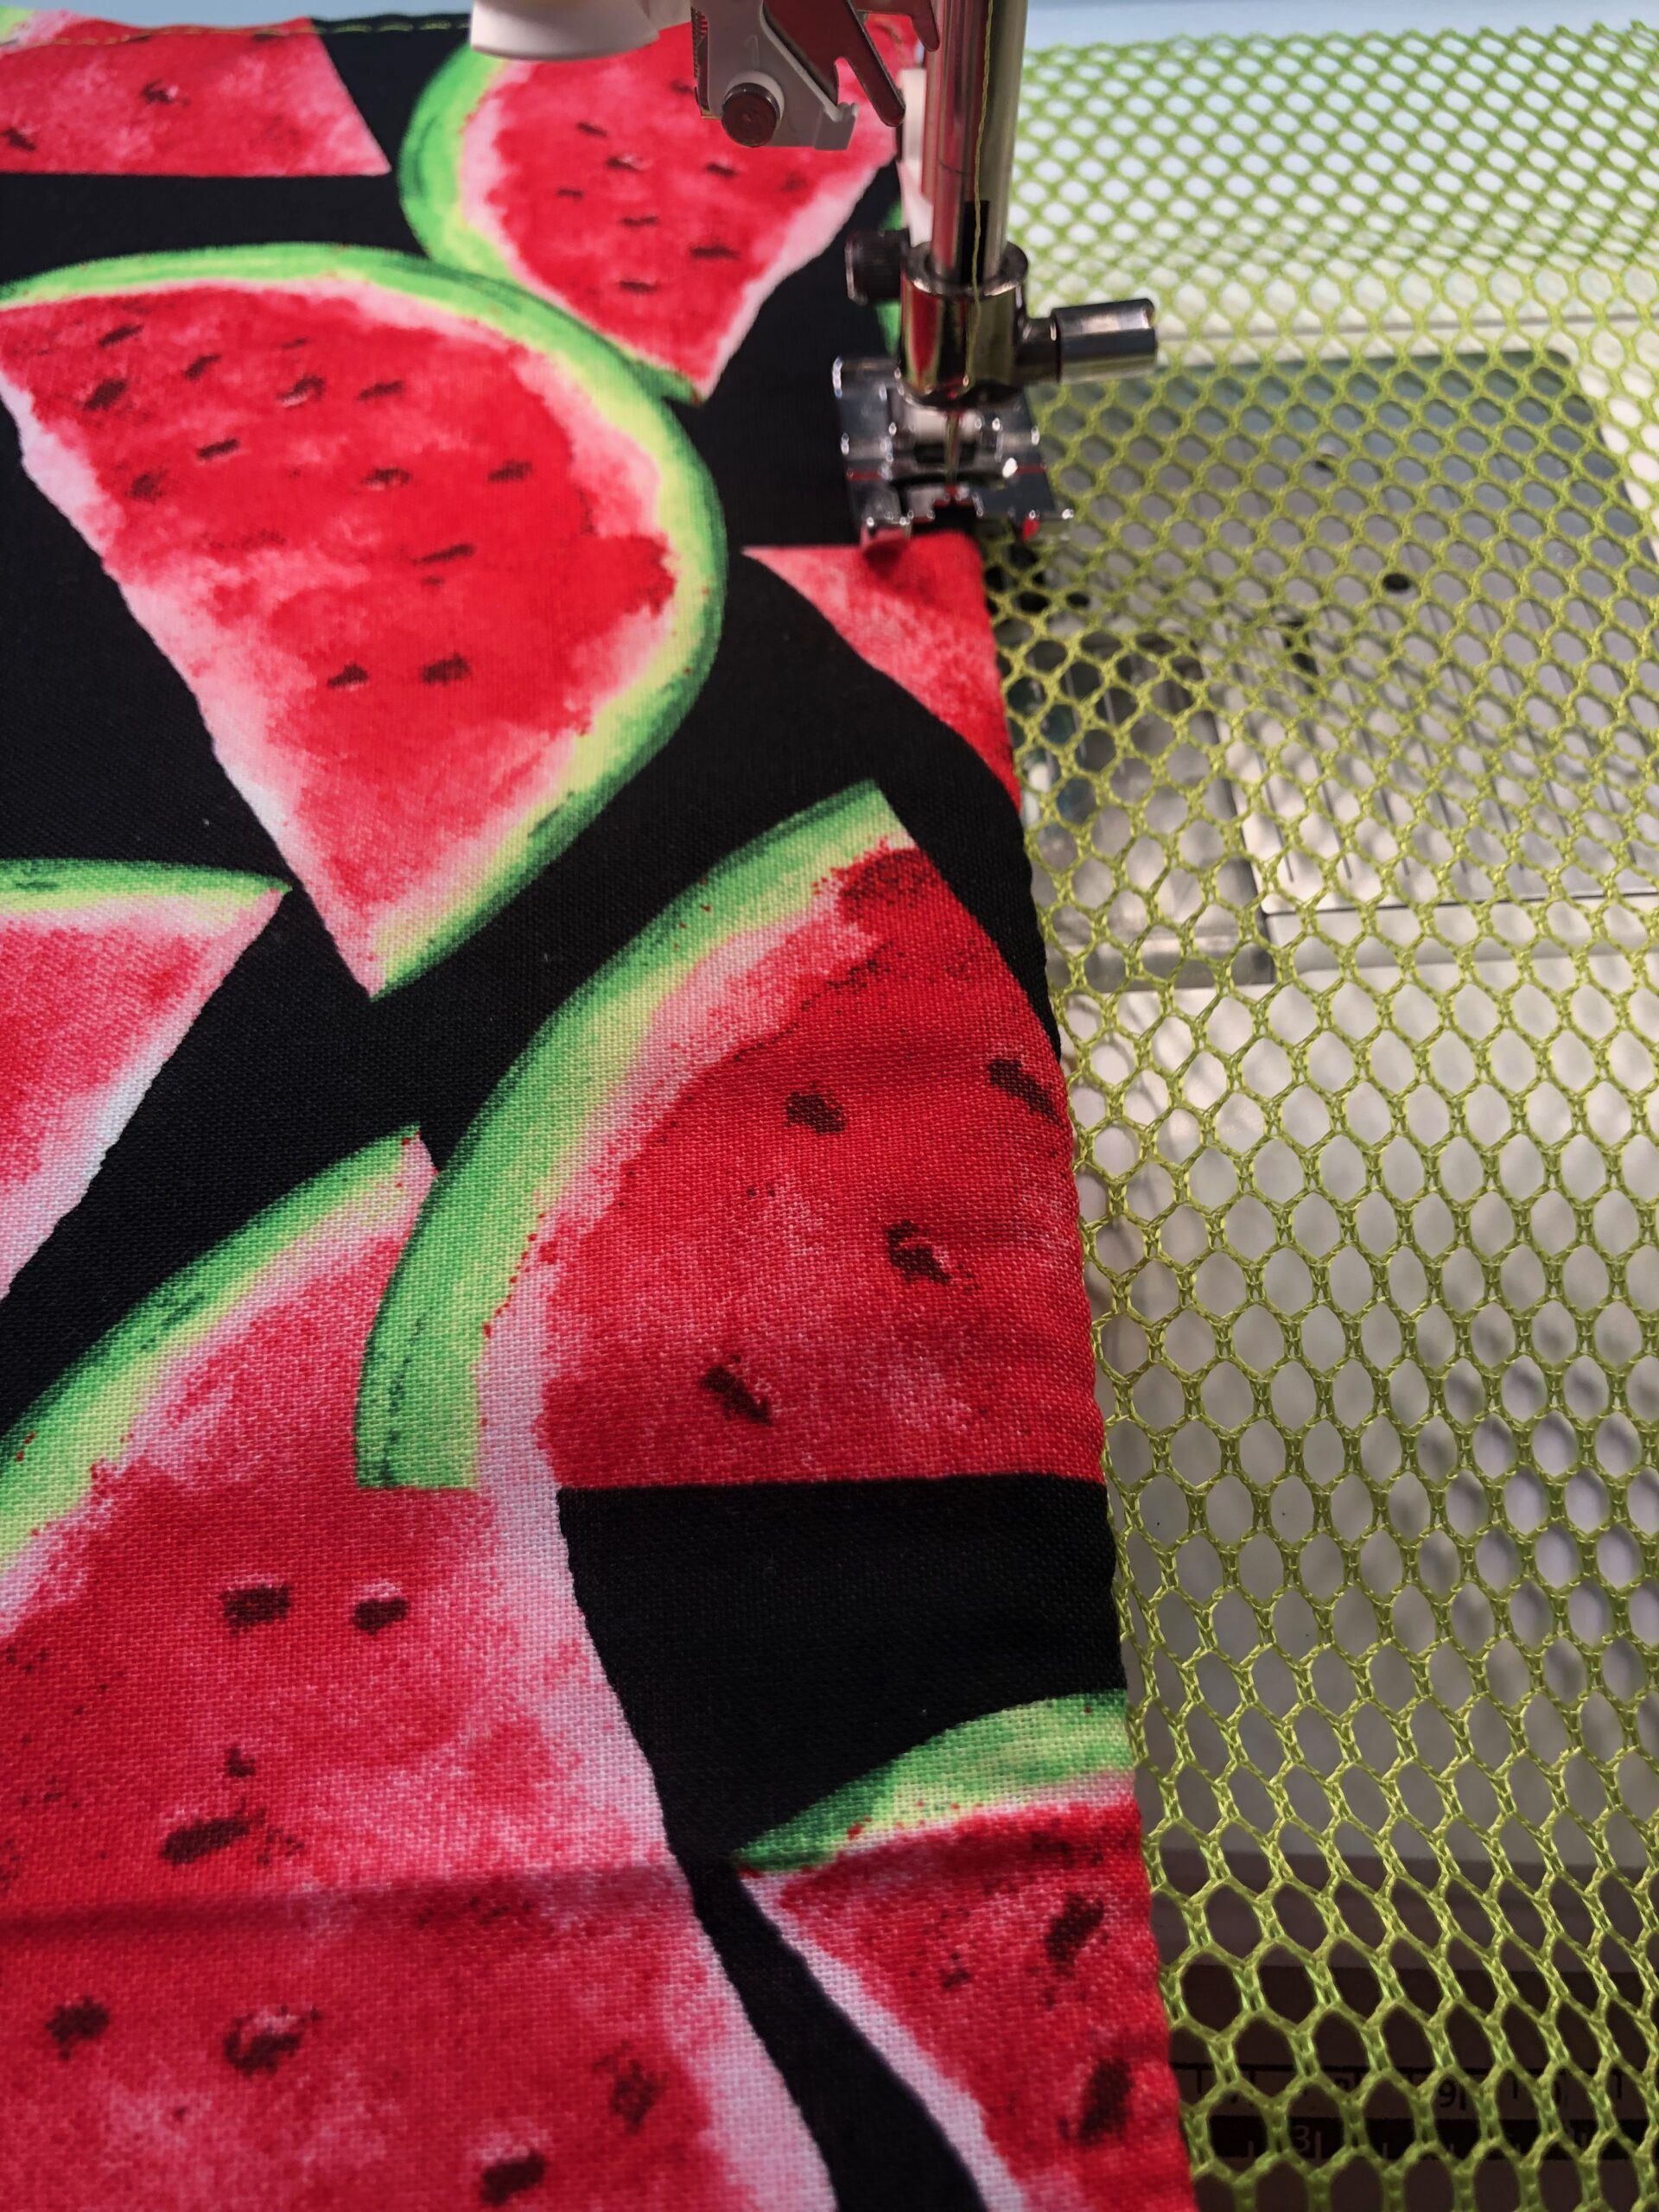
Place one gusset border piece (without foam) right side down over the mesh gusset, matching the 11” edges; baste. Place the remaining gusset border piece (without foam) right side down over the mesh gusset, matching the opposite 11” edge; baste.


Flip over the pieced gusset piece. Place one gusset border piece (with foam) right side down over the mesh gusset, matching the 11” edges. Stitch, using a ¼” seam allowance. Place the remaining gusset border piece (with foam) right side down over the mesh gusset, matching the opposite 11” edge. Stitch, using a ¼” seam allowance.
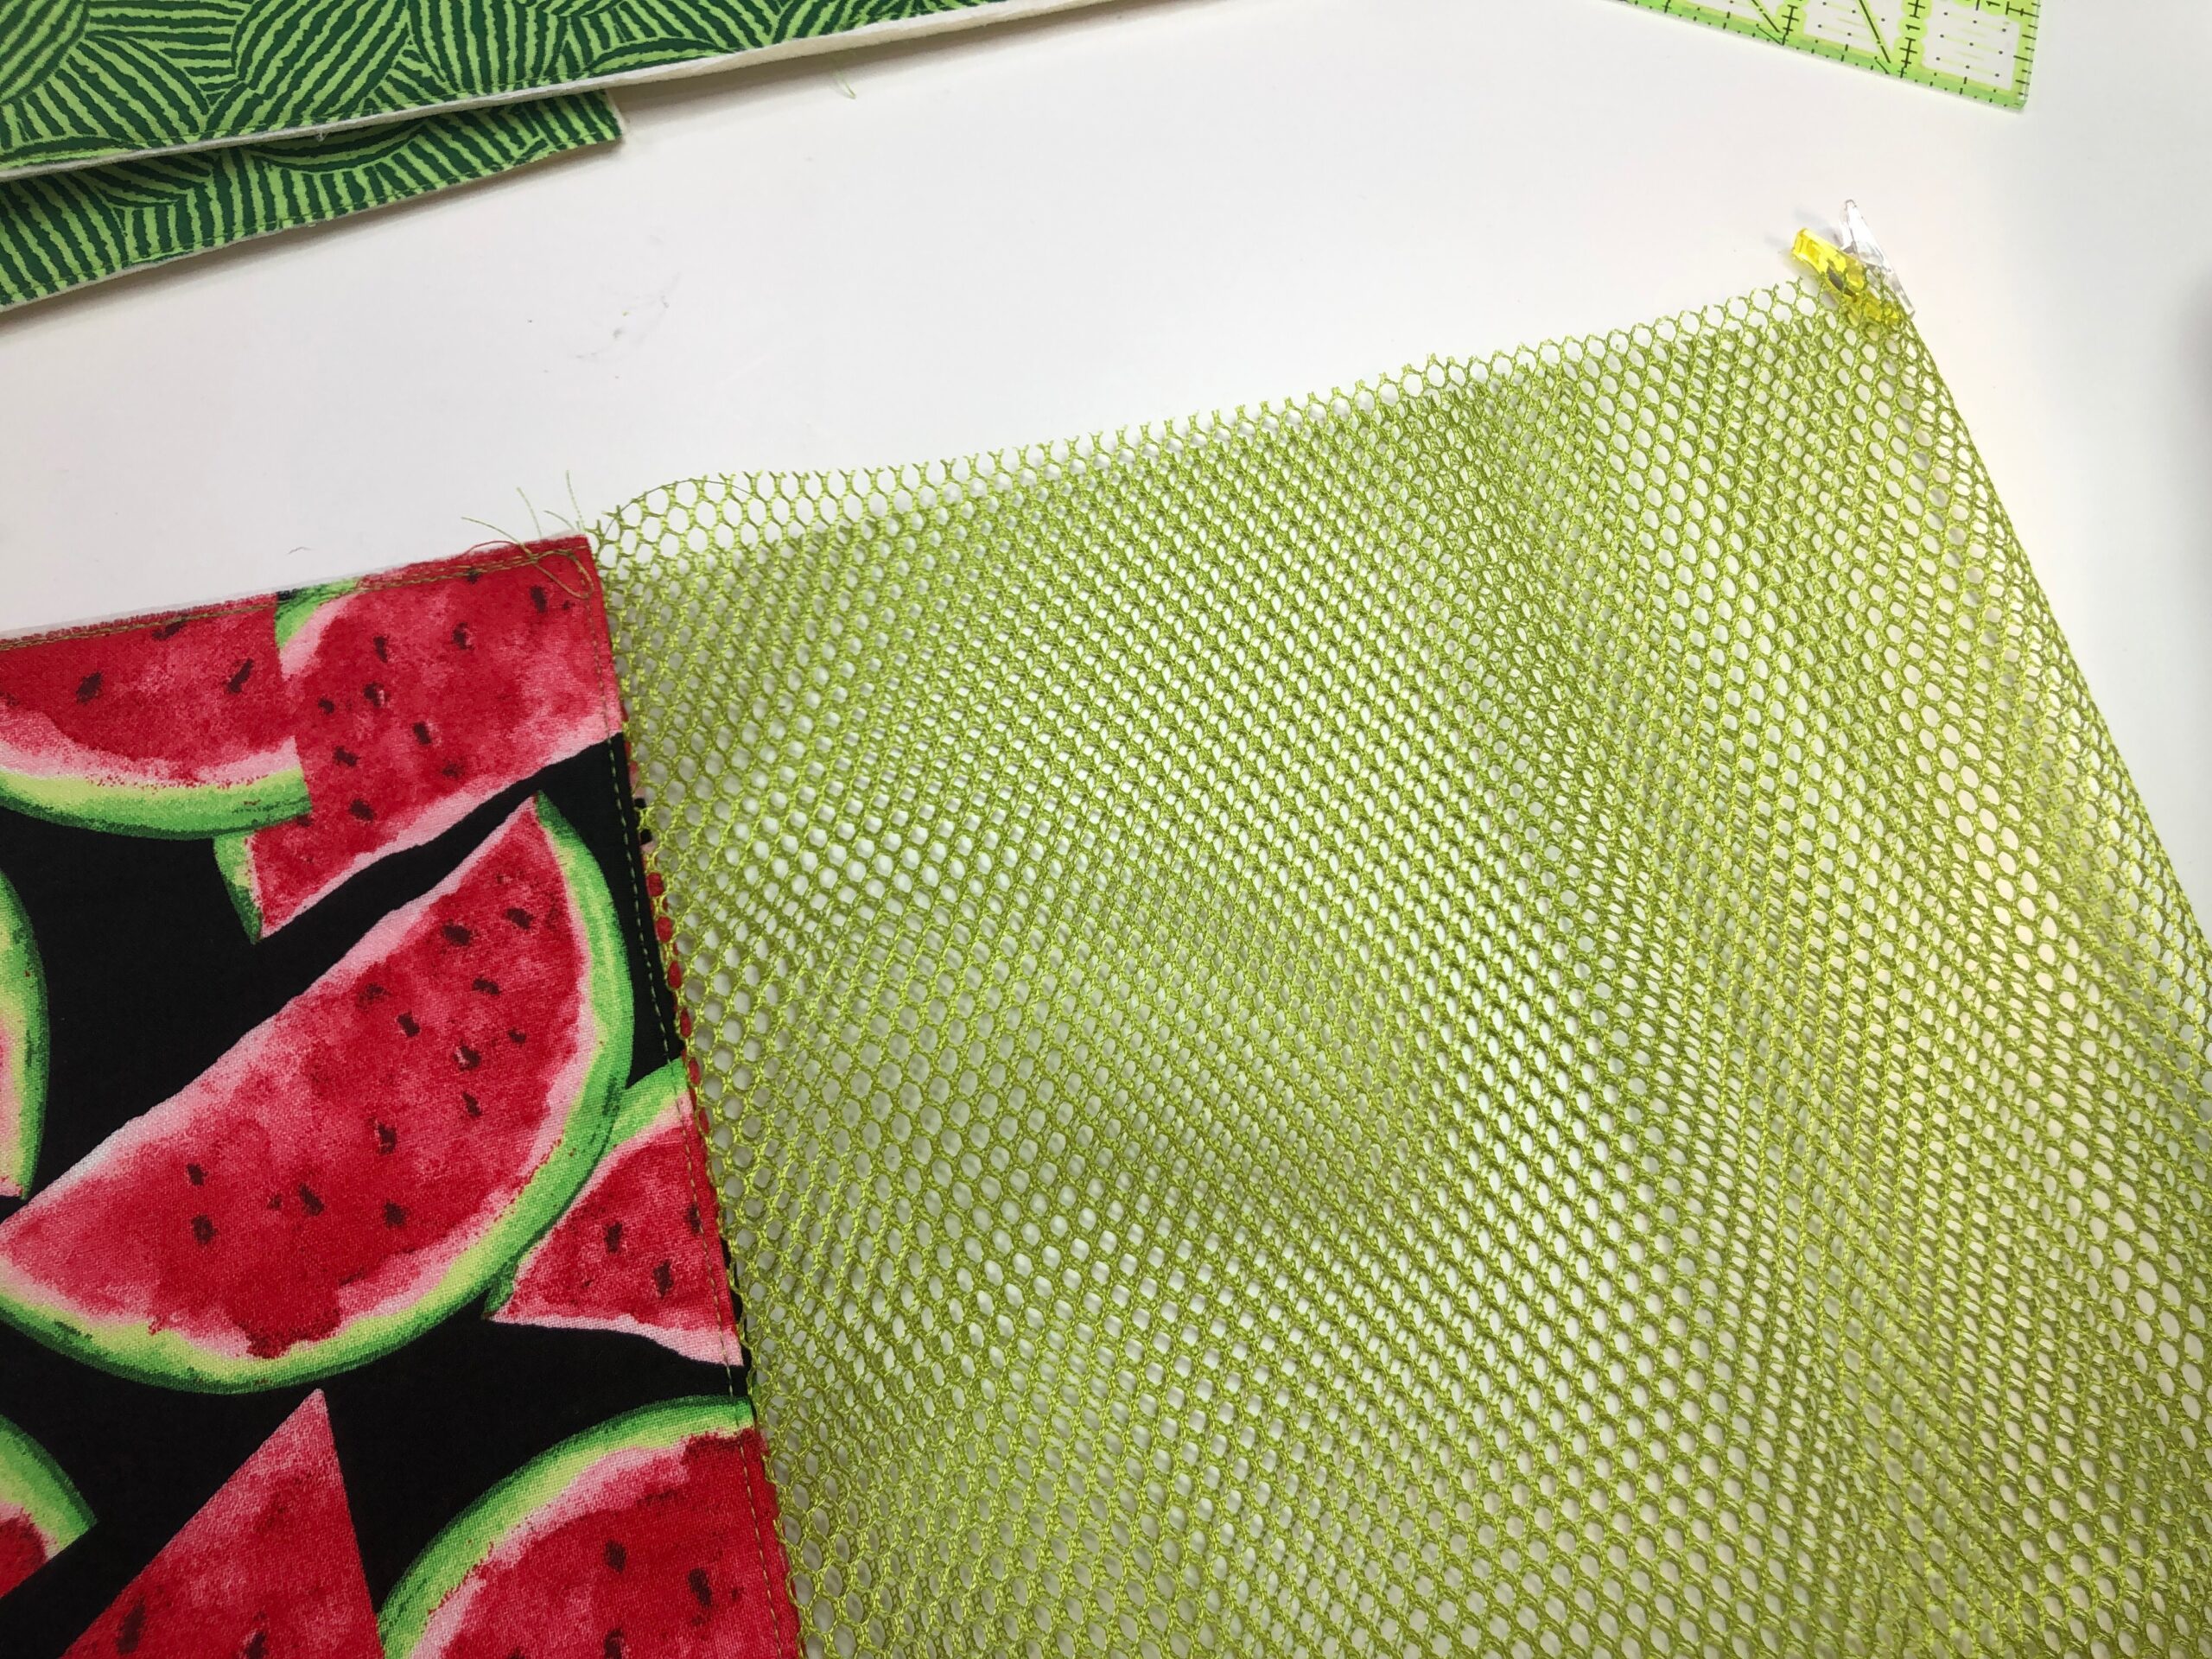
Fold both border gusset pieces away from the mesh on each side; topstitch 1/8” from the seam along the gusset borders. Then, baste the gusset-border sides and lower edges.
Fold the gusset in half widthwise to clip-mark the center along both long edges.
CONSTRUCT FOOD TENT
Match the upper-edge center mark of one outer piece with one gusset long-edge center mark. Pin or use Wonder Clips to secure.
Ease the gusset long edge around the outer piece, pinning or clipping as you go.
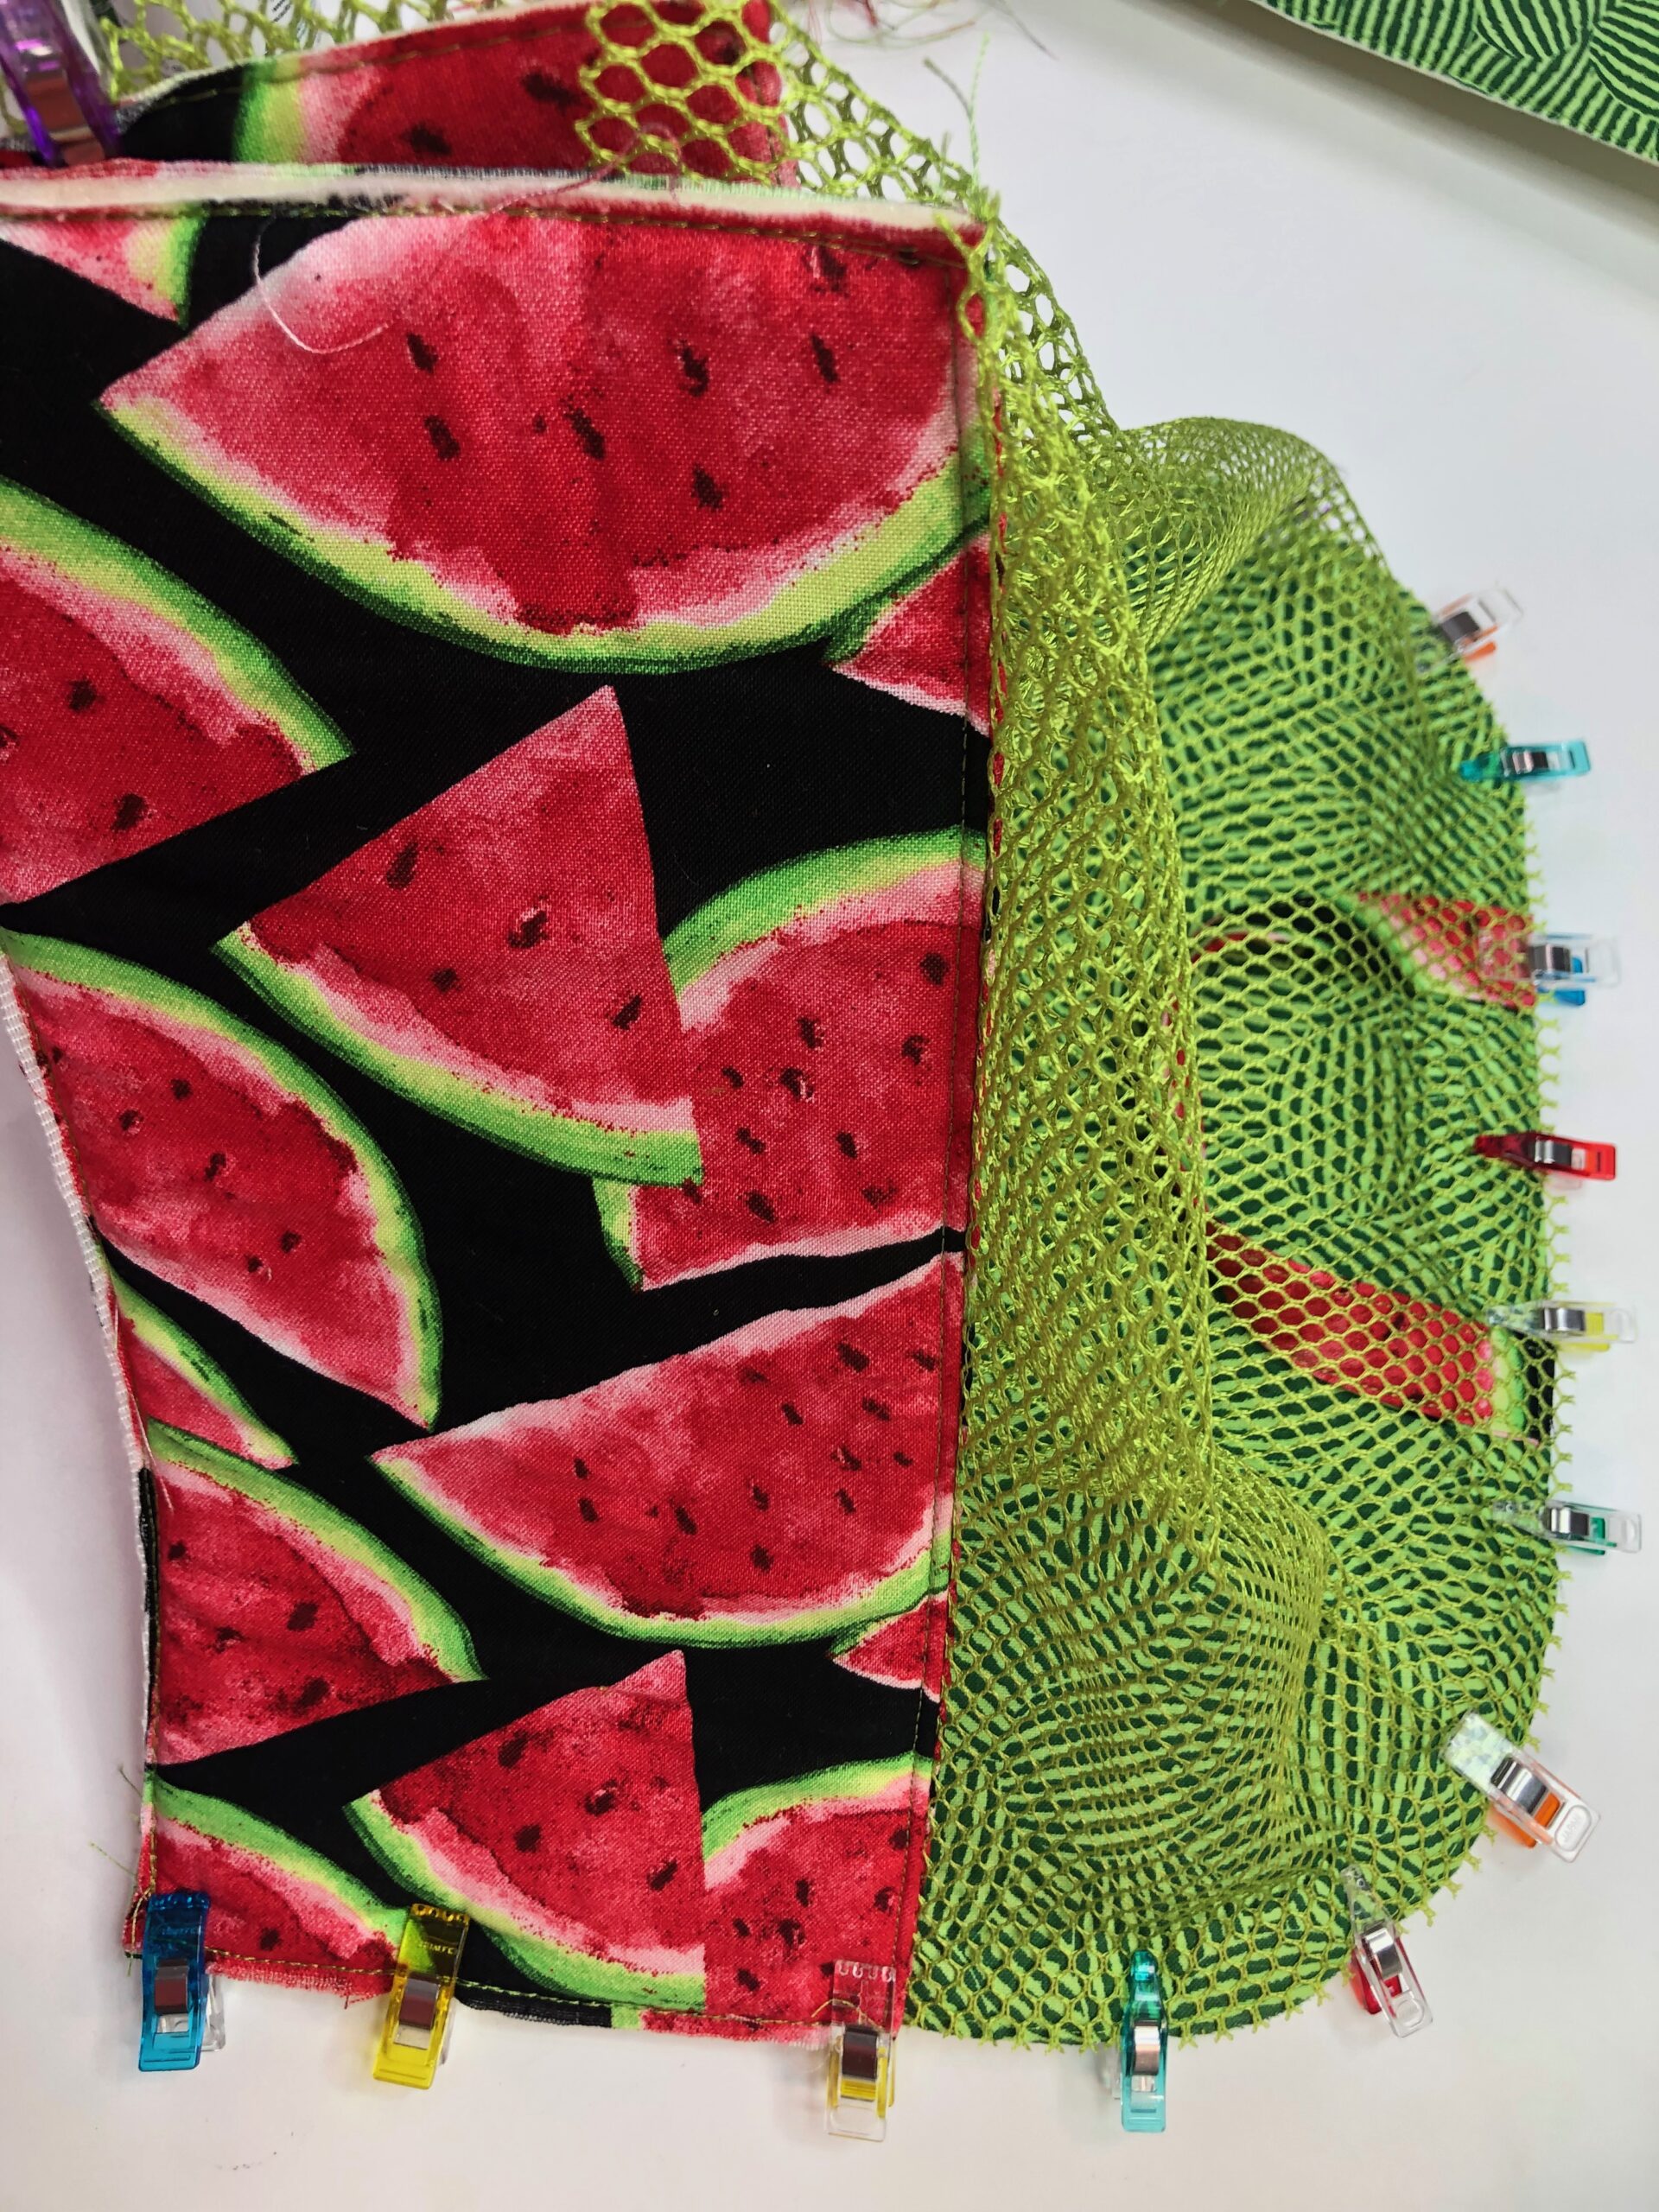
Stitch the gusset long edge to the outer piece using a ¼” seam allowance.
Repeat to stitch the opposite gusset long edge to the remaining outer piece. Keep the food tent wrong side out.
Wrap a length of FOE around each seam; use Wonder Clips or pins to secure.

Zigzag stitch the FOE close to the edge, stretching it slightly as you sew.

Beginning at one back gusset seam, wrap FOE around the lower edge. Fold the beginning raw end ½” toward the wrong side. At the FOE end, overlap the beginning fold 1”; trim, and then nest the raw end inside the folded end. Use Wonder Clips or pins to secure. Then, zigzag stitch along the FOE long edge to bind the fabric food cover.
At the binding beginning, overlap the end and zigzag several times across the join.

Turn the fabric food tent right side out.

Place the fabric food tent over your favorite bowl of watermelon at the park or picnic!


Ellen March
I am the Director of Content for Sulky of America. The former Editor in Chief of Sew News and Creative Machine Embroidery magazines, I hosted Sew it All TV on PBS for nine seasons. I've appeared on It's Sew Easy on PBS, DIY Network's Uncommon Threads, Hallmark's Marie Osmond Show, MacPhee Workshop and more! Come sew with me!


5 Comments
Amy Kollasch
How adorable! And just in time for me here in the Midwest. Bugs are starting to come out! Thank you!
Elaine
thank you. I used to have one years ago and when moved it got lost.
Linda J
Love the Food Tent pattern! Great idea!!!!
Suellen
This is really cute for summer. This idea is wonderful.
Suellen
I really like this Fabric Tent for summer. I can’t wait to see this up.