
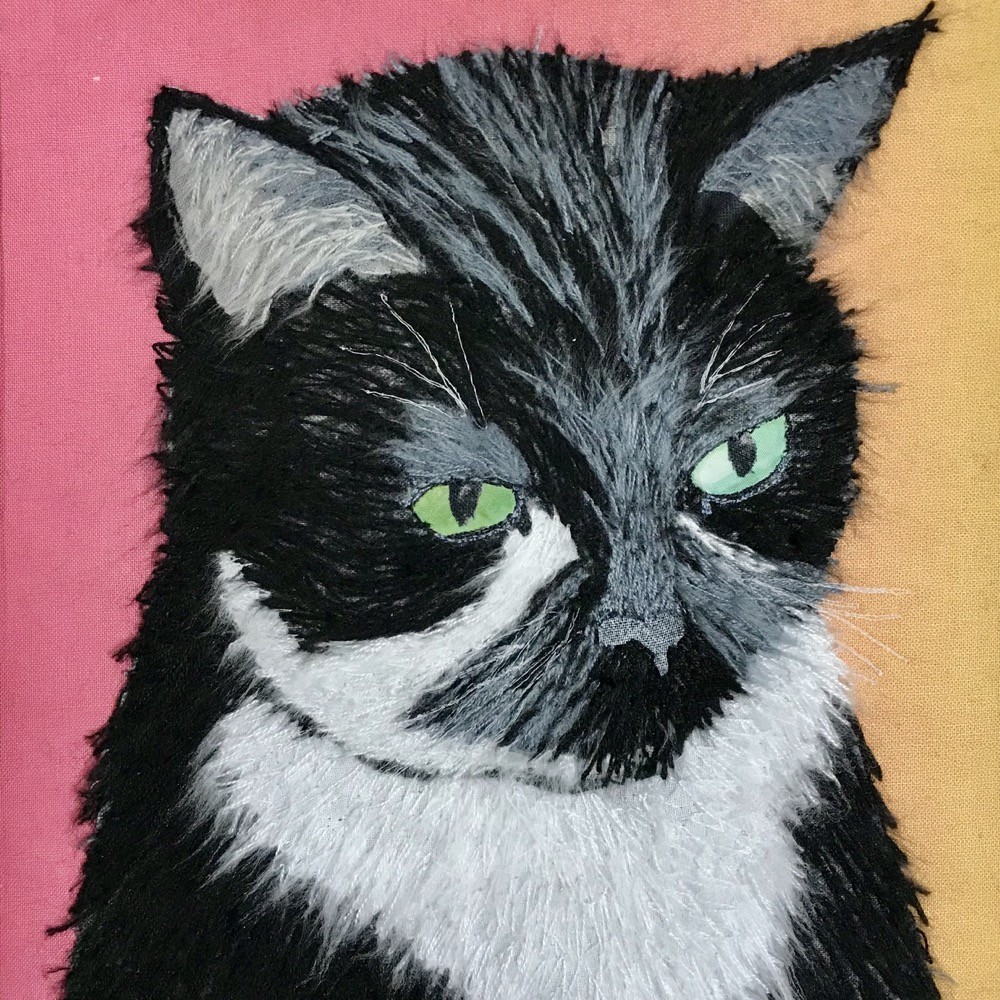
Create a Filaine Fluffy Kitty with Fun Free-Motion Techniques
Filaine Fluffy Kitty
by Bonnie Langenfeld
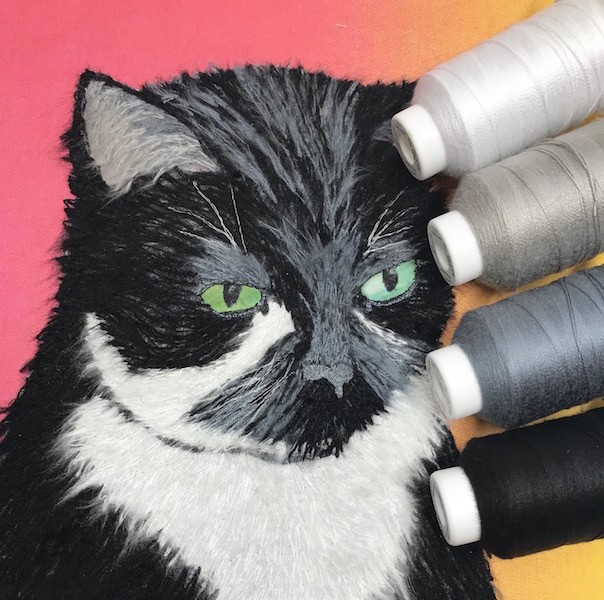
Create a Filaine fluffy kitty using free-motion embroidery techniques. When making this project you will learn how to use fabrics for background color fill, use Sulky® Filaine thread to create beautiful life-like fur, and attach the image to a background of your choice.
Finished Kitty is about 10″ high.
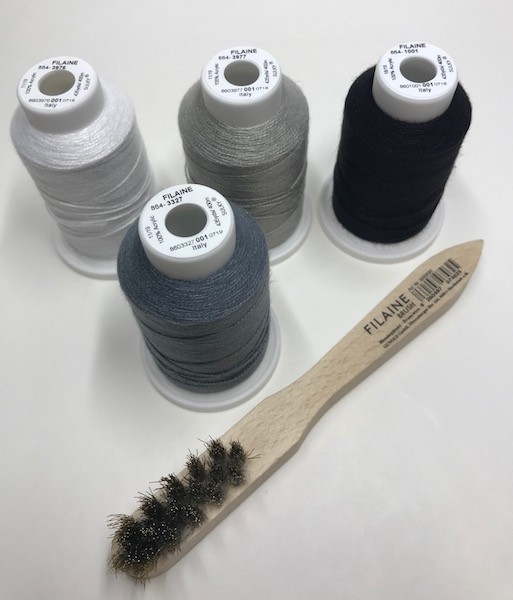
Fluffy Kitty Supply List
- Sulky™ Filaine Brush
- Sulky 12 wt. Filaine thread
- Sulky 40 wt. Poly Deco thread in black, medium gray and white (for bobbins and details)
- Organ 90/14 Top Stitch needles
- Sewing machine with free motion or darning foot, feed dogs dropped
- Fabrics:
- 8×10″ black with small white or gray blotches and specks, snippets of this fabric will be used for eye pupils
- 8×5″ white
- Dark gray scrap for nose
- Blotchy green scraps for eyes
- 10″x12” rectangle of Soft ‘n Sheer Extra™ stabilizer– medium-weight (or two layers of buckram or crinoline)
- Acid free glue sticks
- Tracing paper, pencil
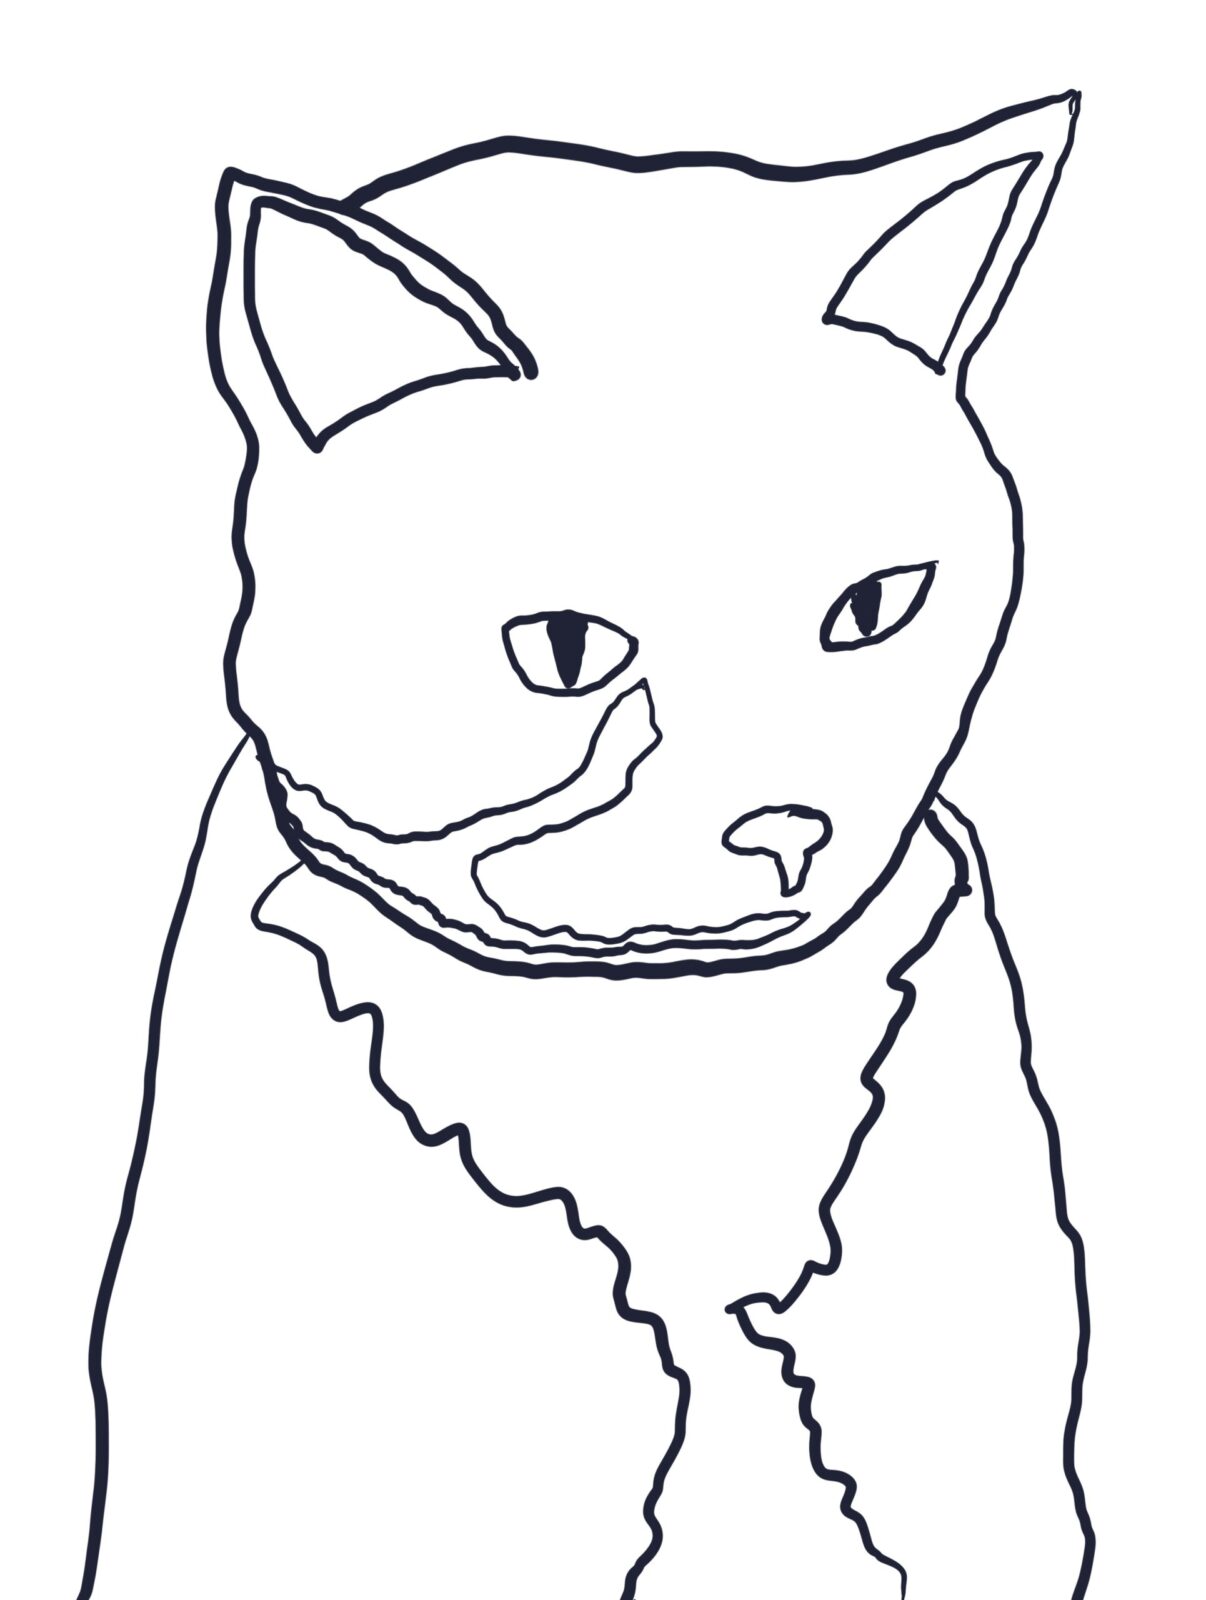
Prep & Cut
- Trace the Filaine Fluffy Kitty pattern onto tracing paper

- Use the glue stick to tack the two layers of stabilizer together, if using buckram or crinolin.
- Cut out fabrics according to traced pattern pieces (The original Filaine Fluffy Kitty pattern will be the reference guide for placement).
Construct the Filaine Fluffy Kitty
- Use the glue stick to tack the black fabric (cat shape) onto the stabilizer.

- Tack white fabric pieces on top of the black.
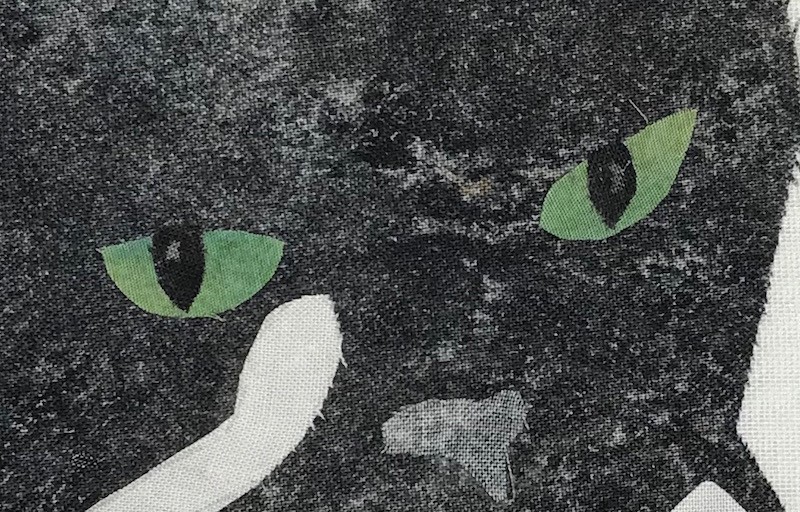
- Glue eyes and pupils in place.
- Glue nose in place.
- Outline inner ear areas.
- Fill a bobbin with 40 wt thread – one with gray, and one with white thread – and use these with the corresponding Filaine colors.
- Stitching Tips:
- When using Filaine, use a very slow stitch while you pull or push the fabric in free motion to get stitches about ¼” long.
- Stitch along contour lines helps make the kitty look dimensional.

- Lines of stitching may cross one another and may go off the edge of the cat shape.
- It works well to move backwards and forwards and even sideways with a continuous line of stitching. When you finish stitching, clip the thread ends close to the stitching.
- Narrow spaces between some line of stitching allow the background fabric to show through and add depth to the look.
- Make small stitches (and don’t brush) where fluffiness isn’t needed, such as above the nose tip.
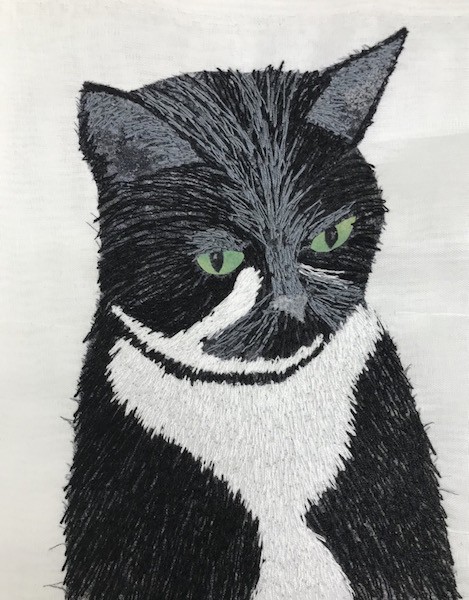
- In free-motion mode, stitch black Filaine onto the black body and head areas of the kitty, following contour lines.


- Stitch the white fabric areas with white Filaine.

Tip: Start at the bottom of the large white area. Work across the area from left to right with lines of stitching forming a zigzag about 1/2″ high. Then, move up to the next ‘row’ and work across the white area from right to left, slightly overlapping the previous row of stitching. Be sure to stitch into the black a bit where the white and black areas meet.
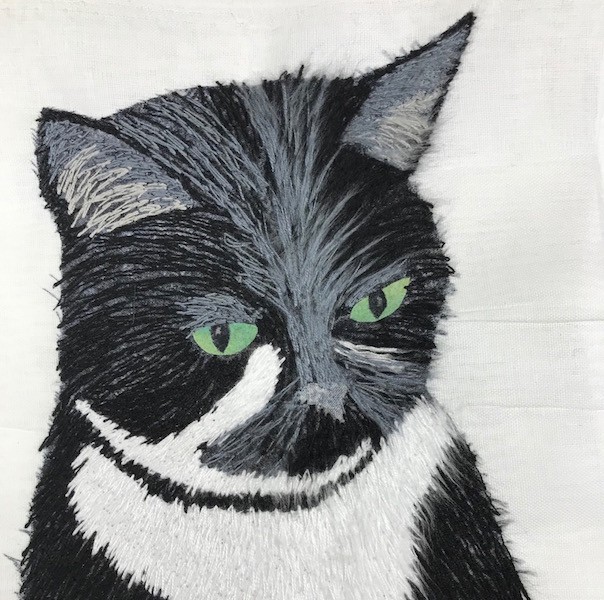
- Stitch using Dark Whisper Gray Filaine. It can be stitched over the black thread.

- Stitch Medium Gray Filaine in inner ear areas. Stitch a few lines of light gray over the medium gray.
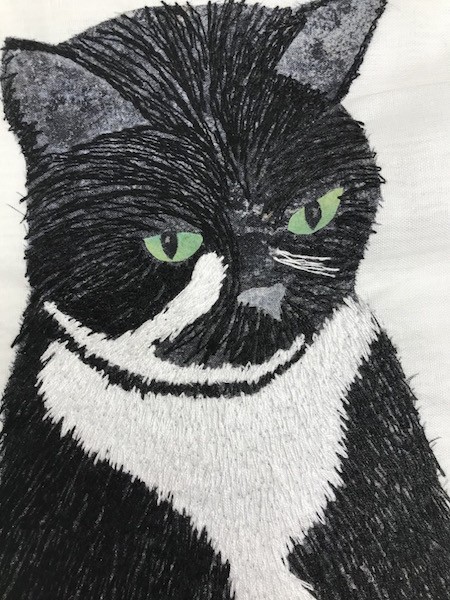
- Use regular thread black thread and small stitches to carefully stitch around the edges of the eyes.
- Use regular medium gray thread and small stitches to make a line about an eighth of an inch below the lower black-stitched eye line.

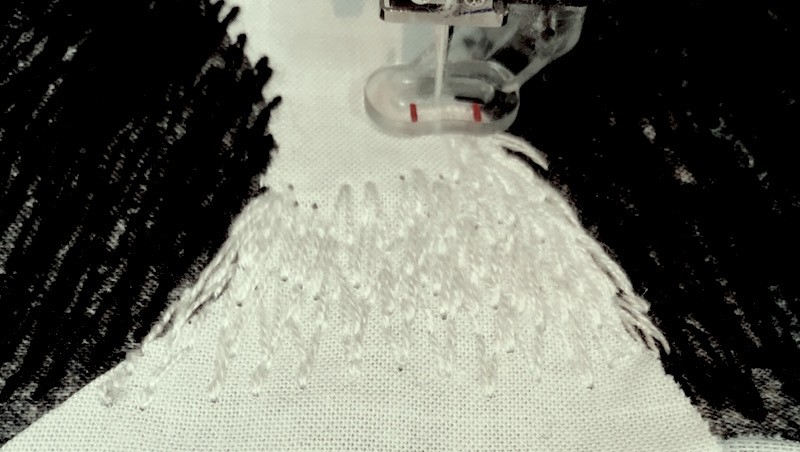
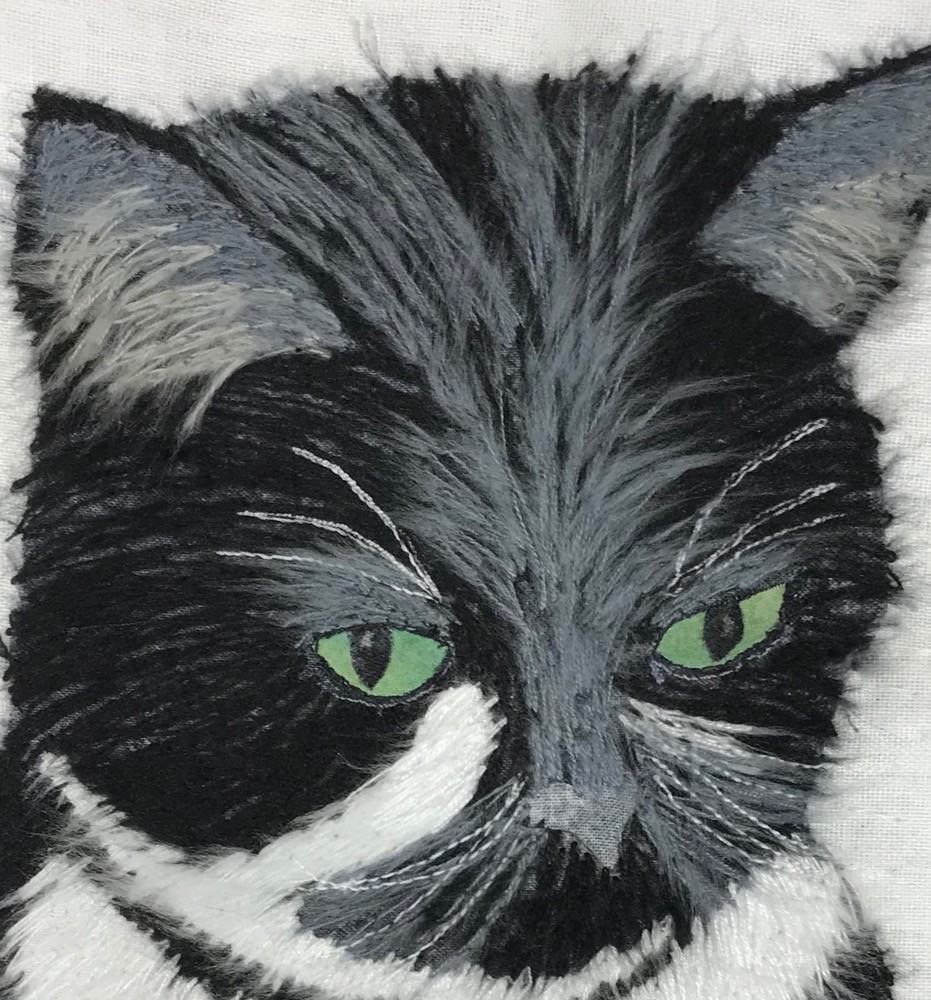
- Use the wire brush to vigorously brush the Filaine. Brushing crosswise is most effective. Be careful not to brush into the eyes or nose. Snip any lose thread ends that pop up. In this image, the right side of the kitty has been brushed.

- Use white thread to stitch whiskers and eyebrow hairs.

Finishing the Filaine Fluffy Kitty
Applique the image to any background you choose.
- Cut close to the edges of the cat to remove the stabilizer.
- Use a glue stick to tack the cat to any background you choose.
- Use Filaine to match the color of the edges as you stitch around the kitty. Follow the direction of the lines previously sewn and extend them just a bit onto the background.
- Brush again to fluff the fur around the edges.
More Inspiration
Here are some more fun designs other than the Filaine Fluffy Kitty, done in Filaine thread so you can see just how fun and versatile the thread is! Substitute Filaine for any areas of designs you want to brush, giving a fluffy look and feel to the project!


Ellen March
I am the Director of Content for Sulky of America. The former Editor in Chief of Sew News and Creative Machine Embroidery magazines, I hosted Sew it All TV on PBS for nine seasons. I've appeared on It's Sew Easy on PBS, DIY Network's Uncommon Threads, Hallmark's Marie Osmond Show, MacPhee Workshop and more! Come sew with me!


4 Comments
Kathleen Orlandi
What Santa design did you use? I would like to se more and more information on this.
Thanks
Kathy Orlandi
Ellen March
Hi Kathleen, the Santa was done free-motion, drawn by Bonnie. I will try and get more information for you.
Ellie
Wow, these are super! Can’t wait to give it a try!
Diana Hensley
I bought these threads. Love them. Really adds to creativity. I did a kitty with embroidery and when I posted it on Facebook, everyone thought it was a real kitty.