
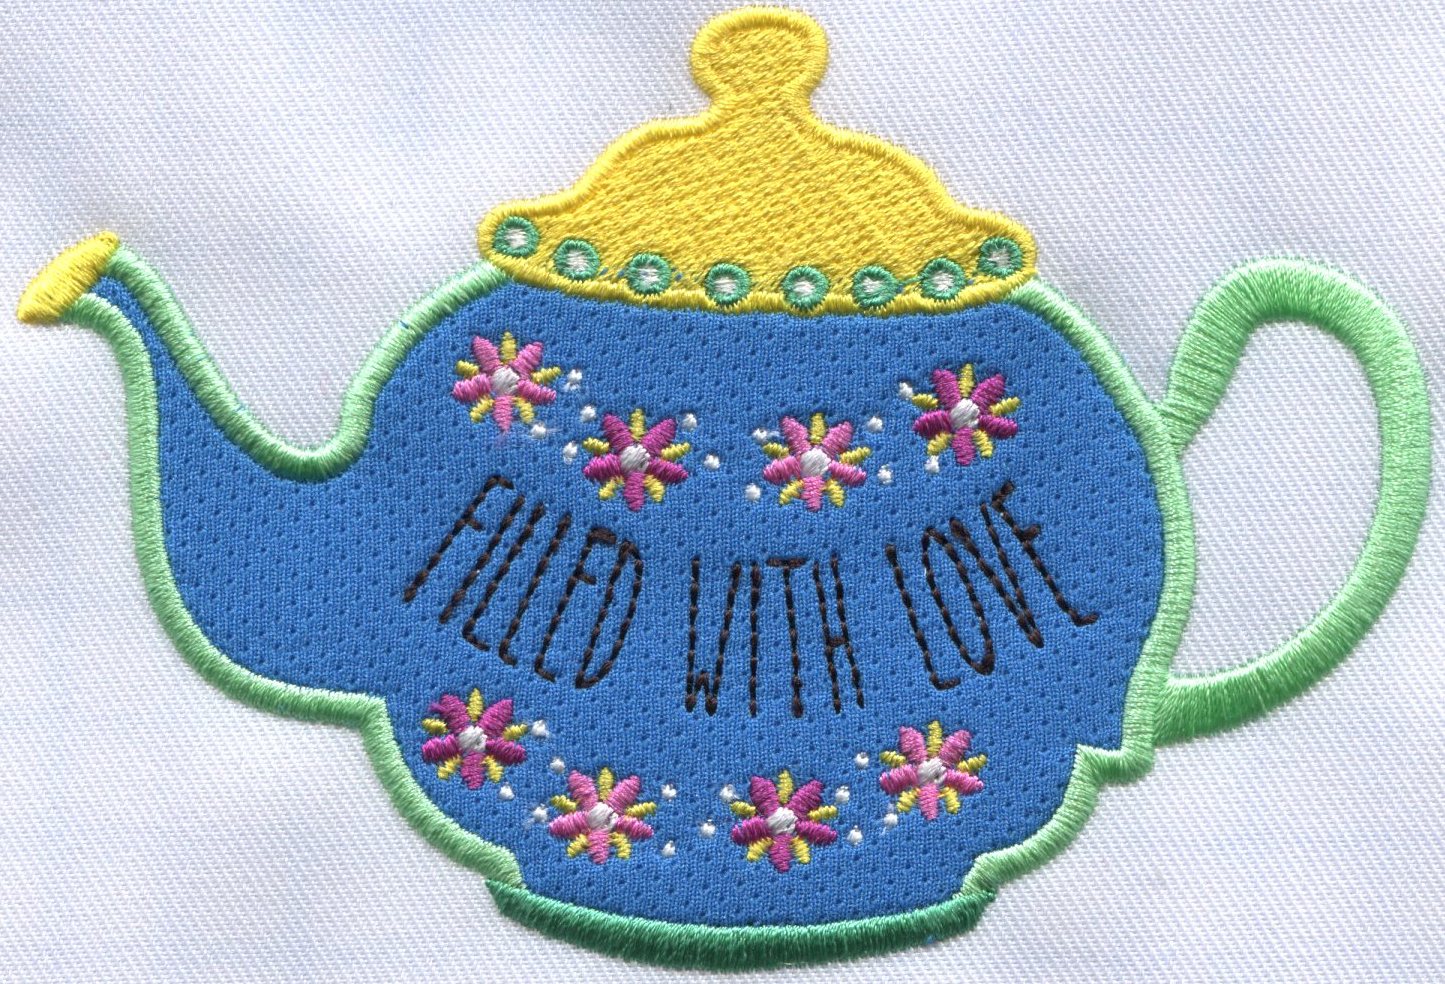
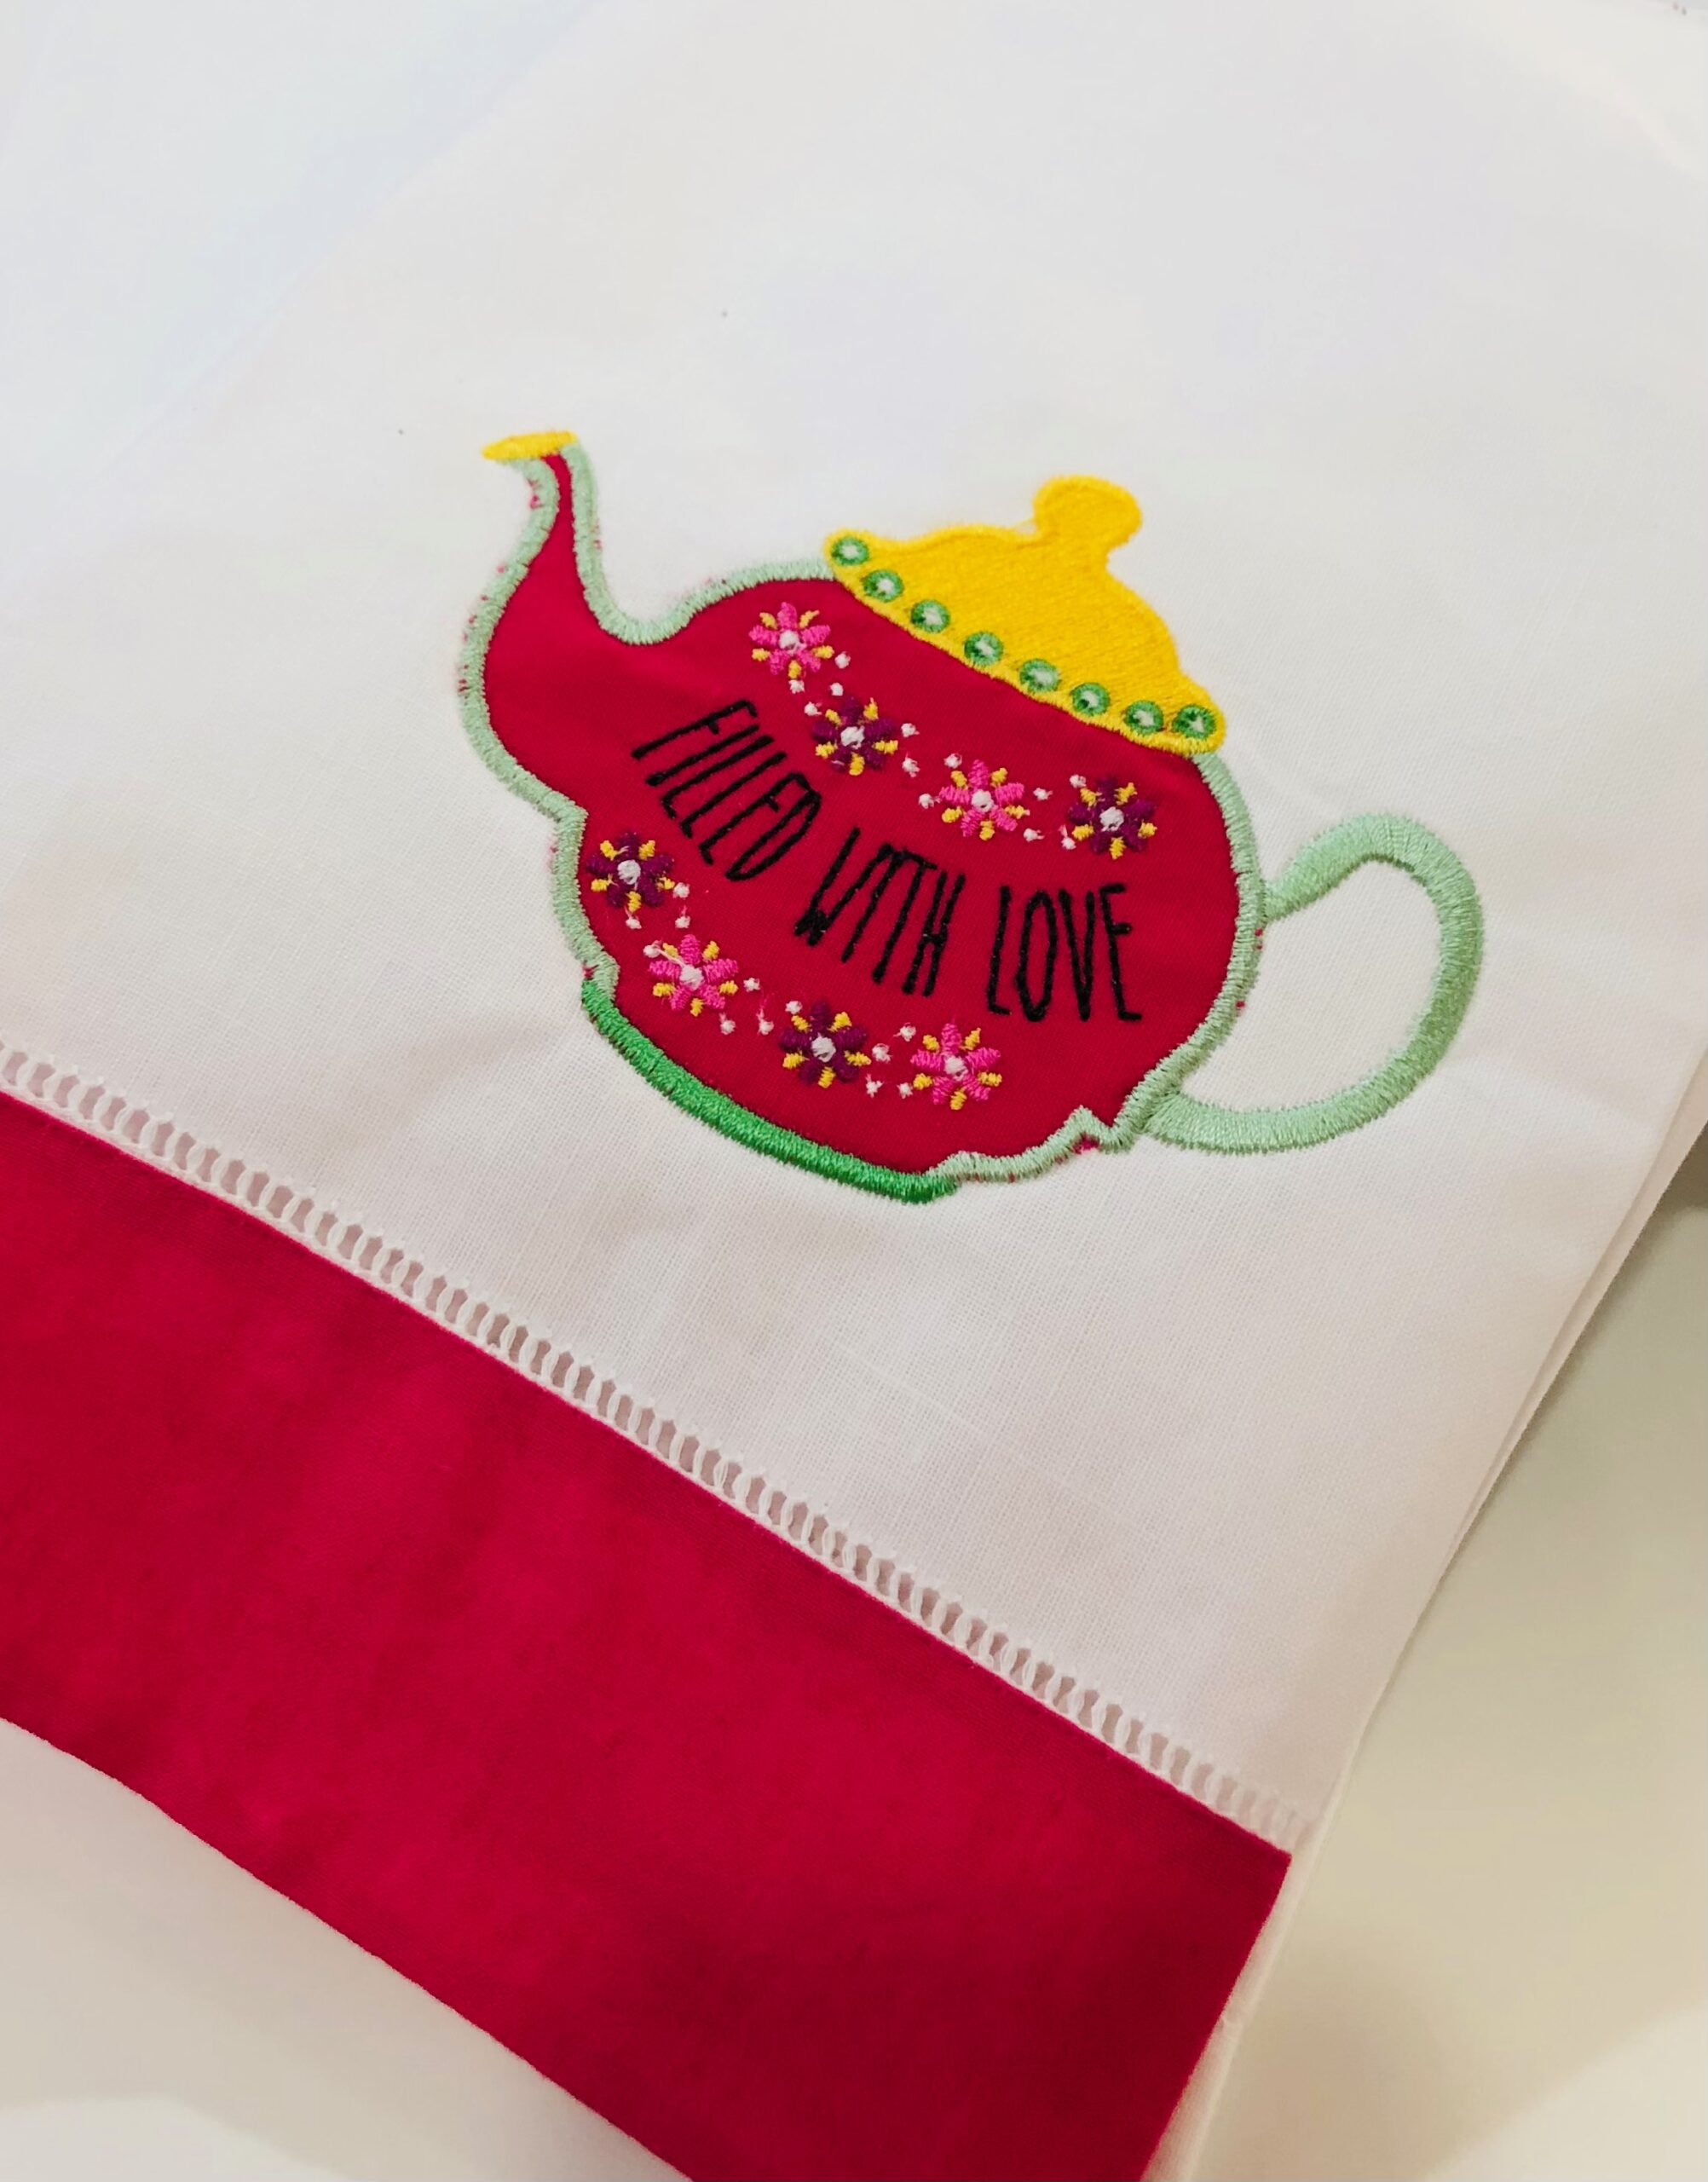
Filled with Love Tea Towel to Stitch
Filled with Love Towel
Add an adorable Filled with Love tea towel design to a blank trimmed tea towel to gift for Valentine’s Day. Start with our Cup of Tea Thread Palette, which includes 10 spools of Sulky Rayon Thread and 6 machine embroidery designs in 3 sizes.

Then grab a towel blank (choose one with a colorful border or add your own!) and Sulky Fabri-Solvy for beautiful results.

The Cup of Tea design collection contains all appliqué designs, done in the hoop of your embroidery machine. You’ll need some fabric scraps for the appliqué design portions, so choose solids that coordinate with the thread colors or fabrics with minimal print so the threadwork shines through.
SUPPIES
- Tea Towel Blank
- Cup of Tea Machine Embroidery Palette
- Sulky Bobbin Thread
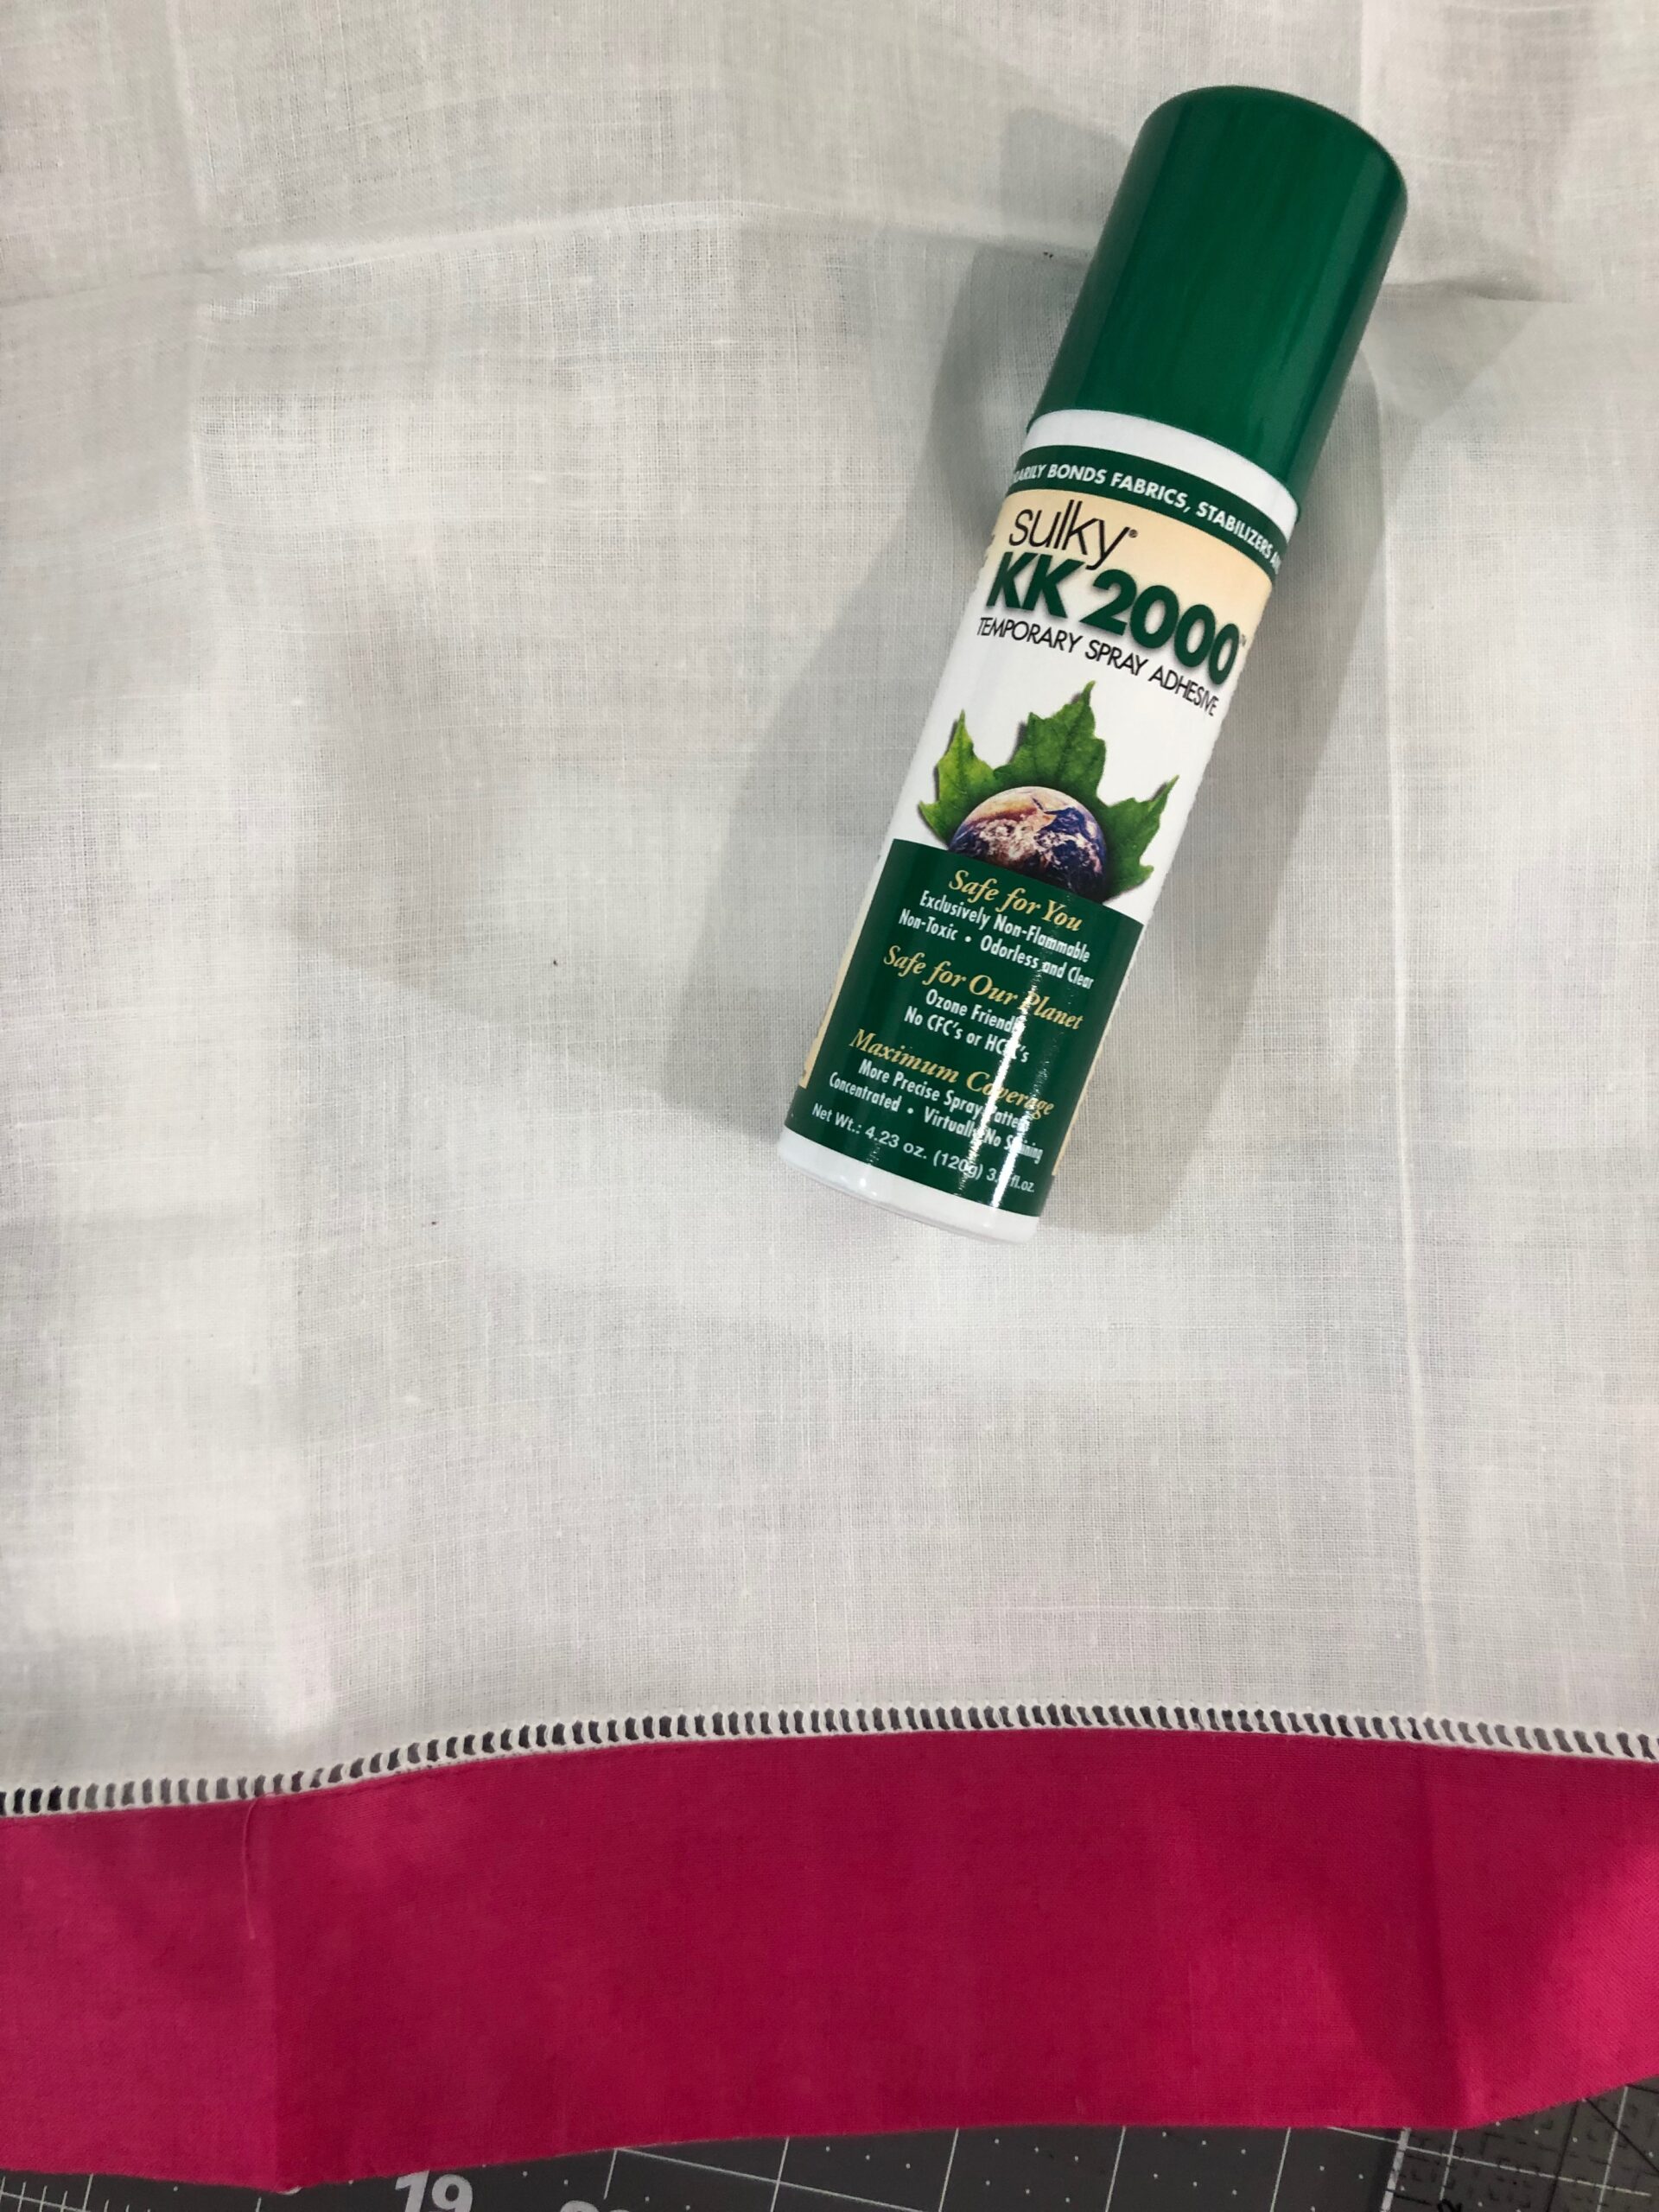
- KK 2000™ Temporary Spray Adhesive
- Fabri-Solvy™ Stabilizer
- Organ® Embroidery Needles
- Appliqué scissors
- Curve-Tip Squeezers
DESIGN CHOICES
The featured Cup of Tea designs come in three sizes. For the featured towel, the 4×4 hoop size was used. But, the featured towel would also accommodate the 5×7 size.
As mentioned, the featured designs are appliqué designs, done in the hoop of your embroidery machine. If not using an appliqué design, follow the same embroidery steps but omit the placement of the appliqué fabrics.
If using a towel that has a pattern, such as houndstooth, plaid or checks, an appliqué design is a good choice to ensure the thread work pops off the background.
Recipe designs or designs that are food or drink related are fun choices for towels, but truly any design works! If you’re gearing up for the big game in February, choose a licensed design that features your favorite football team. (That also makes a great Valentine’s Day gift, too!)
Decide on the desired embroidery placement, and use your preferred method for marking the design center cross-marks on the towel right side.
FILLED WITH LOVE TOWEL
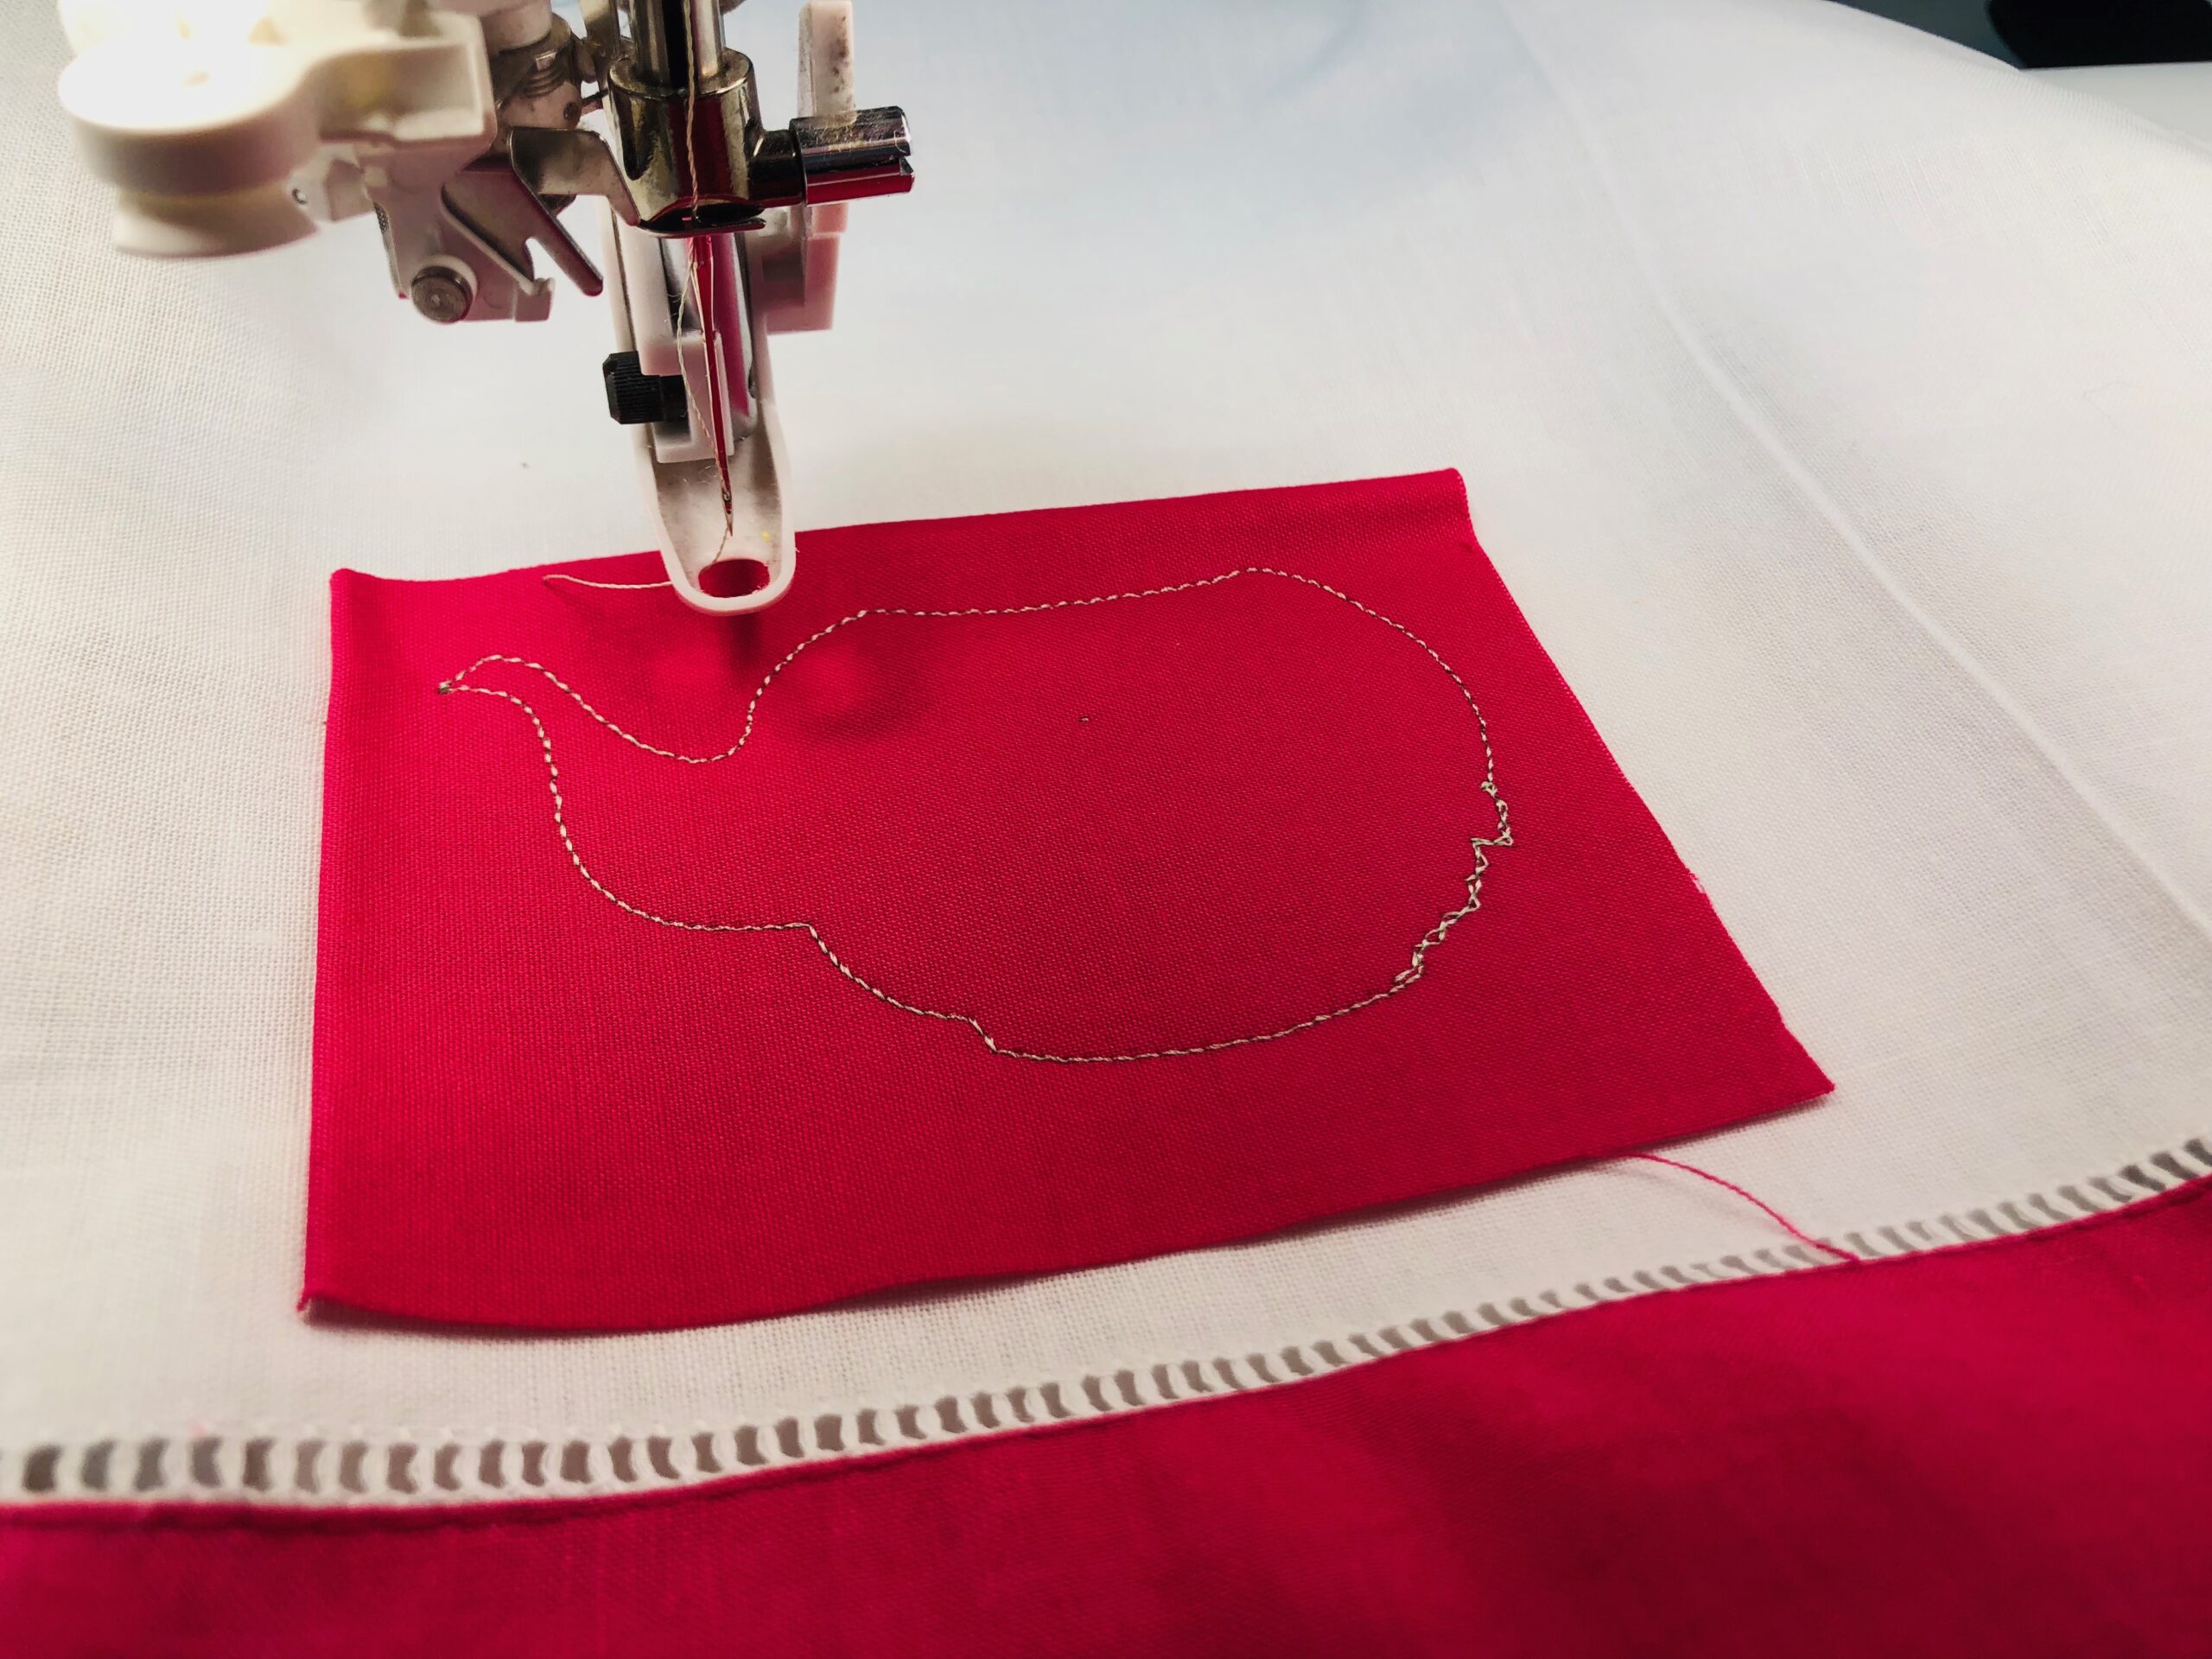
Begin by hooping two layers of only the Fabri-Solvy stabilizer. This provides a stable surface to support the towel and stitching during embroidery.
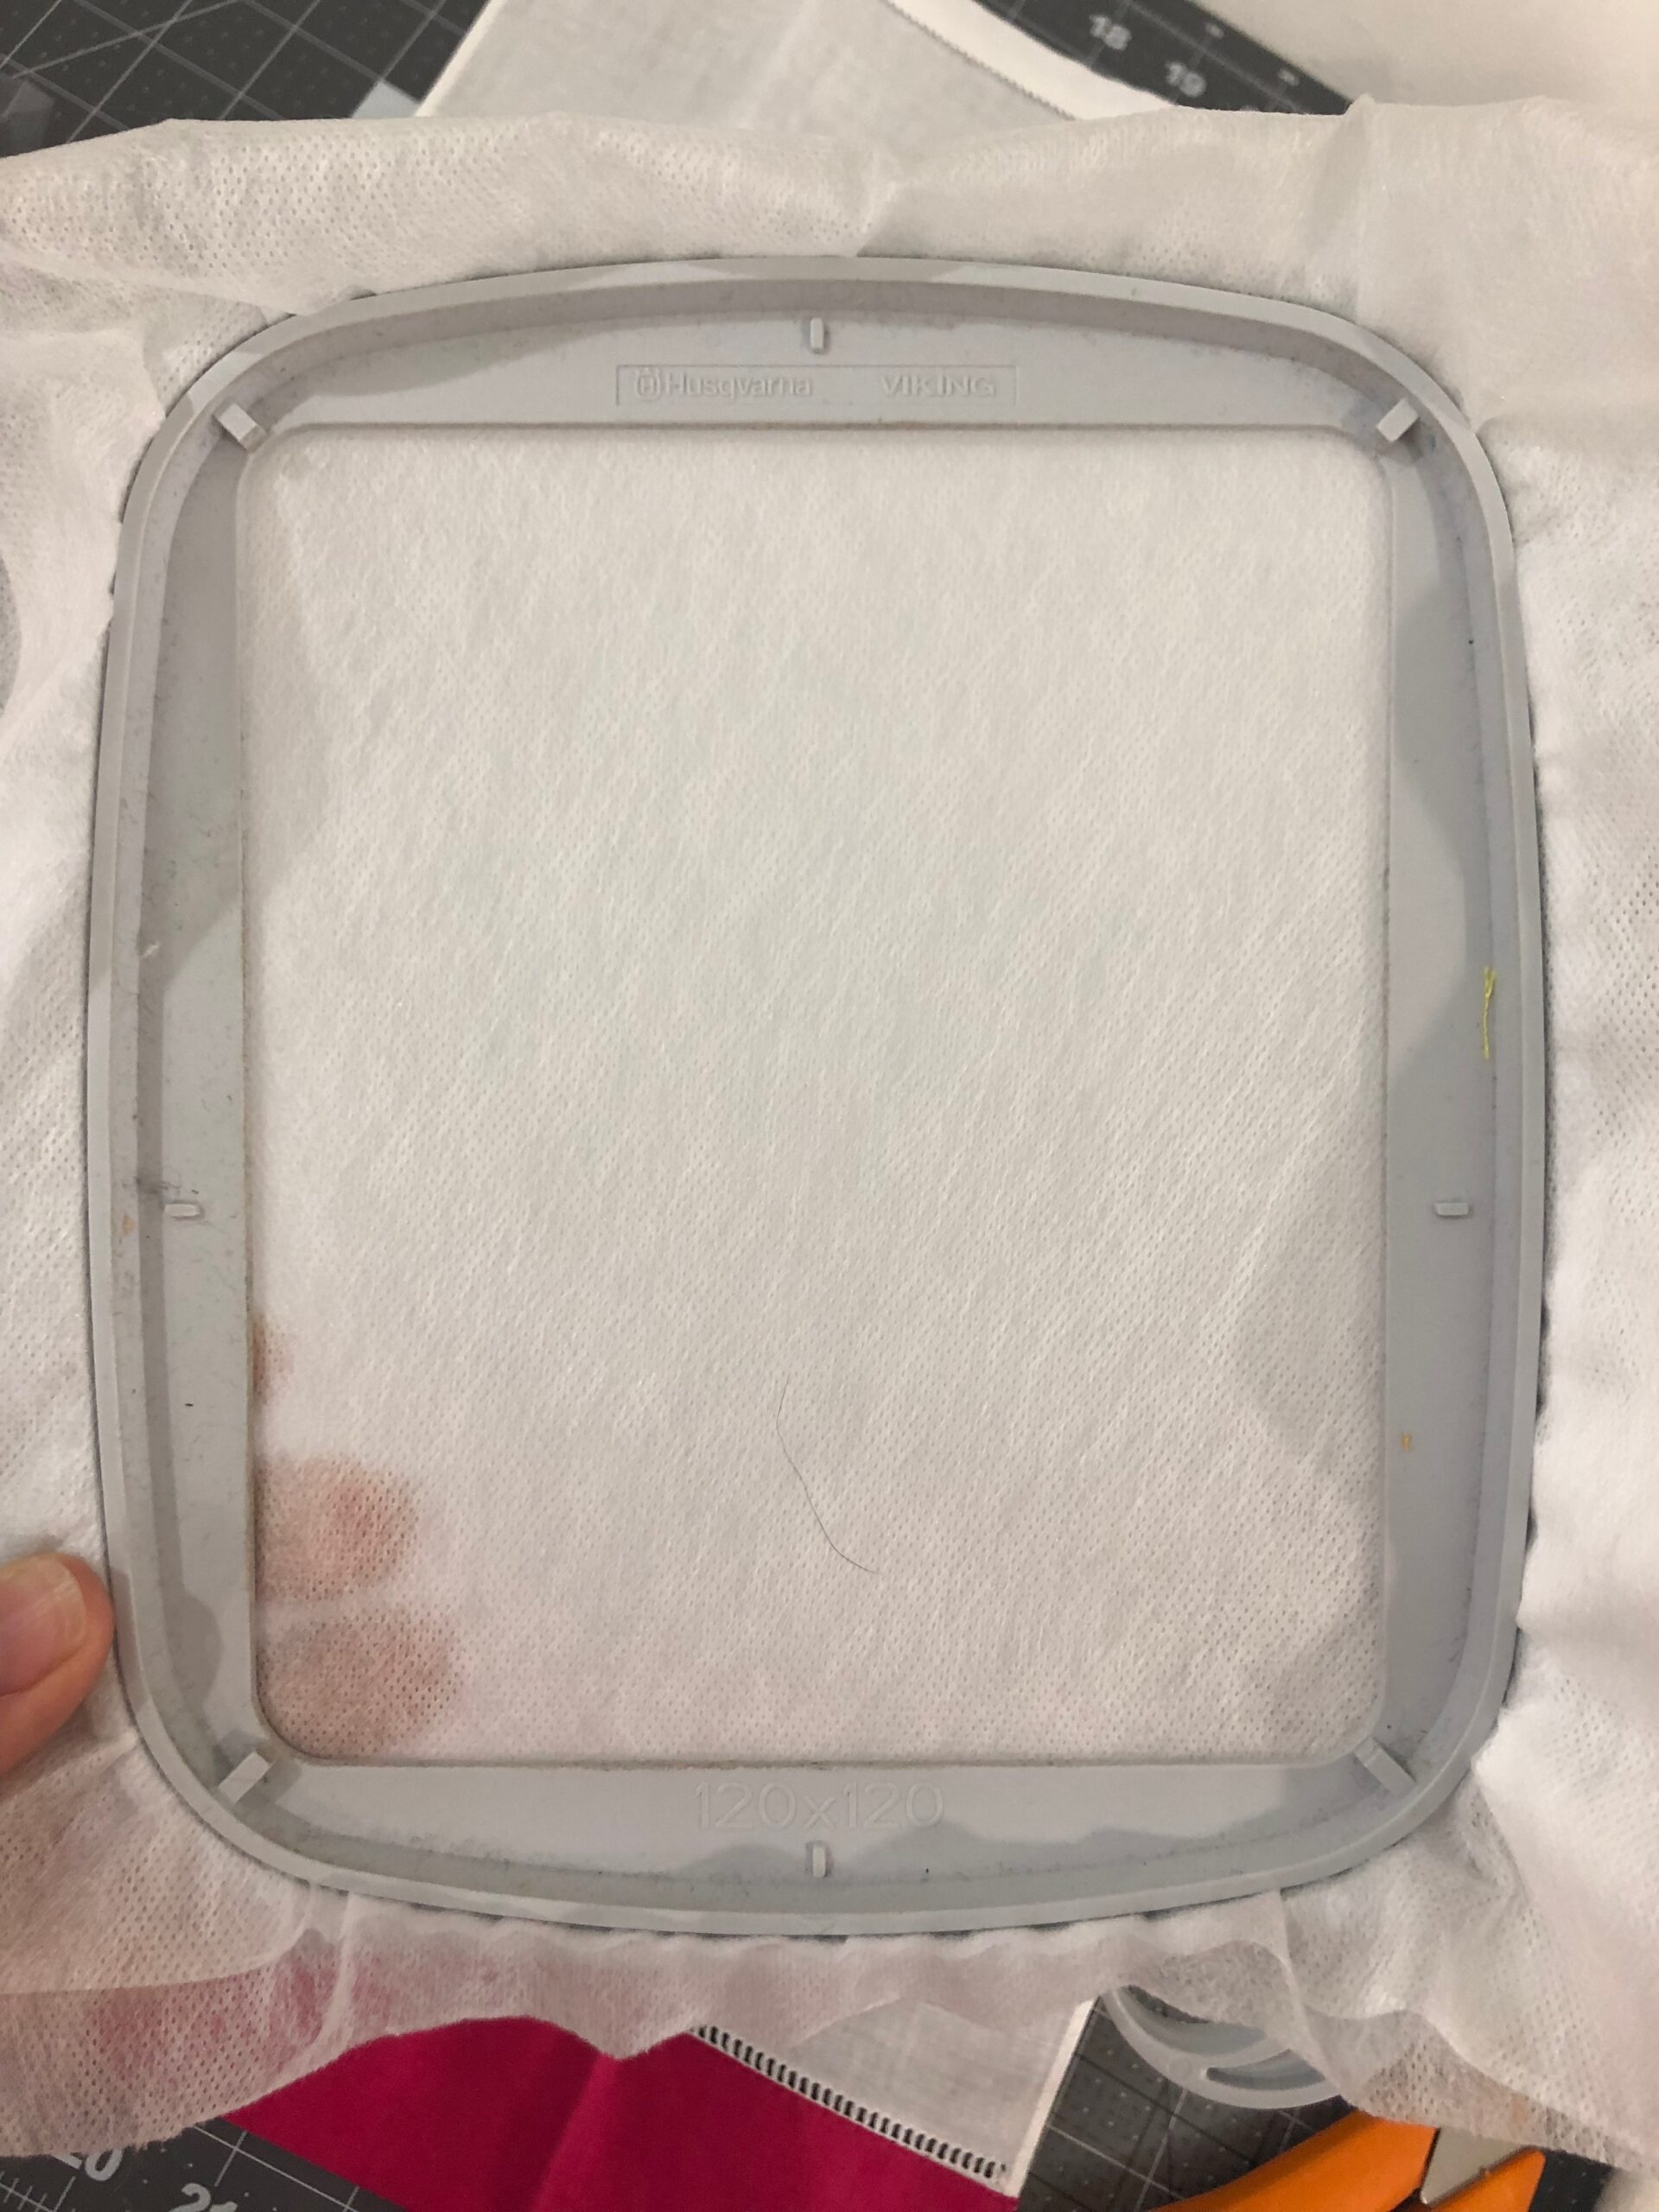
Spray the stabilizer with Sulky KK 2000 Temporary Spray Adhesive. Place the chosen Filled with Love towel right side up over the hooped stabilizer, centering the marked cross marks in the hoop.
Use your hand to smooth the towel in place, securing it with the temporary adhesive. Begin the design, following the color sequence chart PDF for thread color and appliqué instructions, if applicable. Be sure that the chosen appliqué fabrics completely cover the placement stitches of the design.
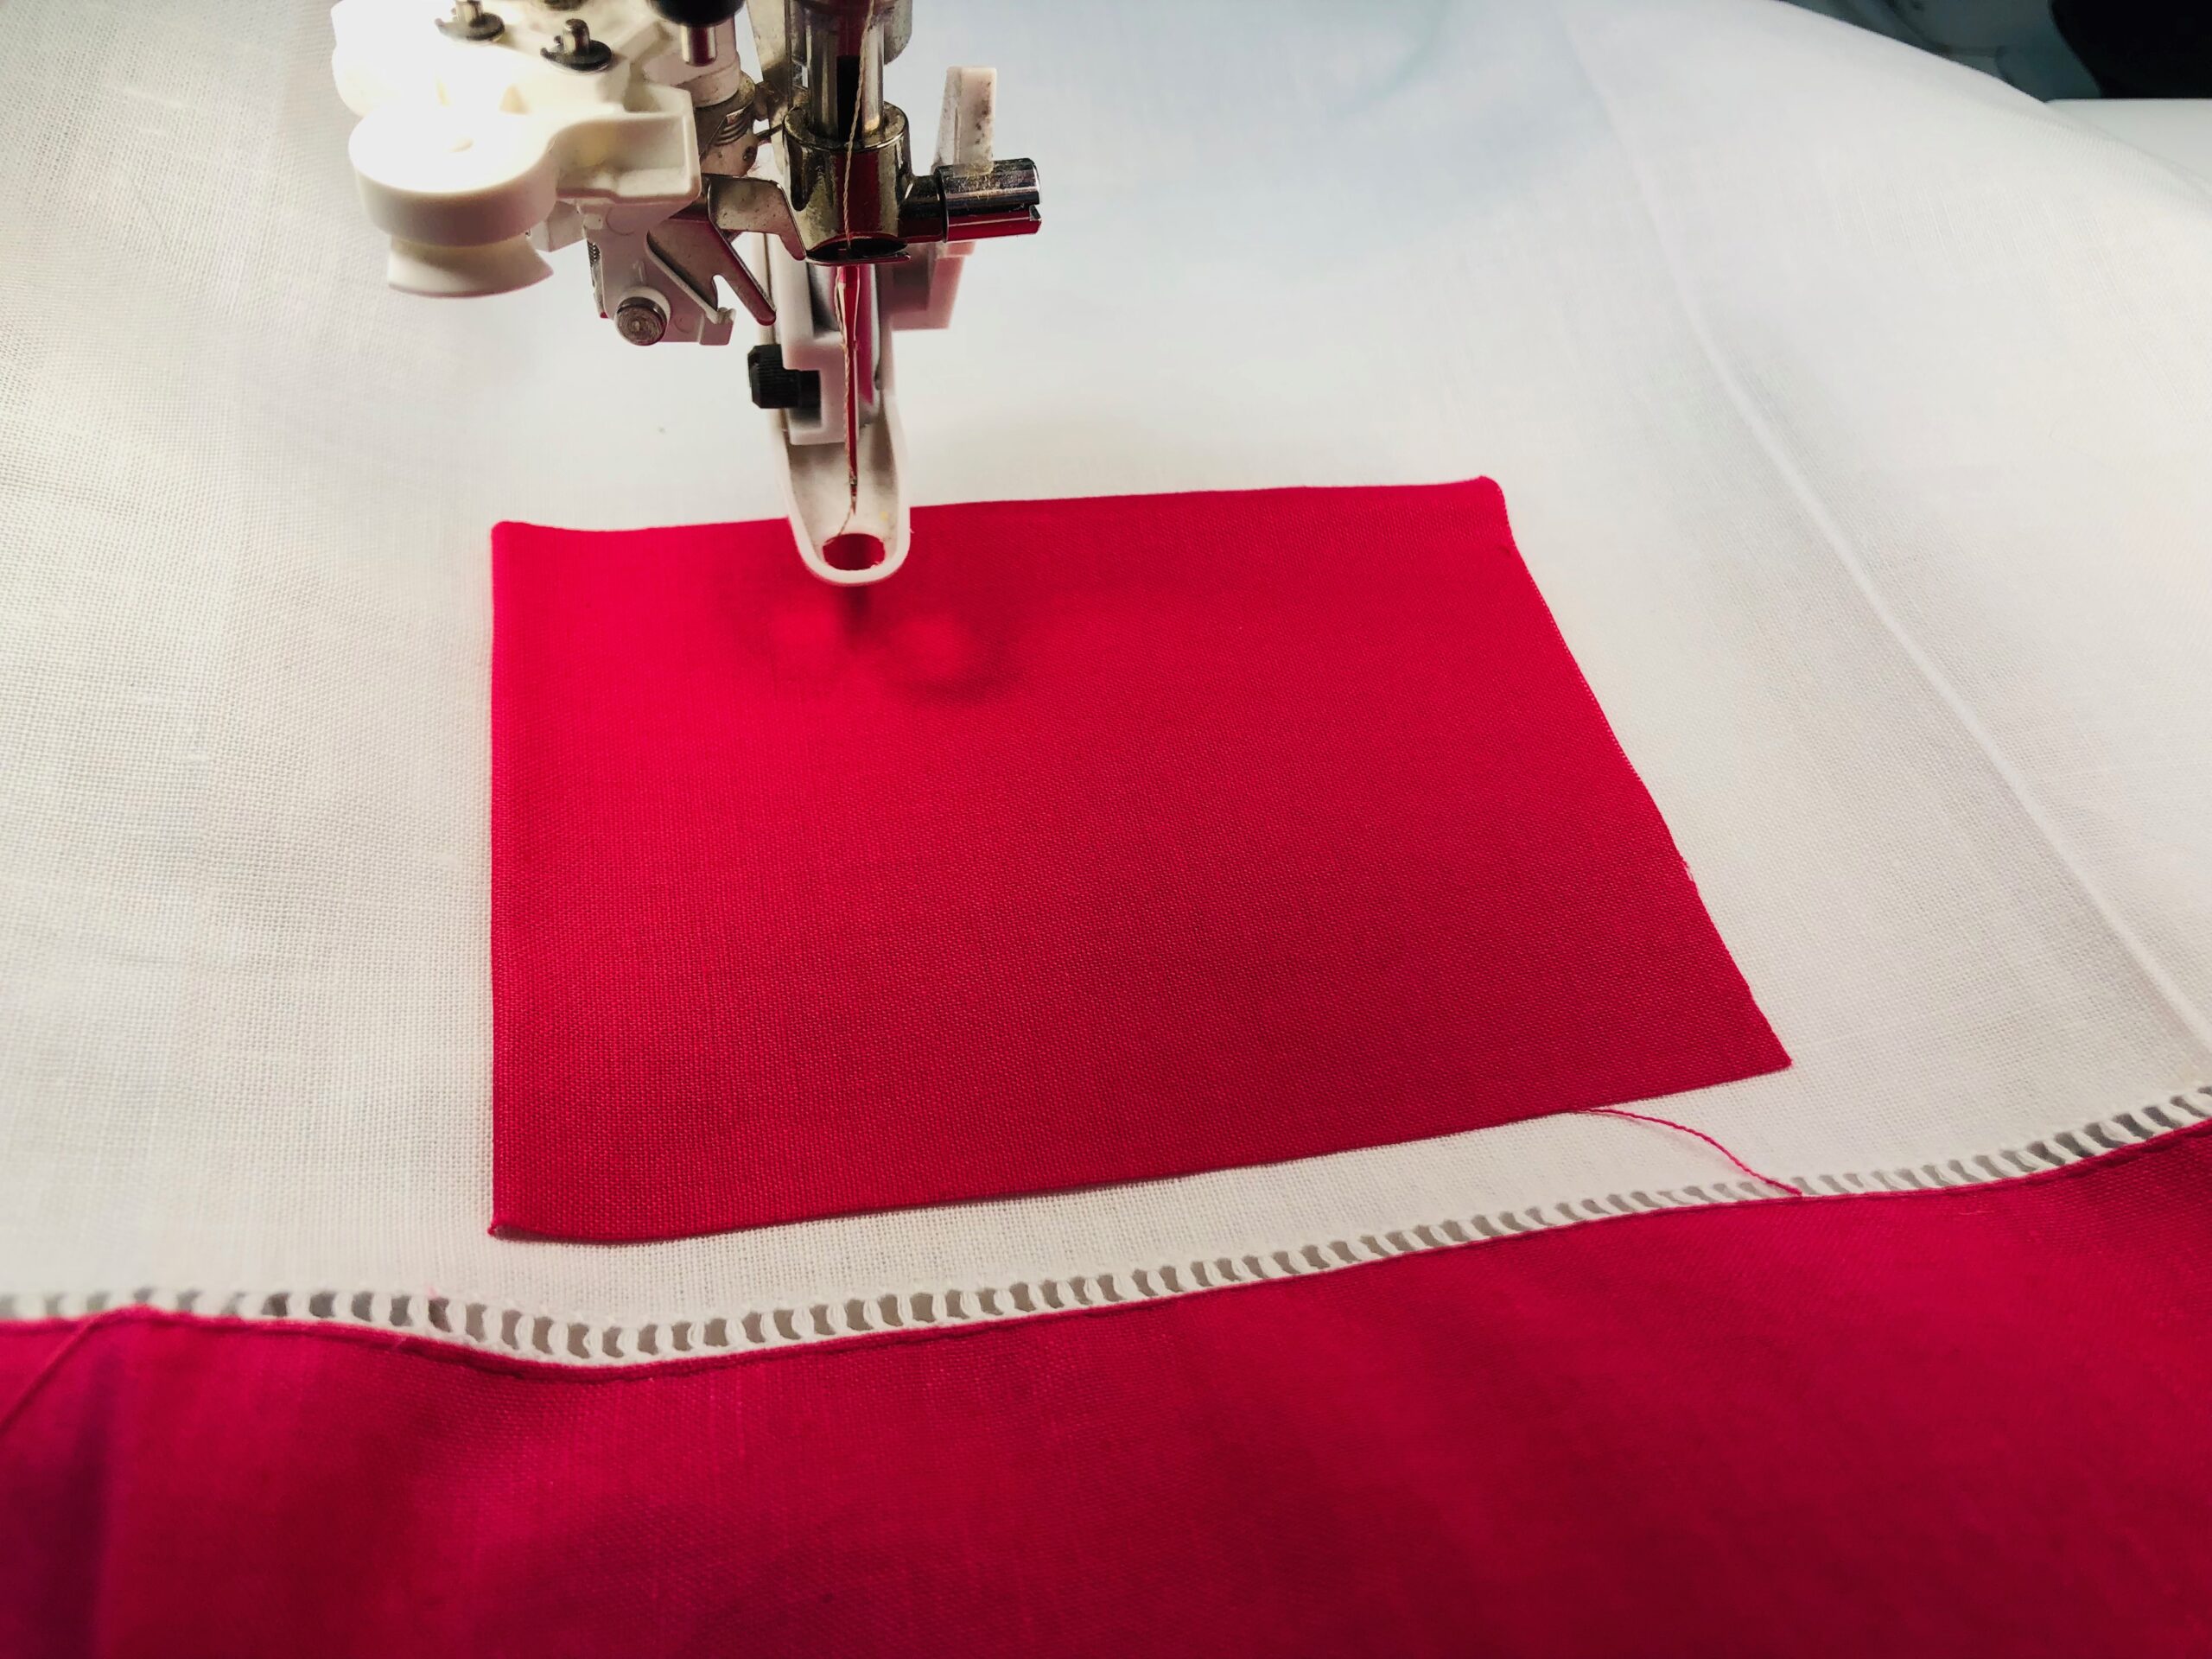
After tacking stitches are complete, use appliqué scissors to trim the fabric close to the tacking stitching without clipping through it.
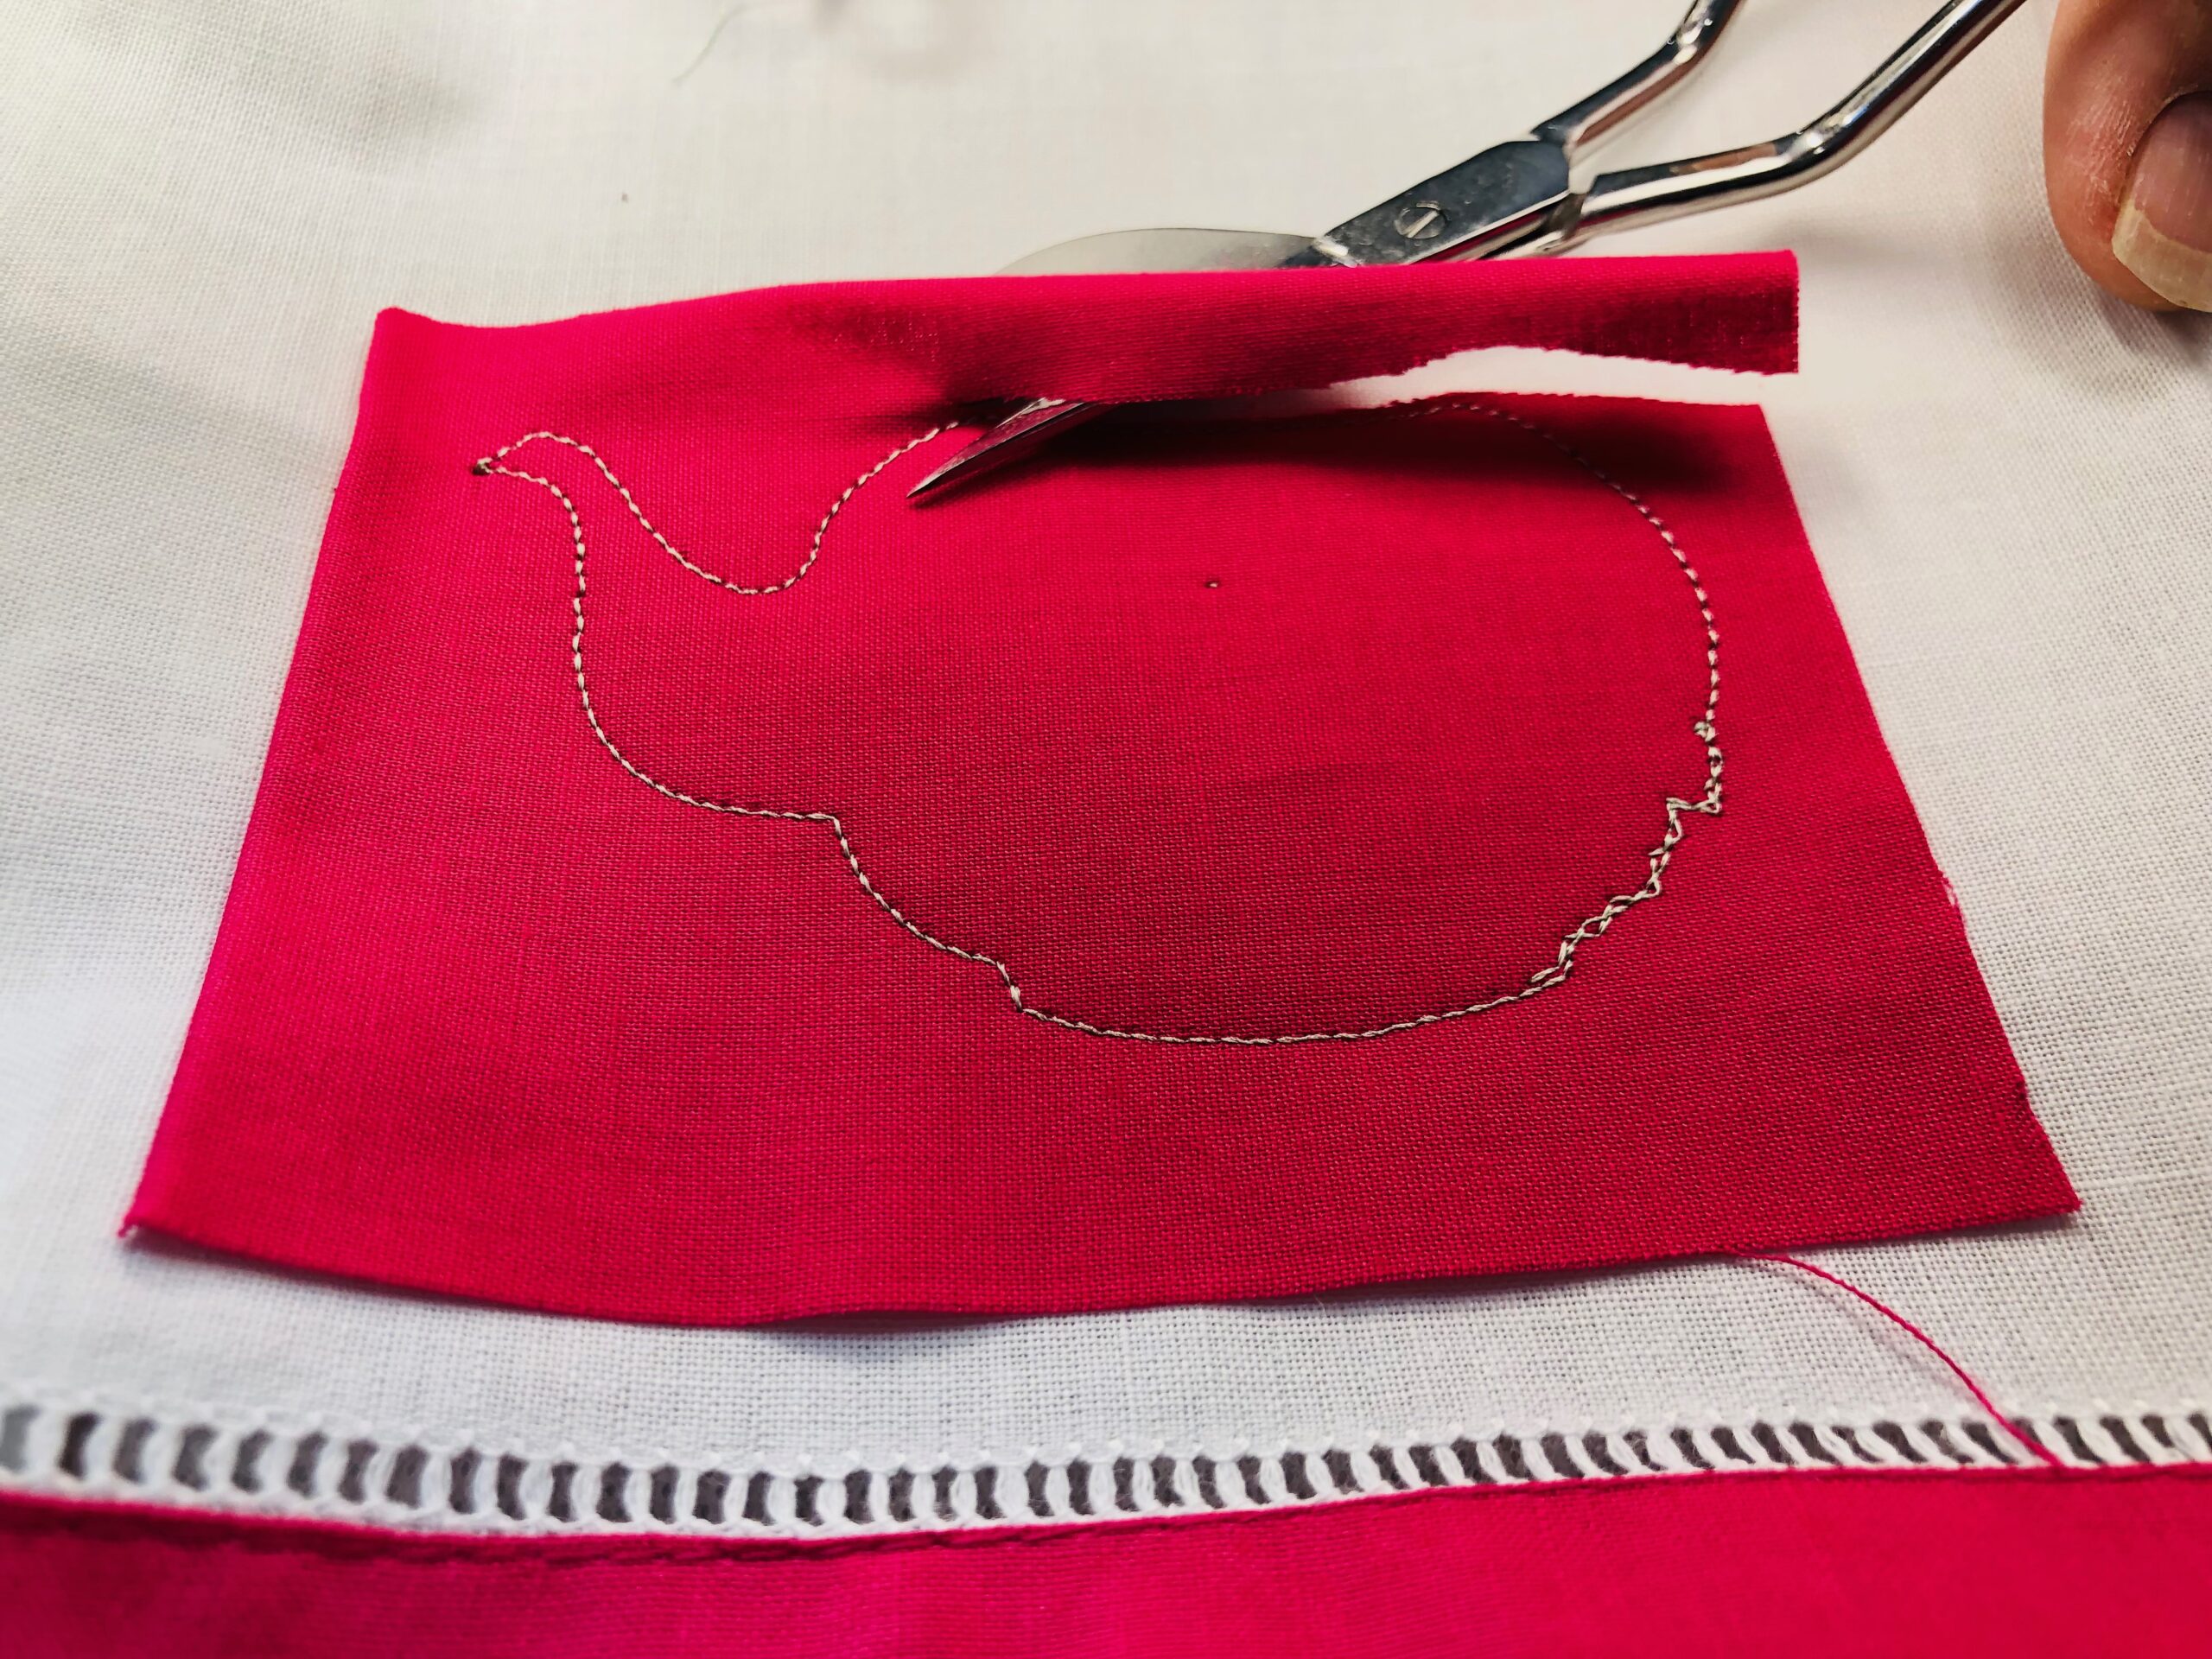
Continue with the design, clipping jump threads with each thread change. (Use curved tip squeezers to easily clip jump threads without piercing the fabric beneath!)

When the design is complete, remove the stabilizer from the hoop. Trim the Fabri-Solvy close to the outer satin stitching on the Filled with Love towel wrong side.
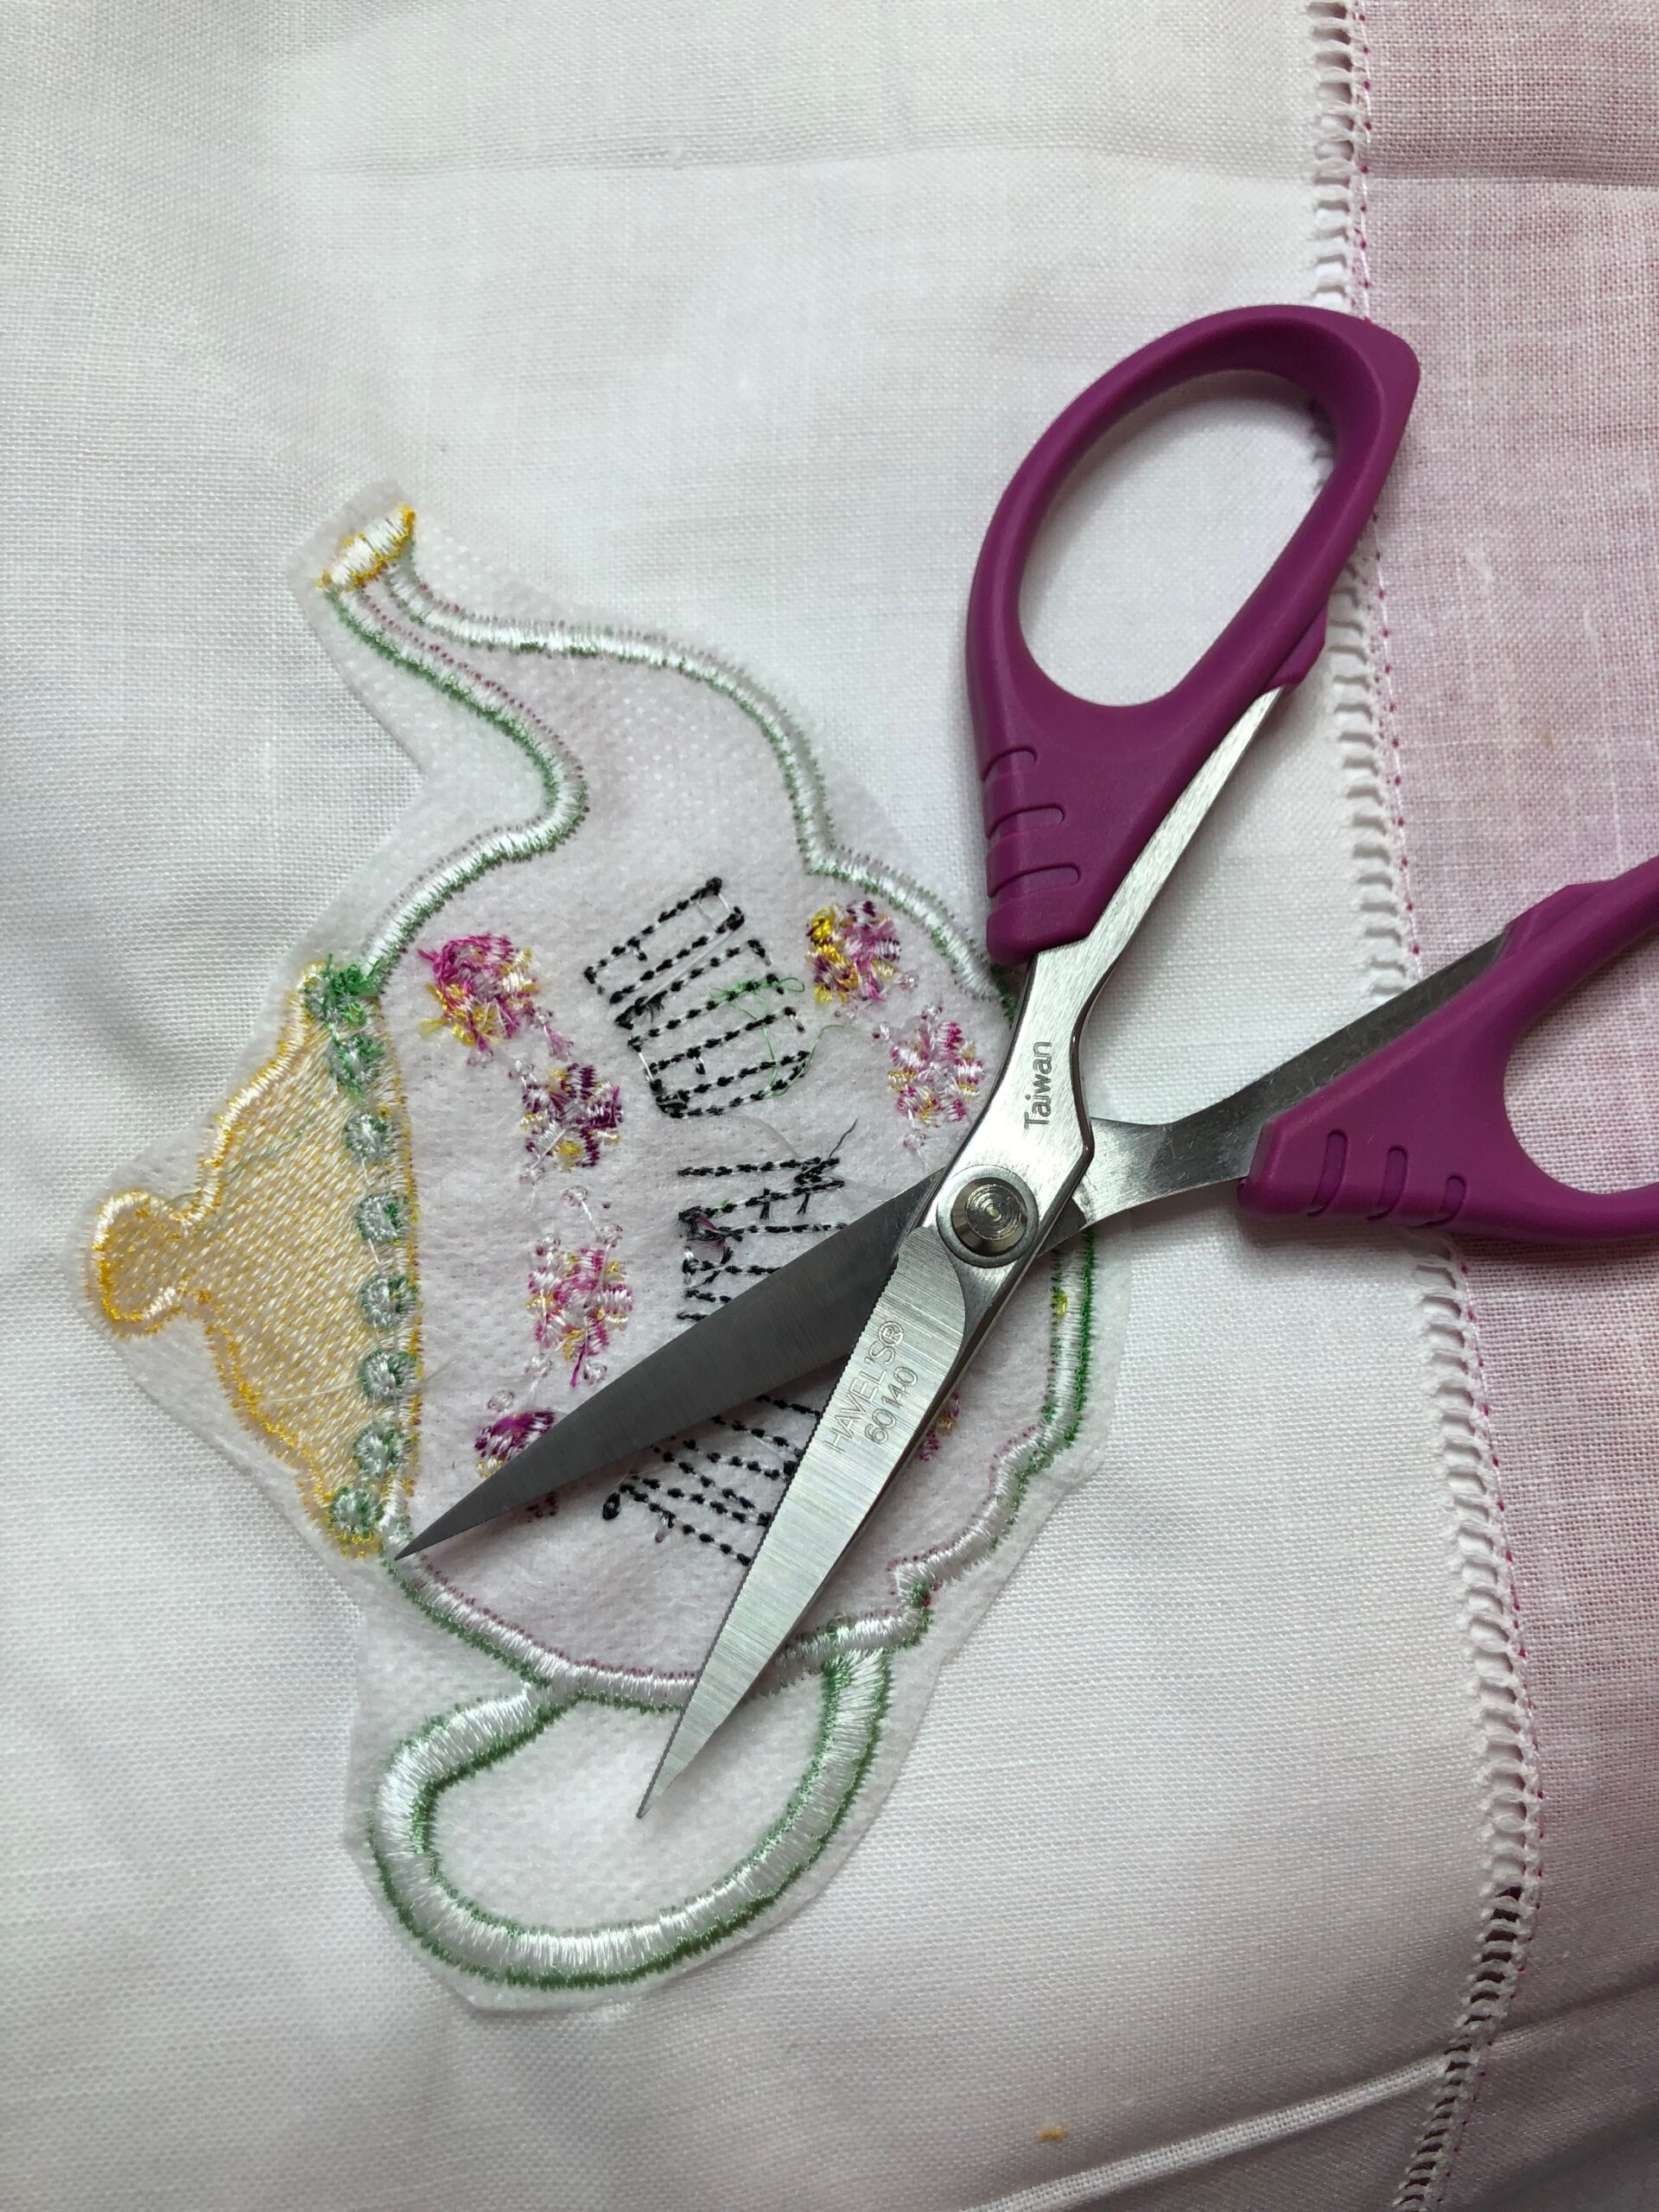
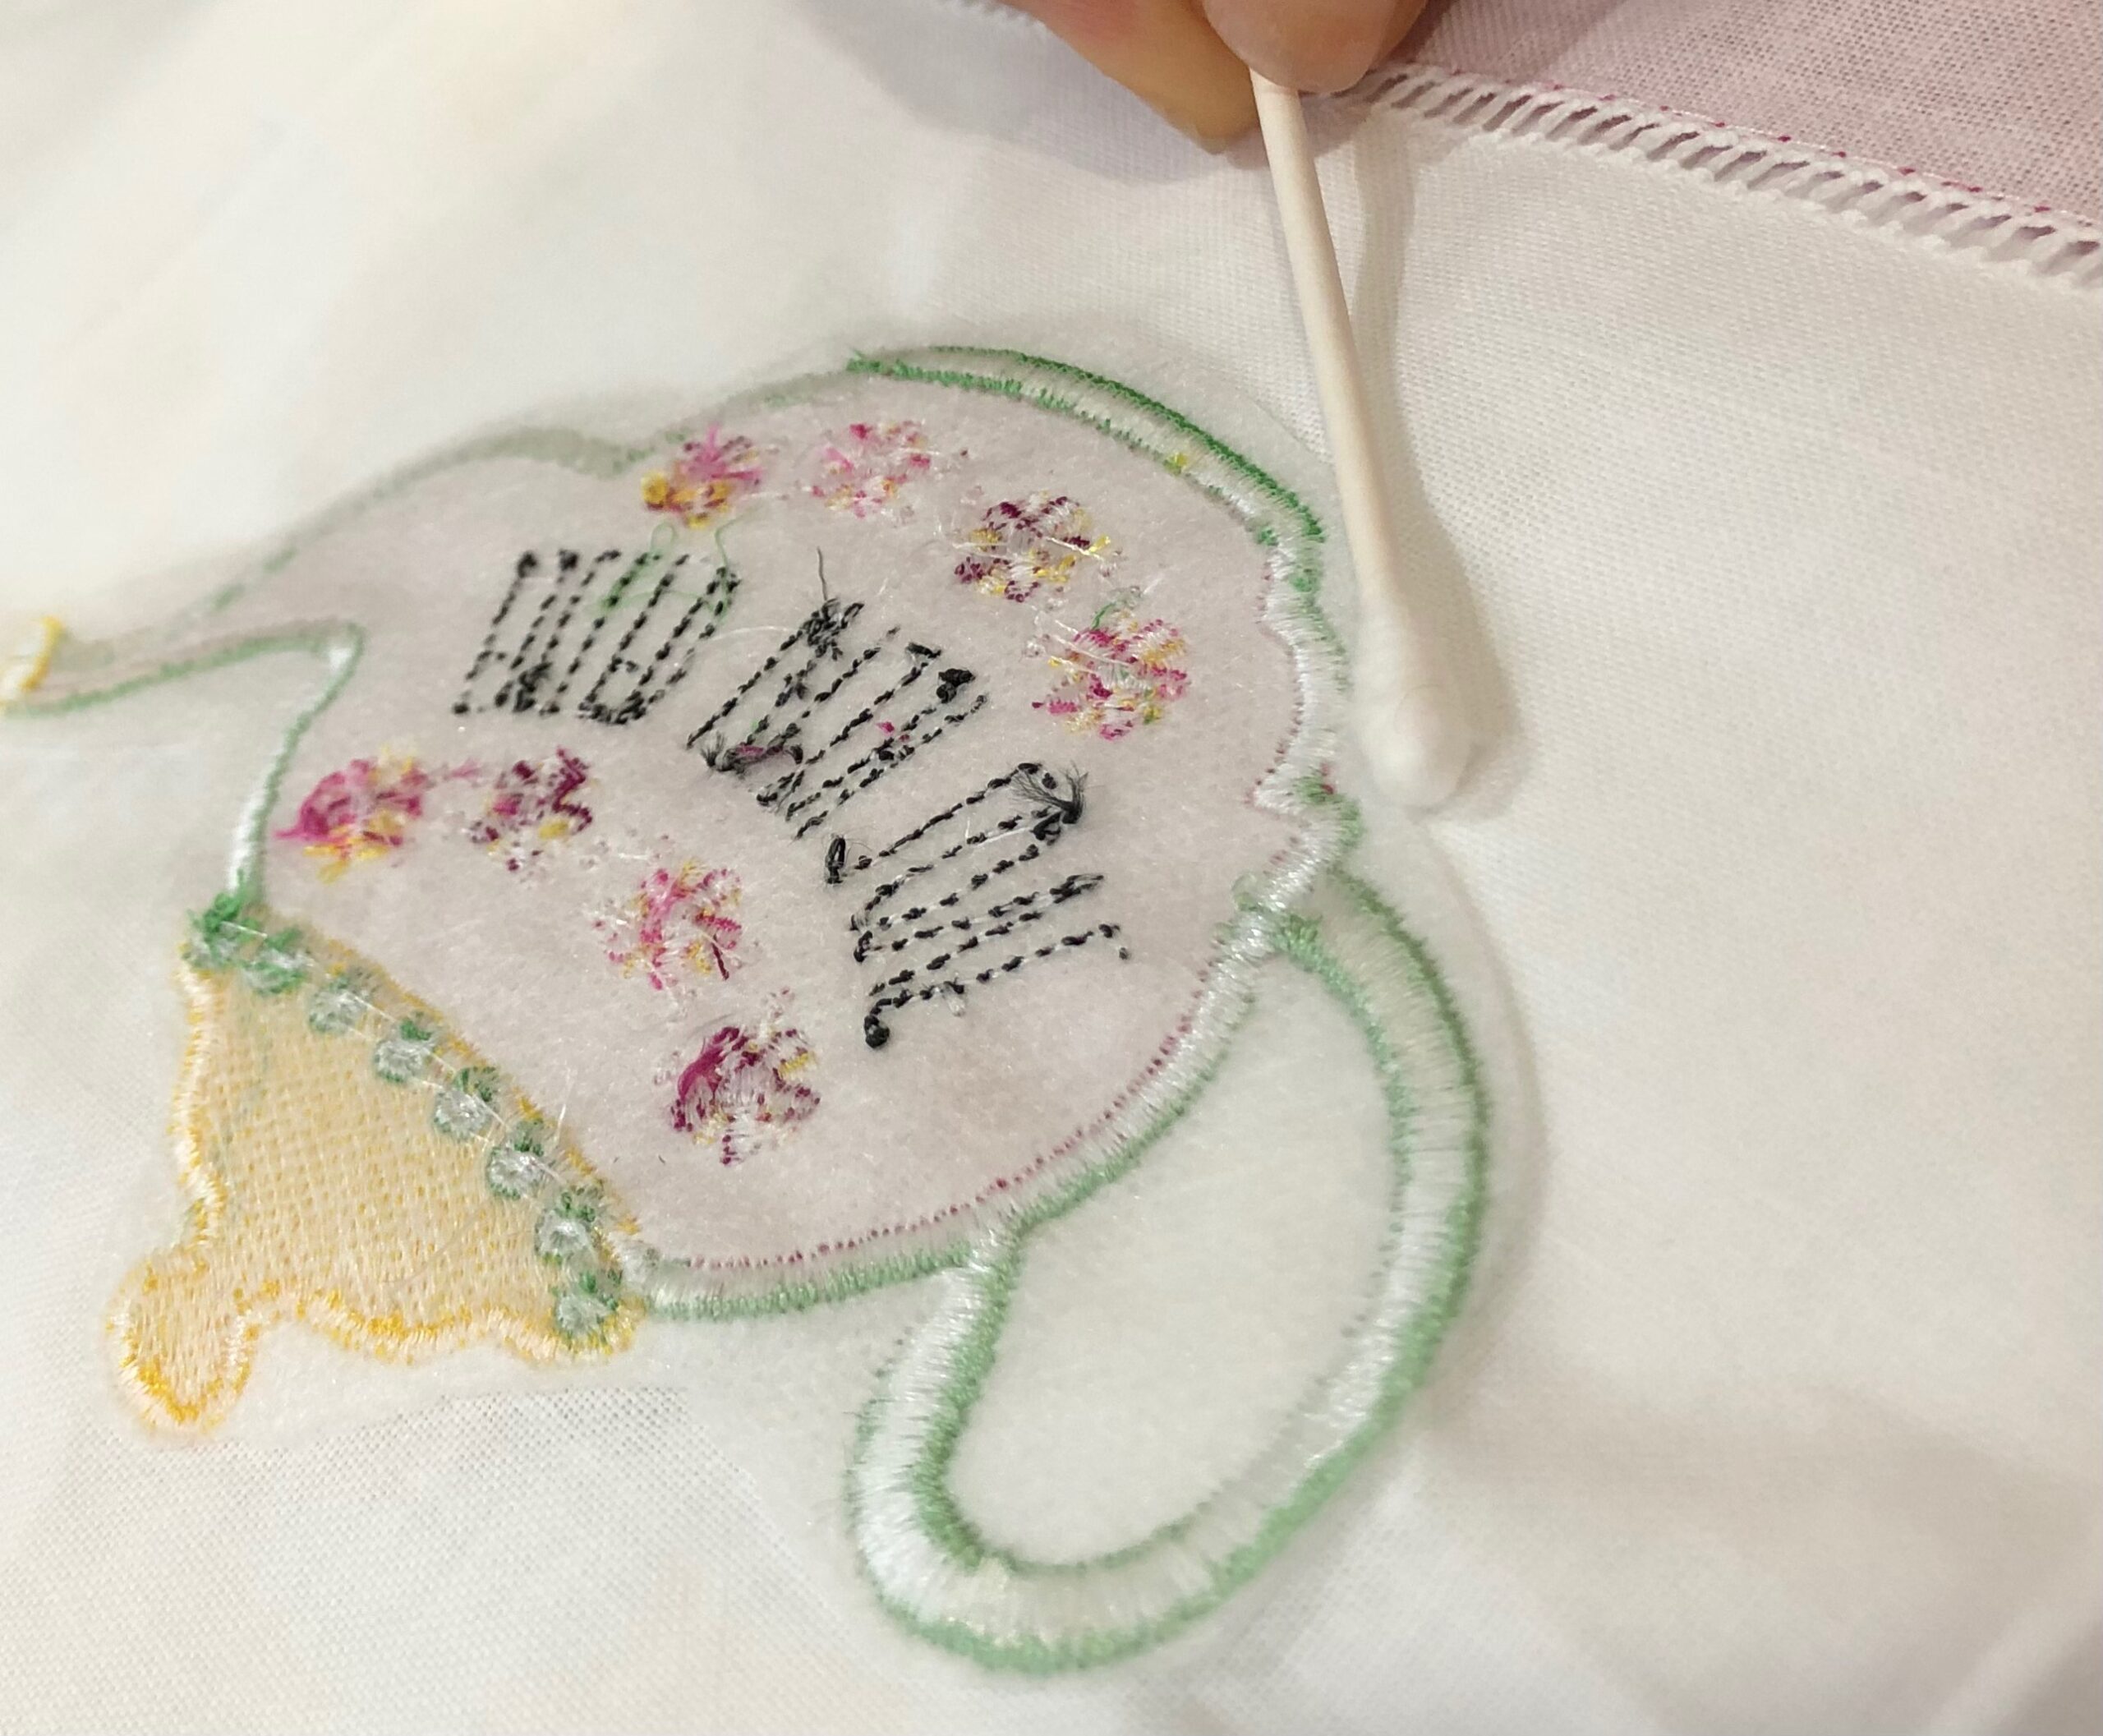
Rinse away the remaining stabilizer, or wet a cotton swab and run it across the stitching to release it from the towel. Any stabilizer that remains within the design elements will wash away with the first towel washing.
FINISHING & GIFTING
If needed, let the Filled with Love towel dry. Press gently from the wrong side, avoiding the embroidery stitching if possible.

Ellen March
I am the Director of Content for Sulky of America. The former Editor in Chief of Sew News and Creative Machine Embroidery magazines, I hosted Sew it All TV on PBS for nine seasons. I've appeared on It's Sew Easy on PBS, DIY Network's Uncommon Threads, Hallmark's Marie Osmond Show, MacPhee Workshop and more! Come sew with me!


5 Comments
Maria ELENA Blecha
I need to order this!!!! It will be my gift from Three Kings, which is today!!!!
Anita Jackson
Super cute!
Ellen March
Thank you Anita!
Norma Jean McDarmont
Ellen, can you tell me where to get the sewing foot that you use in the above picture in the tutorial, “Filled with Love Tea Towel to Stitch”.
I have a Elegante embroidery machine. It is an older Babylock. My email is njmcdar1352@gmail.com
Ellen March
Hi Norma,
It’s just a spring-loaded embroidery foot that came with my machine. I use a Husqvarna Viking Designer Epic 2.