
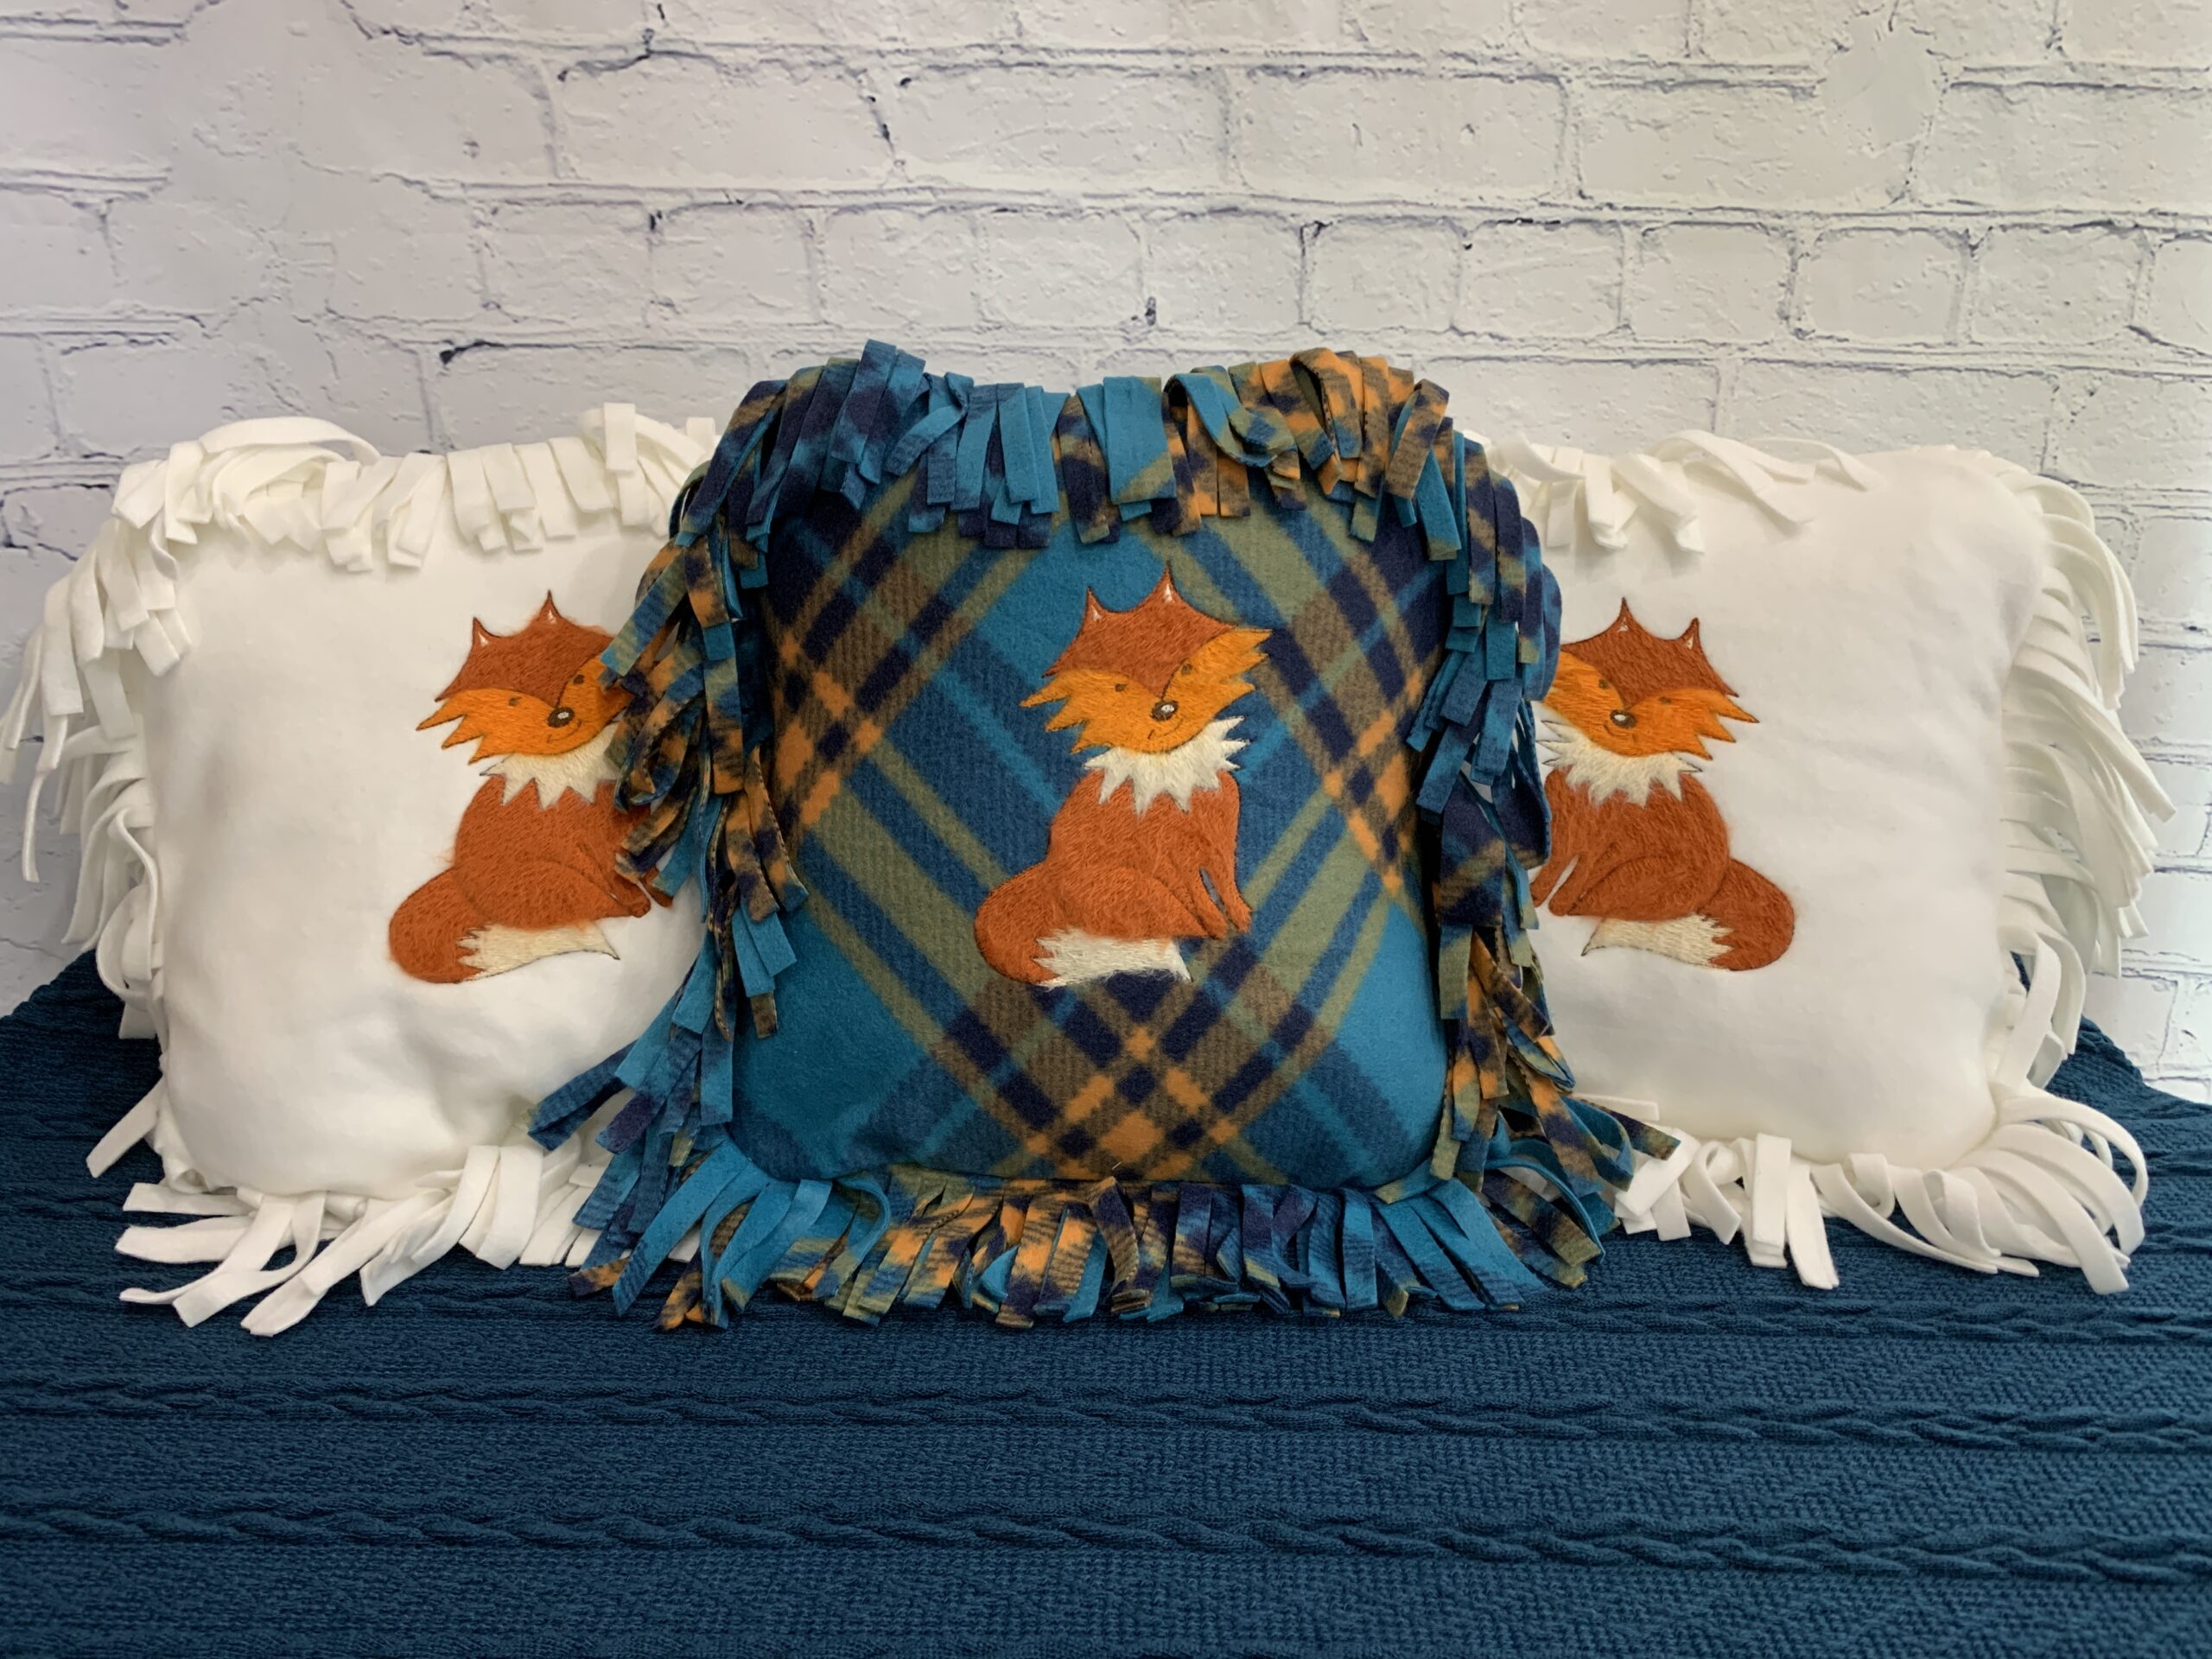
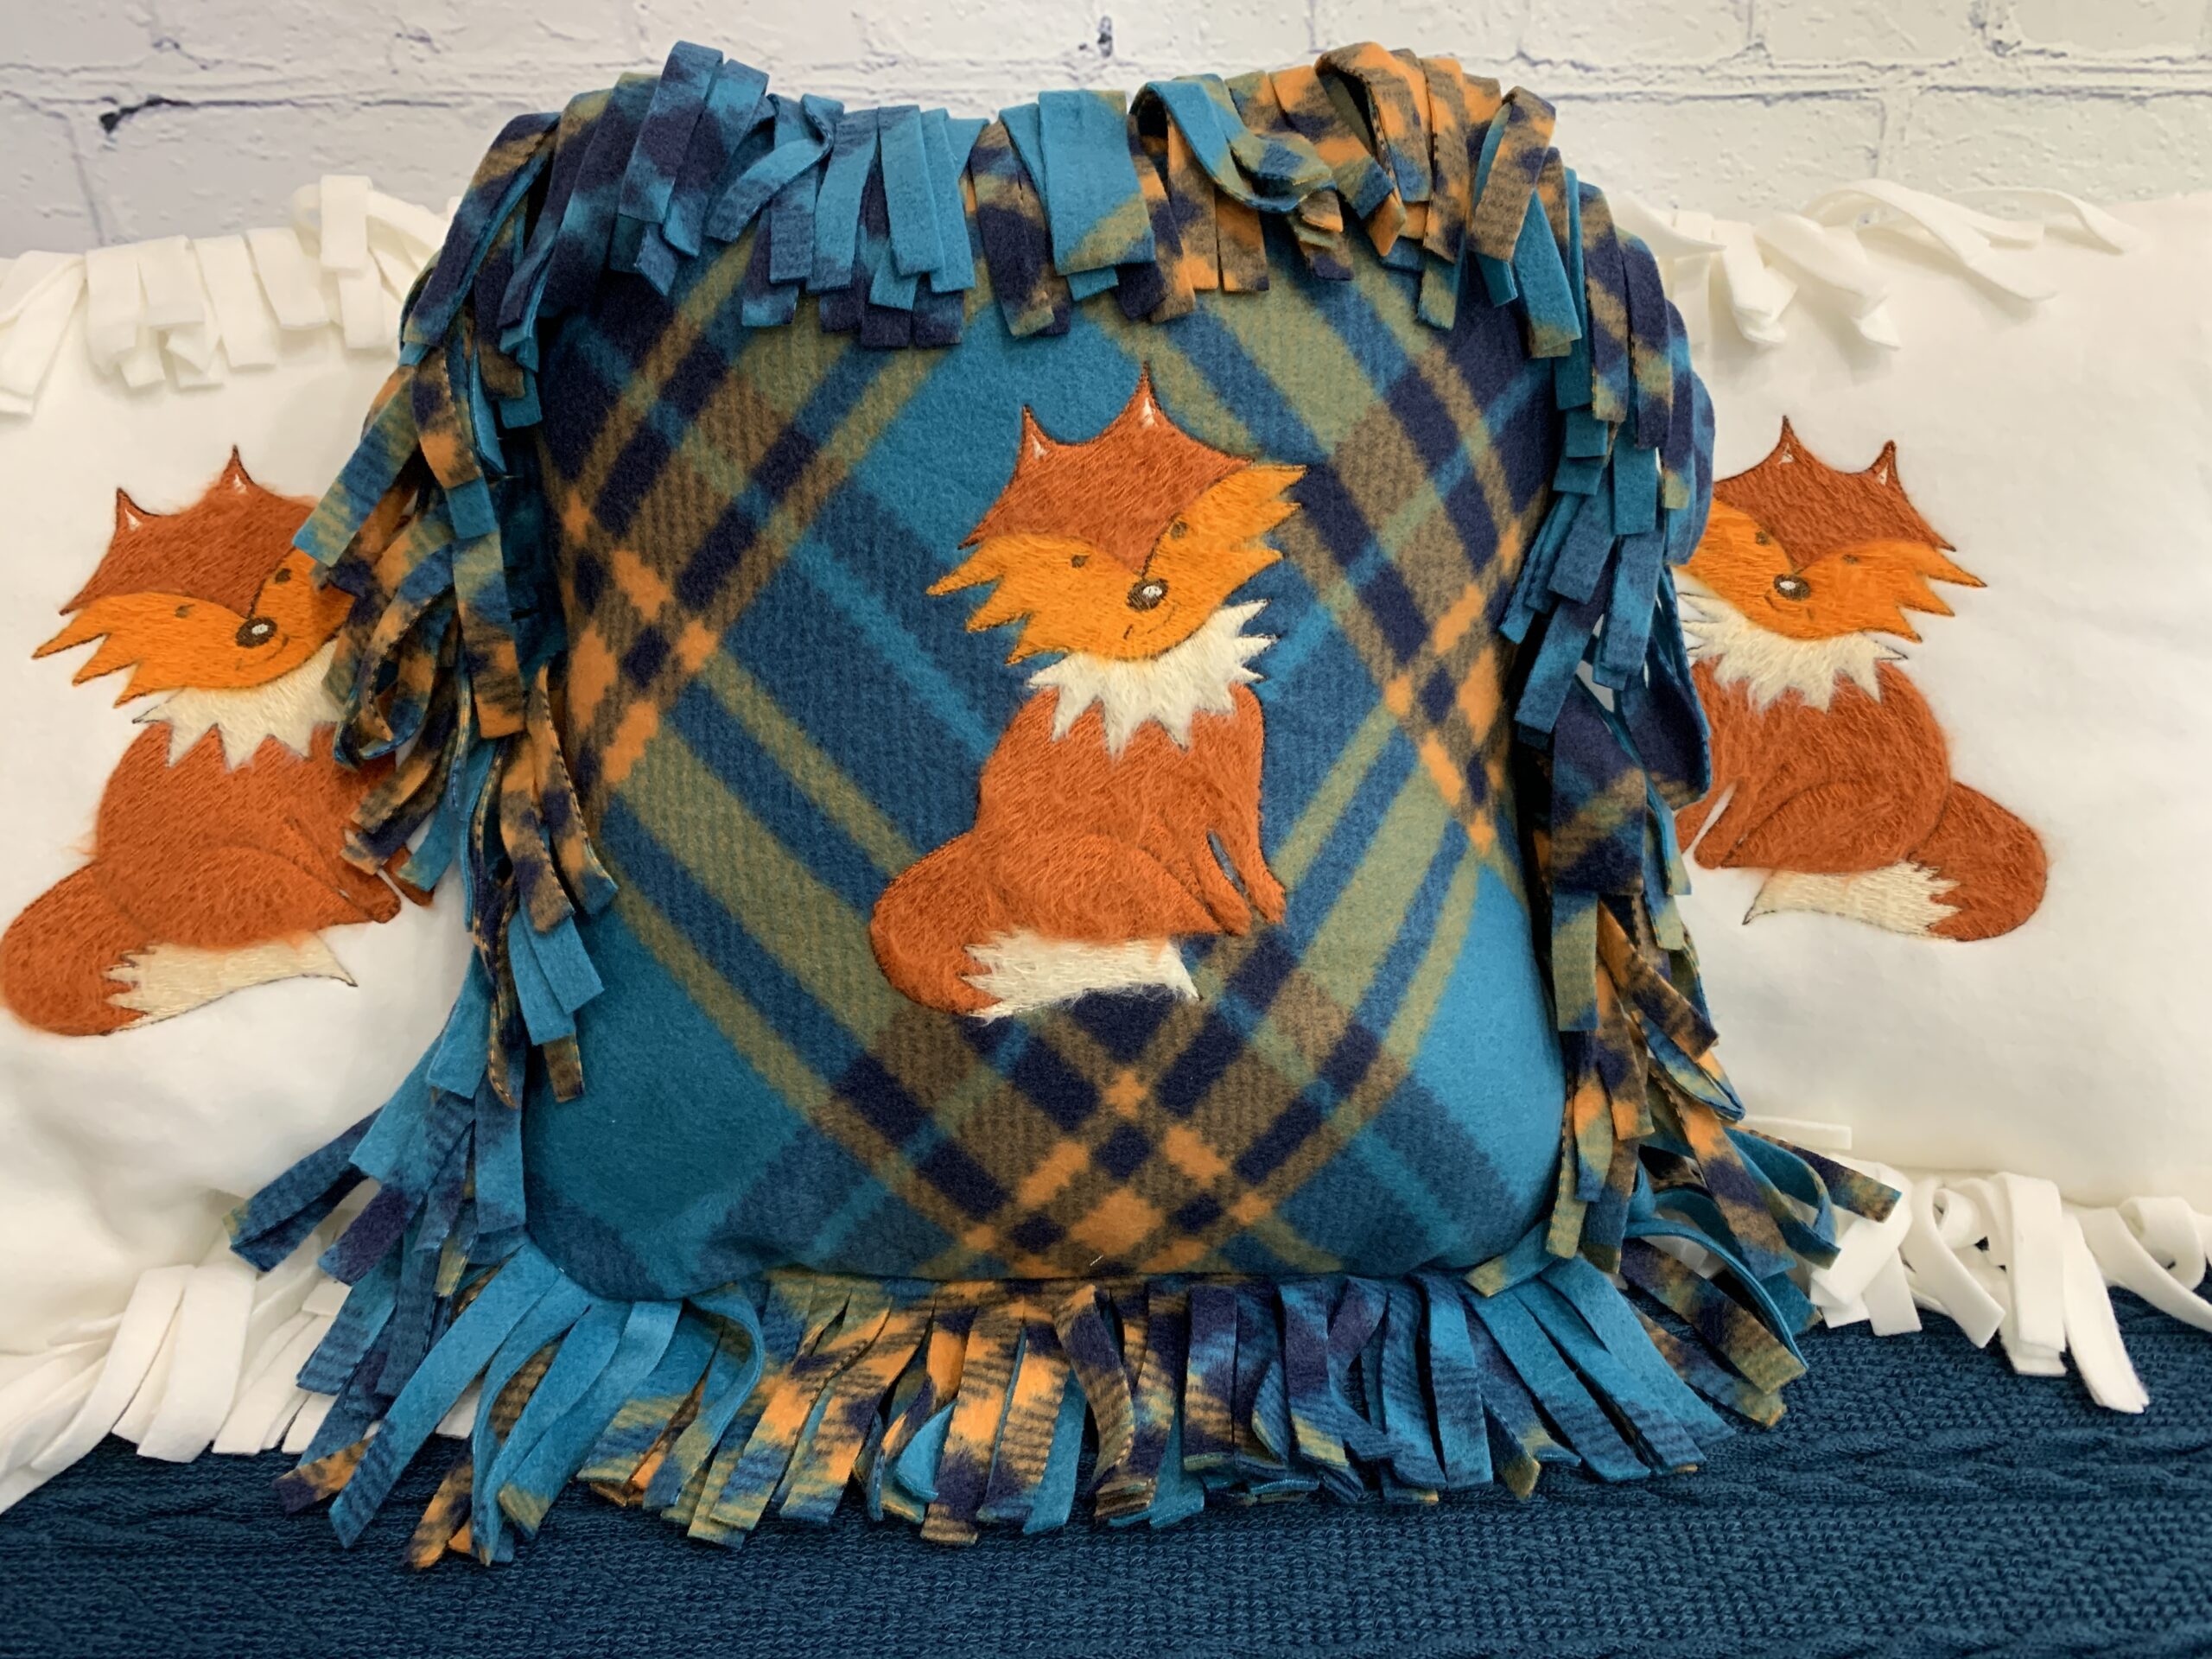
Free Fox Design + Fun Foxy Filaine Fleece Pillow Project
Free Fox Design + Fringe Pillow Project
by Katrina Walker
Grab the Sulky free Fox Design, Filaine Fox, and snuggle up your foxy Valentine with a cuddly fleece pillow. Featuring the adorably fuzzy fox and lots of floppy fringe, this pillow is super fun and easy to create with Filaine thread and less than a yard of fleece!
Note: The featured free fox design has fill areas that are digitized for 12 wt. acrylic Sulky Filaine Thread, for use with a size 100/16 needle. If you choose a different thread weight, the design will not fill properly.
SUPPLIES
- Thread:
- Filaine™: 3424 Maple, 3406 Light Ecru, 3852 True Orange
- Bobbin
- Poly Deco: 1129 Dark Brown, 1082 Ecru
- Sulky free fox embroidery design: Filaine Fox
- Filaine Wire Brush
- Stabilizer: Cut-Away Plus™ & Solvy®
- Sulky KK 2000™ Temporary Spray Adhesive
- Organ Needles: 100/16 Top Stitch (embroidery) & 80/12 Jersey (construction)
- 3/4 yard of polyester fleece
- 16” pillow form
- Wide blue painter’s tape
- Clear quilting ruler
- Rotary cutter
- Rotary cutting mat
- Embroidery hoop, with at least a 140mm x 180mm (5 1/2″ x 7”) hoop stitching area
- Tweezers (optional)
- Pinking Shears (optional)
CUTTING
Cut the following from the polyester fleece:
16” x 16” square – cut 1
16” x 11” rectangles – cut 2
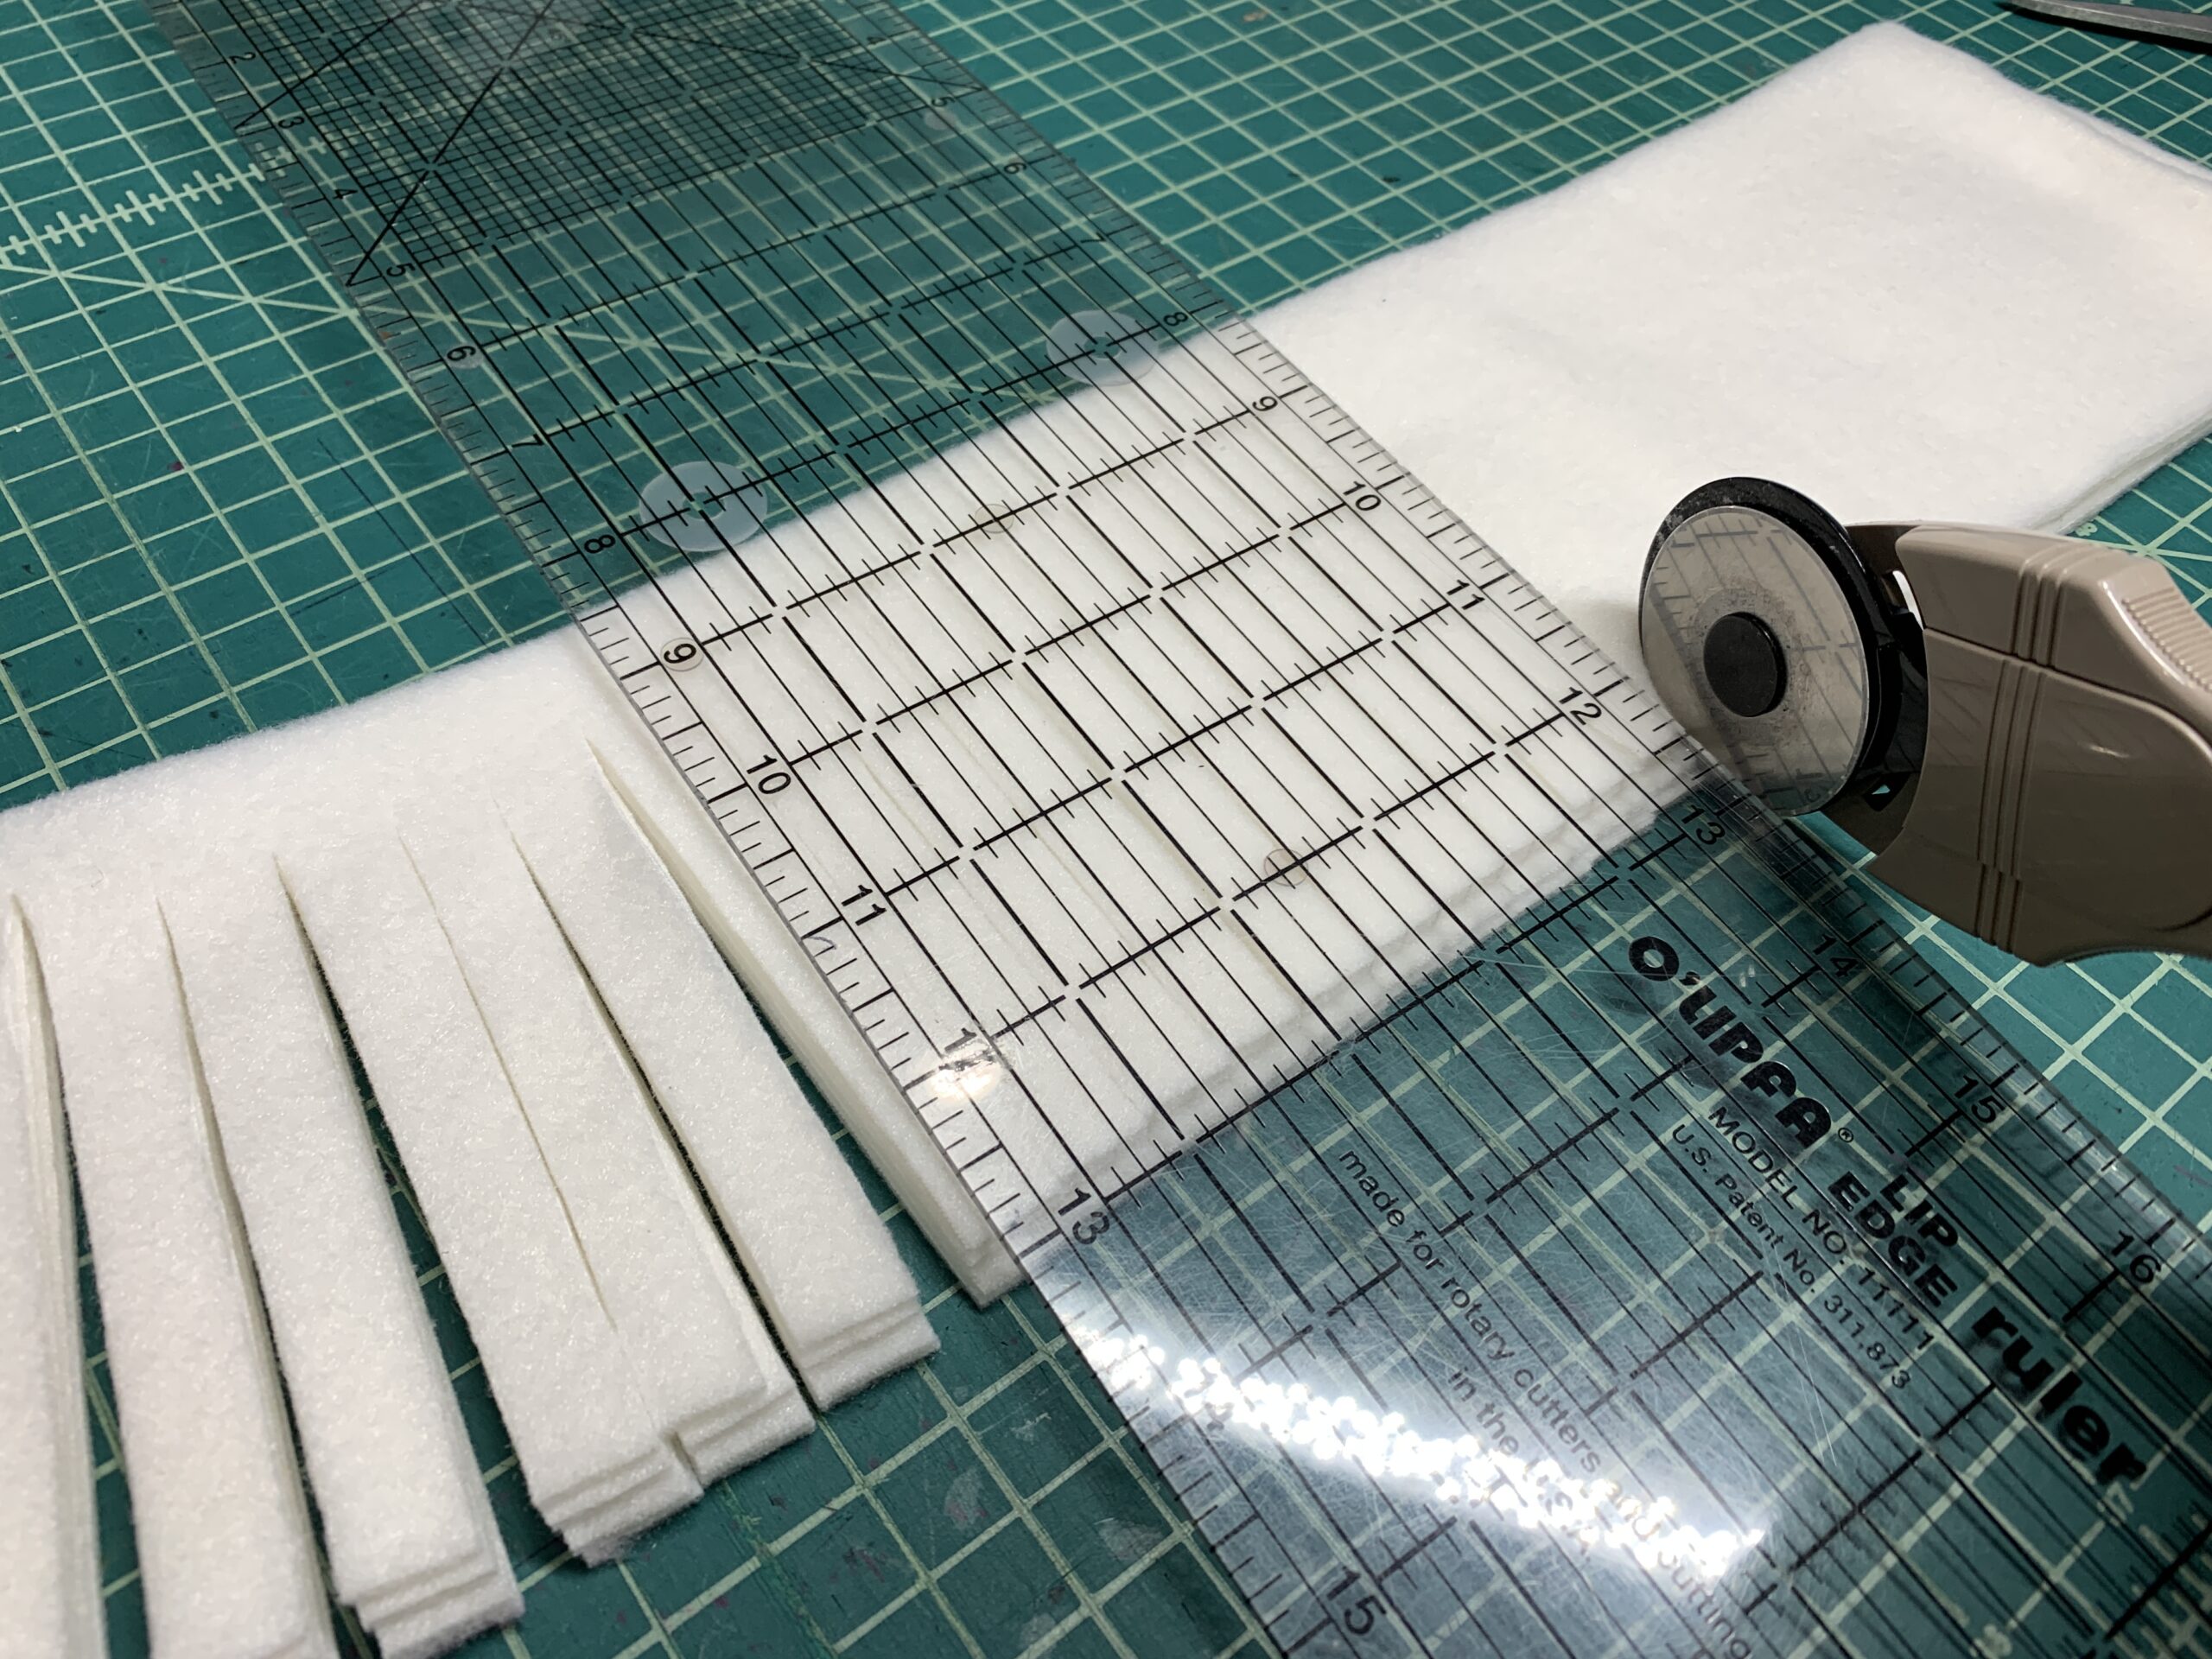
4 1/2” x width of fabric (60″) – cut 2
FREE FOX DESIGN – EMBROIDERY
Hoop a 150mm x 200mm (6” x 8”) or similar sized hoop (design is 133mm wide x 178mm tall) with Sulky Cut-Away Plus stabilizer.
Then, spray the hooped stabilizer with Sulky KK 2000.
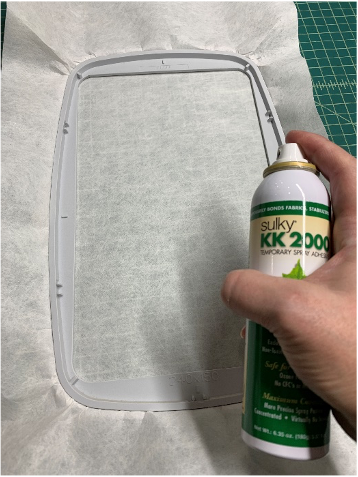
Next, center the 16” x 16” square of polyester fleece in the hoop.
Cut a piece of Sulky Solvy large enough to cover the hoop stitching area and place on top of the polyester fleece.
Load the free fox embroidery design into your embroidery machine. Set the embroidery machine basting function to baste around the hoop area. Install the size 100/16 needle for the FIlaine portions of the design.
Then, baste the Sulky Solvy stabilizer into place. This also helps to secure the fleece for embroidery.
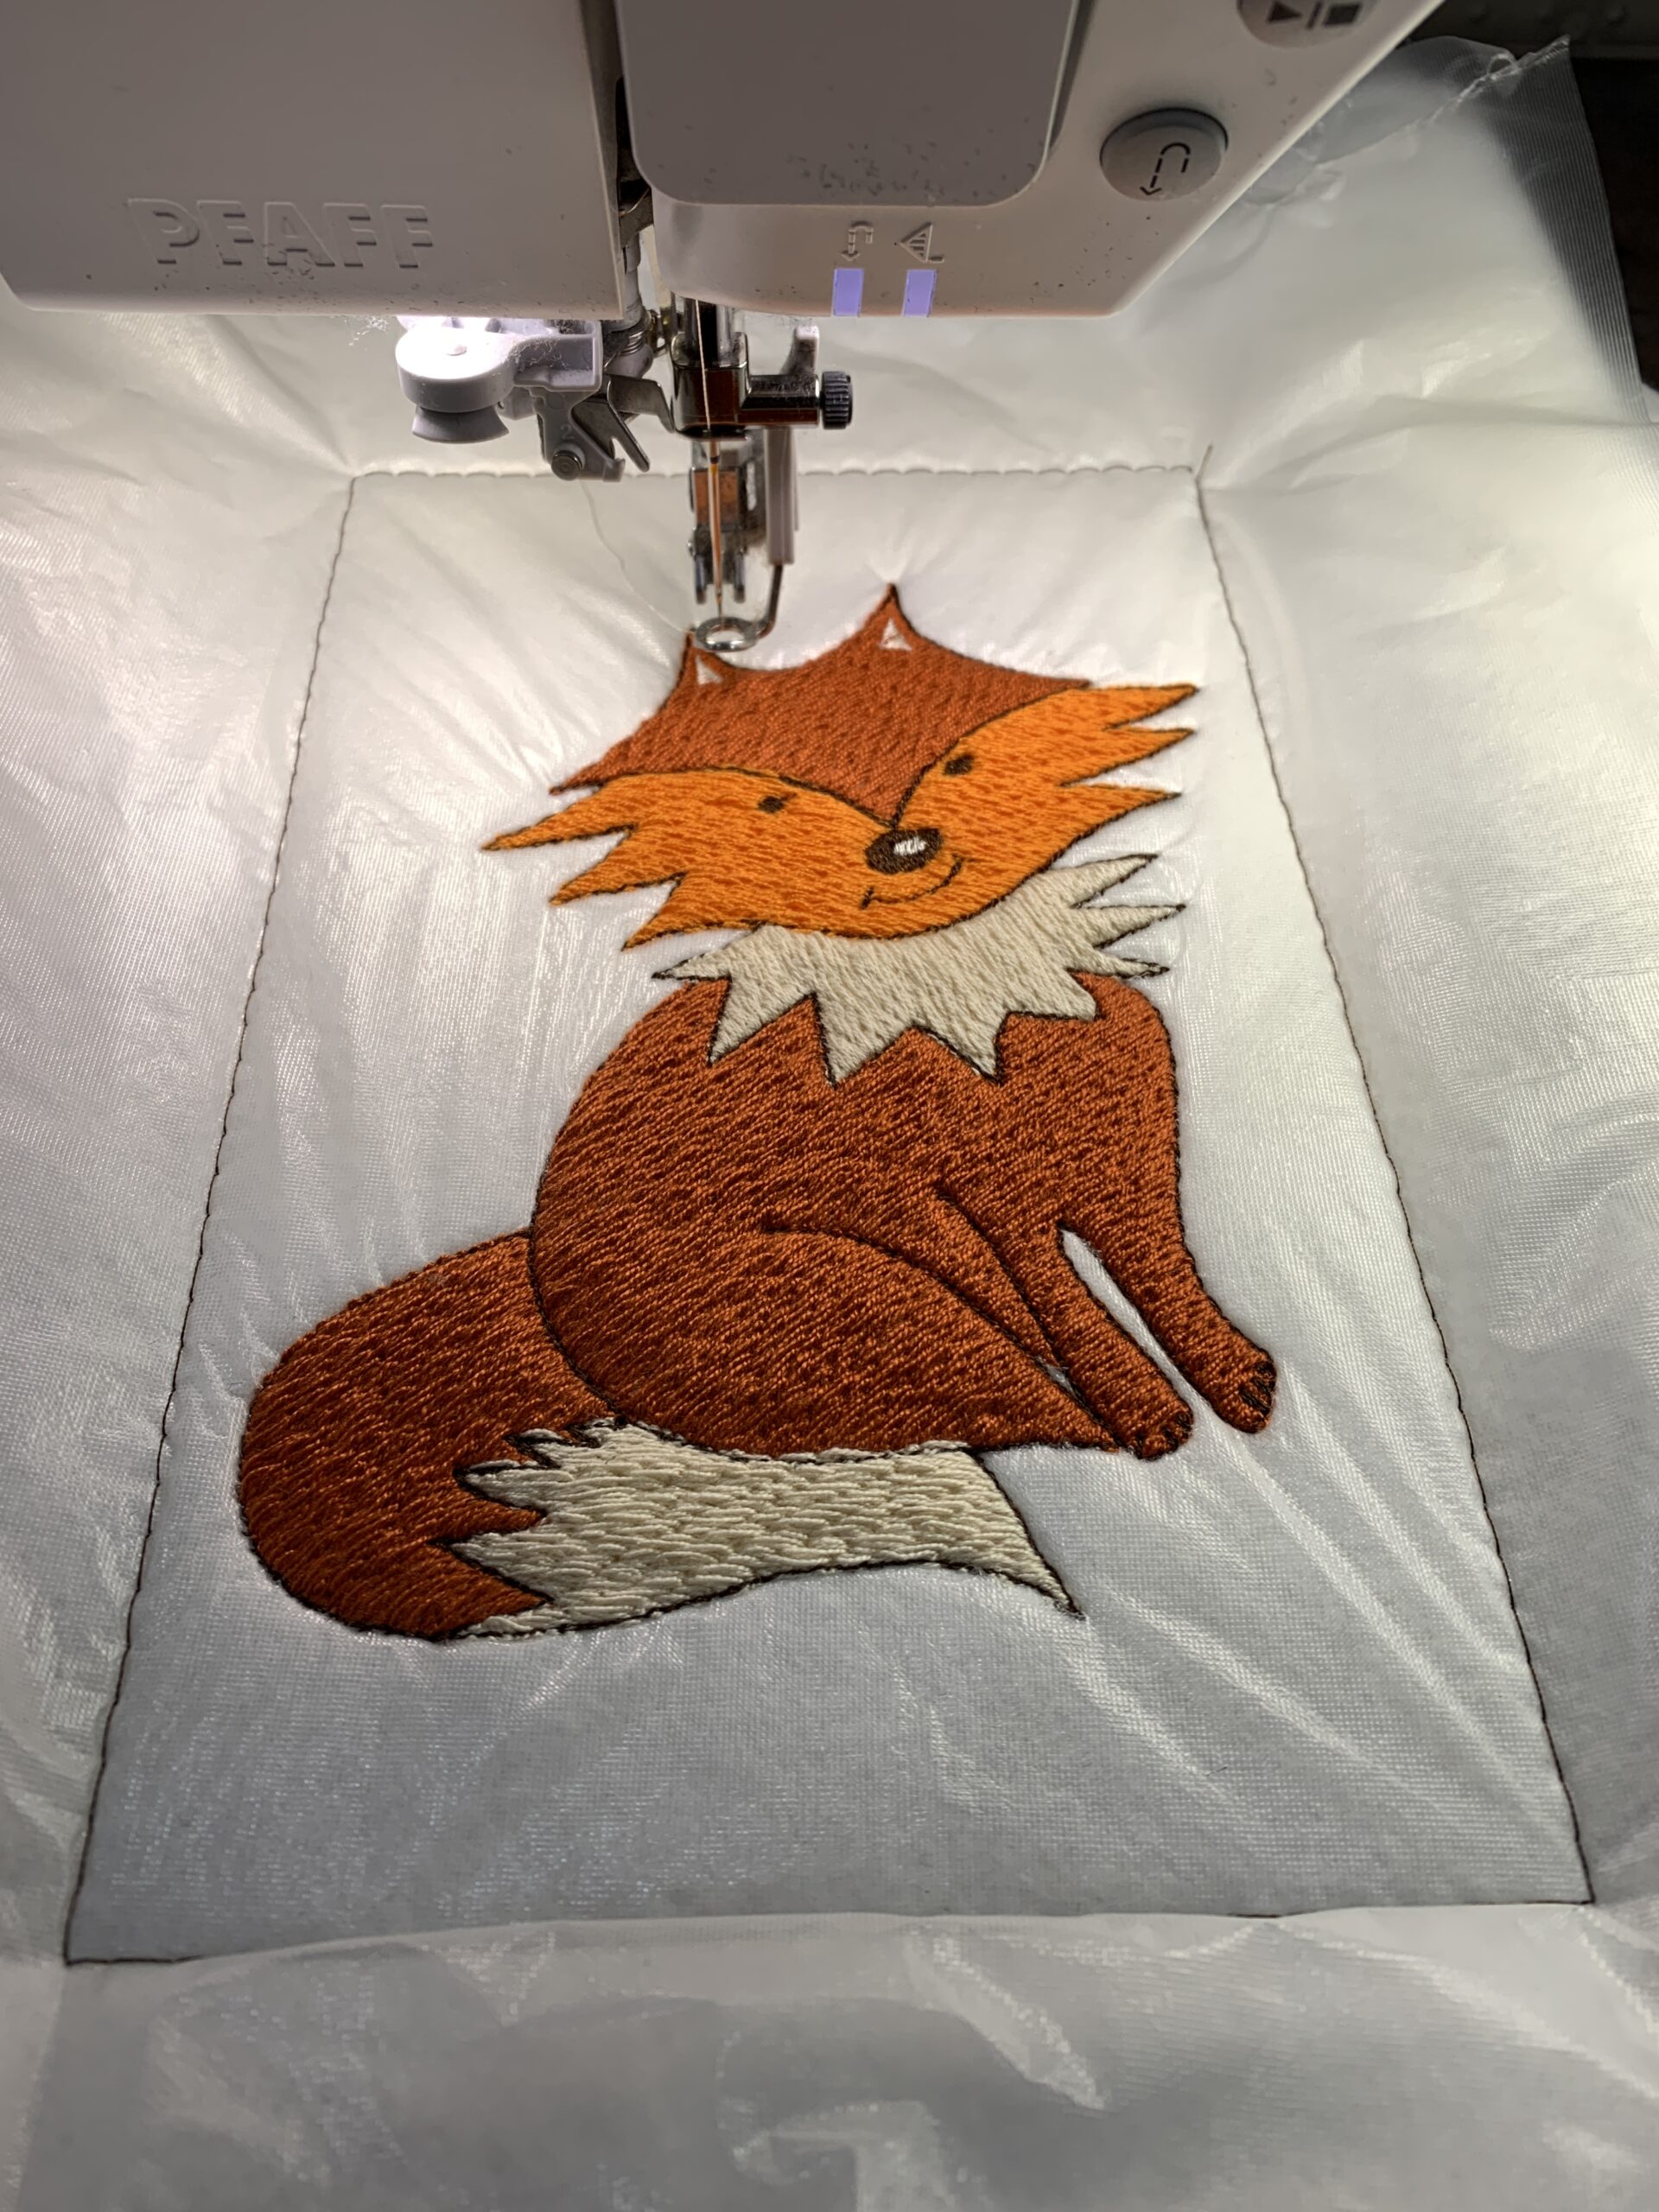
Next, stitch the free fox design according to the design instructions, paying attention to the color chart for thread changes. Read THIS for more help when embroidering with Sulky Filaine Thread. It is important to slow the machine and use a lightweight Sulky Bobbin Thread.
While the free fox design is stitching, cut the fringe from the 4 1/2″ x width-of-fabric strips. Use a ruler and rotary cutter to cut the strips widthwise to create fringe that is 1/2” wide x 4” long.
FREE FOX DESIGN – FINISHING
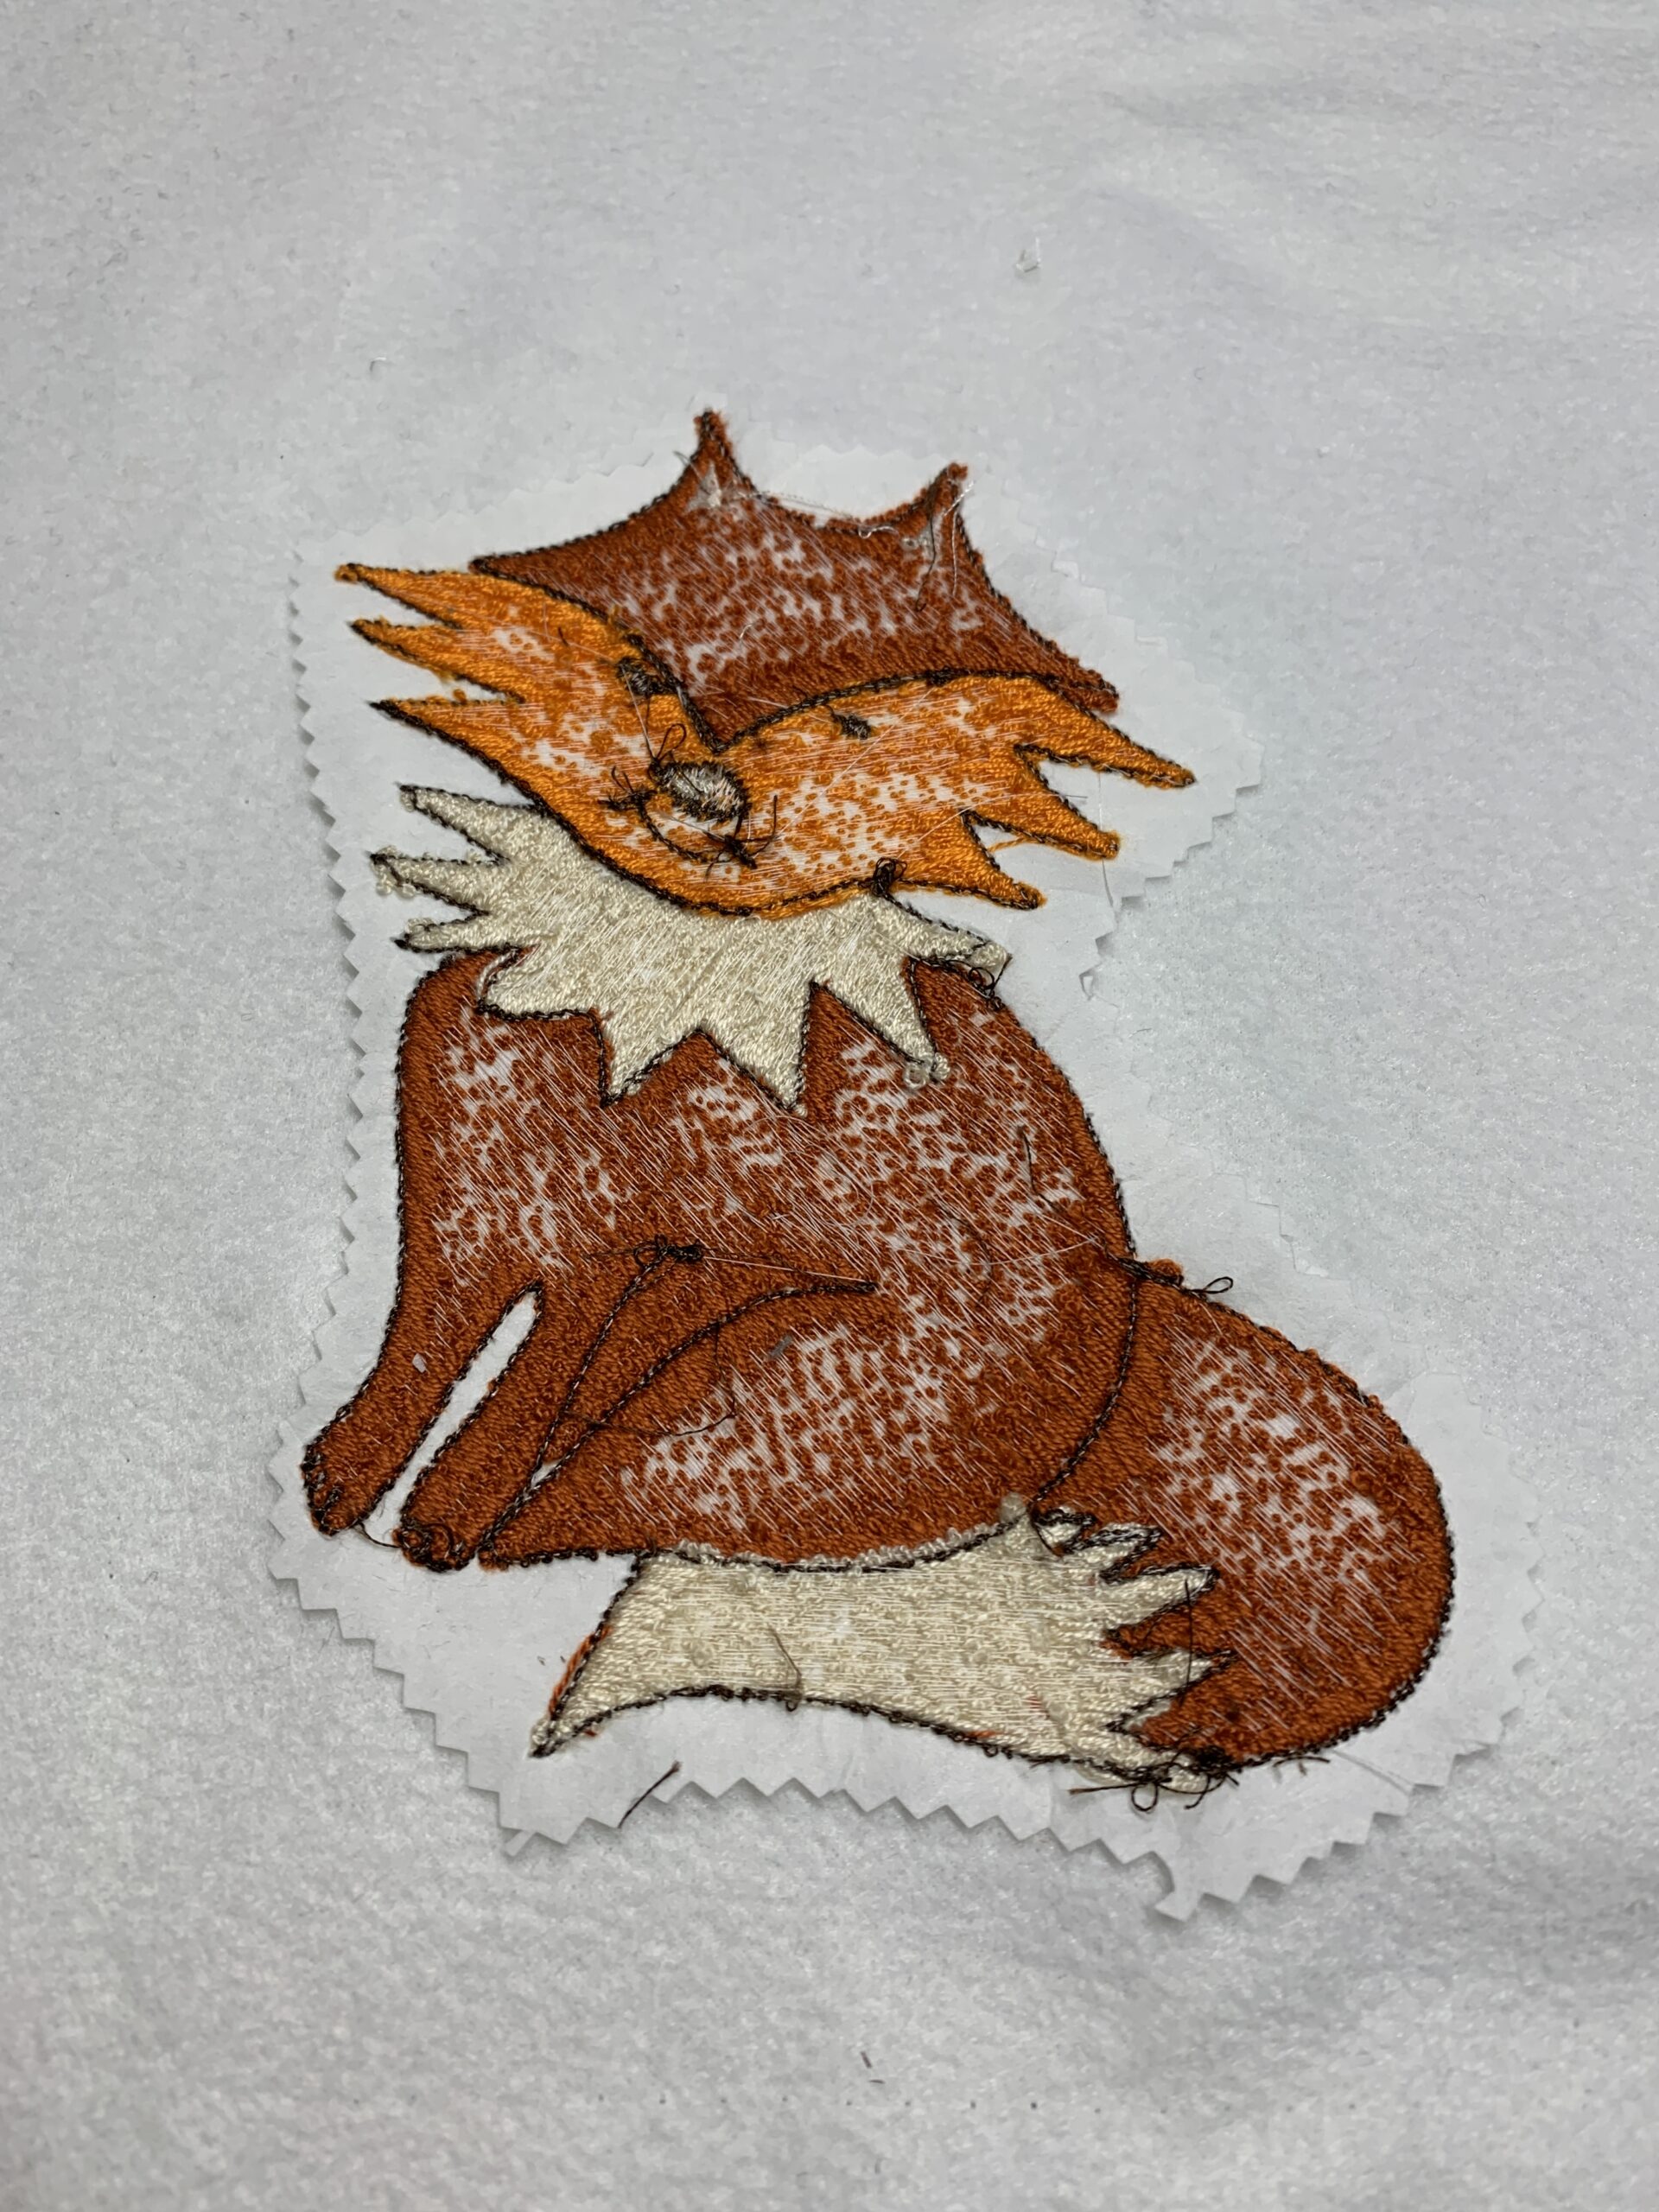
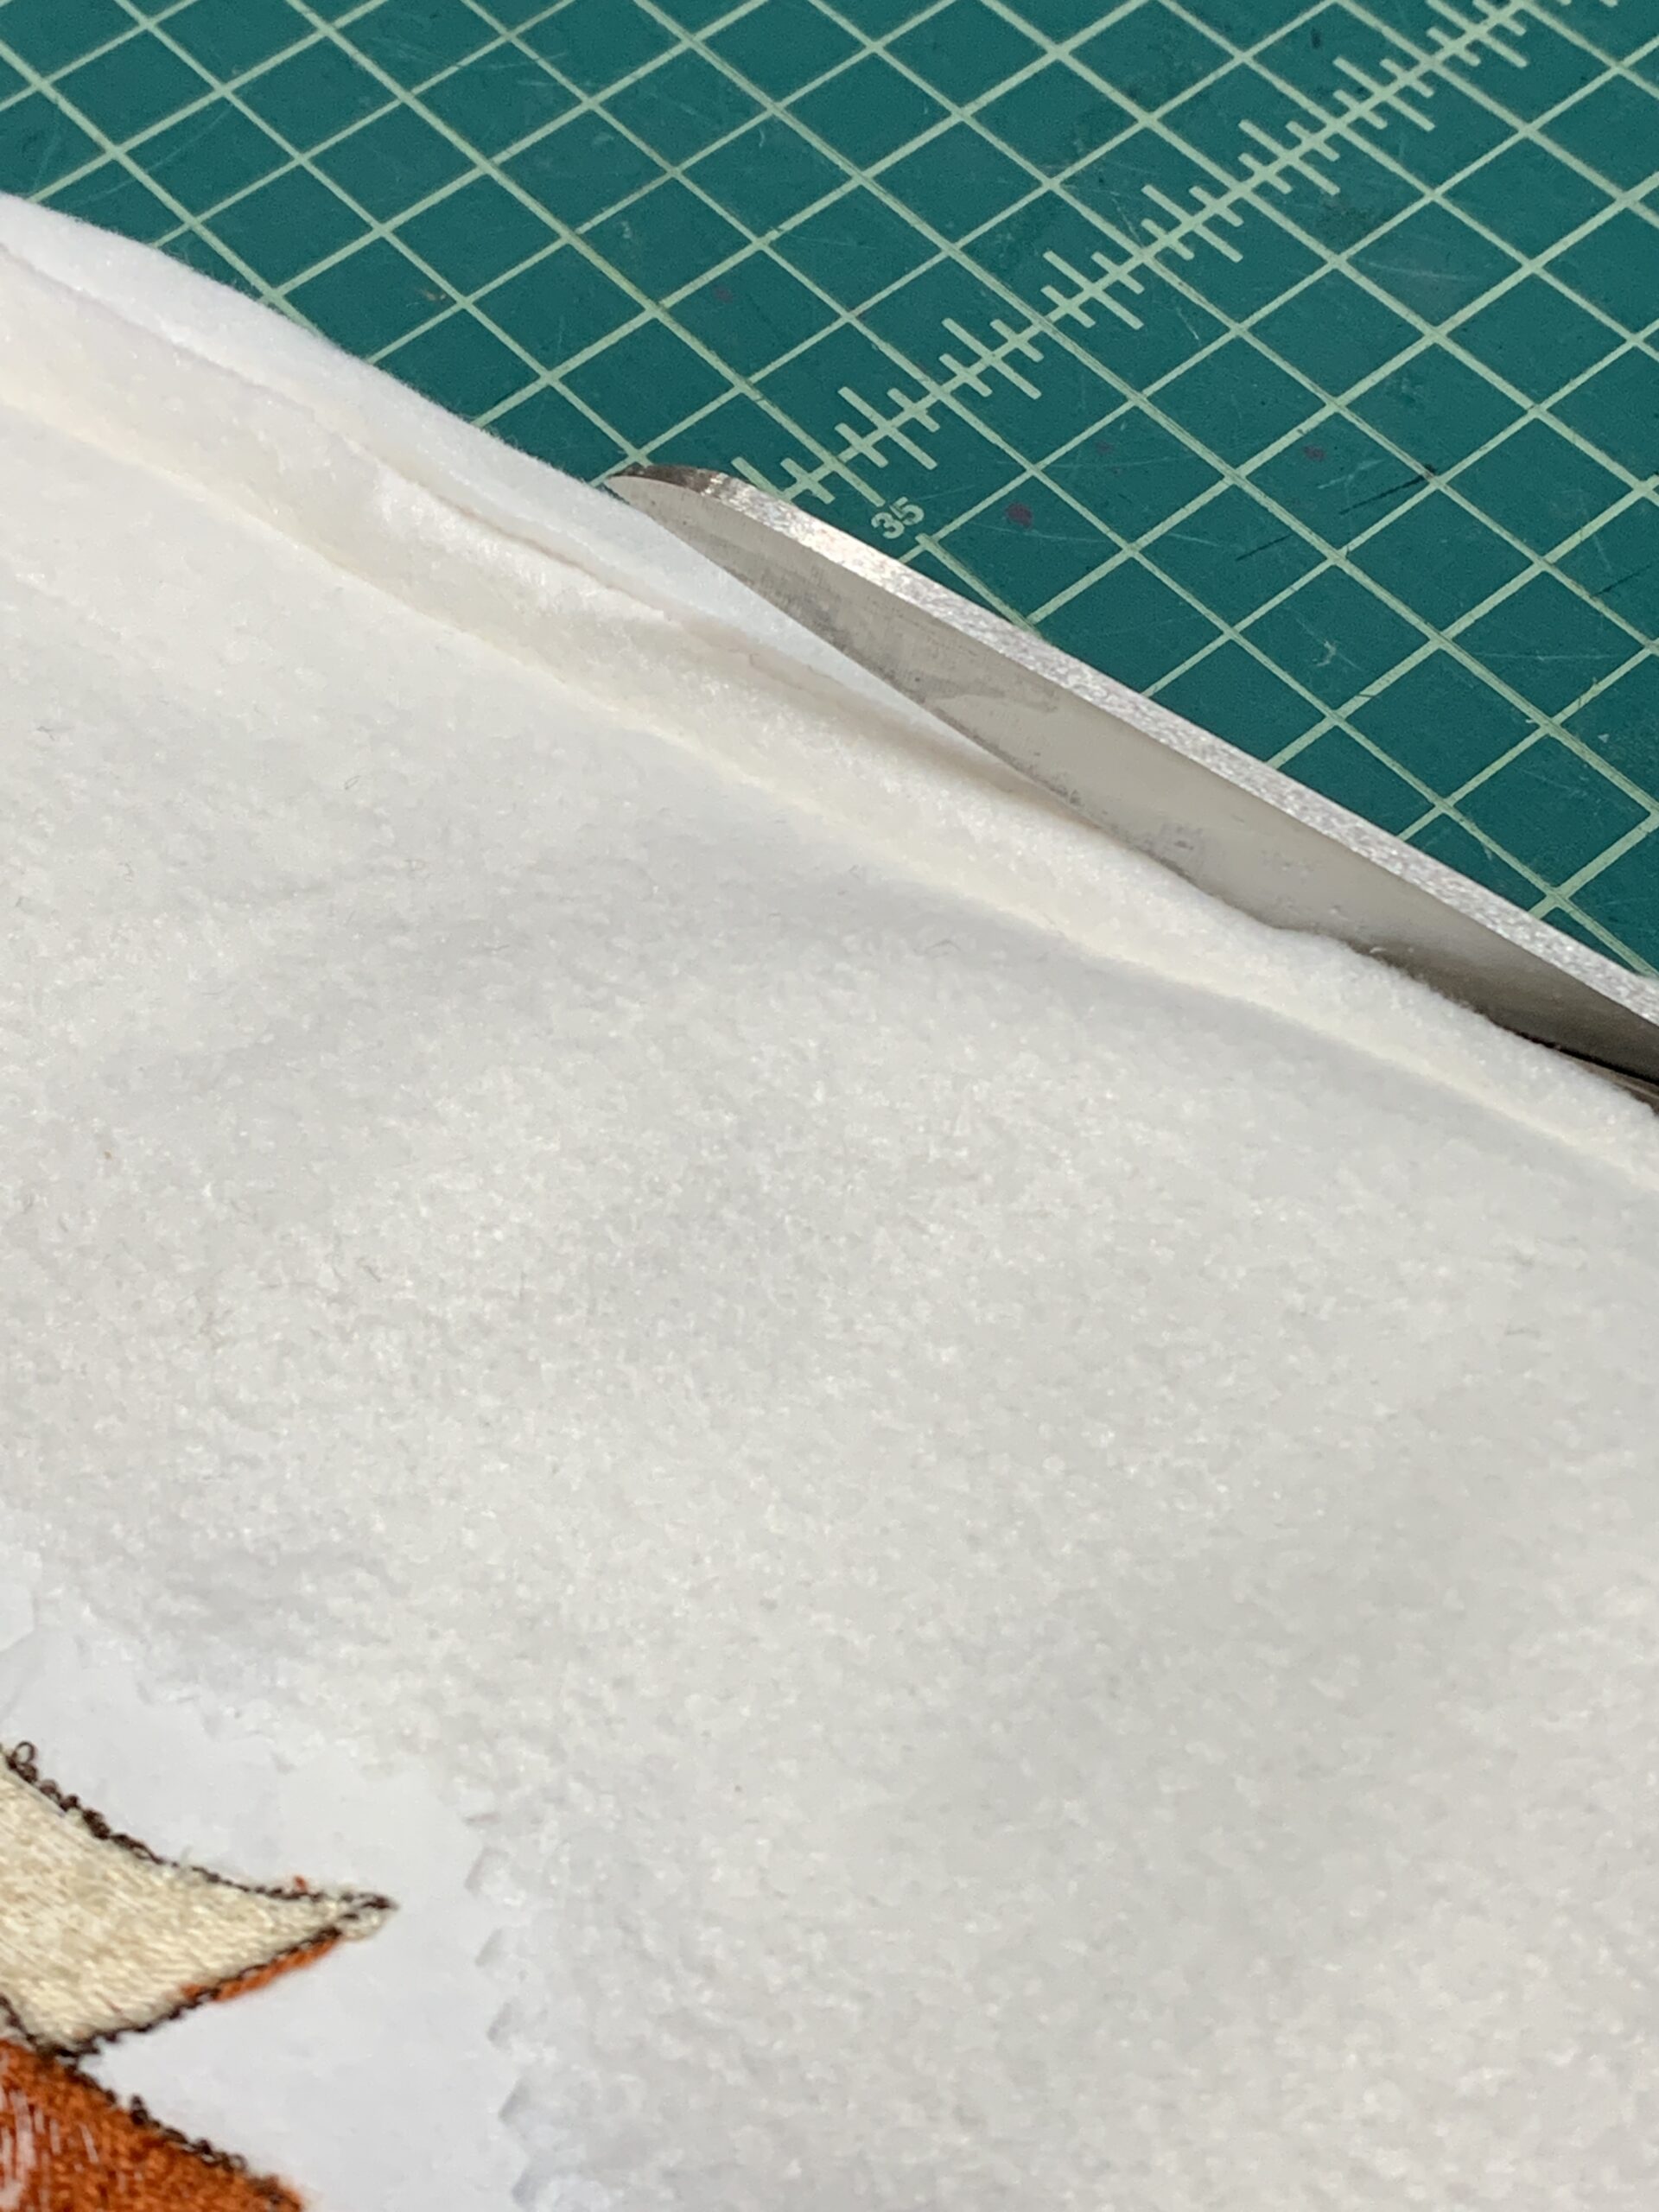
Once the embroidery is finished, remove the embroidery design from the hoop. Leave the Sulky Solvy in place, and then brush the Filaine embroidery using the Filaine Wire Brush. This will make your fox design fuzzy. The Sulky Solvy will protect the polyester fleece from abrasion as you brush the embroidery design.
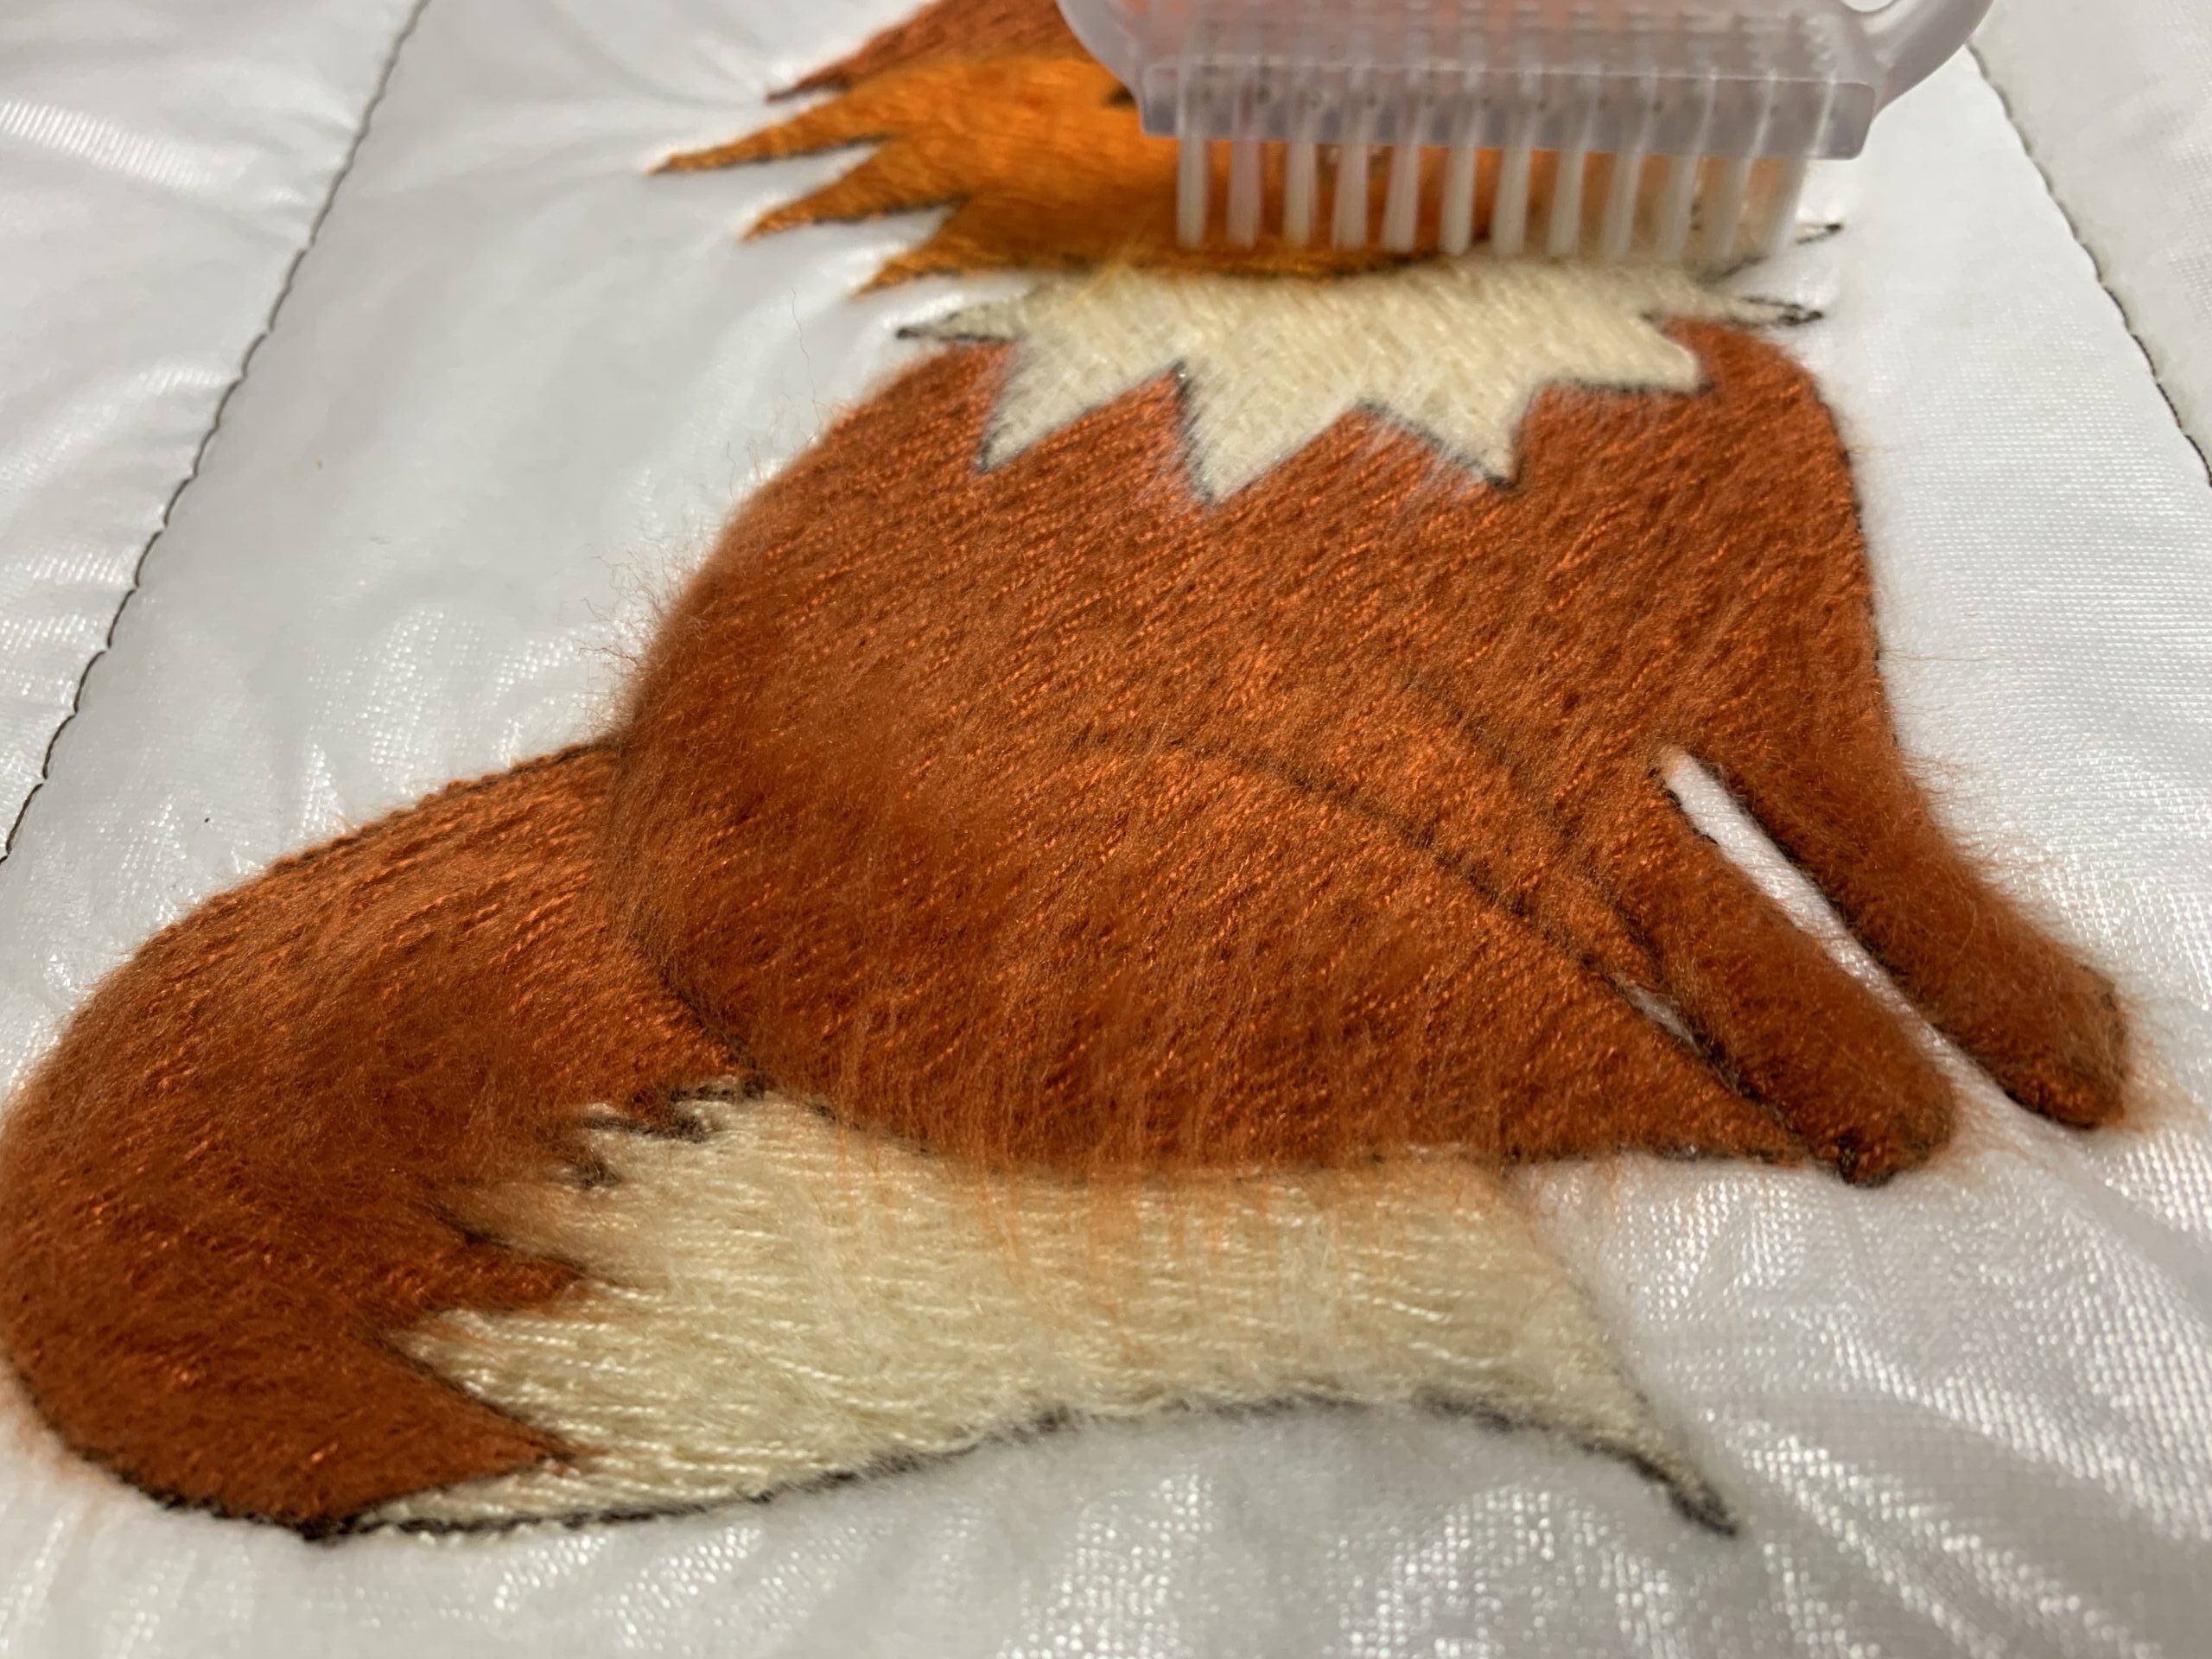
Once the free fox design is brushed to your liking, remove the basting stitches and the Sulky Solvy. Tweezers are helpful to remove small bits of Solvy where needed. A damp cotton swab is also helpful for small areas.
On the back of the embroidery, trim away the excess Cut-Away Plus stabilizer beyond the design perimeter. Use pinking shears, if desired.
PILLOW CONSTRUCTION
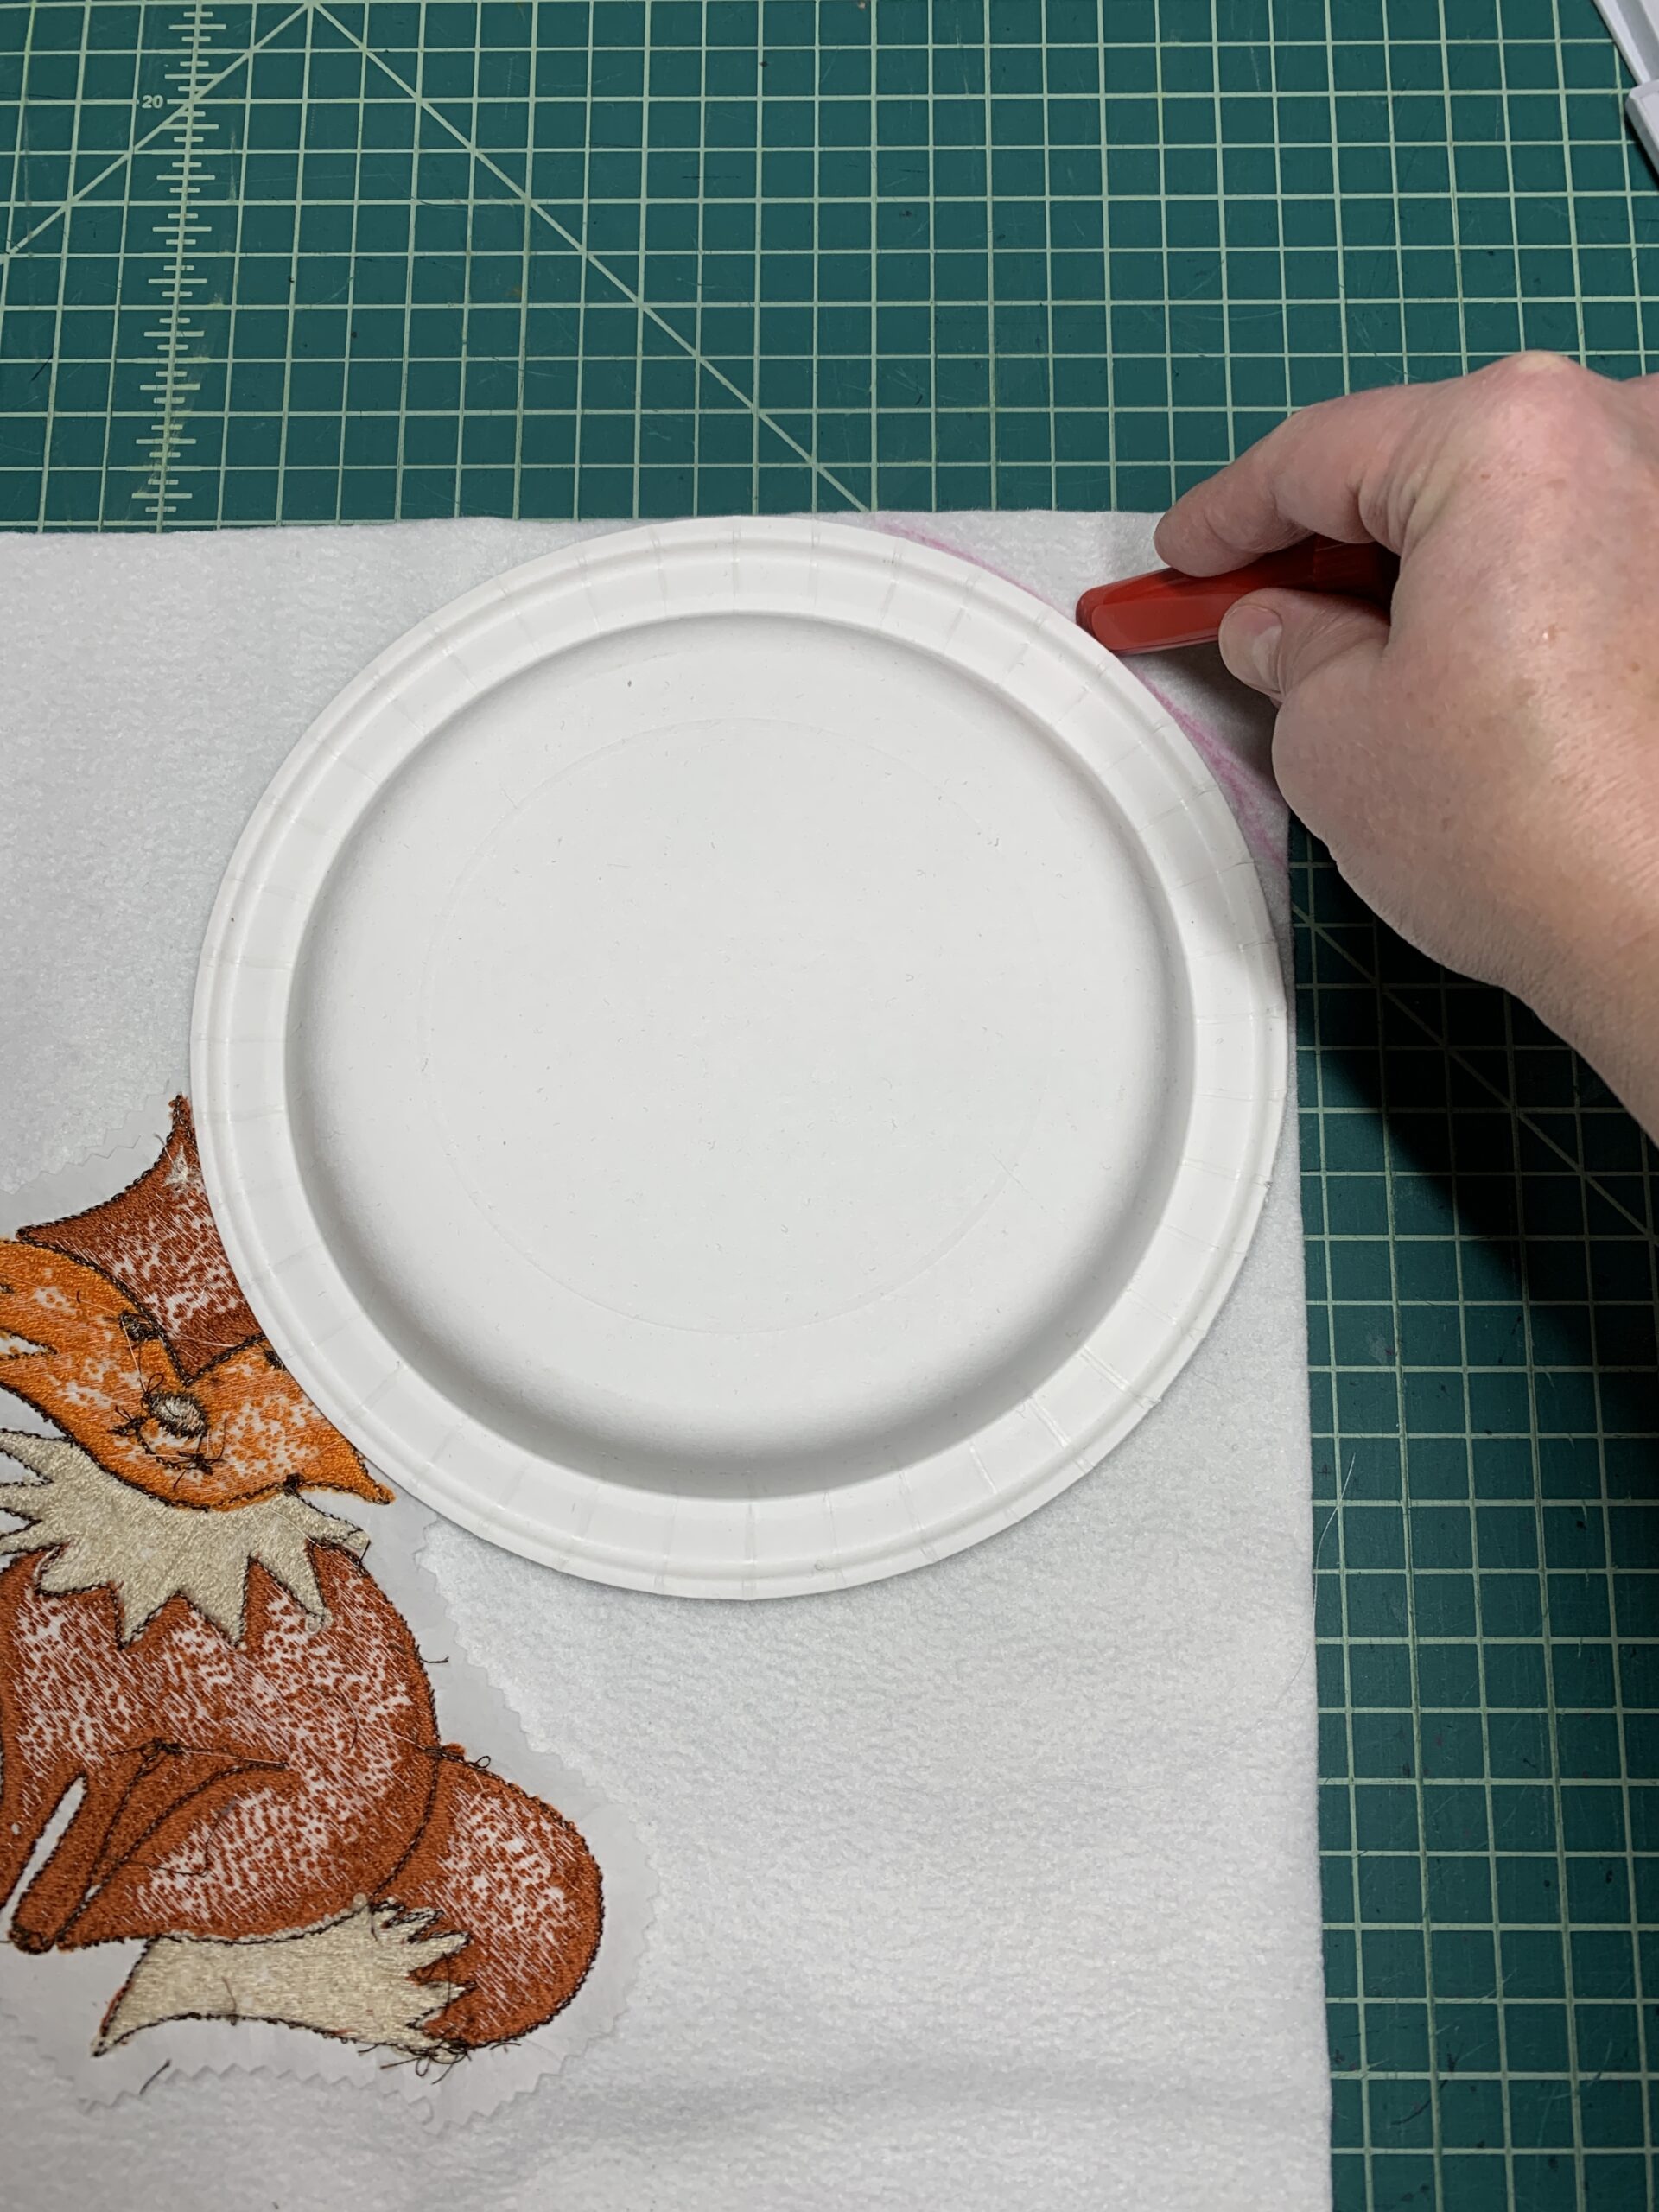
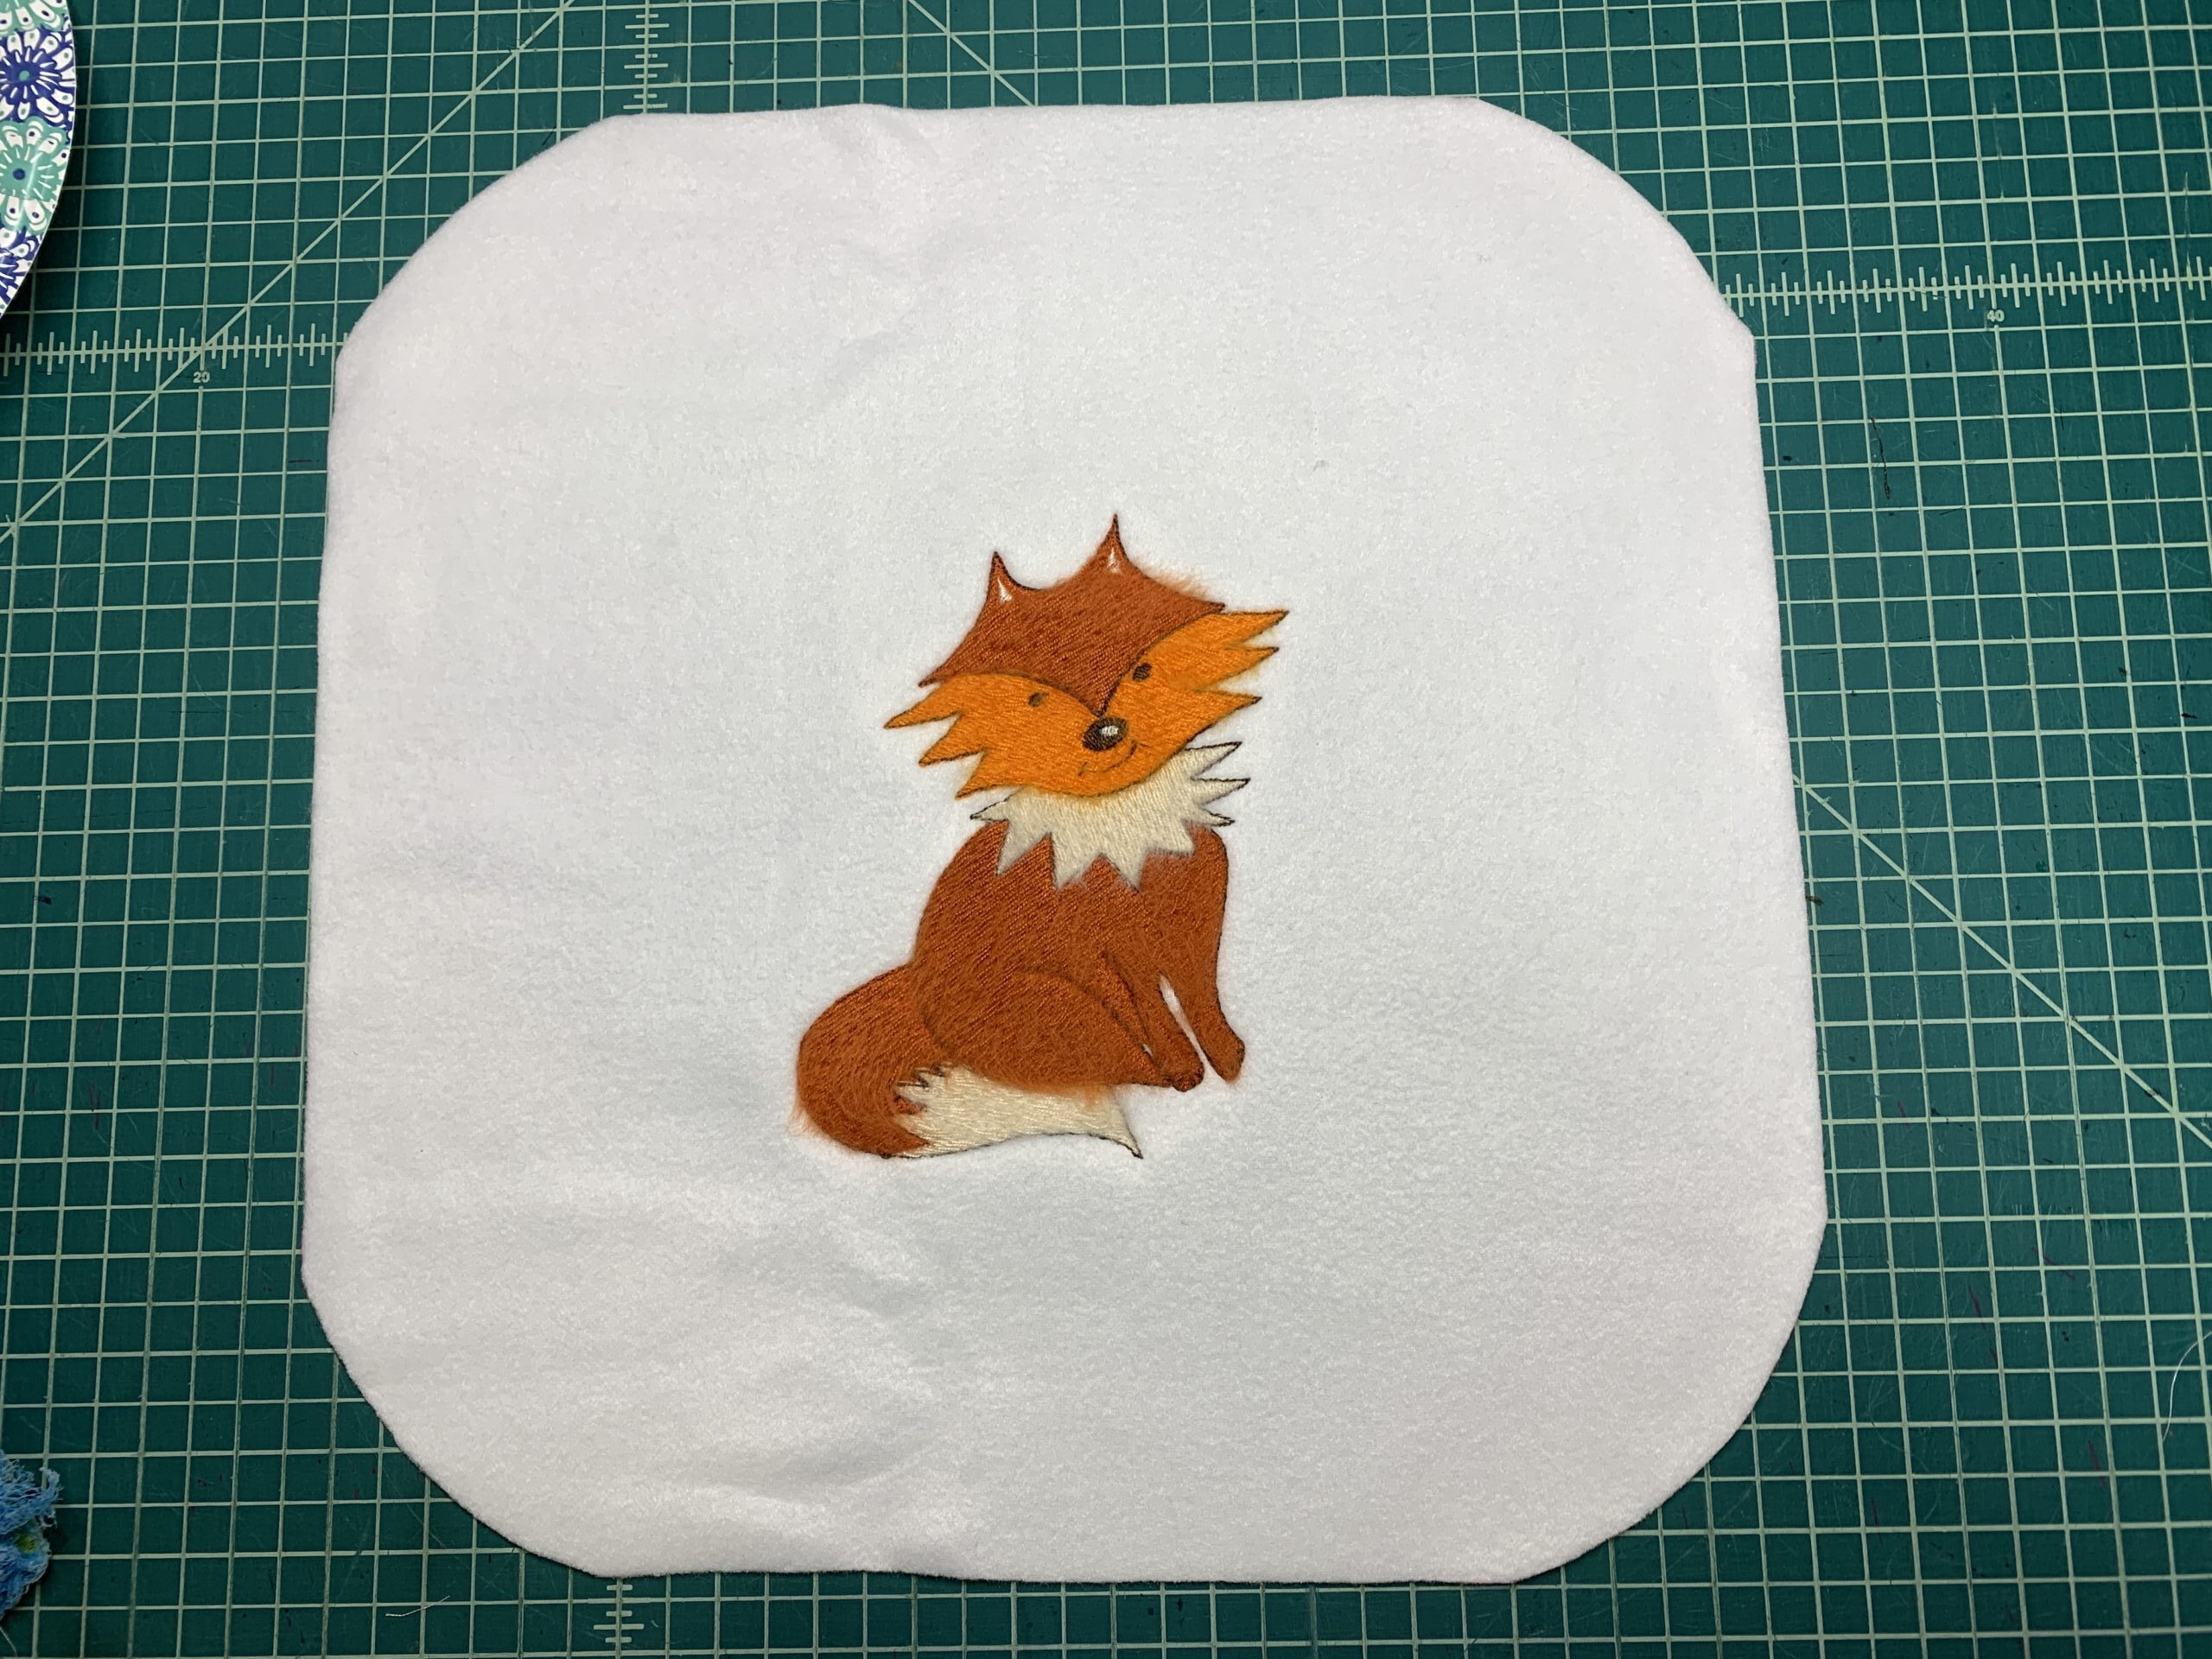
Next, round the corners of the pillow, using a small plate as a template. Align the plate (or similar round item) with the corner as shown, and mark a line with chalk. Then, cut on the marked line to make the corners round.
PILLOW FRINGE
Working on the right side of the embroidered pillow top, add the fringe with right sides together and the fringe facing inward. Align the fringe around the edges of the pillow and trim off any excess. Then, layer the second piece of fringe on top of the first in the same way, starting in a different place so that the ending points are staggered. Next, pin the fringe into place along the edges of the pillow top.
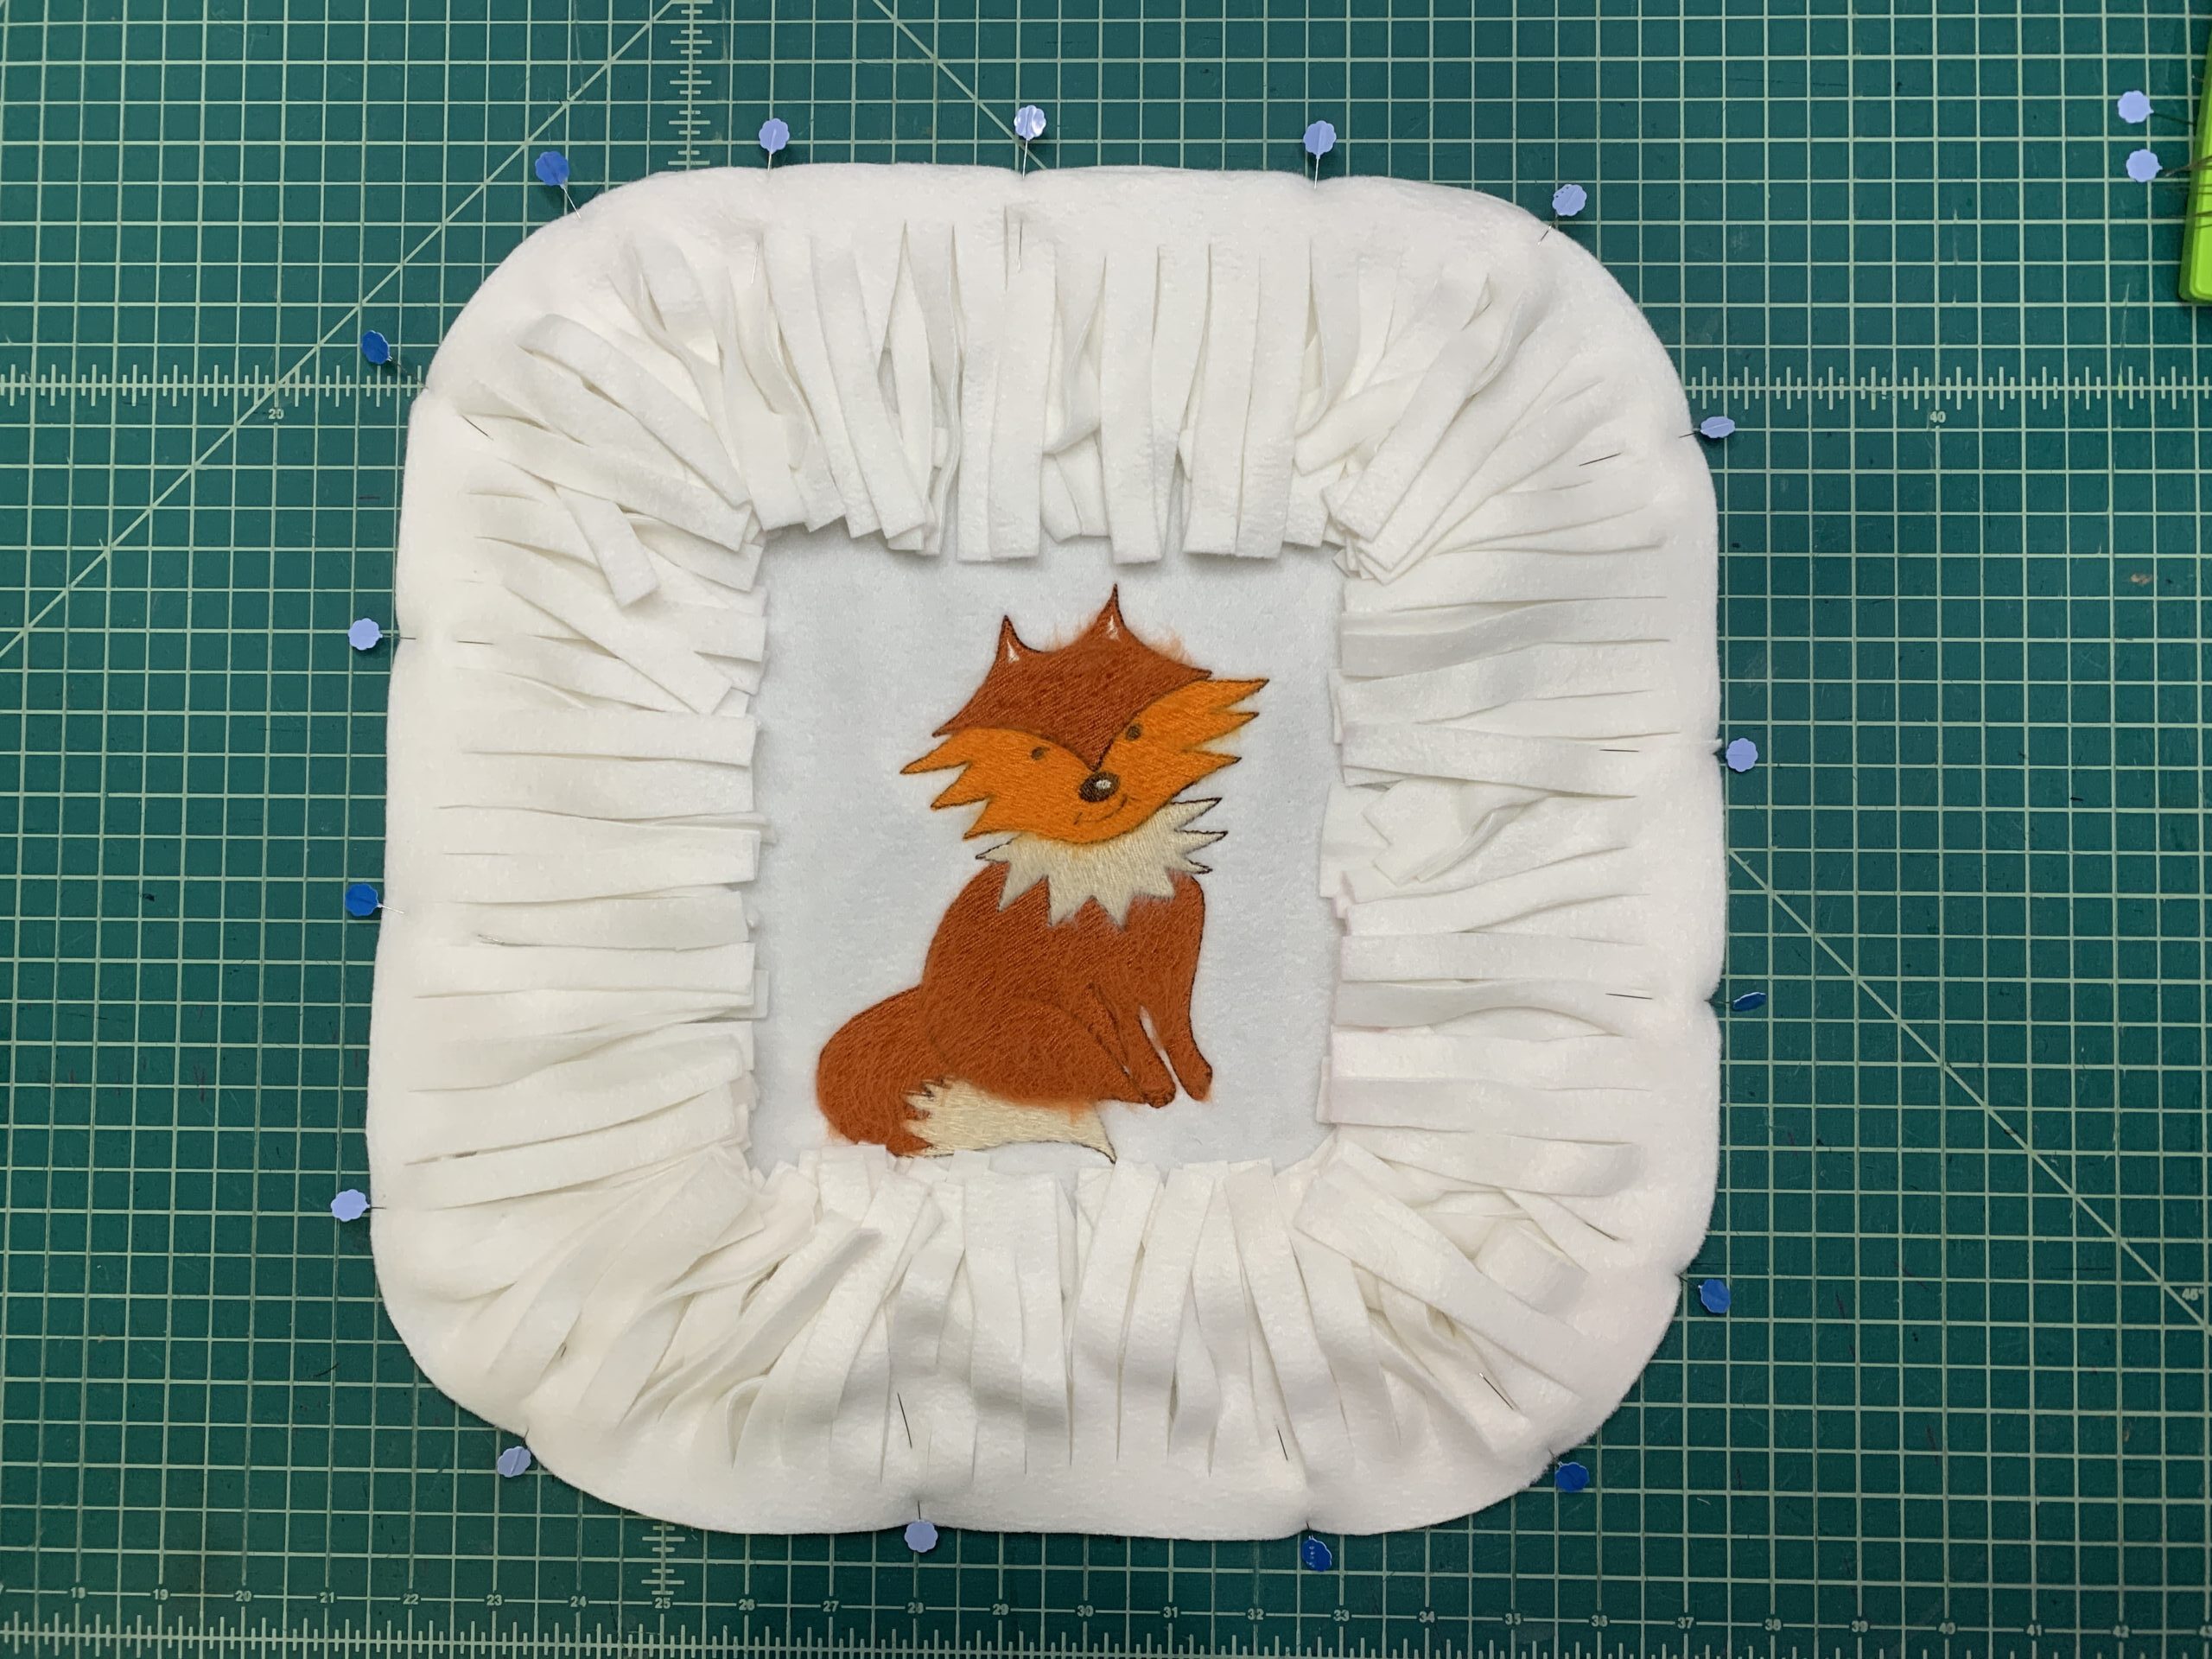
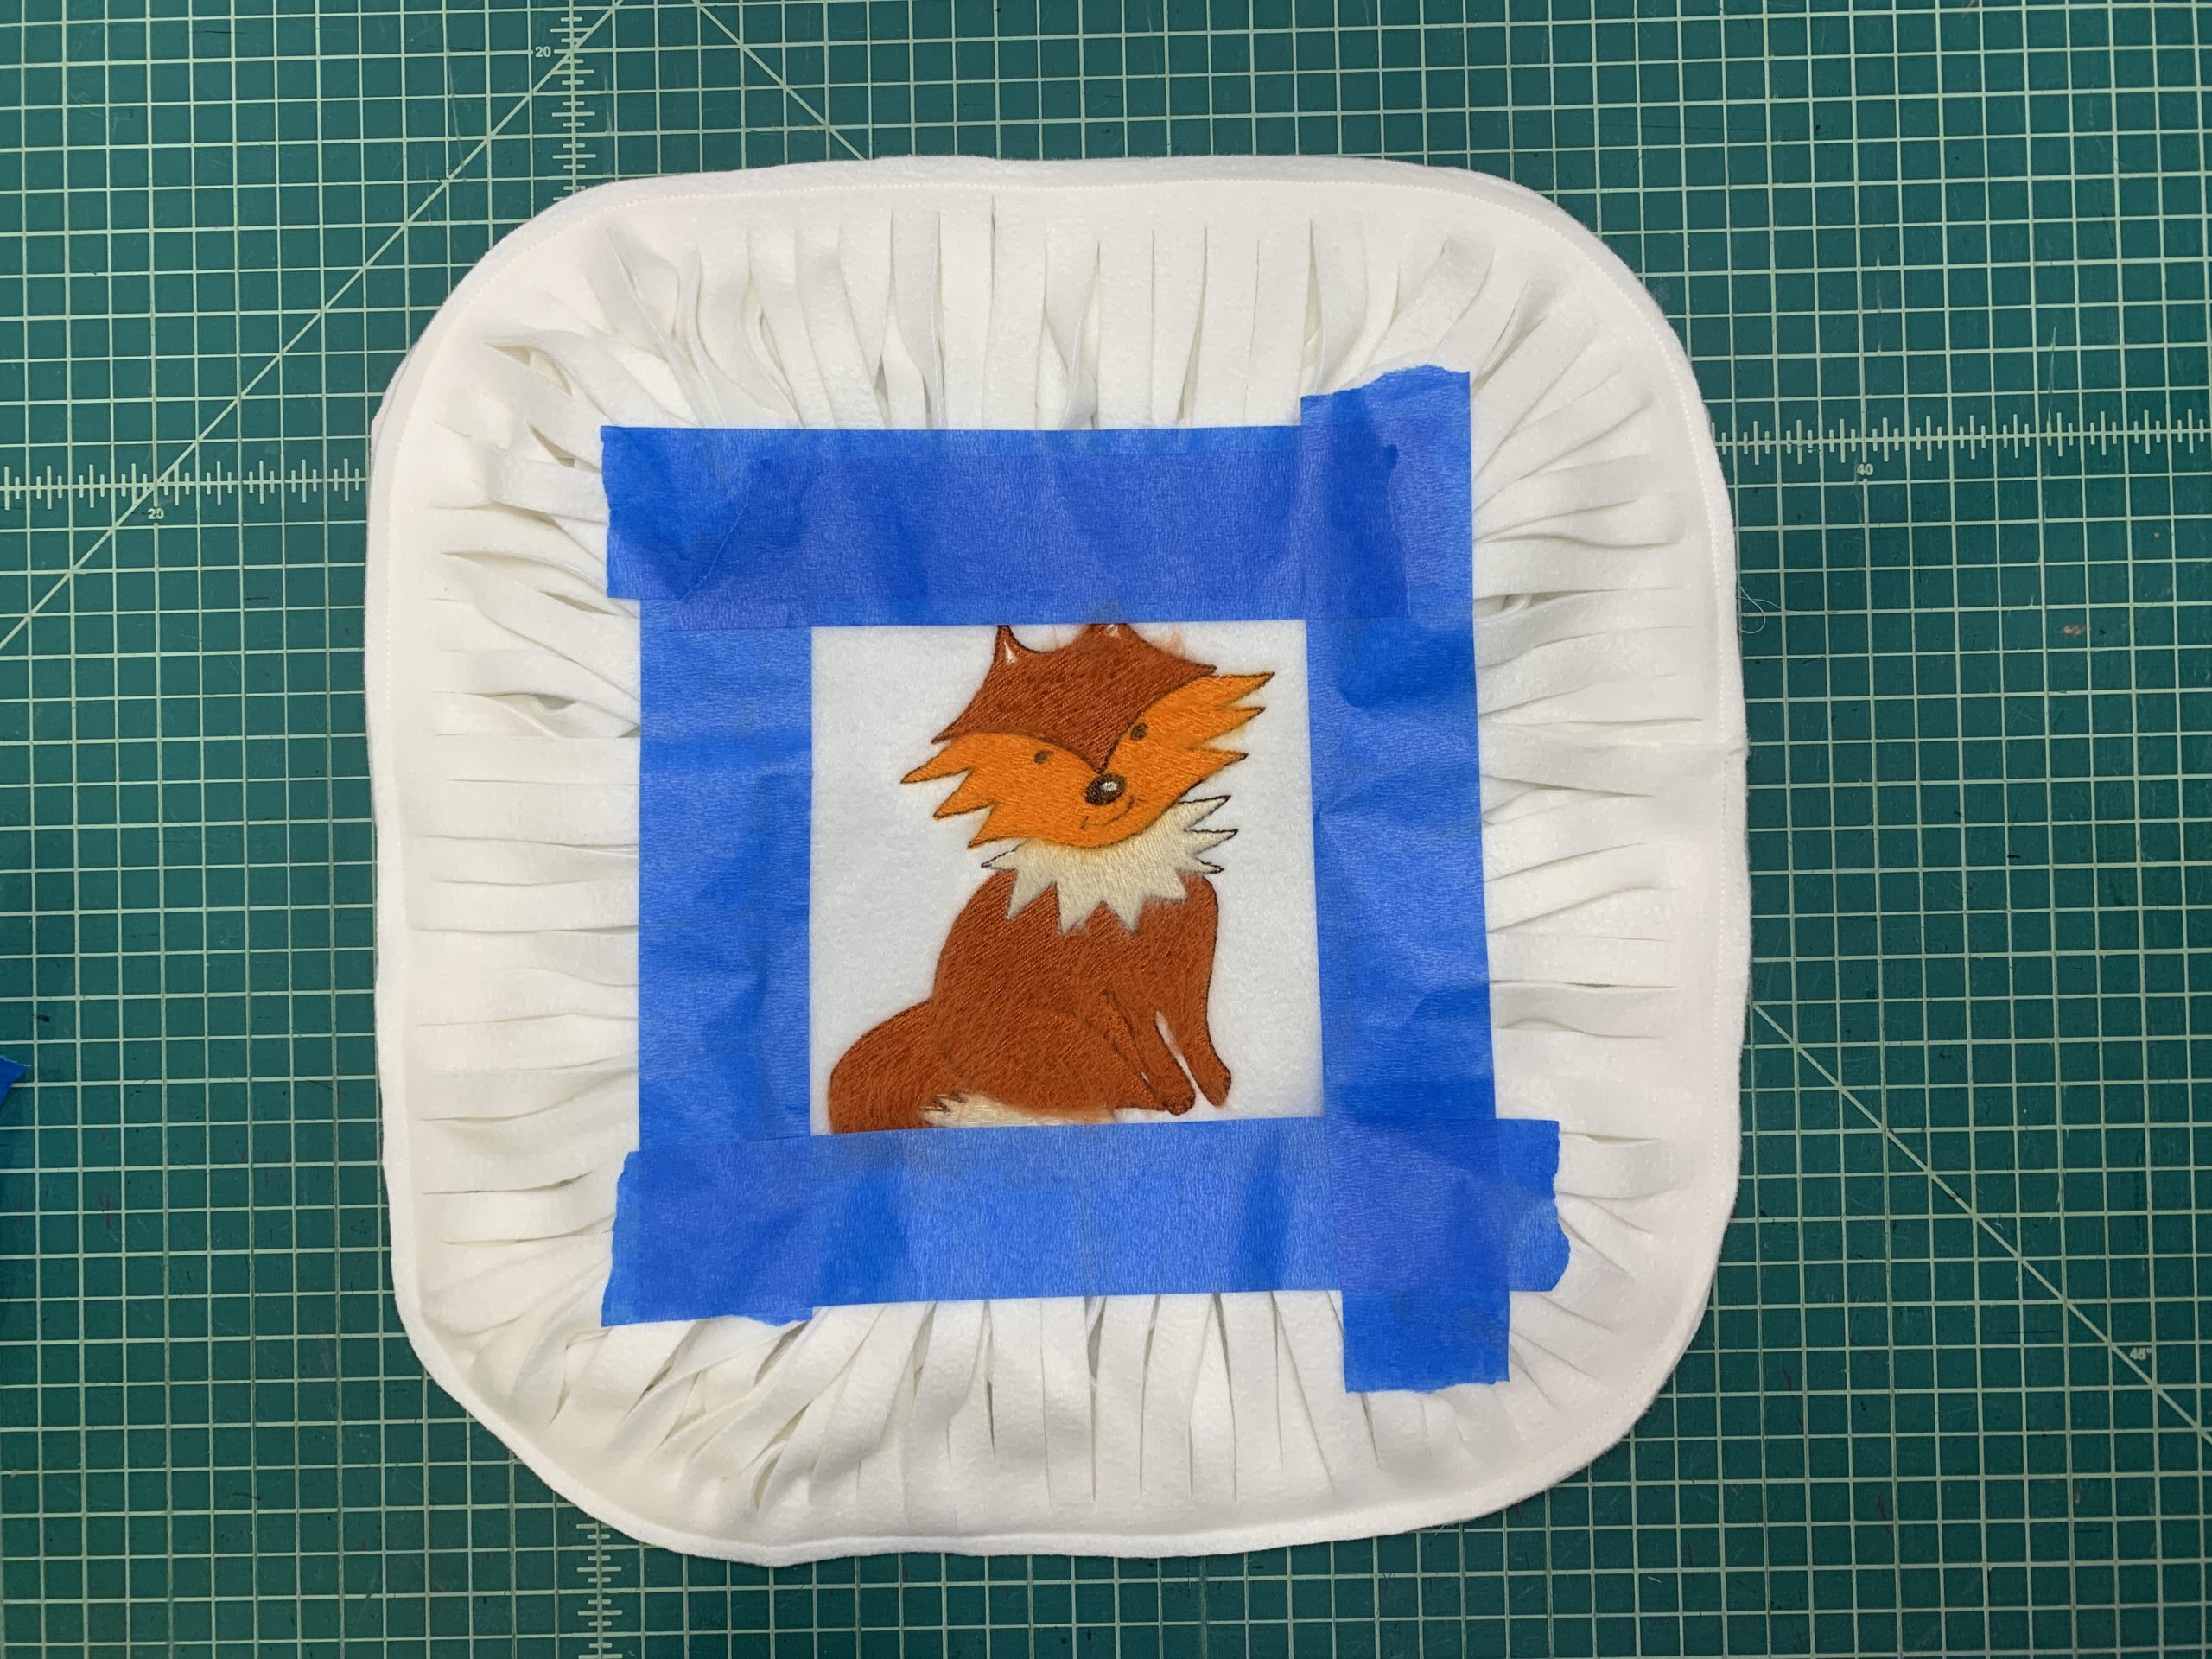
Tape the loose ends of the fringe in place using blue painter’s tape to keep them from flopping around during stitching. Then, baste the fringe to the pillow top using a 1/4″ seam allowance.
FINISHING
Take one of the 11”x16” rectangles and place it right sides together on top of the pillow top with one 16” edge aligned with the top of the pillow top. Fold back the remaining 16” long edge by 2” toward the wrong side.
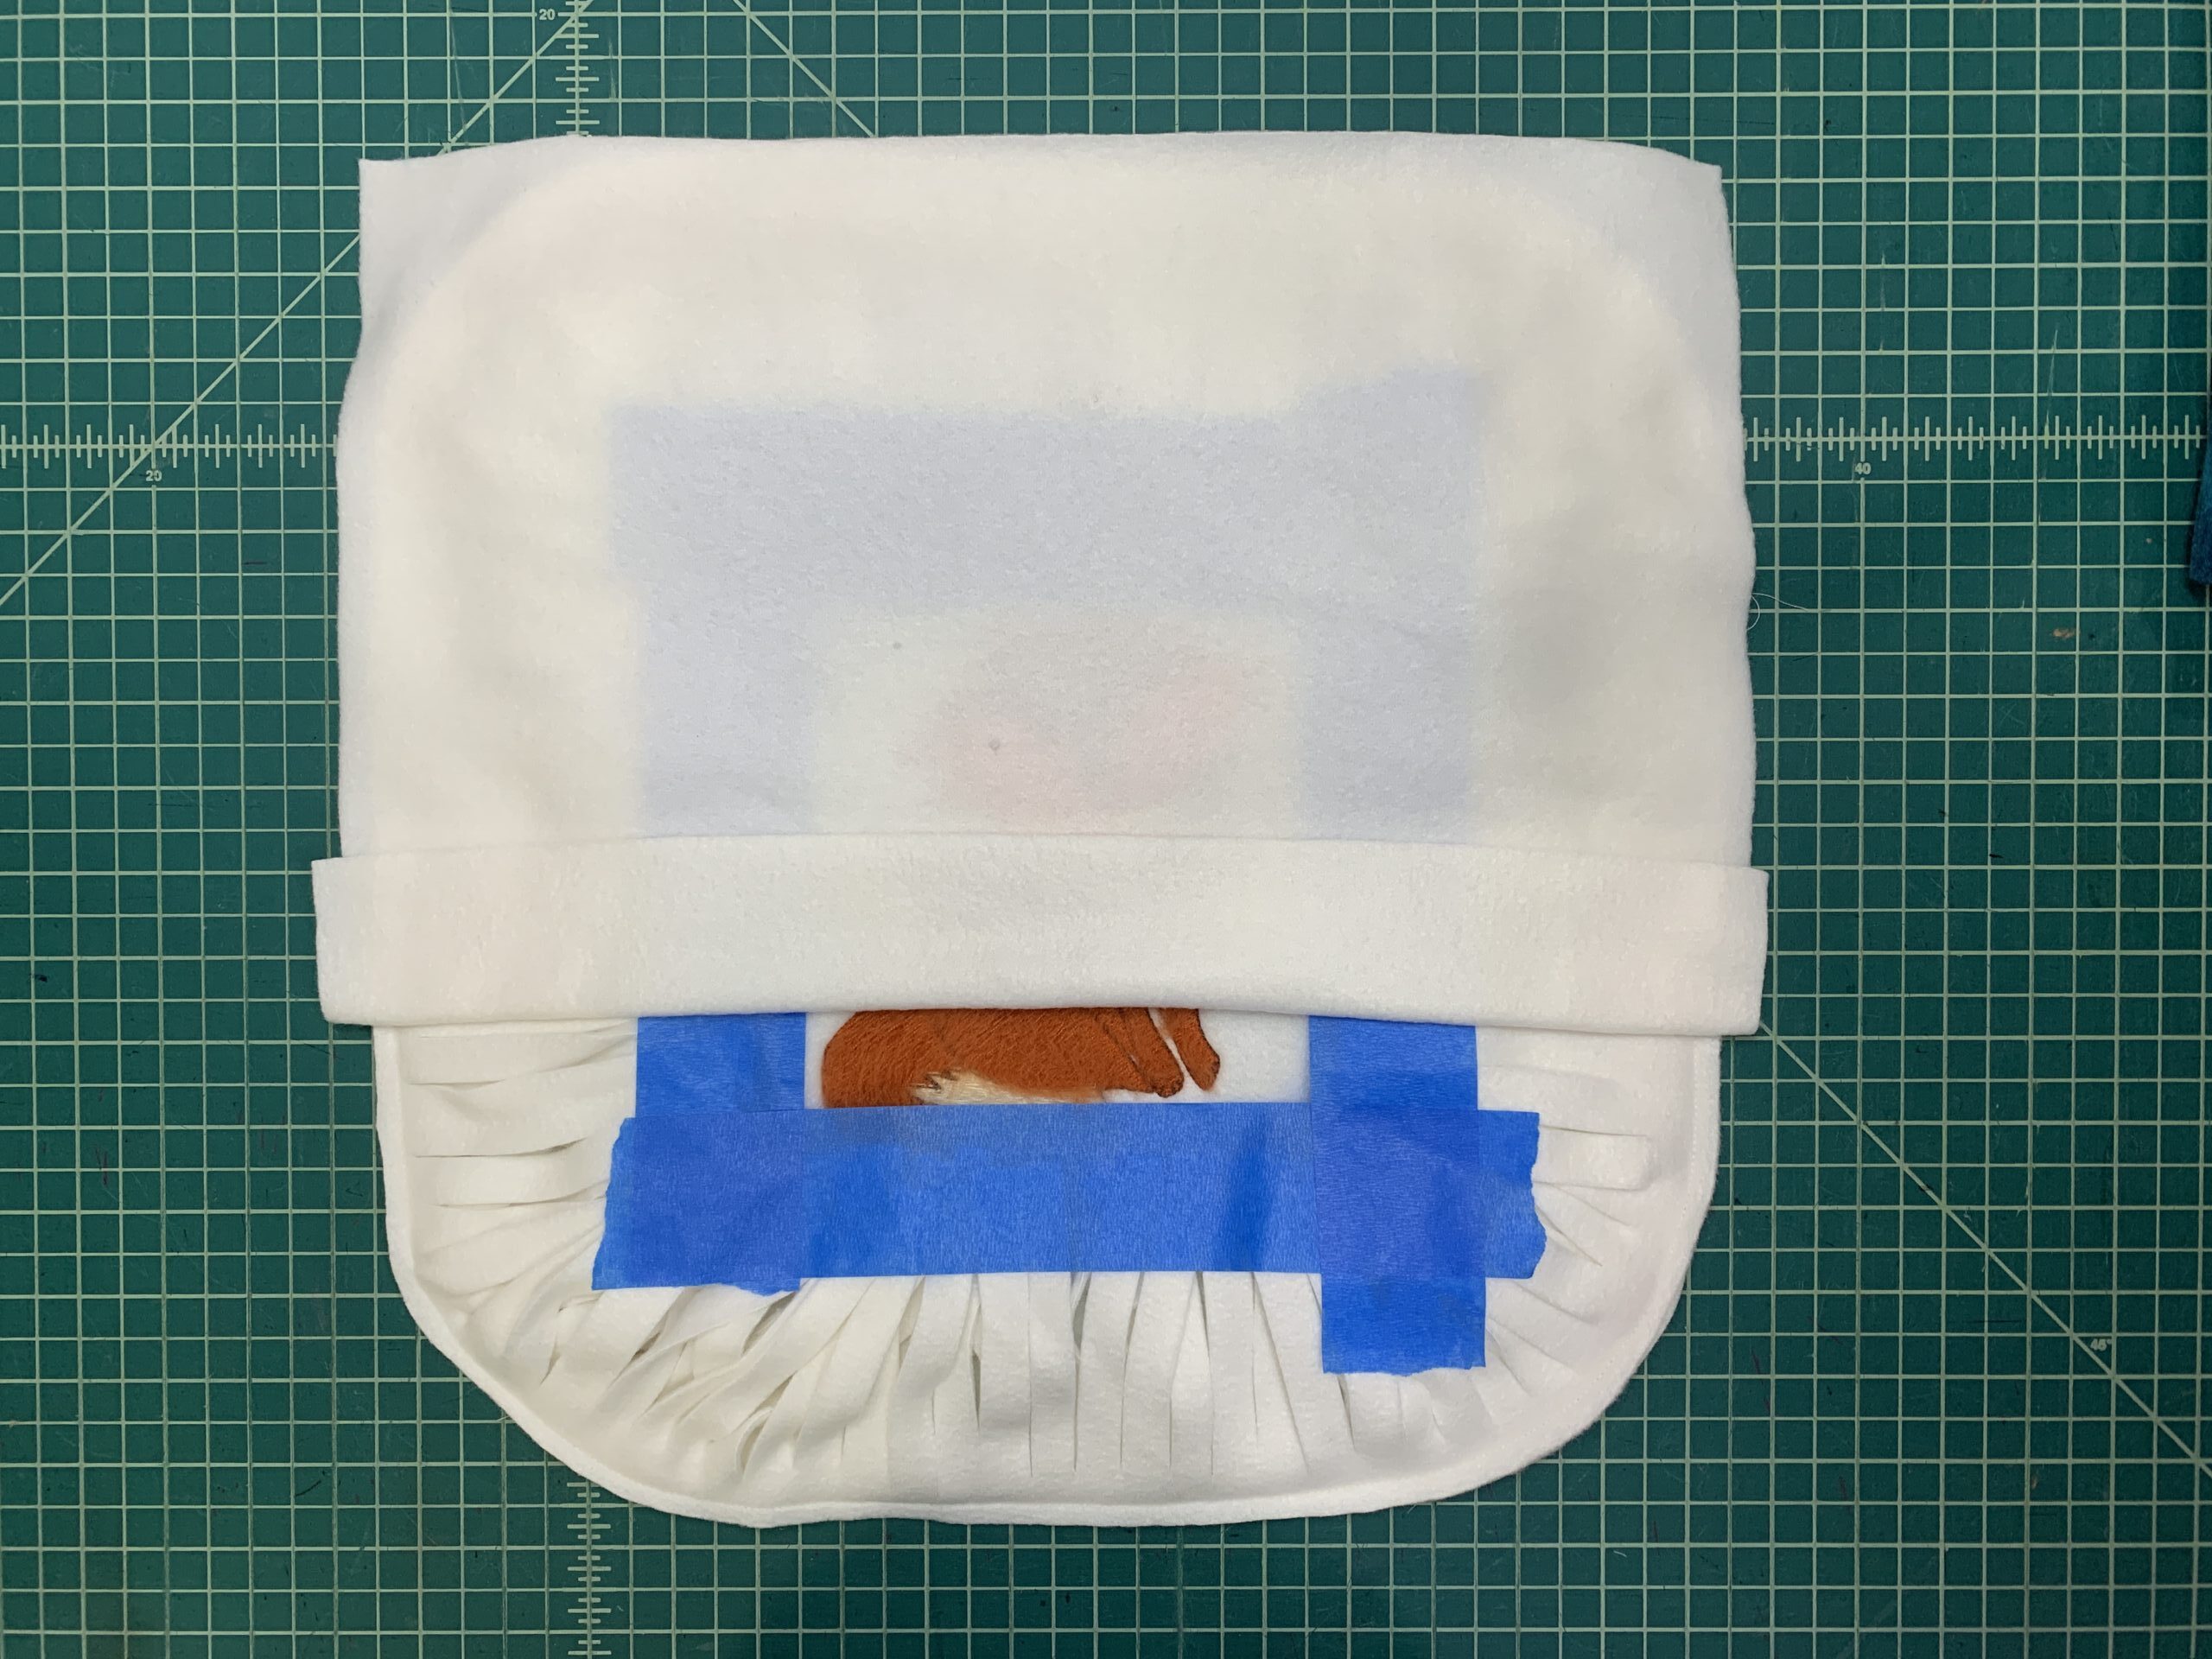
Then, place the second 11” x 16” rectangle on top of the other two pieces, with one 16” long edge aligned with the pillow-top lower edge.

Next, pin the pieces together along the straight edges, then turn the pillow over and trim away the corners of the two rectangles so they are the same size and shape as the pillow top.
Lastly, stitch the pillow perimeter using a 1/2″ seam allowance.
Trim the seam allowance to 1/4″ wide.
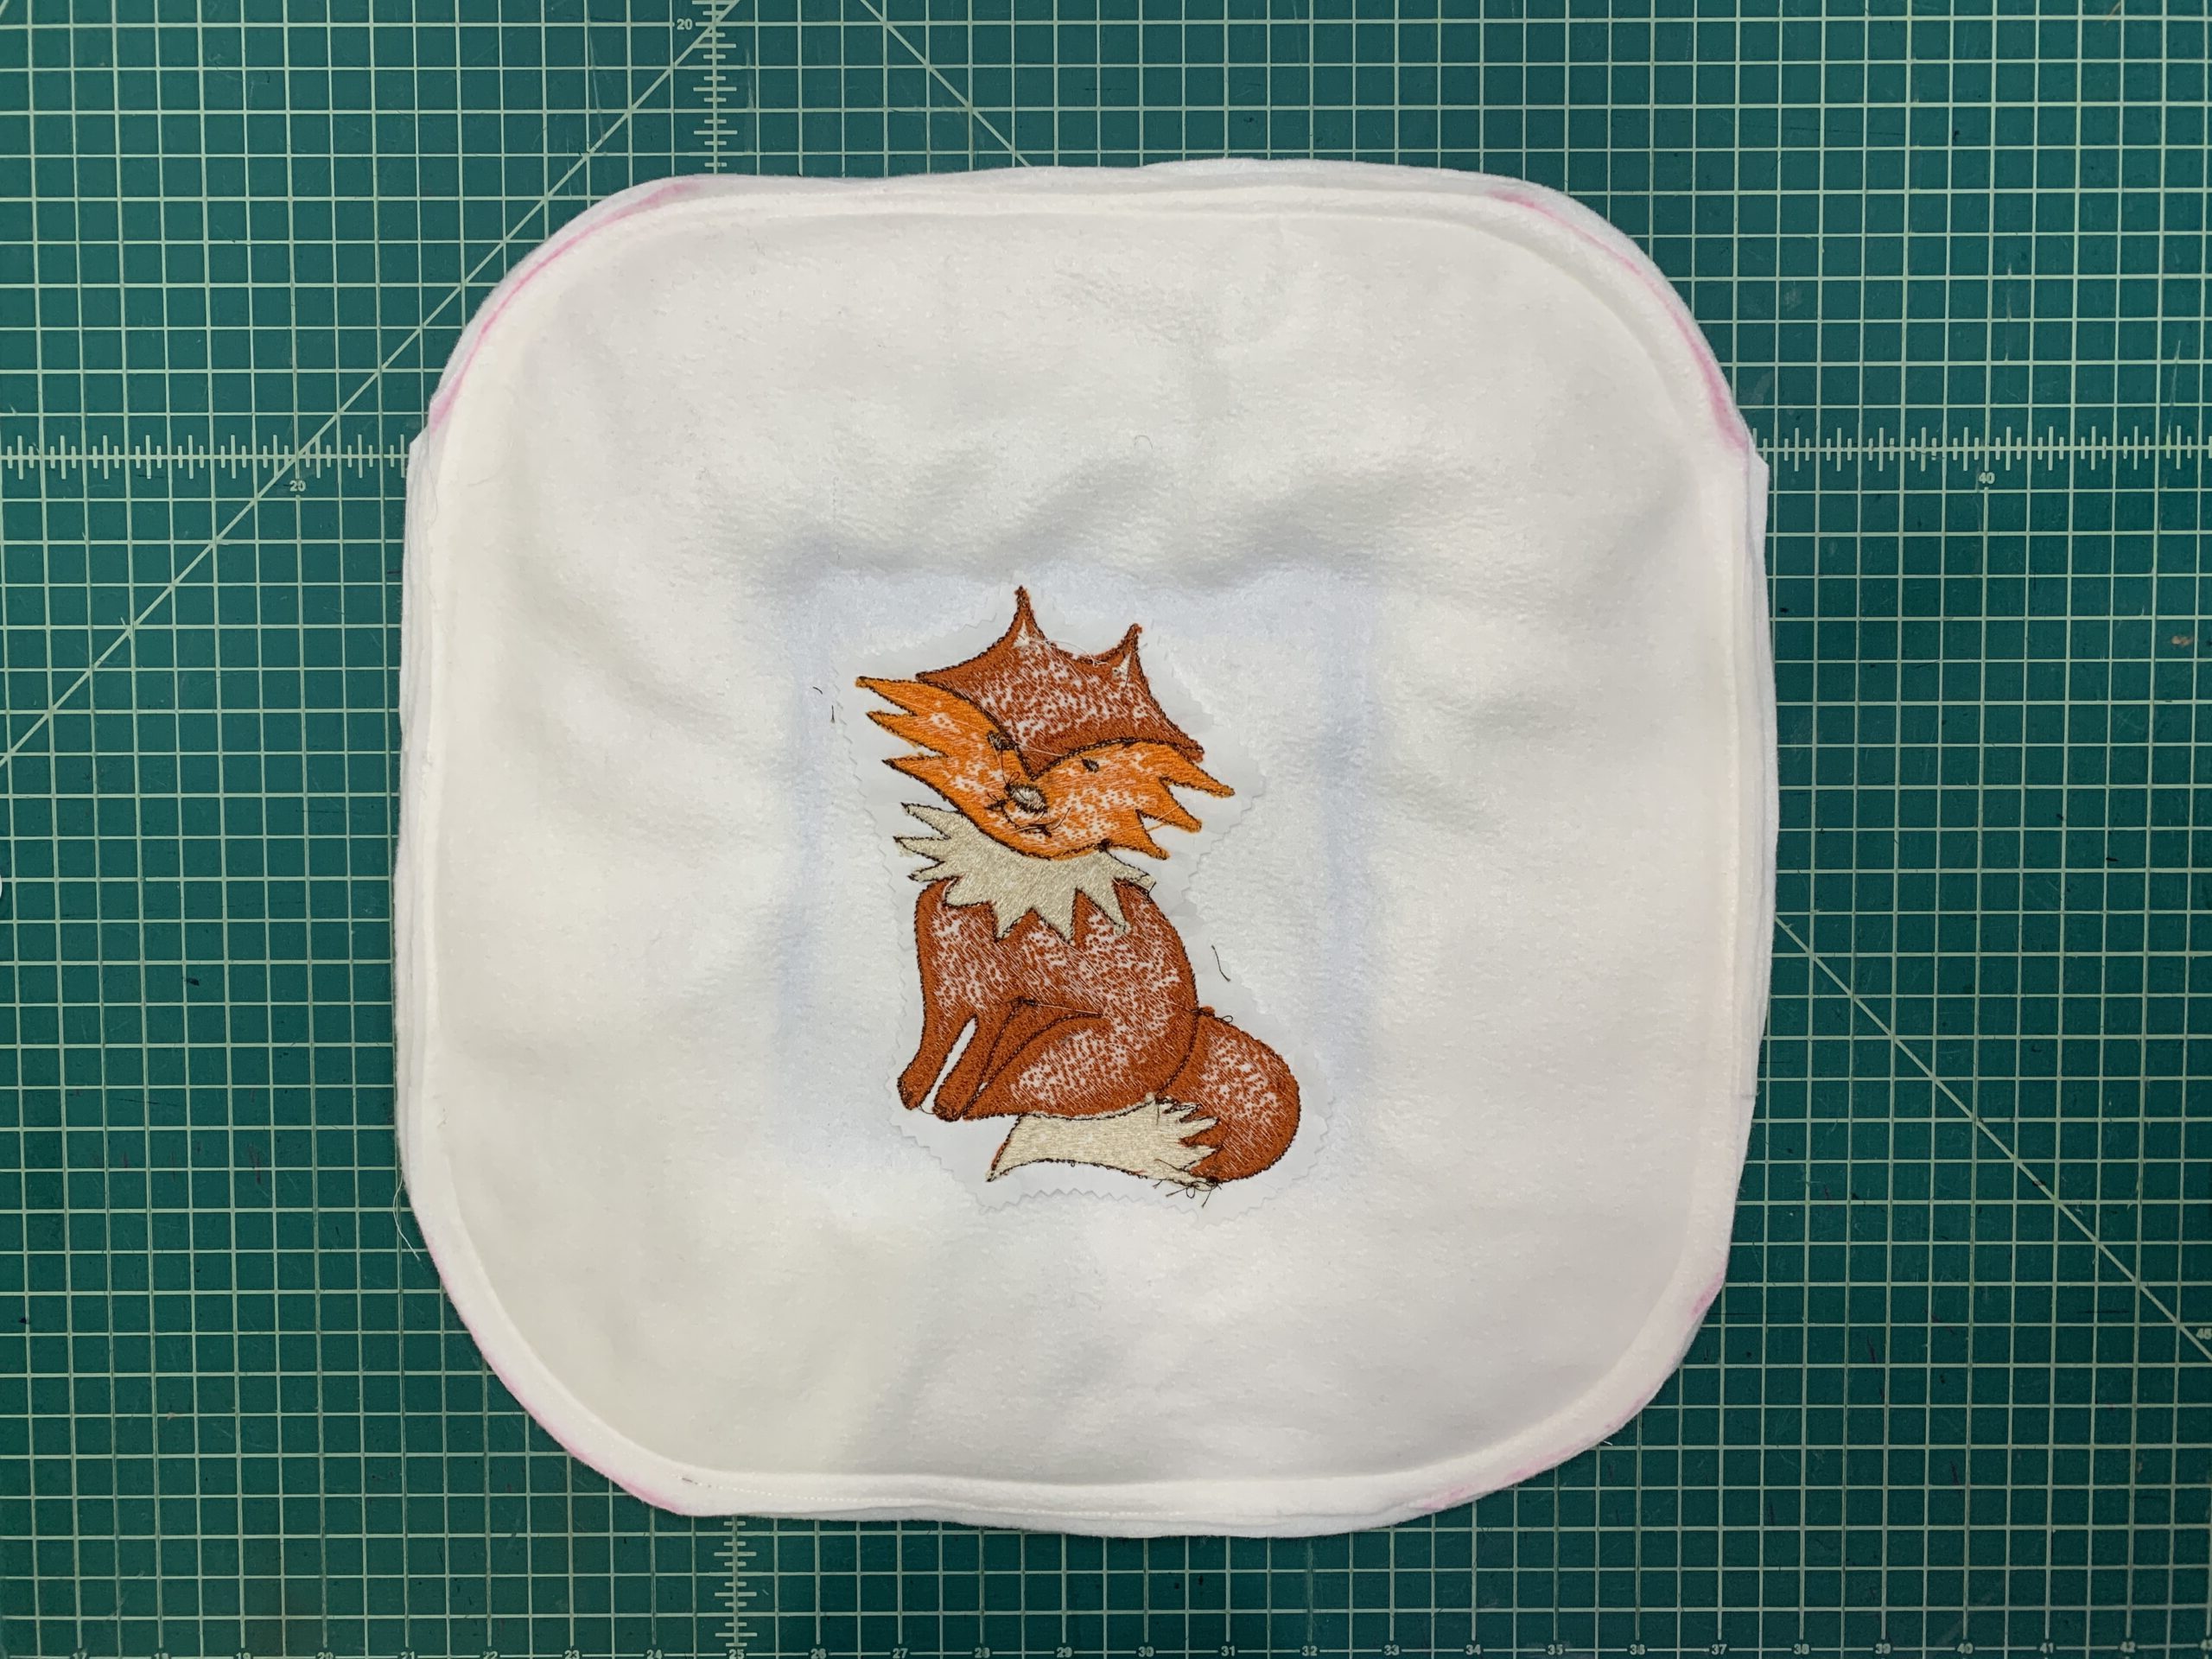
Then, reach through the back overlap opening to turn the pillow right side out. Remove the blue painter’s tape to free the fringe. Insert the pillow form into the pillow to finish. If desired, make multiple pillows to have a cute grouping.

Ellen March
I am the Director of Content for Sulky of America. The former Editor in Chief of Sew News and Creative Machine Embroidery magazines, I hosted Sew it All TV on PBS for nine seasons. I've appeared on It's Sew Easy on PBS, DIY Network's Uncommon Threads, Hallmark's Marie Osmond Show, MacPhee Workshop and more! Come sew with me!


10 Comments
Beverly
Where do you get the free fox design ?
Dawn Tenneson
This project is adorable!!!
Dawn Tenneson
Tried to download the file and it says this was either not correct or damaged file?
Cheryl Collette
The link is under the supplies list. It says Sulky Free Design and the design link is highlighted. when you click on the link, it will take you to a page to enter your email so they can send you the design.
Donna Magee
Click on the words “Filaine Fox” in the Supplies list up in the directions for making the pillow project. It is directly below the threads that are used.
Nikki
A link to get it is in the Supply List on this post. But here it is, too: http://promo.sulky.com/free-project-gateway/
Evelyn Wieland
Could someone please contact me concerning this Fox project? I tried to turn off the auto thread cutting option on my sewing machine (Babylock Destiny 2) and am not sure I succeeded. Also, is 60 weight bobbin thread the correct weight to use on this project?
Ellen March
Yes, that is the correct bobbin weight. Please email us at info@sulky.com so we can assist you further. This thread is very heavyweight and requires machine adjustments. You may also want to try contacting BabyLock to see if that setting is correct.
Debby
I cannot get the link to work to get the free fox design. I added my email, but haven’t received it by email either.
Help!!
Ellen March
Once you input your email, the Free Projects page should populate. Then you need to navigate to “Craft/Sewing Projects” and you will find it. Here is a link for easy retrieval. https://sulky.com/sulky-foxy-filaine-machine-embroidery-design/