
How to Make a Quilt Label with Machine Embroidery
How to Make a Quilt Label with Machine Embroidery
Planning the Quilt Label
Adding a quilt label to a quilt gift is a great way to add a personal touch and provide information to future generations. If you’ve wanted to learn how to make a quilt label, first decide on the design. Add just a name, a message or simply a design with initials. Make the label as big or as small as you like.
I always add a quilt label after the construction is complete. I hand stitch it to the back of the quilt along the lower-left corner. I didn’t intend to have a “signature quilt label” when I made my first one, but the location has become my signature and makes my work more identifiable. Decide the location of your label first, and then determine its size and design.
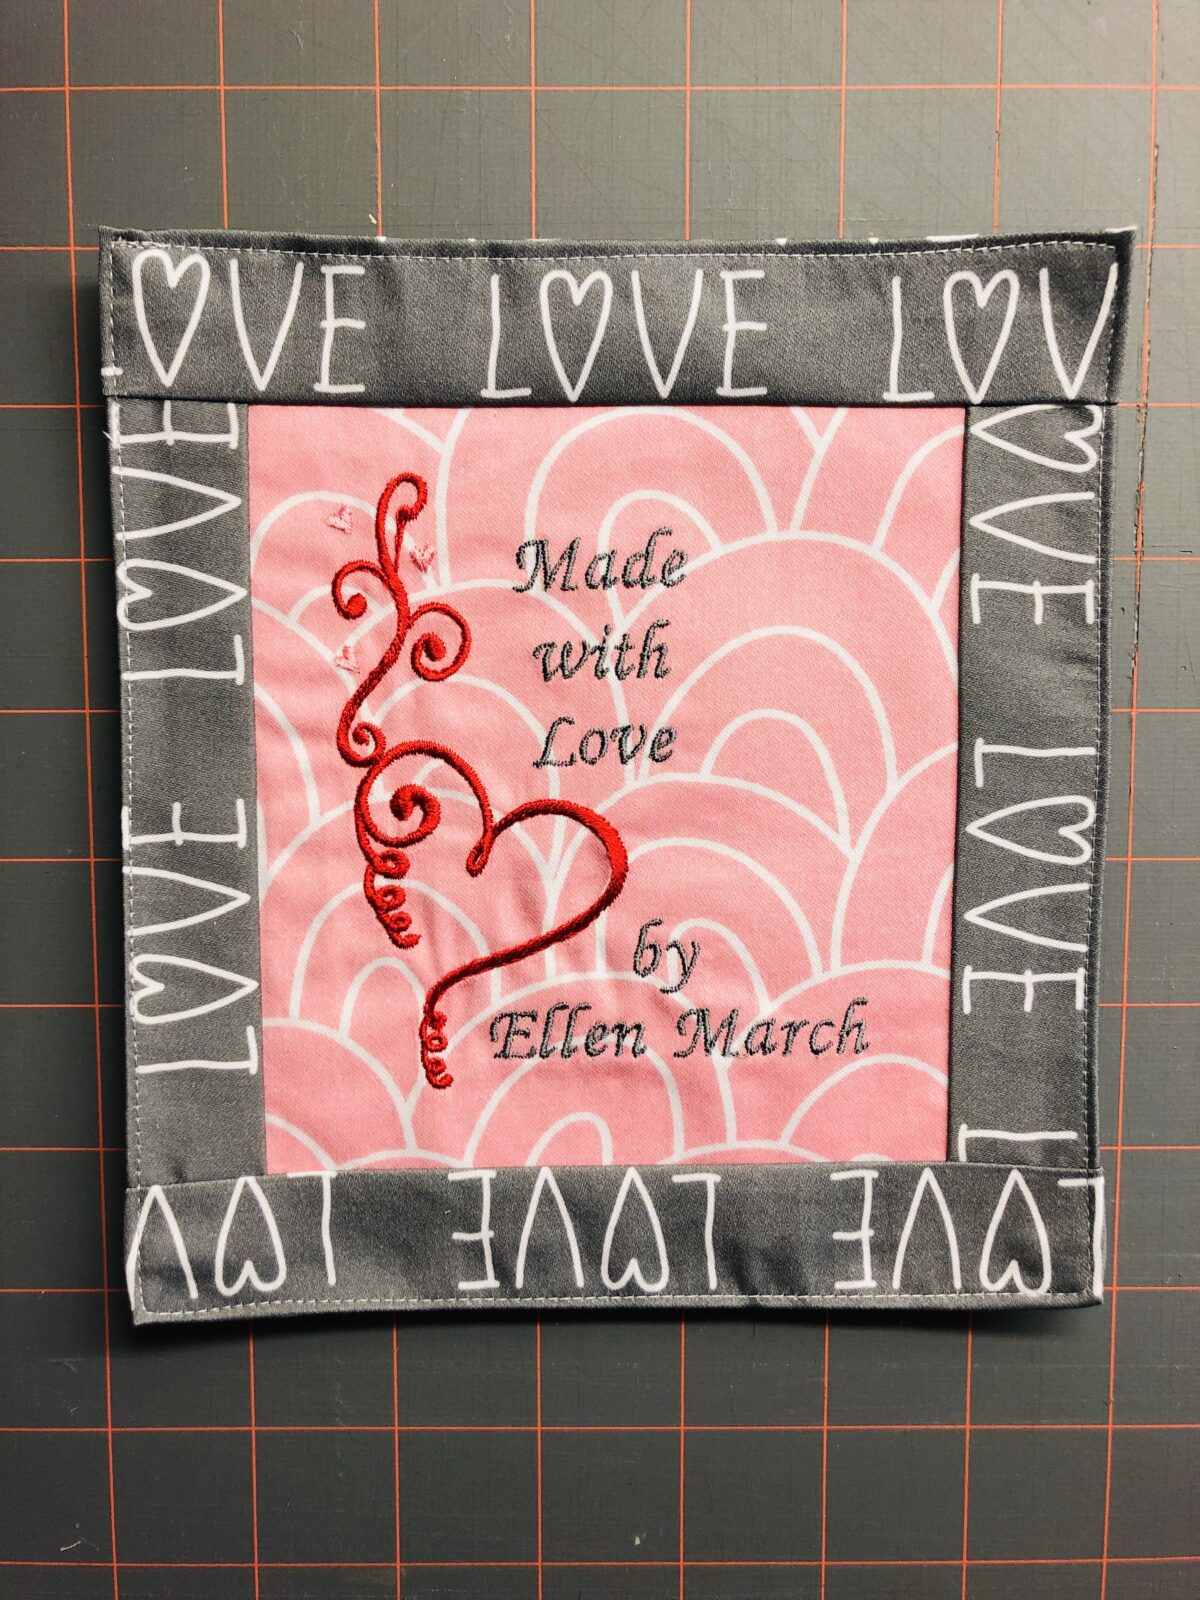
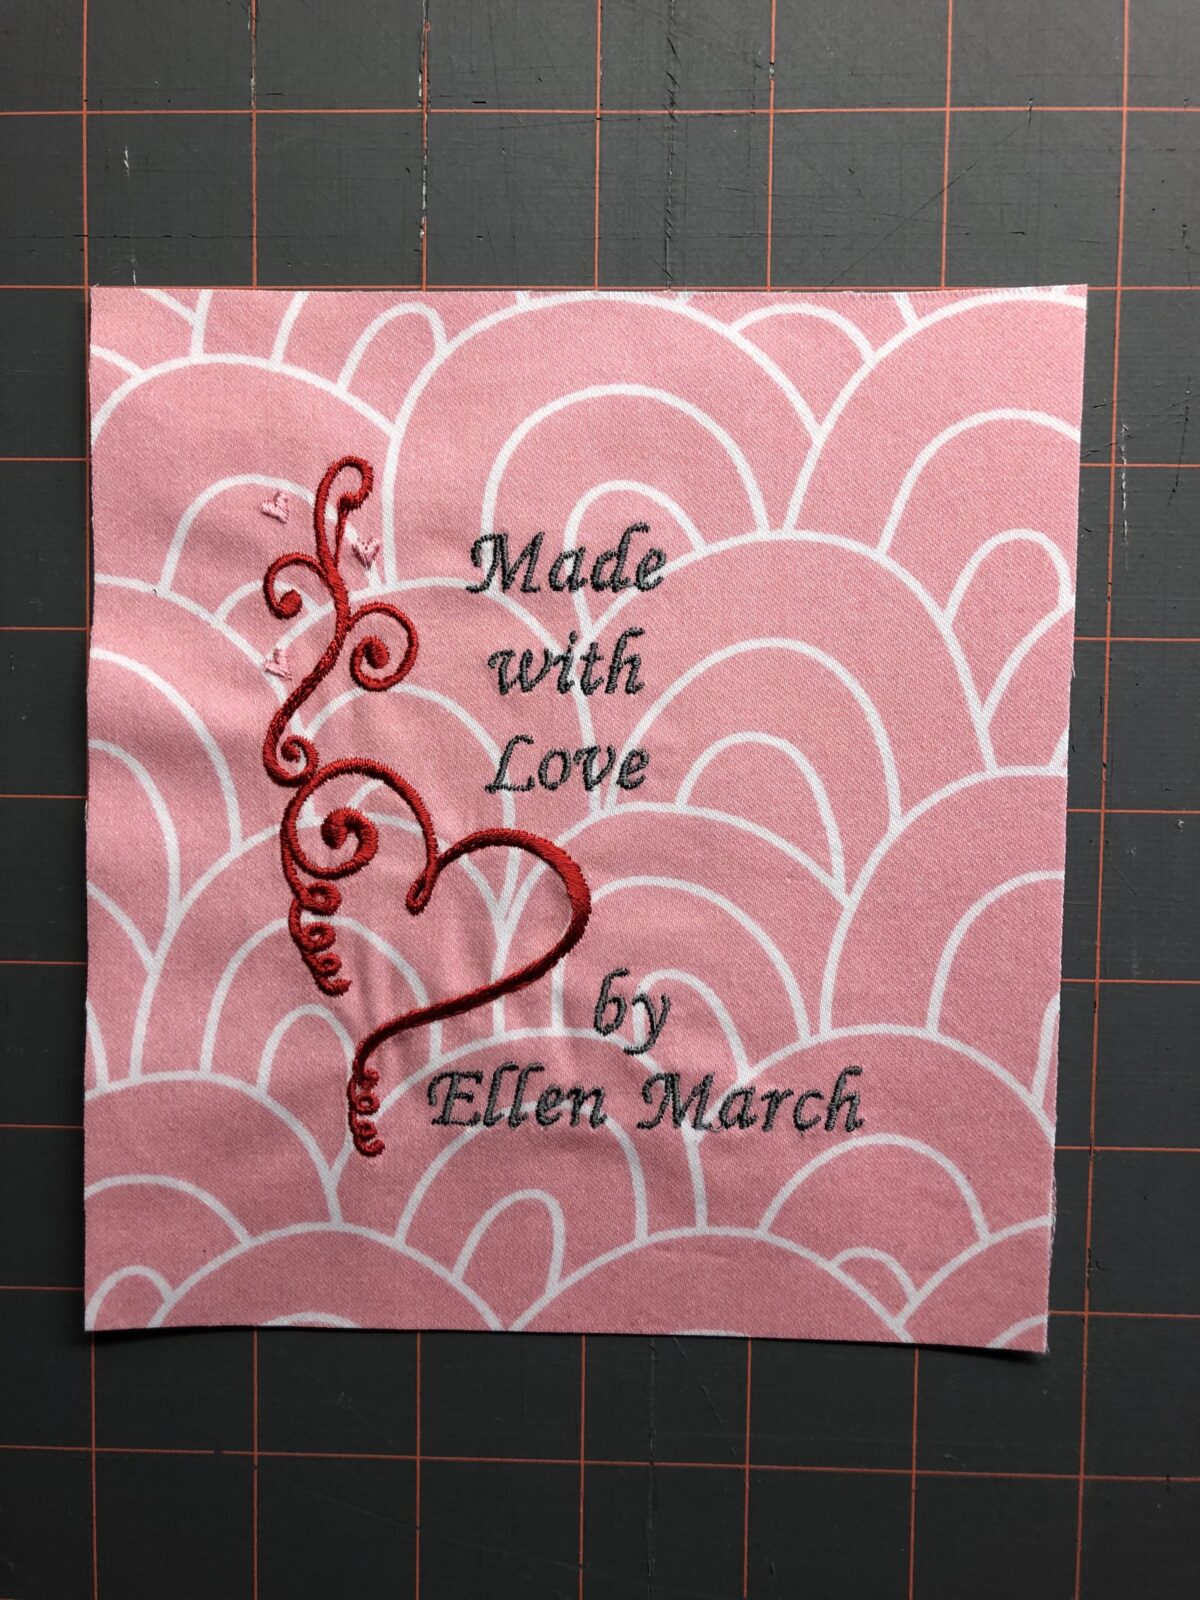
This label measures 6 ½” x 7”. The fabric is custom printed from Spoonflower and coordinates with the Sulky I Heart You Quilt pattern.
Supply List
- Fabric scraps (leftover from the quilt)
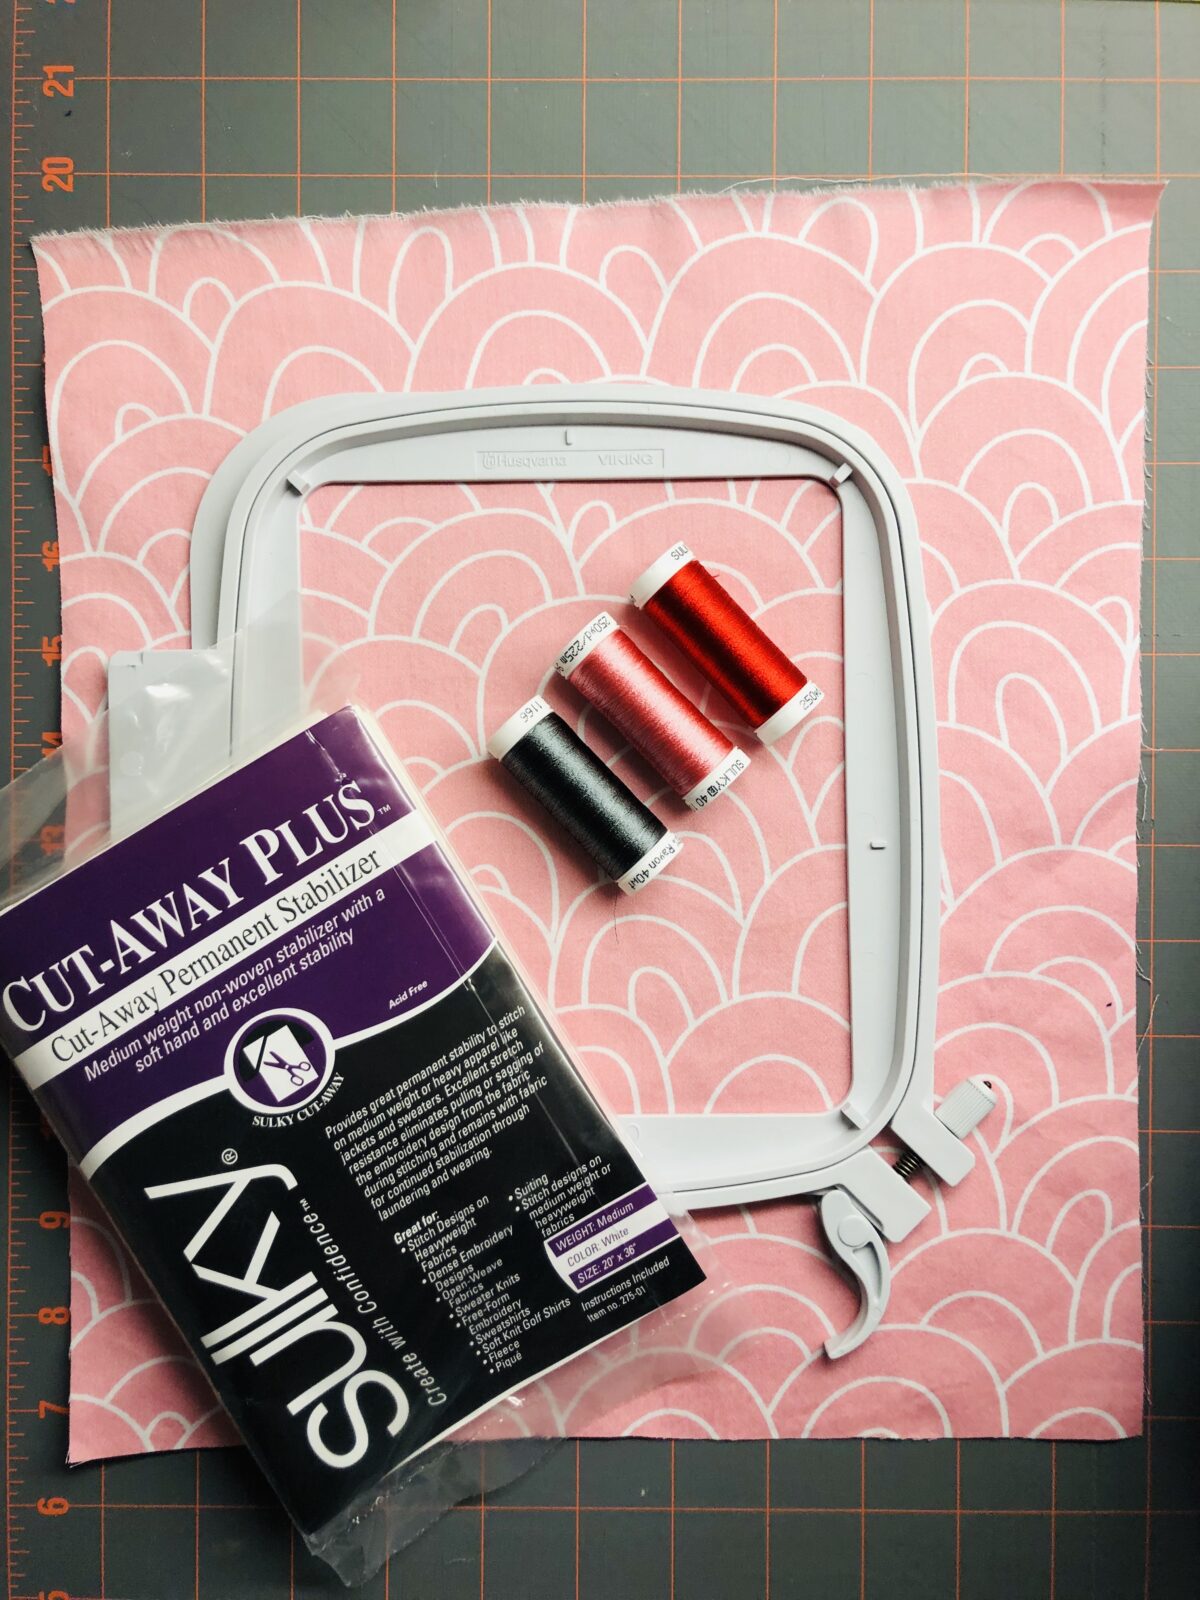
- Sulky Tear-Easy stabilizer or Sulky Cut Away Plus (depending on the fabric substrate used for the quilt, a different stabilizer may be required. Consult the Stabilizer Selection Tool to ensure the right stabilizer is used for the quilt label)
- Sulky 40 wt. Rayon thread – we recommend our I Heart You Thread Palette, which has Rayon, Holoshimmer, and Sliver, plus the Scrolling Hearts designs!
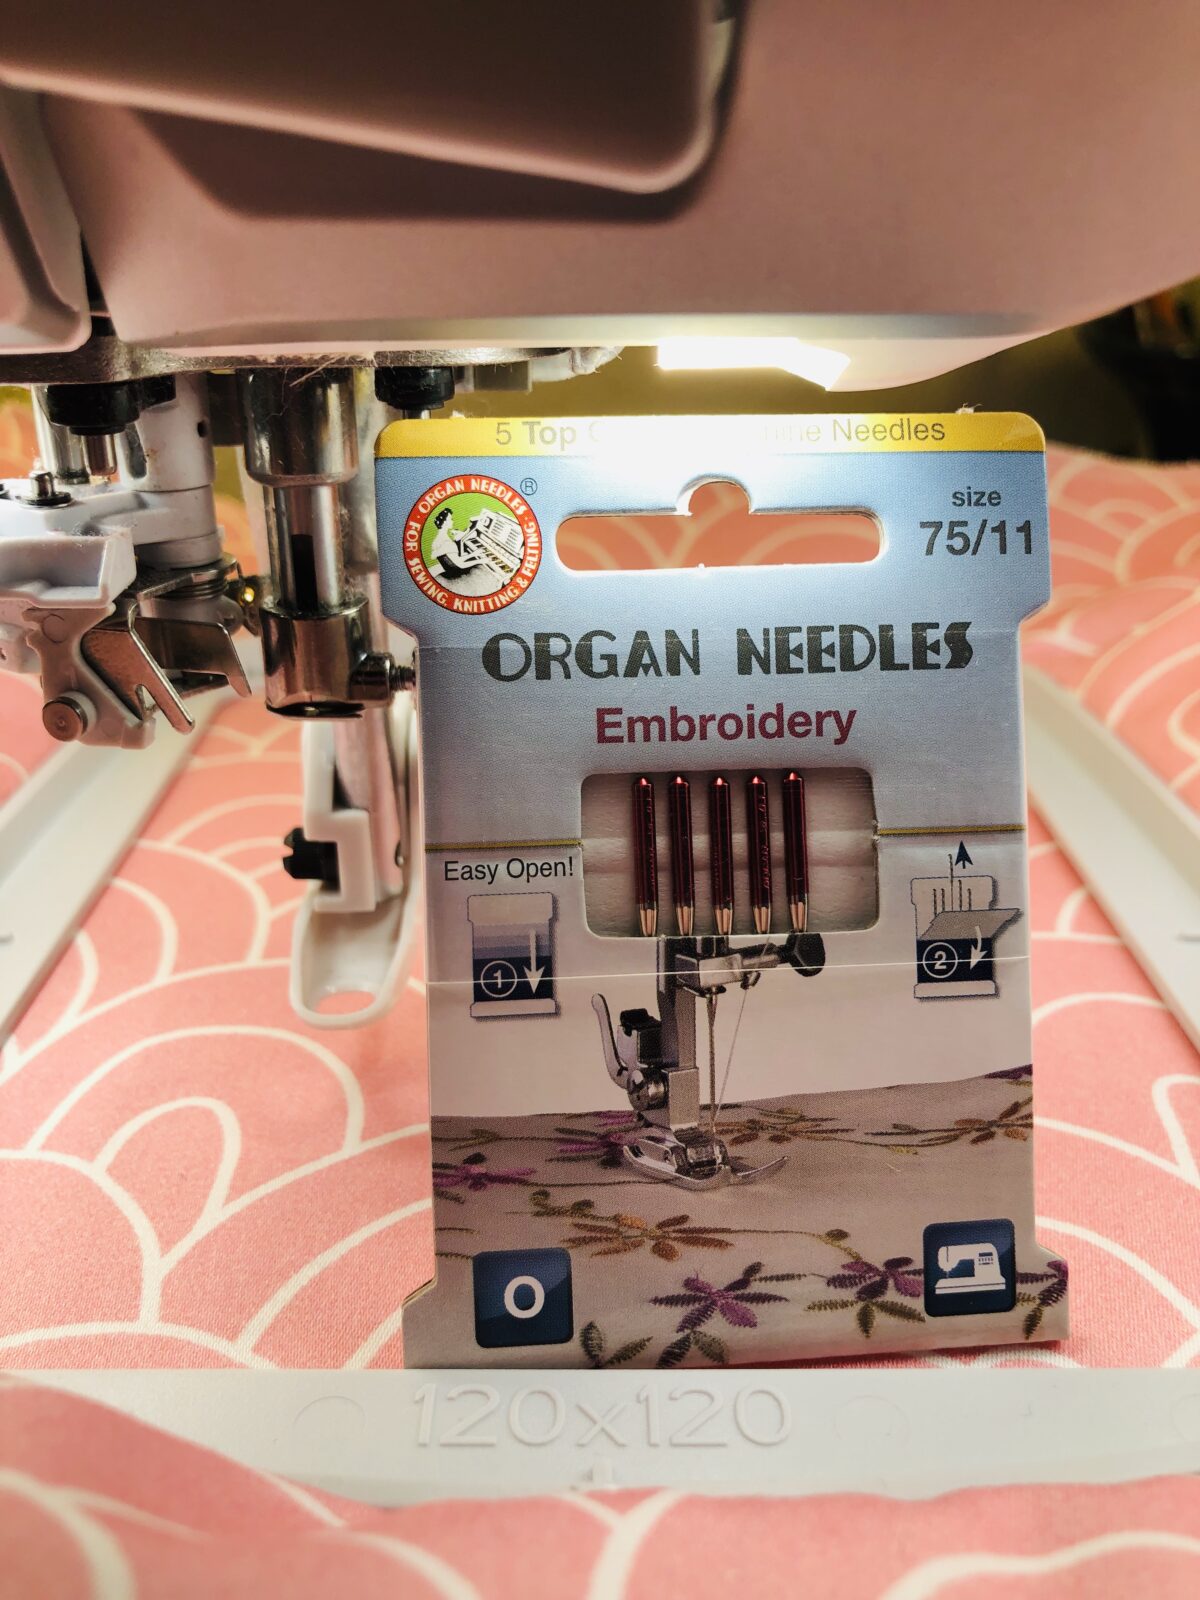
- Organ needles: Universal & Embroidery
- Hand sewing needle
- Scrolling Hearts Embroidery Designs – get them in our I Heart You Thread Palette (size depends on finished quilt label dimensions)
- Built-in lettering design (featured: Belle font from the Husqvarna Viking Designer Epic)
How To Embroider the Quilt Label
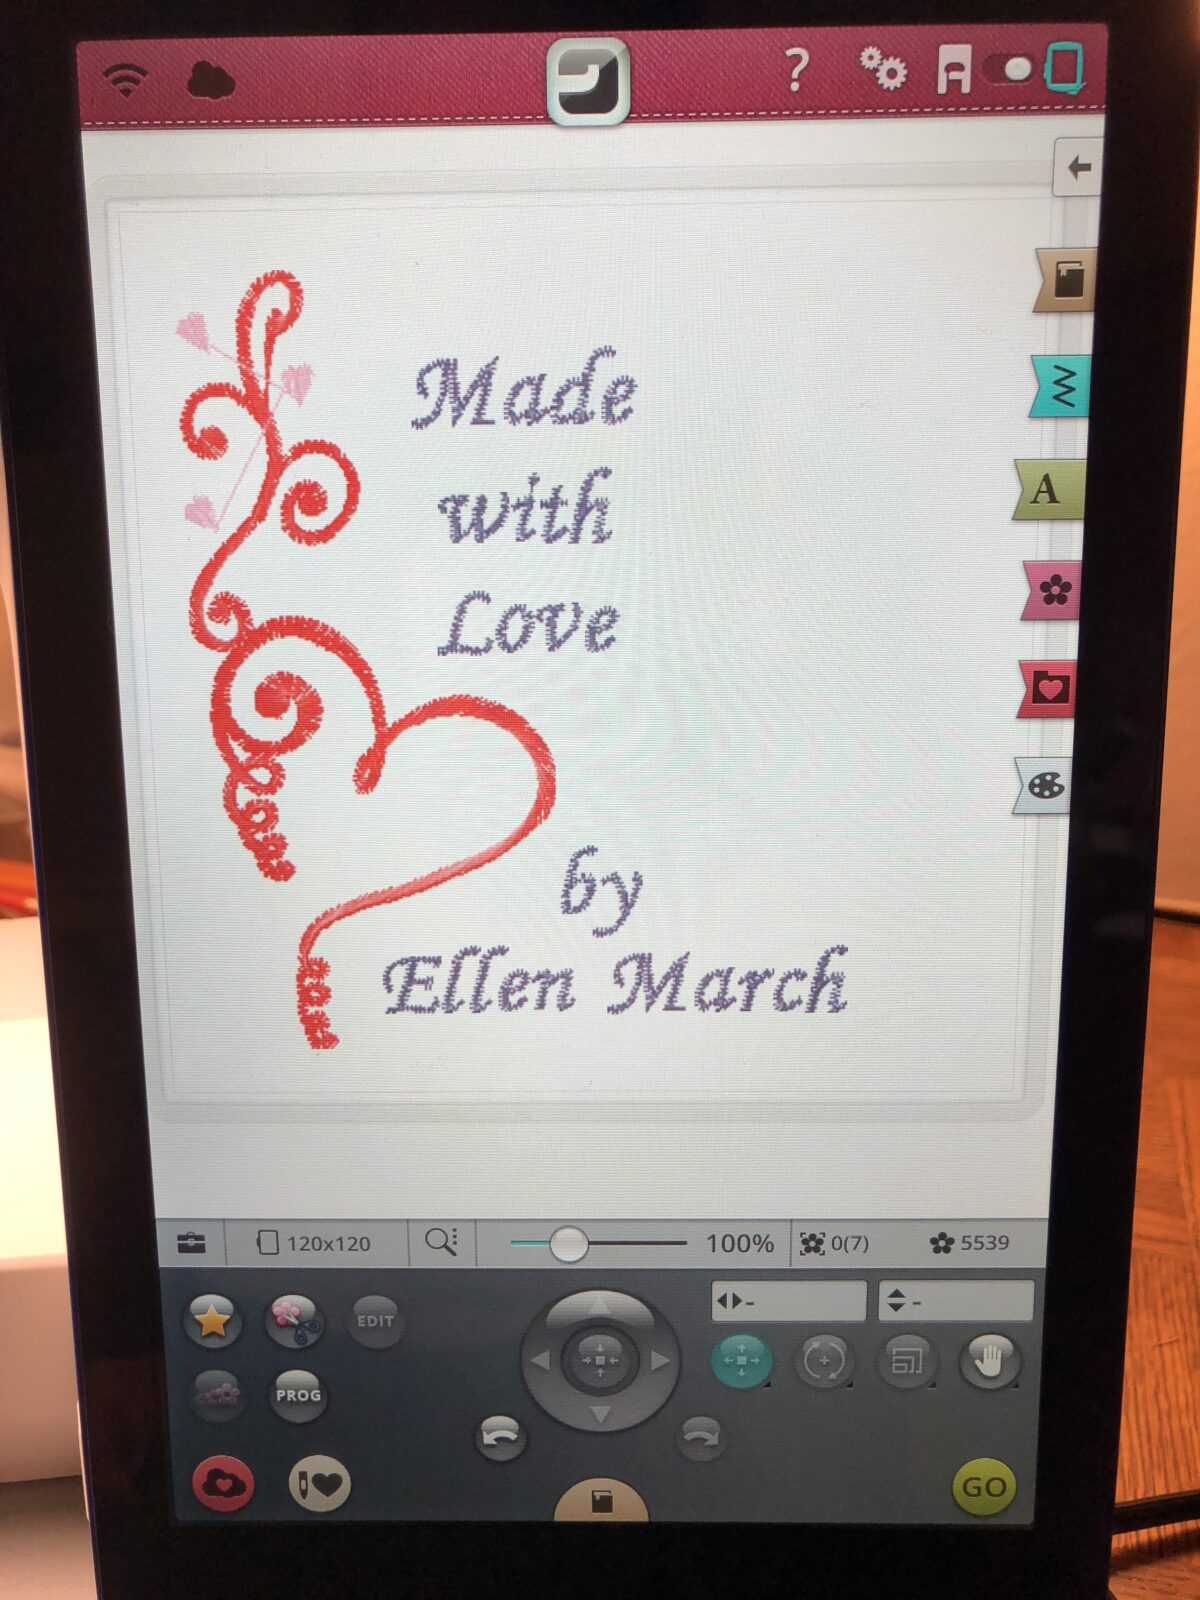
Load the design onto the machine. Use the machine editing functions to resize, move or otherwise alter the design as desired. Add a name, message or initials beside the design, above or below it. When satisfied with the design and placement of motifs within the hoop on the machine screen, group the designs and save your work.
Choose a fabric scrap for the center, making sure it’s large enough for the chosen embroidery design to fit, including seam allowances.
If the fabric is large enough to hoop, layer it with Tear-Easy stabilizer in the hoop. If it’s too small to hoop, use Sulky Sticky+, a self-adhesive tear-away stabilizer on a paper-release sheet, and then place the fabric right side up over the hooped sticky stabilizer.
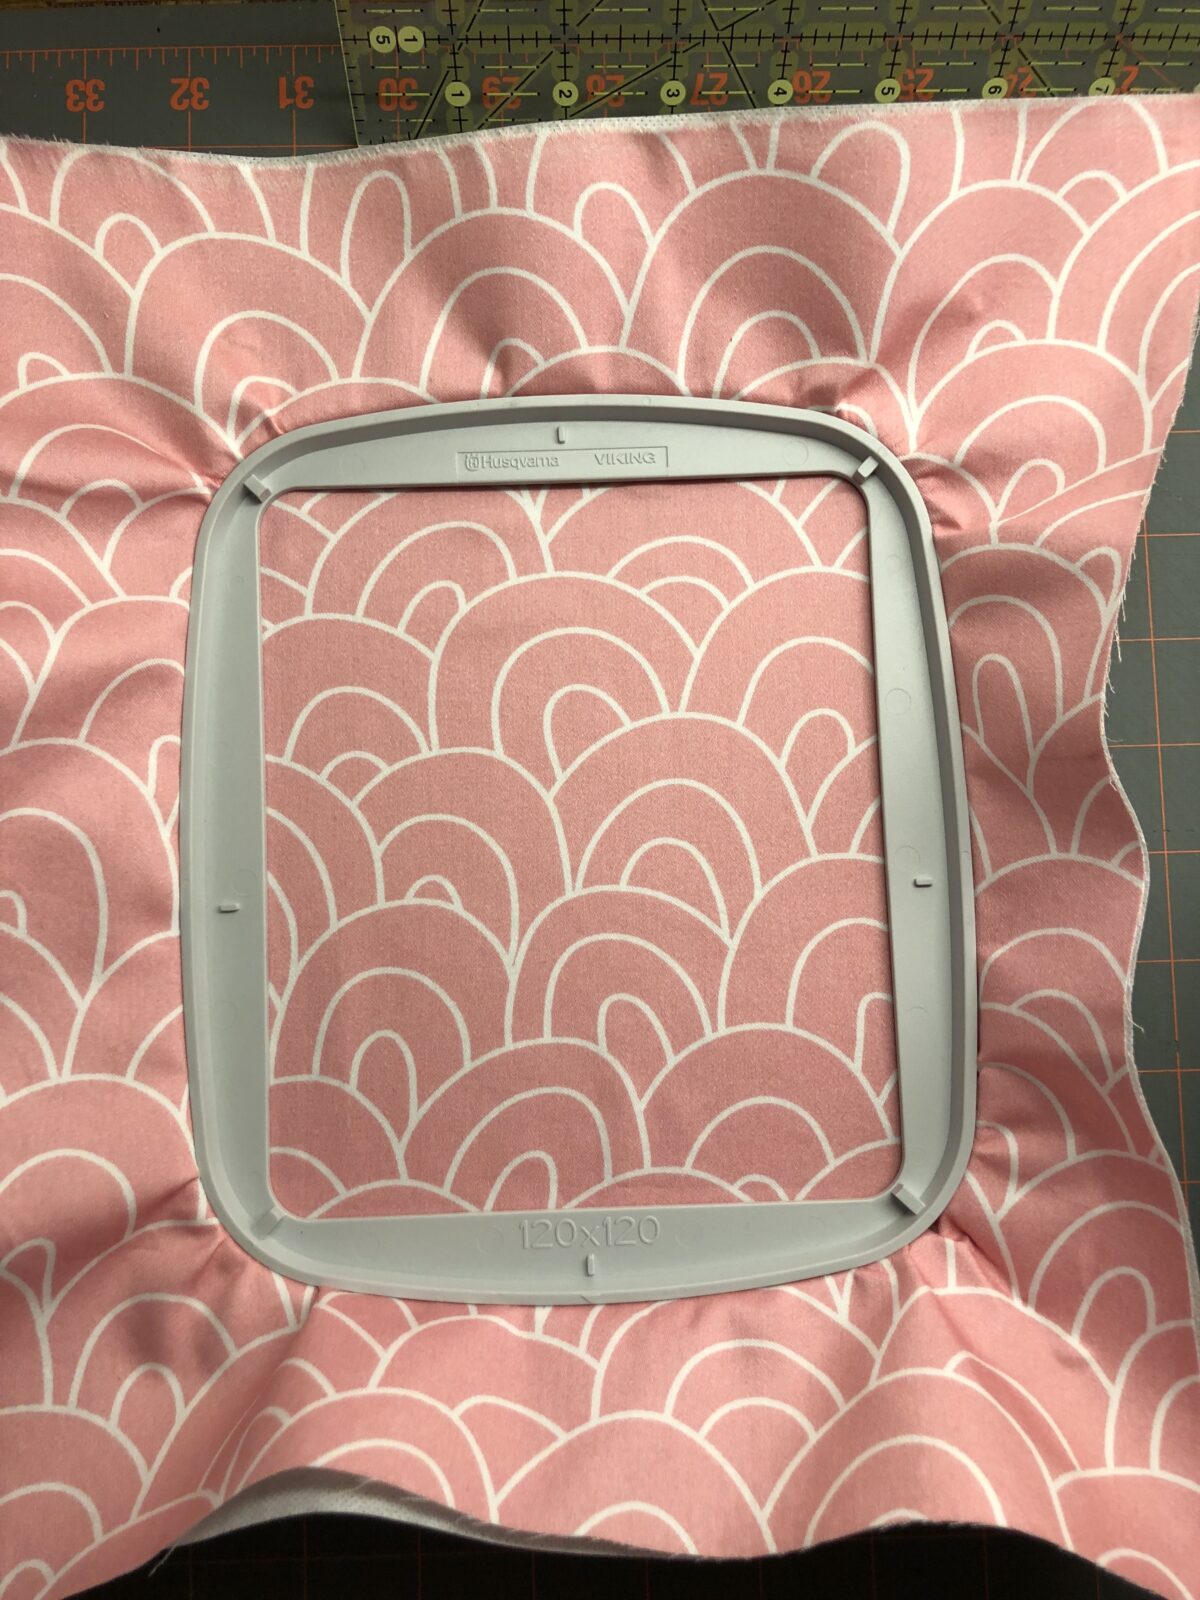
Place the hoop onto the machine. Then embroider the design using 40 wt rayon thread and an embroidery needle.
After the embroidery is complete, remove the work from the hoop. Gently remove the stabilizer from the design wrong side. Press the work from the wrong side, without steam.
How to Sew the Quilt Label
Trim the fabric to the desired size. The featured center fabric measured 5 ¾” x 6 ¼”.
Choose a fabric scrap to use for the quilt-label border. Cut 2”-wide strips long enough to cover the center-rectangle edges, including ½” seam allowances.

Stitch a strip to each center-rectangle side; press the seam toward the darker fabric. Stitch a strip to the center-rectangle upper and lower edge; press the seam toward the darker fabric.
Then fold the raw strip edges ½” toward the wrong side; press. Fold the corners at an angle before folding toward the wrong side to ensure the raw corners are concealed.
Using a universal needle and coordinating thread, edgestitch the perimeter.
Lastly, position the quilt label as desired on the quilt back. Hand sew the label to the quilt, using an invisible slipstitch or ladder stitch.

Ellen March
I am the Director of Content for Sulky of America. The former Editor in Chief of Sew News and Creative Machine Embroidery magazines, I hosted Sew it All TV on PBS for nine seasons. I've appeared on It's Sew Easy on PBS, DIY Network's Uncommon Threads, Hallmark's Marie Osmond Show, MacPhee Workshop and more! Come sew with me!


4 Comments
Millie Carter
Use to do this all the time on jackets I made. I would choose an embroidery design that matched what I chose for the jacket. I also would embroider the month and year it was done.
Glenda Marsh
I do labels for everything. But I position in a corner so that two edges are sewn into the binding edge. Before inserting I have folded down the opposite two edges & machine stitched so that I only have two edges to hand sew on. This makes it harder for that label to be removed when two sides are actually sewn into the binding area. Thanks for this tutorial
Ellen March
Hi Glenda,
Thanks for the tip! This is a great idea.
Happy Sewing!
~Ellen