
Machine Embroidery for Beginners – How to Start
Machine Embroidery for Beginners
how to get started with machine embroidery
by Pamela Cox
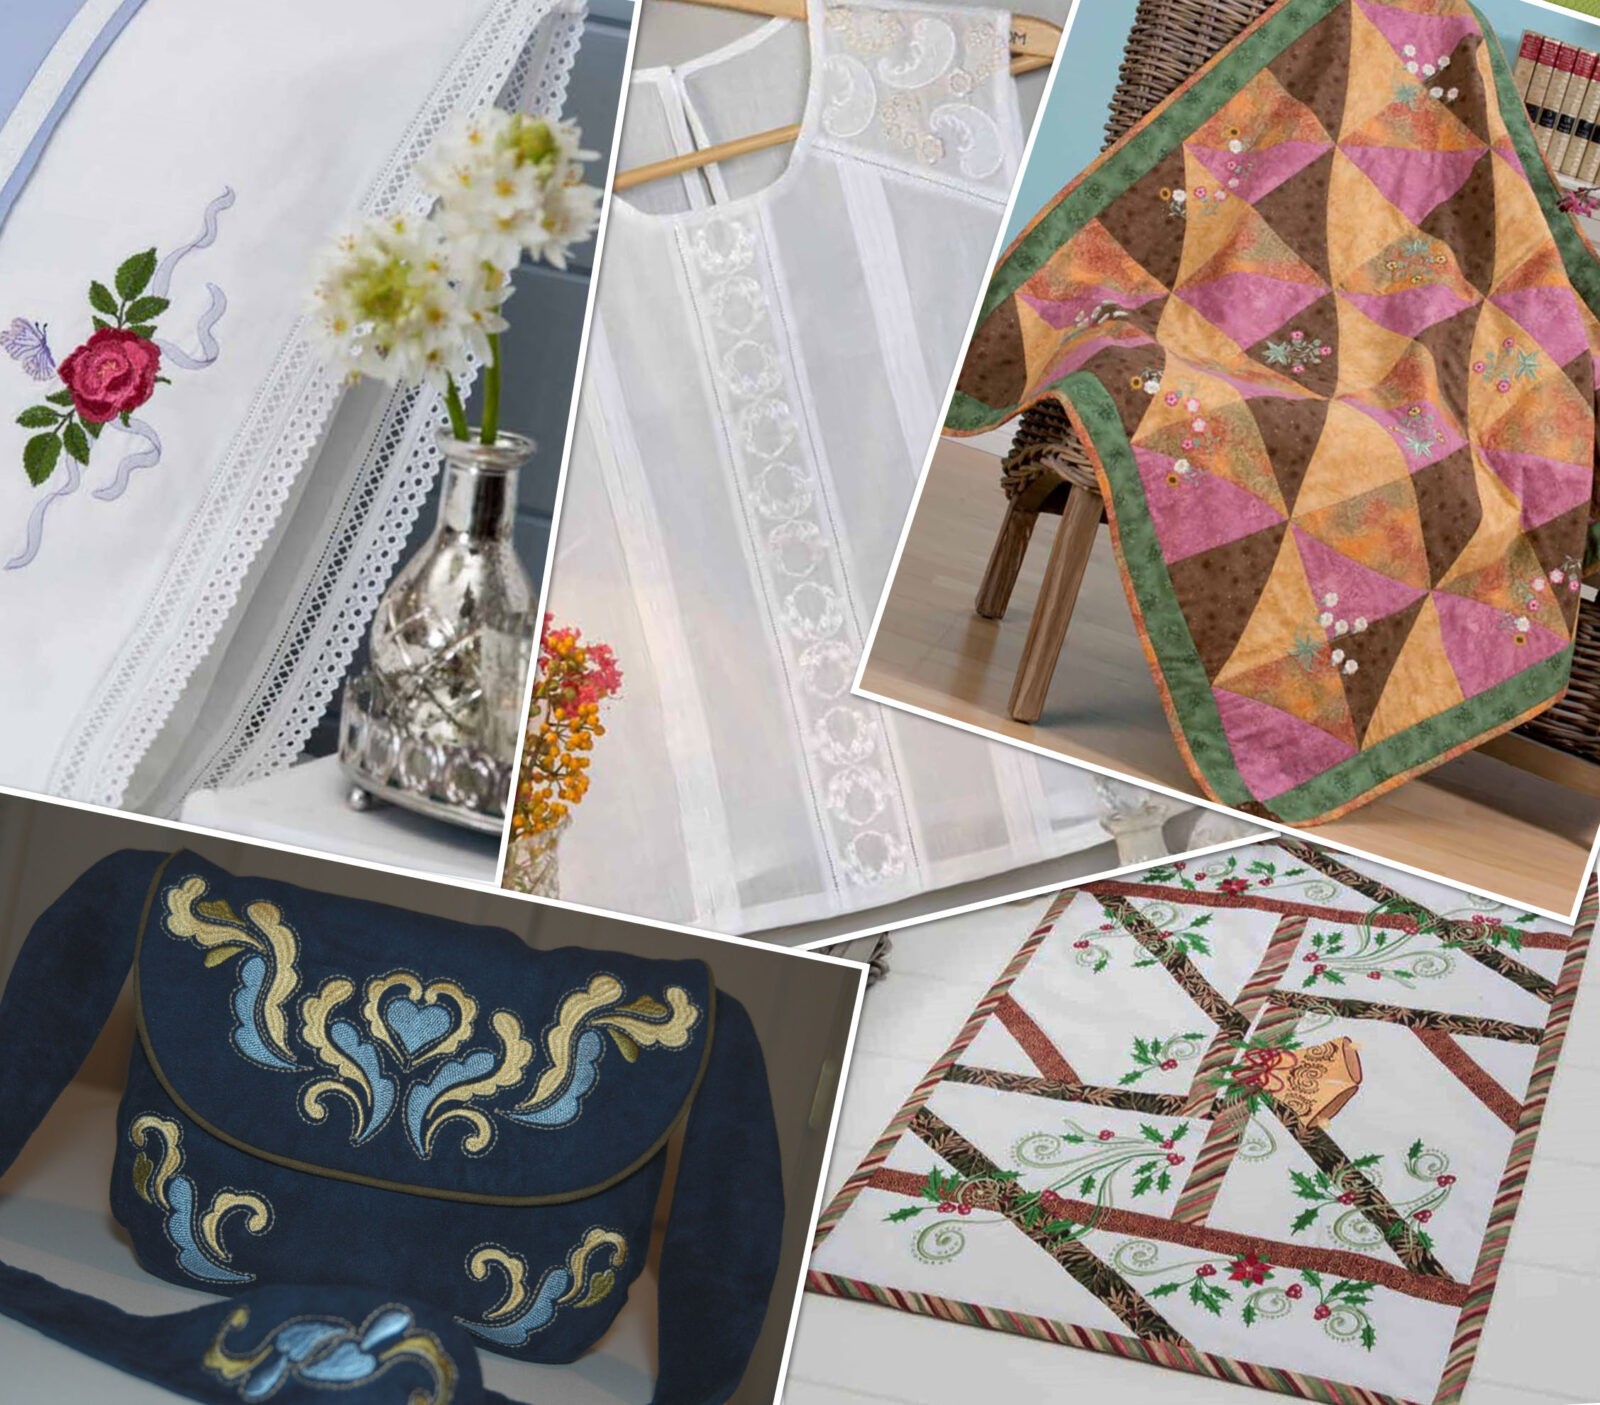
Machine embroidery is a fun sewing technique that allows you to personalize readymade items and custom sewing projects. It’s a simple embellishment to learn once you understand the fundamentals, because the machine does most of the work for you! Let’s delve in to the world of machine embroidery to see just how simple and fun it can be.
Whether you consider yourself a quilter, garment sewist, home-dec aficionado, cross-stitcher, tailor or general crafter, machine embroidery is a technique that adds another layer to your creativity. Think you need to be a super advanced sewist in order to pick up machine embroidery? Think again! We debunked that misconception, and nine other myths, in a previous post. Now we’ll focus on how to get started once you’ve decided to add this technique to your bag of tricks.
WHAT KIND OF EMBROIDERY MACHINE DO I NEED?
Obviously, a machine capable of machine embroidery is a necessity. Because machine embroidery has become so popular, most major manufactures include this function on many of their models. Purchase all sewing machines from a local, reputable dealer instead of buying a machine from a big-box store or online, where there is little to n support available after purchase. Reputable dealers offer educational classes about machine functions, properly maintain the machine at your request and often bring in knowledgeable instructors for inspirational project classes. This type of support is an invaluable bonus to your purchase.
The cost of an embroidery machine ranges from less than $500 to more than $10,000. Lower-priced machines limit the stitching size of a single design, but they don’t necessarily limit the embroidery quality. If you only ever want to stitch 4”x4” designs on patches for a quilt or on a placemat or as a garment accent, a low-cost machine model with standard accessories may be all you need.
Just because a machine only accommodates a small hoop, does not mean that larger layouts can’t be done. However, doing so will require more steps. So while a less expensive machine does not limit creativity, a higher priced model will make your dream easier to create.
As the price of a machine increases, so do the benefits. The most notable is that the machine accepts a larger hoop size, translating into a larger design embroidered as a single unit. 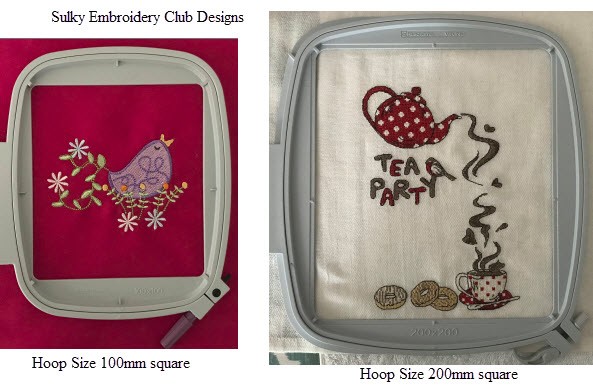 The ability to add letters to an existing design, always a welcomed accent, is often an additional function of mid-range machines.
MACHINE FUNCTIONALITY
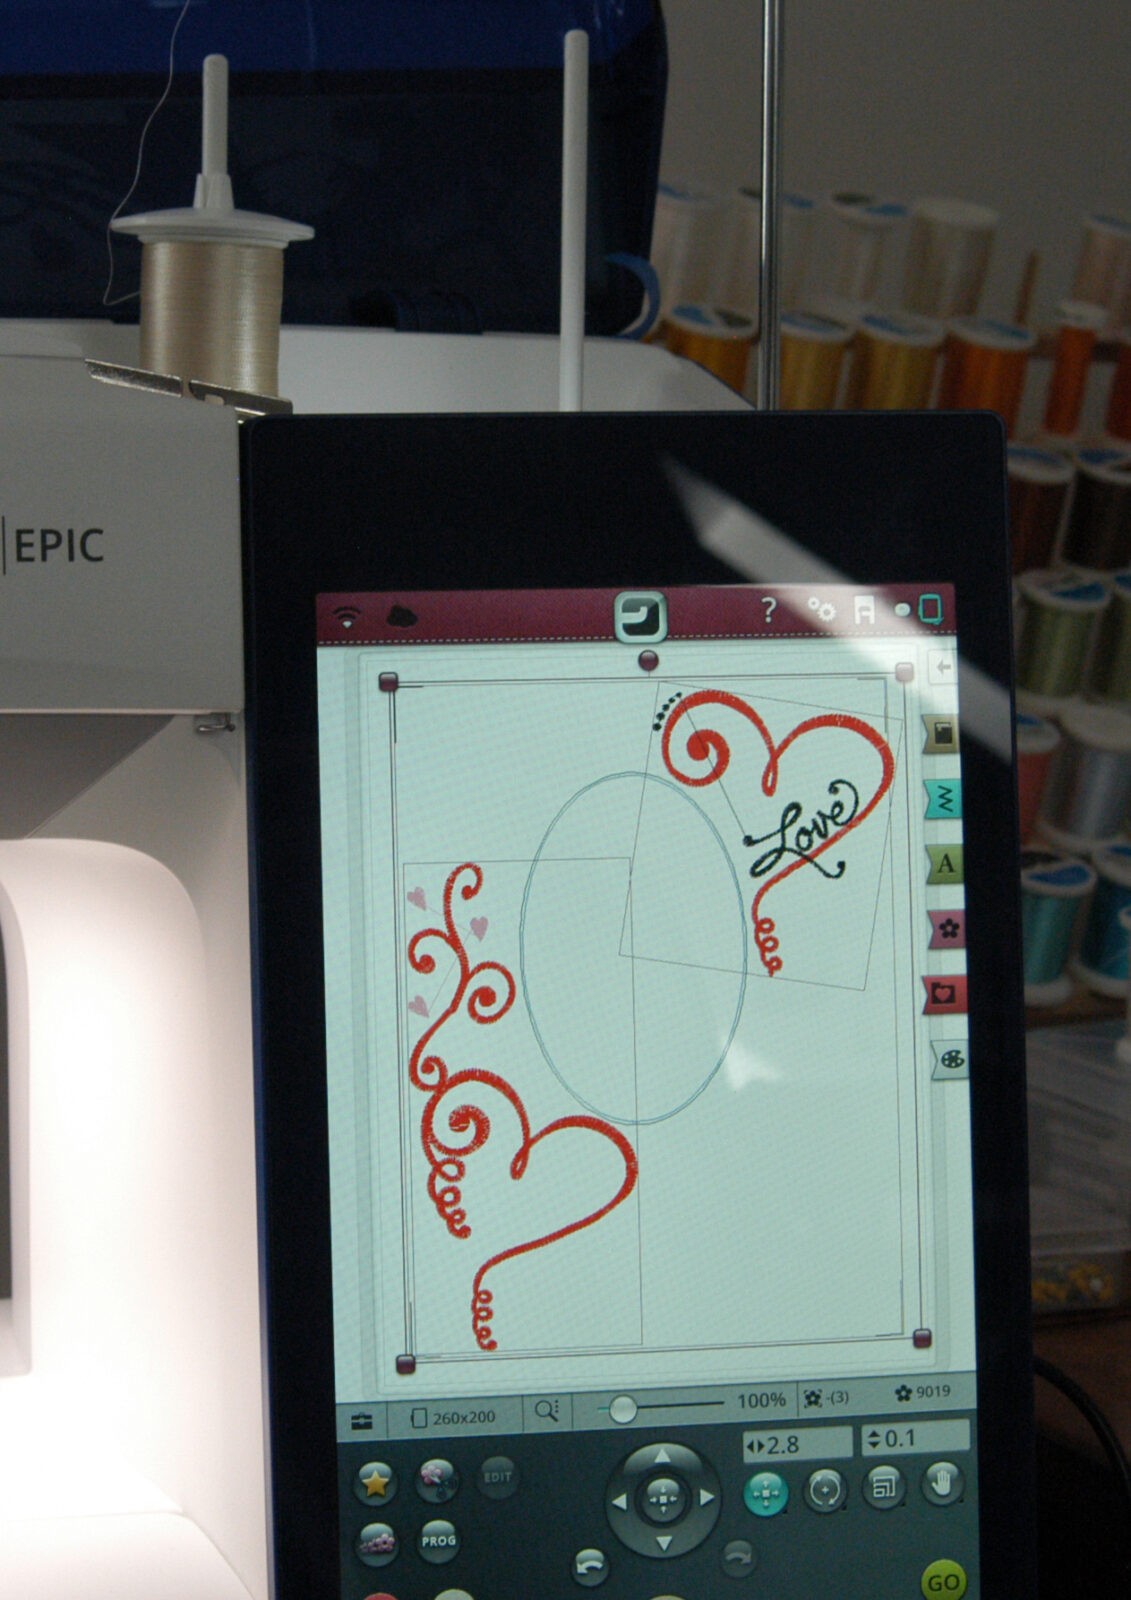
Higher priced embroidery machines offer many more embroidery functions, all of which are calculated to make the embroidery process easier. One luxury is “exact design placement.” If the machine supports design location systems, either with a built-in camera or the ability to match specific points, the time spent trying to achieve perfect placement is greatly reduced. Either method is more accurate, and easier, than manually measuring and hand-basting guidelines or using templates.
When purchasing a machine, the best advice is to do your homework. Understand the advantages one model might have over another. Evaluate your embroidery needs. However, don’t sell yourself short! If you go with a machine that only does embroidery, one day you may want a combo machine that easily switches from embroidery to sewing by swapping the module. Or perhaps you go with a low-cost model to save money but quickly realize that some designs you love won’t fit in the available hoop areas. Maybe right now all you want to do is embroider on a bib or receiving blanket. But this will lead to more wants and needs, and the upfront investment of an upgrade may be worth it in the long run.
Once you begin the art of machine embroidery, you’ll want to embroider everything you see. You won’t want to be limited by hoop size, or design size, or design type. But your first embroidery machine will be a great teacher, no matter your budget. You may or may not be inspired to invest in a machine that offers easier ways to accomplish your design goals.

STARTER SUPPLIES
Other than am embroidery machine, a few additional supplies are necessary to have on hand: fabric (a tightly woven cotton fabric such as broadcloth, is the easiest), a hoop, stabilizer, thread and a design.

Machine Embroidery Hoops
Machine embroidery hoops are available in a variety of sizes and shapes including “specialty” ones, such as “endless hoops” used when embroidering a long-repeated border or a “magnetic hoop” that anchors the base fabric without stressing fibers within the hoop frame.

Not all hoops are compatible with all embroidery machines. Machines that are capable of embroidery should include at least one compatible hoop in the accessory package. Since many machines restrict the size or shape of the hoop, always refer to the machine manual for additional information before purchasing additional hoops.
Until you are truly satisfied that this machine is the final one for you, or at least that this machine brand is the perfect fit, do not purchase a lot of extra accessories. Accessories are often limited to specific manufacturers and will not be compatible on other machines.
Embroidery Designs
Embroidery machines usually have at least a few built-in designs. Some machines have hundreds, while others have less than 100. The price of the machine usually affects the number of built-in designs. Every machine brand has its own file format that the computer recognizes. Refer to the machine manual to identify the proper file format as well as design size limitations prior to purchasing any additional designs.
Stabilizer
What’s the difference between an interfacing and stabilizer? Interfacing is designed to stay in place, adding body or stiffness to a specific area, such as the collar or cuffs of a garment, while stabilizer offers additional support underneath an area where heavy stitching is applied.
There are three basic categories of Stabilizers: cut-away, tear-away, water-soluble. Each name implies the method in which the excess stabilizer is removed from the wrong side/parameters of an embroidered design.
Within each category, there are a couple of weights/thicknesses, colors, or maybe a fusible option or one with a sticky surface. One is not necessarily better than another, however some options are a better choice under specific circumstances.
Initially, it’s more important to have one of each stabilizer type than it is to have multiple stabilizer options.
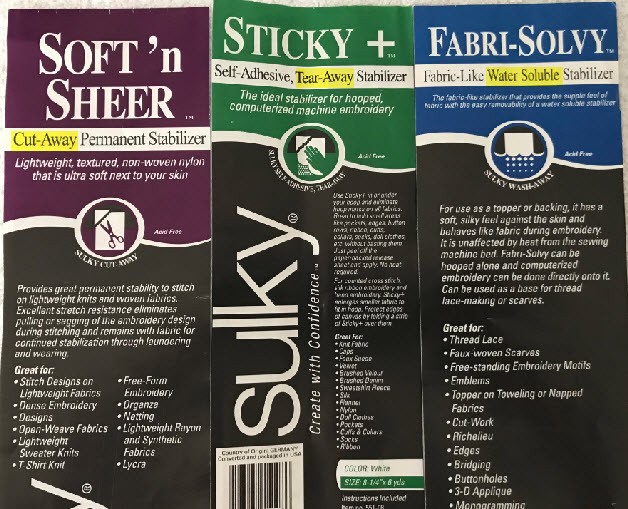
Sulky® Soft ’n Sheer™, a cut-away stabilizer, is a must! It isn’t the end-all answer to every embroidery need, but it does come close. It is very lightweight, so it doesn’t affect the drape of lighter fabric. However, it offers enough additional support to designs stitched on heavier fabrics. It is a strong, fabric-like material, easy to handle during the hooping process.

Sulky® Sticky +™, is a tear-away stabilizer that has a sticky surface. The paper-covered stabilizer is directly secured in the hoop. The paper is then removed from inside the frame exposing a sticky surface. Fabric is securely held in place during the stitching process by pressing it to the sticky surface, yet the excess stabilizer easily tears away from the design edges. his stabilizer is perfect for heavier fabrics that can’t be easily hooped.
Sulky® Fabri-Solvy™ is the perfect wash-away stabilizer to keep on hand. It, too, is a strong fabric-like material that hoops easily. It can accept direct stitching for freestanding lace designs or used as a “topper” for napped fabrics, allowing embroidery stitches to sit on top of, rather than sinking into, the fabric texture.
As skills and interests develop, add specialty stabilizers, such as Sulky® Heat-Away Clear Film™ used when embroidering on non-washable napped fabrics, or Fuse ‘n Stitch™ used when extra stiffness is permanently required. Consider purchasing a Sulky Stabilizer Sampler to try out different varieties. Also available are stabilizer bundles, which offer a great savings compared to buying a la carte.
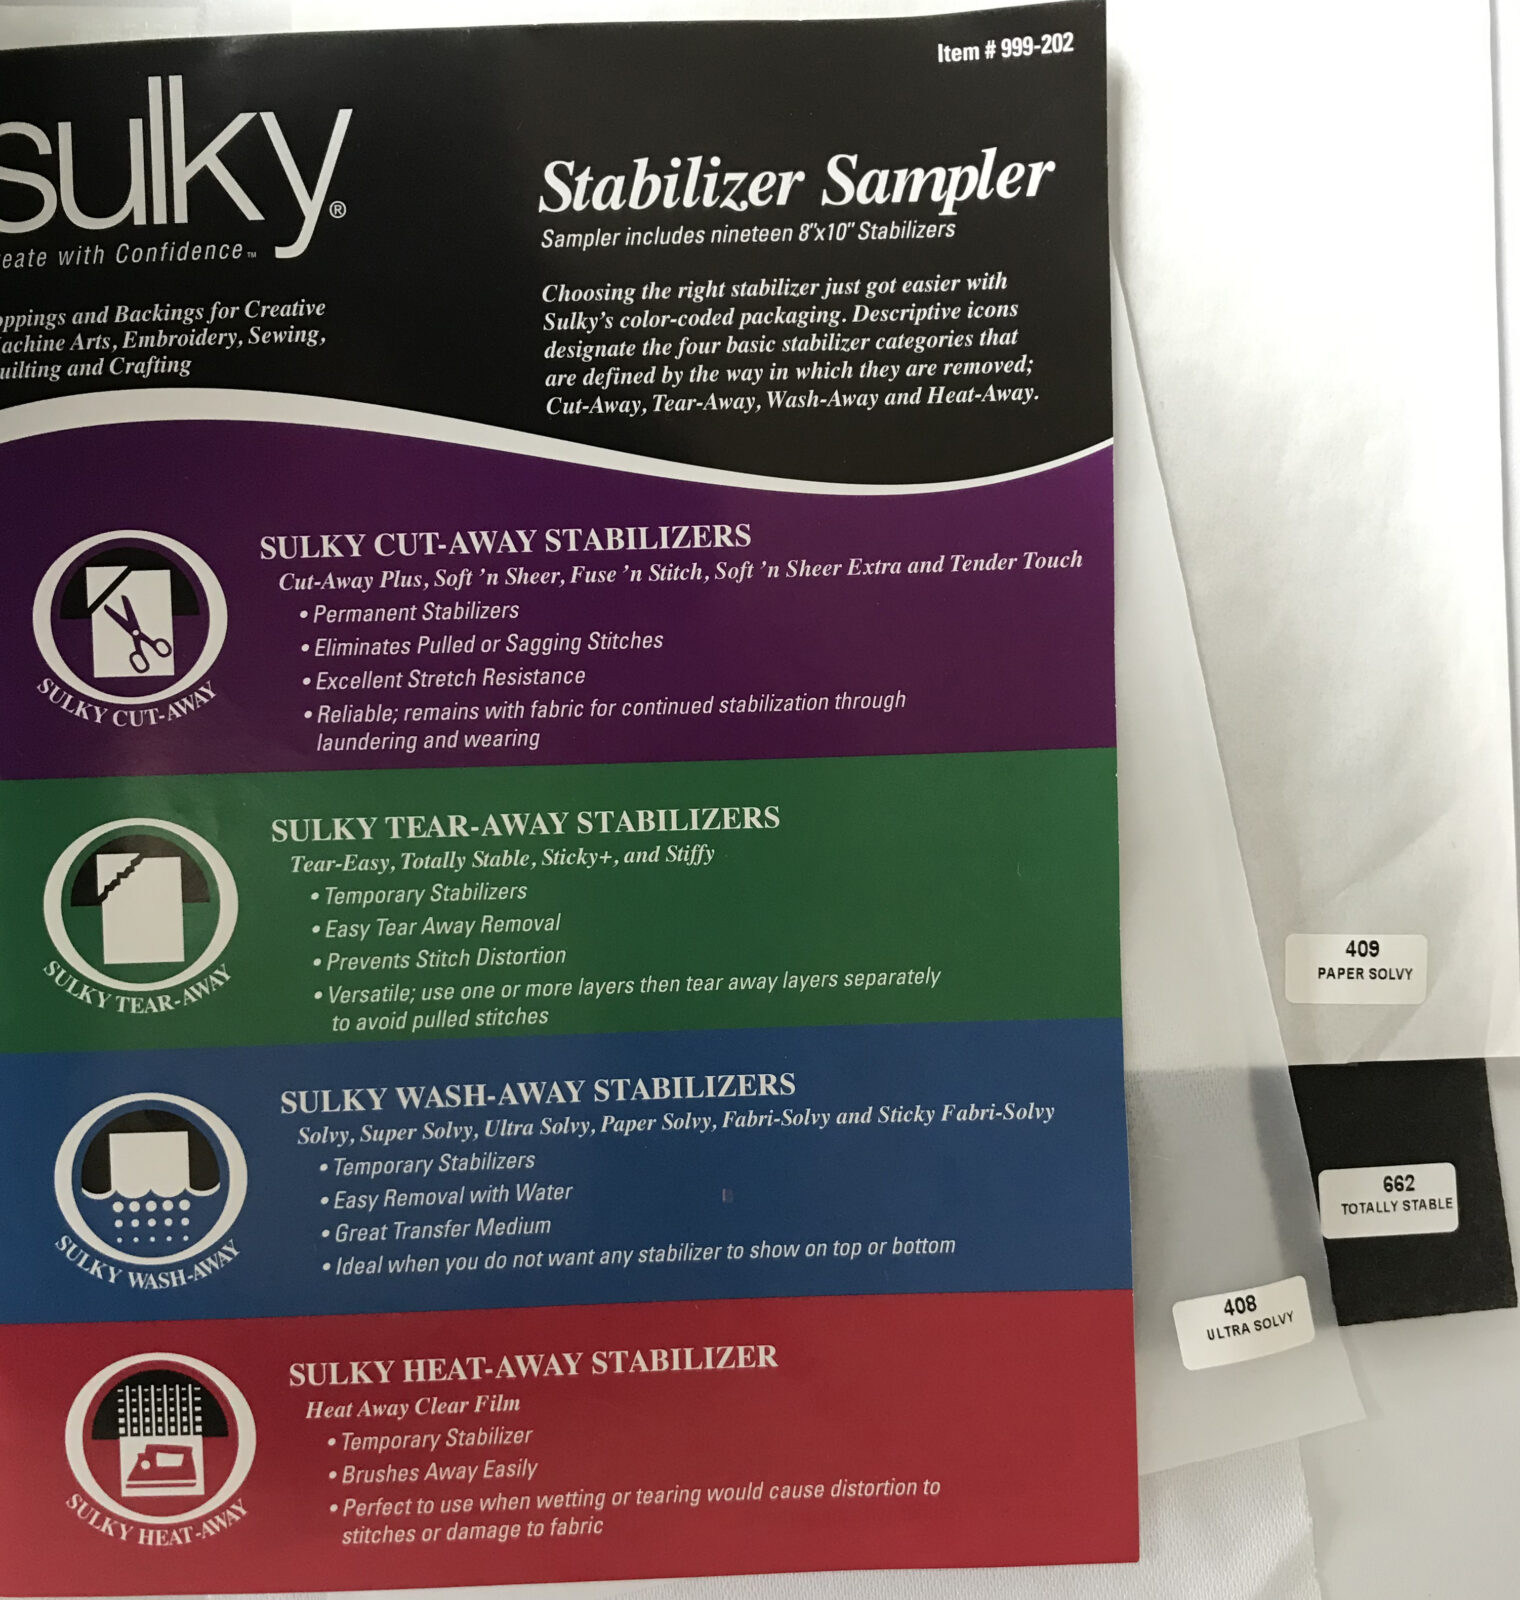
By using the sampler pack, you may discover a stabilizer that you wouldn’t have tried before. For example, I discovered that Sulky Tender Touch™ protects the wearer from scratchy threads and extends the life of the stitchout. This technique was one I had never tried before experimenting with the sampler pack and now a technique I always use.

Thread
Think of thread as your painting pallet. Sulky® offers diverse color assortments in a variety of thread weights and fiber content. All threads are produced to meet the highest standards. Quality thread stitches more evenly, withstands friction during the stitching process and stands the test of time.
40 wt. Rayon thread is the most popular choice for machine embroidery. Sulky Rayon is made from superior raw materials so it stitches as a shiny, smooth surface. Sulky offers several 40wt Rayon collections to help you get started in machine embroidery.

Although Rayon thread is the thread most often used in machine embroidery, many other thread types are suitable for machine embroidery. Sulky® Metallic, Sliver™ Metallic or Holoshimmer™ Metallic add a bit of sparkle and are super fun to use.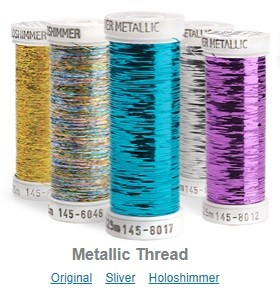
Poly Deco™ is a 40 wt. polyester thread, perfect for projects that will be bleached or washed frequently. PolyLite™ is a 60 wt. thread, which I always use in the bobbin and match to the top Rayon thread when embroidering.
Other available threads that work well with machine embroidery are Glowy™, which really does glow in the dark, and Sulky Blendables®. All of these threads provide additional interest and fun effects to any embroidery design.
 Blendables® #4030 Embroidery Library Design #537275
THE FIRST STITCHOUT
Once you outfit your sewing room with the tools you need to succeed with machine embroidery, you’re ready for your first stitchout. We’ll explore this in depth and provide tips and techniques to ensure you have confidence at the machine. Get ready by reading your machine manual, and find a spot to keep it handy at all times.
Stay tuned for our next post, when we explore how to hoop fabric with stabilizer, how to decipher embroidery color charts and what to do after pressing “start.”


2 Comments
Chicqua e Wilson
THANK ,A BUY MY FIRST YEARS AGO AND NEVER UNDERSTAND ANY NOW TOUSED IT THEY DONT EVEN UP GRADE IT SO I CAN USED IT ANYMORE.,SO I SAY THANK FOR IS BLOG BECAUSE IF I HAD IS I WOULD NOT HAVE MADE THAT MISTAKE
epicstitch
Your words are beautiful and will mean a lot to many people! Thank you. I love your blog.