
Mother’s Day Table Runner to Embroider, Sew & Quilt
Mother’s Day Table Runner
by Ellen March
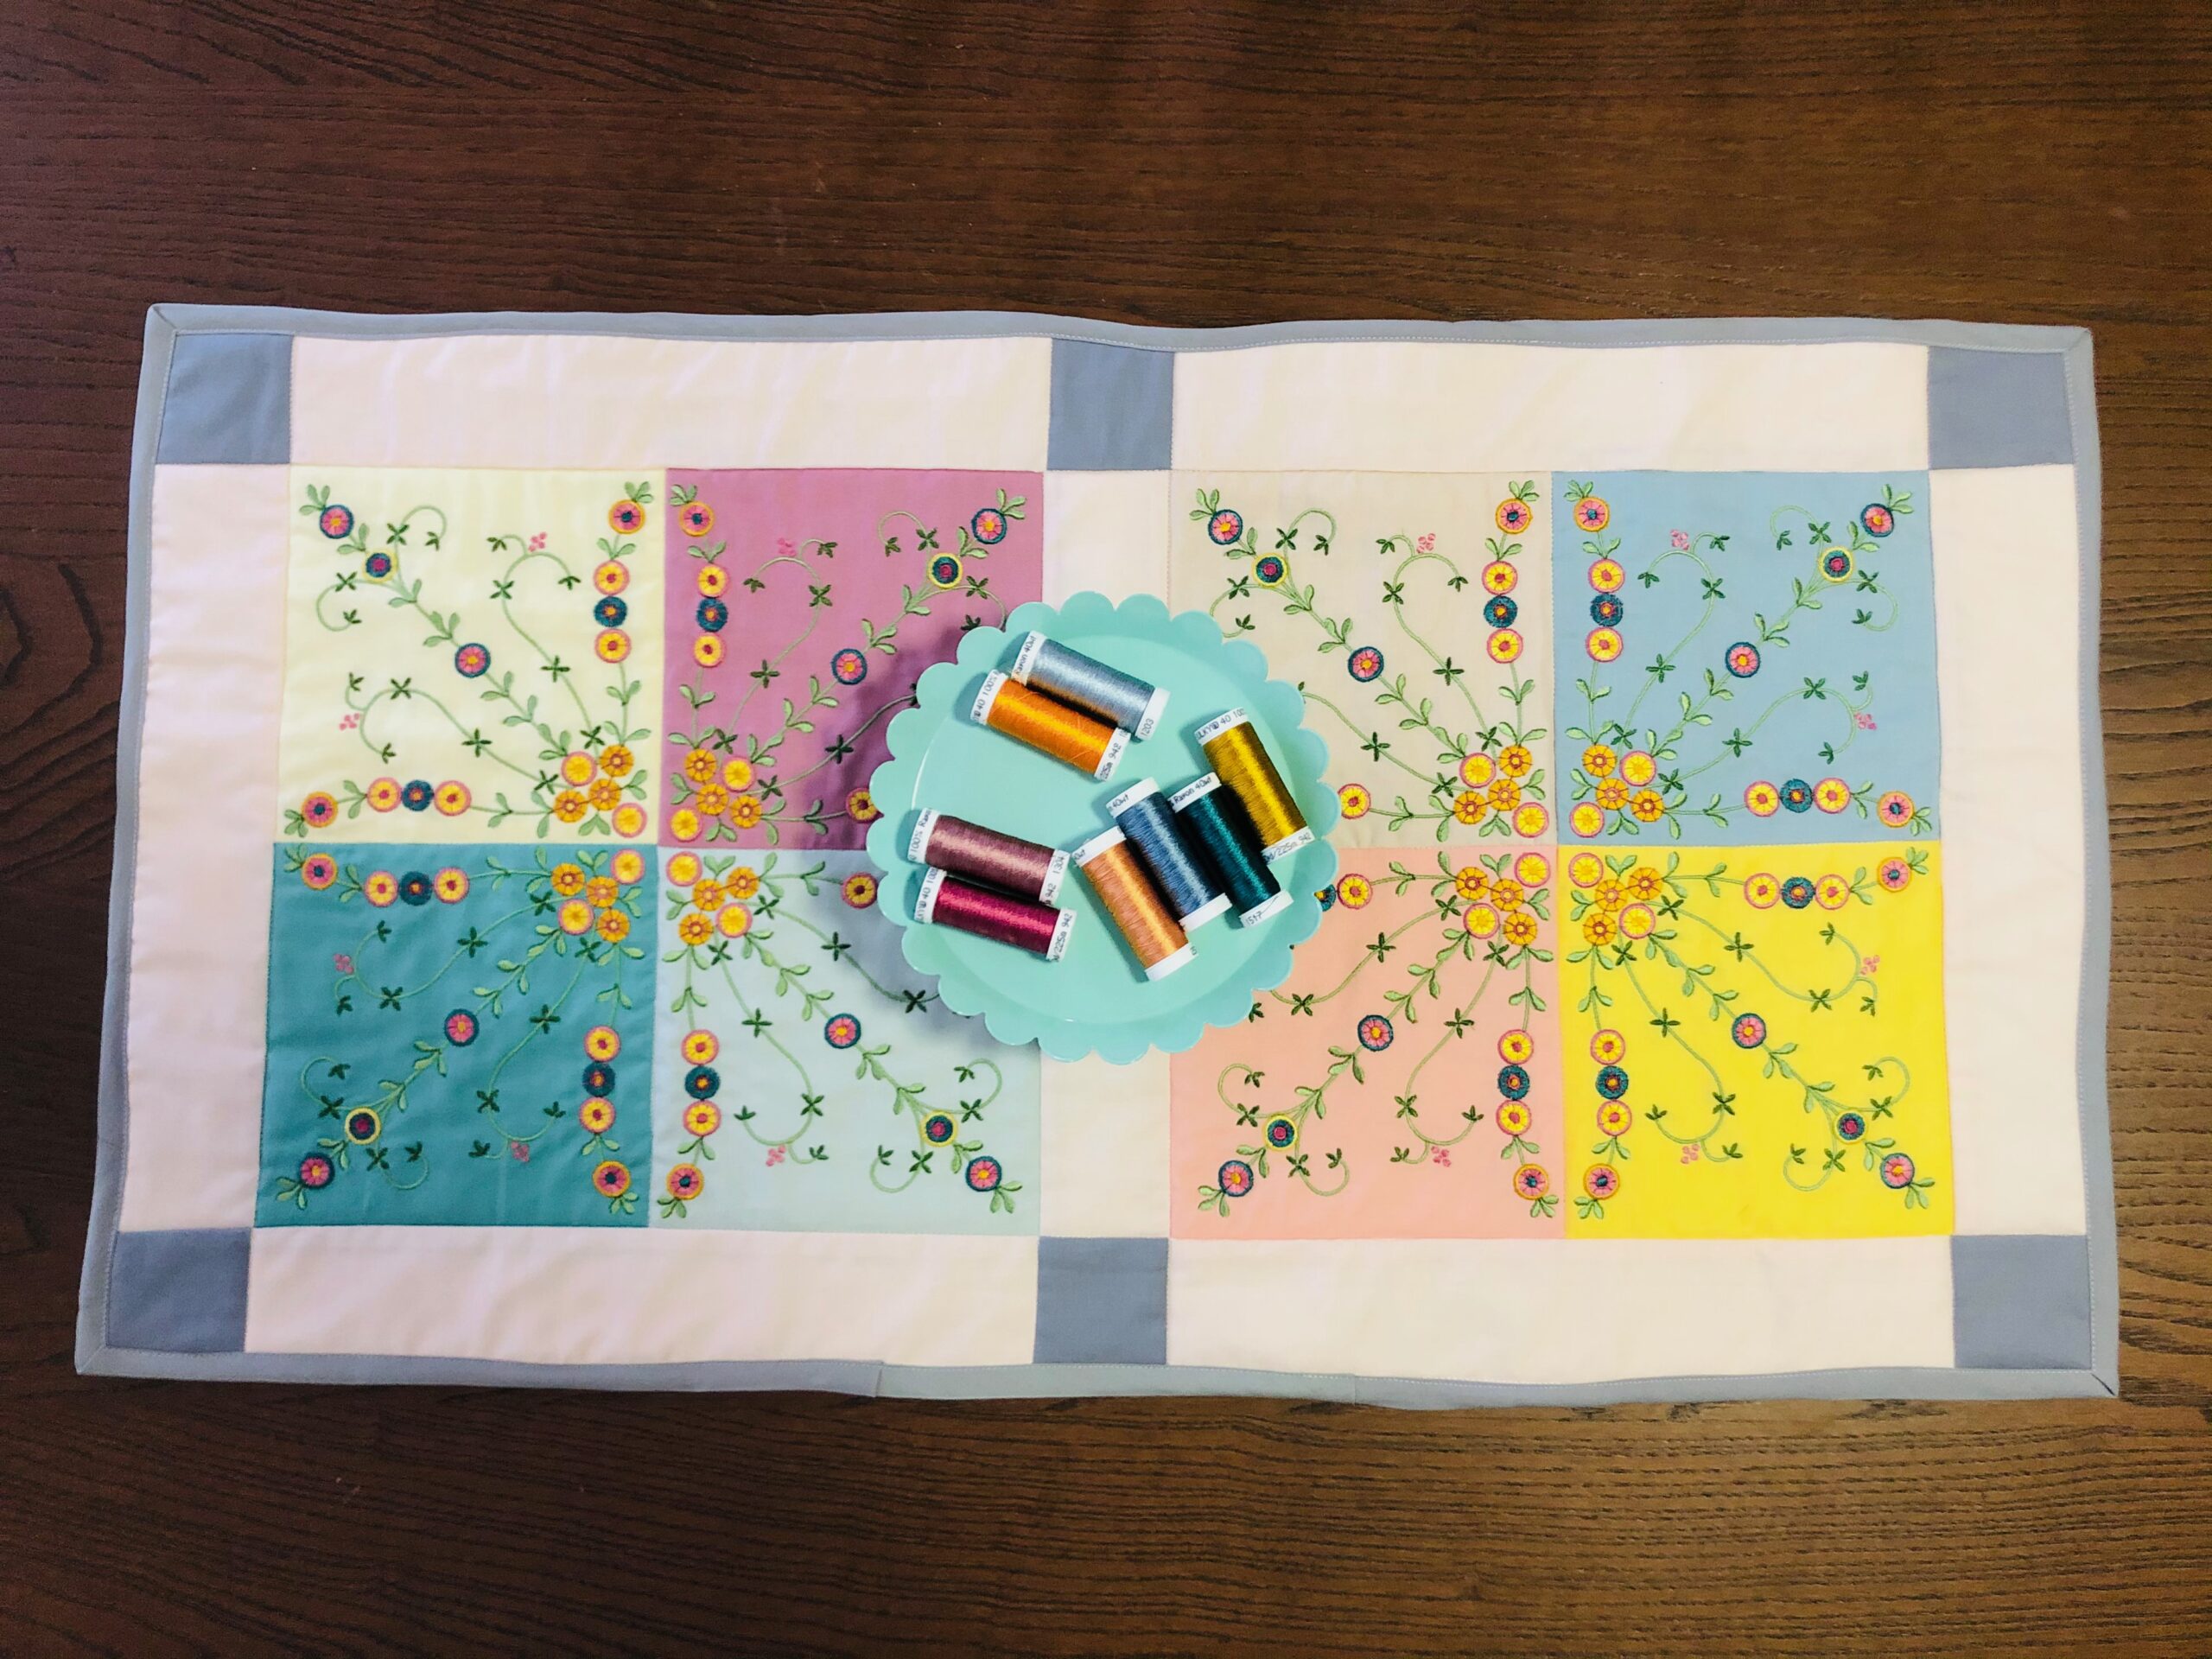
Create a floral embroidered table runner that’s perfect for a Mother’s Day brunch or spring baby shower. Choose a collection of spring colors for each fabric paired with shiny Sulky Rayon Thread for an impactful, pretty piece. Customize the Mother’s Day Table Runner by adding more blocks to make it as long as you wish. Or create a larger quilt or wall hanging using the same methods.
SUPPLIES
- Sulky 40 wt. Rayon Thread (colors as determined by chosen embroidery design)
- Sulky 60 wt. Bobbin Thread
- Organ® Needles: 75/11 Embroidery & 70/10 Microtex
- Sulky Sticky+™ Stabilizer
- Sticky+ Slitting Pen (optional)
- KK 2000™ Temporary Spray Adhesive
- Matching or coordinating Sulky 50 wt. Cotton Thread for quilting
- Clover® Wonder Clips
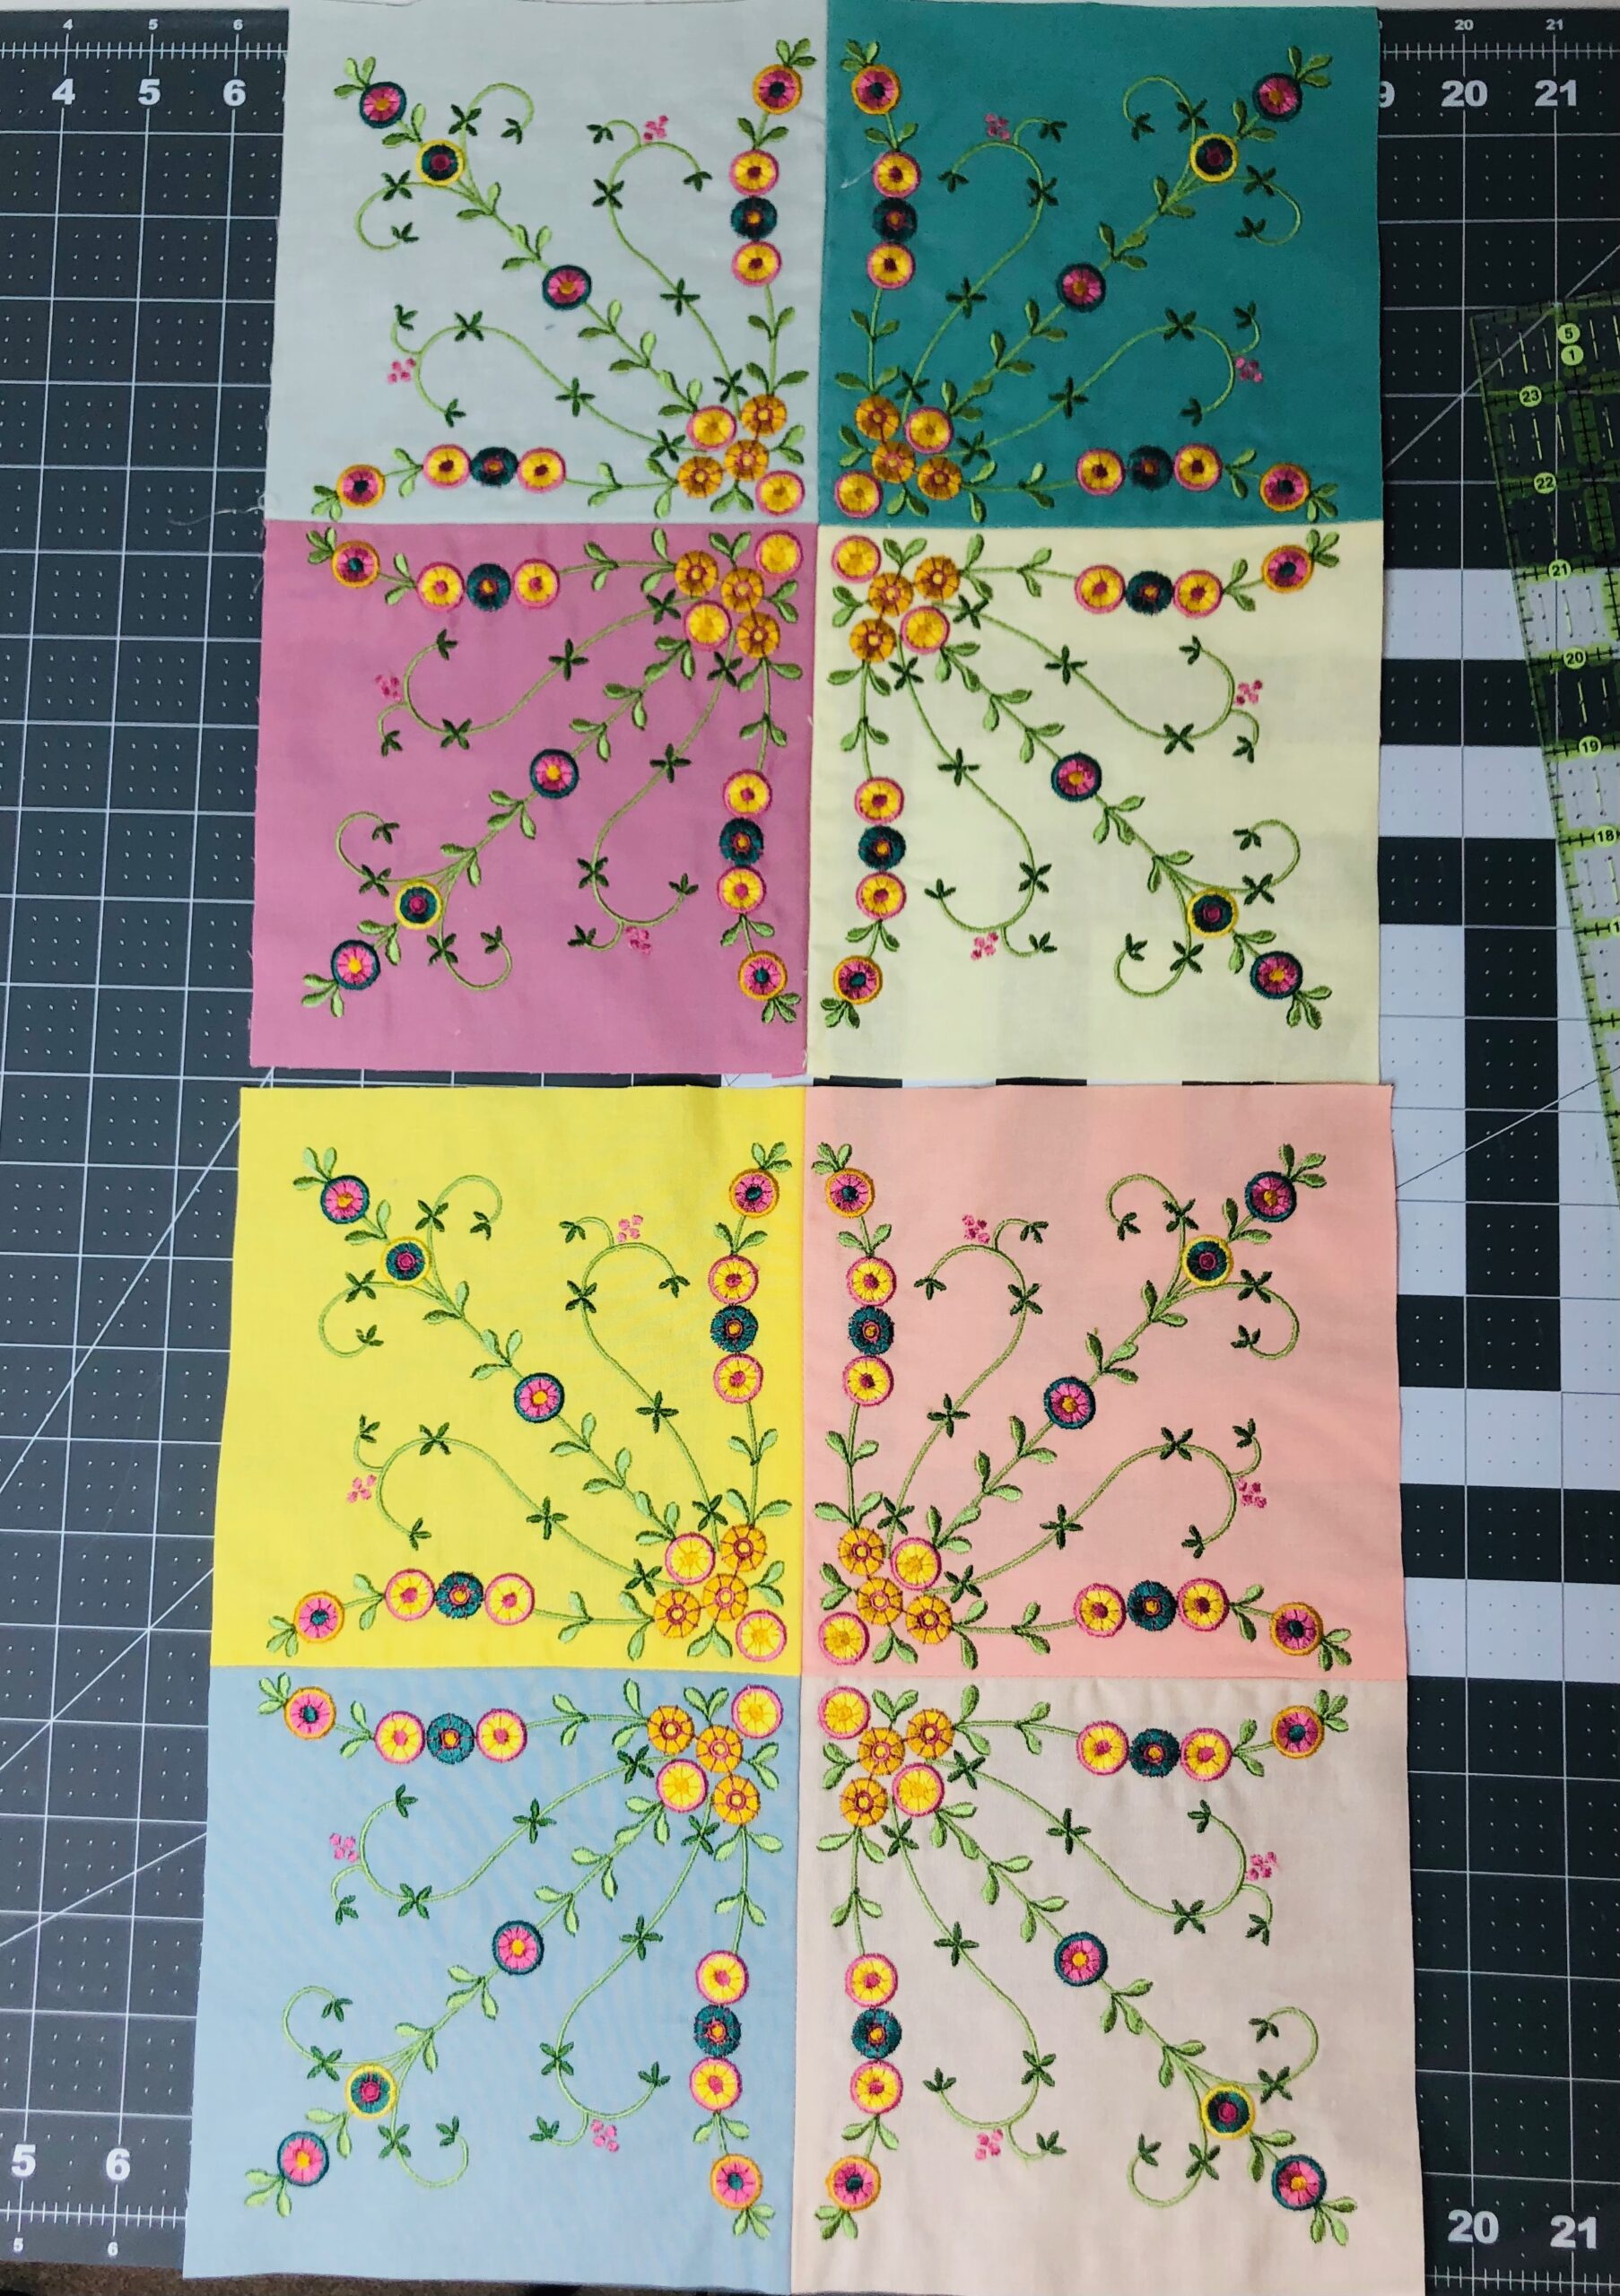
- (8) 10” cotton fabric squares in coordinating colors for embroidered blocks & cornerstones
- Fat quarter of coordinating solid cotton fabric for sashing
- (1) 2½” x 15” contrasting fabric strip
- (1) 18” x 34” rectangle each of coordinating print or solid fabric (backing) & low-loft cotton batting (such as Warm & White® by Warm Company)
- 3 yards of double-fold bias binding (width as desired)
- Hand sewing needle
- Embroidery design (floral corner design measuring approximately 5½” square; featured design is a built-in design on the Husqvarna Viking Designer Epic 2)
EMBROIDERY
Prep the 10” fabrics for embroidery by pre-washing and pressing.
Wind a bobbin with Sulky Bobbin Thread. Insert a new embroidery needle.
Load the embroidery design onto the machine.
Hoop a sheet of Sulky Sticky+ with the paper side facing up.
Score the paper within the inner hoop ring using the Sticky+ Slitting Pen, if using. (If not using, score the paper using a pin very carefully so you don’t slice through the stabilizer beneath.)
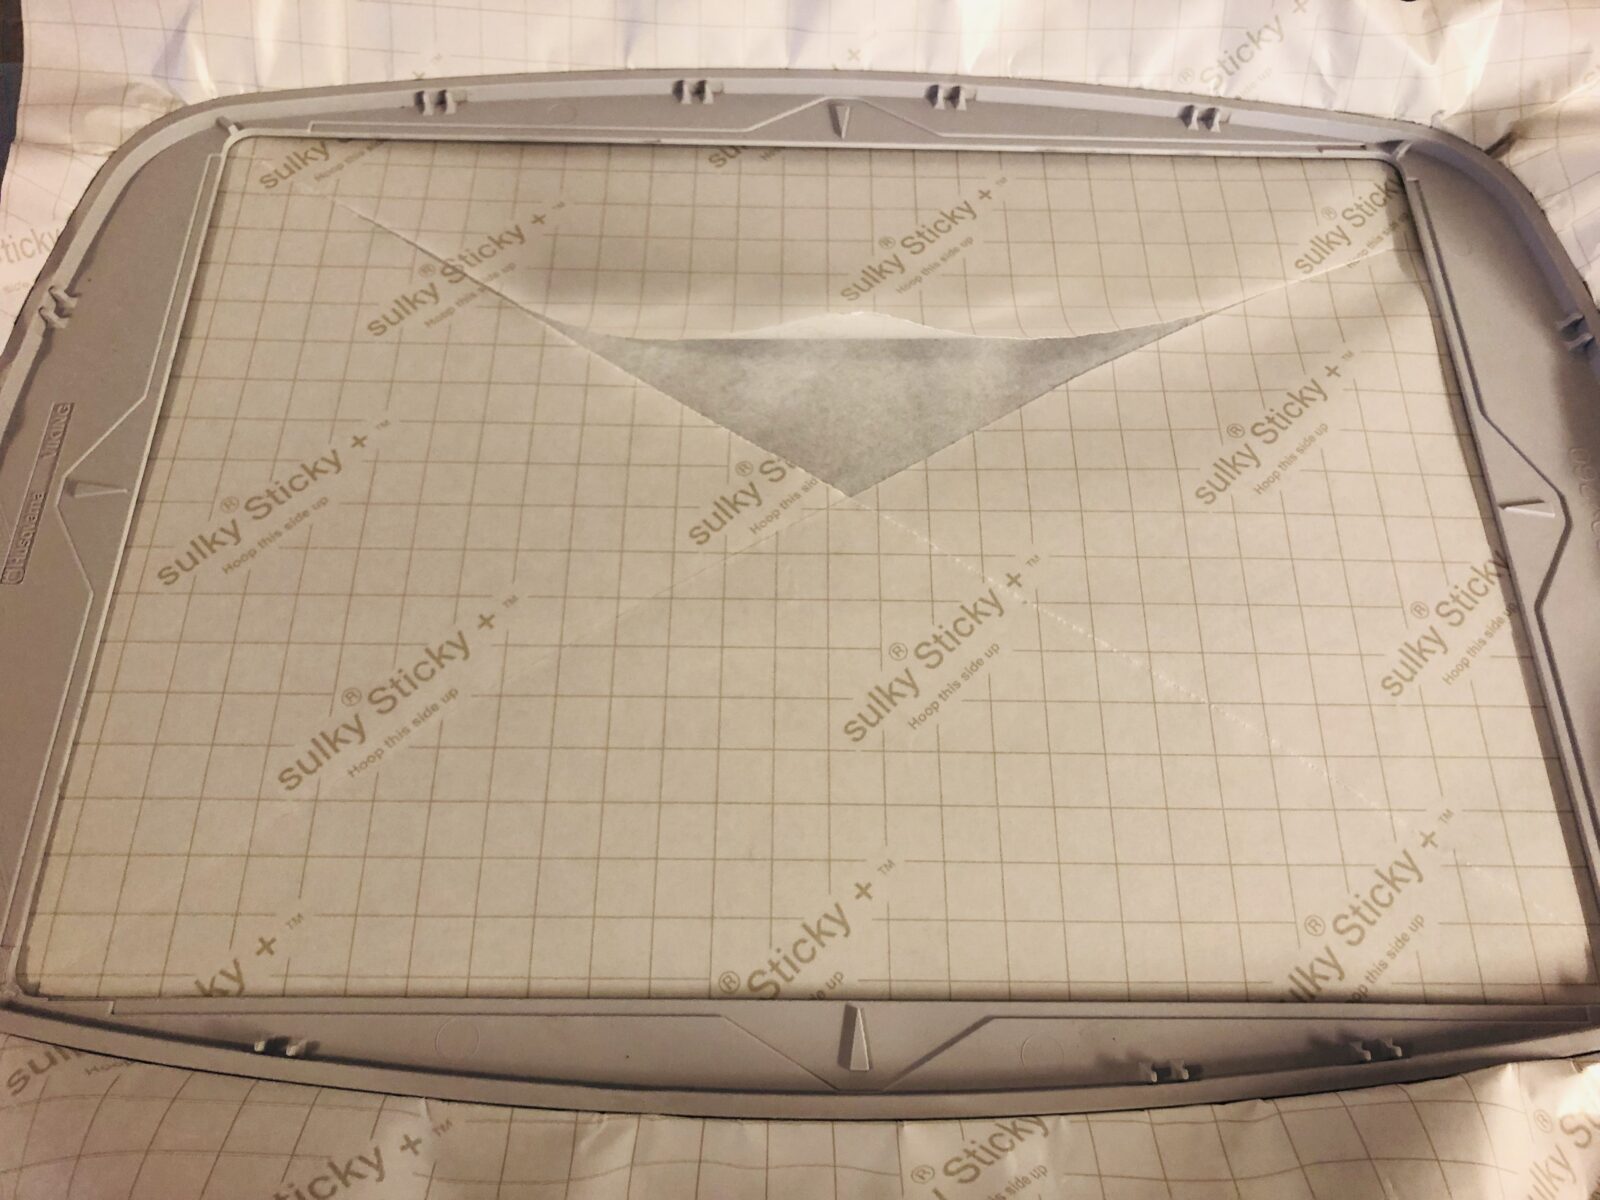
Lift the paper and tear it away to reveal the sticky stabilizer surface beneath.
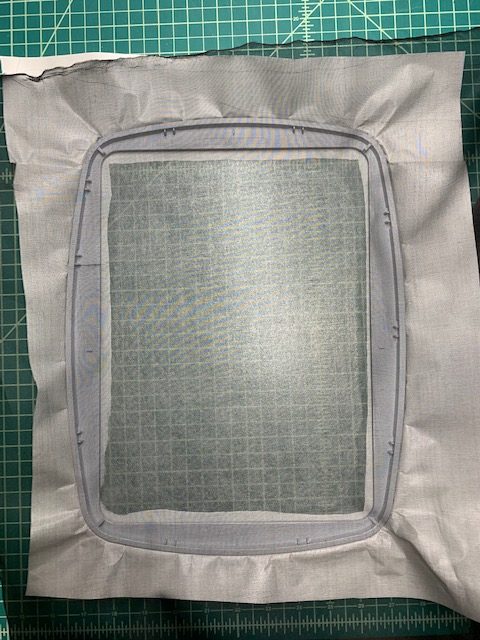
Center one 10” fabric square in the hoop with the right side facing up. Use your fingertips to gently smooth the fabric to the stabilizer, adhering it to secure.
Place the hoop onto the machine.
Thread the needle with the first thread color of the design.
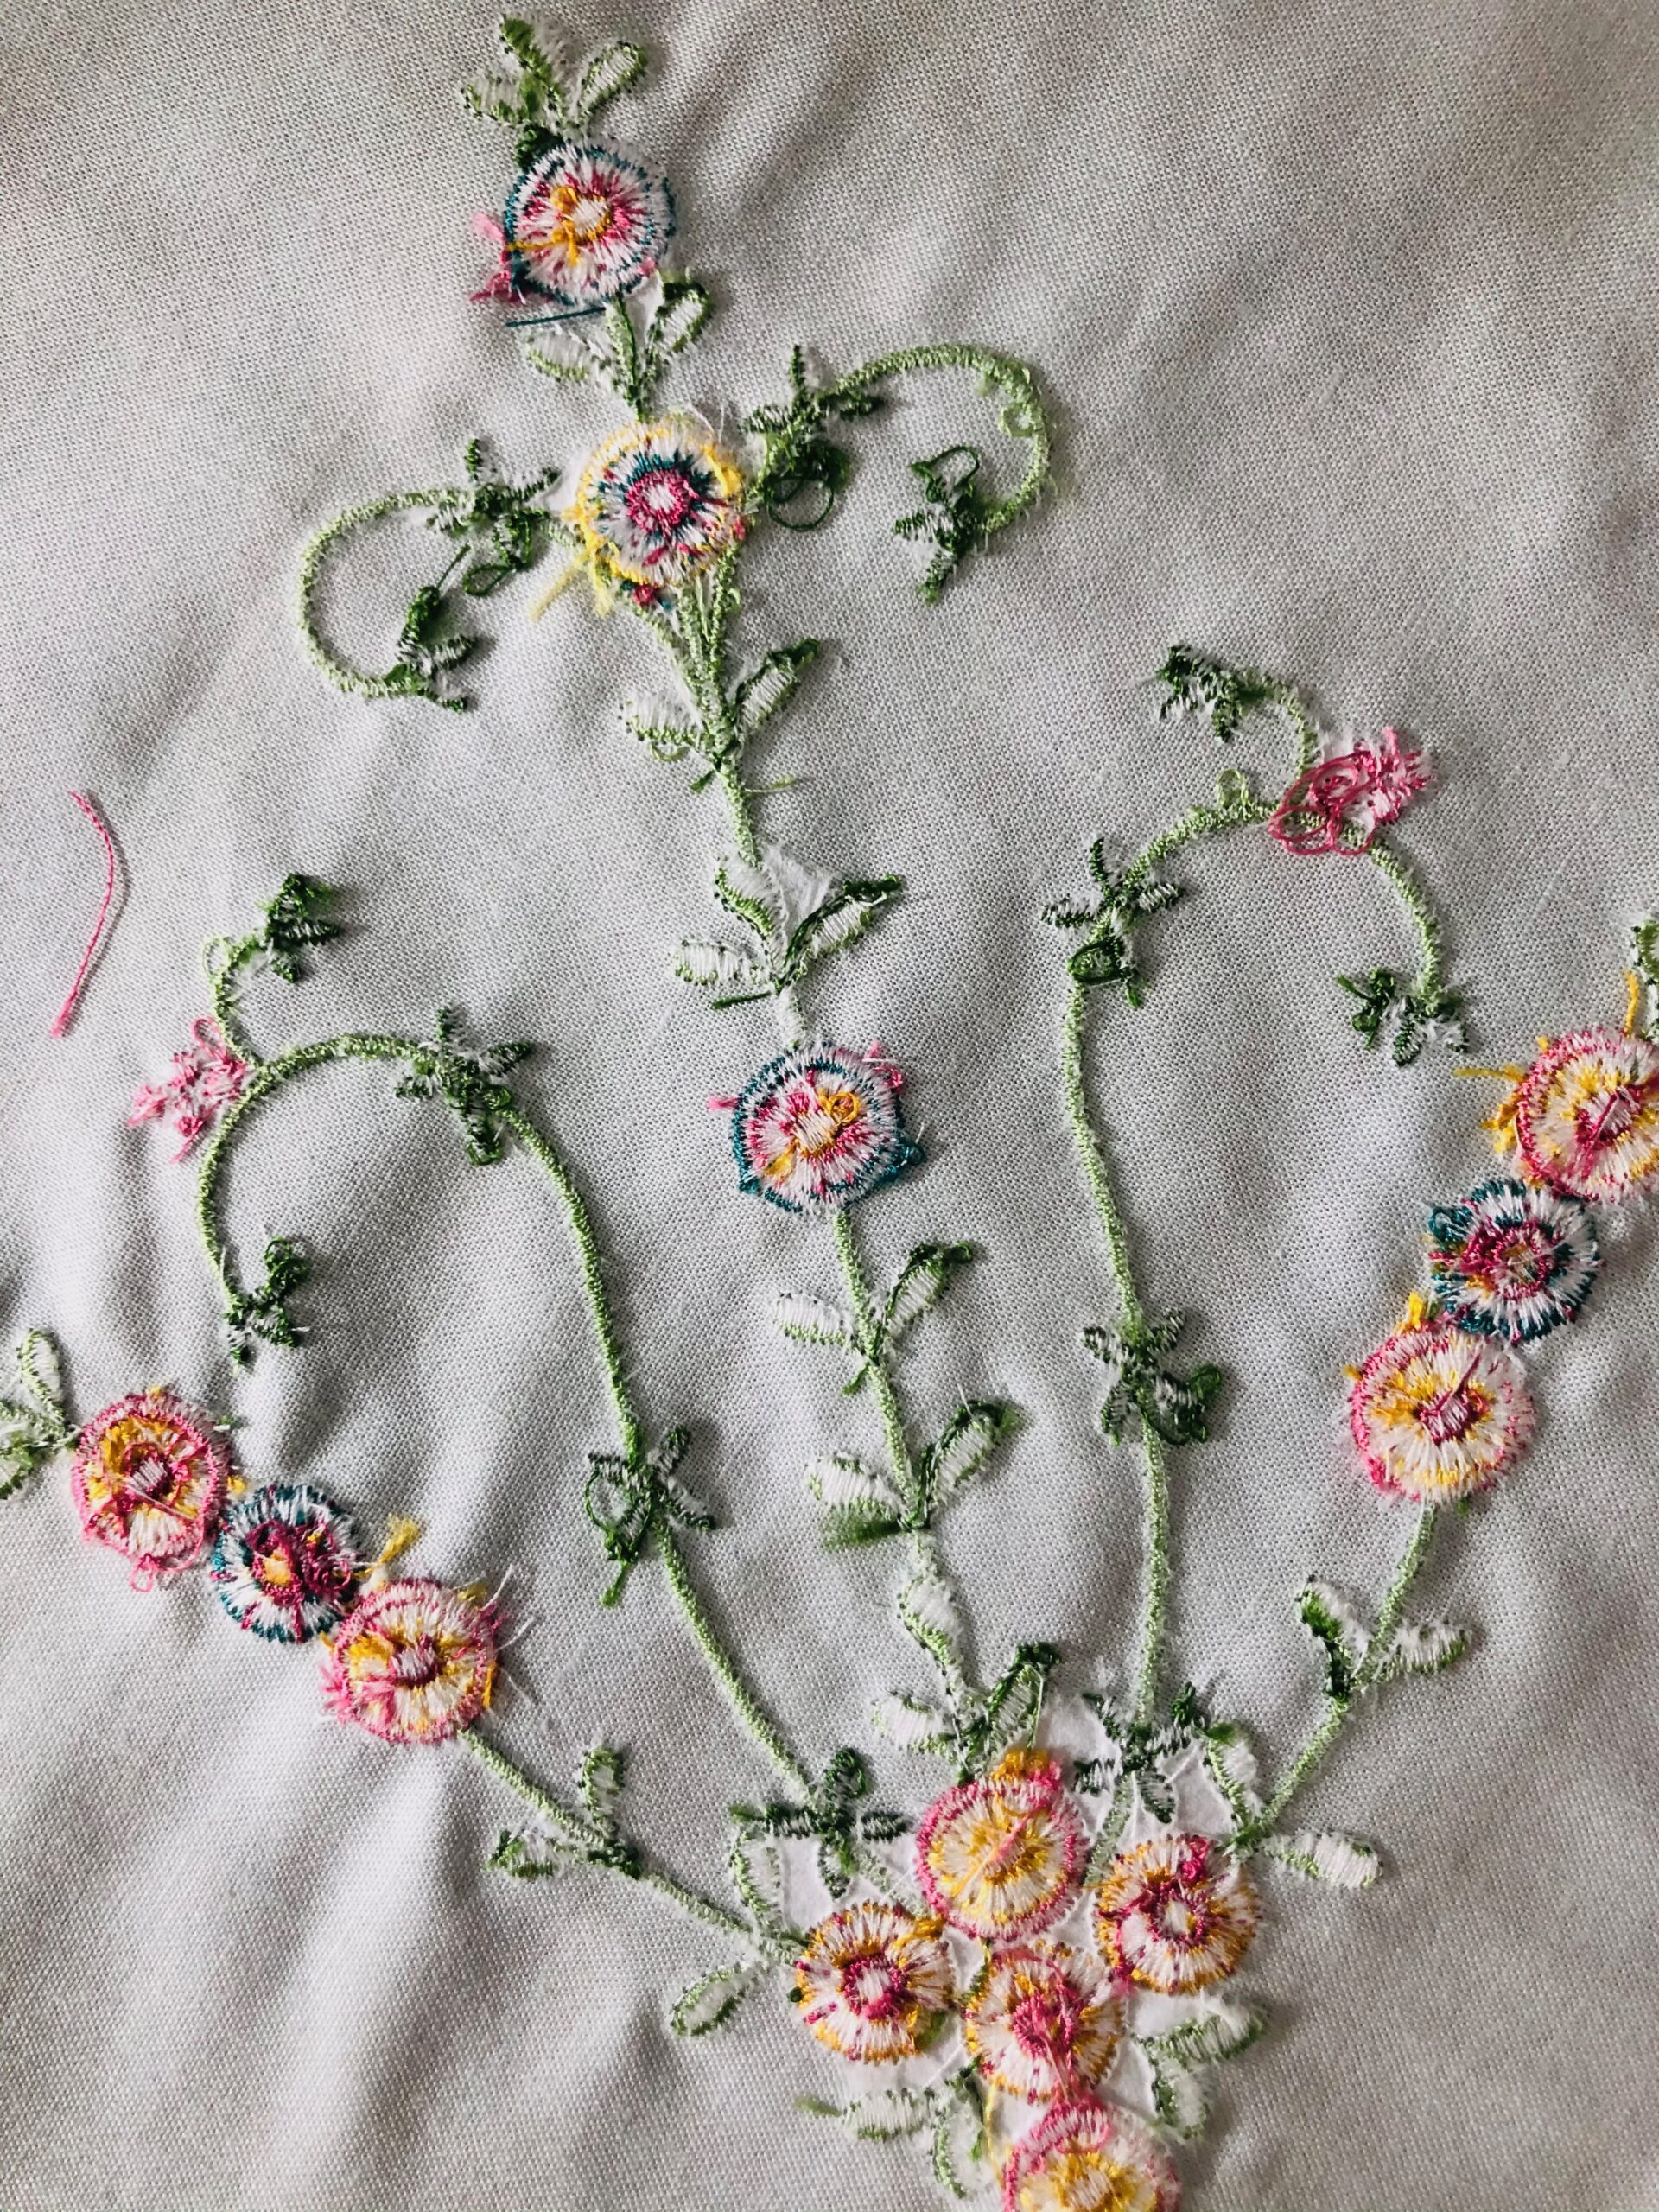
Embroider the design, clipping jump threads with each thread color change along the right and wrong side of the work.
 (Remove the hoop to clip the jump threads along the fabric right side. Then re-place the hoop onto the machine to continue the design. This allows you to remove the stabilizer cleanly along the fabric wrong side when embroidery is complete.)
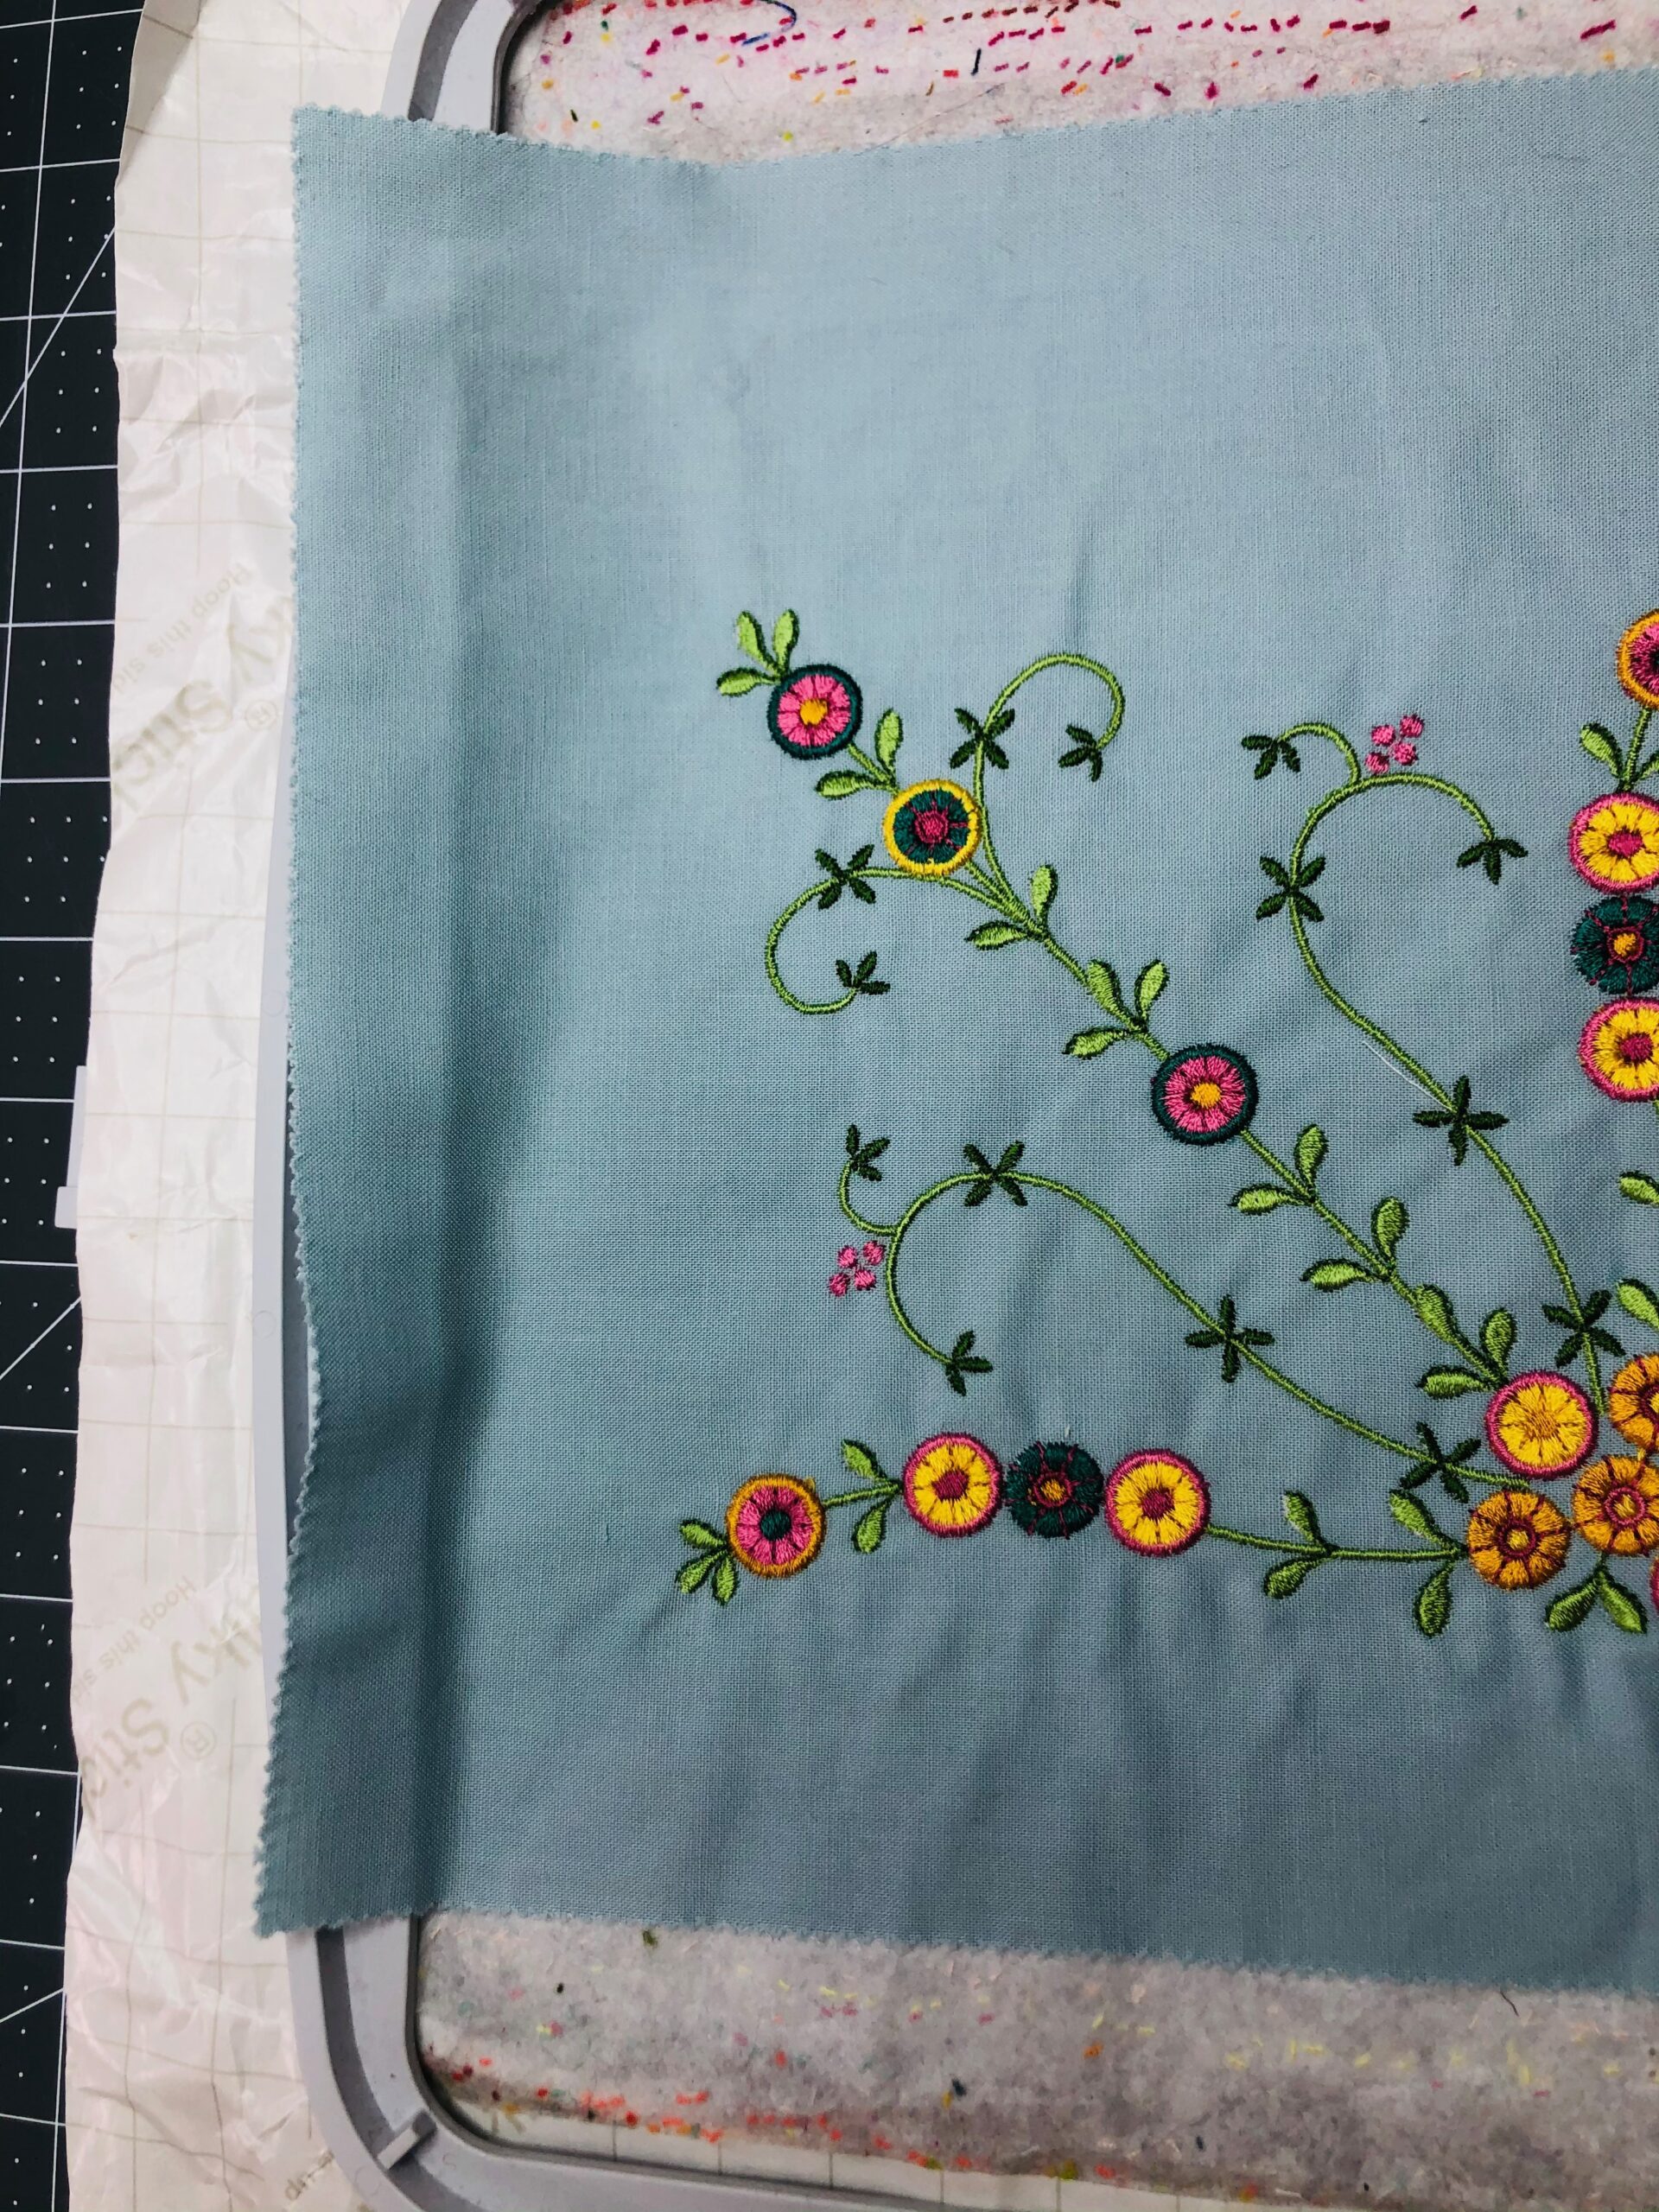
When embroidery is complete, remove the hoop from the machine. Remove the stabilizer from the hoop. Gently remove the fabric from the stabilizer, tearing away as much stabilizer as possible between design elements as well as from the design perimeter.
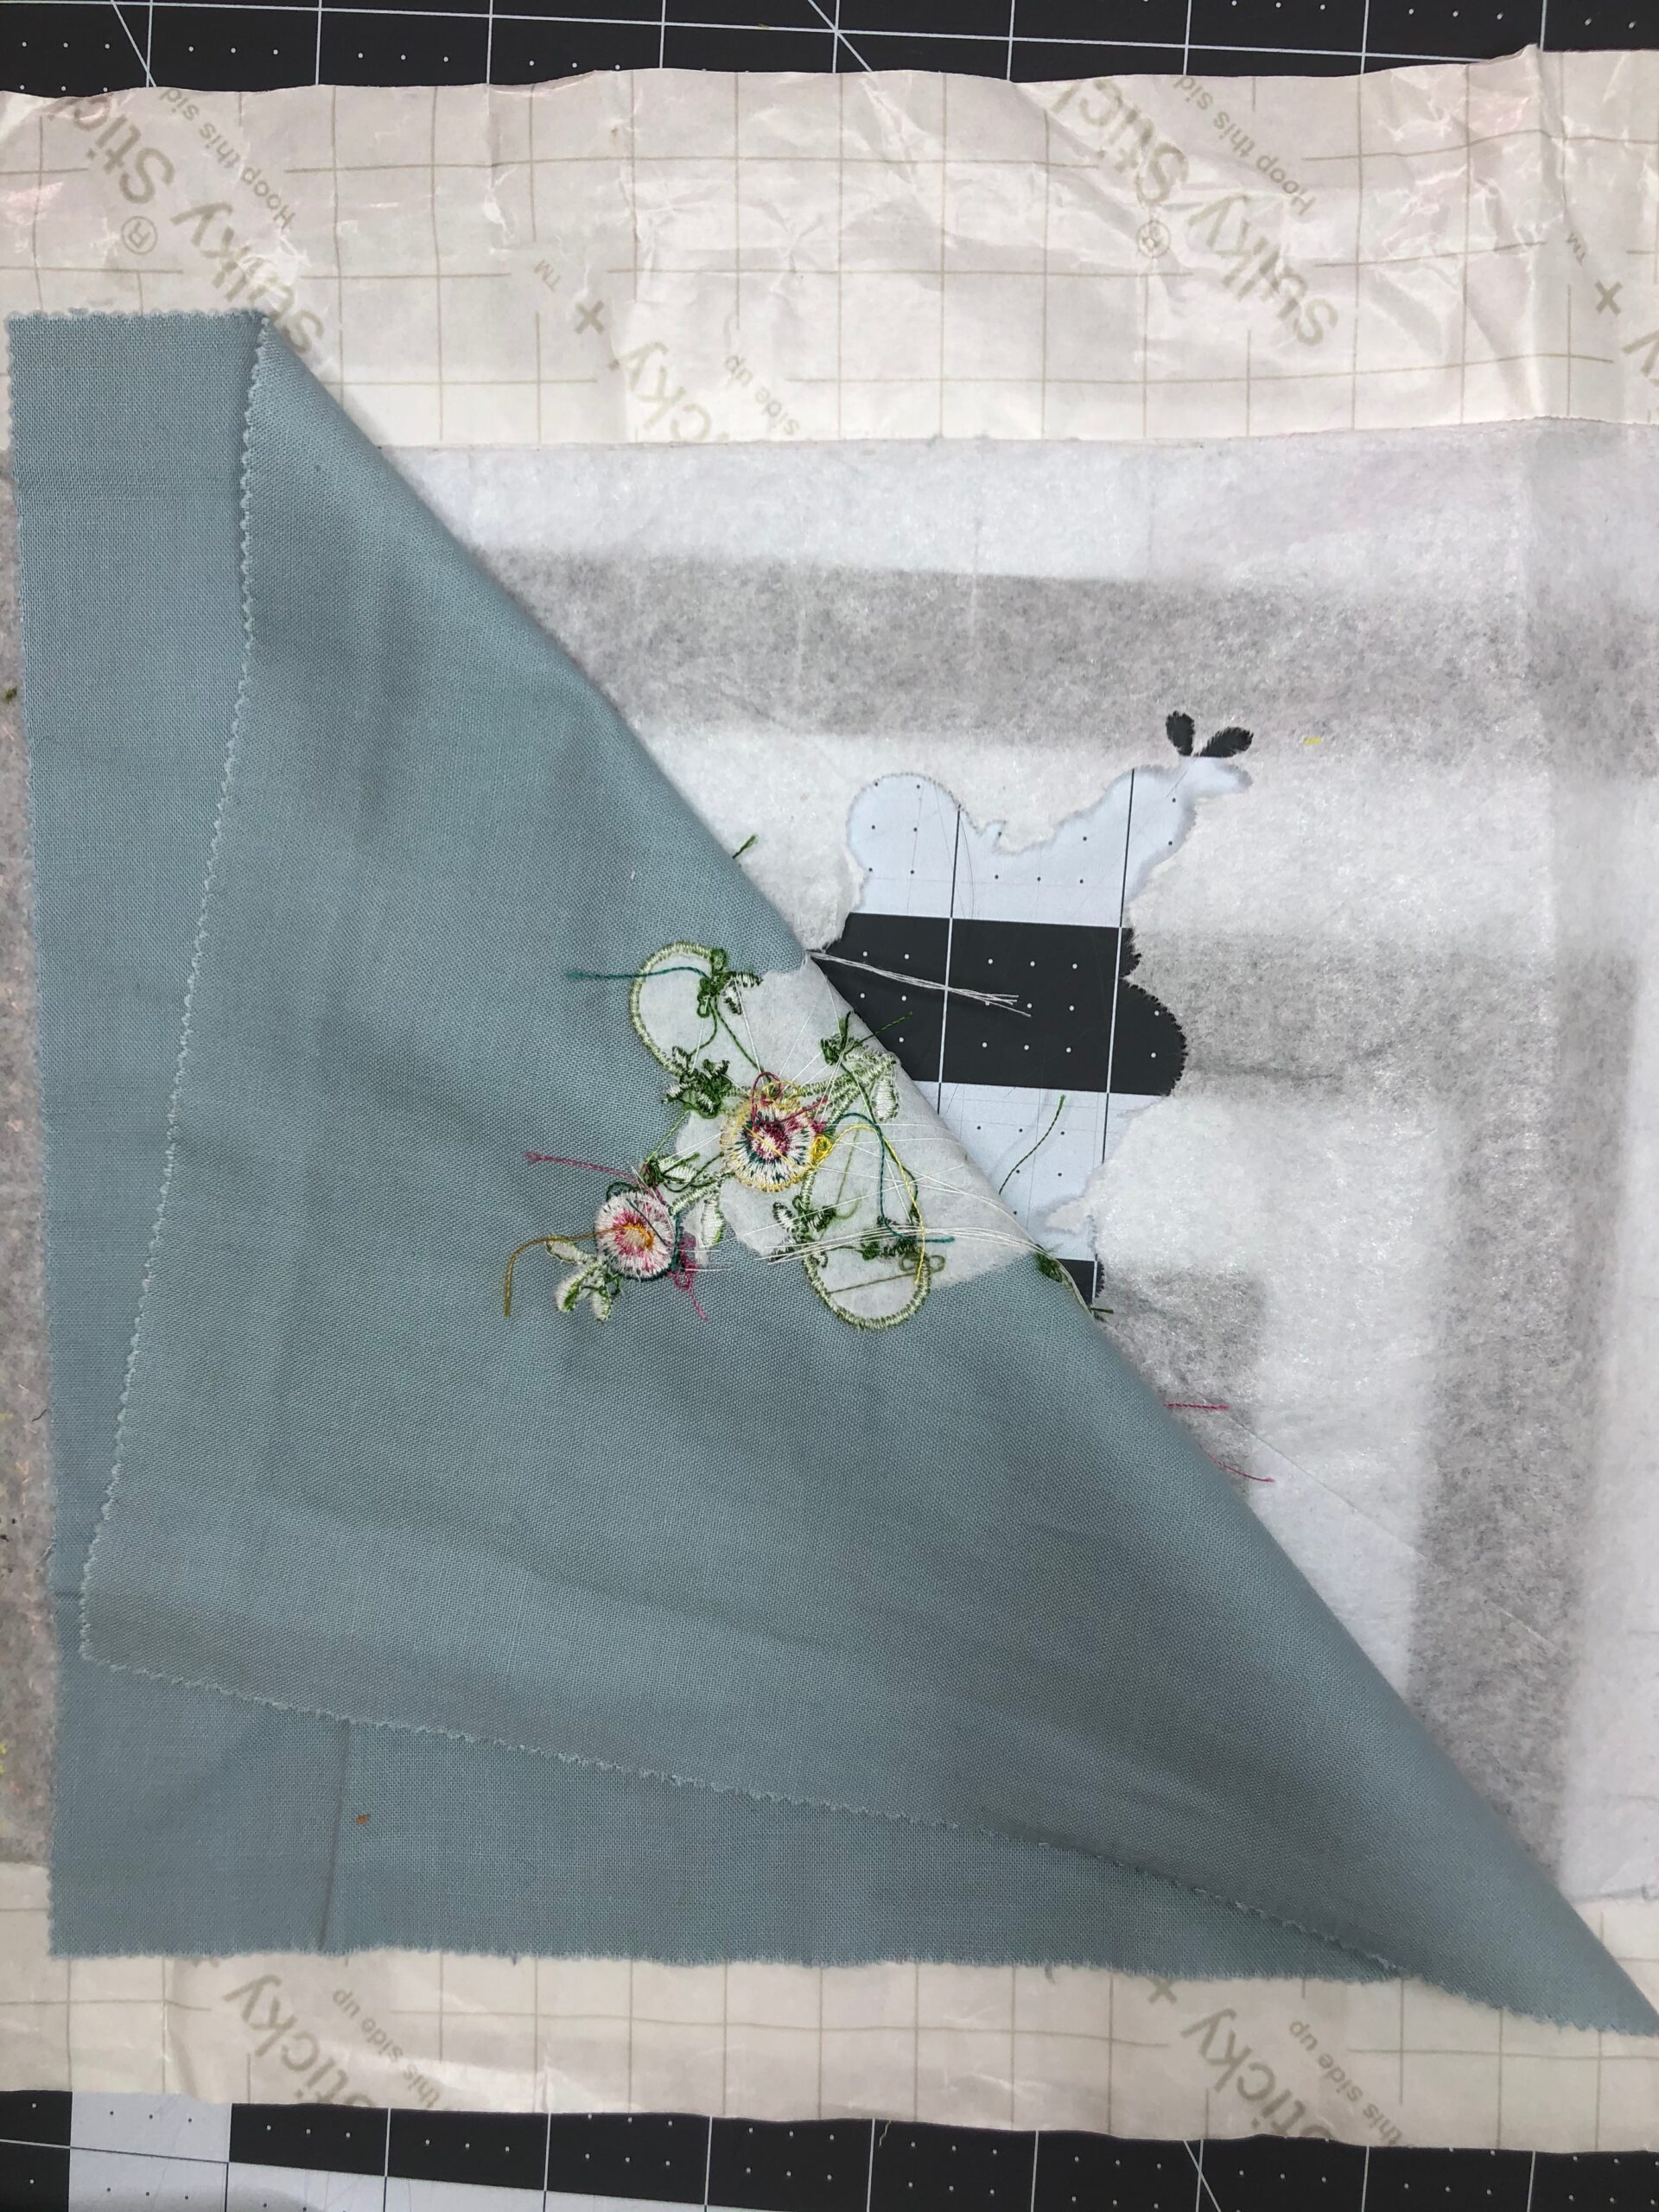
Press the fabric from the wrong side, avoiding the stitches.
Repeat to embroider the same corner design onto each 10” fabric square.
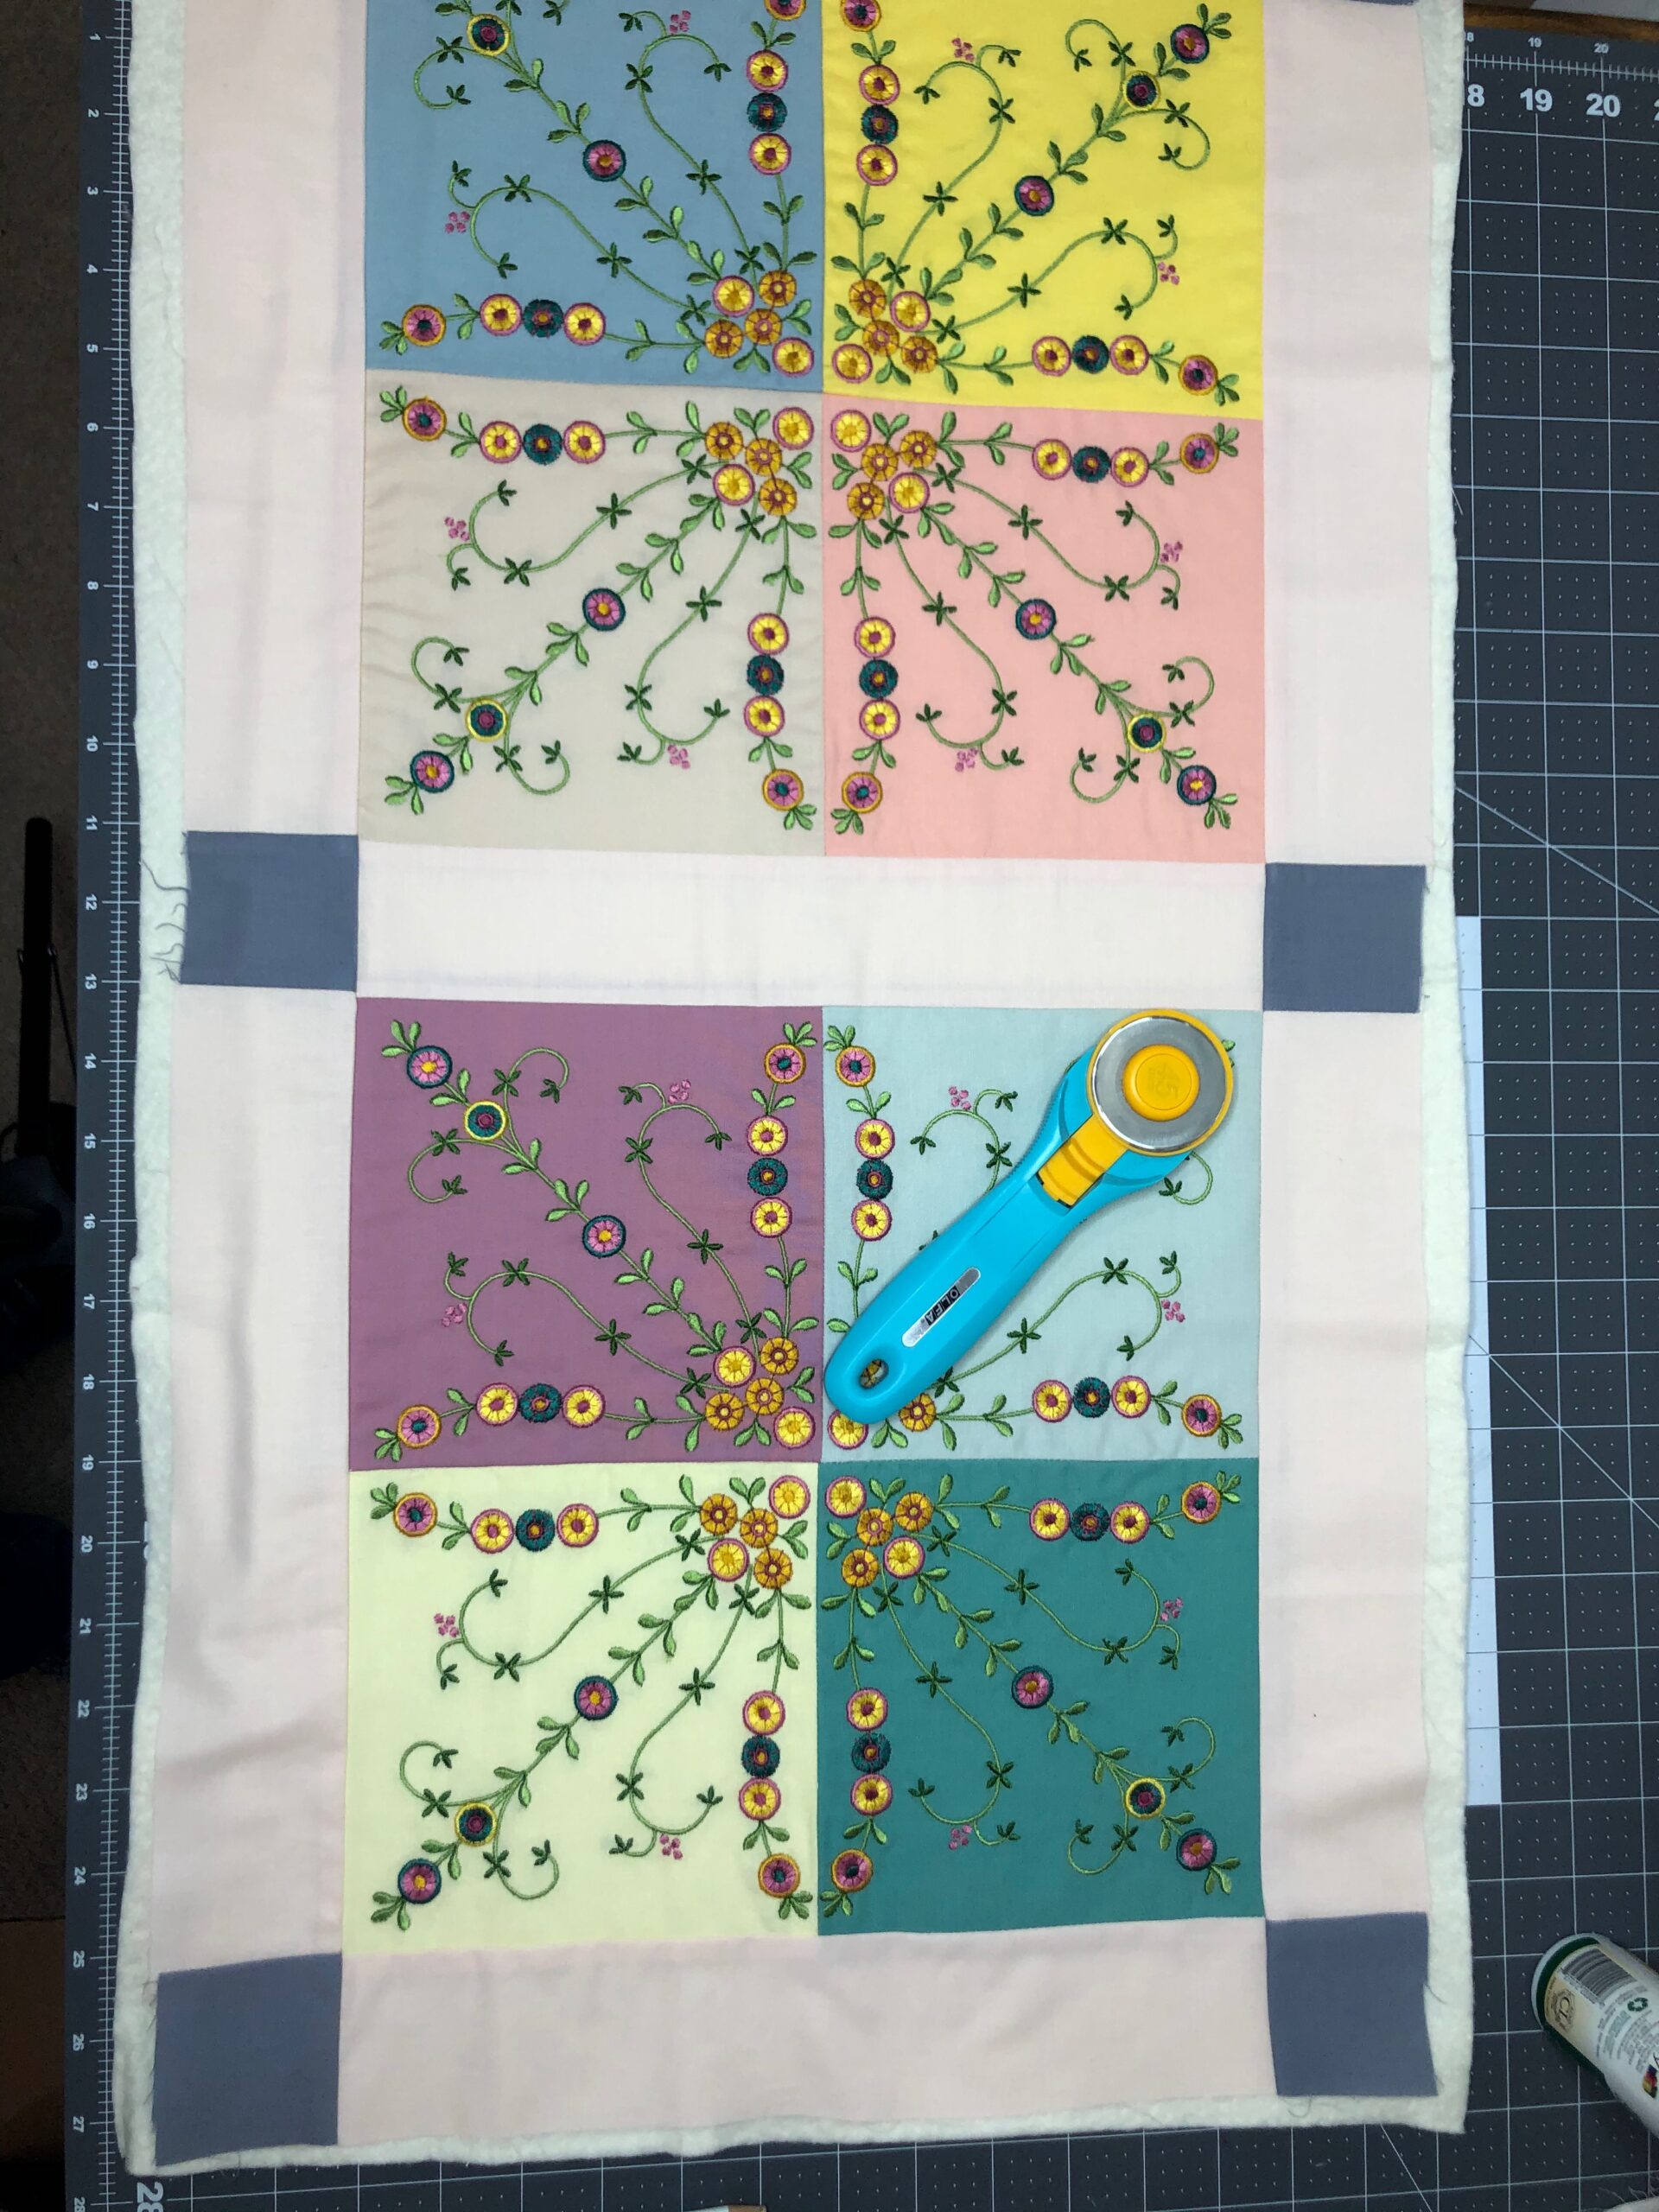
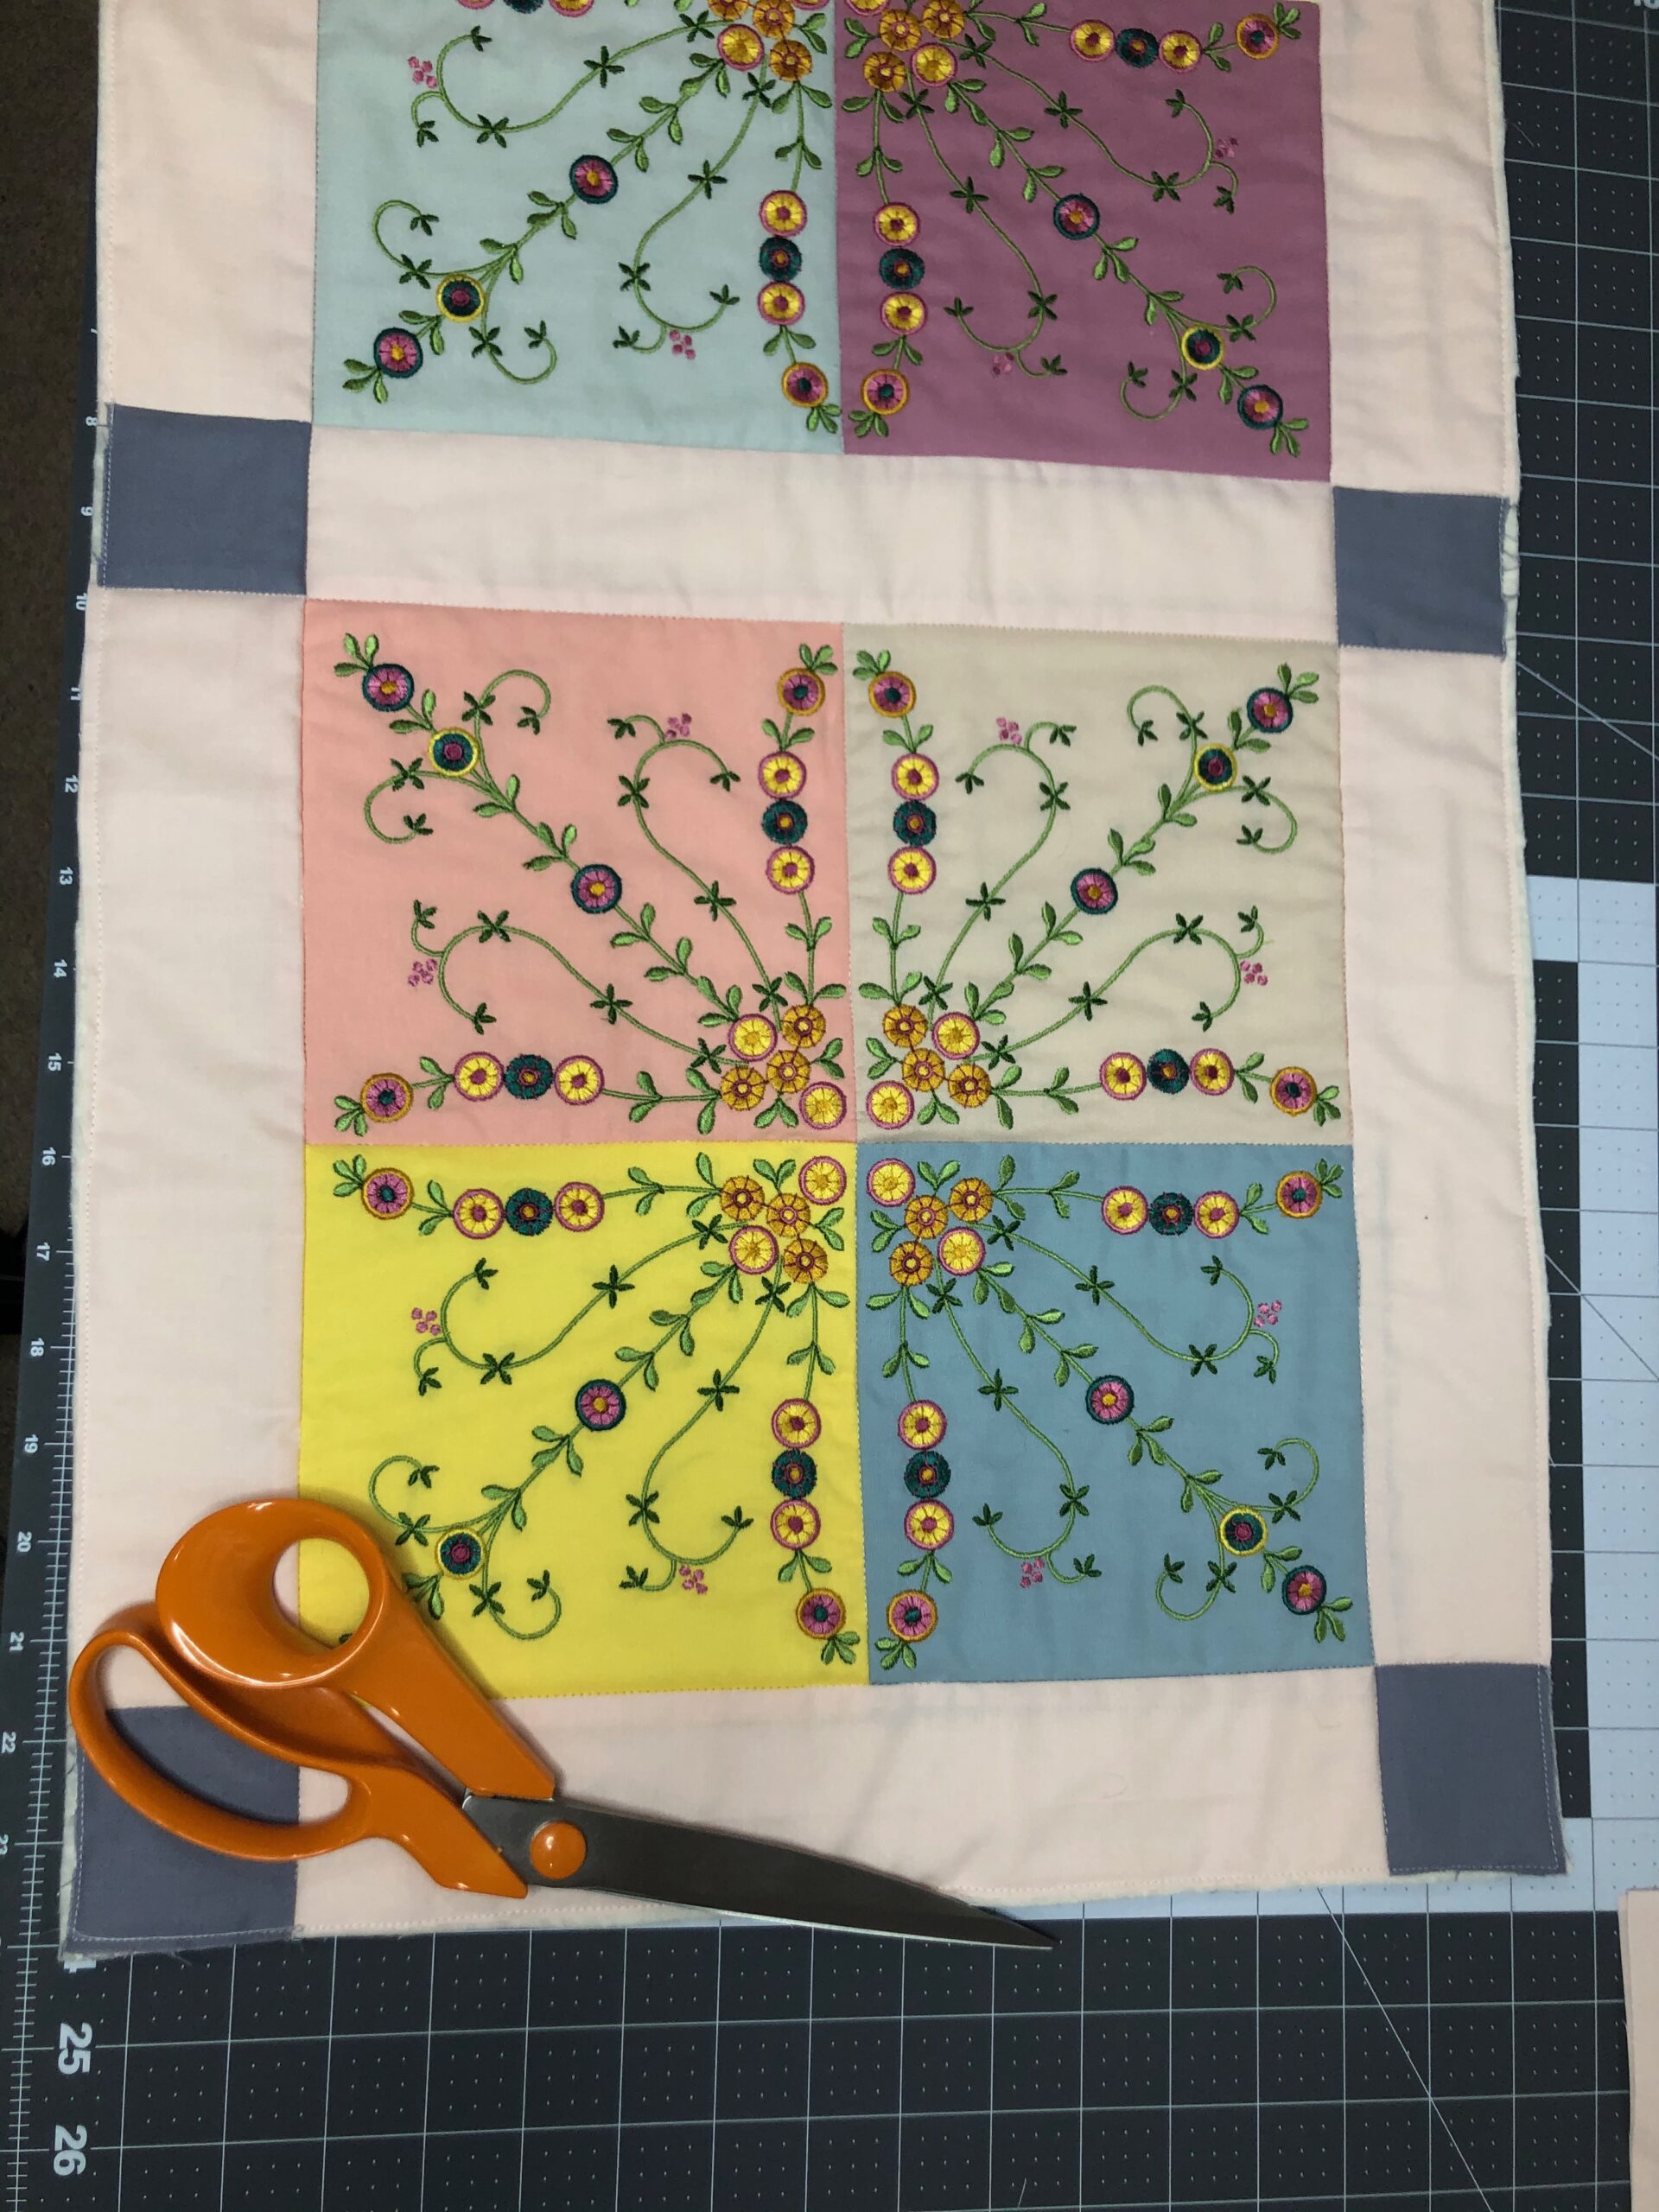
ASSEMBLE BLOCKS
Decide the fabric color arrangement by placing the embroidered blocks on a flat work surface. Audition the desired design until you like the result.
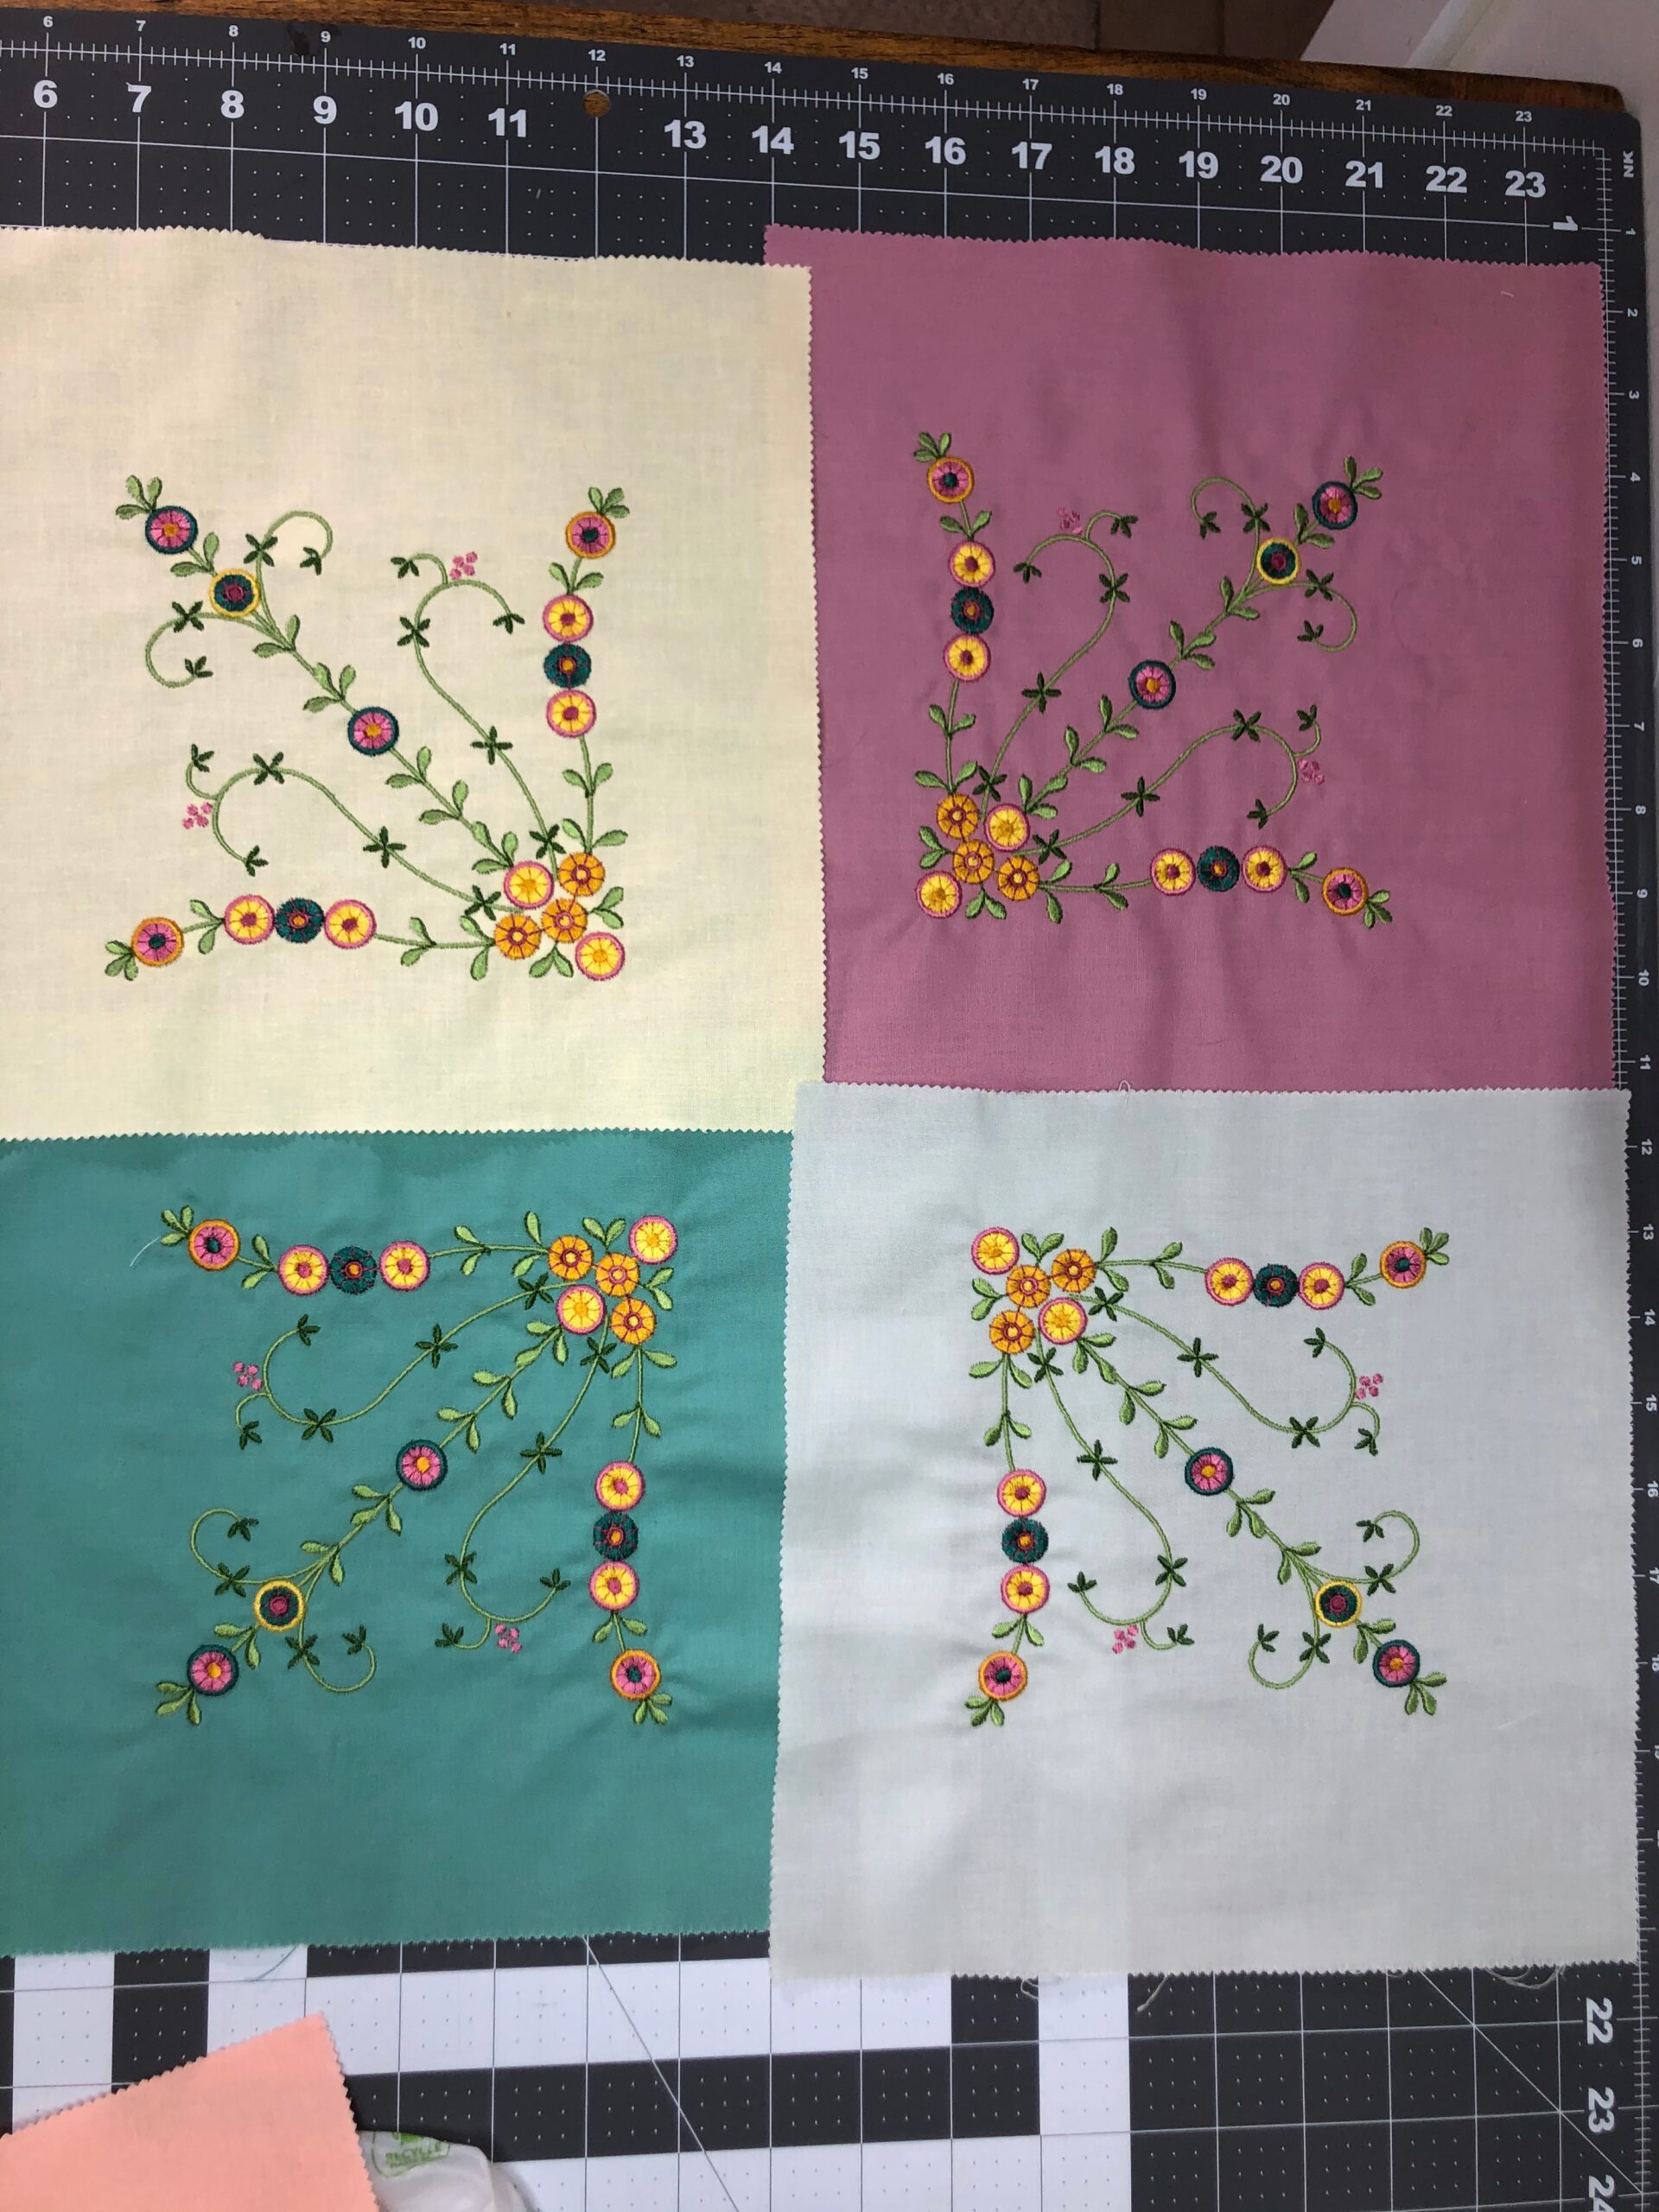
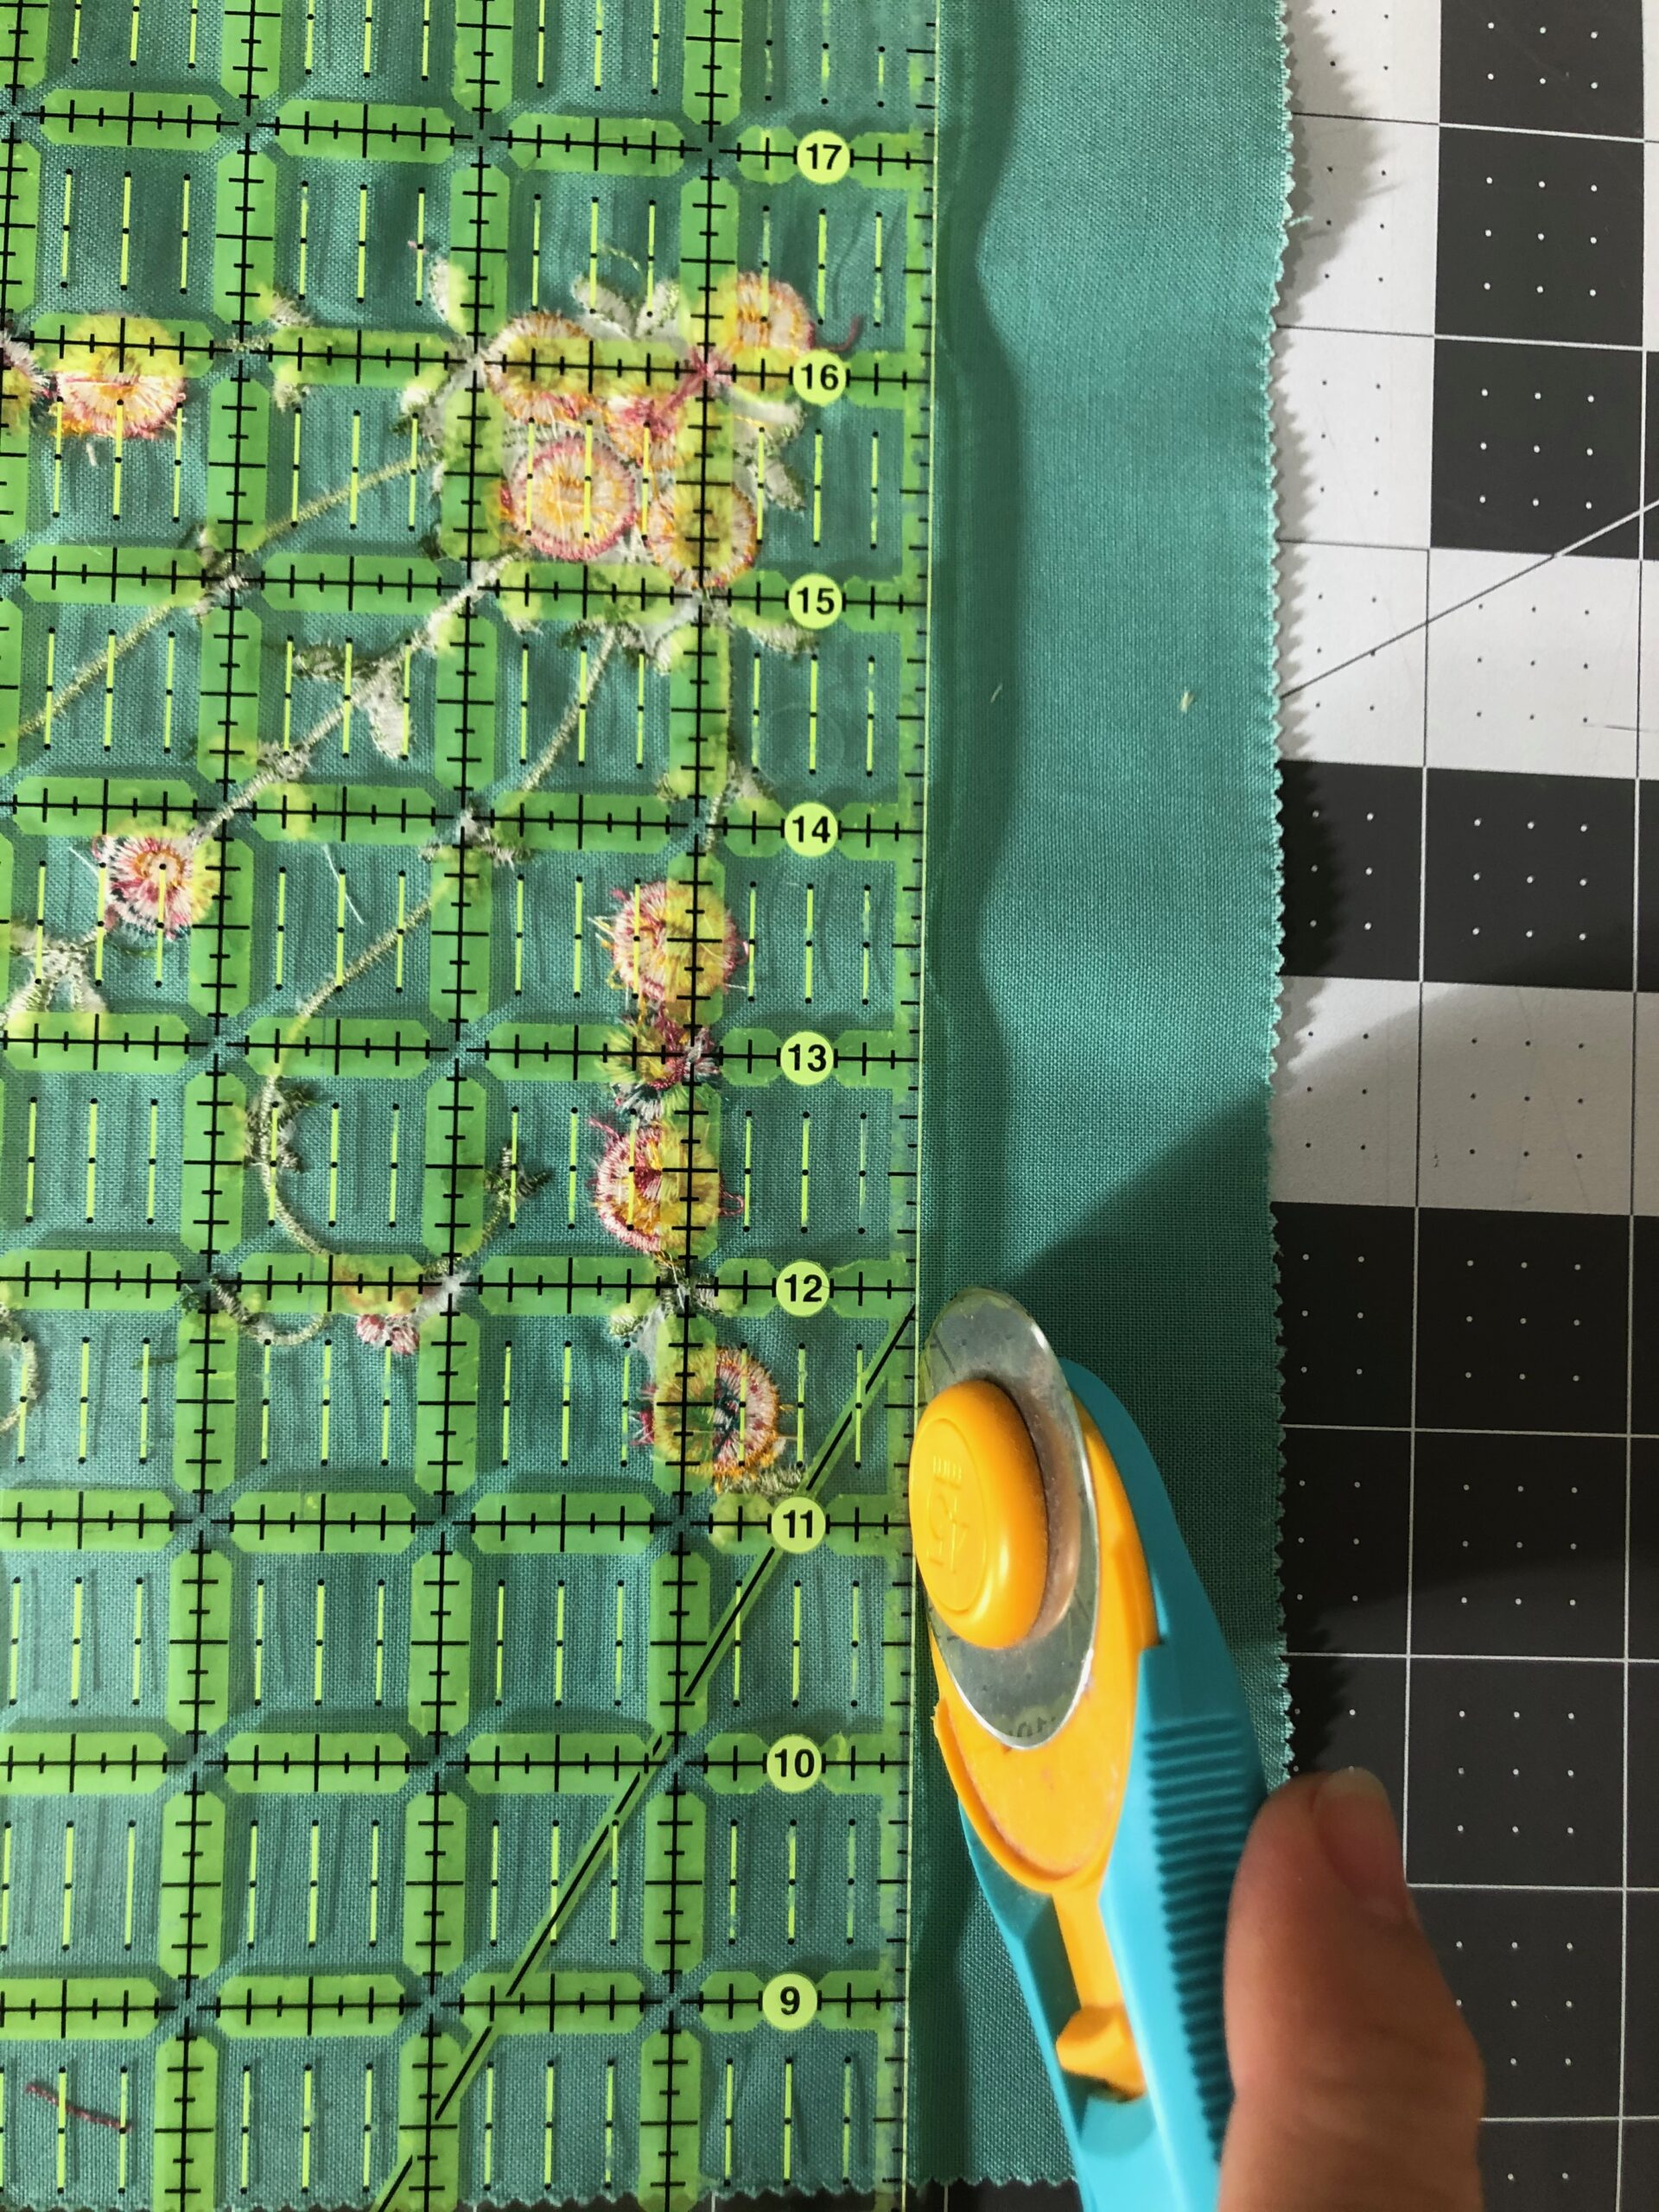
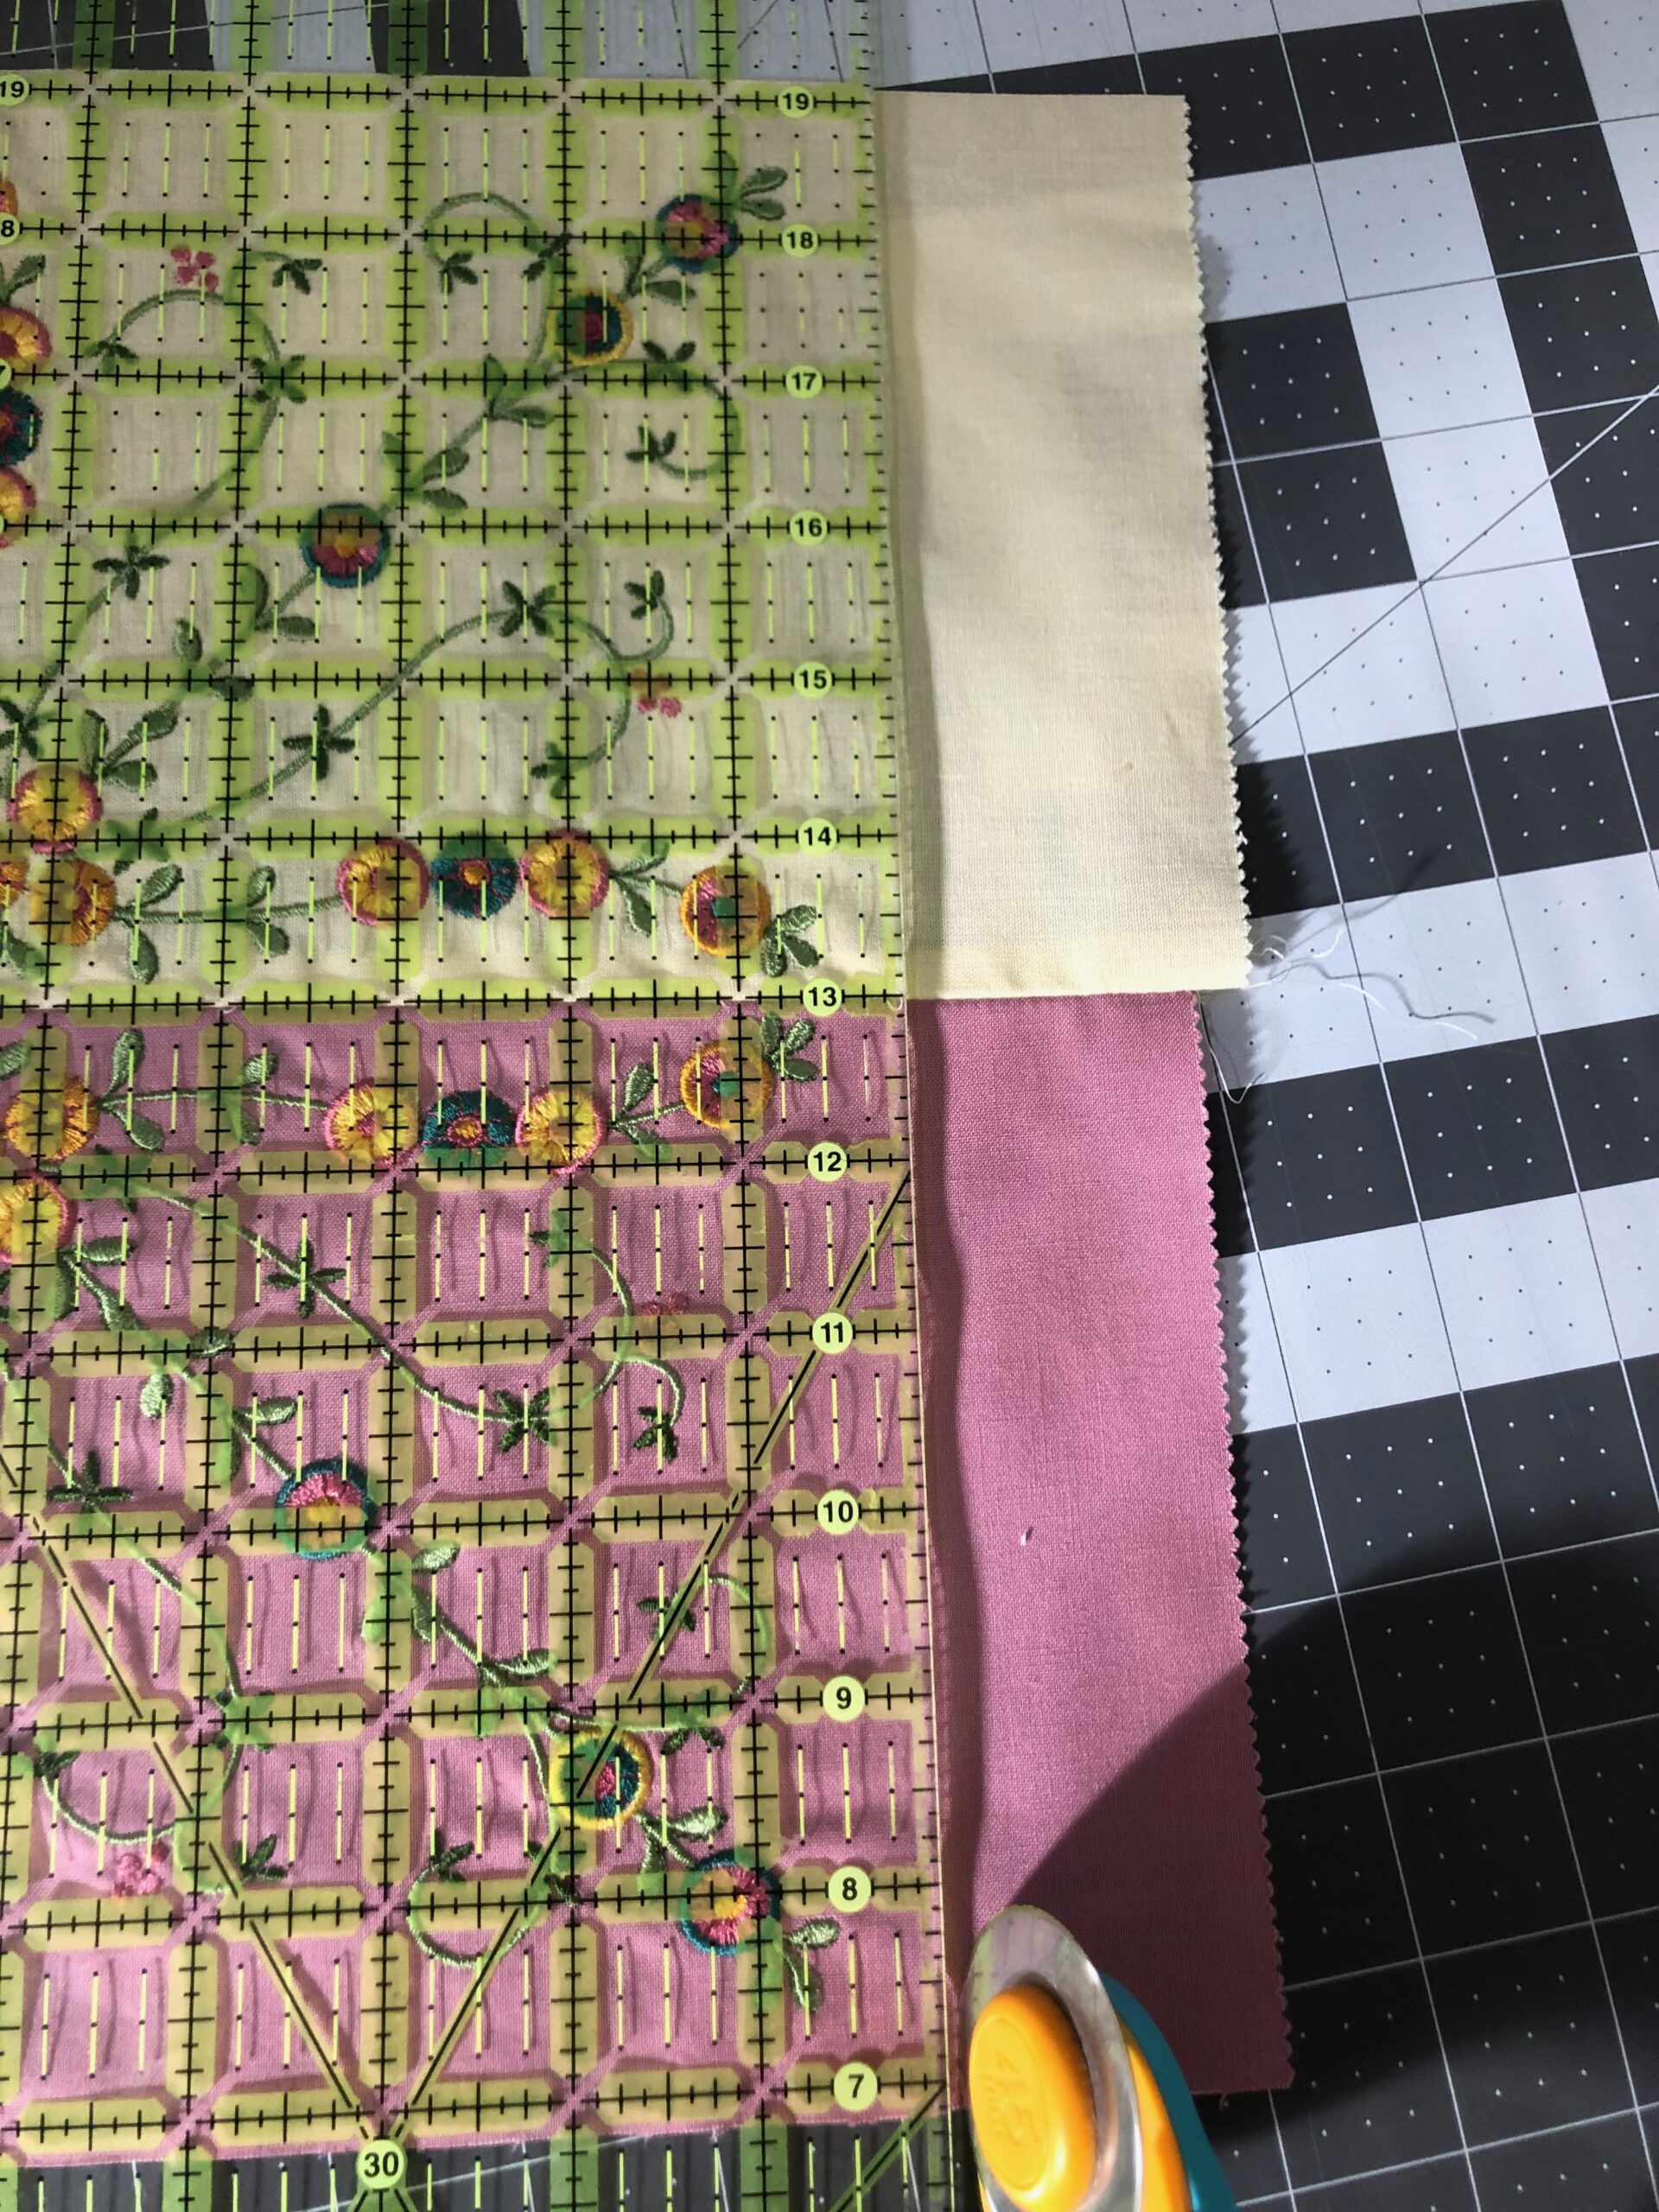
Trim each block to 6½” square, centering the design. (If your embroidery design is bigger, trim the fabric ½” beyond the design perimeter along all edges.)
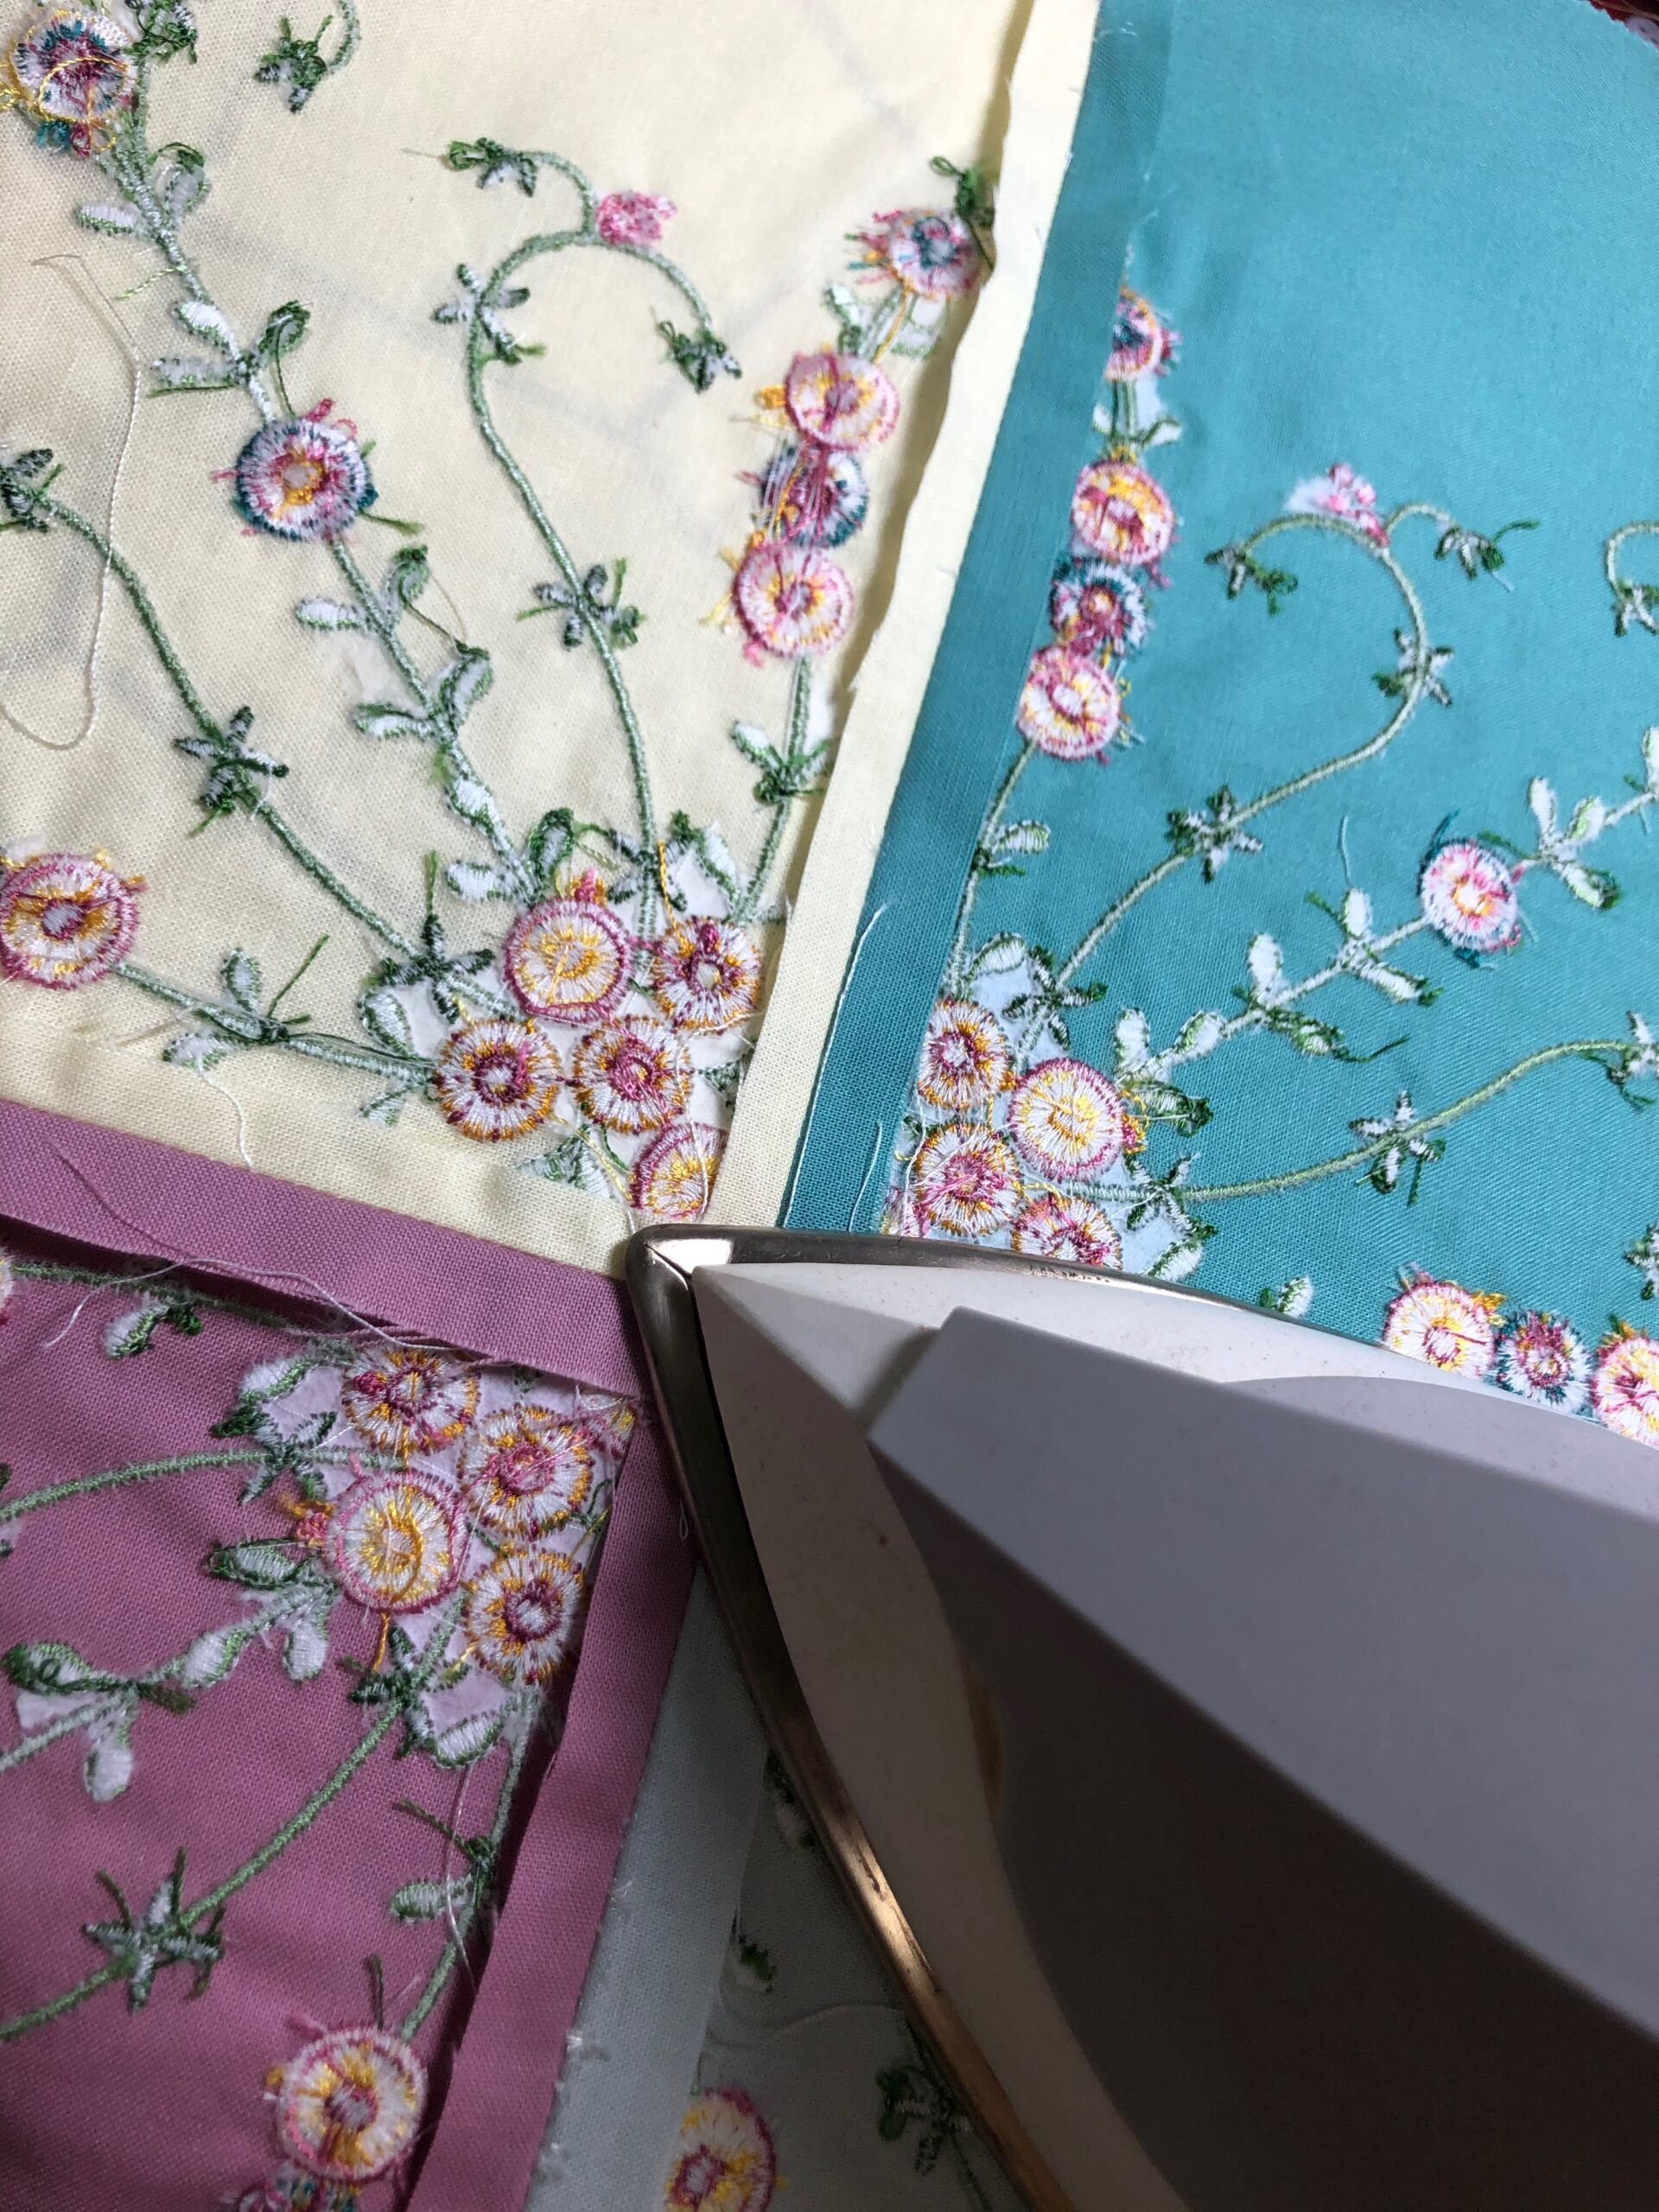
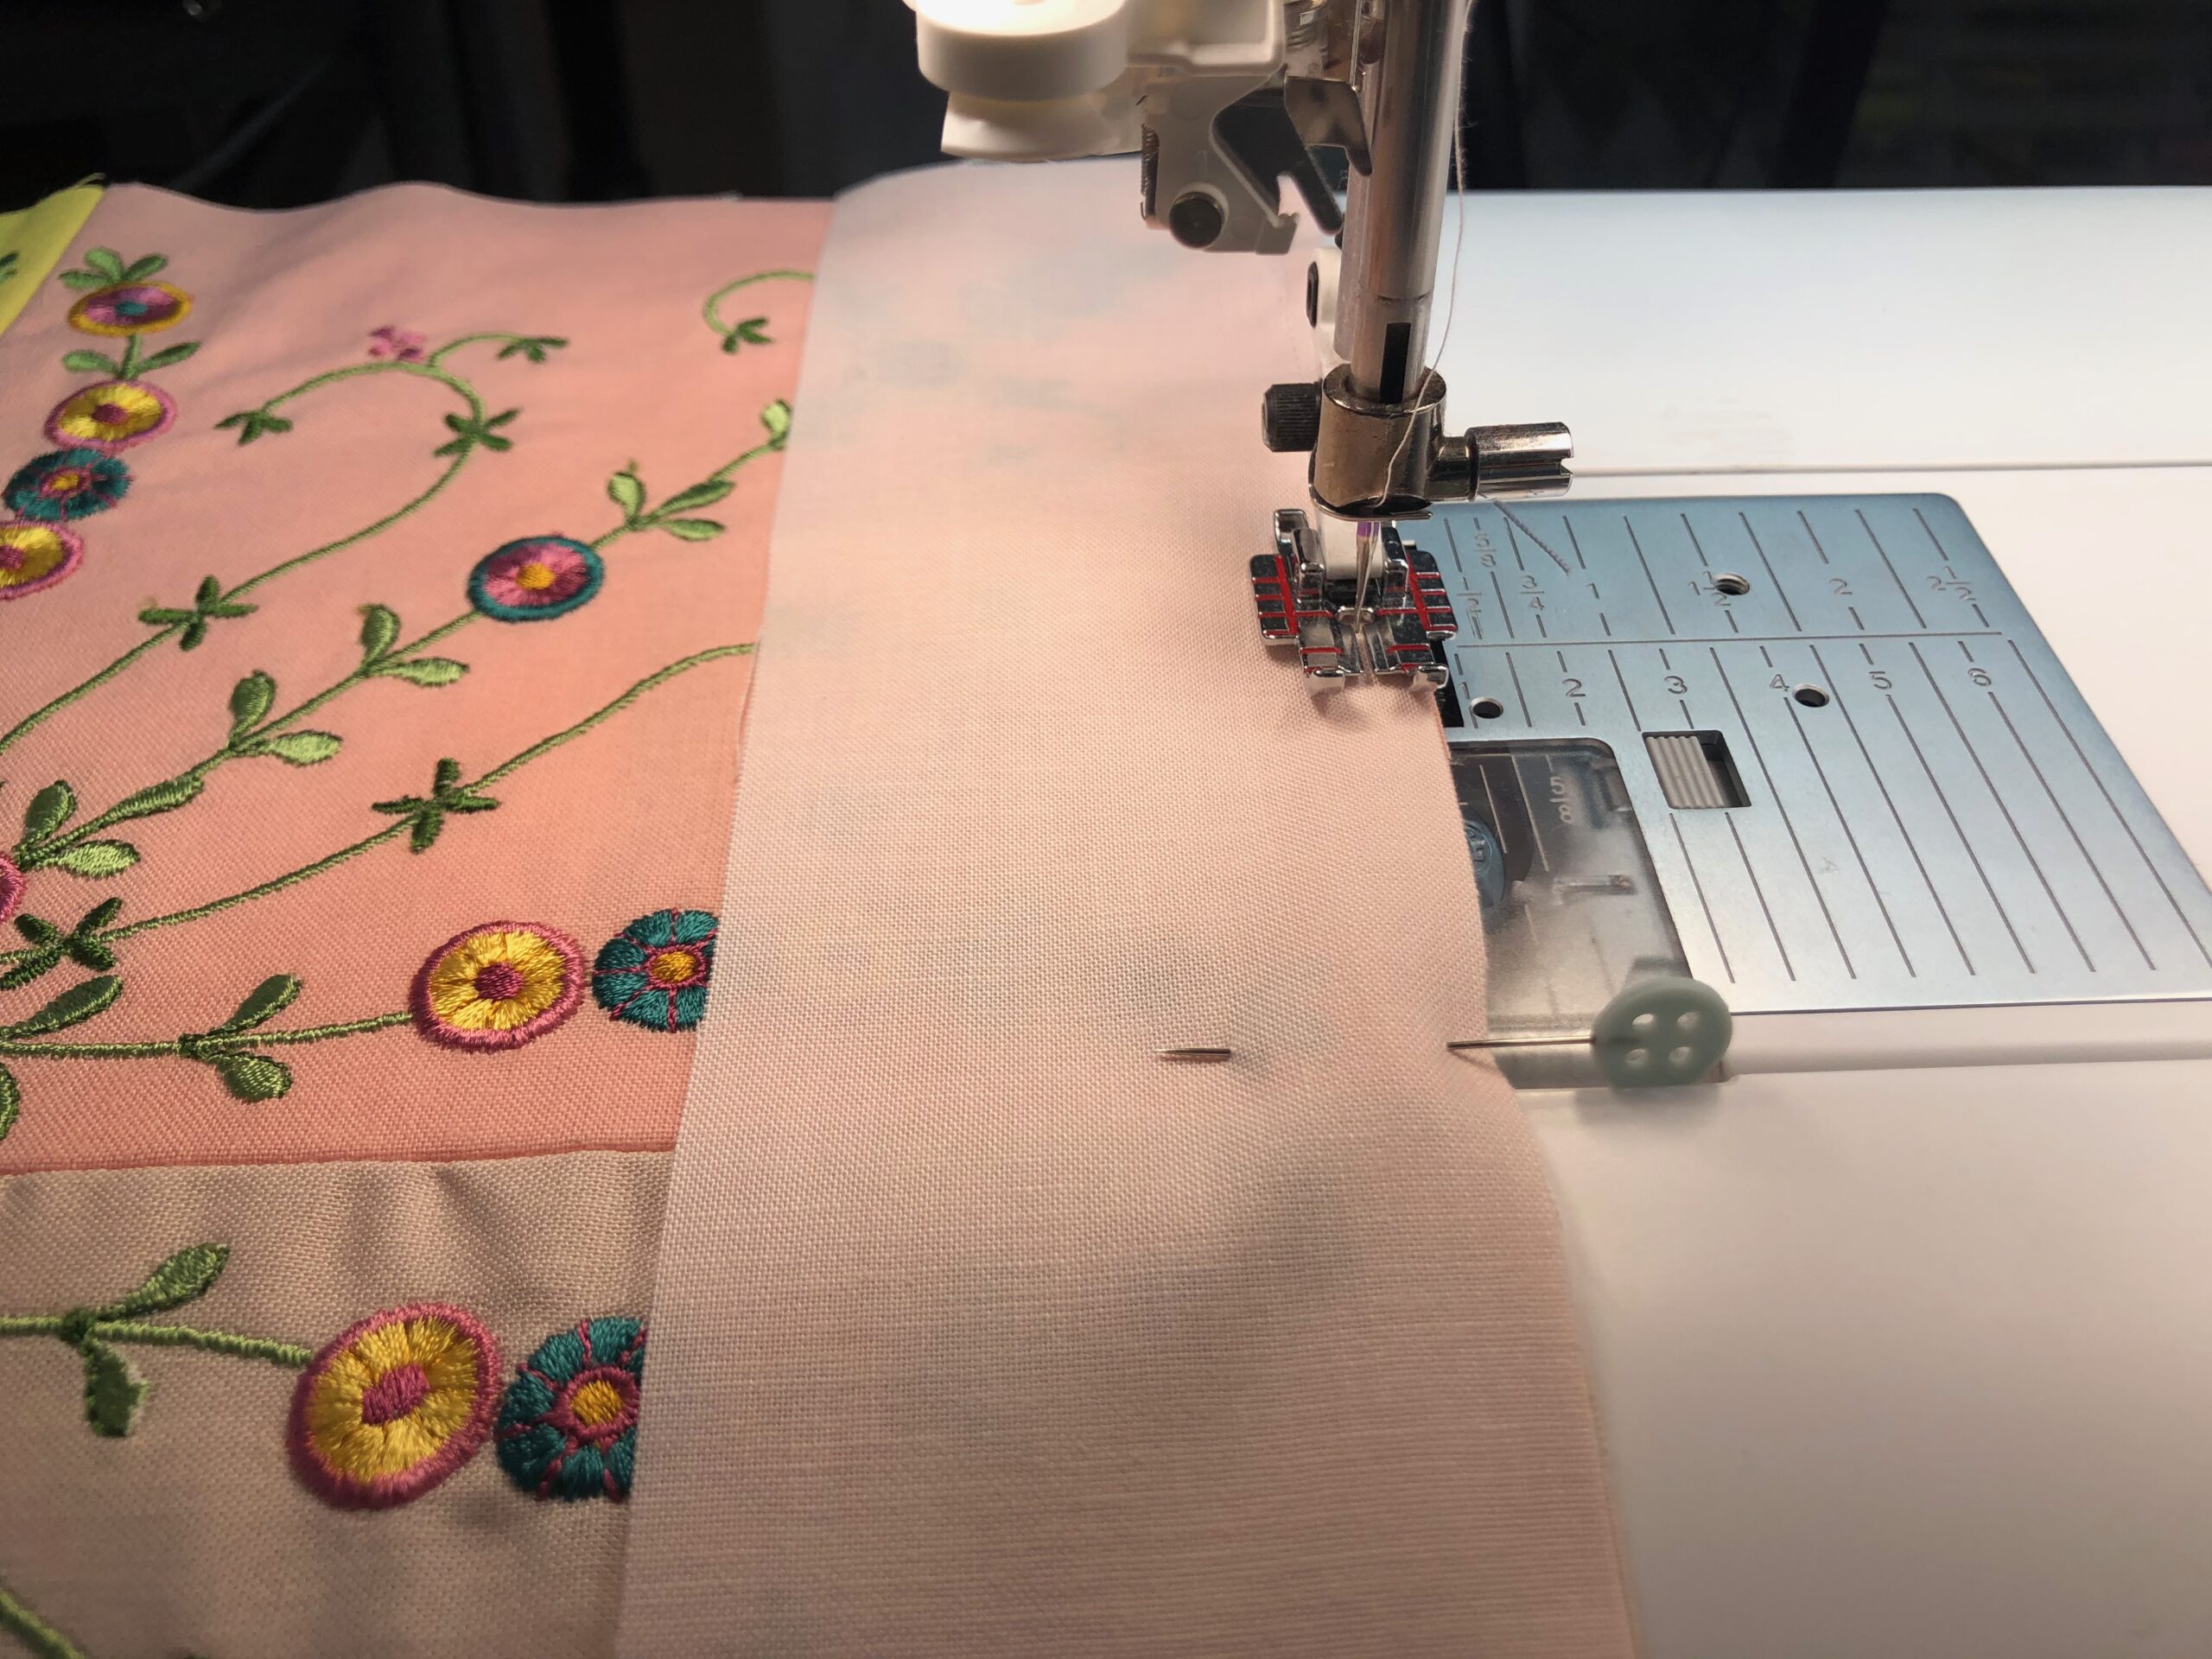
Match two fabric squares along adjacent edges, positioning like embroidery elements right sides together. Pin the edge, and then sew using a 3/8” seam allowance. This should give you 1/8” between the designs. Make sure the design looks like a mirror image of itself along each fabric square.
Press open the seam.

Repeat to stitch the adjacent edge of the next two fabric squares. Then place the joined squares right sides together to stitch that adjacent long edge in the same manner. Make sure the seams are perfectly aligned and pin generously before sewing. Press open the seam.
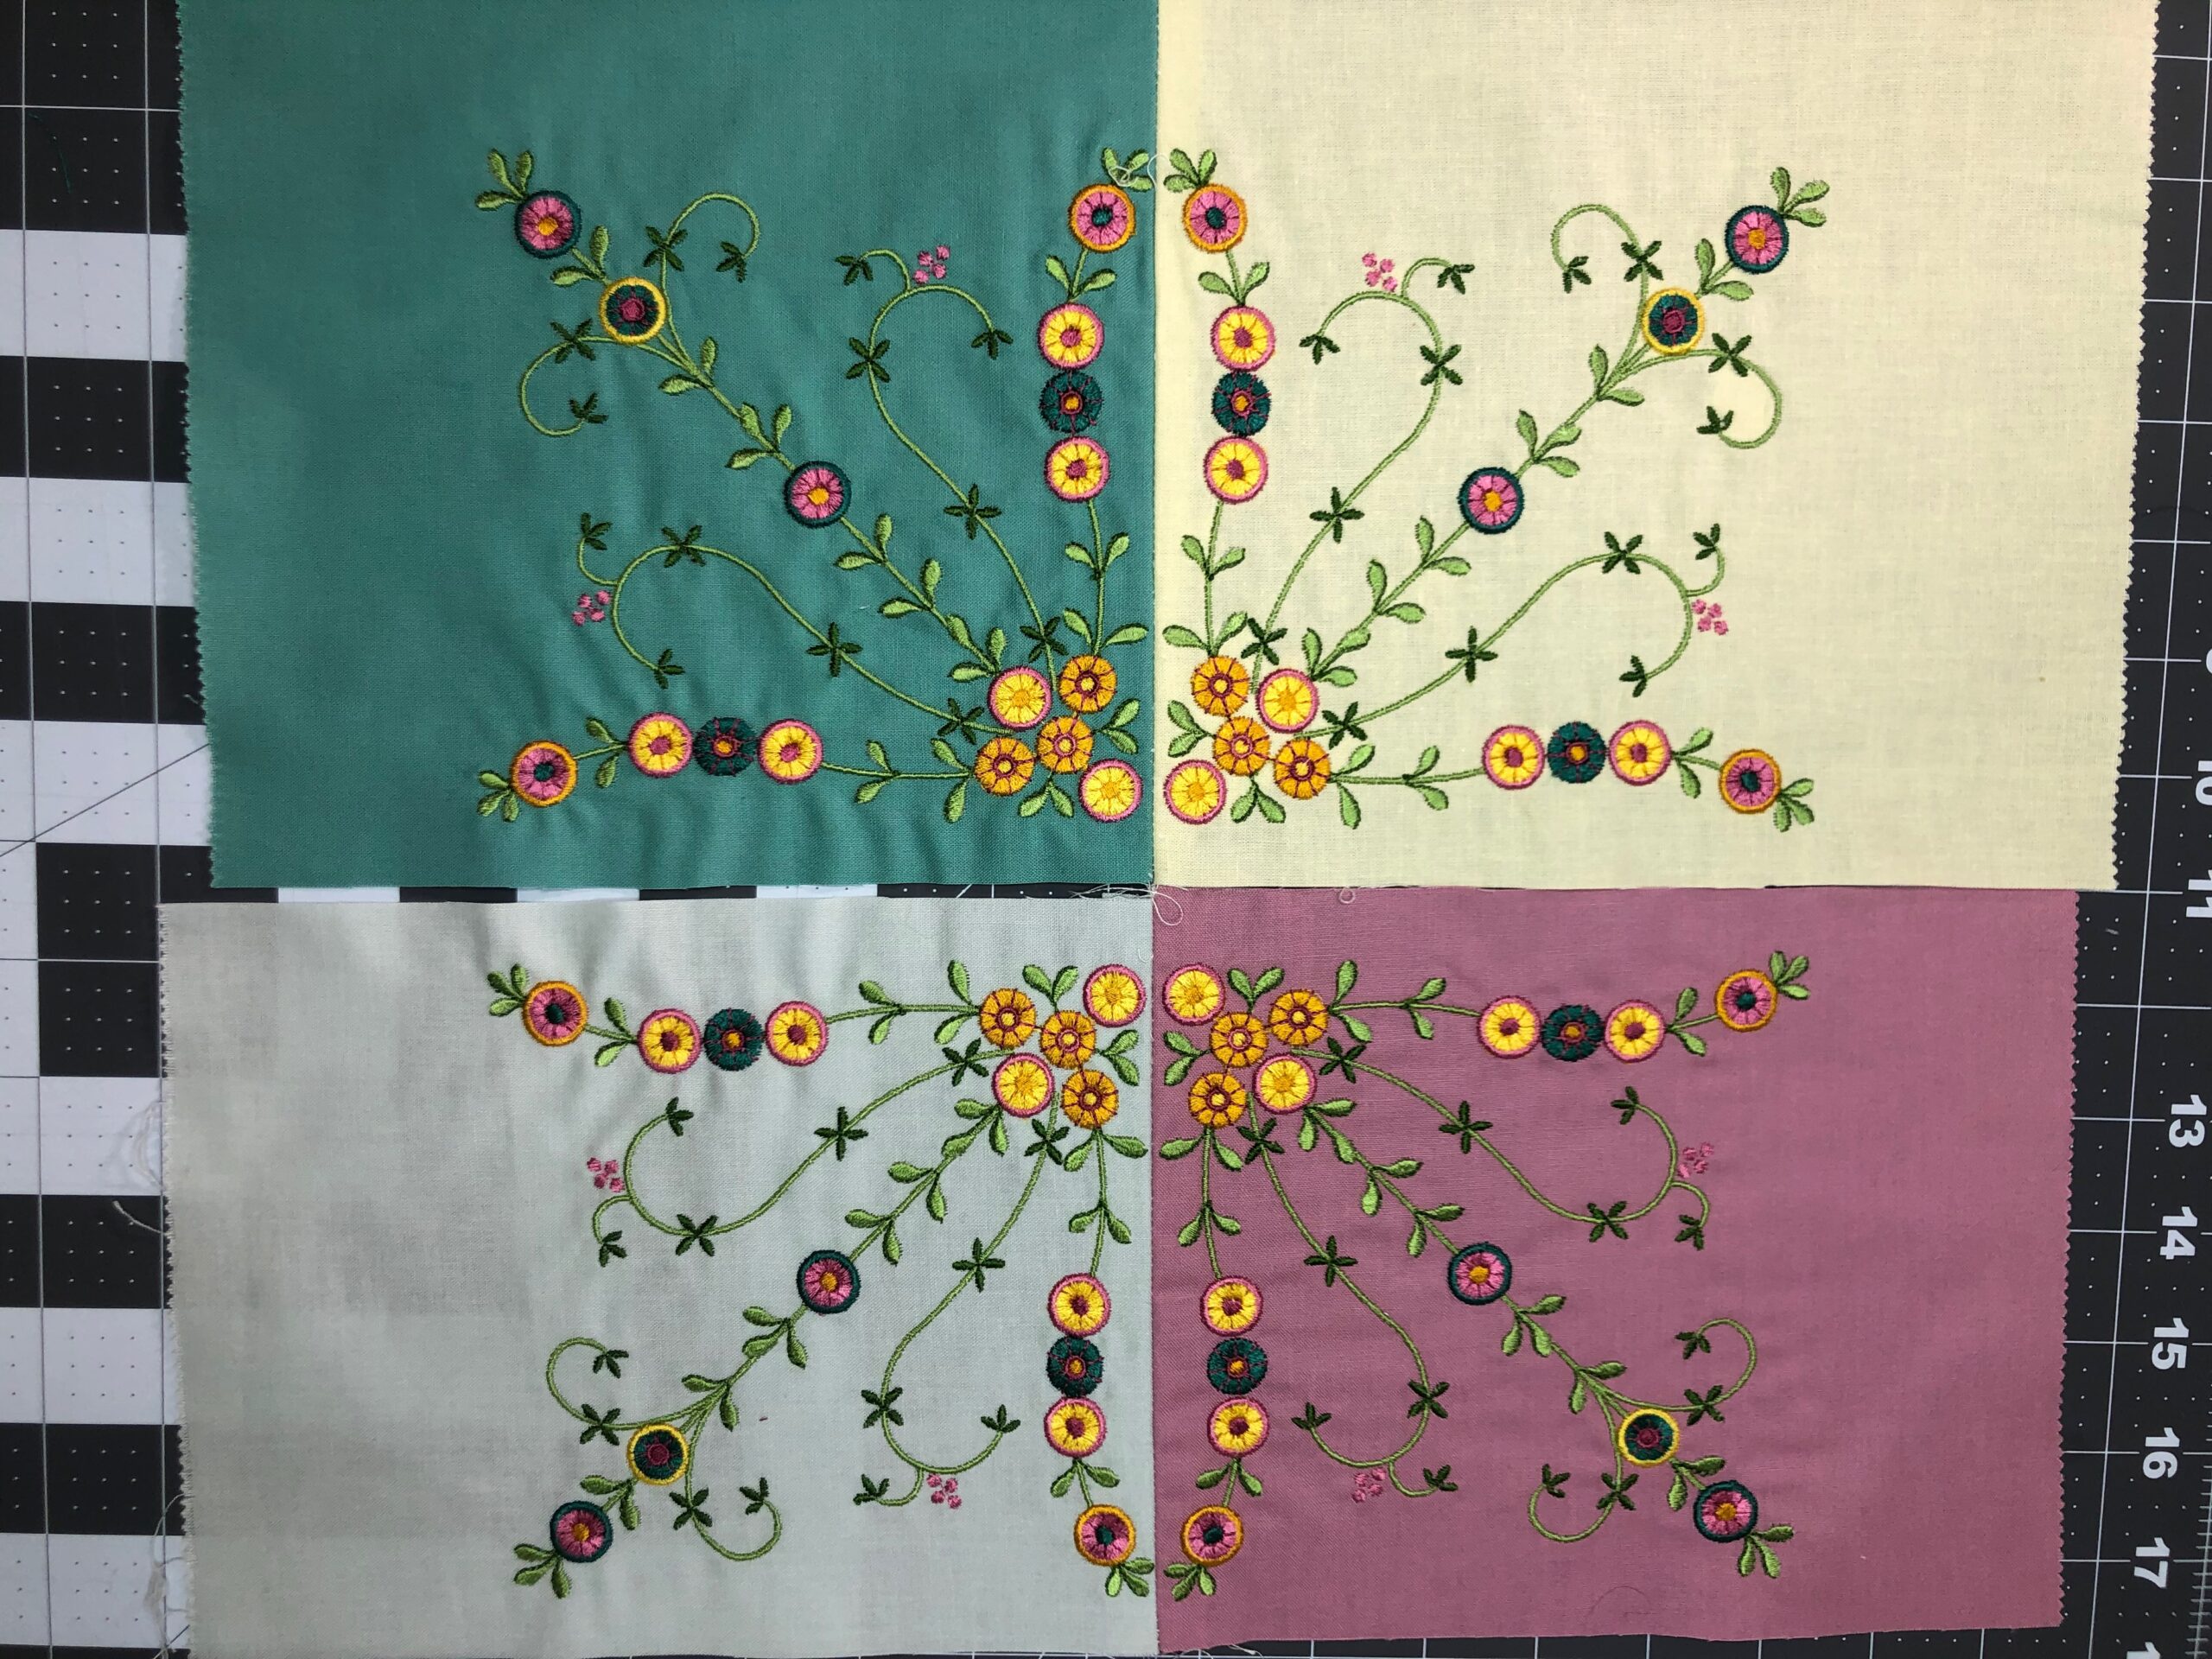
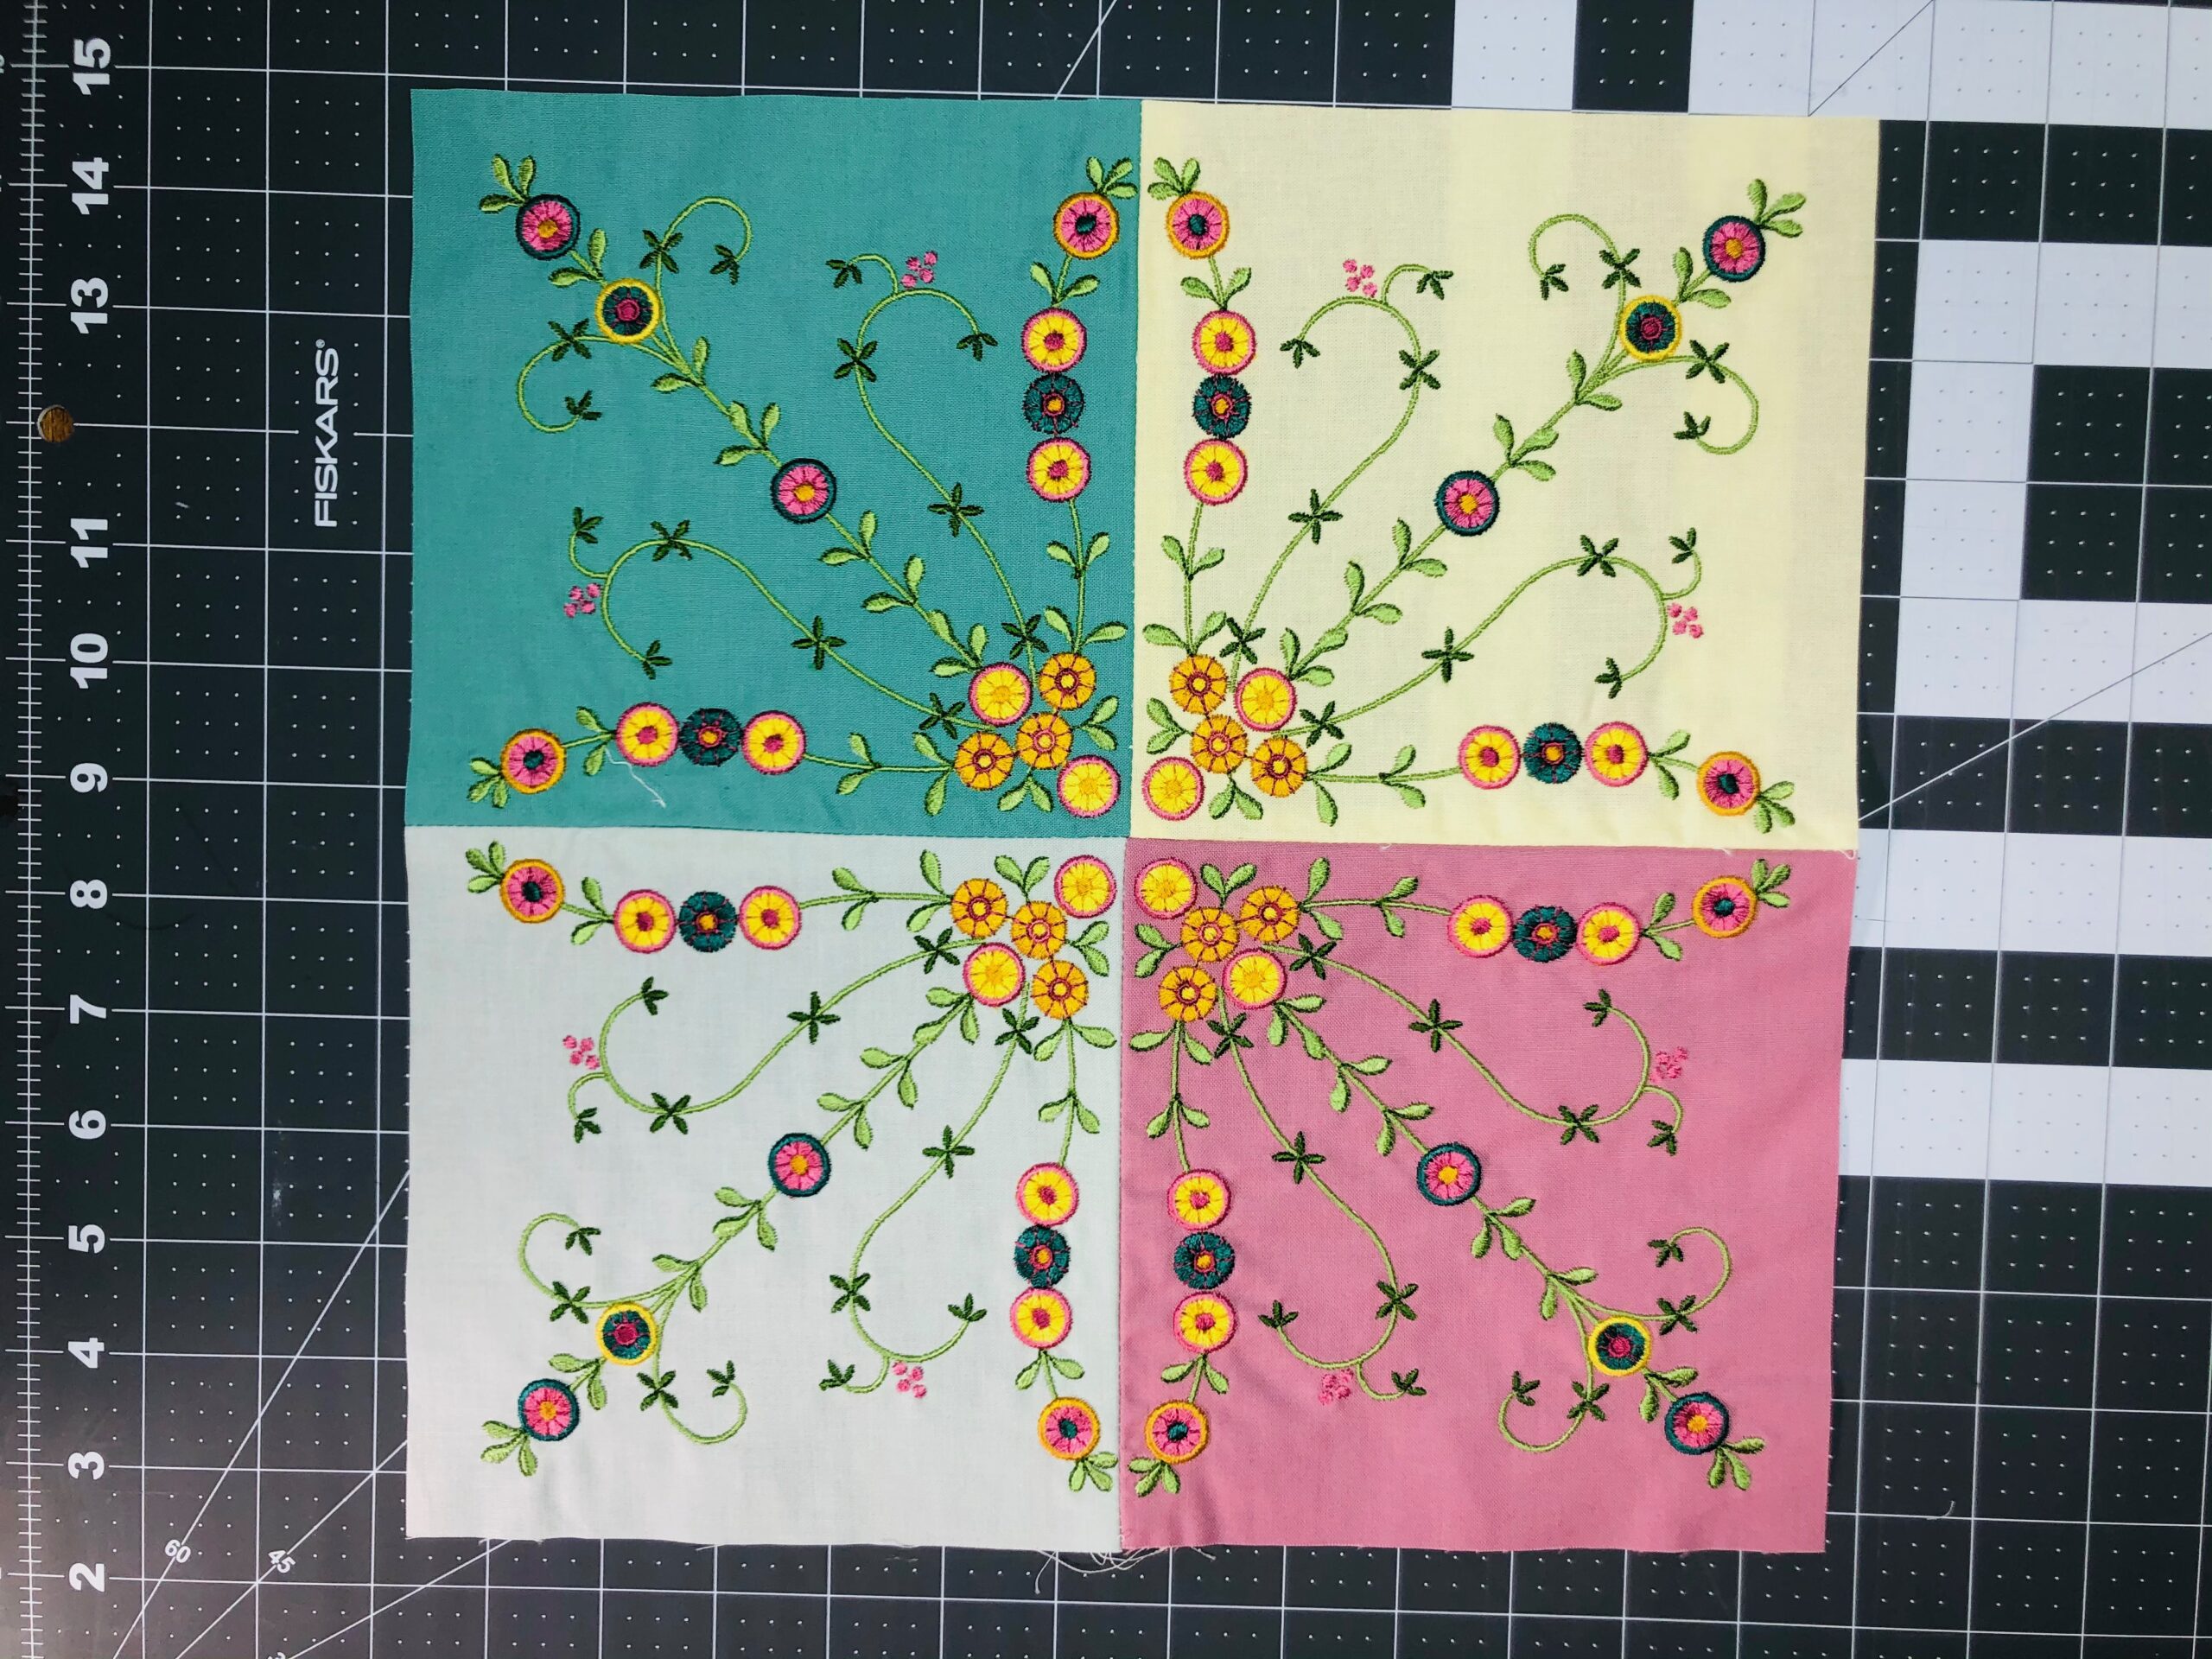
Repeat to stitch the remaining four fabric squares, creating two floral embroidered blocks that measure 12½” square. (If your embroidery design is smaller or larger than 5½”, your block size will differ.)
Trim the edges so they’re even.
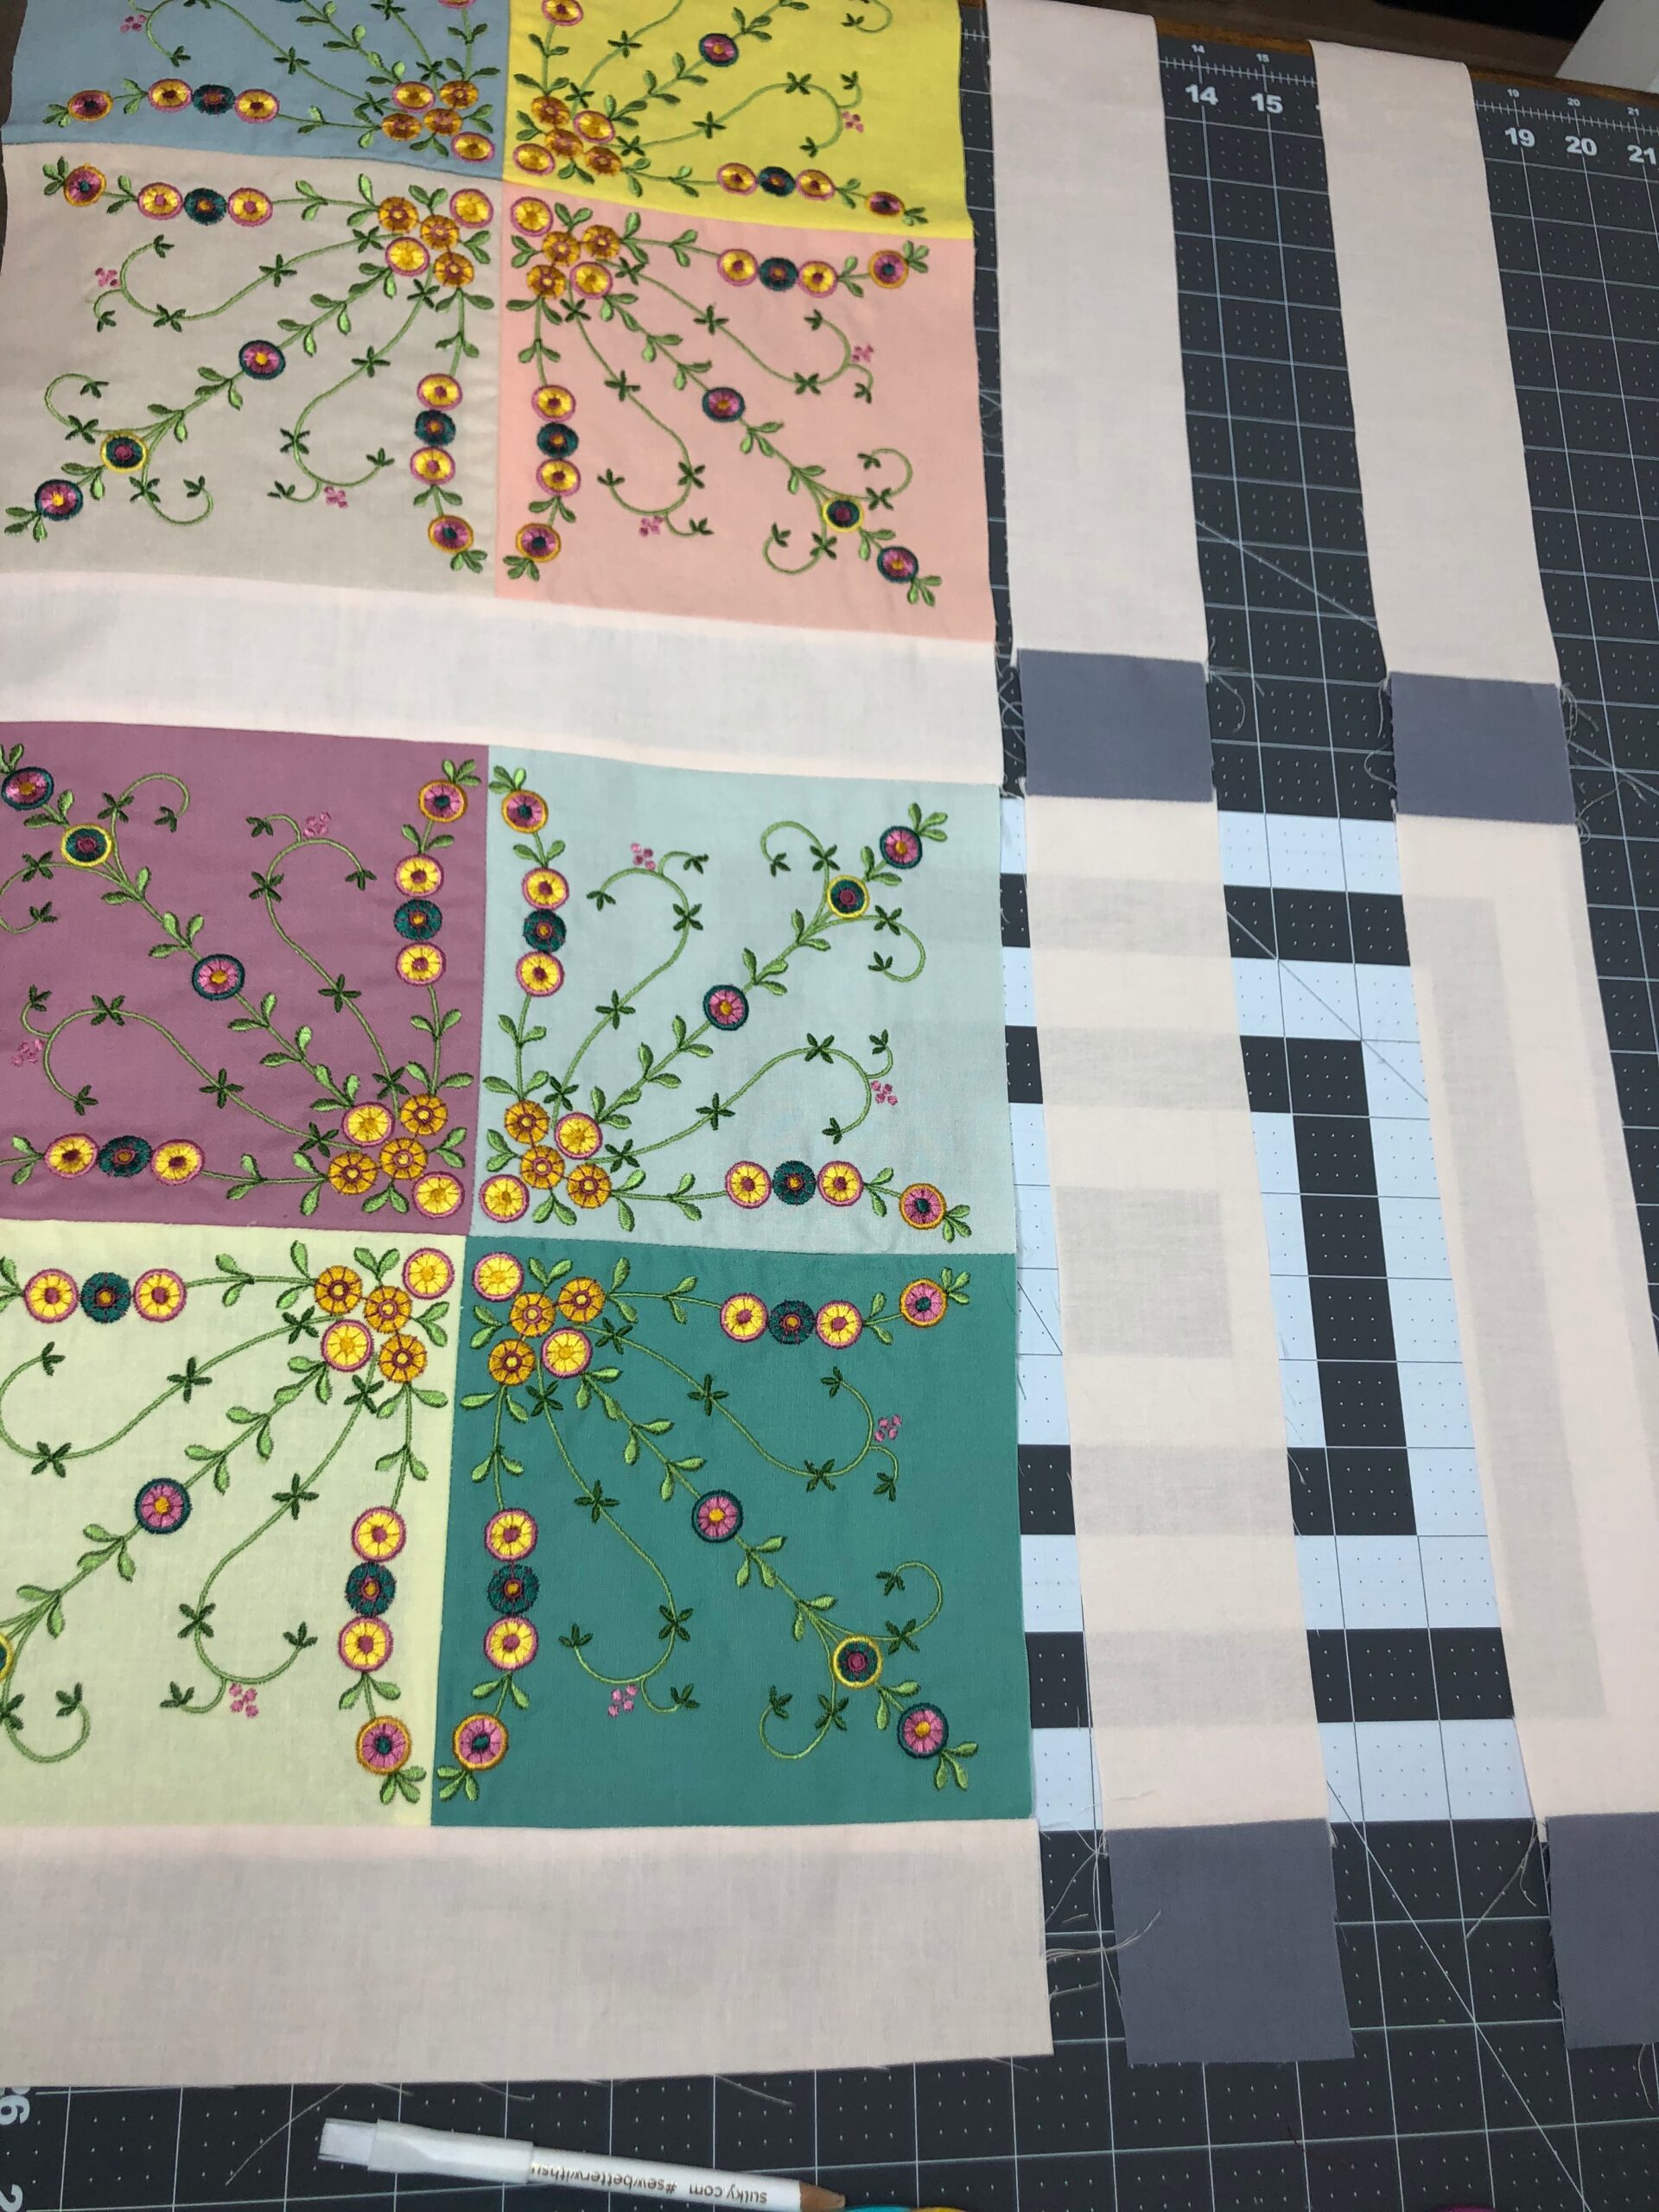
SASHING
From the sashing fabric, cut seven 2½” x 12½” strips.
Stitch one sashing strip to one block outer edge with right sides together and edges aligned. Press the seam toward the sashing.
Stitch a second sashing strip to the opposite block edge; press the seam toward the sashing.
Stitch the remaining embroidered block to the opposite sashing edge; press the seam toward the sashing.
Stitch a third sashing strip to the opposite embroidered block edge; press the seam toward the sashing.
Now the blocks are framed with sashing strips. This is now the “main rectangle.”
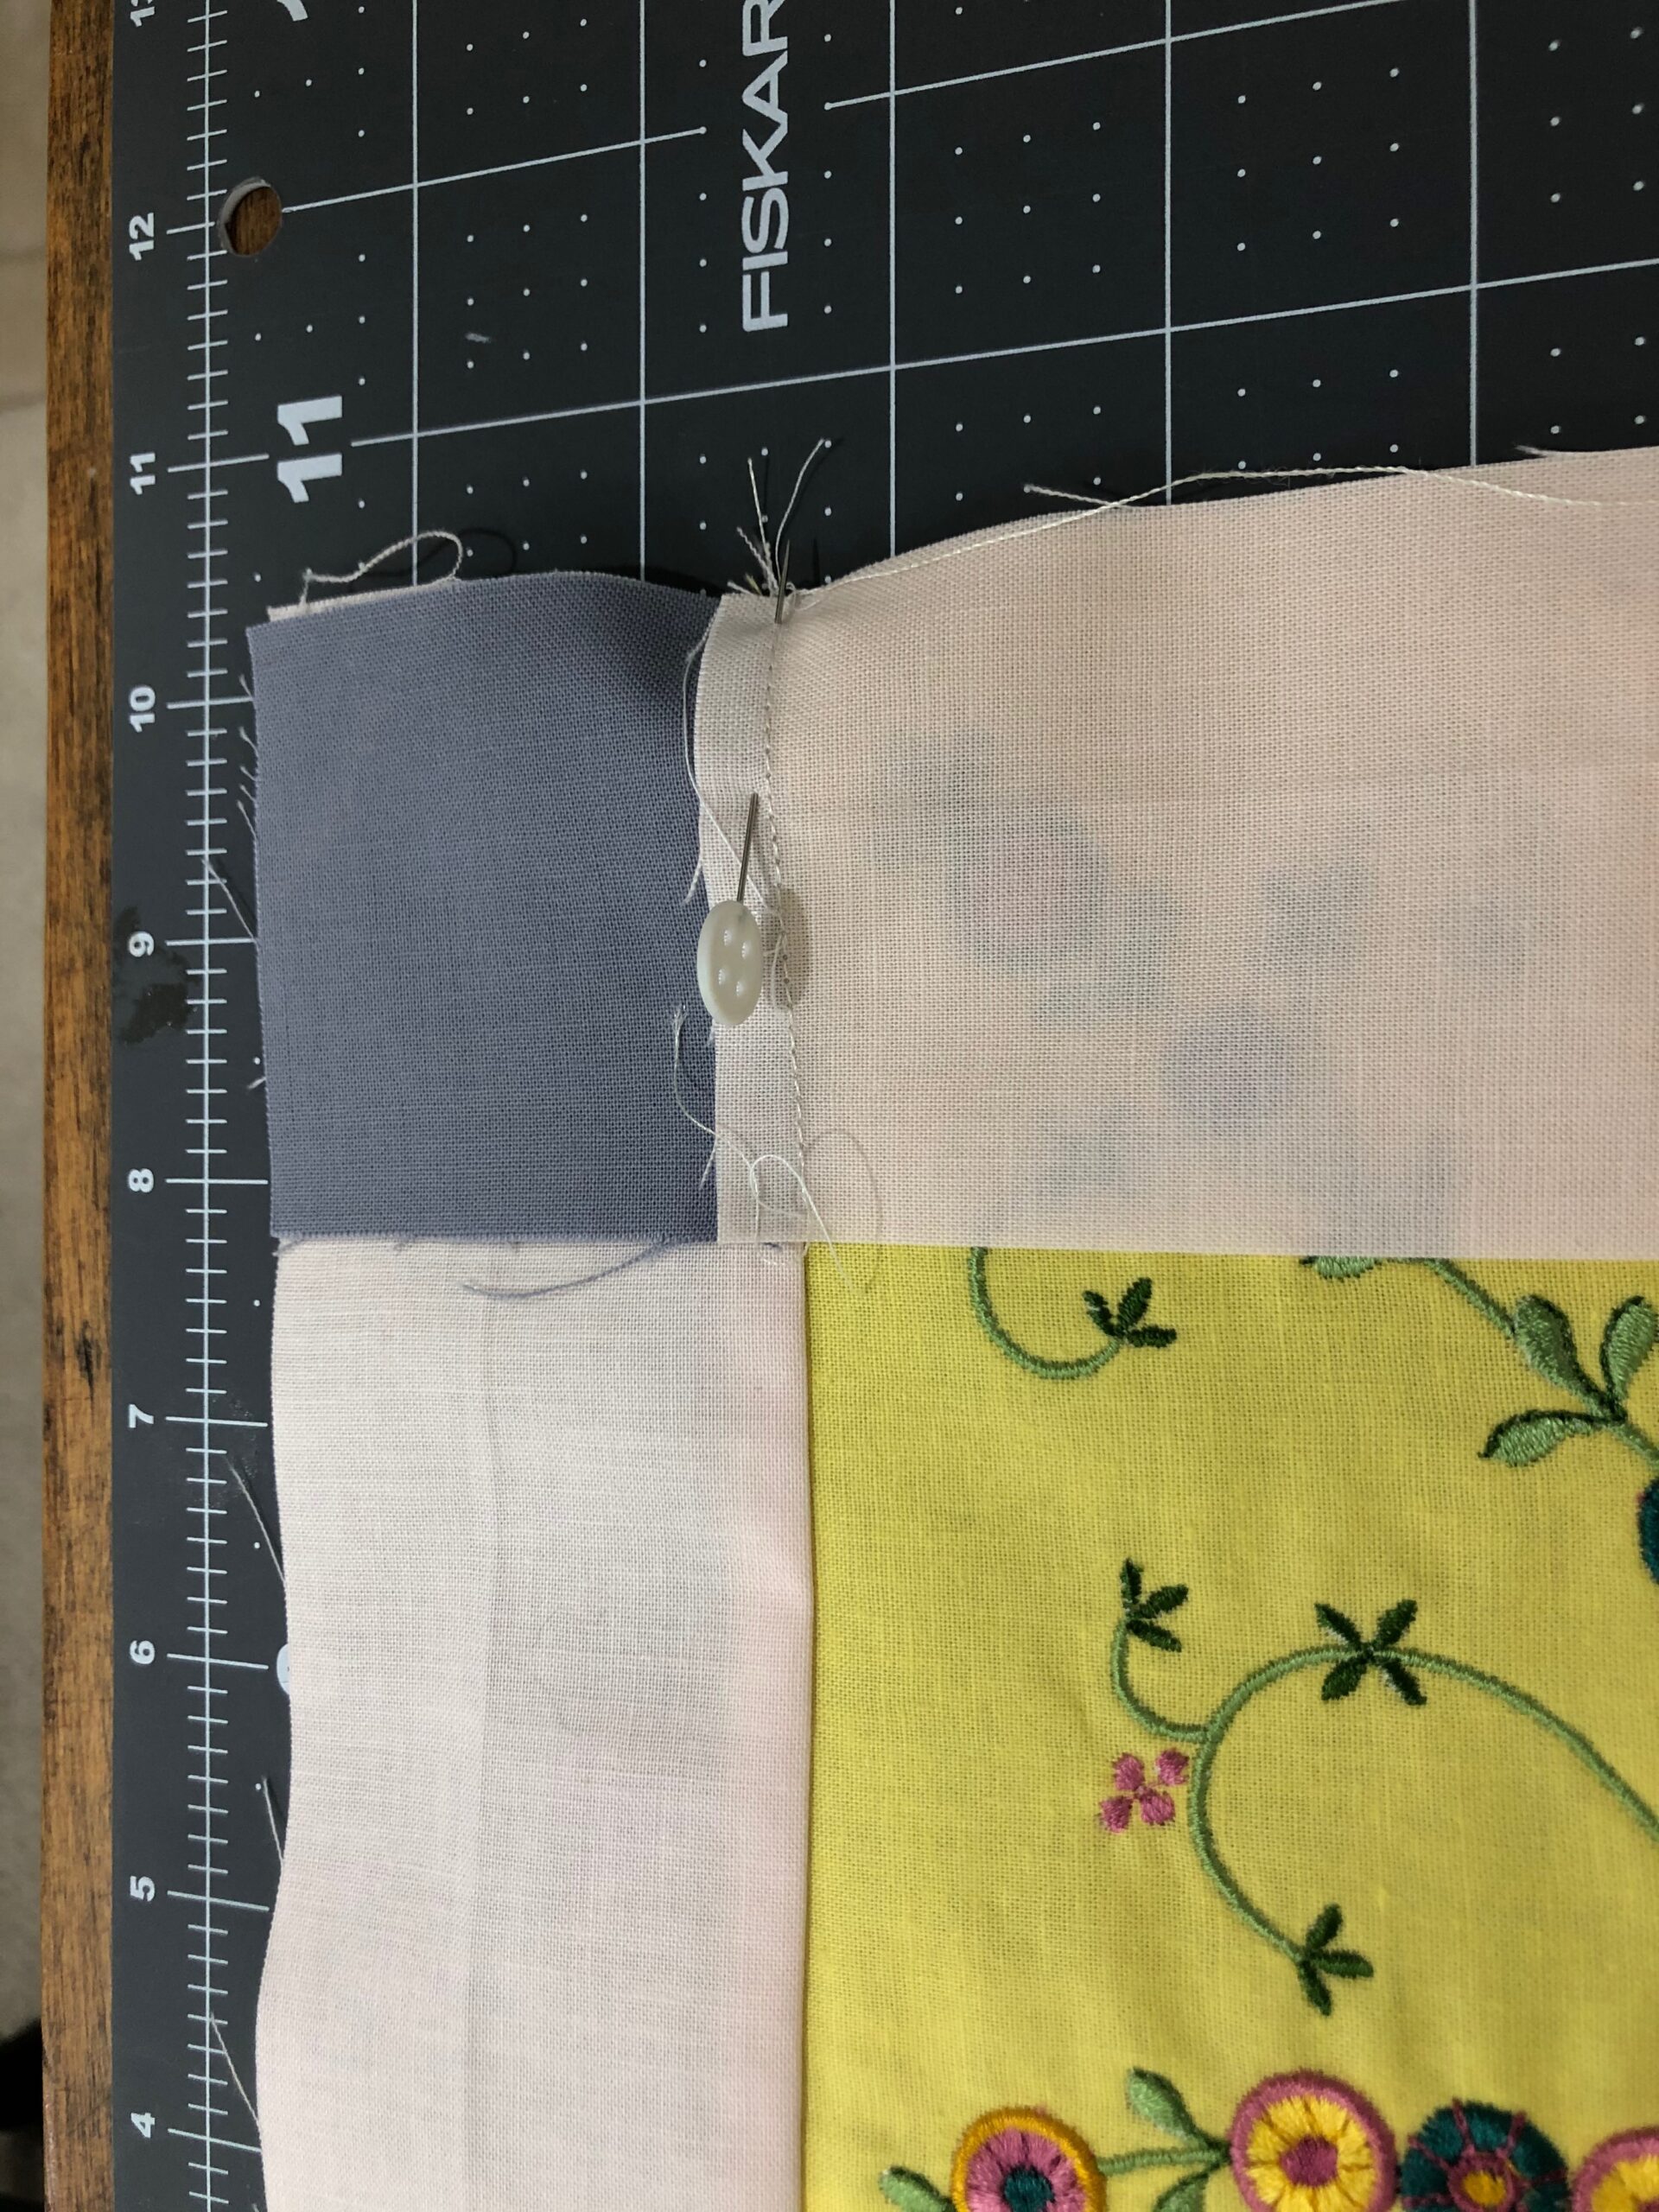
From the contrasting fabric strip, cut six 2½” squares.
Stitch one cornerstone square to a fourth sashing strip end with right sides together. Press the seam toward the sashing.

Stitch another cornerstone square to the opposite sashing strip end. Repeat to stitch a fifth sashing strip and third cornerstone square to this growing sashing strip.
Then, repeat to stitch a sixth, seventh and eighth sashing strip with cornerstones four, five and six to create the opposite sashing strip.

TABLE RUNNER TOP
Stitch one long sashing strip to the main rectangle with right sides together and long edges aligned. Pin generously, making sure the seams are aligned perfectly.
Stitch using a ¼” seam allowance. Press the seam toward the sashing.
Stitch one long edge of the remaining long sashing strip to the opposite edge of the main rectangle. Make sure right sides are together and long edges are aligned. Pin generously, aligning the seams.
Stitch using a ¼” seam allowance. Press the seam toward the sashing.
QUILT SANDWICH
Place the backing rectangle wrong side up on a flat work surface. Spray with Sulky KK 2000™ Temporary Spray Adhesive.
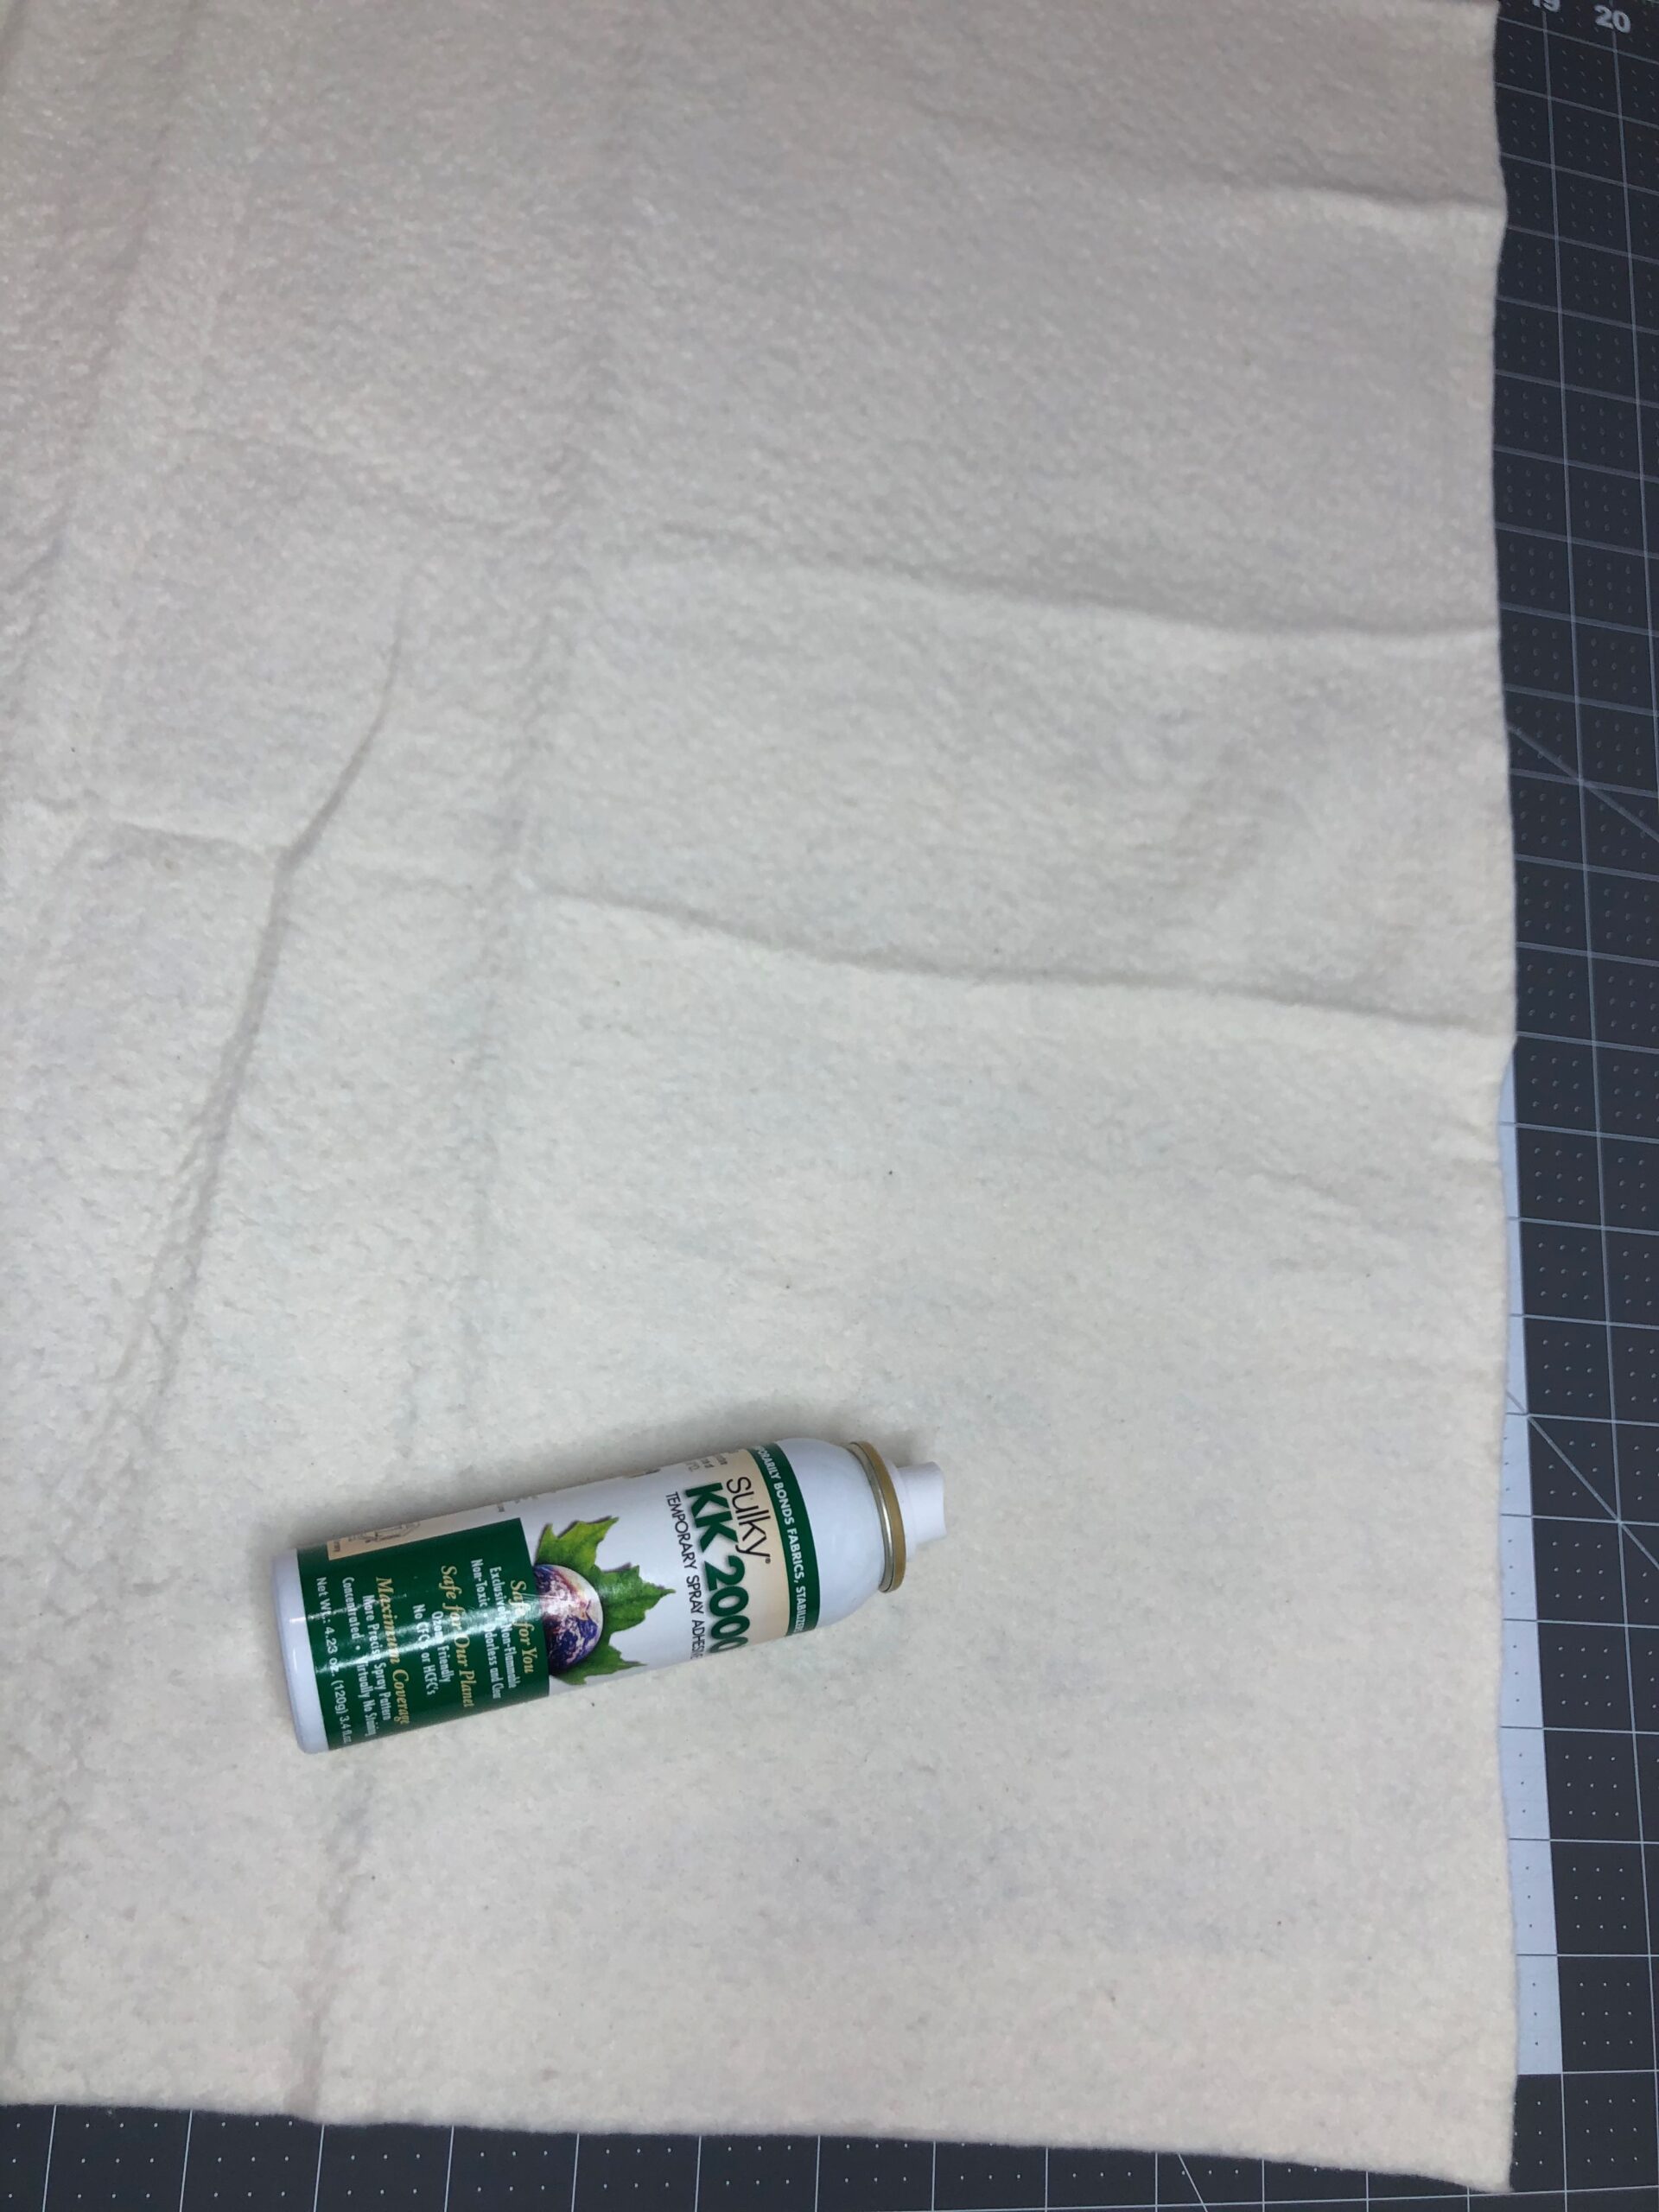
Position the batting rectangle over the backing rectangle, smoothing and securing to the adhesive.
Spray the batting with more KK 2000 until an even coating is achieved.
Center the table runner top right side up over the batting. Gently smooth the table runner down without stretching any areas.
If desired, use additional quilt basting pins to further secure the table runner for quilting.
QUILTING THE TABLE RUNNER
Swap the needle for a 70/10 Microtex.
Thread the needle and wind the bobbin with matching or coordinating 50 wt. Cotton Thread.
If using, install a walking foot, even-feed foot, or engage a dual-feed system on your machine (whichever is applicable to your machine brand). If you don’t have the aforementioned accessories or functions, lessen the presser foot pressure to accommodate the thickness of the table runner layers.
Quilt in the ditch of each table runner seam, beginning with the centermost seam and working outward to the edges.


TIP: For additional embellishment and interest, add a free-motion-quilted flower to each cornerstone block.
FINISHING
When quilting is complete, trim the table runner so all edges are even.
Bind the table runner using the double-fold bias binding.
If creating your own bias binding, cut fabric strips measuring double the width of your desired binding by the WOF (width of fabric). For the featured table runner, cut 3”-wide strips. You’ll need approximately 3 yards of finished binding when pieced together, accounting for mitering and overlap at the beginning and end. Here’s a quick overview of how to prepare binding strips.
Once the needed binding length is achieved, trim one binding end at a 45° angle toward the wrong side. Fold the cut end ¼” toward the wrong side; press.
Use Clover Wonder Clips to secure the binding folded end to one table runner long-edge center, matching the long raw edges.
Begin stitching 3” from the folded end, mitering the corners as you reach them. At the binding beginning, overlap the raw binding end with the folded end; pin and then trim ½” beyond the fold. Continue stitching the binding long edge to the quilt.
Wrap the binding around the quilt edge; pin or clip generously, making sure the miters are retained at each corner. Hand sew the binding fold to the quilt backing using the 50 wt. Cotton Thread.


Ellen March
I am the Director of Content for Sulky of America. The former Editor in Chief of Sew News and Creative Machine Embroidery magazines, I hosted Sew it All TV on PBS for nine seasons. I've appeared on It's Sew Easy on PBS, DIY Network's Uncommon Threads, Hallmark's Marie Osmond Show, MacPhee Workshop and more! Come sew with me!


9 Comments
Cherie A Beach
Beautiful work!
Ellen March
Thank you Cherie!
Wendee Draves
I am wondering where to get the embroidery design?
Ellen March
This design is a built-in design on the Husqvarna Viking Designer Epic 2. Any corner design will work for this table runner, just be sure the design size is comparable or change up the block size to suit the stitchout dimensions.
Here are a few: https://www.emblibrary.com/EL/search.aspx?search=corner%20designs
Joan Shriver
I love this table runner and I think it’s simple enough that I can make it. Thanks.
Marj Roach
Too bad you didn’t use a design that might be available to all of us. I wouldn’t mind having to purchase it, but can’t buy this one.
Lora
It would be nice if you are going to have a tutorial, to use a design that is accessible to all.
Rose Peterson
I wanted to do this for this design as it is so feminine and spring like for the furniture tops in my guest bedroom along with curtains to match! Unfortunate that you didn’t use a design available to share, purchase so we too could do this project! Newbies will be especially disappointed as they can’t always substitute patterns and sizes. Living far from dealers and having COVID 19 restrictions in place still prevents instructions for many machines today or even adequate consultation to do this.
Mary Schmidt
I agree that when sharing a deign for the public embroidery’er that all formats should be made available, even if you decided to charge for the use.