
Paper Pieced Pumpkin Tote + Intro to Foundation Paper Piecing
Paper Pieced Pumpkin Pocket Tote
Make a paper pieced pumpkin tote and learn the basics of foundation paper piecing in the process.
Foundation Paper Piecing 101
Foundation paper piecing is a fun technique that’s made super easy with Sulky Paper Solvy. Loads of foundation paper piecing patterns exist, and the patterns are typically available to download and print (love the instant gratification!), so it’s easy to print them right onto the Paper Solvy and start stitching. Here’s the down-low on how to do foundation paper piecing and achieve great results.

Using Sulky Paper Solvy stabilizer is a great way to use designs off your computer or the internet. Print or trace a design onto Paper Solvy and wash it completely out once it’s stitched. Use it as a base, backing or topper. Suitable for use in copy machines, ink-jet printers or bubble-jet printers. It is the PERFECT paper for paper piecing! Paper Solvy does not gum-up needles, is non-toxic and bio-degradable. You’ll love using it far above traditional paper methods.
Once you understand the basics of foundation paper piecing, you’ll be ready to stitch a cute pumpkin tote with a paper pieced pumpkin pocket on the front!
Foundation Paper Piecing Quick Tips
- Print paper piecing patterns onto Sulky Paper Solvy.
- Use 60 wt PolyLite thread.
- Decrease the stitch length to 1.5mm.
- Begin and end each stitch with a locking stitch. Set the machine for this, if applicable. If not, take a small backstitch at the beginning and end of each seam.
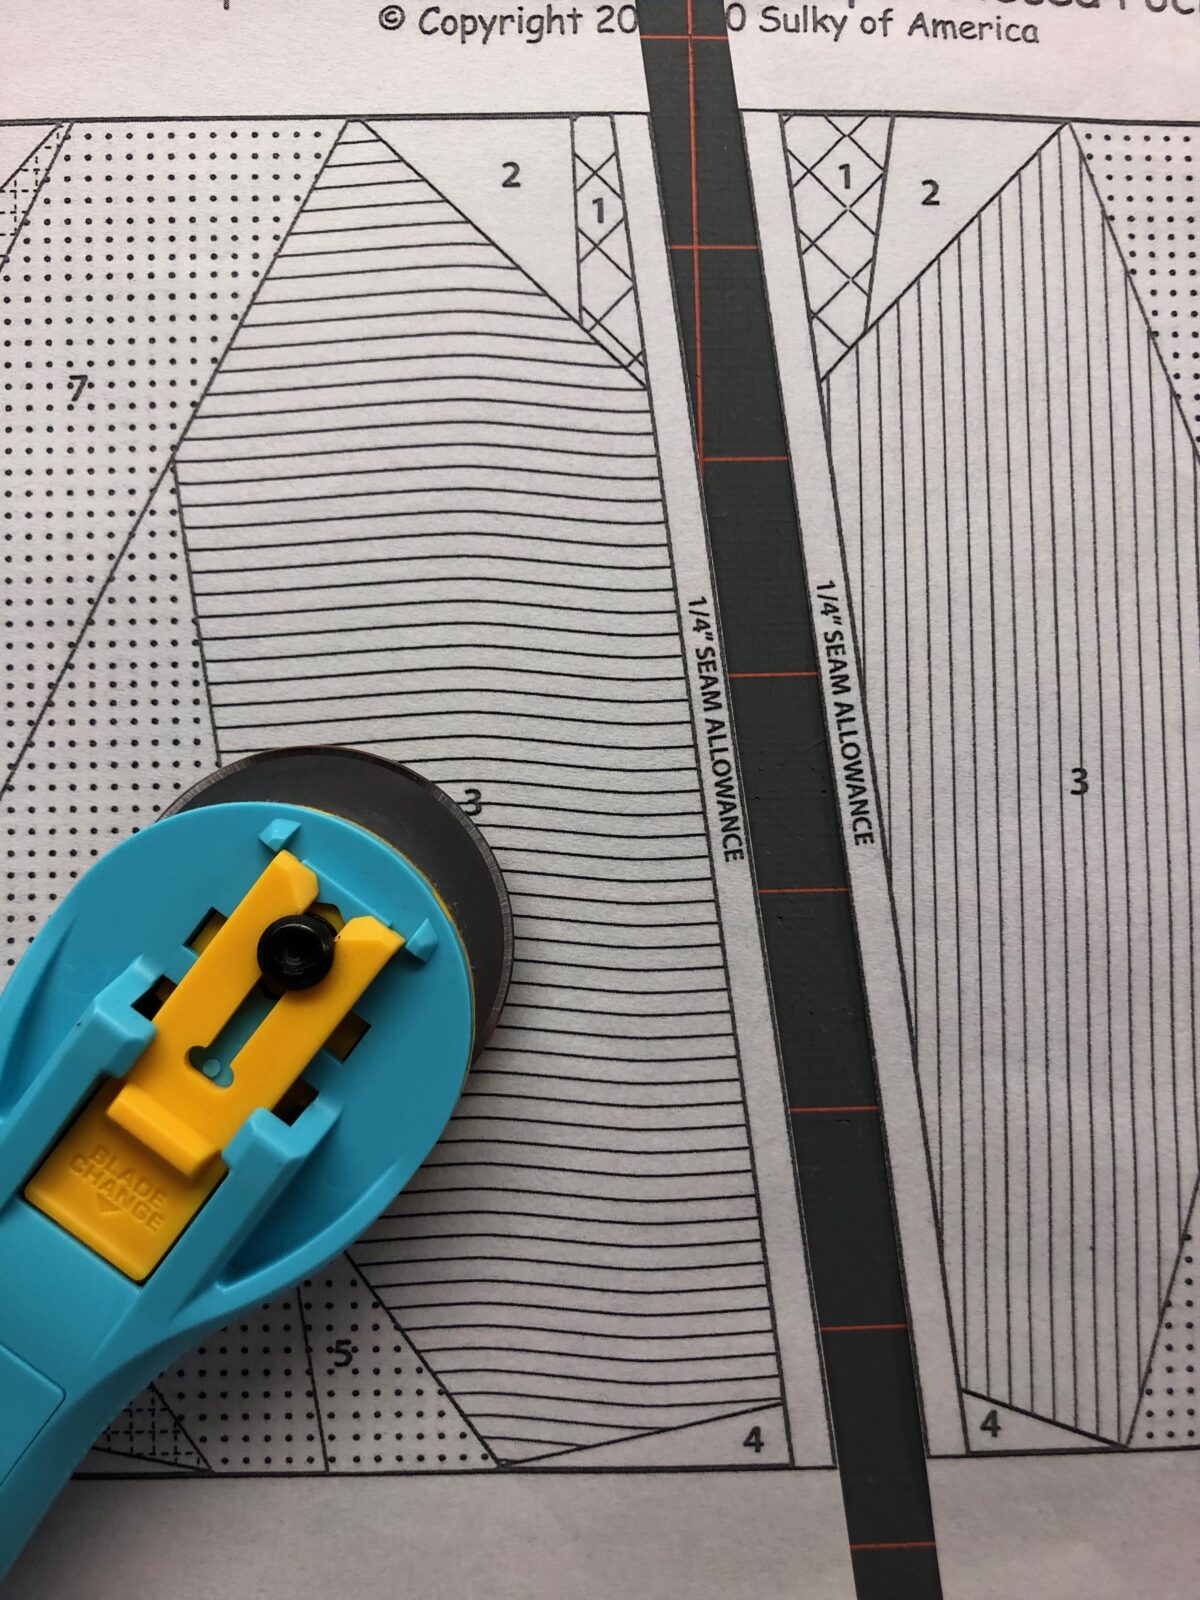
Reading the Pattern
Each section of the pattern is labeled with a number. This is the order the fabric is stitched to the paper.
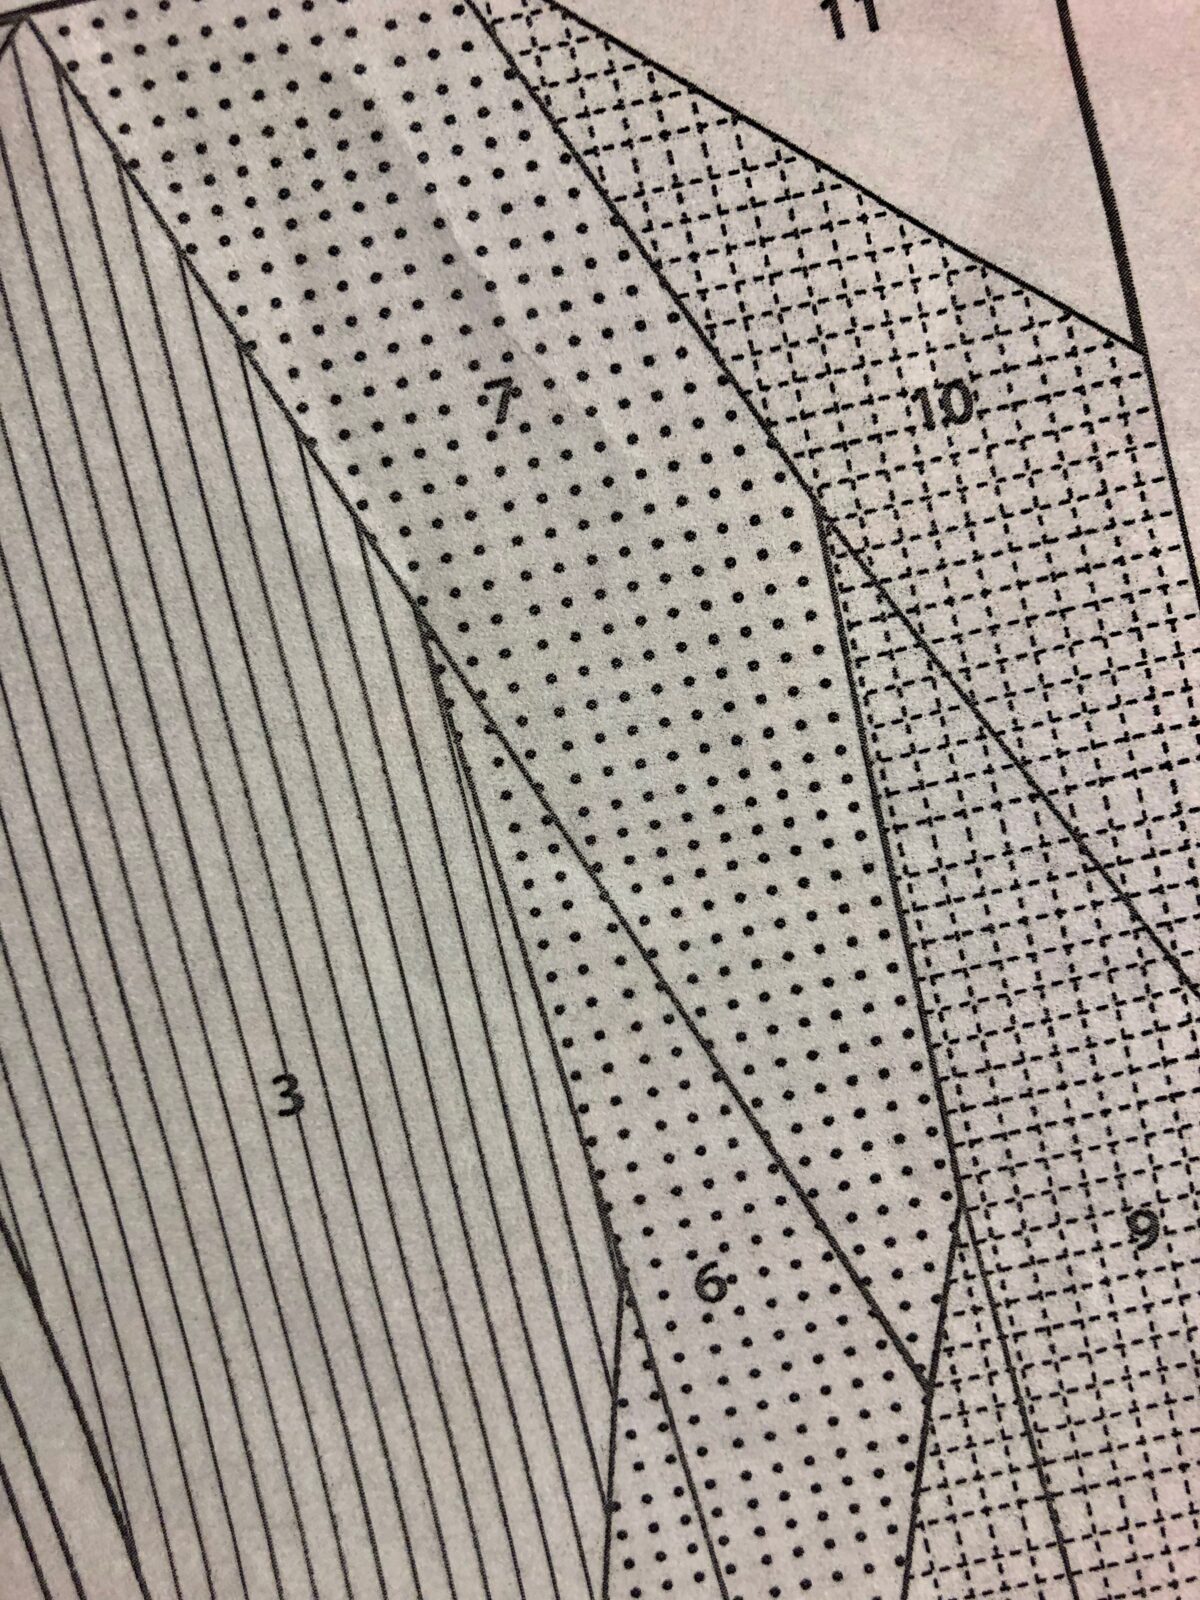
Prepare the fabric to ensure there is enough seam allowance on each piece. Paper piecing is so great because you can use scraps and combine them to make a larger applique or motif. Ensure they’re big enough for each pattern section by first placing it over the section to sew, making sure to have a 1/4″ border. A light box is a great tool to have to assist in seeing the pattern lines through the fabrics!
Paper Piecing Basics
Place a piece of fabric right side down on a flat work surface. Place the pattern face up over the fabric wrong side, centering the pattern piece; pin.
Fold the paper along the line that joins section one and two. Place a second piece of fabric with the right side facing piece one, extending the fabric raw edge ¼” beyond the indicated seamline. Pin the fabric to secure, keeping the pin away from the seamline.
Place the pattern under the presser foot with the paper facing up. Stitch along the line joining pieces one and two.
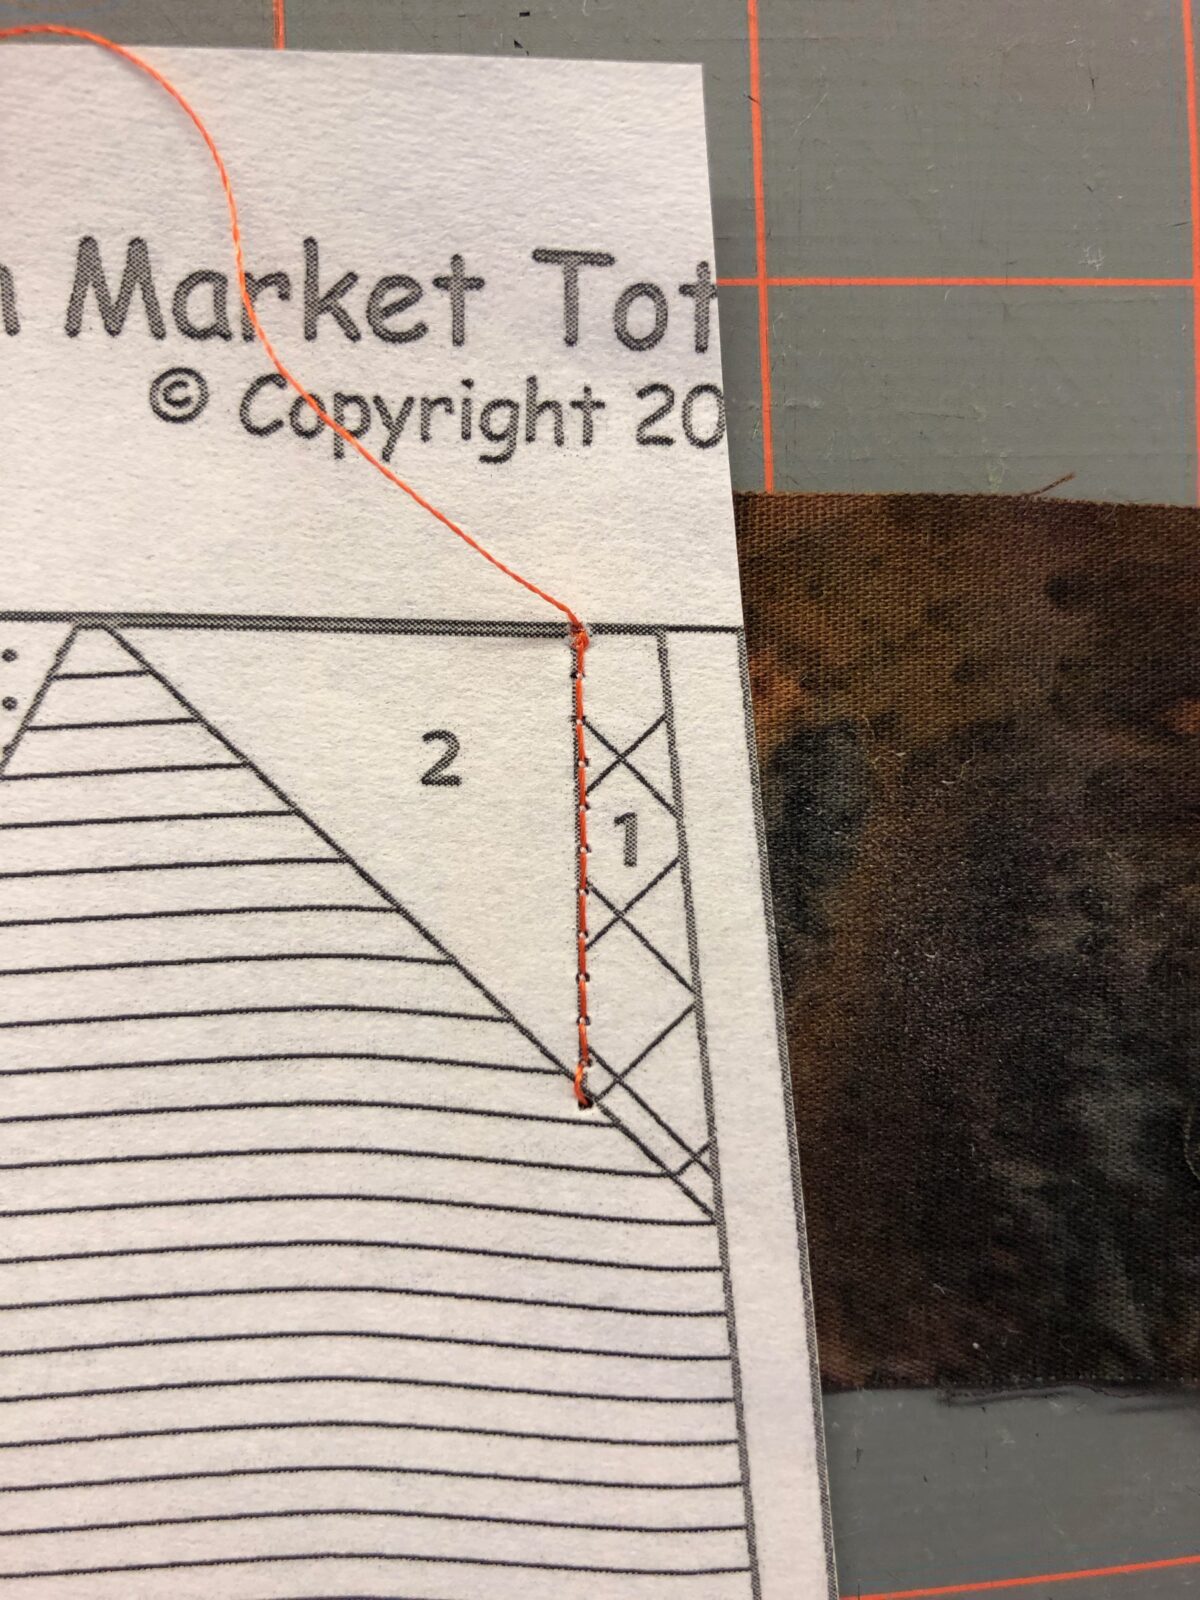
Re-fold the paper pattern along the previous foldline, and then trim the fabric along the seam allowance. Unfold, and then press the seam using a hot, dry iron. (Do NOT use steam to avoid dissolving or distorting the Paper Solvy.)
Continue to stitch each section of the pattern in numerical order. Then trim the section down to size.
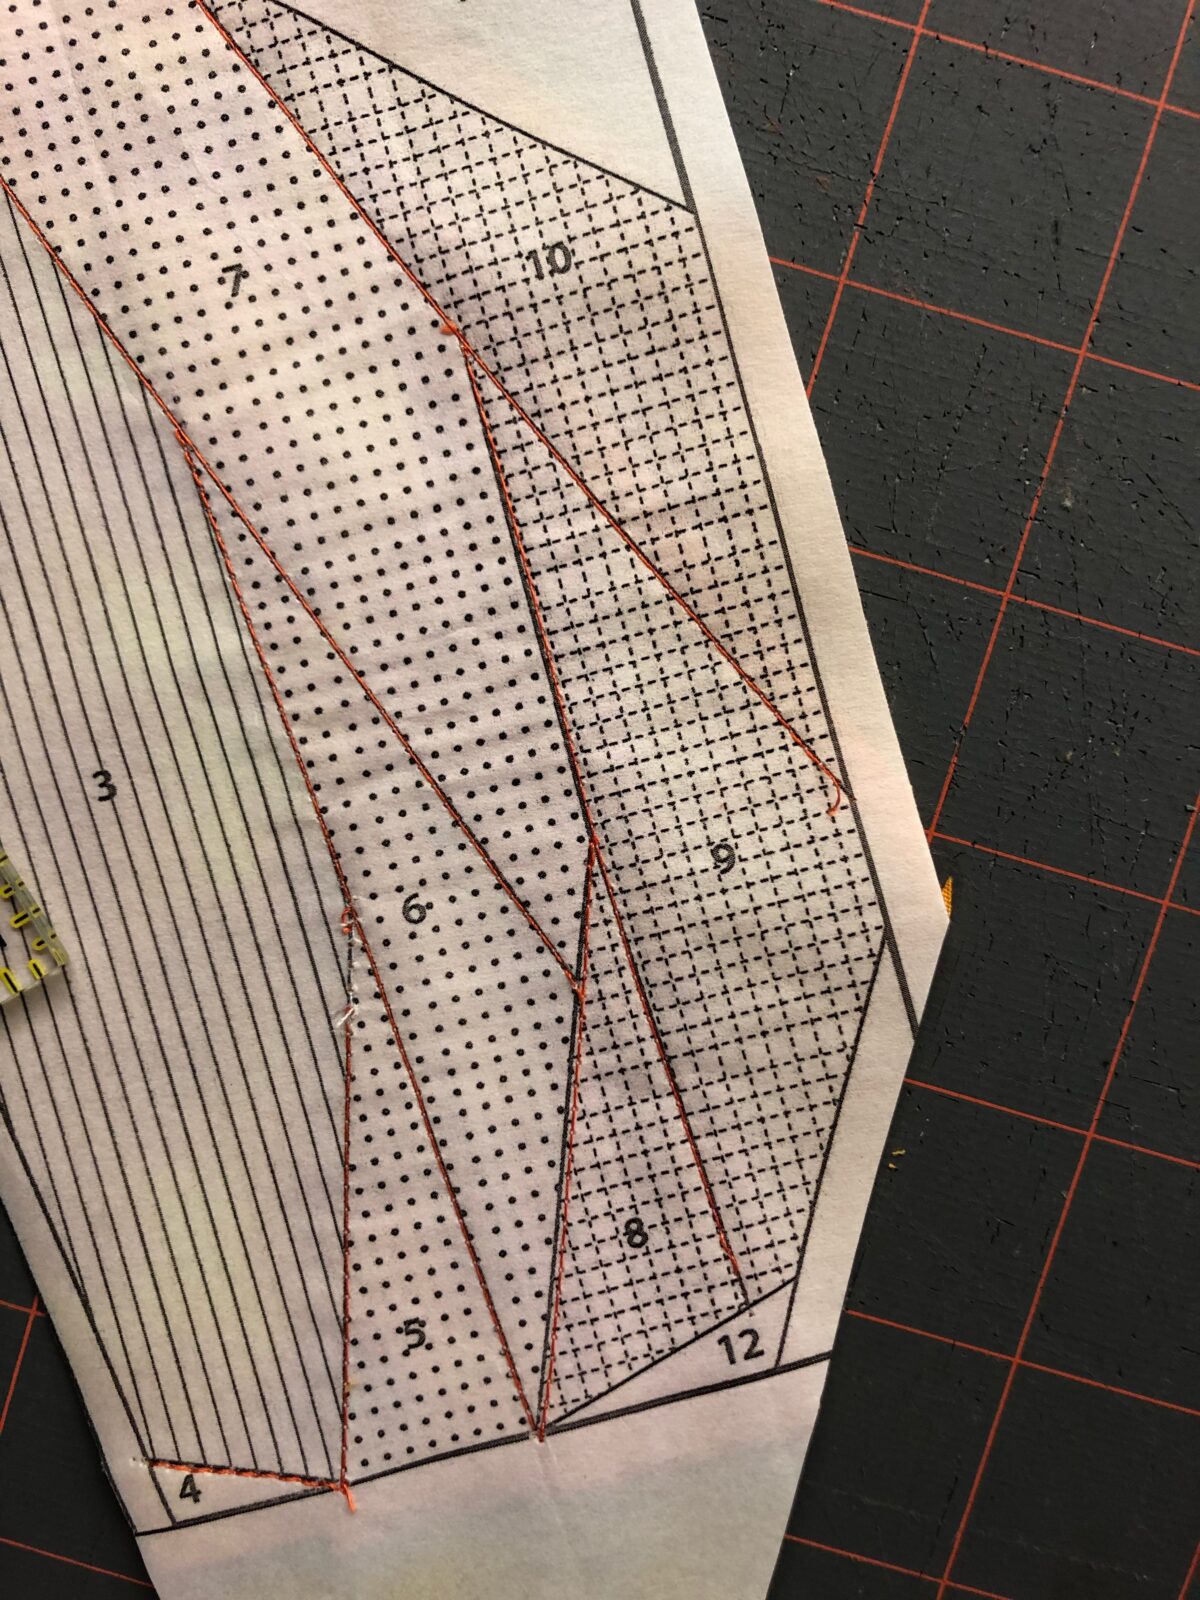
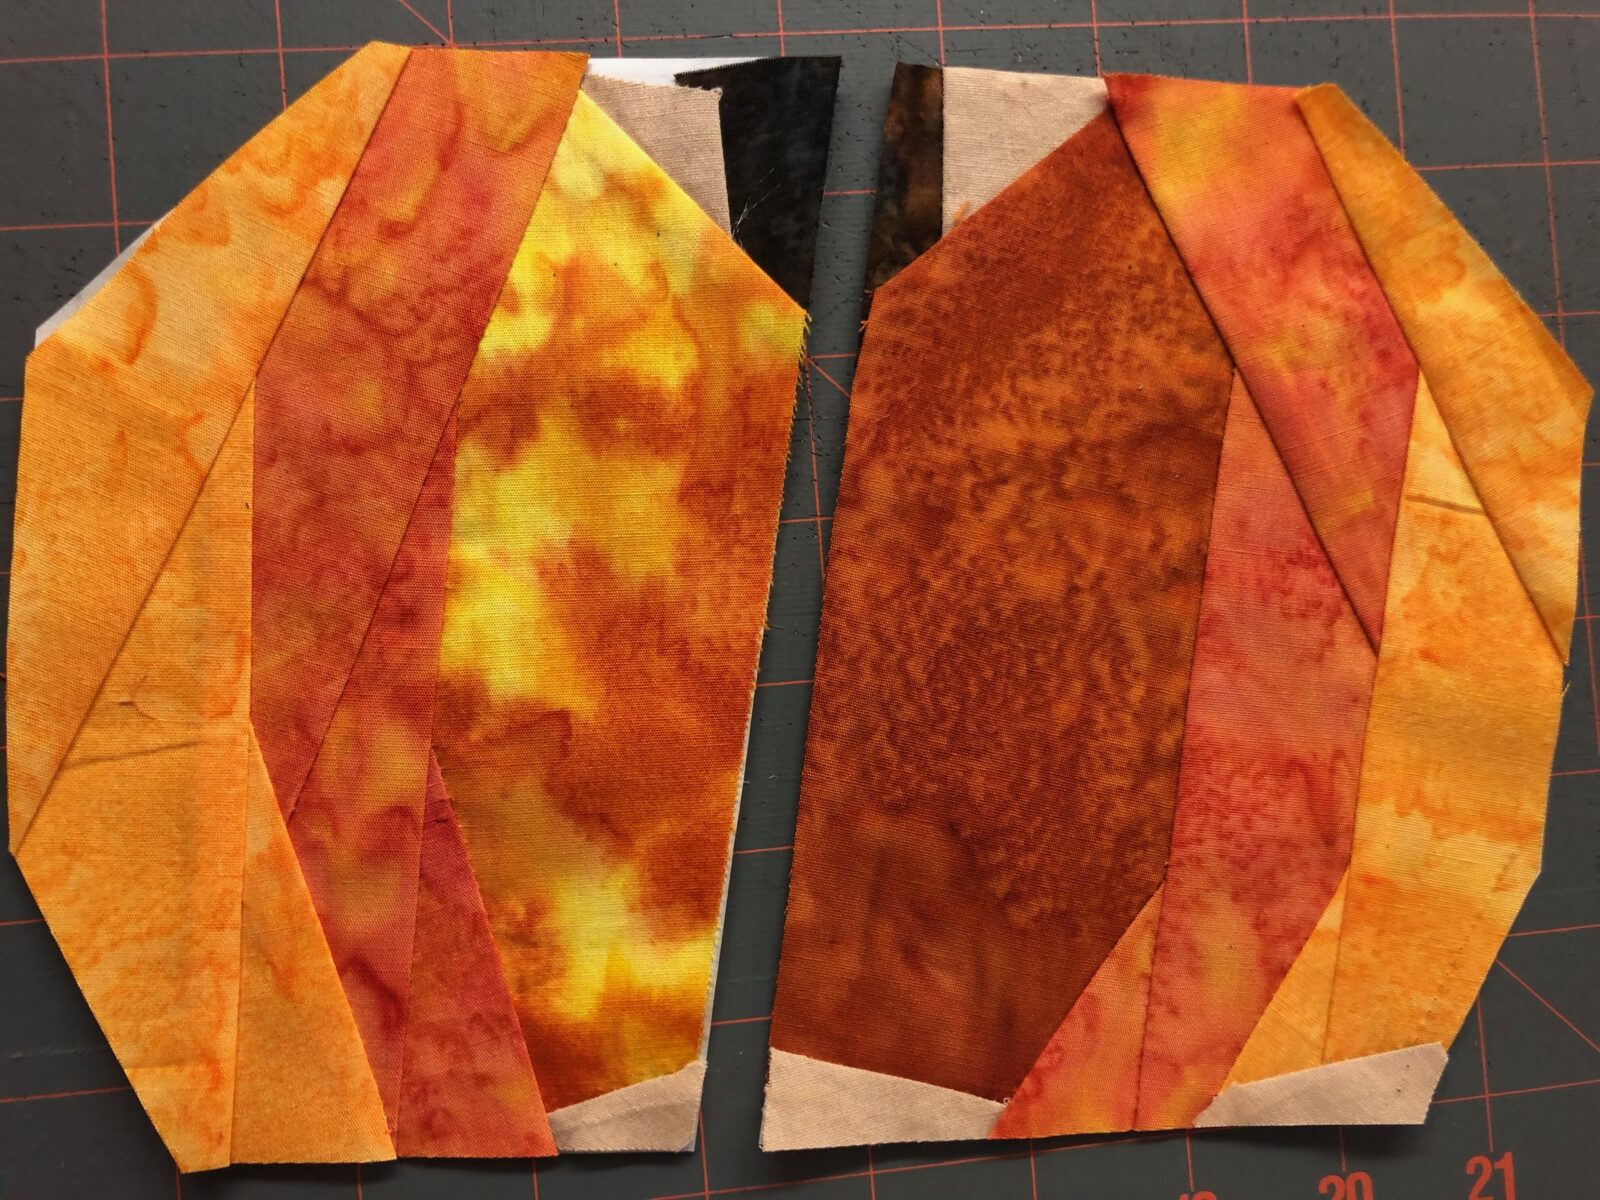
If the pattern has multiple sections or components to create a block, repeat until all the sections are ready to assemble.
Align all of the sections and stitch together along the joining seams using a ¼” seam allowance. Soak the piece or block or run it under running water to dissolve the Paper Solvy.
Let dry, and then press from the wrong side.
TIP: If any pattern pieces need to be joined before piecing begins, cut a ¼”-wide strip of Sticky Fabri-Solvy or Stick ‘n Stitch and use that as the “tape” to ensure everything will wash away when stitching is complete.
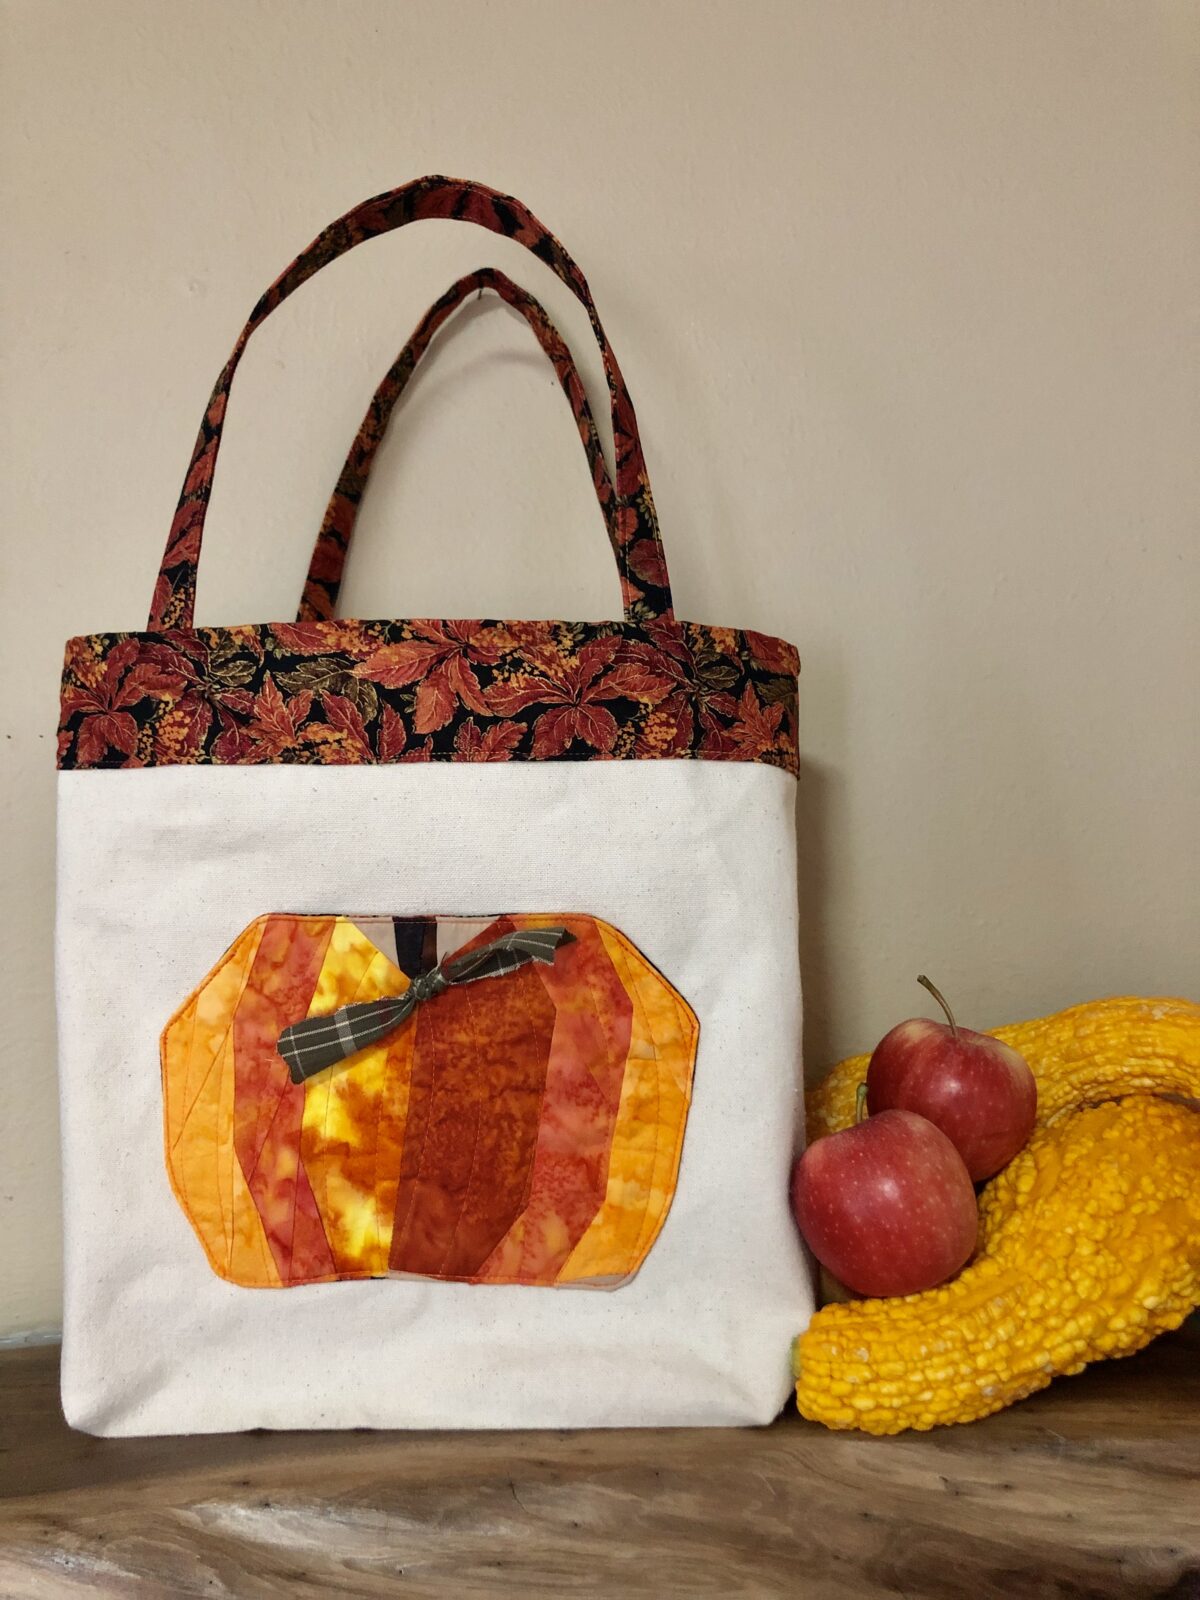
Pumpkin Tote
The pumpkin pocket on this tote bag is all foundation paper pieced. It’s a great simple paper piecing project for a beginner, but equally as fun for a seasoned sewist.
Included in this kit is the Paper Solvy already printed with the pattern! There are a LOT of components to this tote, and most of them are included in the kit. Its so nice to not have to hunt down all these supplies and to be able to find them all in one place–especially the FABRIC! Plus, it’s available at a low, low price. Squee!
In the Kit You’ll find:
- Sulky Fuse ‘n Stitch Stabilizer
- Sulky Tender Touch stabilizer
- printed Paper Solvy
- Iron-on Transfer pen
- Pumpkin leaf templates
- 12 wt. and 30 wt. cotton Blendables thread
- 30 wt cotton thread (classic green)
- Polyester Invisible clear thread
- 40 wt. Poly Deco thread
- Fabric: Canvas, leaf-print fabric, orange-hued fabric, green fabric, plaid fabric, tan fabric
You’ll Still Need:
- 8″x11″ & 5″x9″ rectangles of batting
- Small applique scissors
- Rotary cutter with pinking blade or pinking shears (optional)
- 90/14 Topstitch needle
- Hera Marker (optional; handy for paper piecing)
Along with foundation paper piecing, with this kit you’ll also learn:
- free-motion techniques
- decorative stitching applications
- basic to advanced quilting (your choice)
- adding structure to handles
- enclosed seam finishes
- and more!
Pumpkin Tote Modifications
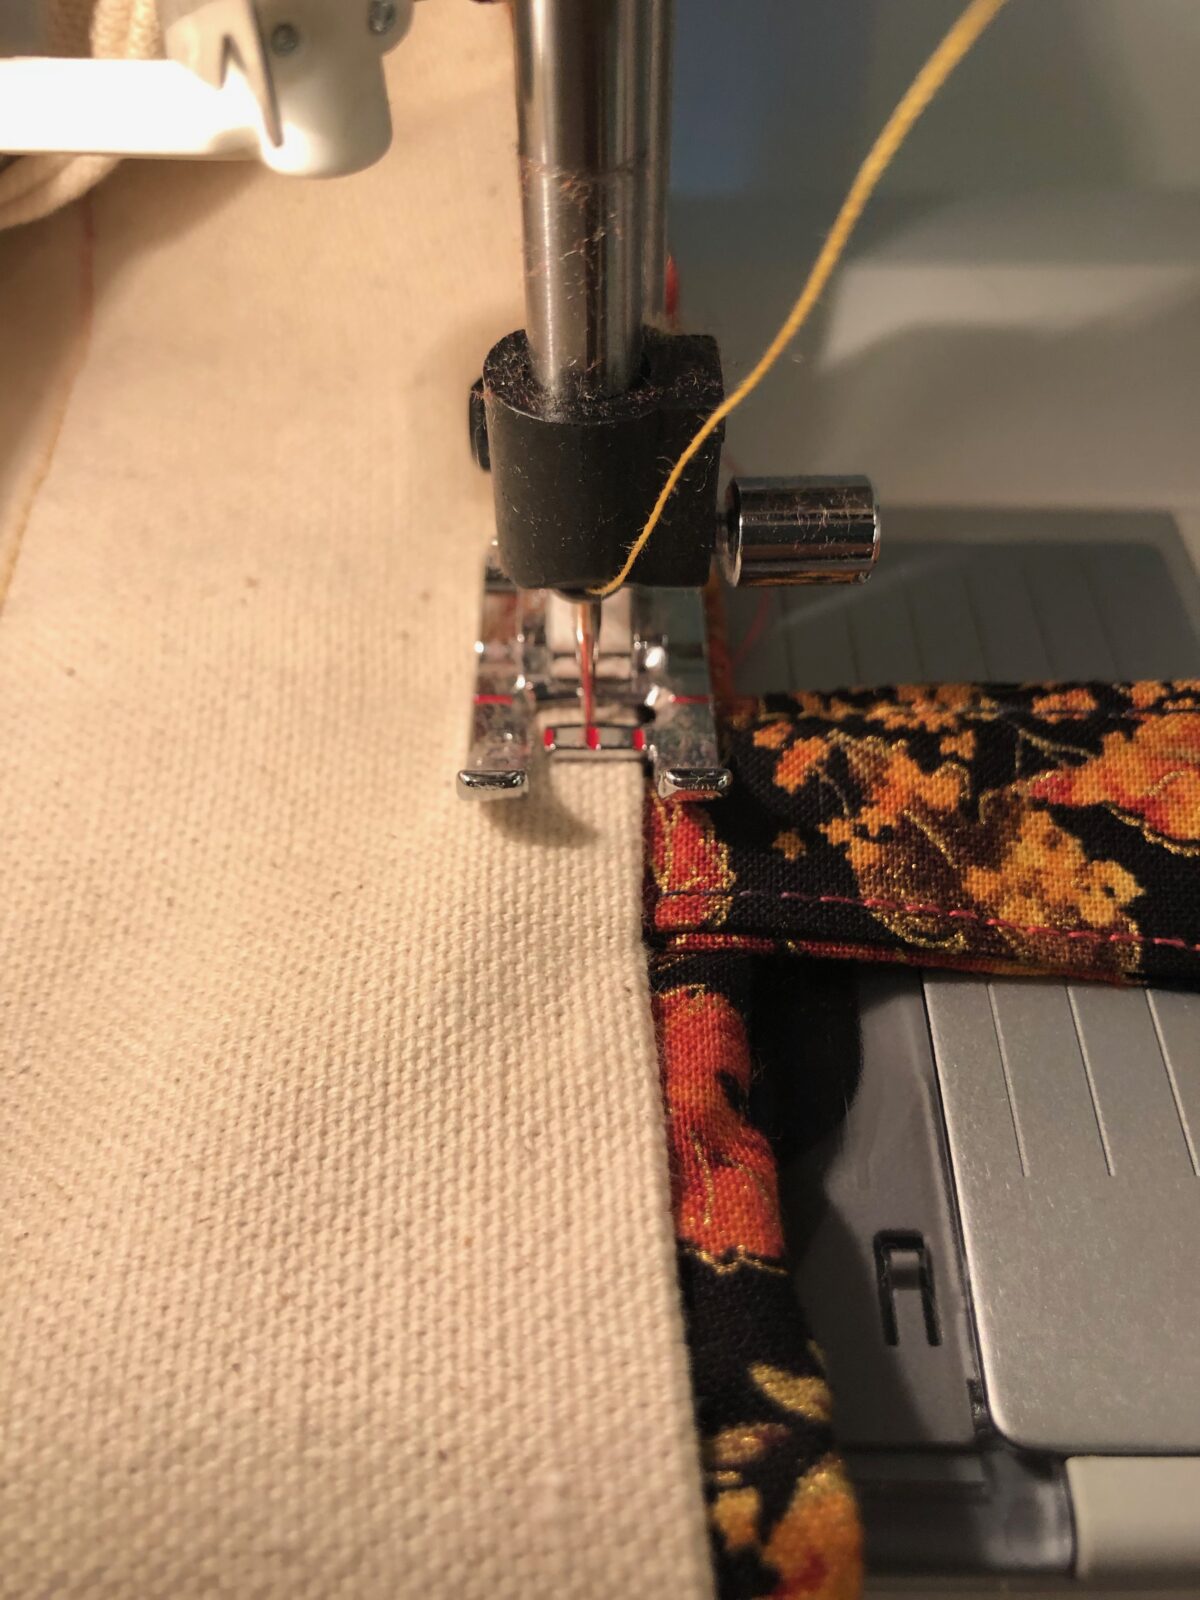
I modified the pattern directions for my tote, eliminating the deco stitching on the canvas. I also eliminated the green leaves along the pumpkin lower edge. As for the pumpkin pocket, I avoided raw edges by adding deco stitched to the pumpkin after it was paper pieced and before it was layered. I simply stitched through the pumpkin and batting layer and saved the backing for a traditional stitch-and-flip method.


I also made the straps smaller and folded them to avoid having any raw edges. I attached them in the upper-edge seam after pinning the fabric trim to the tote. After flipping the trim to the right side, I topstitched the trim along the upper and lower canvas edges using 30 wt cotton Blendables.
The tote turned out great! I love the paper pieced pumpkin pocket on the front. It’s the perfect size for an iPad mini (though it does stick out the top a bit).


Try your hand at foundation paper piecing. You’re sure to love it! Let us see your Pumpkin Tote projects on Facebook and Instagram with #sewbetterwithsulky.
Machine used for this project: Husqvarna Viking Eden Rose.

Ellen March
I am the Director of Content for Sulky of America. The former Editor in Chief of Sew News and Creative Machine Embroidery magazines, I hosted Sew it All TV on PBS for nine seasons. I've appeared on It's Sew Easy on PBS, DIY Network's Uncommon Threads, Hallmark's Marie Osmond Show, MacPhee Workshop and more! Come sew with me!


One Comment
Pingback: