
How to Achieve Perfect Design Placement
Perfect Design Placement
by Pamela Cox
Although there are rulers, plastic templates, charts suggesting where a design should be stitched on any given item, and even fancy laser lights with the sole purpose of aiding in perfect embroidery design placement…
you already have all the necessary tools to ensure proper design placement right at your fingertips!
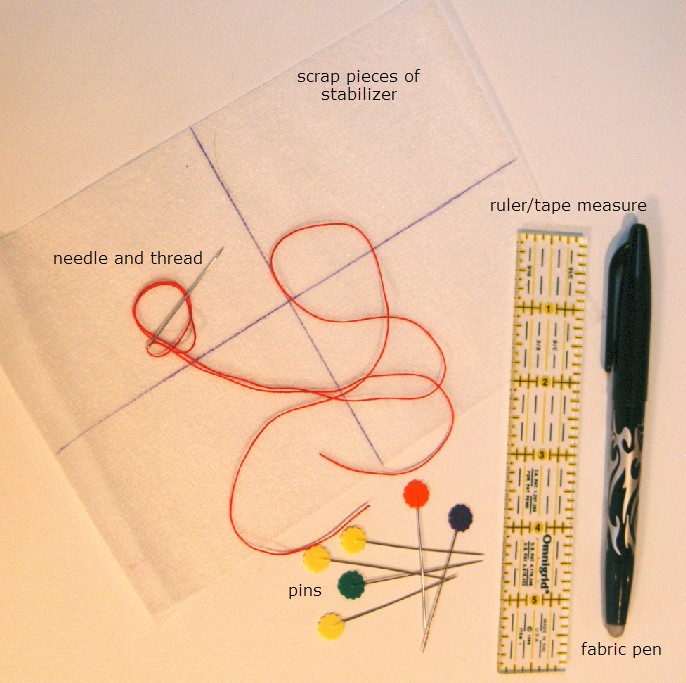
Follow these easy steps to take the imagined difficulty out of the process:
-
Know the size of the intended design:
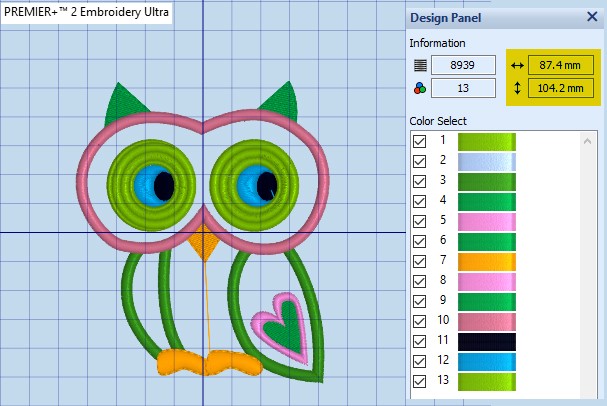
Find this information on either the color chart, in an editing software program, or by checking on the embroidery machine’s screen (if your model offers this feature).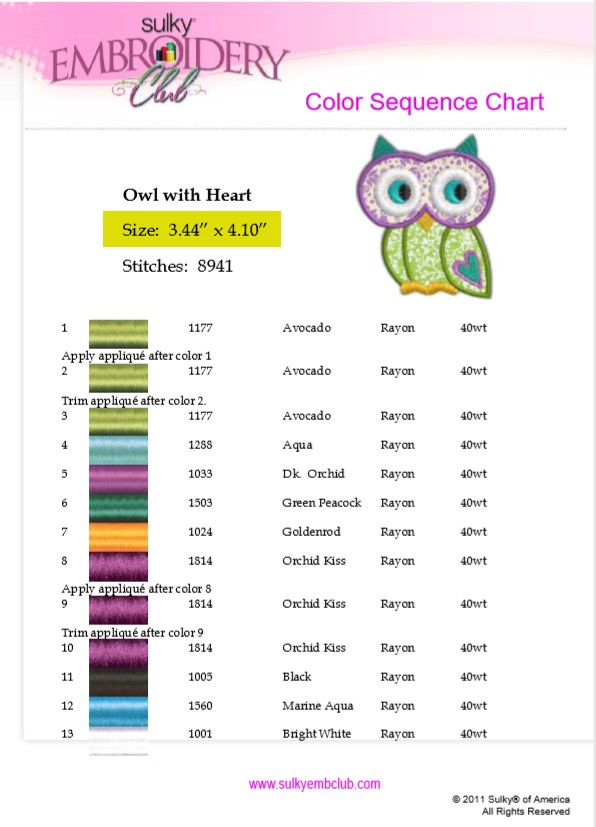
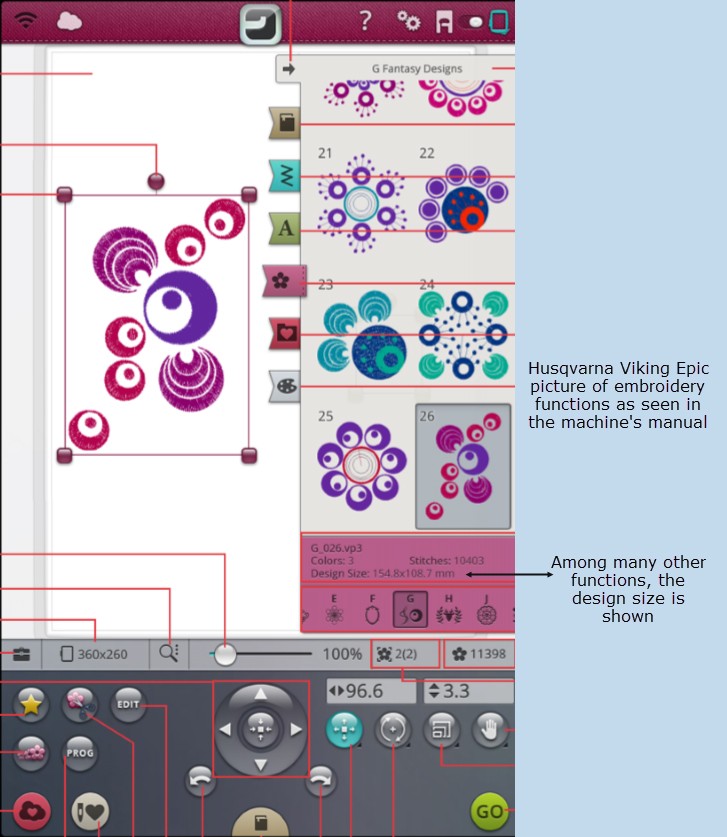
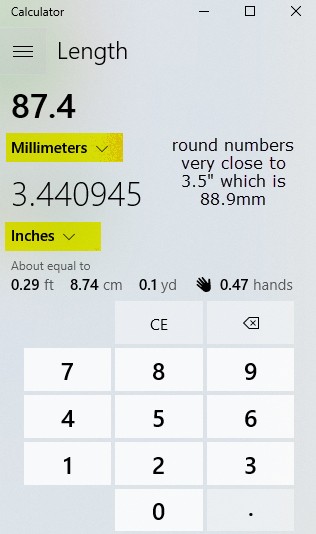
Use a calculator if need be, to convert millimeters to inches.
-
Decide on the general placement area:
Be aware of where the design will show on the body once a garment is put on. For instance, it is best to avoid placing a single design right on the bustline. Avoid stitching over thick seams or ribbed neck/hem bands of garments.
-
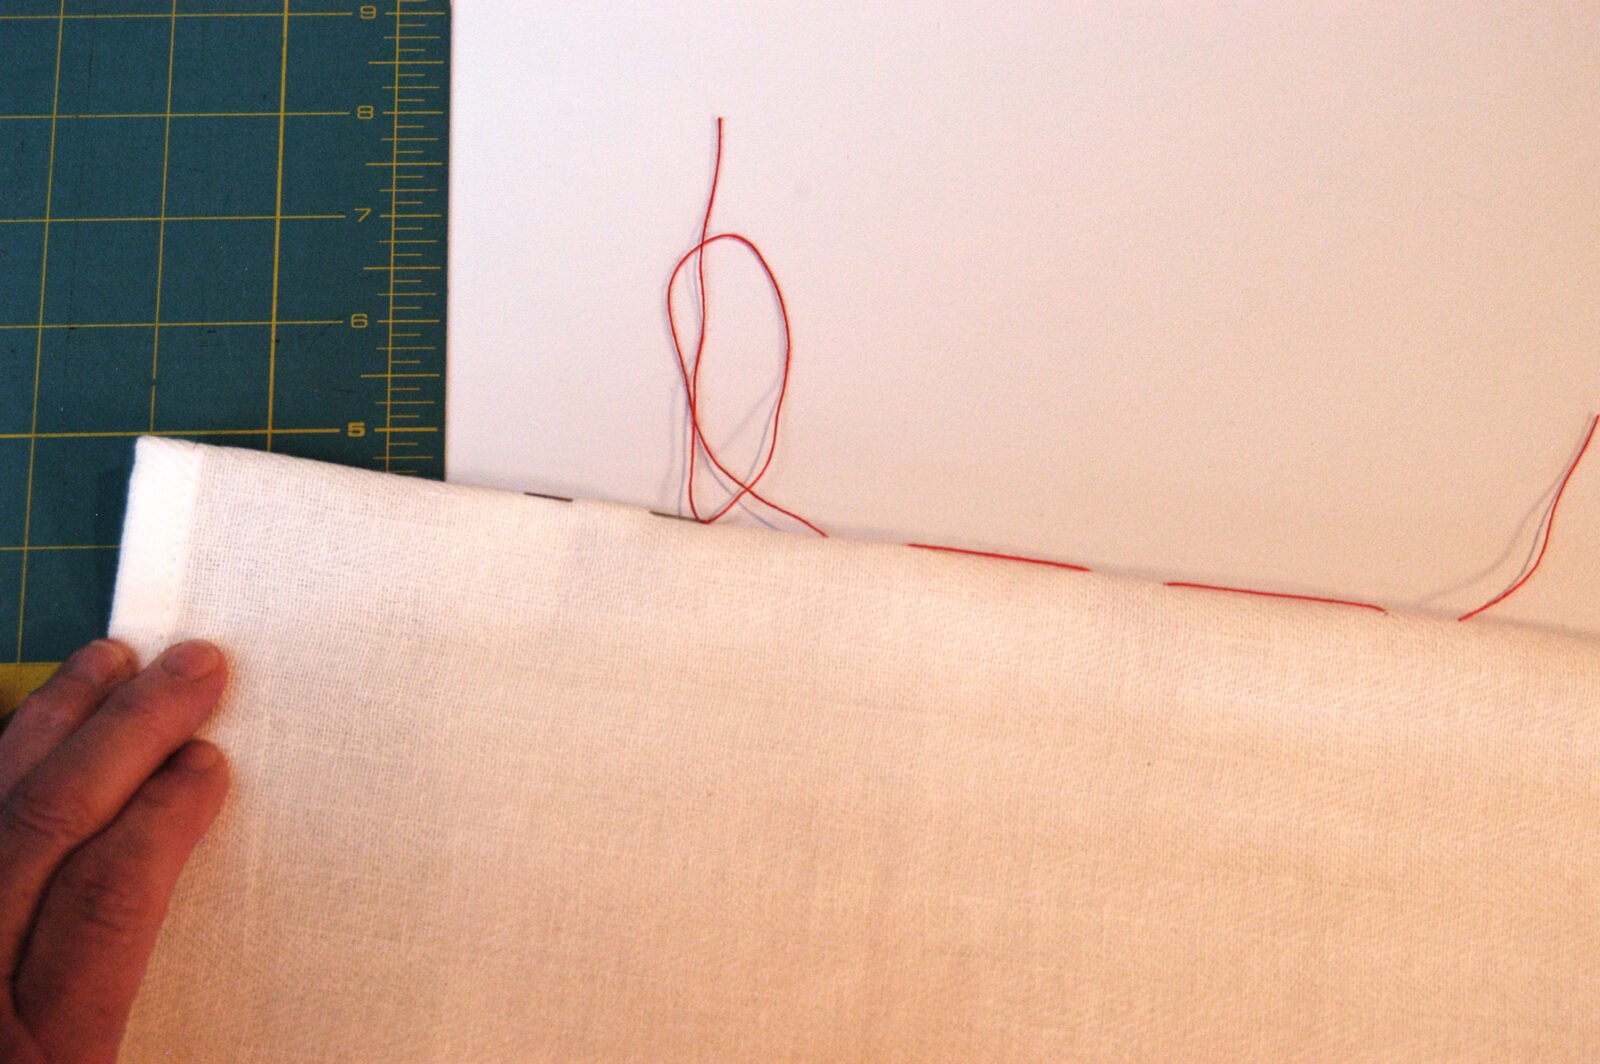
Use hand-basted stitches for placement guide lines on the item:
Basting stitches show on both the right and wrong side of fabric, which affords additional accuracy during the hooping process.
-
Use basic math:
Don’t panic! It is very basic math! Using a calculator is always allowed!
For designs that will be centered in the width of the item, fold the towel/garment in half, matching edges/side seams. Hand-baste stitches on this fold line.
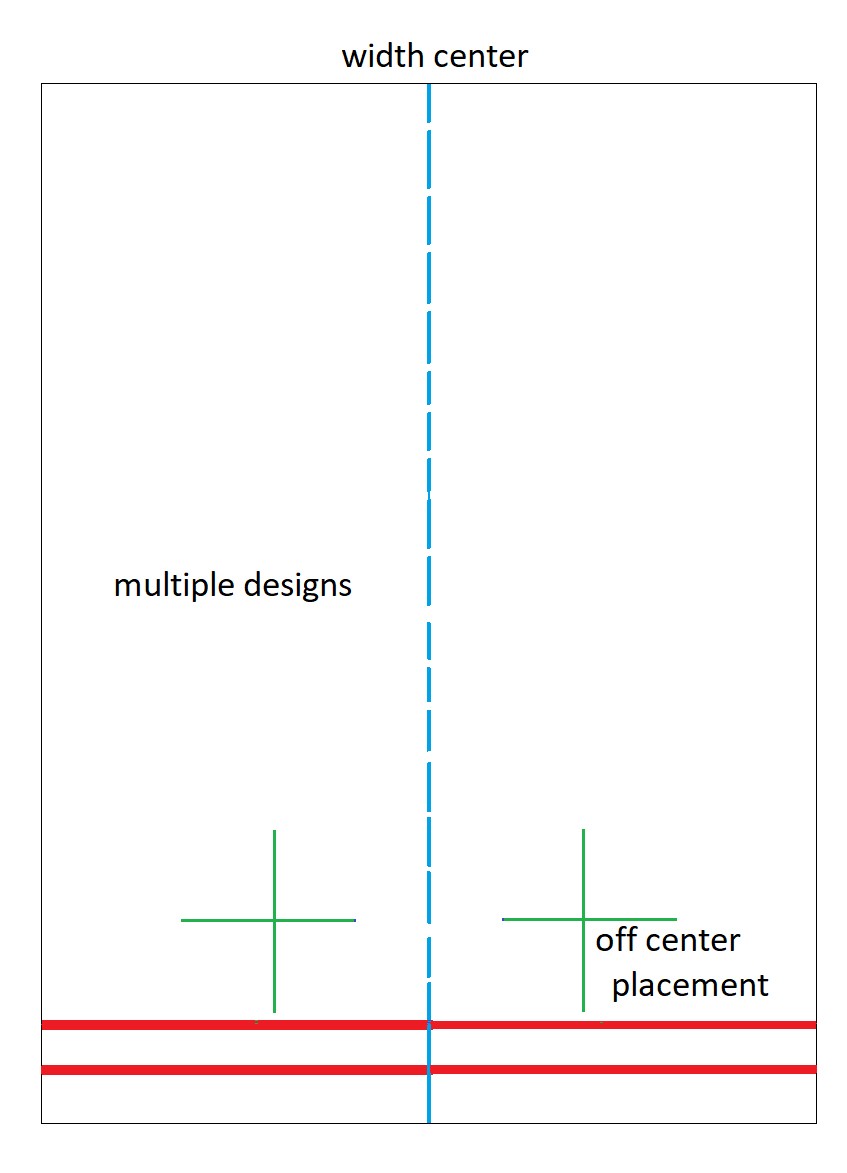
For designs that will be stitched off center, it is still a good idea to locate the item’s center so that the design can be placed equal distance from the center, or in other words, embroidered straight on the item.
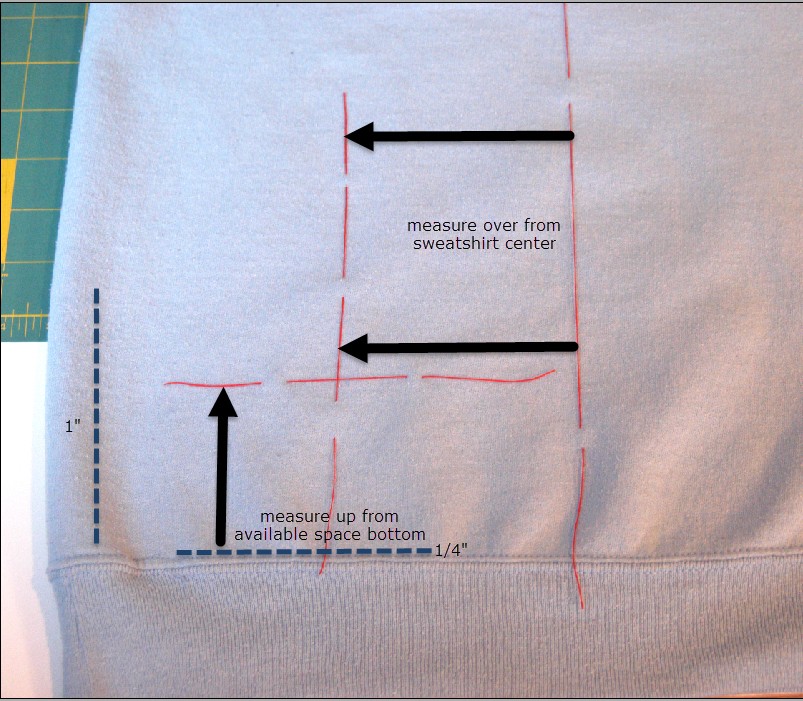
Divide the height of the design in half. From the top edge of “general placement box” measure down this distance and hand baste a line. If the bottom of the “general placement box” is more definitive, such as a towel border or a T-shirt hem, measure up this distance and hand baste a line. The intersection of the two basted lines is the design center and will allow half of the design to stitch above this guide line and half will stitch below this guide line. If multiple designs are being stitched, hand-baste all guide lines in at the same time prior to embroidering.
-
Exact design placement begins with properly hooping the Sulky® stabilizer:
Secure the appropriate Sulky stabilizer directly in the hoop keeping it wrinkle free and “tight as a drum”. If an additional aid is needed, draw lines directly on the stabilizer with a fabric marker, connecting center hoop guides. (Note: The “center” marks on many hoops are not exactly in the center as you look at the hoop. In this particular hoop shown below, the little raised marks on the left and right are the true center of the hoop for design placement. It’s important to be sure you position your inner hoop appropriately. Sometimes the hoops have writing on them that should be right side up when you hoop.)

-
Secure the item to the hooped stabilizer:
Use one of four methods –
Machine baste the item to the stabilizer, which is a function found on most embroidery machines.
Pin the item to the stabilizer keeping the pins out of the stitching path.
Lightly spray the back of the fabric with KK 2000™ Temporary Spray Adhesive from Sulky and firmly press it onto the stabilizer.
Hoop Sulky Sticky Fabri-Solvy™ Stabilizer, which has a sticky surface. (Hoop it with the release sheet UP in the hoop, and score it with a pin and peel it away.)
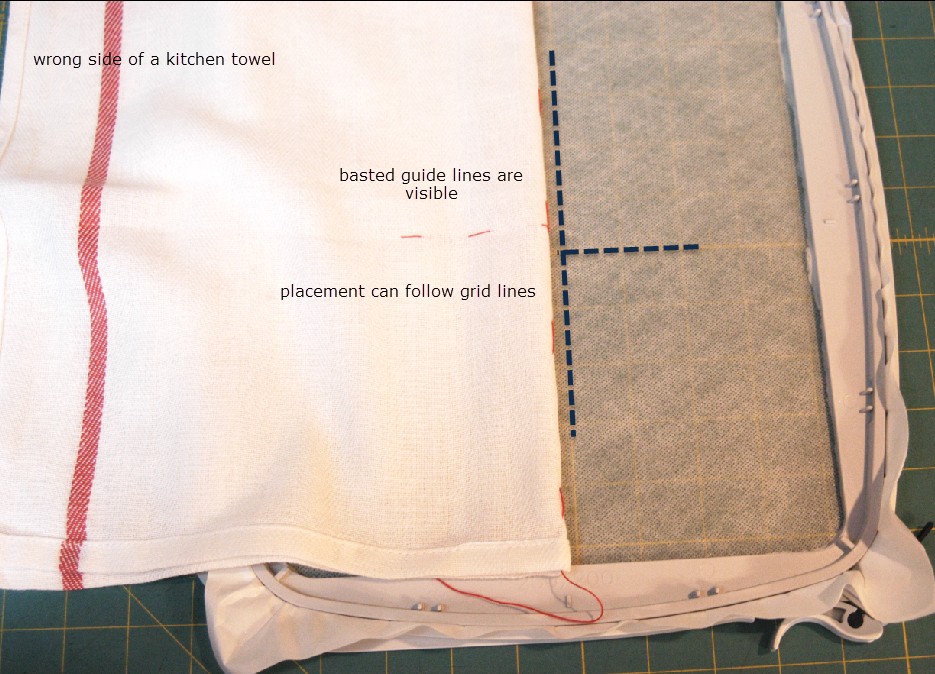
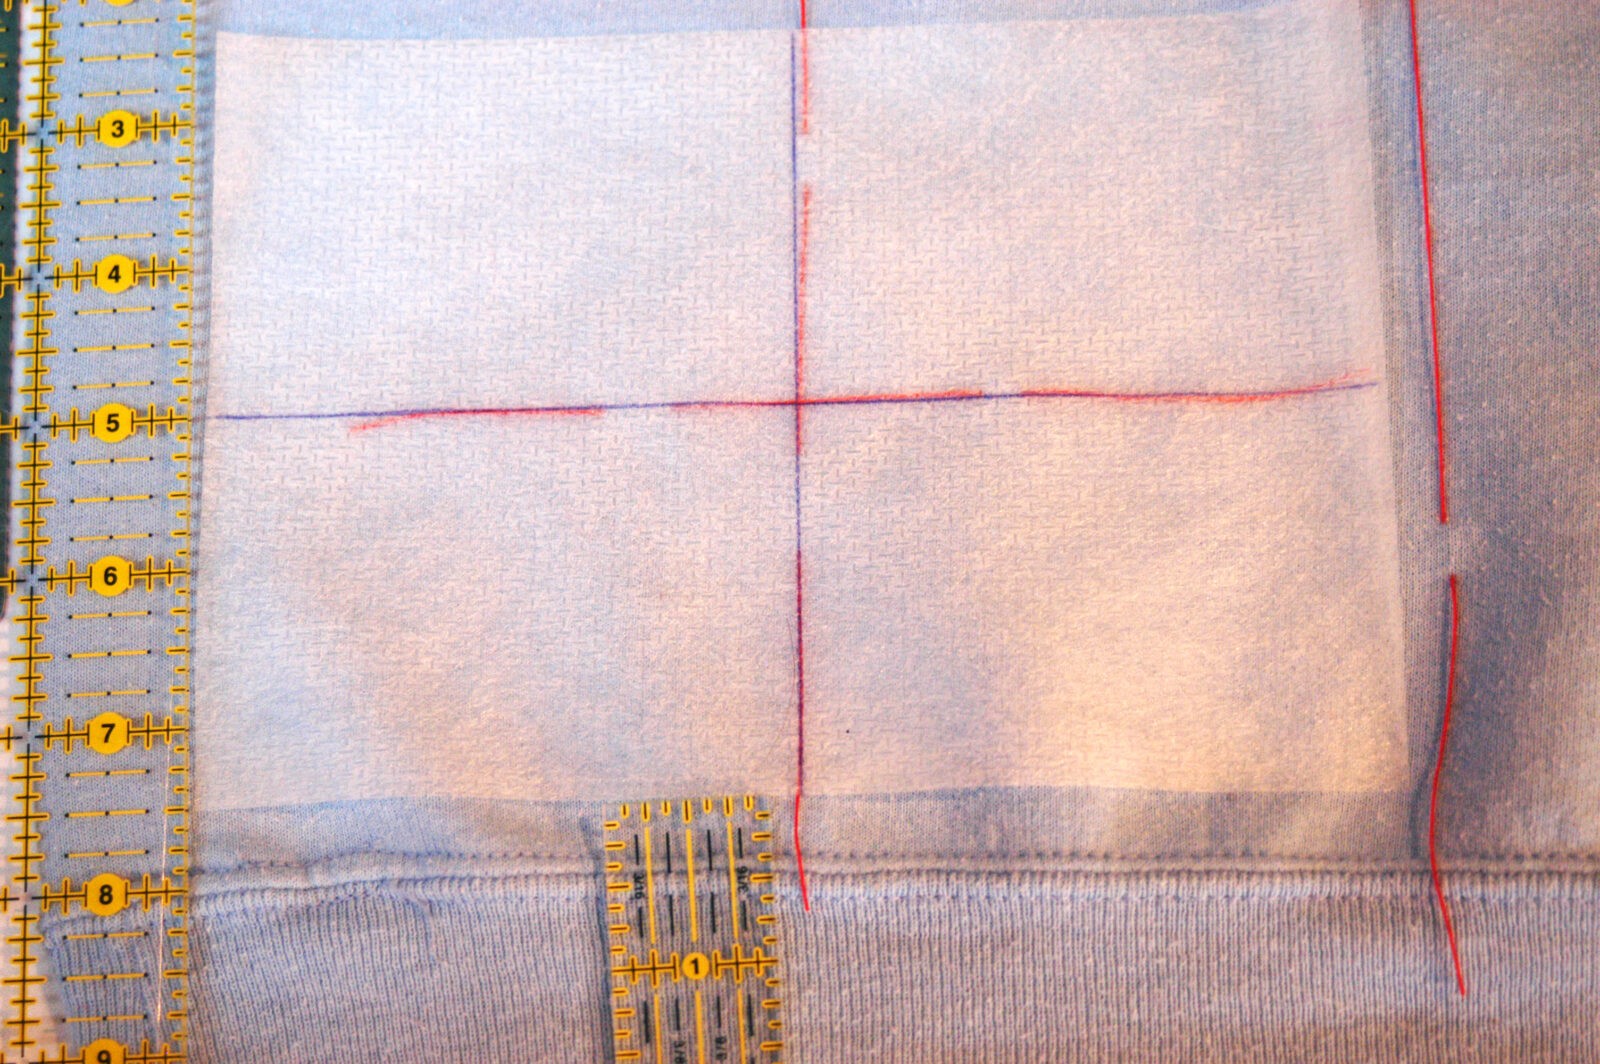
Hoop the item straight, matching the basting lines with the guide lines drawn on the stabilizer, or by viewing grid lines on a quilter’s mat, which can be seen through sheerer stabilizers, such as Sulky Soft ’n Sheer™, Tear-Easy™, Sticky+, or Sticky Fabri-Solvy (shown below).

-
Match the machine needle center to design center:
It is important to know that the machine will stitch the design where you planned. Lining up what the machine is interpreting to be the design center with the intersection of the basted guide lines assures that this will happen.

Many machines offer additional needle placement positions such as corner positions or even locating a specific place in the design. Take the time to learn about your machine’s placement functions and use them.

-
Use a “double check” method where ever possible:
The golden rule for quilting is “measure twice, cut once”. The same principle needs to be applied to design placement.
Examples:
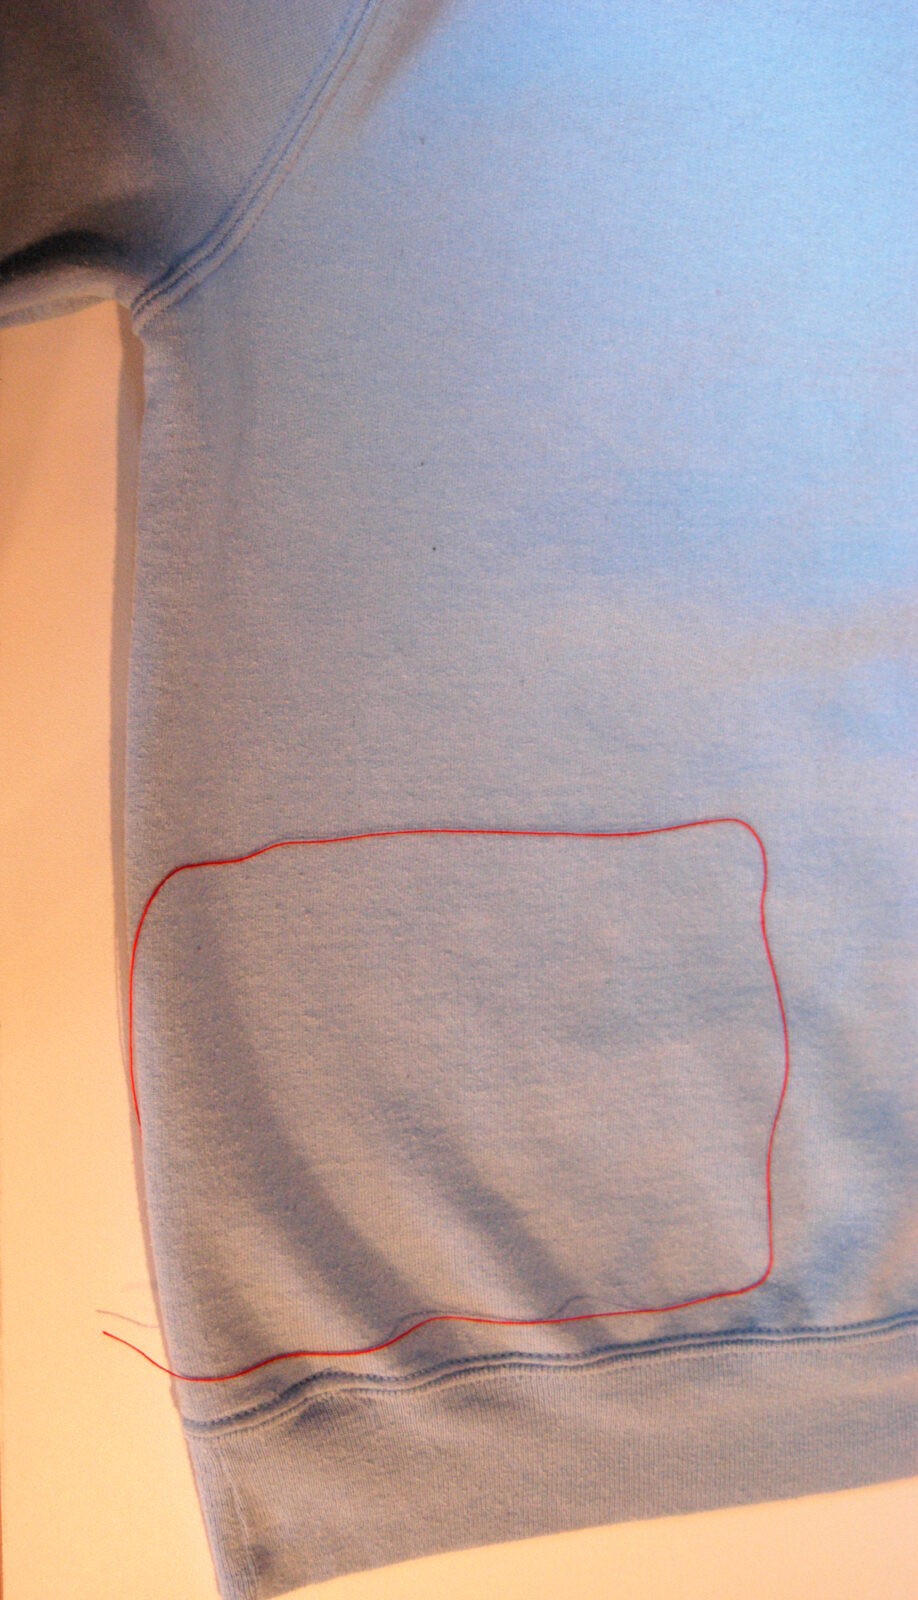
After deciding on general placement, cut a rectangle “template” from scrap stabilizer to size. Save on printer ink when just checking the intended design will fit into the allotted area. Hint: You can also make your own little circle targets to indicate the center, too, when you are doing just a simple placement for a smaller design. Just save your Sticky Fabri-Solvy scraps, and draw cross-hairs on them, like the basting below (but smaller). And if you forget to remove them, and stitch over them – no problem. They’ll wash away.
After basting placement lines on item, draw guide lines on the “stabilizer template” and match. Confirm that design center is where it needs to be. Lightly spraying the back of the template with KK 2000™ Temporary Spray Adhesive from Sulky will hold it in place if any corrections to the basted lines are needed.
Let’s view Design Placement in “real time”…
Design #1844 from Sulky’s Embroidery Club is our example.

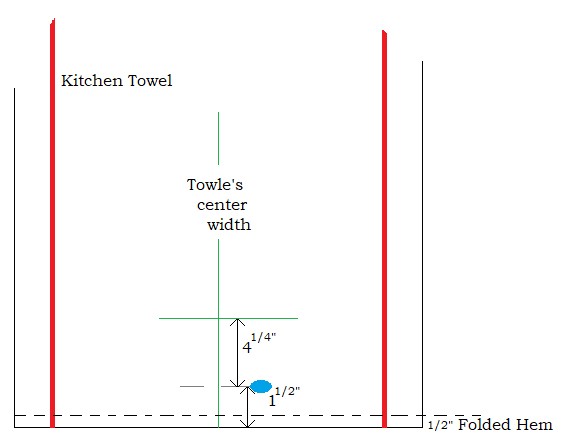
- This design is 8.54” high and 5.95” wide. It is to be centered on the width of a kitchen towel.
- The general area is towards the bottom of the towel clearing the 1/2” folded hem. Using a ruler to visually see how big an 8-1/2” design is, it was decided that it would look good about 1-1/2” up from the towel’s bottom edge.
- Hand basted guide lines:
Towel folded in half to find center width. No need to divide the design’s width measurement.
- Design’s height 8.54” was divided in half (8-1/2”÷2=4-1/4”). A pin was placed 1-1/2” up from the towel’s bottom edge. Measuring up from the pin half of the design’s height (4-1/4”), a guide line was basted.
- Sulky Sticky Fabri-Solvy is securely hooped in a 260x200mm hoop. The towel is firmly pressed onto the sticky stabilizer surface and, to be sure, pins were also used.
- The center needle position was confirmed. Lower right and left corners were also located with the needle position to confirm that the design would indeed stitch above the folded hem, and that the towel was hooped straight, and none of the pins were in the way.
- Double-check method was used in securing fabric and design/machine placement.
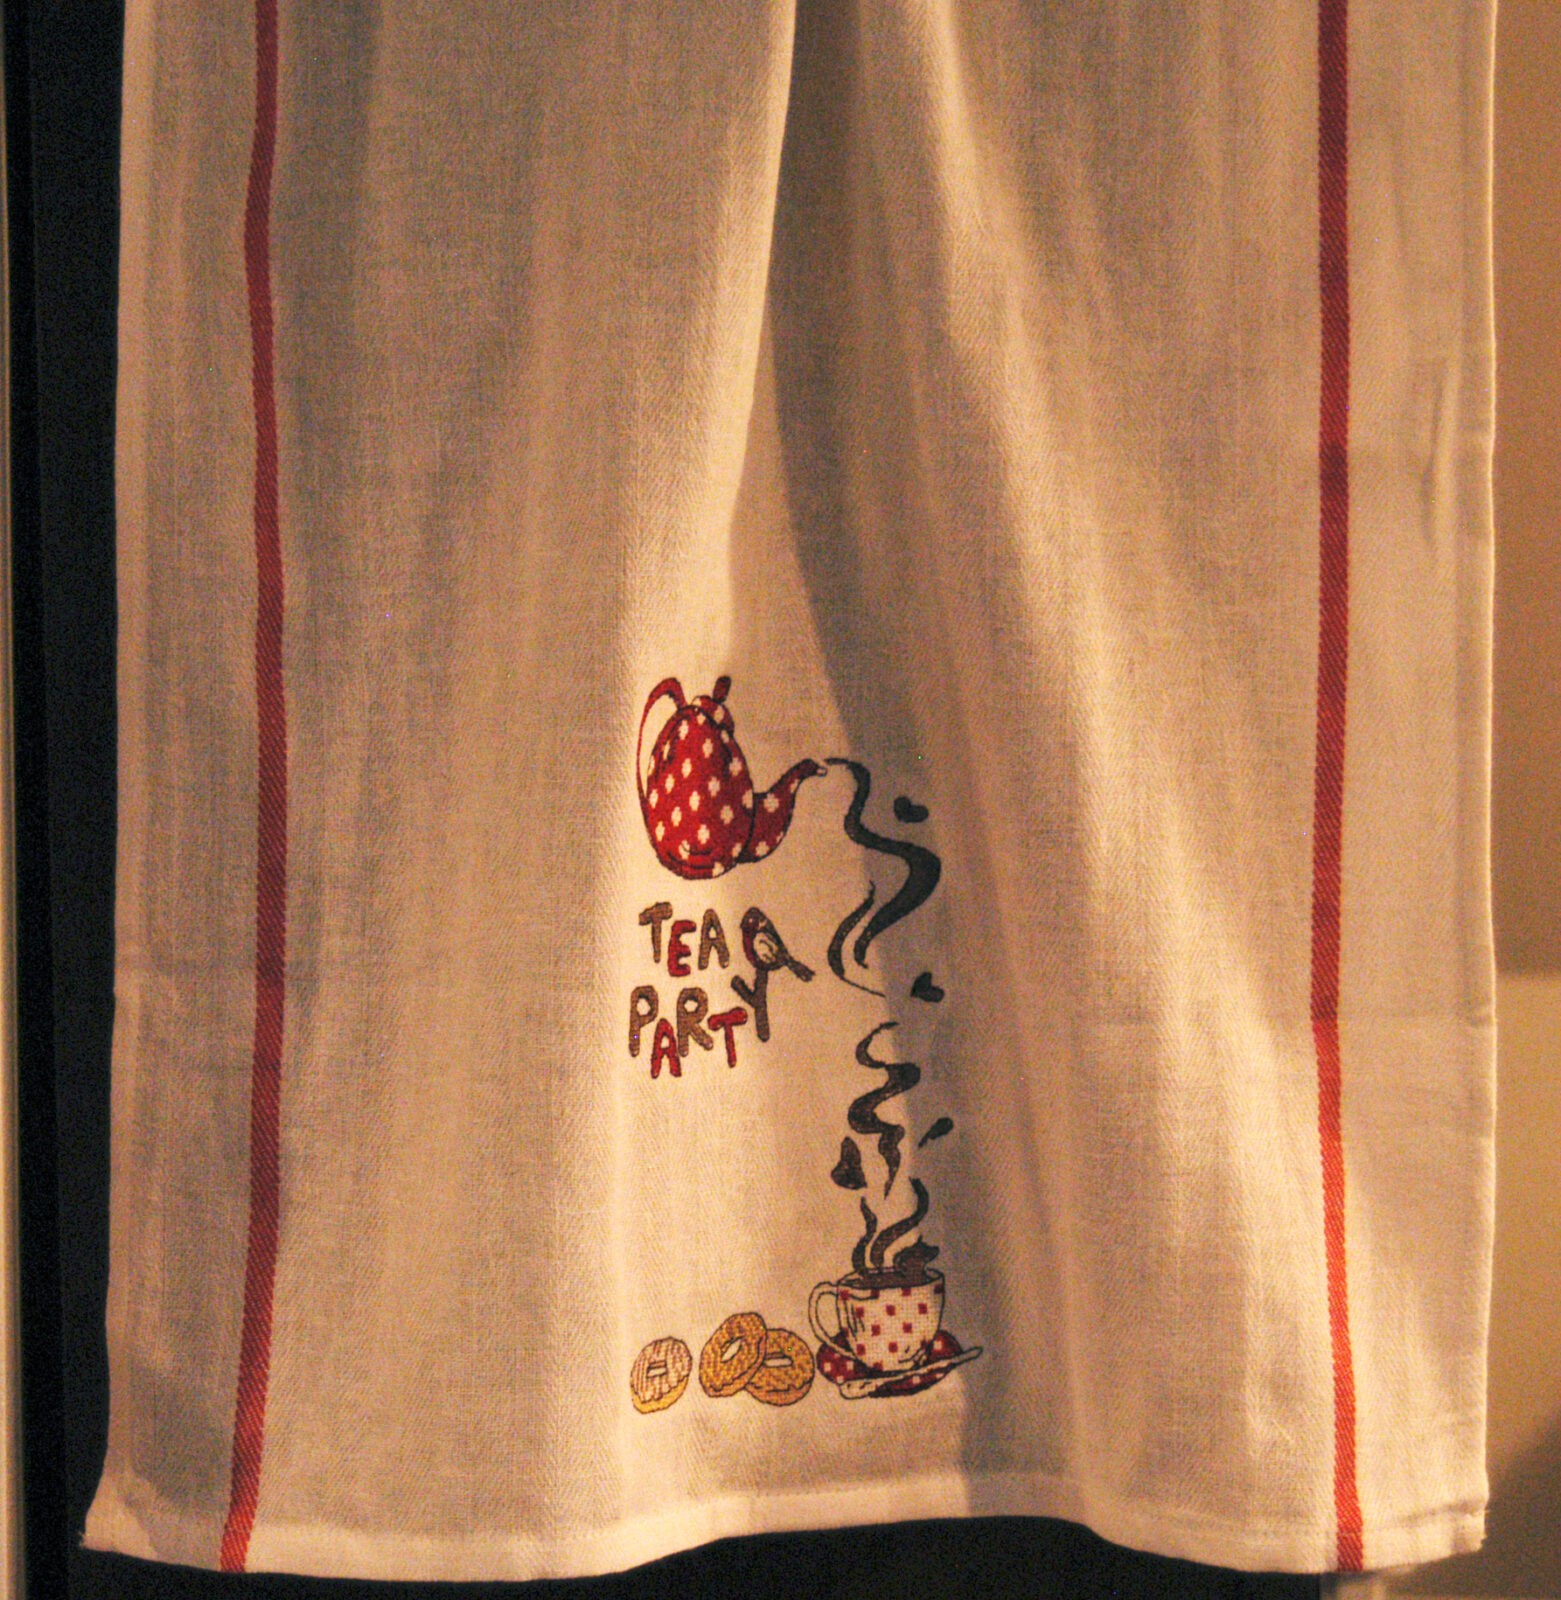
Design was stitched…

excess jump threads and stabilizer were removed…
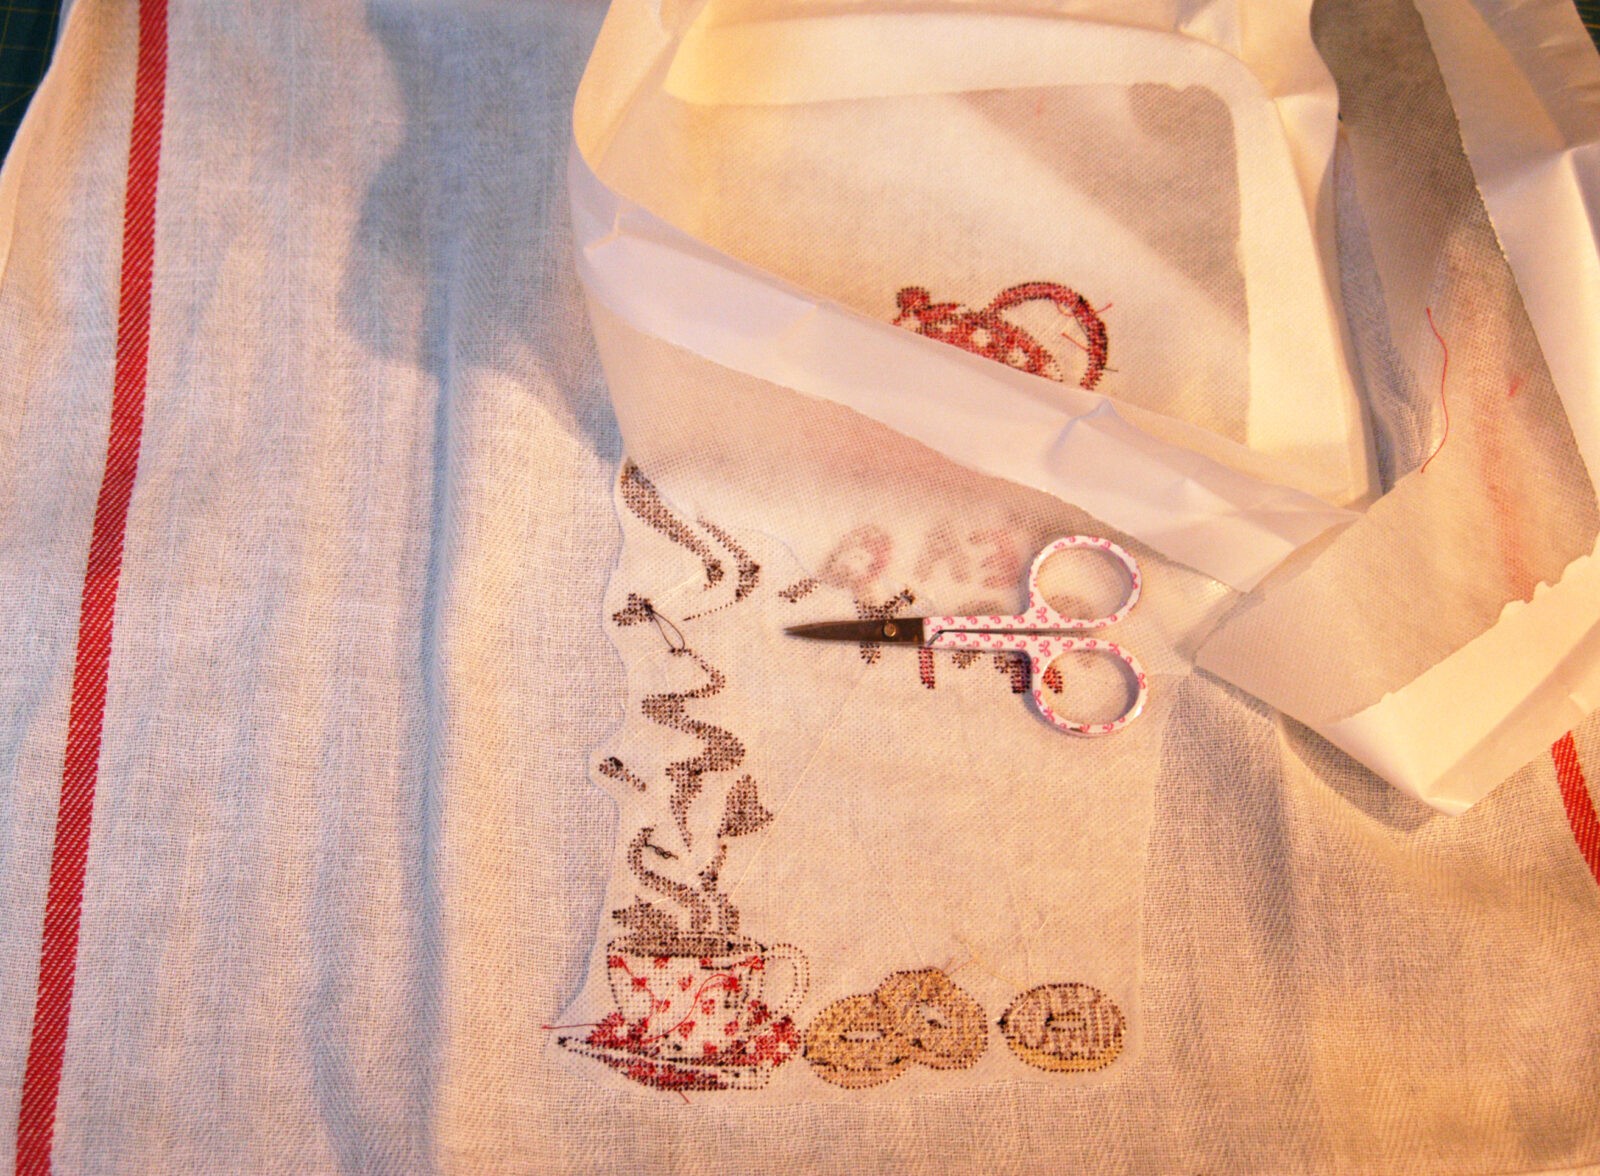
and, in this case, a thorough washing removed all traces of stabilizer.
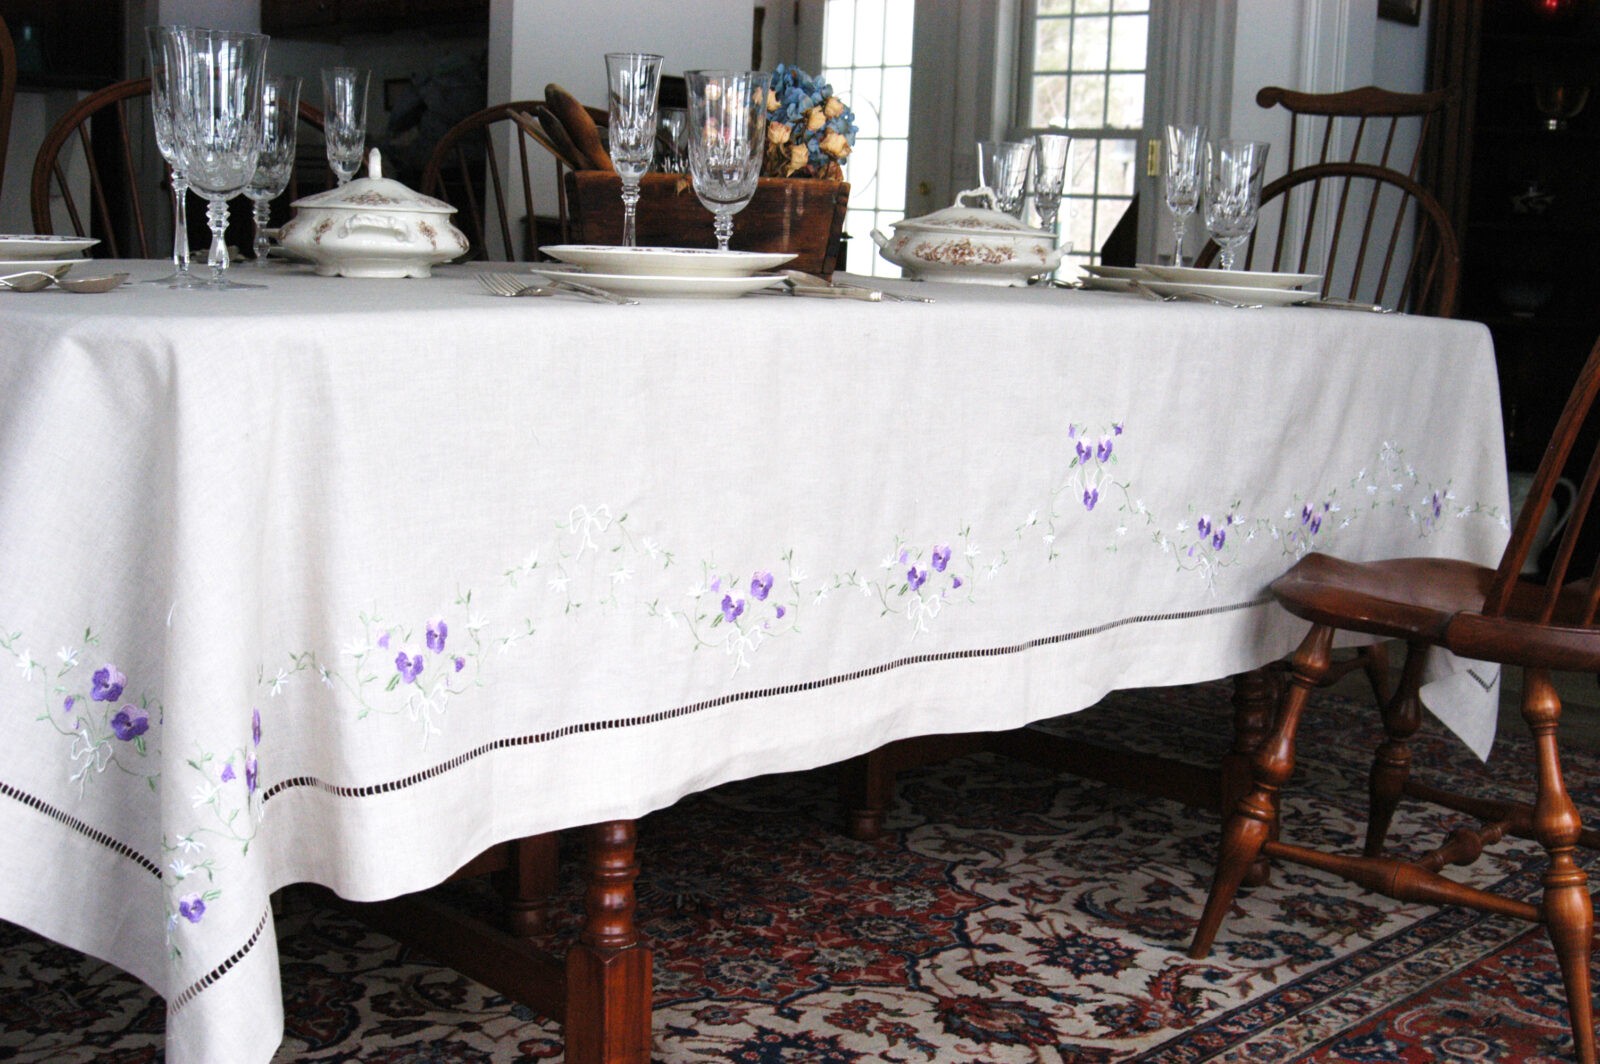
Don’t be afraid to tackle larger projects. Just follow and repeat the steps. If several different designs are used in the same layout, the guide lines may not always be the same distance from hems or center lines – know the size of all designs.

By staying the course, many beautifully embroidered projects can be created.
A more in-depth tutorial about planning and stitching a large border with multiple designs requiring several hoopings is available here.

This series is written by guest blogger, Pamela Cox. Pamela is an expert embroiderer, designer, digitizer and all around wonderful girl! We are so happy to have her contributing to the Sulky Blog!


3 Comments
JD
Thank you for the very informative instructions and the great pictures.
Leila
Very helpful information, a good guide for garment placement as well. Thank you for sharing!
Nikki
You’re so welcome! Glad you enjoyed.