When we think about Breast Cancer, we naturally think about the 1 in 8 women that will be diagnosed with this disease, but did you know that approximately 2,190 men are diagnosed with breast cancer every year? Not only that, men with breast cancer have a higher mortality rate than women because they are less likely to suspect breast cancer and therefore get diagnosed much later. There are a lot of myths about breast cancer, you can read about them on the National Breast Cancer Foundation website here.
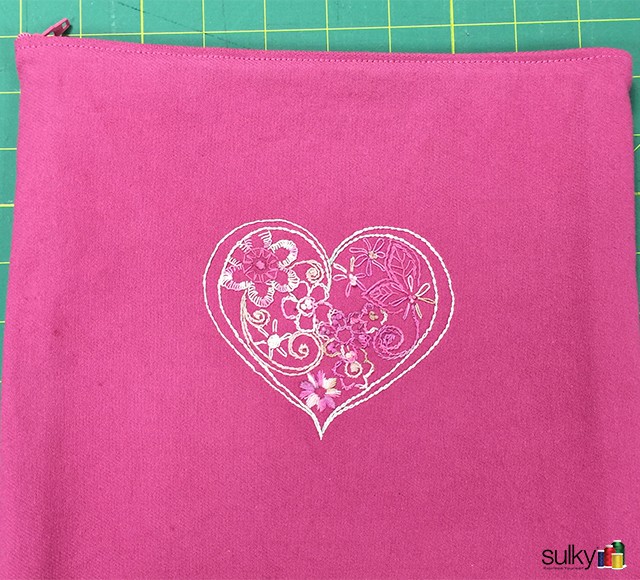
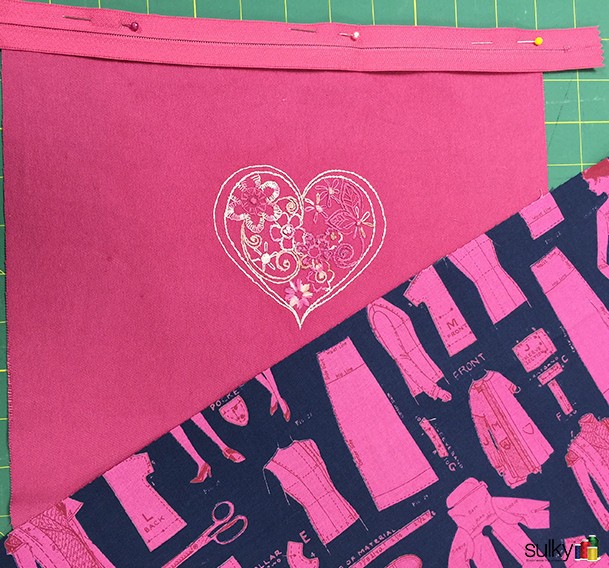
This week, I decided to make a little pink zipper bag. This is a great little bag for all kinds of things from sewing supplies to makeup to even carrying medicines around. What better way to tell someone you love them and are walking through this journey with them than to give them a bag with a hand embroidered heart on the front.
Supplies:
2 Fabrics, 20″ x 12″ – I used Crossroads Denim by Amy Barickman in Hot Pink for the outside and Amy Barickman’s Vintage Made Modern fabric for the lining
Coordinating Zipper – at least 14″ long
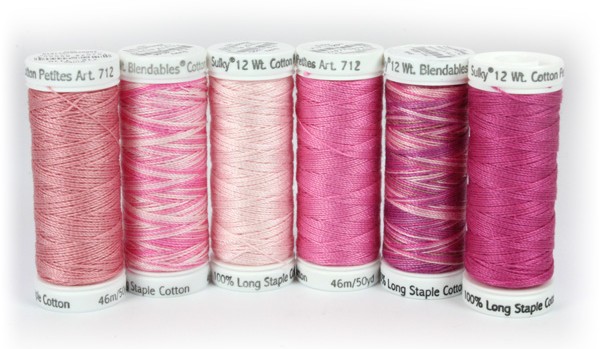
The Sulky Pink Ribbon 12 Wt. Cotton Petites Collection (10% of proceeds goes to National Breast Cancer Foundation!)
Sulky Sticky Fabri-Solvy™
Hand Embroidery Pattern – Get it here
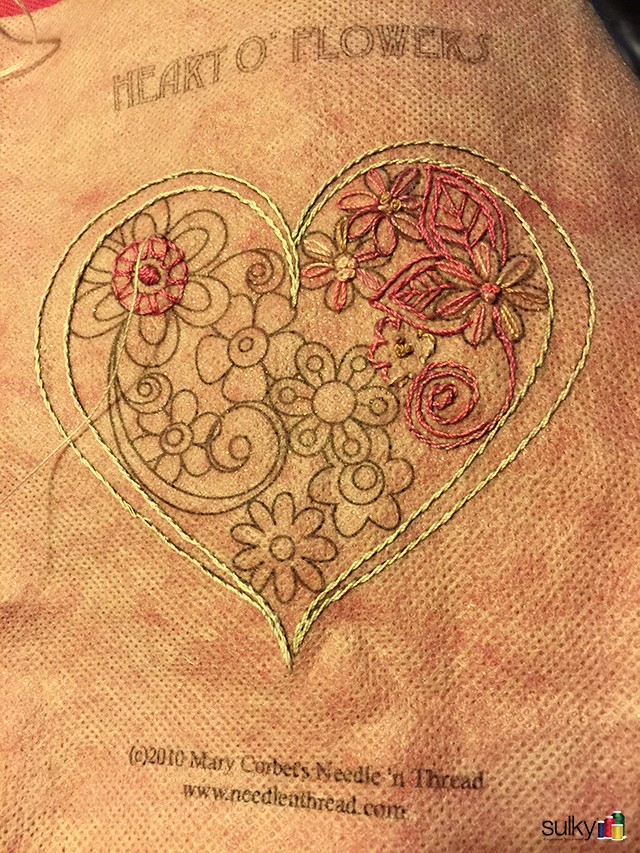
My favorite way to do hand embroidery is to print my pattern onto Sulky Sticky Fabri-Solvy and stick it onto the front of the fabric that I am going to embroider. This allows me to do my embroidery without tracing or transferring my pattern with a transfer pen that is permanent. That is extremely helpful when you want to embroider on something like this Crossroads Denim. It’s denim so there is no way to trace the design onto it; and this particular design, I don’t plan to go over each and every line exactly as it is on the pattern, so Sulky Sticky Fabri-Solvy is really the only way to go. As an added bonus, I also don’t have to fool with an embroidery hoop since the Sticky Fabri-Solvy is stabilizing the fabric for me.
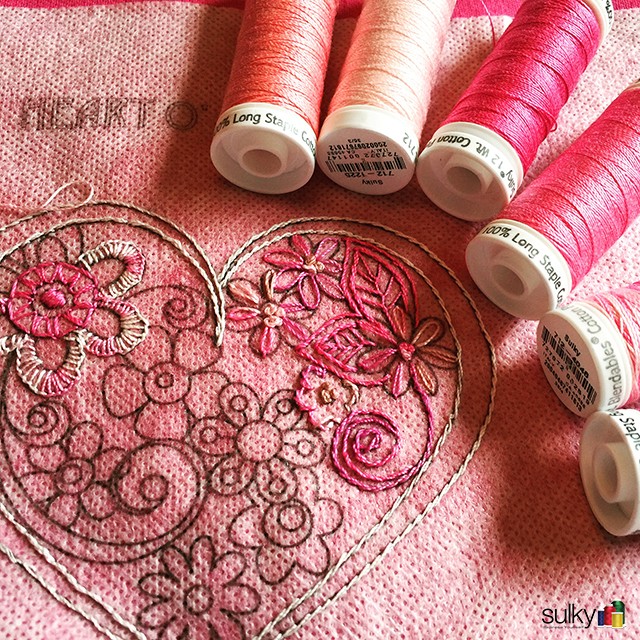
For my heart, I used every thread in the Pink Ribbon 12 Wt. Cotton Petites collection. I also did lots of different stitches. If you want to expand your knowledge of hand embroidery stitches, my favorite person to learn from is Mary Corbet of Needle ‘n Thread. She has wonderful hand embroidery video tutorials and the pattern I used for this is a free pattern from her website.
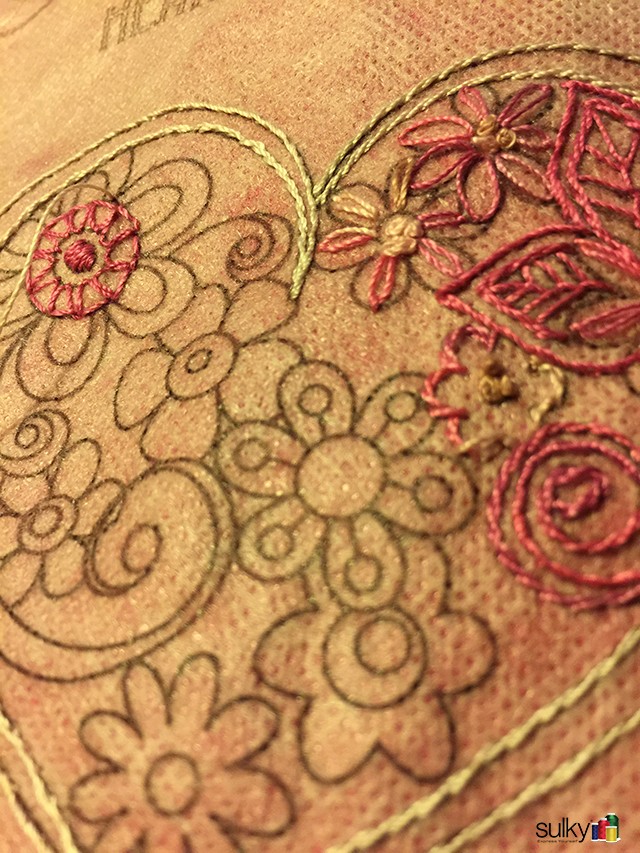
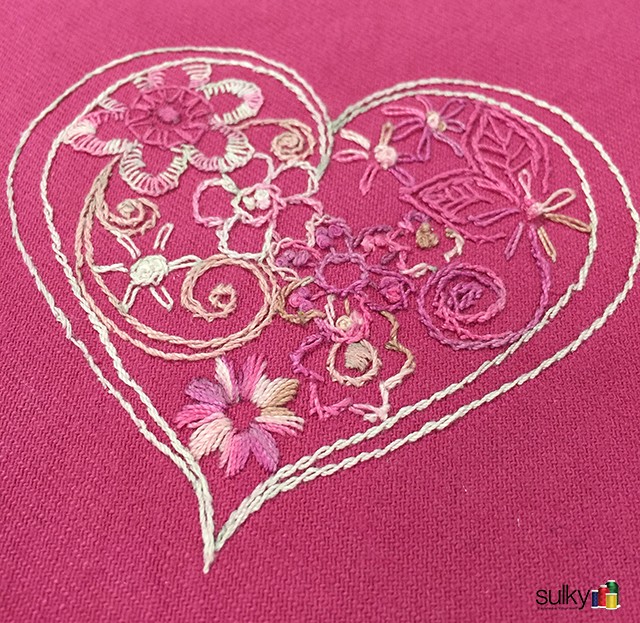
When you are finished with the hand embroidery, rinse the Sulky Sticky Fabri-Solvy away and either iron your piece dry or let it air dry. Now let’s make the bag!
I decided to do a French seam for this because it finishes all the edges and makes putting the zipper in super easy. Begin by putting the zipper face down on the right side of the outside fabric. NOTE: I made a mistake on mine. When you are doing a French seam, the stop-end of the zipper (that little metal piece at the bottom) should come in by 1/2″ so you don’t cut it off later. Just line that end of the zipper up with the side edge of the fabric and you will be set. You should do it right, but if you don’t, I will show you how I fixed it.
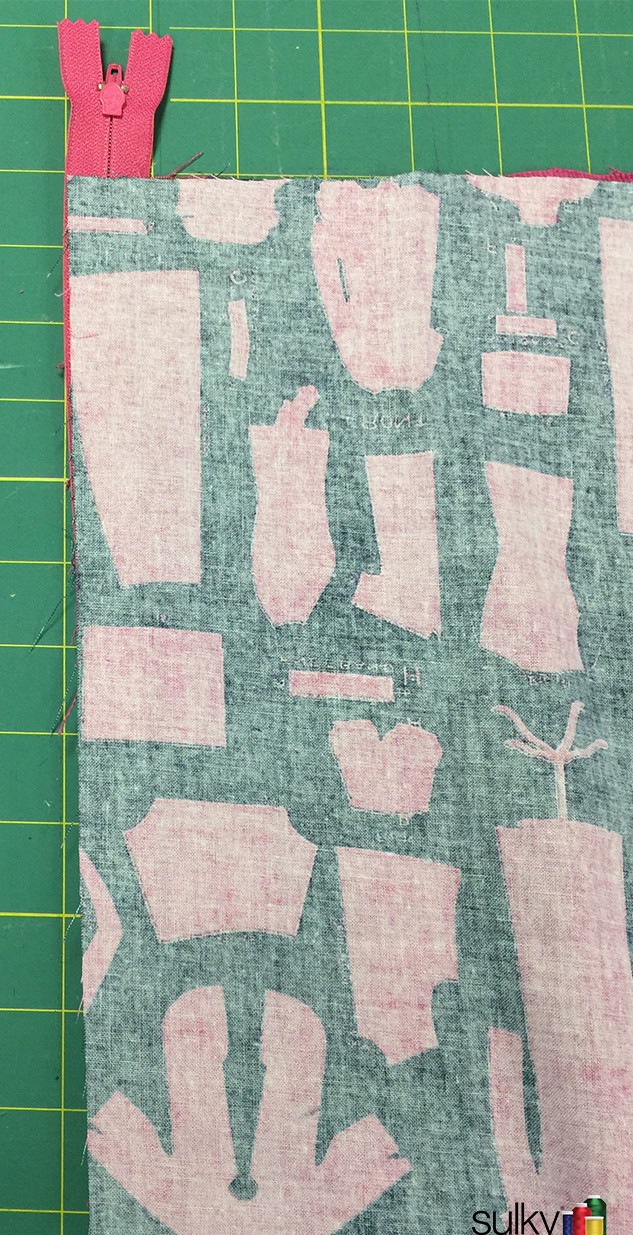
Here’s your “sandwich”: The outer fabric should be right side up, the zipper right side down on the outer fabric, and the lining right side down.
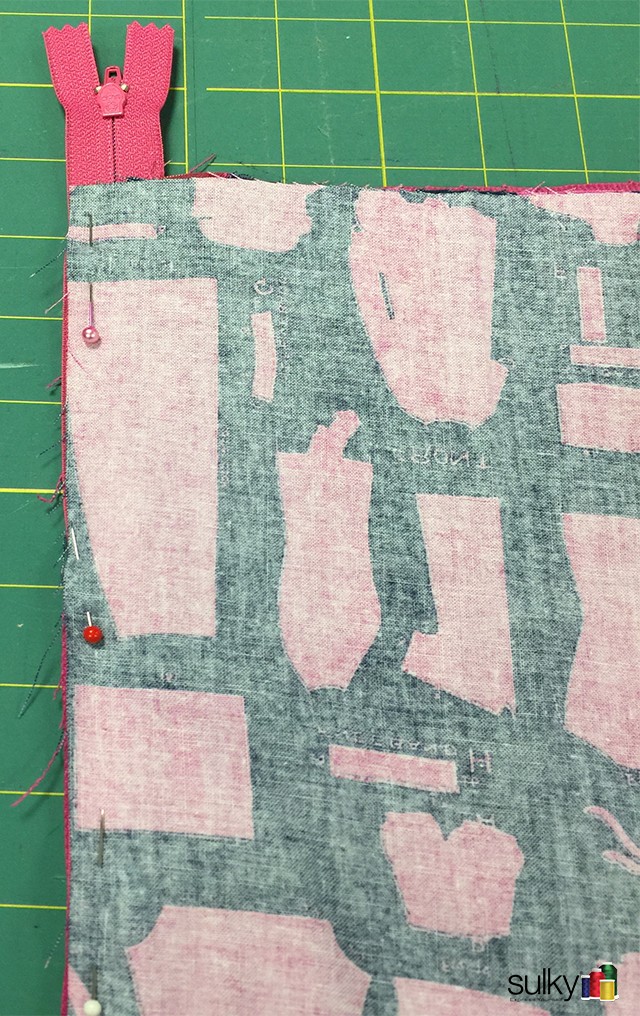
Pin and sew along the outer edge of the zipper. You may want to use your zipper foot for this so you can get close to the teeth of the zipper.
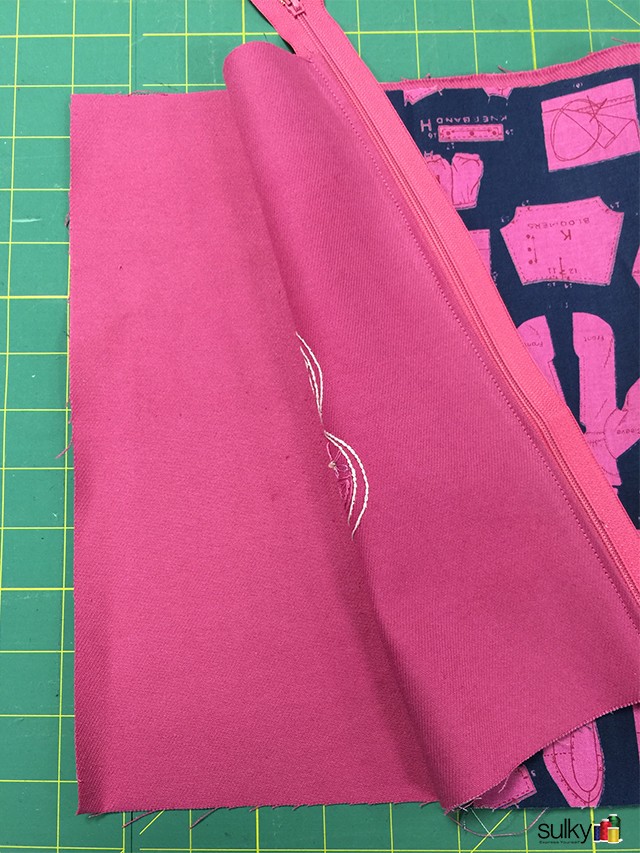
Fold back and iron both the outer and lining fabric, then topstitch the fabric down in place.
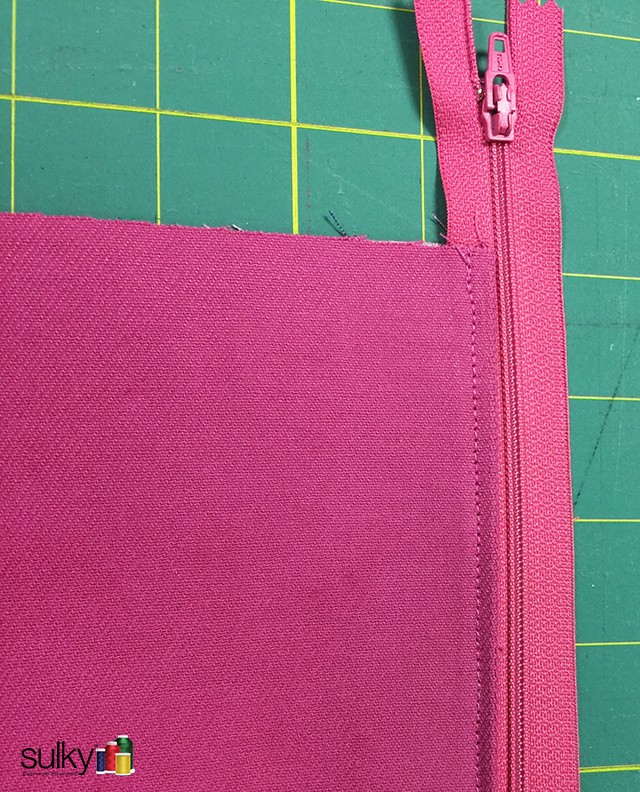
This will keep your fabrics from getting caught in the zipper and it looks cute! I used a matching thread but a contrasting thread would look really cool here too.
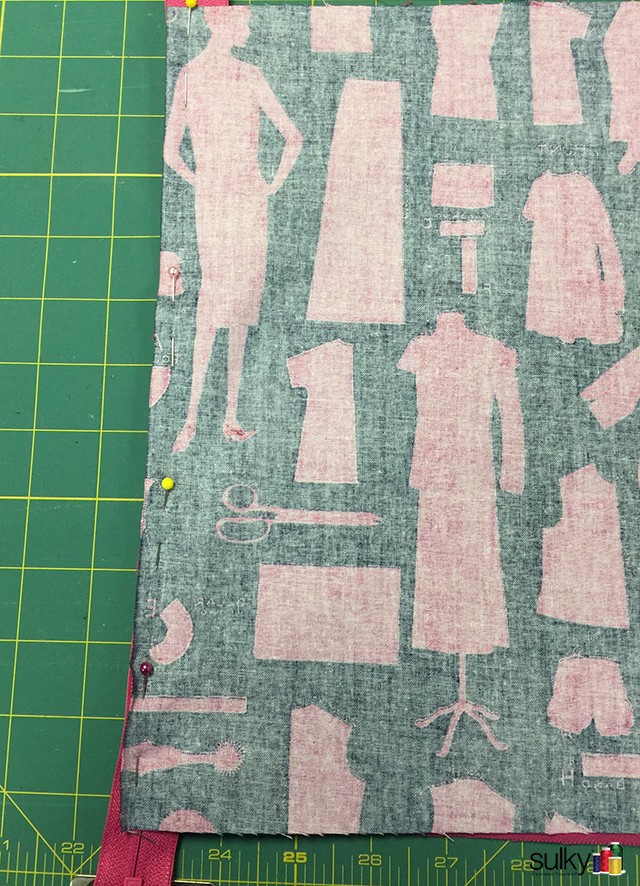
Do the exact same thing with the other end. This time when you are finished sewing it down, you will turn it through the open sides.
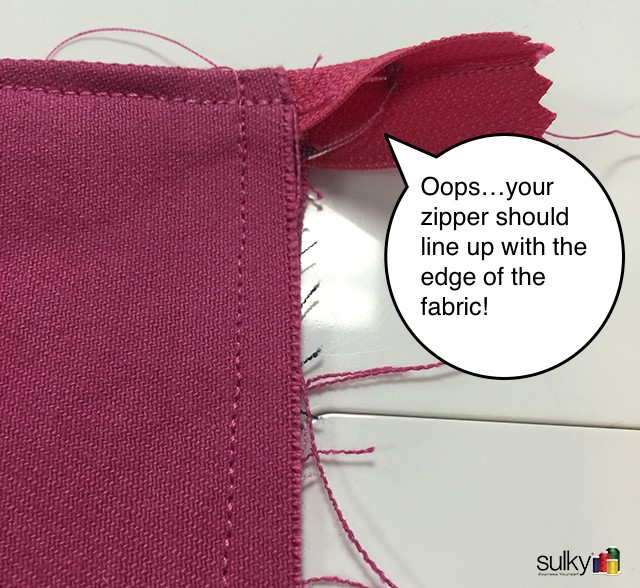
Now for the French seam. A French seam sounds fancy, but it is really easy. Begin by having the bag right side out and laying flat. Sew a seam 1/4″ or a little less along each side. NOTE: See that zipper at the top of the picture? Yours shouldn’t look like that! Yours should have the end of the zipper lined up with the end of the fabric. Have no fear, if yours does look like mine, I’ll show you how to fix it :).
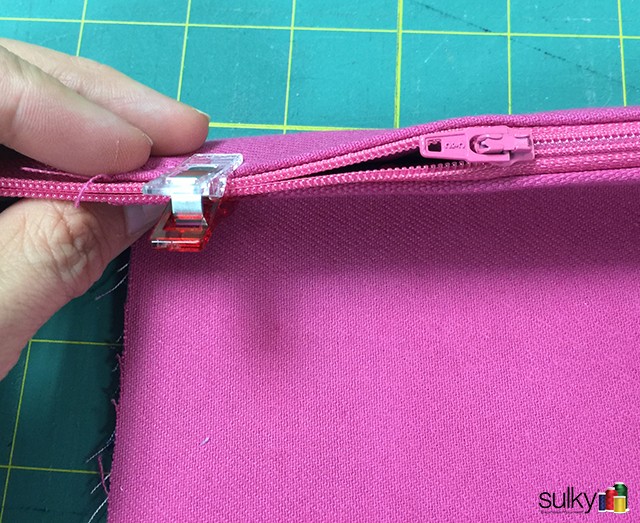
Do the same 1/4″ seam on the other side, but slide the zipper pull to about halfway and use a pin or clip to hold the top together.
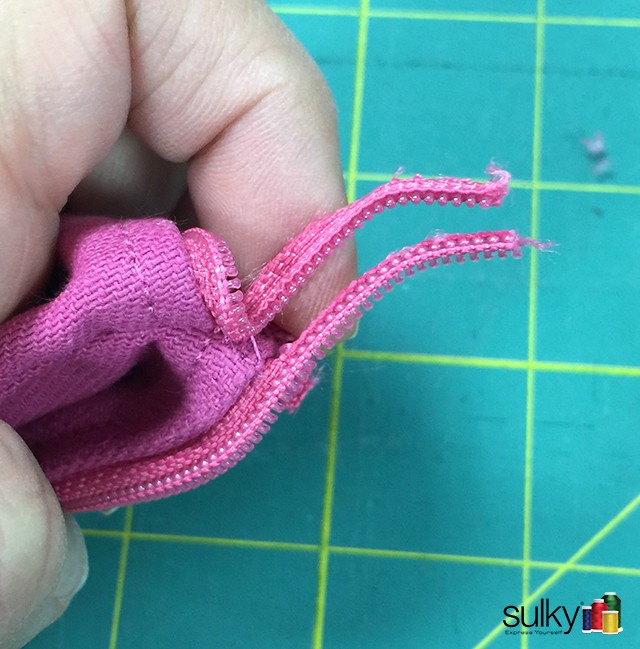
Turn the bag inside out. Now for the fix: If you made the mistake with the zipper that I made, then cut the extra teeth off being careful not to cut into the fabric.
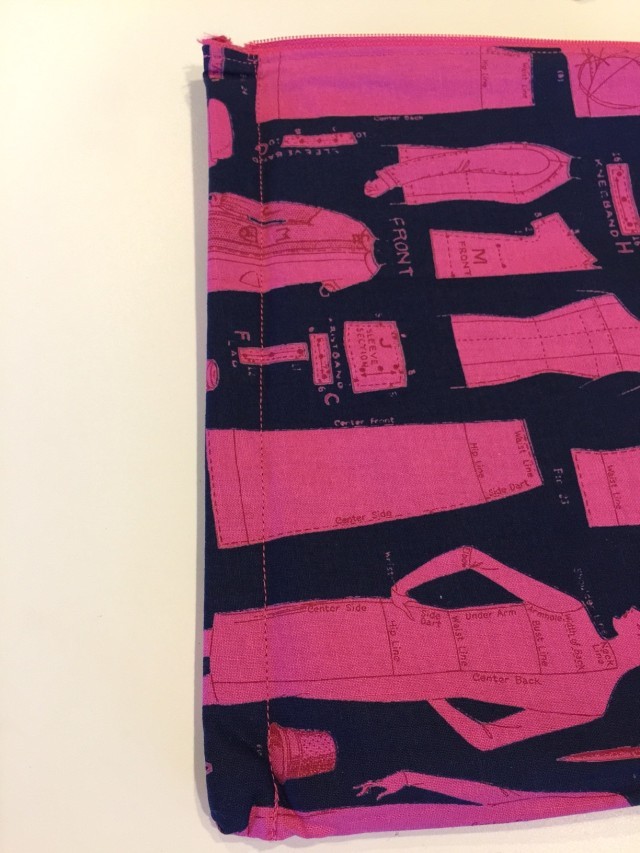
Sew down each side using a seam allowance slightly bigger than 1/4″ so you encase all the raw edges. Be sure to back-stitch at the beginning and end of your stitching line. Fix: Be sure to sew over the very end of the zipper or go back and hand sew a few loops to create a new stop like the one you cut off.

You are done! Now you have a great bag for sewing supplies, makeup, love notes, whatever you would like.
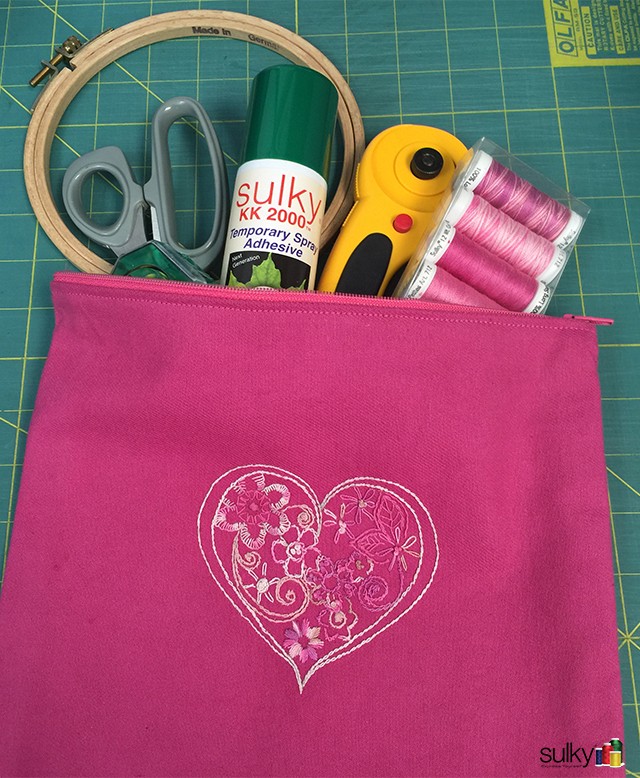
Don’t forget to shop in the Beat Cancer Shop on Sulky.com. 10% of the proceeds from the sale of these threads sets goes to National Breast Cancer Foundation.
BTW – Did you know that if you buy all three sets, you don’t have to pay for shipping? BONUS!
Happy Sewing!


lovely. I love little clutches too. perfect way to combine both. eo
How about a machine embroidery design also?
Here are some great options that are free from the Sulky Embroidery Club. http://www.sulkyembclub.com/designs.aspx?cid=1&scid=36&pt=4
Thank you Kelly for the pouch tutorial. I am a 1 year survivor of uterine cancer…yea. So I will enjoy making this for myself…and maybe one or two for friends…..
…and I am a survivor of kidney cancer hell . …sigh … and I am looking forward to making this too . Thanks for sharing x
….lung cancer survivor here….not a great experience. So, I am enjoying the sulky classes and this pouch, (and reclaiming my fun) I’m thinking of sewing a 3/4 inch ribbon into both sides for handles. That should work, right?. Thank you for this project.
I think a ribbon is perfect for handles. And I am glad you are on the other side of your cancer journey.
Pingback: Pink Ribbon Pincushion Mason Jar Sewing Kit - Sulky
I’m also a uterine cancer survivor! Will make this in peach ( my cancer color) and Sept. is our month. I will make several for my breast cancer friends. Thanks for the inspiration.
Great! You’re welcome. Congratulations on your survivorship!