Embroidered Shoelaces
Add fun hand embroidery to your favorite kicks to show your team spirit! Feature a phrase, team name or school mascot, centered along the shoelace length so it displays perfectly when the shoe is worn. Grab our free template for some examples and transfer the designs using one of two methods.
EMBROIDERED SHOELACES SUPPLIES
- Sulky 12 wt. Cotton Thread (colors that match your favorite team)
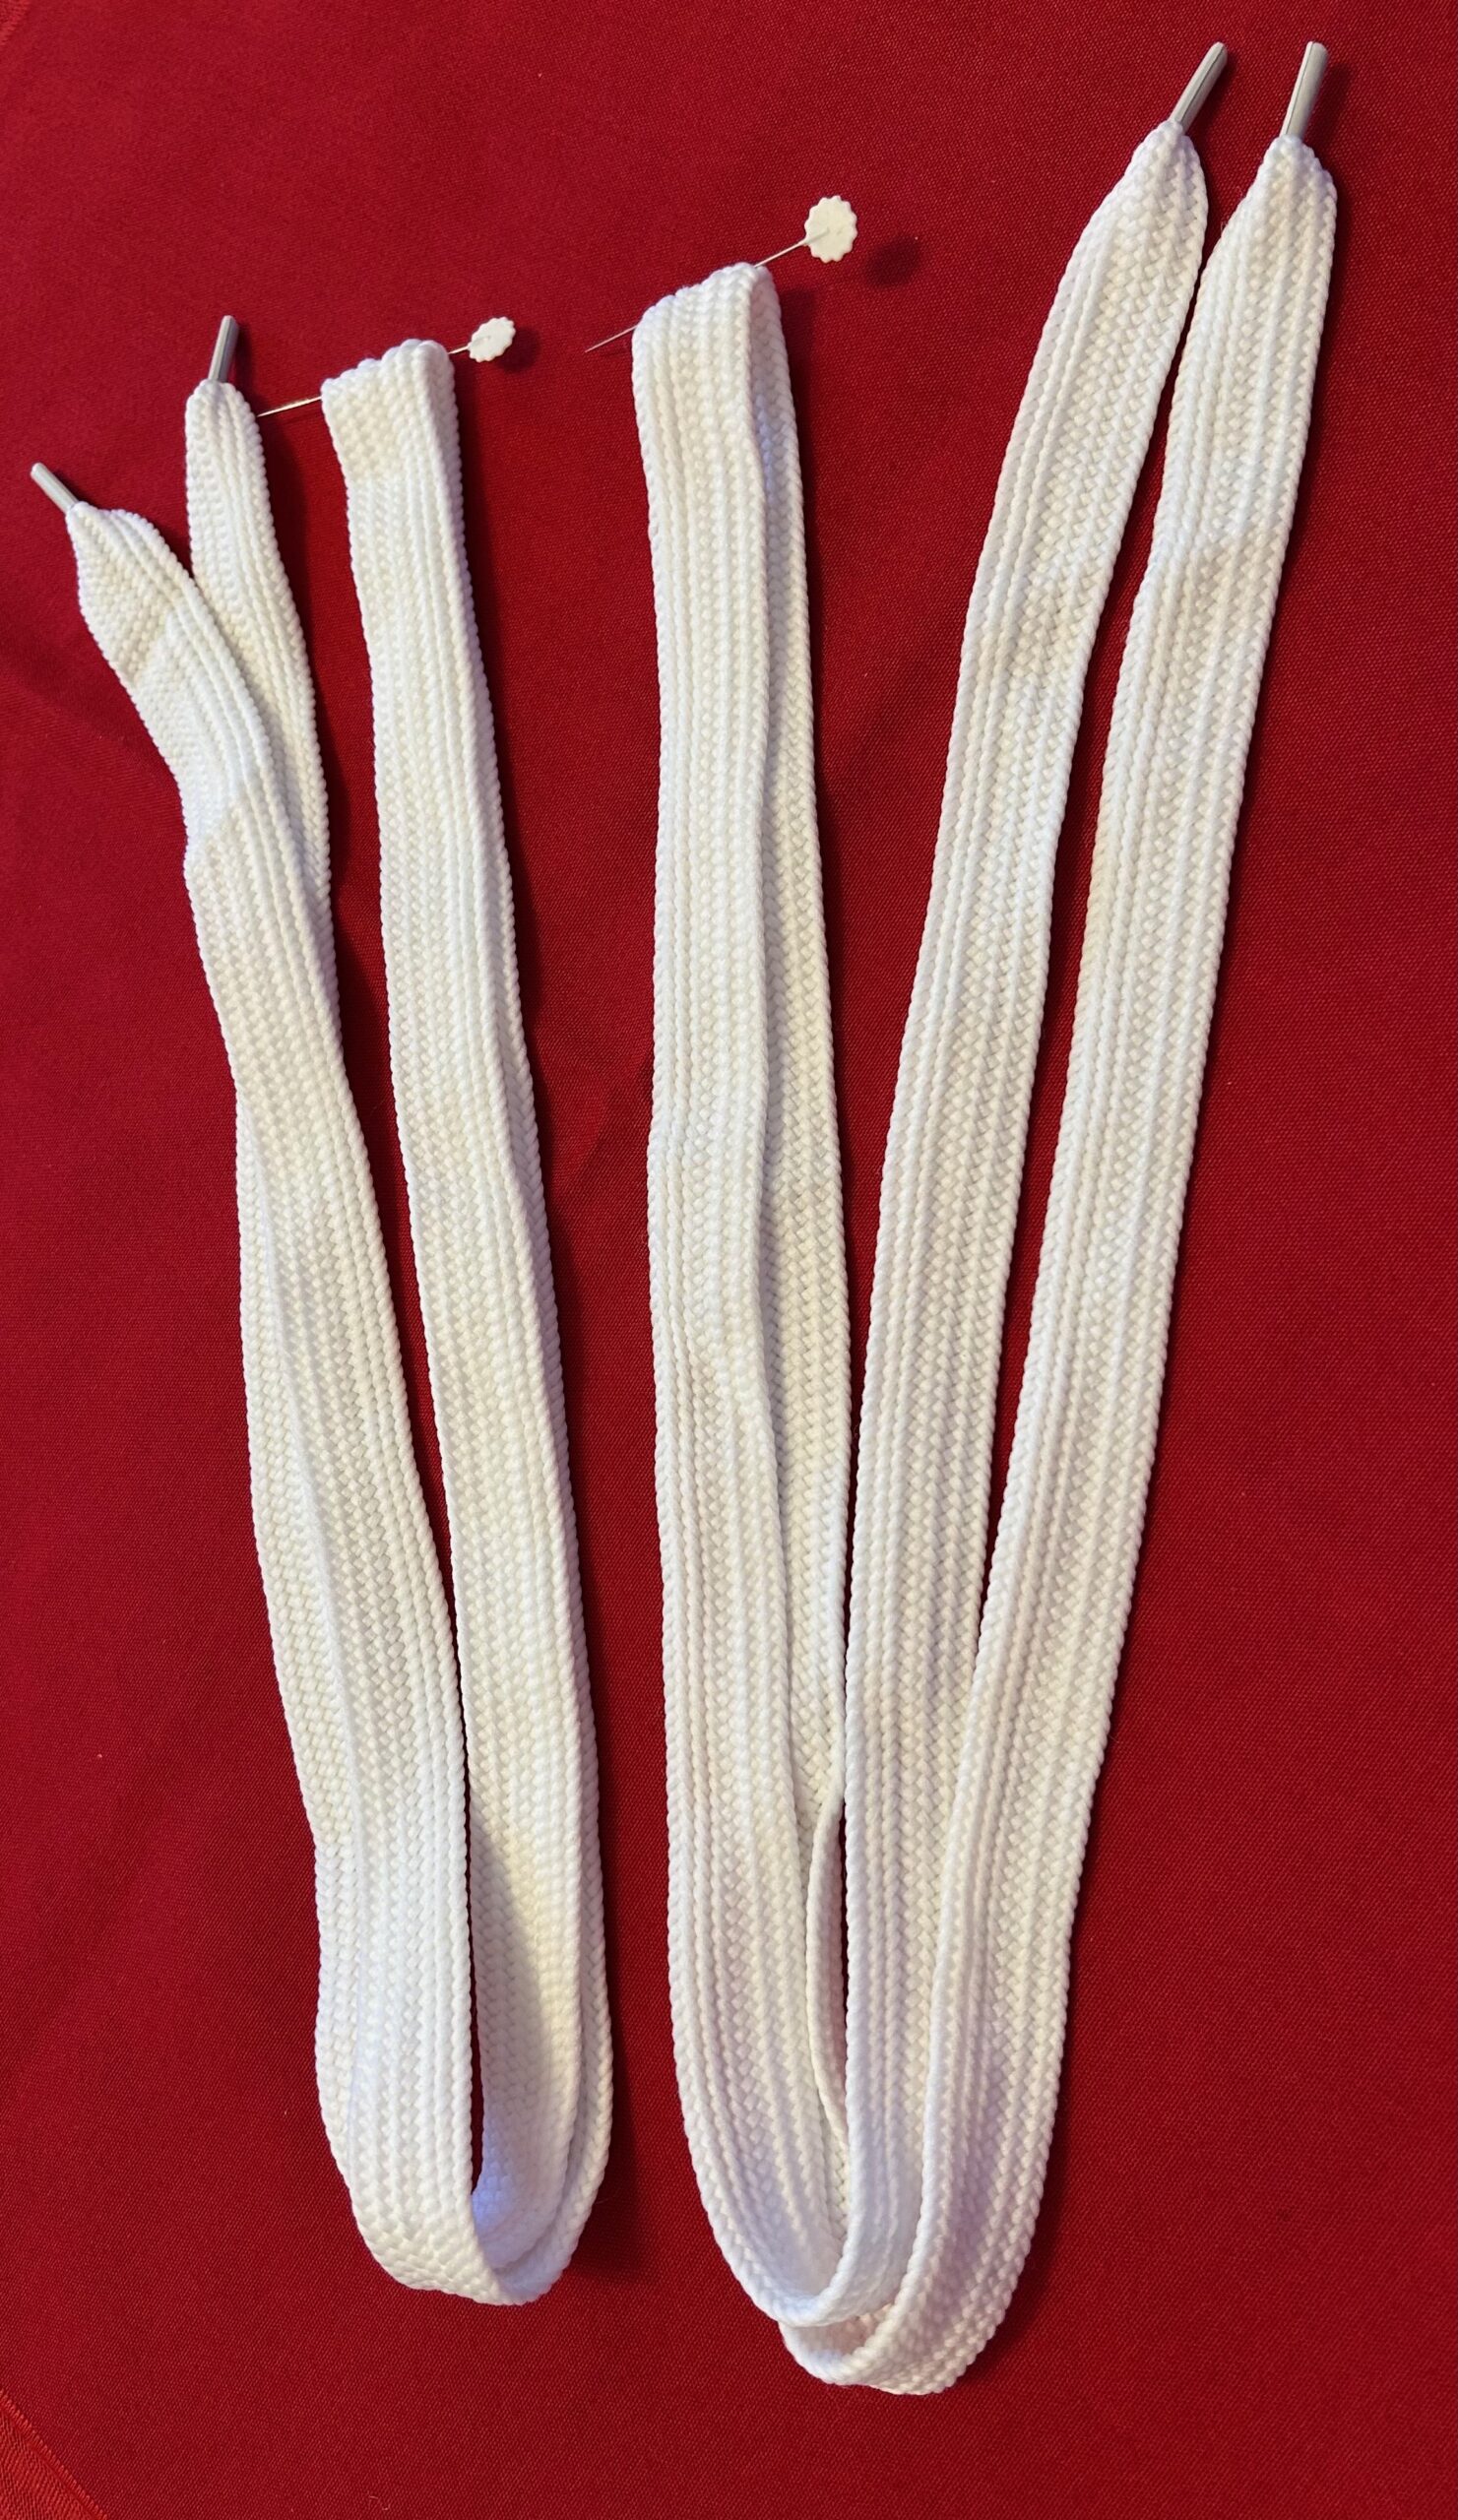
- Pair of shoelaces with 3/4″-wide flat laces
- Sulky Stick ‘n Stitch Stabilizer (method 1)
- Sports Shoelace Embroidery Design Templates
- Sulky Iron-on Transfer Pens (method 2)
- Hand Sewing Needle
EMBROIDERY METHOD 1: STICK’ N STITCH TRANSFERS
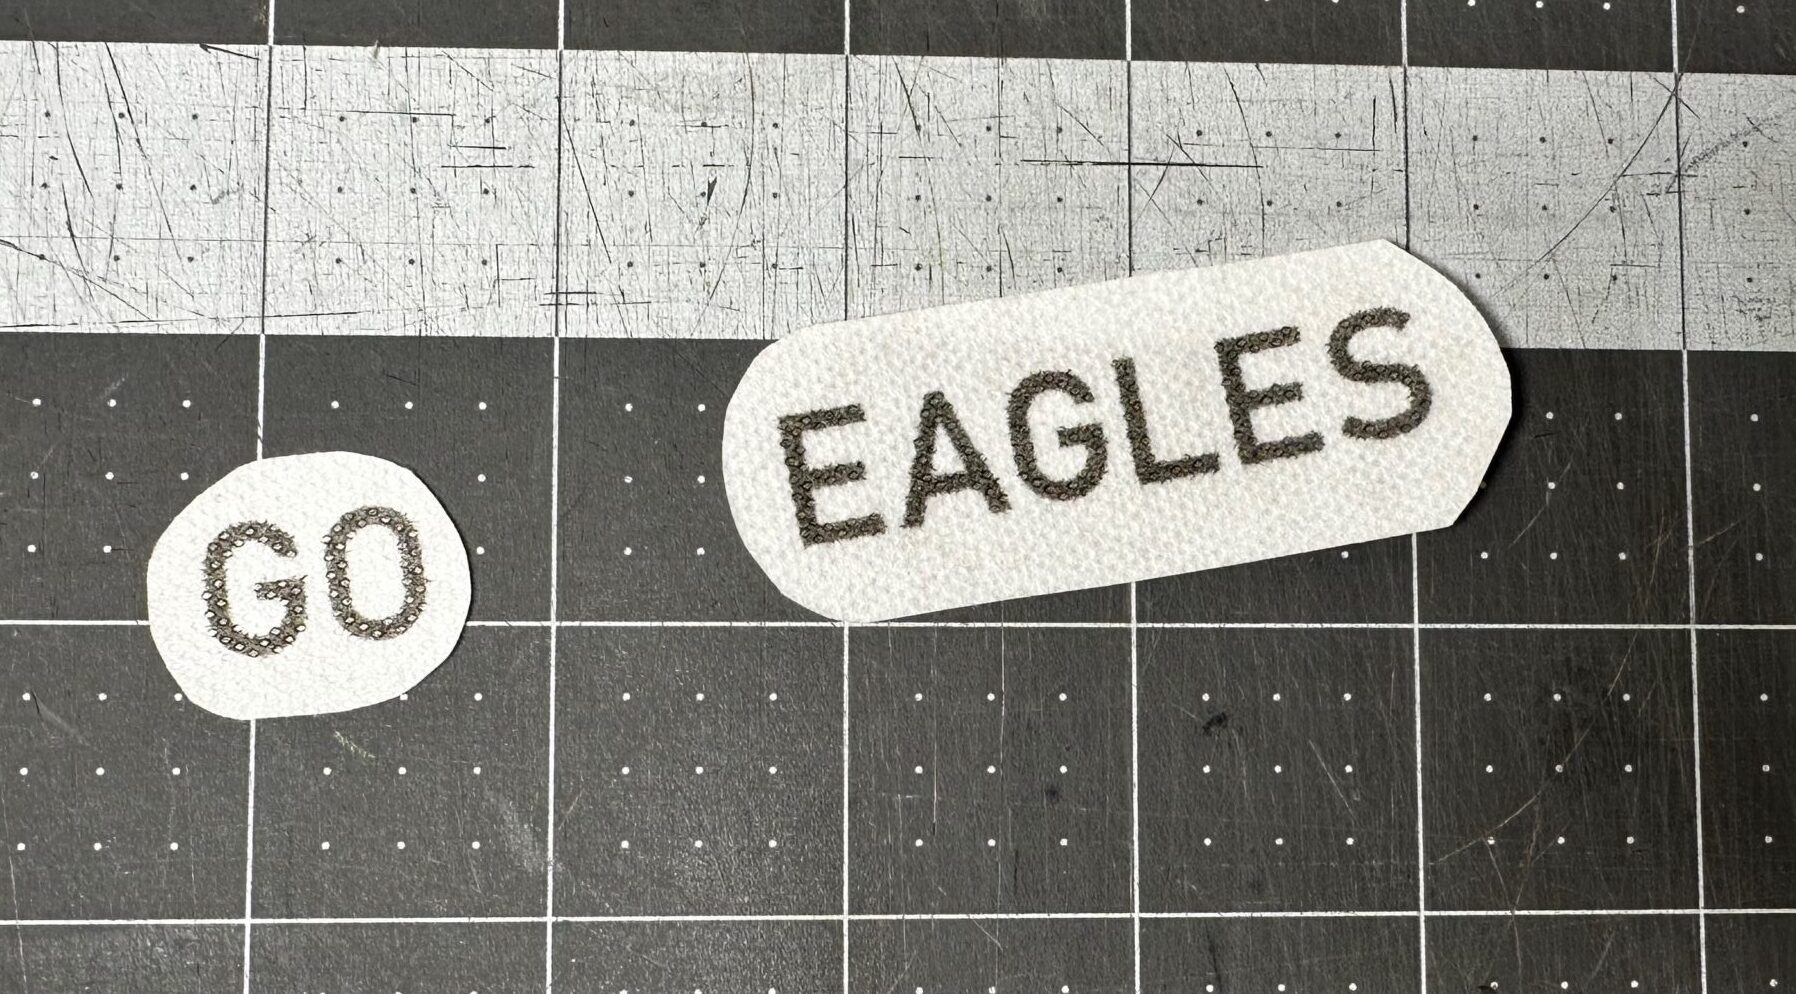
Using the Sports Shoelace Embroidery Design Templates, print the page that’s labeled “for Stick ‘n Stitch.” This page is NOT mirror-imaged.
Choose the desired design for each shoe. For example, “GO” for one shoelace and “TEAM” for the other. Cut out the templates needed, leaving a bit of a border around the lettering.
Find the center of each shoelace. First, fold each shoelace in half and pin-mark the center. Or, mark the center using a removable fabric marker or chalk.
Center one Stick ‘n Stitch Transfer on each shoelace.
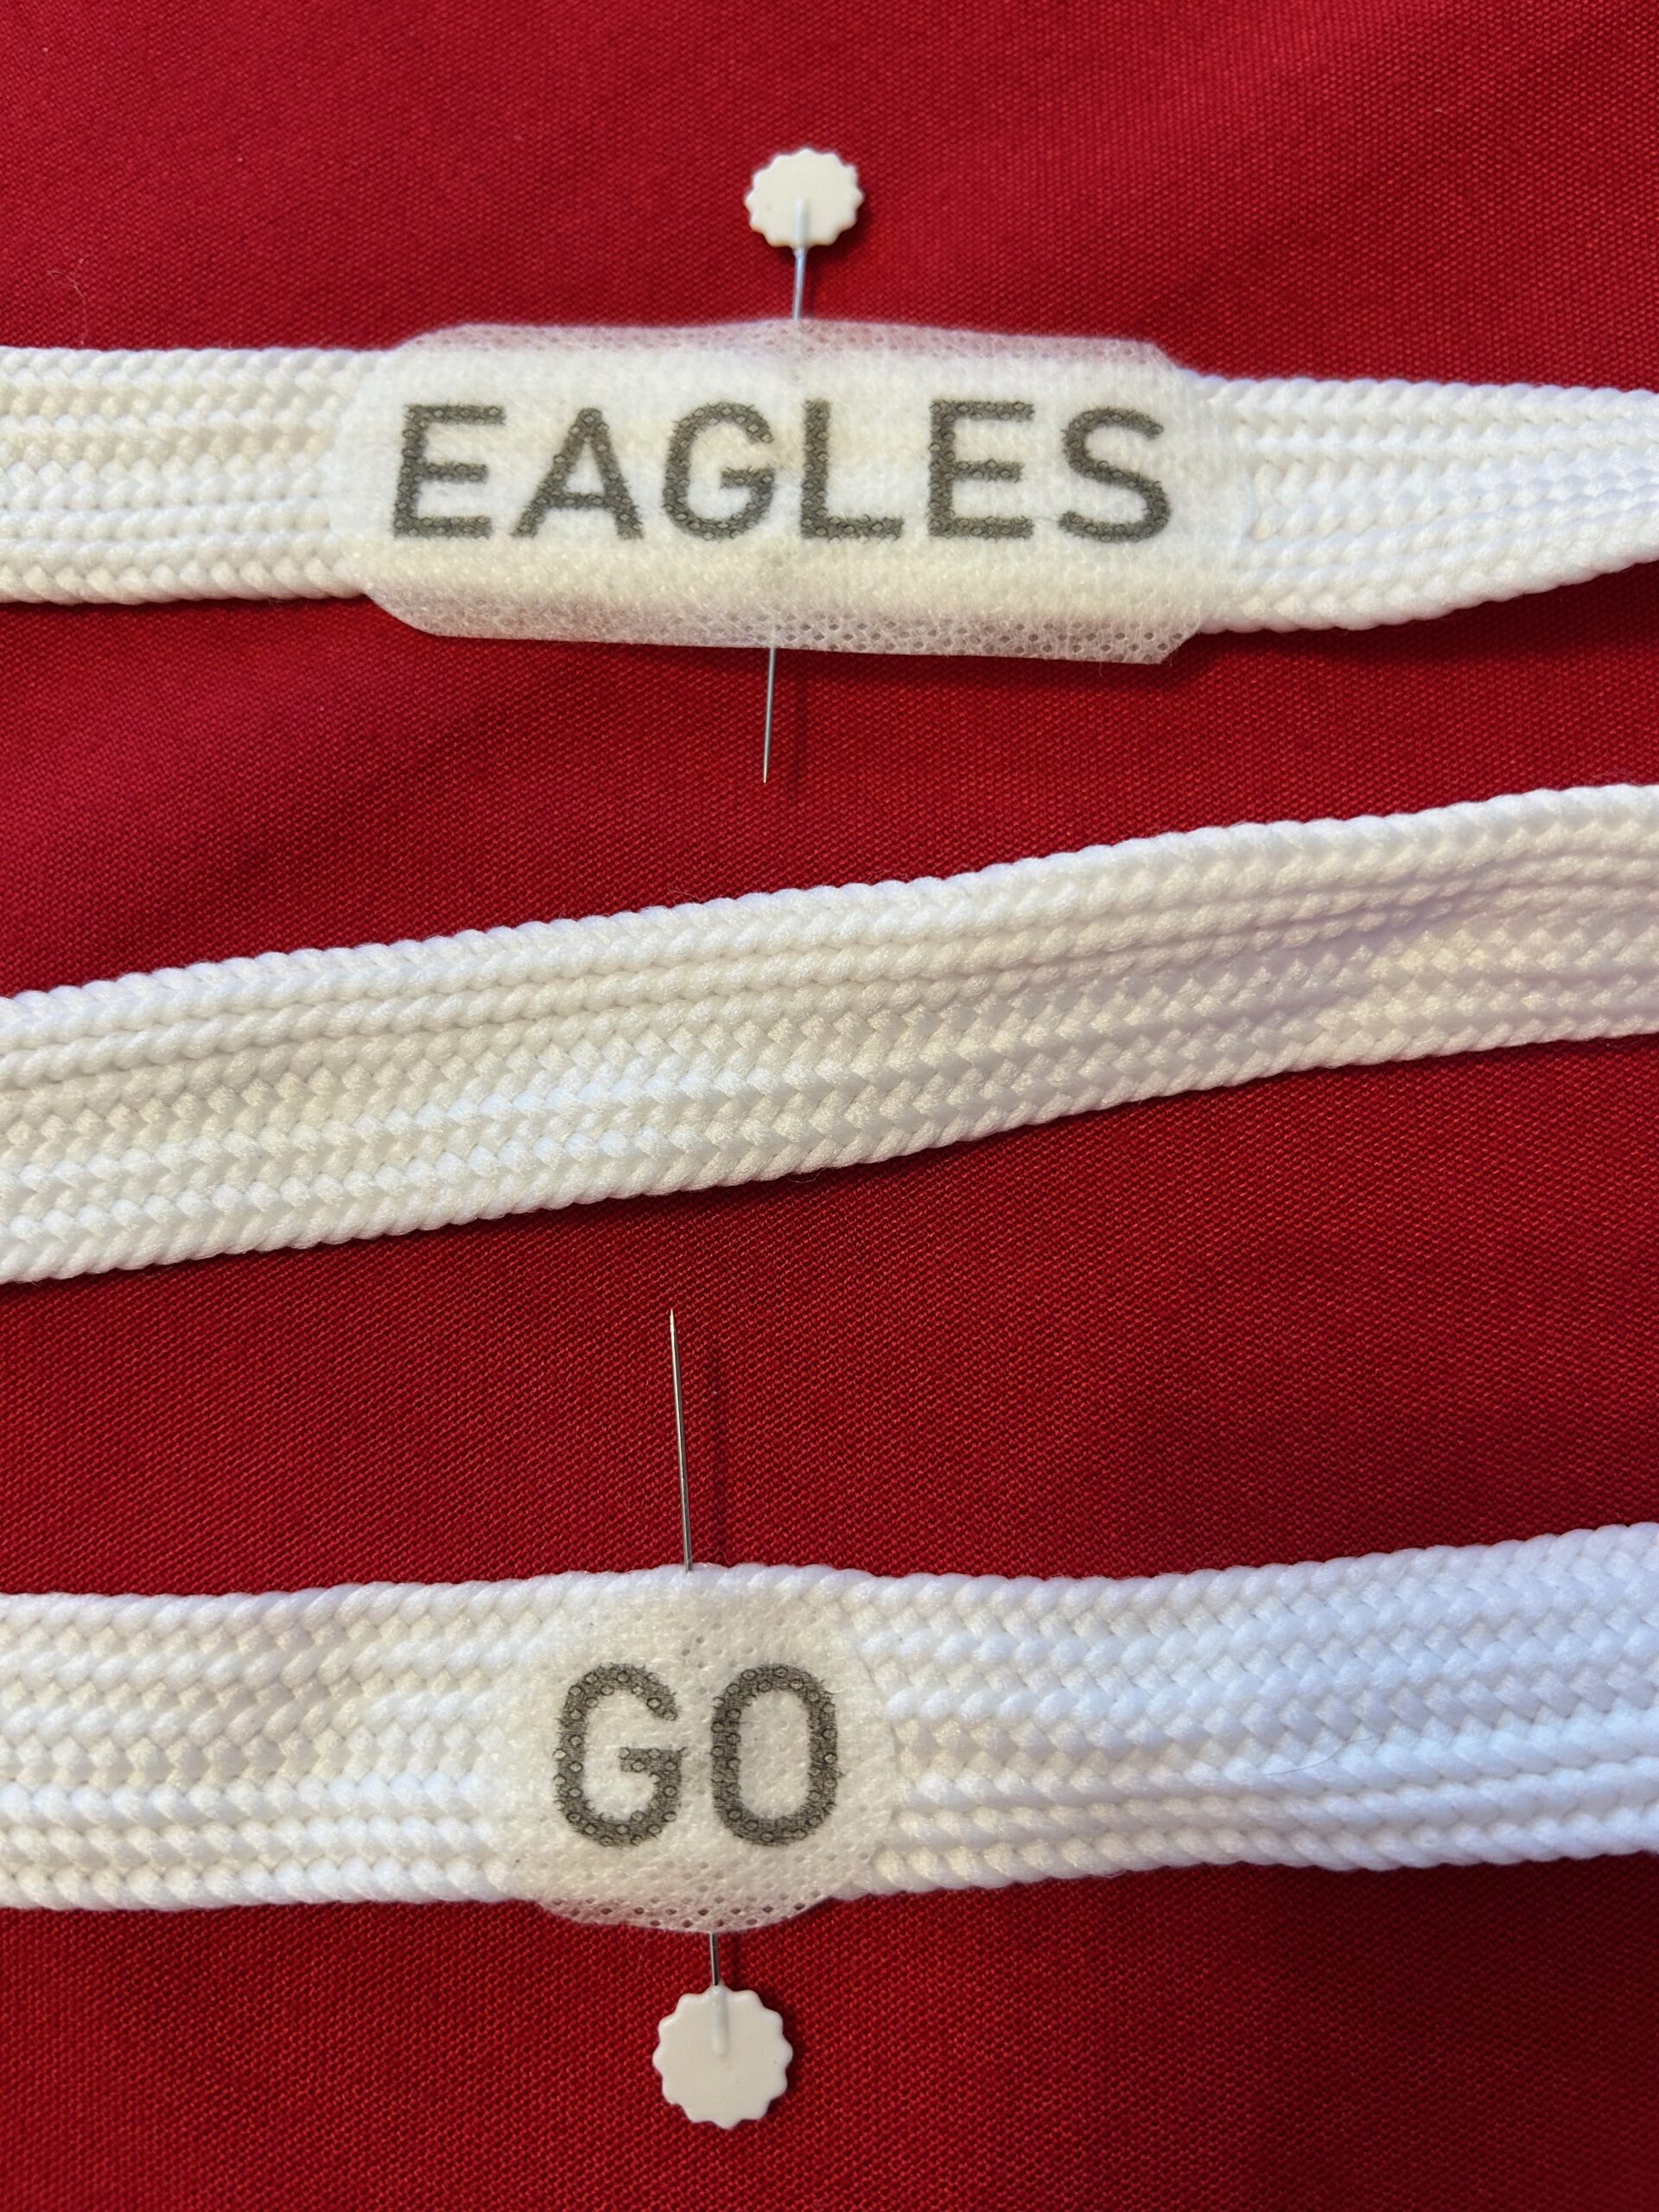
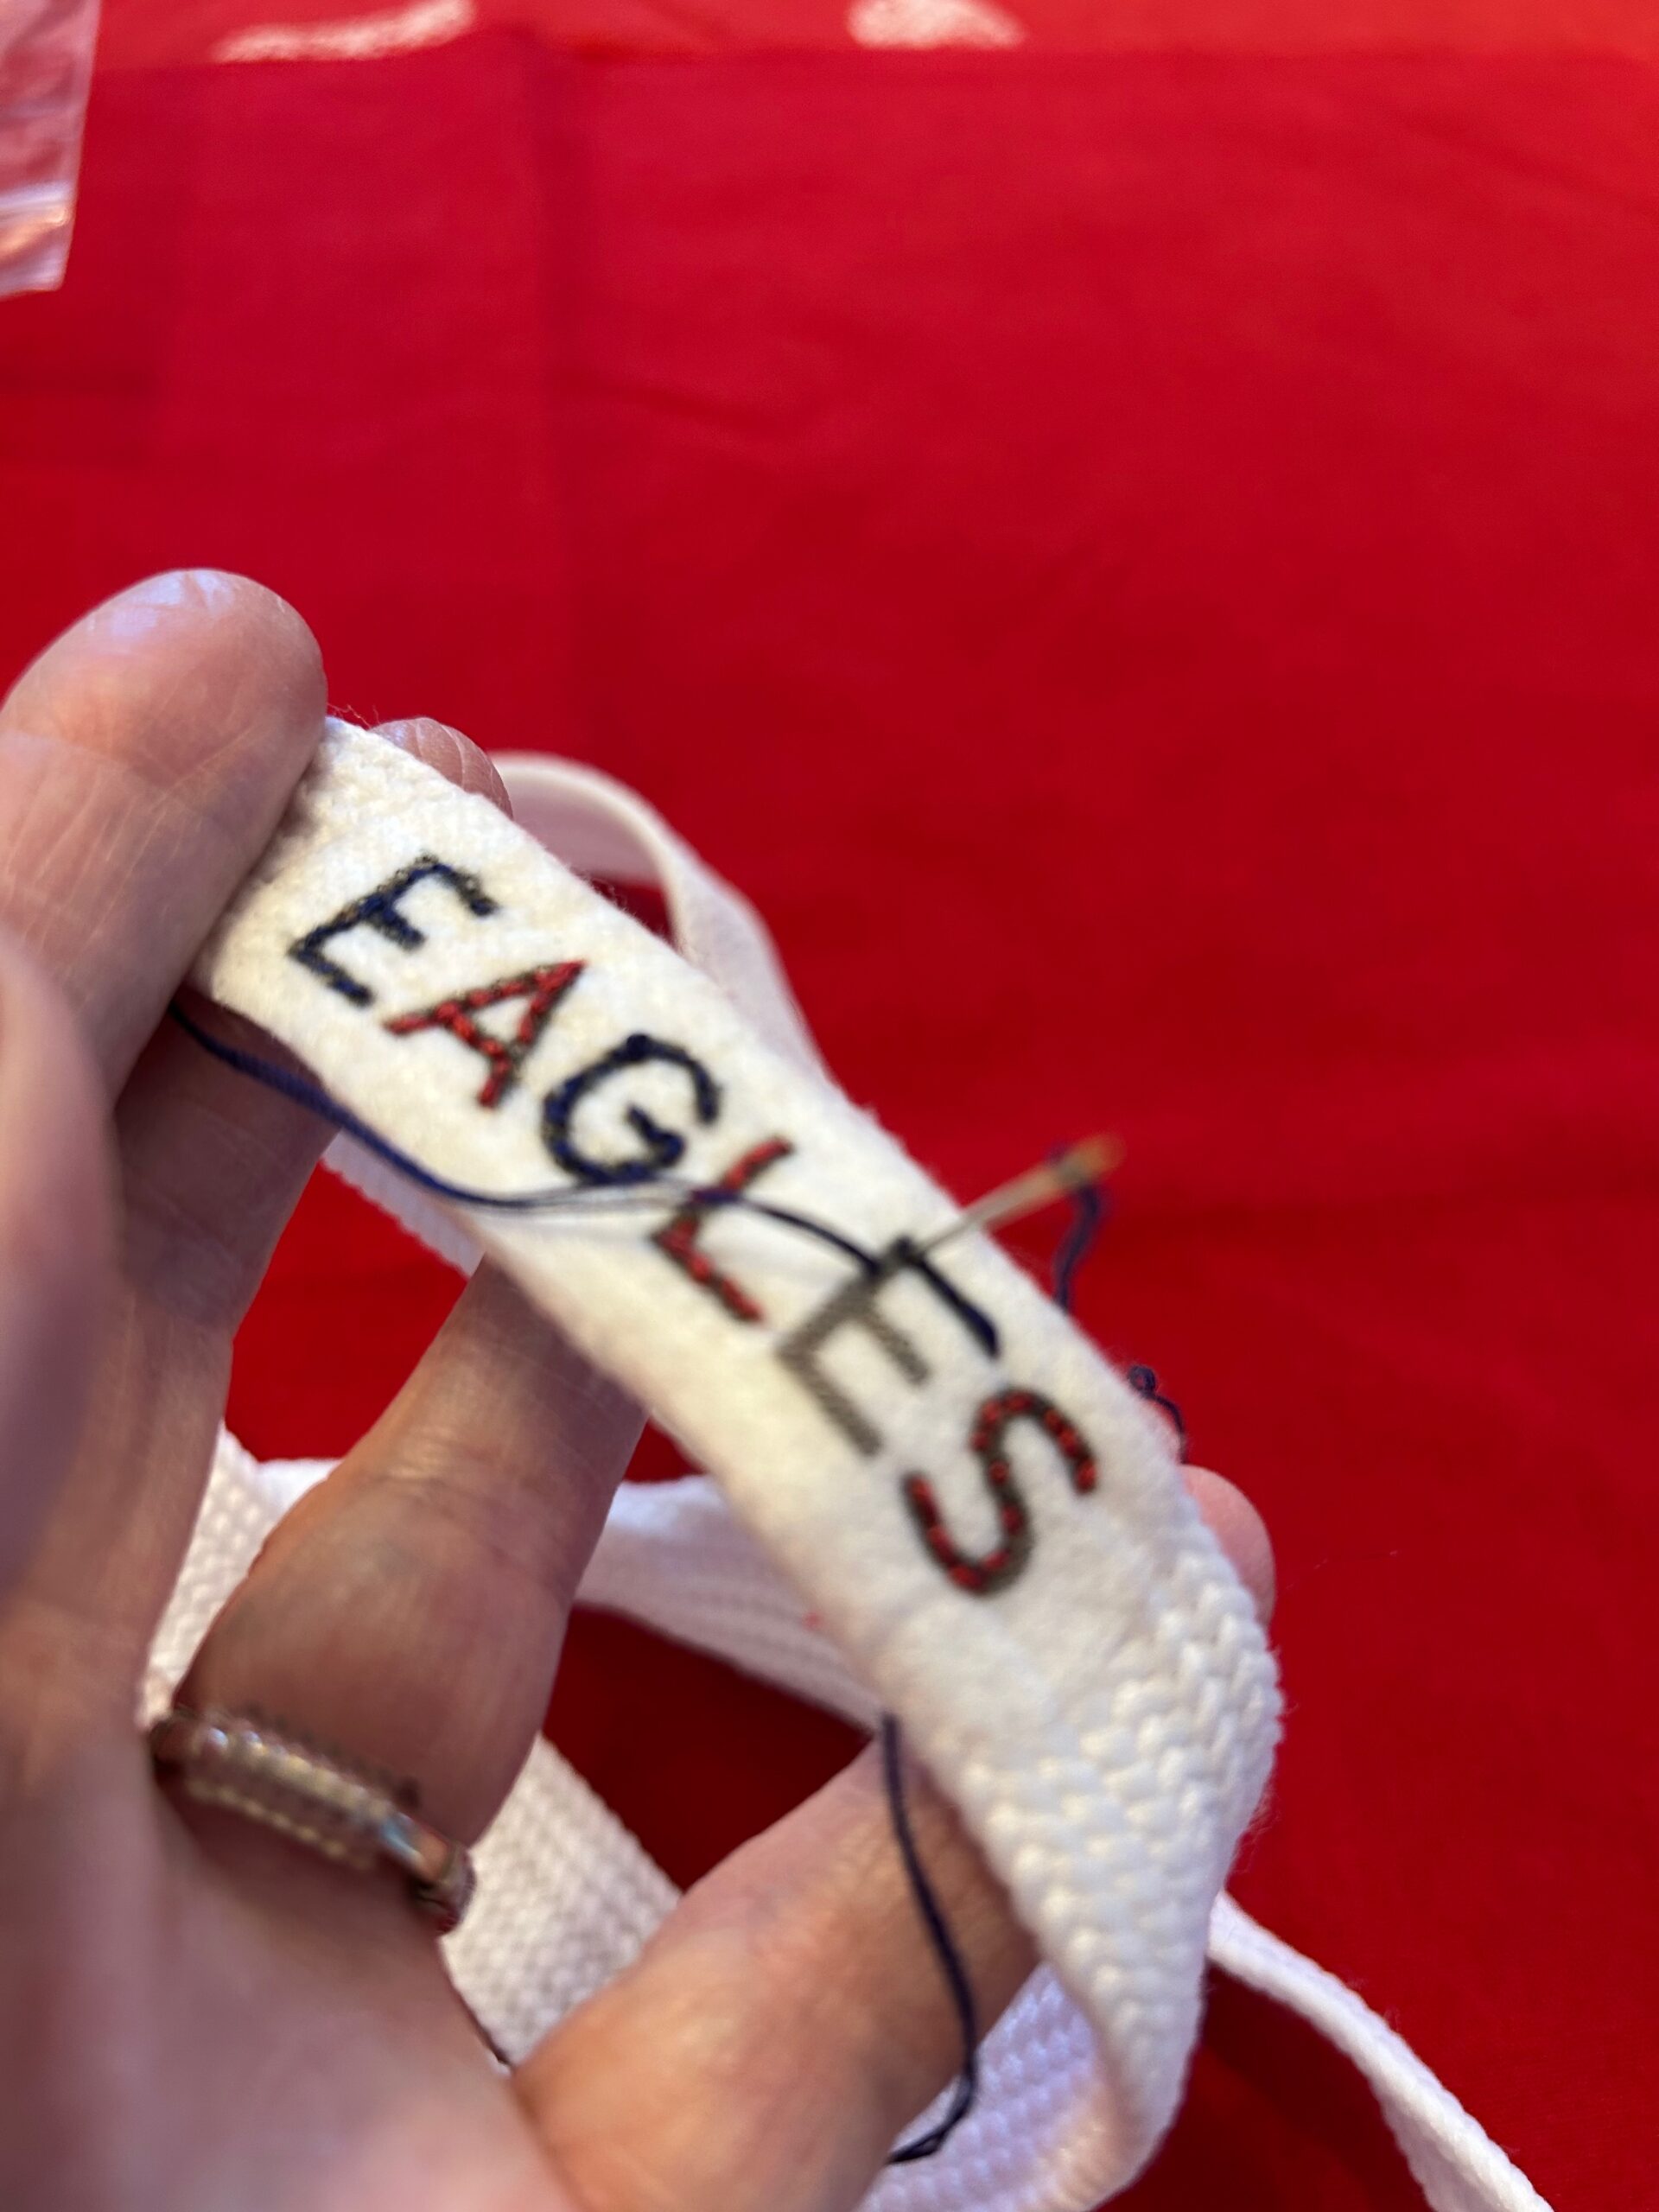
Thread a hand sewing needle with two strands of Sulky 12 wt. Cotton Petites® Thread in the color of your choice.
TIP: Switch thread colors every letter to represent your favorite team colors. Or Use one color for one shoelace and another color on the other.
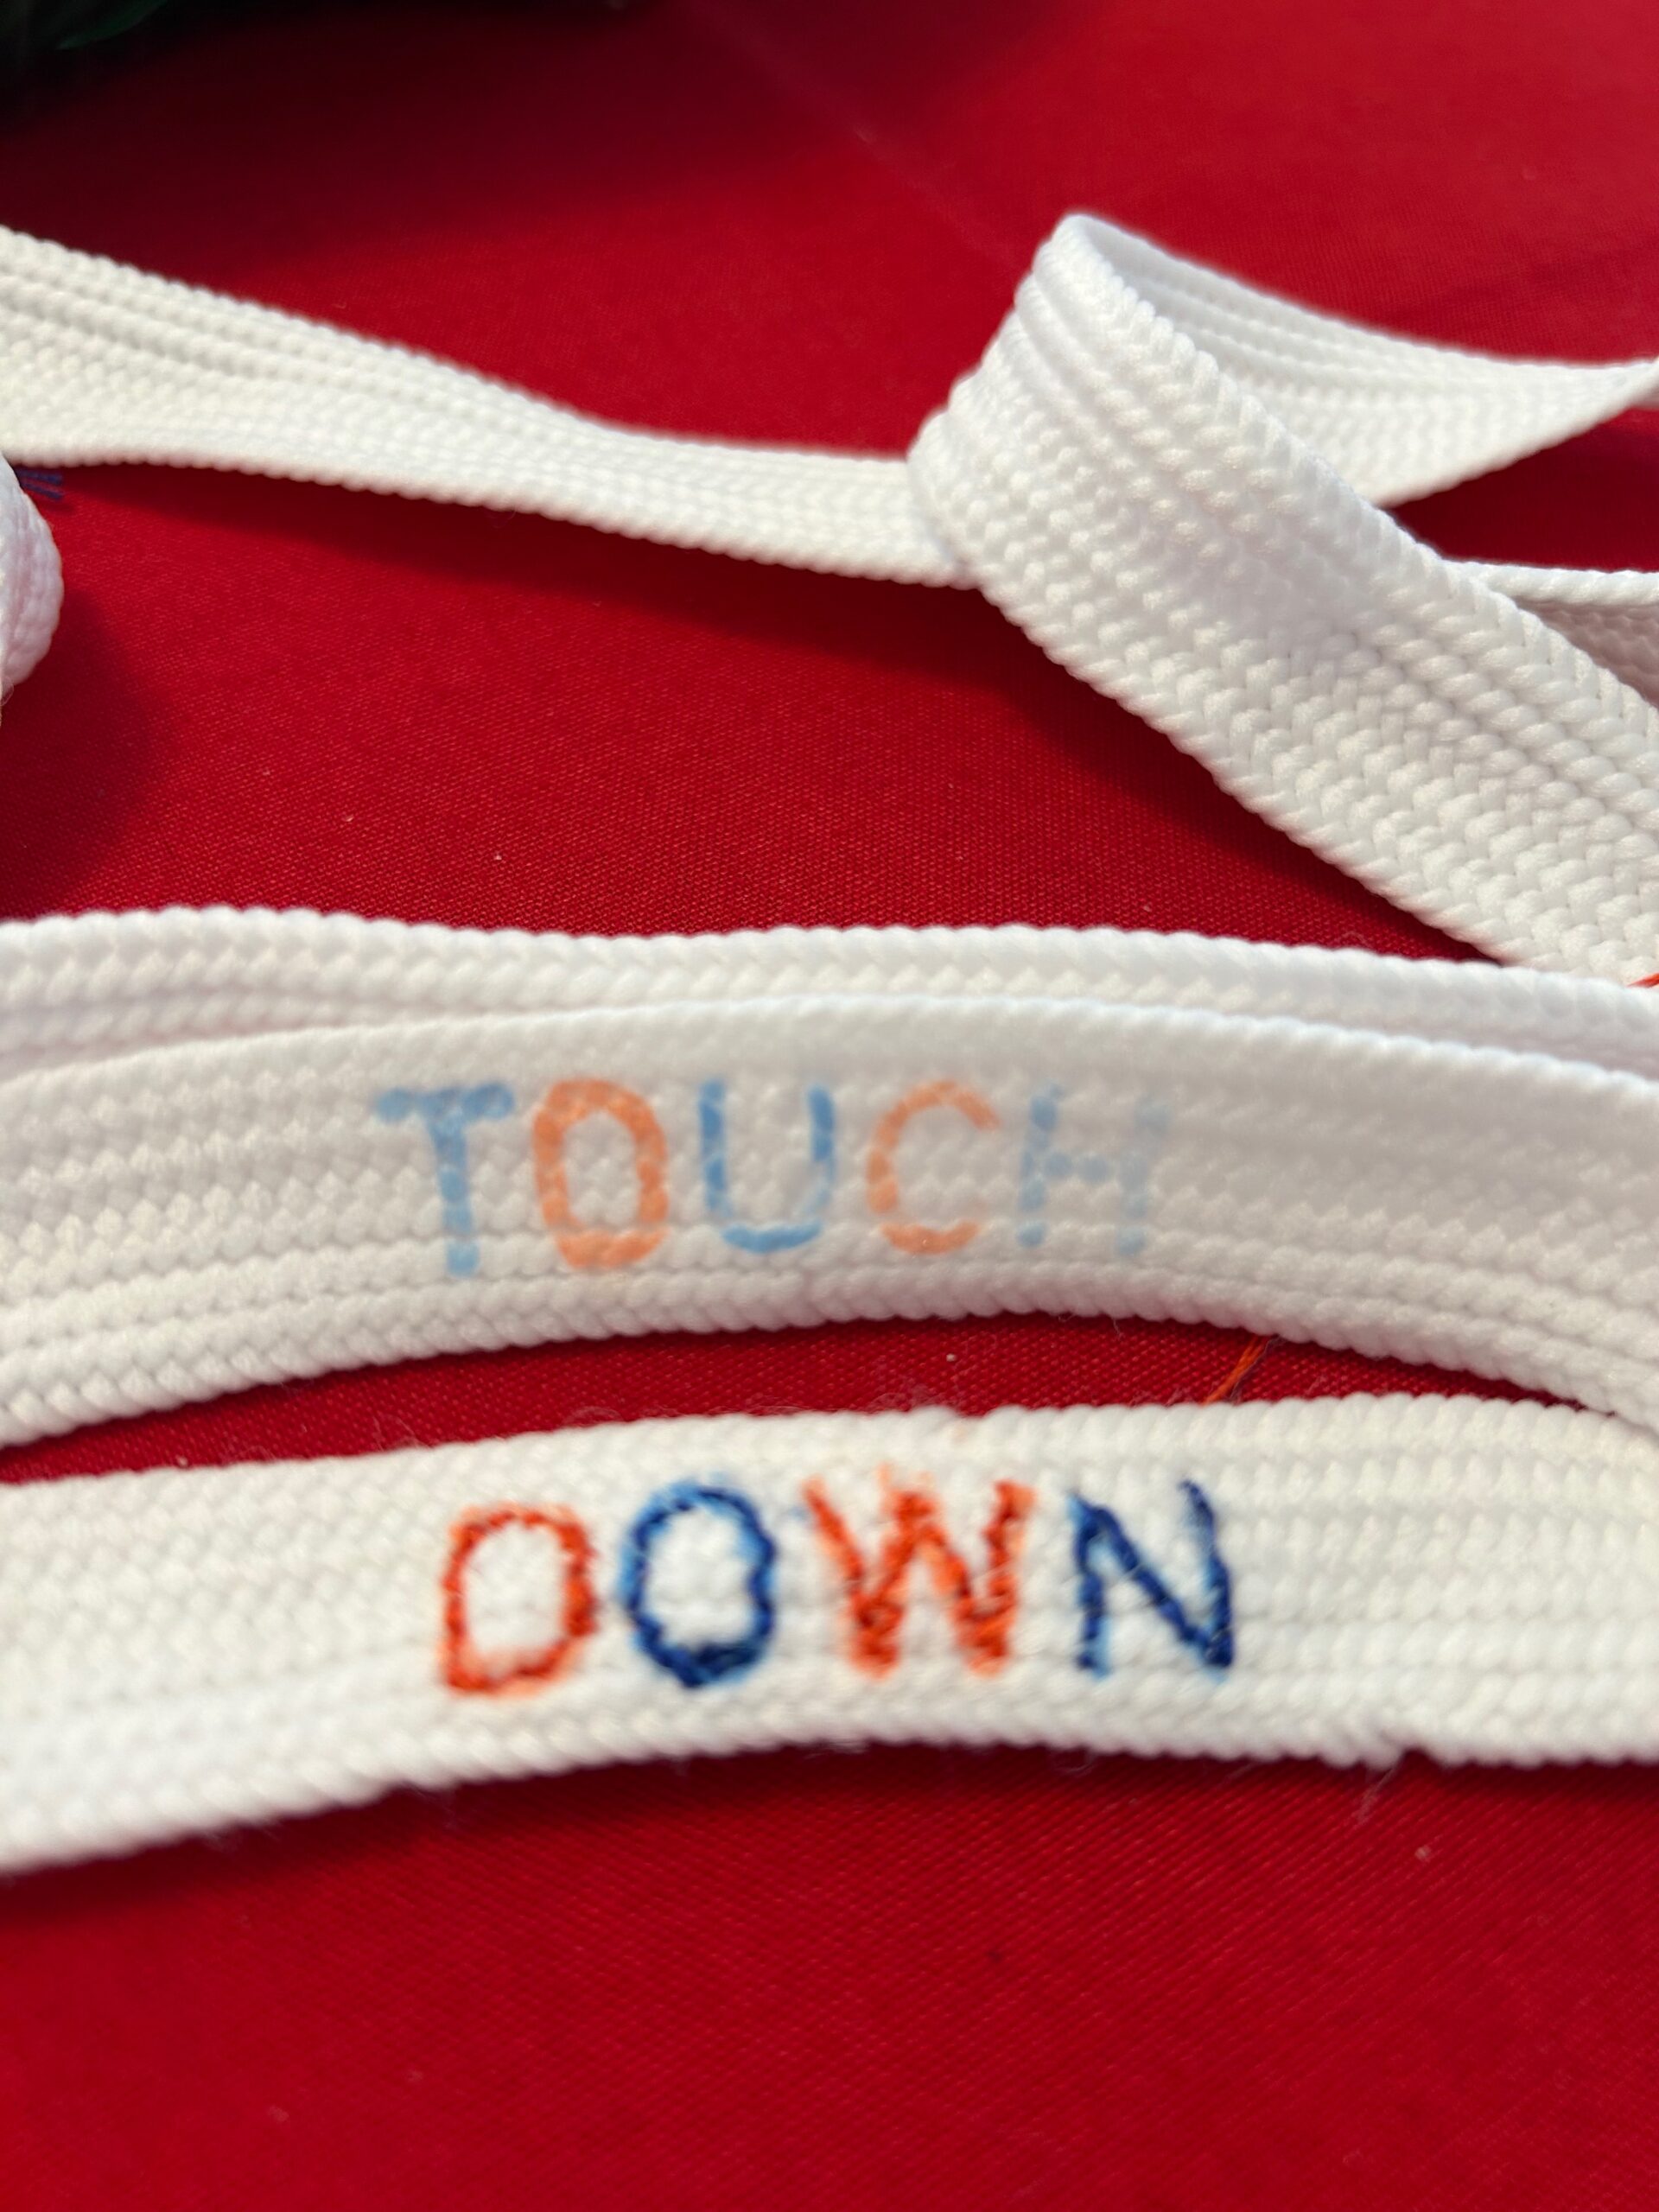
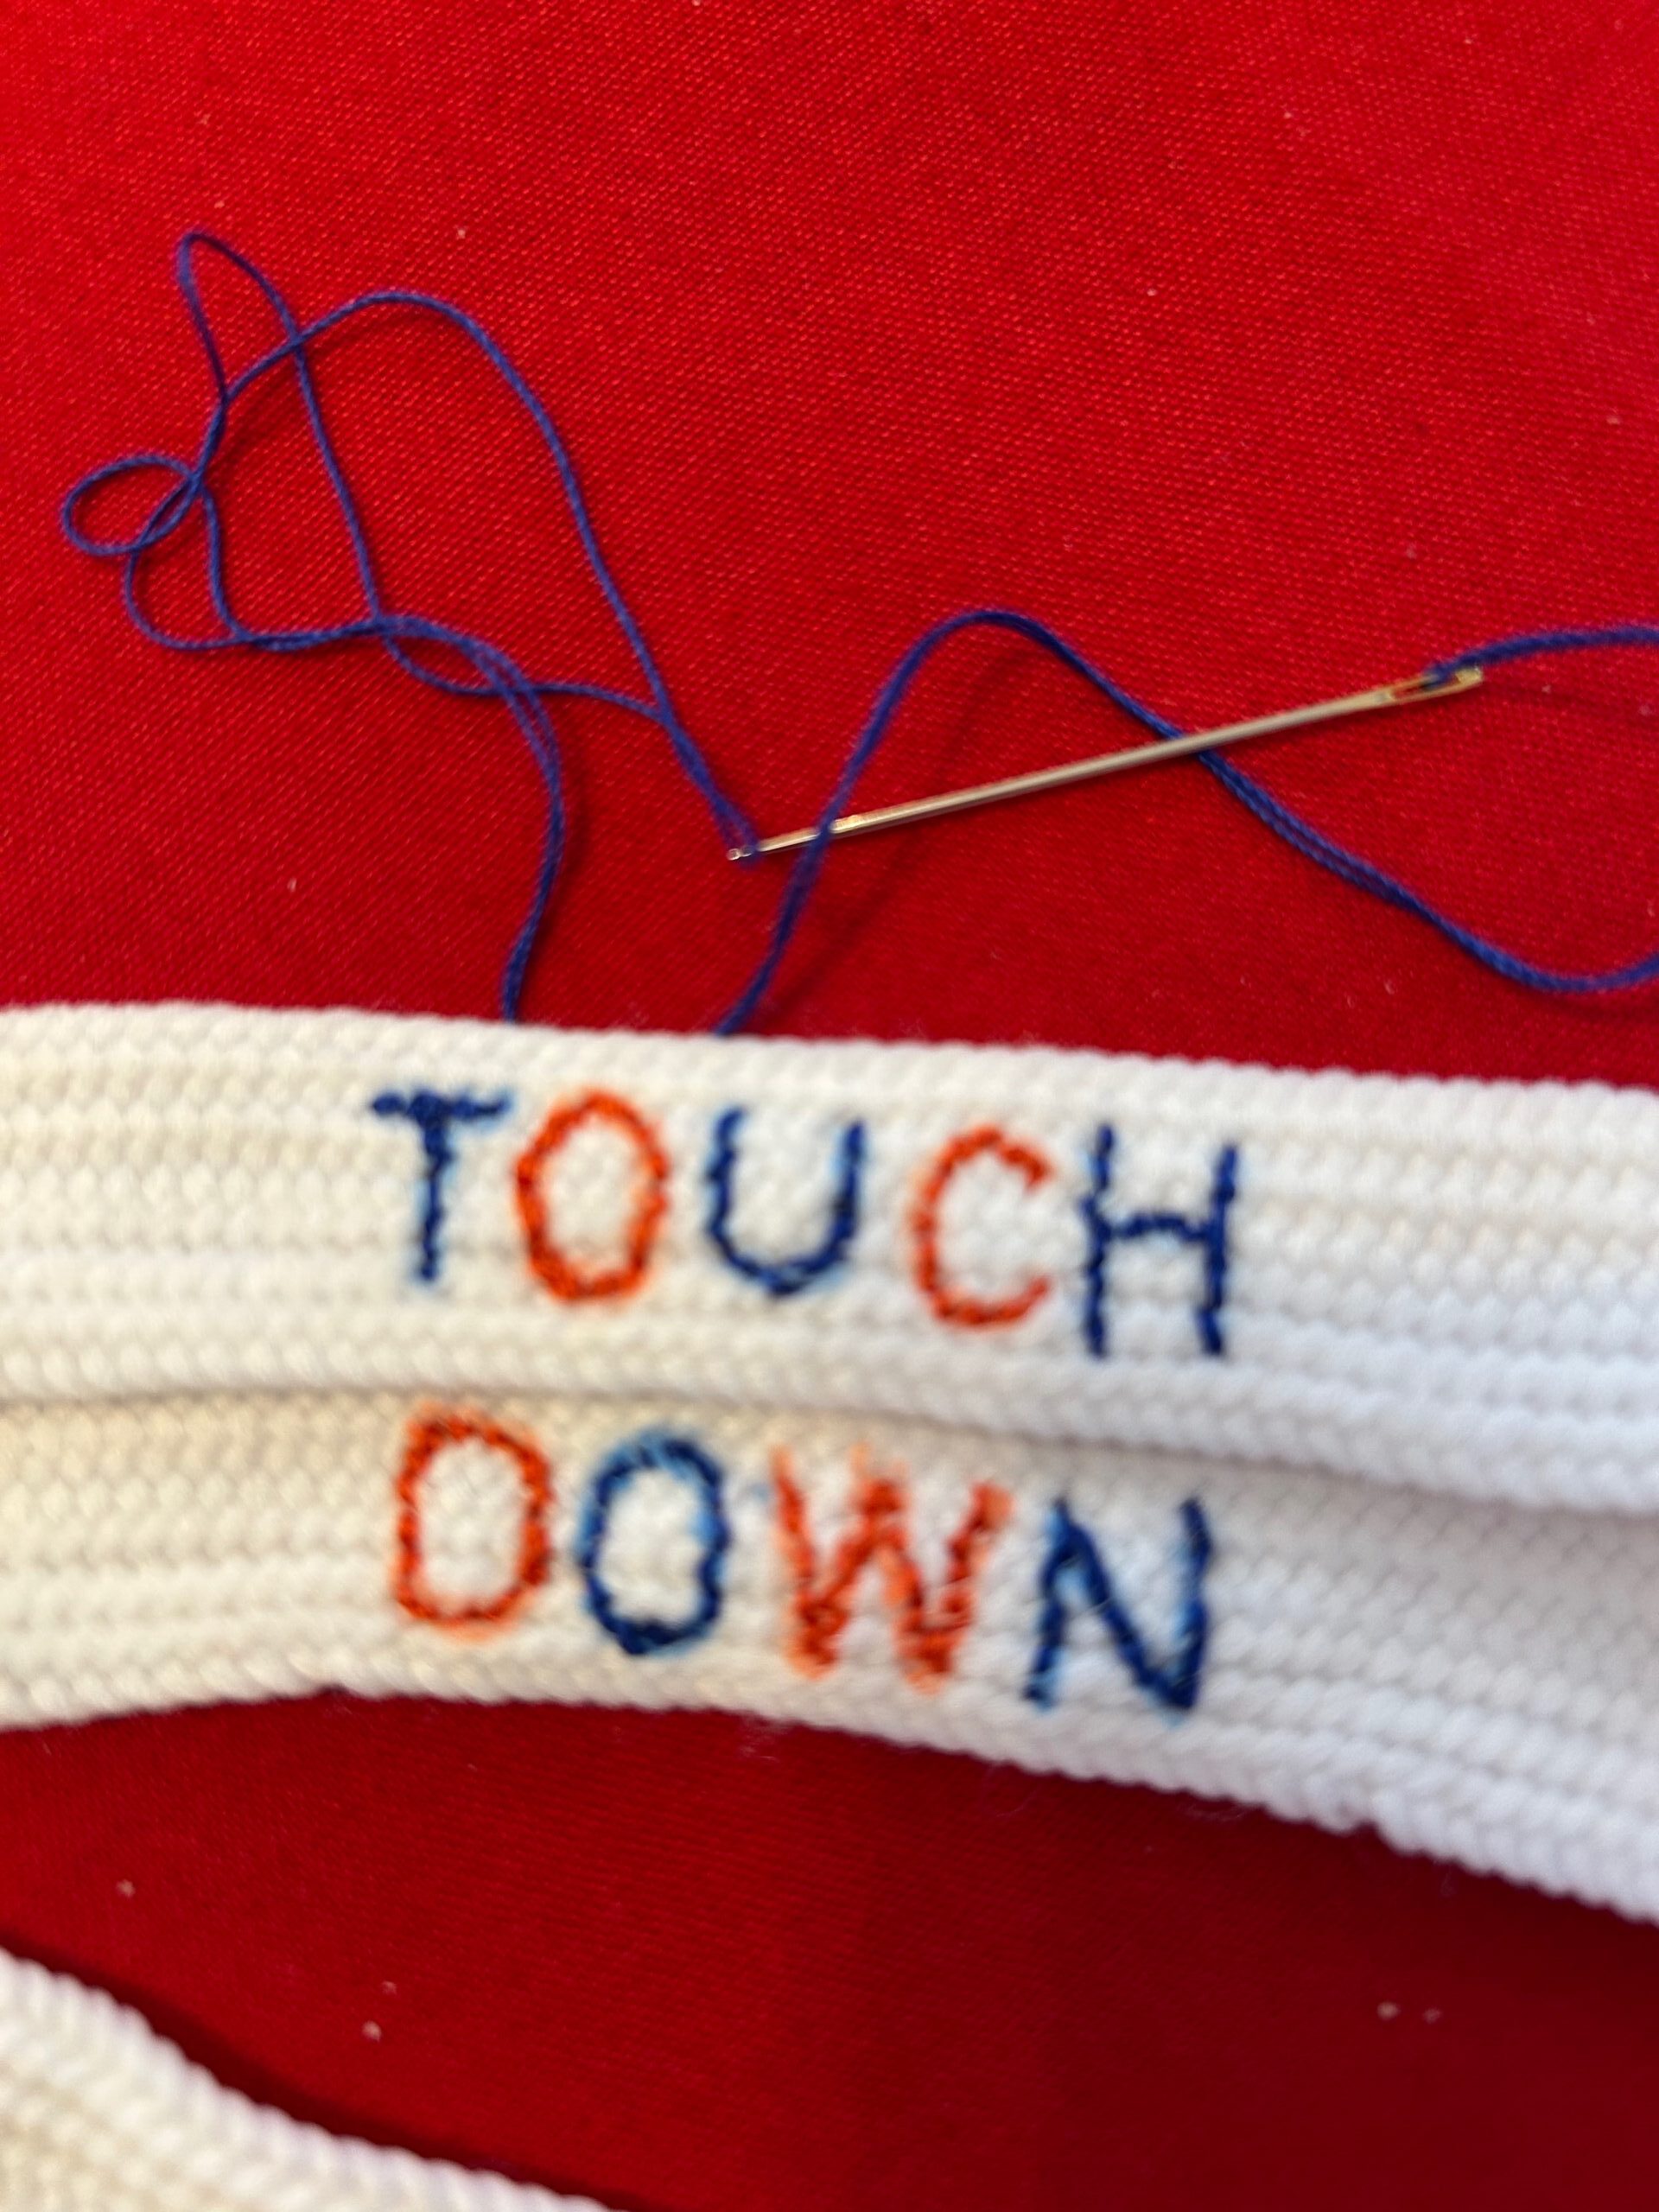
Hand embroider the shoelaces, following the printed lines and using a backstitch. Leave long thread tails at the stitching beginning and end to weave along the stitches on the design wrong side.
New to hand embroidery? Find our Hand Embroidery Stitch Guide and more helpful video tutorials HERE>>.
When the embroidery is complete, rinse away the stabilizer under warm, running water. Do NOT submerge the shoelaces and let soak. This could result in the stabilizer lifting off the shoelaces and traveling elsewhere on the laces. If that happens, the printer ink could transfer to the fibers and stain the shoelaces.
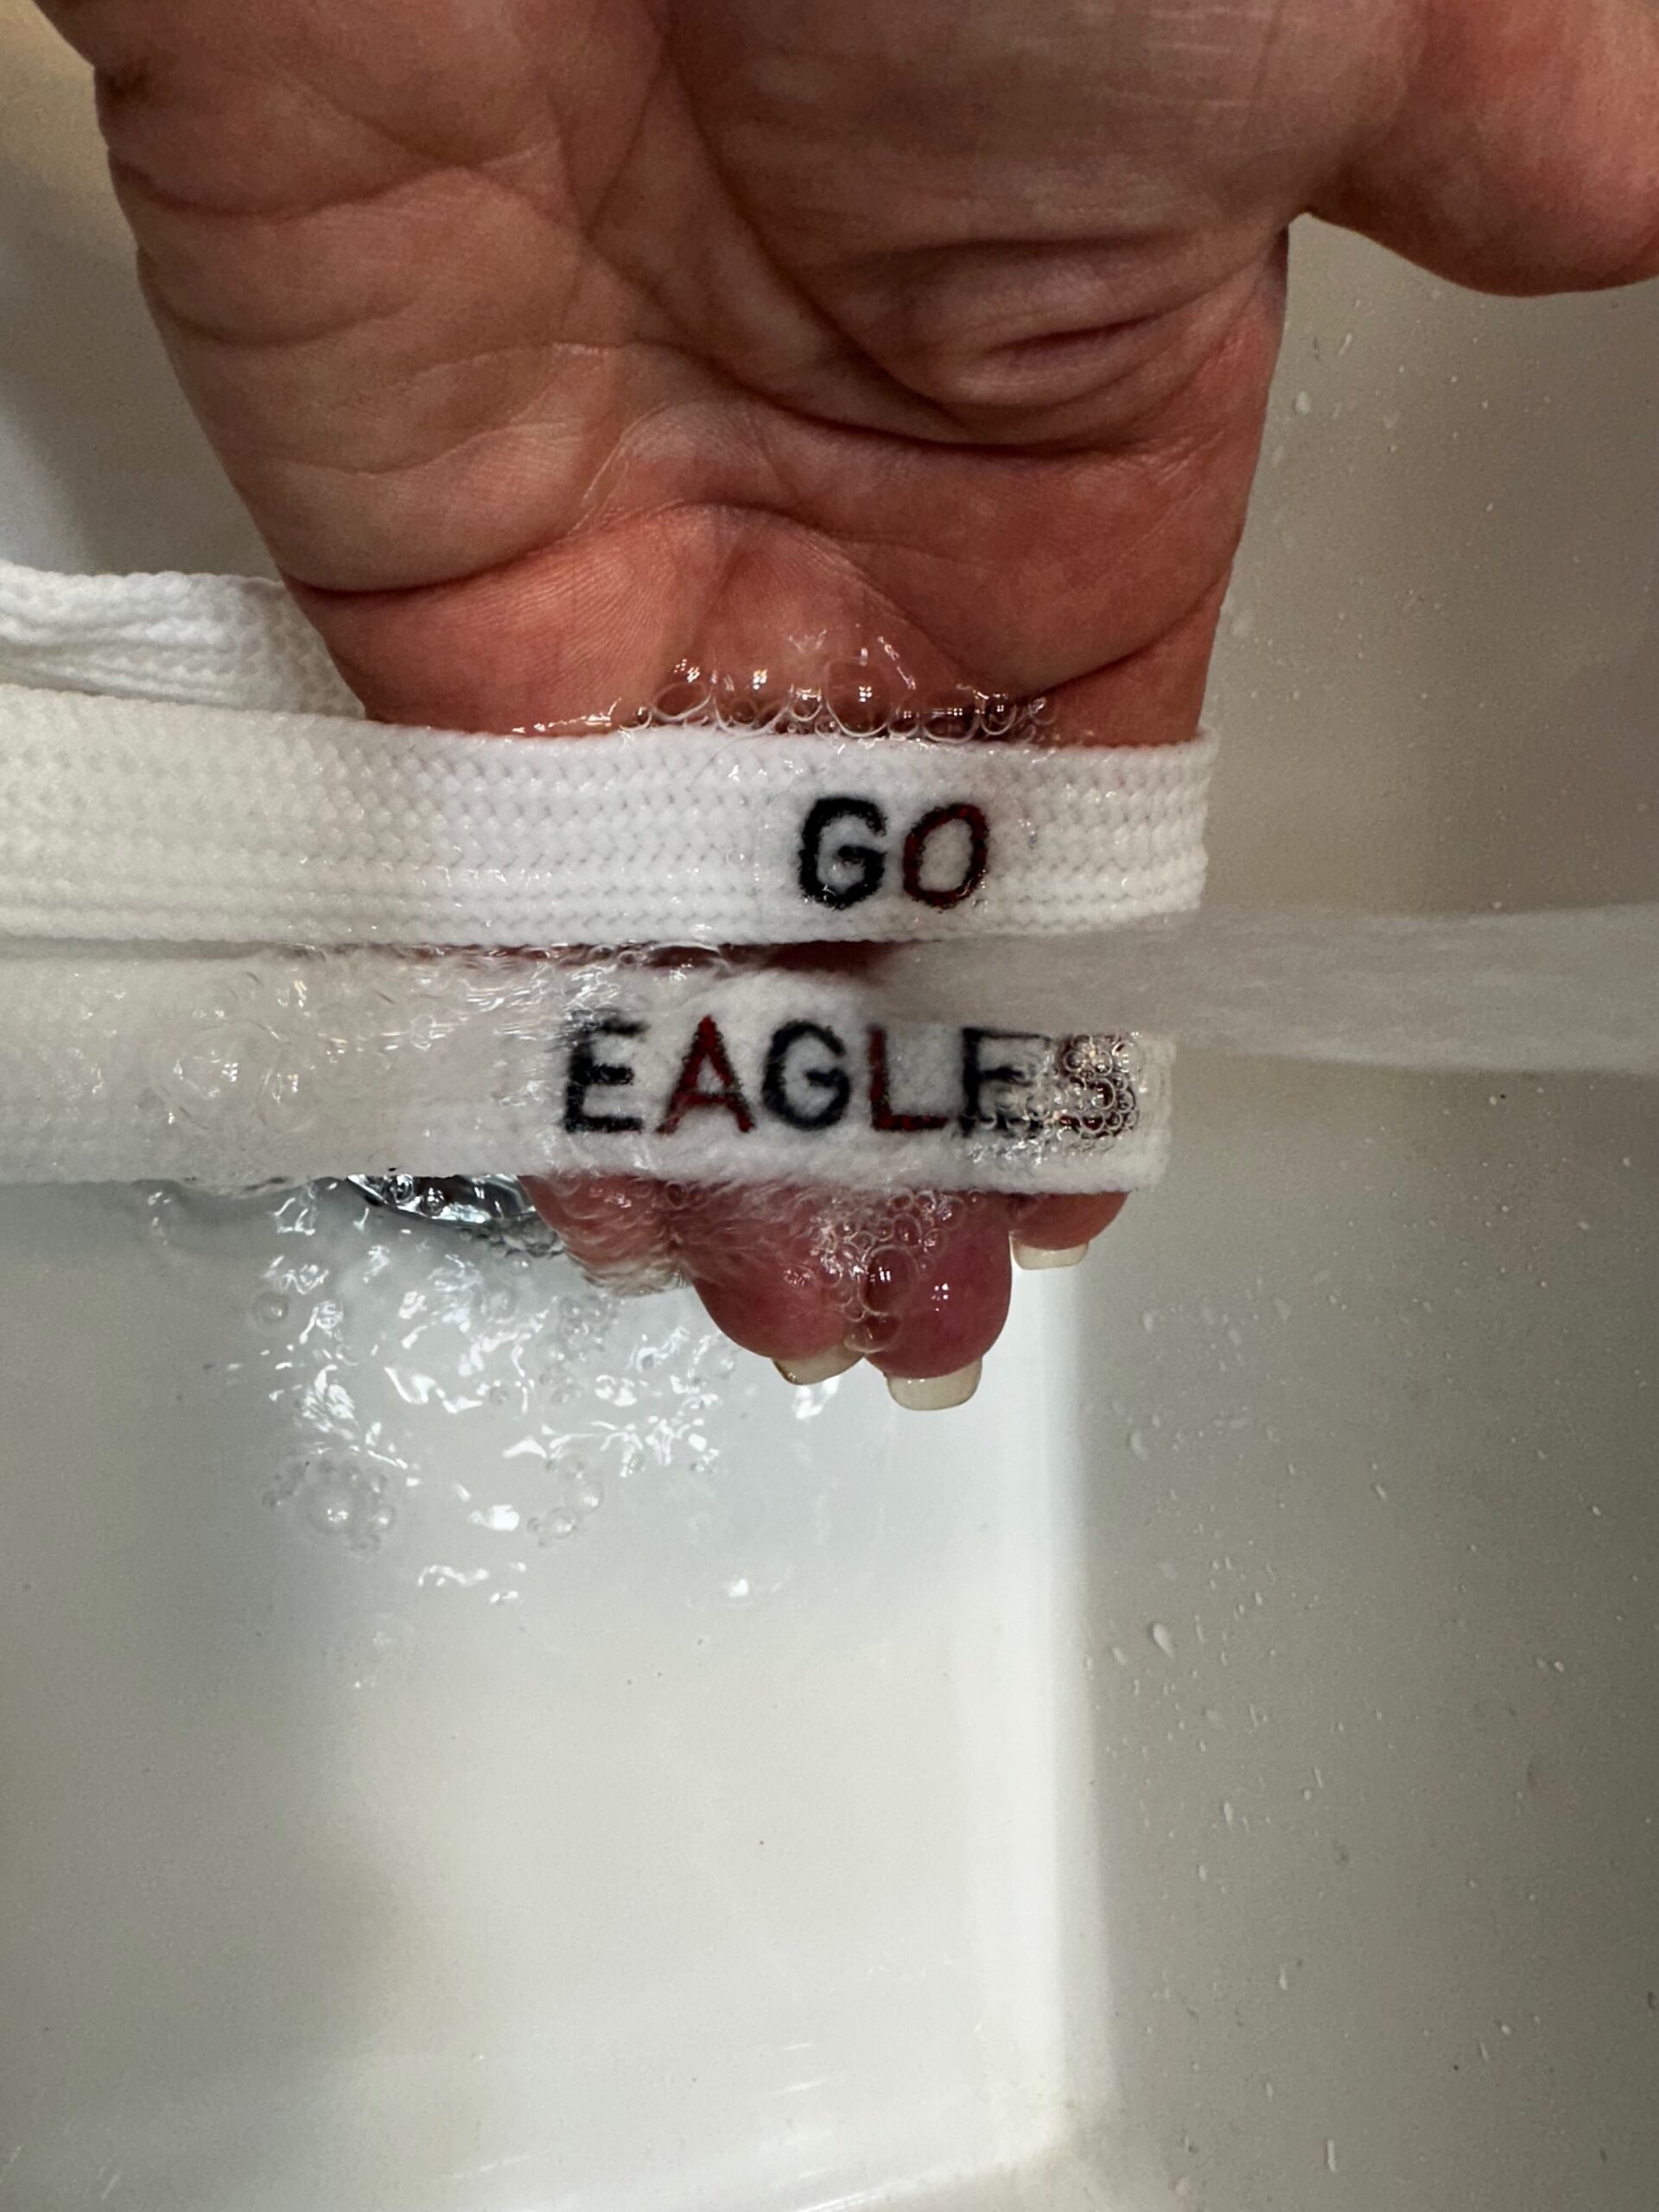
Also, if working with a red, dark navy or black thread on white laces, be advised that the stabilizer should be rinsed away until the water runs clear. Then, place them flat on an absorbent towel and roll the towel around the laces to get rid of most of the moisture. Next, dry them quickly in a dryer to ensure any thread dye doesn’t get absorbed by any water left in the shoelaces after rinsing. These thread colors are highly saturated and we advise using caution if working with white laces.
Did you know? Sulky carries preprinted Stick ‘n Stitch Transfers with beautiful, yet simple, motifs to stitch. Find them with and without thread bundles HERE>>.
Let the shoelaces dry flat on a towel.

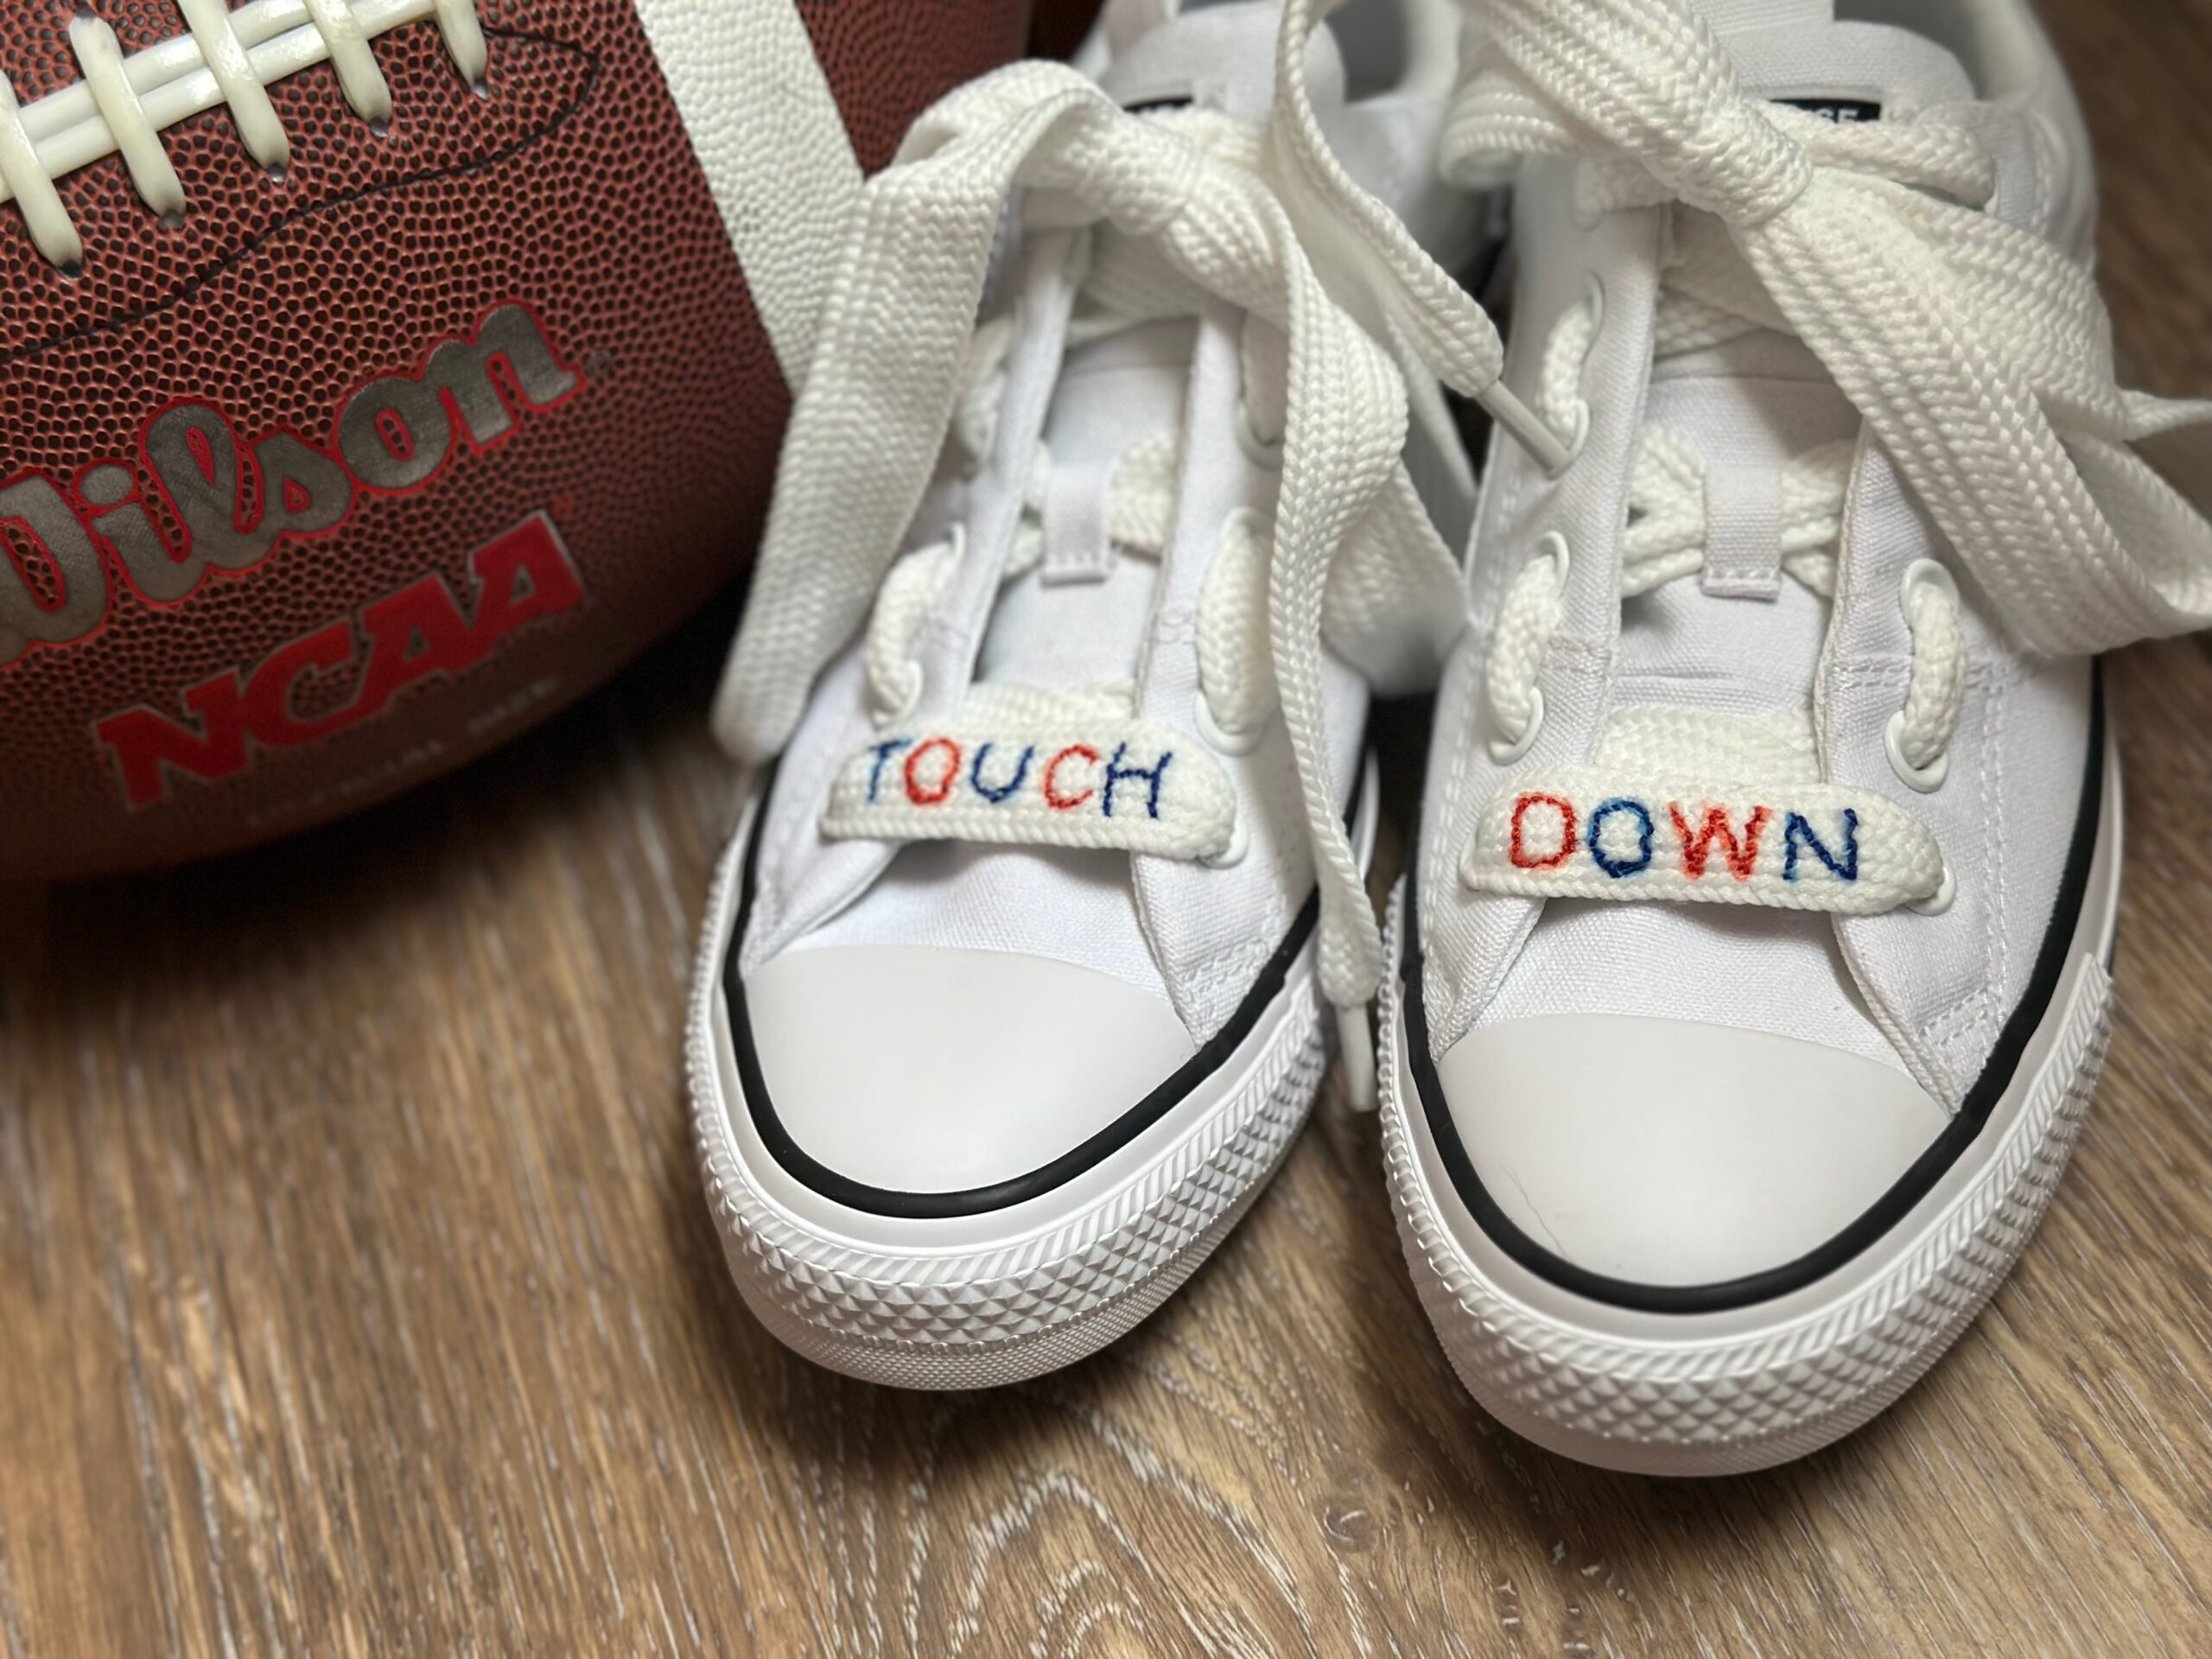
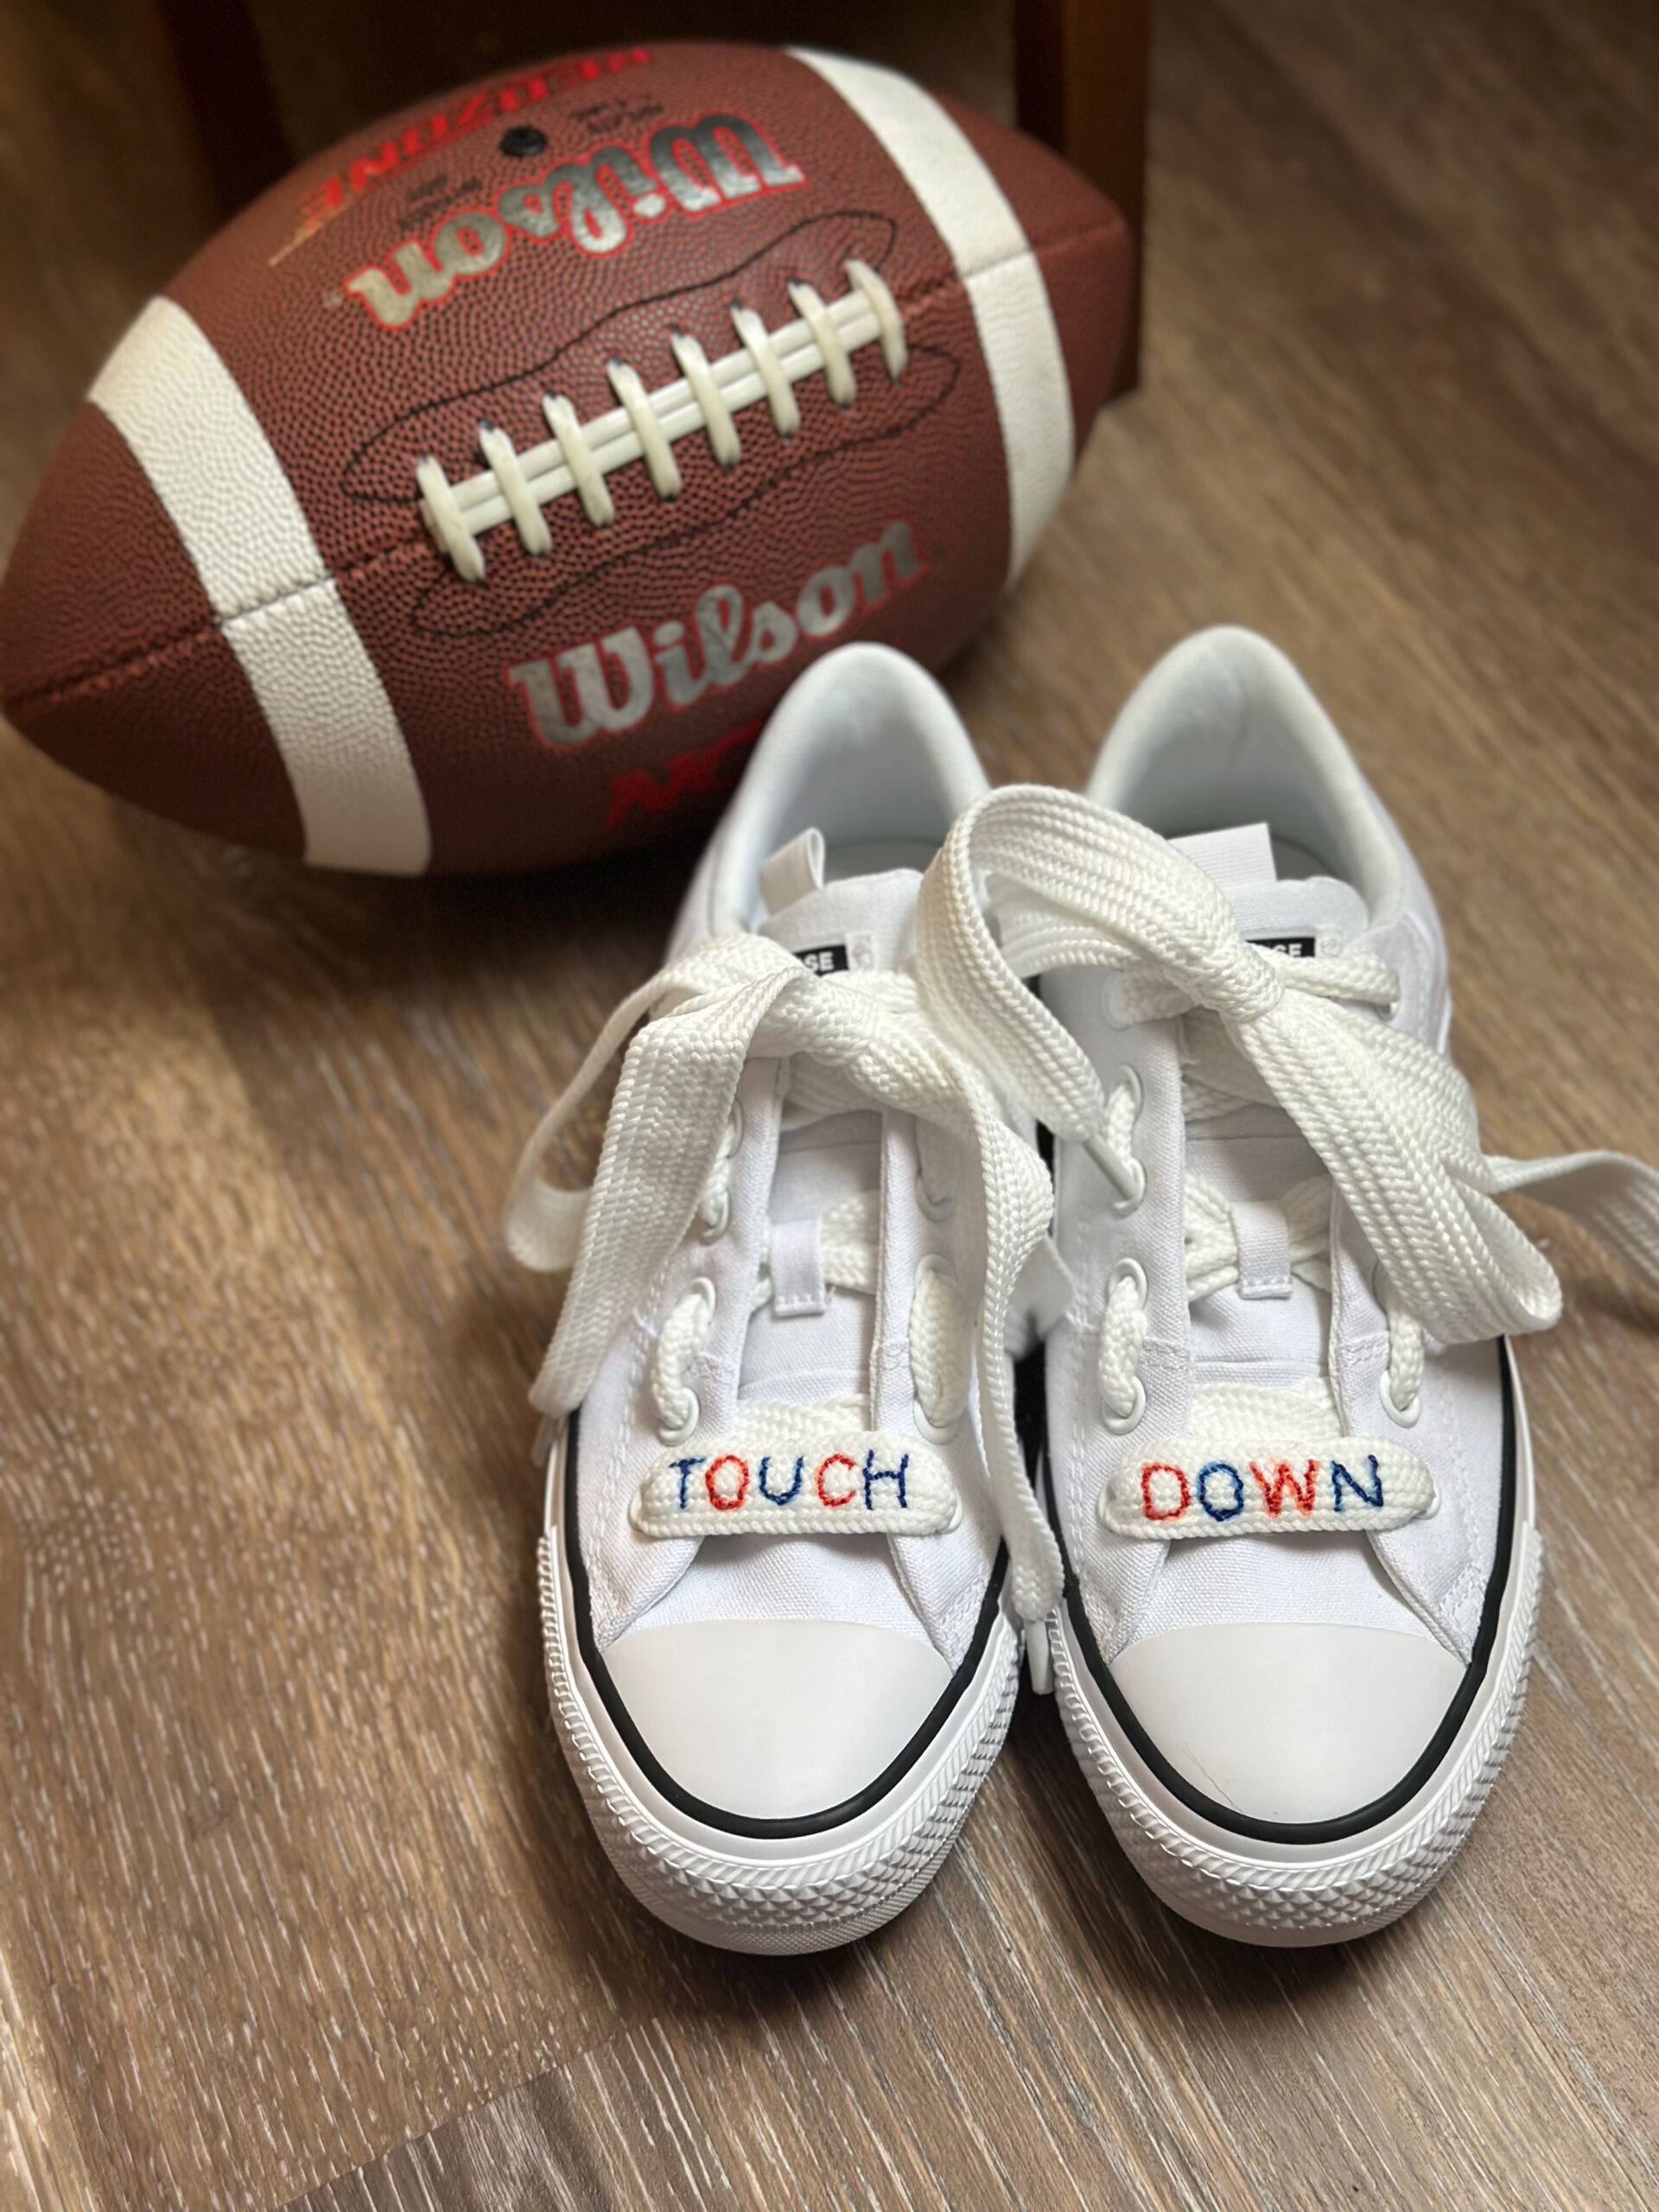
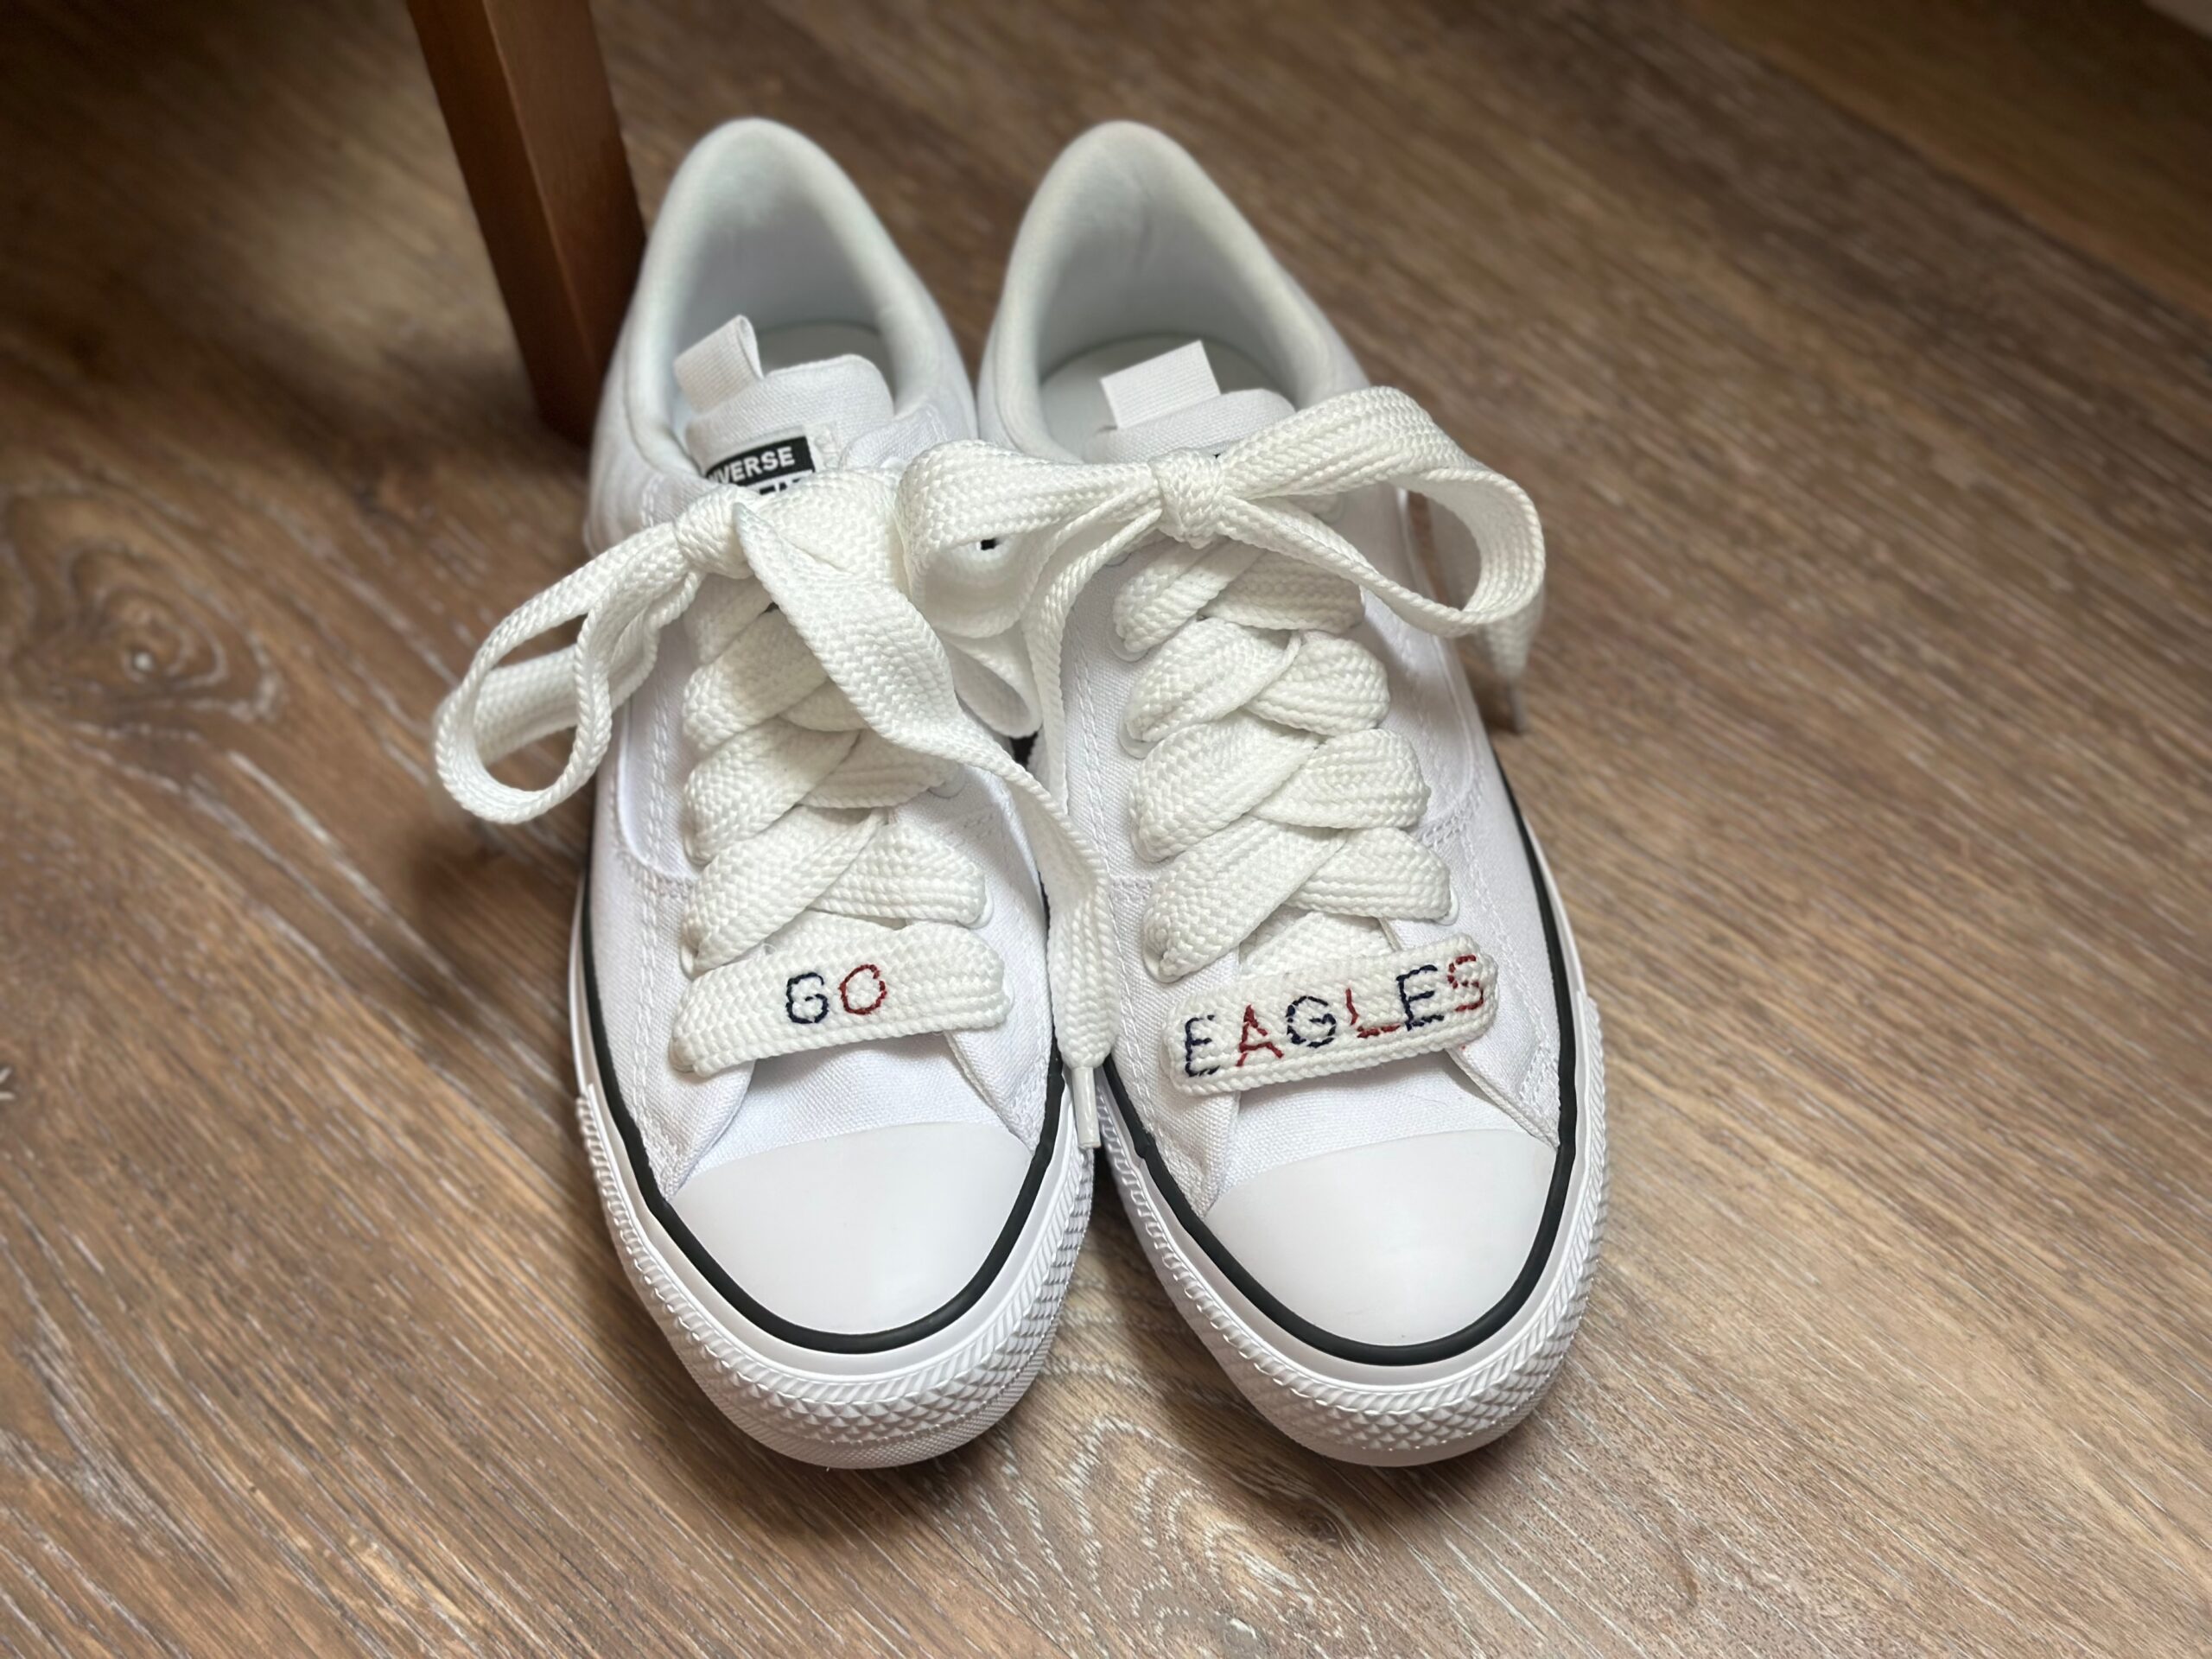
Then, tie up your shoes, centering the lettering along the tongue lower edge.
EMBROIDERY METHOD 2: IRON-ON TRANSFER PENS
Use Sulky Iron-On Transfer pens to easily transfer designs onto fabric, canvas, wood, stabilizers or just about any surface where a hot iron can be used. The pens help create a permanent, non-bleeding transfer.
First, download and print the Sports Shoelace Embroidery Design Templates, using the page that’s labeled “for Transfer Pen.” You’ll notice these templates are mirror-imaged.
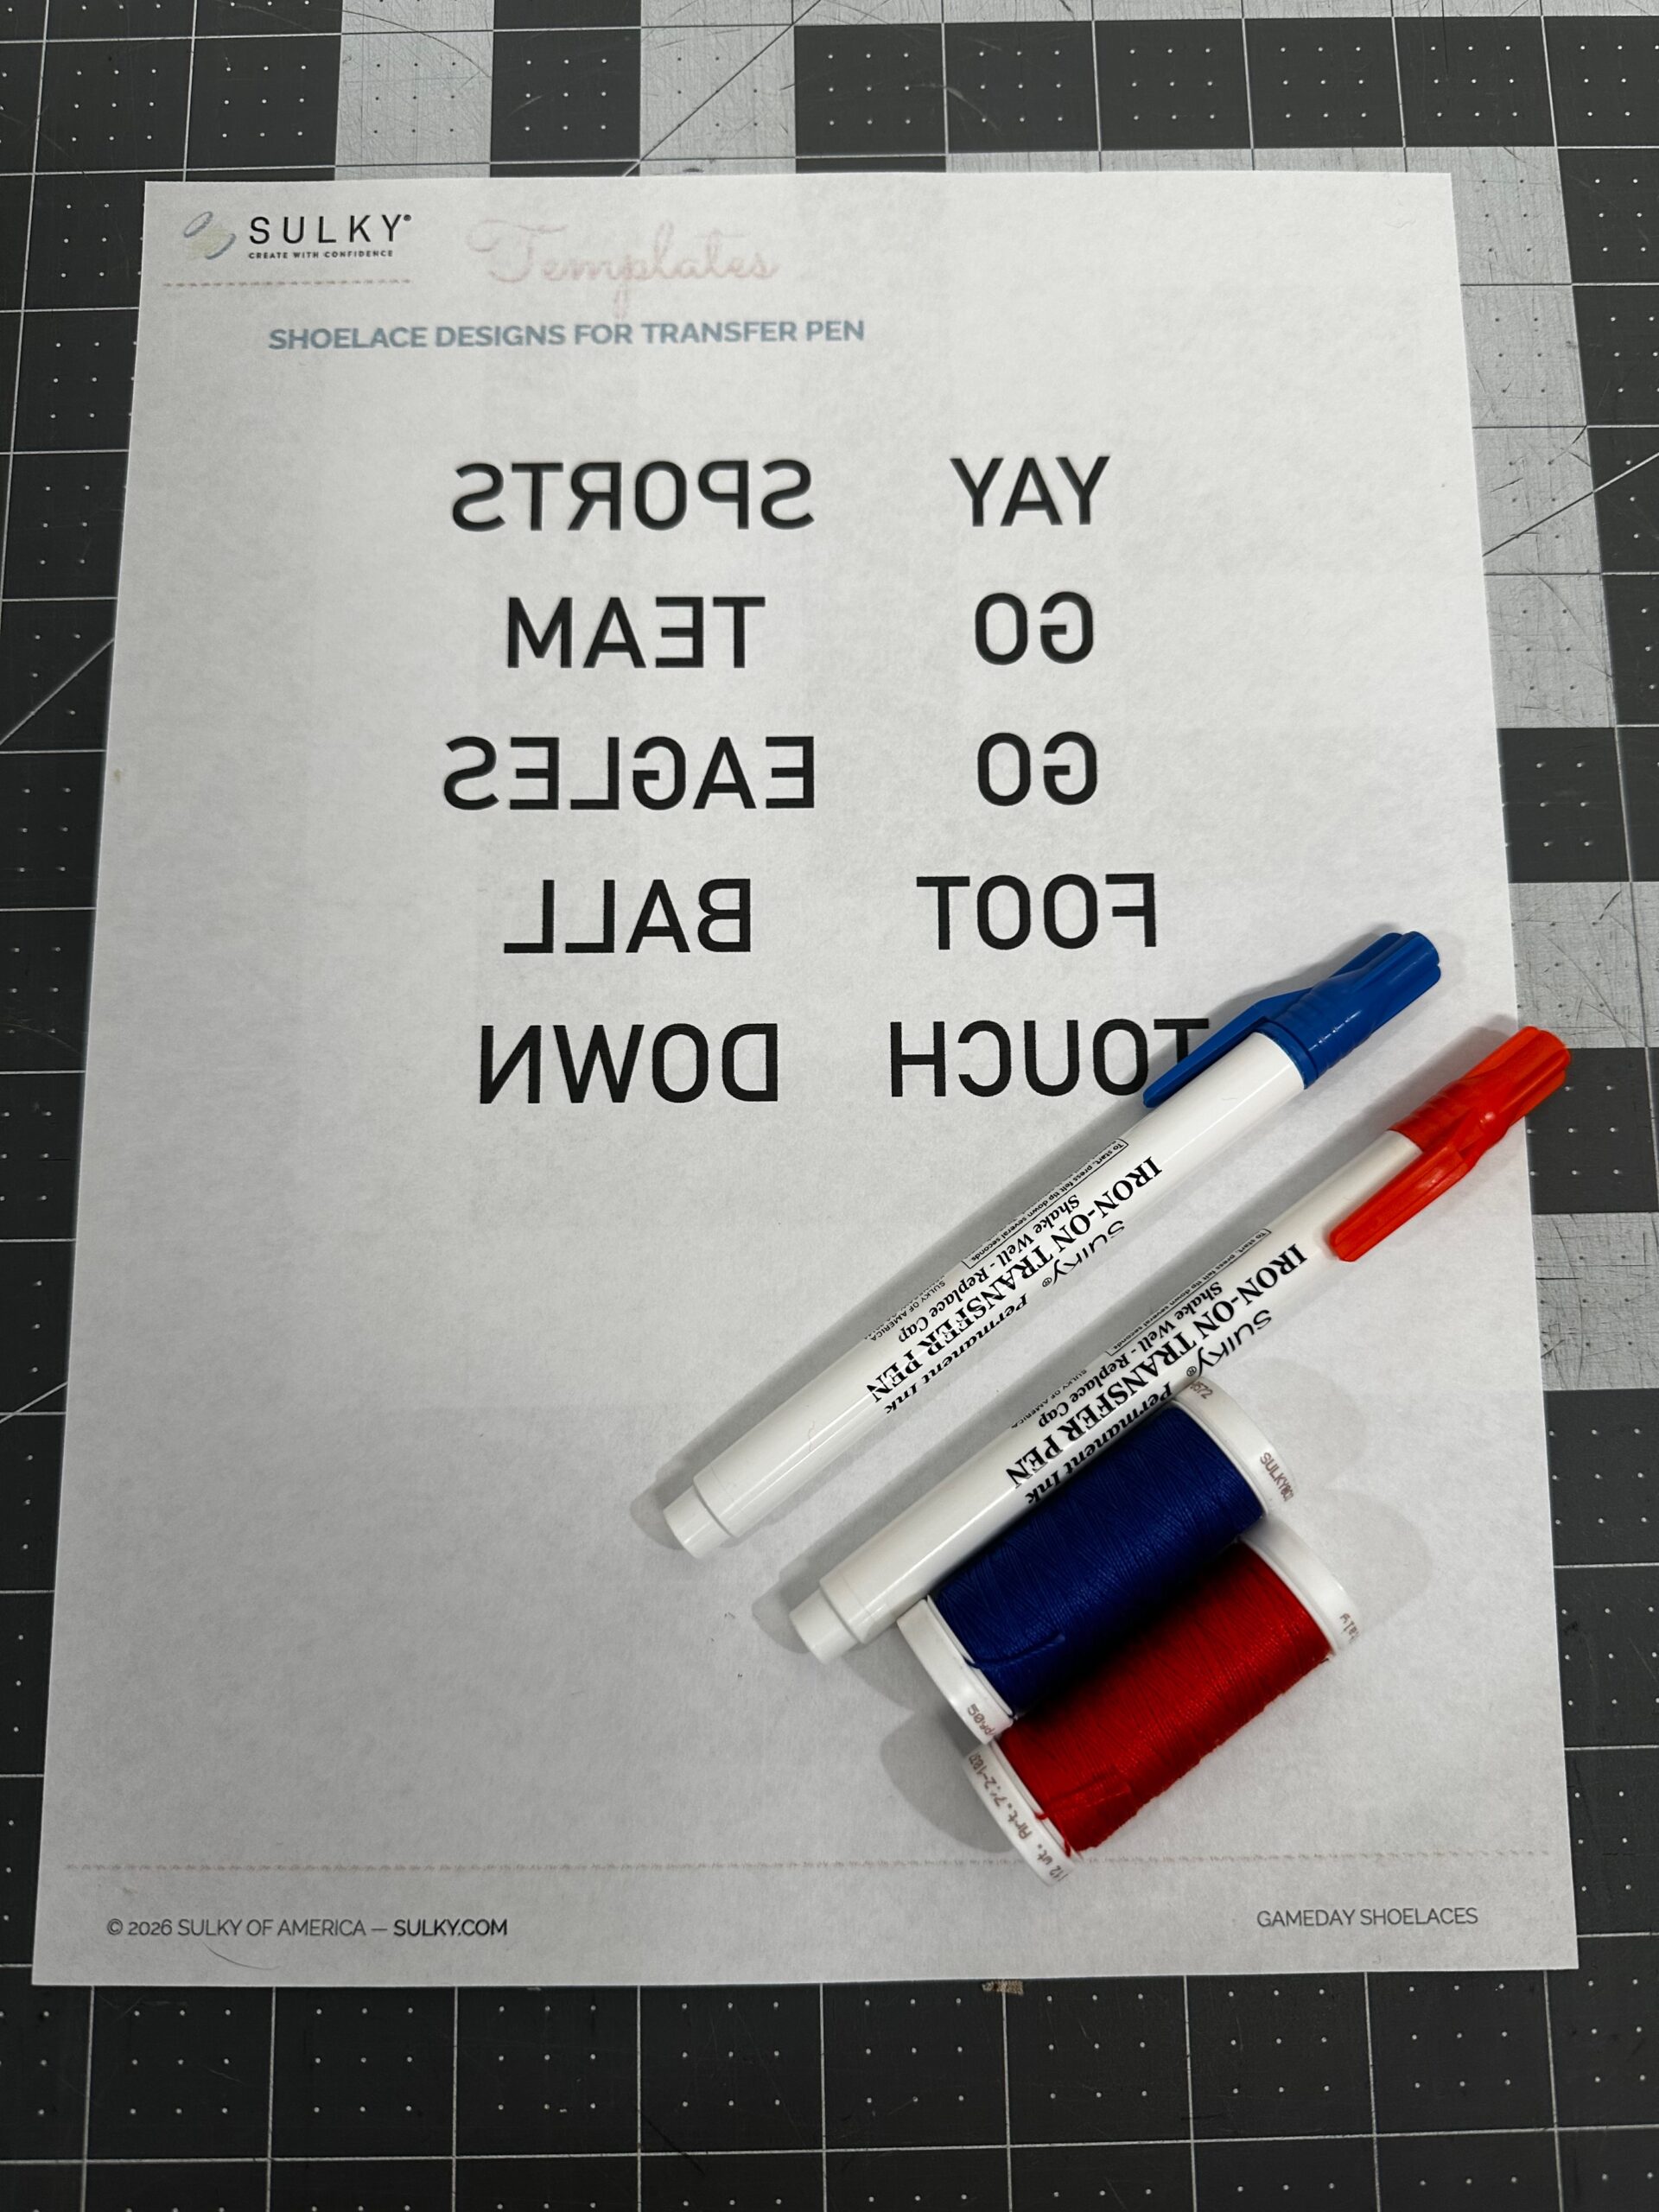
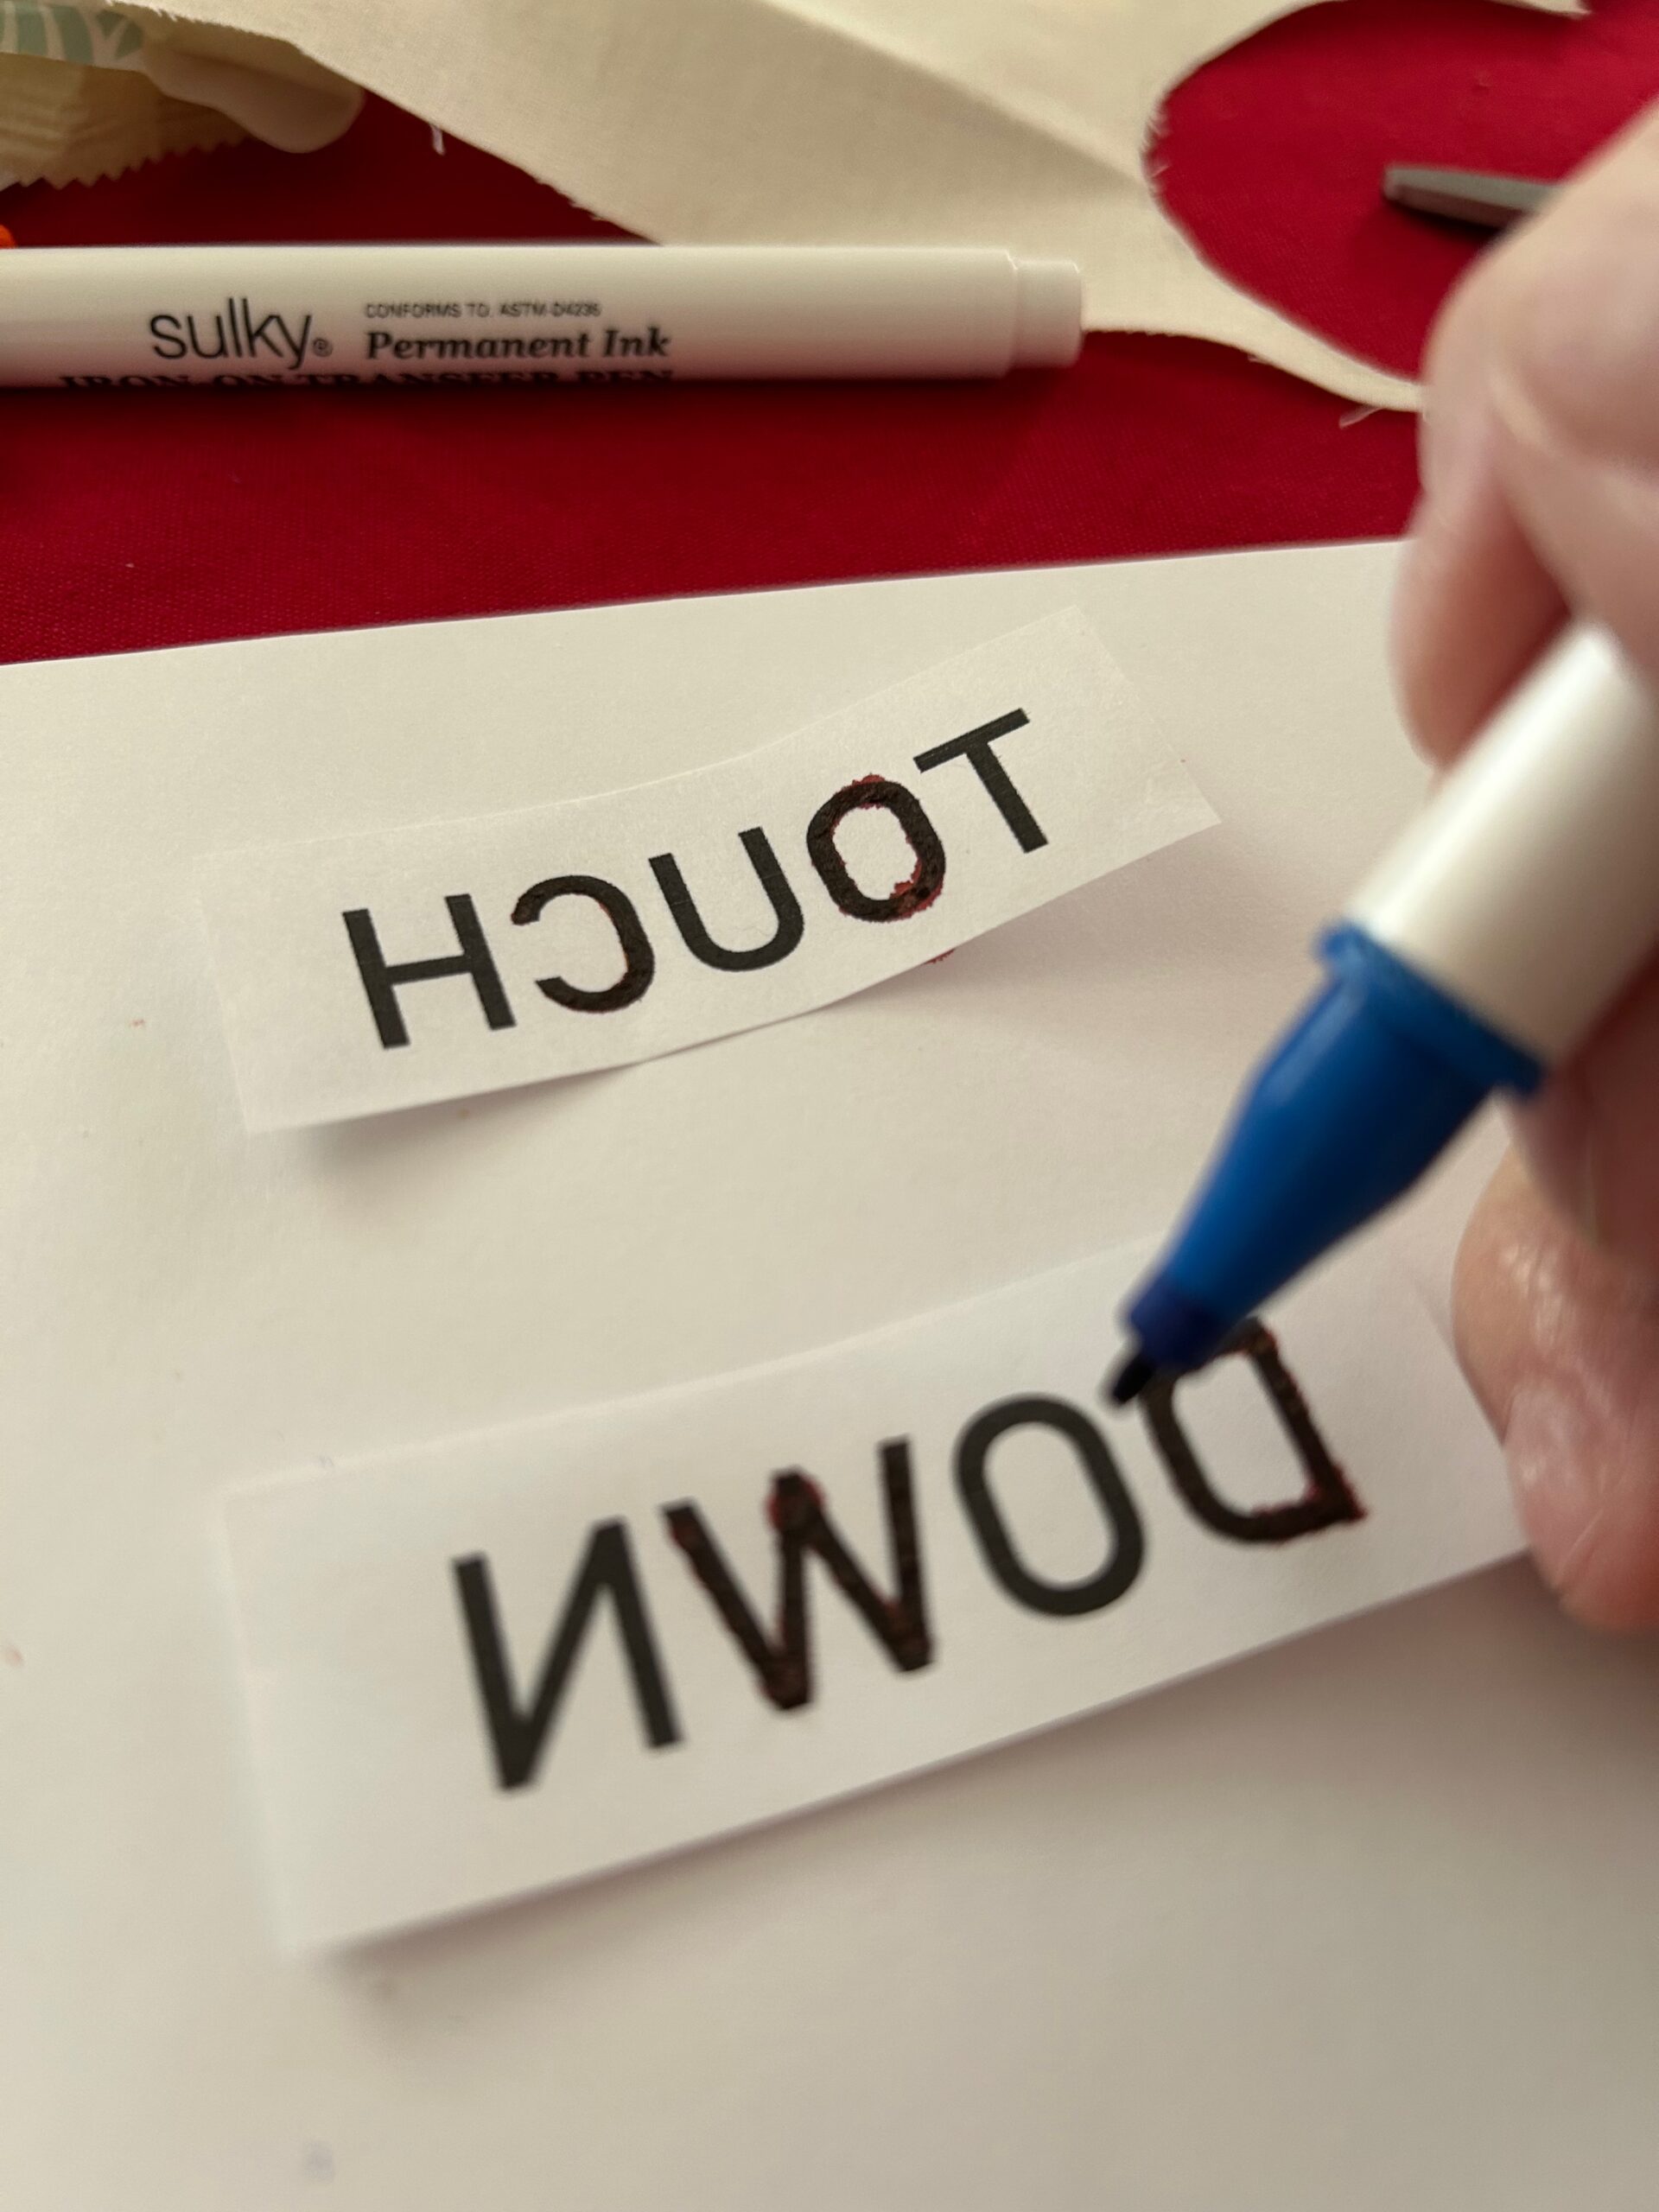
On scrap paper, press the tip of a Transfer Pen into the paper to start the flow of ink. Then, cut out the two words of your choice (one for each shoelace), leaving a bit of a border beyond each word. Draw along each template. If you run short on ink, press the Pen tip into the scrap paper again to get it flowing again.
Find the center of each shoelace. First, fold each shoelace in half and pin-mark the center. Or, mark the center using a removable fabric marker or chalk.
Center one template right side down on each shoelace. Using a medium-temp iron, press the template on the shoelace. Do not shift the iron back-and-forth; rather, just place the iron on the template for a few seconds to transfer the ink. Be sure to use a piece of scrap fabric or muslin as a press cloth to avoid transferring ink to your iron or ironing board.
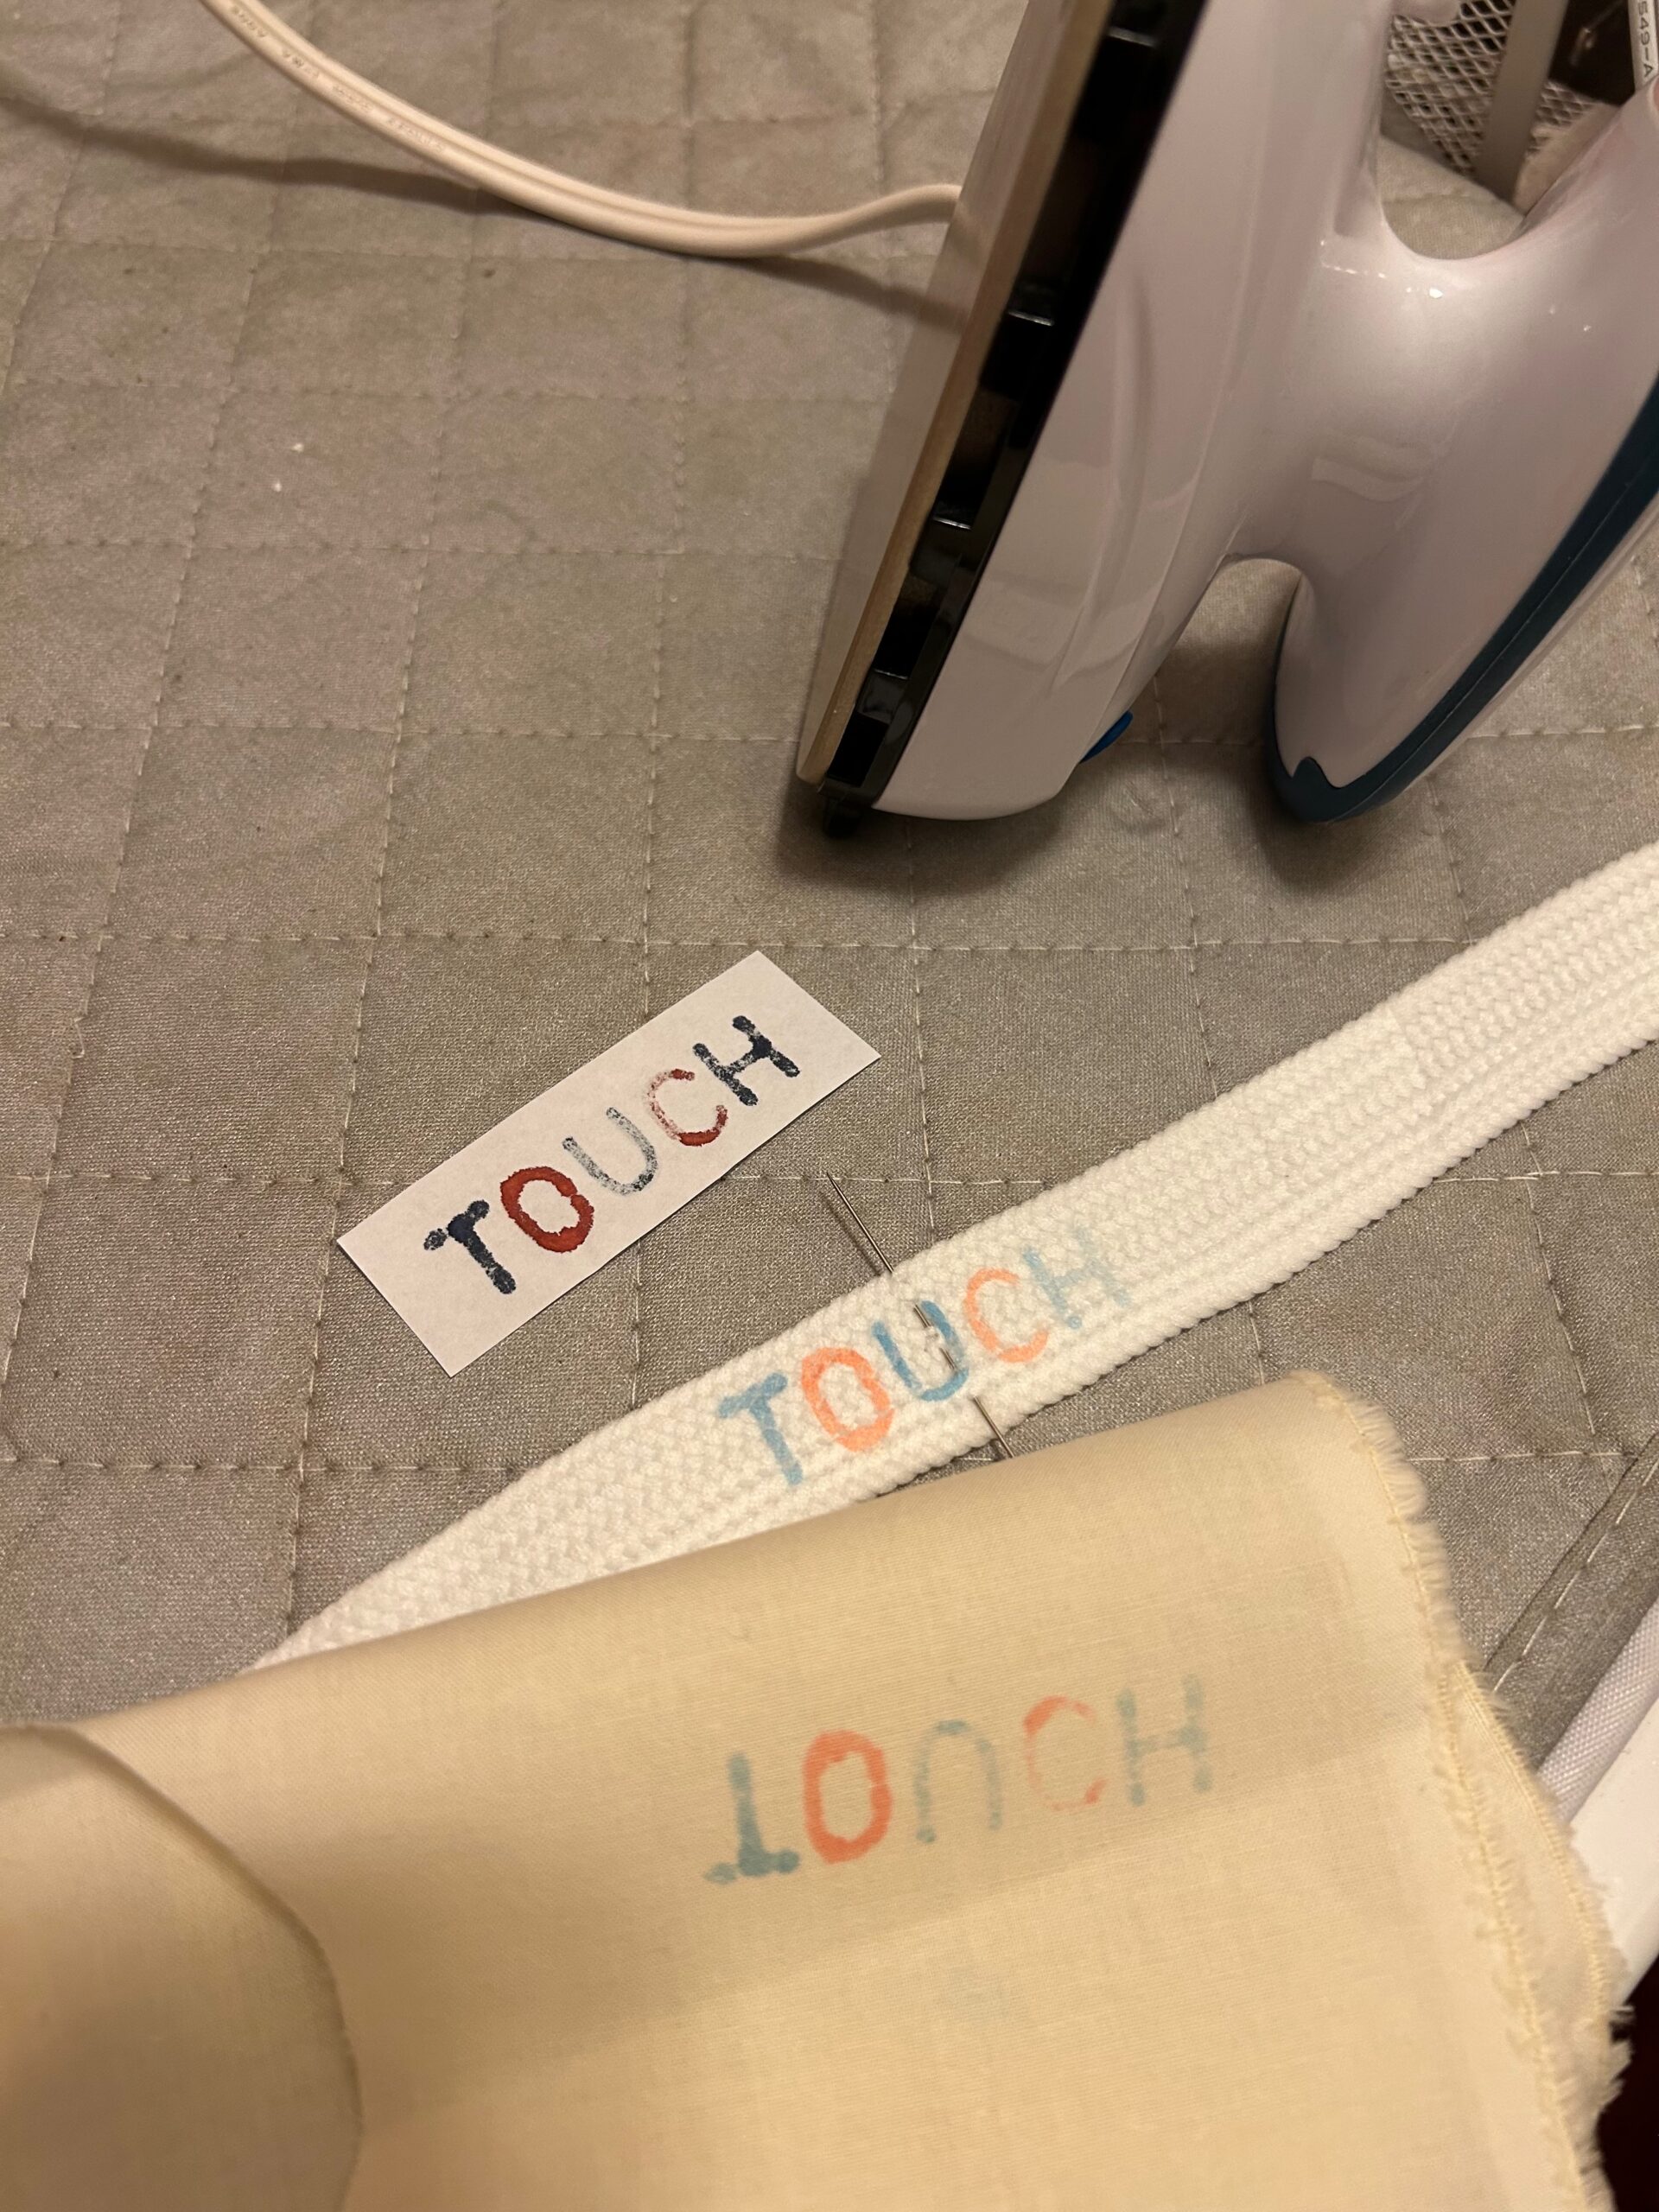
Then, remove the template. The design should now be transferred to the shoelace.
Follow the instructions above to hand embroider the laces using Sulky 12 wt. Cotton Thread.
Reuse the templates 3-5 times to create more shoelaces, if desired.
Put each shoelace on your favorite shoe, centering the design along the throat of the shoe, and then lacing up the tongue. Cheer on your favorite team from head to TOE!