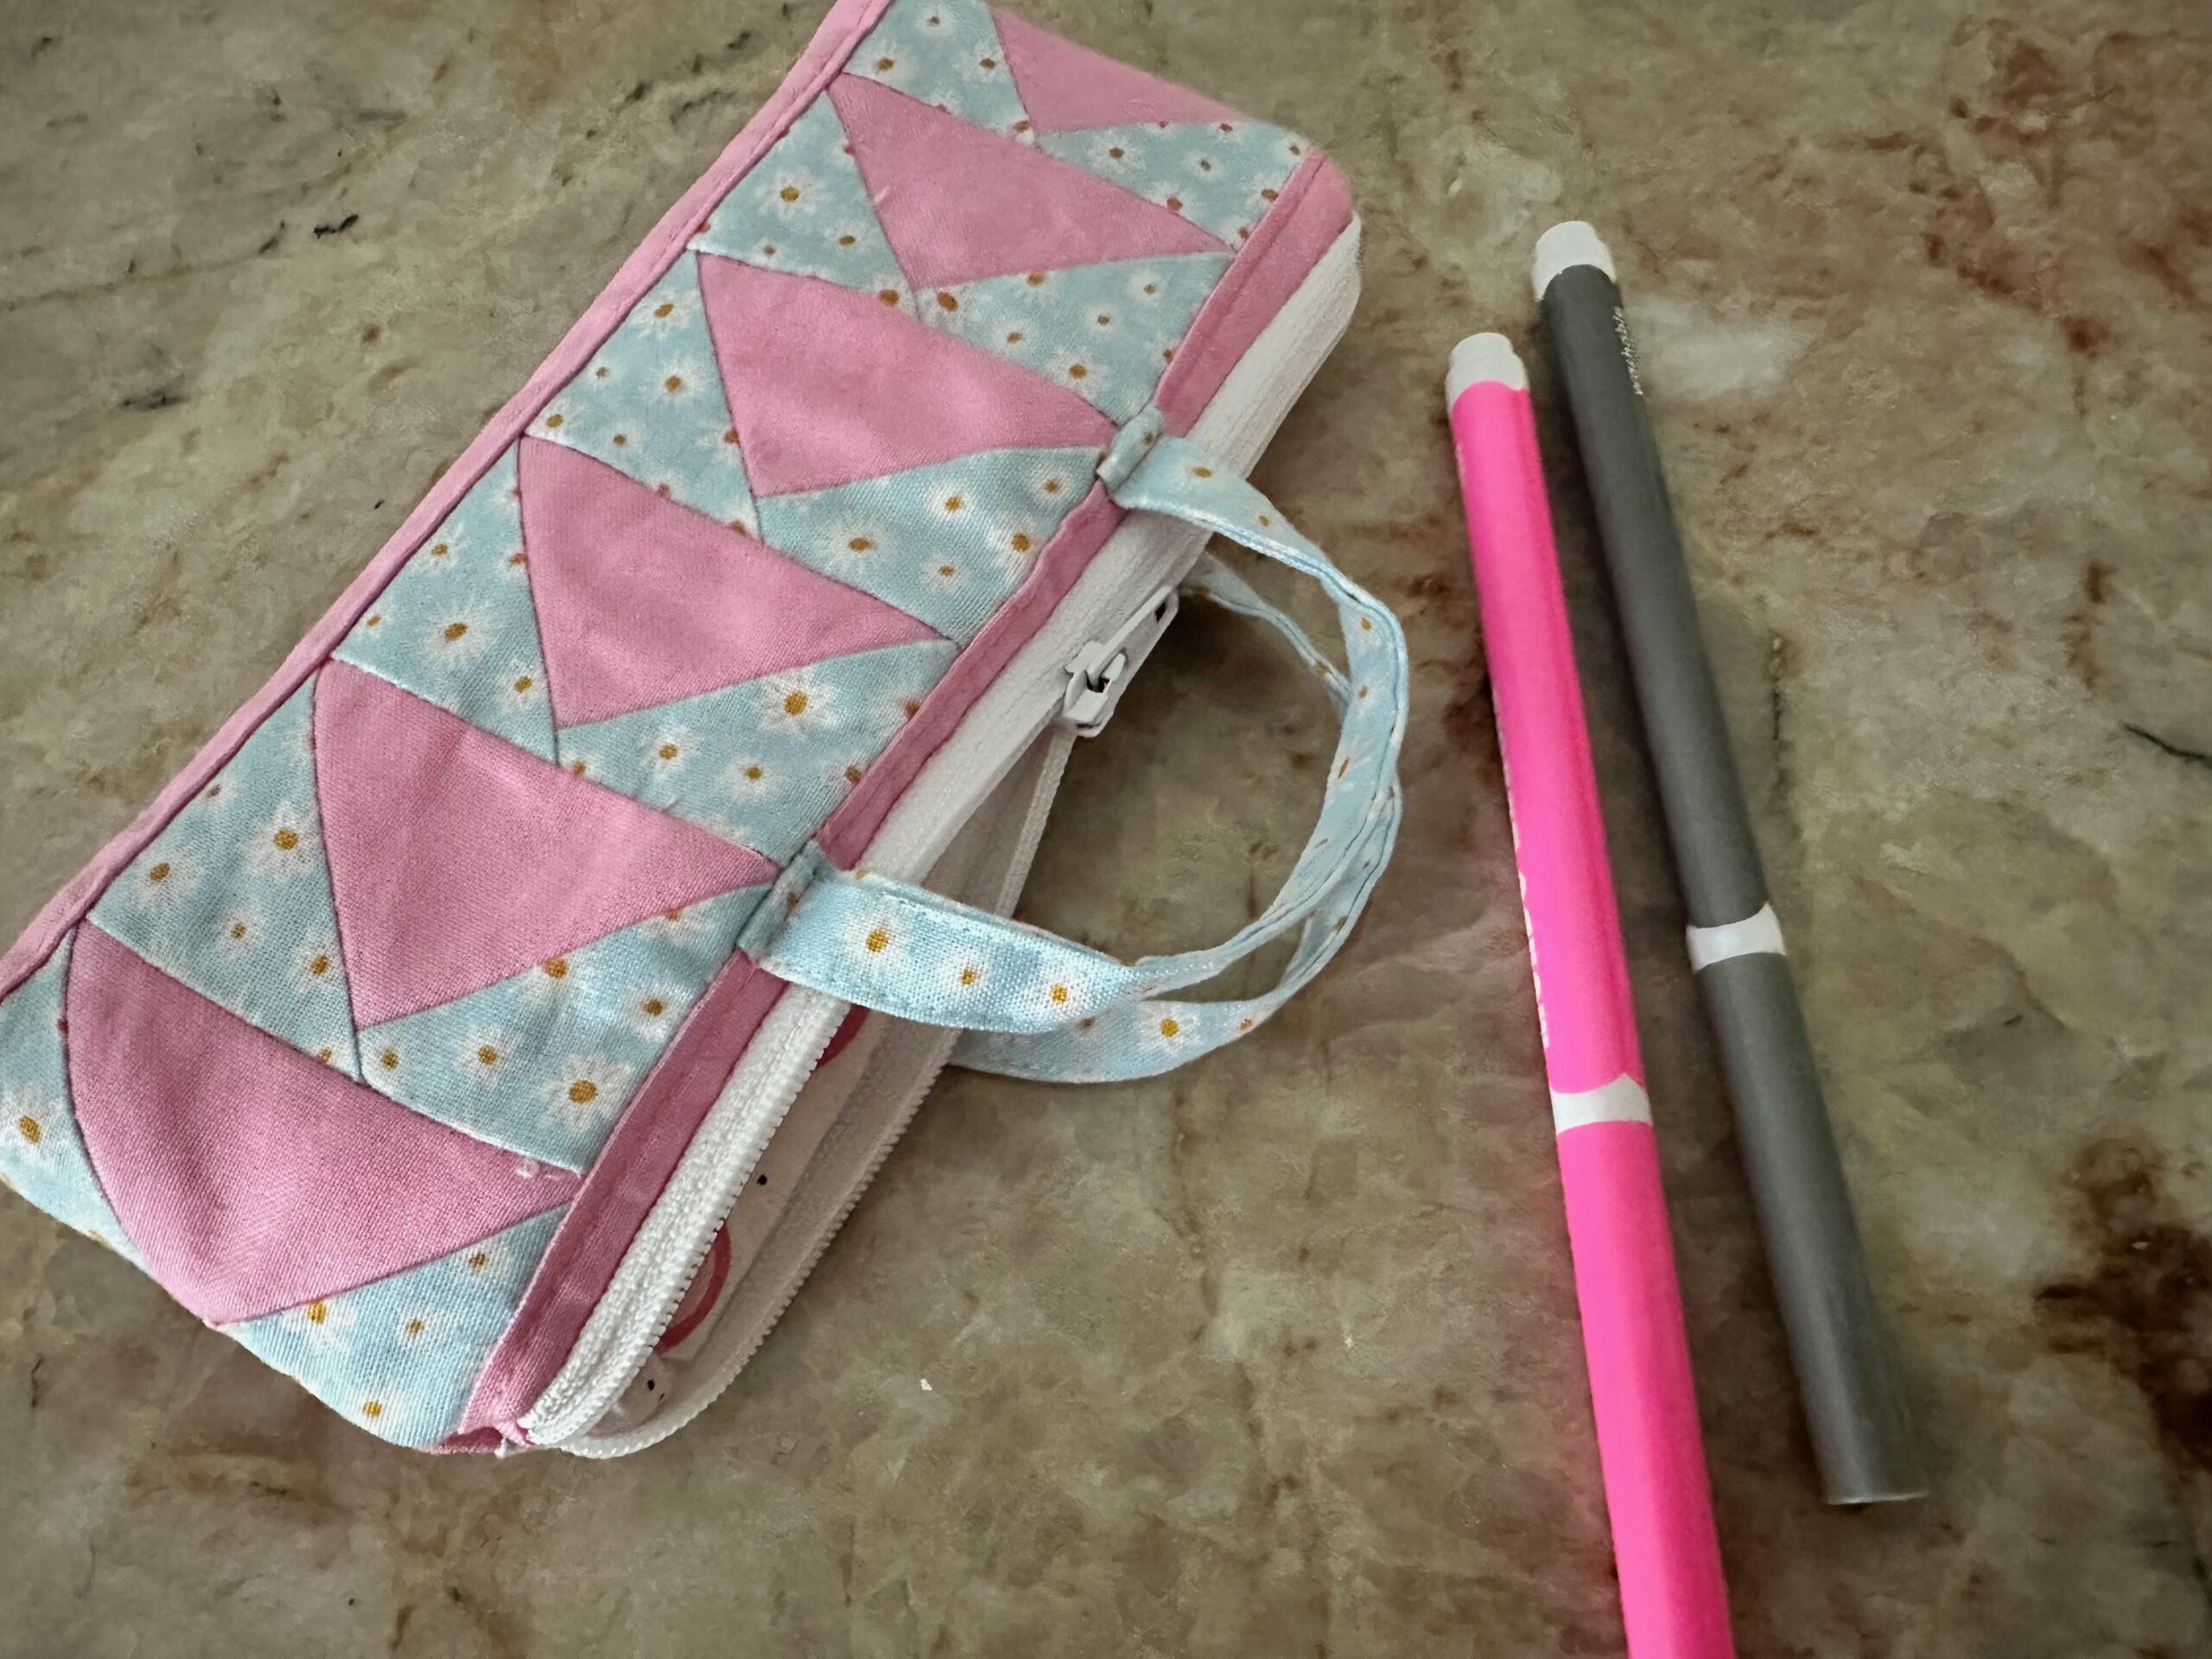
Flying Geese Pencil Pouch
PENCIL POUCH SUPPLIES
- Tiny Tote pattern by A Spoonful of Sugar
- (3) fat quarters of coordinating quilting cotton fabrics (Note: the pattern calls for 3 fat eights of fabric; however, more fabric is added to account for the pieced panels, depending on the desired fabrics used for the Flying Geese blocks)
- Sulky 50 wt. Cotton Thread
- Organ® size 70/10 Universal Needle
- 8″ zipper
- 9″ x 22″ rectangle of fusible fleece or low-loft batting
- Sulky 12 wt. Cotton Petites® Thread
- Hand sewing needle
FLYING GEESE PANEL
The center panel of the Tiny Tote measures 8″ x 1¾”. To make the center Flying Geese panel more prominent, piece the blocks together to create an 8″ x 2¾” rectangle. Cut the upper and lower rectangles for the tote exterior ½” smaller in width to account for the larger center panel.
To create a pieced rectangle for this panel using six flying geese blocks, each flying geese unit should have a finished size of approximately 2¾” x 1¾”.
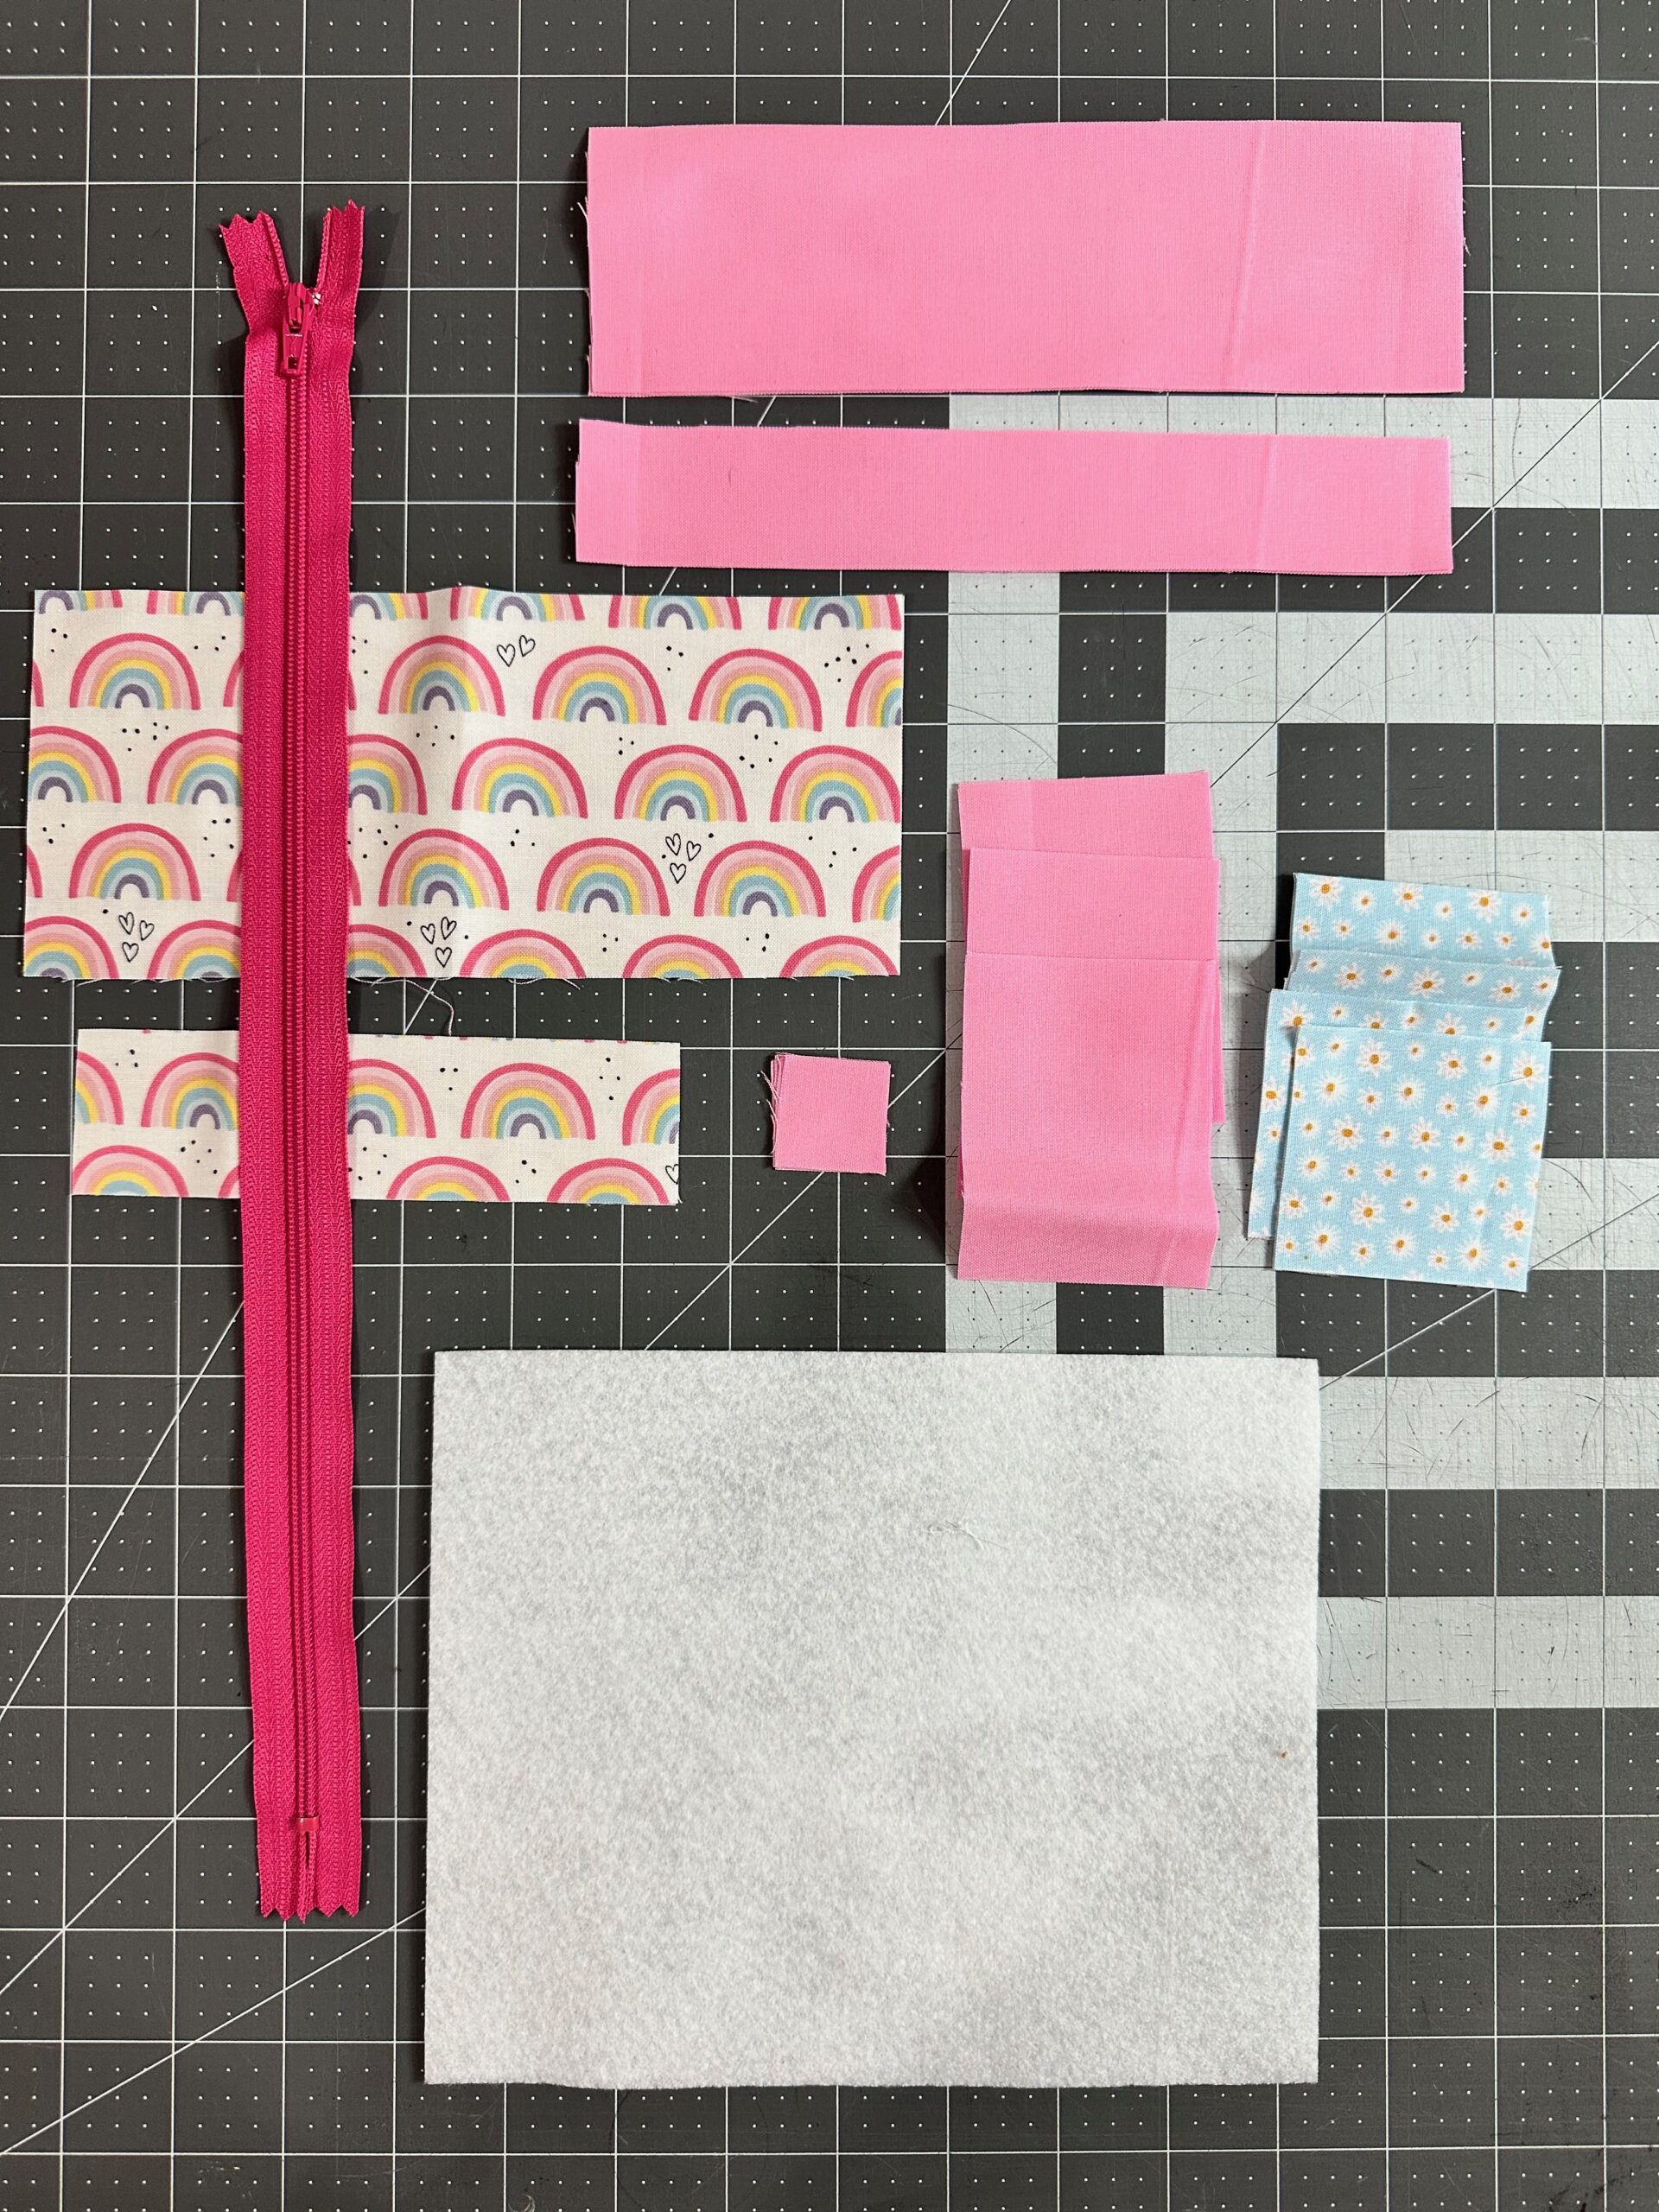
Each Flying Geese unit will be composed of a “goose” (the large triangle) and two “sky” (small triangle) pieces. Determine which fabrics to use for the “geese” and the “sky.”
Cut six “goose” rectangles measuring 2¾” x 1¾”. Cut twelve 1¾” squares for the “sky” squares. (If making a front and back panel, cut 12 goose panels and 24 sky squares.)
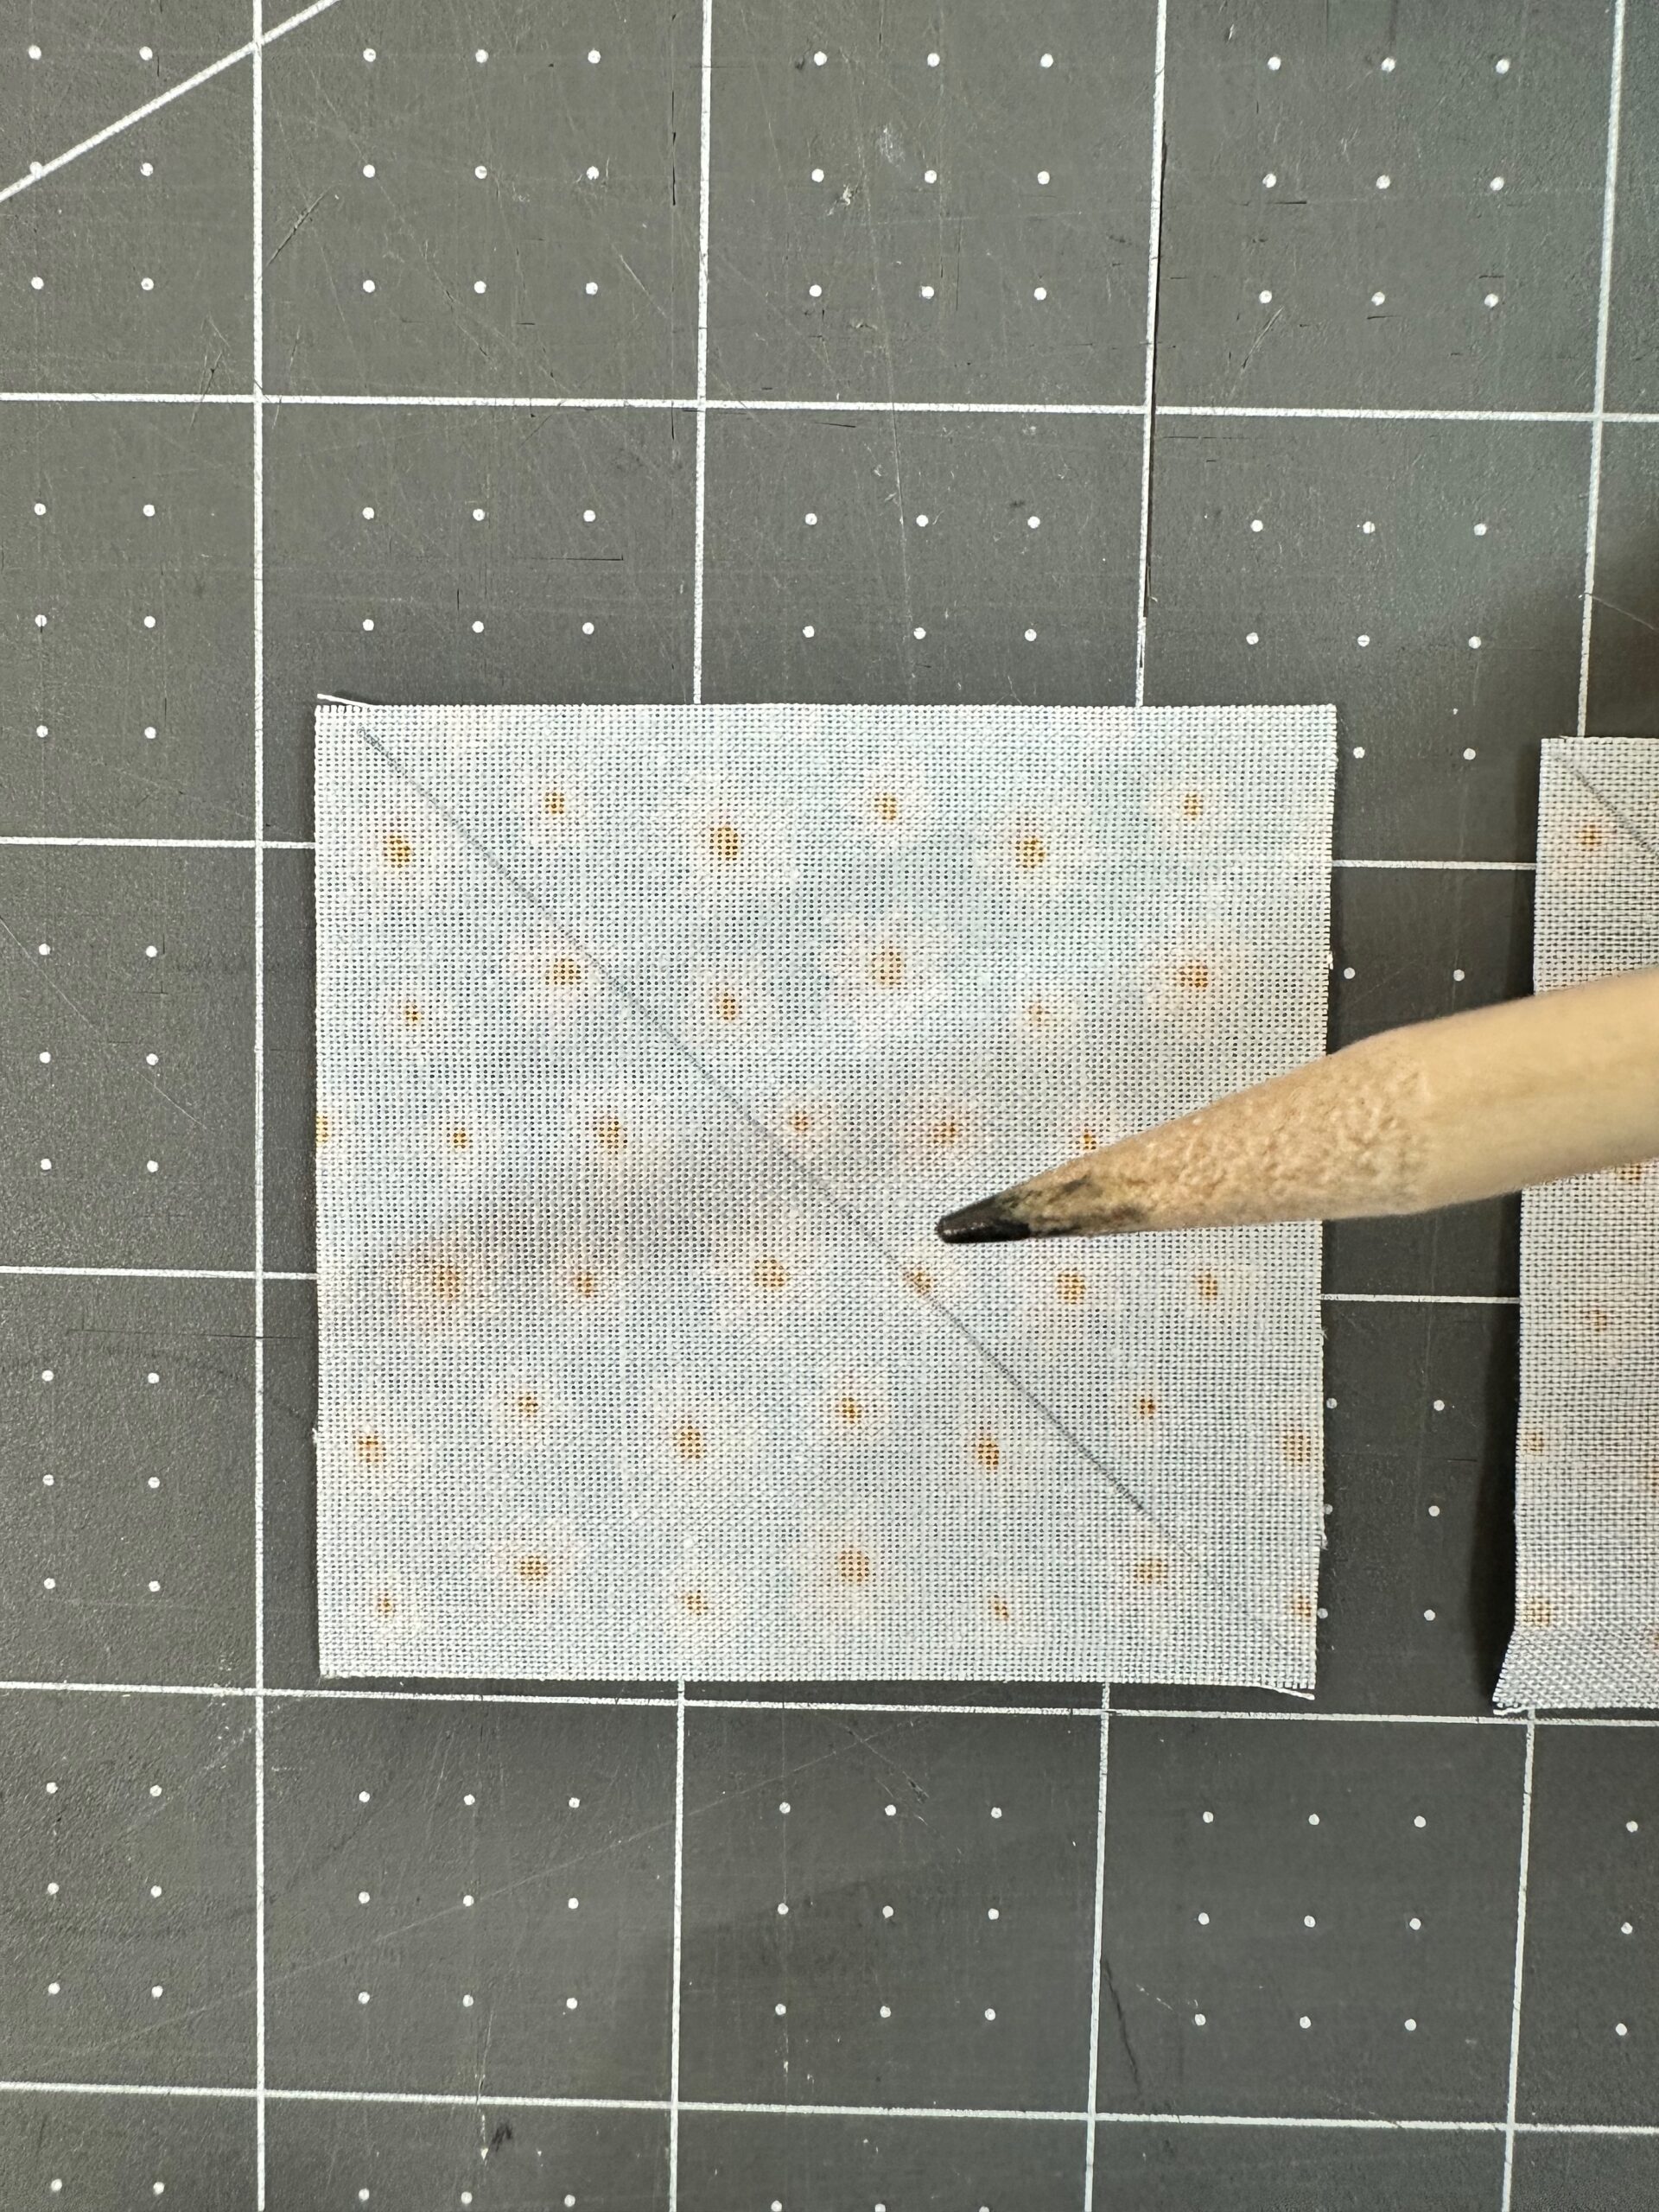
FLYING GEESE PIECING
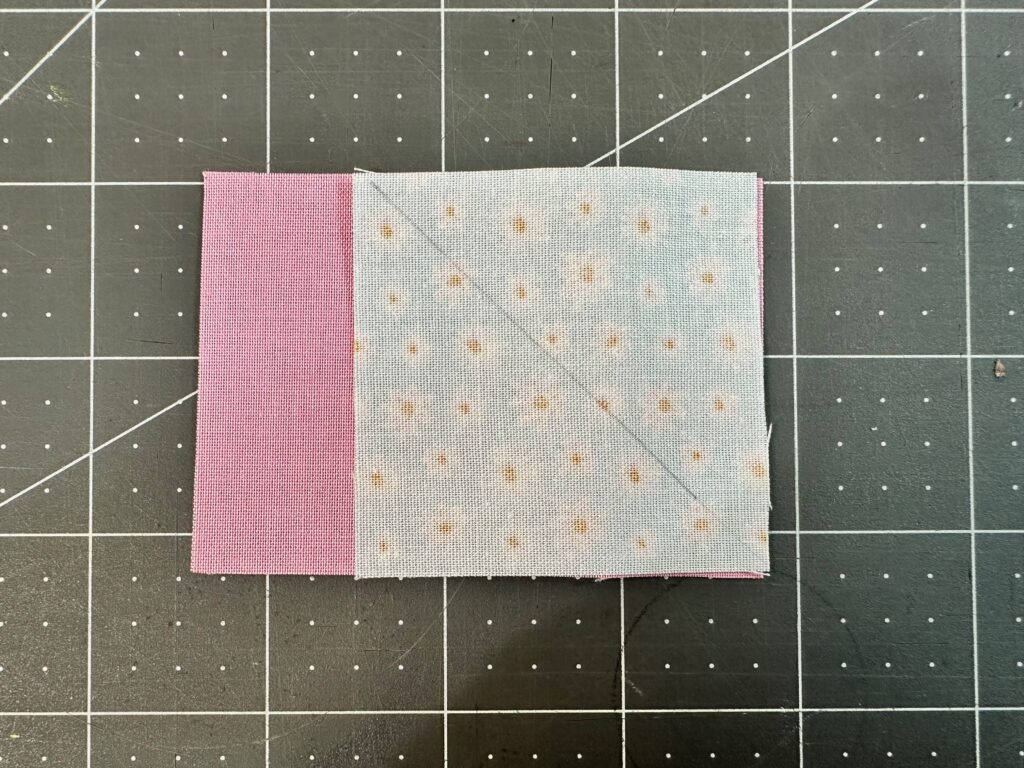
Mark the Squares: To begin, draw a diagonal line on the wrong side of each “sky” square from the upper-edge left corner to the lower-edge right corner. (Use a removable fabric marker and not a pencil as shown!)
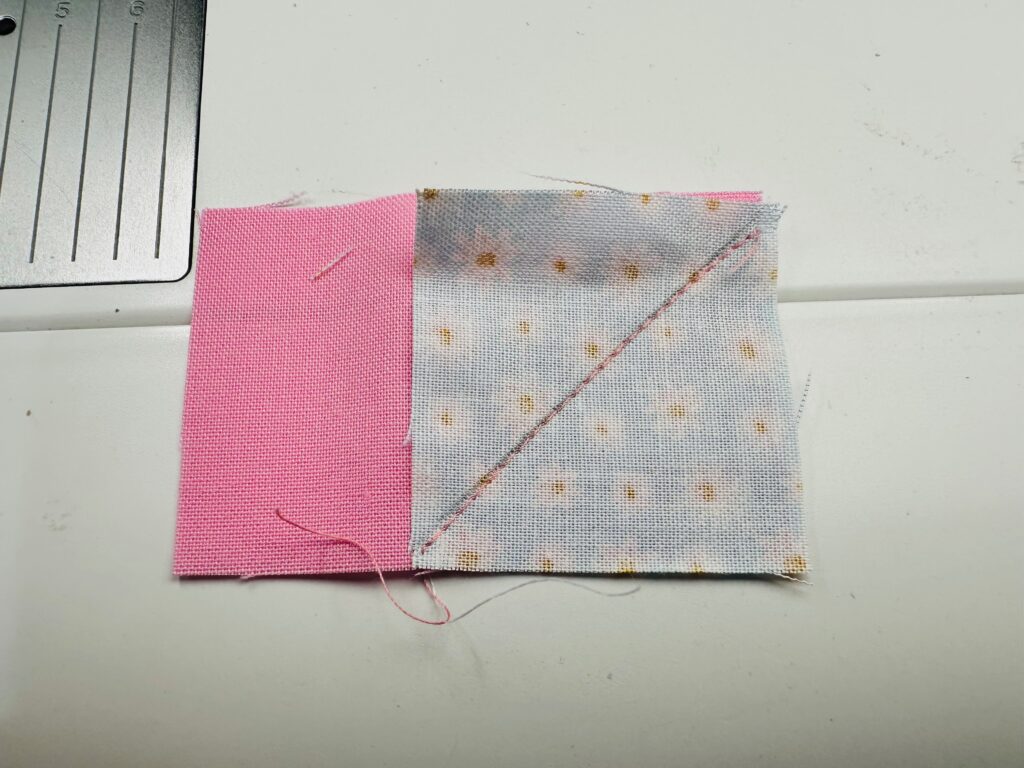
Attach First Square: First, place one “sky” square on the “goose” rectangle, right sides together, aligning the edges. Sew a ¼” seam along the drawn line. (If using a directional print for either the “sky” or “goose,” make sure it’s oriented correctly before sewing.)
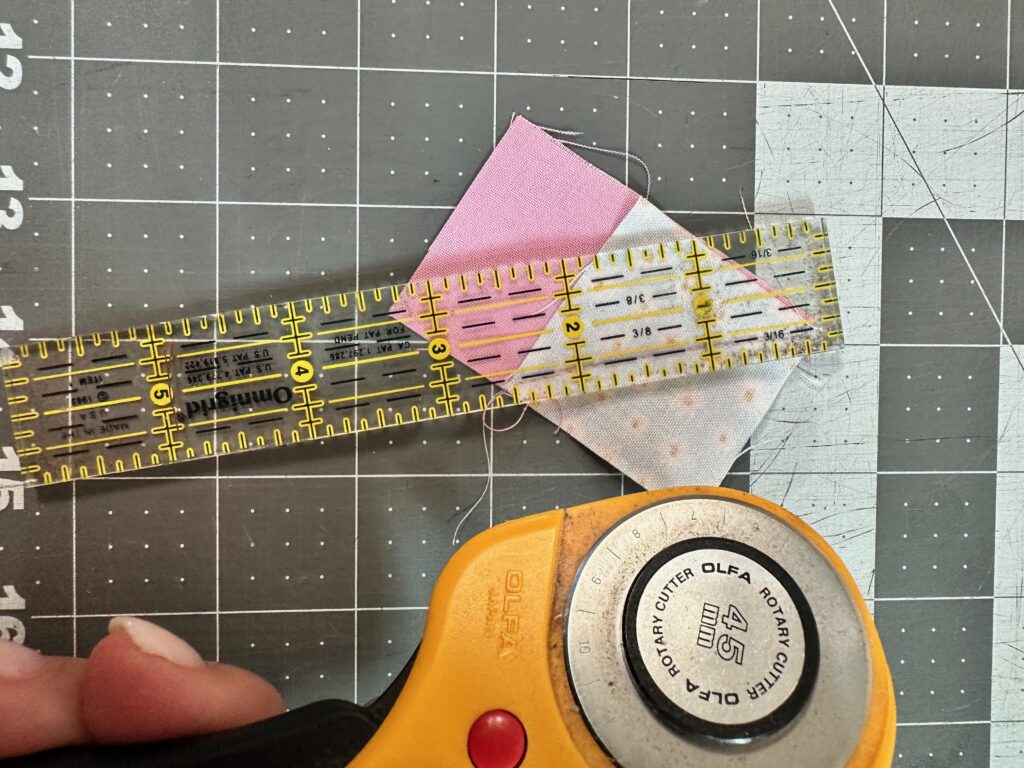
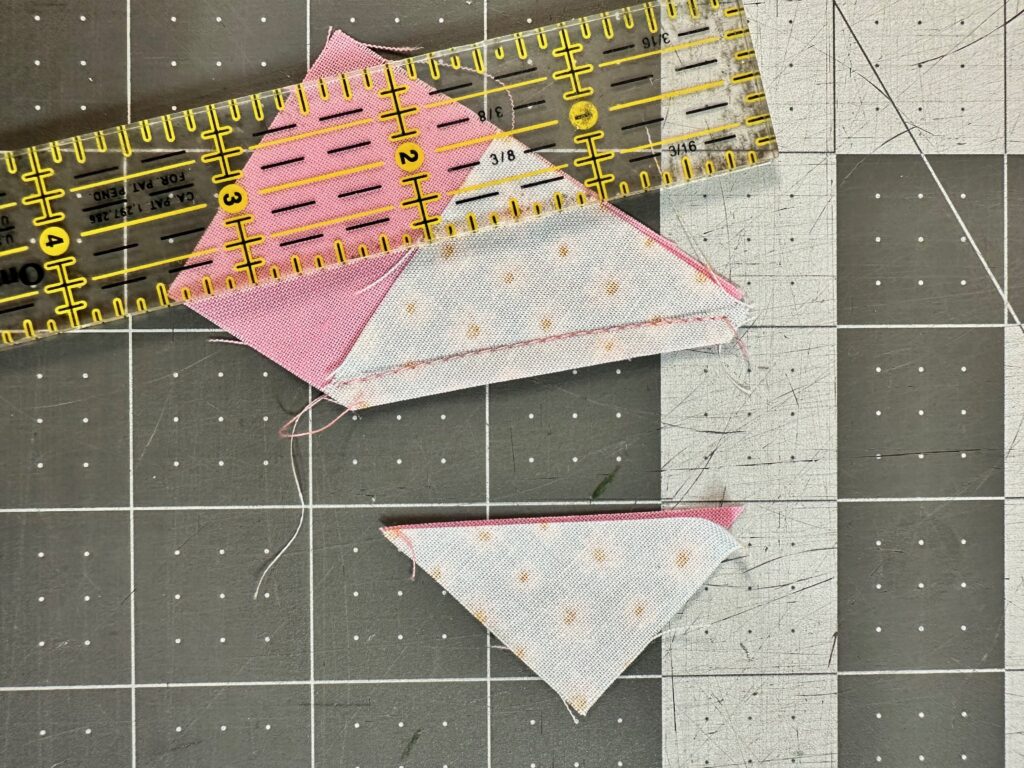
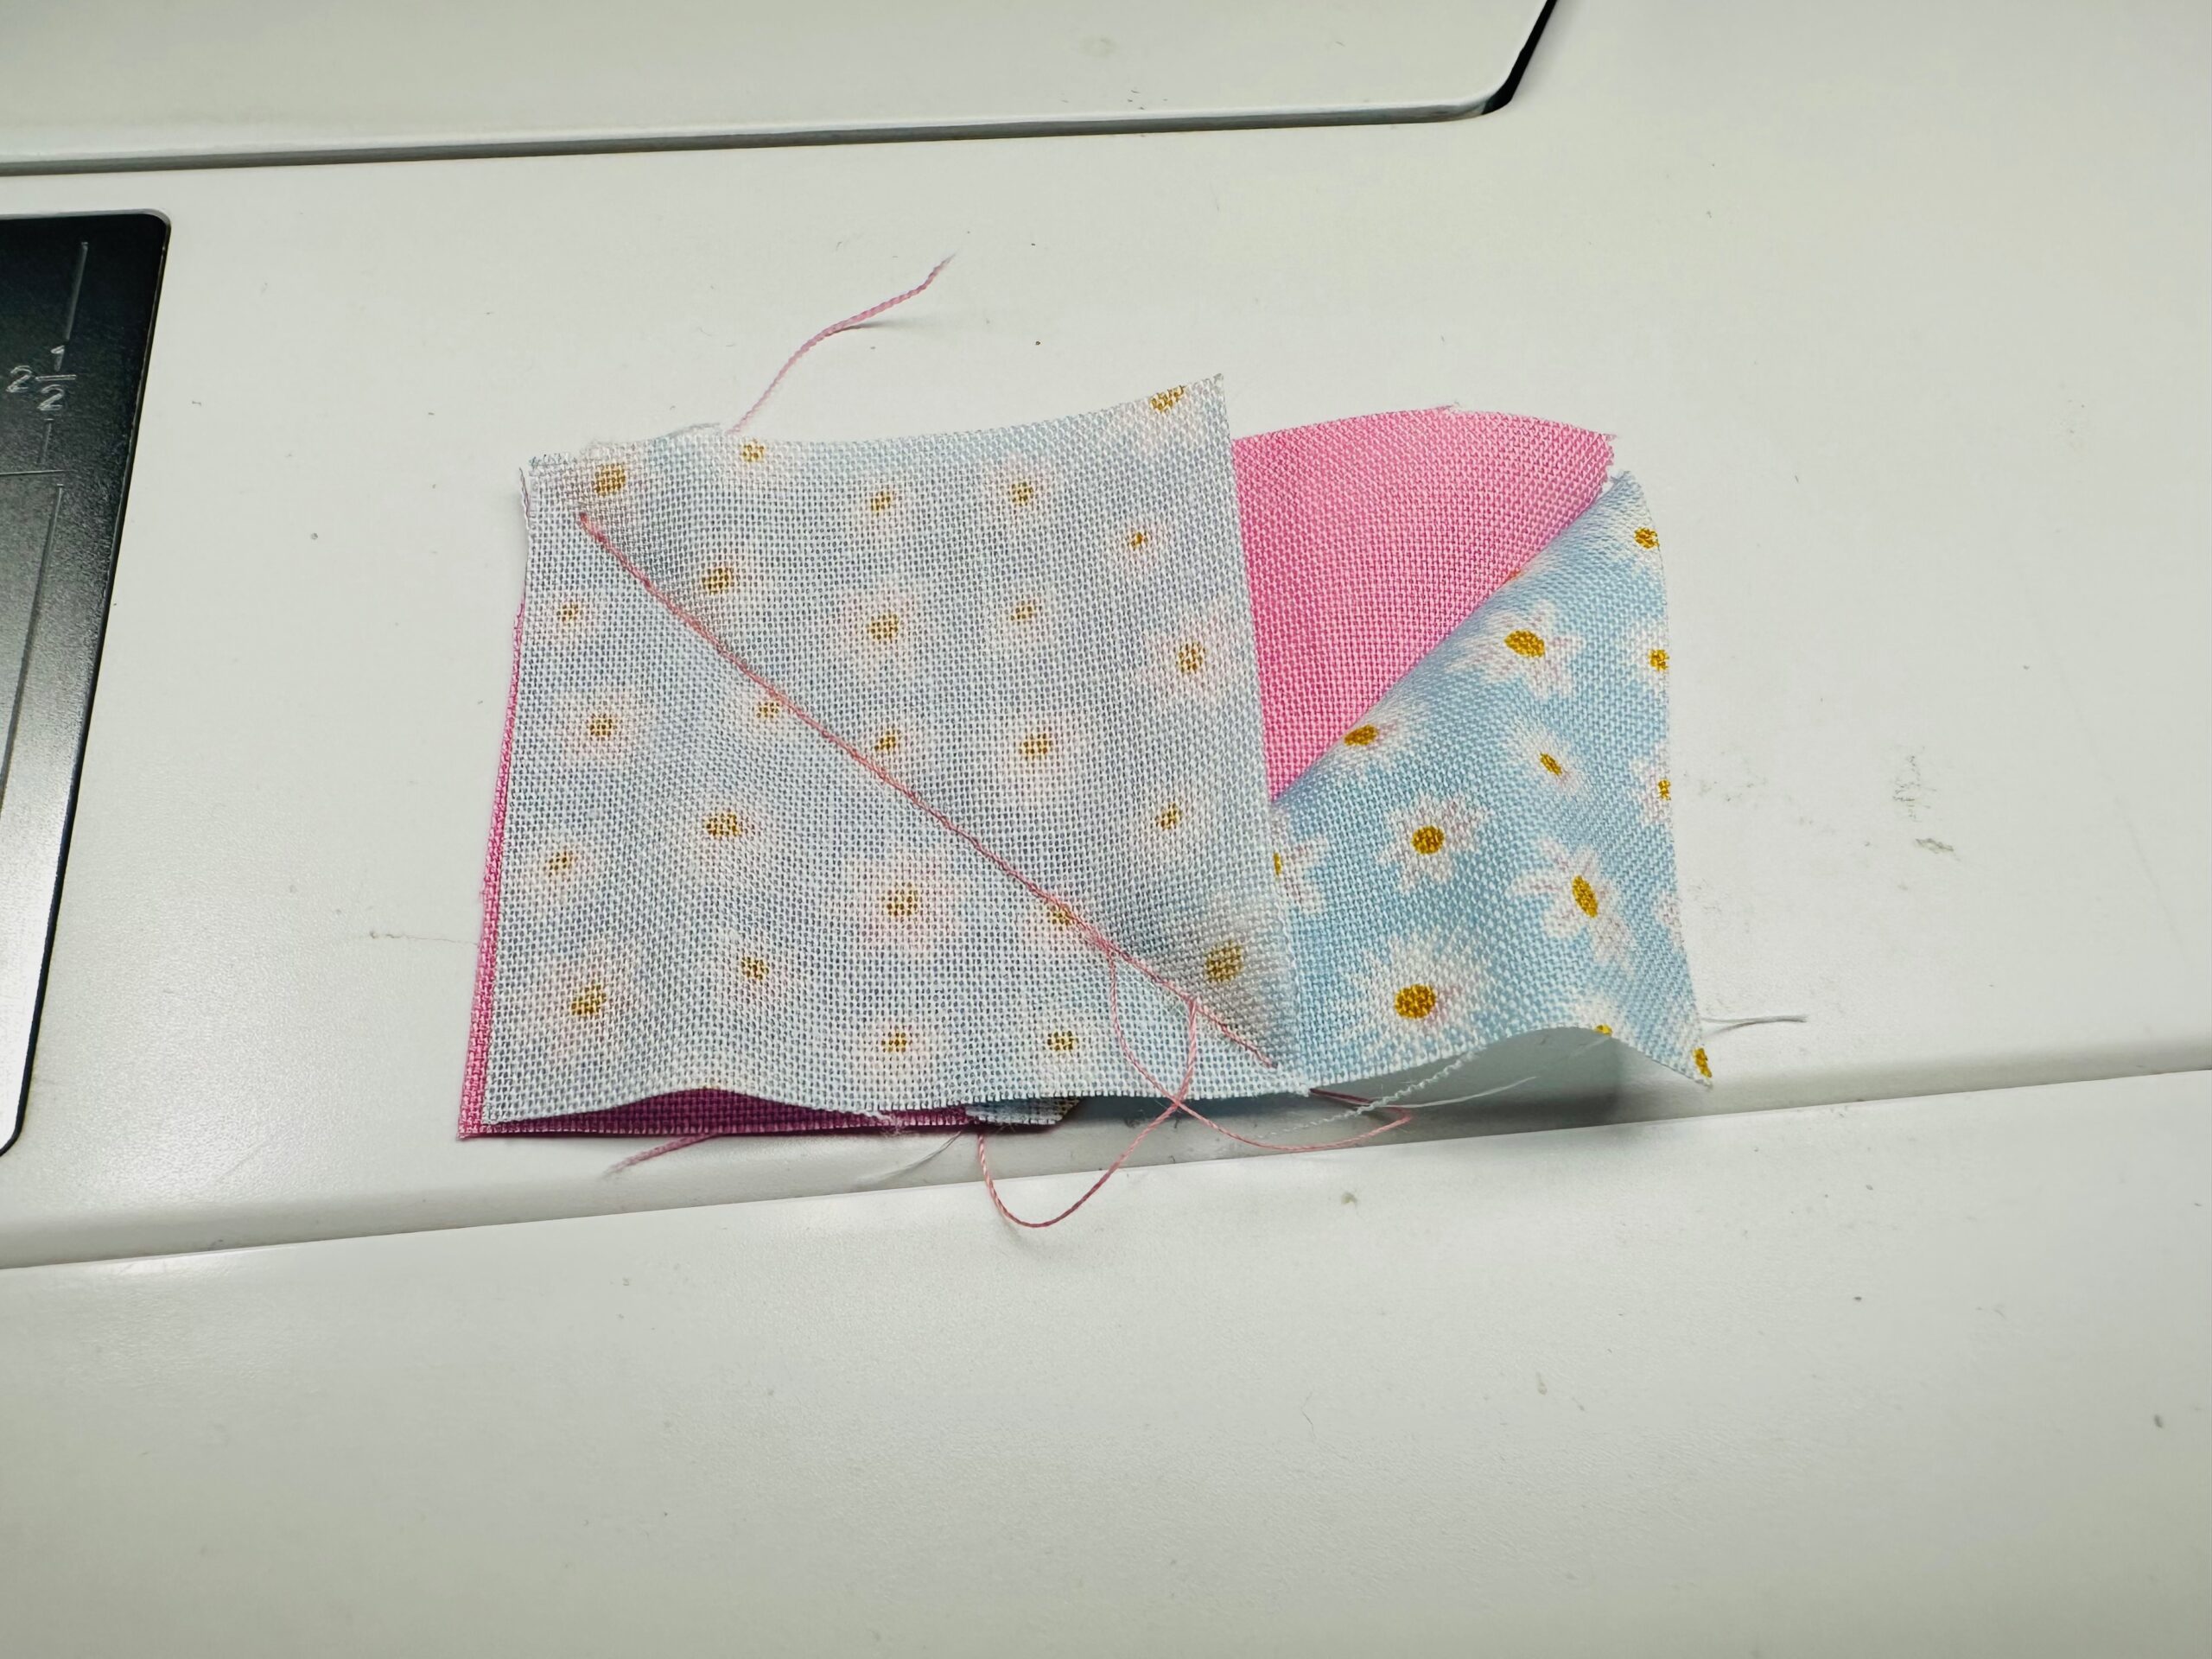
Trim and Press: Next, trim the seam allowance to ¼” and press the seam towards the “sky” triangle.
Attach Second Square: Then, repeat the process with the second “sky” square on the opposite side of the “goose” rectangle.
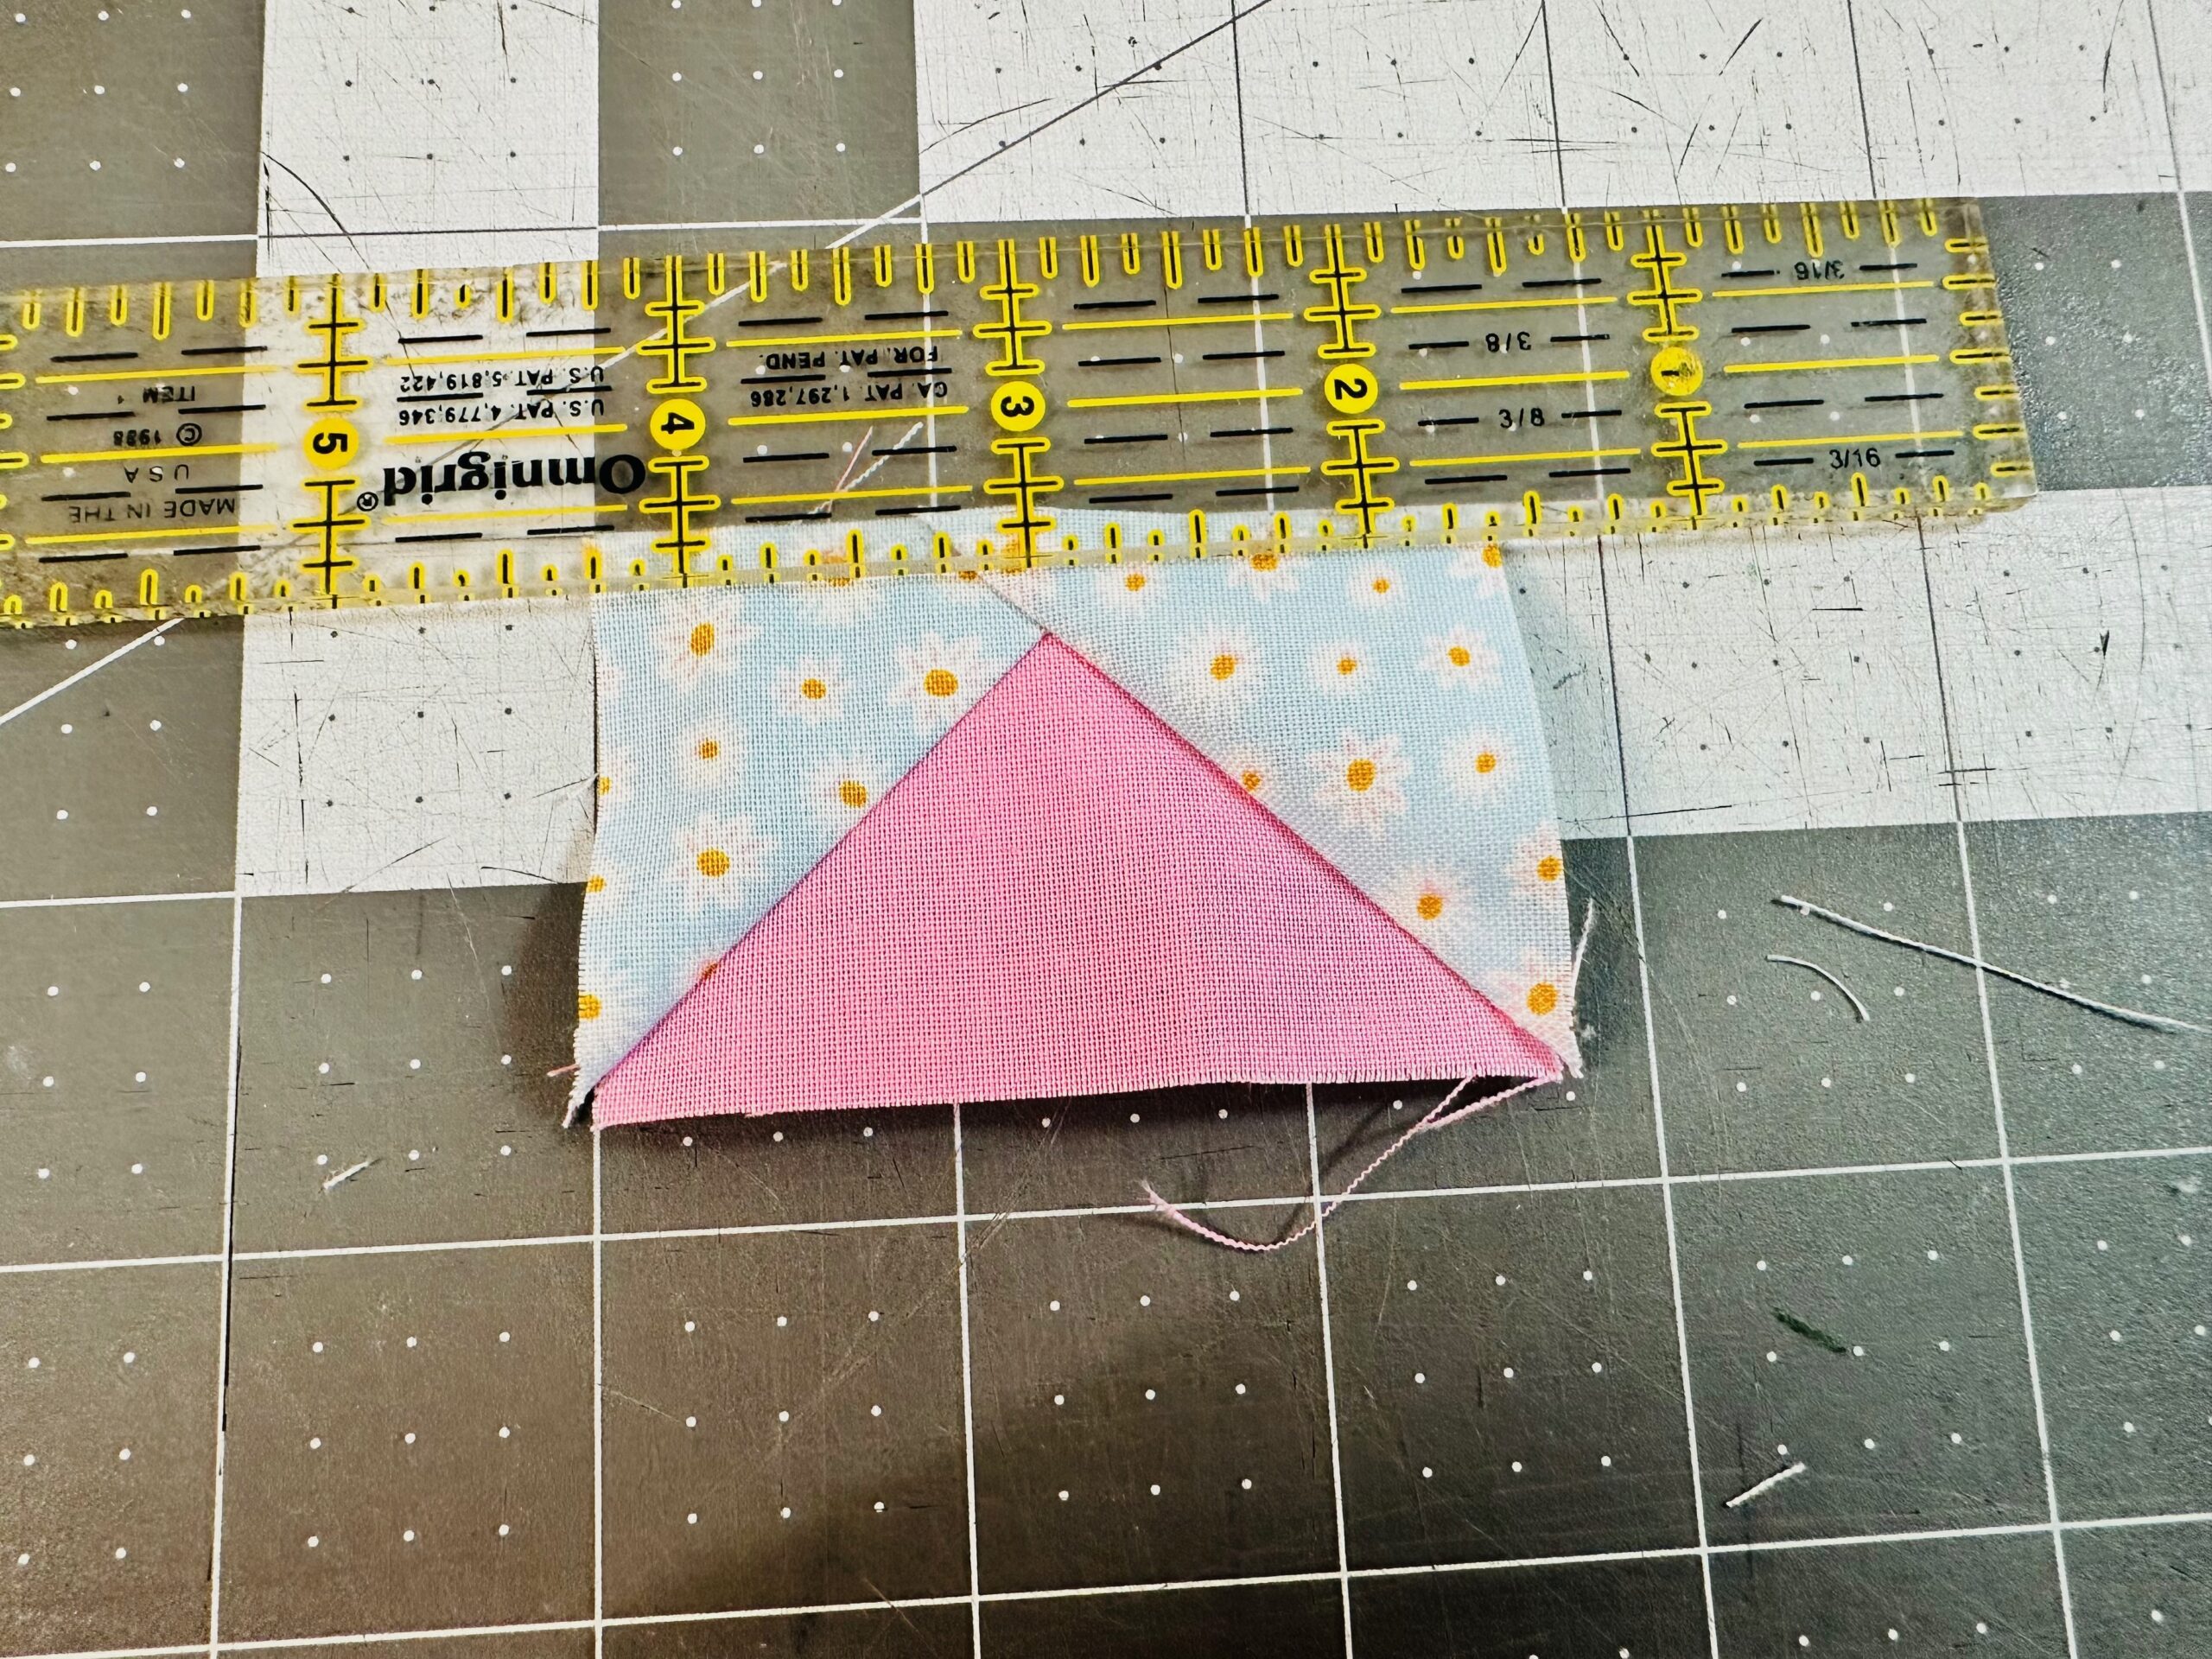
Trim to Size: Using a ruler, trim the unit to the desired finished size (2¾” x 1¾”) taking care to preserve the points.
Repeat: Now, repeat steps 1-5 for the remaining five flying geese units.
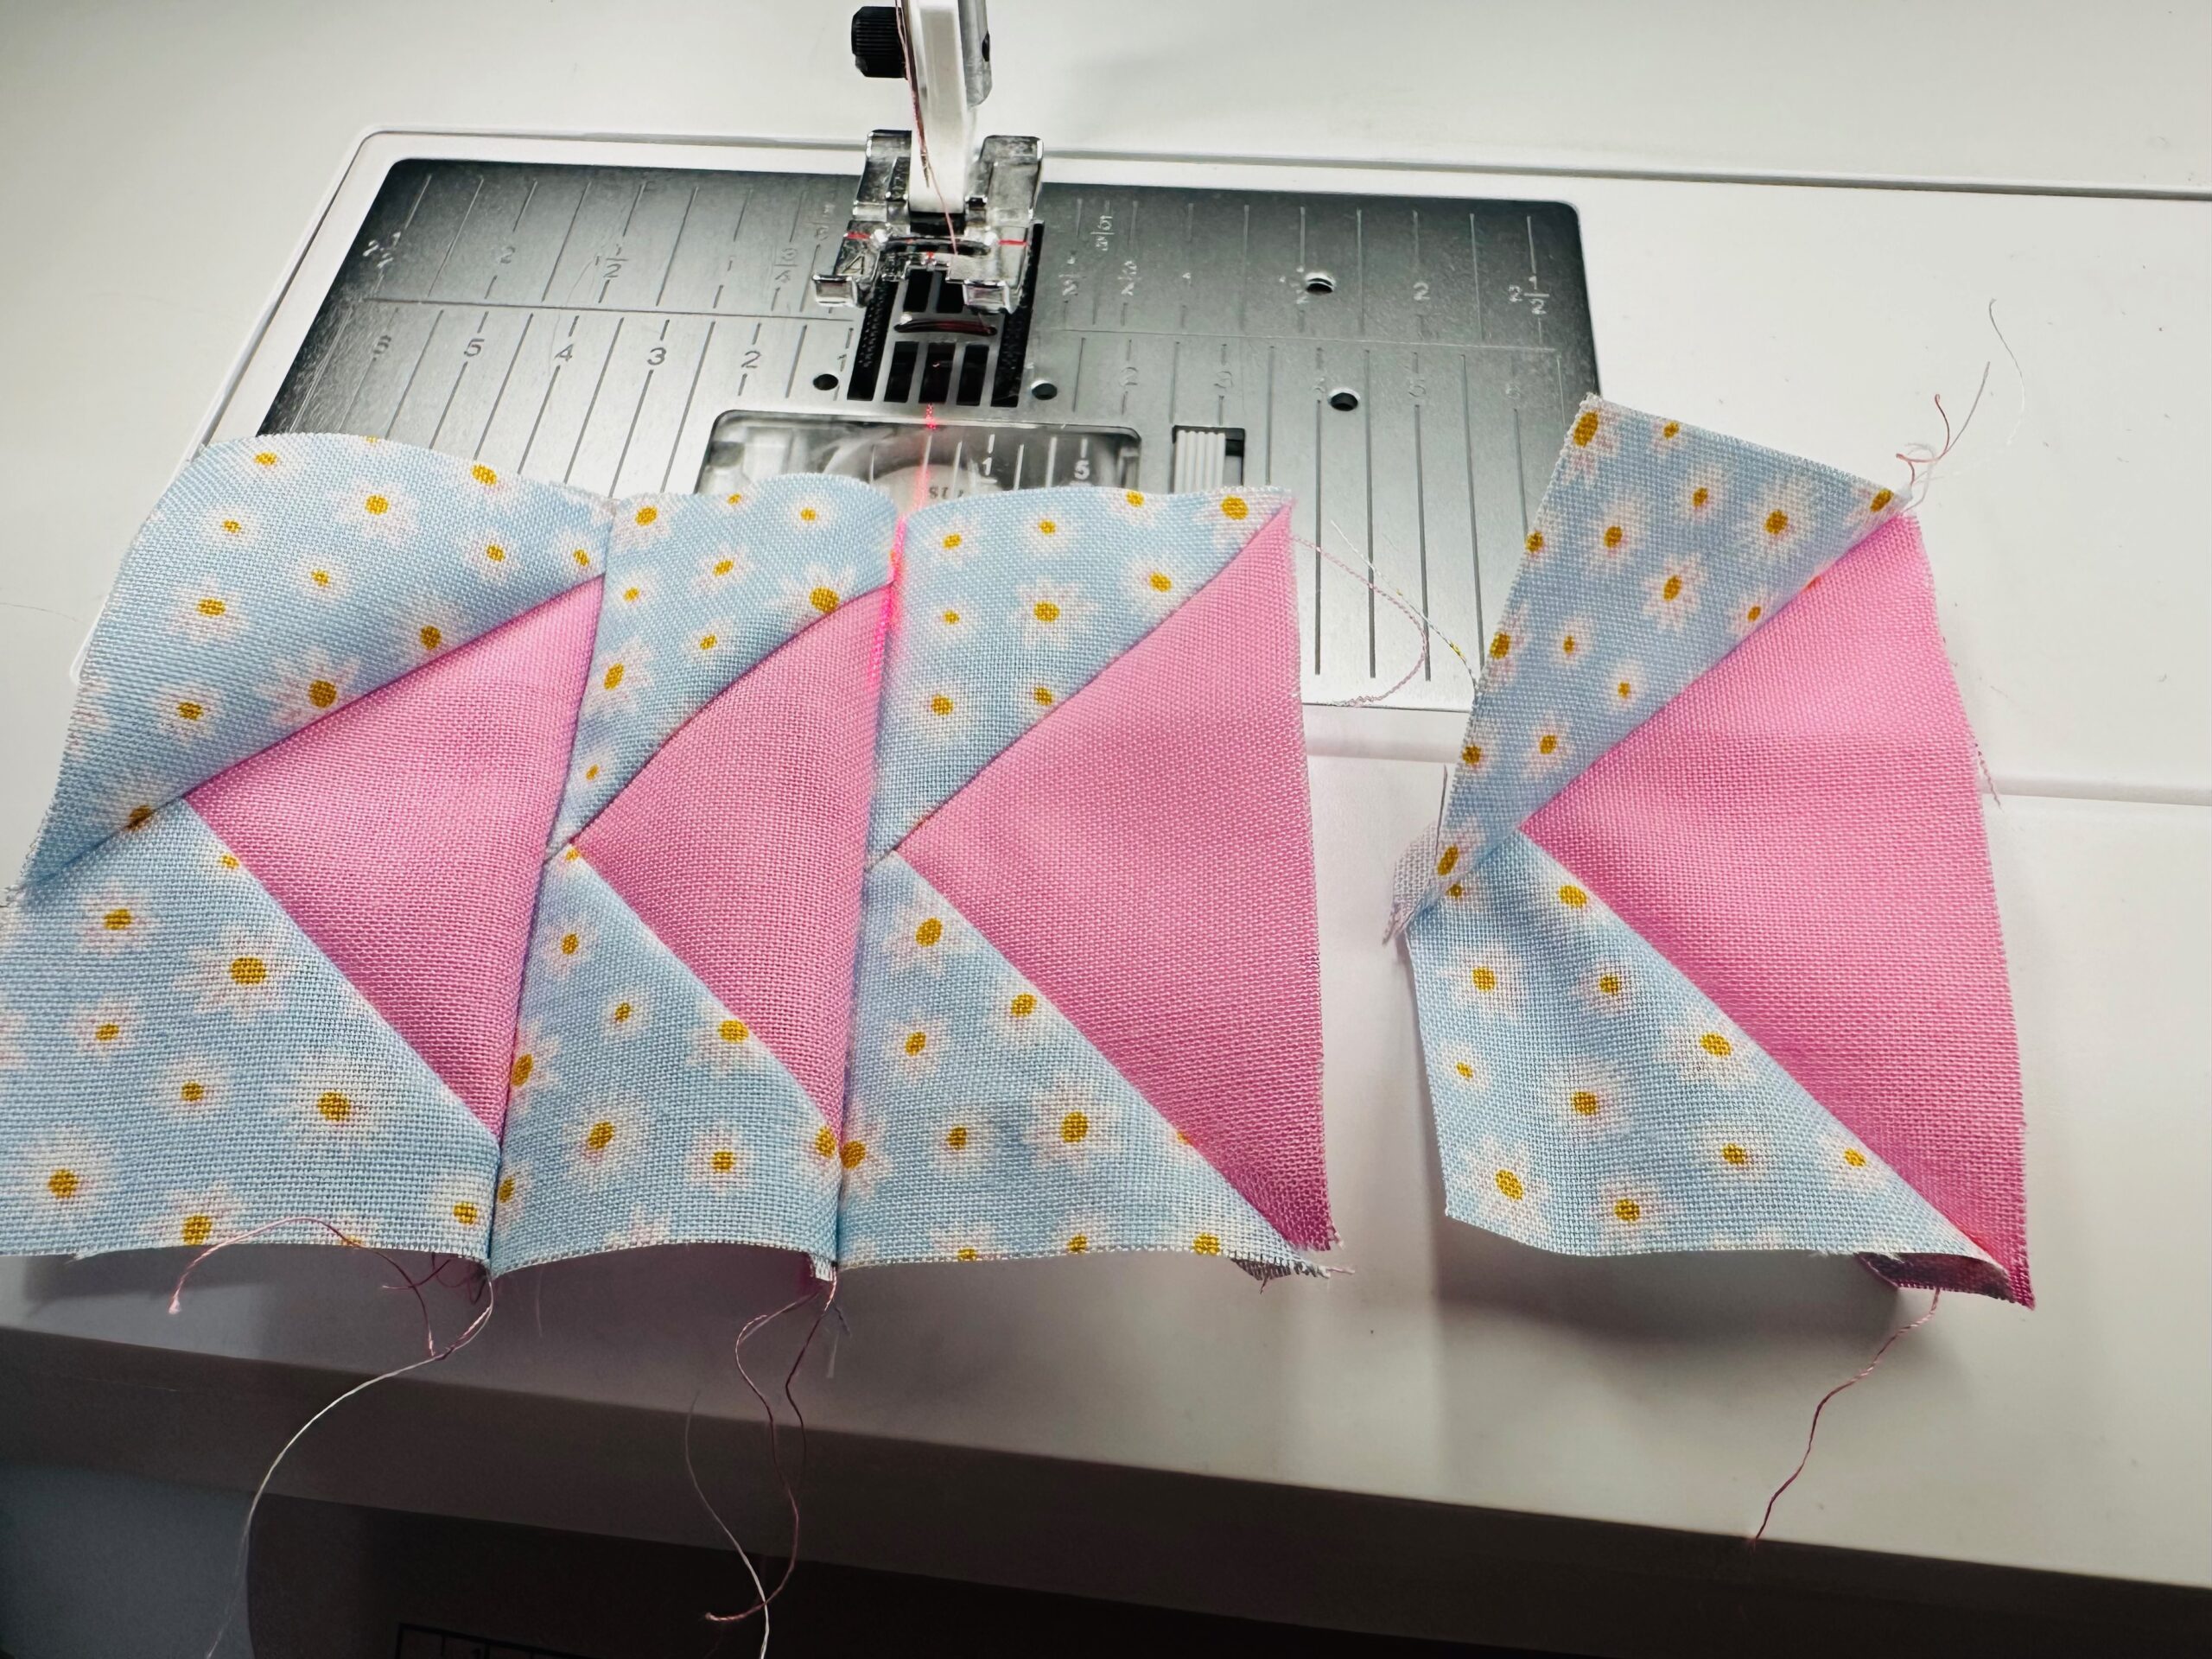
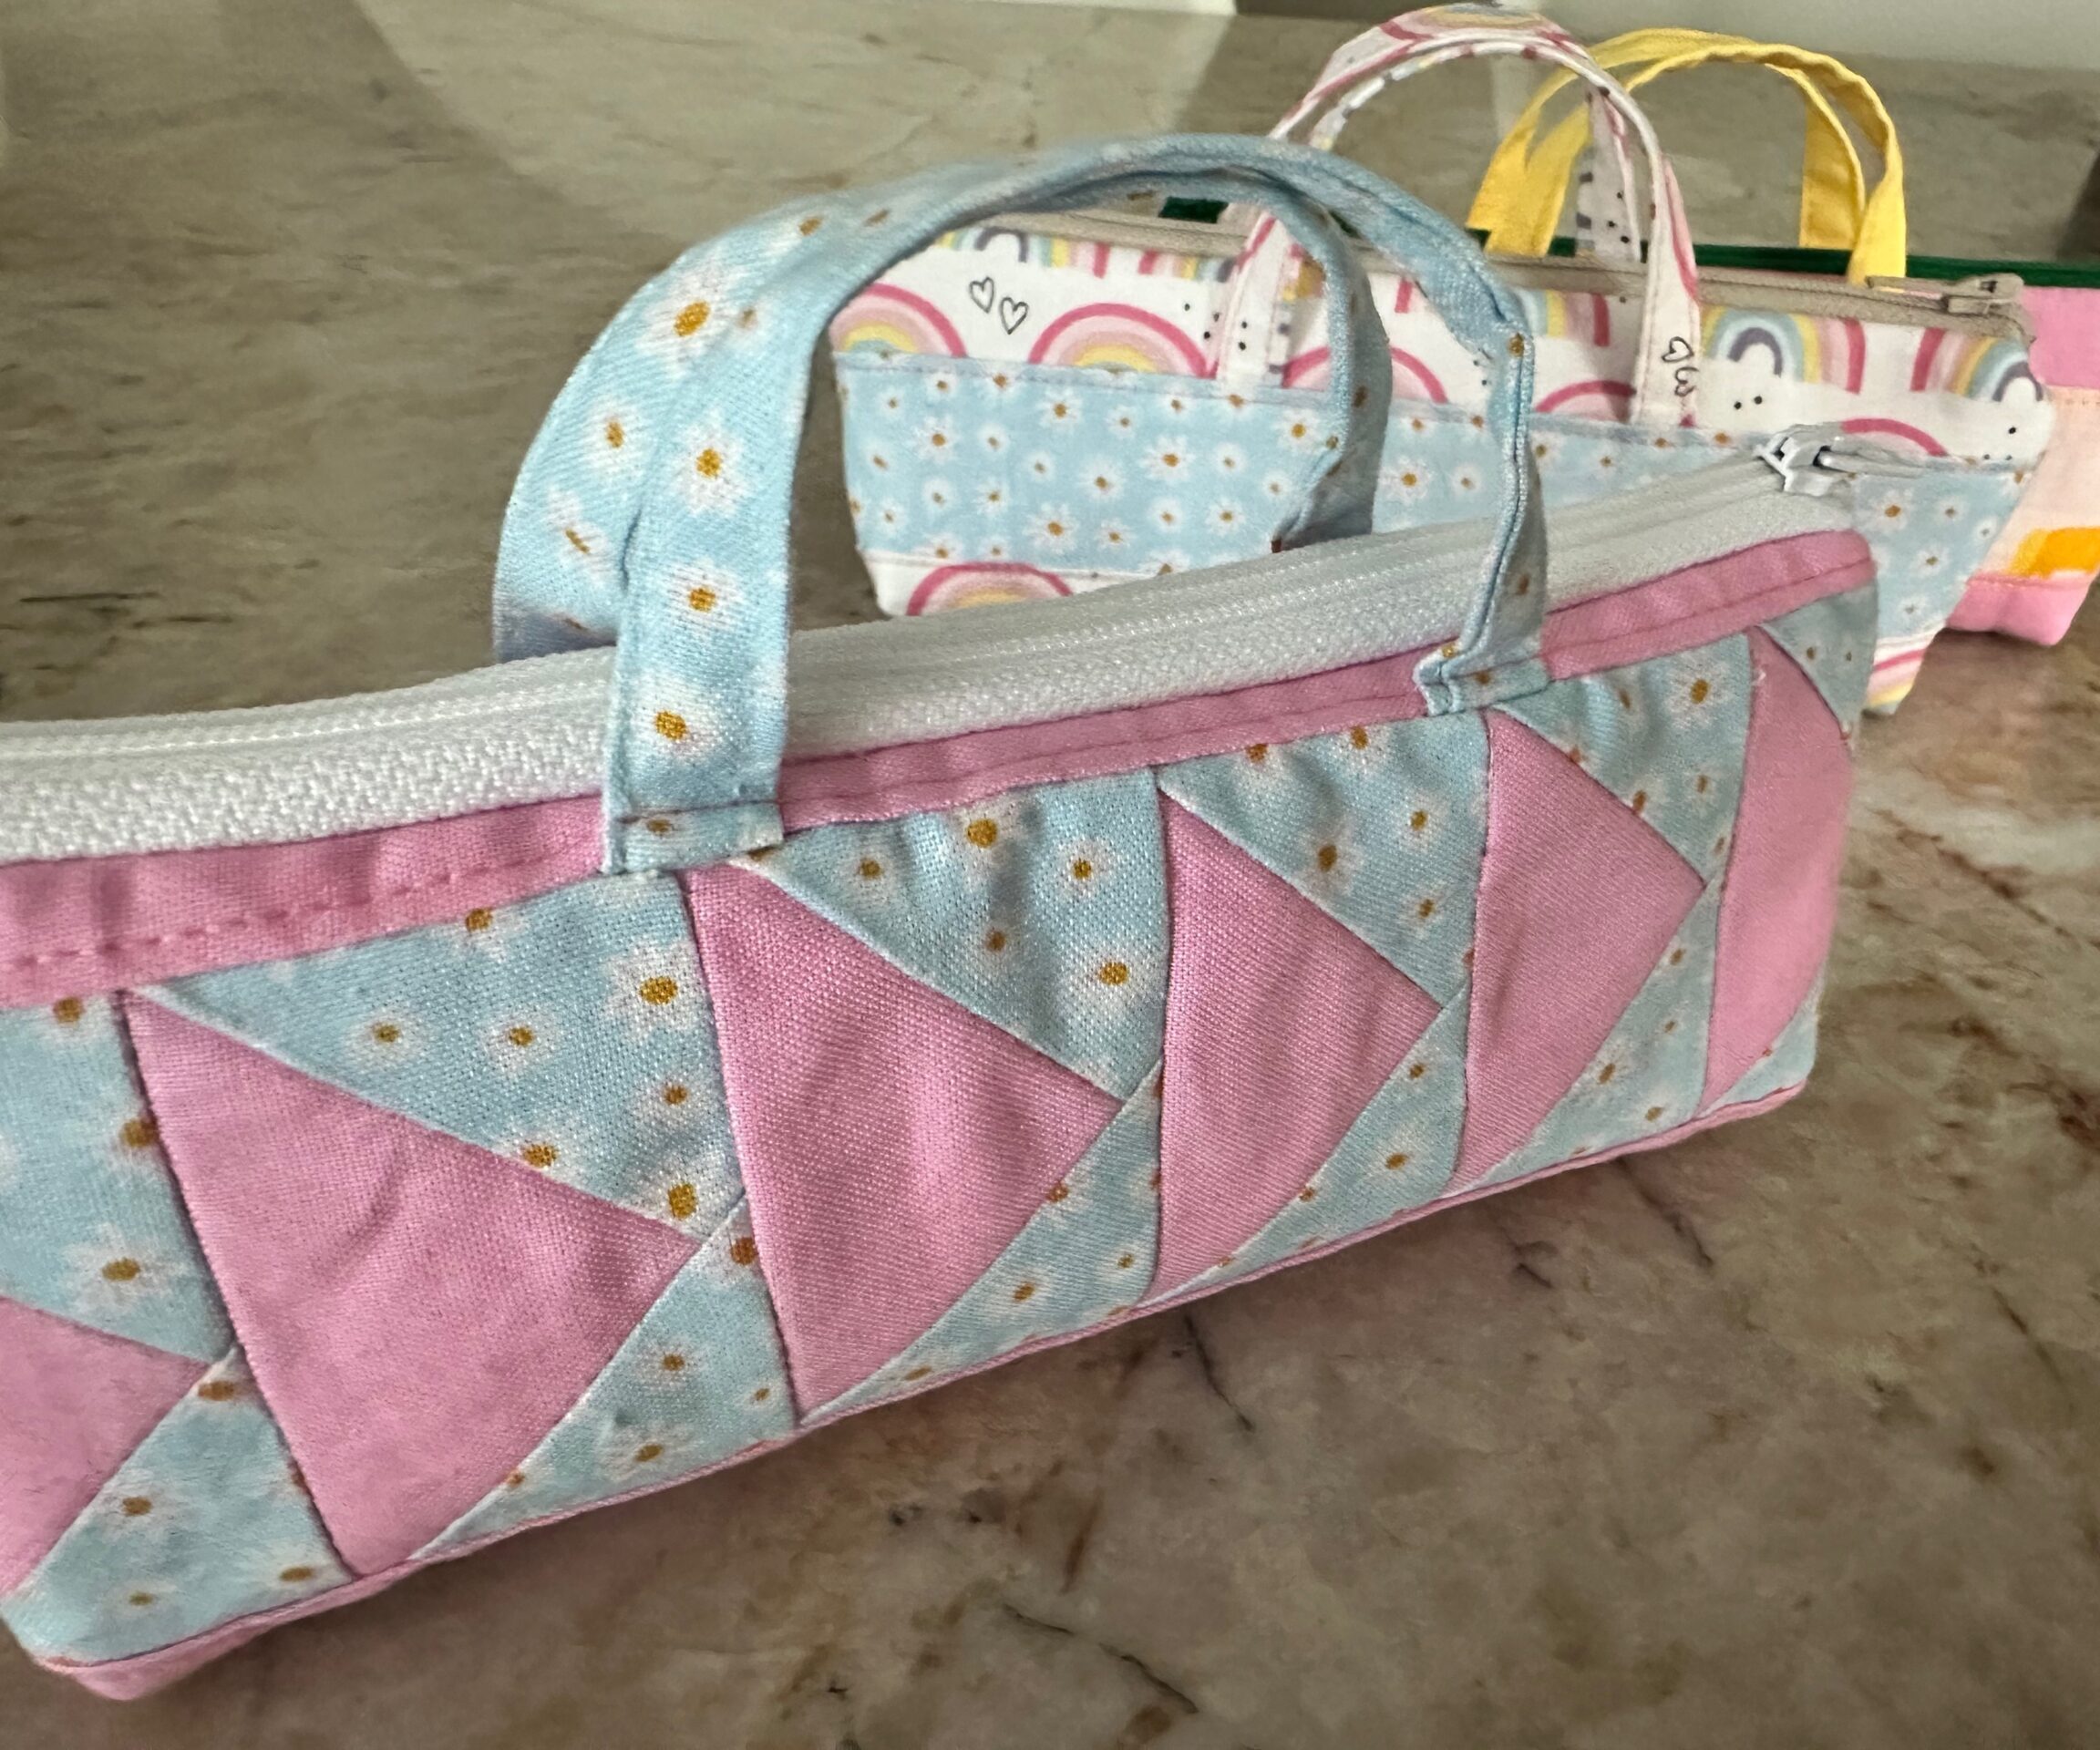
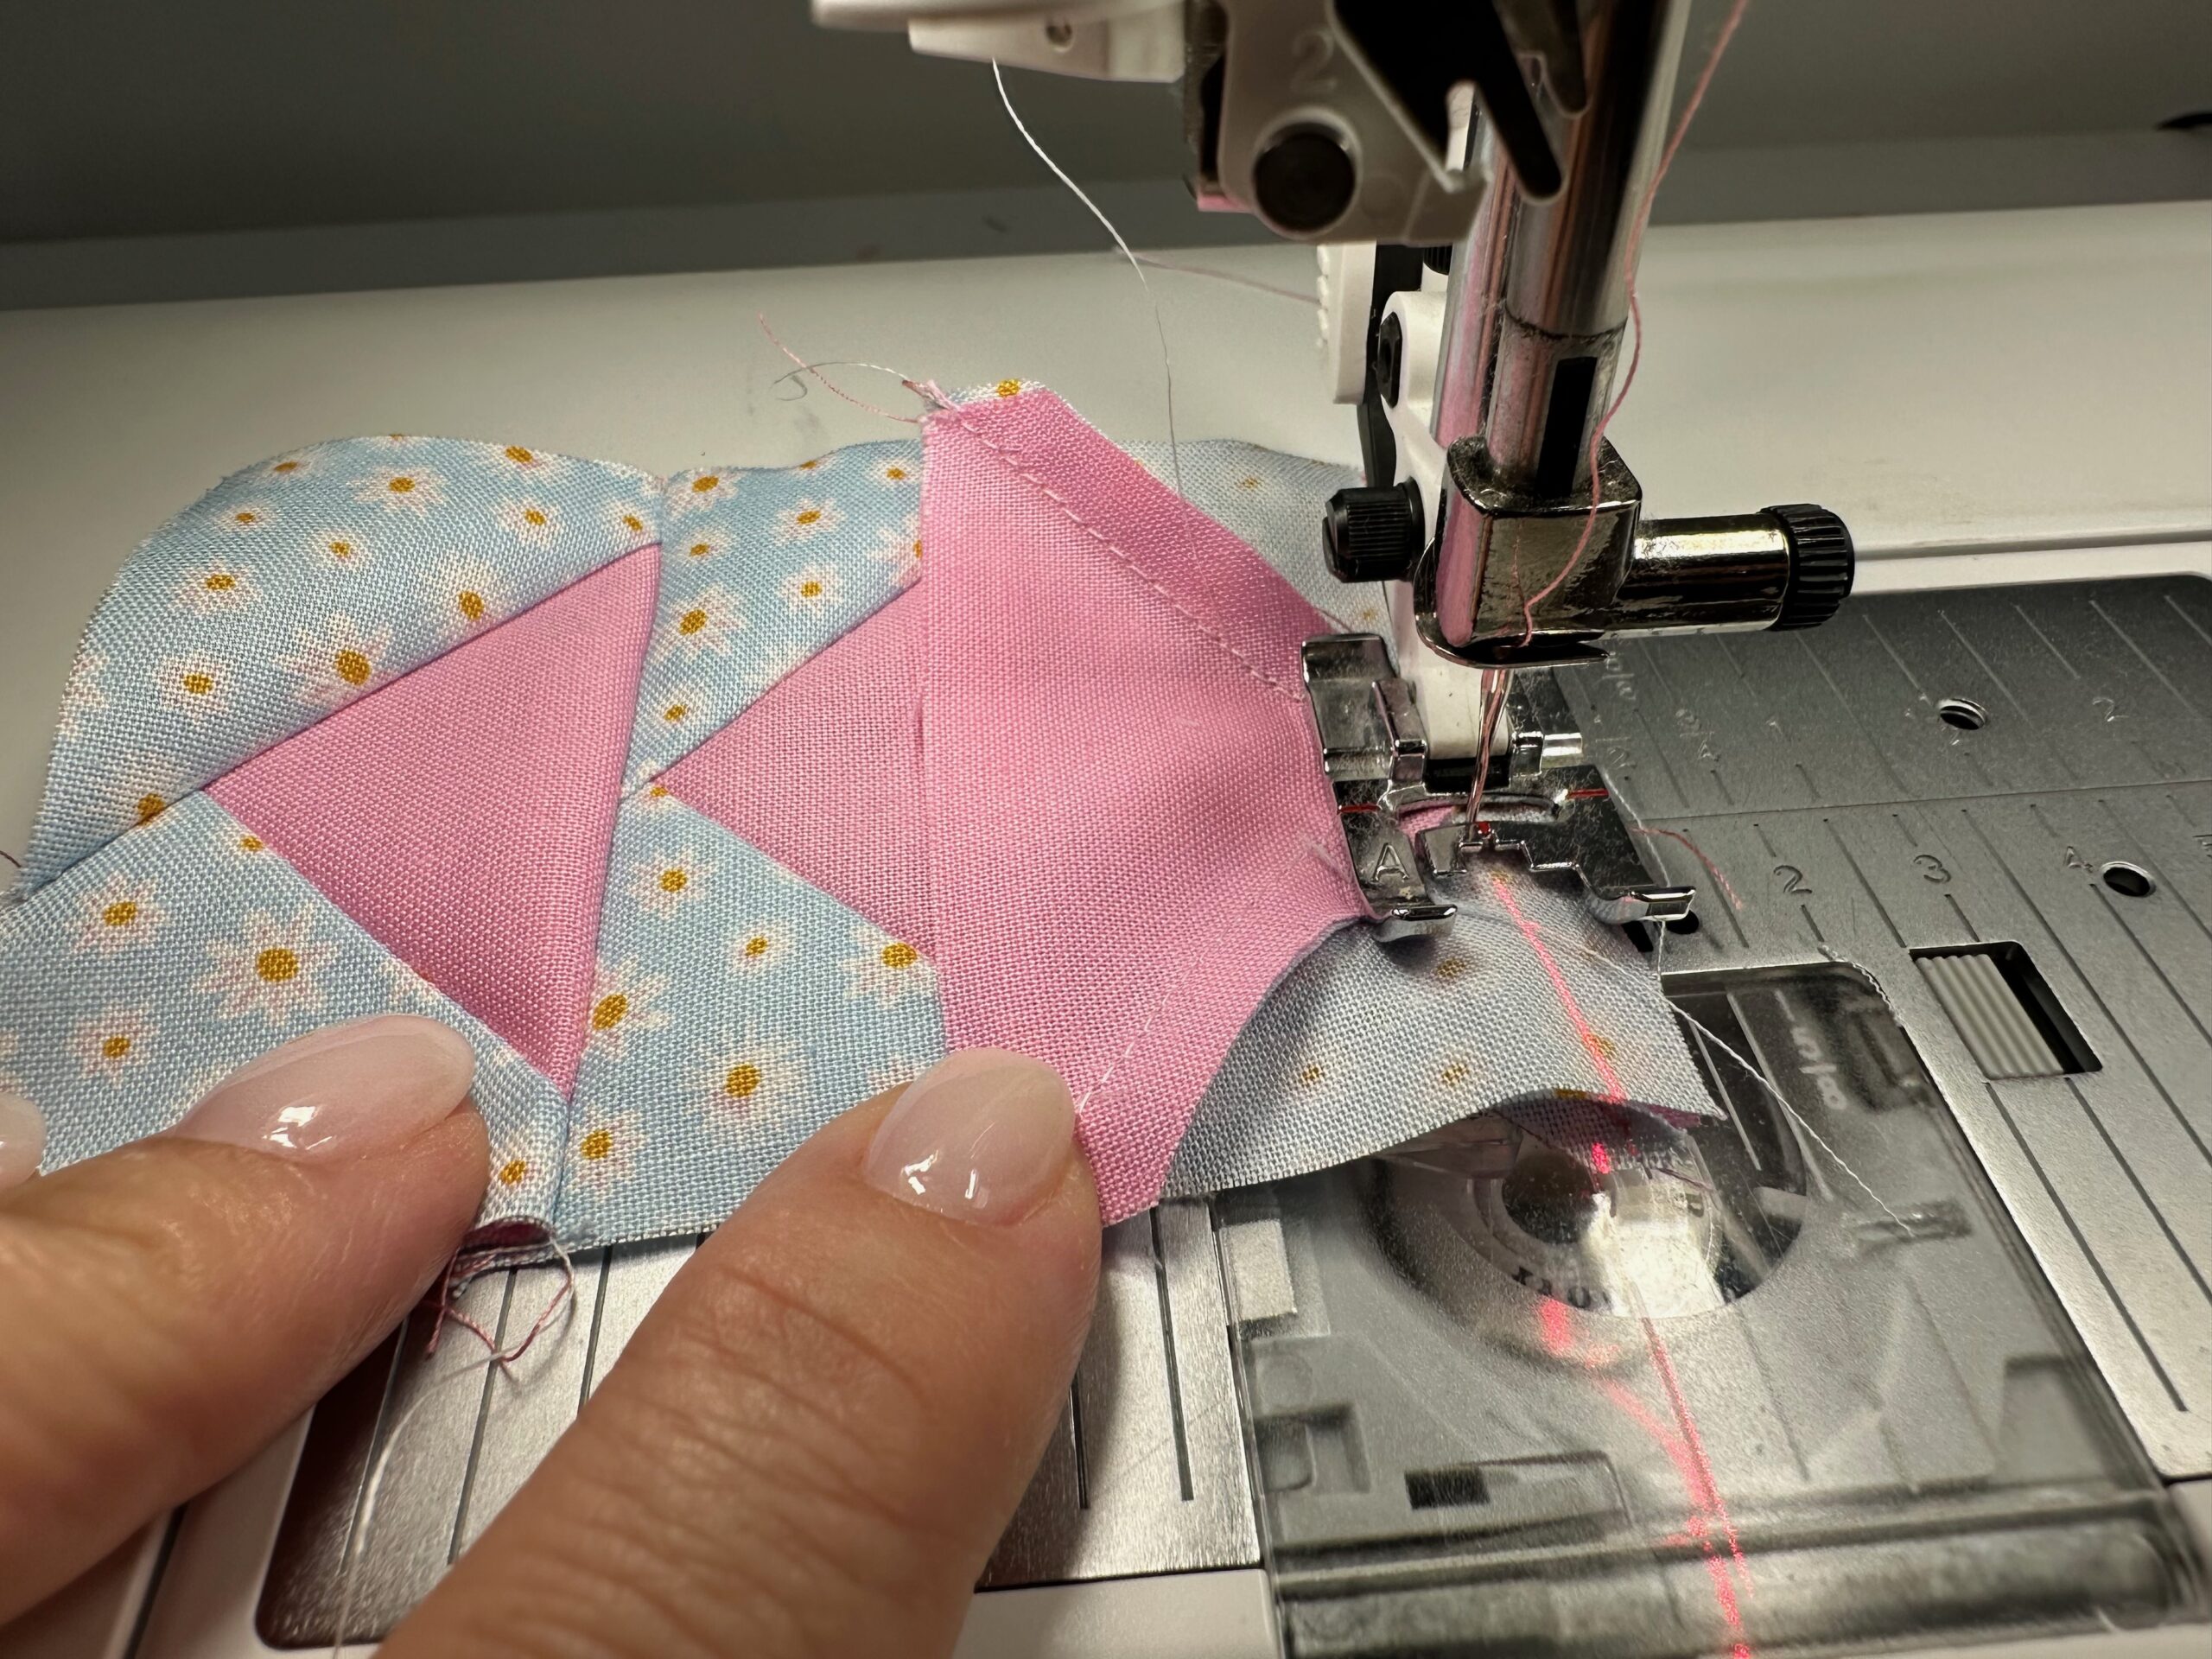
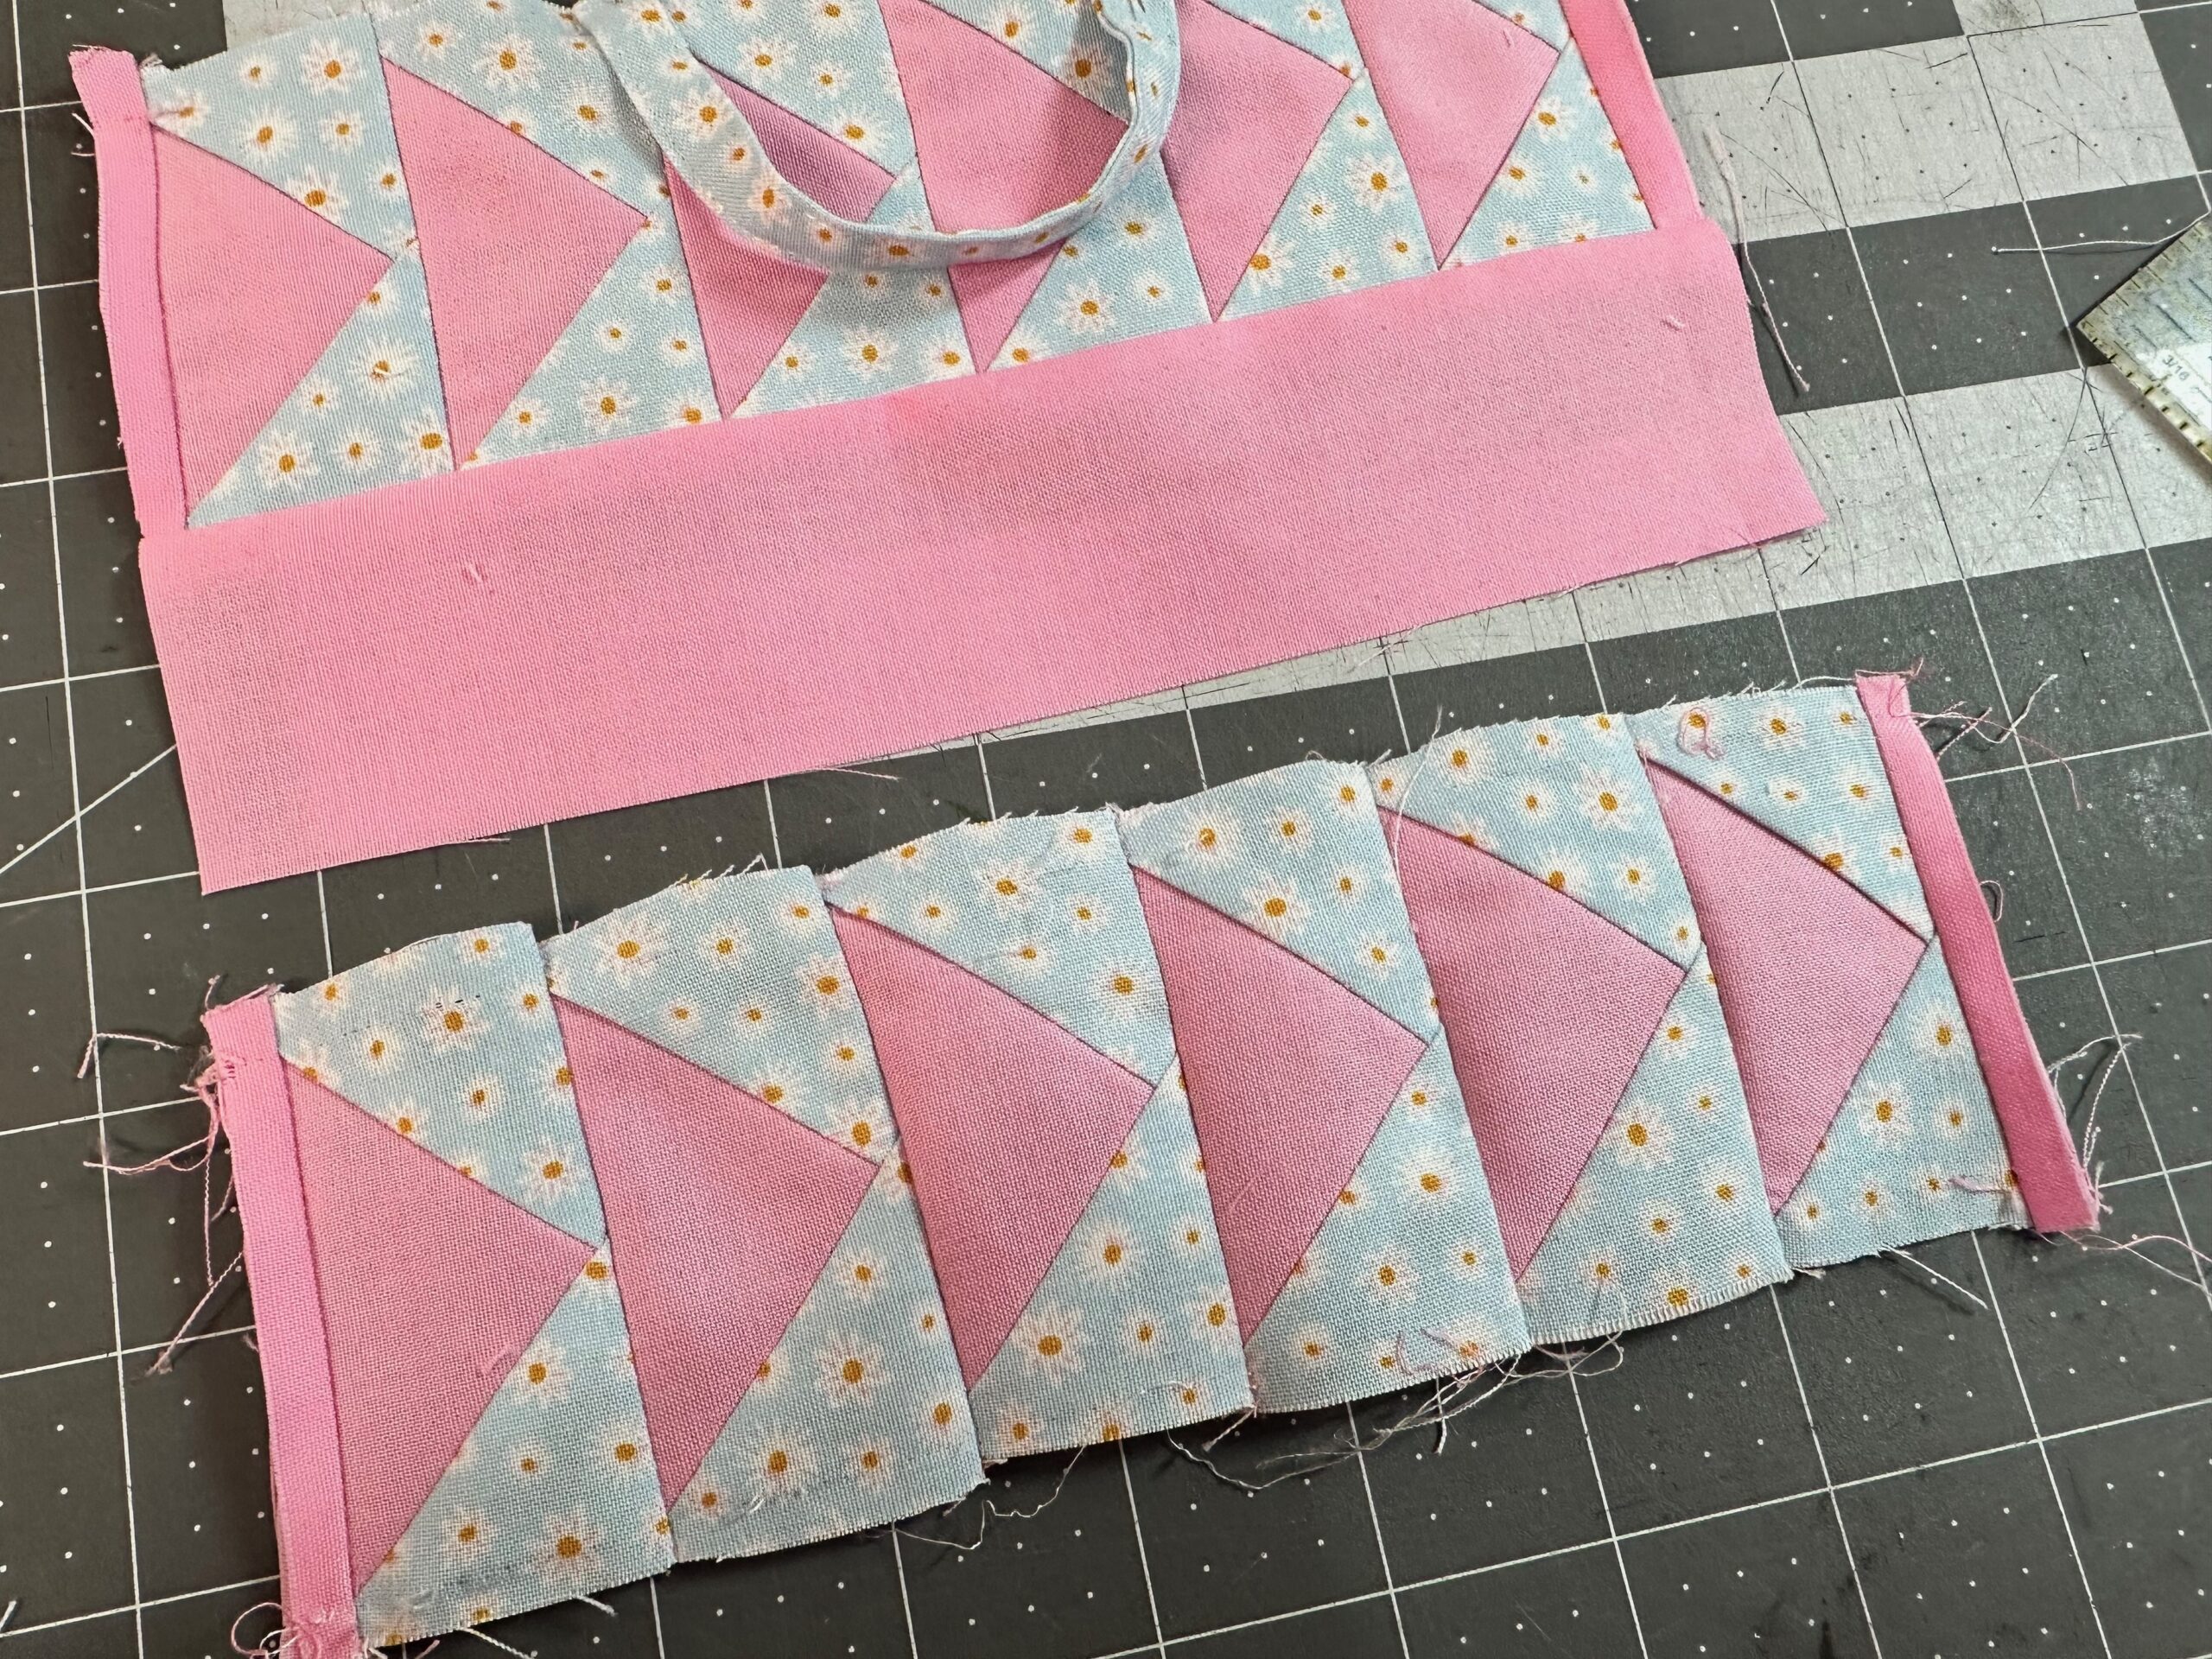
Sew Together: Next, sew the six flying geese units together in a row to form the 8″ x 2¾” rectangle.
If desired, repeat to create two Flying Geese panels – one for the front and one for the back. (I added two small ½”-wide strips of fabric to each end of the block panel as well.)
PIECING TIPS
-
Accuracy:Precise cutting and sewing are crucial for accurate flying geese. Use a scant 1/4″ seam allowance.
-
Seam Allowances:Pressing seams open or to the side to help reduce bulk and improve the final look of the pouch.
-
Trimming:Using a small clear ruler for more accurate trimming. Also, use a rotary cutter and self-healing mat for best results.
-
Layout:When sewing the units together, ensure the seams are nested (pressed in opposite directions) for a flatter finish.
PENCIL POUCH FINISHING
Now that the Flying Geese panels are complete, use them as the center rectangle for the Tiny Tote, following the pattern instructions.
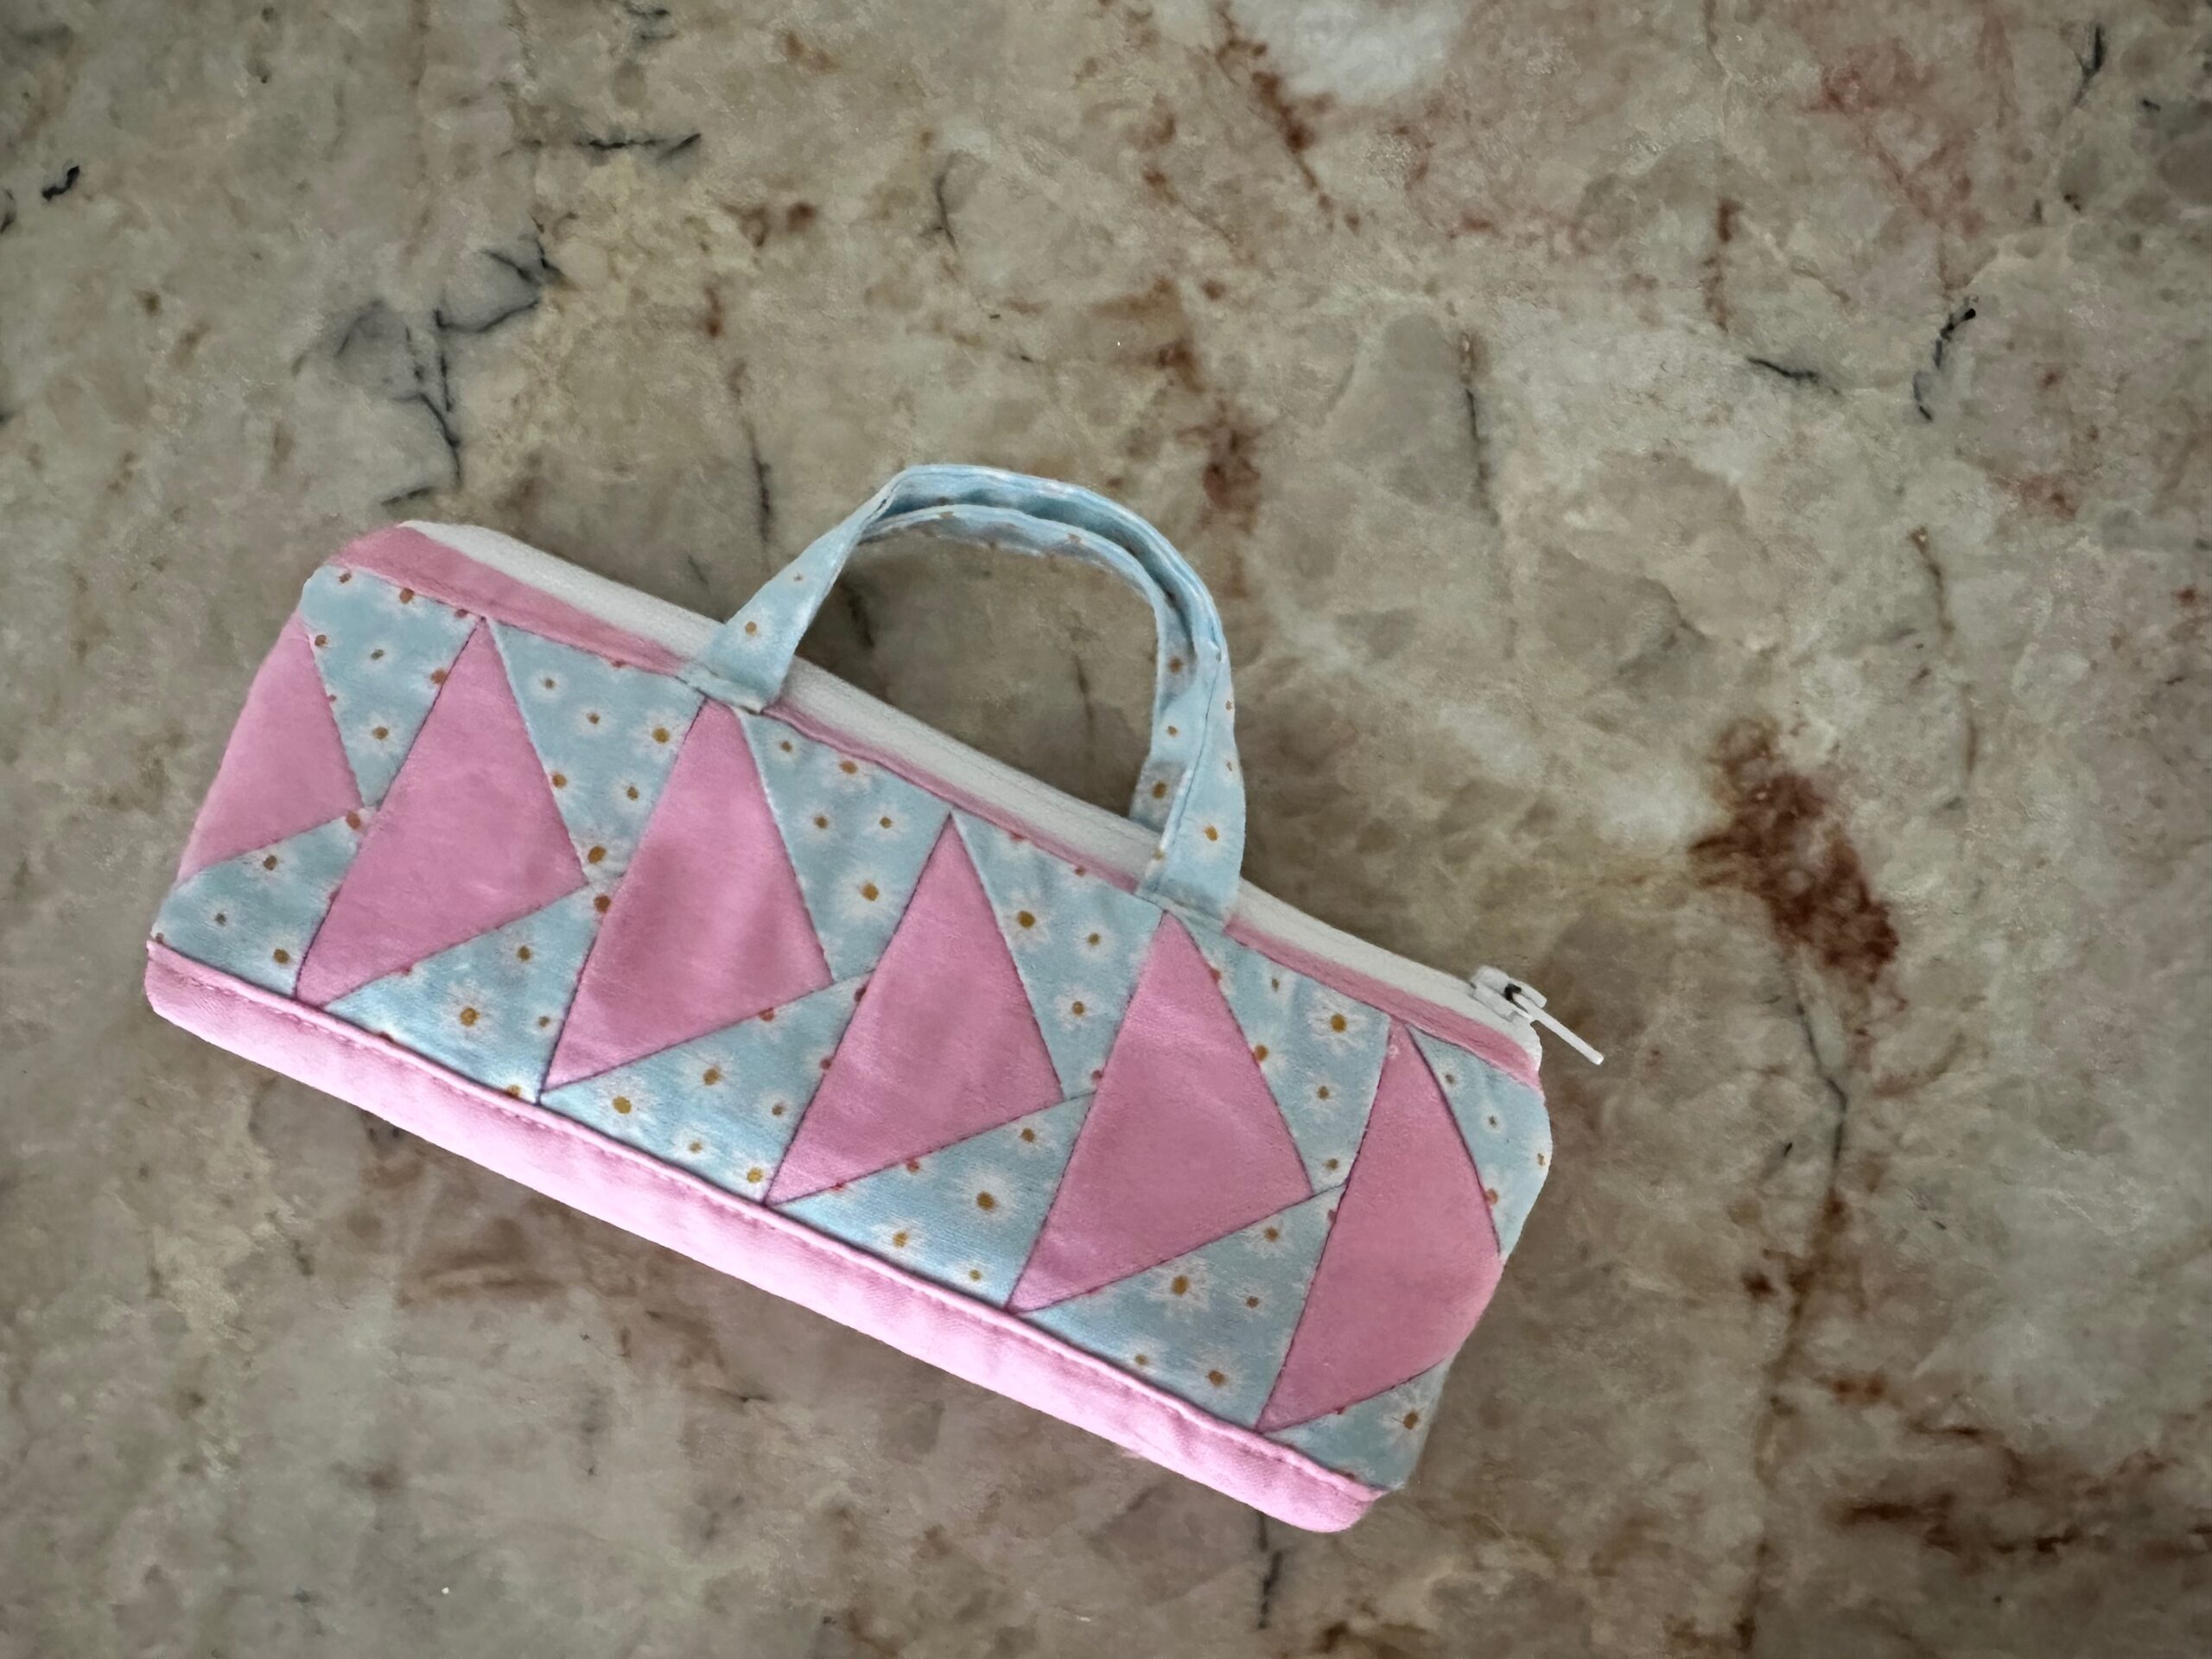
Note: For the featured pouch, extra quilting was added to the lower edge of the middle Flying Geese panel for extra security and embellishment.
