Holiday Hand Embroidery Napkin Set
Designed by Heidi Pridemore
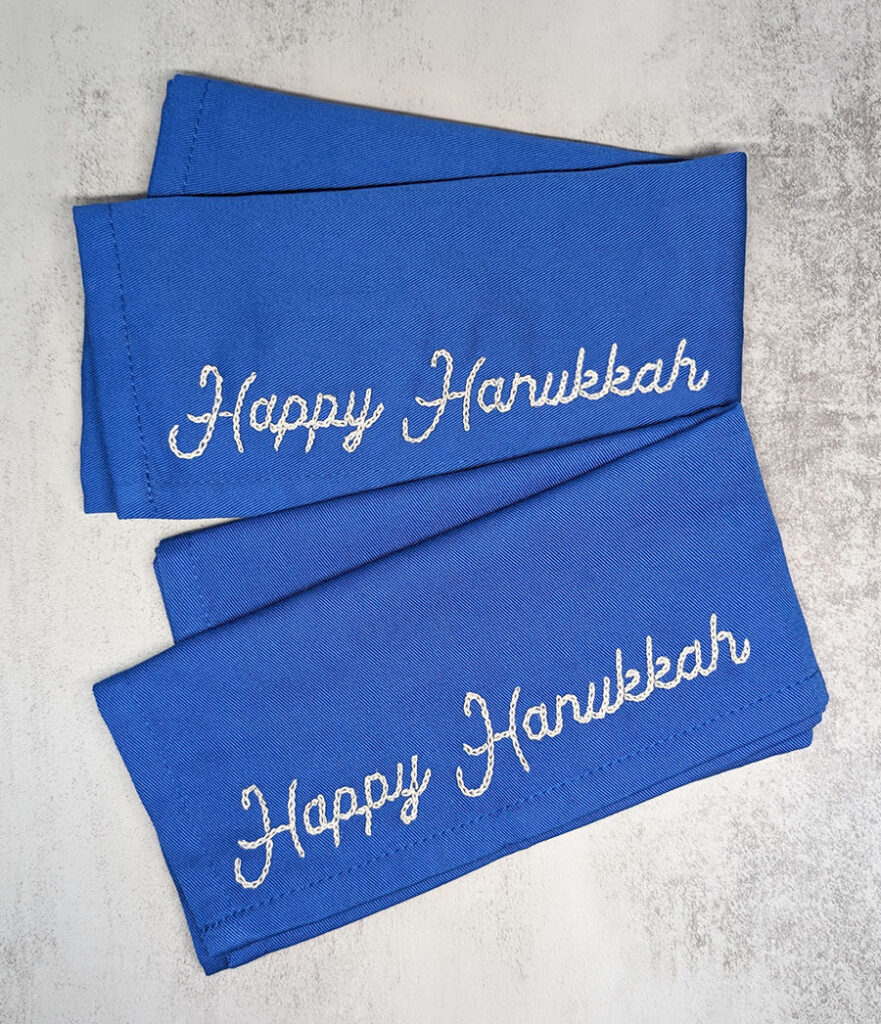
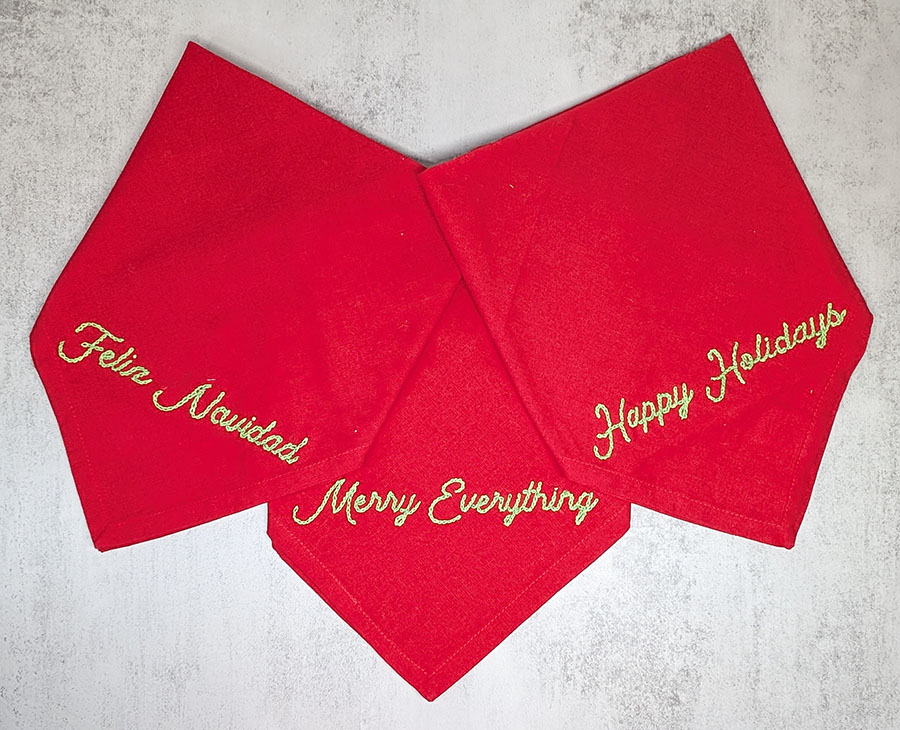
Holiday Hand Embroidery Napkins make a great hostess gift for the holidays. It’s also a nice touch to have newly embroidered napkins on your festive holiday table! Add a personal touch to your table setting or create a memorable handmade gift with these beautiful hand embroidered napkins that feature a classic chain stitch. If you’re new to hand embroidery, this tutorial will help you transform simple napkins into charming, custom pieces that look expensive and upscale. And if you’re a handwork veteran, you’ll love the simple design transfer method that allows you to use any font of your choice to mimic your décor style. These holiday-themed napkins are perfect for elevating any gathering, and they make thoughtful, unique gifts that your loved ones will cherish for years to come.
HOLIDAY HAND EMBROIDERY NAPKIN SET SUPPLIES
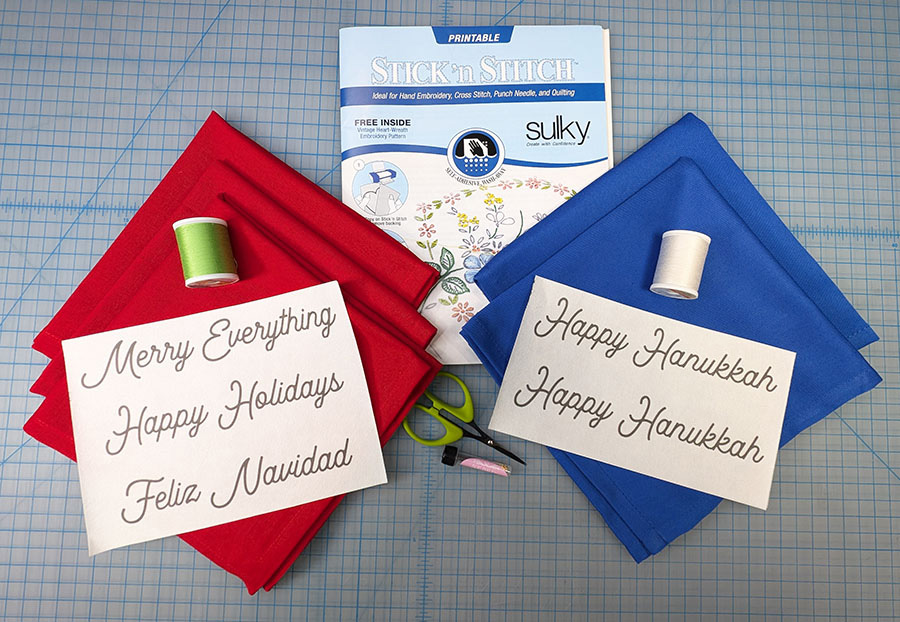
- 18” x 18” Fabric Napkins in the color of your choice
- Sulky Stick ‘n Stitch™ Stabilizer
- 12 wt. Cotton Petites™ Thread
- Size 24 Tapestry Needle
- Embroidery Scissors
- 6” Embroidery Hoop
EMBROIDERY PREP
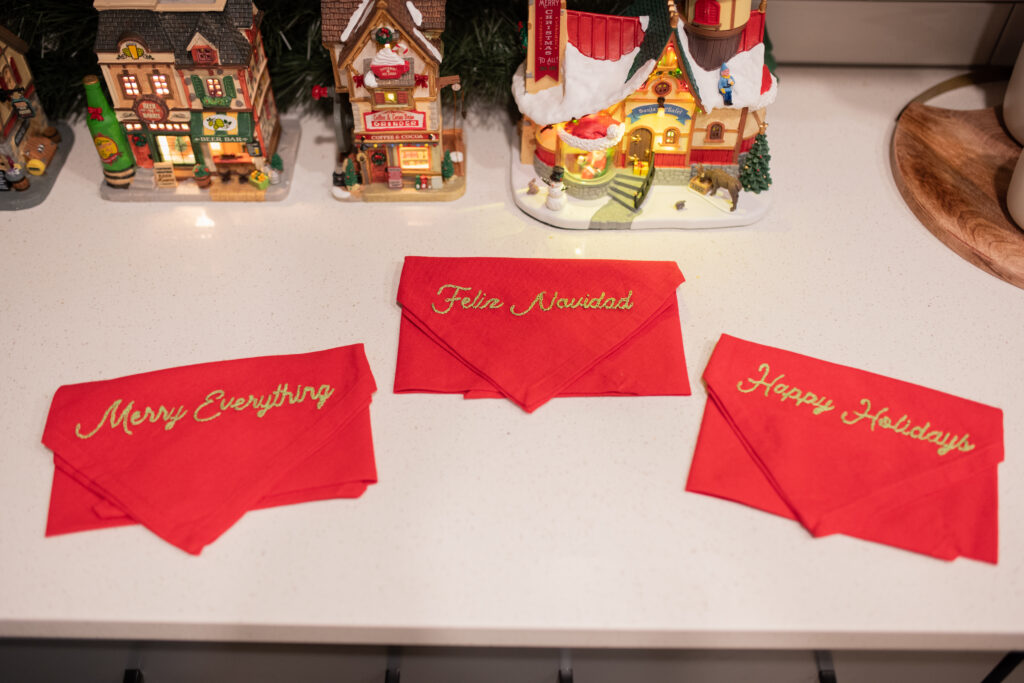
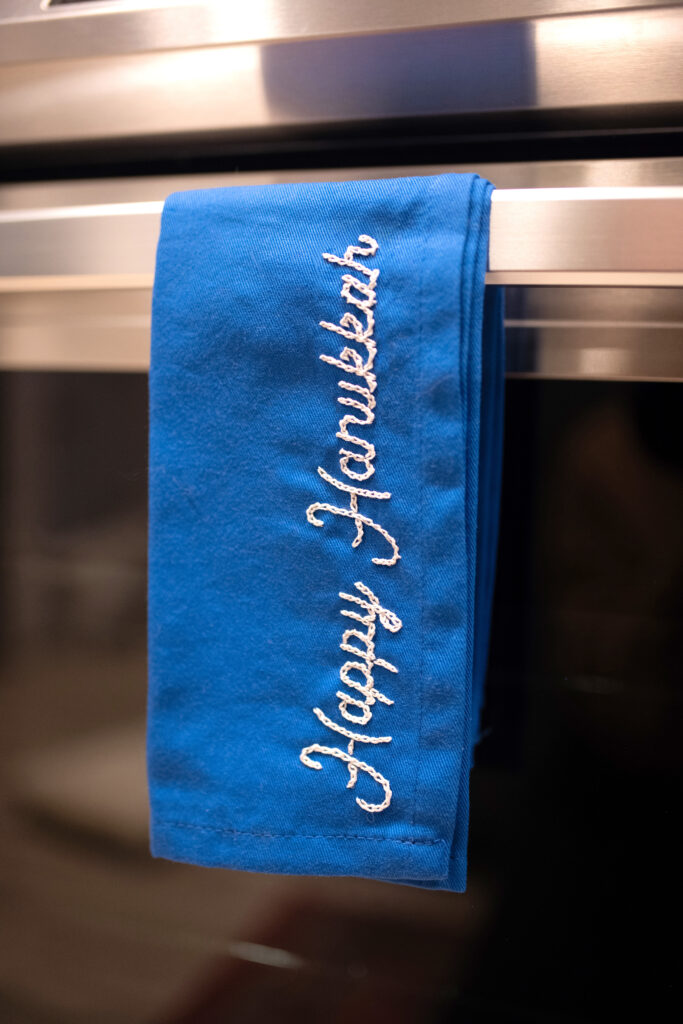
Determine the desired sayings for your napkins. Choose from “Merry Everything,” “Feliz Navidad,” “Happy Holidays,” Happy Hanukkah,” or the saying of your choice. TIP: These napkins work for any holiday or occasion! Open a page (or pages) in a Word processing program and type the saying(s) you’ve chosen to embroider. Play around with different fonts and type sizes until the desired design(s) is achieved.
Print the desired sayings onto Stick ‘n Stitch Stabilizer sheet(s). Be sure to insert the Stabilizer into your printer so the fabric-like side will be printed. And, set the printer for the lowest ink setting, sometimes called “Draft Setting.”
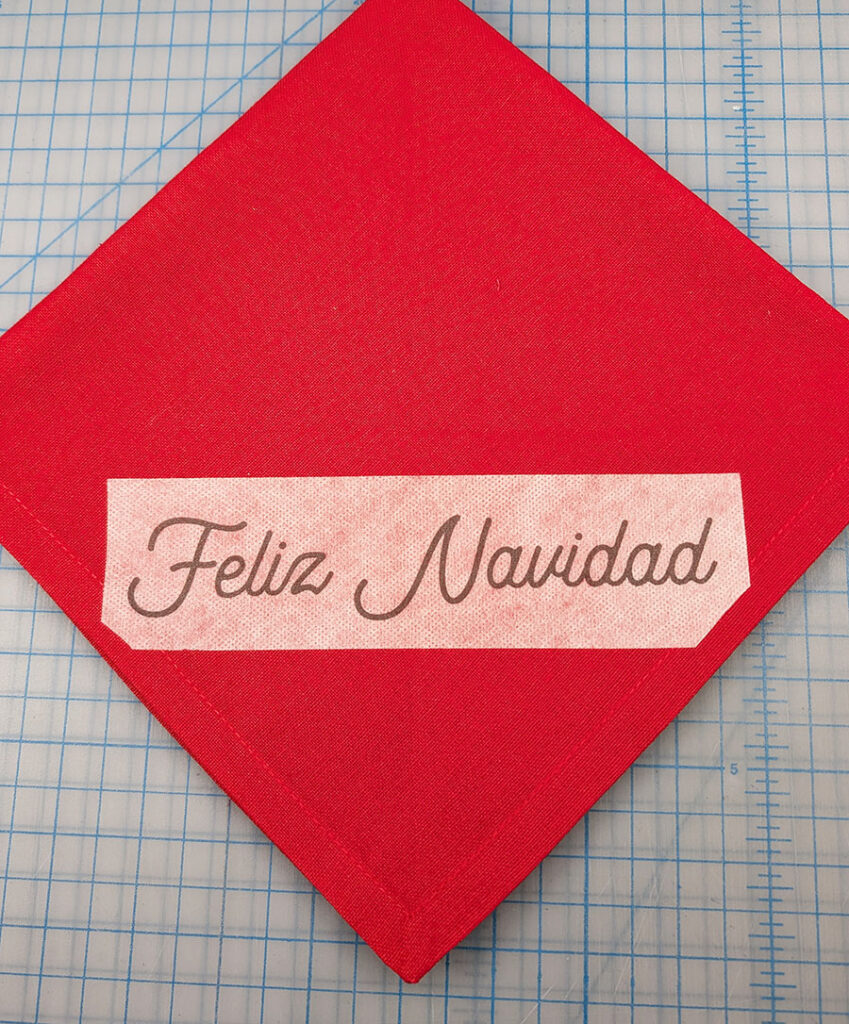
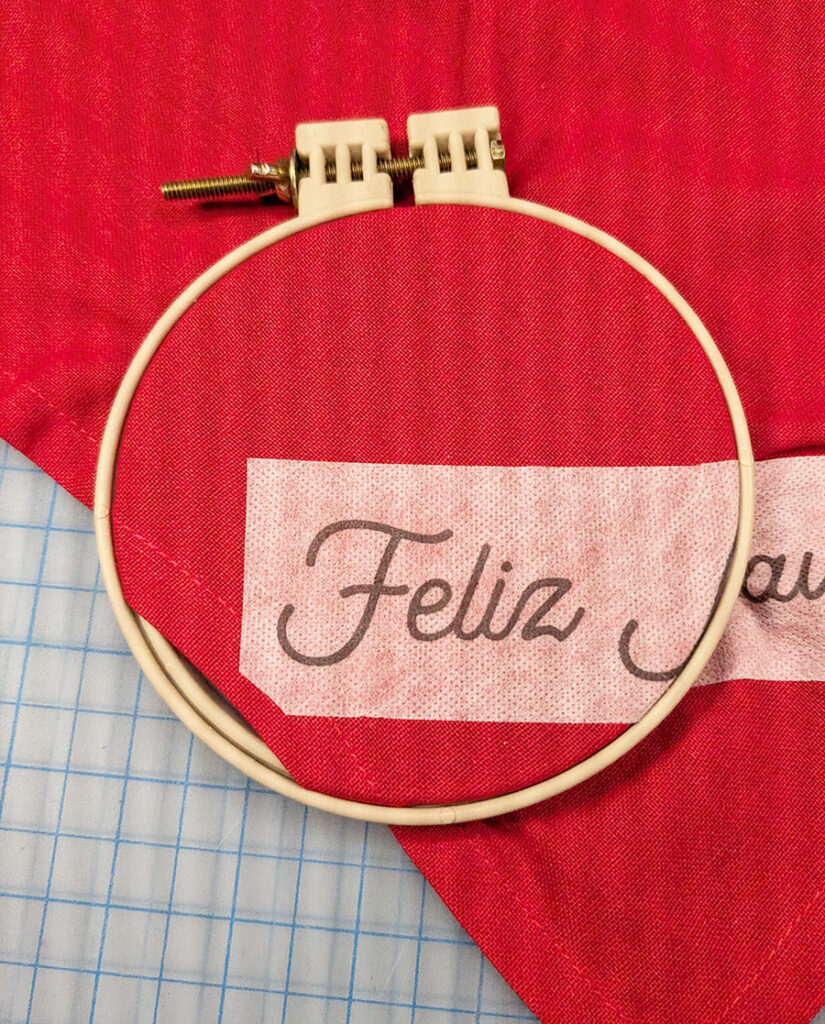
After printing, cut out each saying leaving a bit of a border. Position the sticker transfer right side up onto the right side of the napkin where desired.
Place the napkin with sticker into an embroidery hoop. Make sure the napkin is taut in the hoop but not stretched.
EMBROIDERY
Thread two strands of 12wt. Petites Thread into the embroidery needle and knot the thread ends.
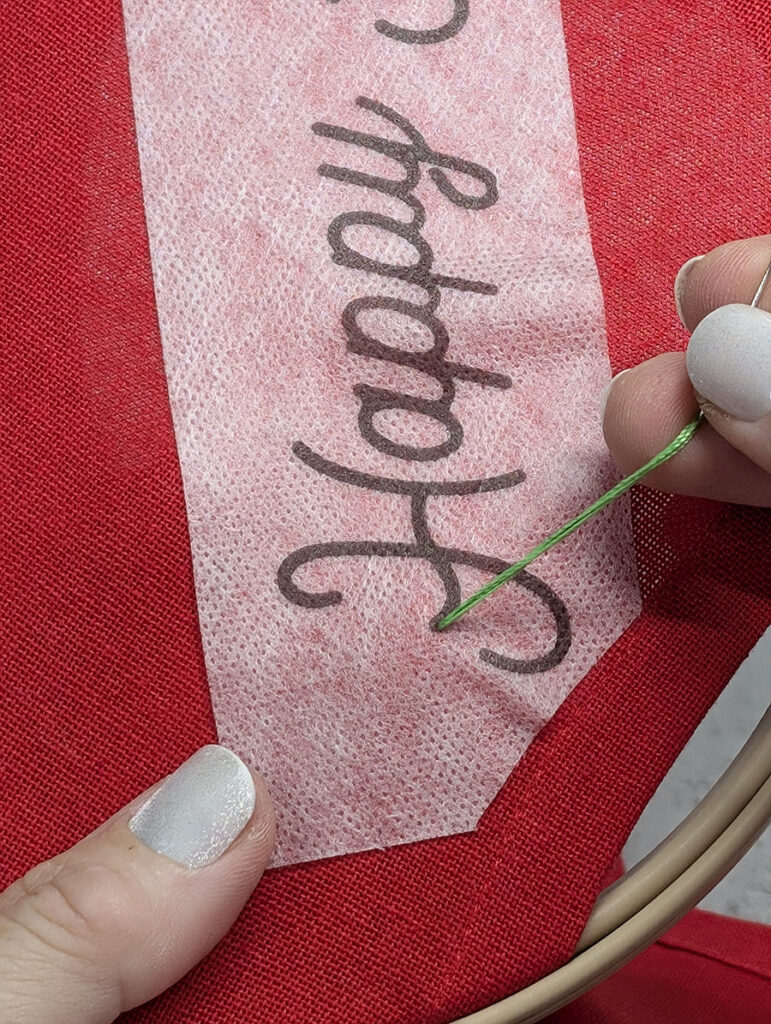
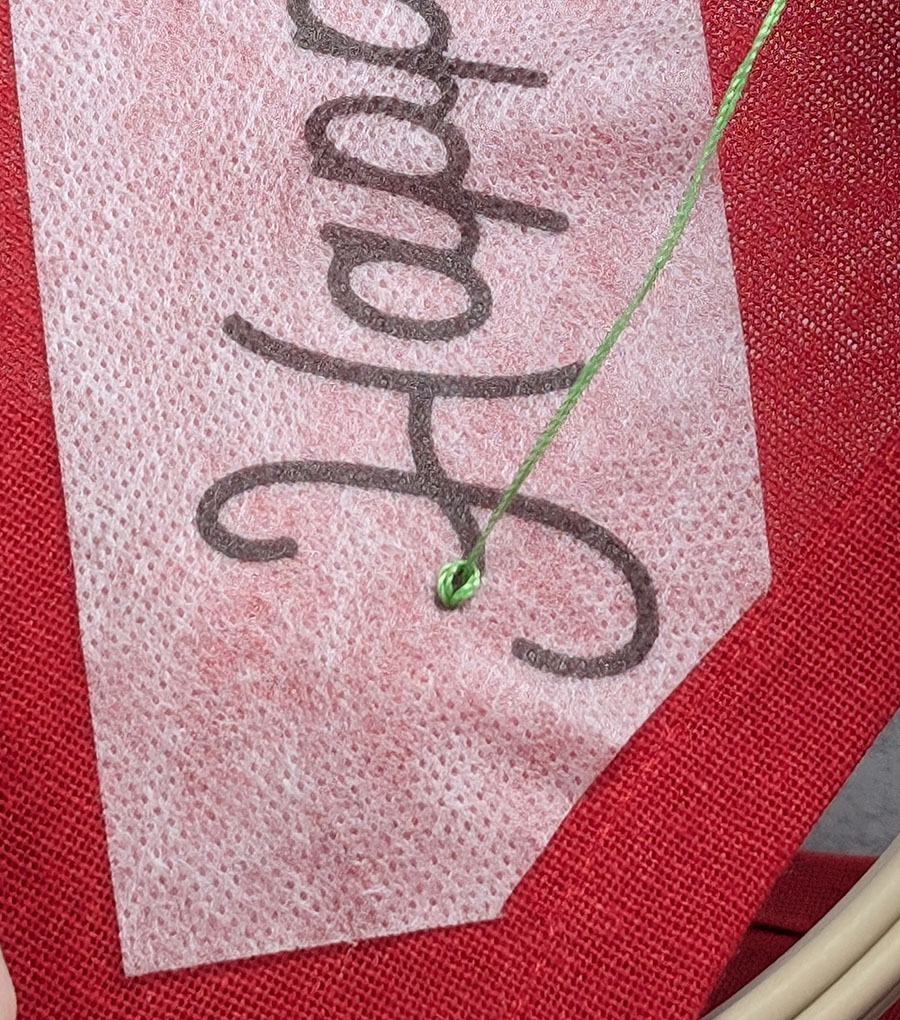
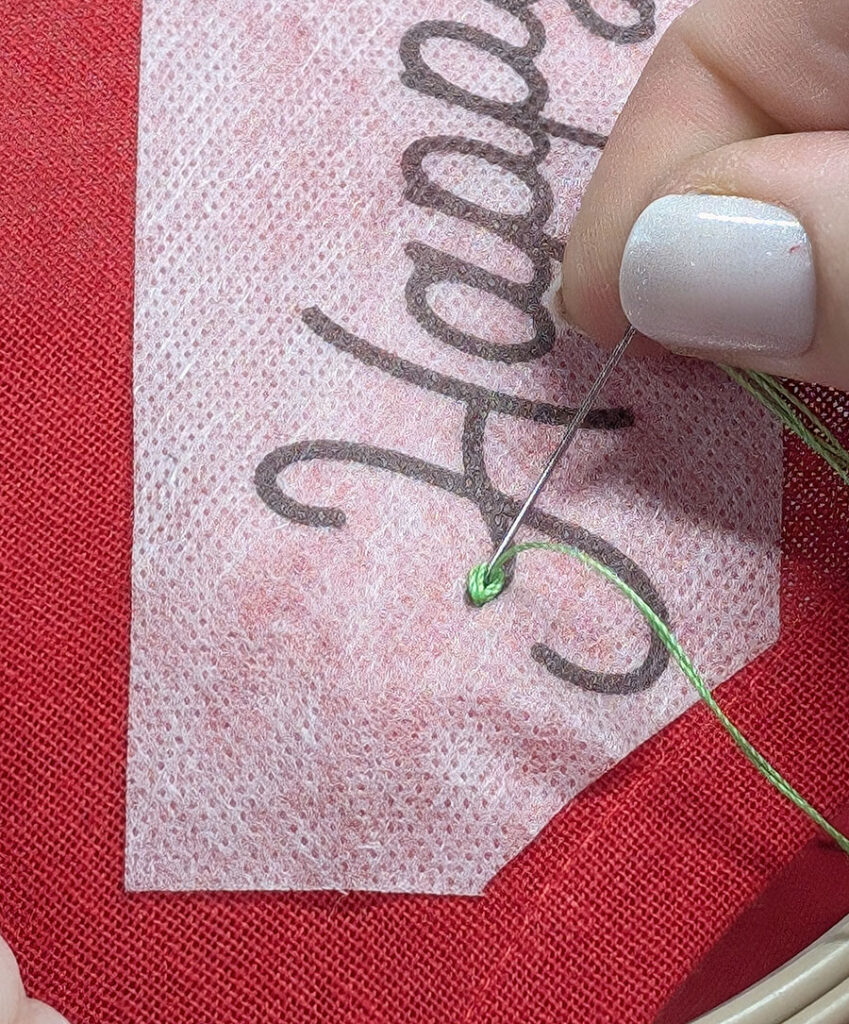
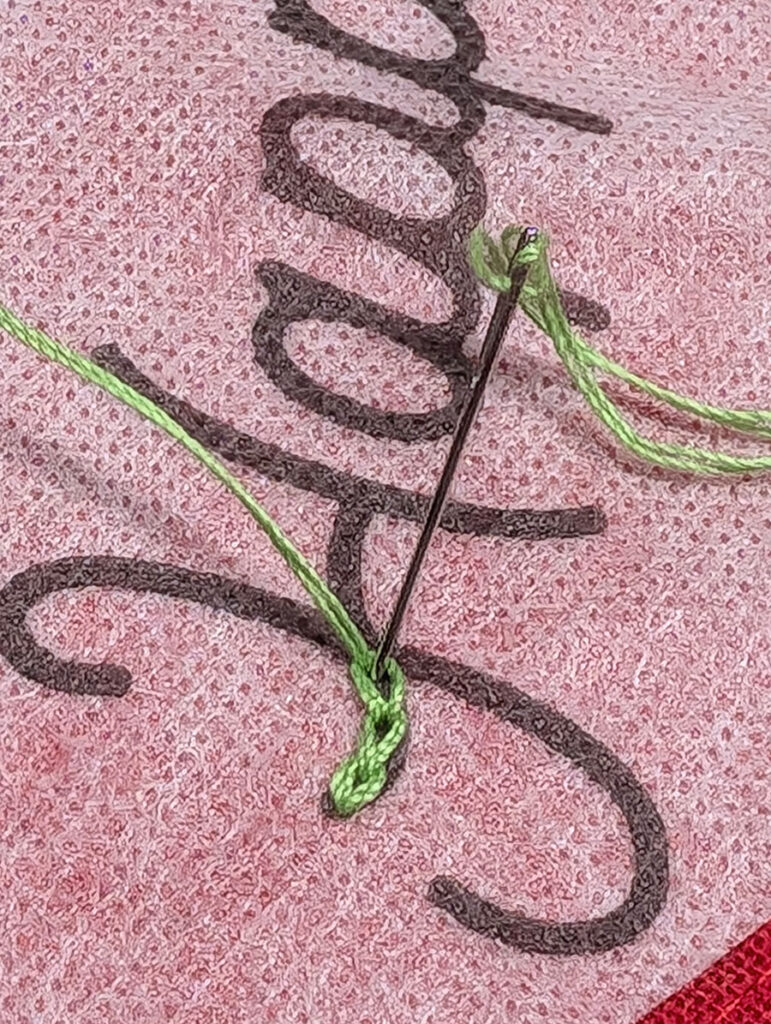
To begin the Chain Stitch, insert the needle up from the back of the napkin at the beginning of the printed line.
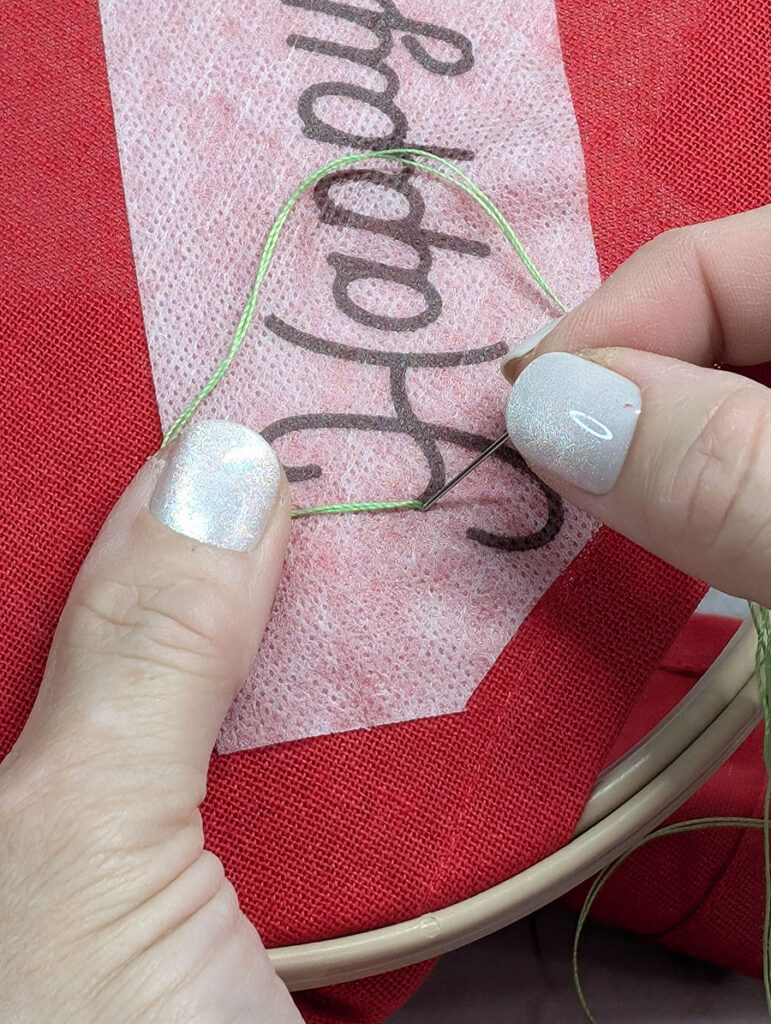
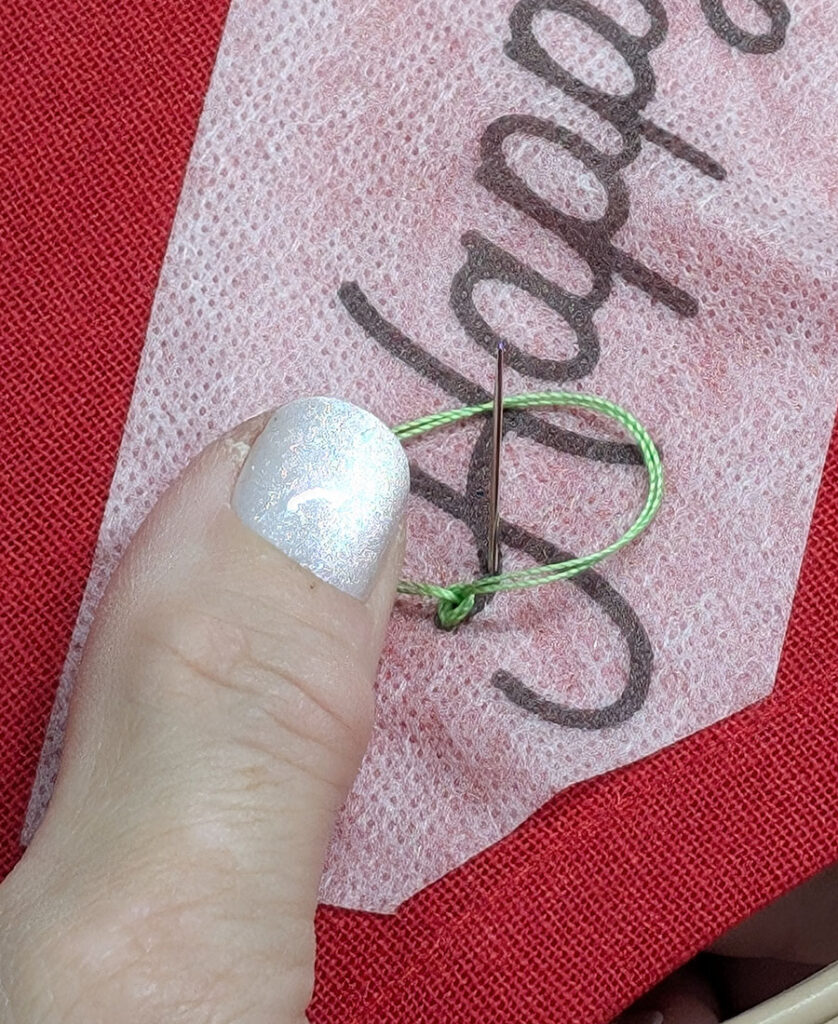
Next, push the needle back down through the same hole from the first step. Do not pull the thread taut, but instead create a small loop and hold it with your thumb.
Push the needle back up to the front of the piece, one stitch length away from the first step. Pull the needle up through the loop formed in the previous step.
Pull the stitch taut to create the first chain.
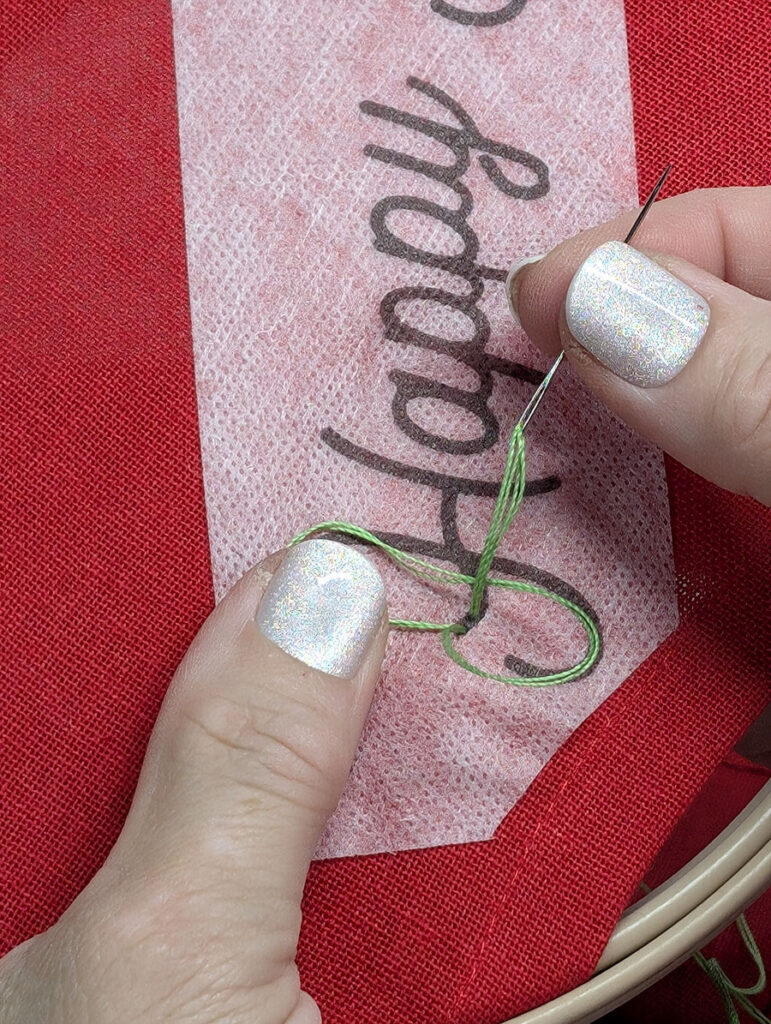
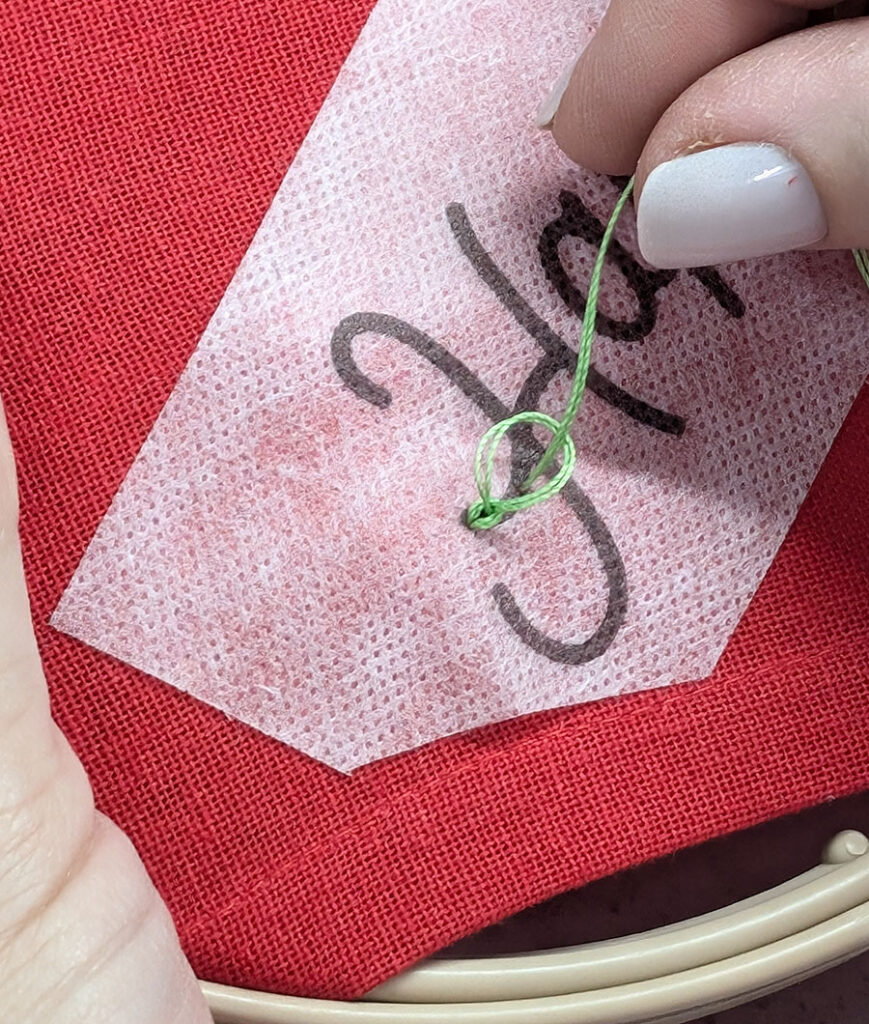
To make the next Chain Stitch, Push the needle to the back through the hole made in the last step. The needle should be inside the first chain stitch formed.
Repeat 6 to form a loop and hold it with your thumb.
Push the needle back up to the front of the piece one stitch length away from the last hole. Pull the needle up through the loop to form the next Chain Stitch.
Continue to form Chain Stitches, following the printed lines.
NAPKIN FINISHING
At the end of the line, push the last stitch on the outside of the last loop to lock the loop in place. Turn over the napkin and knot the thread on the back. Push the thread under a couple of threads to “bury the tail” and trim away the excess thread.
Continue to stitch Chain Stitches along the saying to complete the hand embroidery.
After embroidery is complete, rinse away the Stick ‘n Stitch under warm, running water. Make sure to rinse the stabilizer so it falls off the napkin, rather than submerging the napkin in a bowl of water. This ensures the product runs off the fabric, rather than pooling over the top of the embroidery.
Then, let the napkin dry flat on an absorbent towel.
Gift or display the finished holiday hand embroidery napkins, ready to enhance any table setting or bring a smile to someone special. Whether you’re gearing up for the holidays or planning a gift, these embroidered napkins are sure to add a cozy, homemade charm that everyone will appreciate.

