I HEART YOU QUILT PATTERN
designed by Ellen March for Sulky of America
Featuring Spoonflower fabrics
Quilting done by Crystal Zagnoli of the Quilted Cricket
Quilt dimensions: 46”x50½”
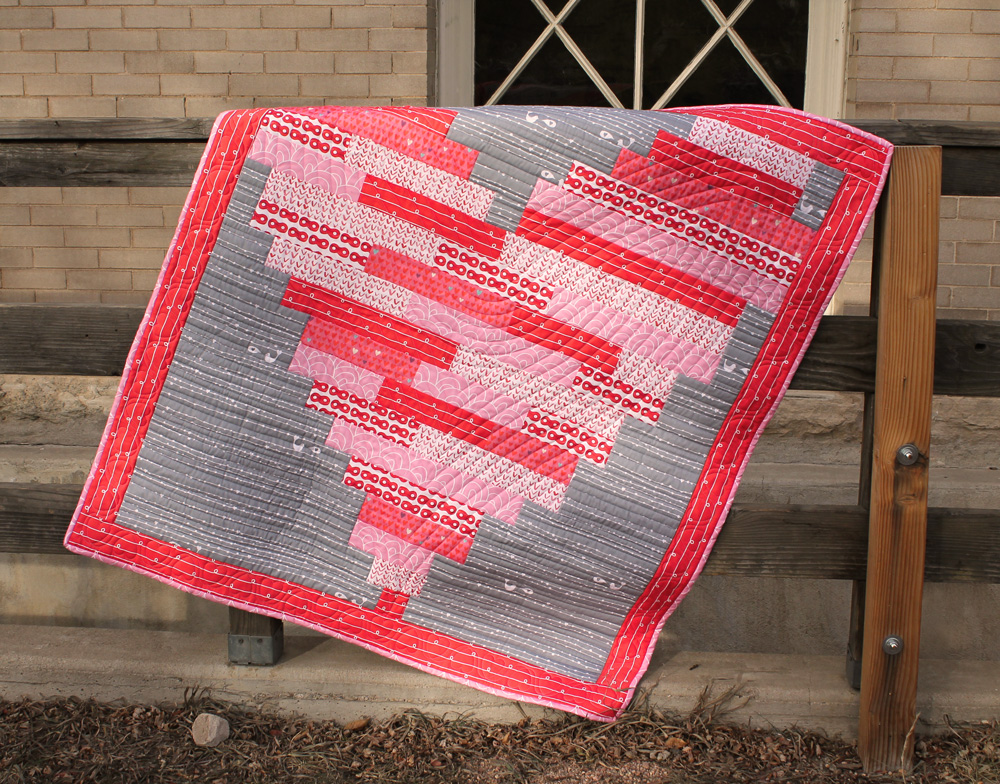
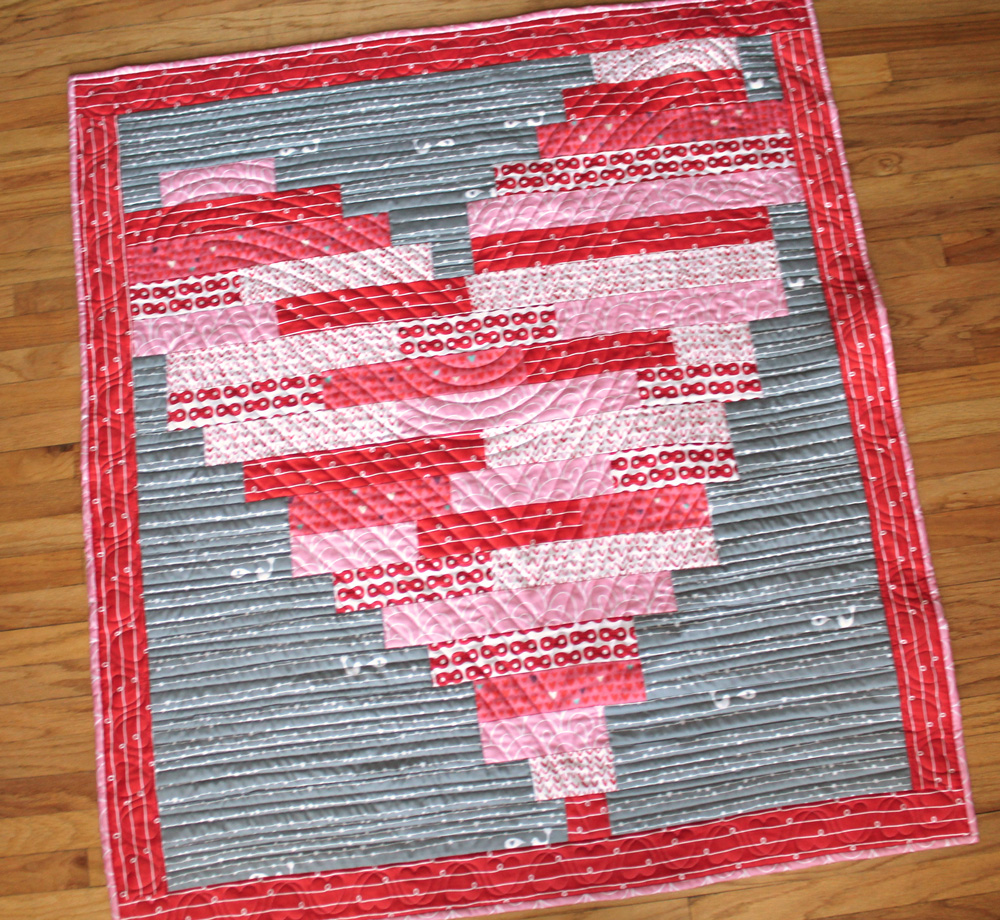
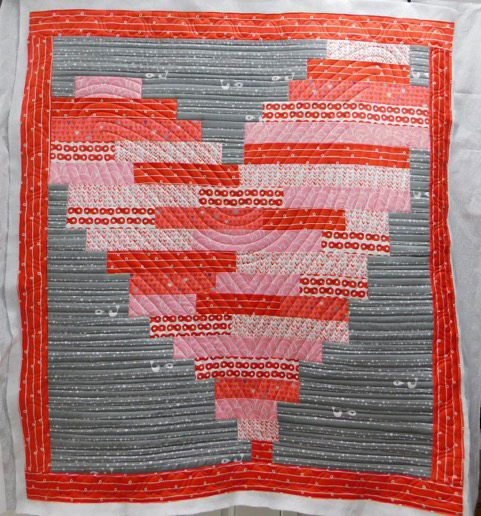
Tell someone “I Heart You” with this quilt pattern that features strip-piecing and three different quilting methods. This I Heart You Quilt is perfect for your Valentine’s Day decor but also works year-round!
Grab the printable pattern HERE.
I HEART YOU QUILT SUPPLY LIST
- Quilt Diagram
- 50-wt. Cotton + Steel thread by Sulky (piecing)
- Organ® size 70/10 or 75/11 Needles (piecing) & 90/14 Quilting Needles (quilting)
- Sulky 30 wt. Cotton Thread (quilting)
- KK 2000 Temporary Spray Adhesive
- Fabric—assorted coordinating 45”-wide quilting cotton or 54”-wide organic cotton sateen (refer to the Quilt Diagram for fabric numbers & placement)
- 3 yards for backing
- ¾ yard for Heart #1 print
- ¼ yard for Heart #2 print
- ¼ yard or 1 fat quarter of Heart #3 print
- ¼ yard for Heart #4 print
- ¼ yard or 1 fat quarter for Heart #5 print
- 1 yard of gray background print (#6)
- ½ yard for border
- Low-loft cotton batting
I HEART YOU QUILT – FABRIC CUTTING
From the backing fabric, cut 2 panels measuring 28″ x 50″.
Pink (1) = 3/4 yd.
6 strips 2.5″ x WOF for binding
1 strip 20.75″ x 2.75″
1 strip 16.25″ x 2.75″
2 strips 14″ x 2.75″
2 strips 9.5″ x 2.75″
2 strips 7.5″ x 2.75″
1 strip 7.25″ x 2.75″
Red (2) = 1/4 yd.
1 strip 18″ x 2.75″
1 strip 14″ x 2.75″
1 strip 13.5″ x 2.75″
1 strip 11.75″ x 2.75″
1 strip 11.5″ x 2.75″
1 strip 9.5″ x 2.75″
1 strip 9″ x 2.75″
1 square 2.75″ x 2.75″
Purple/pink (3) = 1/4 yd or 1 fat quarter
2 strips 16.25″ x 2.75″
1 strip 11.75″ x 2.75″
2 strips 9.5″ x 2.75″
1 strip 7.5″ x 2.75″
Dark pink (4) = 1/4 yd or 1 fat quarter
1 strip 18.5″ x 2.75″
2 strips 14″ x 2.75″
1 strip 11.75″ x 2.75″
2 strips 11.5″ x 2.75″
1 strip 9.5″ x 2.75″
2 strips 5″ x 2.75″
Dark red (5) = 1/4 yd or 1 fat quarter
1 strip 18.5″ x 2.75″
1 strip 11.75″ x 2.75″
3 strips 9.5″ x 2.75″
2 strips 7.5″ x 2.75″
1 strip 7″ x 2.75″
Gray background print (6) = 1 yard
1 strip 29.75″ x 2.75″
1 strip 27.5″ x 2.75″
1 strip 21.625″ x 2.75
1 strip 21″ x 2.75″
2 strips 18.5″ x 2.75″
1 strip 16.625″ x 2.75″
2 strips 16.25″ x 2.75″
2 strips 16″ x 2.75″
3 strips 14″ x 2.75″
2 strips 11.75″ x 2.75″
5 strips 9.5″ x 2.75″
3 strips 7.5″ x 2.75″
4 strips 5″ x 2.75″
9 squares 2.75″ x 2.75″
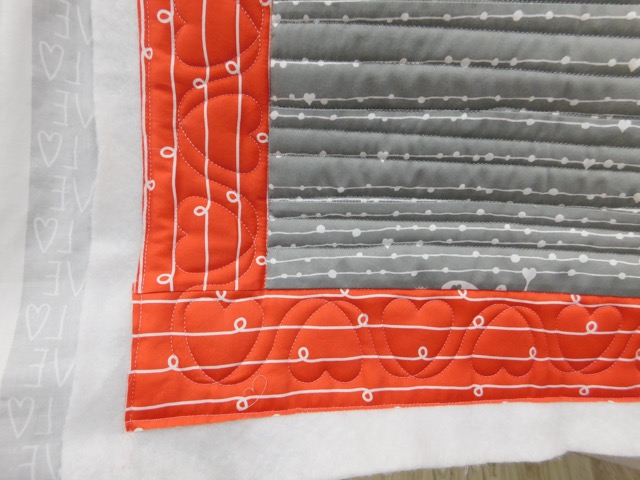
Border print = 1/2 yd.
2 side borders 41″ x 3.25″
2 top/bottom borders 46.5″ x 3.25″
Batting = 50”x55” rectangle
QUILT TOP PIECING
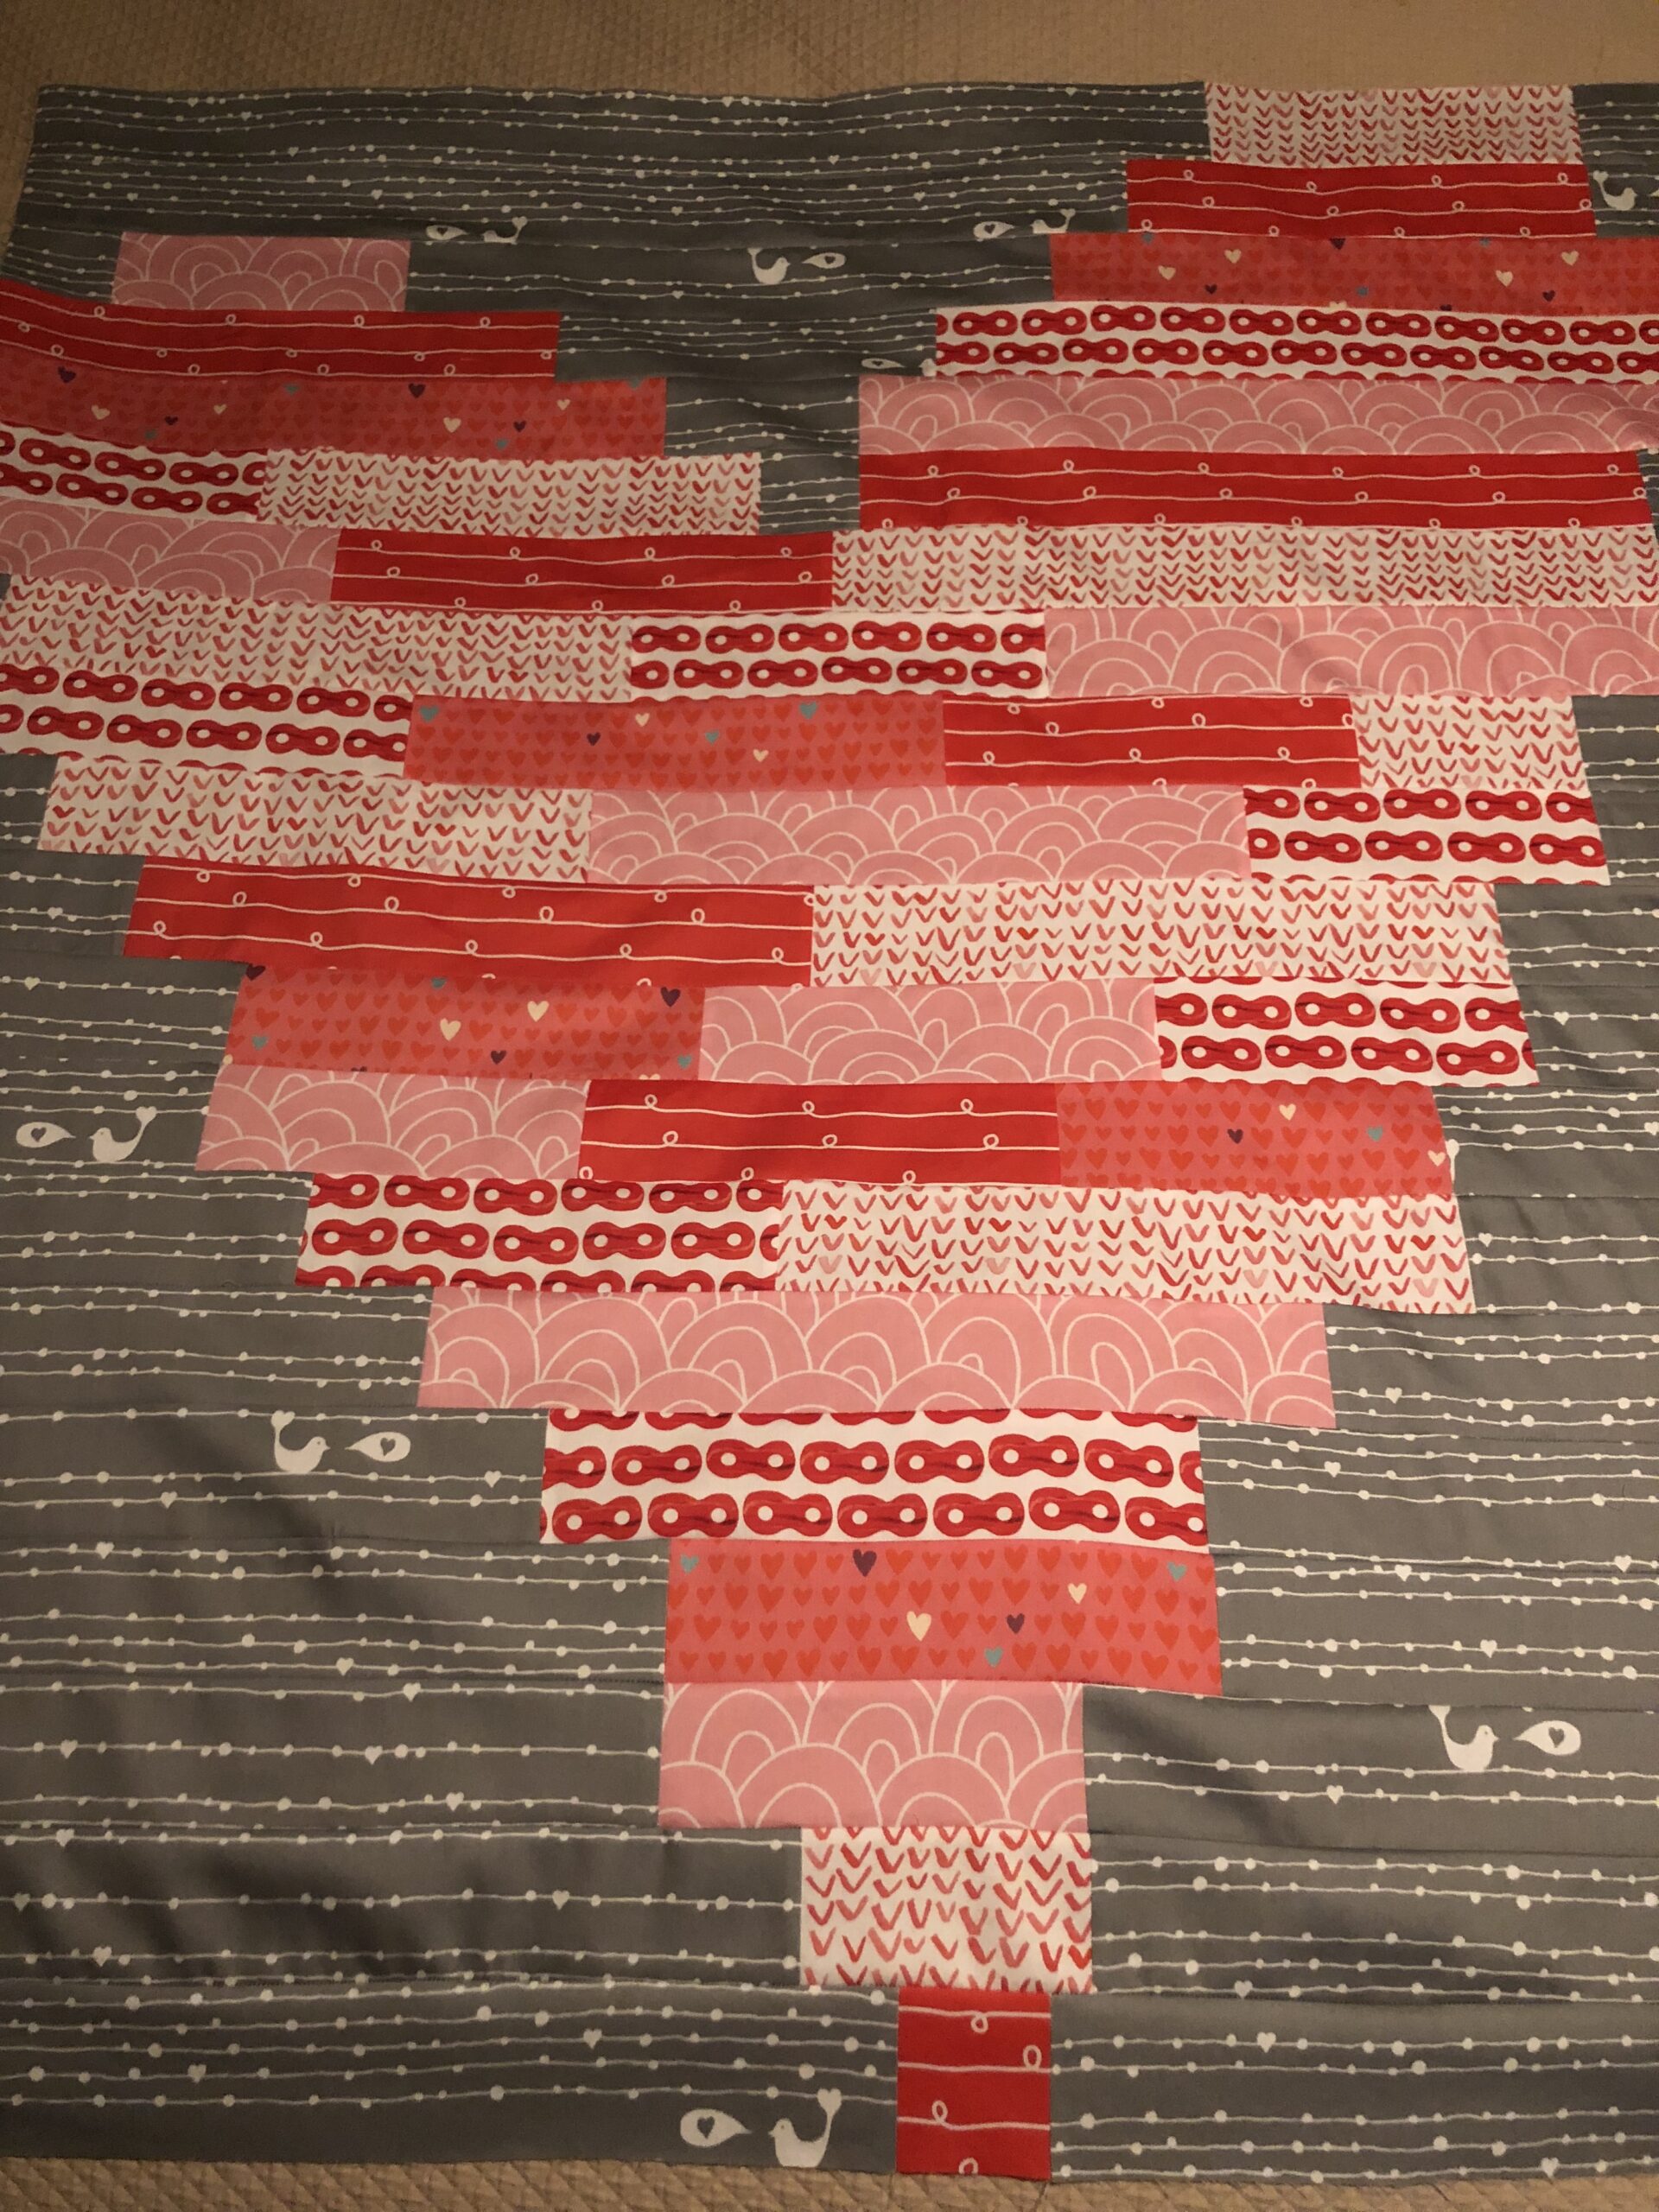
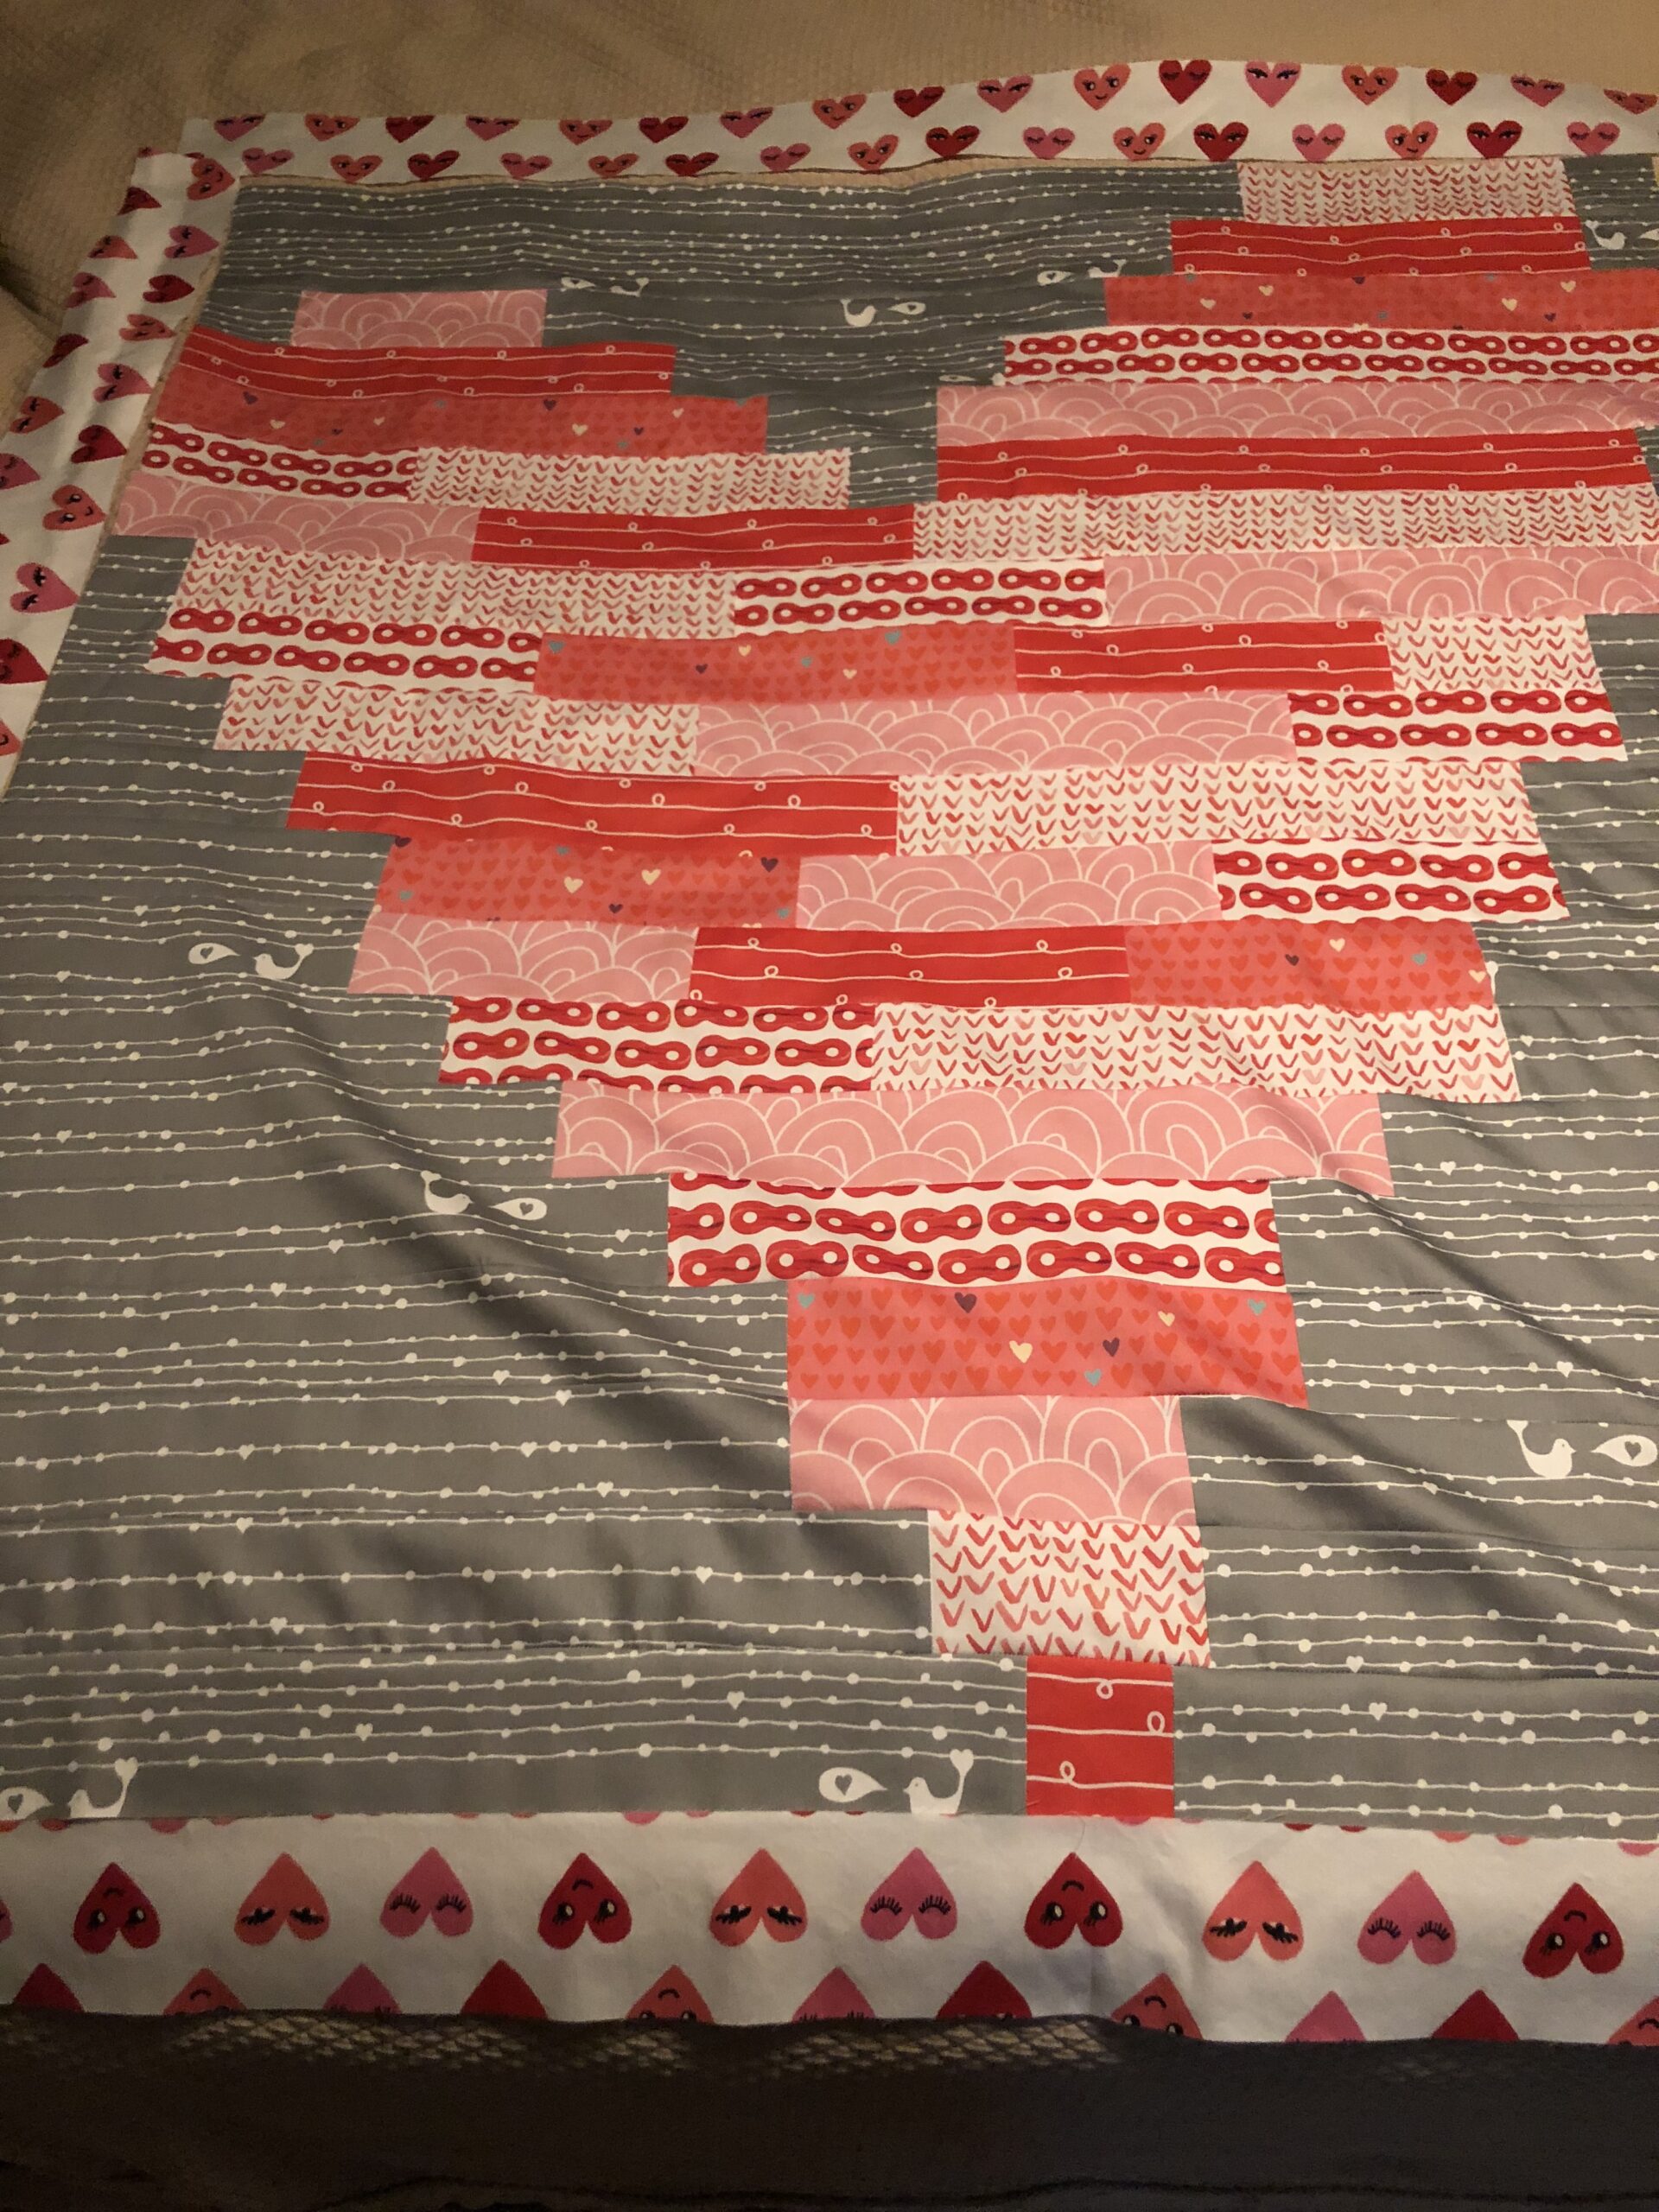
Cut out each fabric and place on a quilt board or flat work surface in the order indicated by the quilt diagram.
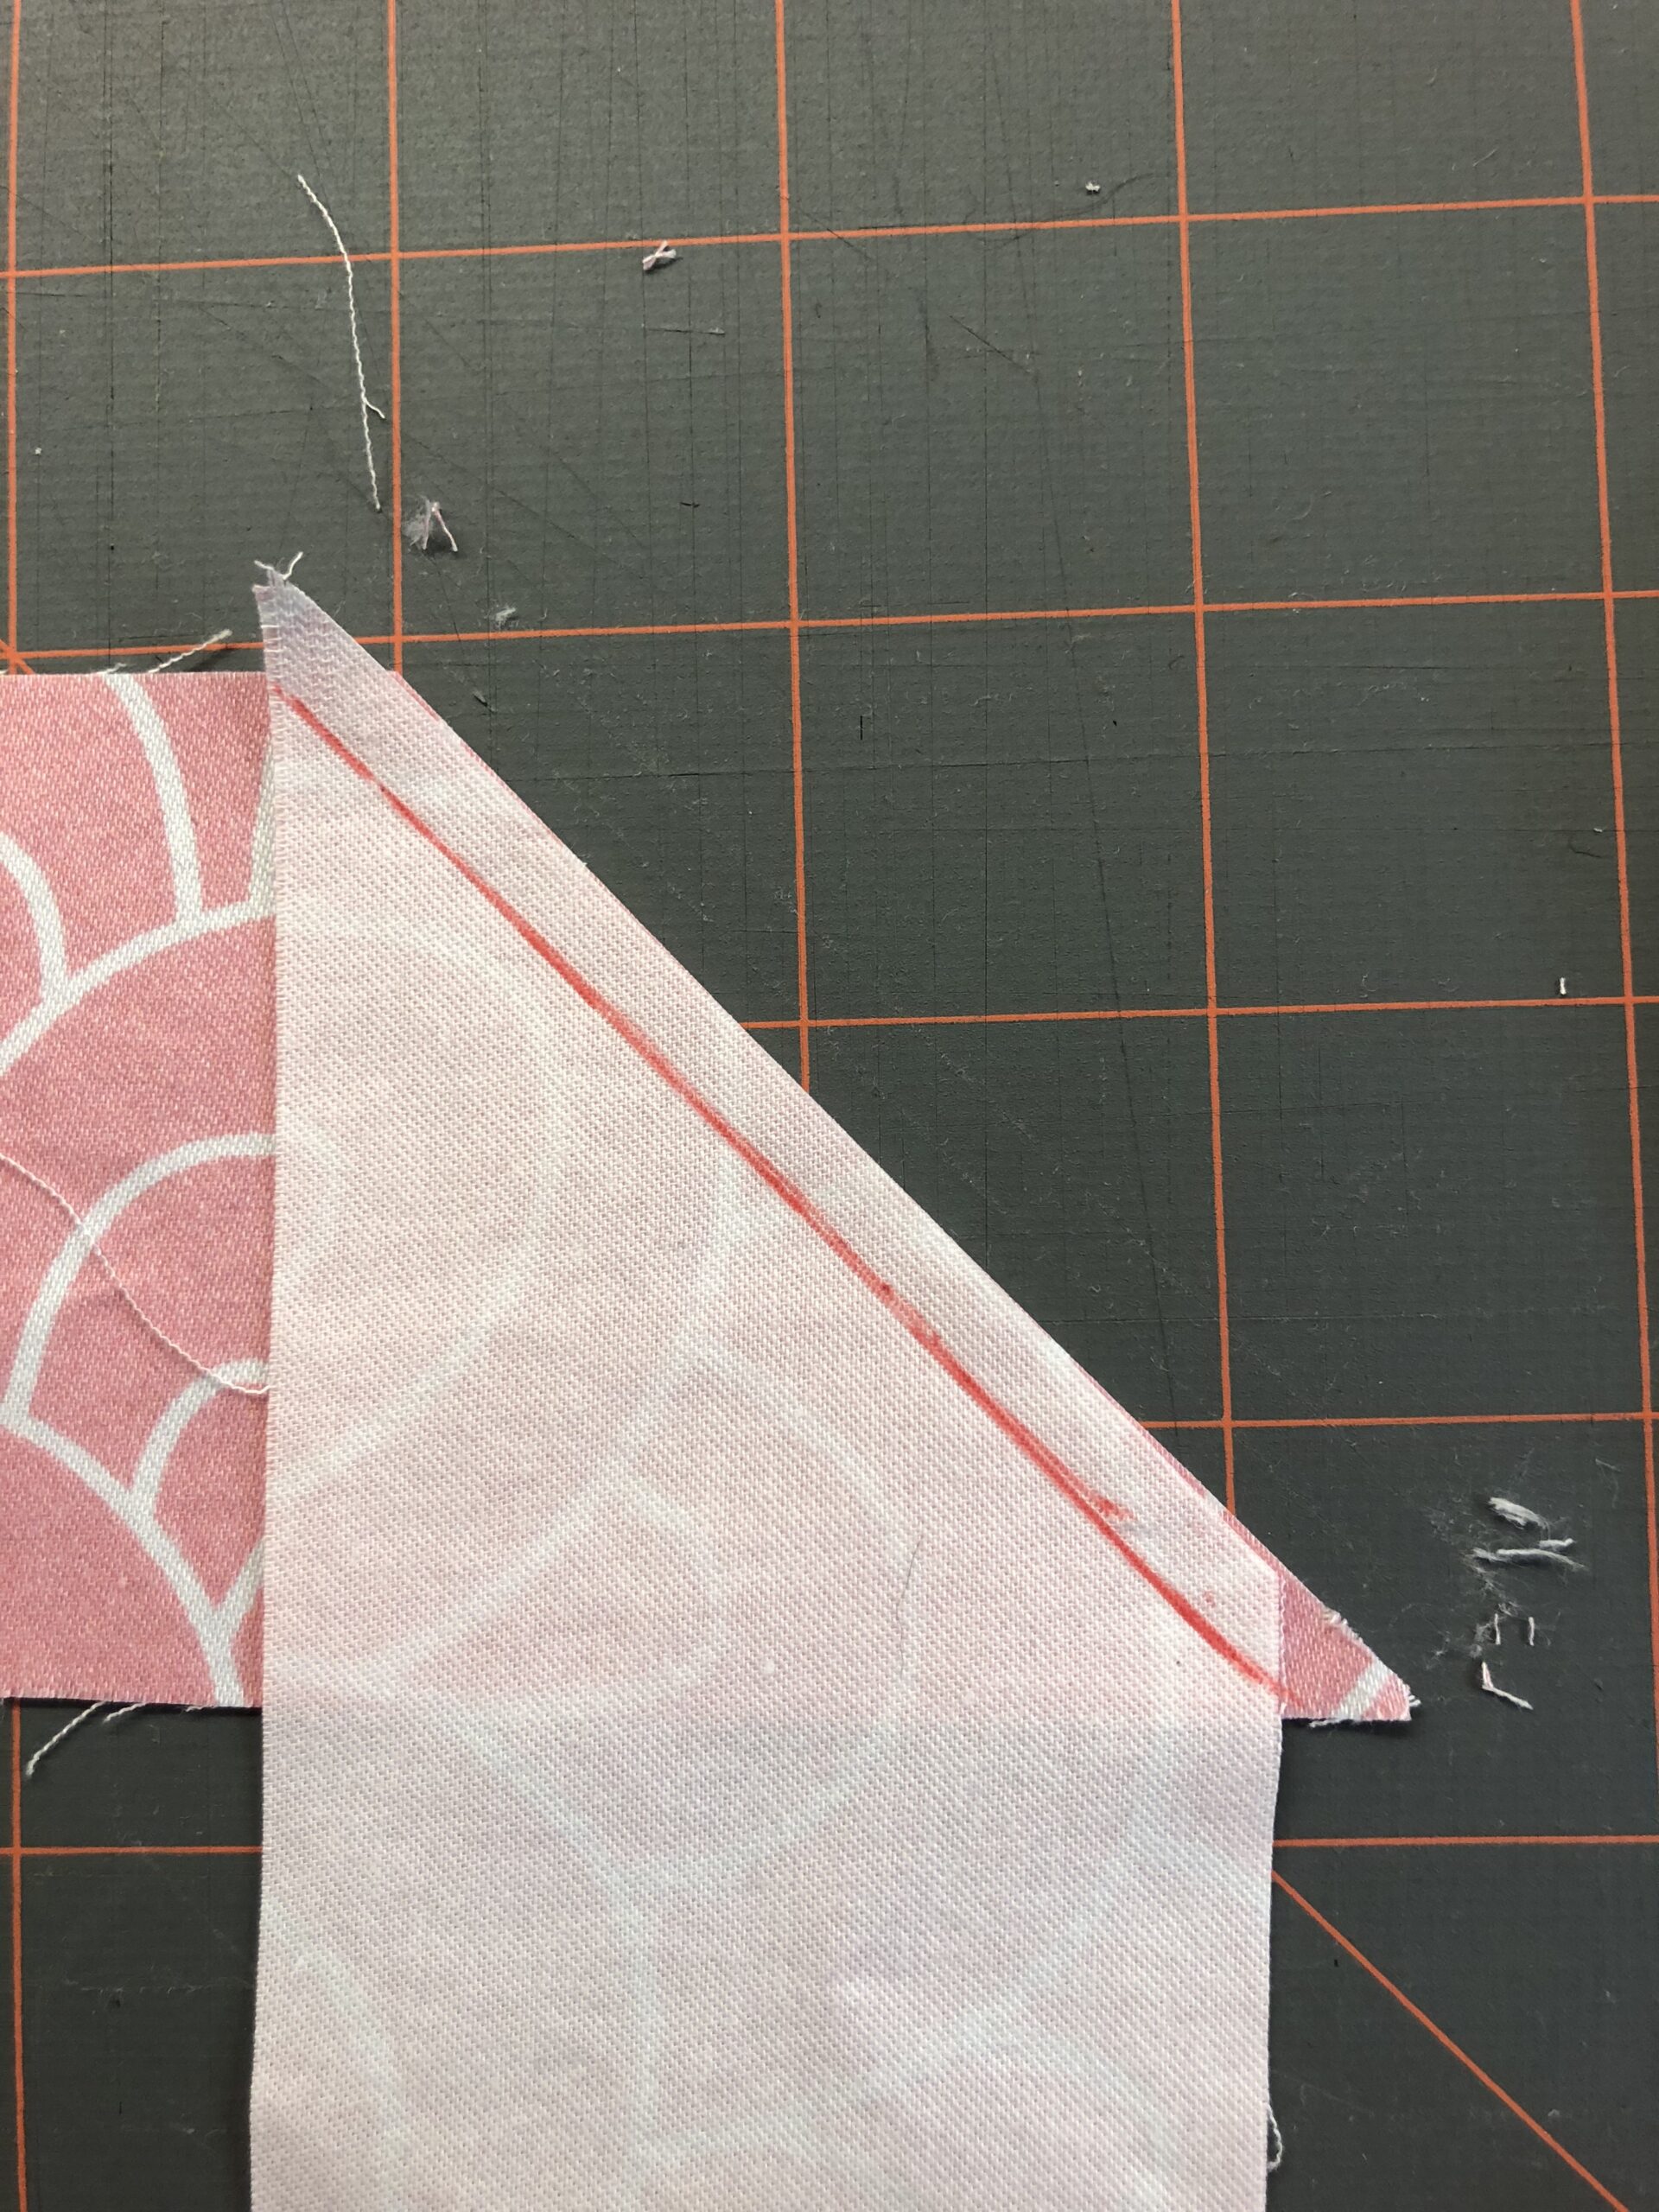
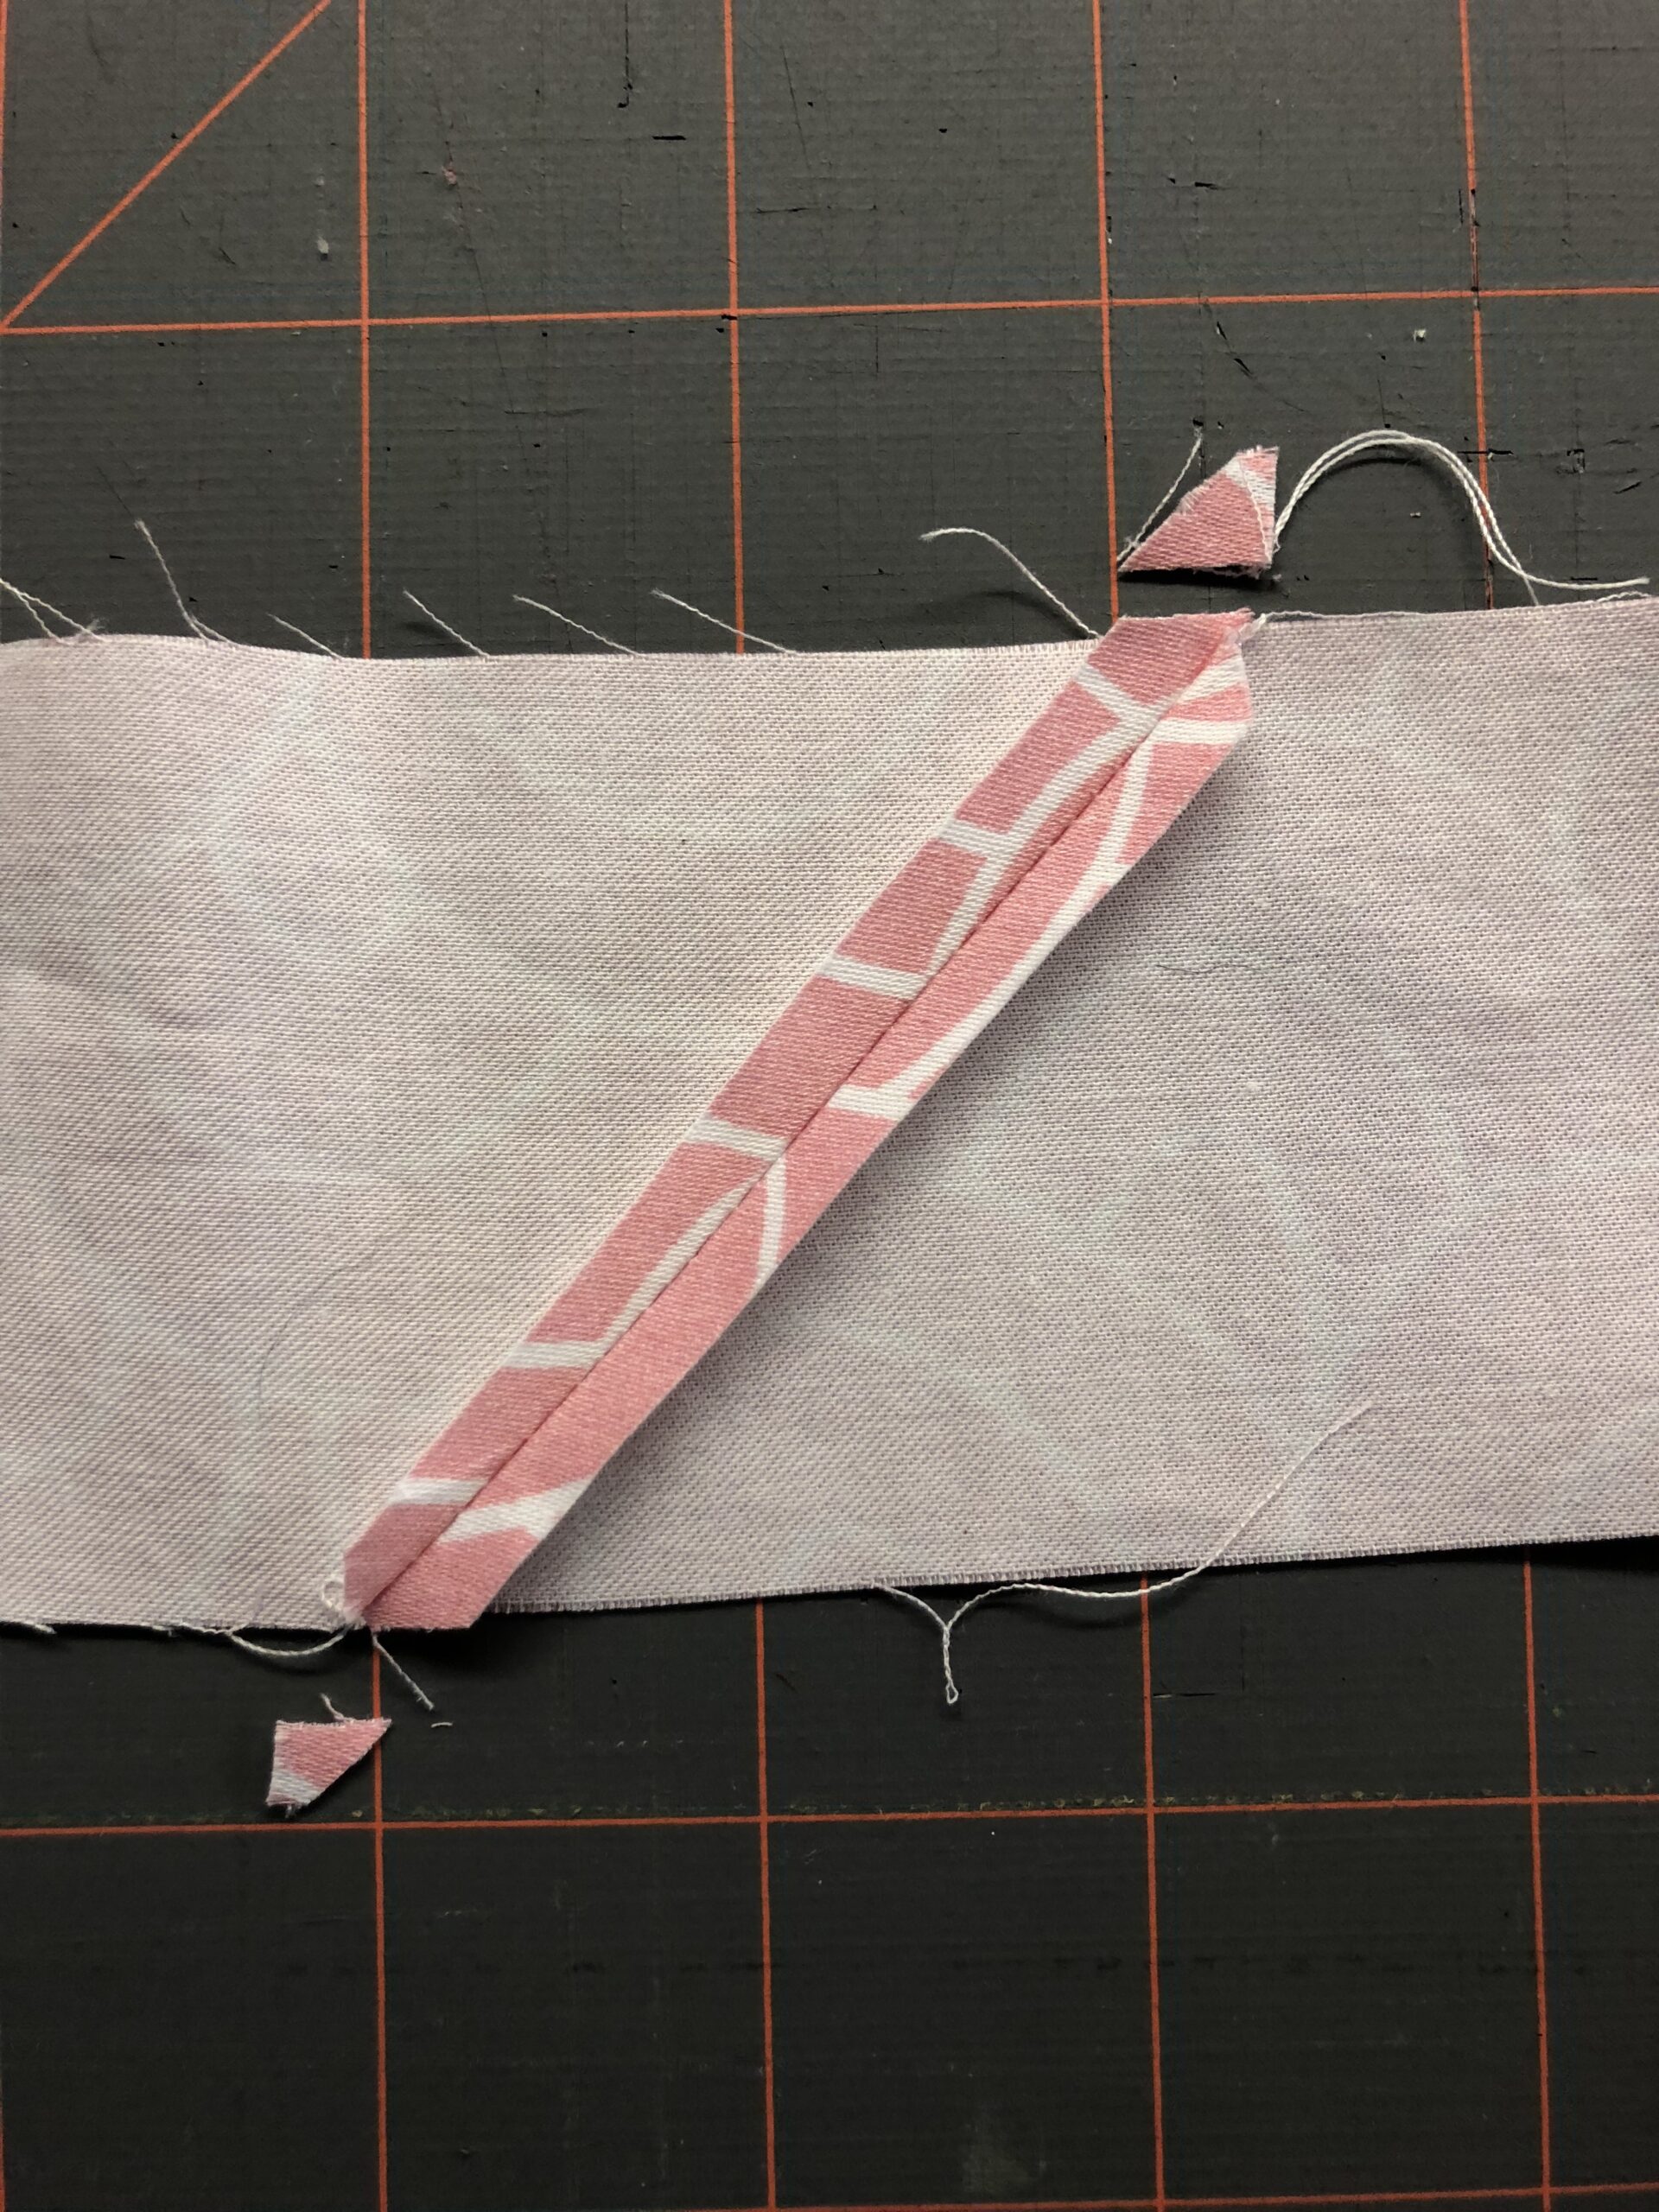
Beginning with row 1, piece each strip end to end with right sides together; press the seam toward the darker fabric.
When all rows are pieced, stitch the long edges with right sides together; press the seams downward.
Stitch the side borders to the quilt-top side edges with right sides together and edges aligned. Press the seams toward the quilt top.
Stitch the upper and lower borders to the quilt-top upper and lower edges, respectively. Press the seams toward the quilt top.
Then, piece the backing rectangles and trim to 55”x60”. Take into account the fabric direction and if matching prints is desired prior to cutting and piecing to ensure the desired result.
Next, place the backing wrong side up on a flat work surface. Center the batting rectangle on the backing, using KK 2000 to secure. Center the quilt top over the batting, using KK 2000 to secure. Additionally, pin-baste the quilt sandwich in several areas to ensure no shifting.
QUILTING
Quilt as desired. The featured quilt was echo quilted inside the heart shape to emphasize and define the shape. The gray bordering fabric was quilted in the ditch with additional lines within each strip. The border was quilted with a repeating computerized design.
After quilting, trim the quilt to 46”x50 ½”.
I HEART YOU – BINDING
First, piece together the binding strips. Place two fabric strips at a 90 degree angle with right sides together, offsetting the ends to account for a 1/4″ seam allowance, Stitch, and then trim the ends at a 45 degree angle.
Repeat to stitch each binding strip until you have one long strip.
Trim one strip end at a 45 degree angle. Fold that end ¼” toward the wrong side; press.Fold the binding in half lengthwise with wrong sides together; press.
Stitch the binding to the quilt top, beginning at the lower-edge center and leaving 4” of binding free at the beginning (folded angled end) and end. Miter the corners as you reach them.
Insert the straight binding end into the angled binding end; trim the straight end ¼” beyond the beginning foldline. Pin the remaining binding long edge to the quilt top. Finish the binding stitching.
Wrap the binding folded edge toward the quilt-top backing; pin or clip generously, ensuring the corners retain their miters. Hand sew the binding fold to the quilt backing.