
This series is written by guest blogger, Pamela Cox. Pamela is an expert embroiderer, designer, digitizer and all around wonderful girl! We are so happy to have her contributing to the Sulky Blog!
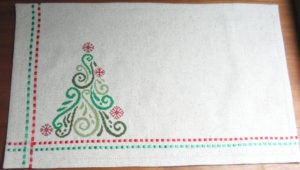
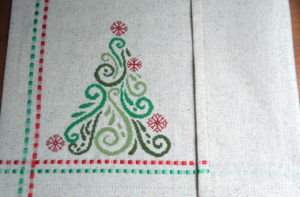
Whether you are looking to add something beautiful to your Christmas table or looking for a great gift, these machine cross stitch Christmas place mats are perfect! They are elegant without the elegant price because they are made with Osnaburg fabric. Osnaburg is a loosely woven utility fabric. It resembles coarse linen, but at a much lower price point. The thicker fibers, which are woven in a simple basket-weave pattern, make it easy to create the “run” needed for weaving ribbon into the fabric.
Osnaburg is 100% cotton and must be washed, dried, and pressed prior to using.
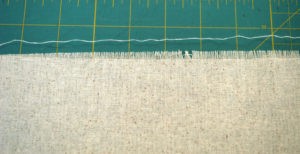
It must also be square-cut, on-grain, not only for the pulled runs to appear straight, but also to achieve more of an authentic, hand-done cross-stitched effect. To place the fabric on true grain, pull threads across the width of the fabric until one fiber travels the full width of the fabric, from selvage edge to selvage edge. This establishes the “straight edge” to begin straight cutting.
Gather Supplies:
Osnaburg fabric for each placemat:
- 19” x 13” front
- 16-1/4” x 10-3/4” back
Note: 1-1/2 yards of Osnaburg fabric along with 4 yards each of two ribbon colors will yield 4 placemats
1 yd each of 2 complementing colors of 1/8” wide satin ribbon
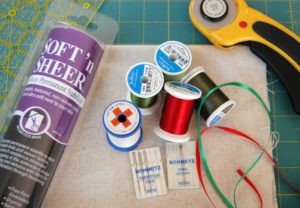
Sulky® Soft ’n Sheer™ Stabilizer
Sulky KK 2000™ Temporary Spray Adhesive (optional)
Thread:
- Sulky 40 wt. Rayon – for embroidery
- Sulky 50 wt. Cotton+Steel® Thread by Sulky – for construction
Needles:
- 80/12 Schmetz® Topstitch
- 70/10 Microtex (optional)-fixing function
- 100/16 Wing Needle (optional)-hemstitch
Rotary Cutter, Quilter’s Ruler, and Cutting Mat (optional, but very helpful)
Lickity Stitch™ Cross Stitch Embroidery Designs by Marcia Manning
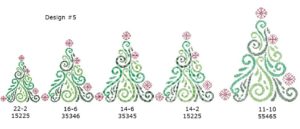
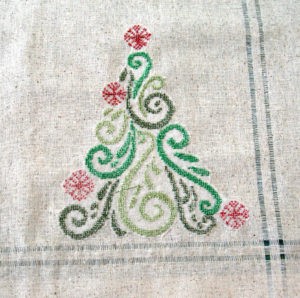
There are ten designs available in this exclusive cross-stitch exhibit of Christmas trees, and each one is available in various stitch-count formats.
In other words, each individual design is available to be stitched in various sizes and density depending on the chosen stitch count. Additional stitch-counts are available for each design other than the ones shown. To better understand the stitch-counts and sizes, check out the tutorial on the Sulky Embroidery Club site.
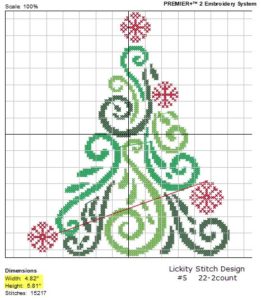
Osnaburg’s weave is about 25 threads per inch. Design #5, count 22-2 has been chosen for this place mat, lending the design to a petite-point, cross-stitch look.
How to make it happen:
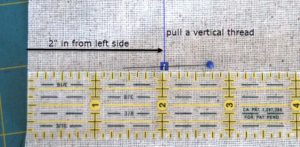
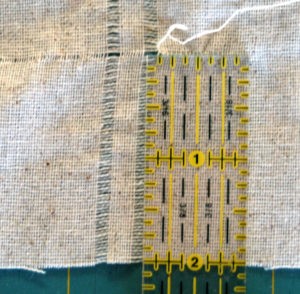
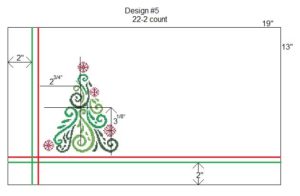
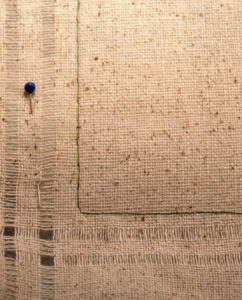
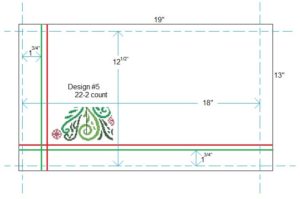
Begin by pulling threads on the 19” x 13” piece of Osnaburg fabric. Measure over 2” from the left side of the rectangle. Select one vertical thread and “catch it” with a pin.
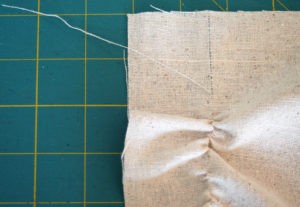
Gently pull up on this thread, noticing that the fabric begins to gather.
Pull this single thread out of the woven fabric – the entire 13″ height of the fabric piece.
The first fiber removed from any “run” is the hardest to remove. It will break…and it will break several times. However, the continuing thread length is easy to spot further down in the run since the initial weave of the fabric has been distorted. Use a pin to pick up the frayed end, and continue to gently tease the gathers along this same thread line.
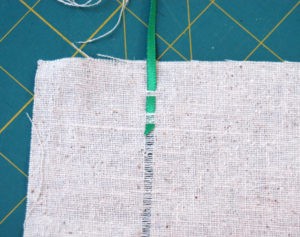
Remove adjacent vertical threads until an 1/8” wide run has been created in the fabric. About four or five threads will need to be removed. However, since the woven fibers of Osnaburg are not uniform, sometimes you may have to remove more or less threads. It is important to do a reality check on each run before moving on to create the next run. Start to weave a strip of ribbon into the run.
The run should easily accept the ribbon, allowing the ribbon to lay flat. Use a yarn needle or a dental floss carrier to make weaving easier. Magnifying glasses may also be helpful.
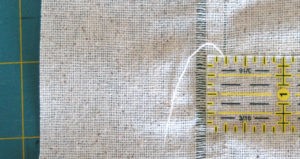
Once the width of the first run has been established, measure 1/4” from its side towards center of the place mat.
Pull a thread and begin the process of creating a second run.
After the two vertical runs have been made, repeat the process in creating two horizontal runs. Begin by measuring up 2” from the bottom edge and selecting a horizontal thread to “catch” with a pin.
Pull the proper number of threads for the first run, measure up towards center 1/4” and pull threads for the second run.
Once the four runs have been created, press the fabric keeping all runs straight and perpendicular. Steam may not be your friend here.
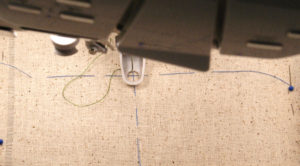
Mark the design placement on the fabric by basting lines to indicate the design center. Please Note: Measurements for the design center will vary, dependent on the chosen design and also on the chosen stitch count.
Check the design’s height and width, and divide that number in half.
Measure from the edge of the run closest to center. Since the design measurements are very close to 5” x 6”, and the stitches should not contact the open fibers of the run, divide 5” x 6” in half and even add 1/8 to 1/4” to those measurements for a bit of extra space.
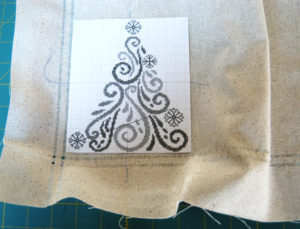
Printing a template true-to-size is another method of ensuring proper placement of a design.
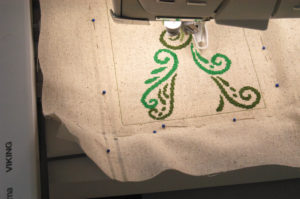
Hoop the fabric….(technically, only the stabilizer will be hooped).
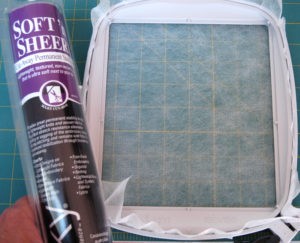
Secure a piece of Sulky® Soft ’n Sheer™ Stabilizer in the proper size hoop making it as “tight as a drum” as possible.
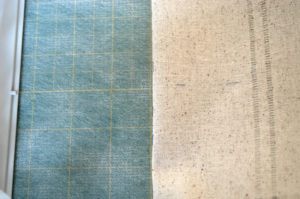
Fold the fabric back exposing the basting lines on the wrong side. Match the intersecting basting lines to hoop center. Viewing a grid underneath the stabilizer will help to keep fabric straight in the hoop. (Hint: The center marks on your hoop may not be a true-center of the hoop. Use the marks on your hoop.)
Attach the hoop to the embroidery arm, and begin the process of matching the design center to the center needle position on the embroidery machine.
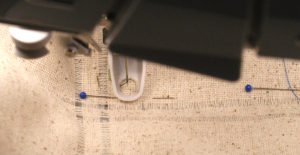
If an exact positioning function is available on your machine, check the lower left corner of the design to ensure that the stitching will clear the pulled thread runs.
Fix the fabric to the stabilizer (a basting function found on many embroidery machines). Use a 70/10 Microtex needle for this step. Although it will require changing to a larger needle for embroidery, this fine needle will make smaller holes when fixing. The fixing box will also serve as another check-point, not only that the design clears the runs, but also that the fabric has been hooped straight.
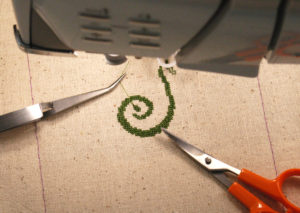
Change to the Topstitch Needle; slow the machine down to half-speed and begin to embroider the design.
Monitor the stitching process, and cut the jump threads as they occur.
Once the embroidery is complete, remove from the hoop, and clean up the back by trimming long jump threads and excess stabilizer.
Press the top, keeping the runs straight and perpendicular to each other.
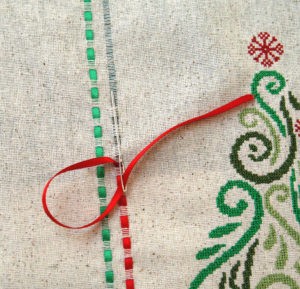
Begin weaving the ribbon through the runs starting with a length of ribbon several inches longer than the run. Use a simple basket weave of going over six threads and under six threads, or however many threads you choose, for the full length of the run.
The first run is the hardest to weave since the fibers need to be counted. The second weaving goes much quicker since you just match the in and out spacing of the first run, alternating the up/under pattern of the two ribbons.
After the four runs have been filled, press the piece once again.
Re-cut the front, beginning 1-3/4” on the outside of the first run on the left.
Measure over from this edge 18”, and straight cut.
Measure 1-3/4” down from the outside of the first run on the bottom, and square cut.
Measure up 12-1/2” from this cut edge, and square cut the top.
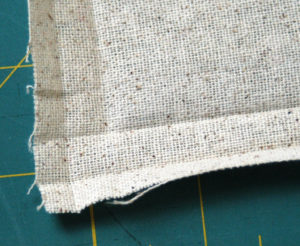
Press under 3/4” on all 4 sides. Open back up. Fold and press the raw edges in to meet this 3/4″ crease.
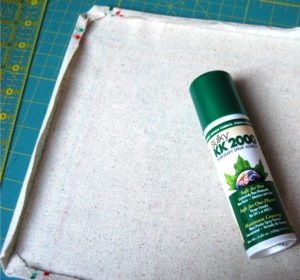
Cover the back of the place mat with the 16-1/4” x 10” piece of Osnaburg inside the hem lines. Lightly spraying the back side of the smaller piece with Sulky KK 2000™ Temporary Spray Adhesive will help to keep it in place, smoothly behind the front.
Fold the hem over the back piece, mitering the corners. Pin the hem in place, and secure it with a machine stitch of your choice. This can be a straight stitch, or any number of decorative stitches.
This method of finishing a place mat allows the back to look as precise as the front.




Very pretty!
love this project
Pamela, Nice project!
Where can you get the material?
You can get it here: https://www.fabric.com/find?searchText=osnaburg and I bet they also sell it at Joann’s although I have not checked there myself.
Many thanks for this tutorial. Do these projects require digitizer?