 This series is written by guest blogger, Pamela Cox. Pamela is an expert embroiderer, designer, digitizer and all around wonderful girl! We are so happy to have her contributing to the Sulky Blog!
Vinyl – Not the clear stuff!
Since “summer fun” is right here at our finger tips, let’s explore vinyl, another material which might never be considered as an acceptable foundation for machine embroidery. Yet, it is perfect for quick summer or party accents, not to mention, it is actually useful for totes or accents on hand bags or even throw pillows.
Once again, vinyl, even displaying beautifully embroidered designs, will never be considered an “heirloom”. However, with minimal time and materials, the finished product will help define a moment in life which was worth celebrating.
Vinyl is a non-porous, non-forgiving surface. These characteristics are both good and bad. Non-porous means that this material tends to repel moisture, making it a good choice for coasters, shelf paper or placemats. Non-forgiving means that any hole, whether made by a stitching needle or even a pin, is there to stay. This also includes marks left by direct hooping or contact with an iron.
However, just by gaining a bit of knowledge, your “fun project” is sure to remain enjoyable from start to finish!
Vinyl comes in a variety of weights, beginning with a very thin – “whisper- weight” – into a medium-weight, progressing towards heavier ones used for upholstery or incorporated into marine usage.
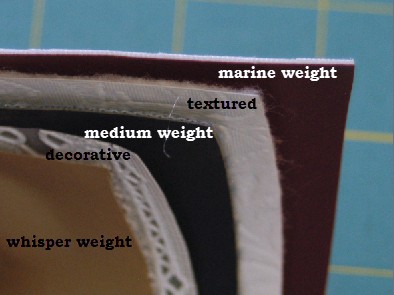 Vinyl can be found in many fabric stores offering “utility fabrics” and is therefore sold by the yard. However, it can also be found in pre-packaged rolls sold in hardware stores or even at Dollar Stores, for the intended use as shelf-paper. Vinyl also is seen in many pre-made items.
Not only is vinyl available in various weights, it also comes in a wide choice of colors, prints and textures. Simply purchased and cut to size, vinyl can fulfill many necessary utilitarian needs. However, by embroidering a personal touch, it takes this same, practical, “ho-hum” item from utility into a special, “must have”, “greatly appreciated” category!!
So let’s explore how to make this happen!
Choosing the proper stabilizer is the most important factor to ensure success when embroidering on vinyl. As already established, the un-forgiving surface should not be secured directly in the embroidery hoop’s frame.
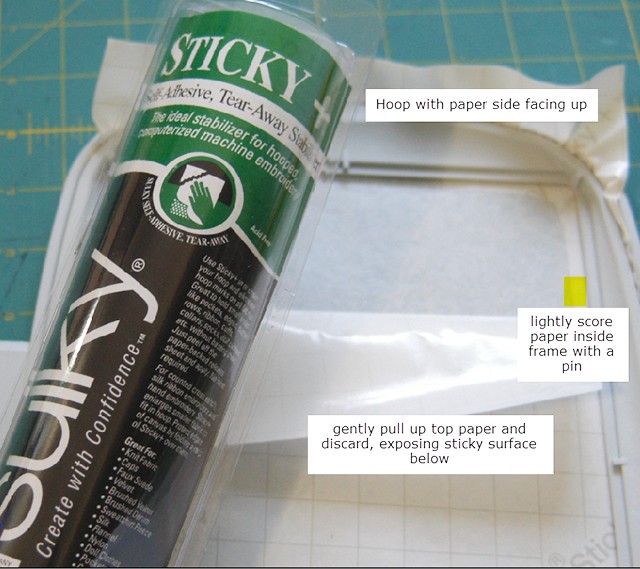
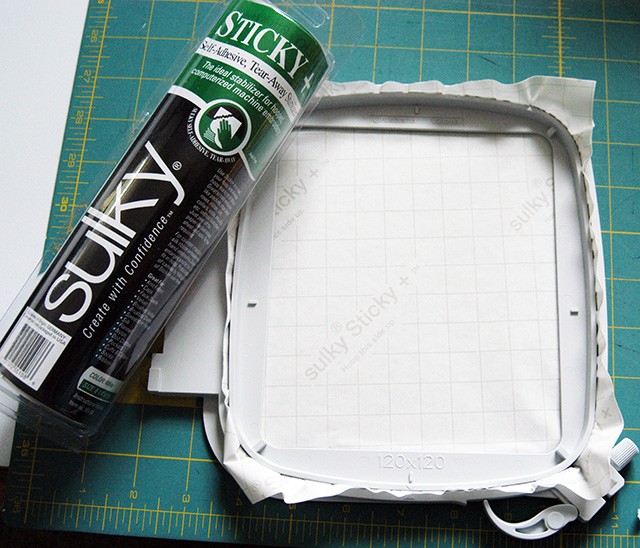 Hoop Sulky® Sticky +™ Stabilizer as tight as a drum with the paper still intact and facing up. Expose as much of the sticky surface by gently scoring the paper with a pin.
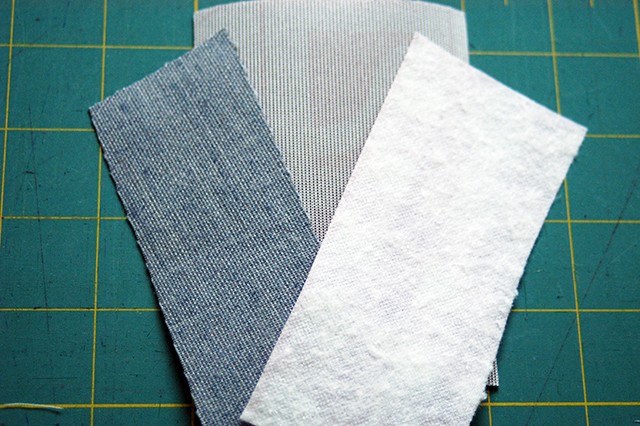
 Many vinyl “fabrics” are manufactured with a knitted, cloth backing or even a light weight fuzzy batting. The porous backing is the perfect texture to securely adhere vinyl to the sticky stabilizer.
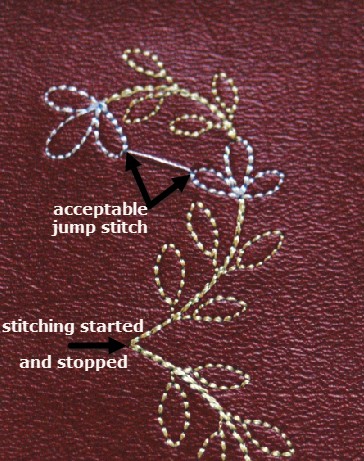
 Selecting a proper embroidery design is extremely important. The design must be digitized specifically for non-forgiving surfaces such as leather or paper with the understanding that every time a needle penetrates the surface, this hole remains and cannot be erased. Quality designs falling into this category will have every stitch fall within the actual design. Note in the example below (which features a design from “My Fair Lady Summer Stipple Collection”), the design begins and ends in the same hole with the green vine stitching in a continuous pattern. Although jump stitches were required to position the needle for individual flowers, the needle “jumped” to a place right in the flower outline and then stitched in a continuous pattern. These are acceptable jump stitches.
 Embroidering on vinyl requires the use of a leather needle. This specialty needle slices through the surface, actually cutting it, as opposed to simply penetrating it. Select a gauge-appropriate to the weight of the vinyl. Slow the speed of the machine down by at least half, and monitor the stitching process.
Two examples were stitched following all the suggestions above:
Lemonade and Flower Vine
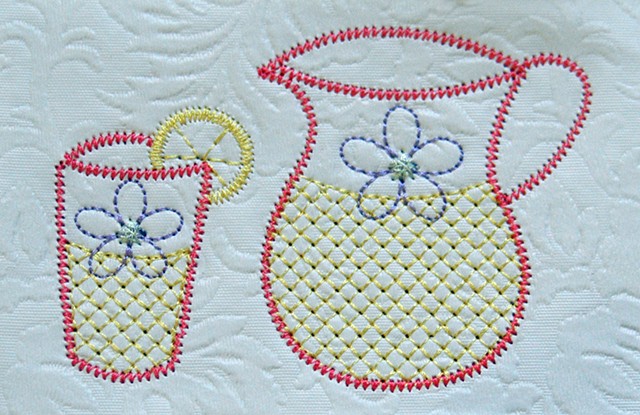
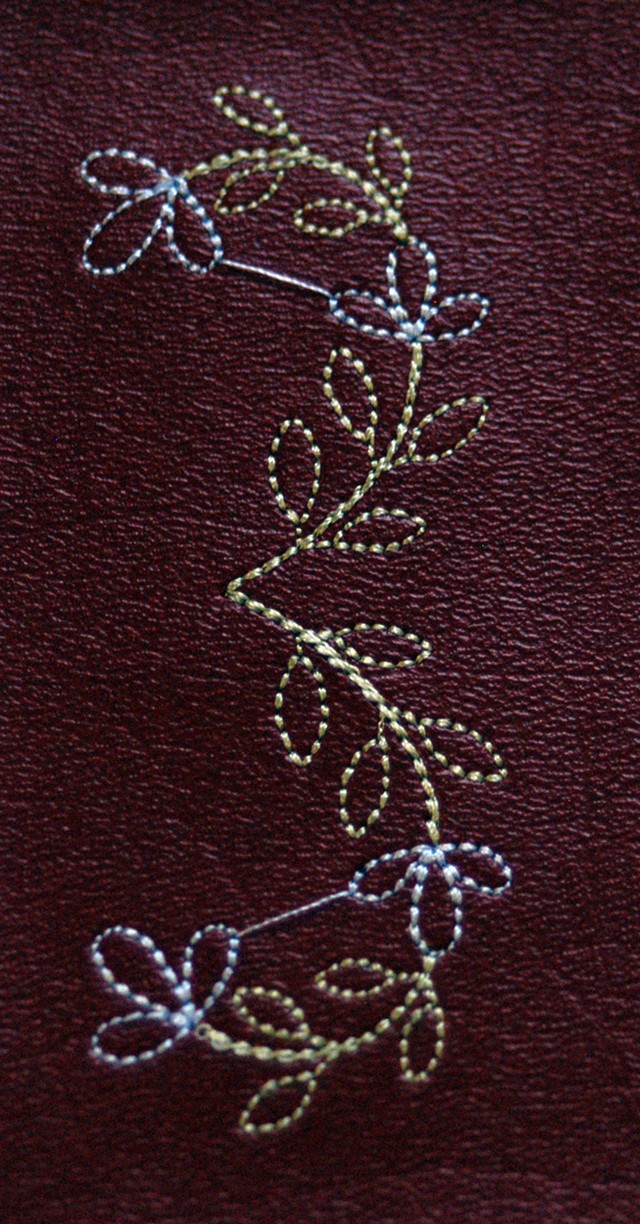 Stabilizer: Sulky® Sticky +™
Hoop size: 150mm square although the design required only a 100mm sq
Needle: Leather 90/14
Thread: Sulky® 40 wt. Rayon
Machine speed: slowest
Designs: “Summer Stipple Collection” by My Fair Lady Designs
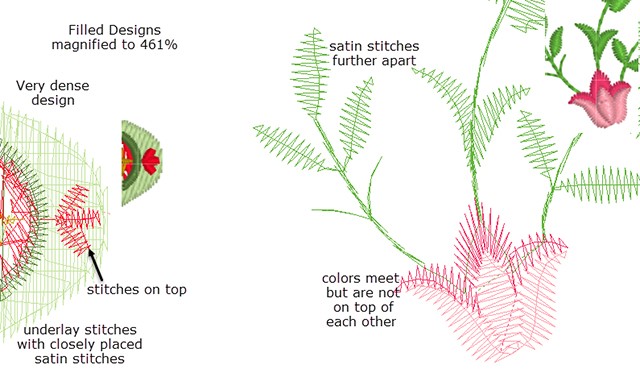
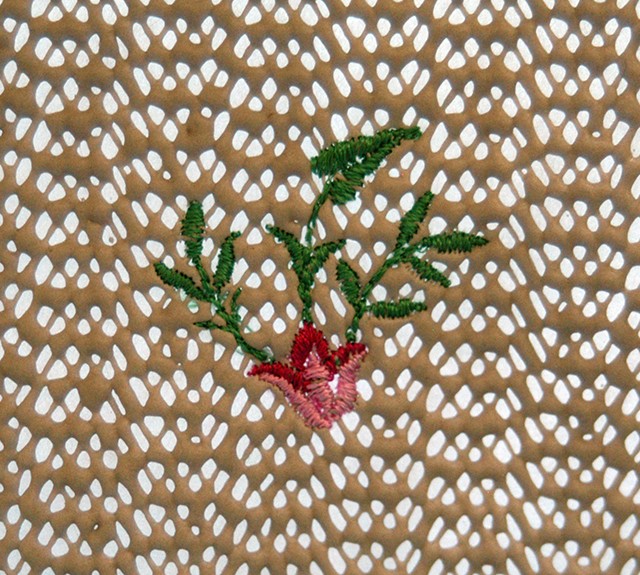 Finding this light-weight, lacy-textured vinyl sold by the roll presented other possibilities in embroidering. Although a “filled design” was chosen, it was one digitized with finer fabric in mind (“My Fair Lady’s Cinderella Companion 2 Collection”).
Sulky® Soft ’n Sheer™ was secured in the hoop’s frame and the lacy vinyl was machine basted to it using a 80/12 Topstitch Needle, and slowing the machine’s movement down to next to the slowest speed.
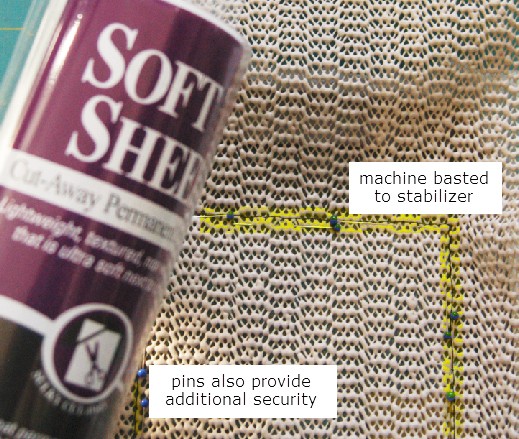 Sulky Soft ’n Sheer™ Stabilizer provides additional support for the fill design, and will remain intact to continue supporting the embroidery. Trim excess where it is easily available, but even if left, the stabilizer is invisible.
An applique was also successful on the textured vinyl, but again, it was one from the “Summer Stipple Collection” and digitized with no extra stopping points and with a lighter touch in regard to the density of the holding stitches.
 The vinyl was once again machine basted to Soft ’n Sheer, still using the topstitch needle. Soft ’n Sheer Extra™ (a fusible version of Soft ‘n Sheer) was fused to the back of the applique fabric prior to applying it in the design. It all worked perfectly!!!
All the original “rules” of stitching on vinyl have just been broken!! However, this method will not work on heavy, solid vinyl: a leather needle must be used, machine basting will leave visible holes, a filled design will undermine the foundation since the covering stitches are so close to each other.
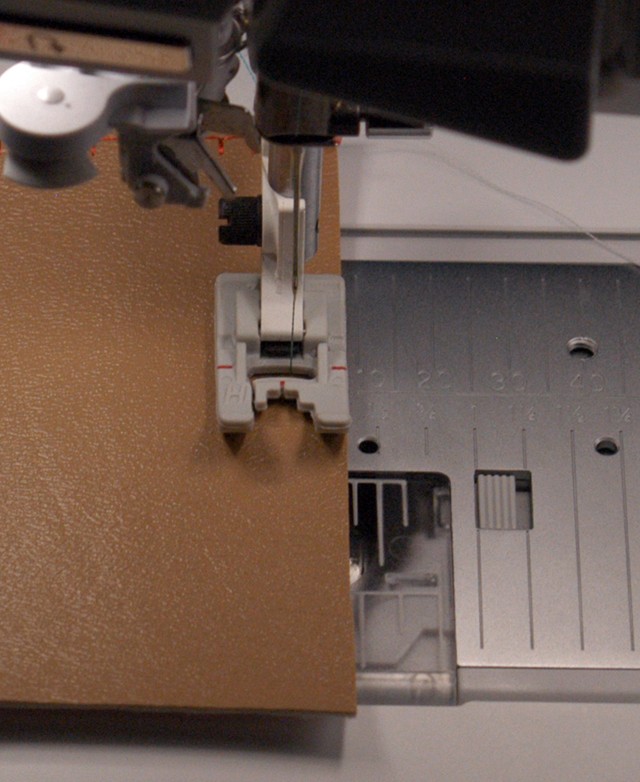
 Keep in mind that vinyl can be seamed together, or their edges can be butted against each other and stitched as a method of joining pieces. Use a leather needle and it may be helpful to use a Teflon presser foot which allows the material to glide into the path of stitching.
 To butt vinyl seams:
Cut vinyl edges straight. Cut a strip of Sticky +™ Stabilizer (1” or wider). Score a straight line and remove paper from one side. Firmly press vinyl to stabilizer following the straight line of the remaining piece of paper
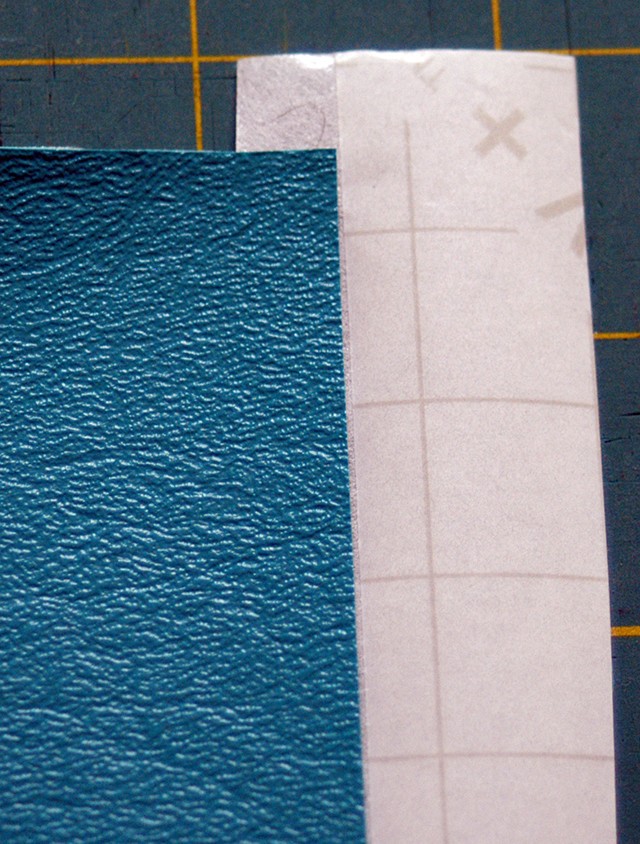 Remove remaining paper and butt the edge of the second piece of vinyl right up to the first, pressing firmly in place
 Choose a decorative stitch that will “bite into” each side of the butted seam
 Vinyl can also be accented with fabric, such as a binding; or the two materials can be combined and made into tote bags or throw pillows!
 When stitching vinyl to fabric, use a topstitch needle and stitch with the fabric on top. Vinyl edges do not require any finishing however, adding a decorate stitch to the edge of a placemat or table runner will provide additional interest to the project especially if stitched in one of Sulky’s many Blendables® thread.
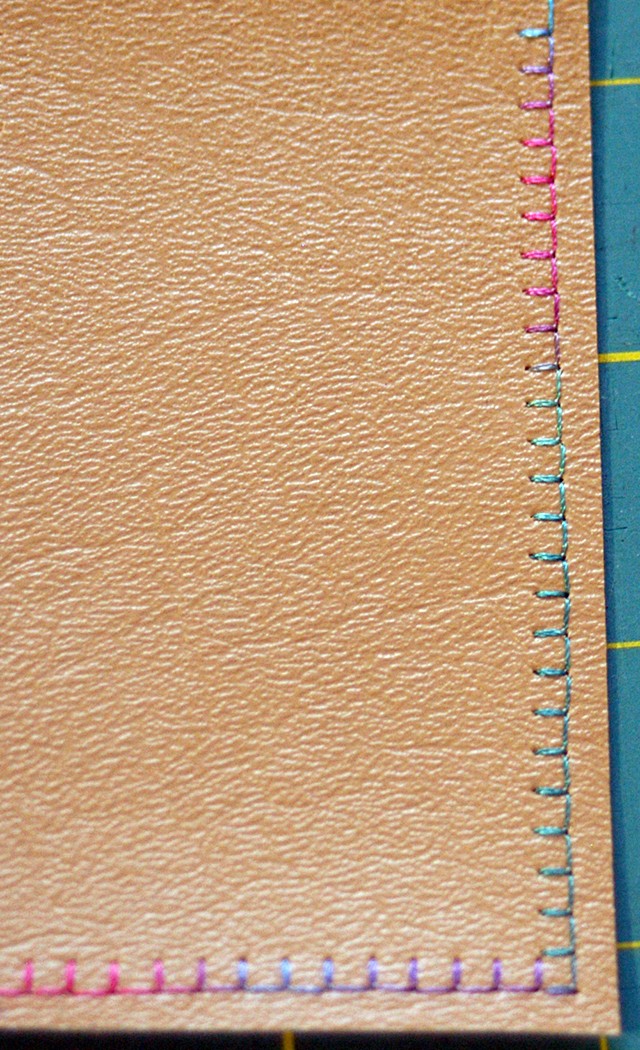 Think of an outdoor luncheon with the table setting to include white textured placemats embroidered with a pitcher of lemon aide or a floral vine. Quick, easy but very, very special. Enjoy your summer!!


thank you for this tutorial & including the seam matching image as well, this is exactly what i will be attempting to do!! fingers crossed. xoxo