Pieced Sewing Machine
Scrap-Busting Foundation Paper Piecing with Sulky Paper Solvy
National Sewing Month is the perfect time to turn your leftover fabric scraps into a stunning pieced sewing machine project that celebrates your love of sewing. Foundation paper piecing (FPP) is an ideal method to make precise, geometric designs, and with Sulky Paper Solvy and 50 wt. Cotton Thread, it’s easier than ever. This tutorial features the Geometric Sewing Machine pattern by Quiet Play, transforming your scrap fabrics into a beautiful wall hanging for your sewing room.
PIECED SEWING MACHINE SUPPLIES
-
Geometric Sewing Machine Pattern by Quiet Play
-
Sulky Paper Solvy – water-soluble, printable stabilizer
-
Sulky 50 wt. Cotton Thread – lightweight, perfect for detailed stitching
-
Assorted fabric scraps
- Background, backing & binding fabrics (sizes according to desired finished project; backing fabric from QT Fabrics)
Prepare the Pieced Sewing Machine Pattern
Print the Geometric Sewing Machine pattern onto sheets of Sulky Paper Solvy. Be sure to print only the pattern pages onto the stabilizer (no need to have the instructions printed on the product!).
Cut out each section pf the pattern along the outer dashed lines.
Determine the fabrics to use for each section and/or each piece of each section. It may be helpful to label each scrap with the section (A, B, C and so on) and number (1, 2, 3 and so on), using a removable fabric marker.
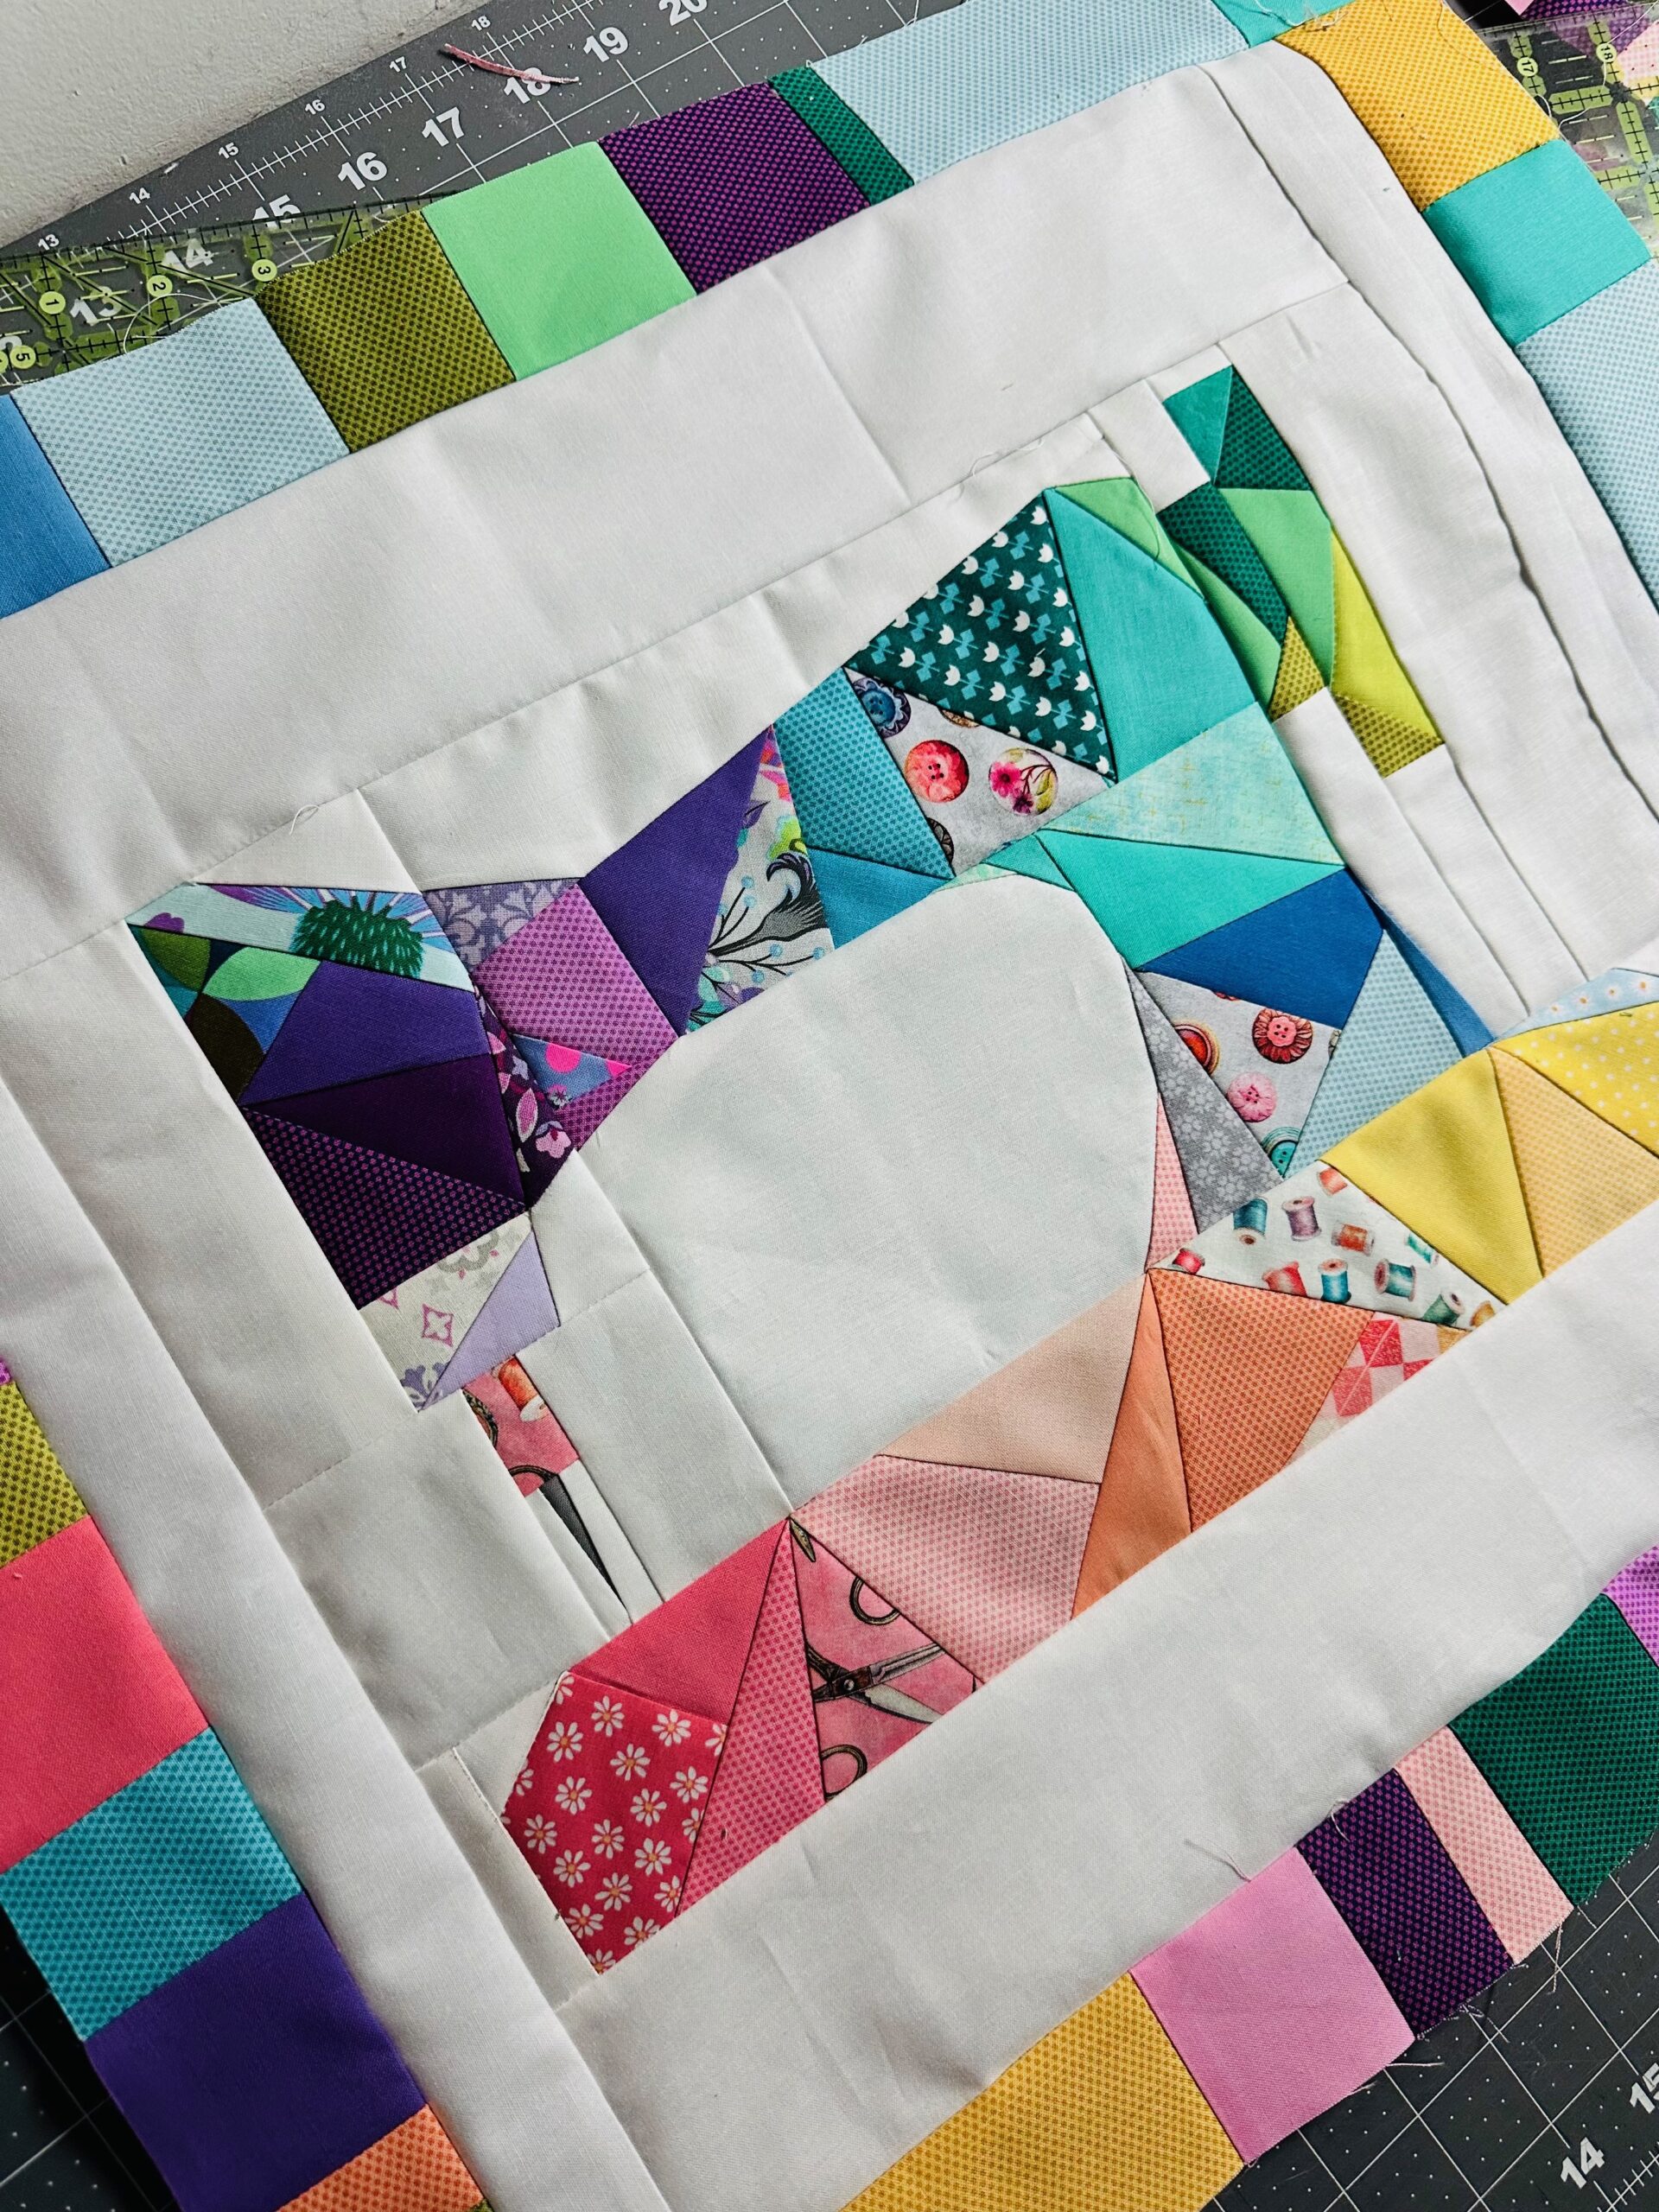
The featured pattern is color-blocked, featuring a rainbow of fabric prints. Celebrate your previous sewing projects by using scraps from completed projects from the year. Or dive into your scrap bin to find the perfect shades to coordinate with your sewing room. Choose prints, solids, or textures that complement each other. A vibrant mix of scraps will bring the Geometric Sewing Machine to life.
Foundation Paper Piecing
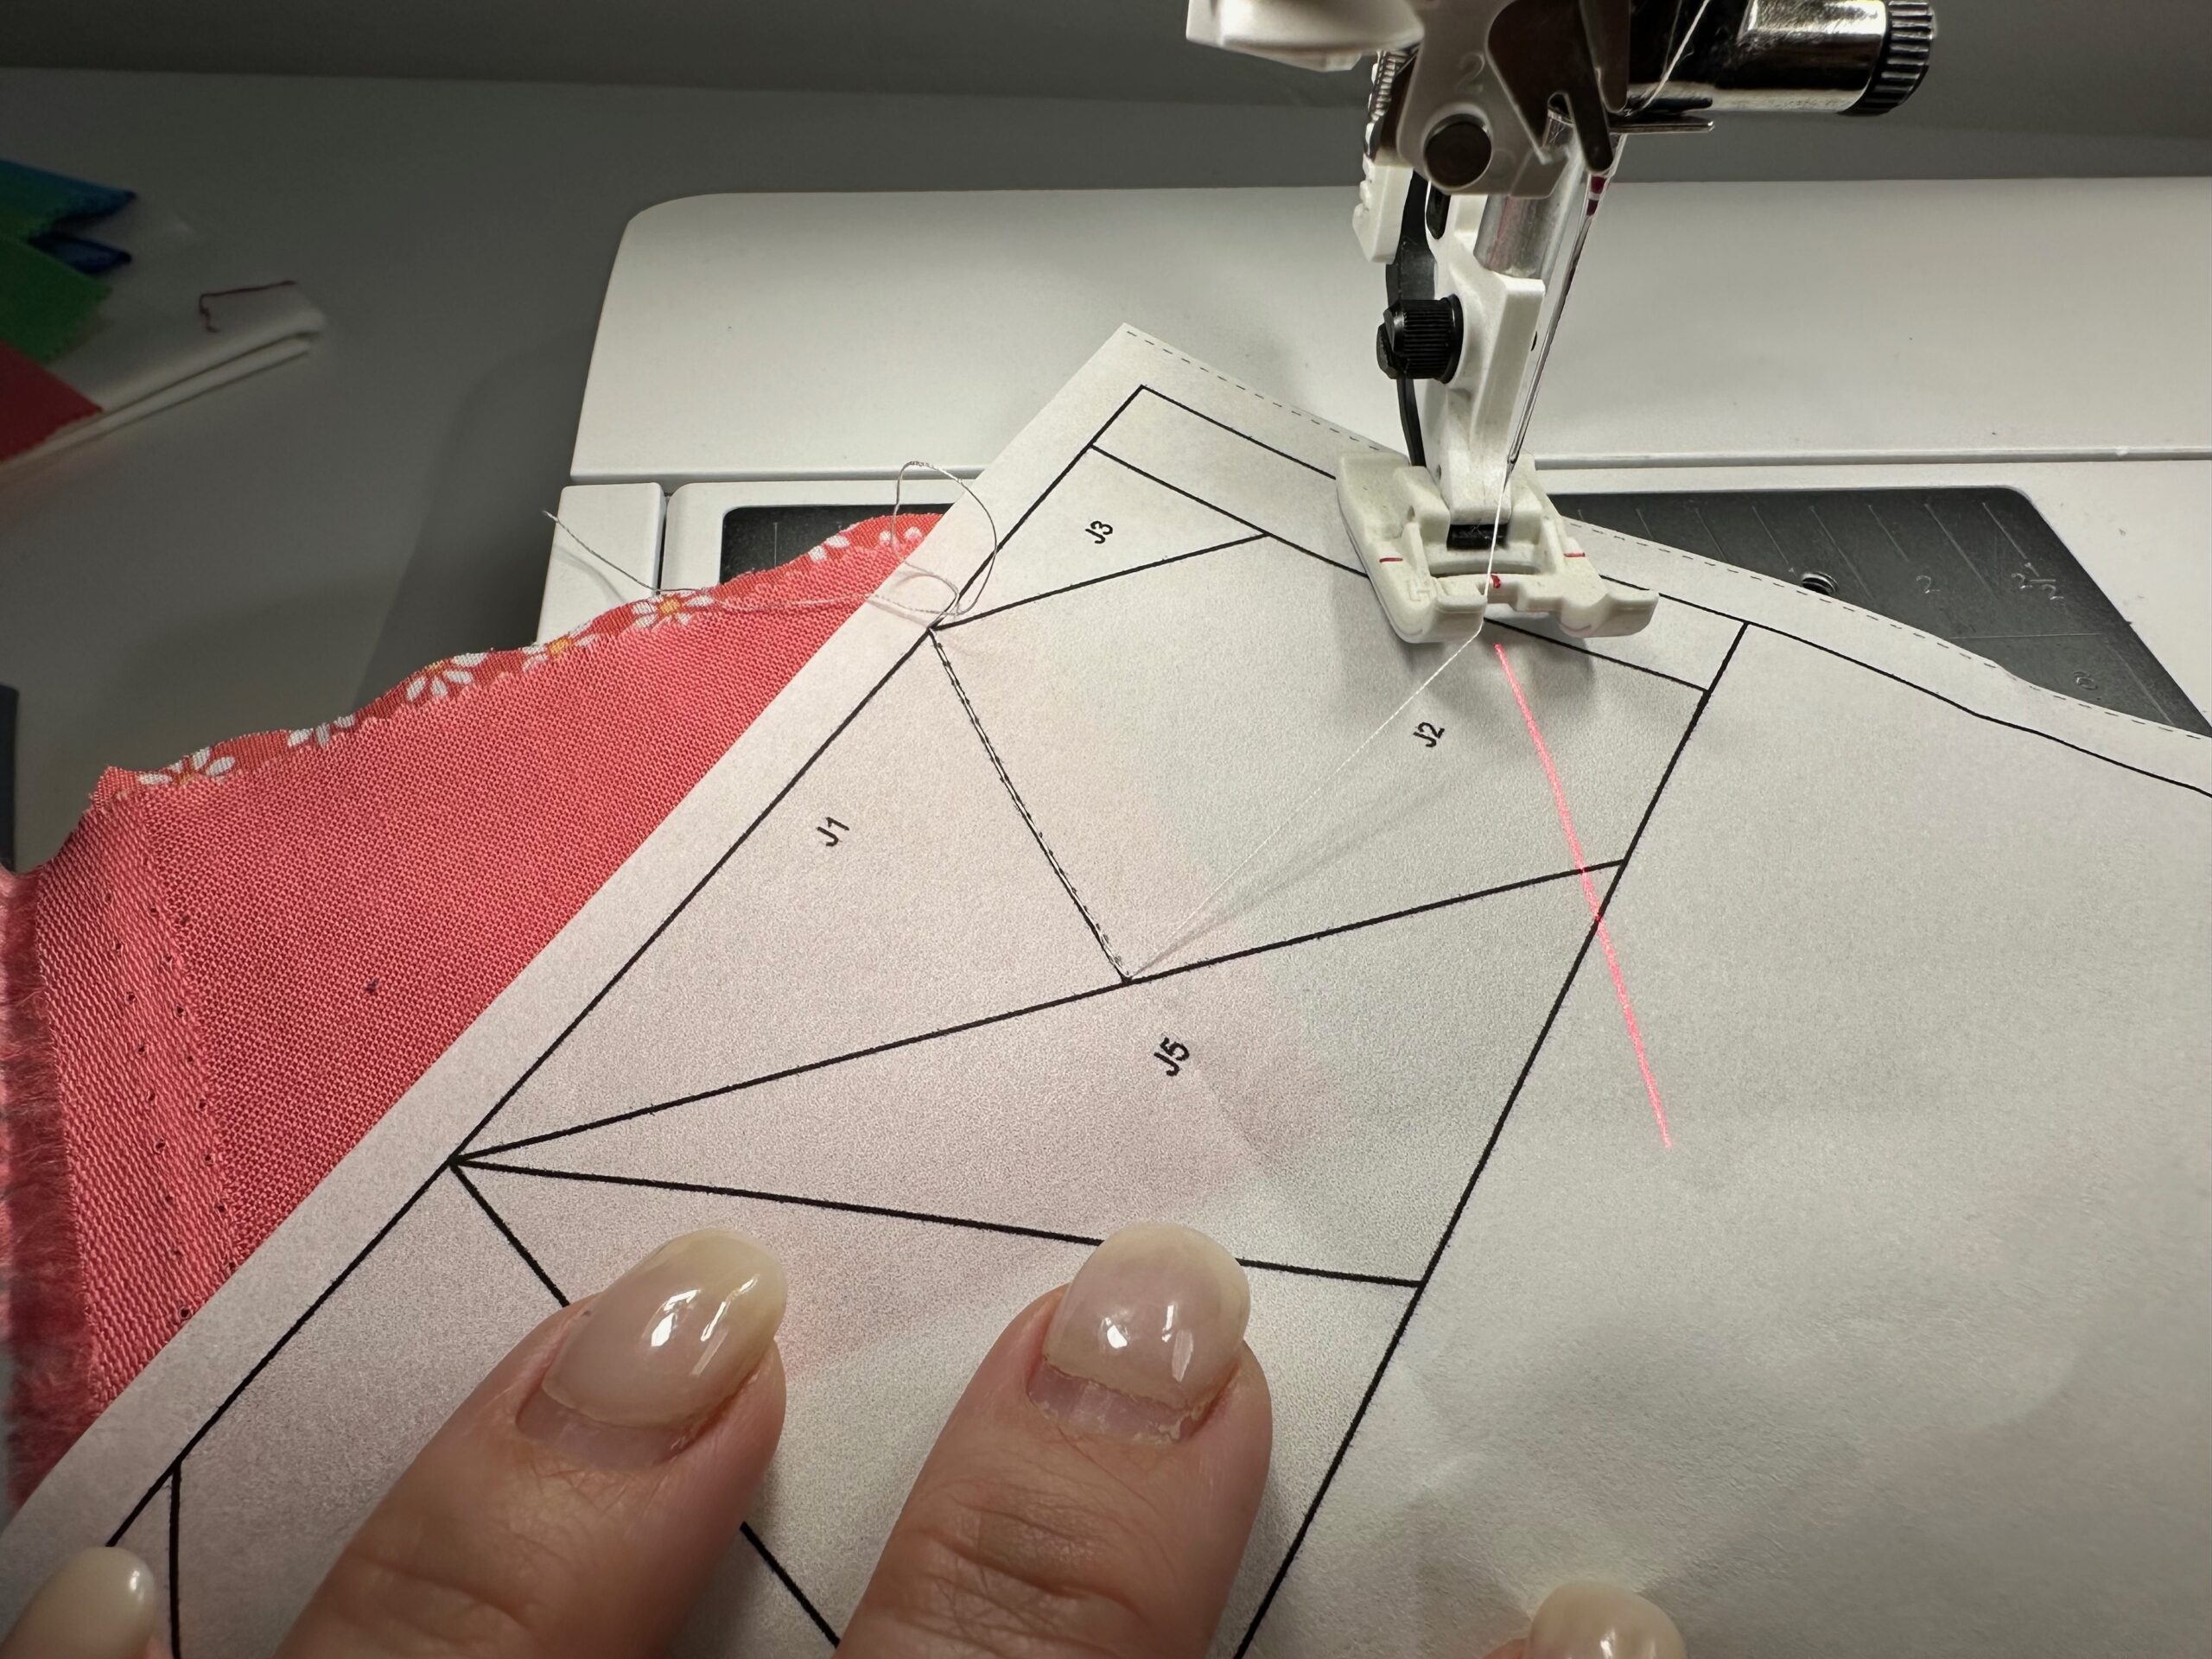
The pattern has several sections, labeled with letters, designed to be pieced in numerical order. Place the first fabric right side up on top of the stabilizer, making sure it’s large enough to cover the area marked “1.” Begin with any section, for example A, B or J, as shown below. But always begin with number 1 for each section.
Next, flip the fabric over (wrong side up) and place it along the pattern wrong side, with the seam allowance extending 1/4″ beyond the solid line separating number 1 and 2.
Place the fabric for number 2 right side facing the fabric for number 1, aligning the seam allowance edges.
Using Sulky 50 wt. Cotton Thread, stitch along the solid line between sections 1 and 2. This thread is nice and lightweight, leaving no telltale “bump” of thread between sections.
Flip over the paper and trim the seam allowance to 1/4″. Fold the fabrics to the right side; press. Trim the fabric edges 1/4″ beyond the line between section 3 and 1-2.
Continue piecing sections, trimming and pressing as you go. You may notice that the Paper Solvy discolors when ironing at high heat. This is perfectly fine, as the stabilizer will be removed after stitching is complete, leaving no trace!
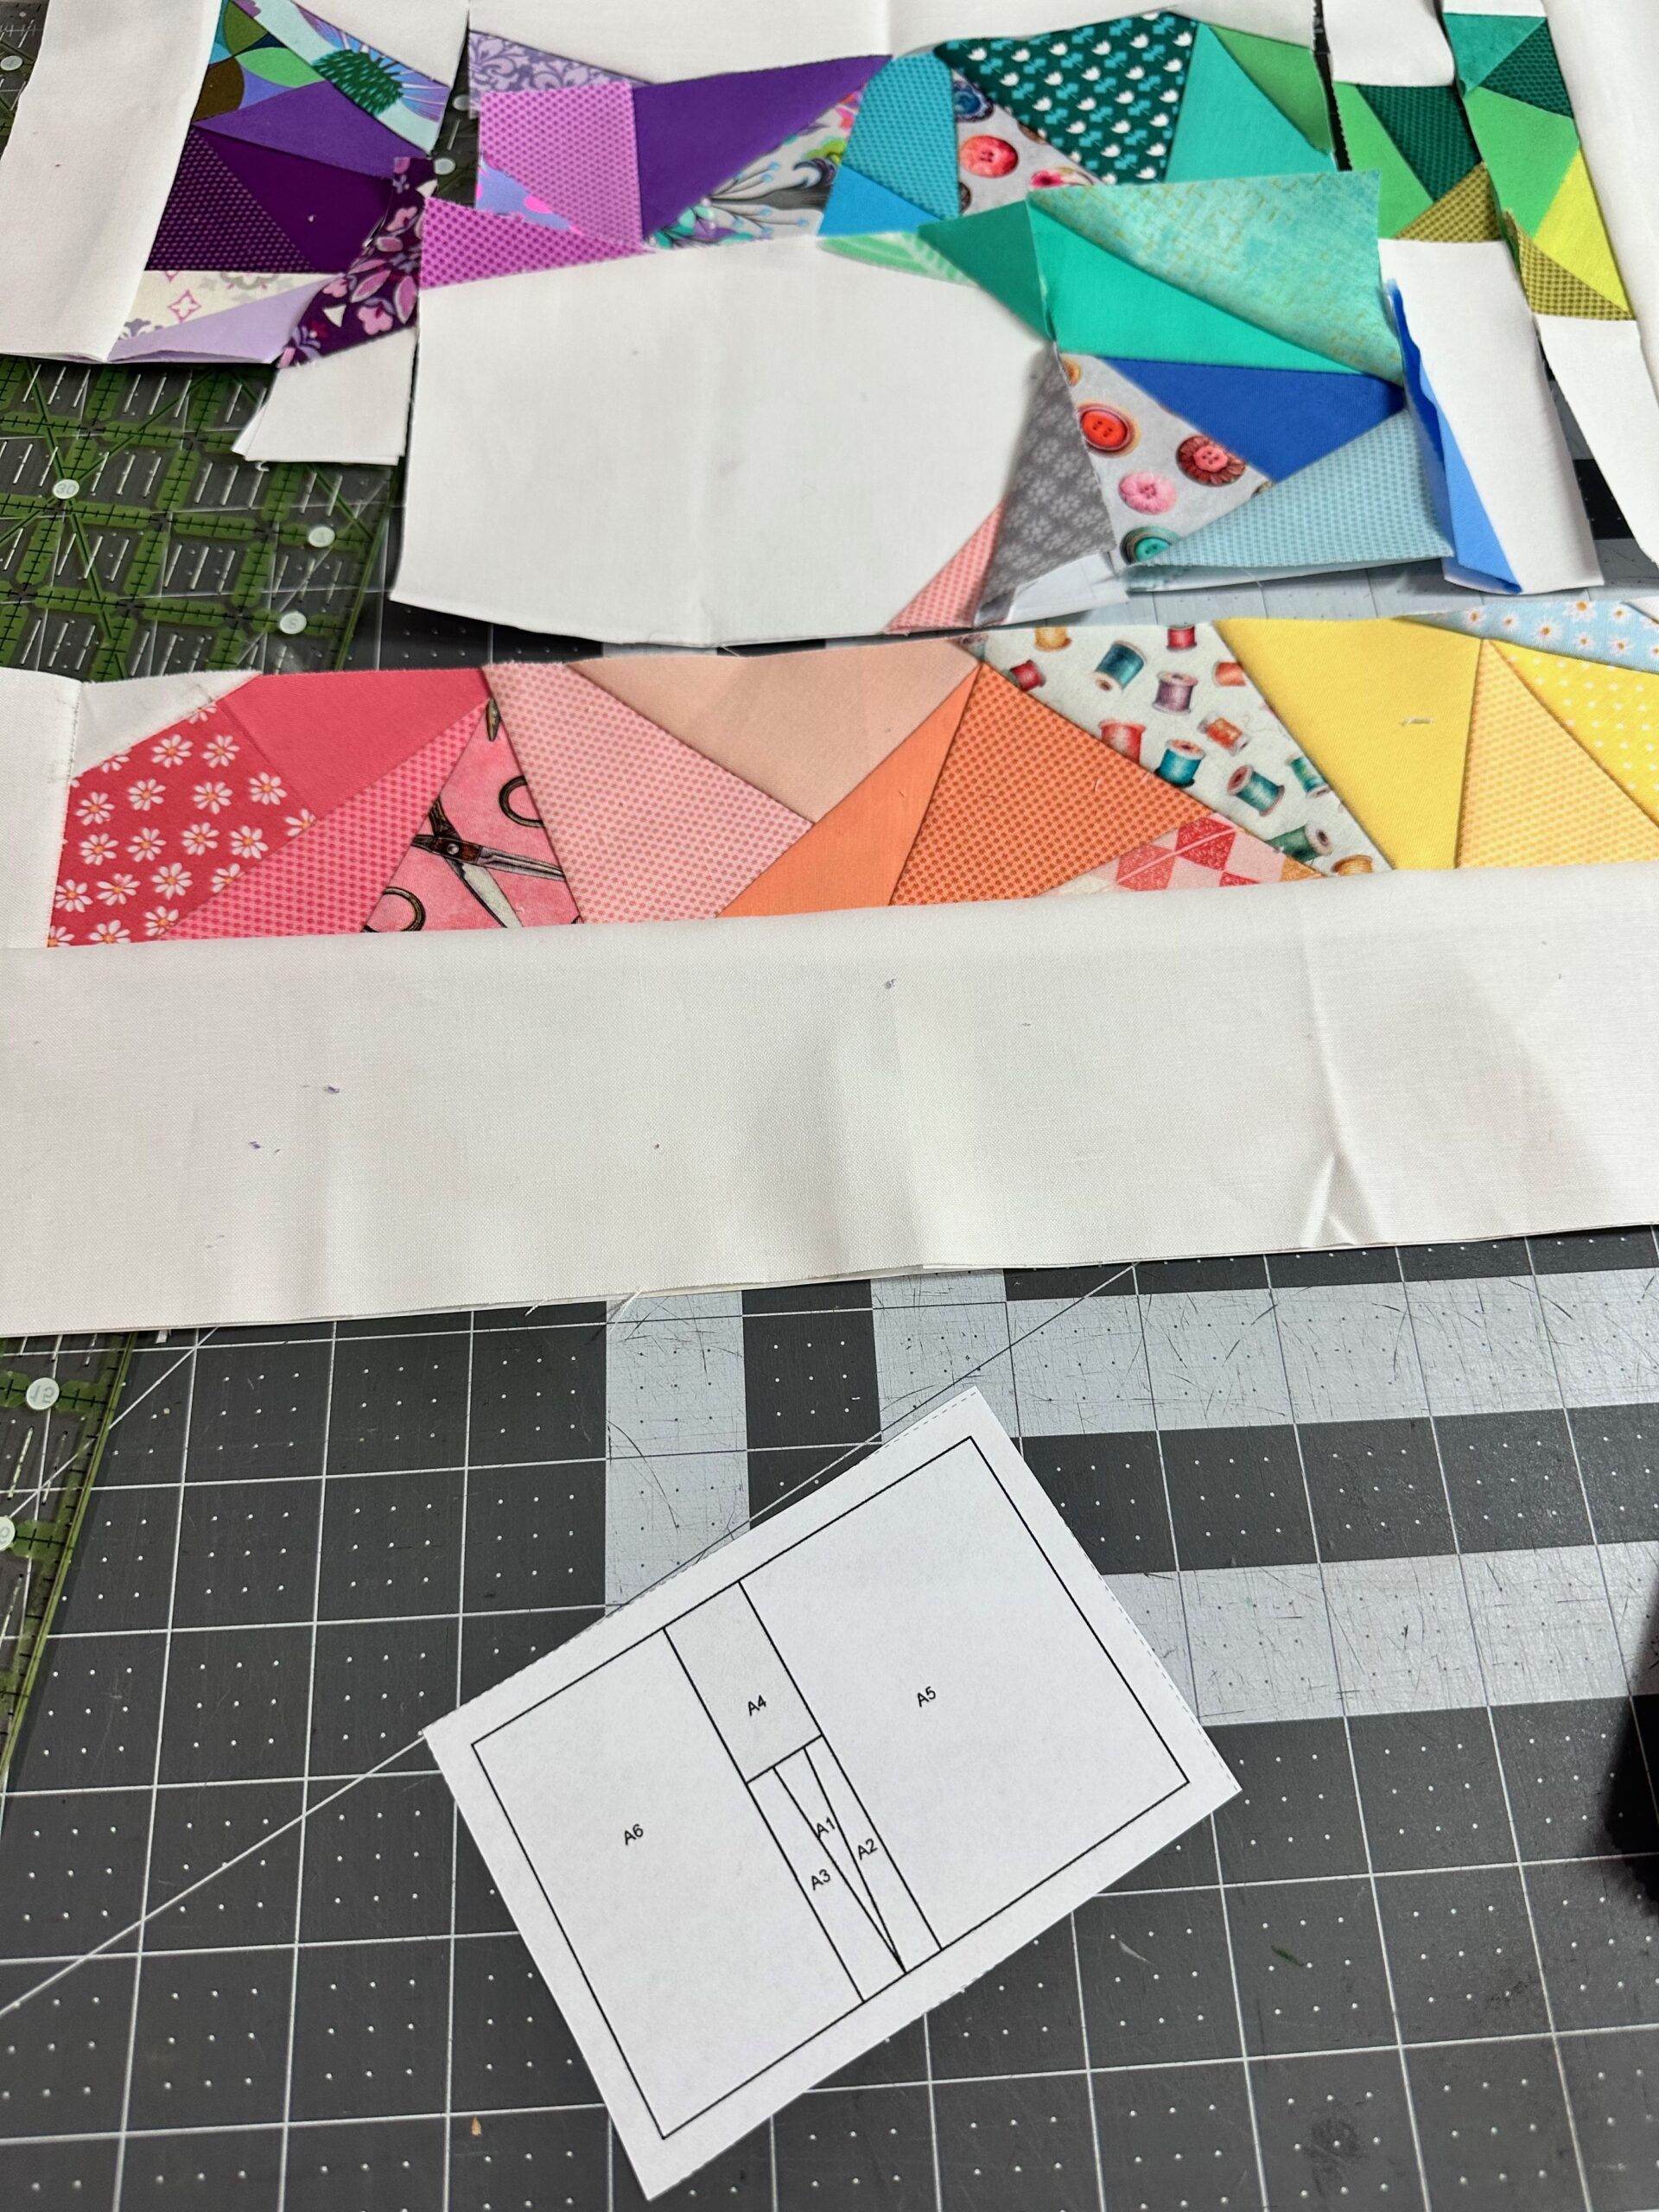
After each section is pieced, sew them together following the pattern guidesheet.
Removing the Paper Solvy
After piecing is complete, remove the Paper Solvy. Work on larger sections first, gently tearing the Paper Solvy away from the seamlines. Or, moisten a cotton swap and run it along the seamlines to lift the stabilizer away from the stitching.
For smaller sections, it may be best to leave the paper intact until the entire project is finished and binding is added. Then, rinse or soak the project in warm water until the stabilizer is dissolved. Or wait to remove it until the first washing. The paper will dissolve in the washing machine, leaving no trace!
Adding Borders
Add batting and backing fabric and quilt as desired, or add borders to add more color and create a larger piece.
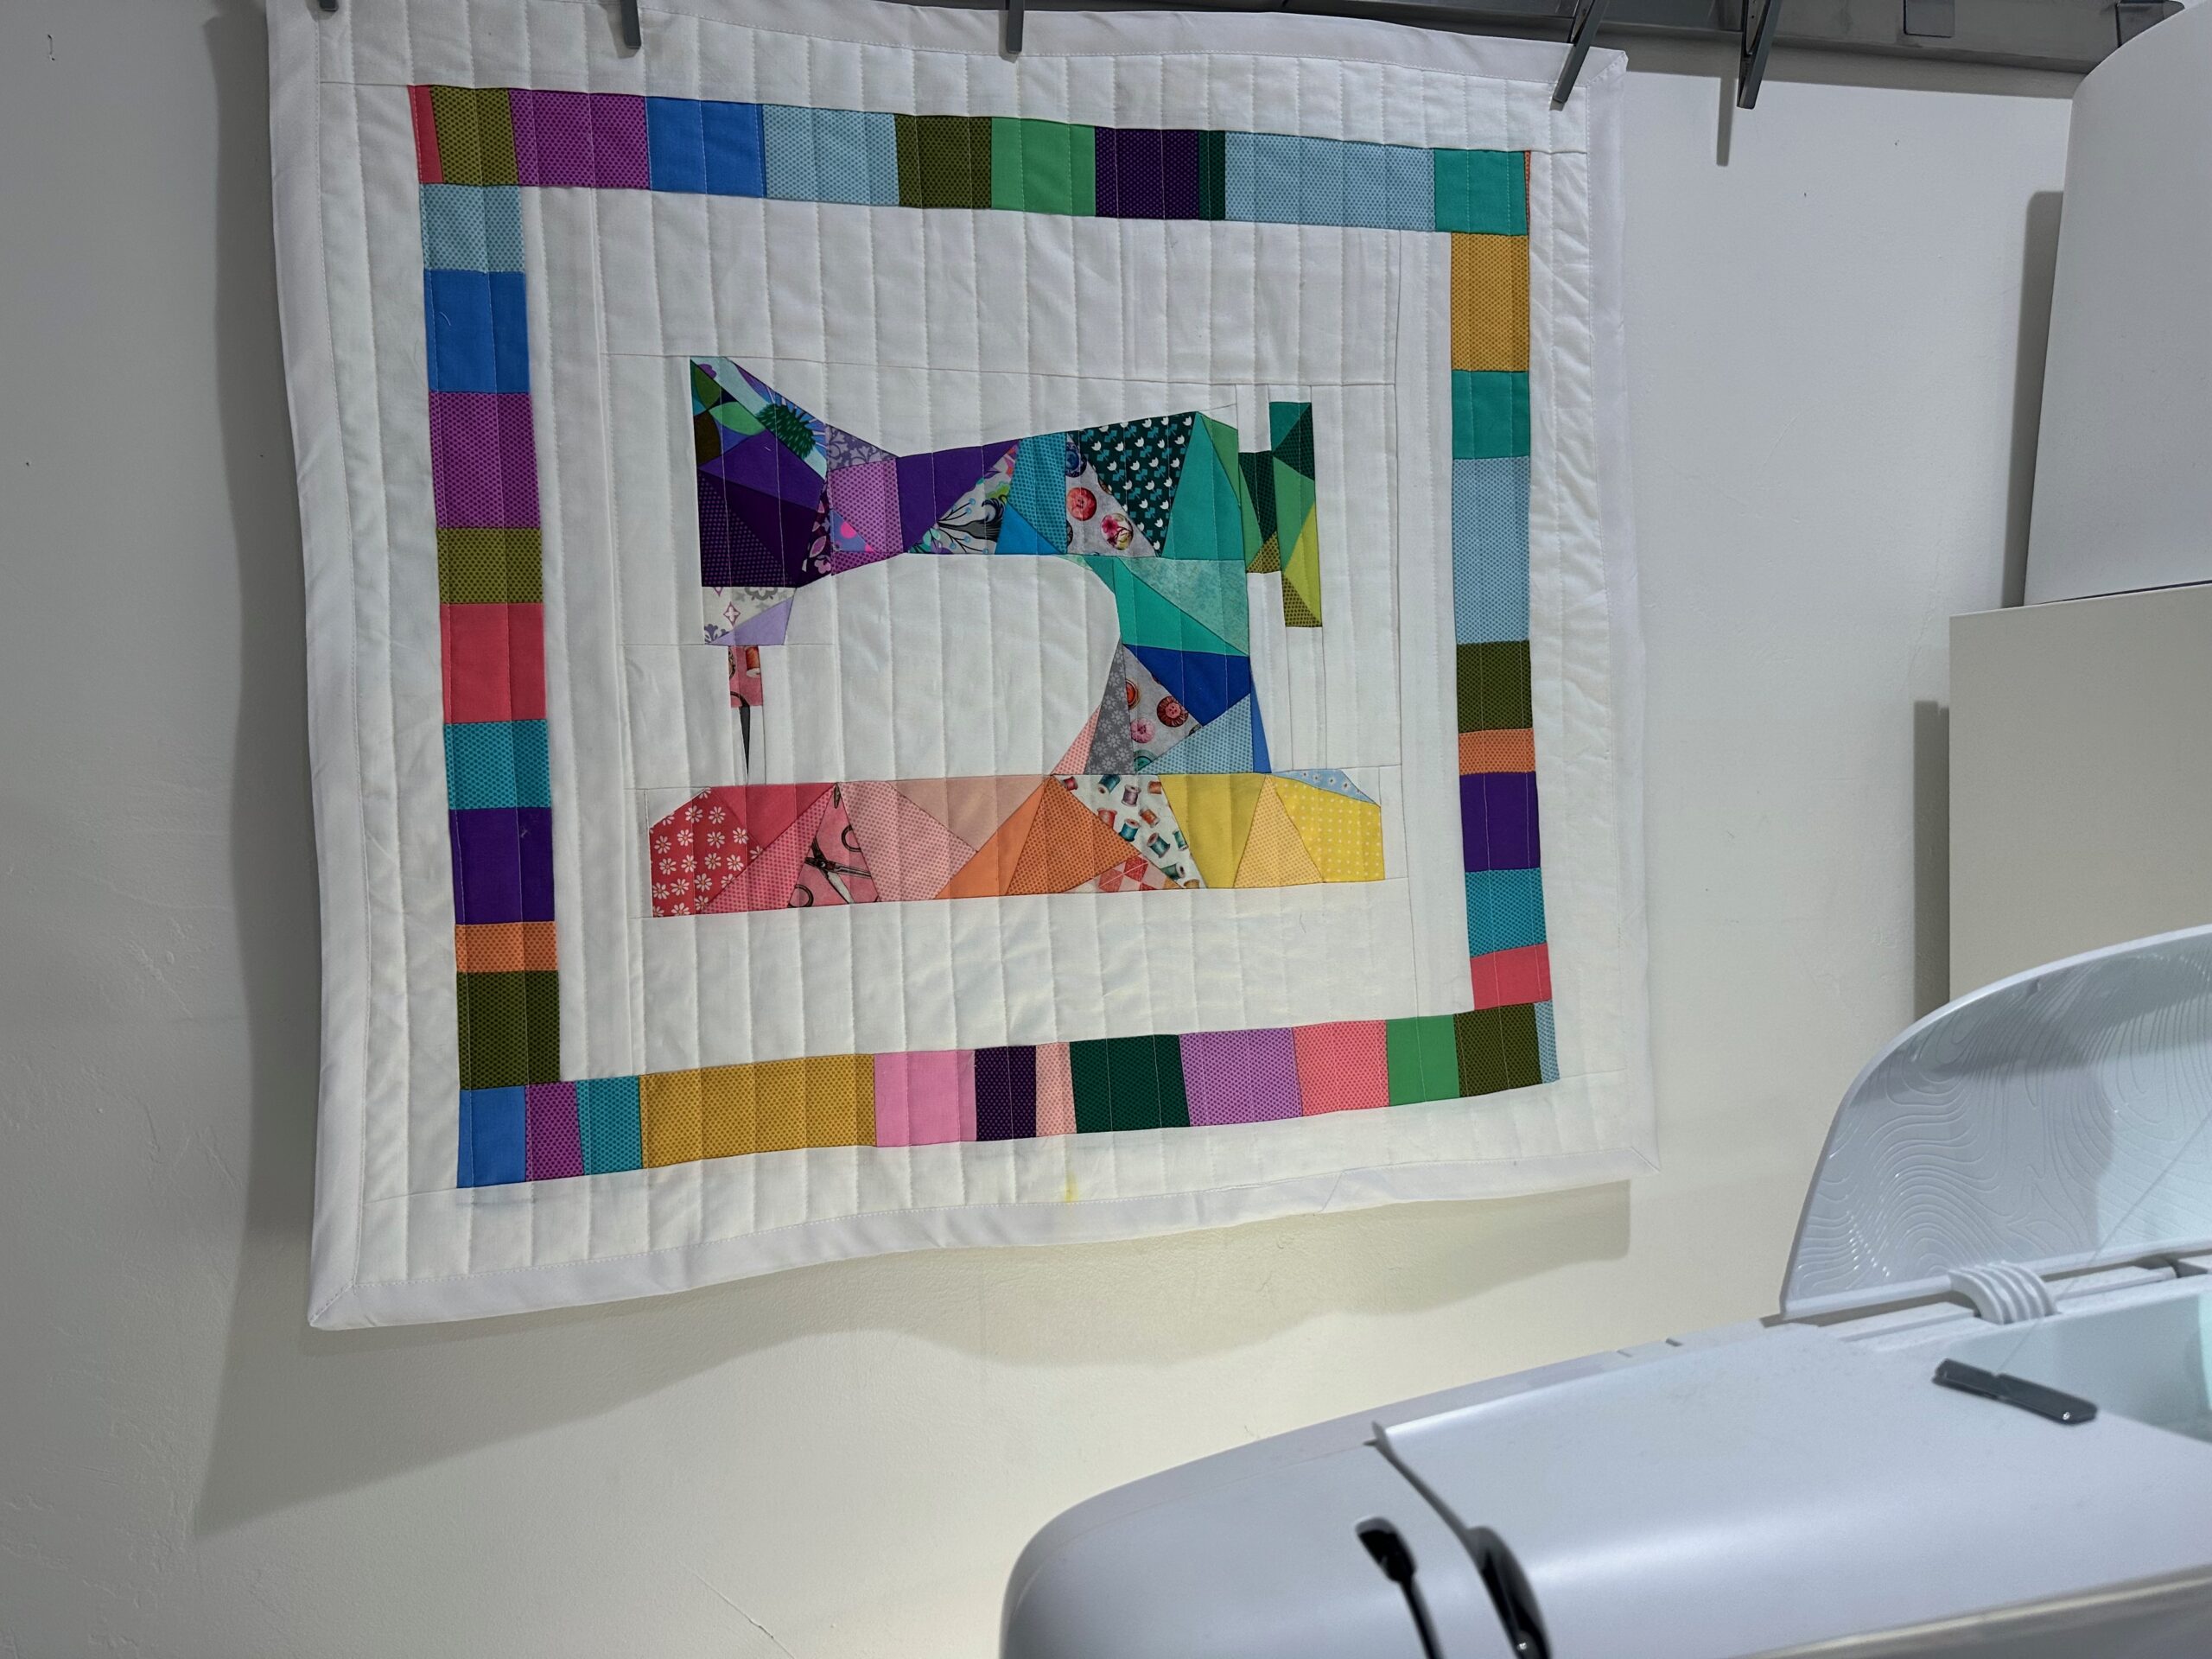
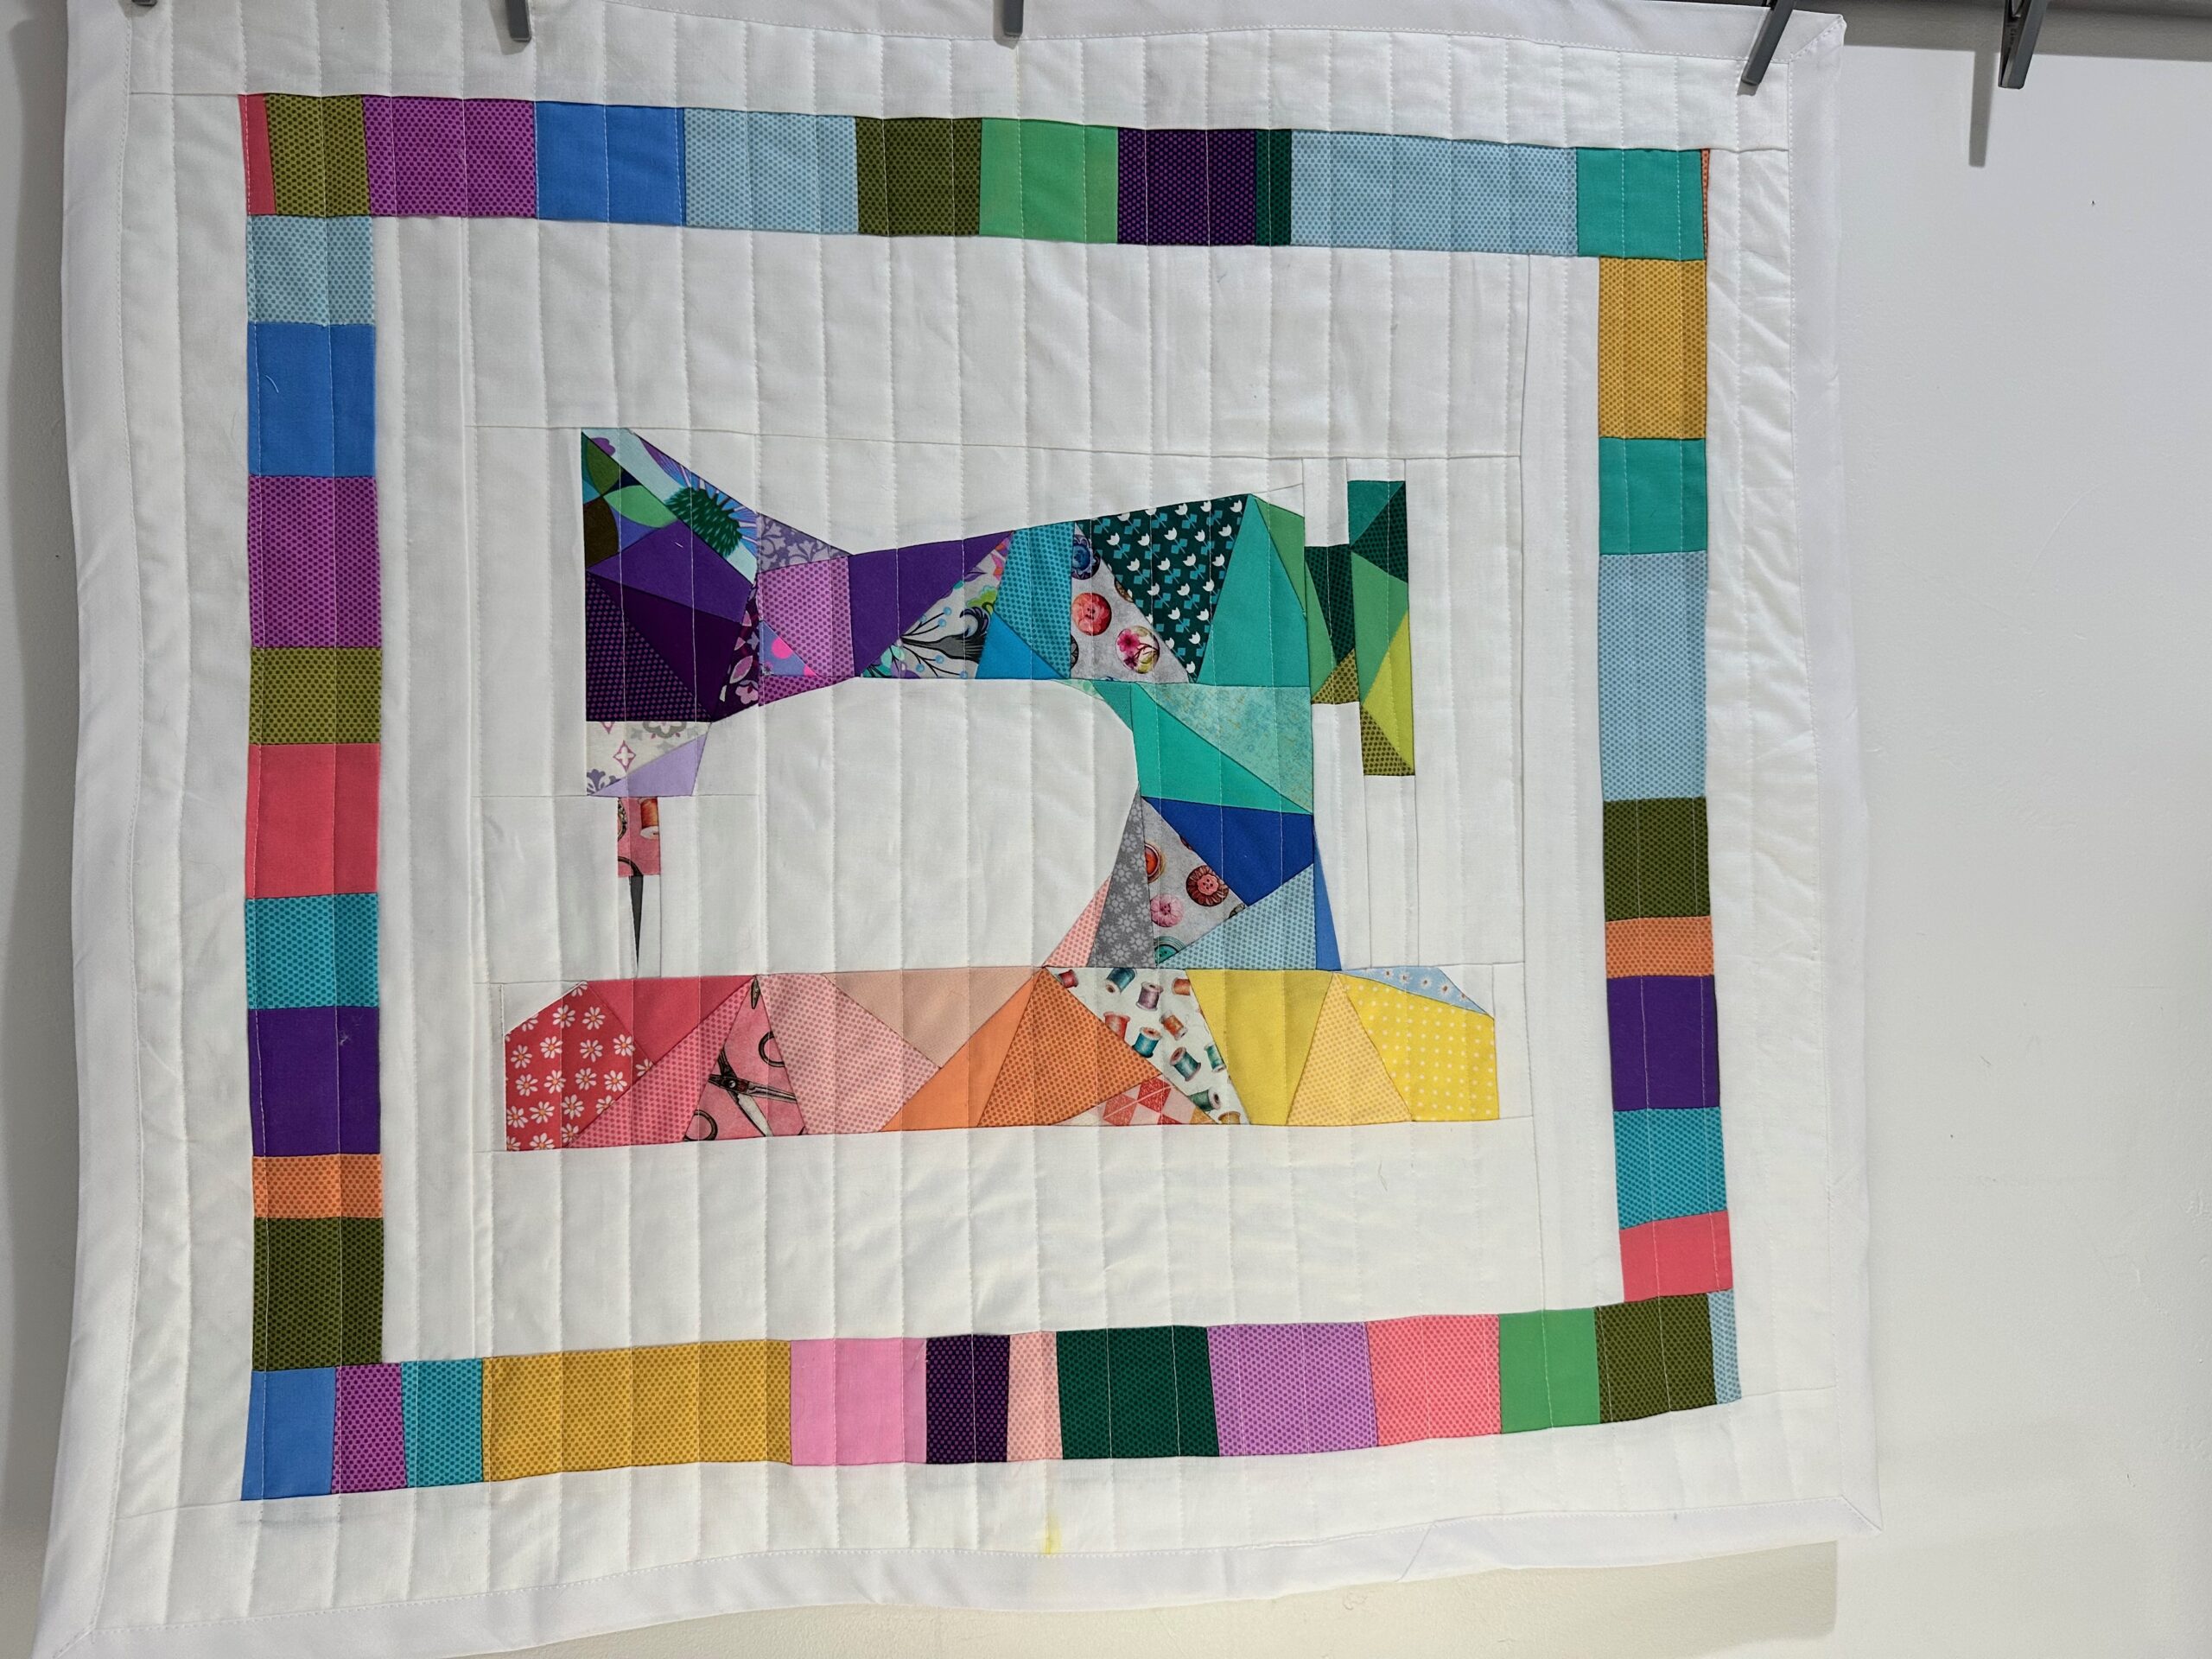
The pieced sewing machine makes a great focal point for a larger quilt or wall hanging. To add borders, either use 2½”-wide fabric strips (leftover jelly roll fabrics work great here!) or piece together more scrap fabrics and stitch the strips to the pieced sewing machine outer edges.
Stitch additional borders using the background fabric, if desired, until the desired dimensions are achieved.The featured wall hanging measures 26″ W x 24″ H.
Wall Hanging Quilting
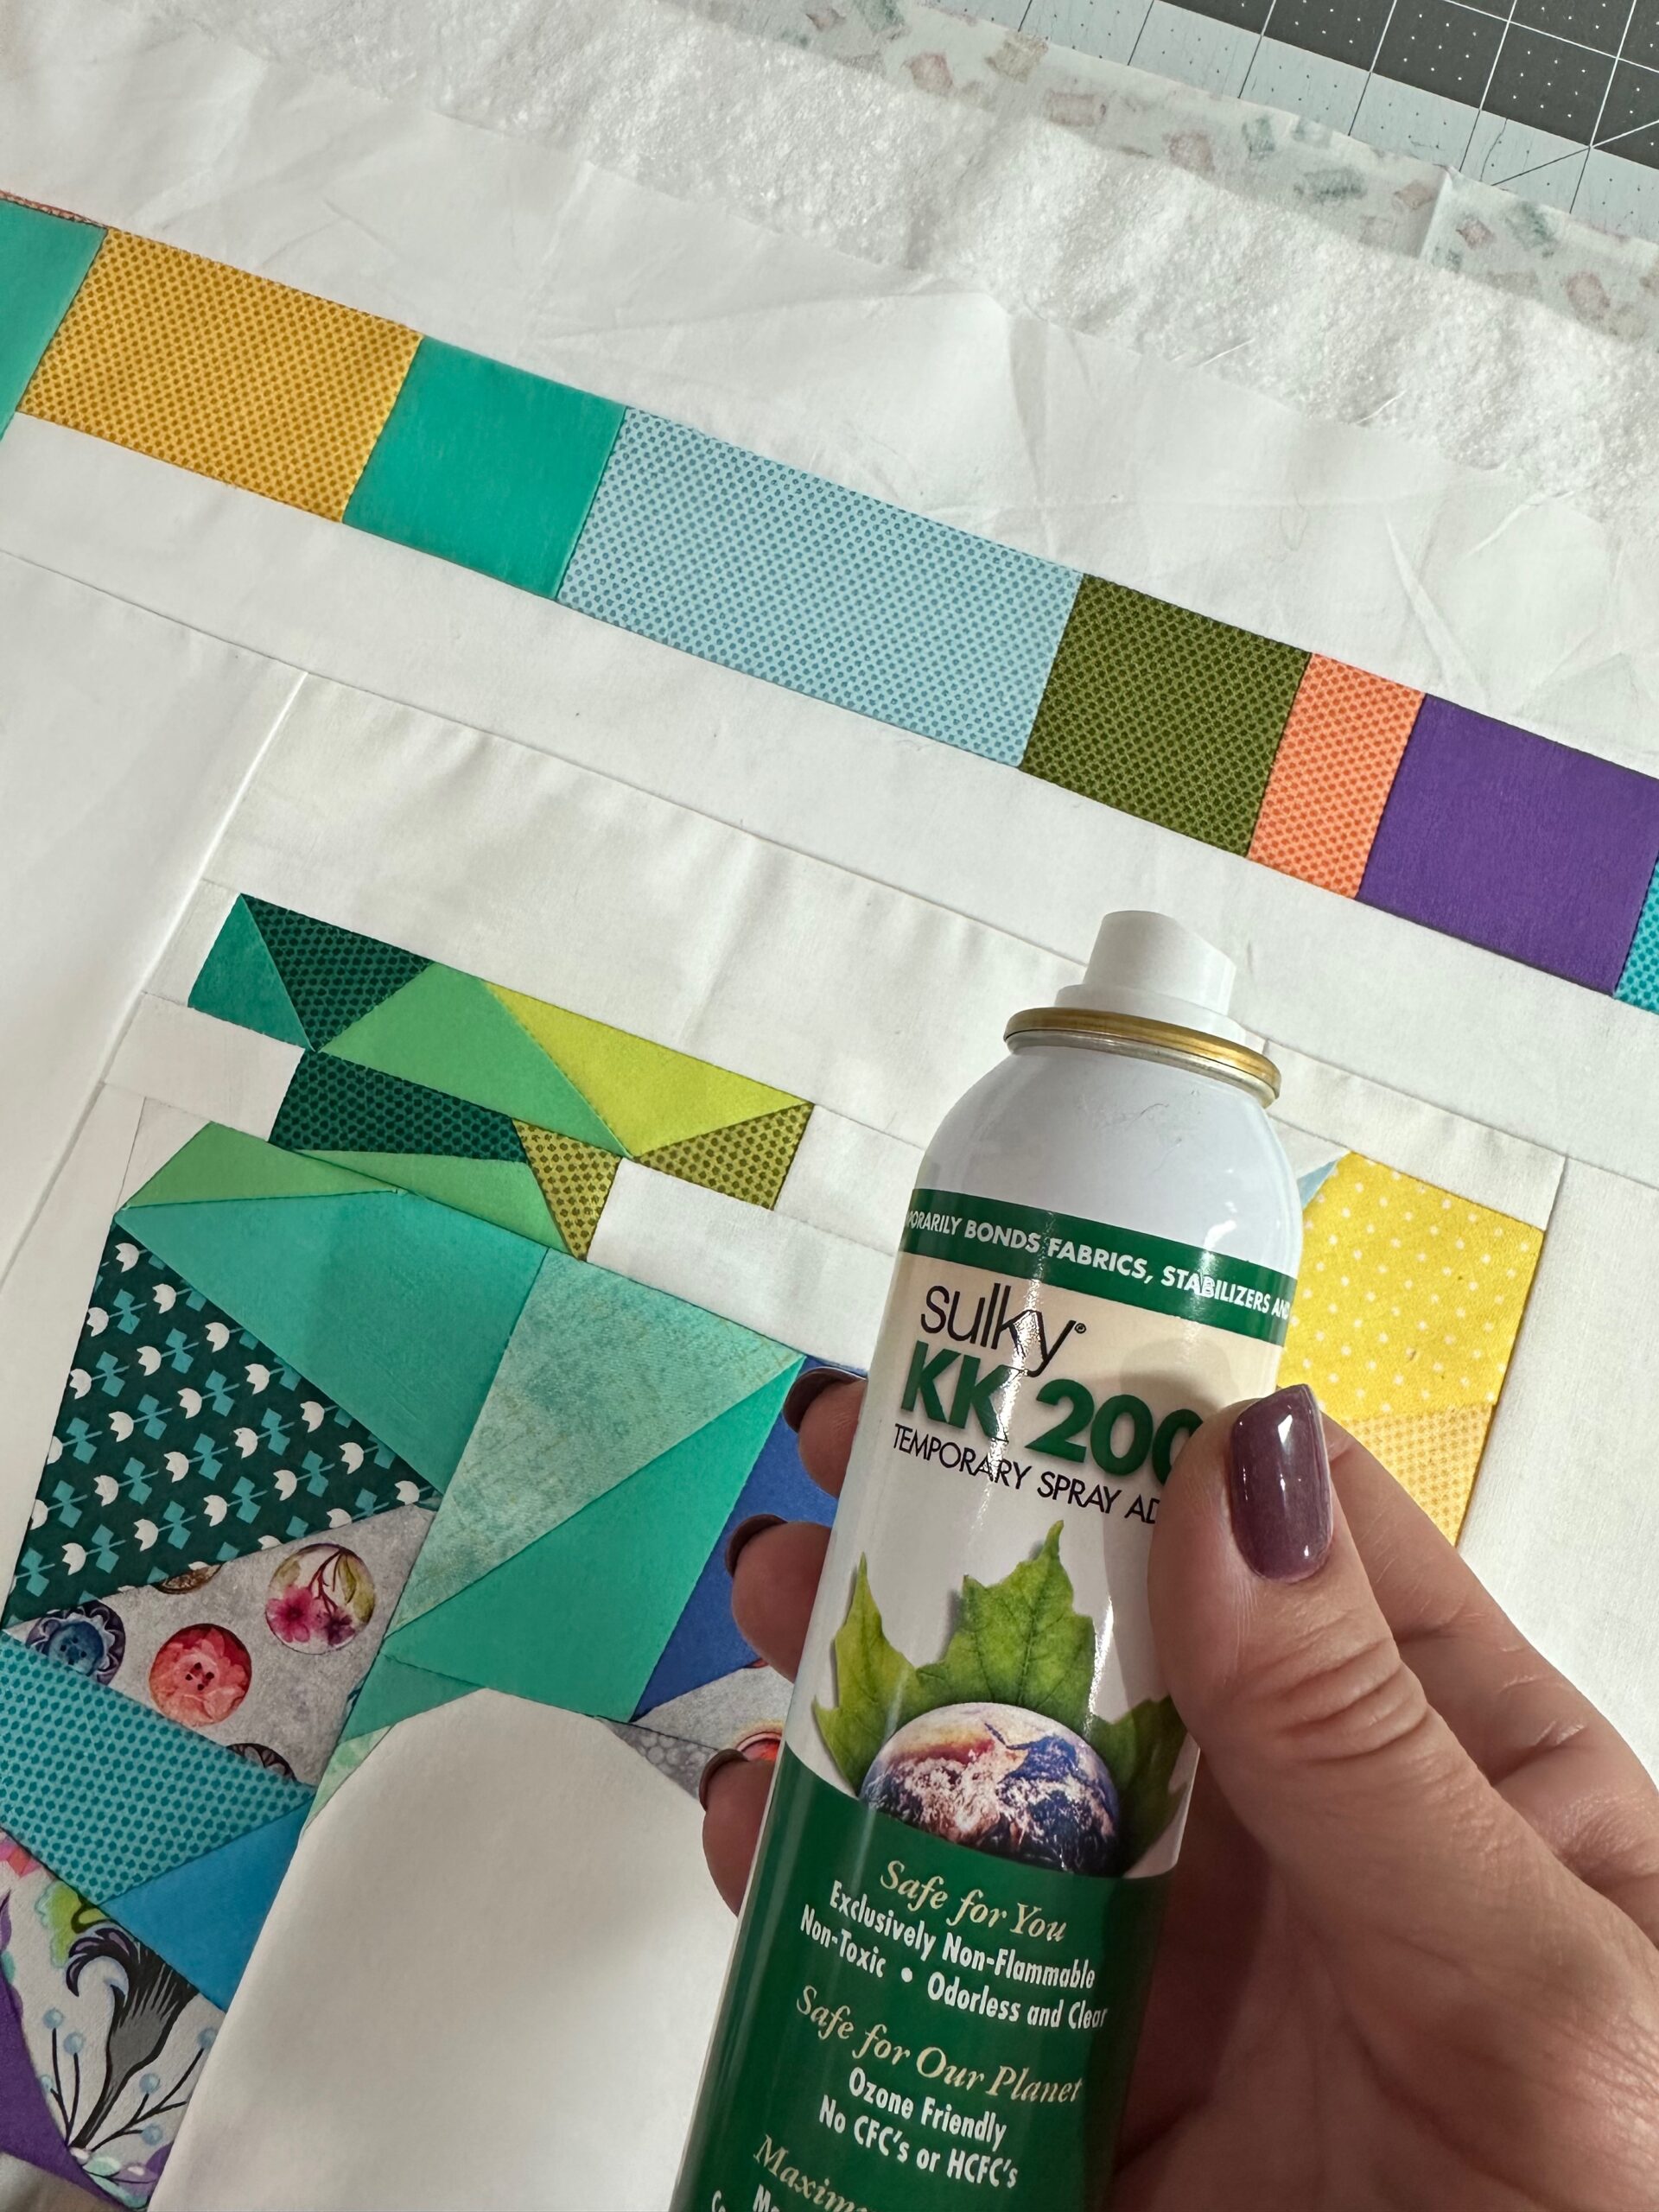
Layer the pieced sewing machine top with batting and backing, cut slightly larger than the top on all sides. Use Sulky KK2000 Temporary Spray Adhesive to secure the layers.
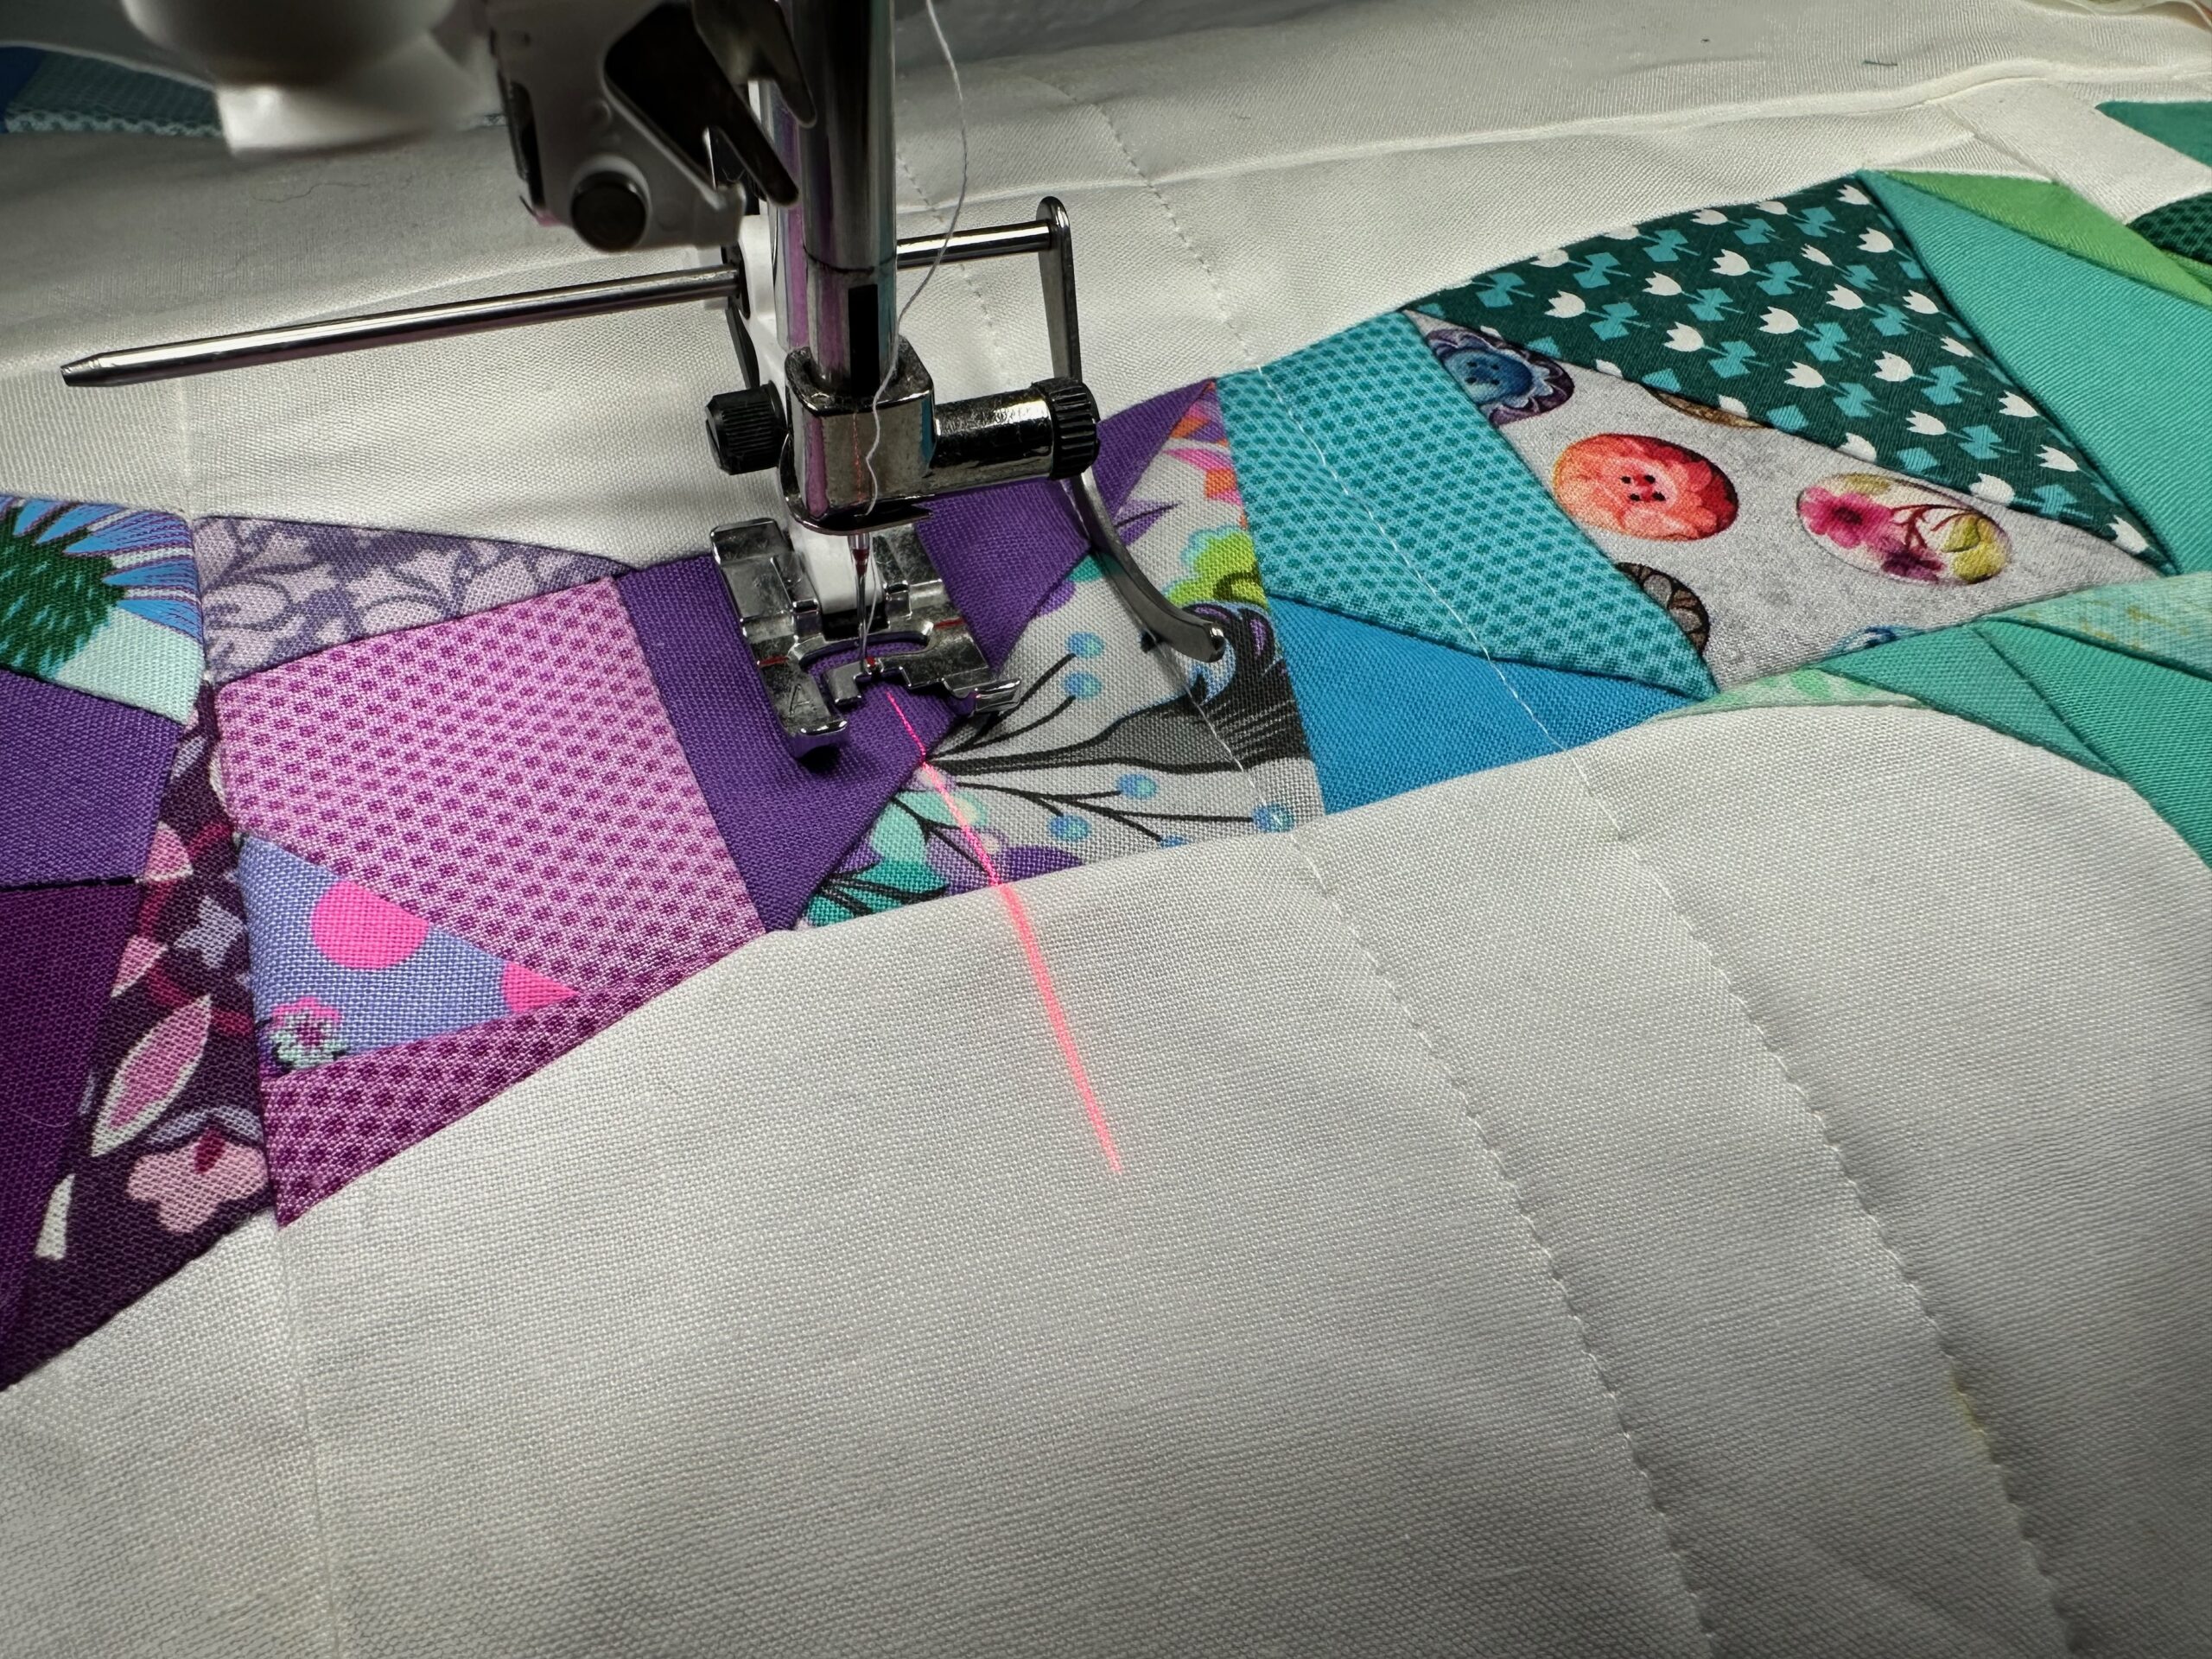
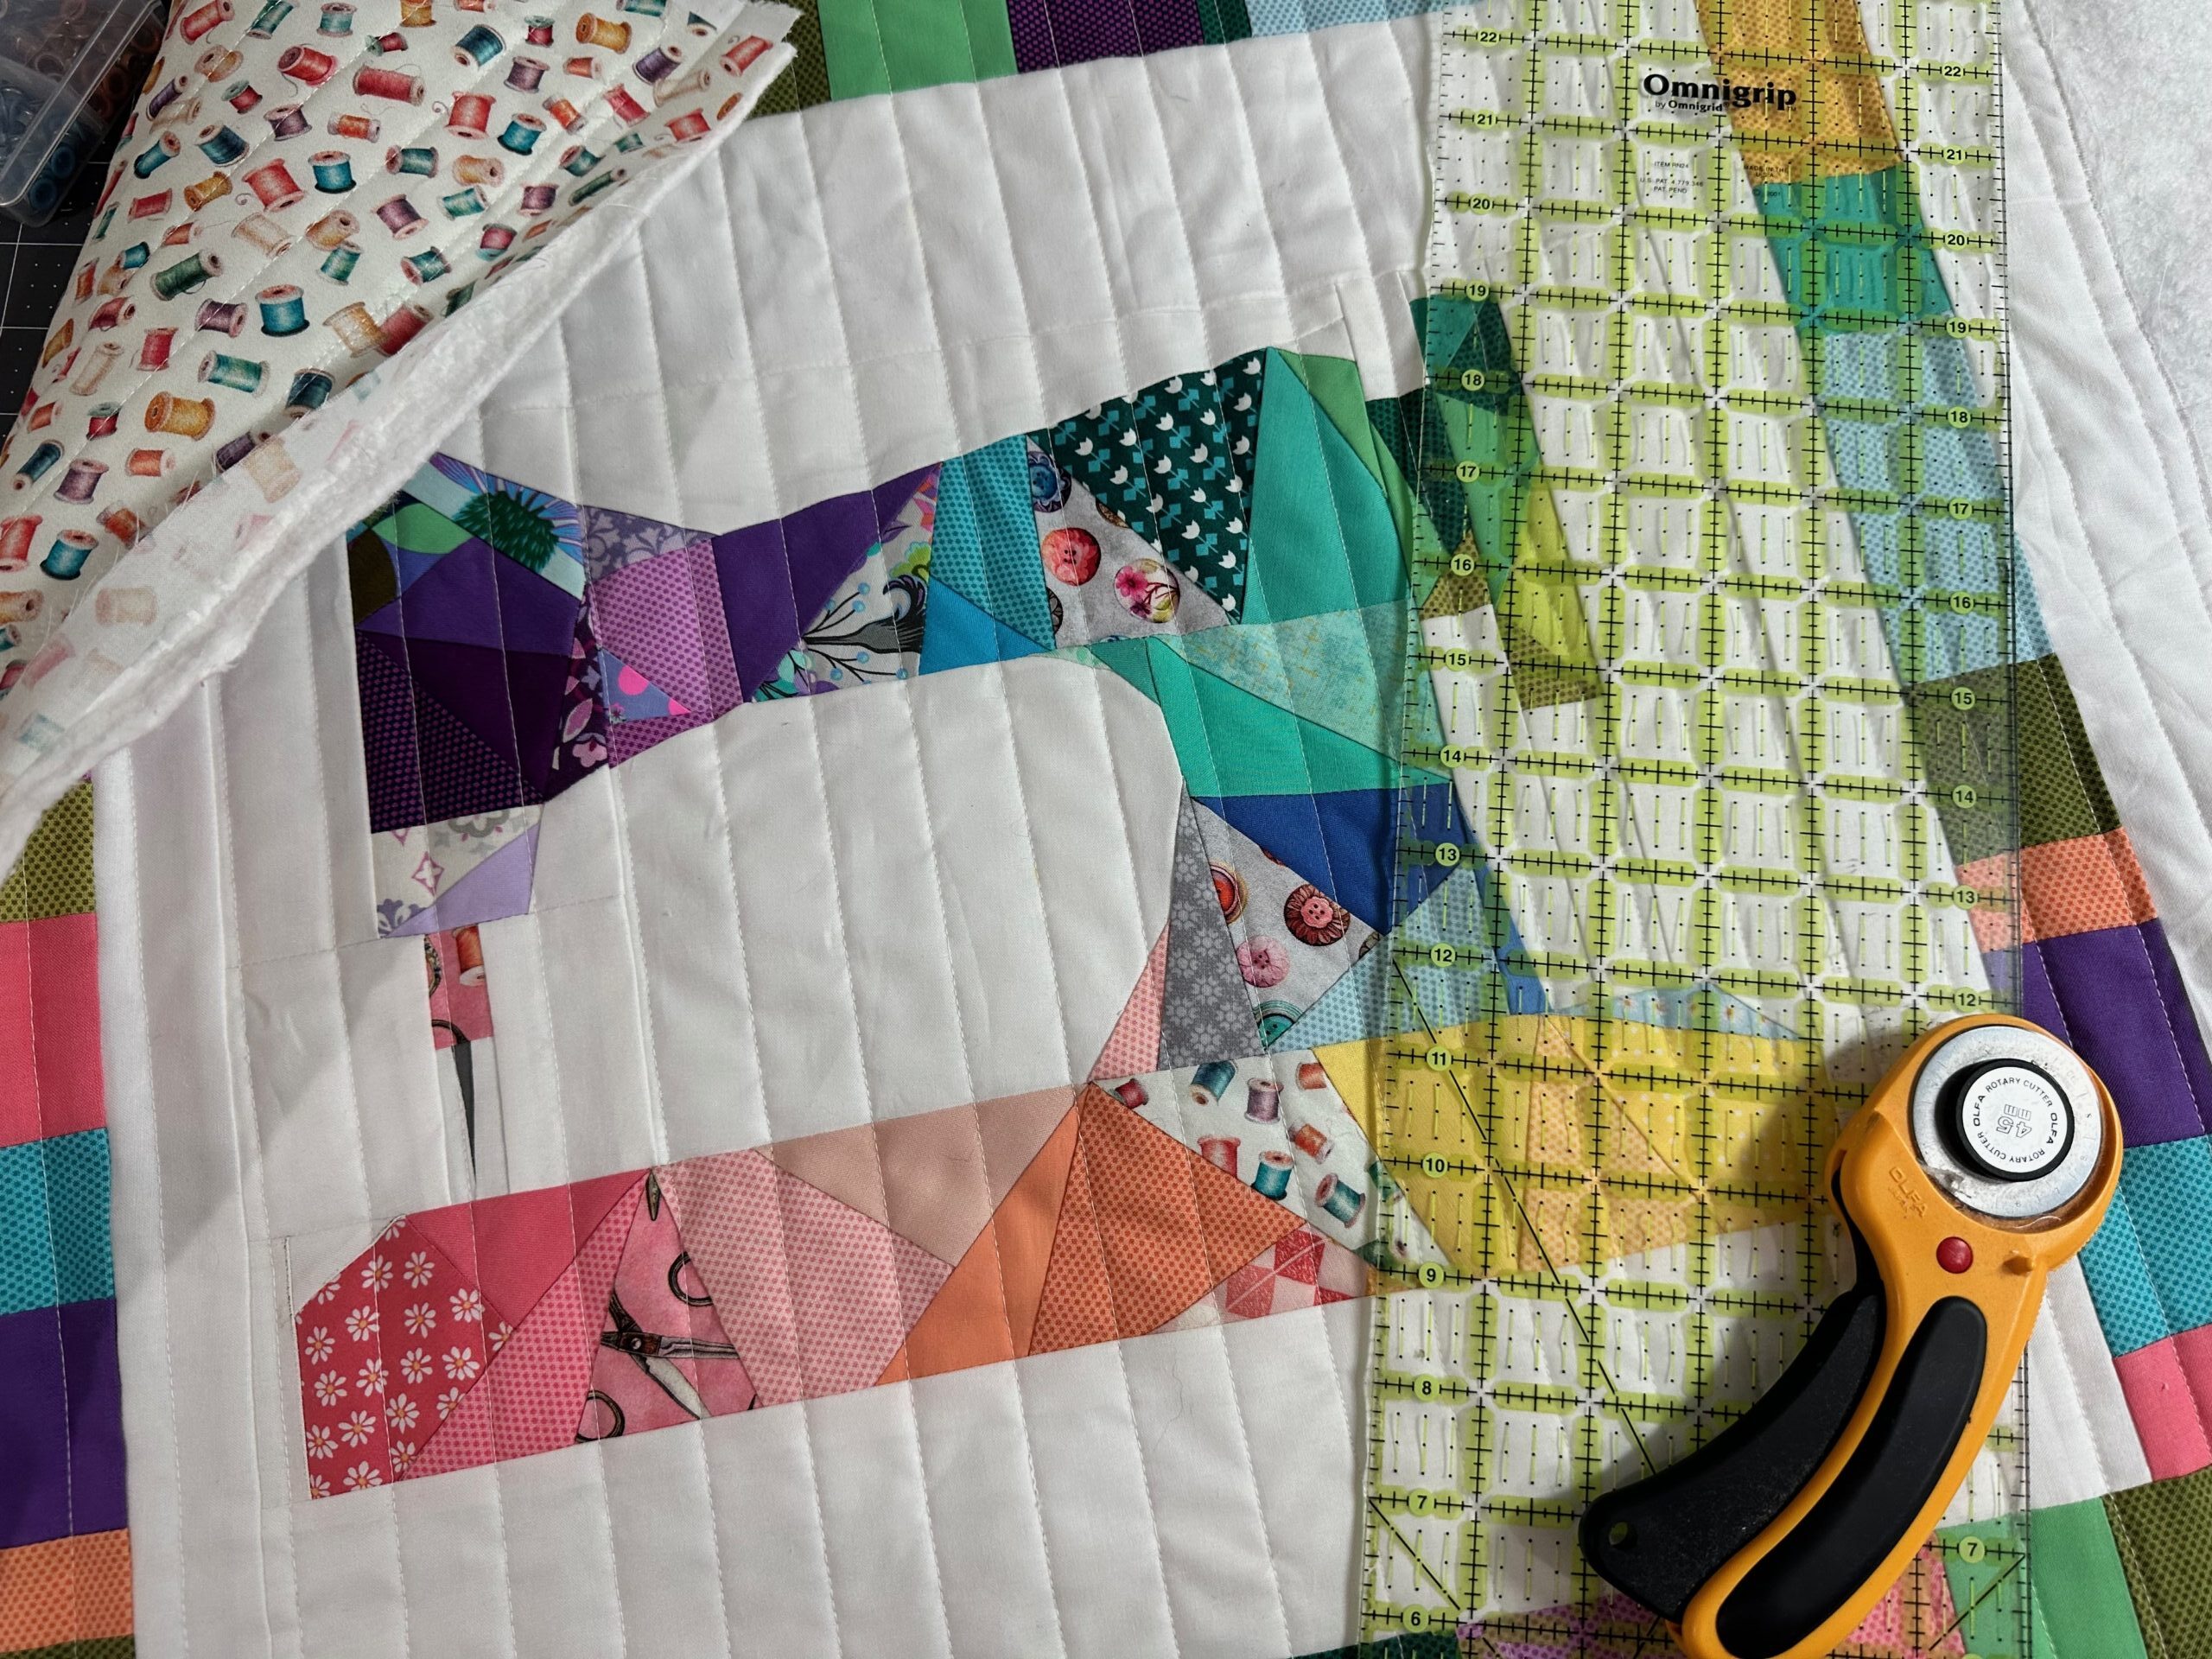
Keep the quilting simple to let the piecing take center stage. For the featured wall hanging, the piece is quilted with straight lines, placed 1″ apart across the wall hanging width. TIP: If you have a quilting guide, use it to avoid having to plot each line on the project.
After the quilting is complete, trim the wall hanging so all edges are even.
Lastly, bind the wall hanging in the manner of your choice.
This project turns leftover scraps into a personalized, frame-worthy piece that celebrates your sewing journey. The Geometric Sewing Machine design highlights your creative tools and allows your unique fabric stash to shine. Whether hung in your sewing nook or given as a gift, it’s a meaningful way to celebrate National Sewing Month.
