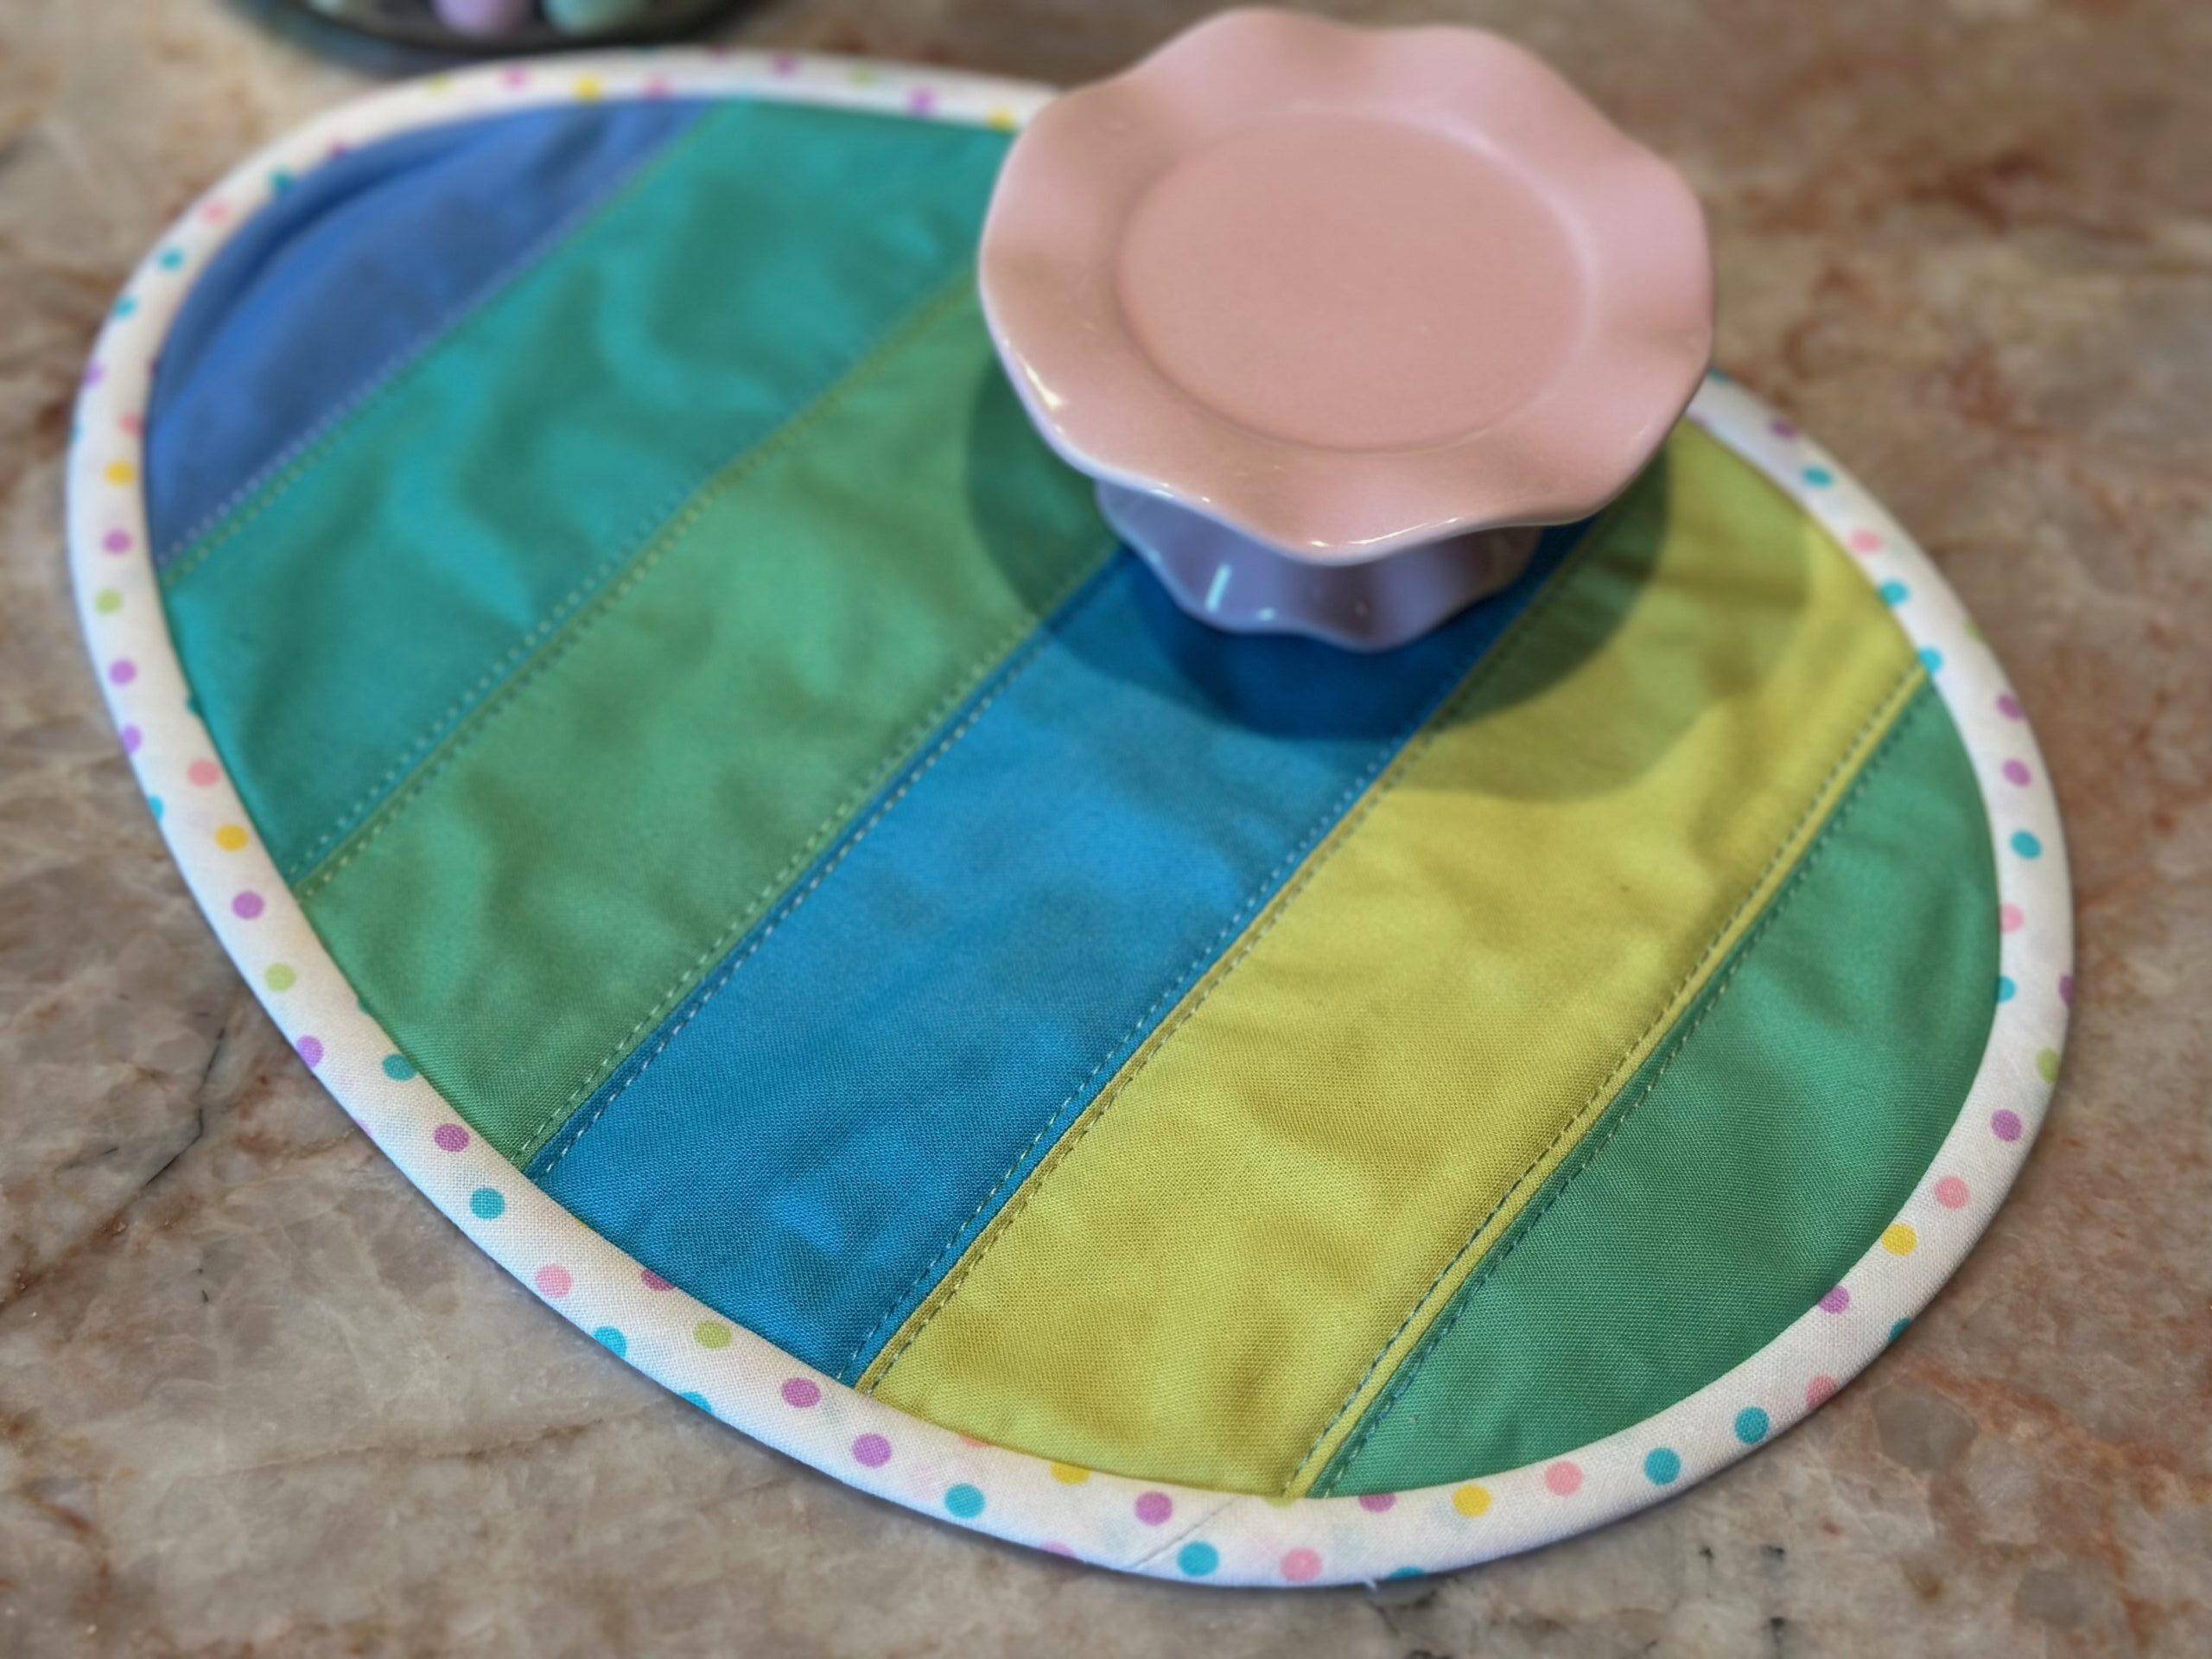
Quilt-as-You-Go Egg Snack Mats
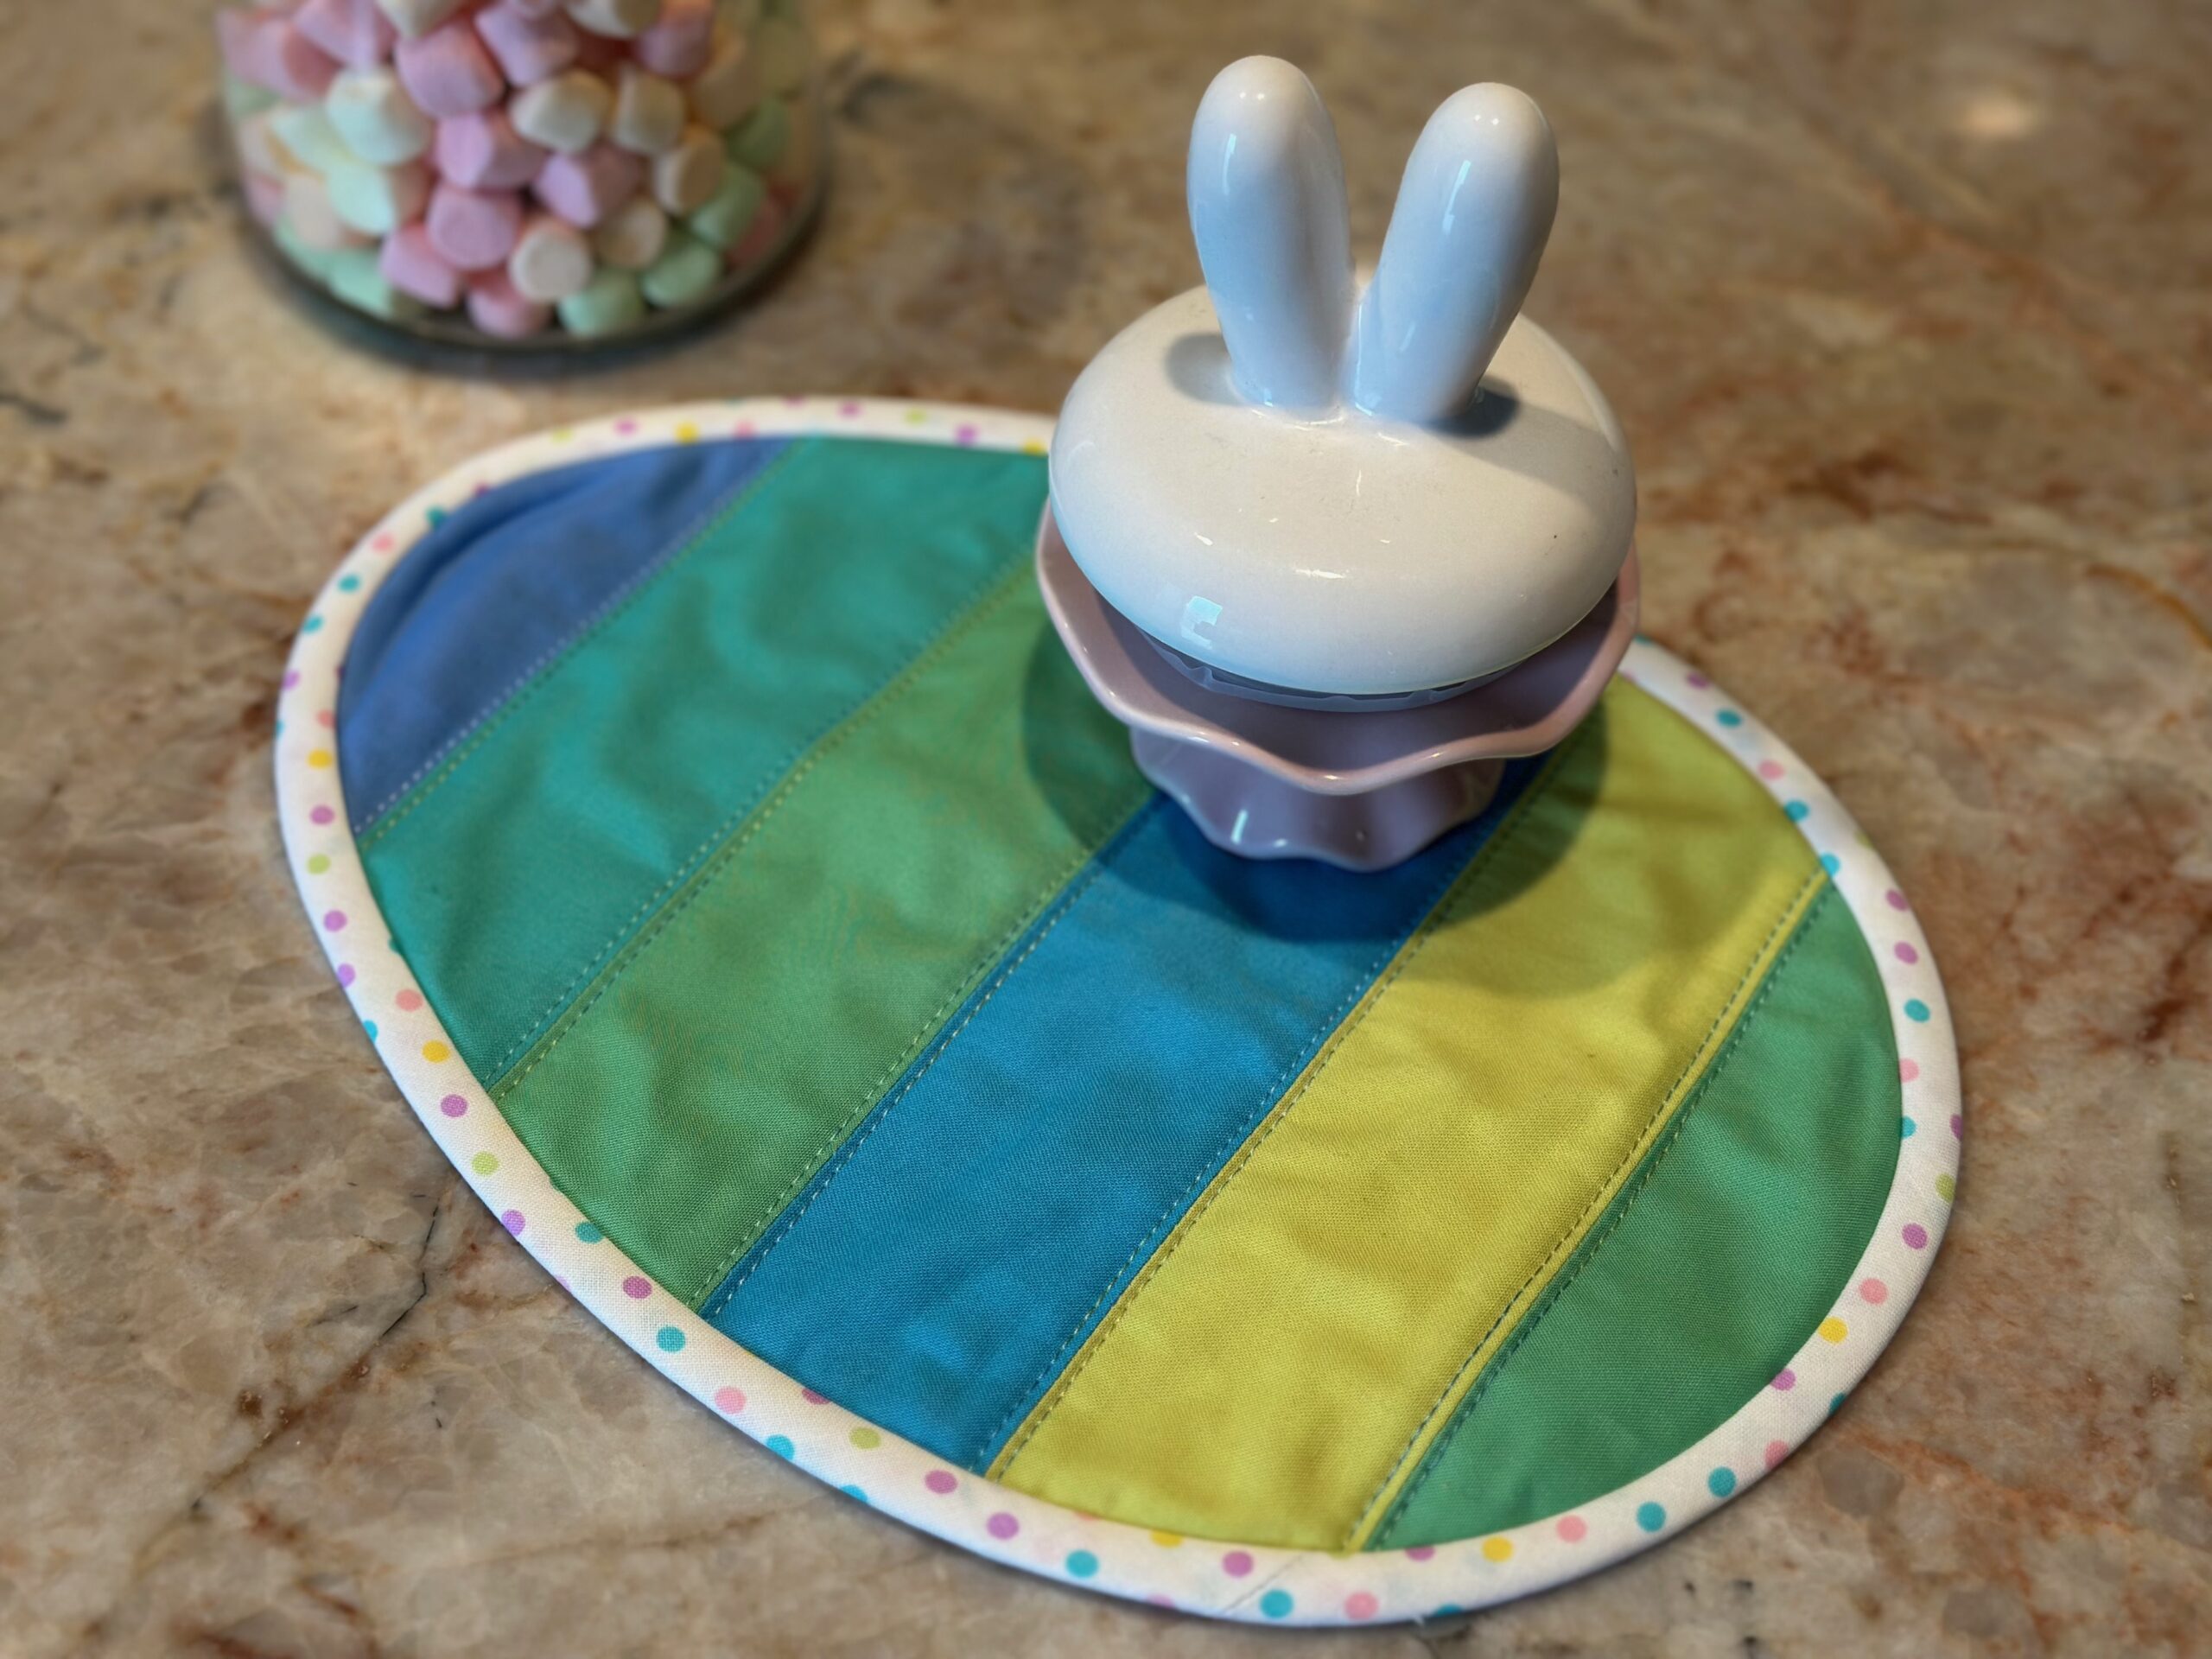
Create strip-pieced egg-shaped snack mats for a festive addition to your Easter décor. These are on the small size, so think of them as more of a “mug rug” or snack mat! To make a larger placemat size, simply enlarge the templates by about 20% when printing. Note: If you enlarge the pattern, you may need more fabric than what’s listed in the supplies below.
FINISHED SIZE 8 1/2″ W x 11 3/4″ H
Egg Placemats Supplies
Supplies listed are enough to make one snack mat.
- Egg Snack Mat Pattern Templates
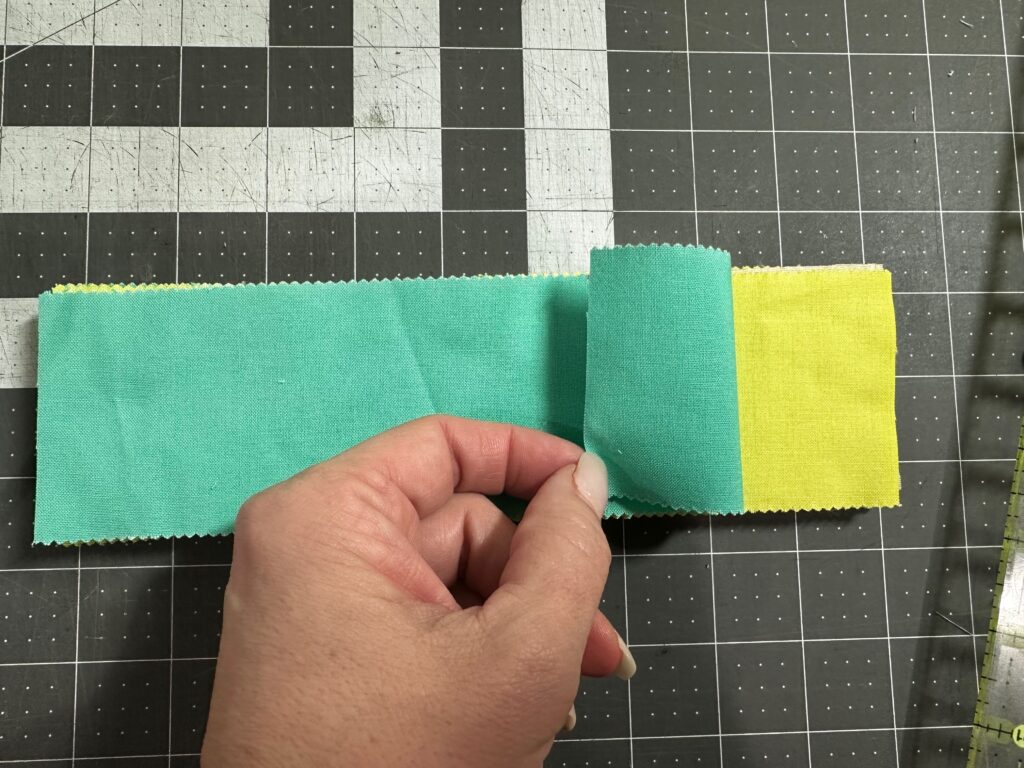
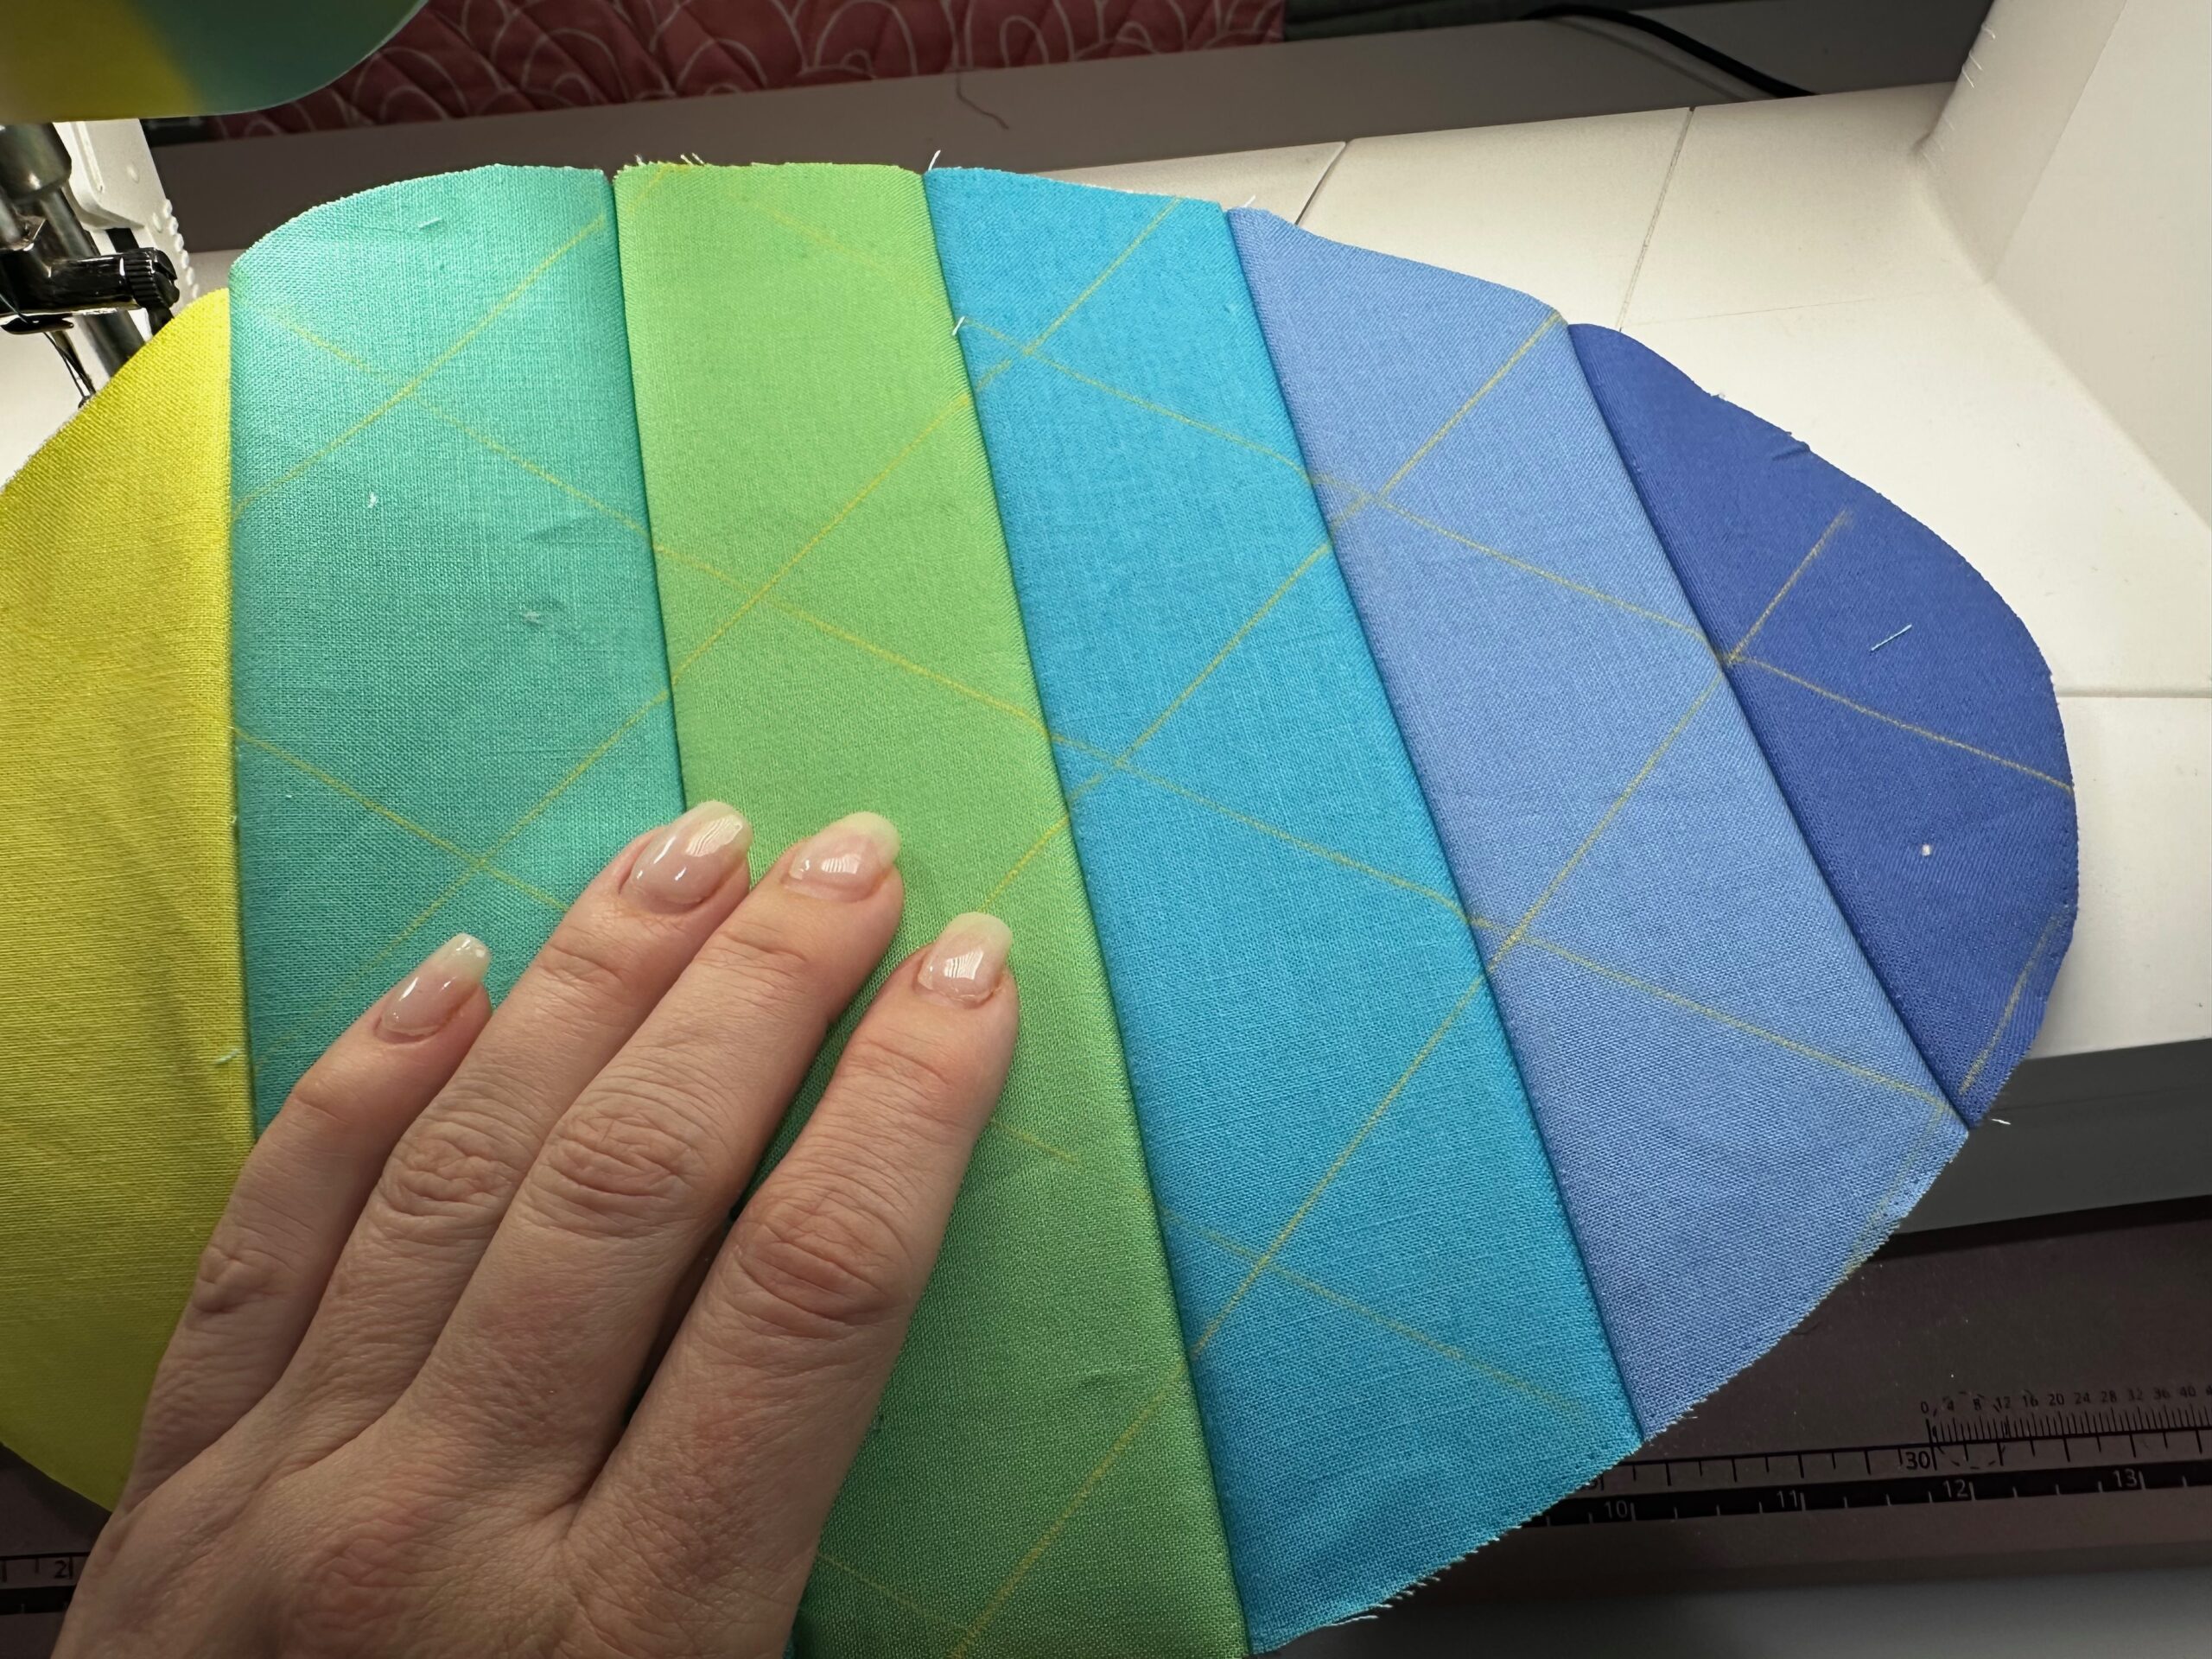
- (12) coordinating 2 1/2″-wide x 9″ fabric strips (this is a great project for leftover jelly roll strips!)
- (6) 2 1/2″ x 9″ rectangles of batting or lightweight sew-in foam interlining
- Sulky 50 wt. Cotton Thread
- Sulky 30 wt. Cotton Blendables® Thread (optional)
- Organ® Universal and/or Quilting Assortment Needles
- Bias binding (self- or pre-made)
Quilt as You Go
“Quilt as you go” (often shortened to QAYG) is a quilting method where the quilt is assembled and quilted in smaller sections. Instead of piecing the entire quilt top, then adding batting and backing for the actual quilting step, sections are added with all three layers at once. This makes quicker work of smaller quilty projects, such as the featured snack mats.
With the quilt-as-you-go method, you can also use a serger to create the entire snack mat. Set the serger for a three- or four-thread overlock stitch and serge each seam as you build the project.
Additional quilting stitches can be added after each seam, too. If you plan to add quilting stitches, choose a Sulky 30 wt. Cotton Blendables Thread to add color and depth to the project. You’ll need a size 90/14 Needle for this thread thickness.
Let’s get started!
Snack Mat Construction
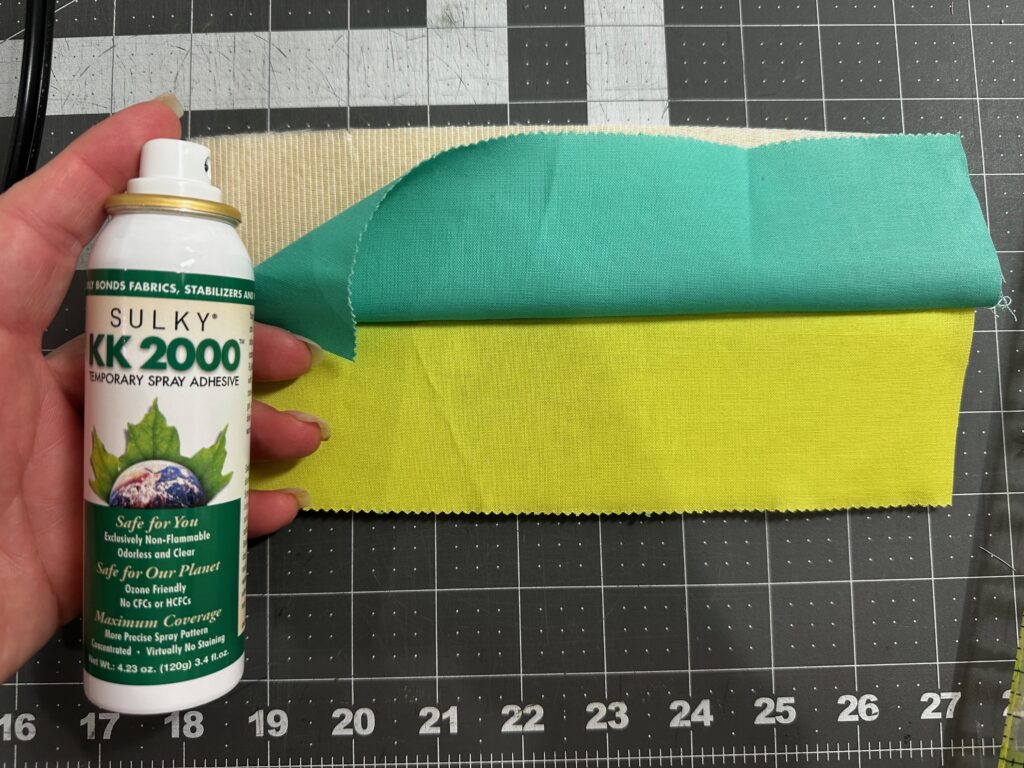
Place one fabric strip wrong side up on a flat work surface. Center a rectangle of batting (or foam) on the fabric wrong side; secure with Sulky KK2000 Temporary Spray Adhesive.

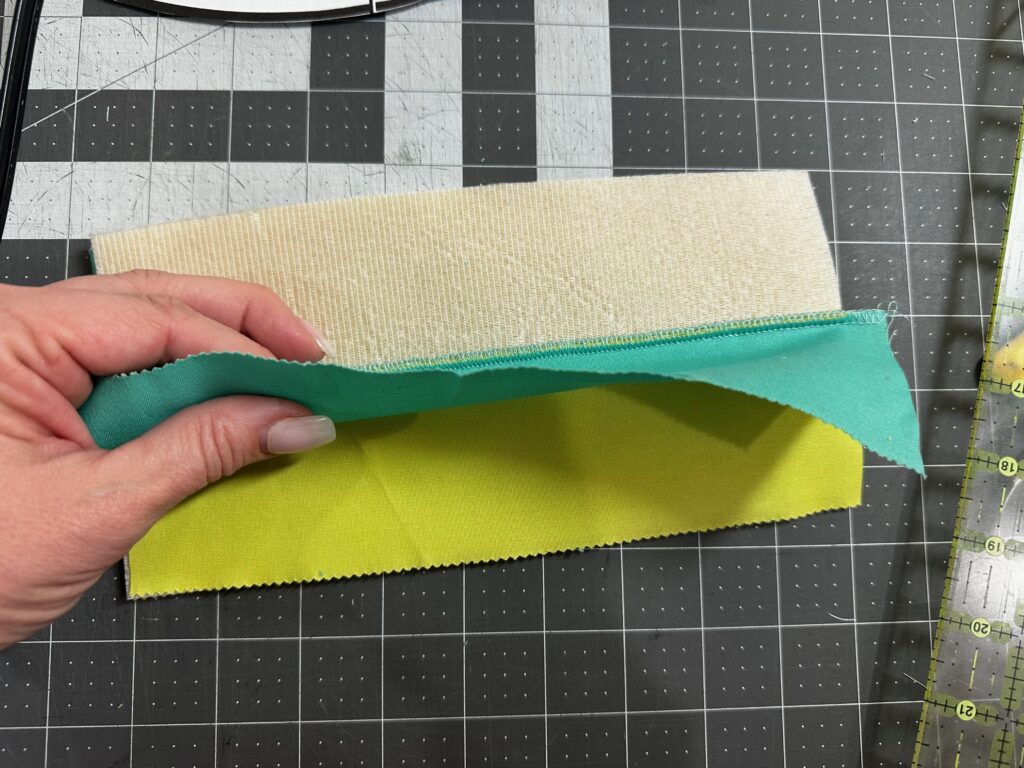
Then, center another fabric strip right side up over the batting.
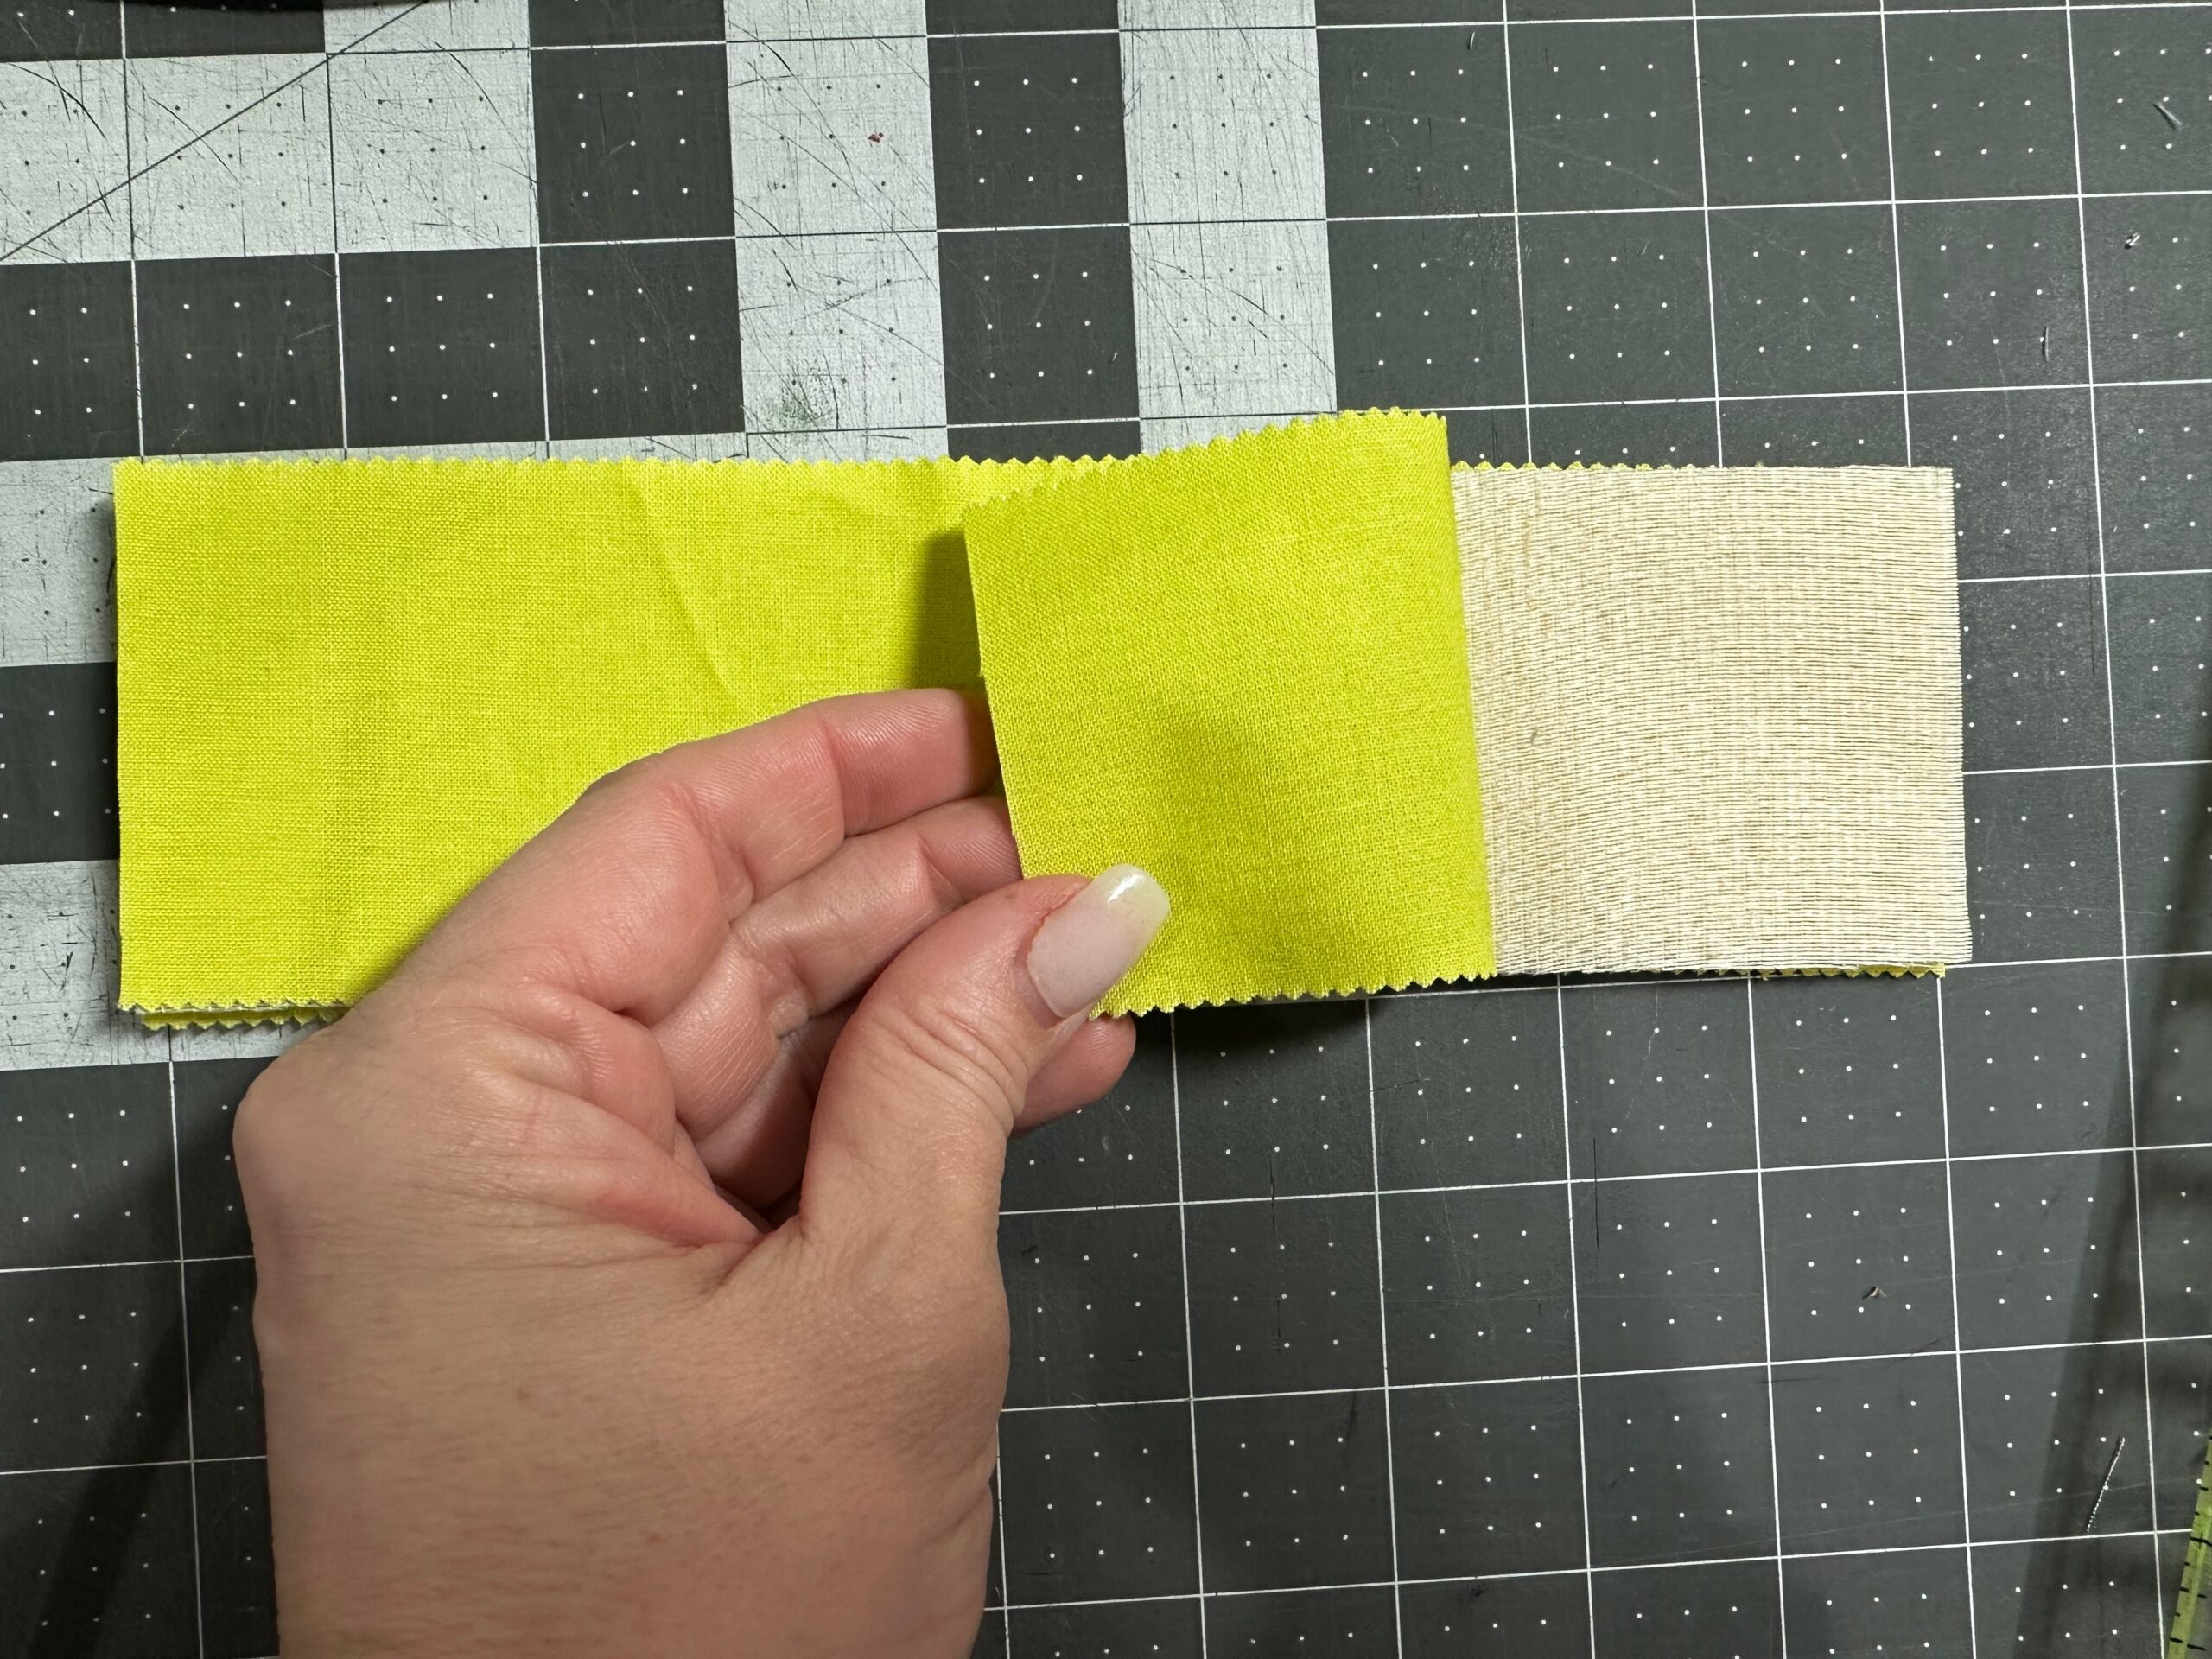
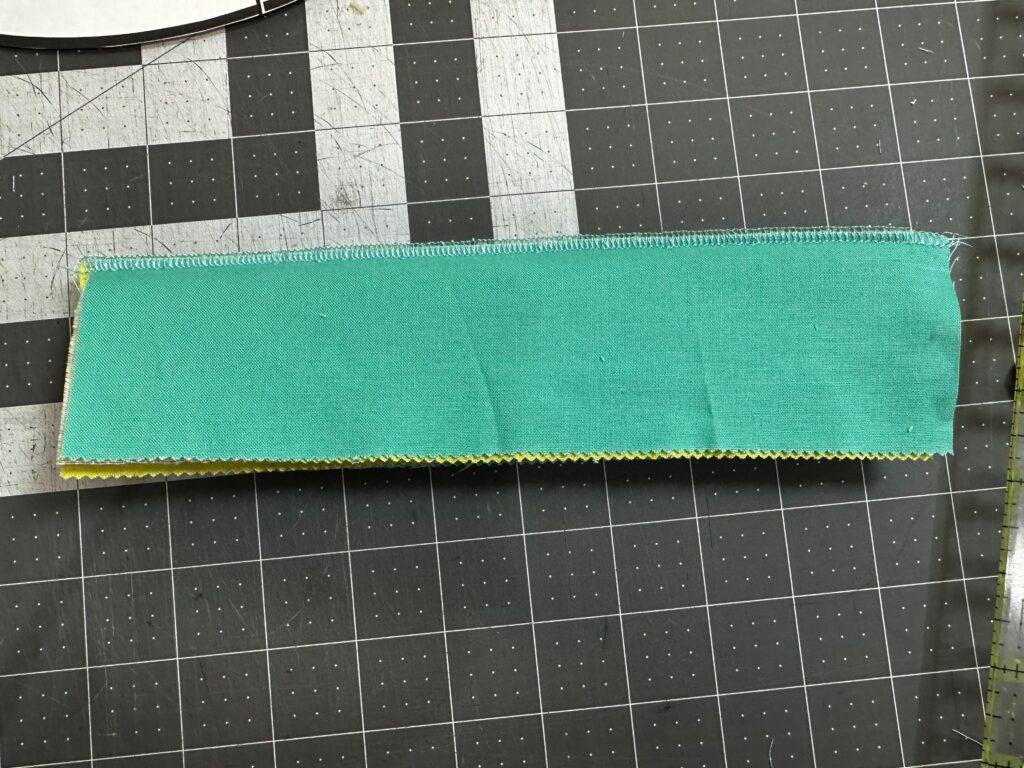
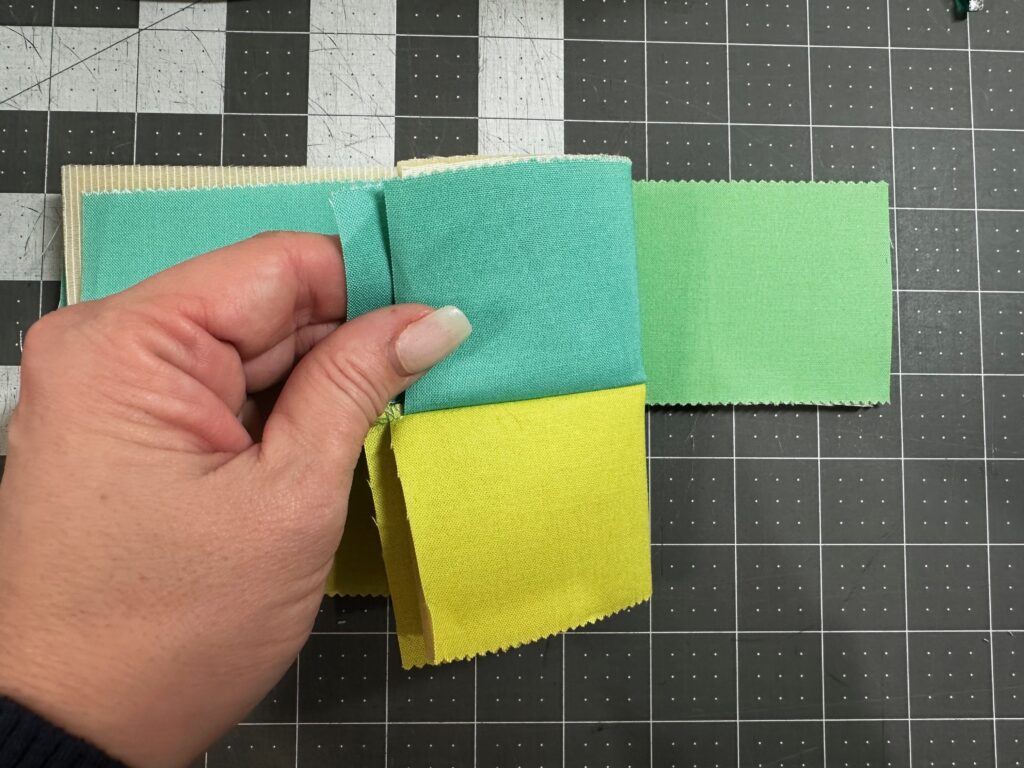
Next, place another rectangle of batting (or foam) on the flat work surface. Center a fabric strip right side up on the batting. Then, place the previous fabric-strip sandwich over the fabric, aligning all edges and corners. Center another fabric strip over all layers, with the wrong side facing up. Stitch the long edge through all layers.
Note: if using foam, this will be a very thick seam! It’s helpful to use a serger to compress the layers together. Or, use a walking foot, even-feed foot or raise the presser foot pressure slightly to accommodate the fabric thickness.
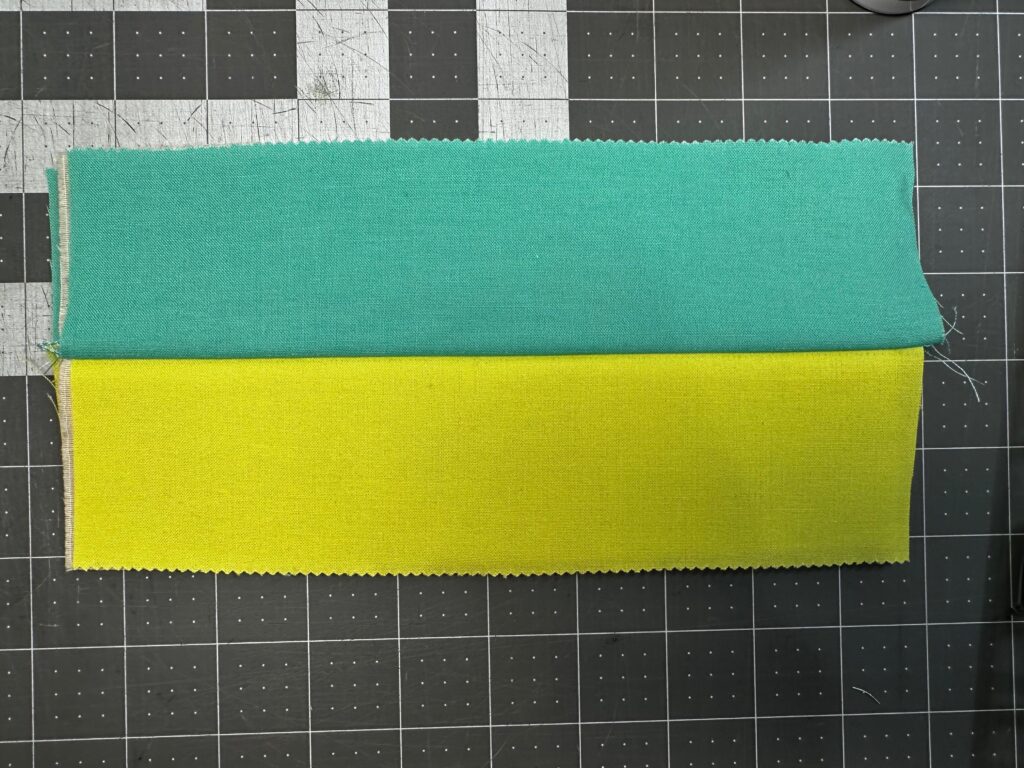
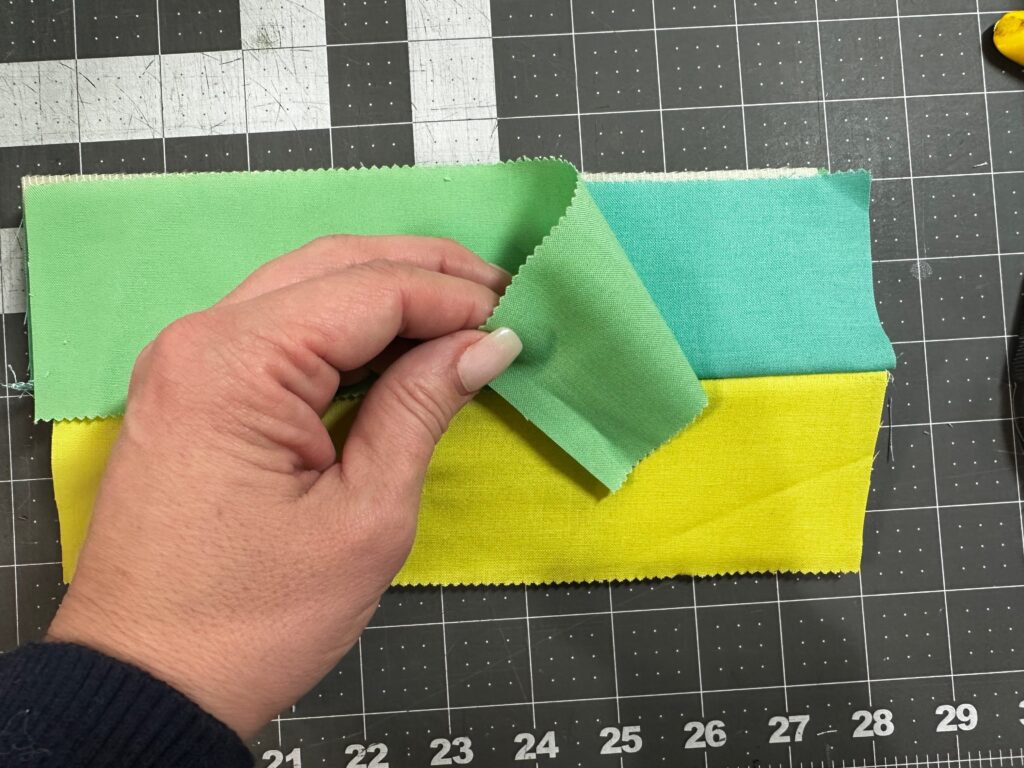
Next, fold the lower batting/fabric up away from the center fabric sandwich. Then, fold the upper fabric up toward the right side. Press, and then use KK2000 to secure this “sandwich.” Now, notice that the seam is enclosed inside the second fabric sandwich.
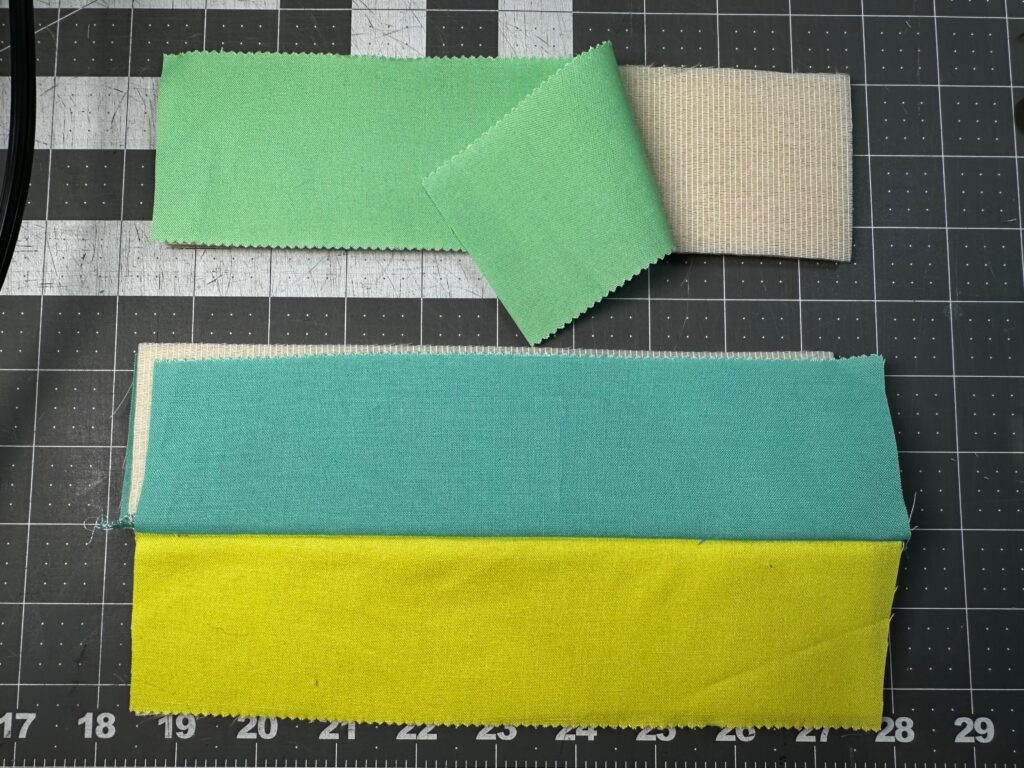
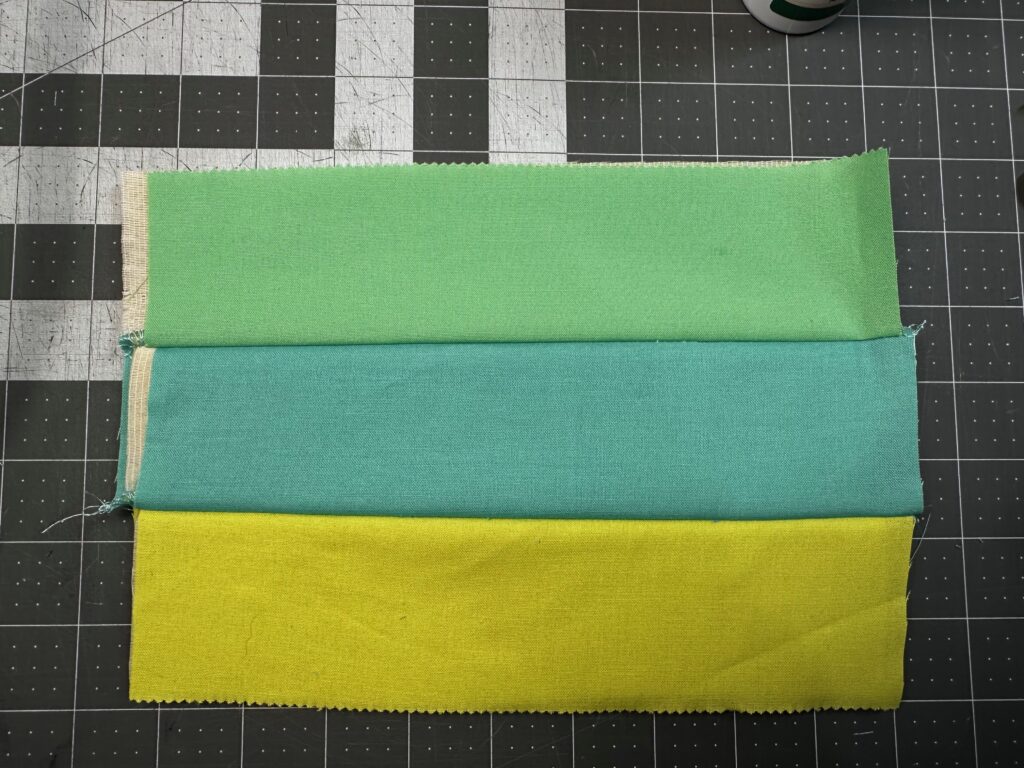
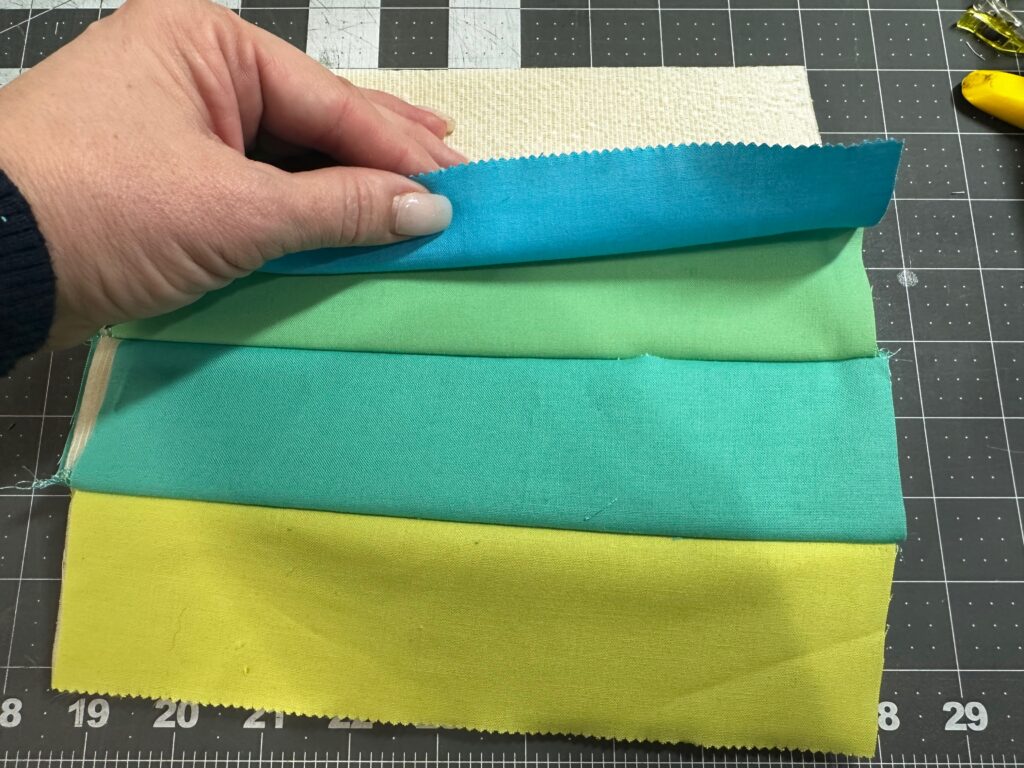
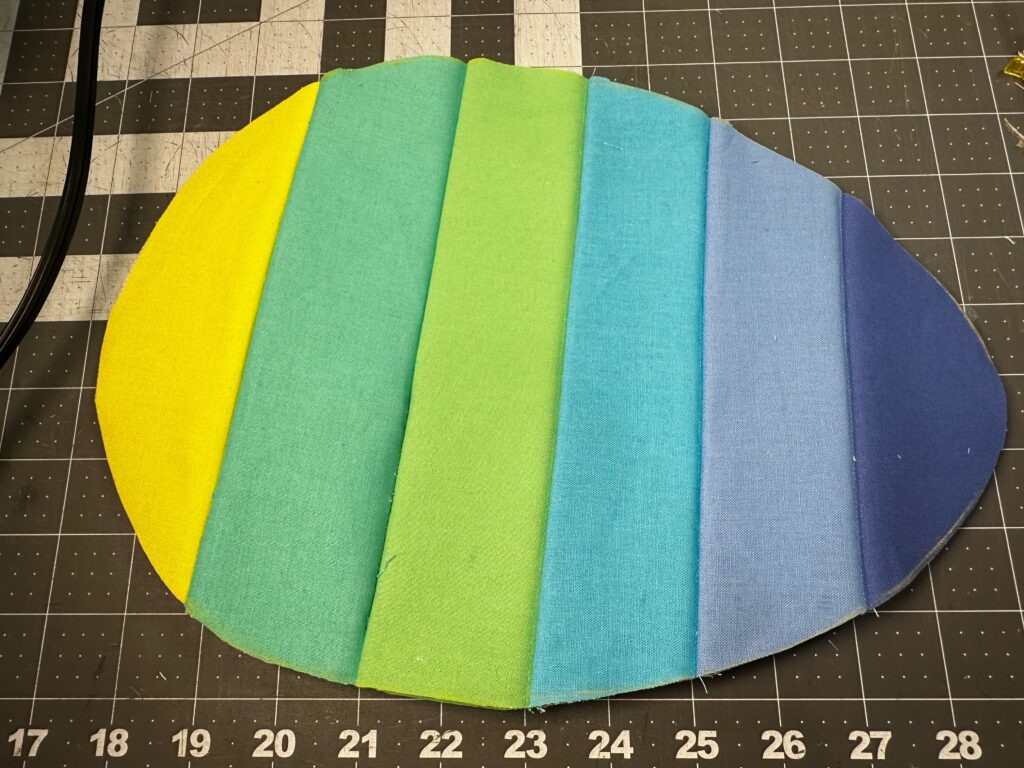
Repeat to add more fabric strip sandwiches until you have a pieced/quilted fabric rectangle.
Optional Additional Quilting
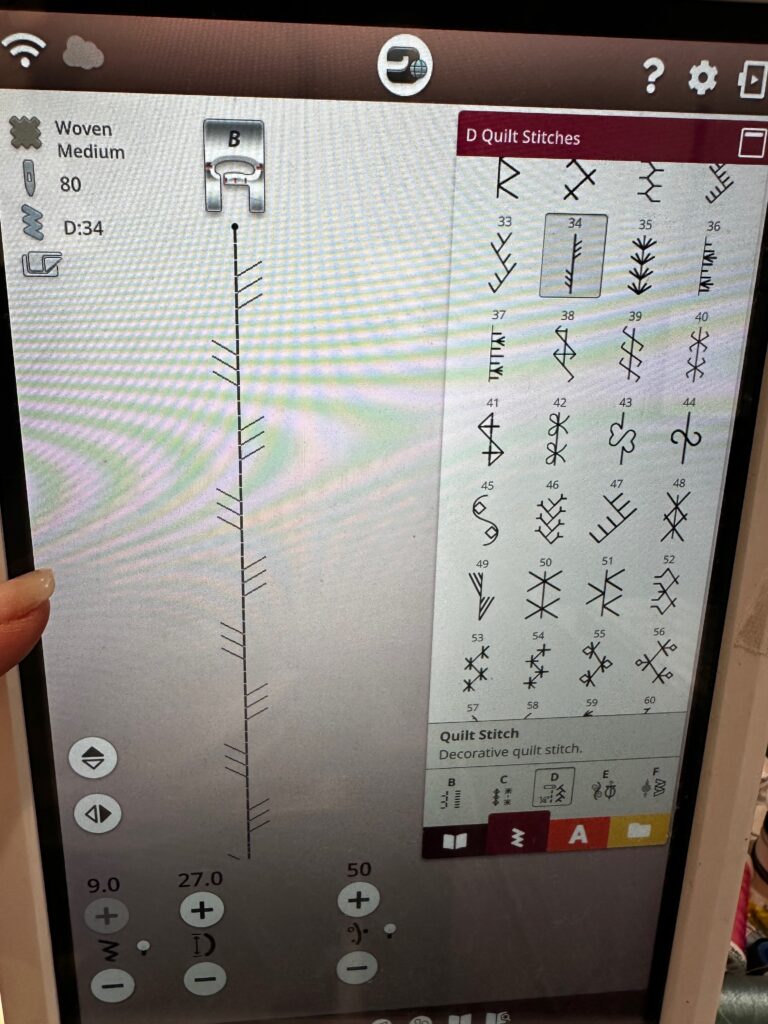
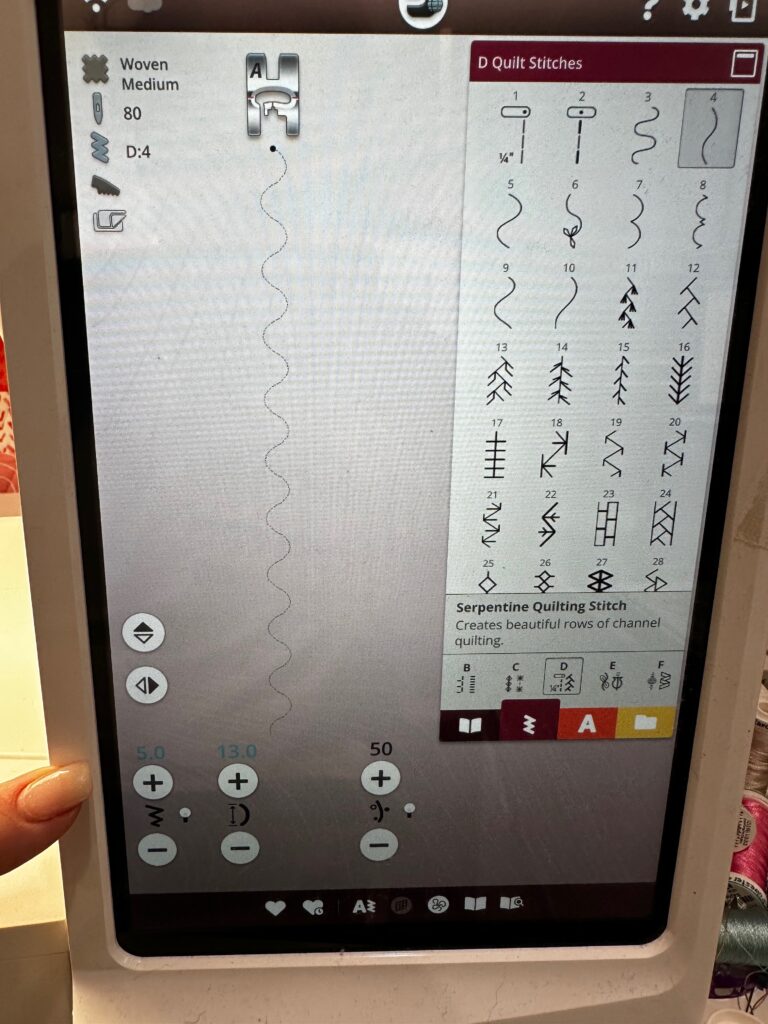
If you want to add visible quilting stitches, plot the desired quilting lines onto the fabric rectangle right side, using chalk or a removable fabric marker.
Stitch along the lines, using a straight stitch with a 3.5mm stitch length. Or choose a decorative quilting stitch from your machine menu. First, practice the latter on scrap fabrics to determine the optimum stitch length and width settings.
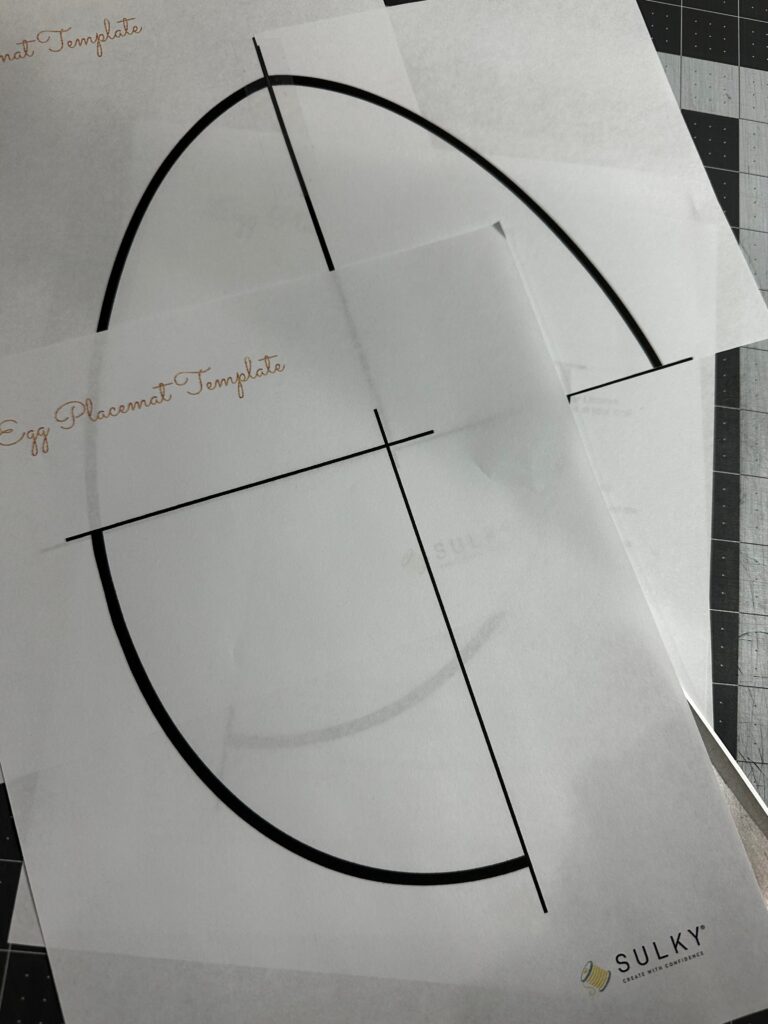
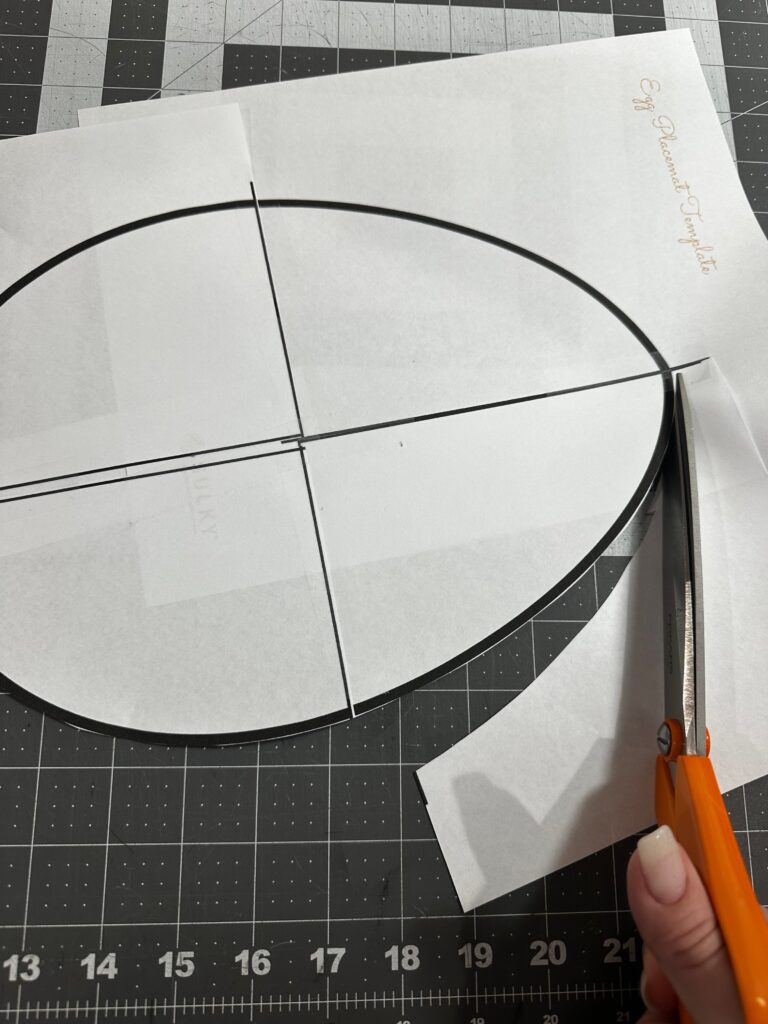
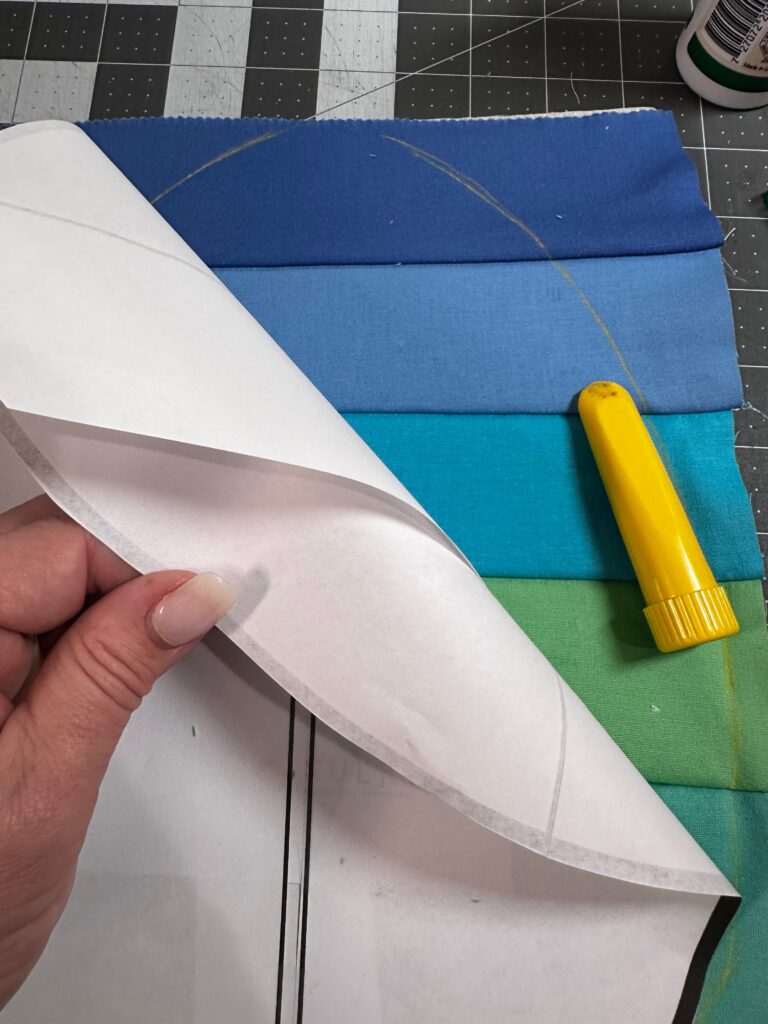
Either trim the fabric rectangle to the egg shape, using the template, after or before the quilting is complete. Print out the template and tape it together, matching the centerlines of the snack mat. Cut out the template, following the outer egg shape. Use this template to trim the quilted egg snack mat to size.
Finishing
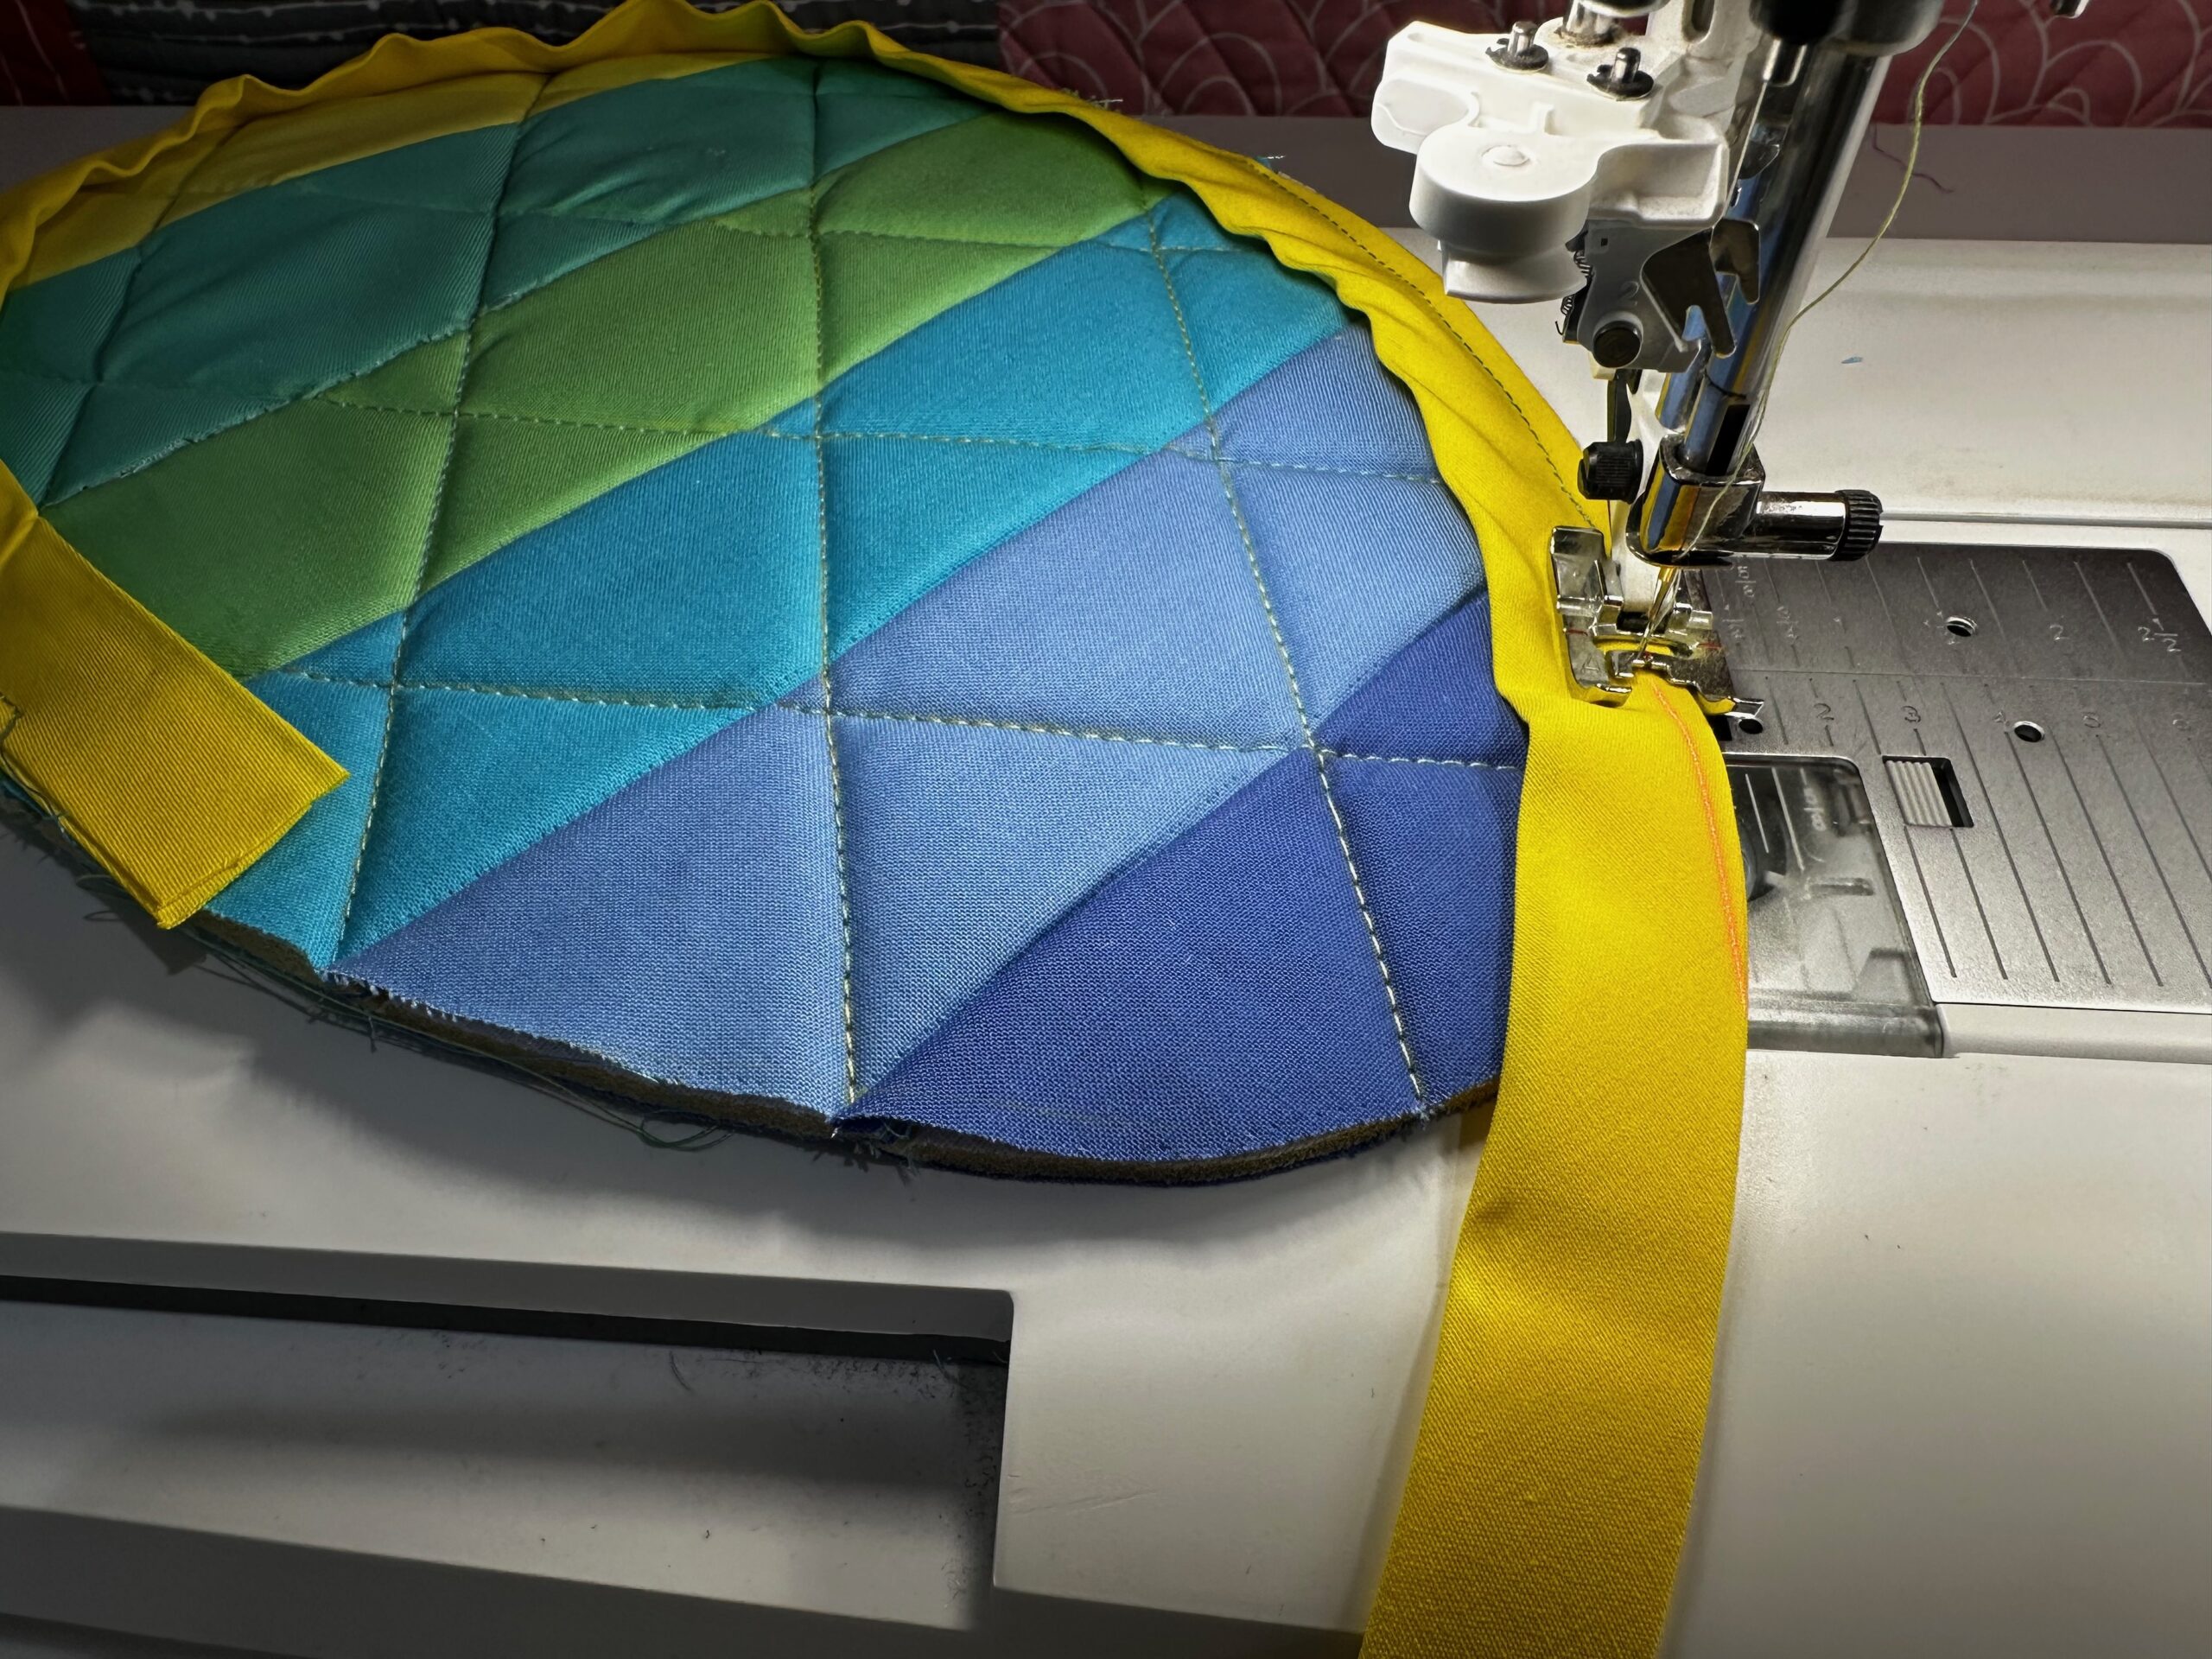
Bind the egg snack mats in the manner of your choice. This is a great opportunity to use up leftover binding strips, either self-made or pre-made. Just make sure the binding is cut on the bias so it conforms to the placemat curves!
Repeat to create as many egg snack mats as desired.
For more inspiration on quilt-as-you-go (QAYG) and scrap-friendly techniques similar to this Egg Snack Mats tutorial, be sure to explore a few trusted resources. Kaye Wood’s 6-Hour Quilt method offers a fast and accessible approach to quilting as you piece, making it ideal for beginners and quick projects. Valerie Nesbitt demonstrates a versatile flip-and-sew technique in her scrap quilting tutorials, showing how to efficiently join fabric strips for dynamic designs. Additionally, the Scrap Fabric Love “Join and Flip” method provides a modern, improvisational take on stitching scraps directly onto a foundation—perfect for creative, low-waste sewing. Together, these techniques highlight the versatility and ease of QAYG construction while encouraging experimentation with fabric scraps.
