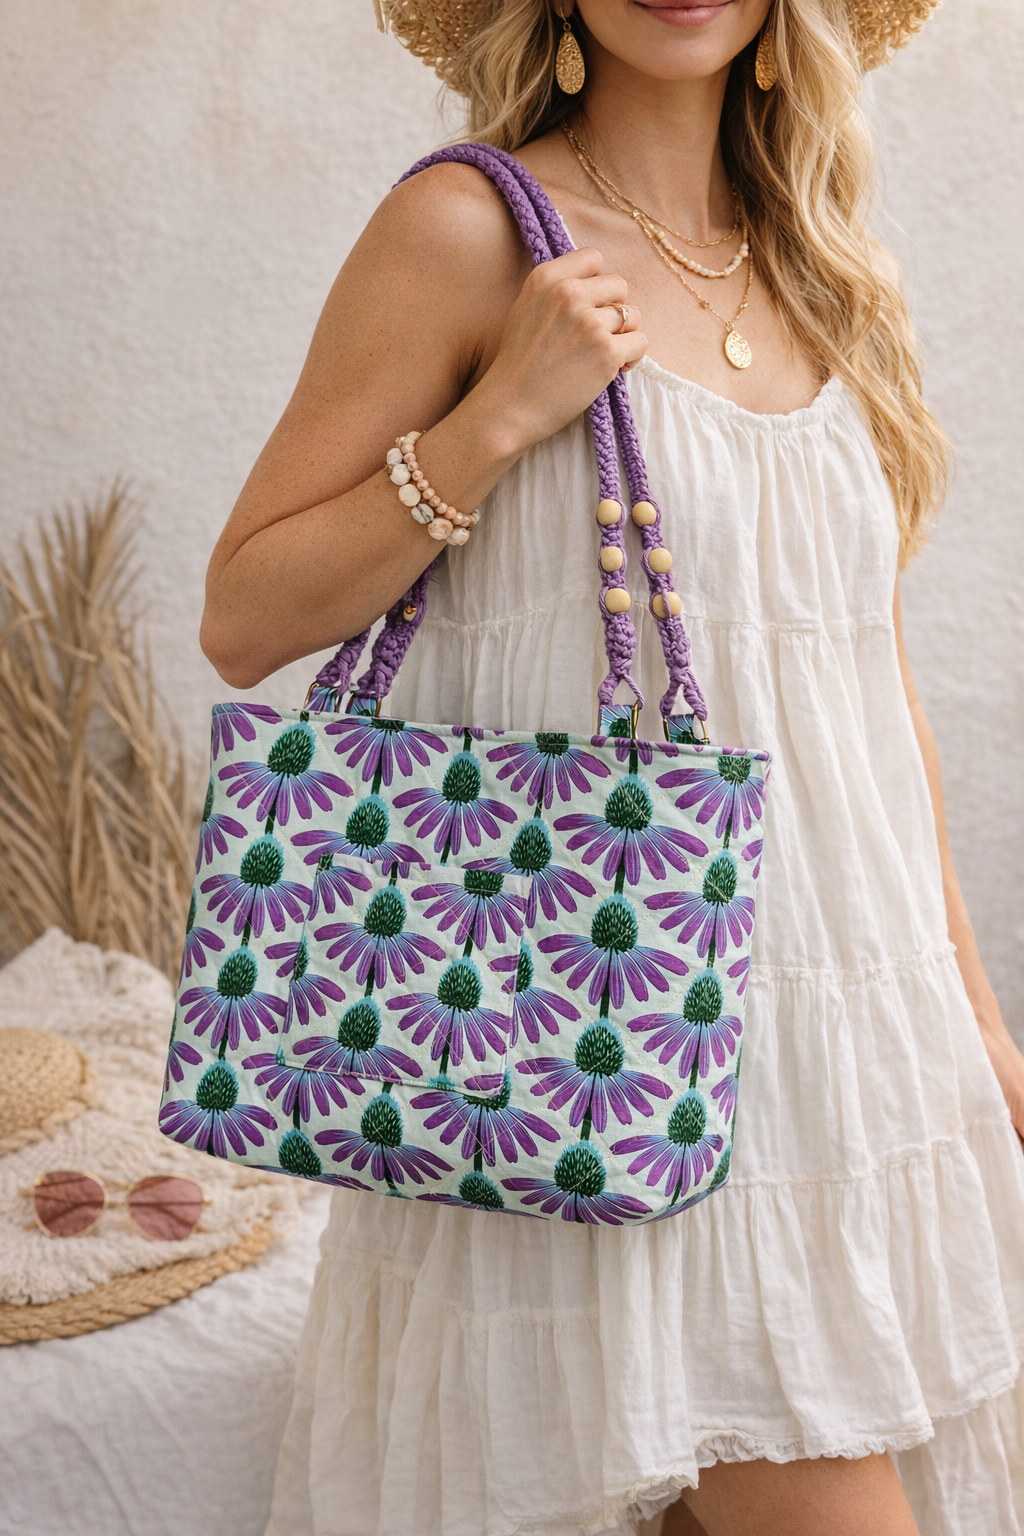
Quilted Tote with Macrame Handles
designed by Ellen March
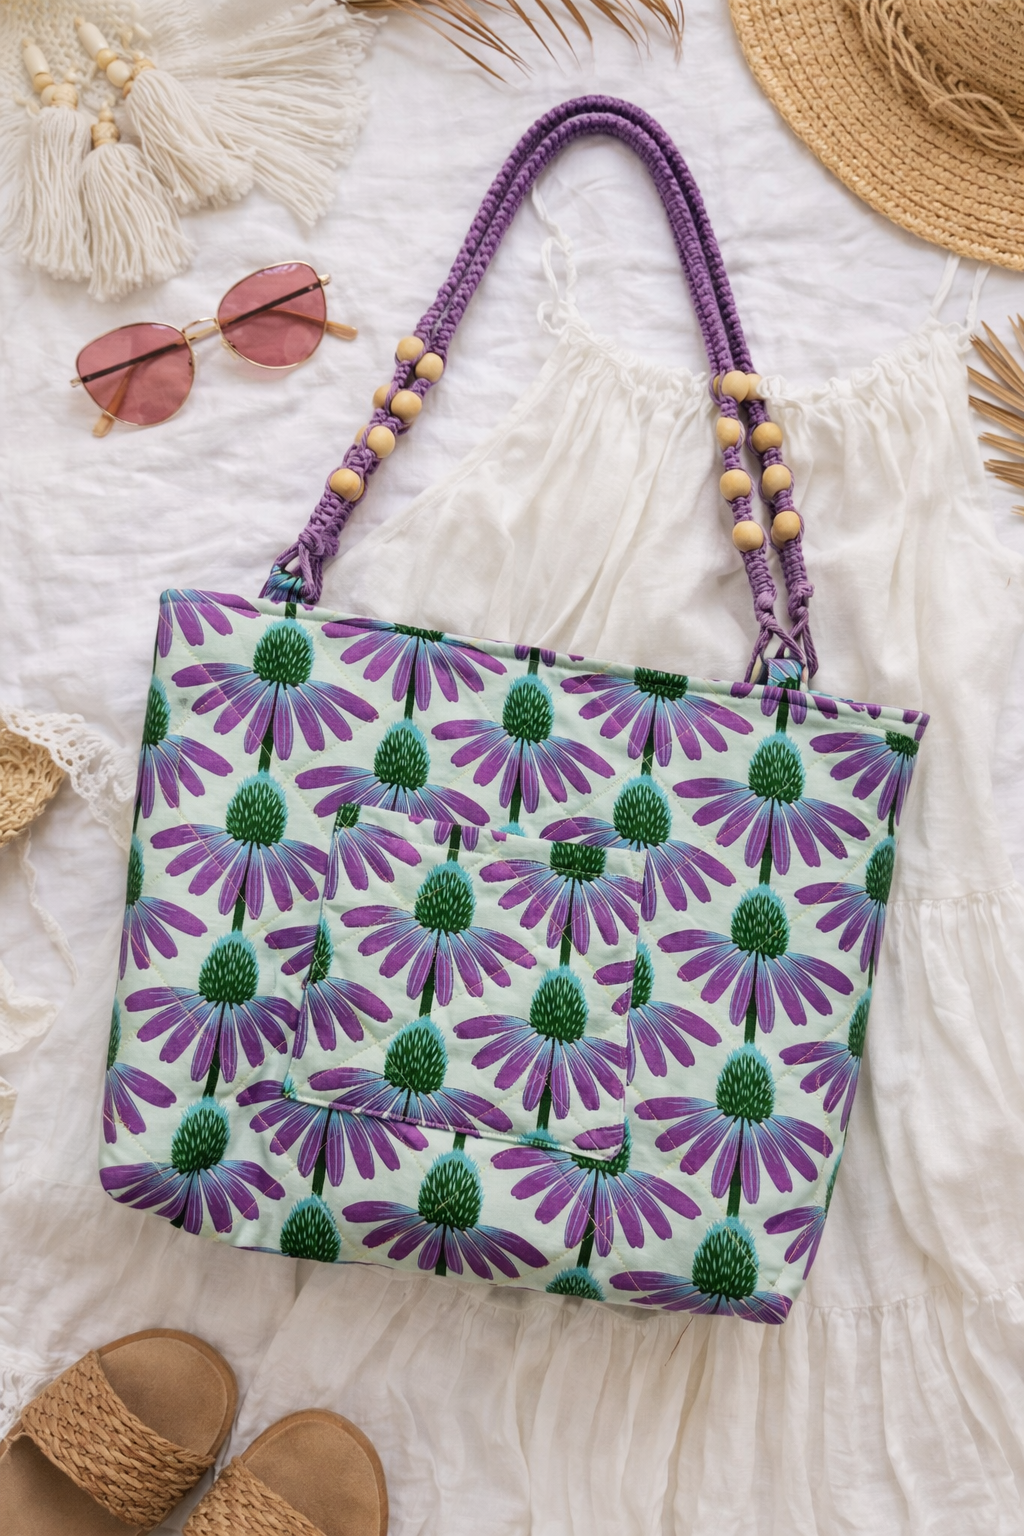
Stitch, knot and carry in style with a quilted tote that pairs cozy patchwork with sturdy, handcrafted macramé handles. Explore multiple quilting variations to give your bag a one-of-a-kind look, and experiment with different thread types and weights to add texture, shine and personality to every stitch. Whether you love bold quilting lines or subtle detail, there’s a version to suit your style. And, we’ve got a special all-in-one kit available so you’ll have everything you need to start sewing with confidence. The kit also comes with six quilting templates and a sampler quilt pattern, which you can use as practice for this project or for future makes! This is the perfect tote for spring break and summer adventures!
FINISHED SIZE: 15″ W x 11 1/2″ H x 3″ D
Supplies
Purchase a kit for this project that includes all of the items listed below (unless otherwise noted).
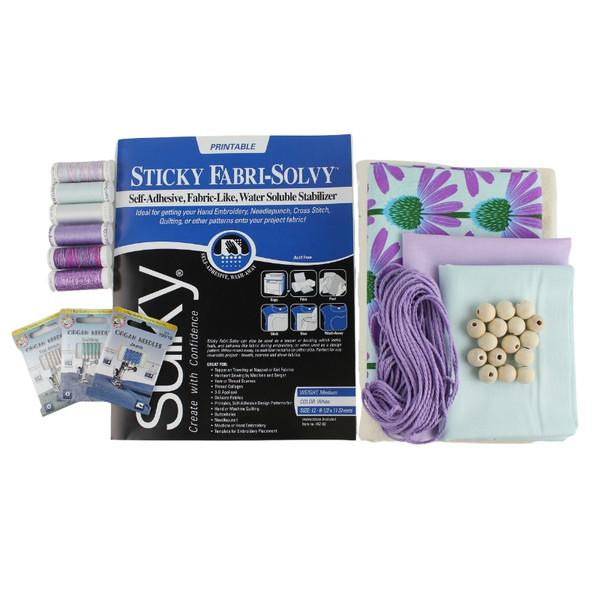
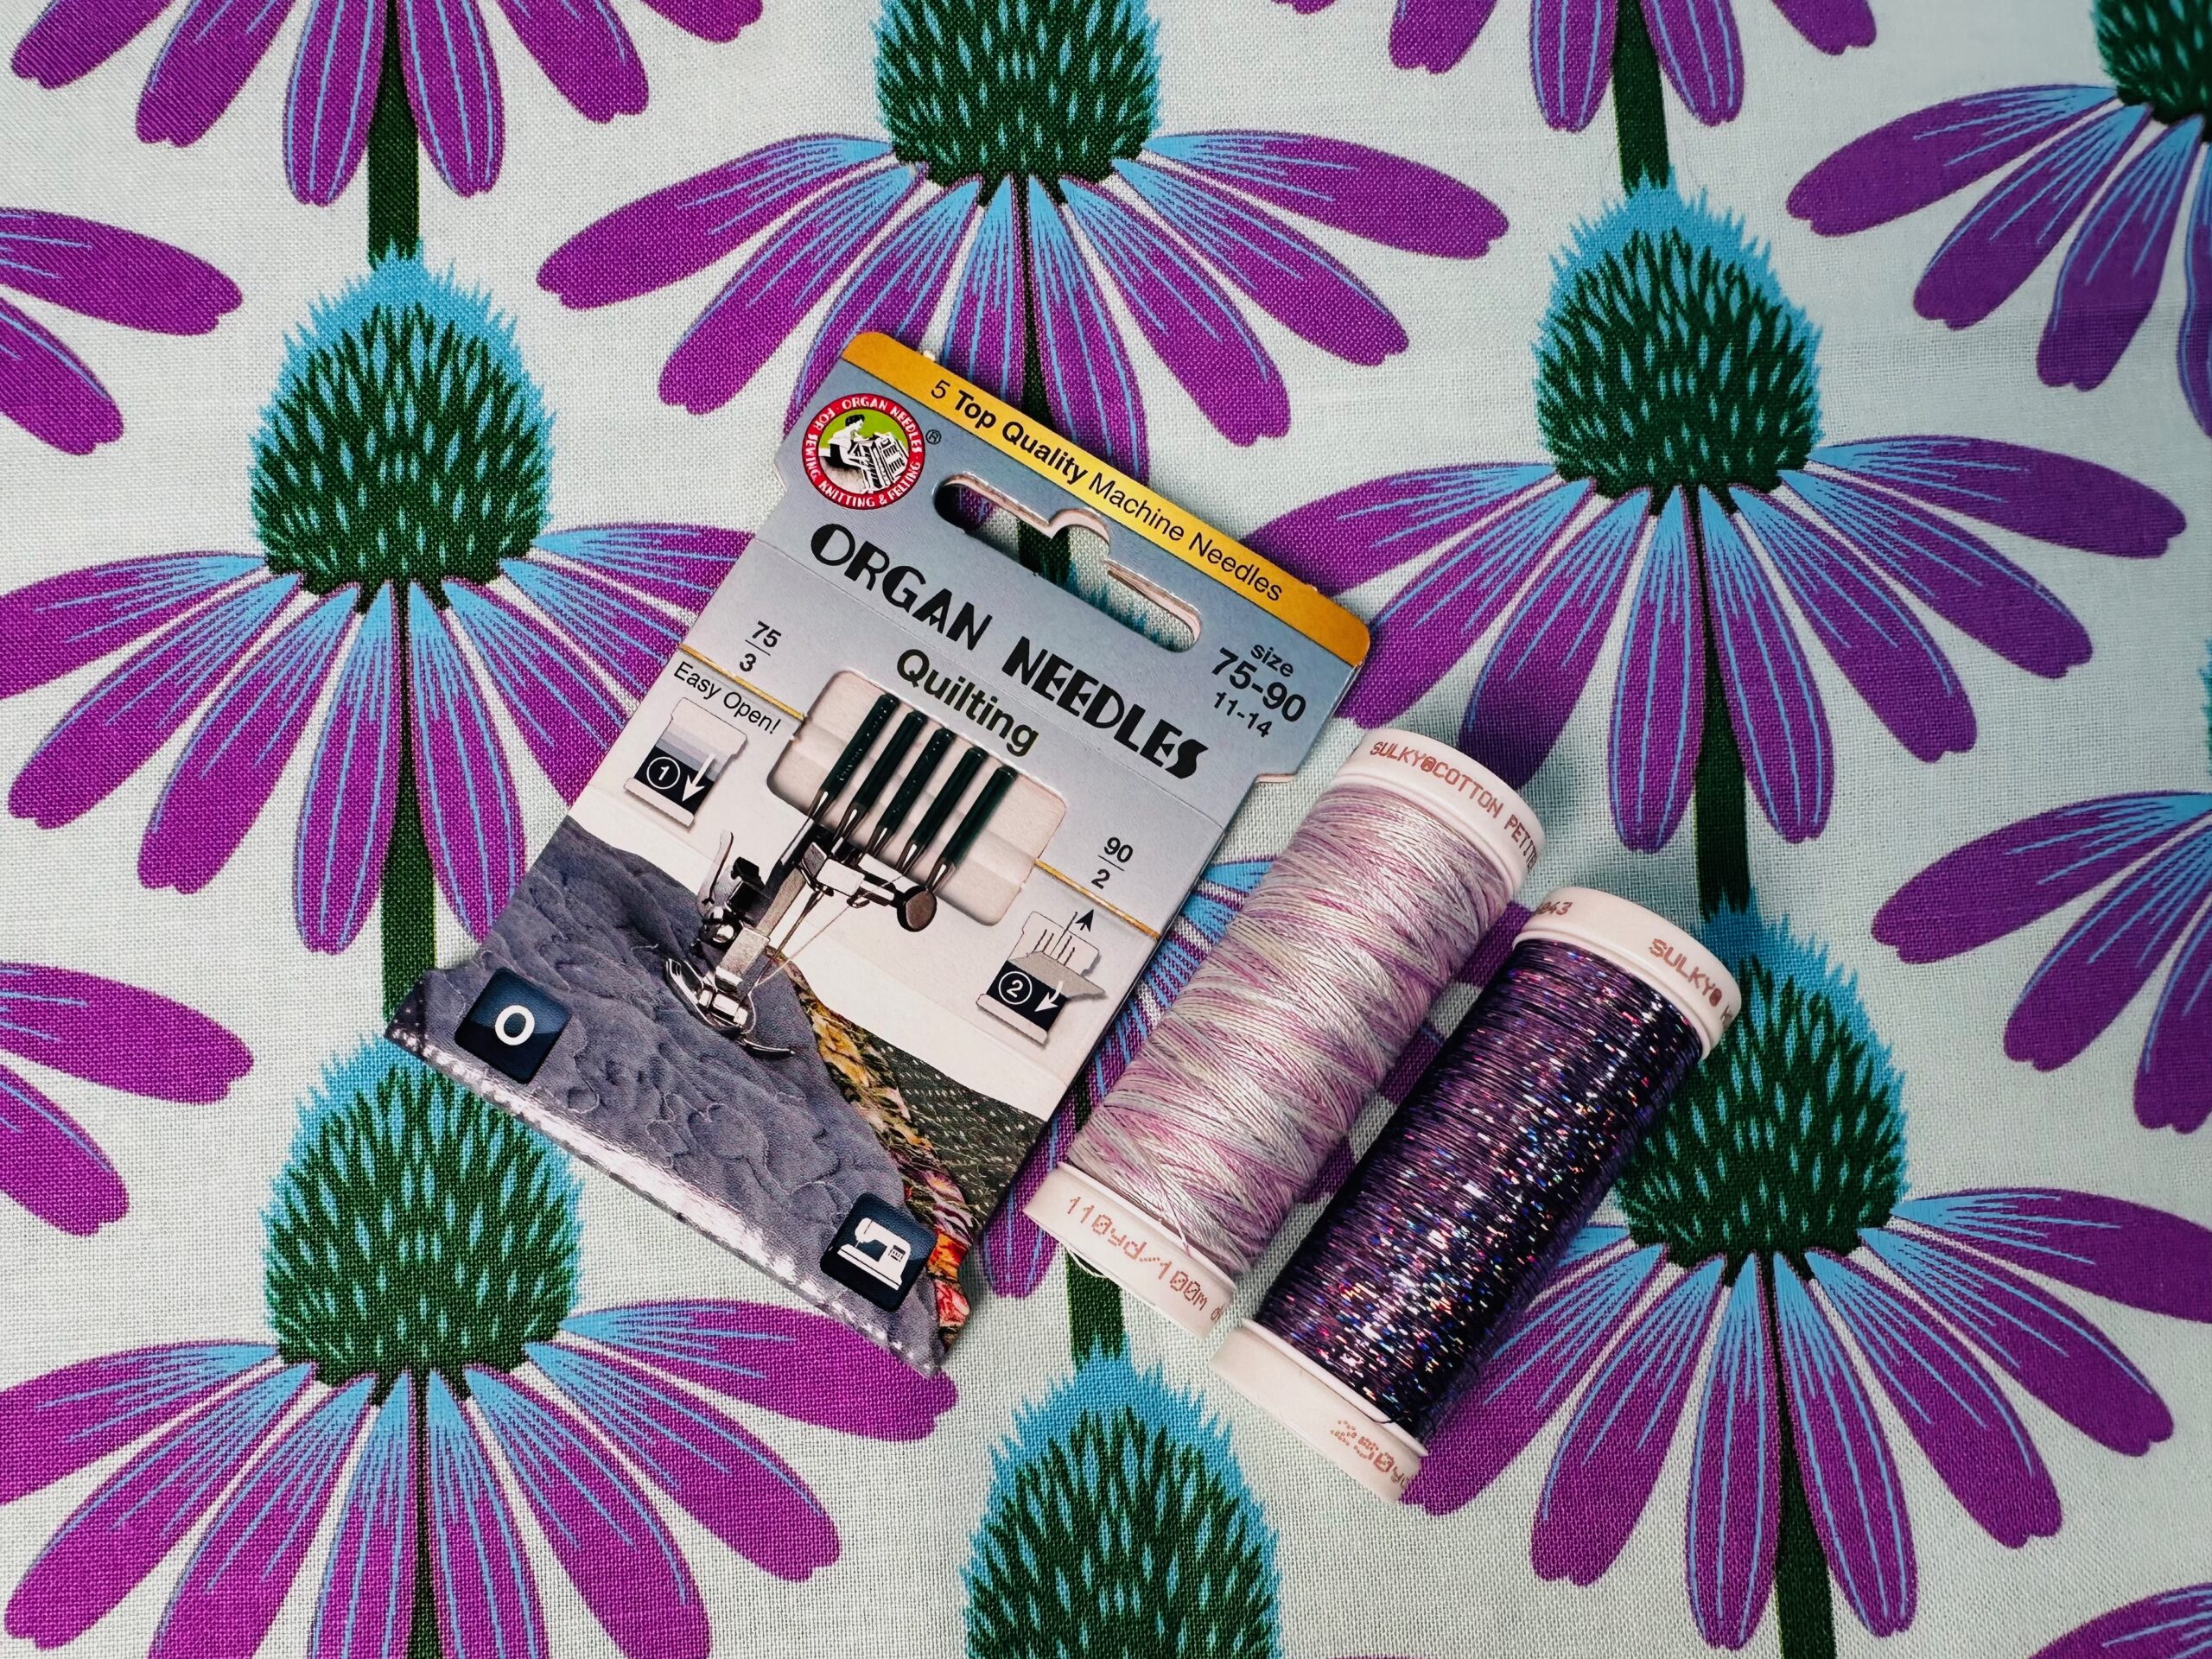
- Sulky Thread
- 50 Wt. Cotton – 160 Yd. Snap Spool – Jade Tint
- 30 Wt. Cotton Blendables – 110 Yd.. Snap Spool – Pale Amethyst
- 12 Wt. Cotton Blendables – 50 Yd. Snap Spool – Lt. Jewels
- Invisible Thread – 440 Yd. Snap Spool – Clear
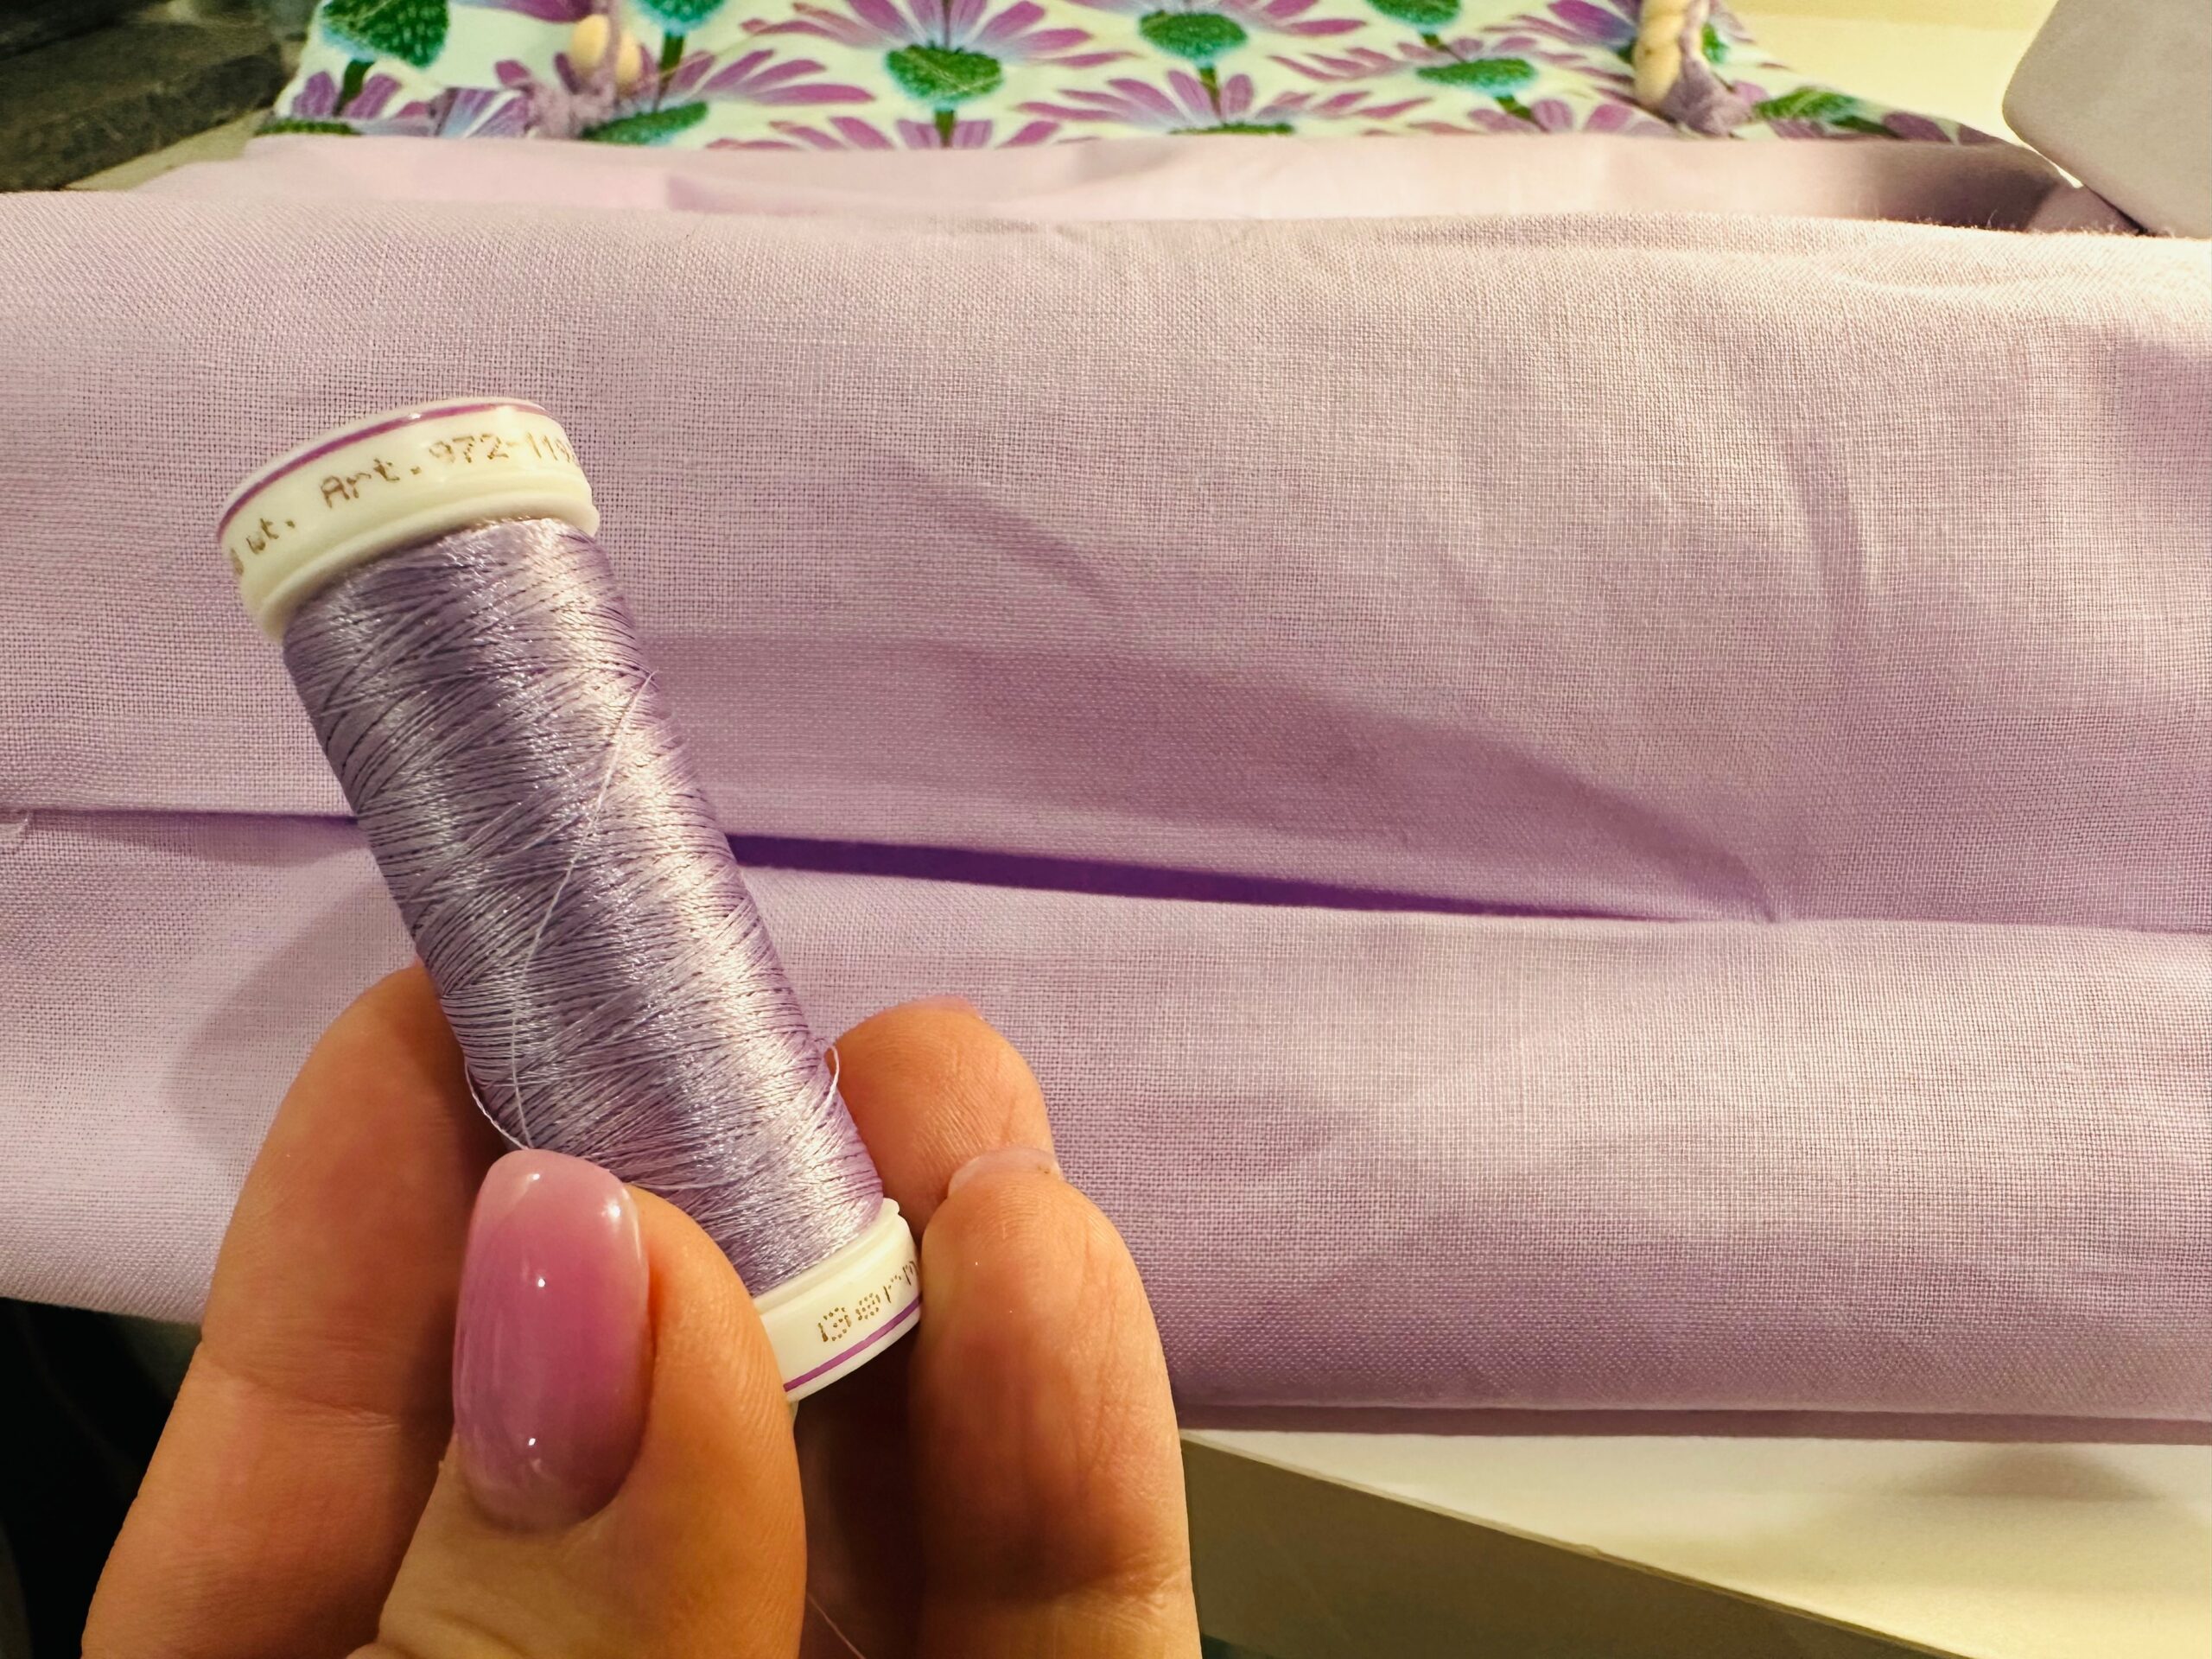
- 60 Wt. PolyLite – 440 Yd. Snap Spool – Lavender
- Holoshimmer Metallic – 250 Yd. Snap Spool – Lavender
- 4 sheets of Sulky Sticky Fabri-Solvy
- Organ Needles
- FreeSpirit Fabrics
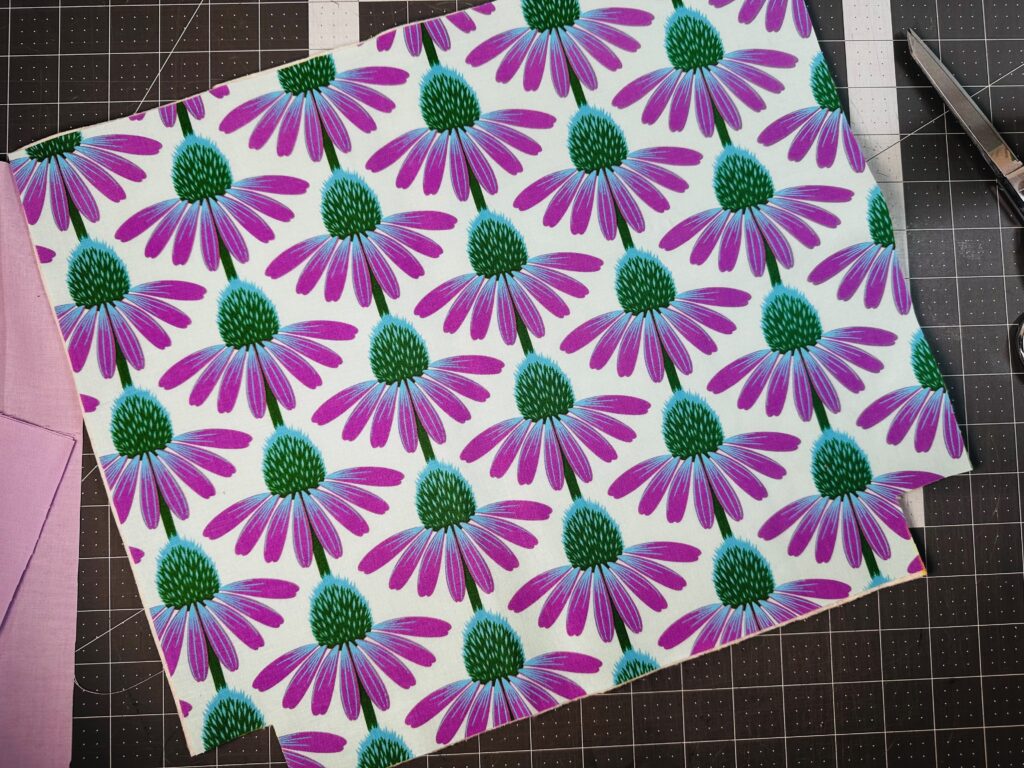
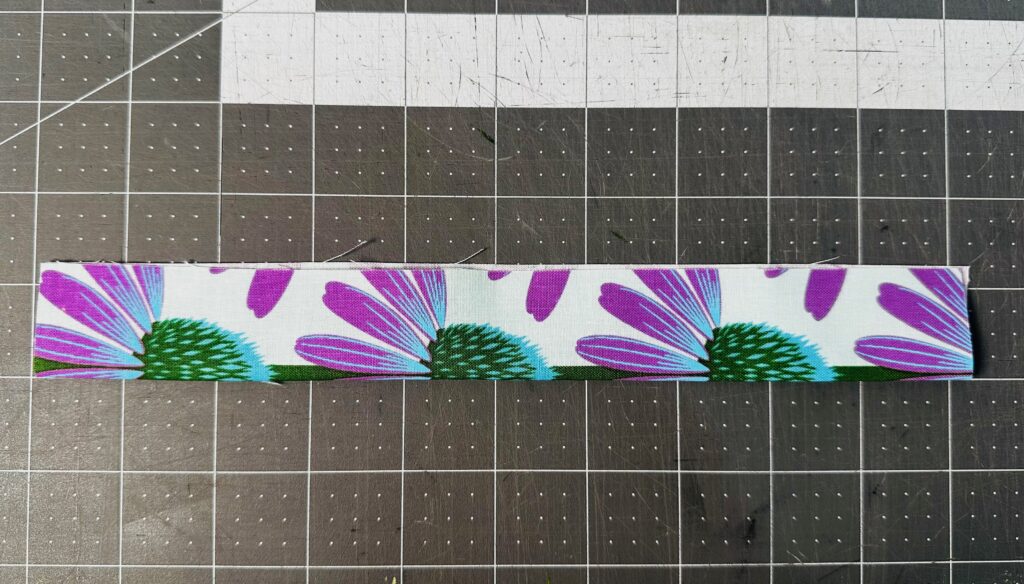
- 1 yard of Echinacea Grape by Anna Maria Horner
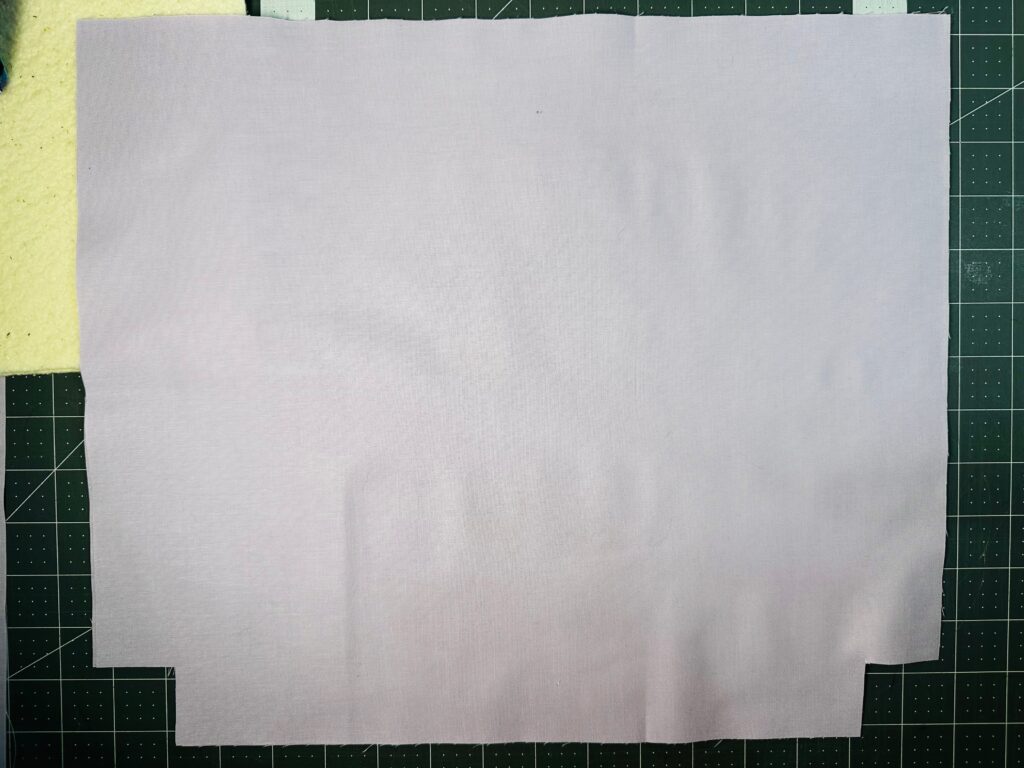
- 3/8 yard of Tula Pink Dazzle solid (Lining)
- 1/4 yard of Tula Pink Dewdrop solid (optional fabric handles)
-
16 yards 2mm macramé cord
-
16 wooden beads with 4mm hole
- Sulky KK2000 Temporary Spray Adhesive (not in kit)
- Removable fabric marker or chalk (not in kit)
- Sulky Multipurpose Turning Tool (not in kit)
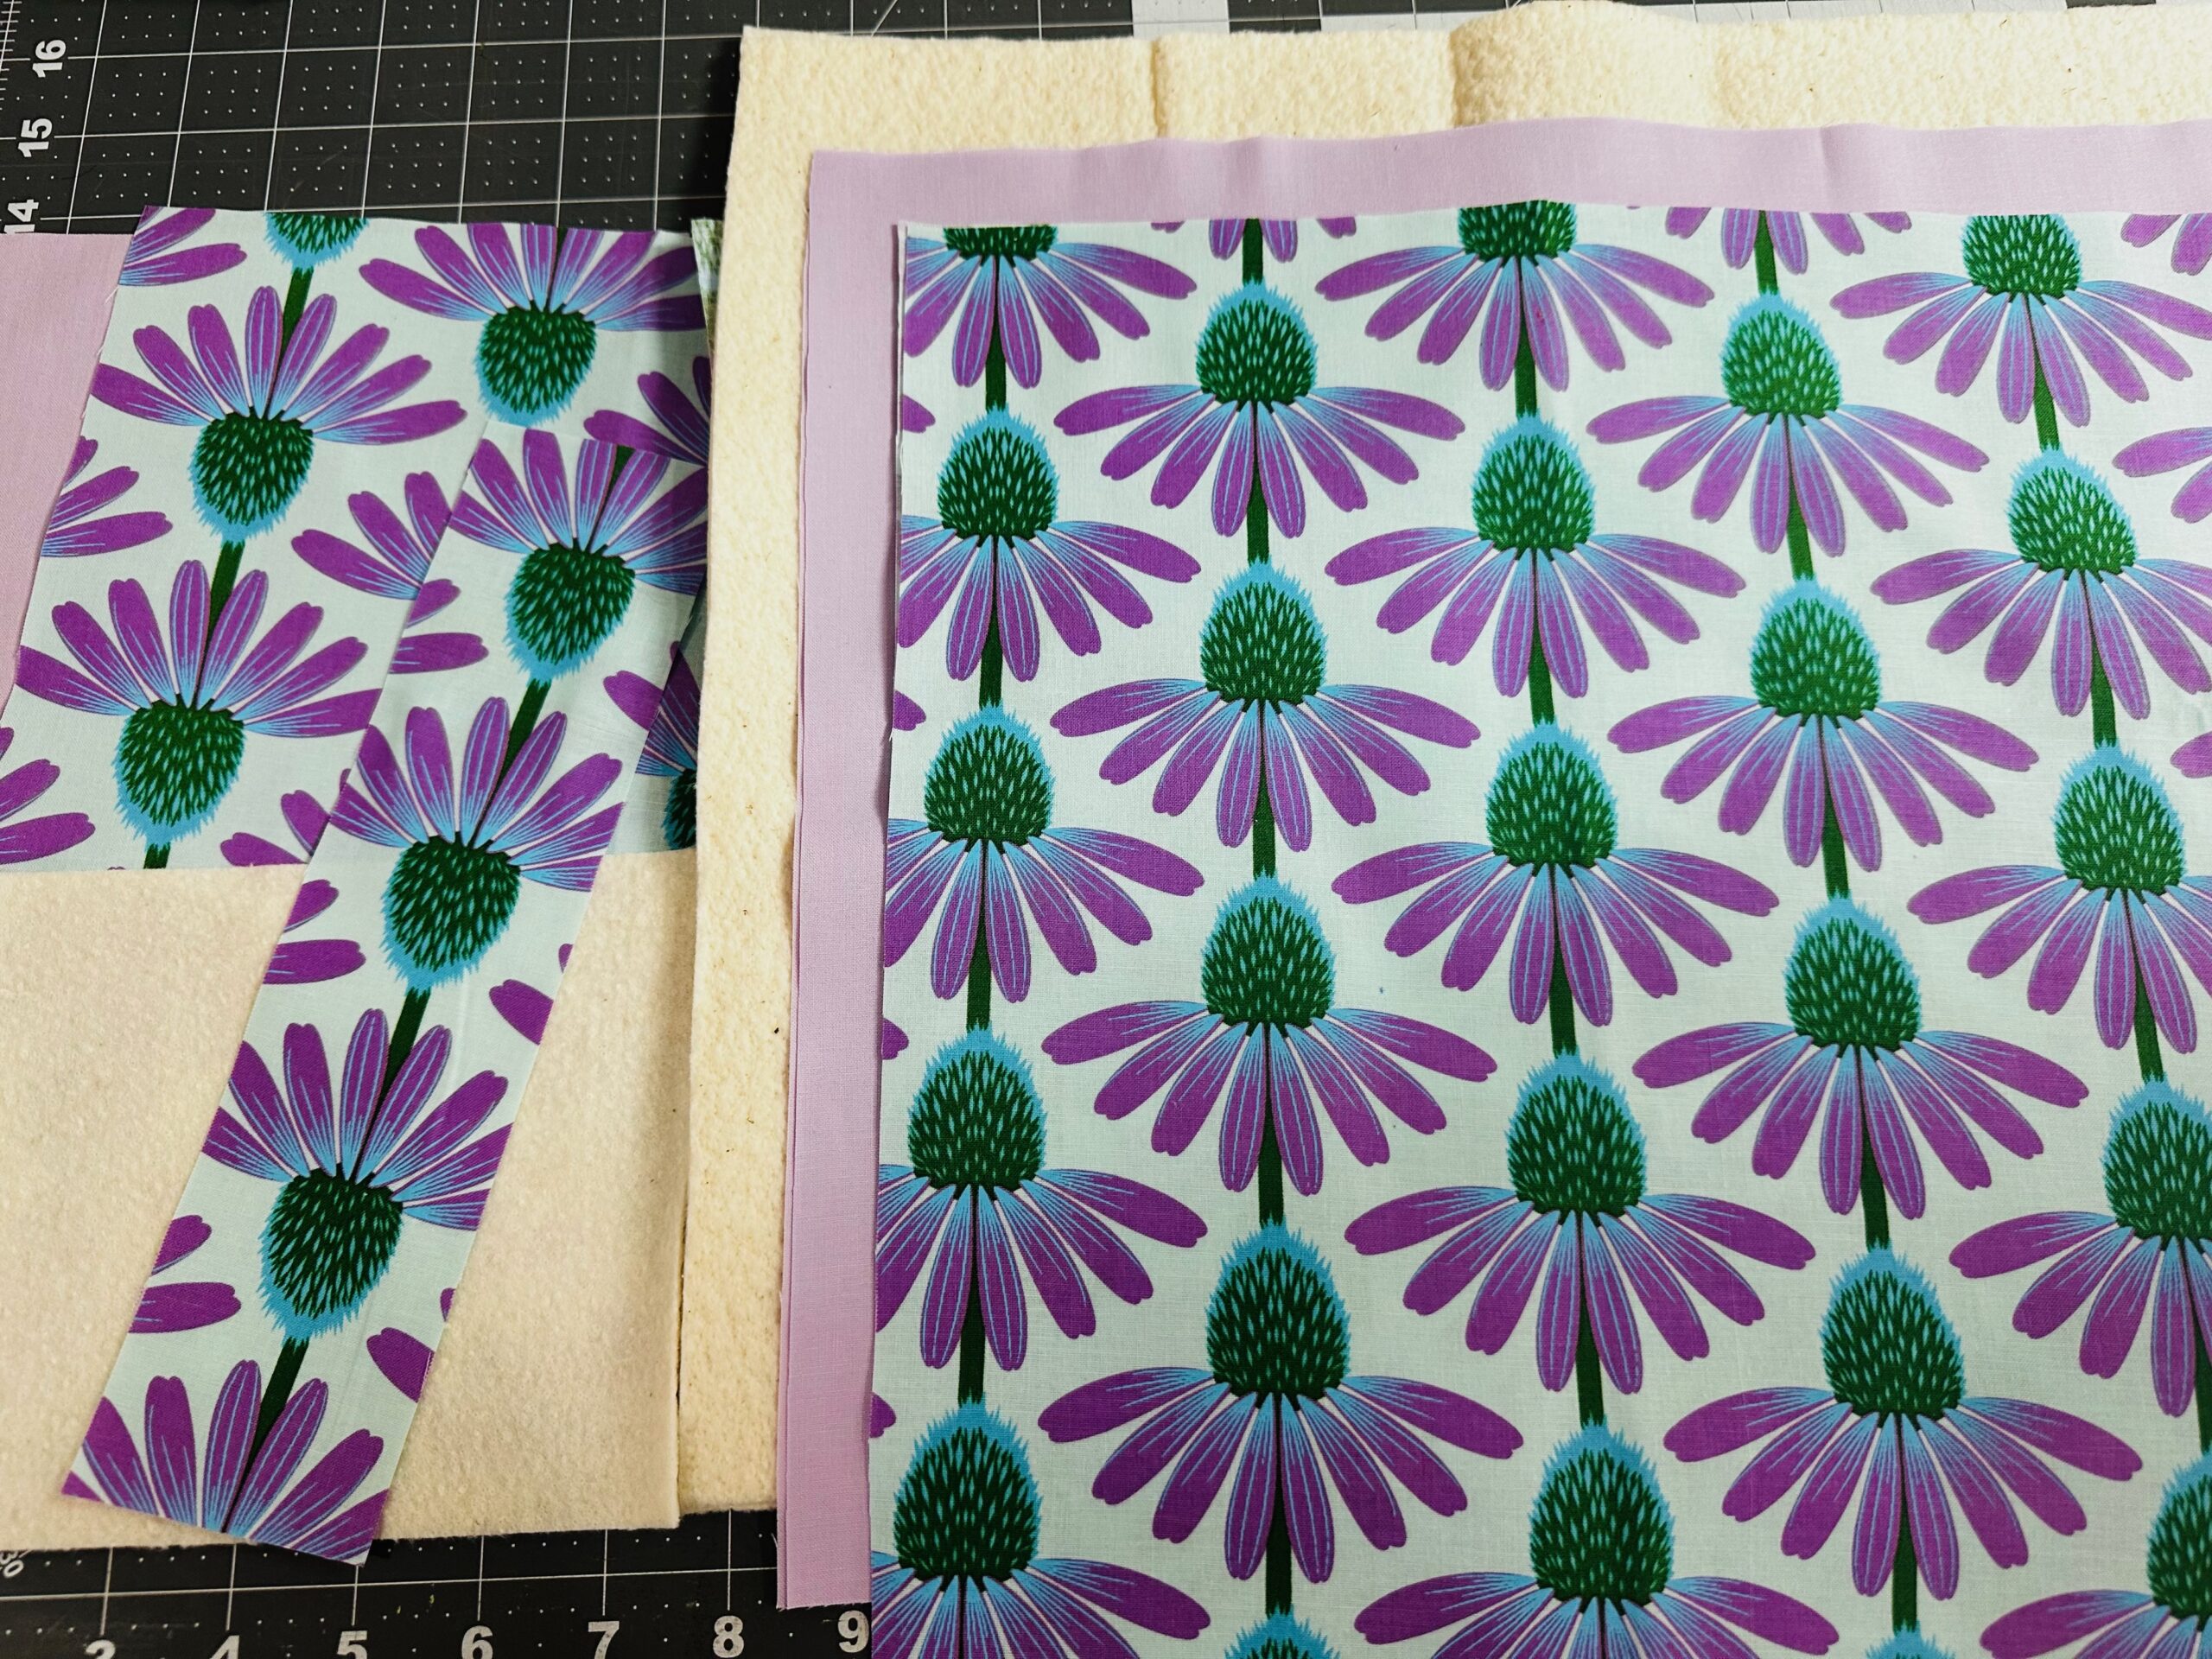
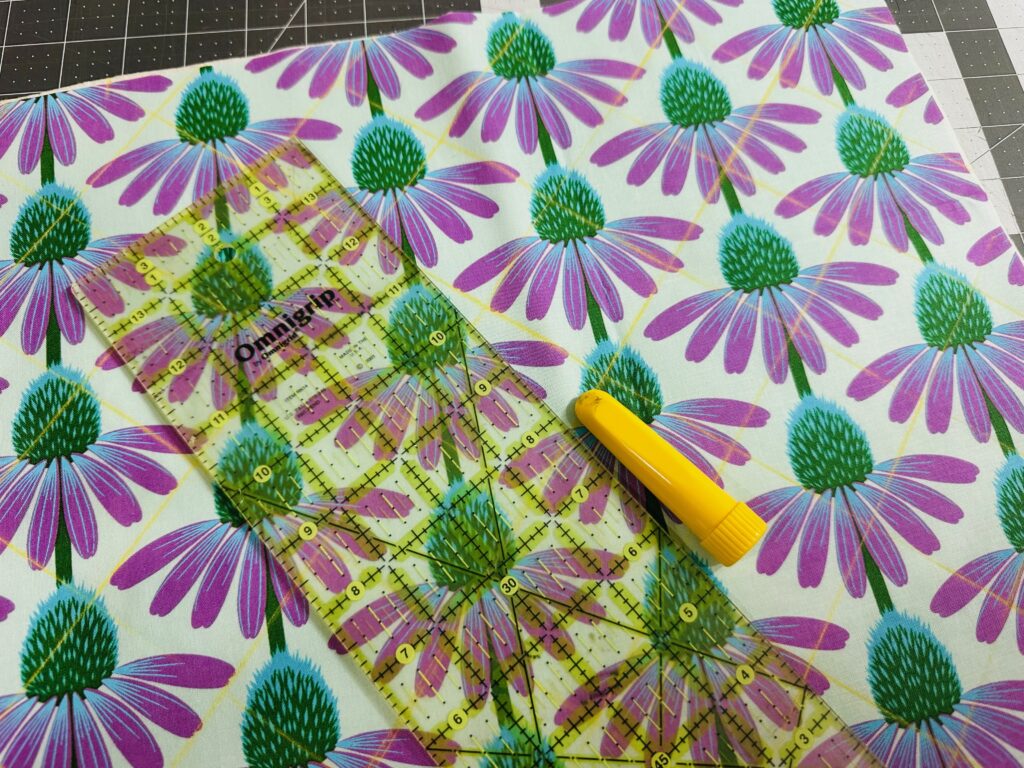
Tote Cutting
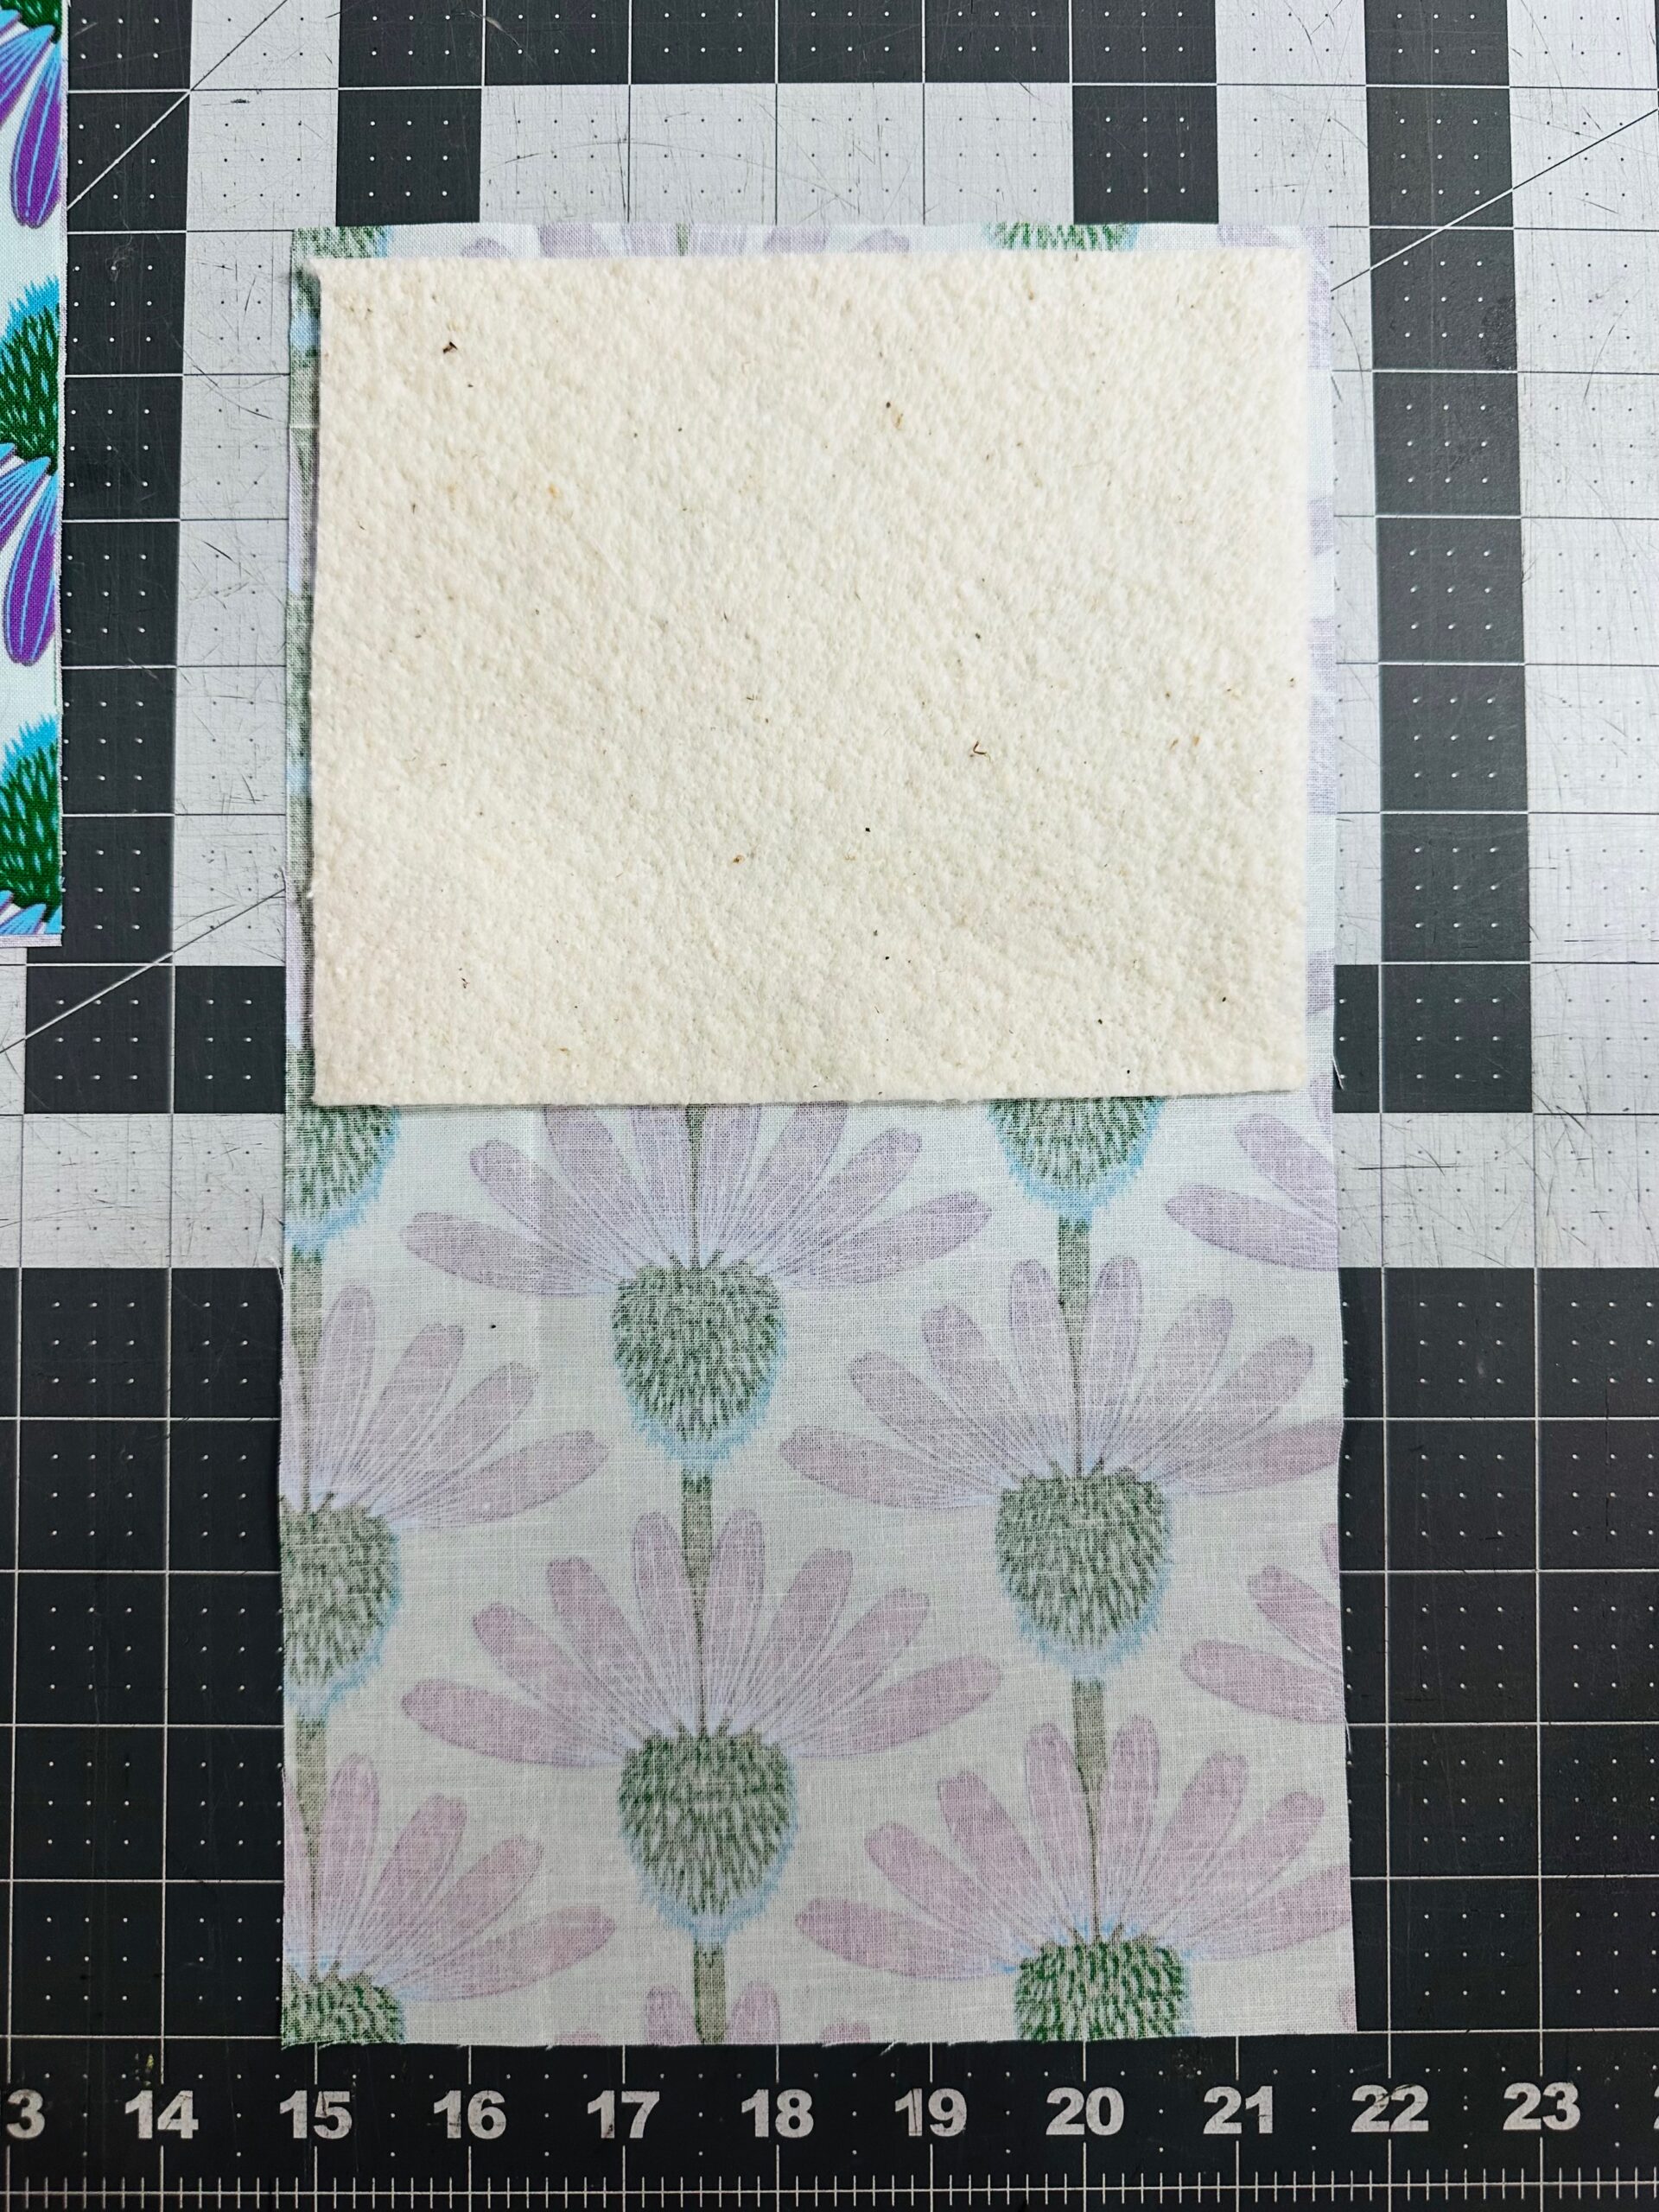
First, from the Exterior, Lining and batting, cut two 13 1/2″ x 16″ main rectangles each. From the Exterior and Lining, cut one 7″ W x 12″ H rectangle each for the Exterior and Lining Pocket. Just from the Exterior, cut one 2 1/2″ x 10″ rectangle for the Handle Connectors. From the batting, cut one 6 1/2″ x 5 1/2″ rectangle for the Exterior Pocket interlining.
Preparing Pieces
First, place the main rectangle batting along the Exterior wrong side, and use Sulky KK2000 Temporary Spray Adhesive to secure the layers.
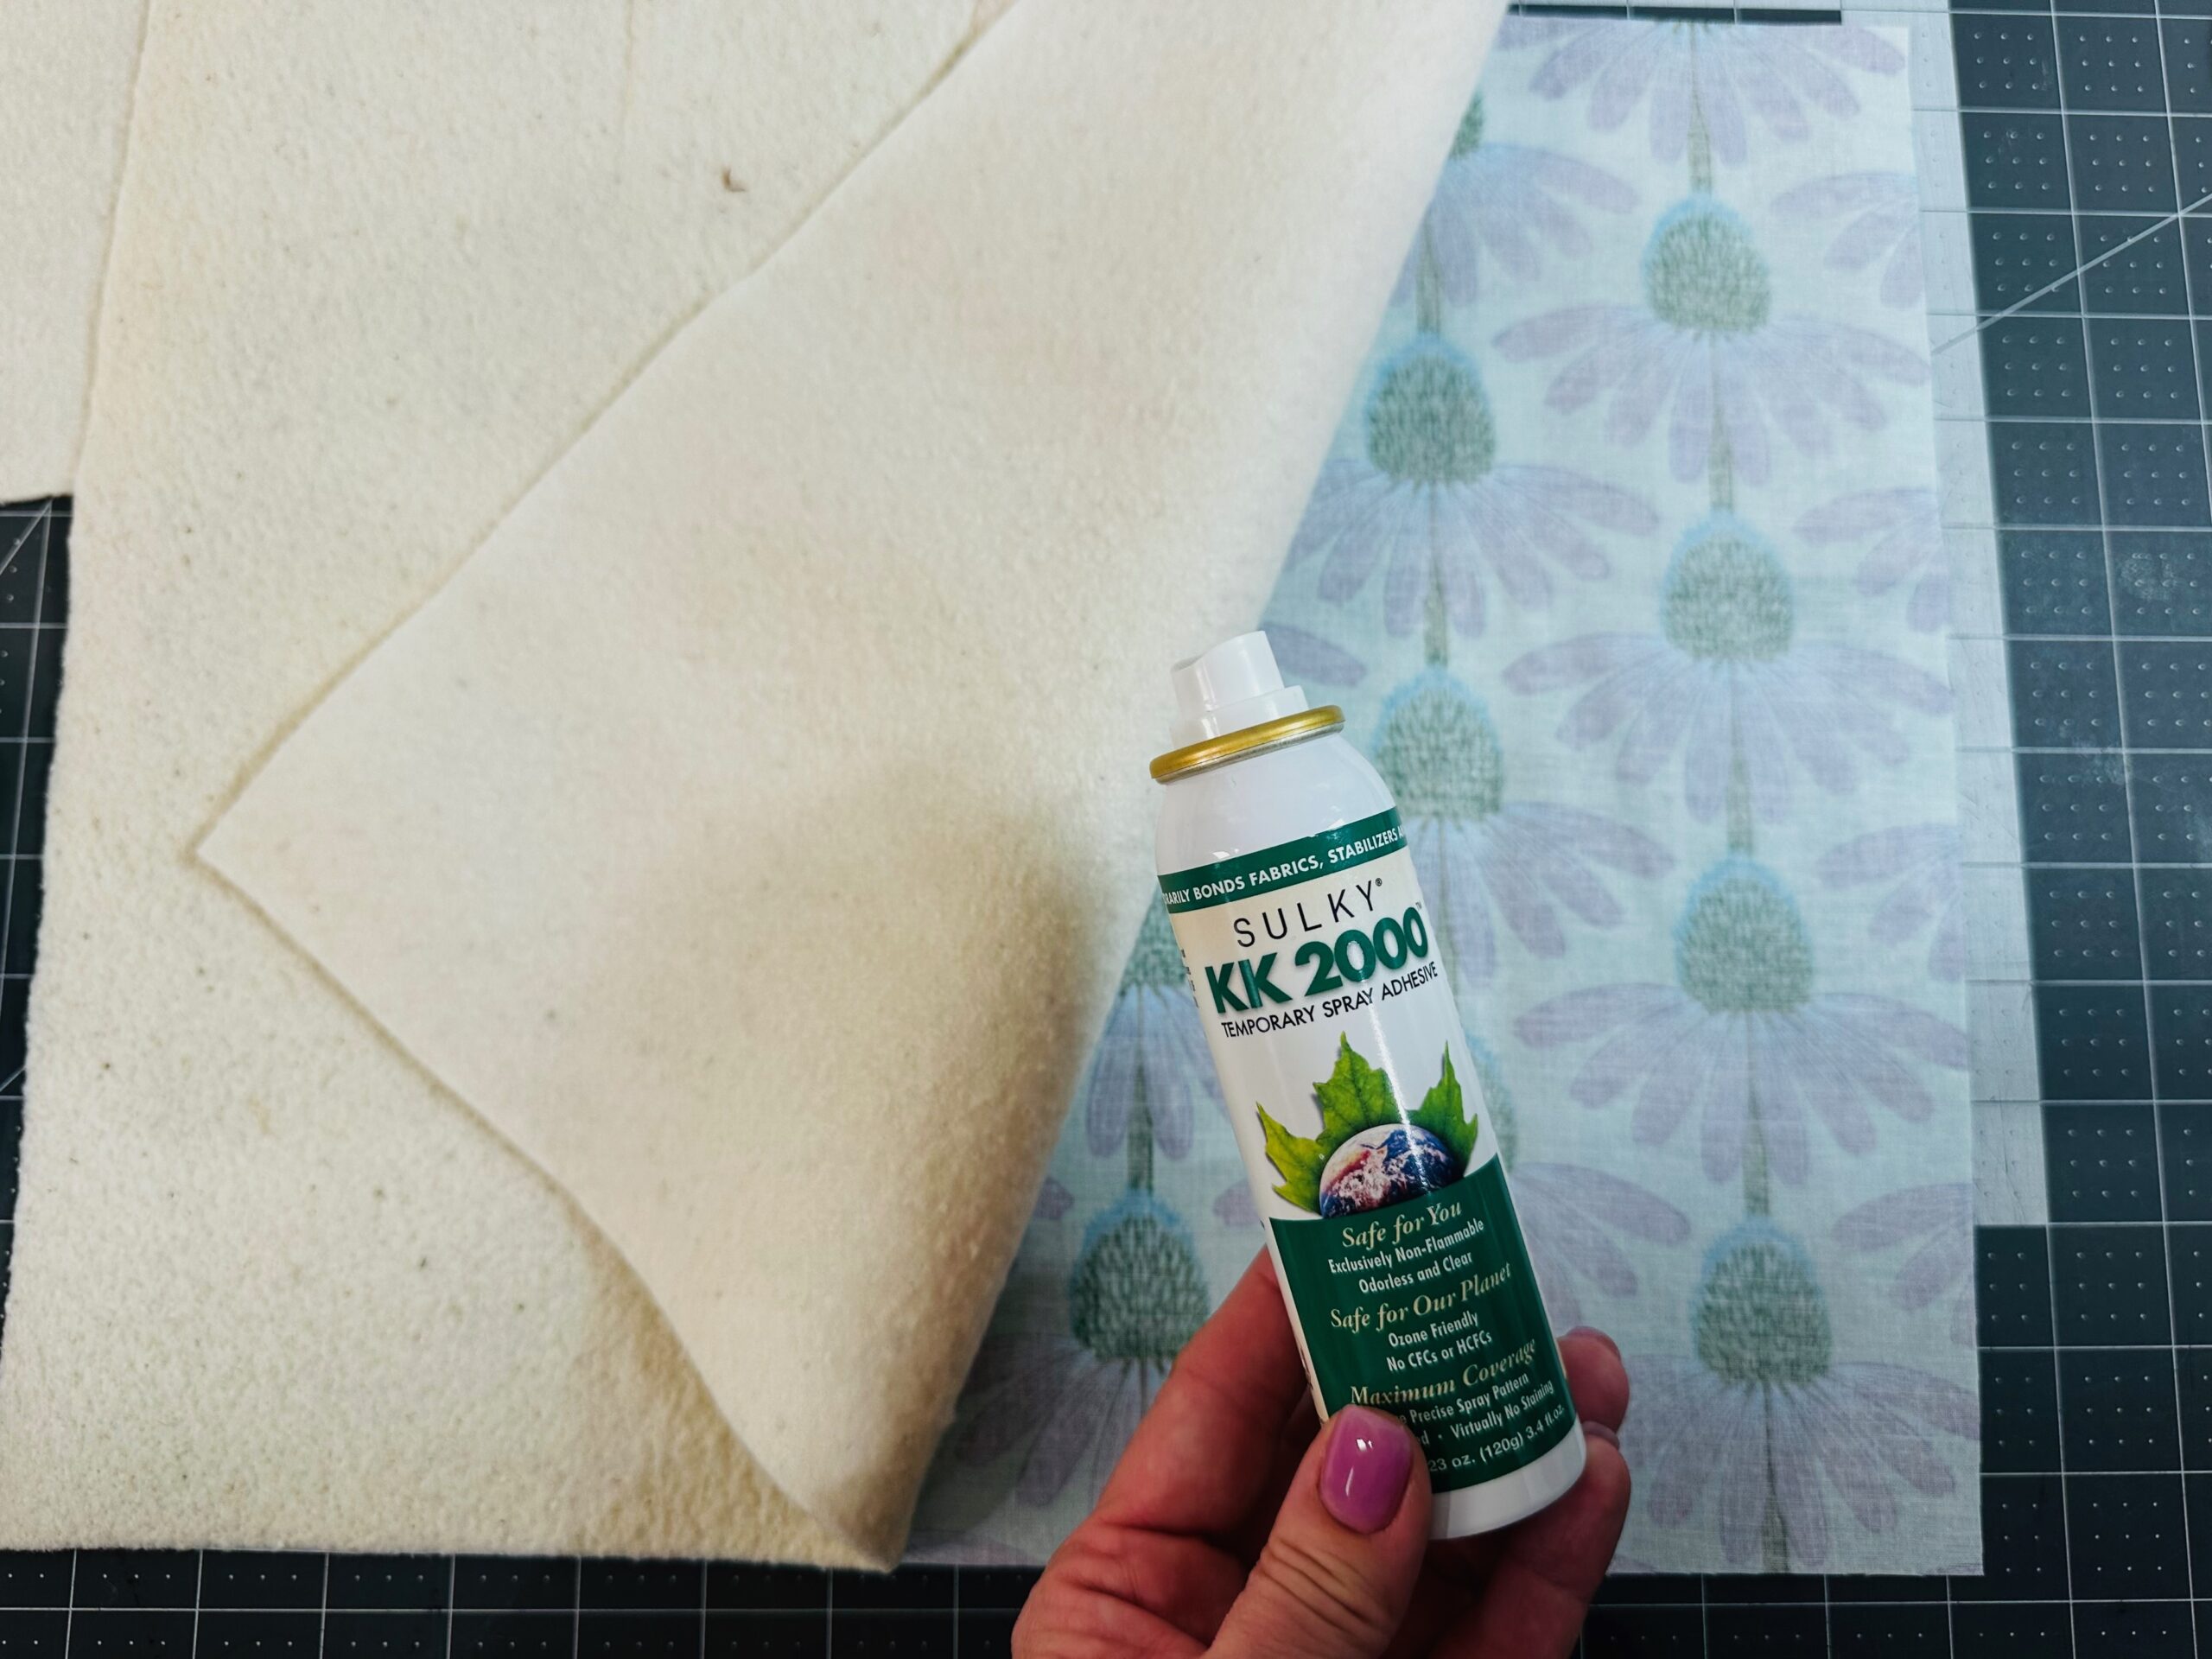
Then, place the batting pocket interlining along the exterior pocket wrong side. The batting short edge should be 1/4″ from one fabric short edge; secure using KK2000.
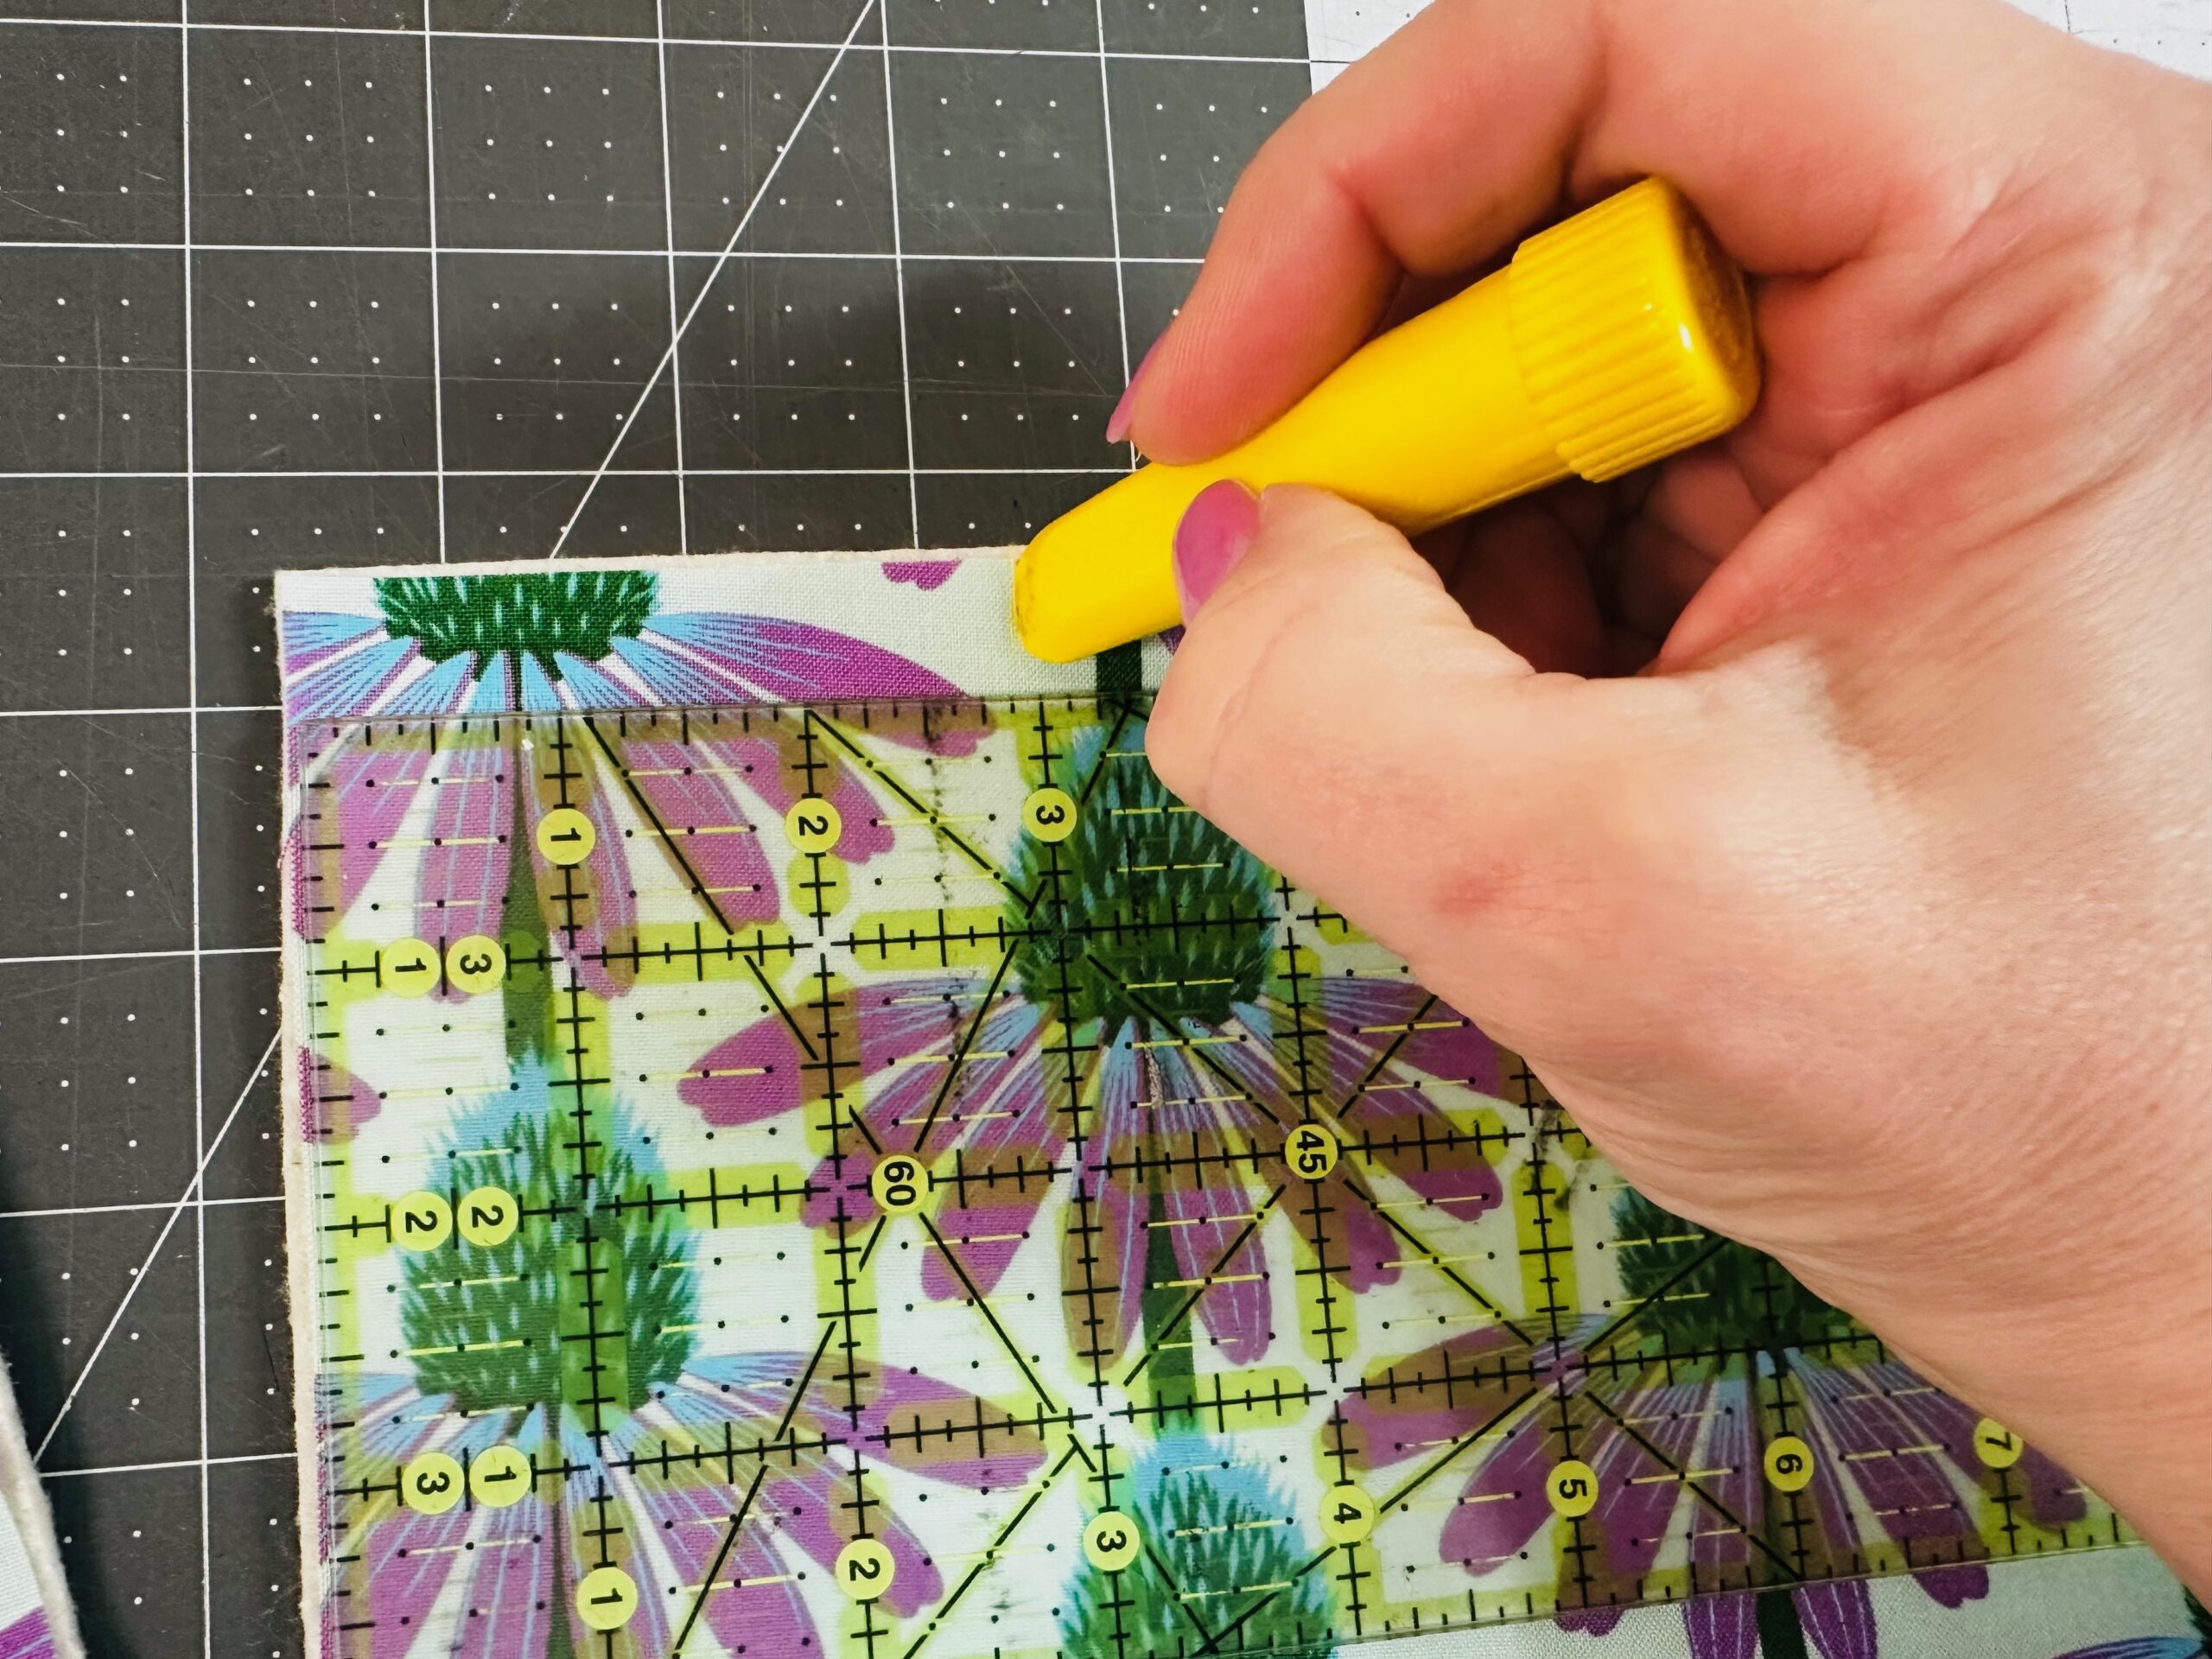
Along each rectangle lower edge, cut out a 1 1/2″ square for boxing the corners later.
From both main Exterior upper edges, measure and mark 3″ from each upper-edge corner to denote the Handle Connector placements.
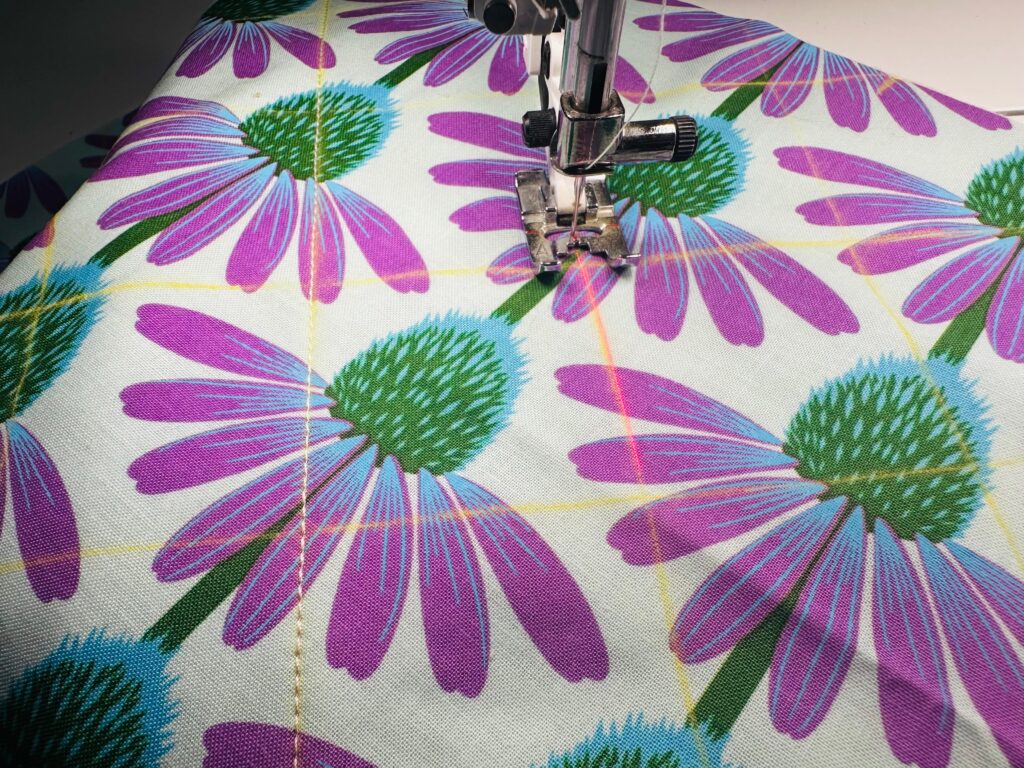
Quilting Overview
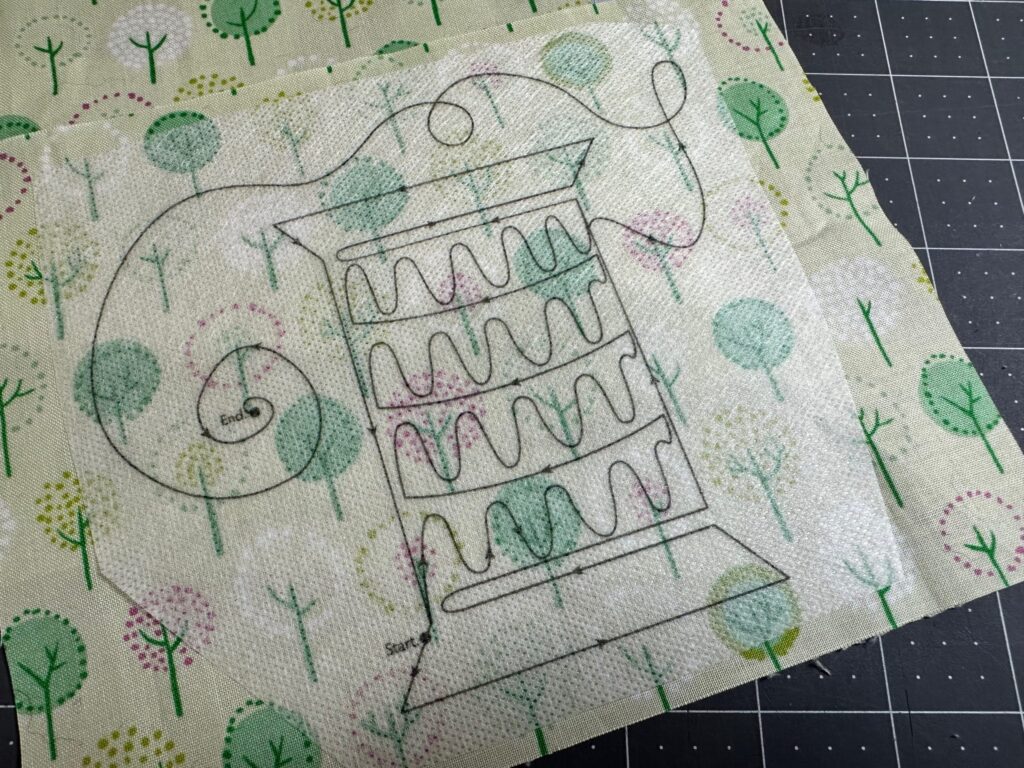
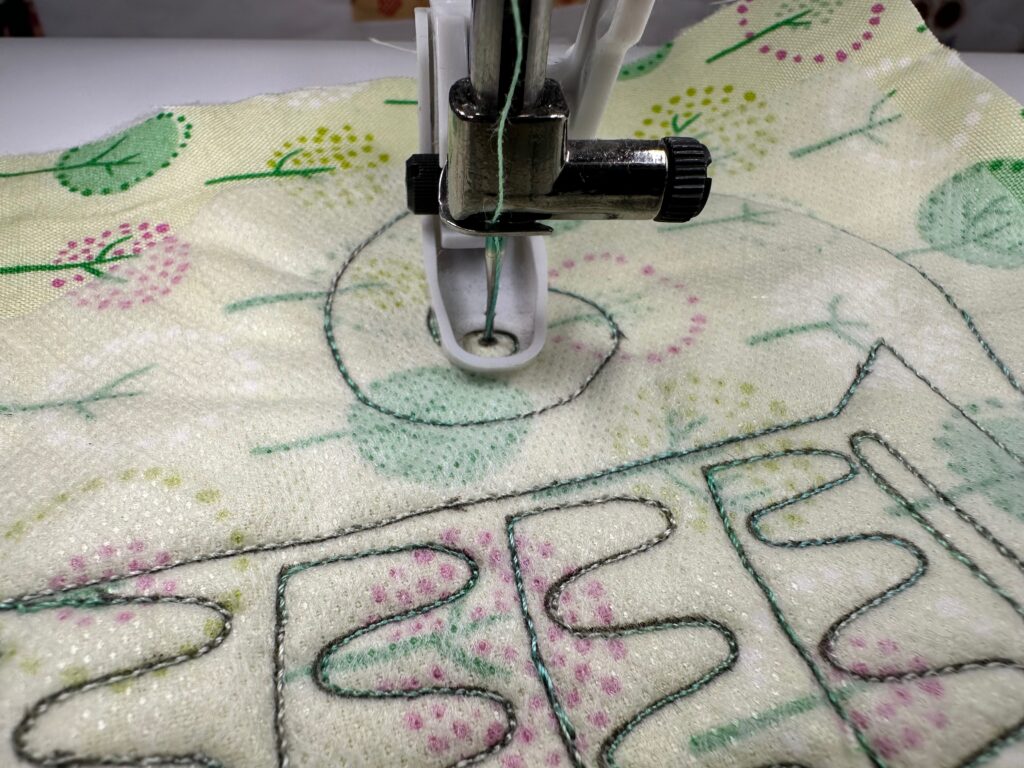
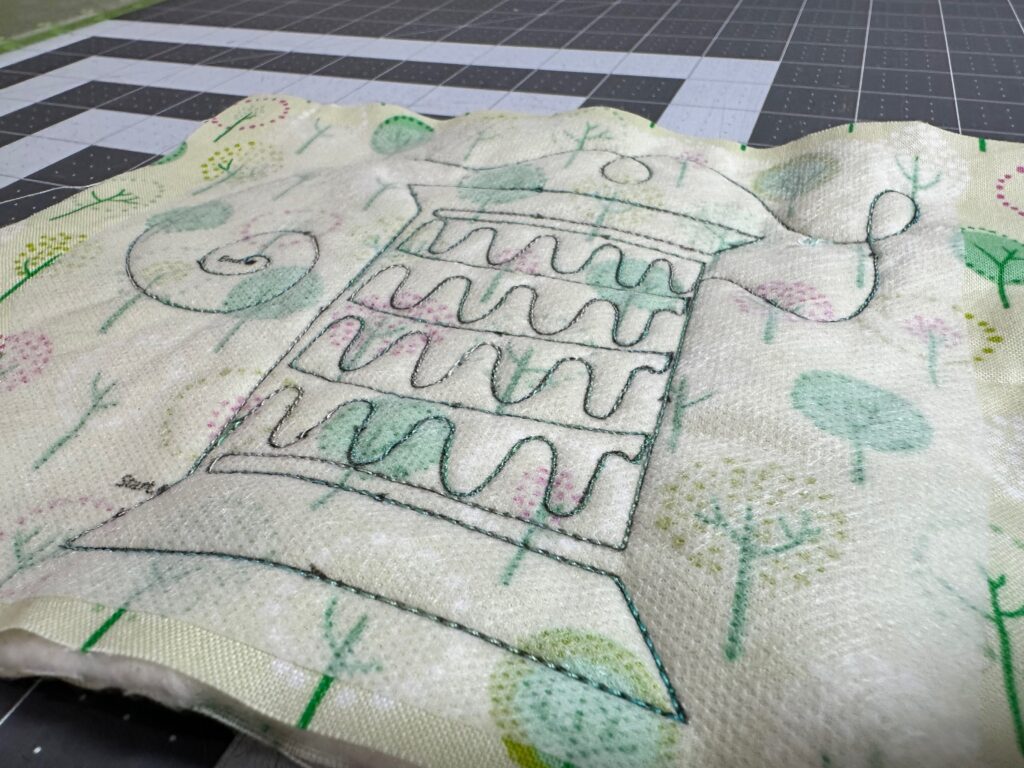
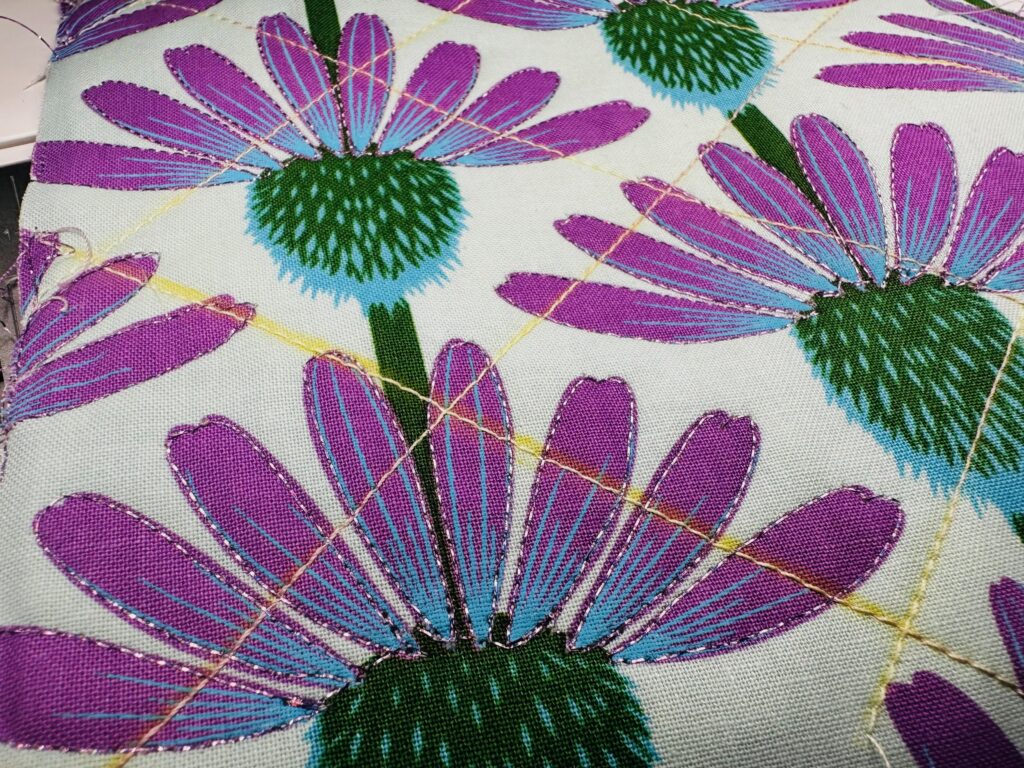
If purchasing a kit, four sheets of Sulky Sticky Fabri-Solvy are included for either printing or sketching a quilting design/plan. Choose one of the six printable templates included with purchase of the kit or draw your own quilting design onto the sheet(s). If printing a quilting design/motif, print on the fabric-like side of the Sticky Fabri-Solvy. Then, place the printed design transfer right side up on the exterior fabric right side. Quilt through all layers, following the printed design. Then, wash away the transfer under warm running water and let the piece(s) dry flat. Note: The images below are not showing the templates that come with purchase of the kit. These are illustrative images only, to show how to use Sticky Fabri-Solvy to transfer quilting designs. Grab the Thread Spool FMQ template shown below HERE>. The design is a great size for the Exterior Pocket quilting. Note: only the pocket half with batting attached is quilted.

Quilting Thread
Once you’ve determined the type of quilting you plan to do on the tote Exterior and Pocket pieces, decide which thread types and weights to use for the quilting. Choose from the following thread and needle combinations that come in the kit. You may want to use all of the following or choose one or two you like best. Note: The 50 wt. Cotton Thread is intended for the tote construction, too.
-
- 50 Wt. Cotton – pair with a size 75/11 Quilting Needle
- Lightweight yet strong. The quilting will blend into the fabric and be subtle. This thread is used for the tote construction, but can also be used for quilting.
- 30 Wt. Cotton Blendables – pair with a size 90/14 Quilting Needle
- This thread is mediumweight and colorful. This quilting will stand out and become a focal point of the tote. Lengthen the stitch length to 3.0mm or 3.5mm for best results.
- 12 Wt. Cotton Blendables – pair with a size 100/16 Jeans Needle
- Very heavyweight and colorful. This quilting will be very pronounced. lengthen the stitch length to at least 3.5mm.
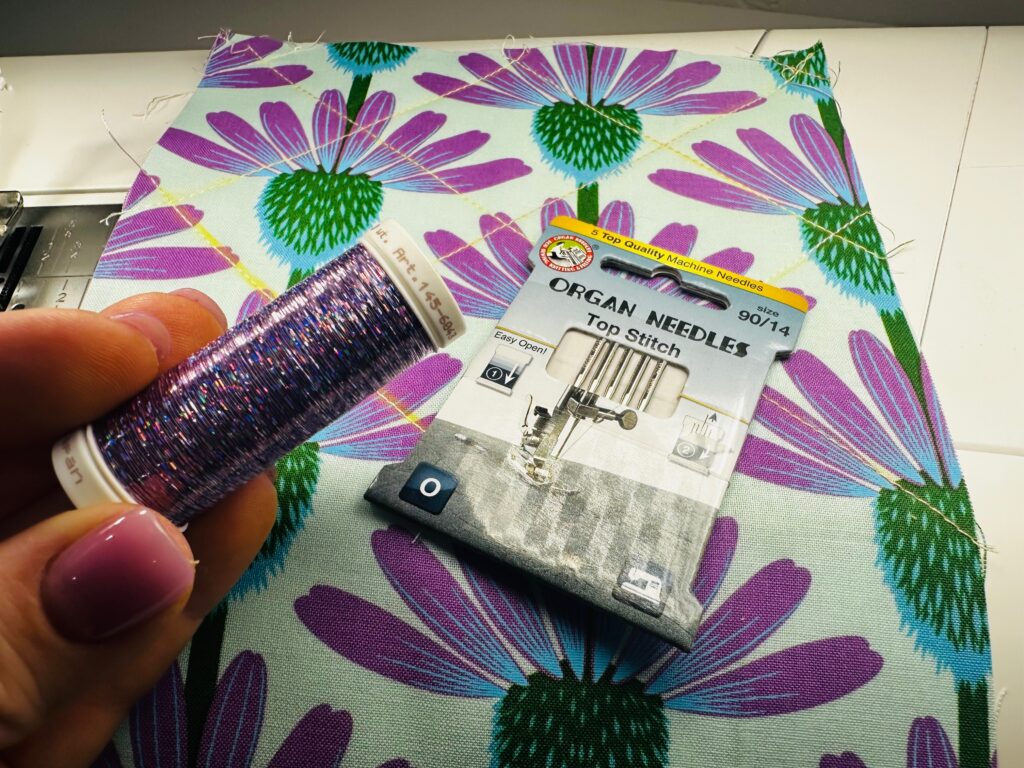
- Invisible Thread – pair with a size 90/14 Top Stitch Needle
- This thread is, you guess it, invisible. If you want the quilting to totally disappear, choose Sulky Invisible Thread.
- 60 Wt. PolyLite – pair with a size 75/11 Quilting Needle
- A great choice for the bobbin thread, but it can also be used for very subtle quilting. It’s even lighter than the 50 wt. Thread.
- Holoshimmer Metallic – pair with a size 90/14 Top Stitch Needle
- For shimmer and shine, try Holoshimmer Metallic. This thread is a great choice for details, like free-motion flower petal outlines and stems.
- 50 Wt. Cotton – pair with a size 75/11 Quilting Needle
For more info and step-by-step instructions for free-motion quilting, register for our Free-Motion Quilting Session HERE.
Quilting
If desired, plot the quilting lines using a removable fabric marker or chalk.
For the featured tote, the main Exterior pieces were quilted in a cross-hatch pattern using 30 wt. Sulky Blendables Thread. The Exterior Pocket was also quilted in the same way, but additional free-motion quilting was done to outline the flower petals in Sulky Holoshimmer Metallic Thread.
Tote Pockets
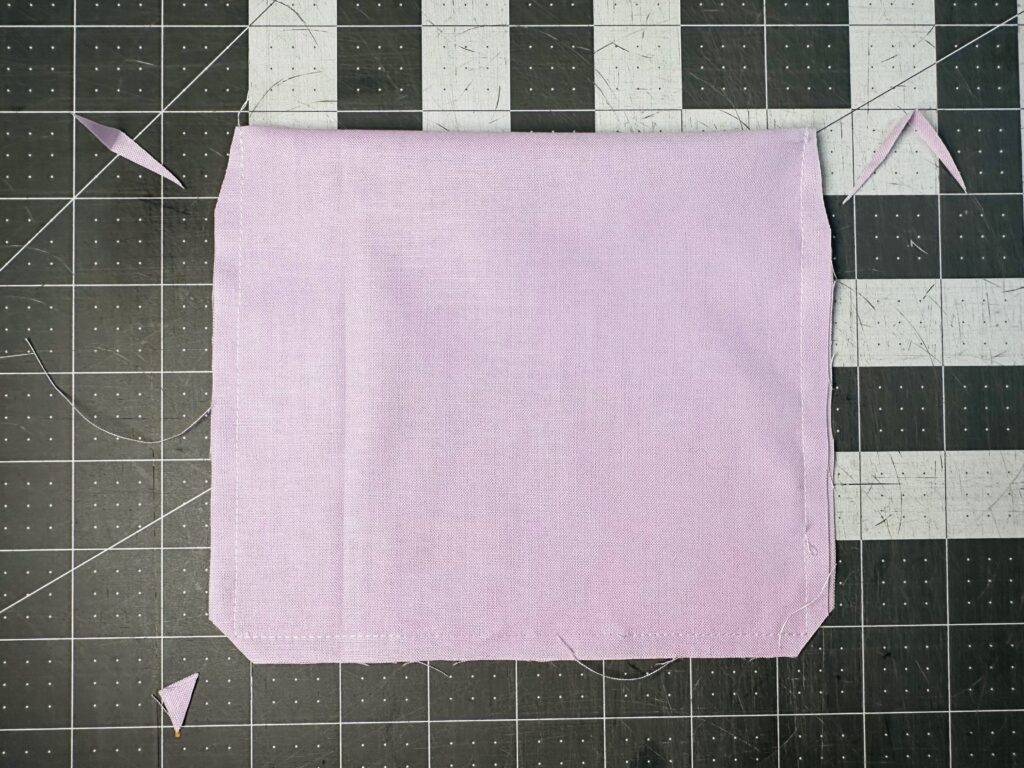
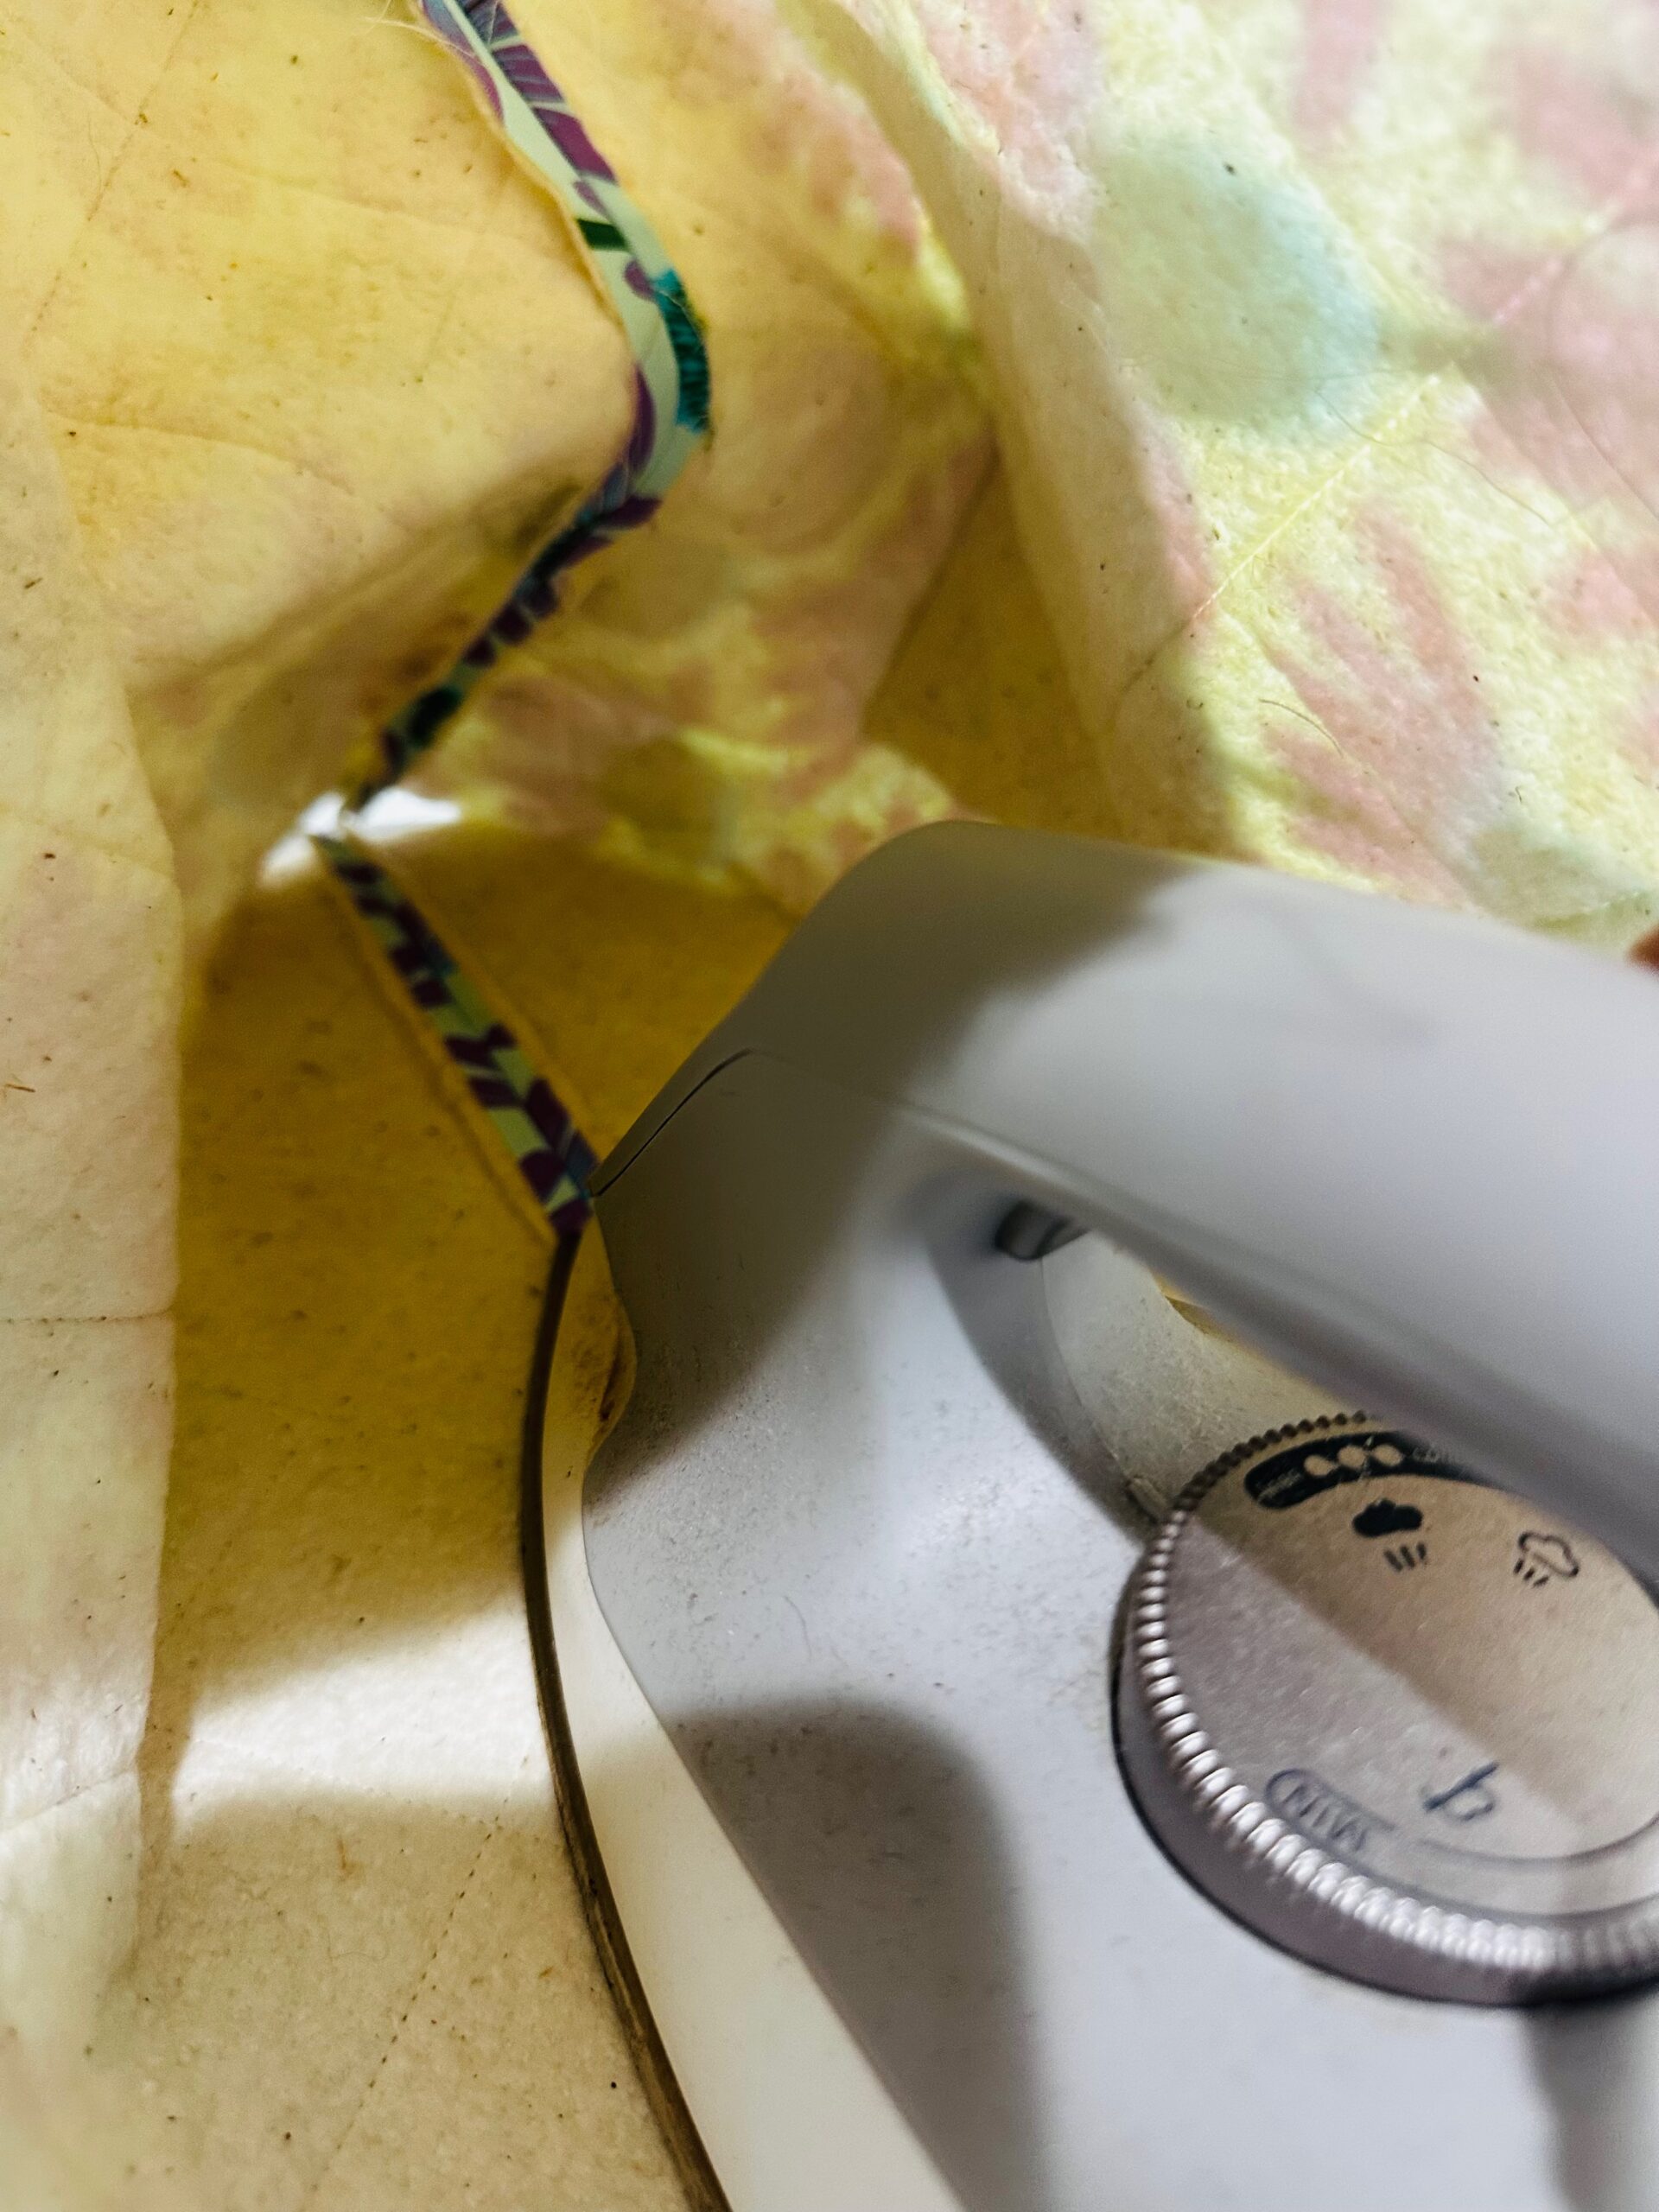
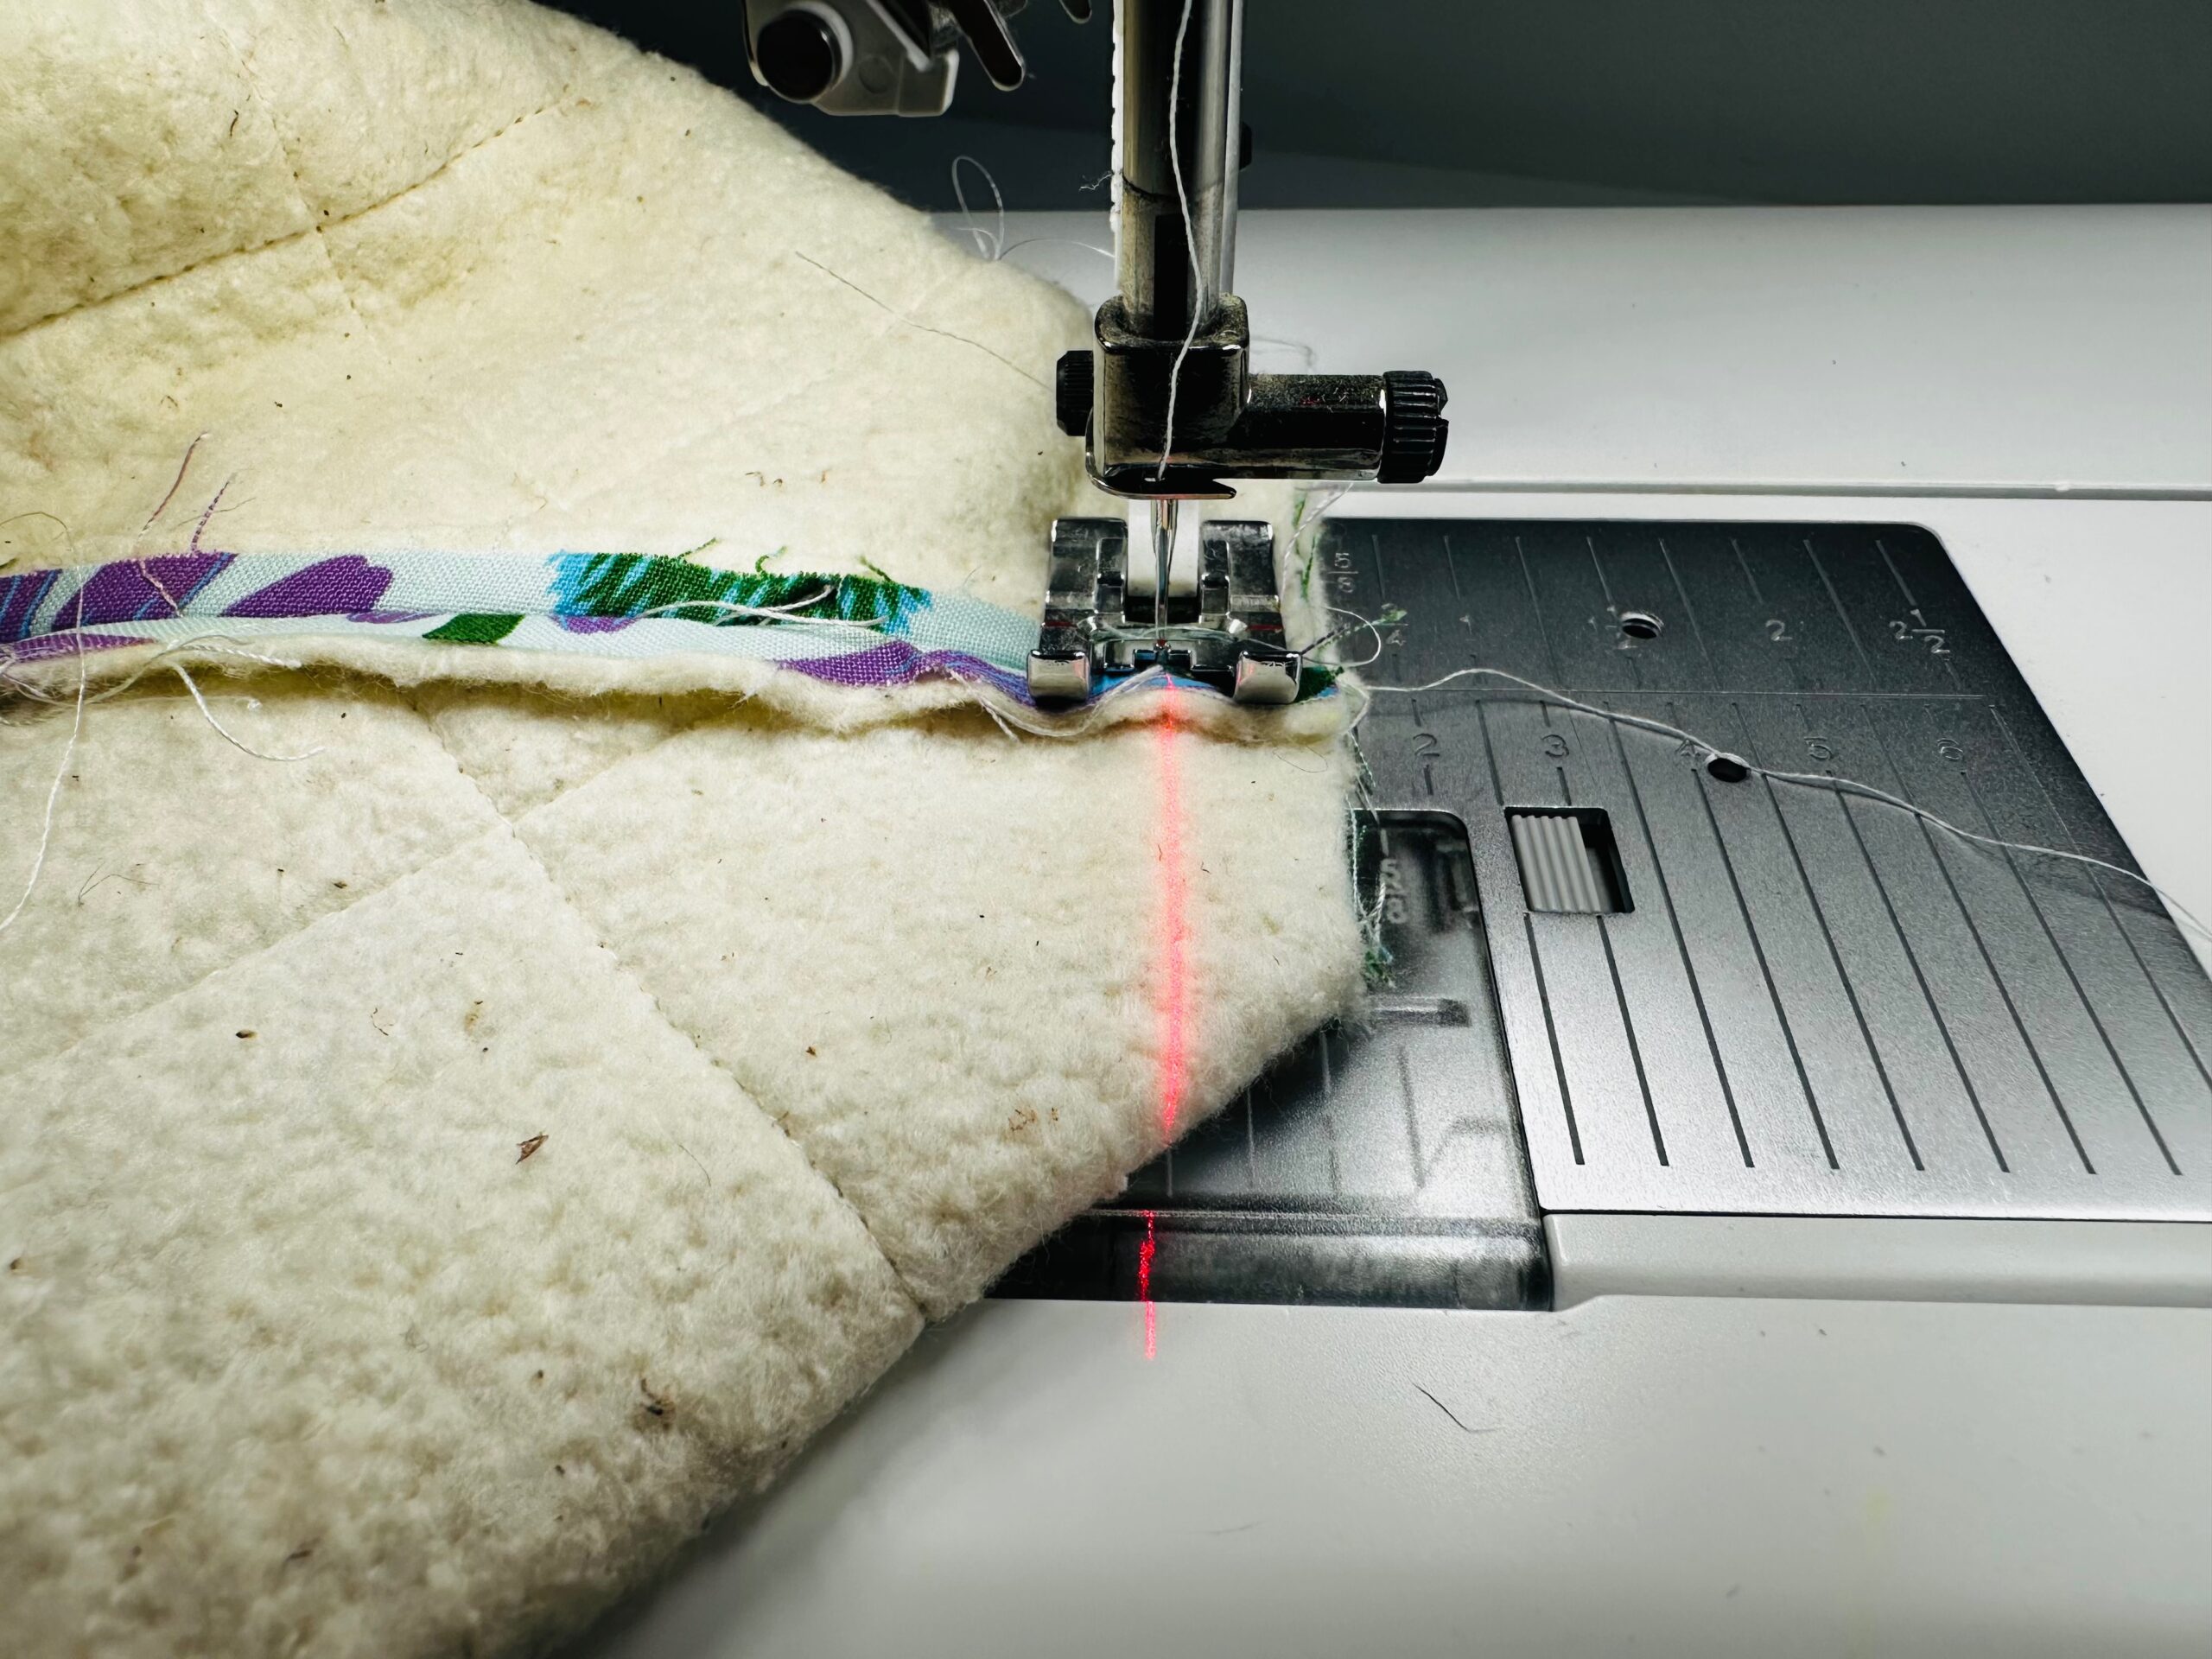
First, fold the Exterior Pocket in half widthwise with right sides together so it measures 7″ W x 6″ H, with the fold as the upper edge. Then, stitch the sides and lower edge, leaving a centered opening along the lower edge for turning. Next, clip the corners. Turn the pocket right side out, pushing out the corners gently using a Multipurpose Turning Tool.

Press the pocket flat, turning the opening seam allowances in toward the wrong side. The quilted pocket side that has batting interlining attached is the right side. Stitch 1/2″ from the pocket upper edge.
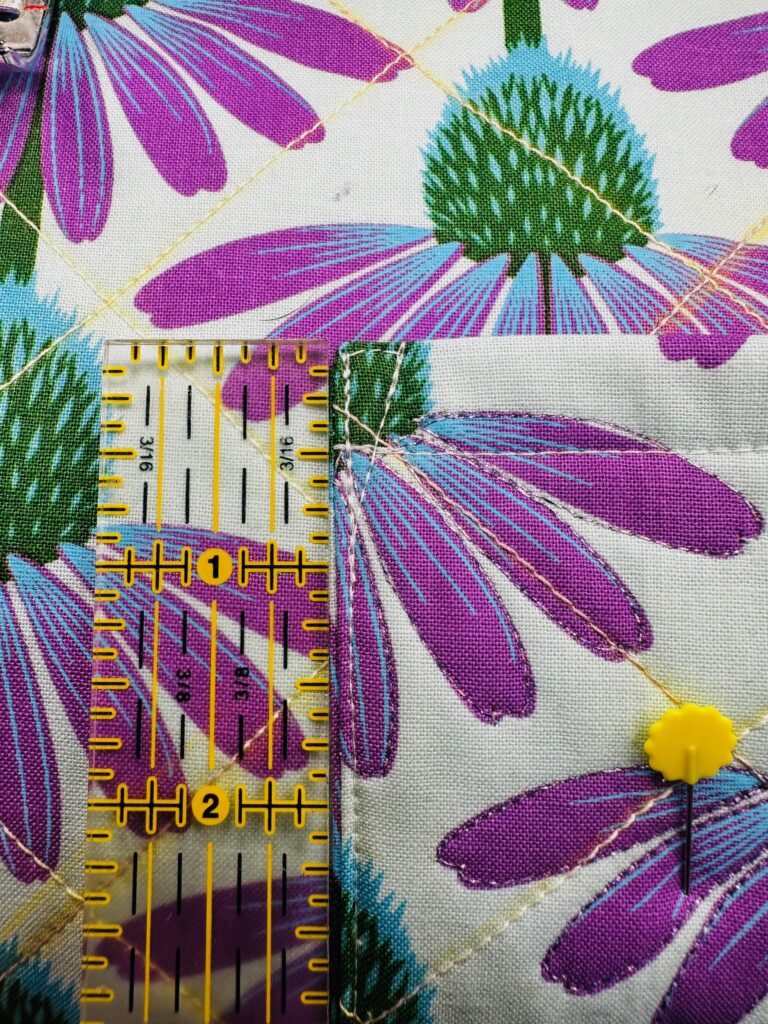
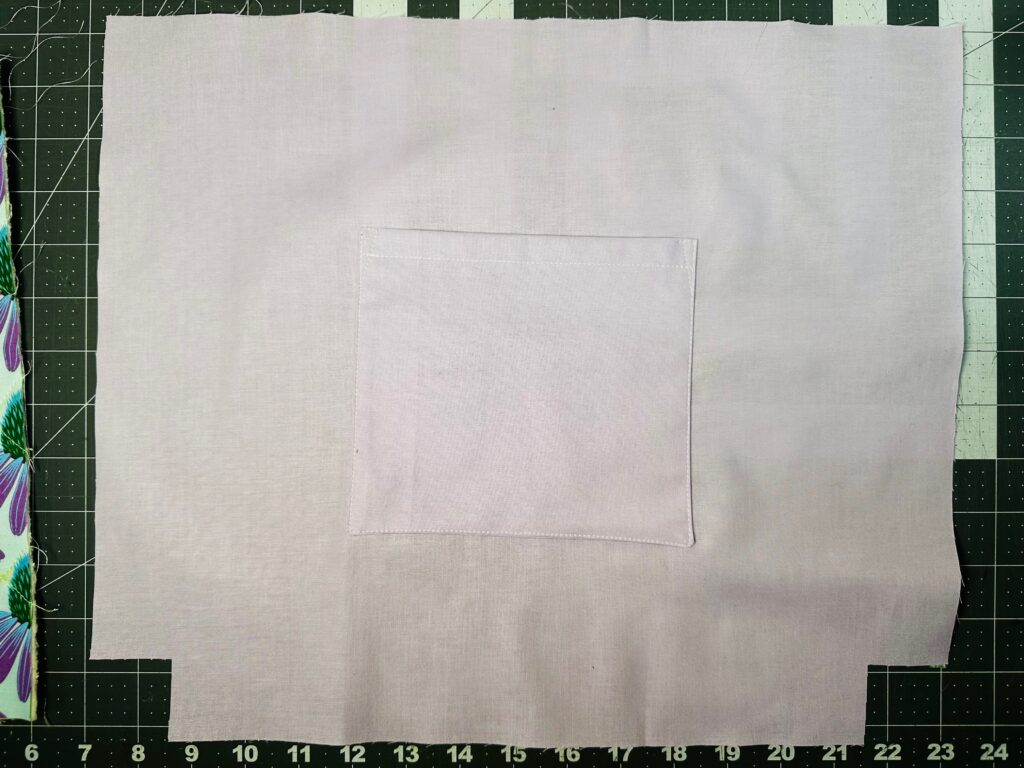
Center the Exterior Pocket right side up on one main Exterior right side, 4″ down from the main Exterior upper edge. Pin the pocket in place.
Then, topstitch the pocket sides and lower edge. This also closes the turning opening.
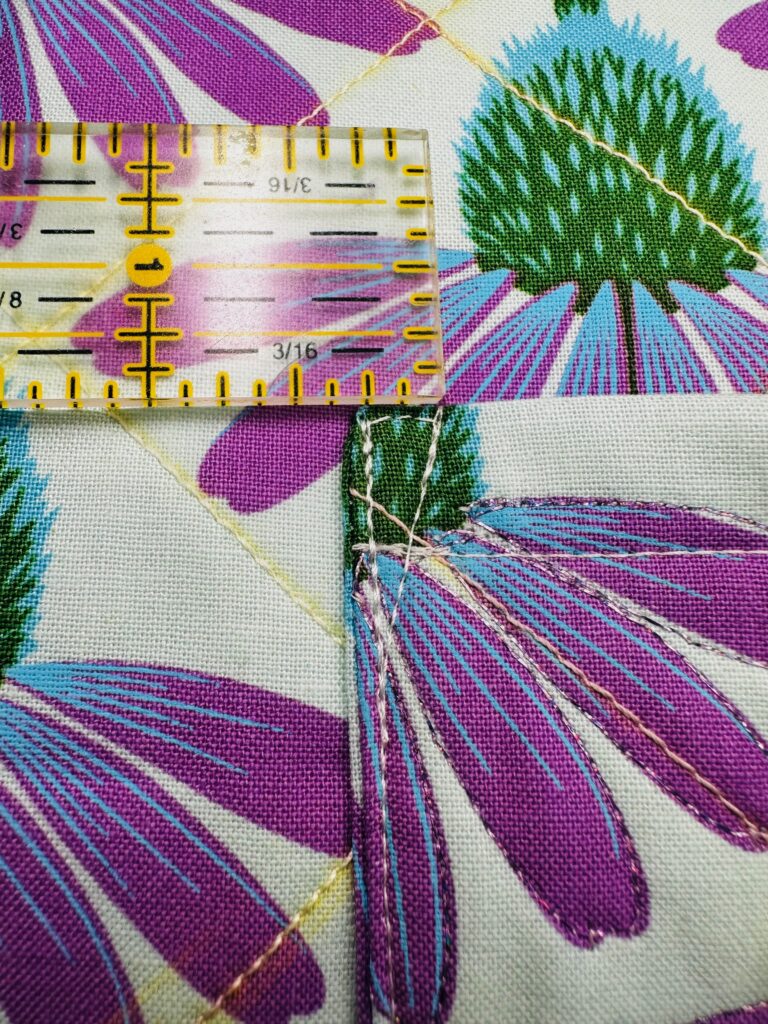
For additional reinforcement, stitch a right triangle at each upper-edge pocket corner. Mark 1/4″ in from each upper-edge pocket corner. Then, mark 1″ down from each upper-edge pocket corner. Stitch from mark to mark, following the upper-edge corner, and then connect the beginning and ending with stitches.
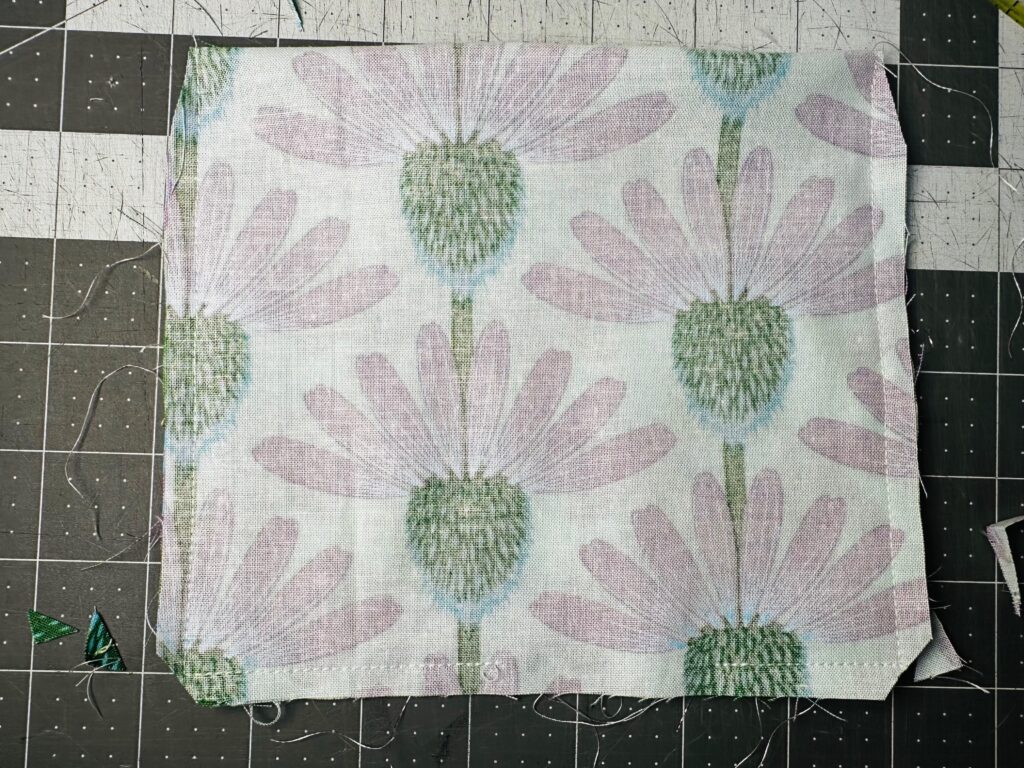
Repeat to create the lining pocket and stitch it to one main Lining piece.


Tote Exterior Construction
Place the main Exterior pieces right sides together, aligning all edges and corners.
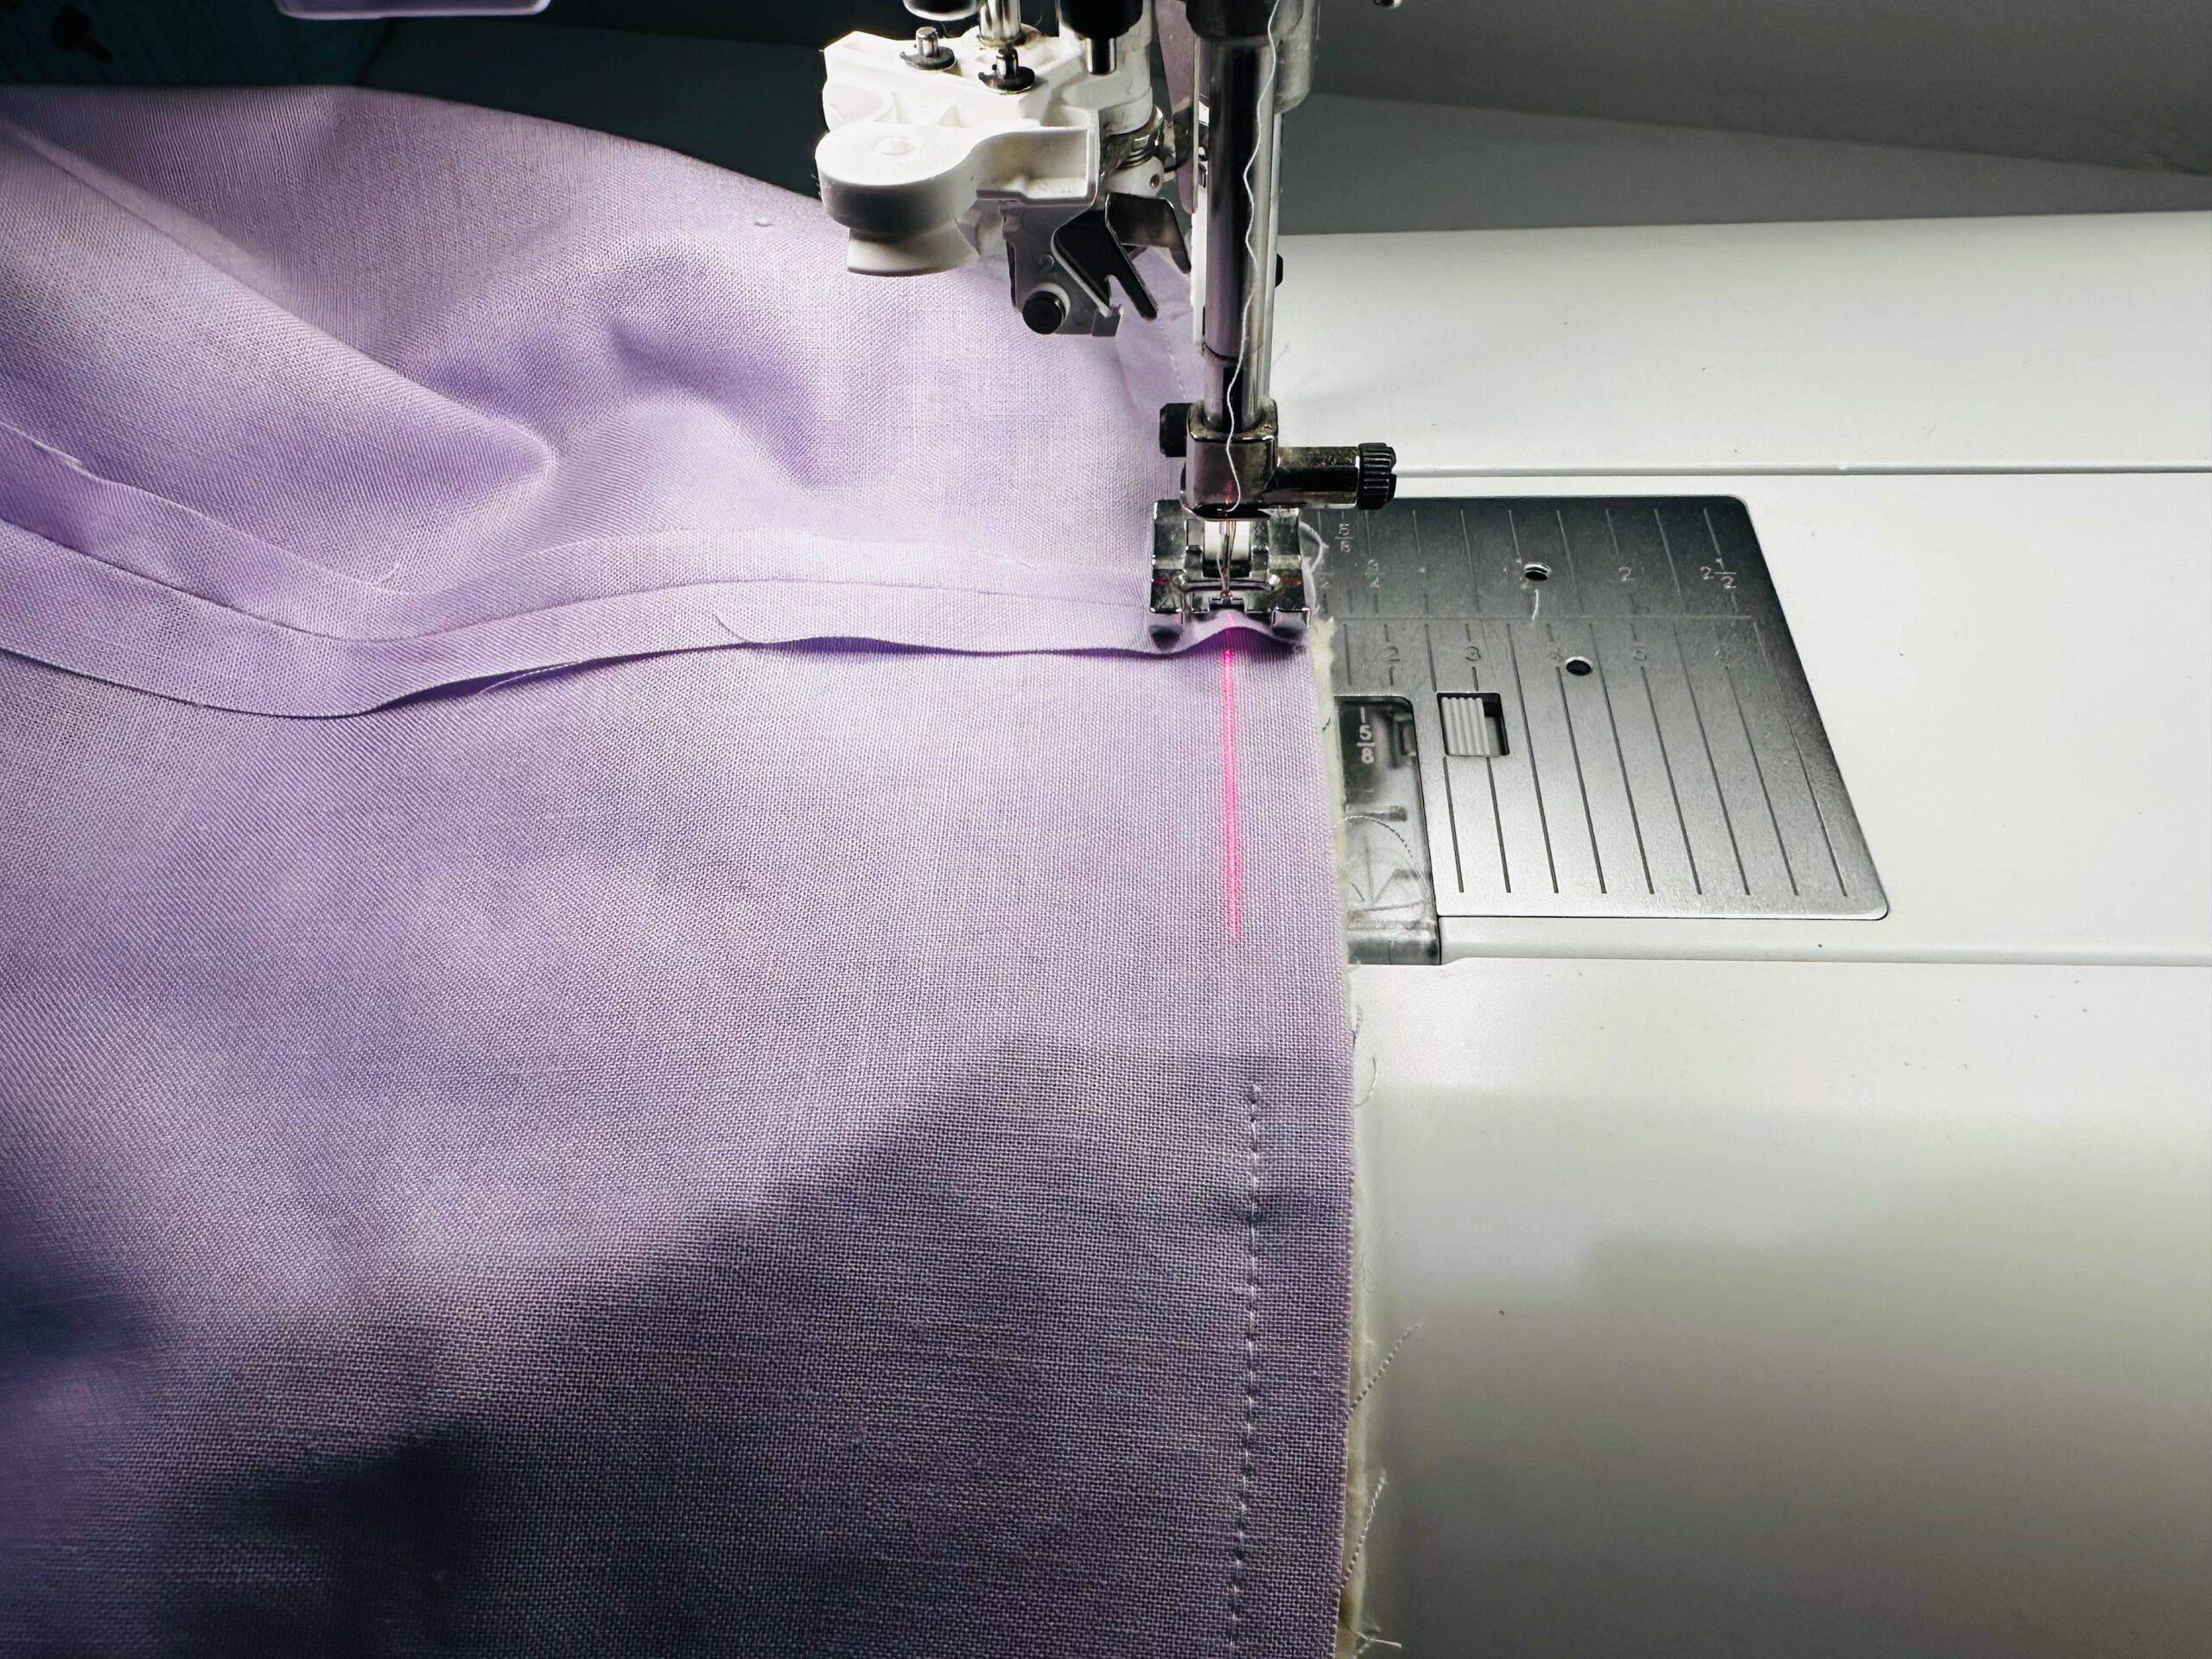
Next, stitch the sides and lower edge using a 3/8″ seam allowance. Press open the seams. (I find this easiest to do with the tote right side out, placing the iron inside the tote and very carefully pressing the seams open. Or, use a sleeve roll or seam stick.
Pinch together one bottom corner to align the side seam with the lower-edge seam; pin or clip.

Stitch 3/8″ from the corner raw edges. Repeat to box the second corner.
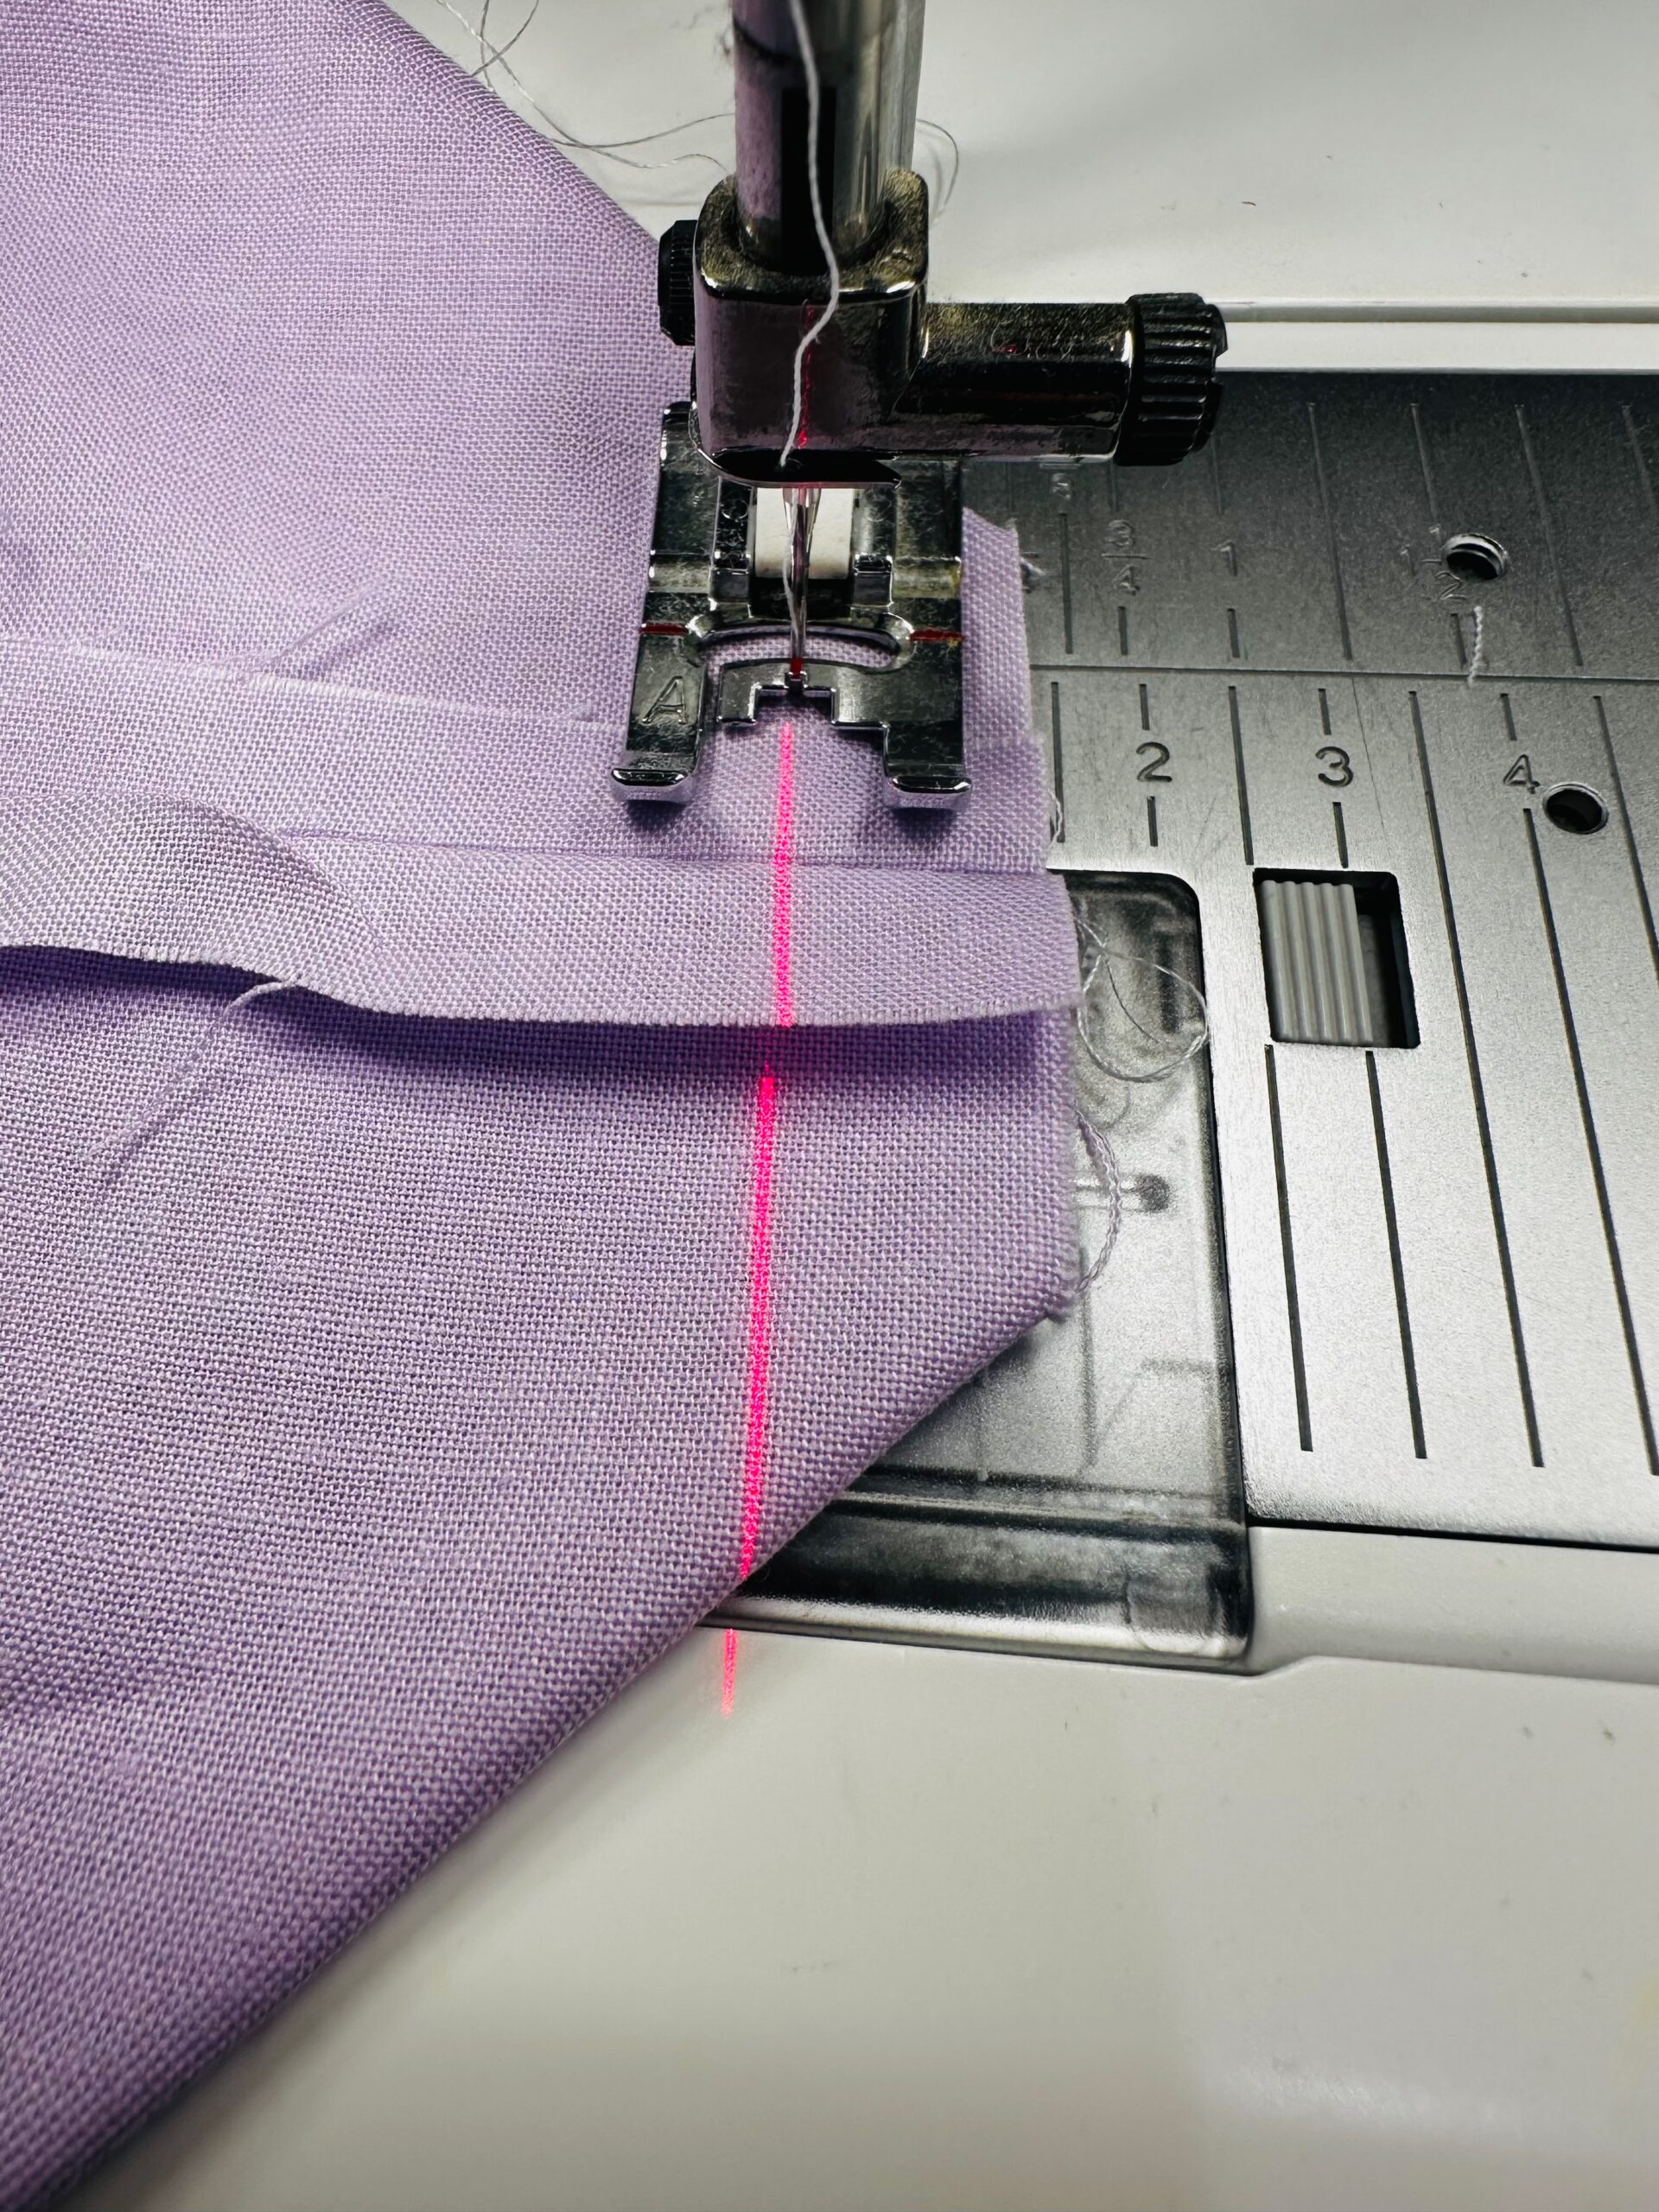
Lining Construction
Repeat to stitch the main Lining pieces. When stitching the Lining side seams, begin at 3/8″ seam allowance and taper to 1/2″ at the lower edge. This will help the lining fit snugly into the exterior.
Stitch the lower edge using a 1/2″ seam allowance, leaving a centered 5″ opening for turning. Then, box the corners using a 3/8″ seam allowance.
Handle Connectors
Prepare the Handle Connector pieces. Fold the 2 1/2″ x 10″ rectangle in half lengthwise with wrong sides together; press, and then unfold. Next, bring the long raw edges toward the center foldline, with wrong sides together; press. Then, re-fold the rectangle along the first foldline to encase the raw edges.

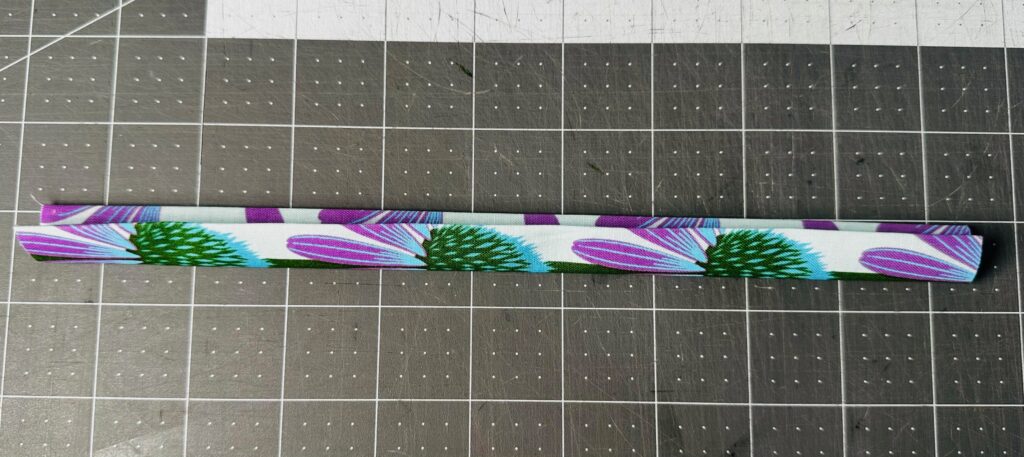
Topstitch along both rectangle long edges.
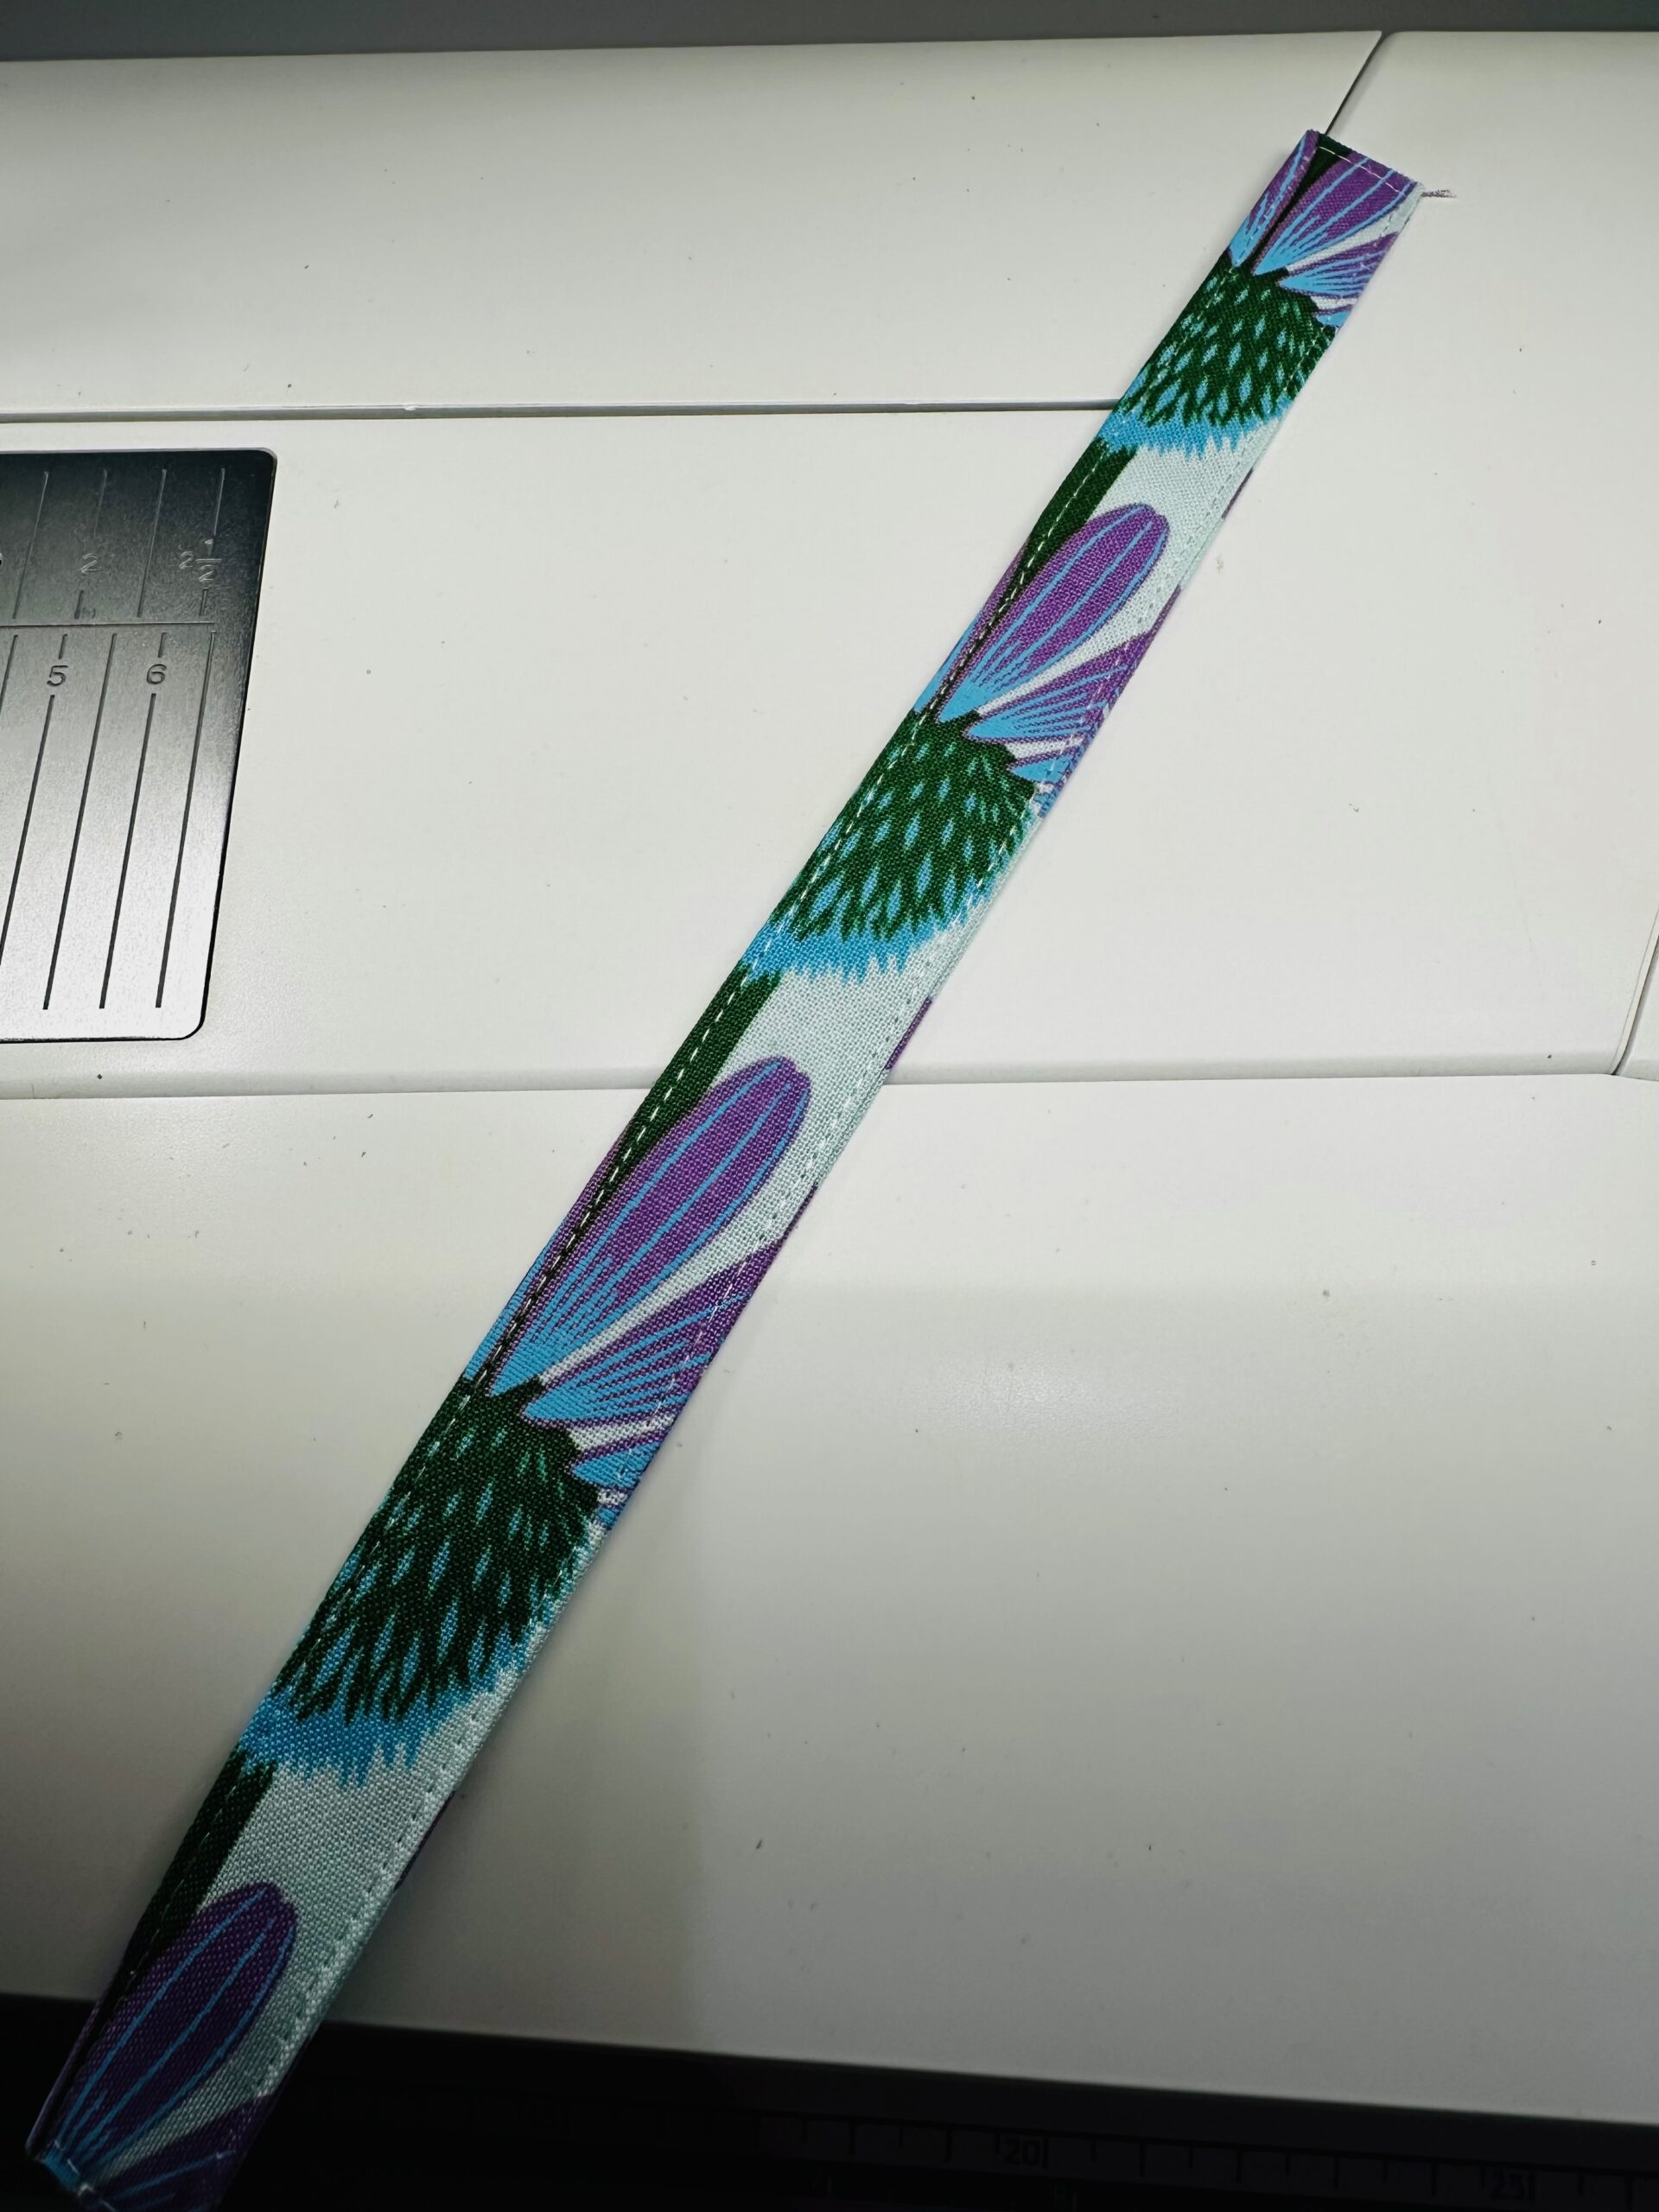
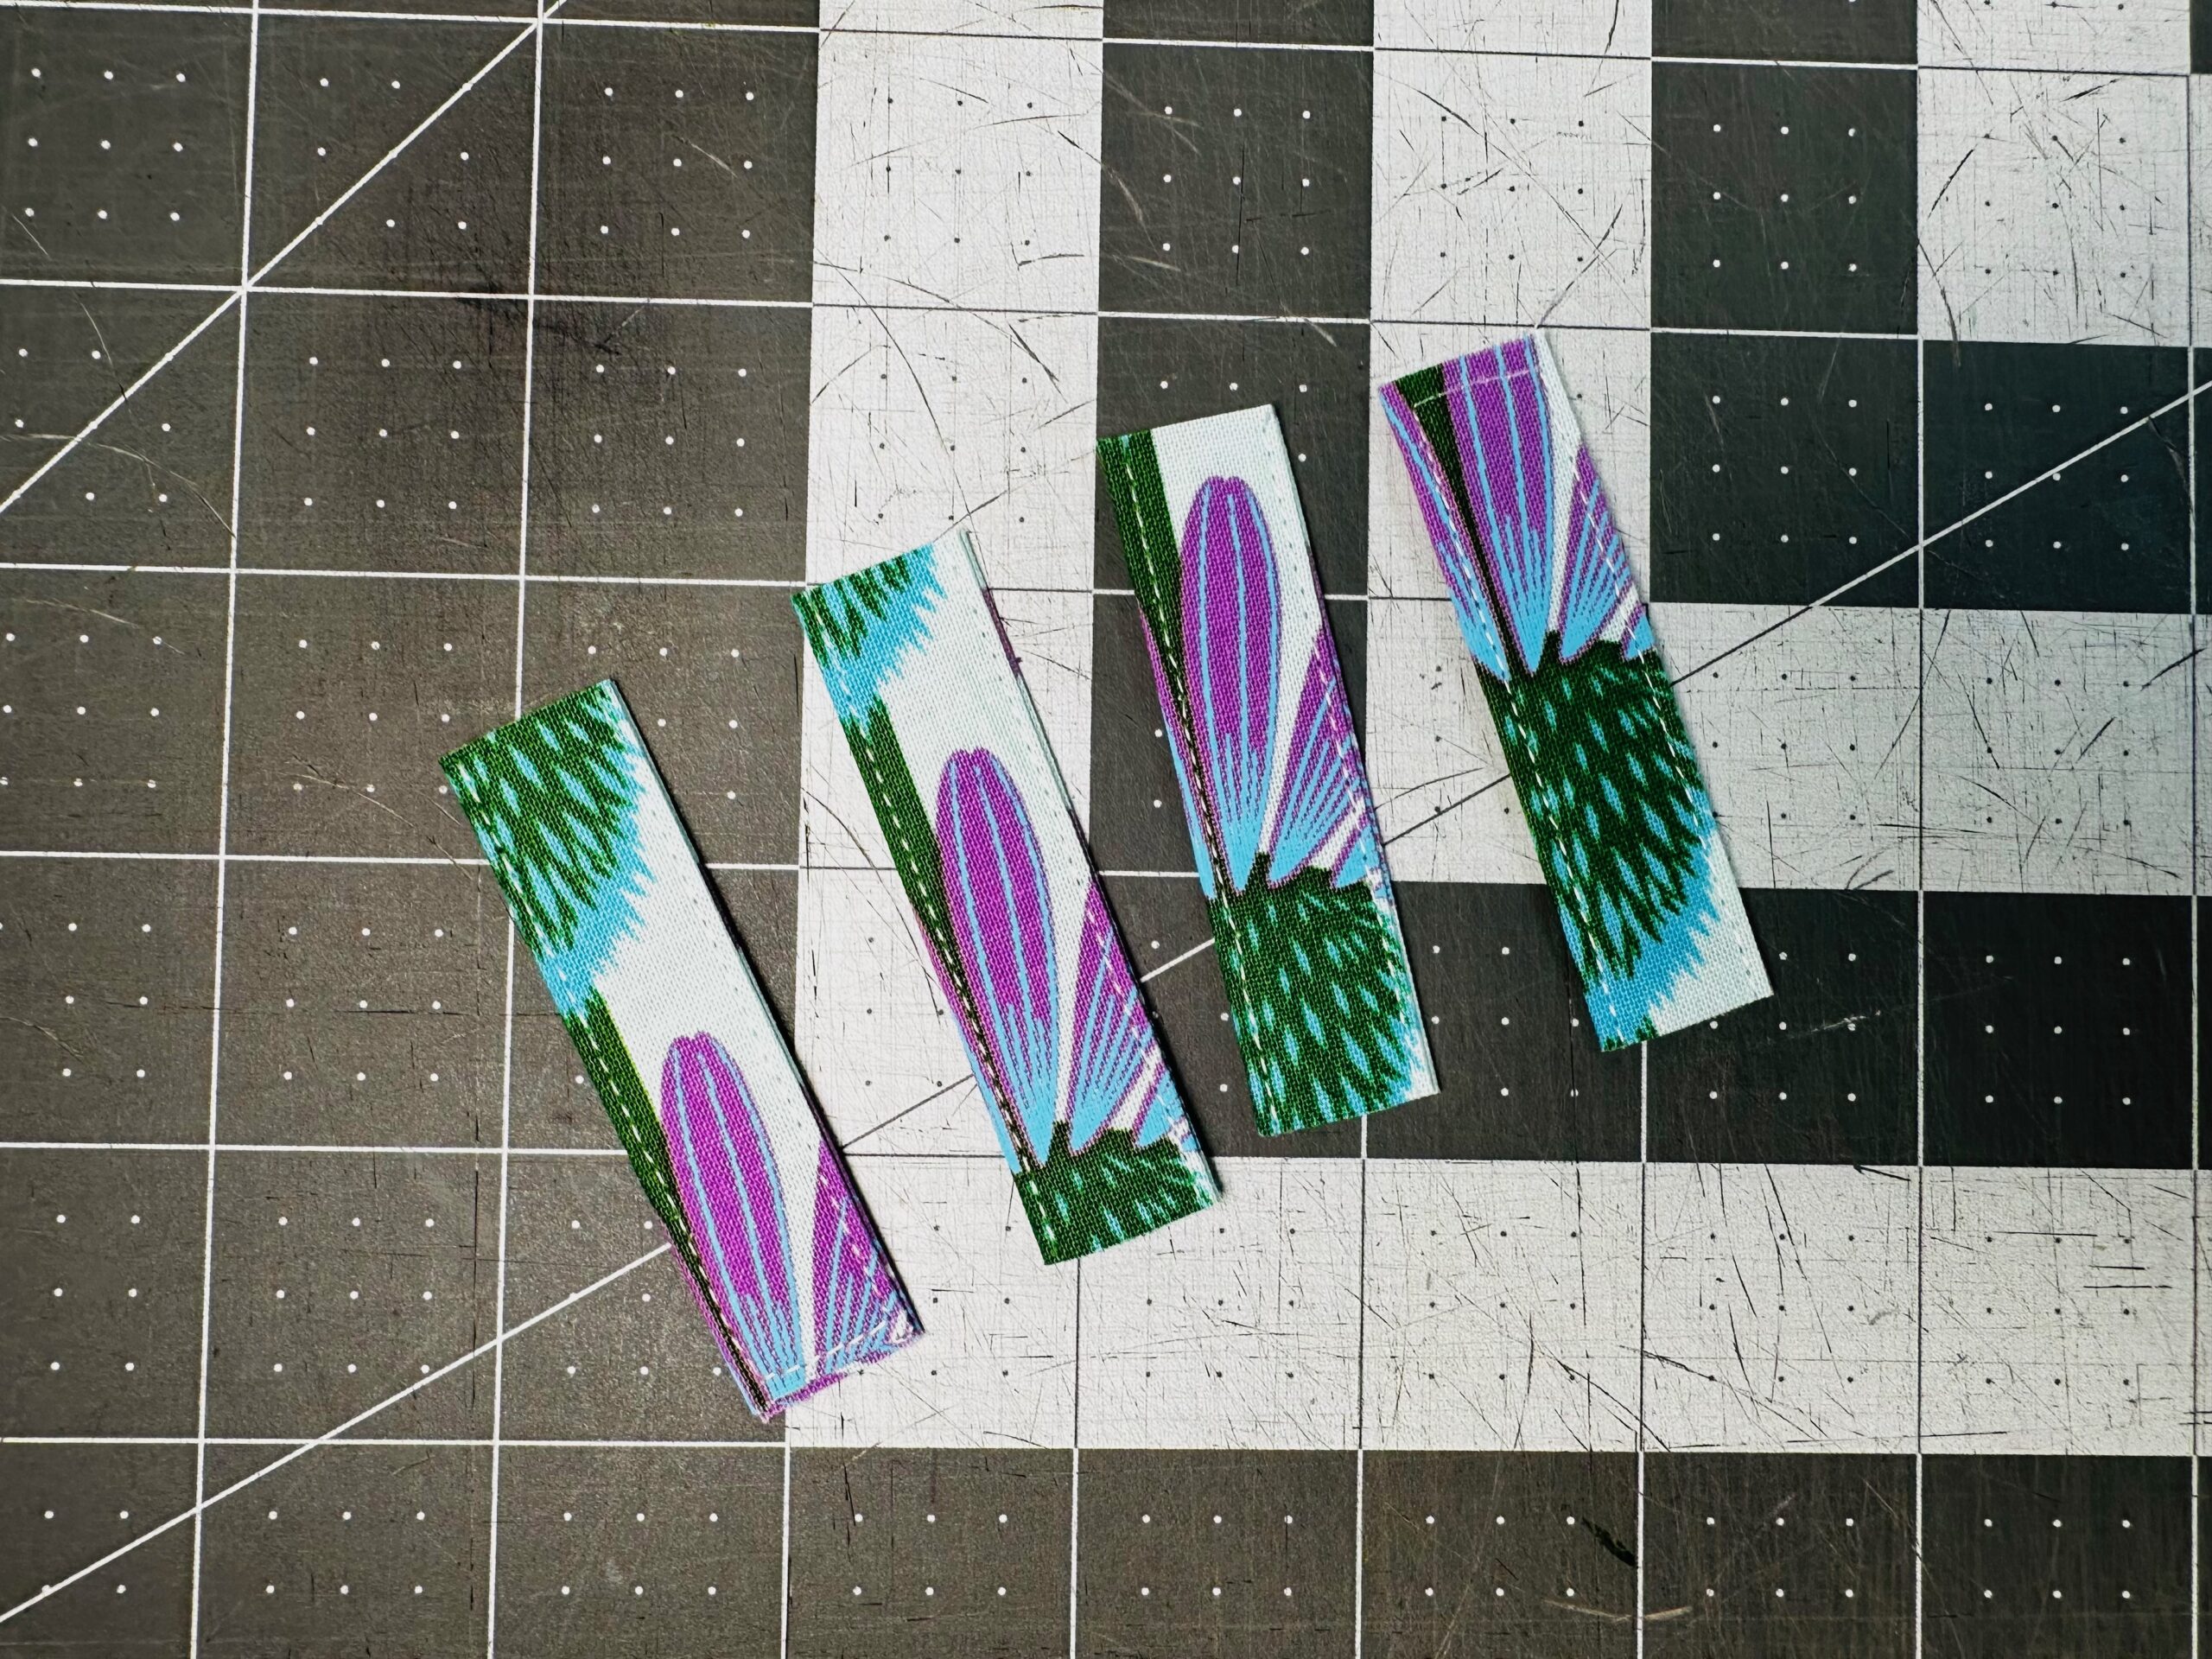
Then, subcut the rectangle into four equal pieces, measuring 2 1/2″ long. Set aside the Handle Connectors.
Macrame Tote Handles
Check out THIS VIDEO for a visual tutorial on how to create the Macrame Tote handles.
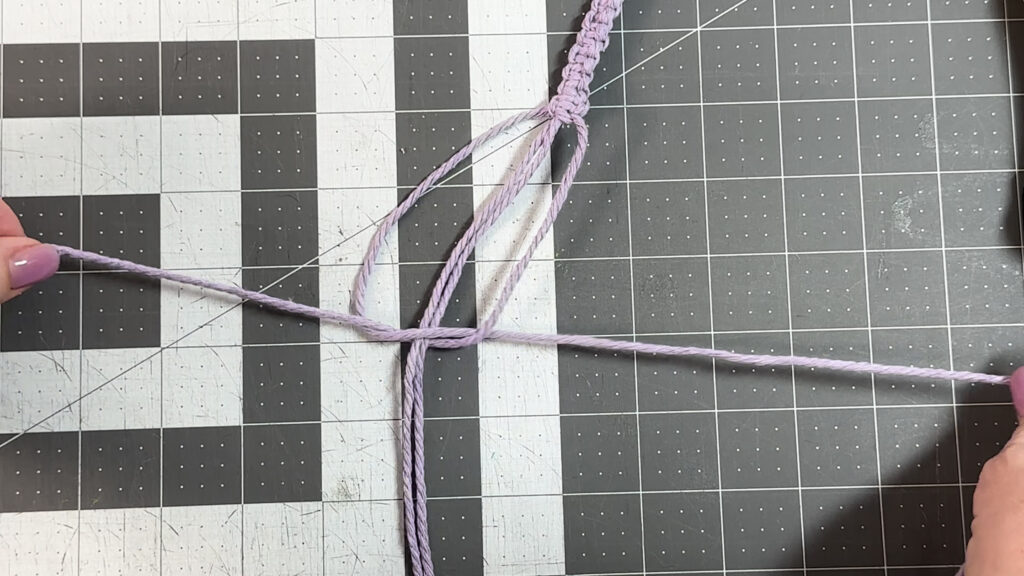
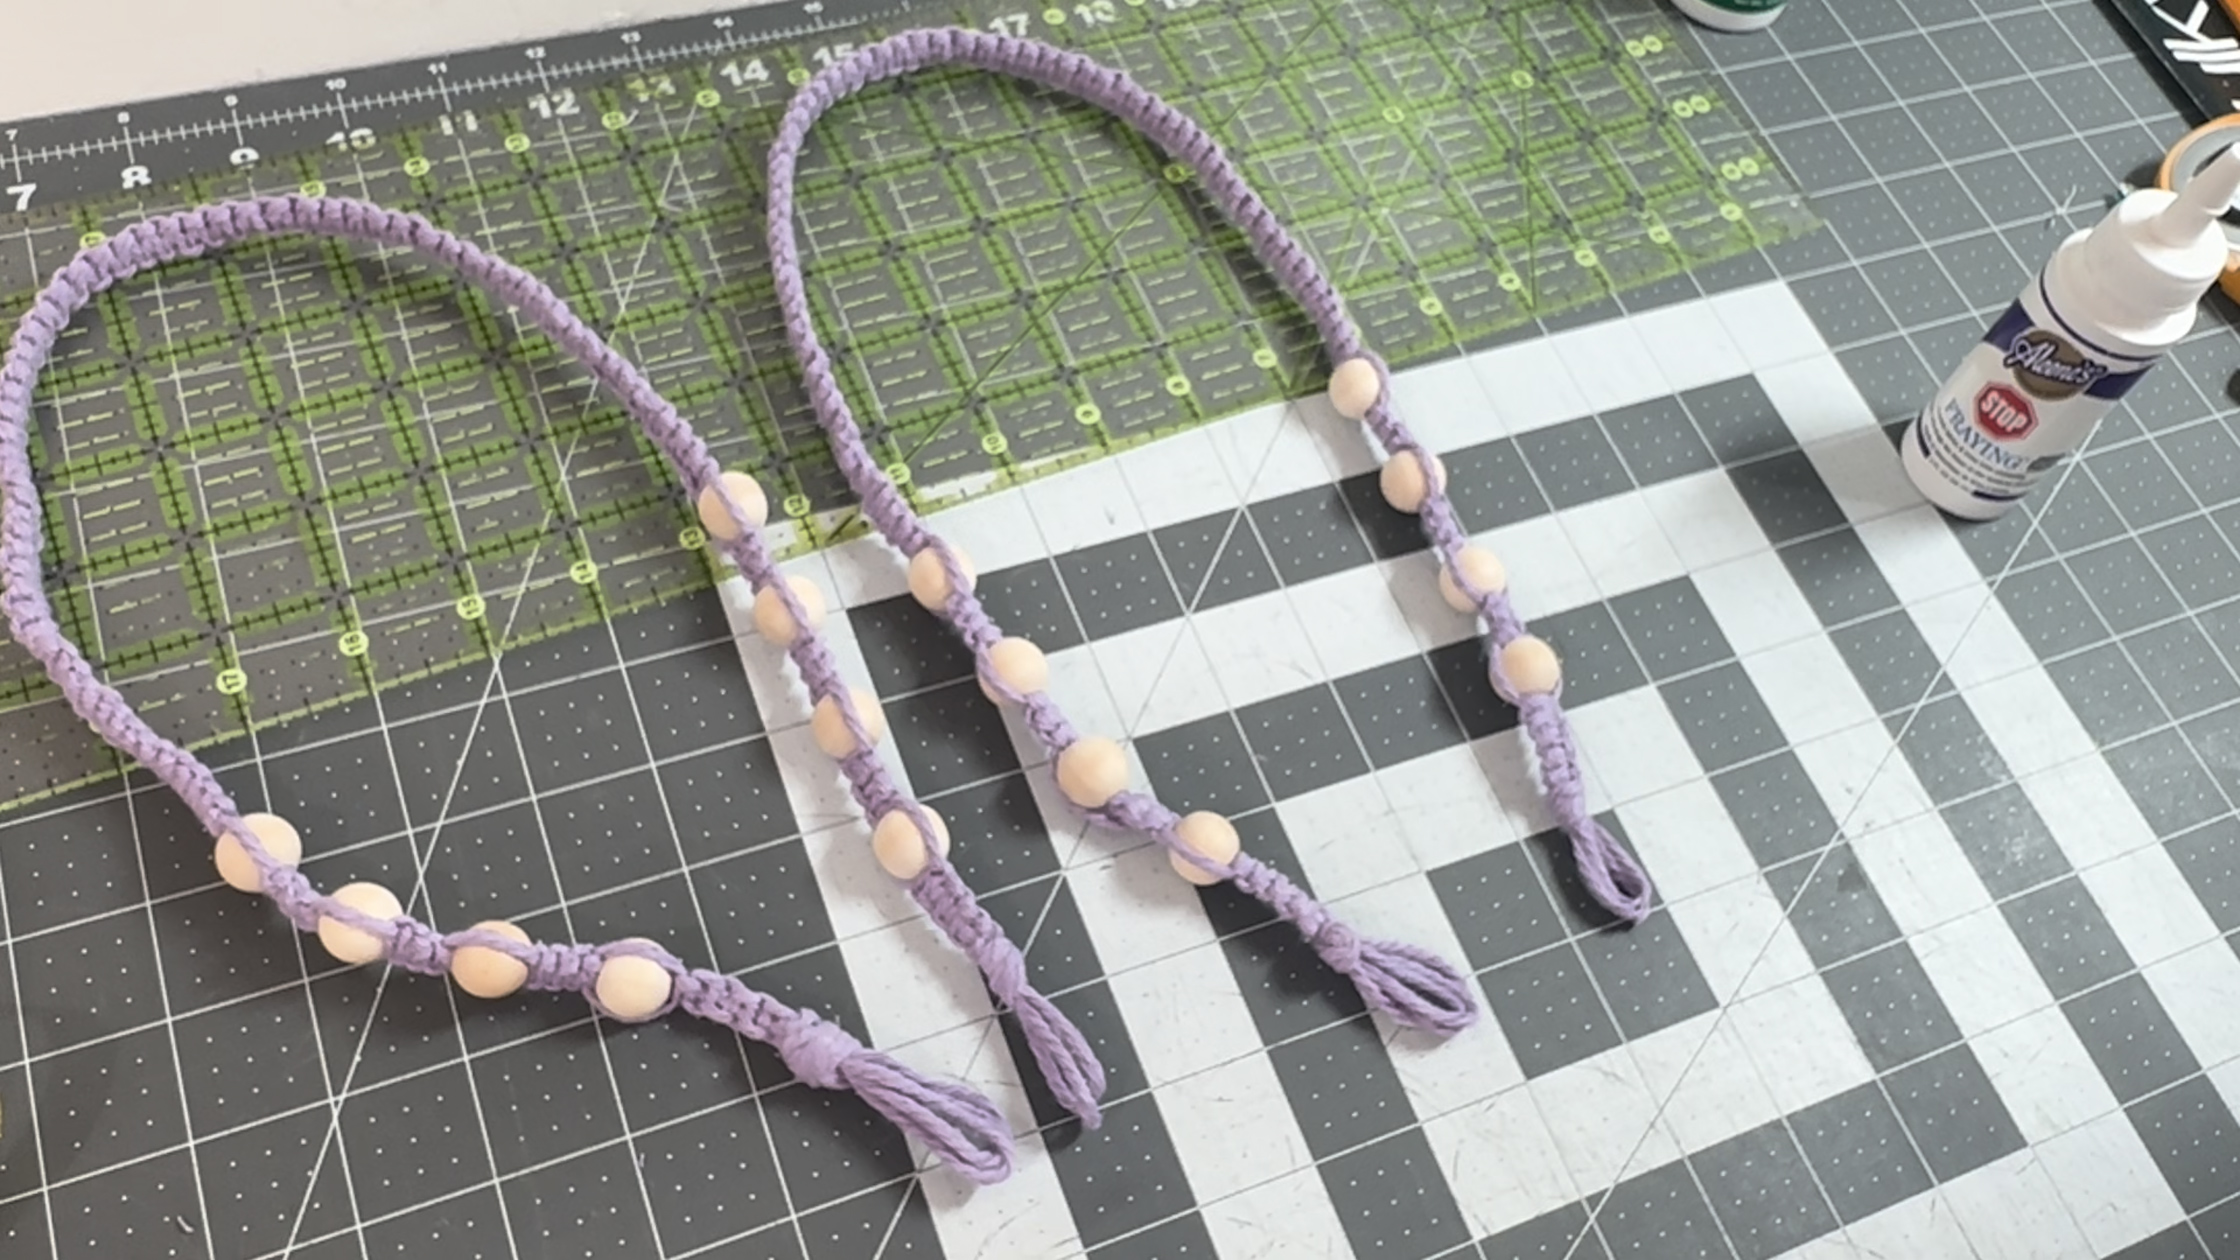
Gather the macrame cording and beads. You’ll make two handles using an alternating square knot technique with beads spaced evenly at each handle end. This creates strong handles that won’t stretch much and feel great in your hand. Cut the 16 yards of cording in half so you have one per handle.
For each handle, cut one cording length measuring 66″. This will become the two middle cords. Use the remaining cord (228″) for the outer strands.
Fold the two cords in half. Create a loop approximately 1″ long, and then knot the strands together to secure the loop.
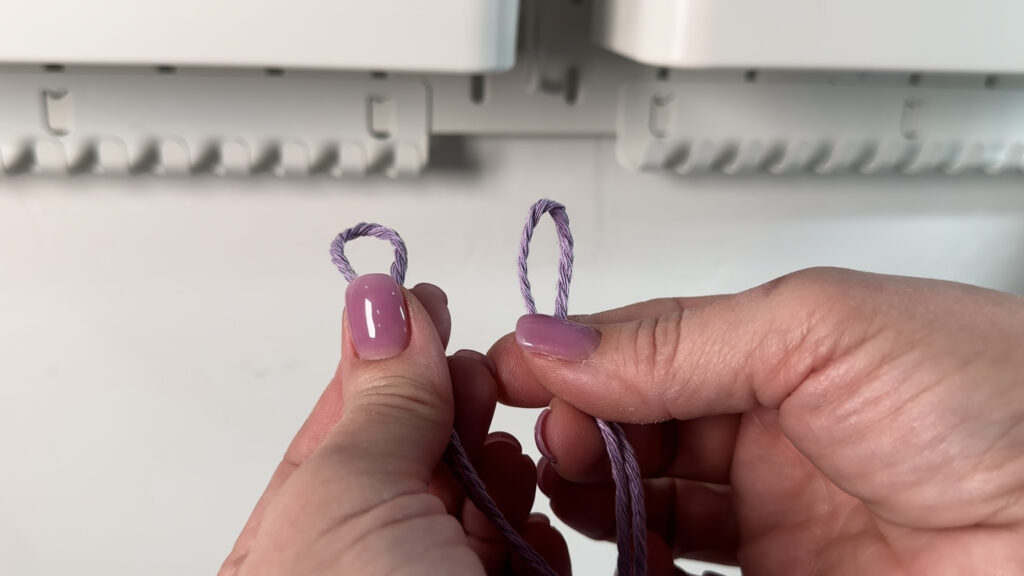
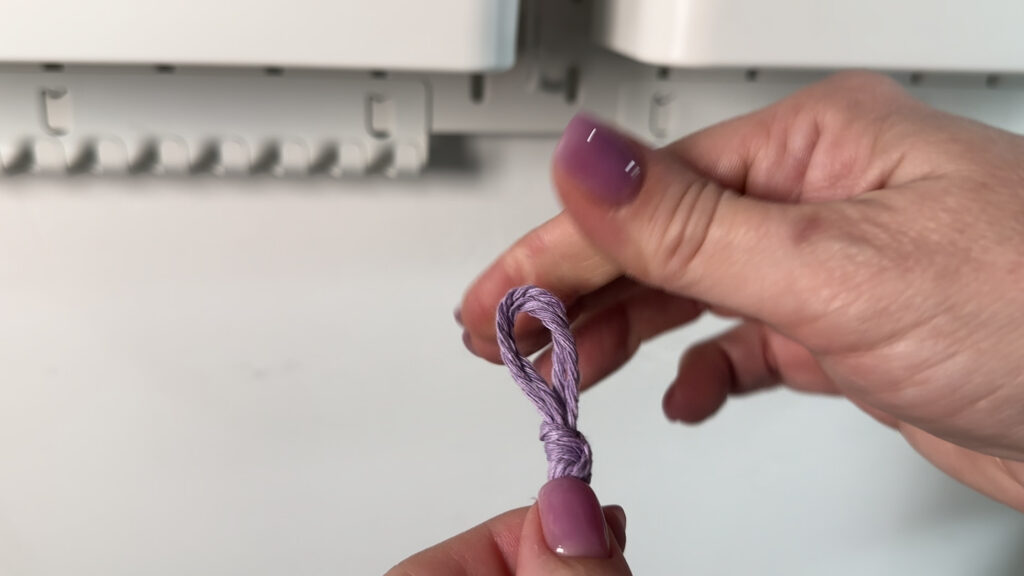
Tape the loop to a work surface or secure it onto a pole or sturdy chair post. (If you have a vertical spool pin on your sewing machine, that works great, too!)
Divide the strands so the shortest are the two in the center and one long strand is on either side. Then, tape the two center cord ends together. This will help keep them together and thread the ends through the beads.
Tie a square knot using the strands from each grouping.
- Take the leftmost strand and bring it up over the middle strands and under the rightmost strand.
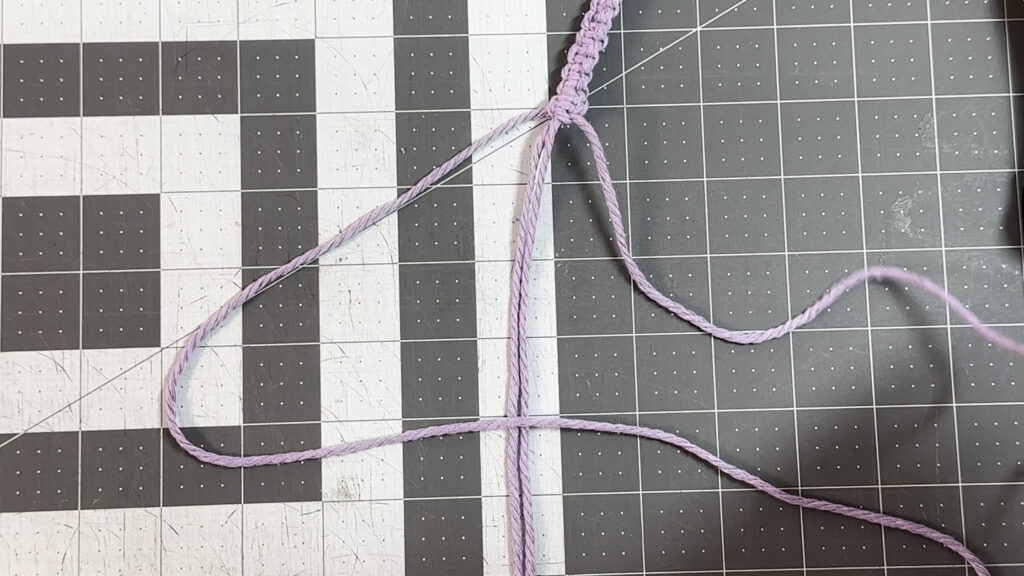
- Then take the rightmost strand and bring it under the middle strands and over the leftmost strand.
- Bring the knot up to the loop, making sure the two center strands remain straight.
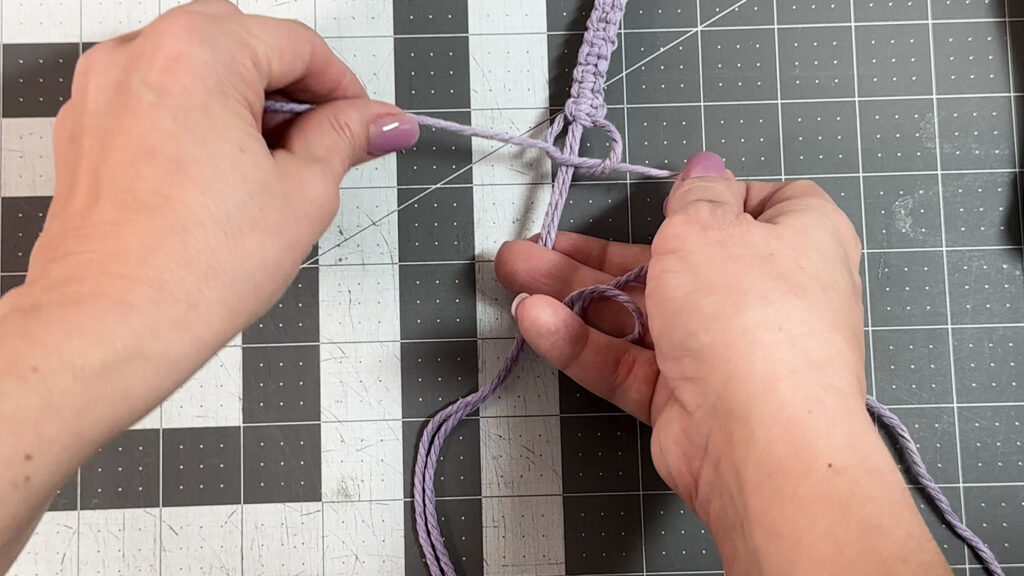
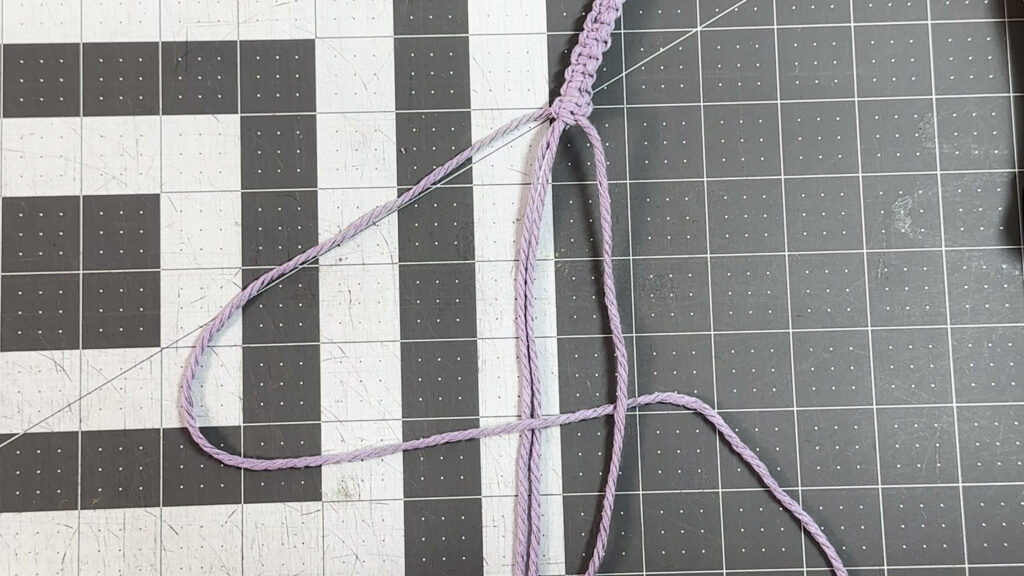
- Repeat in the opposite direction (take the rightmost strand and bring it up over the middle two strands and under the leftmost strand).

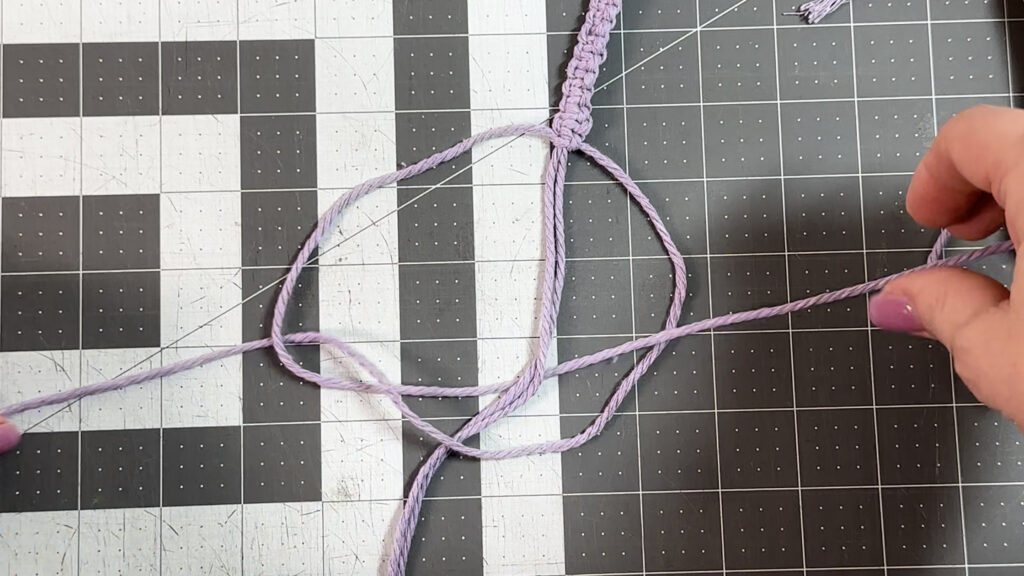
- This completes the square knot.
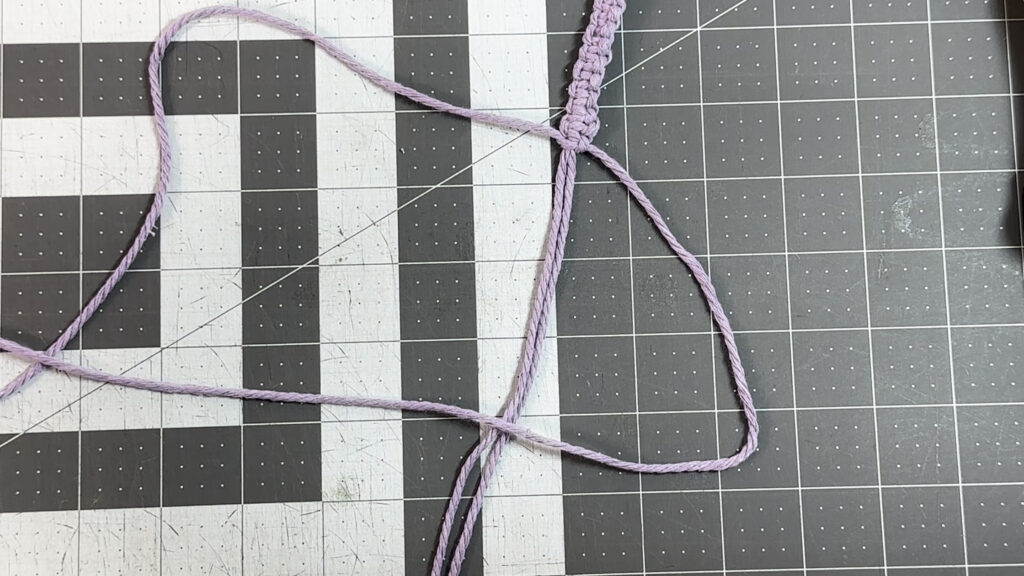
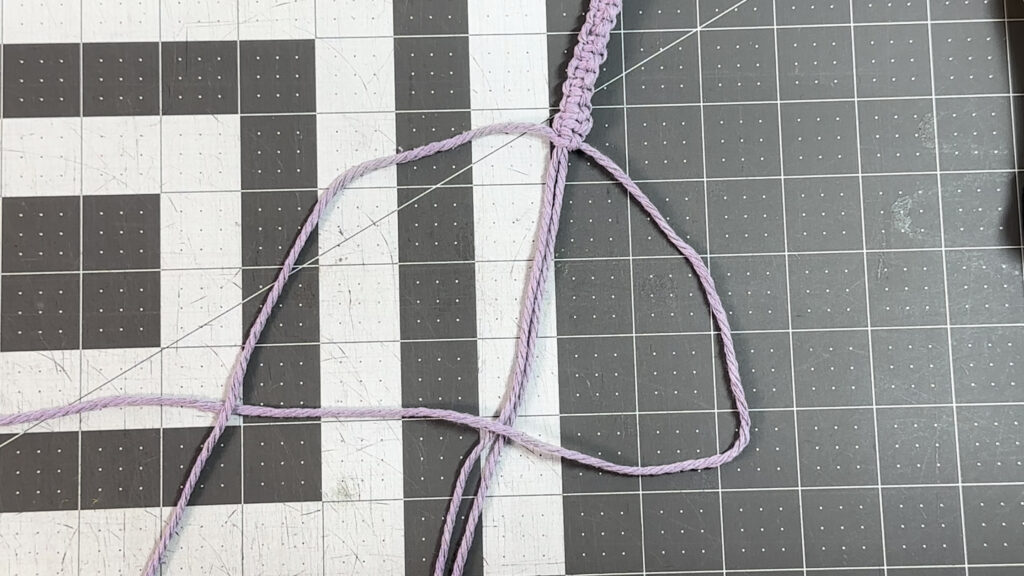
Create three more square knots, following the instructions above.
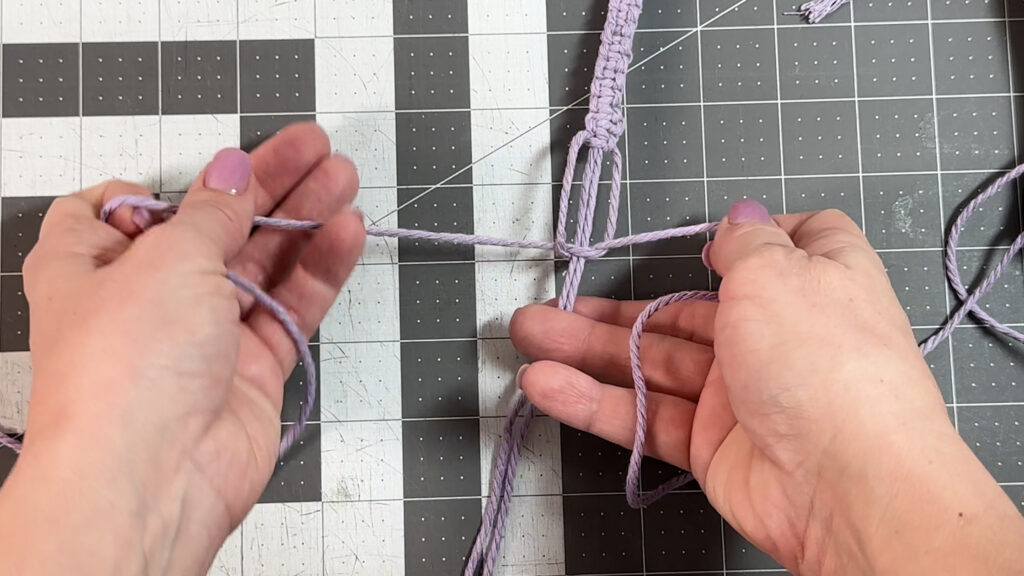
Adding Beads to Handles
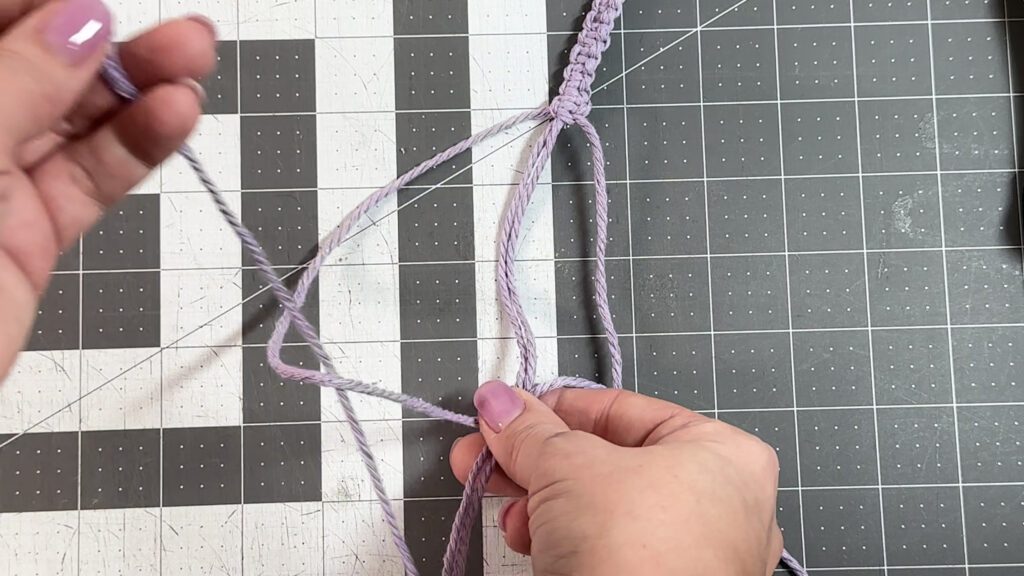
Tie the first row of the square knot. Before completing the knot, thread a wooden bead through the center two strands. Then, create the second knot to complete the square knot. The bead should be sitting securely between the two knots.
Repeat to add three more equidistant beads with three square knots between each.
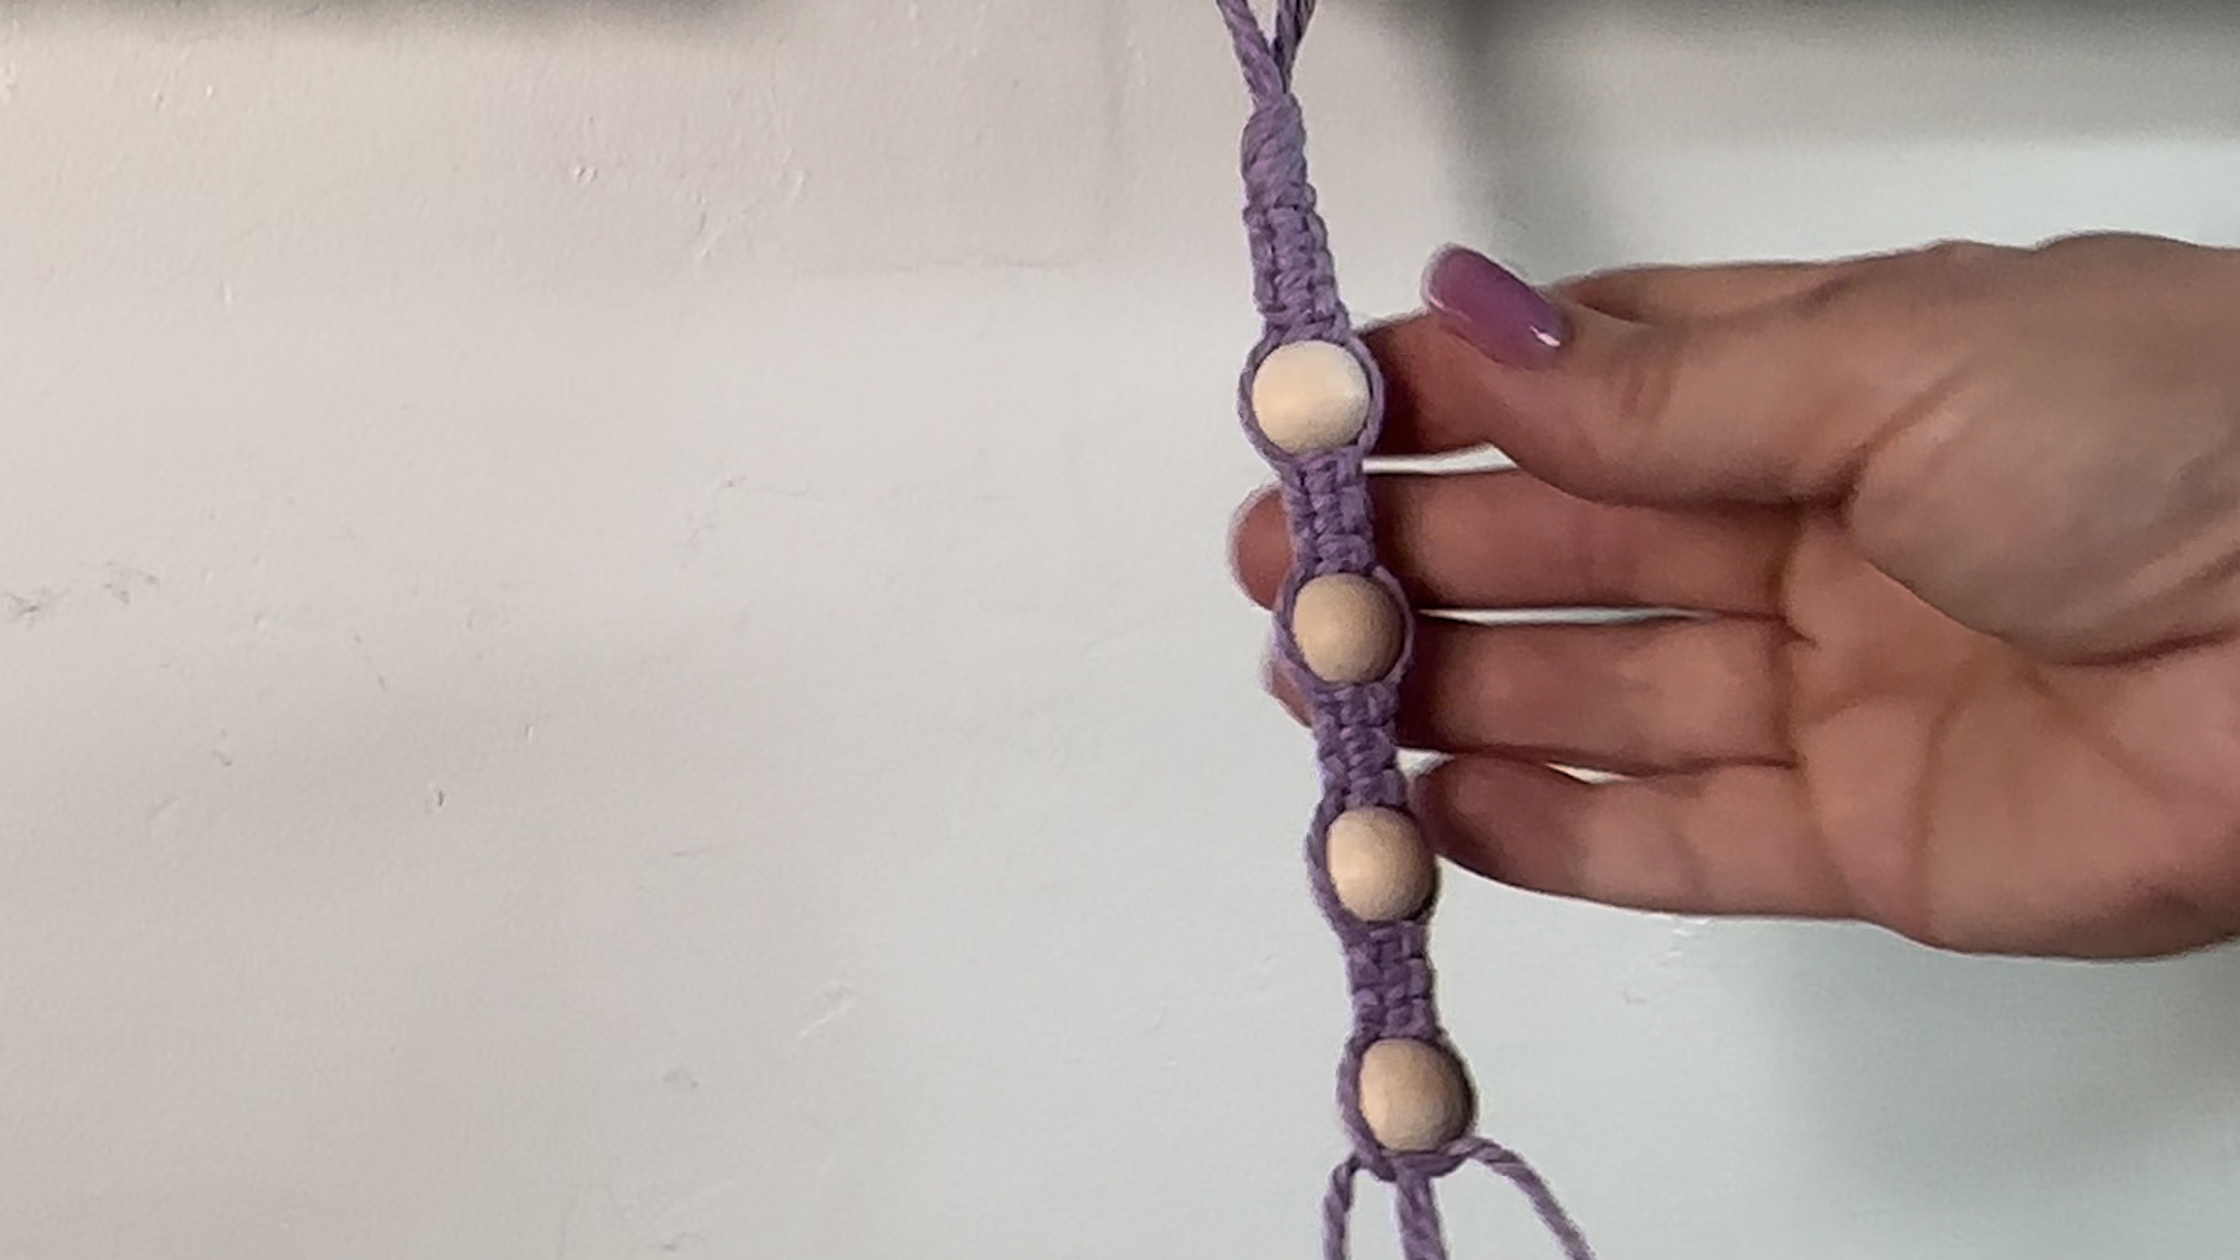
Next, continue to tie square knots for approximately 14″. Then, add four more equidistant beads at the opposite strap end.
Handle Finishing
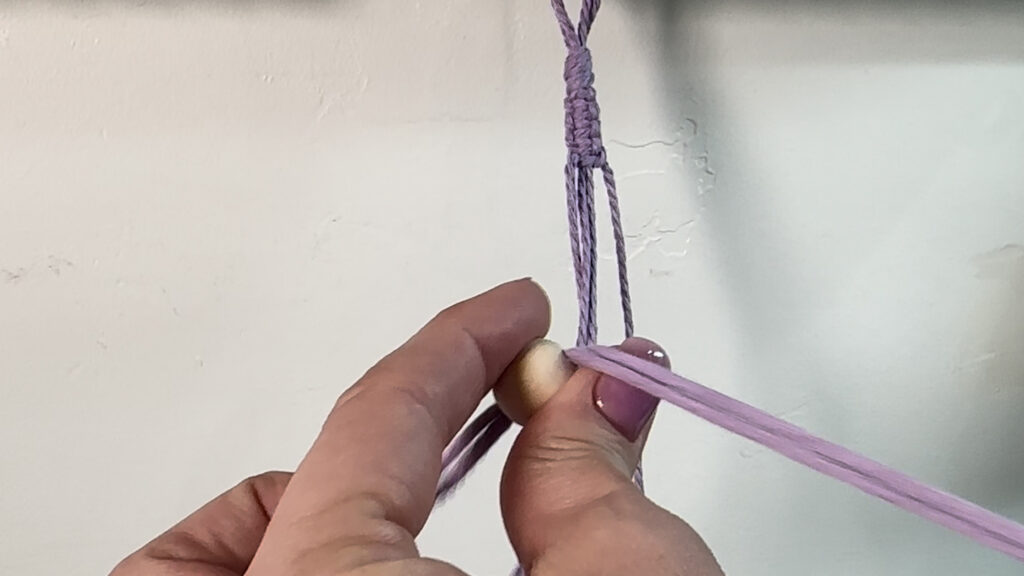
After the last bead:
- Continue knotting all strands together in square knots.
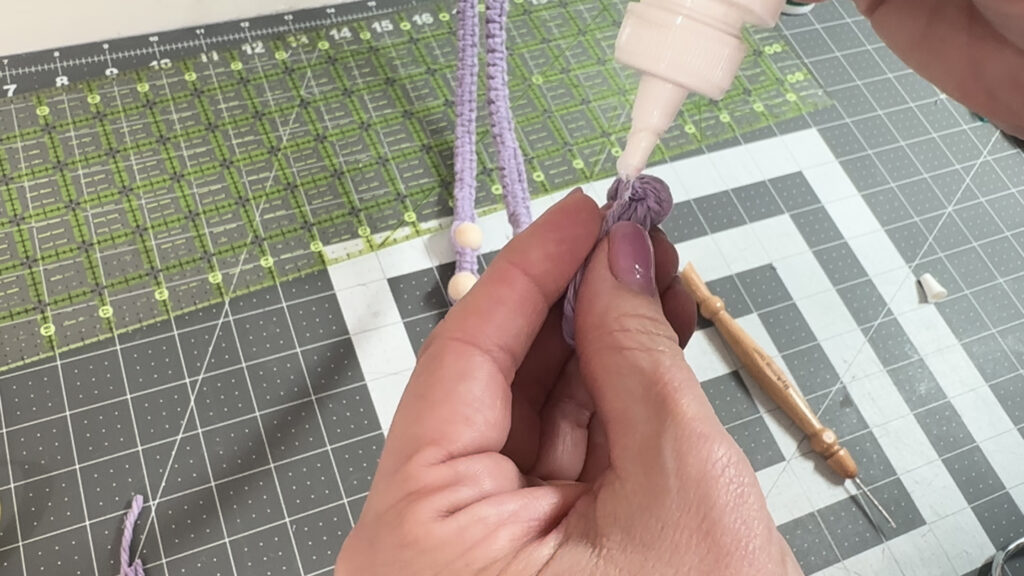
- When you reach about 6″ from the handle end, fold the ends to create the second attachment loop.

- Secure the loop ends with a strong knot.
- Trim the cord ends evenly.
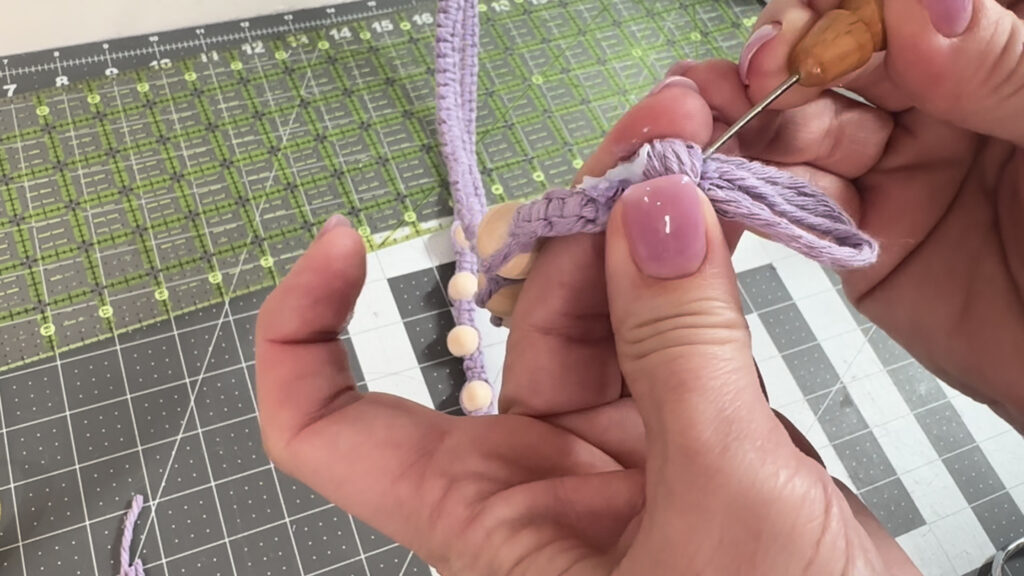
- Add a dab of Fray Check® to the cut ends; let dry. Then, very carefully push them slightly into the knot using a Sulky Multipurpose Turning Tool or similar tool.

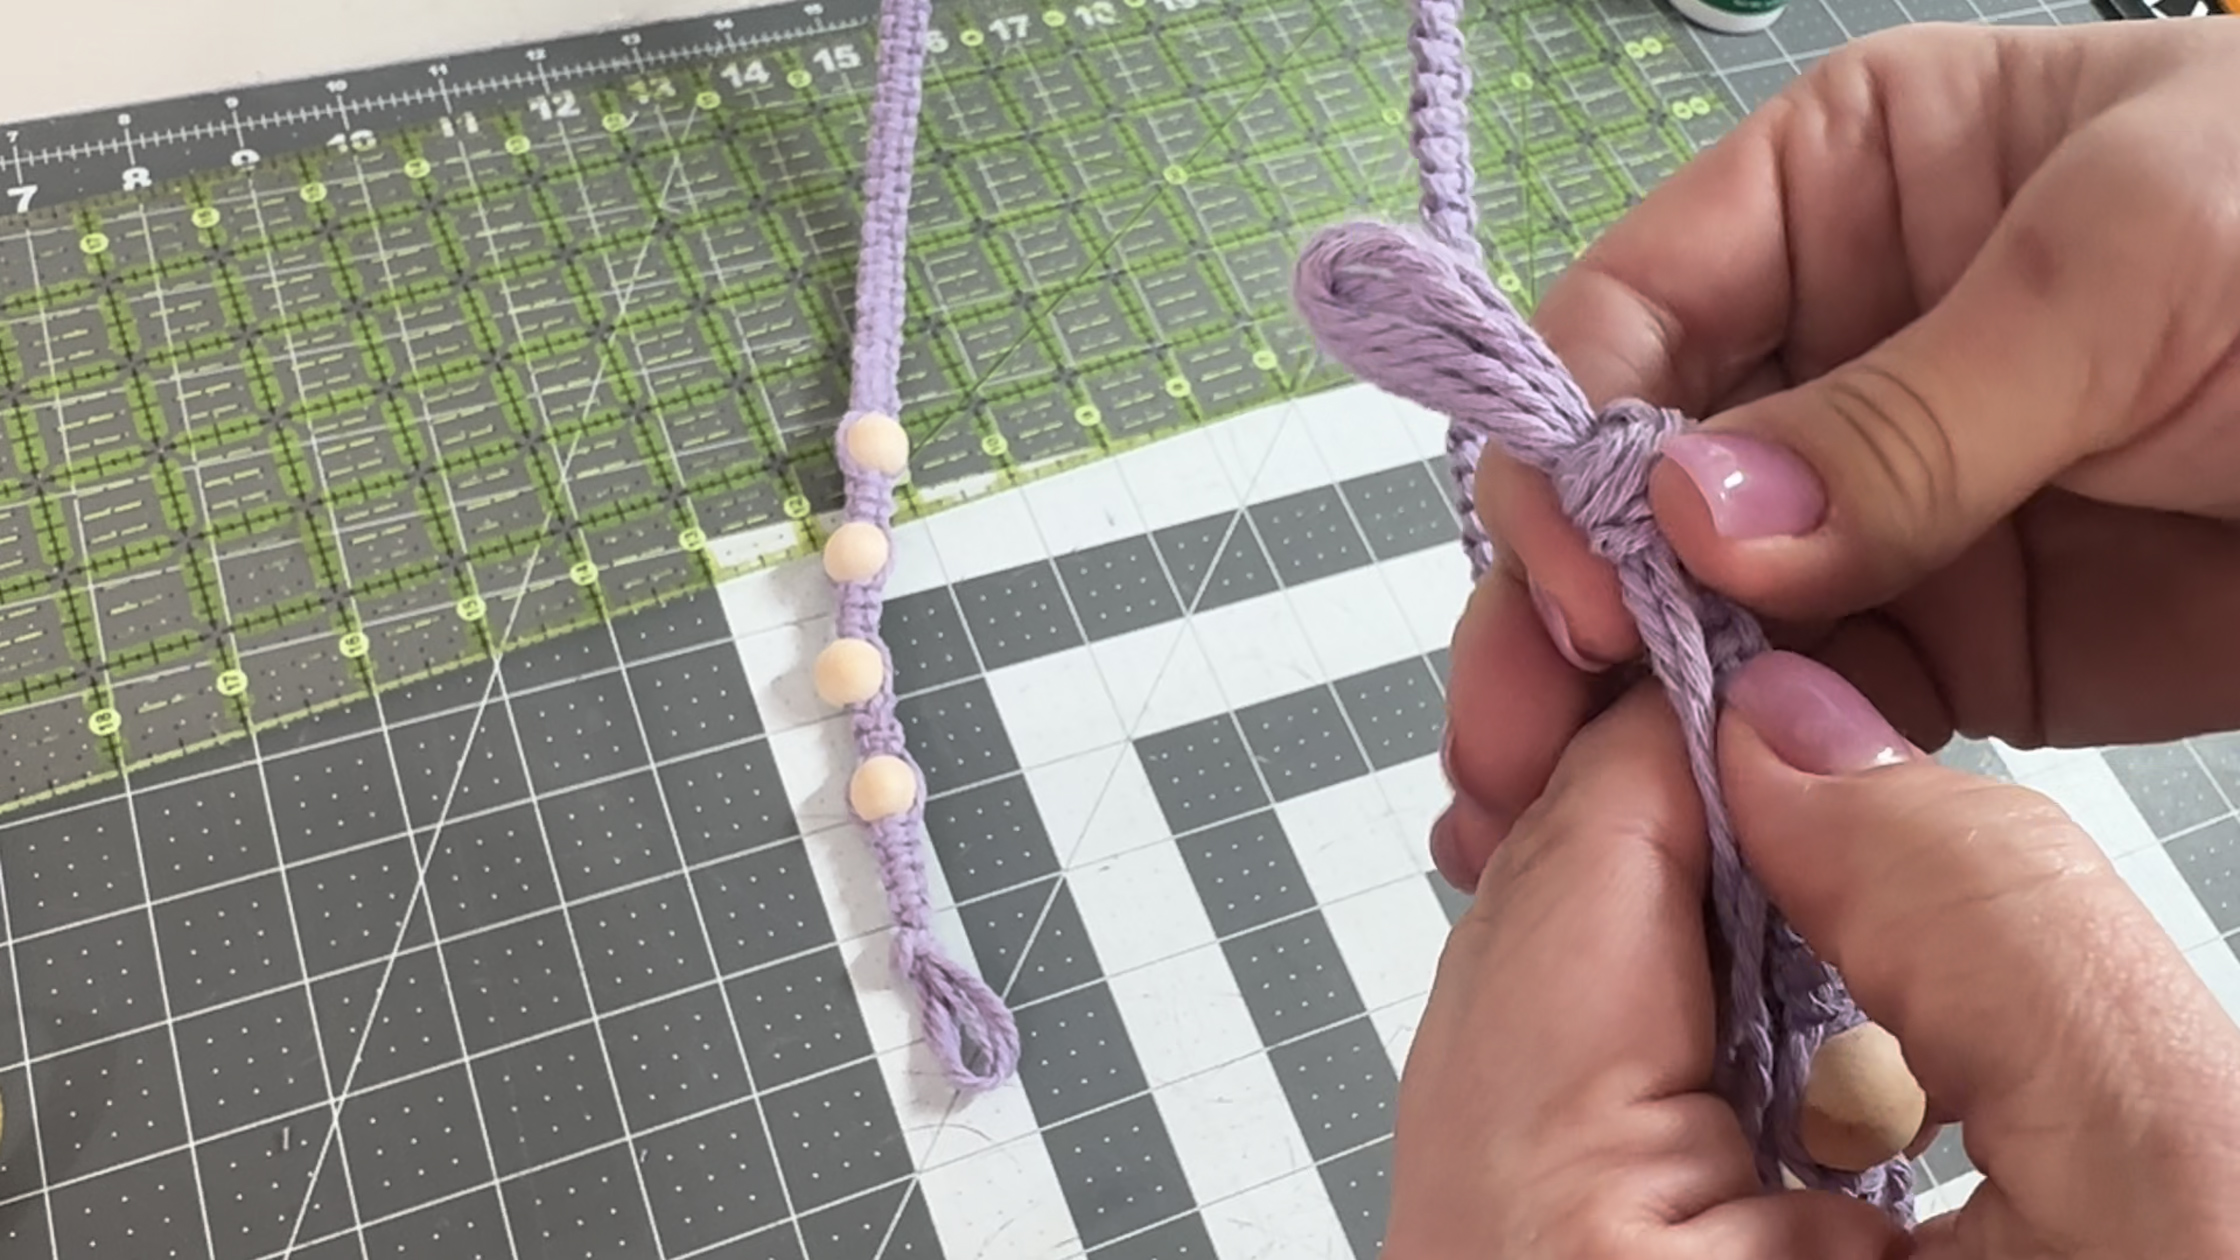
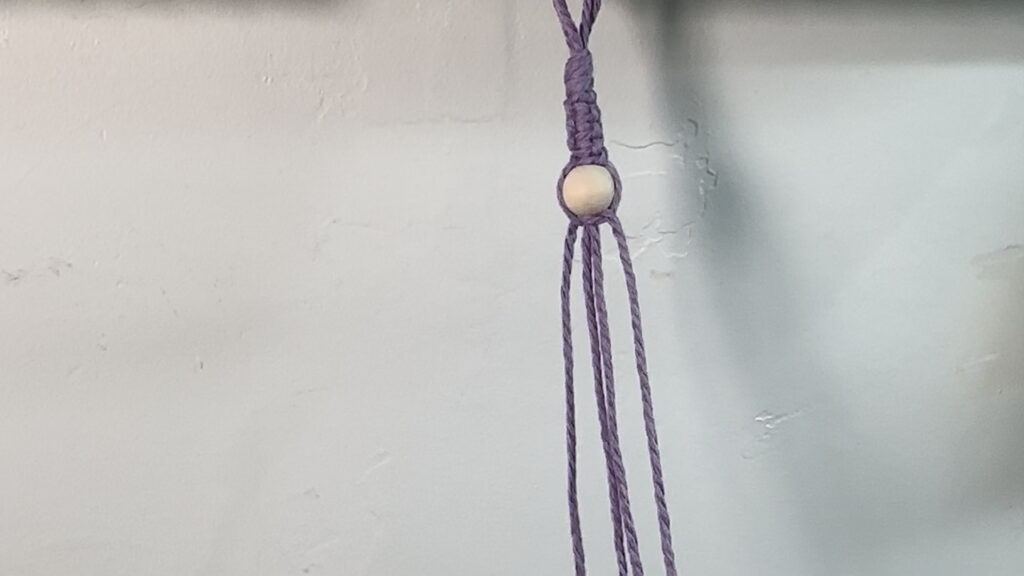
Repeat all steps to make the second handle. The final handle length with both loops should be approximately 26″.
Tote Finishing
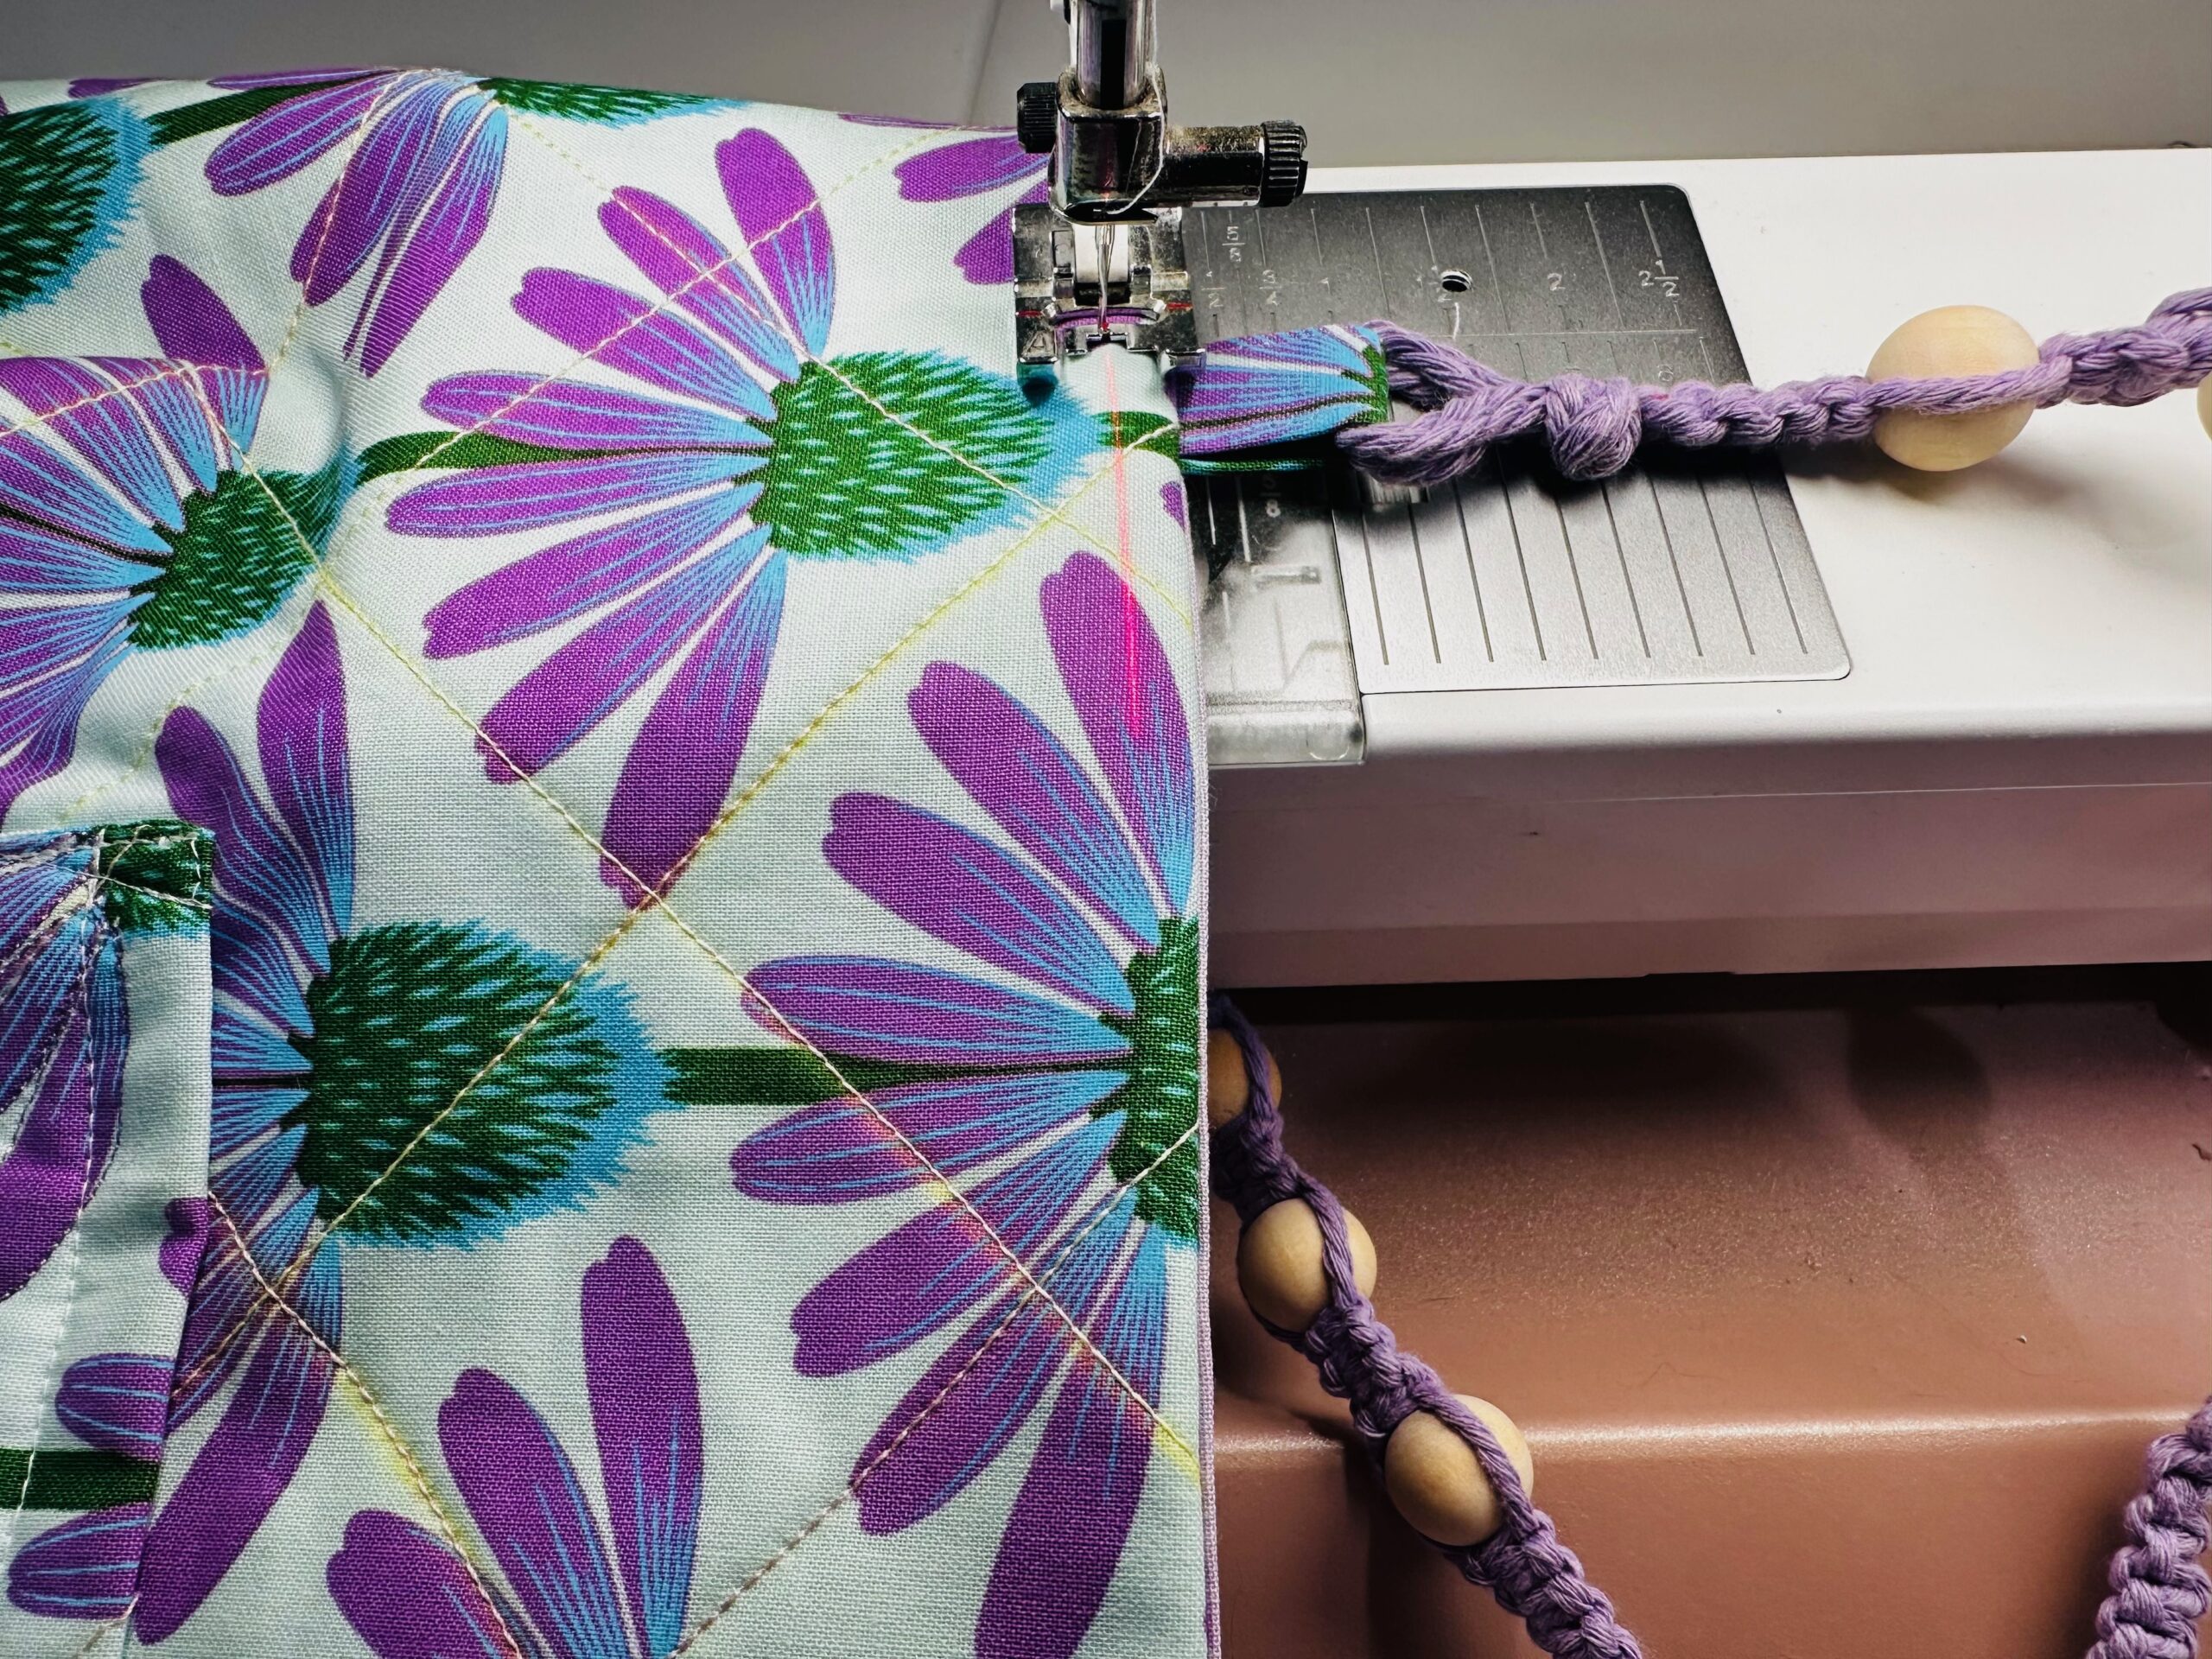
Insert a Handle Connector into each Handle loop, and then align the Handle Connector short ends. Clip the ends together to secure.
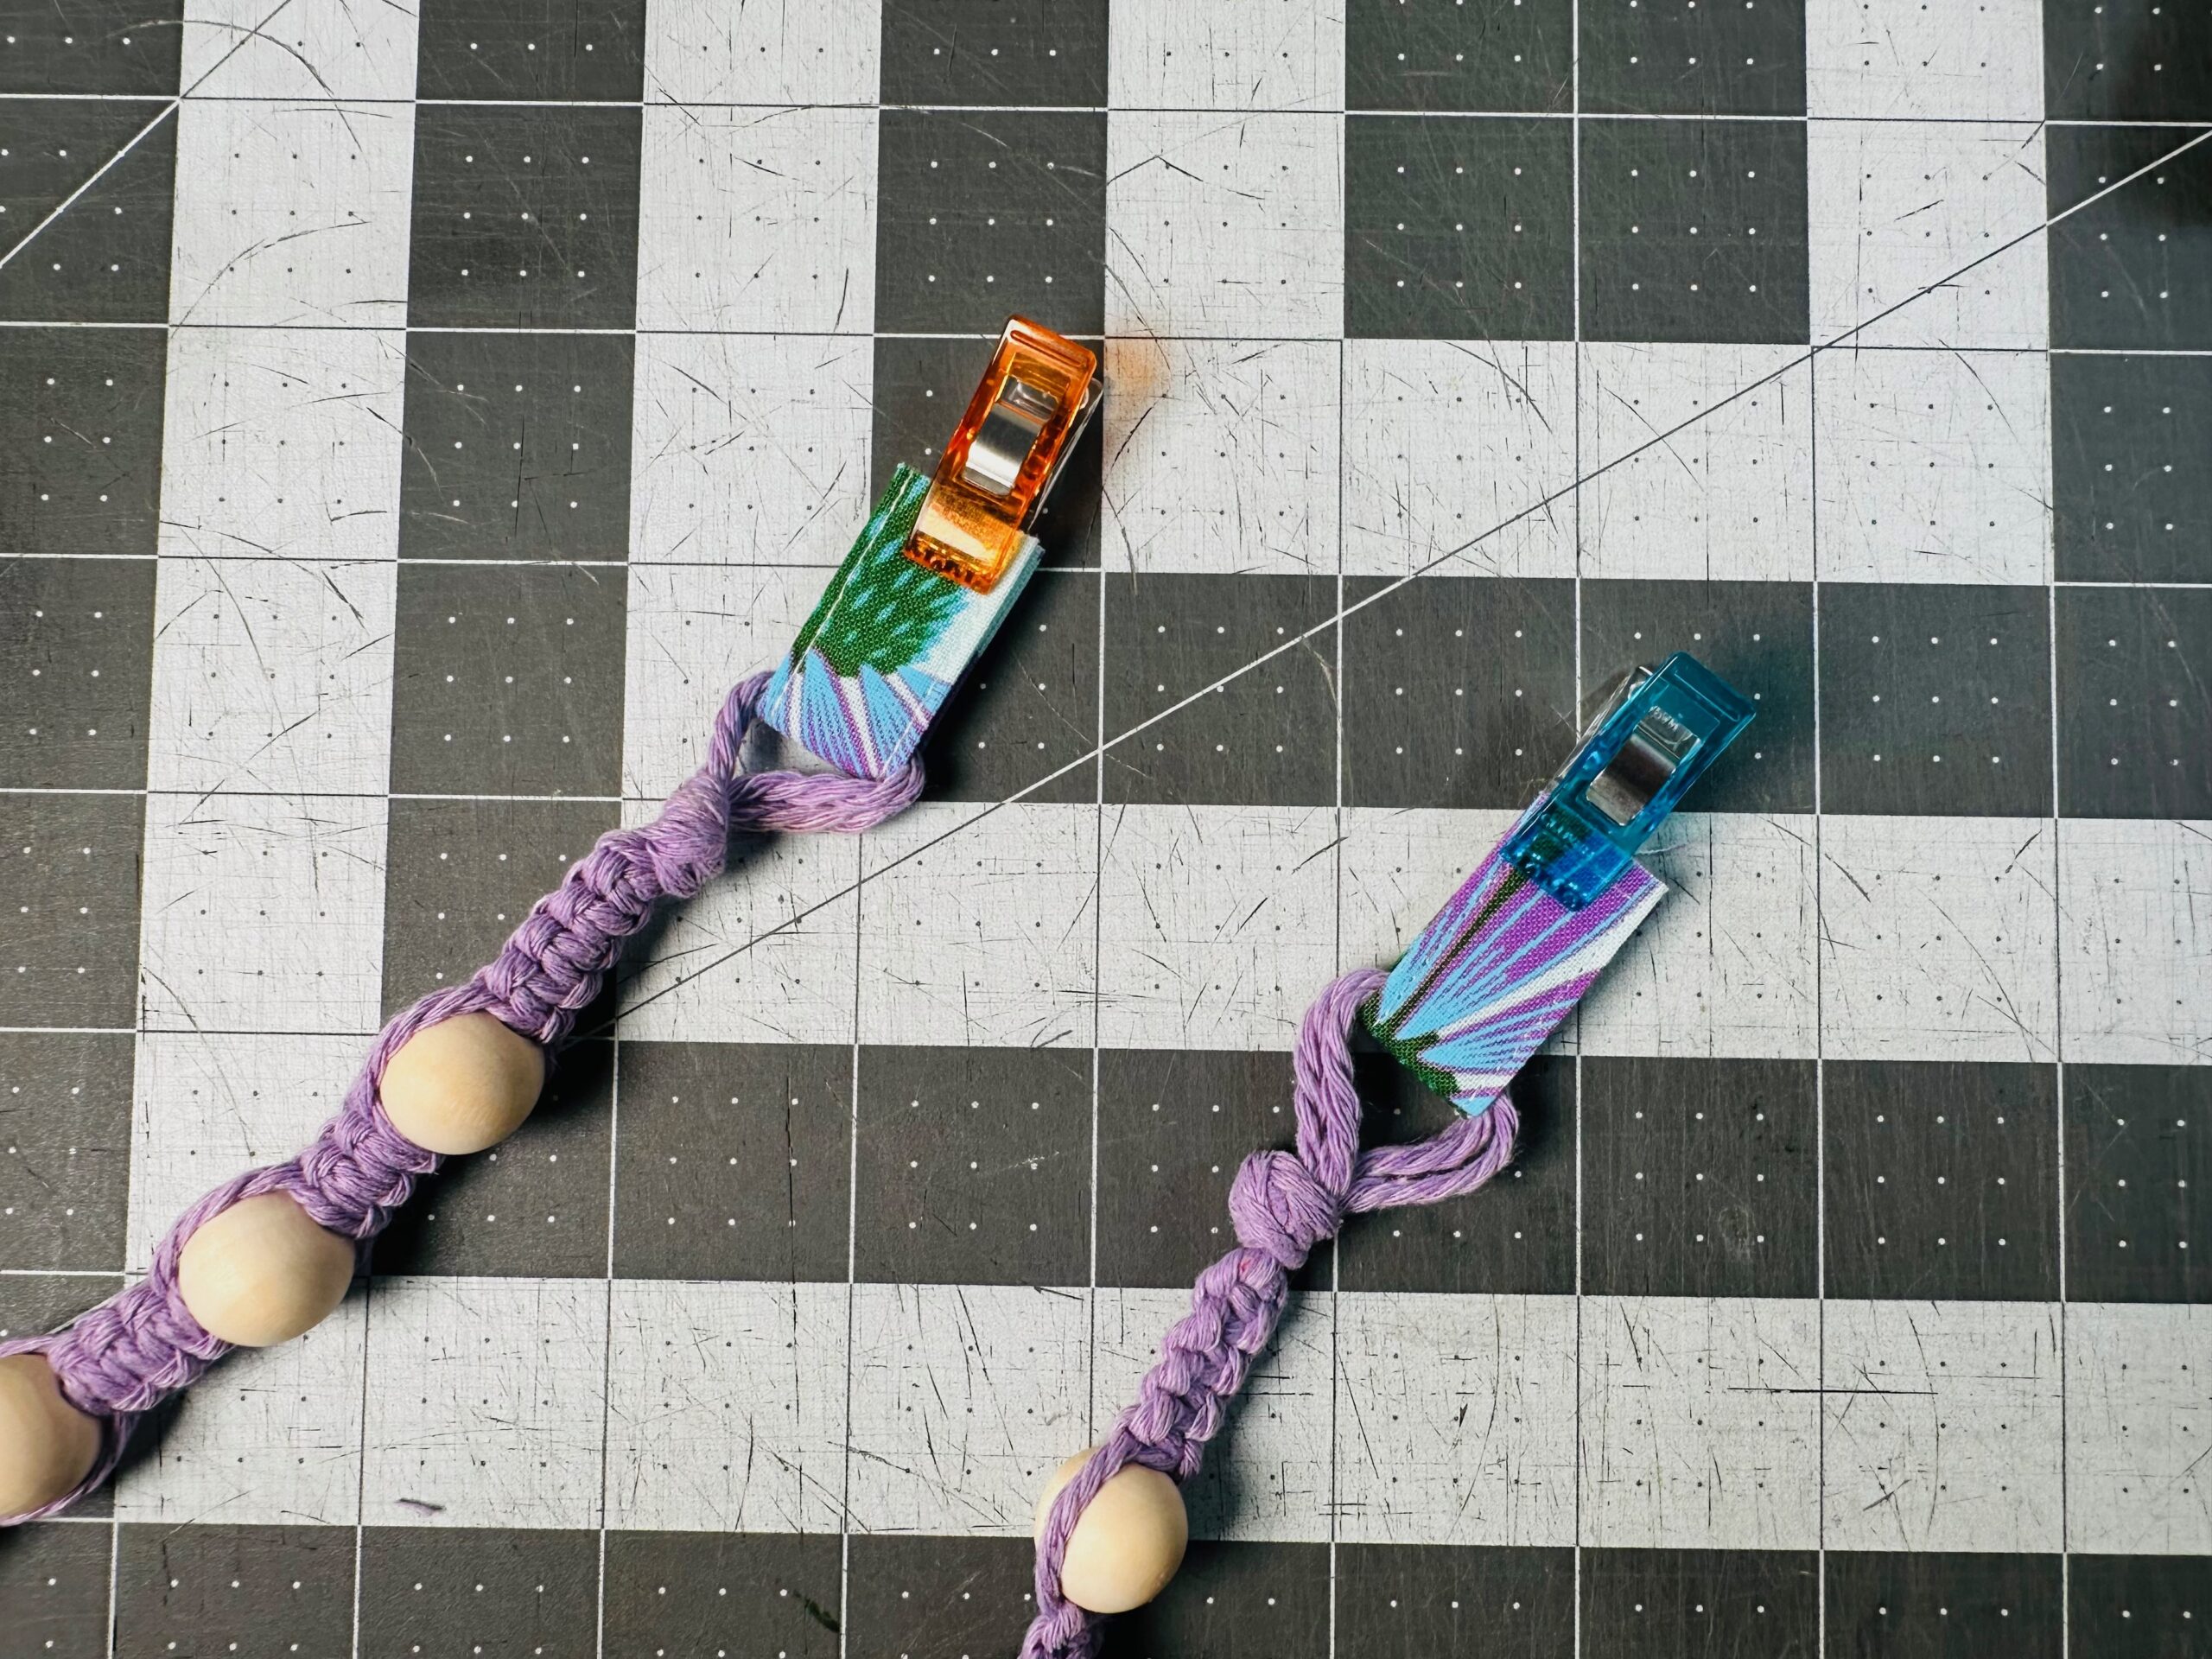
Center the Handle Connector raw ends along the tote exterior upper edges at the handle marks; clip to secure. Make sure the Handle and Handle Connector ends aren’t twisted. Baste the Handle Connector ends in place.
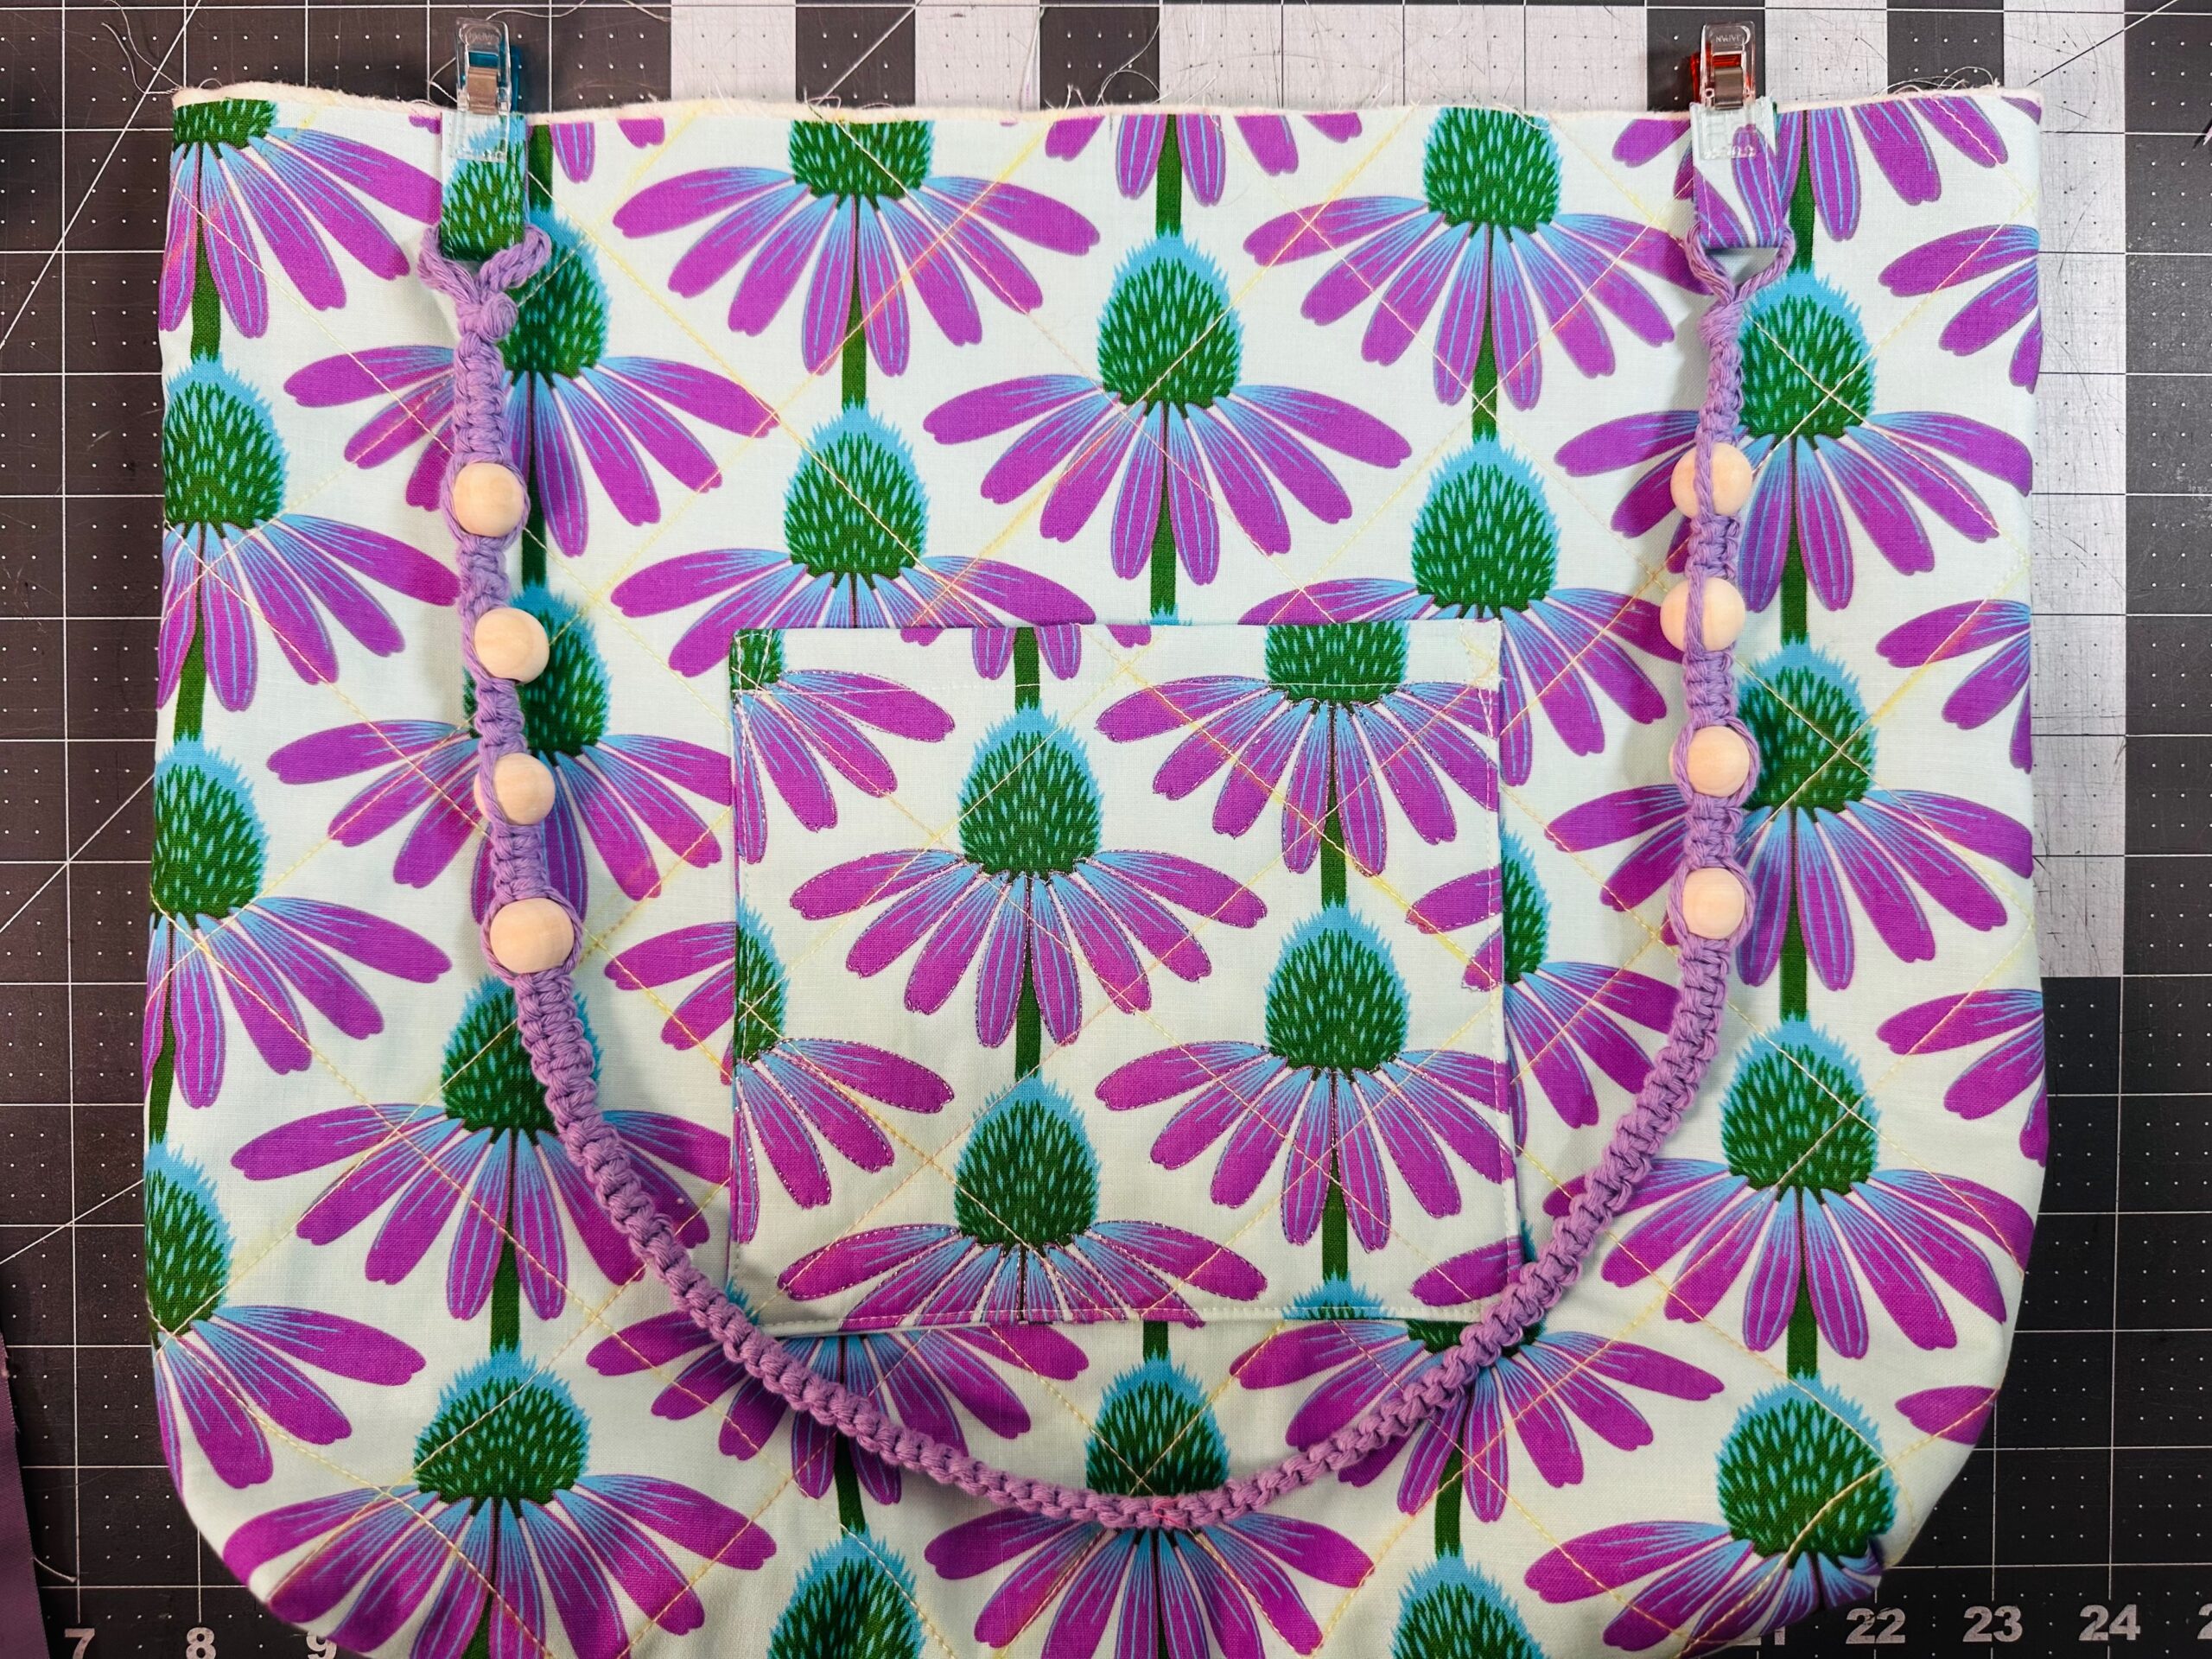
Insert the Exterior right side out inside the Lining (wrong side out) so right sides are facing and all edges and seams are aligned. Make sure the Exterior and Lining Pockets are opposite each other.
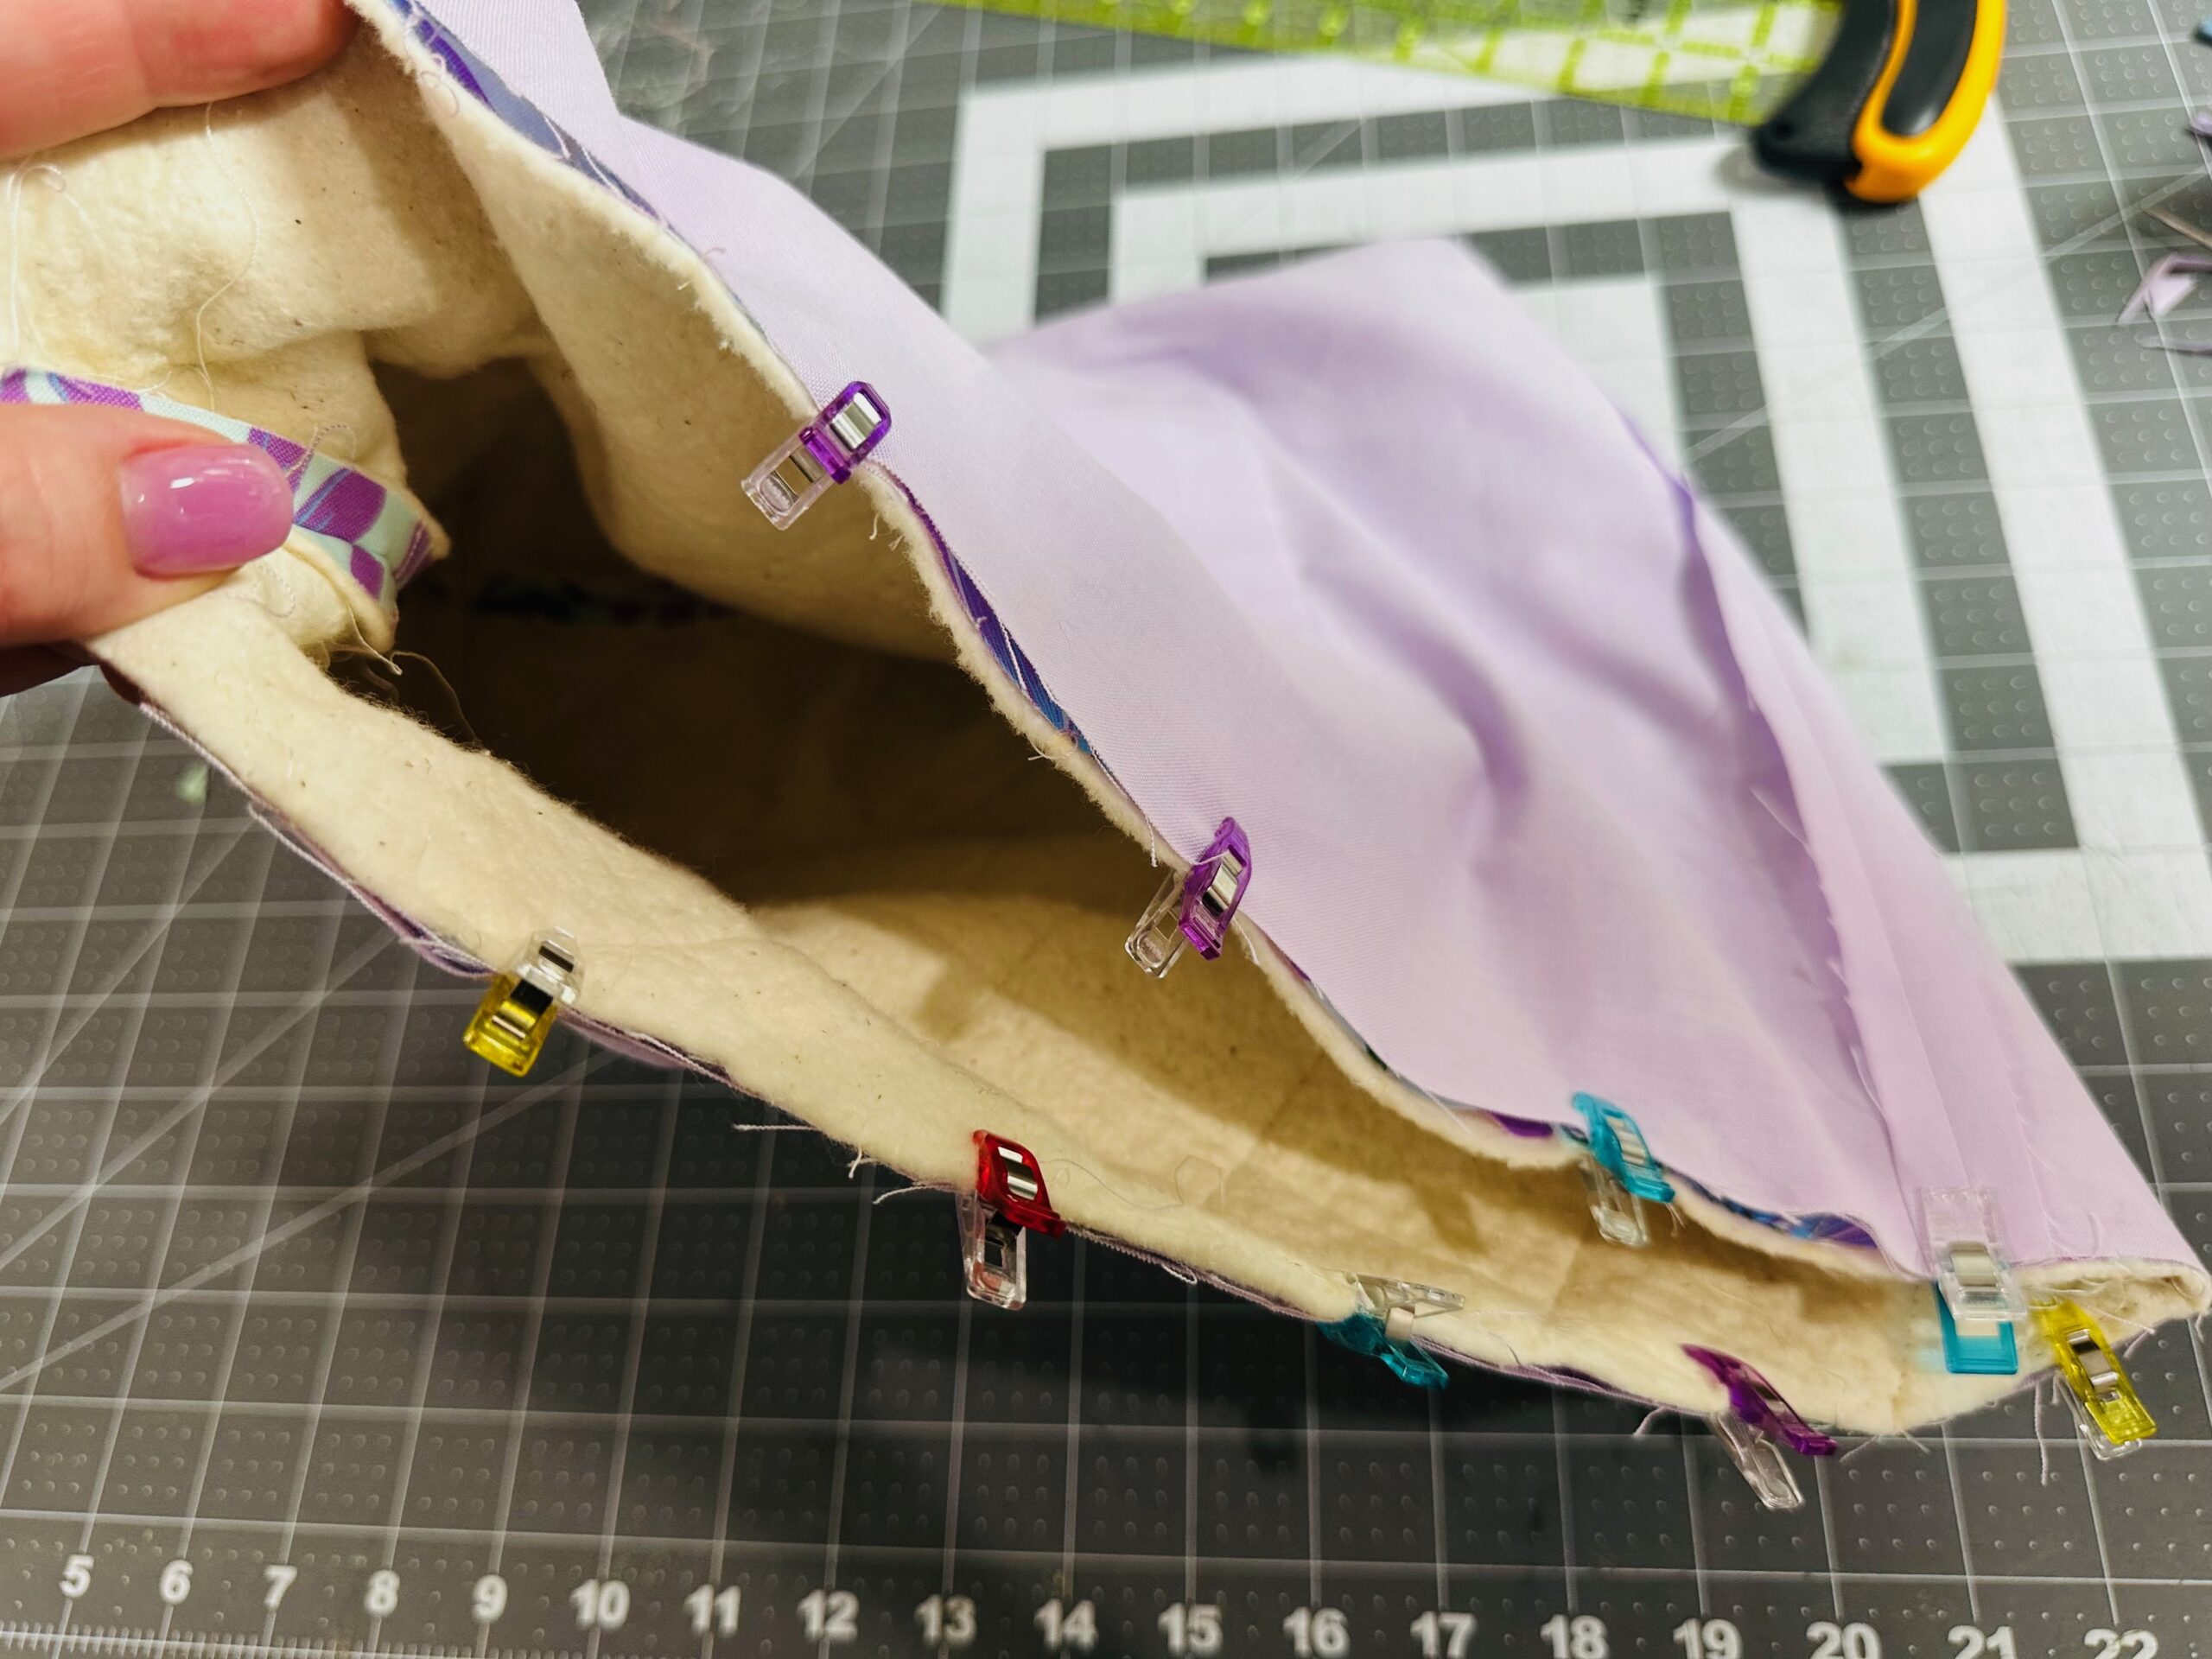
Then, stitch the tote upper edge, sandwiching the Handle Connector ends between the layers in the process.
Next, turn the tote right side out through the opening in the lining. Then, hand sew or stitch the lining opening shut using matching 60 wt. Polylite Thread.
Push the lining into the exterior and press the upper edge flat. Then, topstitch 1/4″ from the tote upper edge.
Optional Fabric Handles
If you’d rather have fabric handles, cut two 3 1/2″ x 28″ rectangles from the “optional fabric handles” fabric.
Follow suit to stitch the handles as per the Handle Connector rectangle: First, fold each rectangle in half lengthwise with wrong sides together; press to set the foldline. Then, unfold the rectangles and fold each long edge to meet at the center foldline; press again. Next, fold each rectangle in half along the first foldline to enclose the long raw edges. Topstitch each long edge.
Place each strap end along the tote upper edge in lieu of the Handle Connectors. Make sure the Handles aren’t twisted. Then, stitch to the tote upper edge, securing the Handle ends in the stitching between the Exterior and Lining, following the previous instructions for the Handle Connectors and Finishing.
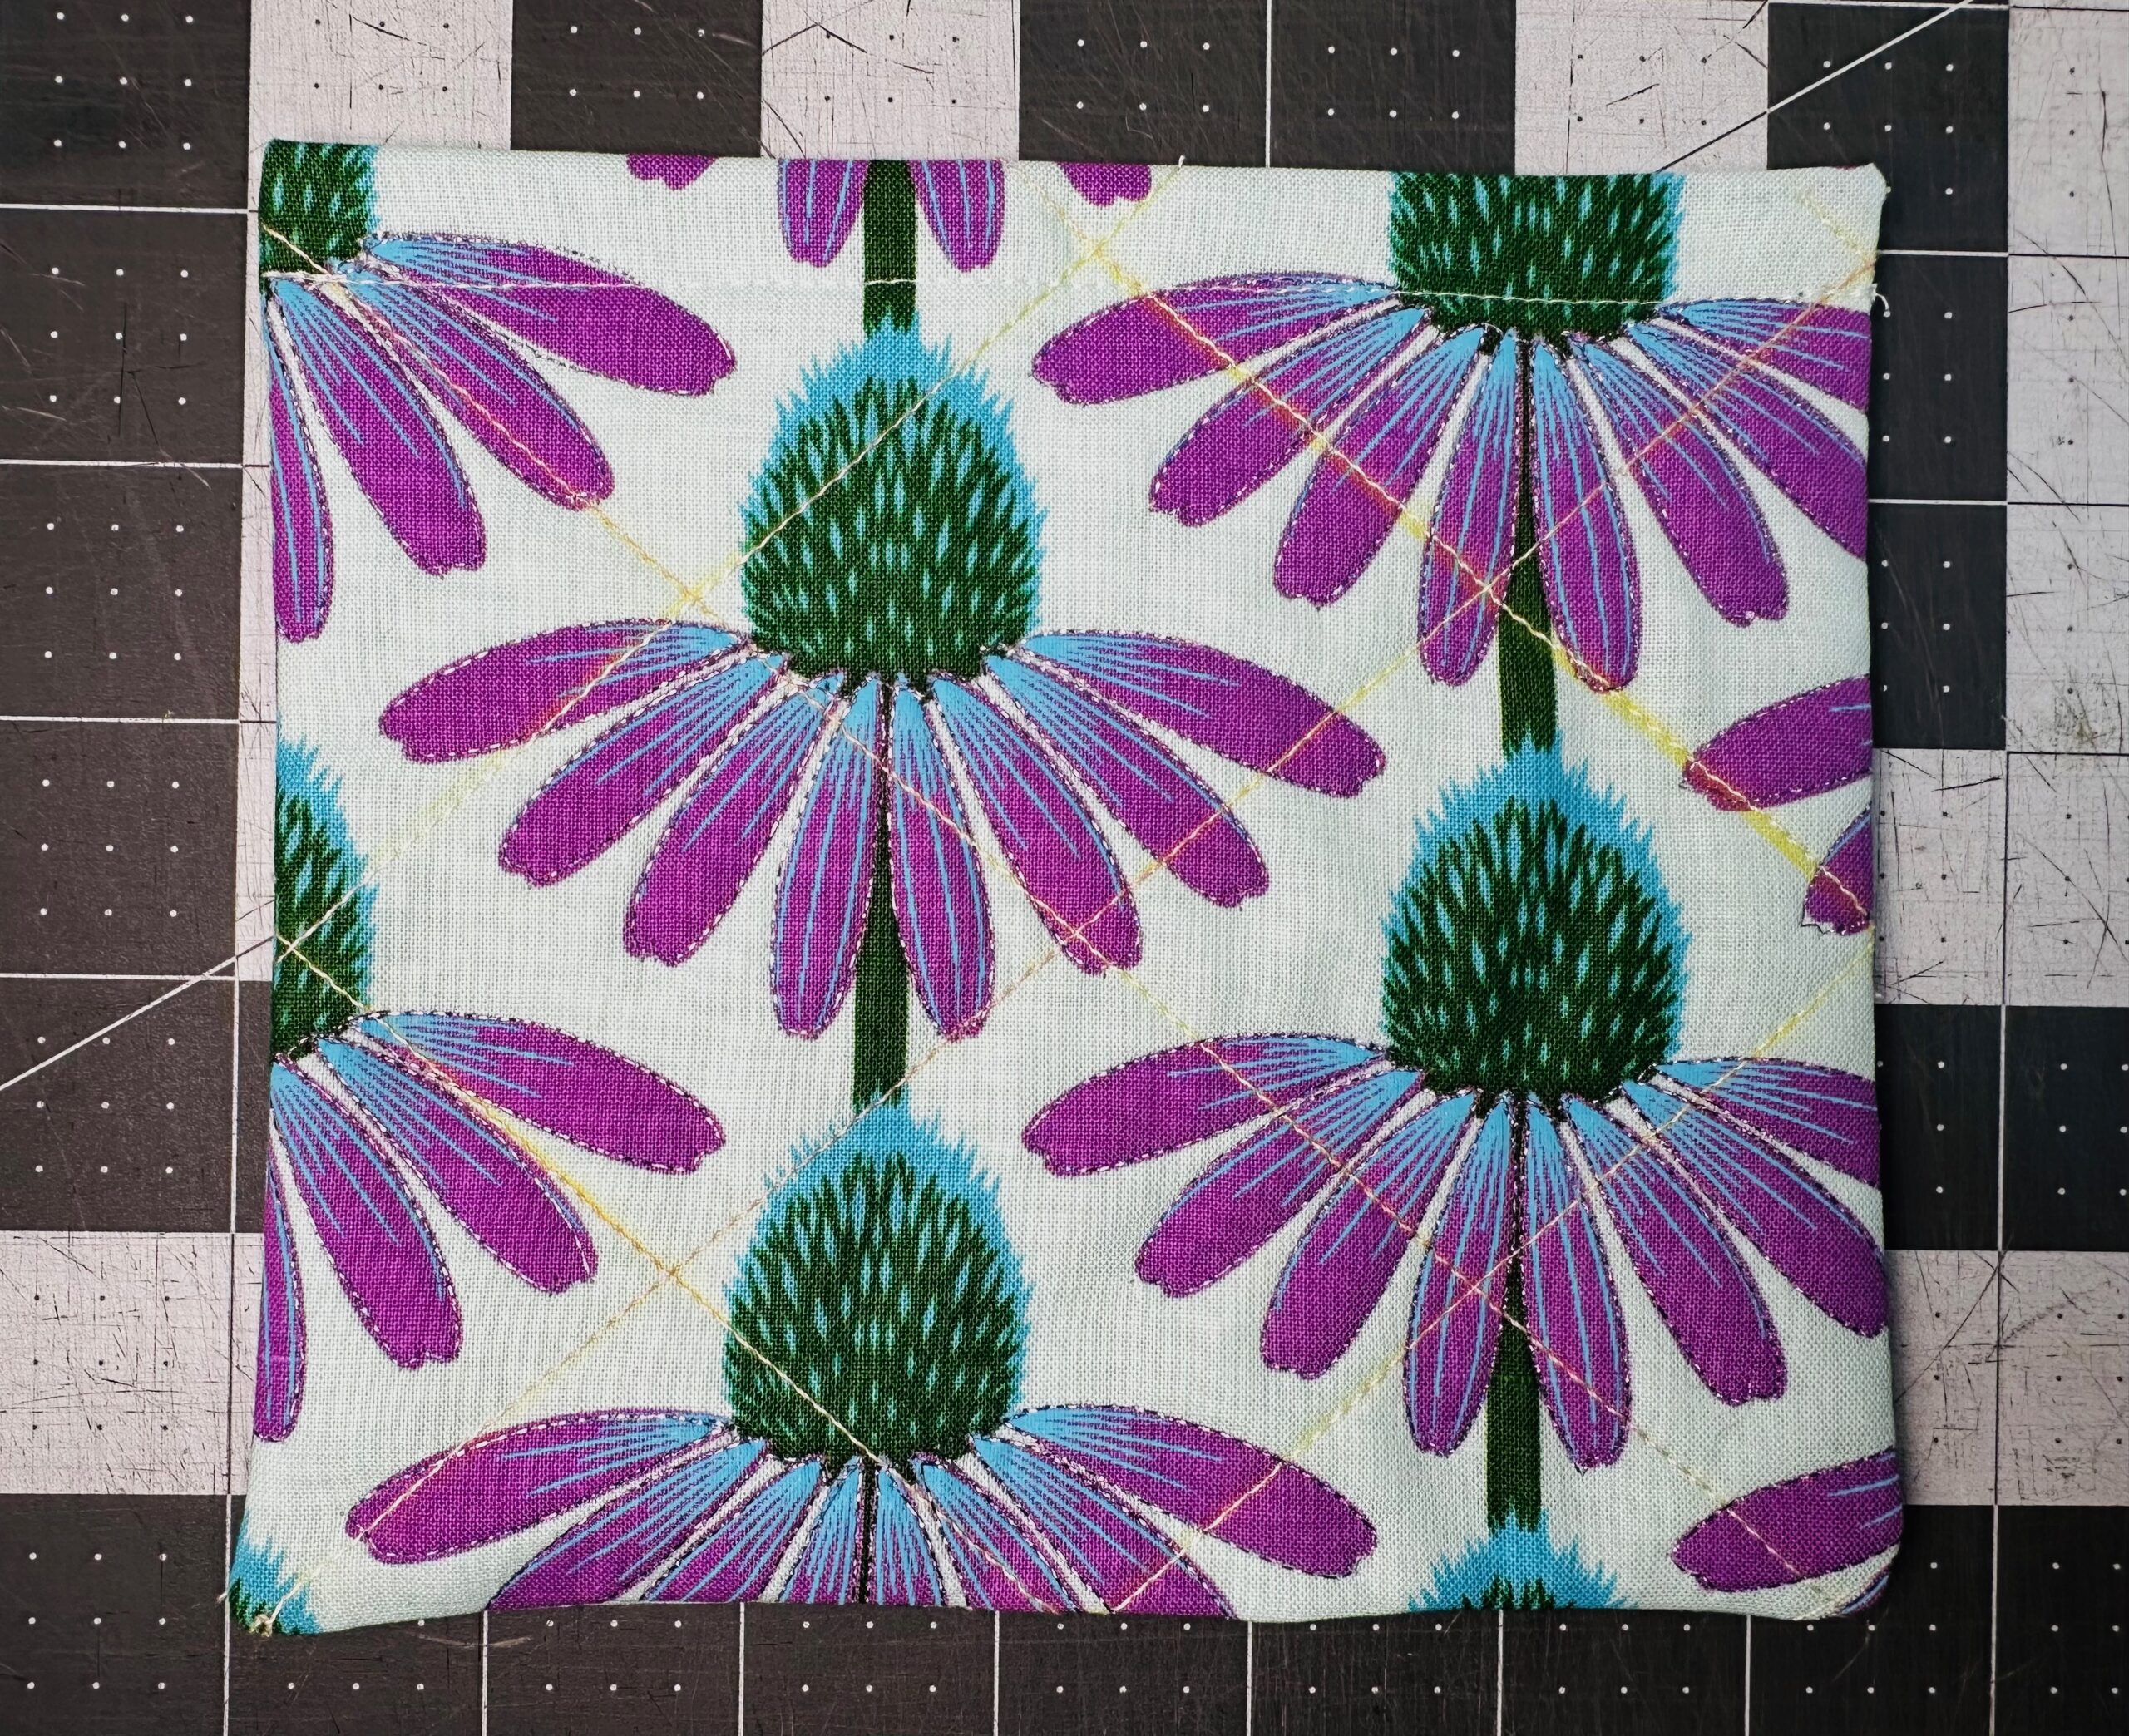
Finished Quilted Tote with Macrame Handles
Remove any fabric markings from the plotted quilting lines, if used.
Then, show off your new tote! Bring it to the beach or lake, paired with a flowy spring or summer dress. This accessory has a trendy boho vibe, and it also works as an easy-breezy farmer’s market or shopping tote. Enjoy!