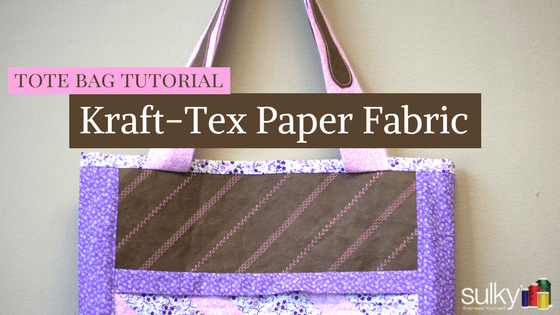
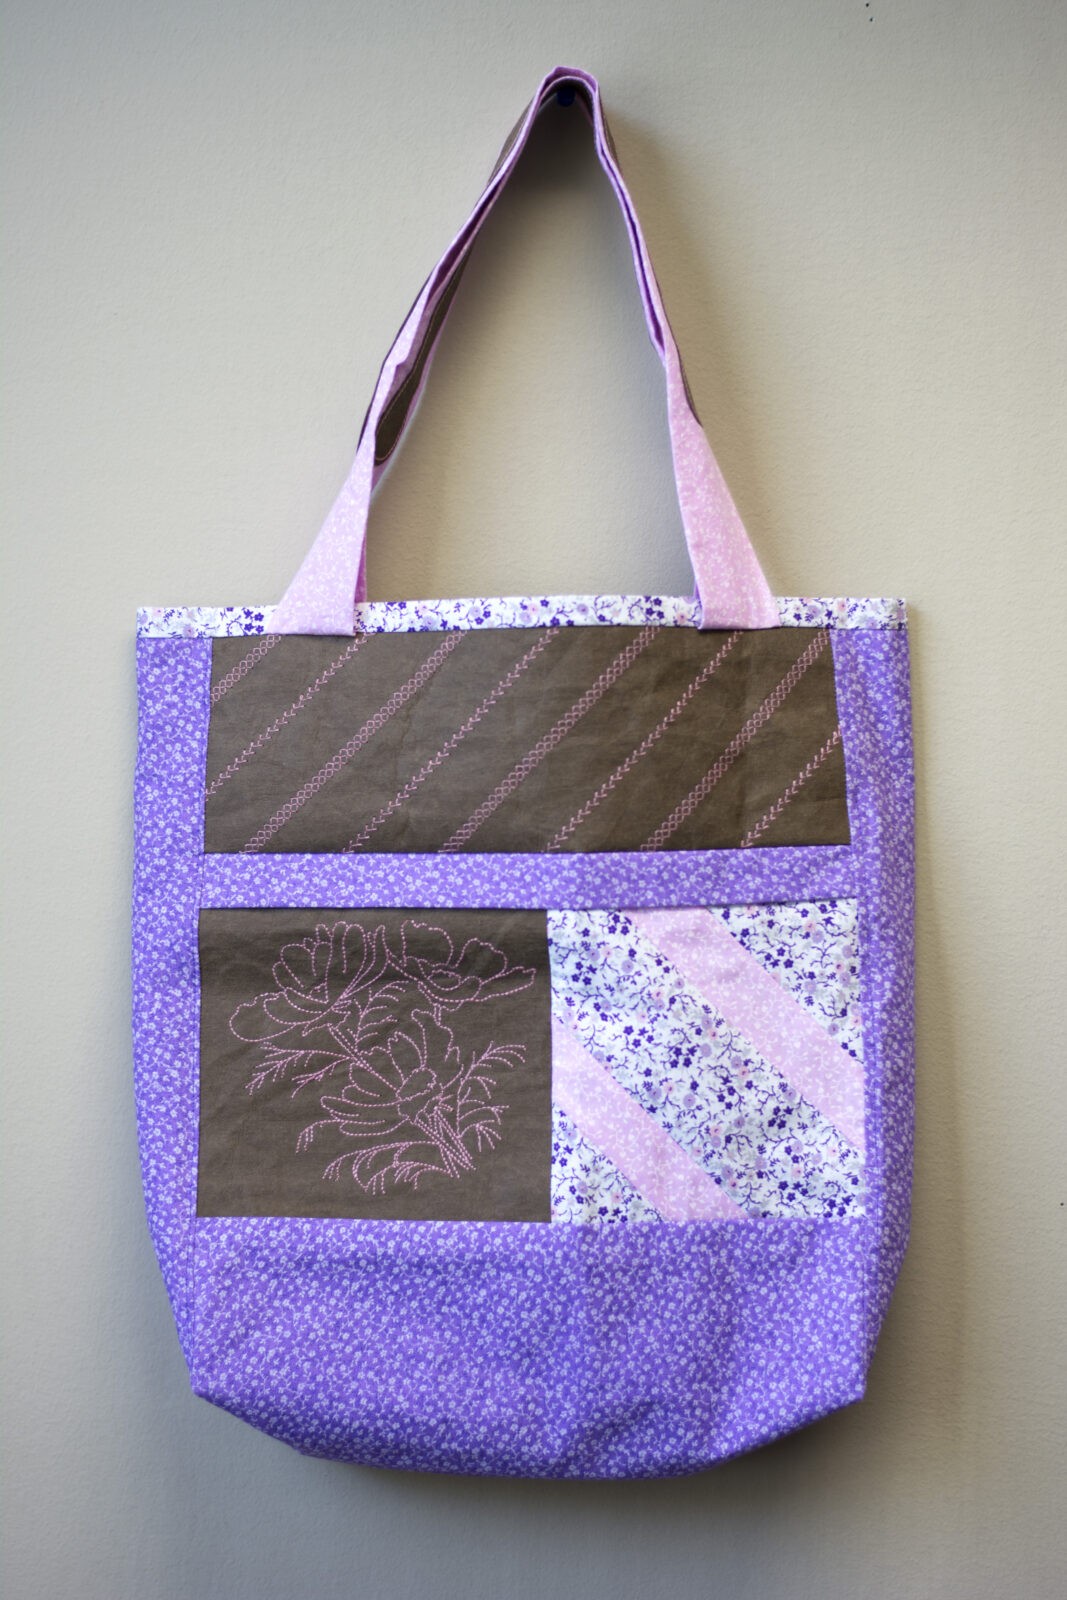
DIY: Kraft-Tex™ Paper Fabric Tote Bag


This series is written by guest blogger, Pamela Cox. Pamela is an expert embroiderer, designer, digitizer and all around wonderful girl! We are so happy to have her contributing to the Sulky Blog!
Tote Bags have become a lifestyle necessity. In fact, we depend upon this casual bag for everything from carrying groceries home, to heading off to the beach! Bags embroidered with specific themes can even help us stay organized by knowing which bag to grab when heading to a music lesson or off to the gym.
The birth of tote bags began with being environmentally conscientious. To embrace this concept, let’s create a bag which is strong enough to withstand repeated usage, yet pretty enough to make a fashion statement! For this tote, renewable materials such as 100% cotton fabric and thread will be used, along with Kraft-Tex™, a plant-based, hybrid material. Kraft-Tex is not only “earth friendly”, but this product provides an exciting new outlet for creative expression.
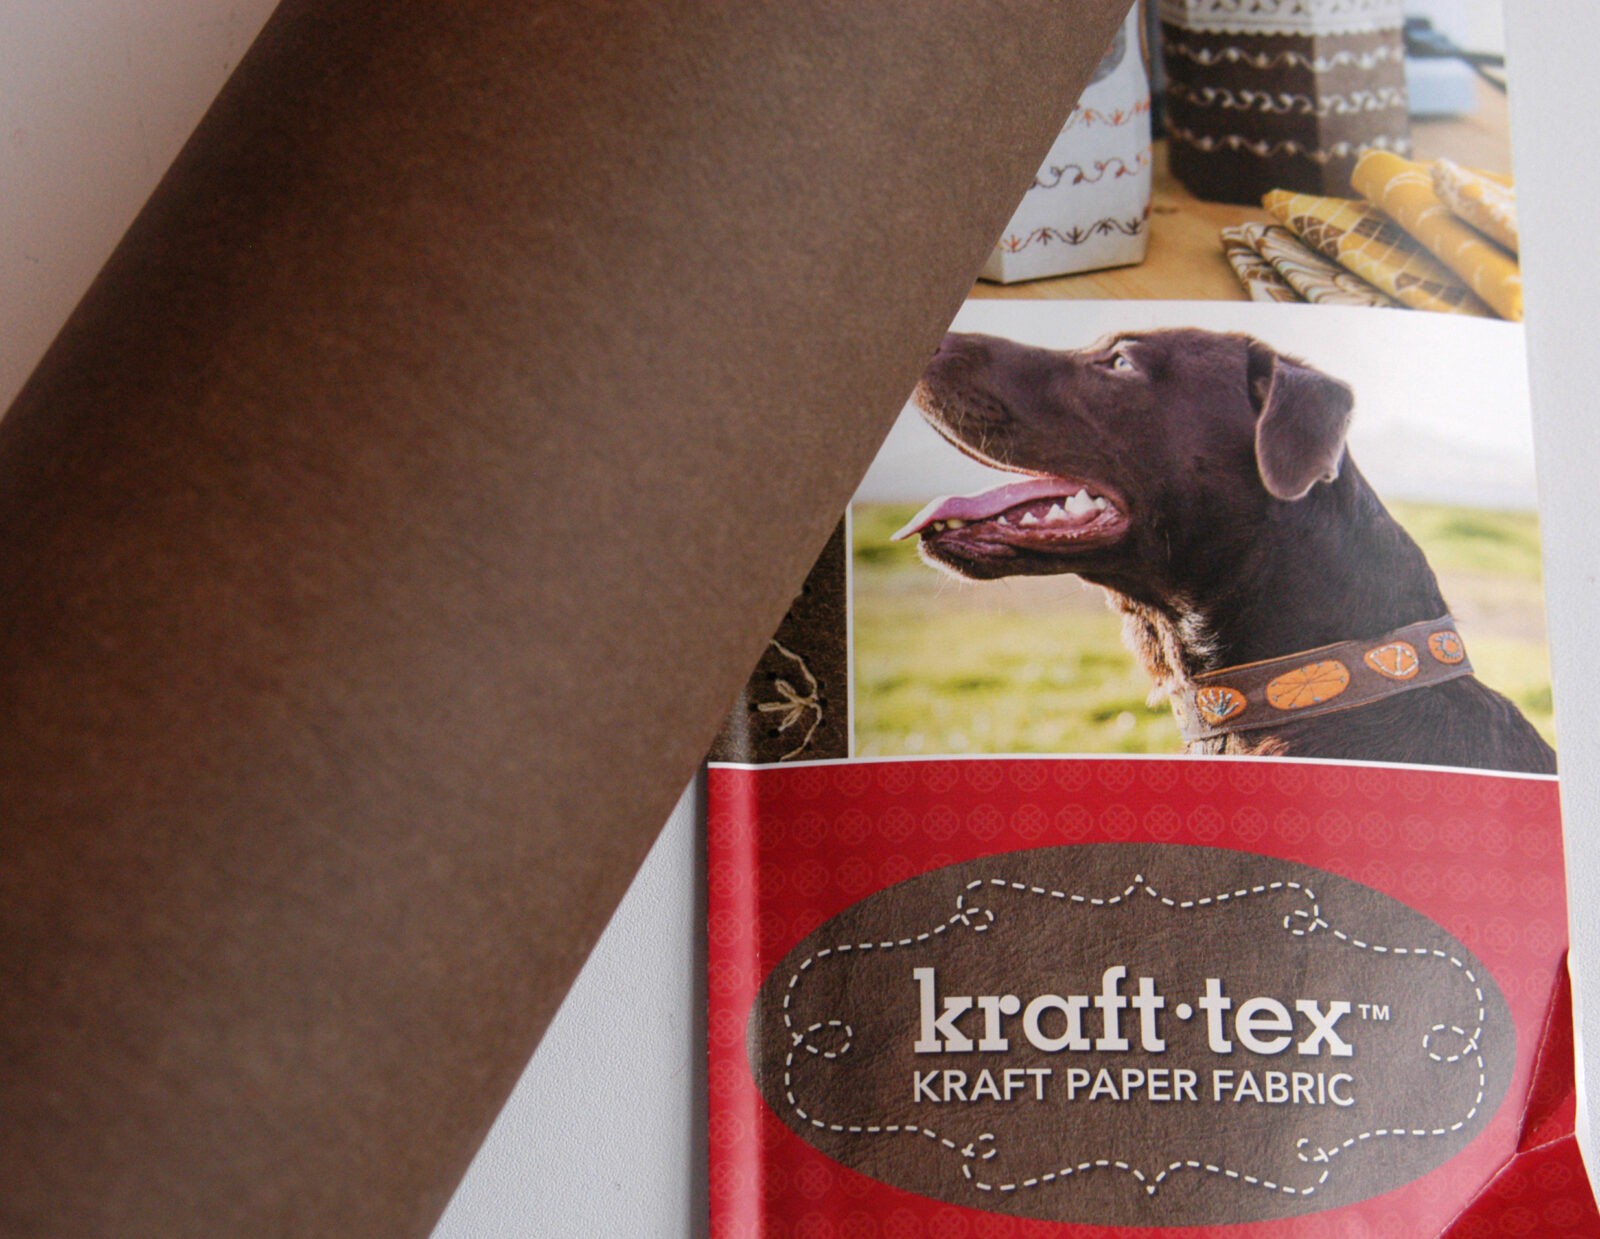
Kraft-Tex is a paper product that performs like fabric on many levels! The paper can be kept stiff, much like a light-weight cardboard, or softened by washing it. Although it must be treated as a “non-forgiving surface”, Kraft-Tex feeds through the sewing machine effortlessly and can be enhanced with machine embroidery.
Tote Bag Directions
Preparation:
Note: Read through the directions and assemble the materials prior to beginning the project.
Pre-wash, dry, and press all material, including Kraft-Tex – although you may want to pre-cut the necessary pieces, making it easier to put into the washing machine. Cut pieces slightly larger than the required final sizes. Re-cut to the true measurements after washing. Both 1/2” and 1/4” seams are used throughout this project and are specified.
When stitching bias strips together, press seams prior to laying the unit on top of the template to mate with the next segment.
When joining the patchwork pieces, depending upon your sewing/cutting skills, it may be necessary to re-square the joined pieces. Take the time to check, and if necessary, take off the minimal increments needed to square the piece.
If you’ve never worked with Kraft-Tex, please take the time to review Sulky’s recent blog post Kraft-tex Paper Fabric for this material. It will afford a wealth of information!
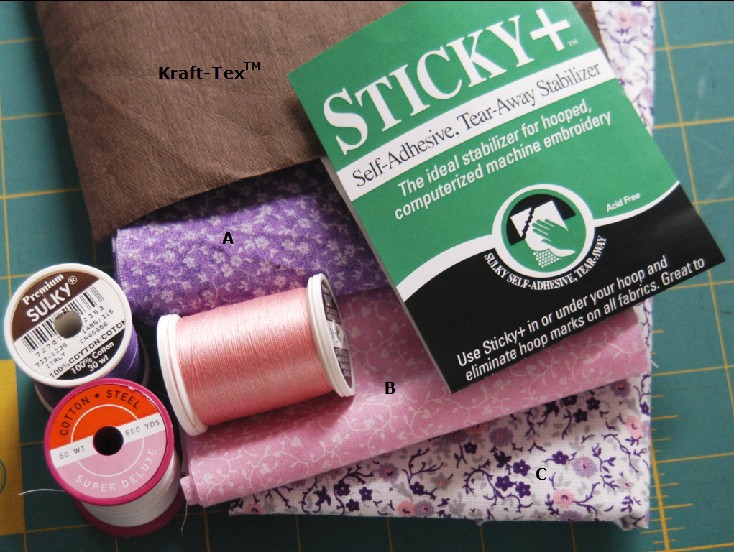
Supplies:
100% cotton fabric 45” wide:
- Fabric A: 1/3 yd.
- Fabric B: 1/3 yd.
- Fabric C: 1 yd.
- 2 pieces: 5” x 12-1/2” – top panels
- 1 piece: 7-1/4” x 9-1/2” – embroidered square
- 2 pieces: 1-1/4” x 15” – strap accents
Thread:
- 50 wt. Cotton+ Steel® Thread by Sulky – construction
- Sulky 30 wt. Cotton Thread – machine embroidery and decorative stitches
90/14 Topstitch Needle
Sulky Embroidery Club design #1048 Poppies
Download the free Pattern Templates here.
Painter’s or Masking Tape (optional)
Quilter’s cutting mat, ruler, and rotary cutter (optional)
Prepare Patchwork Segments:
-
Machine embroider the 7-1/4” x 9-1/2” piece of Kraft-Tex:
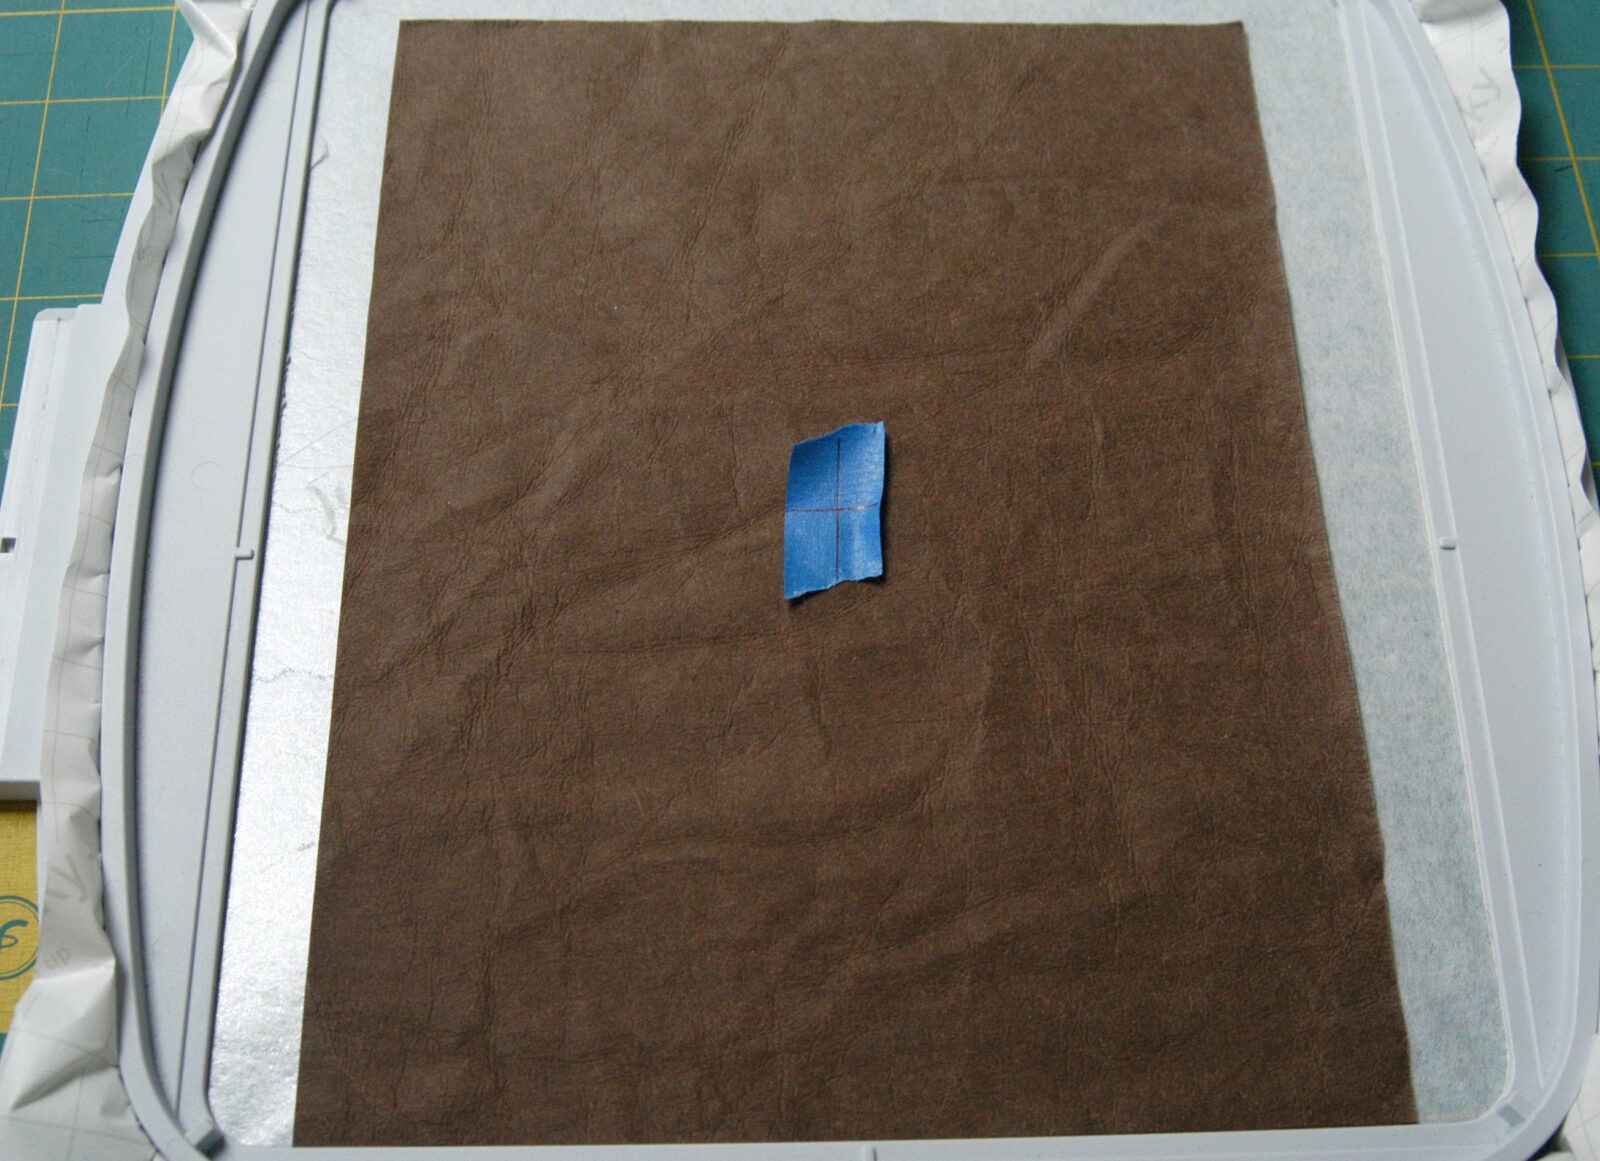
To mark the design placement on the unforgiving paper surface, begin by drawing a “+” on a small piece of painter or masking tape. Place the tape’s crosshairs centered on the width of the Kraft-Tex piece, and 4-3/4” up from the bottom edge.
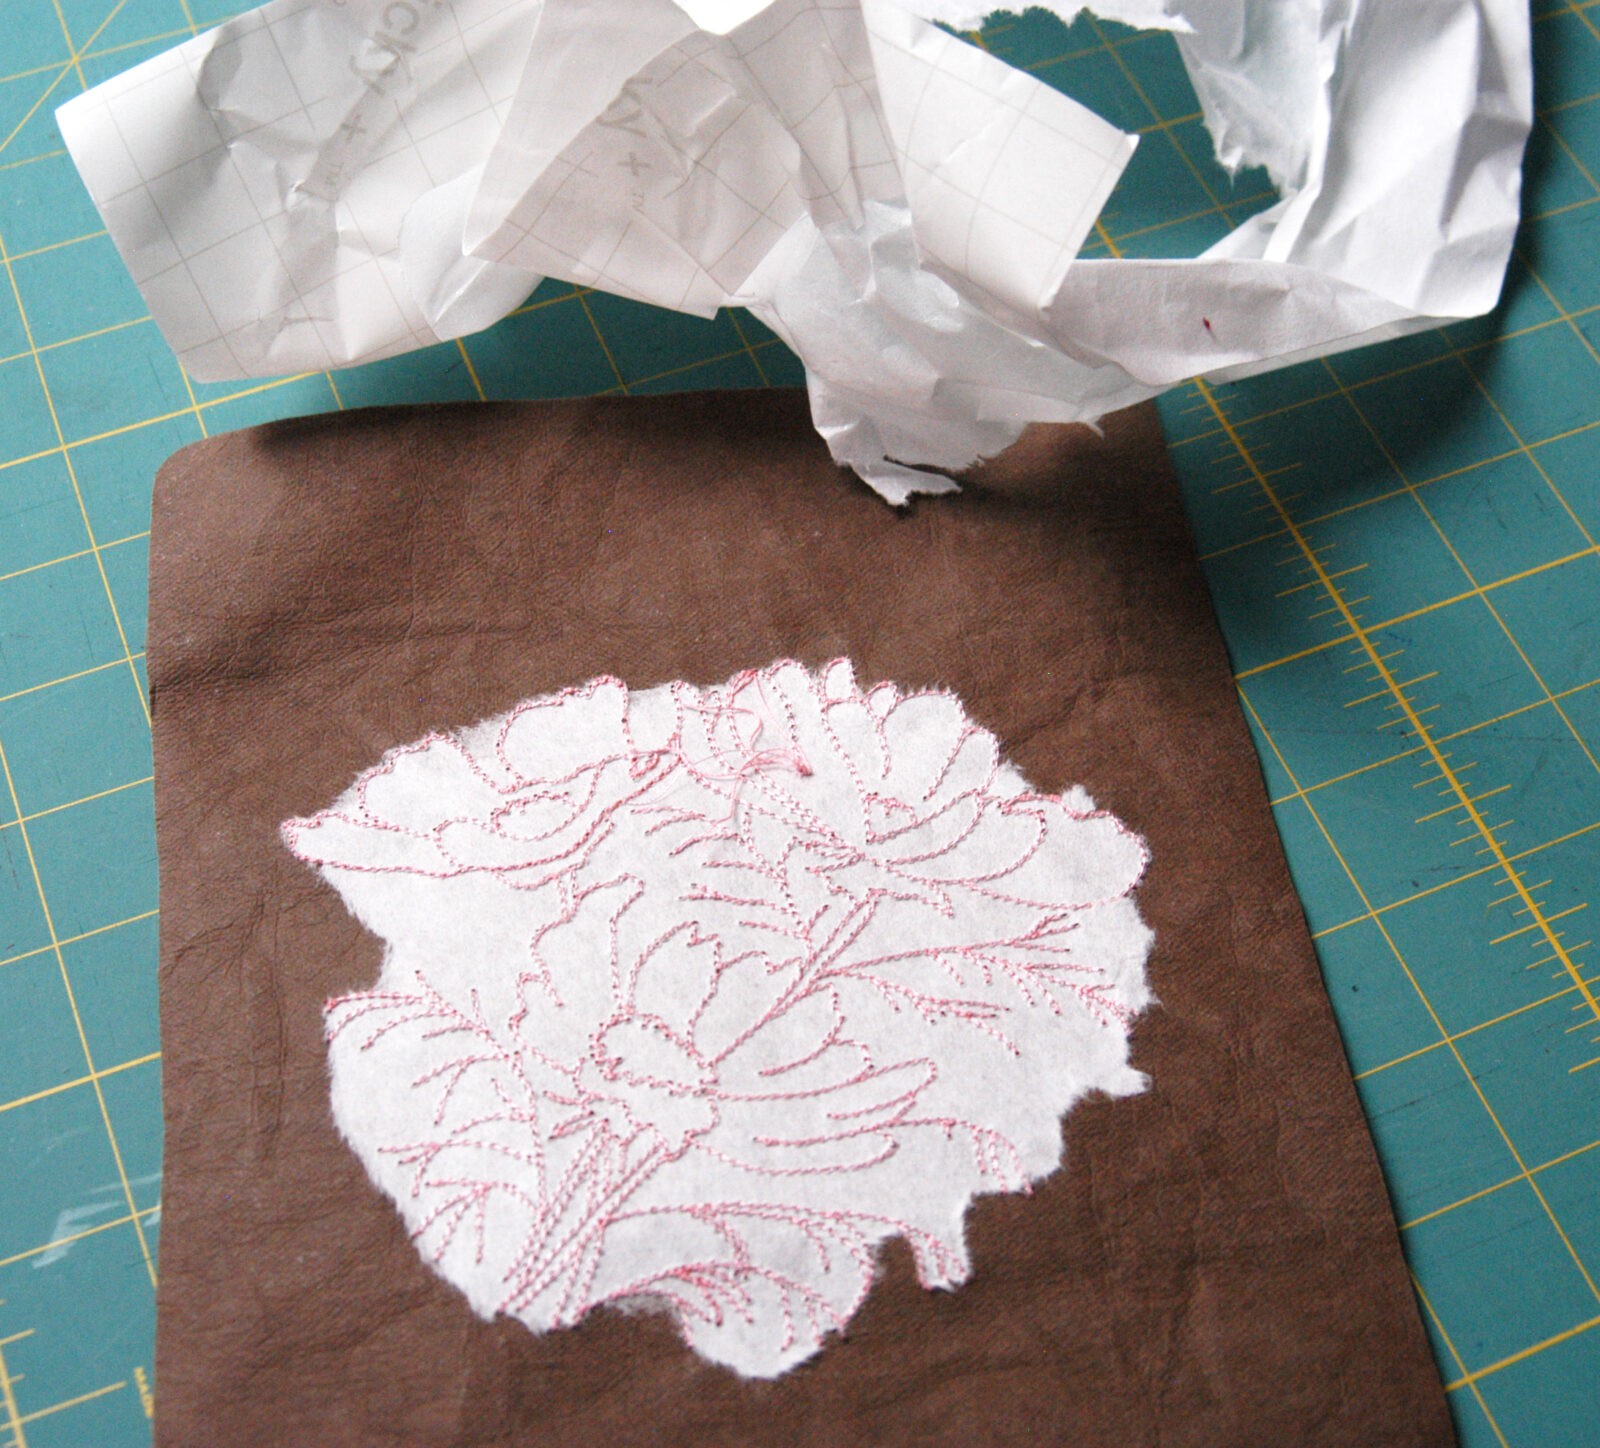
Hoop Sulky Sticky+ Stabilizer directly in the embroidery hoop, with the shiny, paper-side facing up.
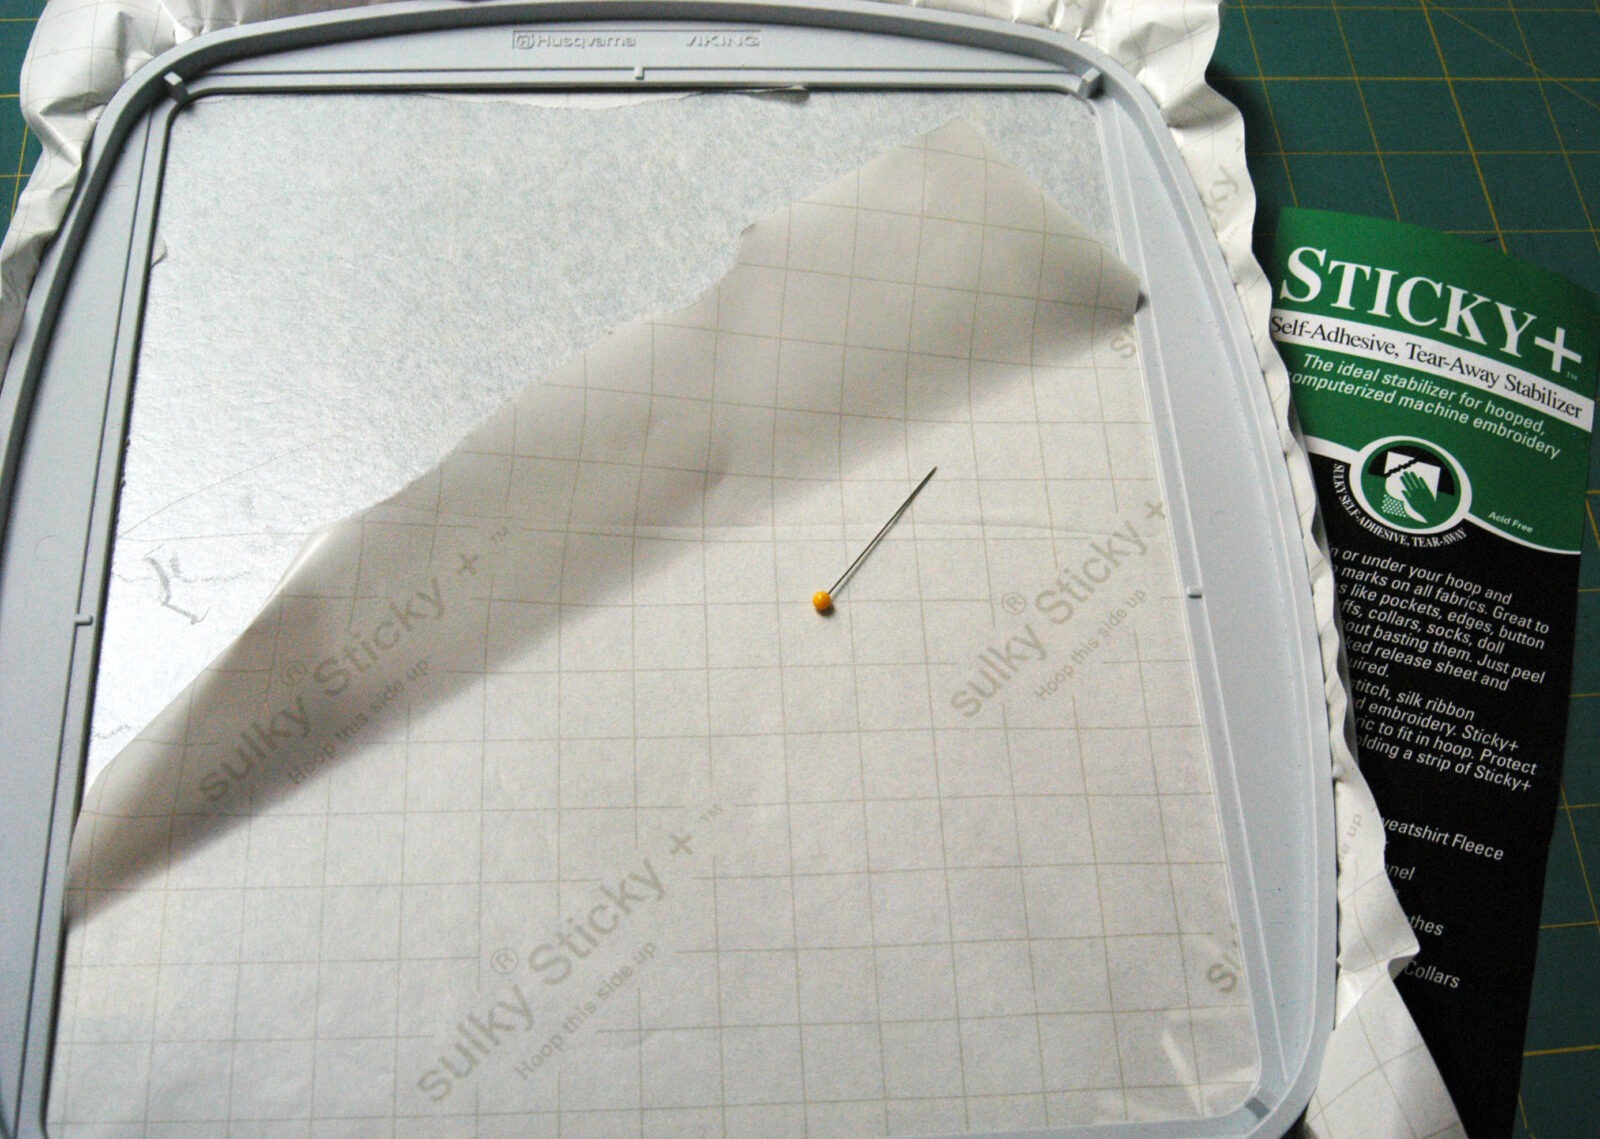
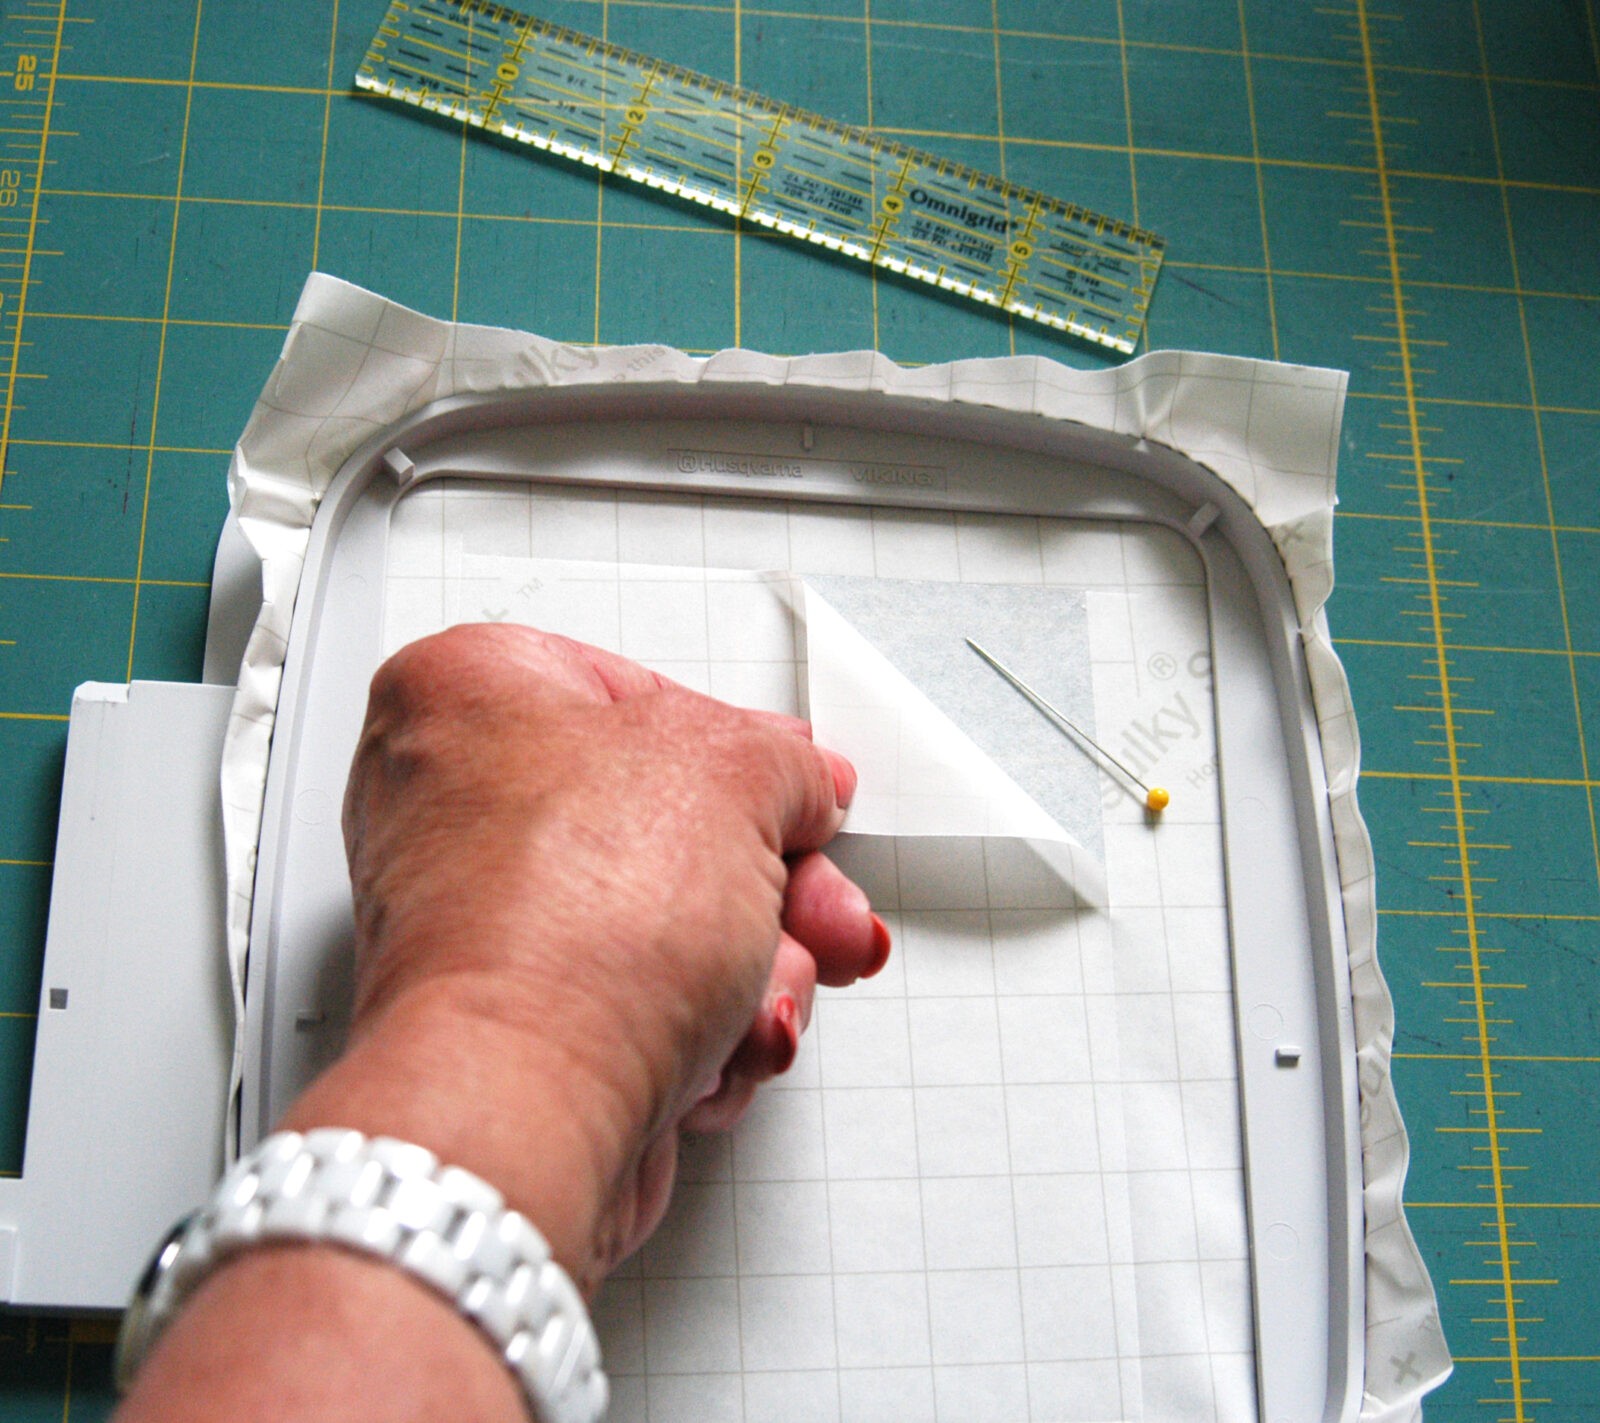
Lightly score the protective paper with a pin and peel it away, exposing the stabilizer’s sticky surface.
Firmly press the paper onto the sticky stabilizer, matching the tape’s crosshairs with the hoop’s center markings. Note: Hoop centers may not be actual true centers. Make sure your hoop is assembled with these marks showing correctly.
Transfer the embroidery design to the machine. Match the needle center position to the design center.
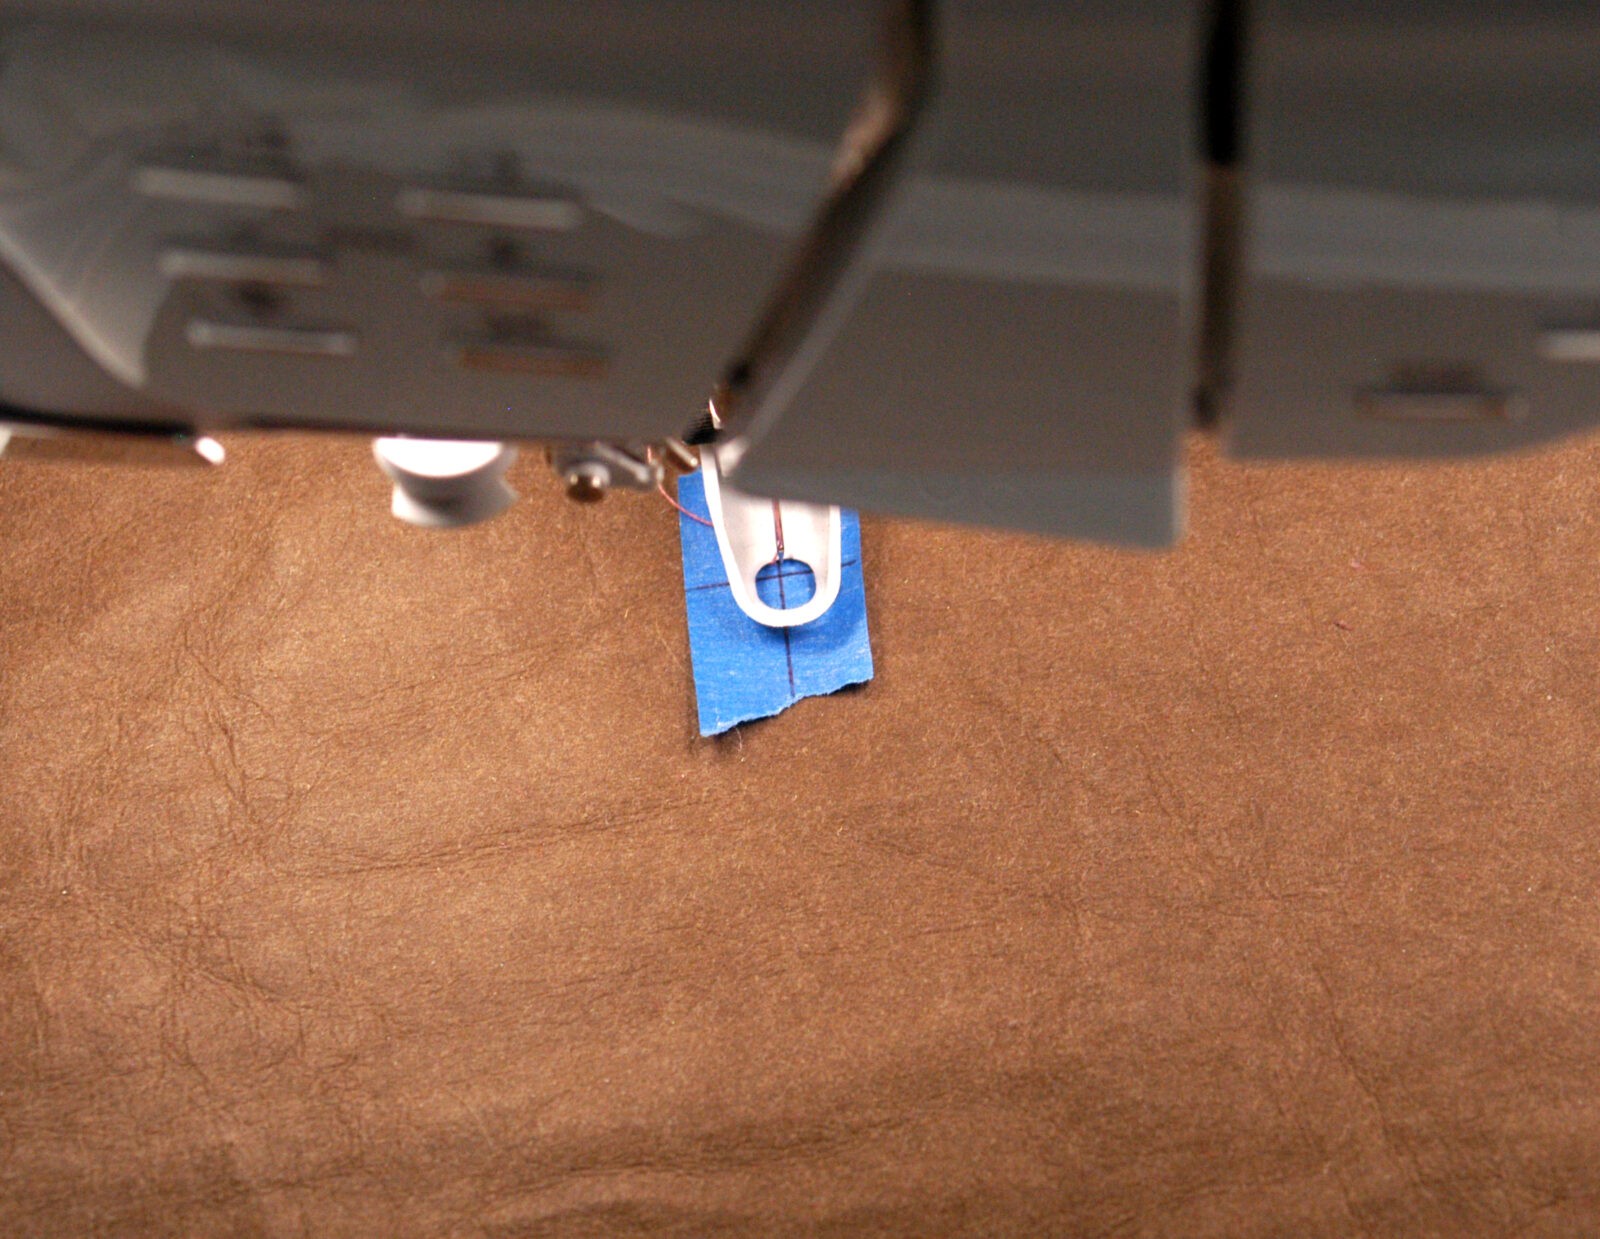
Once satisfied, remove the tape and embroider the design using Sulky 30 wt. Cotton Thread. Slow the machine down to at least half-speed.
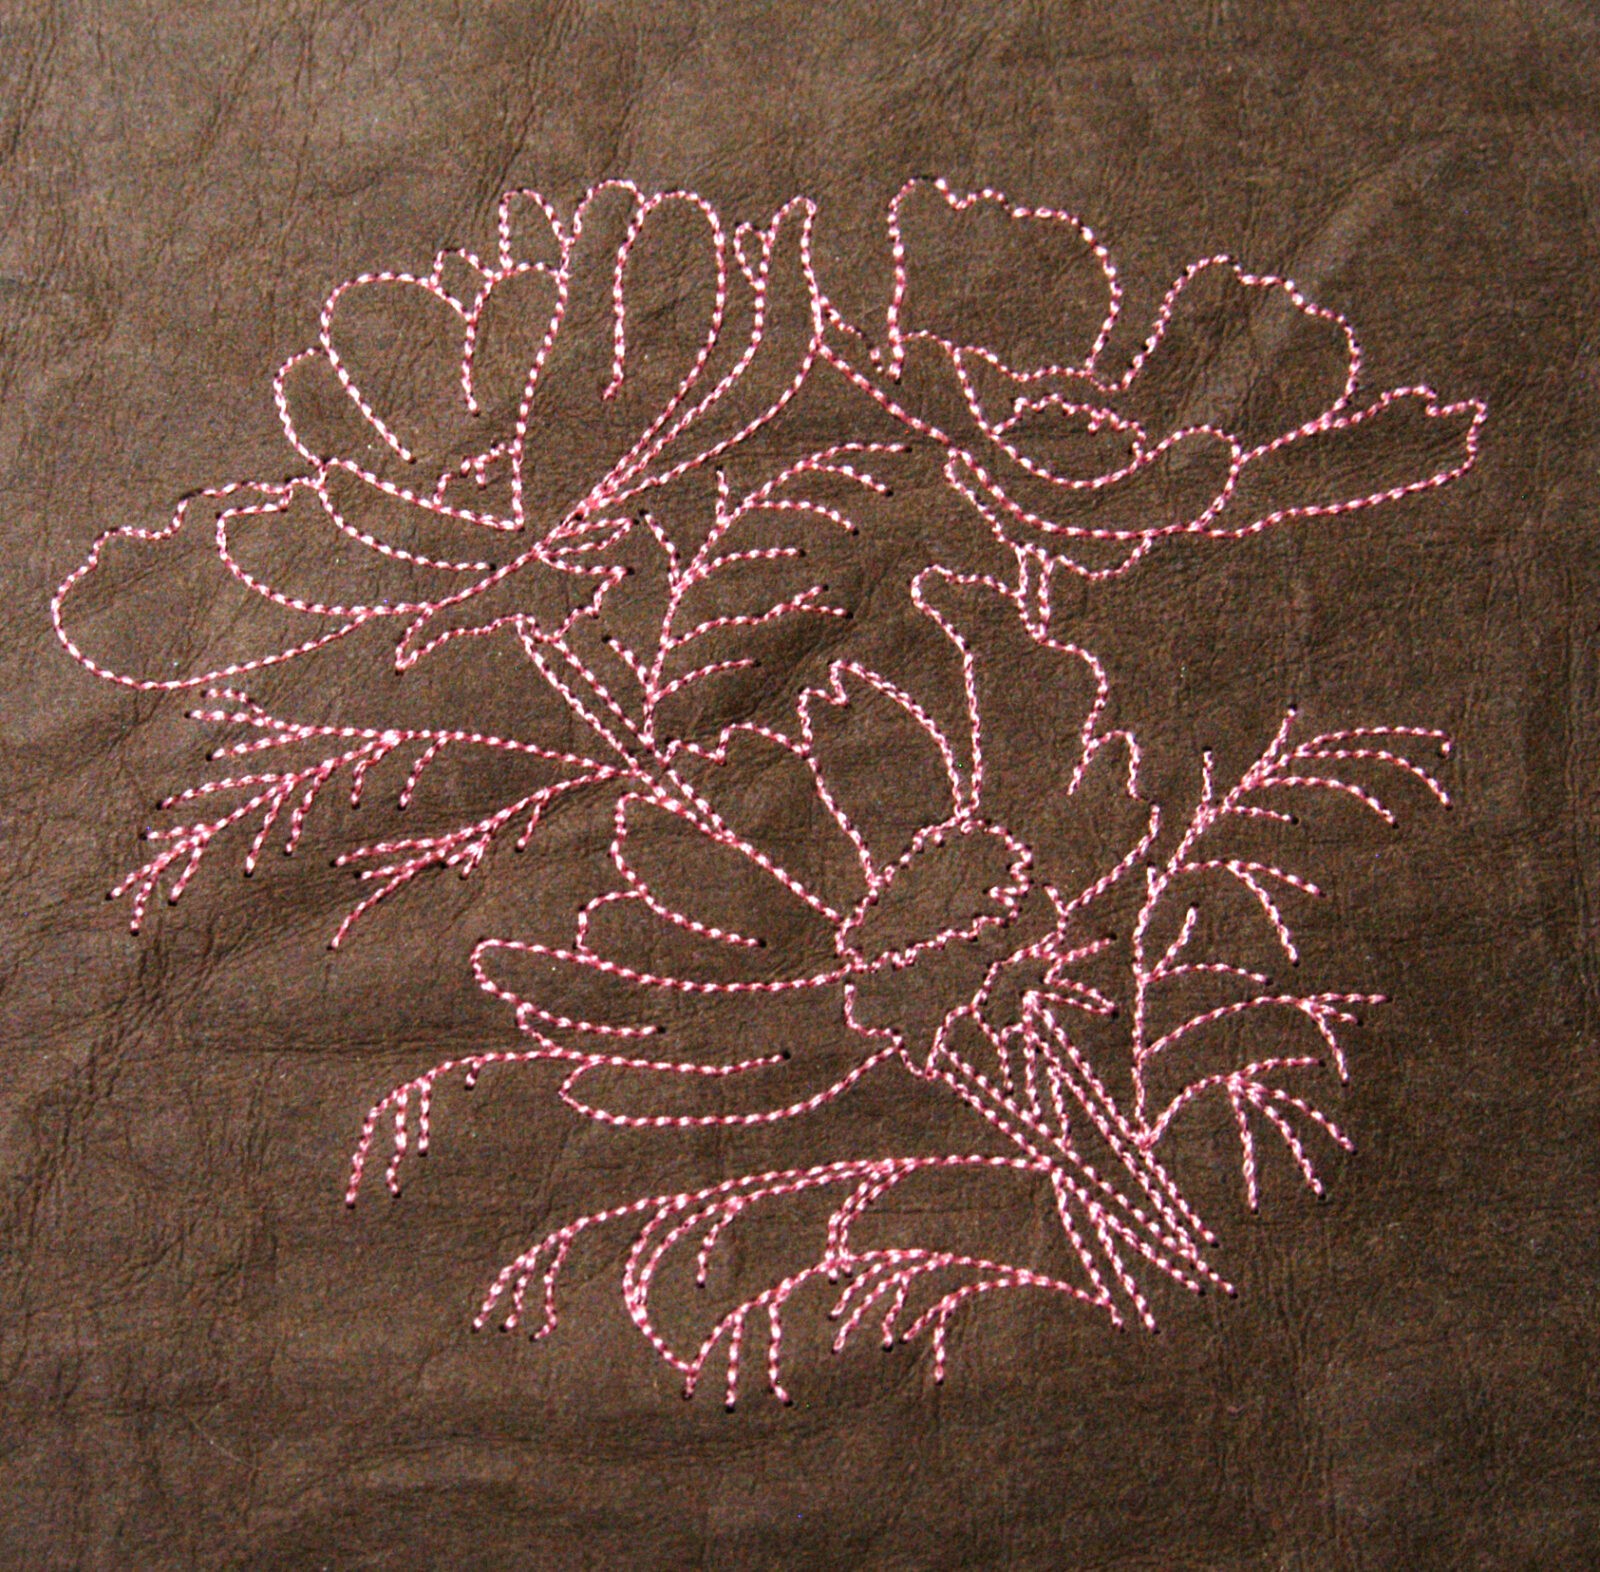
Gently tear away the excess stabilizer from the embroidery.
-
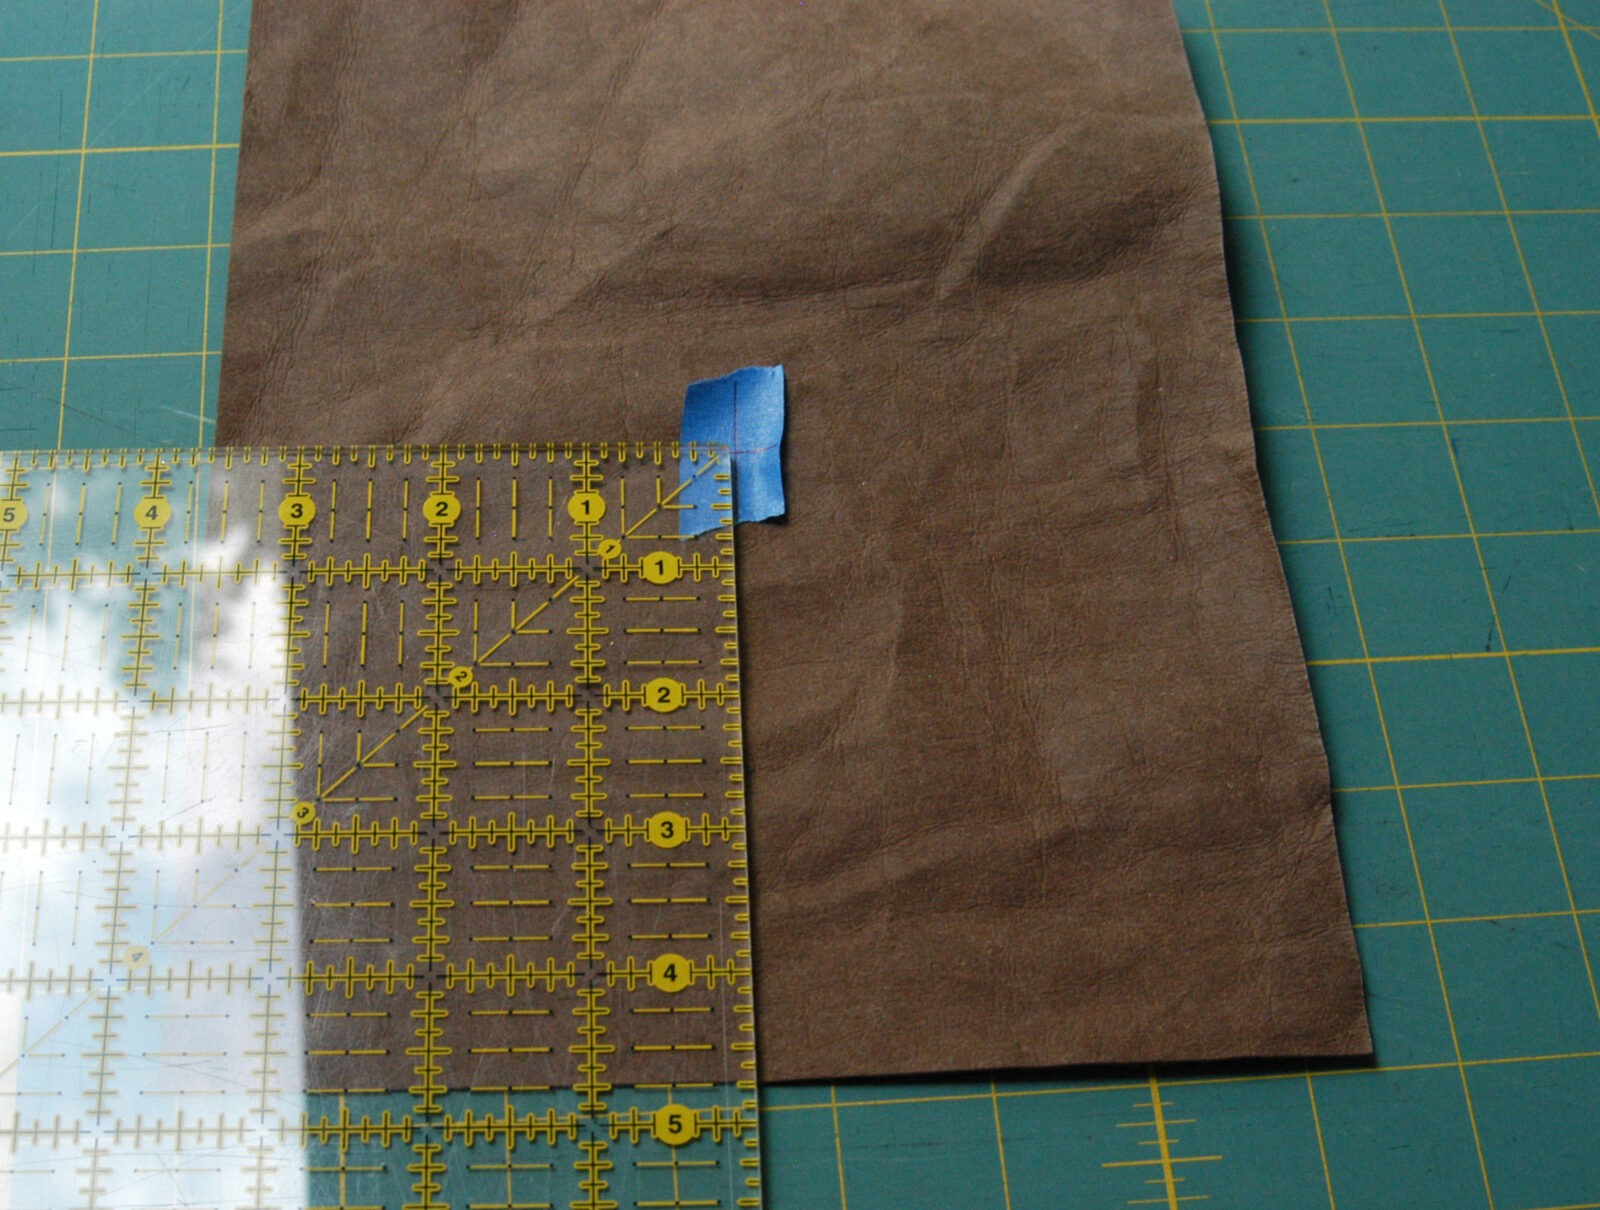
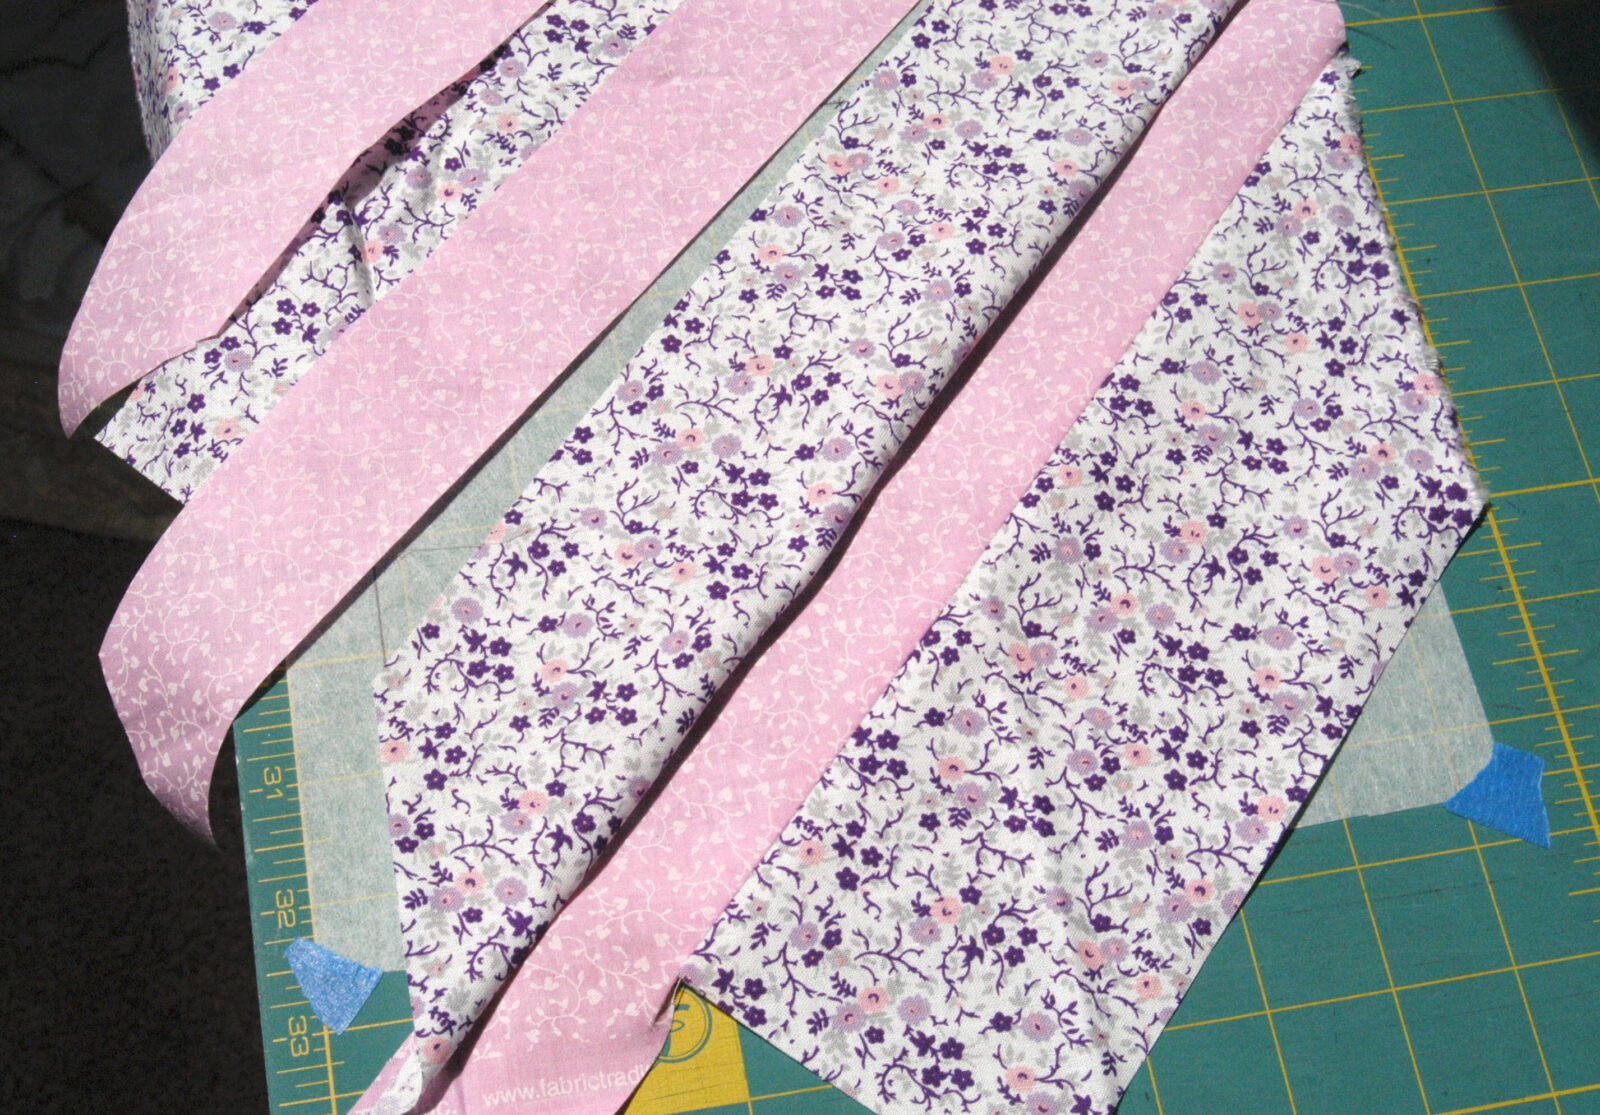
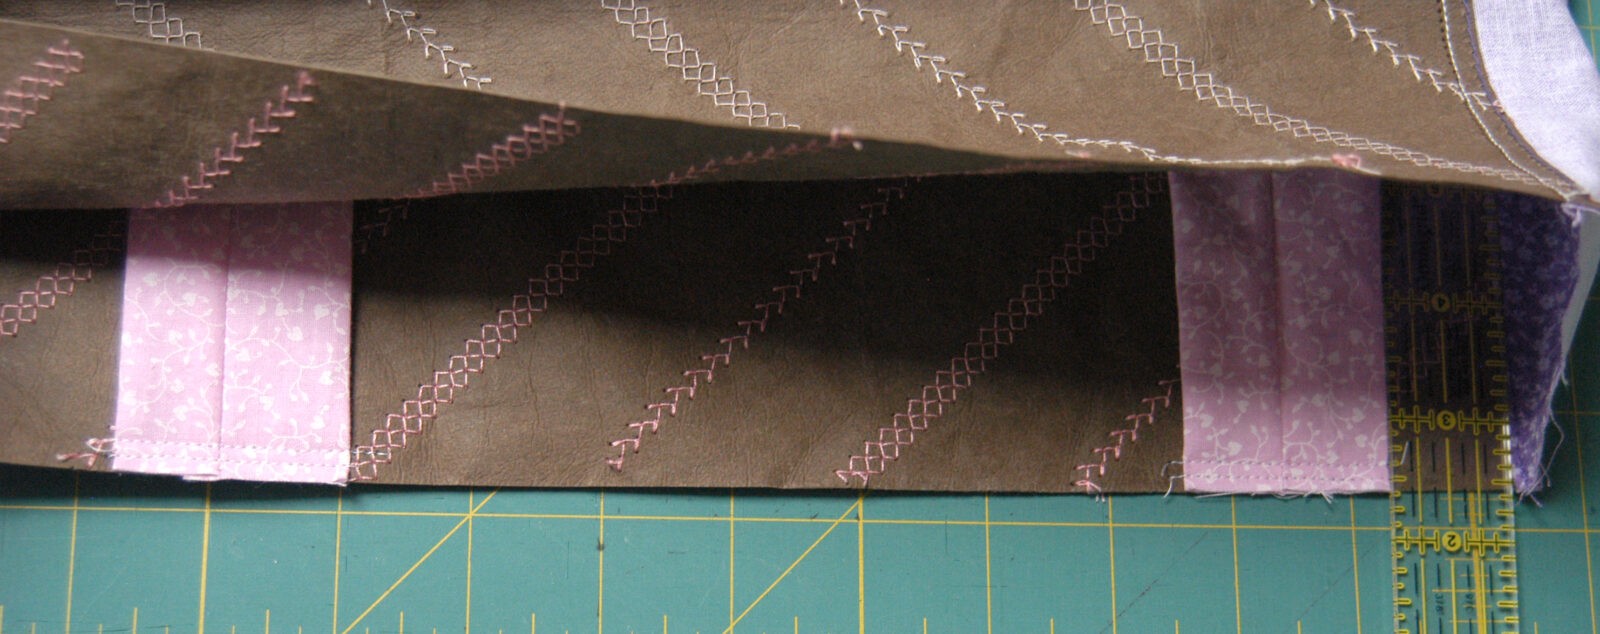
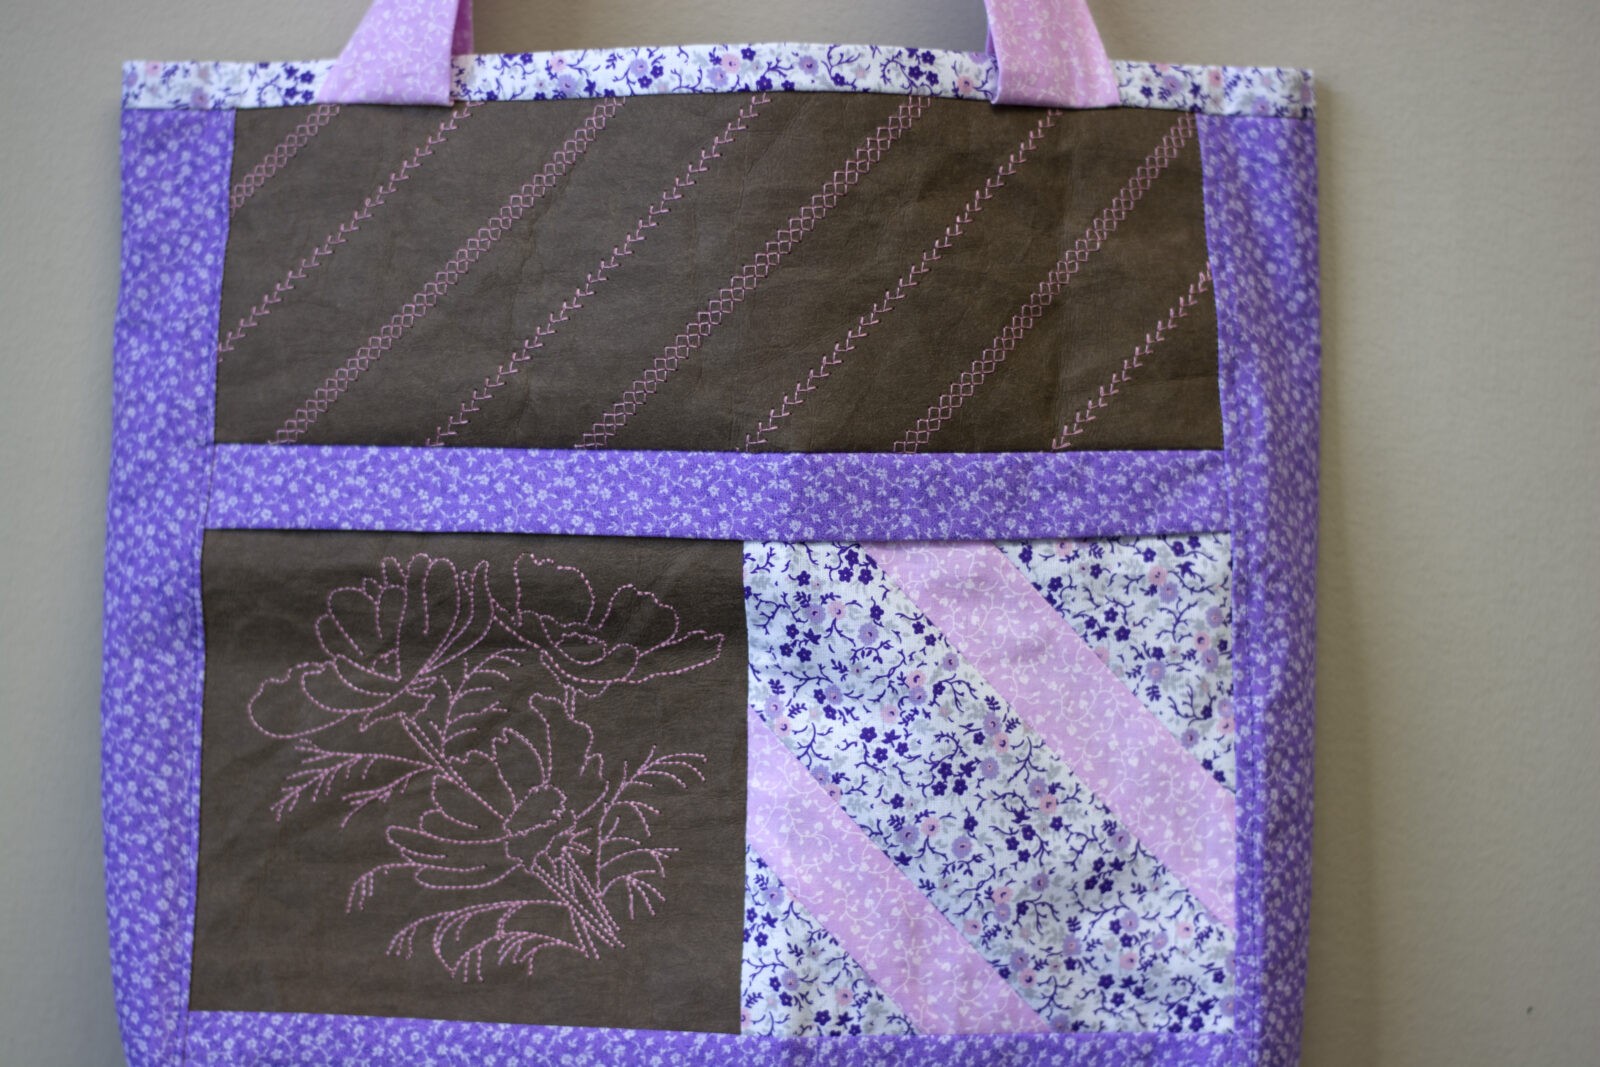
Decorate both 5” x 12-1/2” panels of Kraft-Tex:
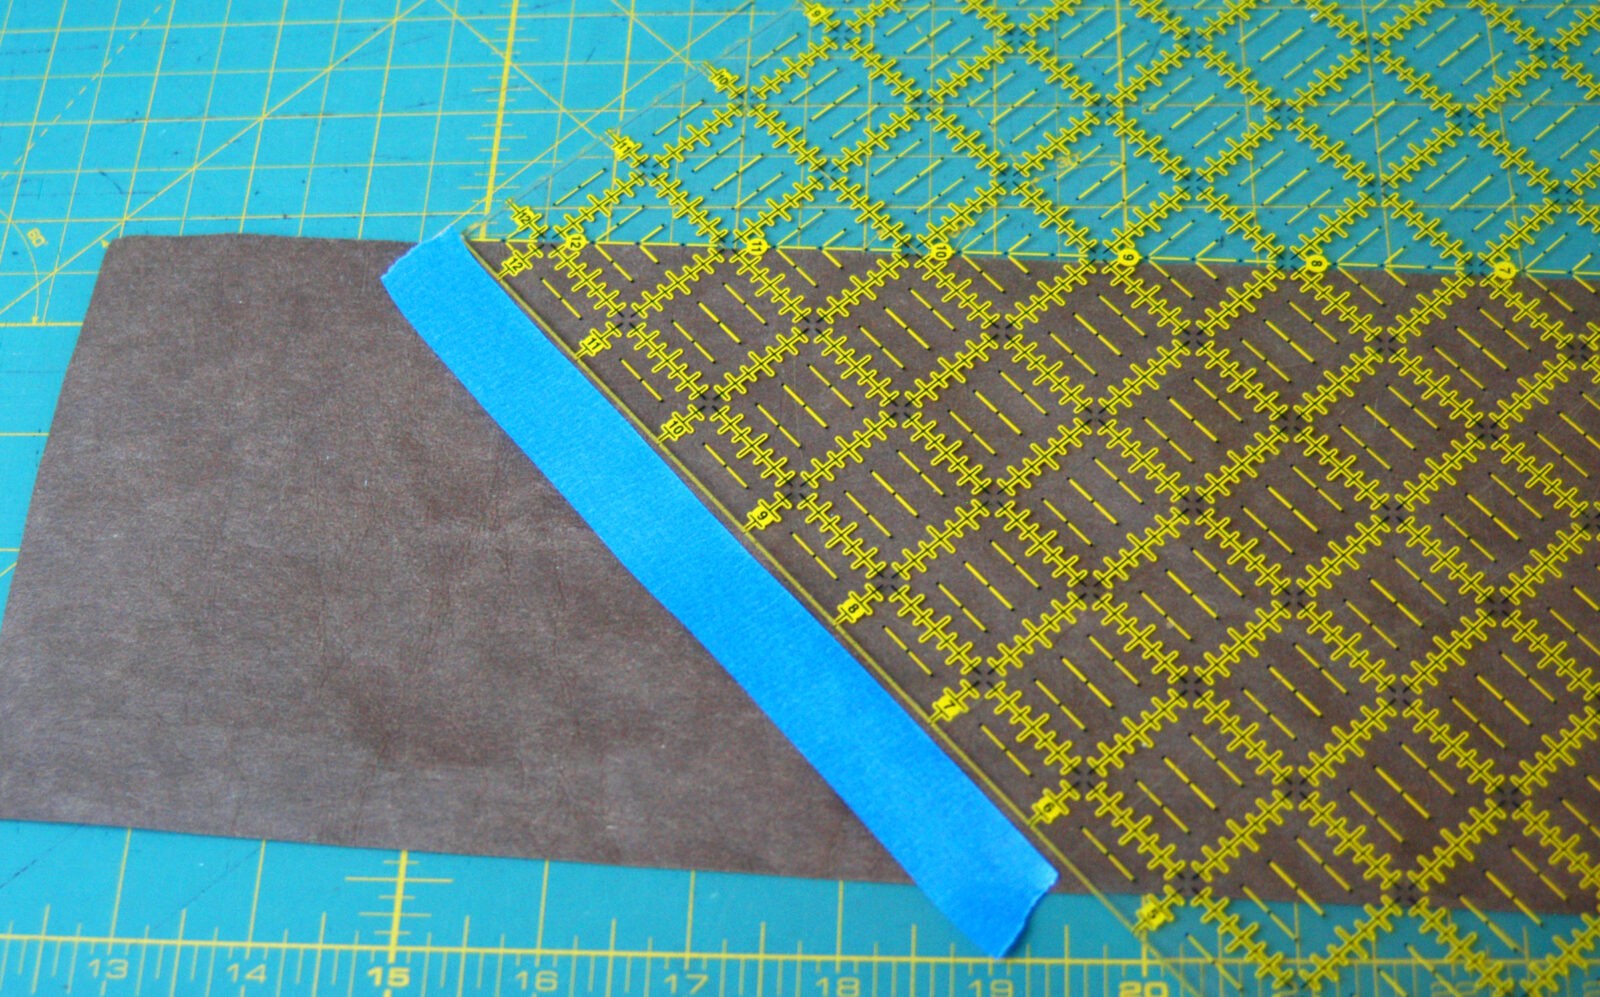
Establish a 45° diagonal line with a quilter’s ruler. Lay a piece of painter or masking tape along the ruler’s edge. It is not important where the initial line is established within the rectangle; only the angle is important.
Choose decorative stitch(es). Your creative thoughts may travel to using just one, or a combination of two, as shown; or possibly including many different stitches. It’s all good!
For the first row of stitching, guide the edge of the presser foot along the edge of the tape, which establishes the 45° angle.
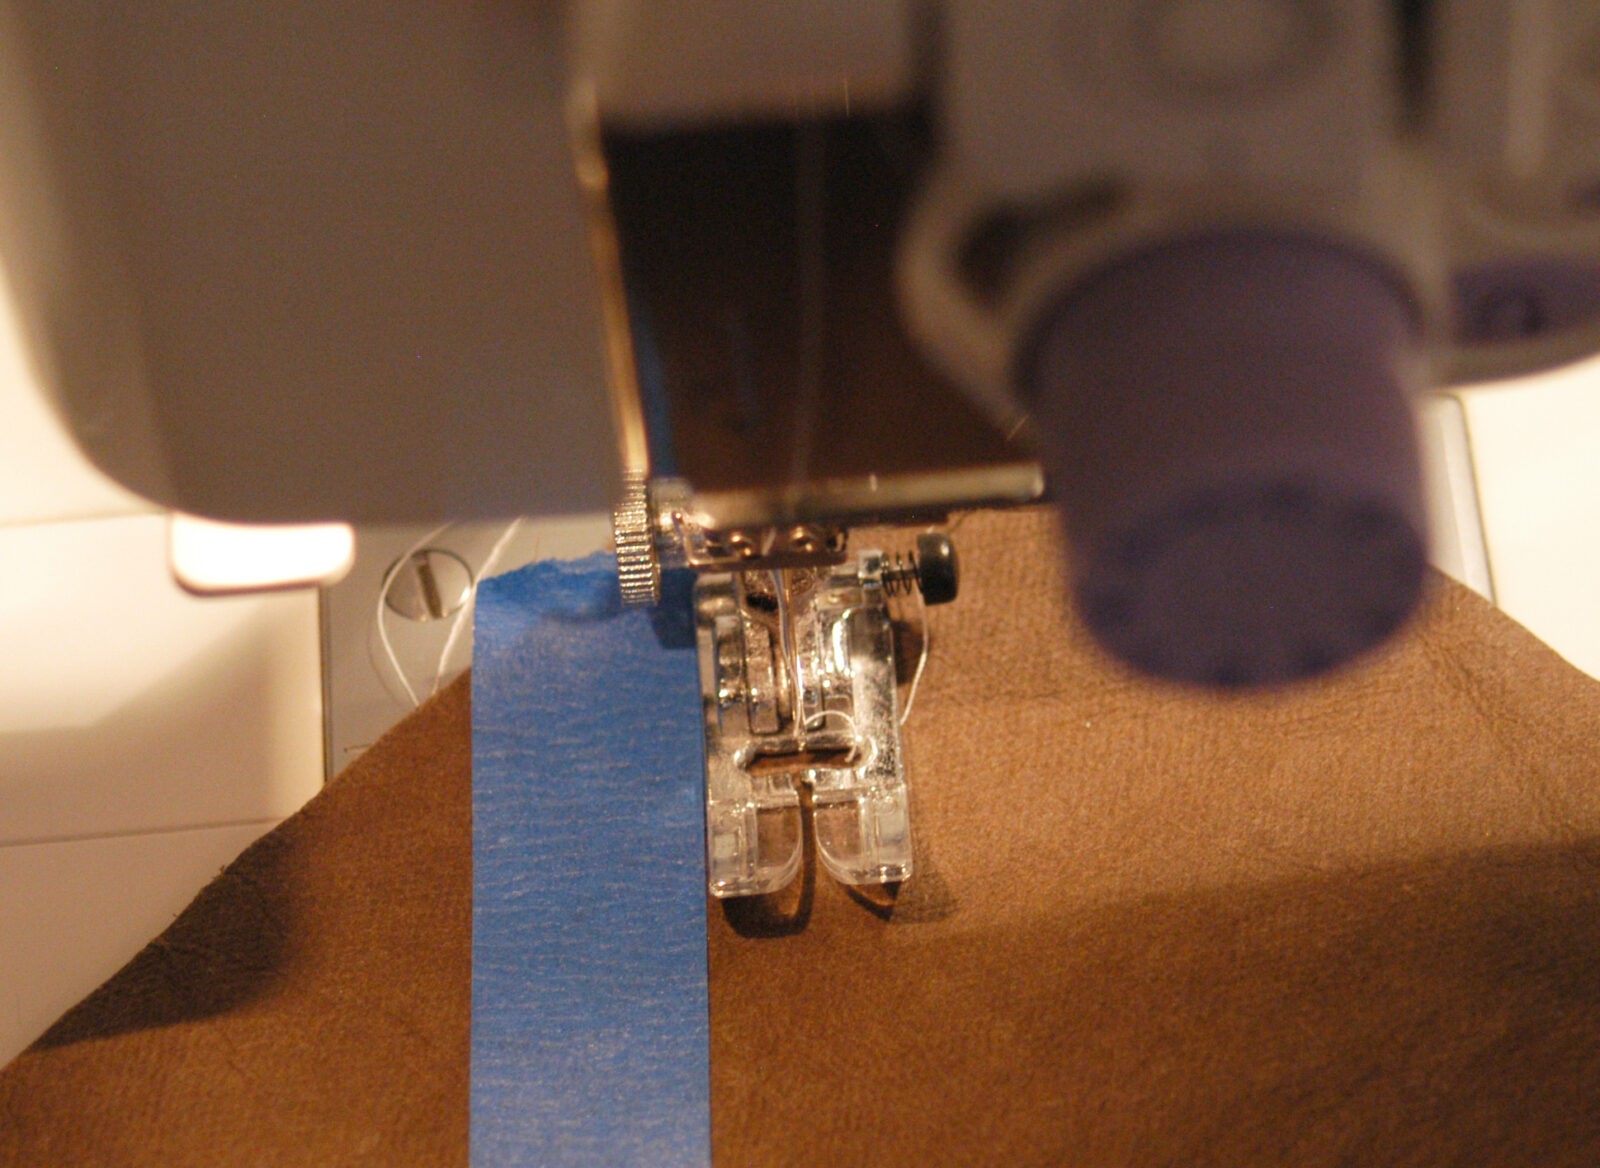
There is a wealth of aids available on the market to assist in uniformly spacing rows of stitches. Feel free to use any of these aids. I chose a quilting bar guide.
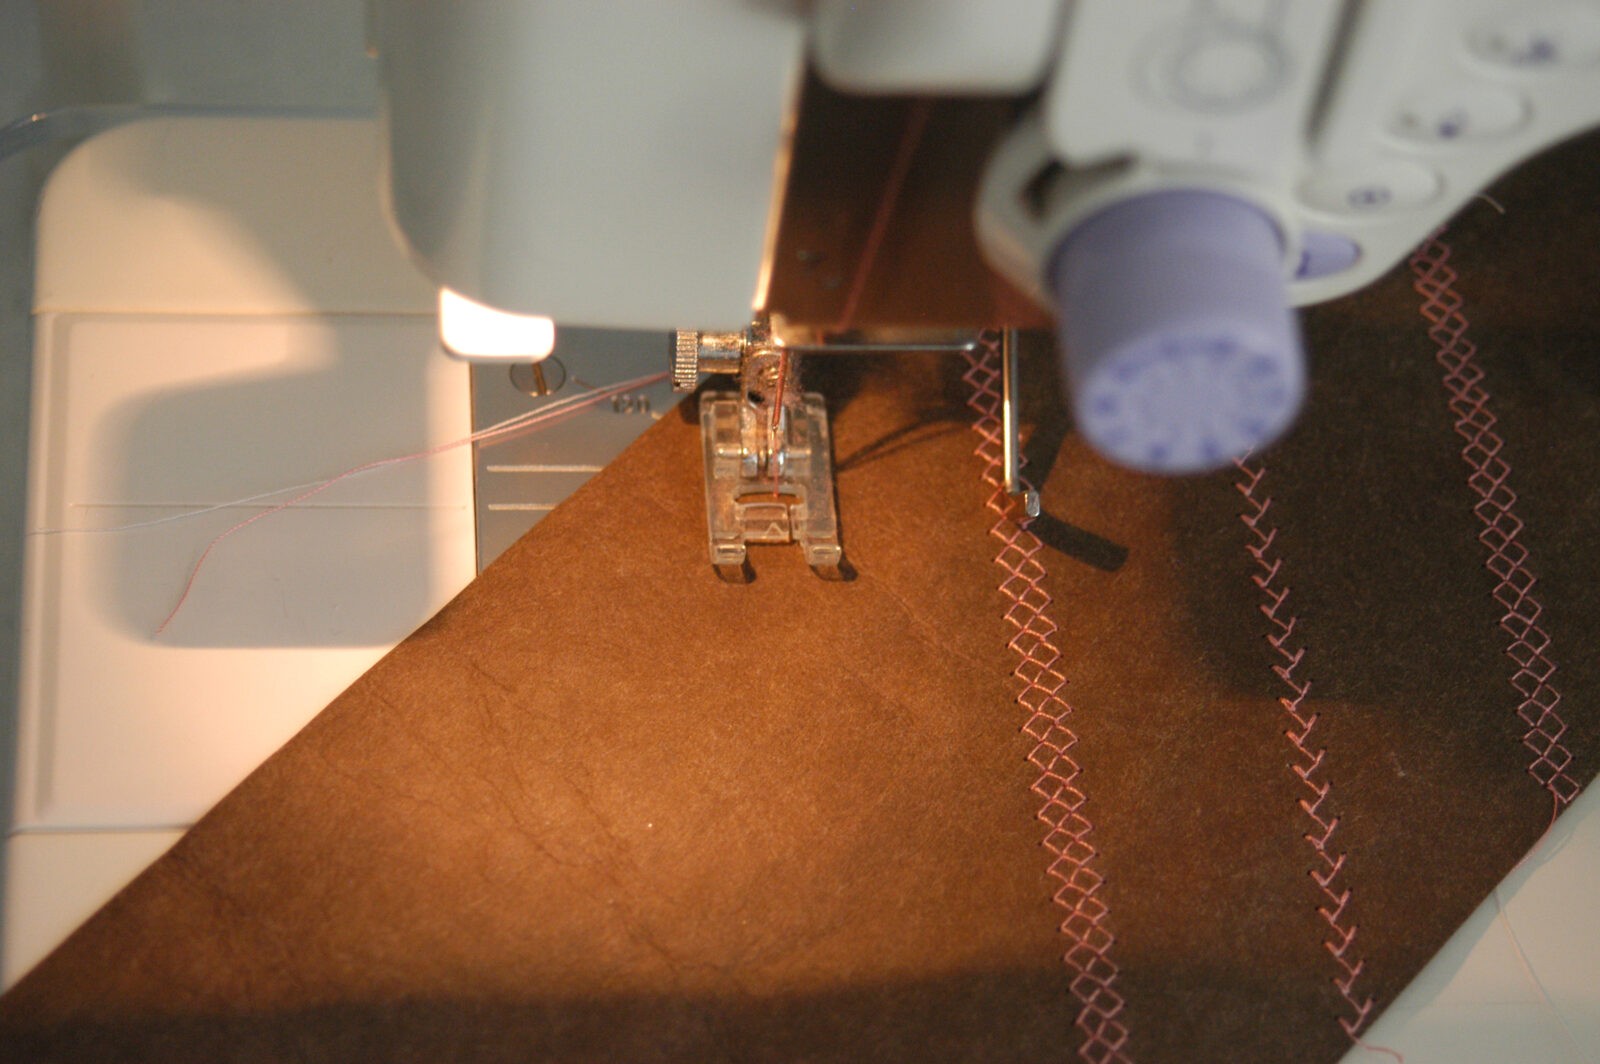
The bar travels down the middle of the existing stitched row, placing the next row of stitches on the same angle, and keeps rows equally distanced from each other.
Cover the entire surface of the Kraft-Tex panel. The example shown alternates stitches #31 and #46, Mode 2 on a Janome Memory Craft Professional 6500, spaced 1-3/4” apart.

Since the front and back top panels are separated at each side by a fabric panel, mirror imaging or matching rows is not a consideration. The only criteria when stitching the second panel is to maintain the same stitching pattern and angle.
-
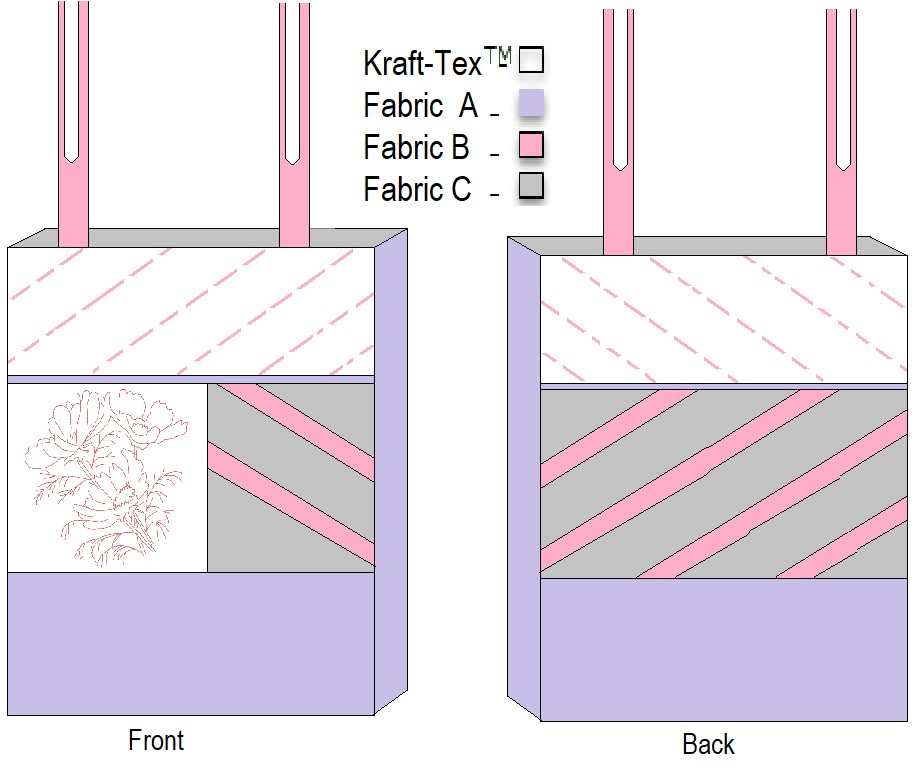
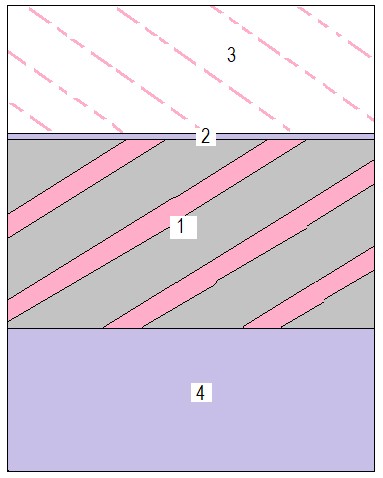
Cut cotton fabrics referring to Fabric Key graphic presented:
- Fabric A:
Cut two strips: 3” x 12-1/2” – accent strips
Cut two pieces: 5-1/2” x 12-1/2” – bottom panels
Cut two pieces: 4” x 16-1/2” – side panels
- Fabric B:
Cut two strips: 4” x 23” – straps
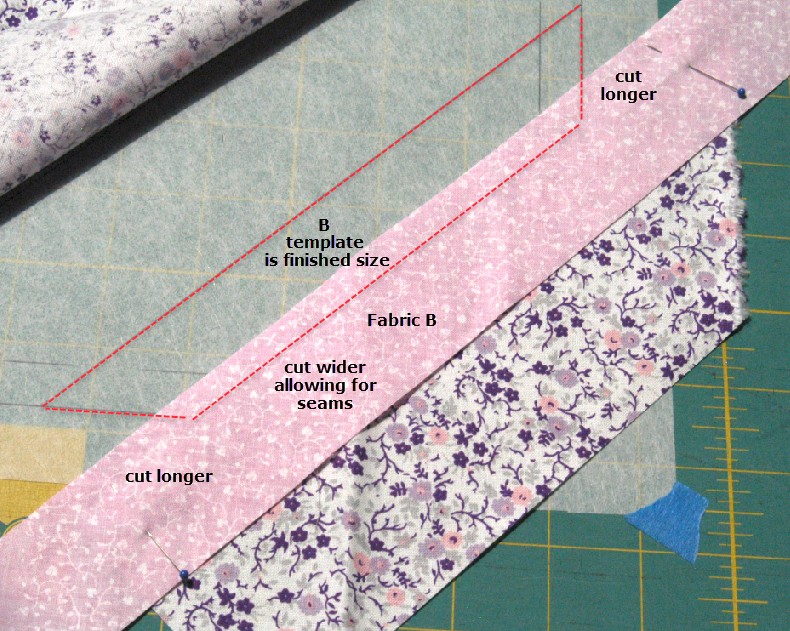
Bias panel patches: Refer to the template for required lengths. Cut 5 bias strips each 1-5/8” wide, and longer than its placement position on the template.
- Fabric C:
Cut two panels: 12-1/2” x 17-1/2” – front and back lining
Cut two strips: 4” x 17-1/2” – lining side panels
Cut one piece: 8-1/2” x 14” – inside pocket
Bias panel patches: Refer to the template for required lengths, and cut each strip longer than its placement position on the template.
Cut four strips: 3-3/4” wide – upper right and lower left corner strips for both front and back panels
Cut three strips: 2-3/4” wide – middle strips of front and back panels
-
Stitch Fabric B/C bias strips together to form both front and back panels:
Lay the cut strips out in their proper places on top of the template. Starting at a corner, stitch strip B to C – right sides together – making sure that edges extend well beyond the rectangle’s border.
Once seamed, press open, and position the piece on top of the template to mate with the next segment.
Continue in this same fashion until the entire rectangle has been stitched.
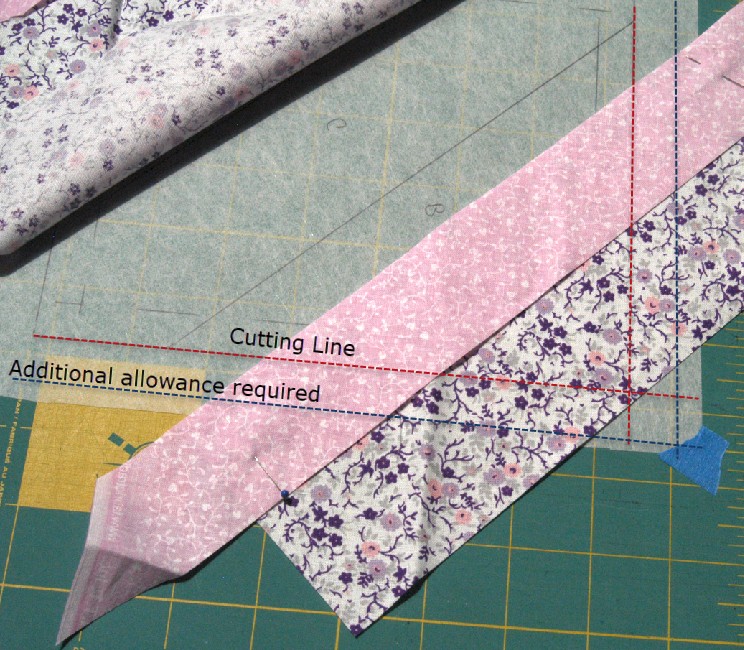
Place template on top of pieced fabric rectangle. It is not important to match the actual seams, but rather to match the 45° angle of the bias strips to the template.
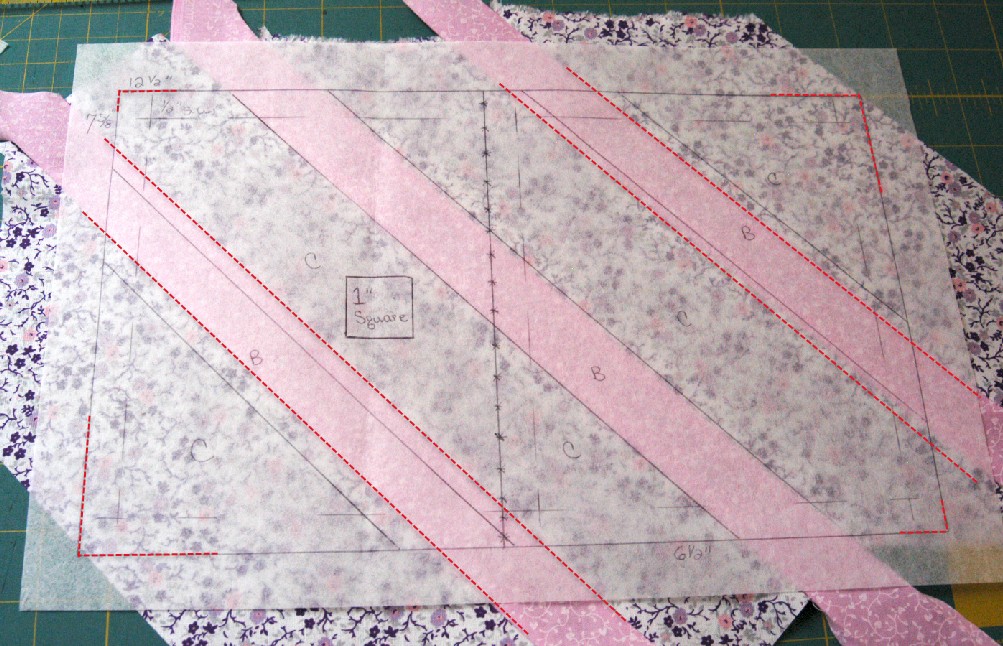
Cut the rectangle for the tote bag back panel. Repeat the process for the smaller front panel.
-
Make the straps:
Fold the fabric in half, right sides together.
Stitch the long side with a 1/4” seam allowance, leaving both ends open.
Press the seam open, and turn right side out.
Press the strap with the seam running down the middle of the back side.
Re-shape the ends of the Kraft-Tex 1-1/4” x 15” strips, using the provided template.
Center the Kraft-Tex accent on the fabric strap, both in width and length. If needed, hold in place with painter/masking tape.
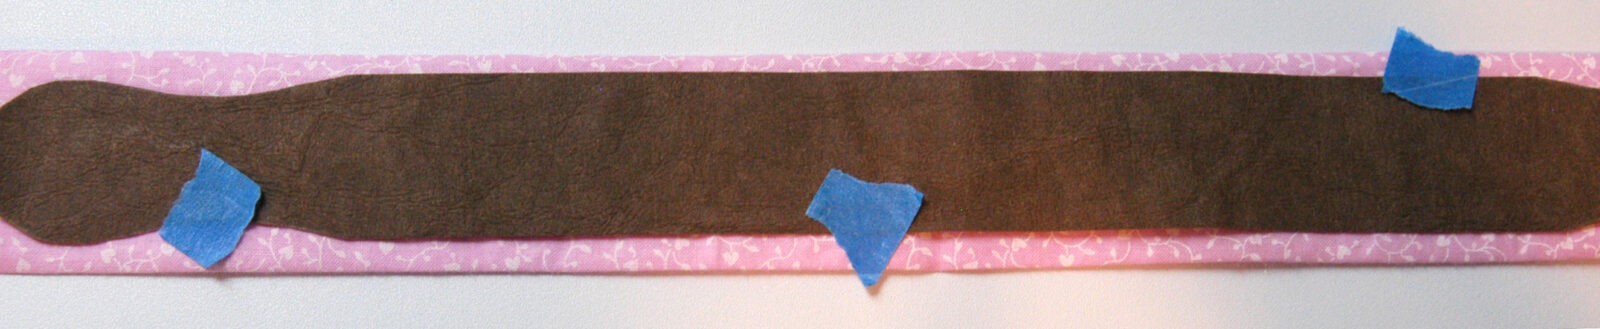
Stitch the Kraft-Tex accent to the fabric strap with Sulky 30 wt. Cotton in any chosen decorative stitch. (The example shows a Triple Topstitch, Mode 1, stitch 5; Janome Memory Craft Professional 6500 stitched 1/8” in from edges). You may want to choose a very simple stitch though, since you need to make that curve.
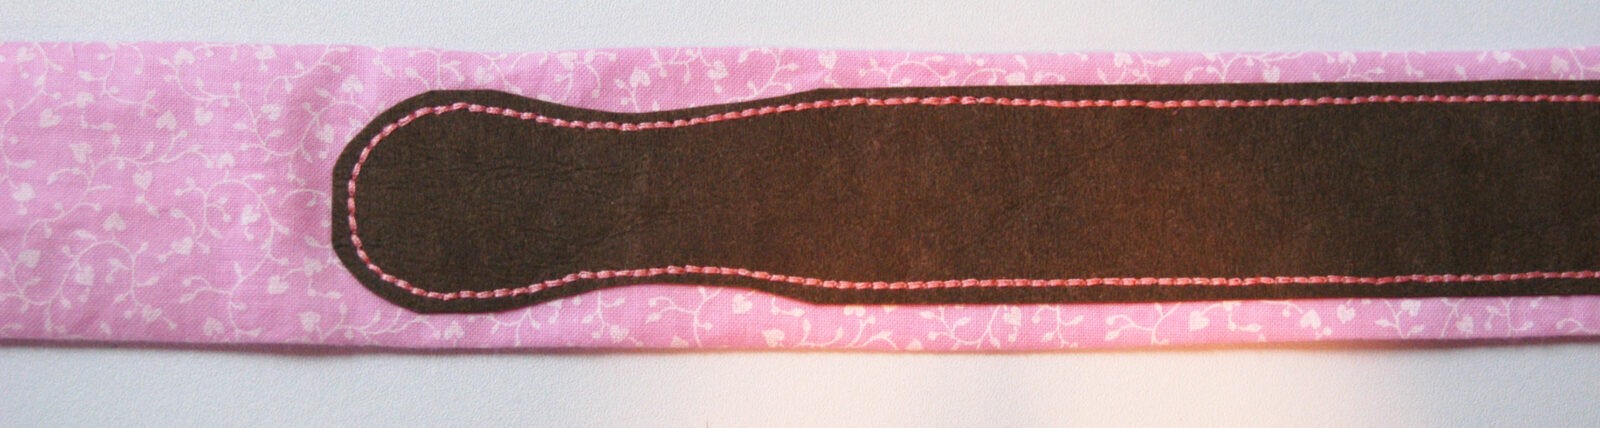
Leave a long thread tail at the end, and pull the top thread to the back side. Hand-tie a couple of knots, and then thread the tail into a sewing needle and weave the ends under a few stitches
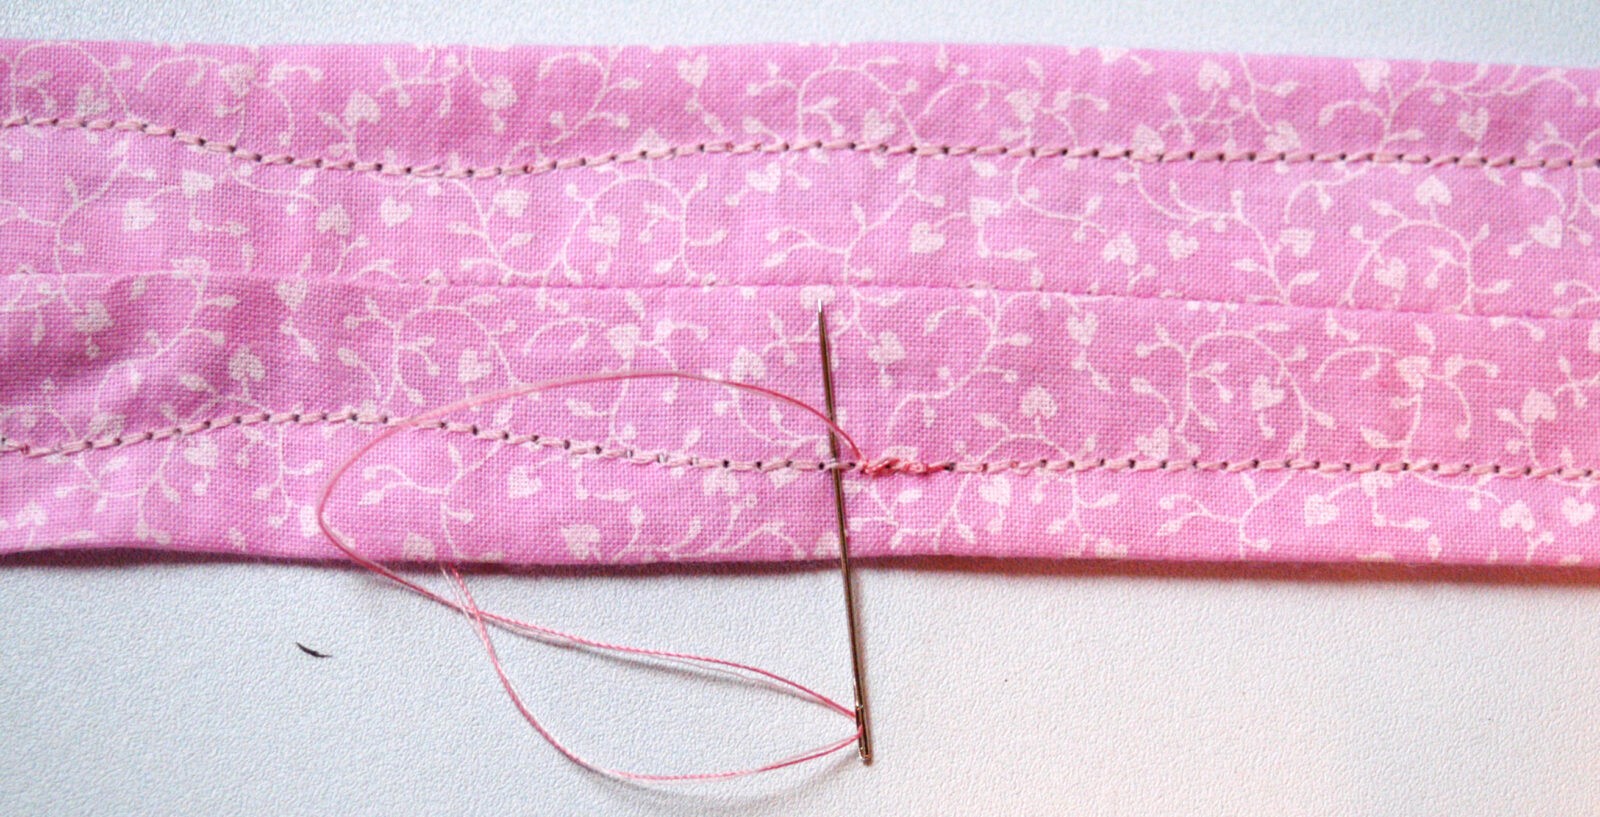
before cutting to make a neat underside.

Construction –
Front Panel:

Stitch the bias square to the embroidered Kraft-Tex using a 1/2” seam allowance. (Using the numbers in the above diagram, stitch 1 to 2)
Fold one fabric A accent strip in half to create a flange, and baste it to the top of the joined squares within the 1/2” seam allowance. (Stitch 3 to the newly joined 1 and 2)
Stitching with 1/2” seams, add the top decoratively-stitched Kraft-Tex panel and then the bottom fabric panel. (Stitch 4 to the top and 5 to the bottom)
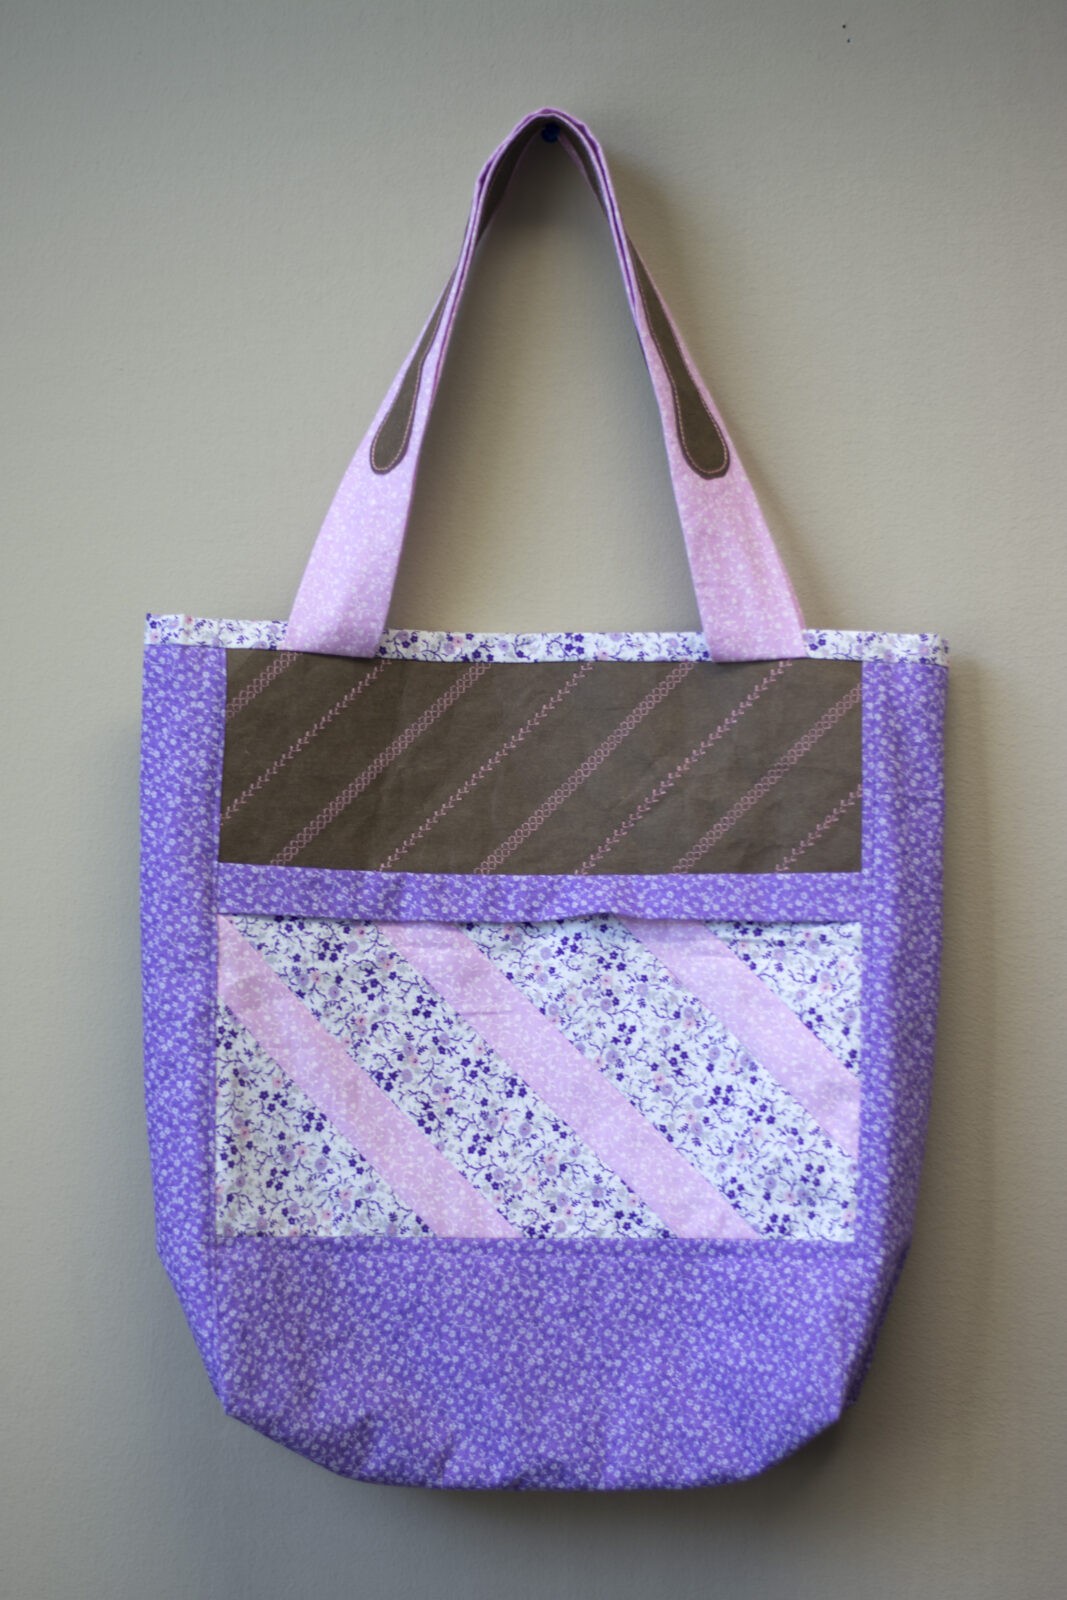
Back Panel:
Fold the remaining fabric A accent strip in half, and baste it to the top of the pieced bias rectangle, within the 1/2” seam allowance.
Stitching with 1/2” seams, add the top decoratively-stitched Kraft-Tex panel, and then the bottom fabric panel.
Side Panels:
Using a 1/4” seam allowance, stitch the side panels to the back sections on both sides.

Stitch the front and back panels together at the side seam.
An optional, but suggested step, to reinforce seams: Press the side joining seams towards the side panel center. Topstitch 1/8” from the seam on the side panel, using Sulky 30 wt. Cotton Thread.

Fold the bag at side panels, matching the front and back seams.
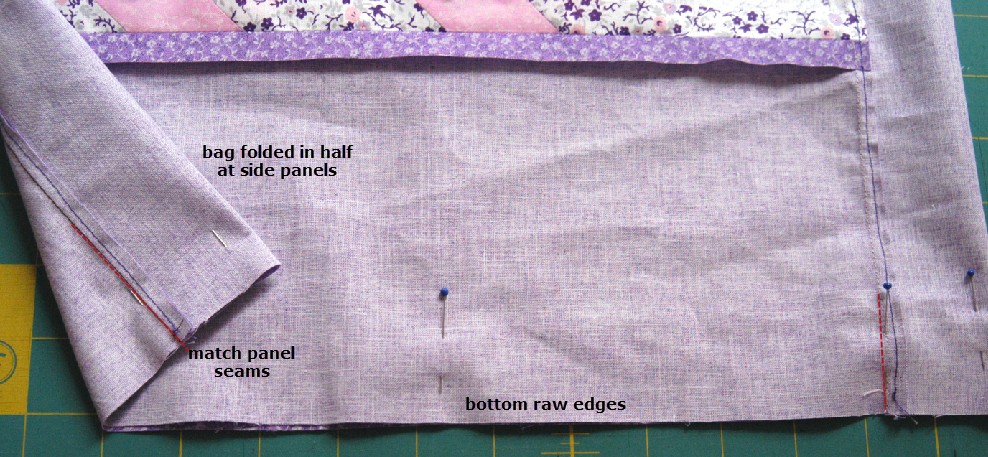
Stitch a 1/2” bottom seam.
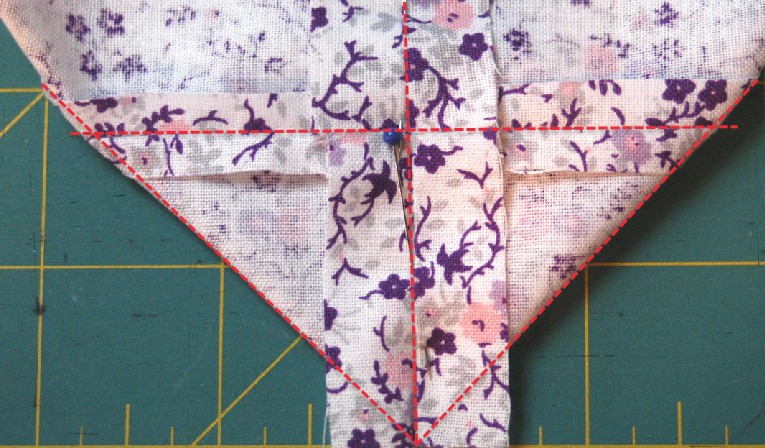
Make bottom gusset:
Inside the bag, push a finger up into a bottom corner.
Flatten the bottom seam into the side panel,
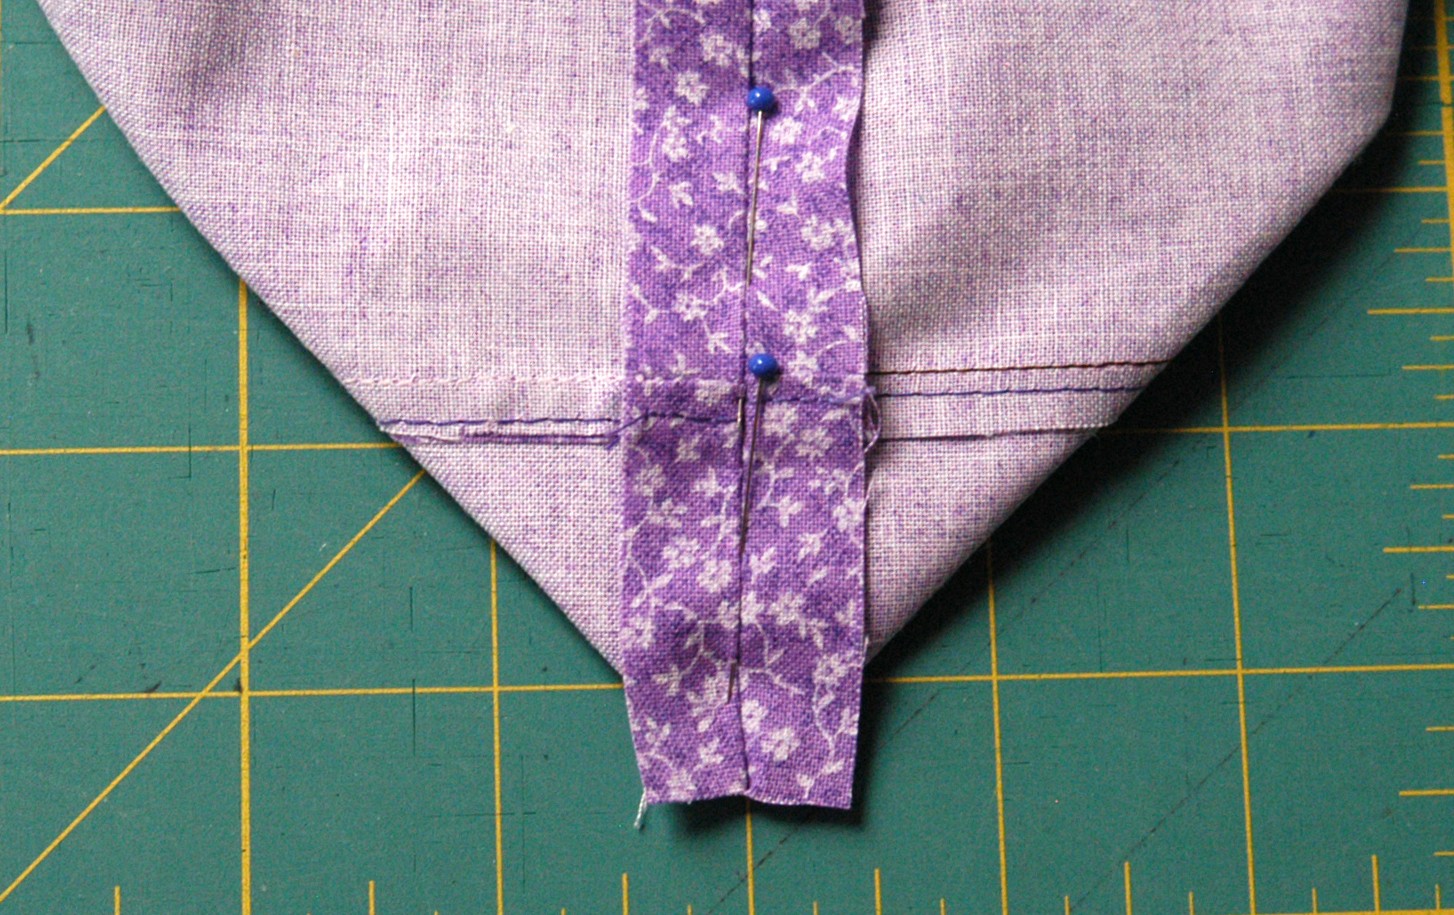
matching the seam to the center of the side panel.
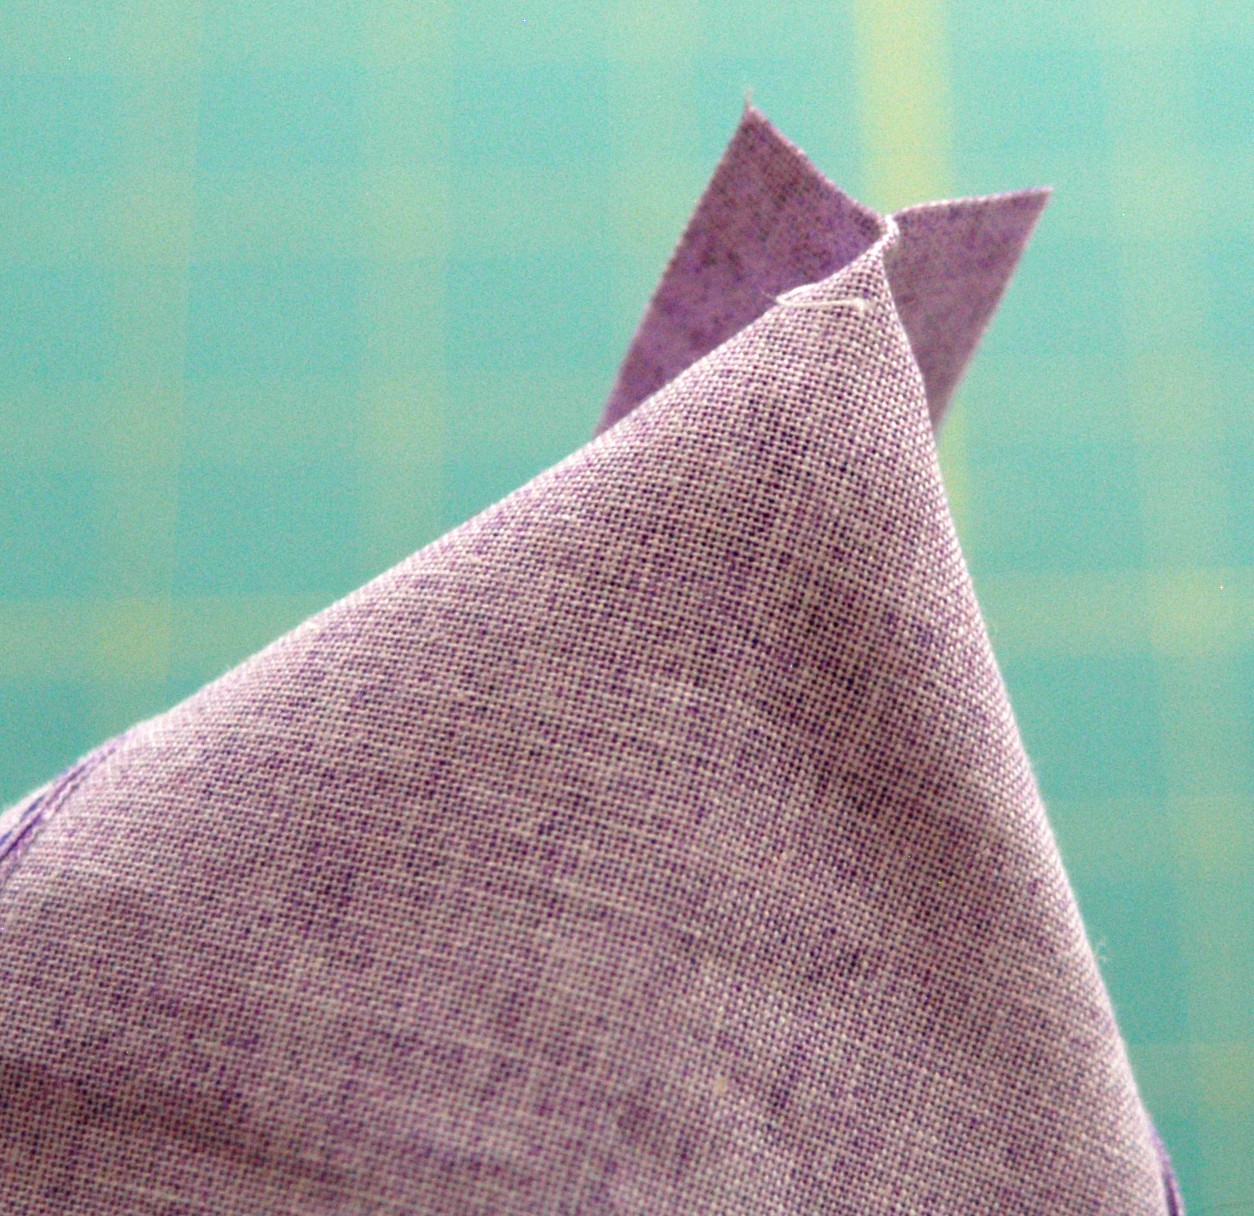
Work the fabric to make an isosceles triangle; a triangle which has two equal sides.
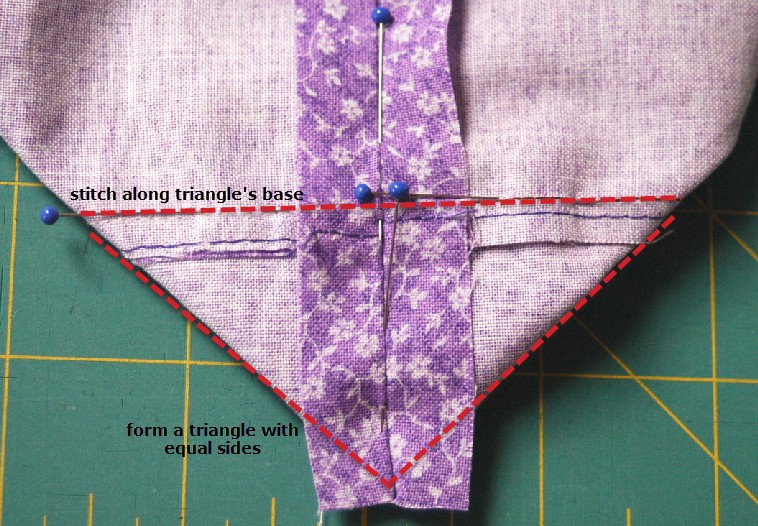
Once satisfied, pin in place and stitch along the seamed line at the base of the formed triangle. (That’s the top line in the picture above)
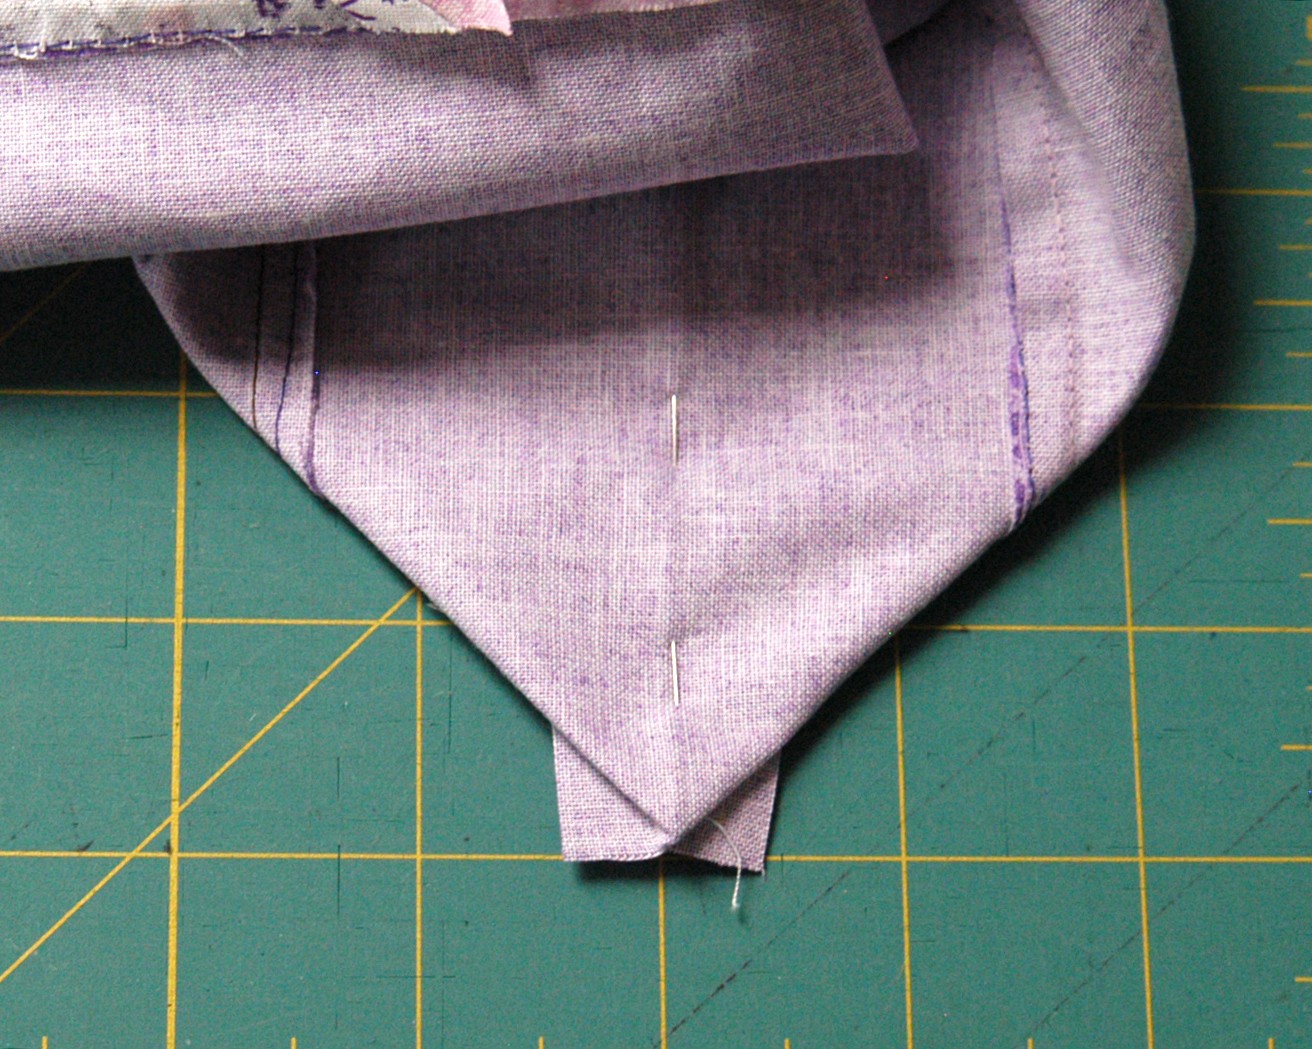
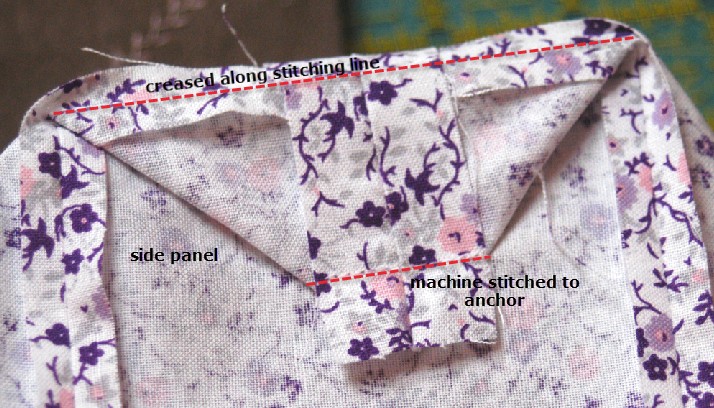
Press the triangle flat and then crease along the seam, pointing the triangle in the direction of the bottom seam.
Repeat for other side.
Optional: Tack corner triangles into the bottom seam with a few hand stitches. This keeps the bag’s shape during repeated washing cycles.

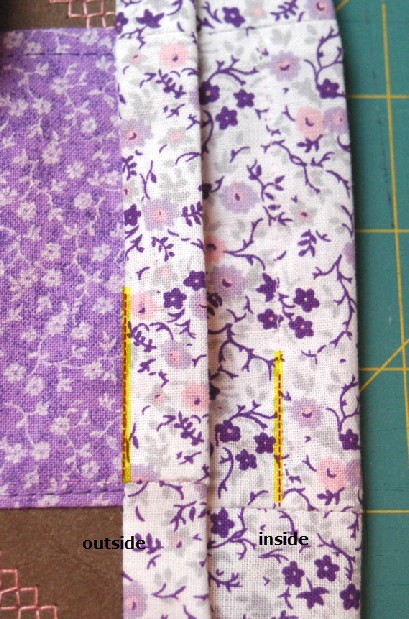
Add a strap to the front and back panels:
With right sides facing each other, and raw edges matching, place the outer edge of one strap 1” away from a side seam towards bag center.
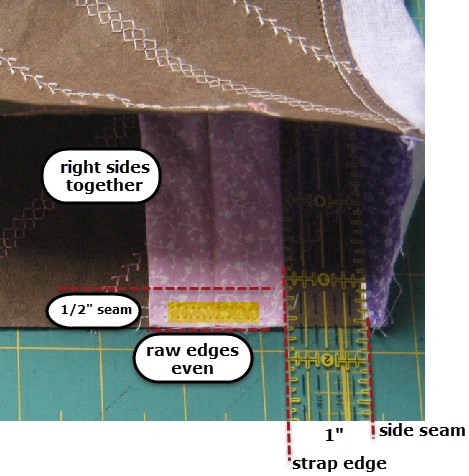
Stitch twice: 1/8” and 1/4” down from top edge
With the length of the strap hanging down into the bag, bring the other strap end up to stitch to the other side of same panel. Make sure the strap is not twisted.
Attach the remaining strap to the other panel in this same fashion.
Leave the tote bag inside out.
Lining:
Make a pocket:
- Fold the pocket piece with right sides together, making it 8-1/2” x 7”.
- Stitch three sides with 1/2” seam, leaving an opening on one side for turning.
- Cut the corners on a diagonal, and press seams open.
- Turn right-side out and press.
- Topstitch the pocket to one panel. Folded side of the pocket is 6” below panel the top edge and centered in width.
Attach the side panels using 1/4” seams joining front and back pieces. Leave an 8” opening in the middle of one side seam for turning purposes.
Press seams open.
Stitch 1/2” bottom seam checking that the pocket opening is facing to the upper edge of the fabric tube.
Make the bottom gussets as described above. (Note: the long line is the stitching line). Since seams have been pressed open, stitch “in the ditch” at the base of the triangle.
Press the triangle towards the side panels. Optional tacking was done by machine for the lining since it will not be seen.
Put it all together:
With the tote bag inside out and the lining right side out, drop the lining into the bag, matching side panel seams. Right sides of each unit will be facing each other. Have the pocket panel (lining back) facing the non-embroidered bag back panel (although it’s not crucial where the pocket is inside the bag).
Keep top raw edges even, and pin at fabric sides to hold in place. If needed, use clips or masking tape to hold fabric to the top Kraft-Tex panels.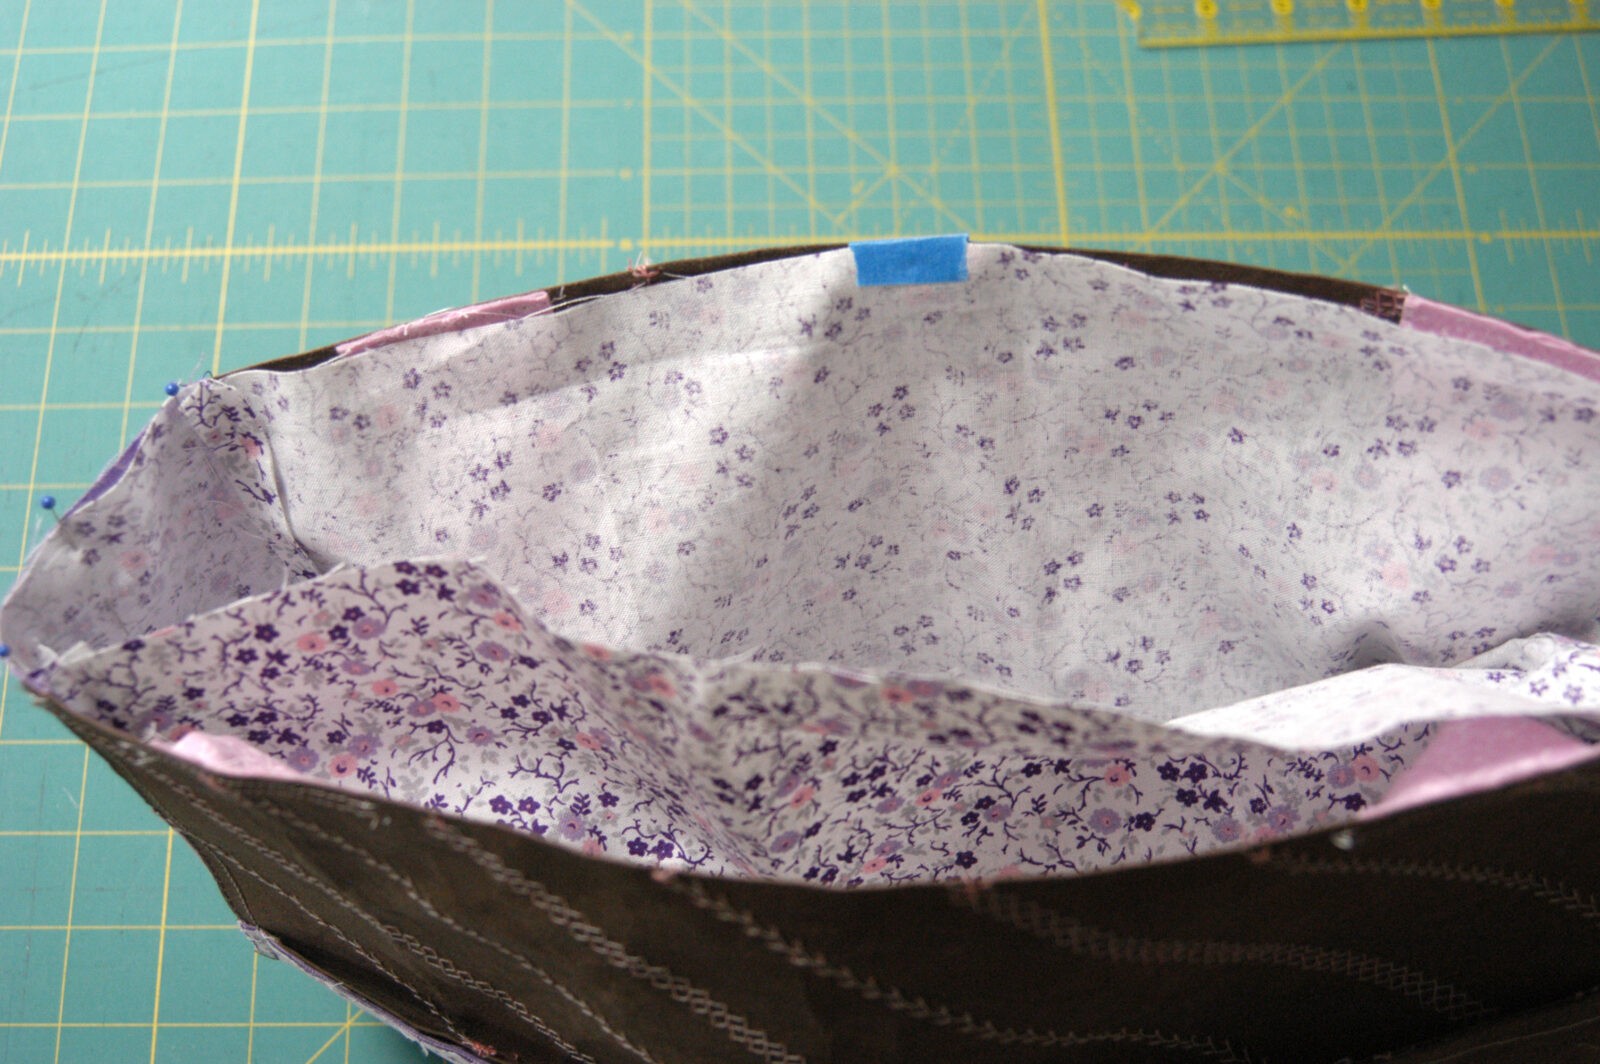
Stitch along top edge using a 1/2” seam, keeping the straps straight down inside bag, so only the top-edge of the strap is caught within the seam.
Pull the lining straight out of the bag.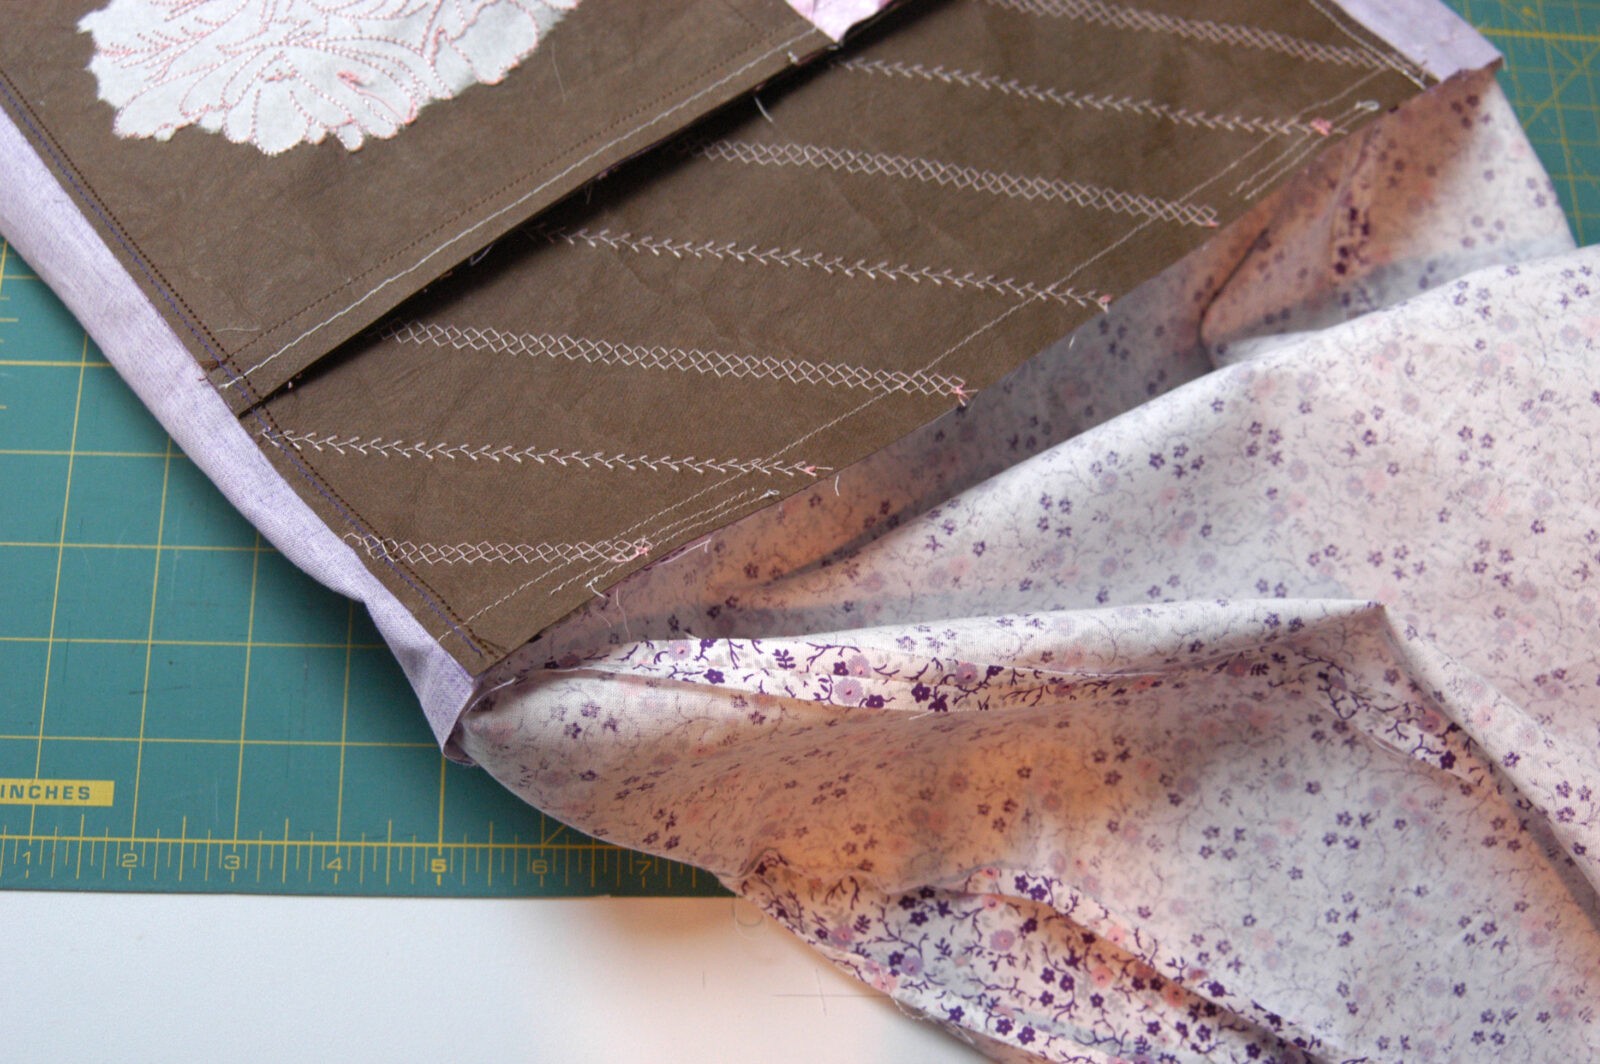
Reach into the lining through its side opening, grab the tote bag, and begin to pull it out through this hole.
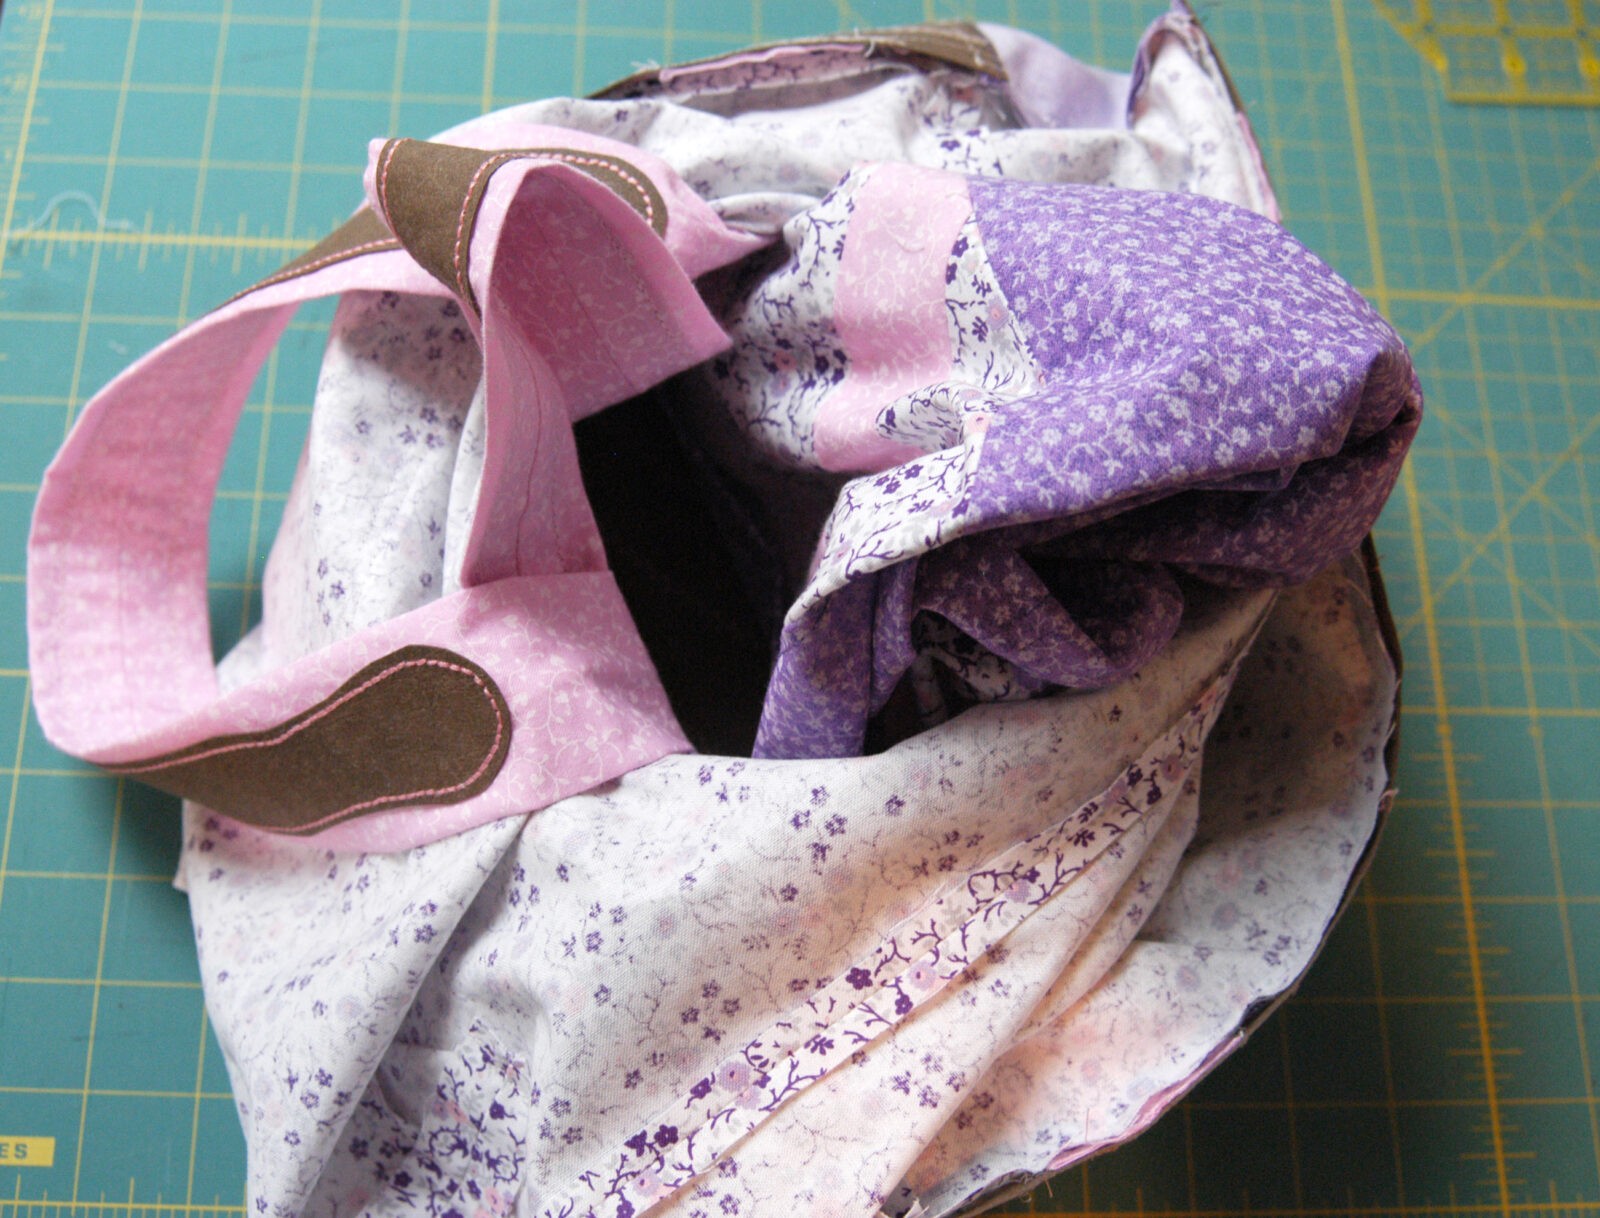
Don’t be afraid to bend the Kraft-Tex. Once the bag begins to emerge, it becomes easier to pull the remaining fabric through the opening.

When the bag is completely freed, the entire bag will face right side out. Close the lining slit with hand-stitches.

Tuck the lining down inside the bag, pushing into the bottom. Push the lining gusset into tote bag gusset – squaring up the bottom.
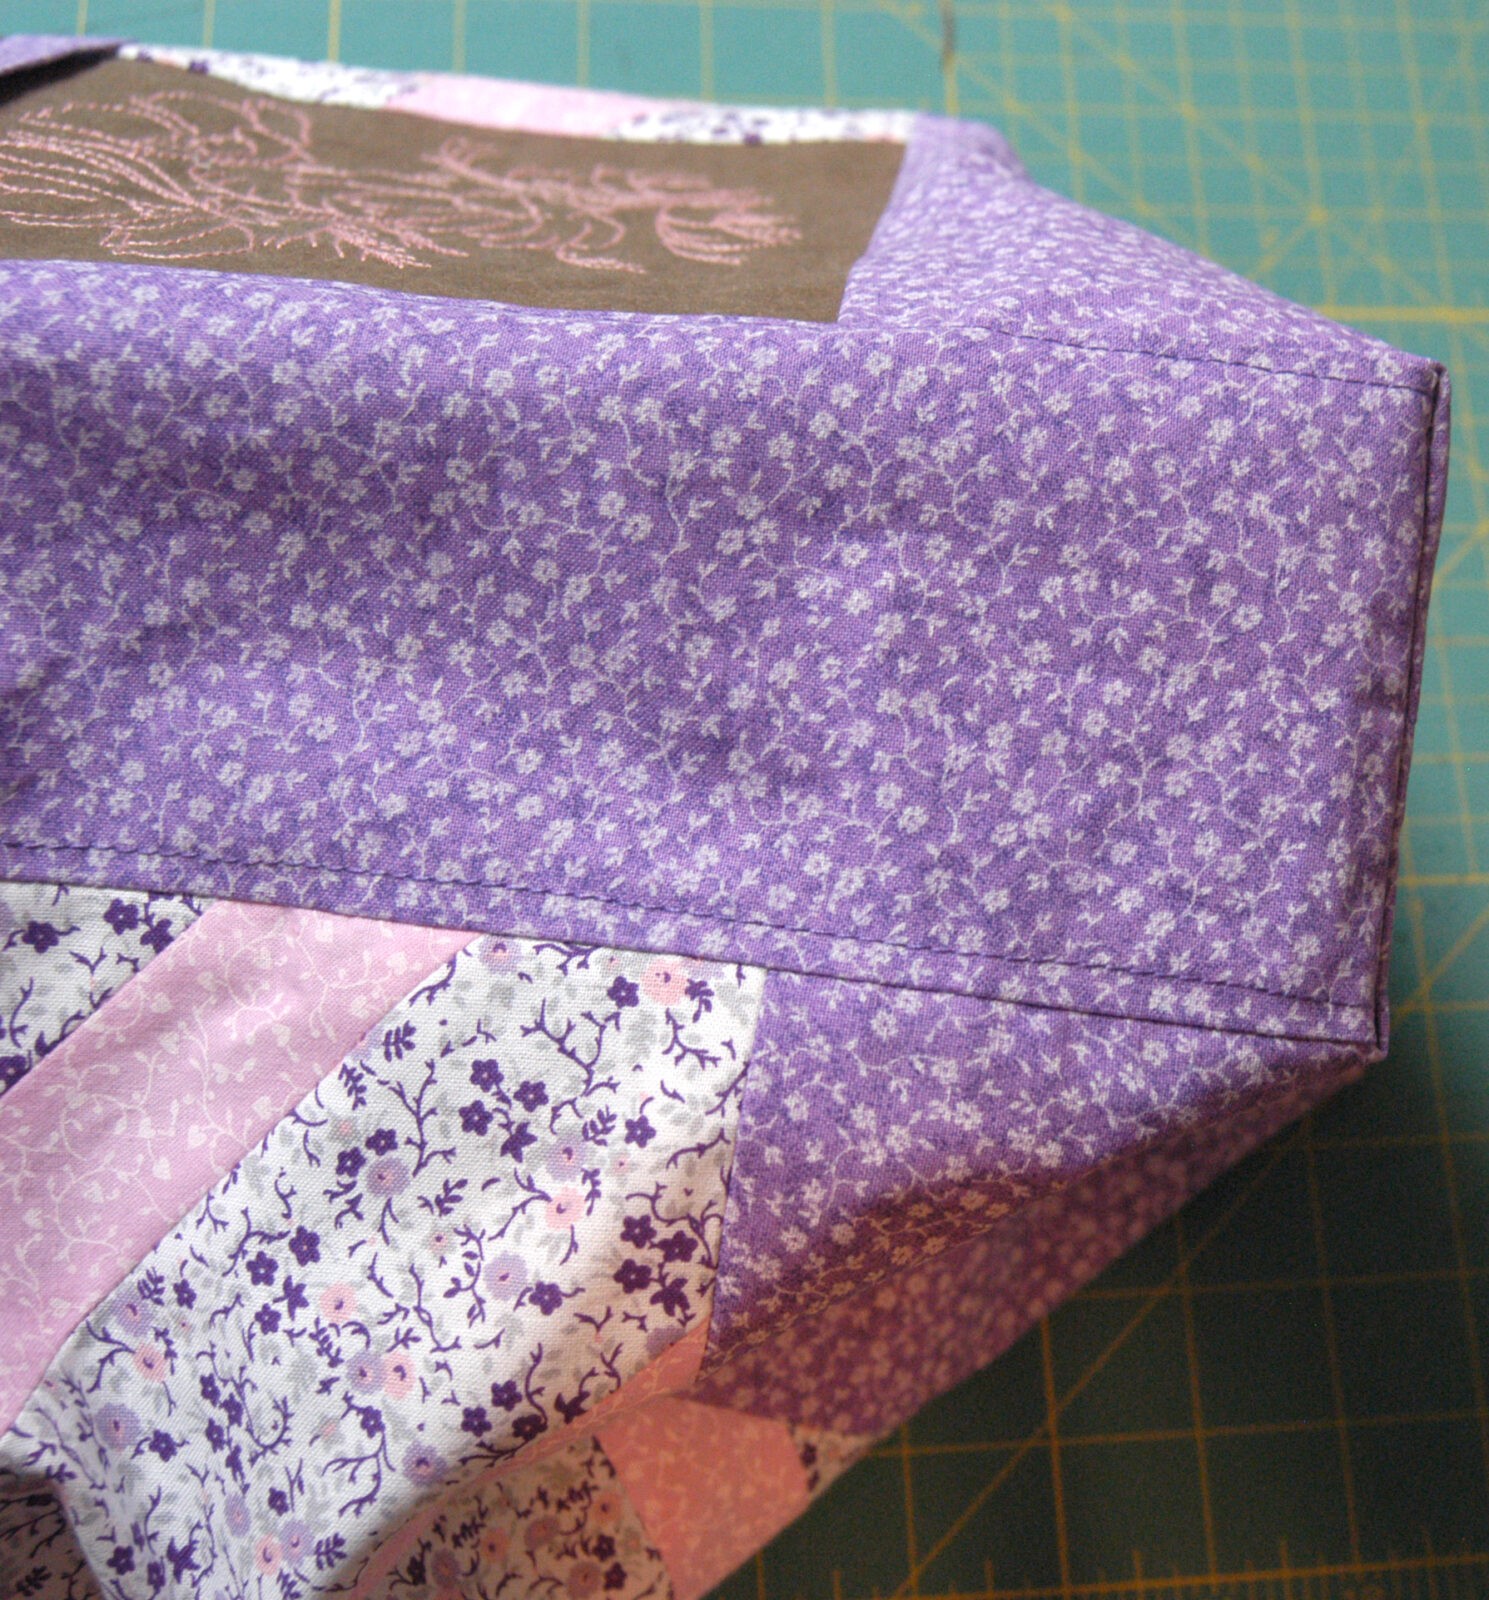
Allow the lining to roll over the stiff Kraft-Tex top edge, enhancing the overall bag design with a fabric “binding”.
Press lining around the entire top, creasing the edge.
Stitch “in the ditch” on the fabric side-panels.
Kraft-tex Paper Fabric is environmentally friendly, useful, fashionable, plus extremely versatile!
Be creative! Select your own fabric colors, mix or match thread choices, and experiment with decorative stitches available on your sewing machine. Just have fun and enjoy the process!

You say in an optional tip, to tack the gusset triangles down to help the bag keep its shape through many machine washings. Will the Kraft-Tex withstand many machine washings?
I am not an Expert on this product and suggest you question the company directly. However, it is advertised to stand repeated washings. In washing the product initially, the paper did not go limp but simply softened and appeared textured. It still had plenty of badly and strength. I plan on washing my bag as often as a tote bag needs to be washed.
Pamela Cox
I am delighted that I noticed this website, precisely the right information that I was searching for!
Thanks for Sharing!
embroidery digitizing tipsntricks
Amazing DIY Tote Bag Directions !
Very, very nice diy bags level, amazing!