When I went to Quiltcon in February, I discovered a new type of quilting called Matchsticking. It might not be new, but it is new to me!
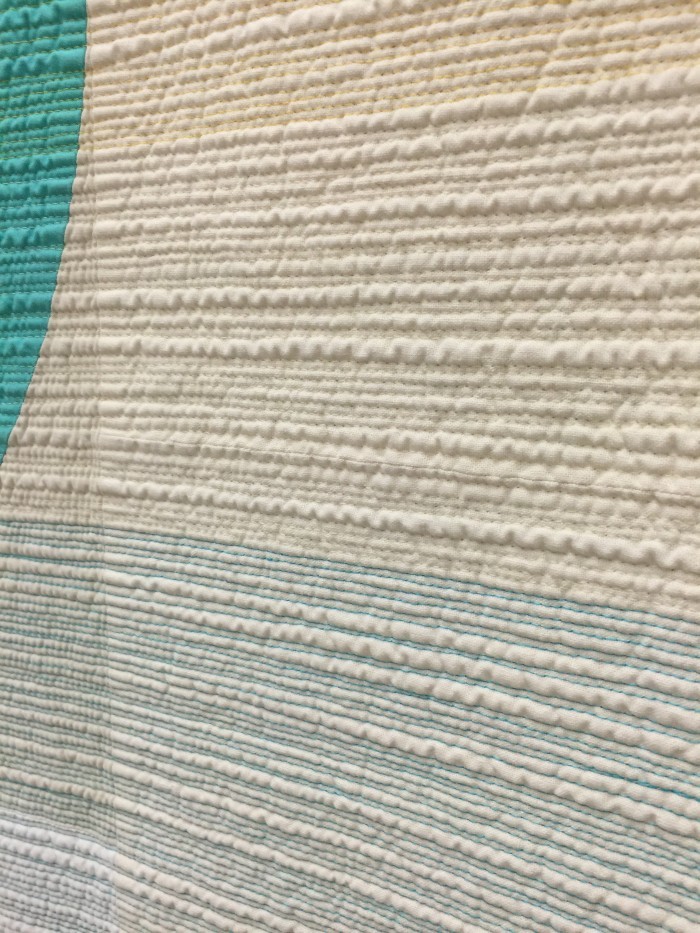
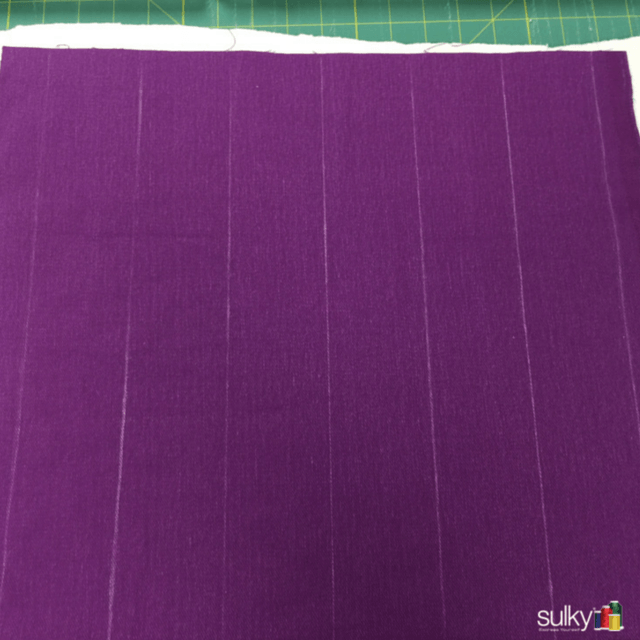
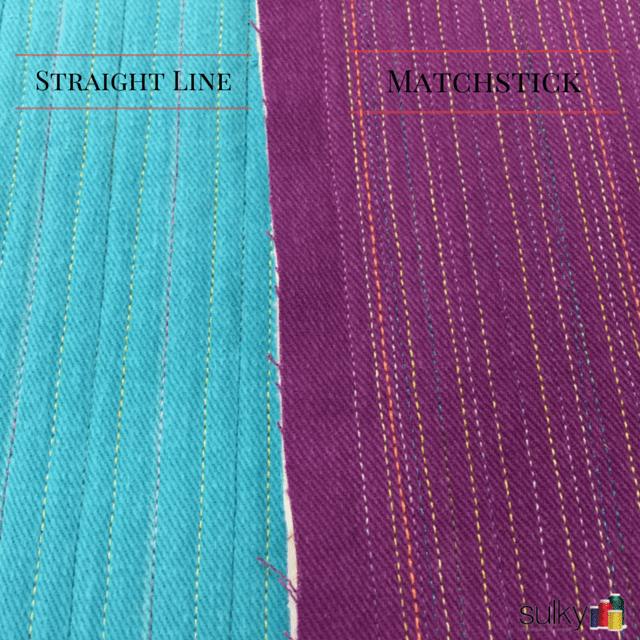
Matchstick quilting on one of the quilts hanging at Quiltcon 2015
I fell in love with this technique, so I cornered Jacquie Gering, the Chairperson of the Modern Quilt Guild, to tell me how it is done. She gave me some great tips, including telling me to just go home and try it! That is just what I did. If you want to try it, here are some tips to get you started.
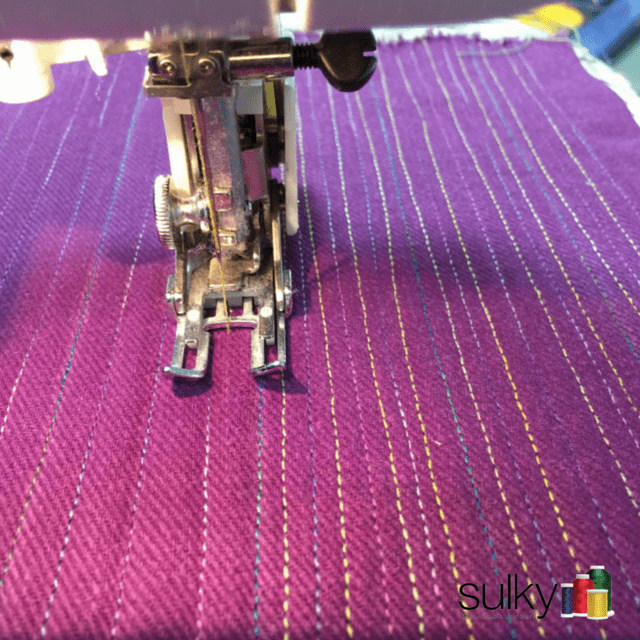
The first thing I did was use a ruler and a chalk marker to draw straight lines 2.5″ apart.
I sewed on those lines, then I drew lines in the exact center of those lines and sewed over them. On both of these steps, I started in the center and worked my way out. It’s pretty important to get these first lines as straight as possible or your whole design will be off.

I asked some matchstick quilting experts (AKA people that had done it more than once) why you can’t just start from one side and then keep sewing lines really close together. Each of them said that it is impossible to get straight lines that way. The only way to keep the lines straight is to start with drawn lines and keep sewing lines in between the lines. Every time you sew a set of lines, cut the distance in between those two lines in half, and sew another line.

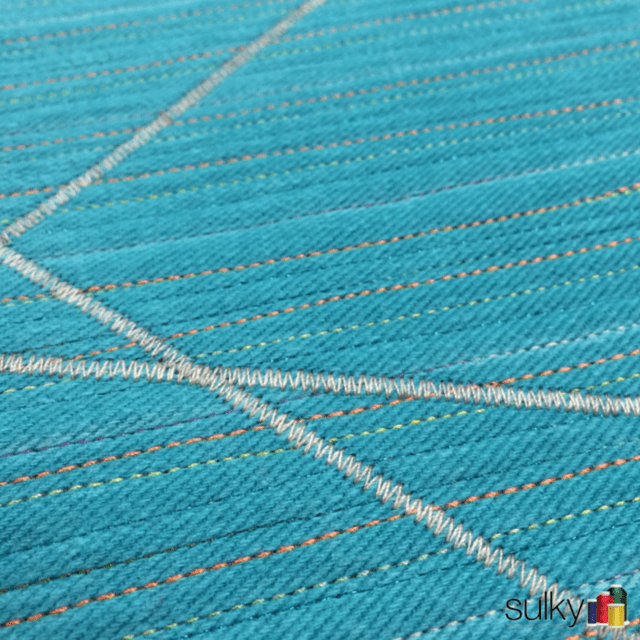
I did always start in the middle of my piece and work out. At this point, however, I didn’t draw the lines on anymore; I just used the edge of my foot as the guide. But, I started to get worried. To me, this still looked like Straight line quilting, not Matchsticking. When I split that last line in two, the matchsticking emerged!
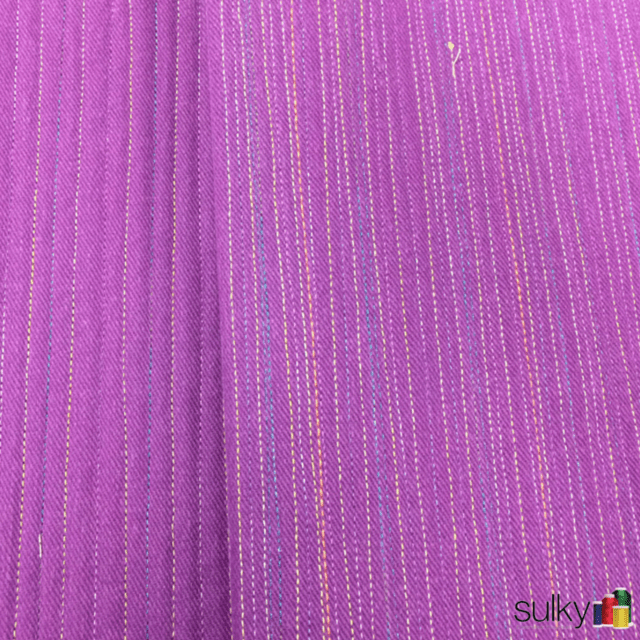
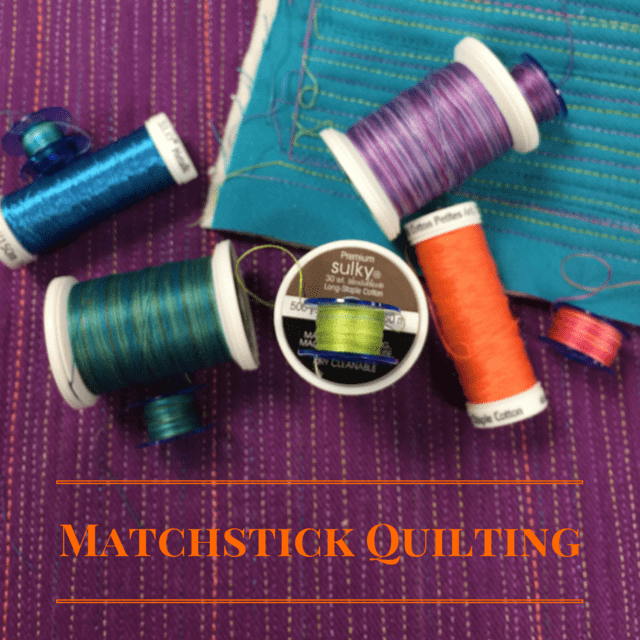
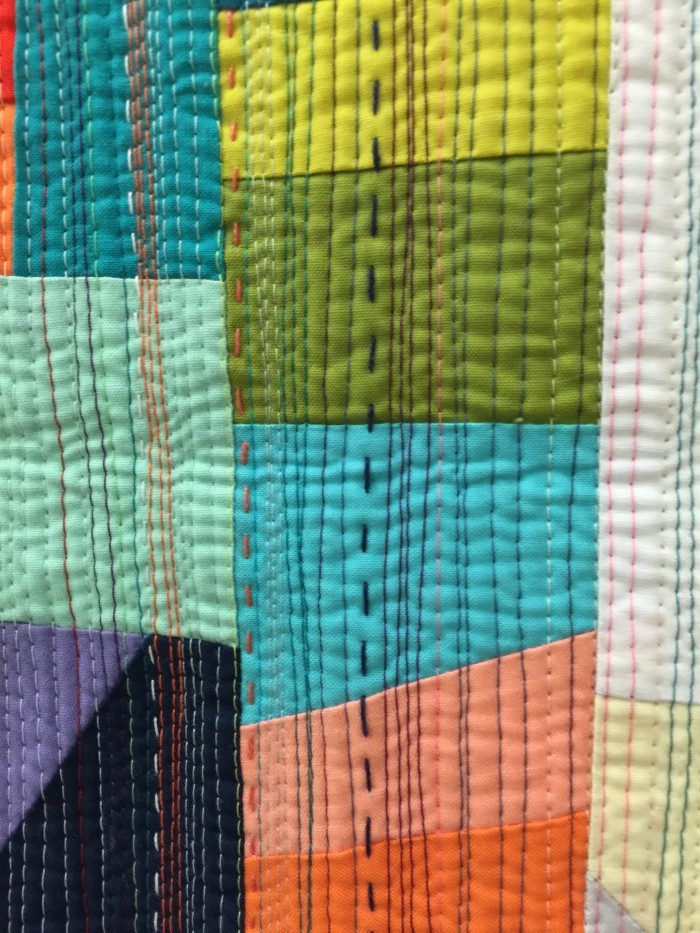
Isn’t it cool ?!?! I used several different thread colors, weights and types of thread to add interest. For this piece, I used Sulky 30 wt. Cotton Blendables®, Sulky 12 wt. Cotton, Sulky PolyLite™, and Sulky Metallic thread. The fabric I used is Amy Barickman’s Crossroads Denim.
At one point in my sewing, I started to wonder, what makes it Matchstick quilting vs. Straight Line or Echo quilting? I decided in was 1/4″. If the space between the lines is 1/4″ or more, it is Straight line or Echo Quilting. Under that, it’s Matchstick. (Disclaimer: This is not a scientific study, it’s just my opinion)
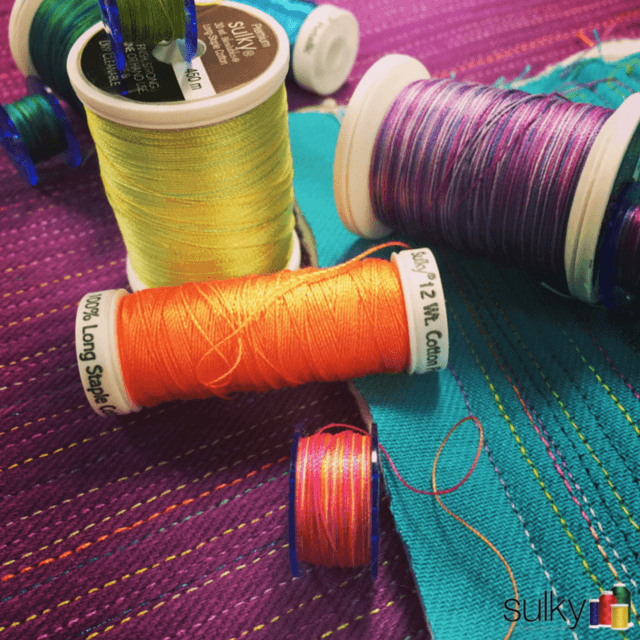
I made two large rectangles with matchstick quilting, but wanted to go one step further on my second piece, so I added a tight zigzag with Sulky 30 wt. Blendables Thread in Granite.
I am in love with this technique. I can see using this for so many projects. This particular piece, I am going to make into a computer bag for my new computer (tutorial to come, I promise!).

What do you think of Matchsticking? Have you tried it? will you try it? Let me know in the comments below!
Happy Sewing!

I imagine the quilt being too stiff.
Maria, I was worried about that too, but it is surprisingly soft! I used a very soft denim fabric and Warm and Natural batting so that probably helped in the ‘softness’
I think it’s all the different colors & weights that make it interesting..both pieces turned out really pretty!
What needle size do you use with these heavy weight threads? What thread do you use in the bobbin?
For this piece, I used at 100 topstitch needle for all the threads since I am using 12wt., metallic and 30 wt. cotton threads. I used 30 wt. cotton in the bobbin when I was using 30 wt. and 12 wt. cotton in the top and I used 60 wt. PolyLite in the bobbin when I used the metallic thread.
Thank you for the information on needles and threads.
Thanks for keeping us up on the latest new thing. It’s really pretty. Did you use an even feed foot?
Joan, Yes, I did use my even-feed foot. It definitely made it easier to get straight lines.
I have also loved this technique but didn’t know how to do it. I tried just sewing straight lines close together but it didn’t look like this. I love the threads you used. Your samples turned out great. I will try this again doing it the way you described. I am also curious if you used the walking foot? Thank you for this technique now I know it is called Matchsticking.
Karen, I hope you will try again and send me pics! I had a blast doing this. Yes, I did use my walking foot and I highly recommend it. I know it made stitching much easier.
Just to clarify, the same foot is called by some a walking foot (which I have) and by others an even feed foot which is a term I am not familiar with? Thanks heaps & for the great instructions. I too had seen it in quilts but had no idea how it was done
Yes, Anne, an even-feed and a walking foot are the same thing. Thank you for the sweet compliment! I hope you will try it!
I am going to try this!!. I have been collecting threads lately and i am going to use size 8 thread by hand for the first wide rows. Then I can try out many of the metallic and embroidery threads on my machine.
Go for it, Dell! I think that will look amazing.
Fantastic technique. I love being able to show off the beautiful Sulky threads. I can see it used in many fun projects!
I think it is very interesting. I will try it on a bag I am making. Thanks for sharing!
I like this look. I will try it…..perhaps on a jacket.
Dona
Very clear explanation -thank you for helping me understand what I was doing “wrong” I am adding modern style in some traditional crafts and loving it! Another technique for my favorite Sulky threads and to incorporate into my Sulky techniques-based classes.
I have never quilted anything before and have several printed tutorials for my first try, but I have only an inexpensive and 20 yr old sewing machine – not a quilting machine and only about 25 stitches. I have been eager to try piecing fabrics, but the quilting part of the deal was very worrisome. I don’t have the sewing space (or the patience) to do those fancy swirly designs that go on and on and on….I am now completely ready to start my first quilt – I absolutely love the look of matchstick quilting and the fact that I won’t have to continually turn and turn a large chunk of fabric and batting makes is all the more pleasing. thanks for this clear tutorial!
Fantastic use of various threads. I will keep it in mind for a project. Thanks for the tutorial.
I love the great colors you used — the bright fabric and then colorful and varied thread. I must try this.
will be a perfect technique for modern wall hangings! thanks!
I love this and will be trying it soon! I see how great it looks on solid colored fabrics. But, wonder how this will show up on other fabrics like: florals, geometric, Kaffe Fassett, etc.
I think it will look great, Alice! I am glad you are going to try it.
I did a matchstick on a Christmas runner with presents on it. I fudged and played and sewed and love it. Will enter in our quilt show. I will be doing more but only small pieces for now. I love the zig zag you did awesome idea.
When doing the matchstick stitching how many layers are you stiching through ? What are they? Thanks
I stitch through all three layers of the quilt sandwich
When you do the matchstick quiltimg, do you always start quilting from the same side, e.g. top down. Or do you alternate, i.e. top down then bottom up?
I usually alternate top down and then bottom up.
Re: top down then bottom up. Does it matter if you do all the top downs and then turn and do all the bottom ups (alternating in between the first set?) Sorry to be so late to the game, but your work is stunning! 🙂
It’s best to go the same direction, whether you start from the bottom or the top.
I don’t get the difference between straight line stitching and matchstick quilting.
Hi Lynda,
Straight line quilting consists of equidistant lines of straight stitching. matchstick quilting is much tighter lines, spaced closely together and not necessarily straight. Some can be at a slight angle to the others for a more freeform look and finish.
What stitch length did you set your machine on to sew the lines? Thank you for the great info.
A 2.0mm or 2.5mm is a good stitch length. If you’re using a thicker thread, like a 30 wt Cotton, set the stitch length to 3.0mm. Test on scraps to make sure you get the look you’re going for.
Thanks for the information. I have a Laura Heine wallhanging I need to quilt and this is exactly what I need to do to it. Perfect timing.
Love this. Perfect for wall hangings!!
Just loved this post and the personal approach. Thank you, looking forward to trying.