How to Embroider a Luggage Tag
To embroider a luggage tag, first find a good quality luggage tag blank. Make sure there is an easy way to access the front or back of the luggage tag to accept the embroidery without having to rip apart seams or embroider through all layers. For the following tutorial, a leather luggage tag is featured. Make sure to note the fabric type and contents of the chosen luggage tag in order to determine the proper stabilizer to use.
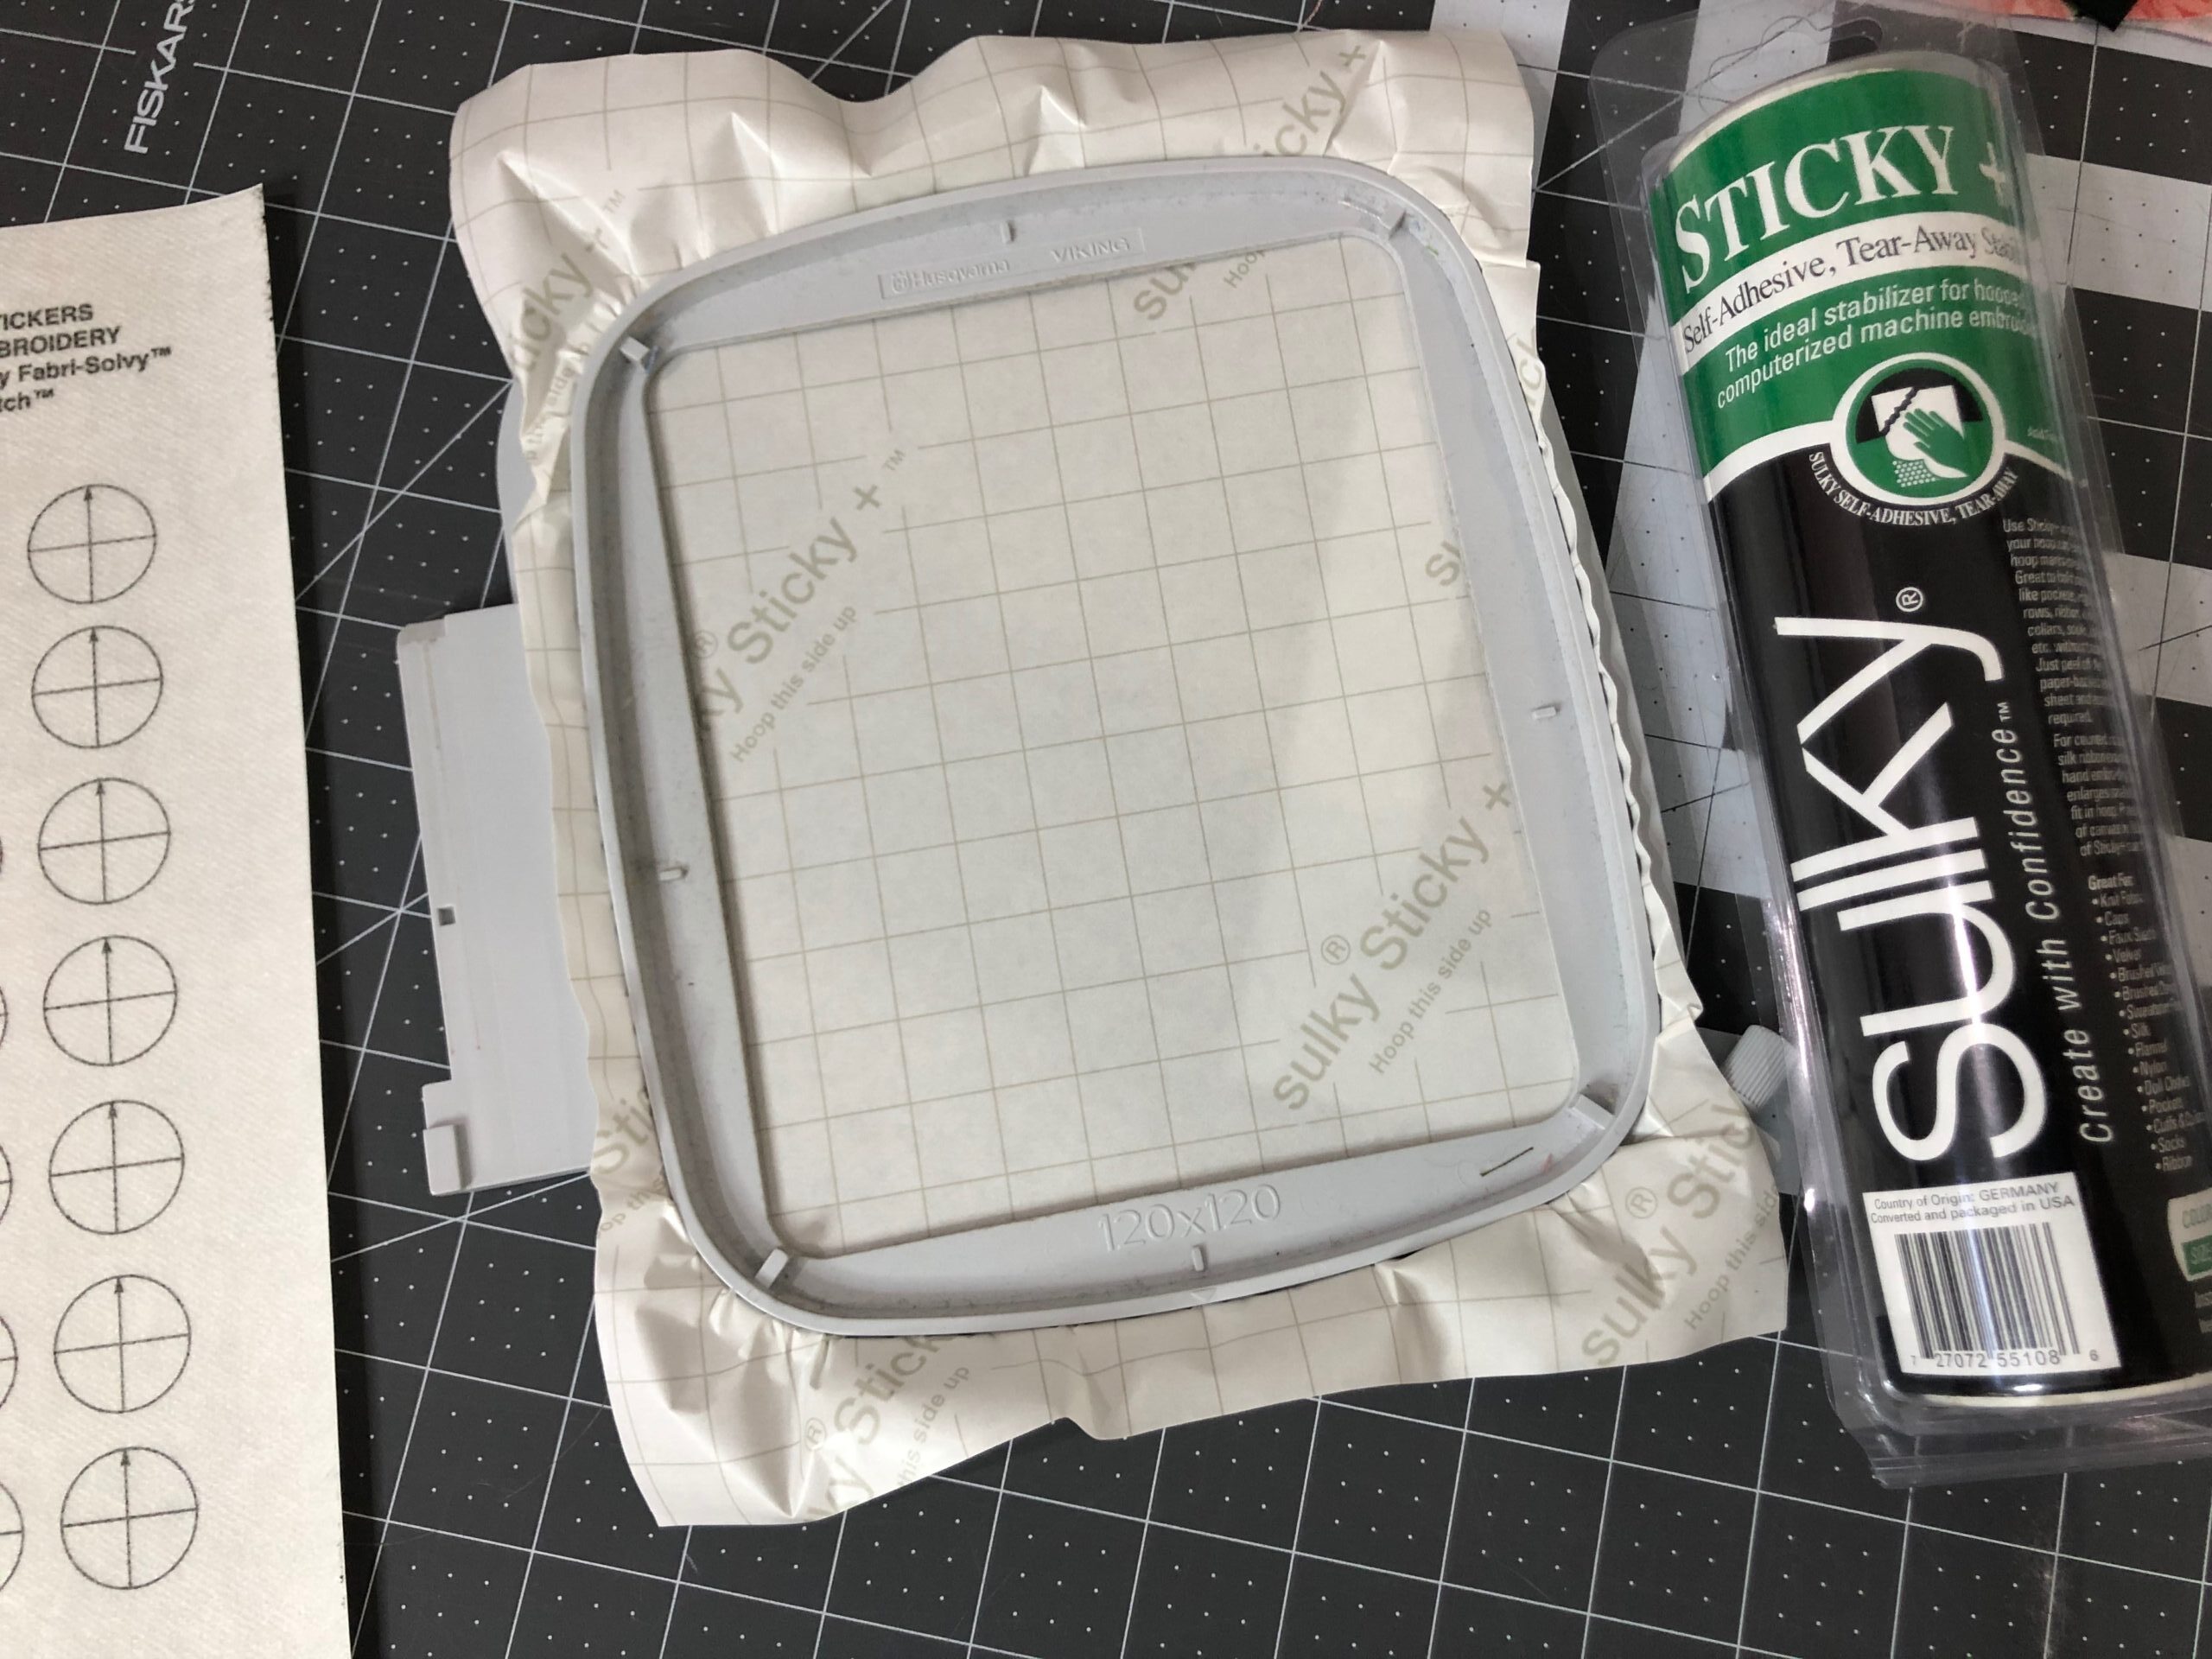
EMBROIDERED LUGGAGE TAG SUPPLIES
- Luggage Tag Blank
- Sulky Sticky+™ Stabilizer
- Sulky 40 wt. Poly Deco™ Thread (colors determined by design & luggage tag color)
- Bobbin Thread: Sulky 60 wt. Bobbin or PolyLite Thread
- Sulky Sticky+ Slitting Pen
- Organ® size 75/11 Embroidery Needles
- Sulky Embroidery Placement template
- Stick ‘n Stitch™ Stabilizer Sheet
- Pen or marker
EMBROIDERY DESIGN CONSIDERATIONS
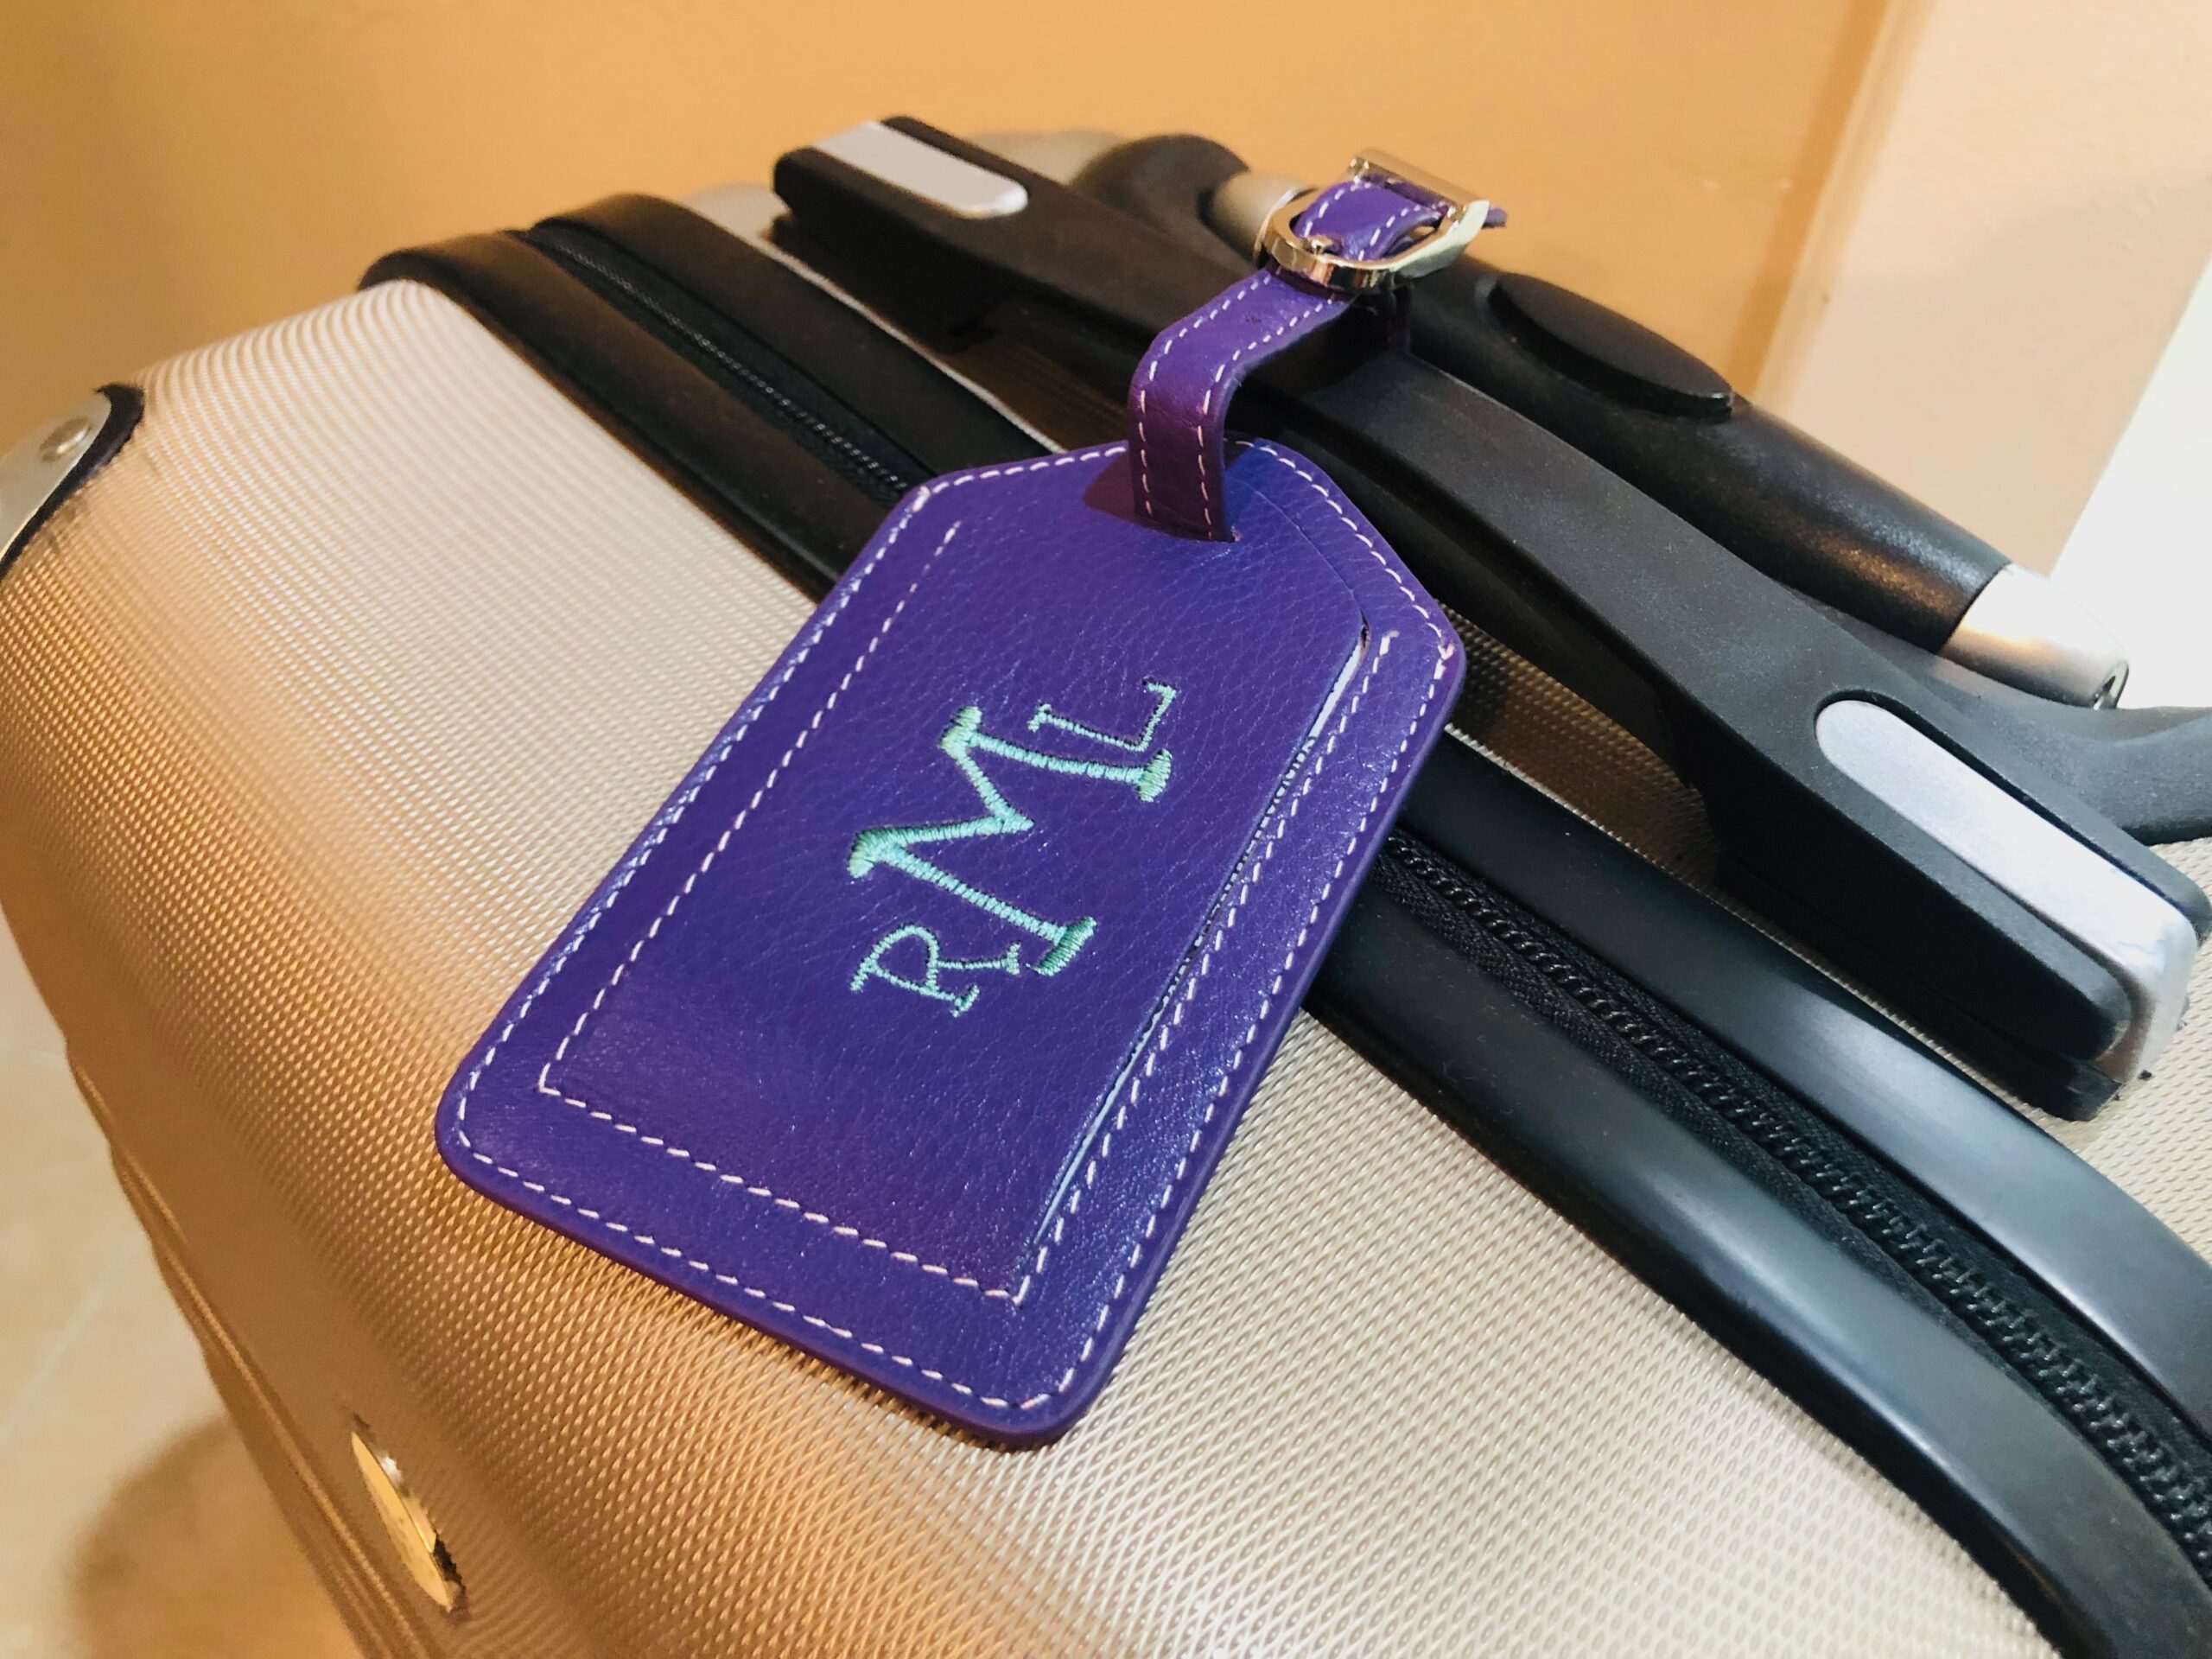
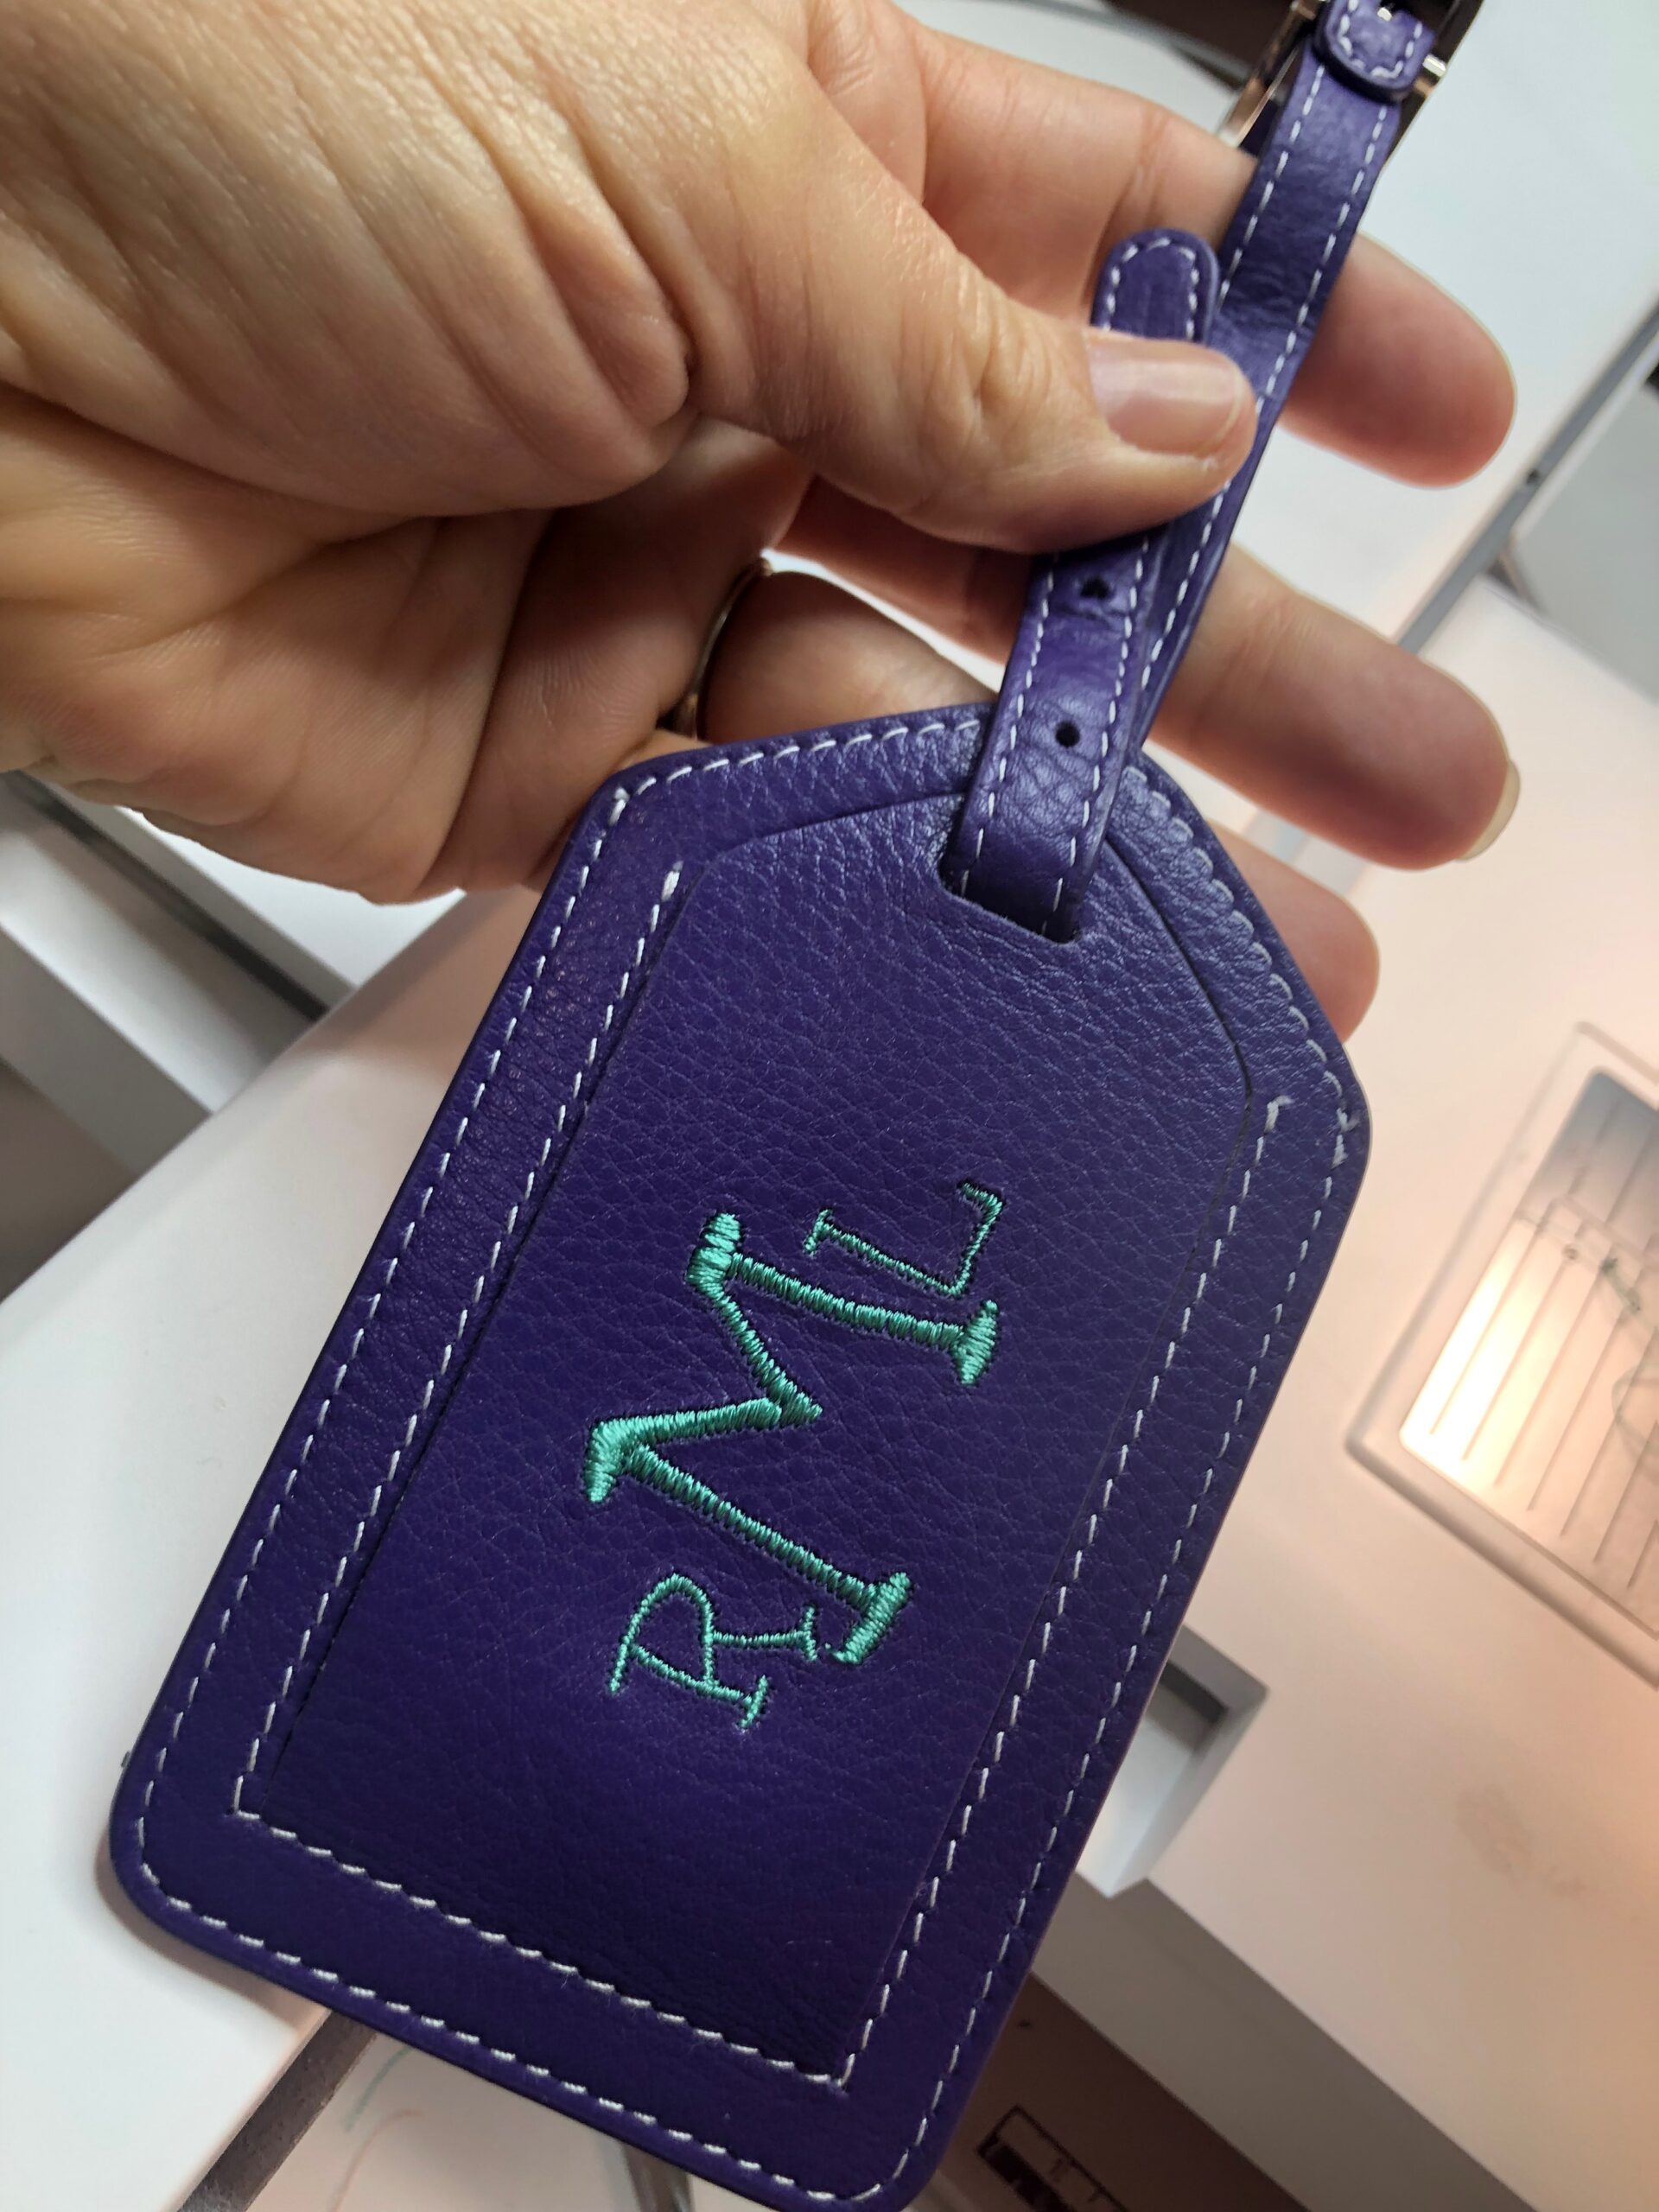
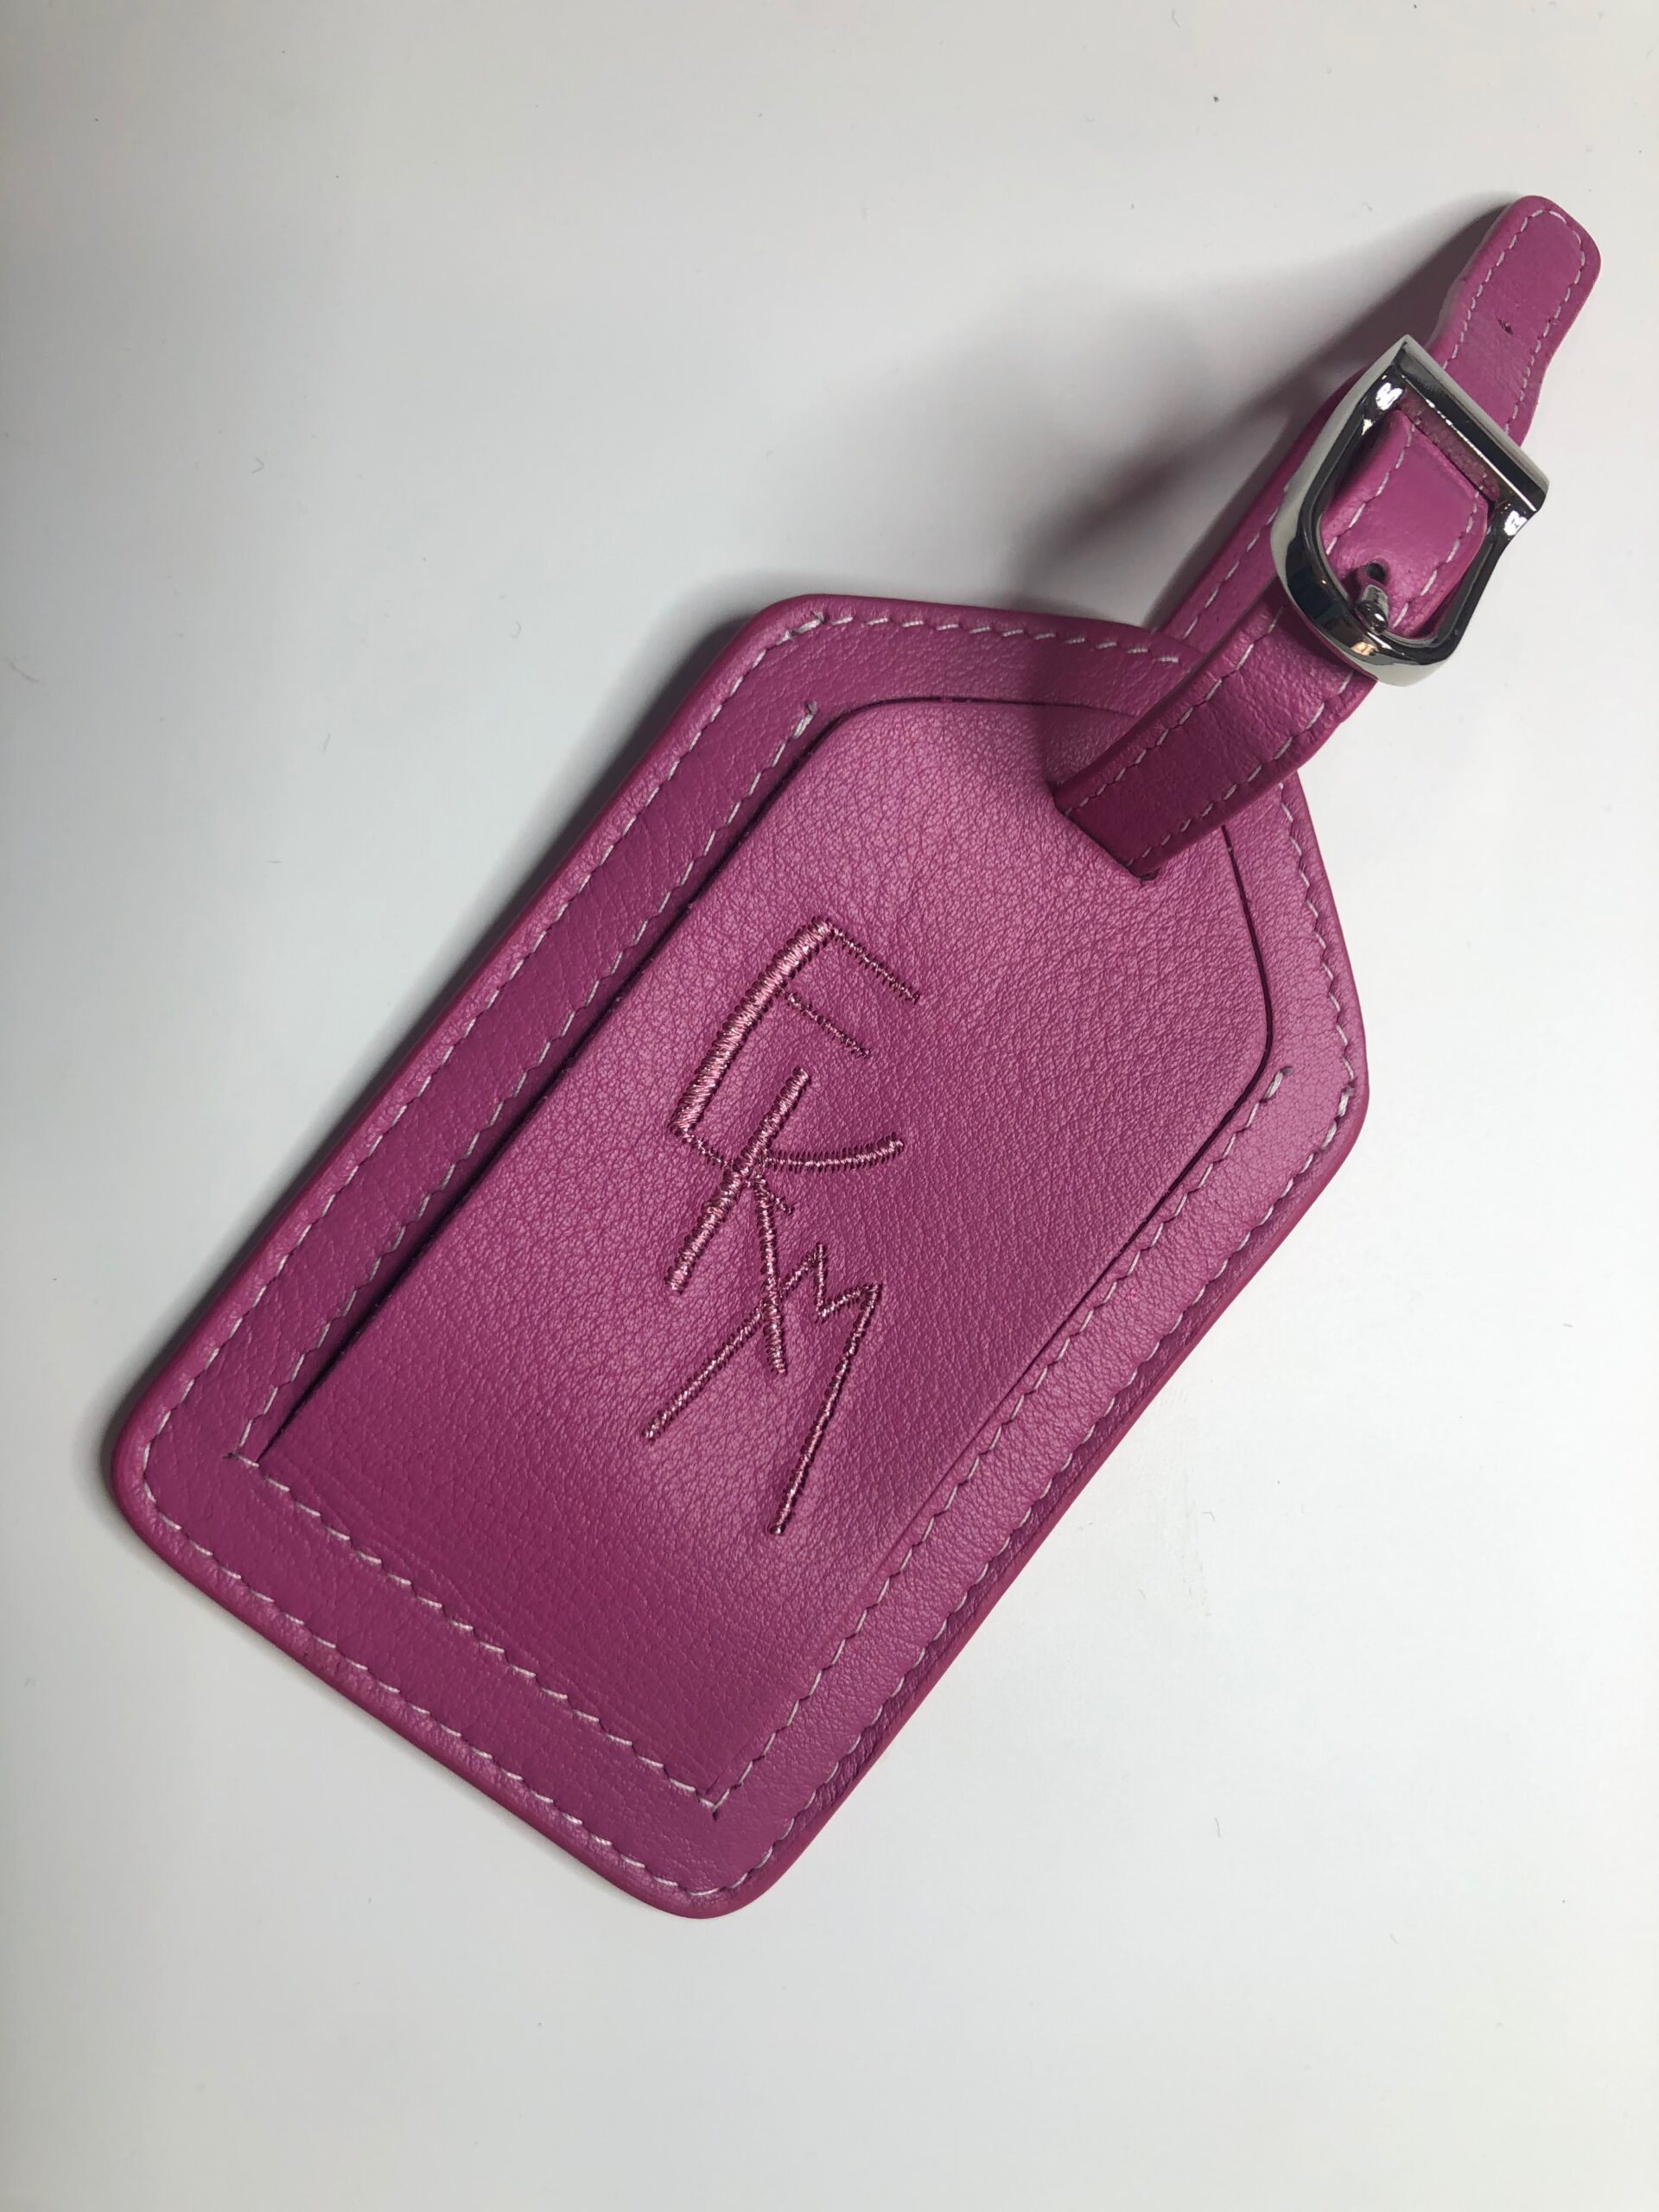
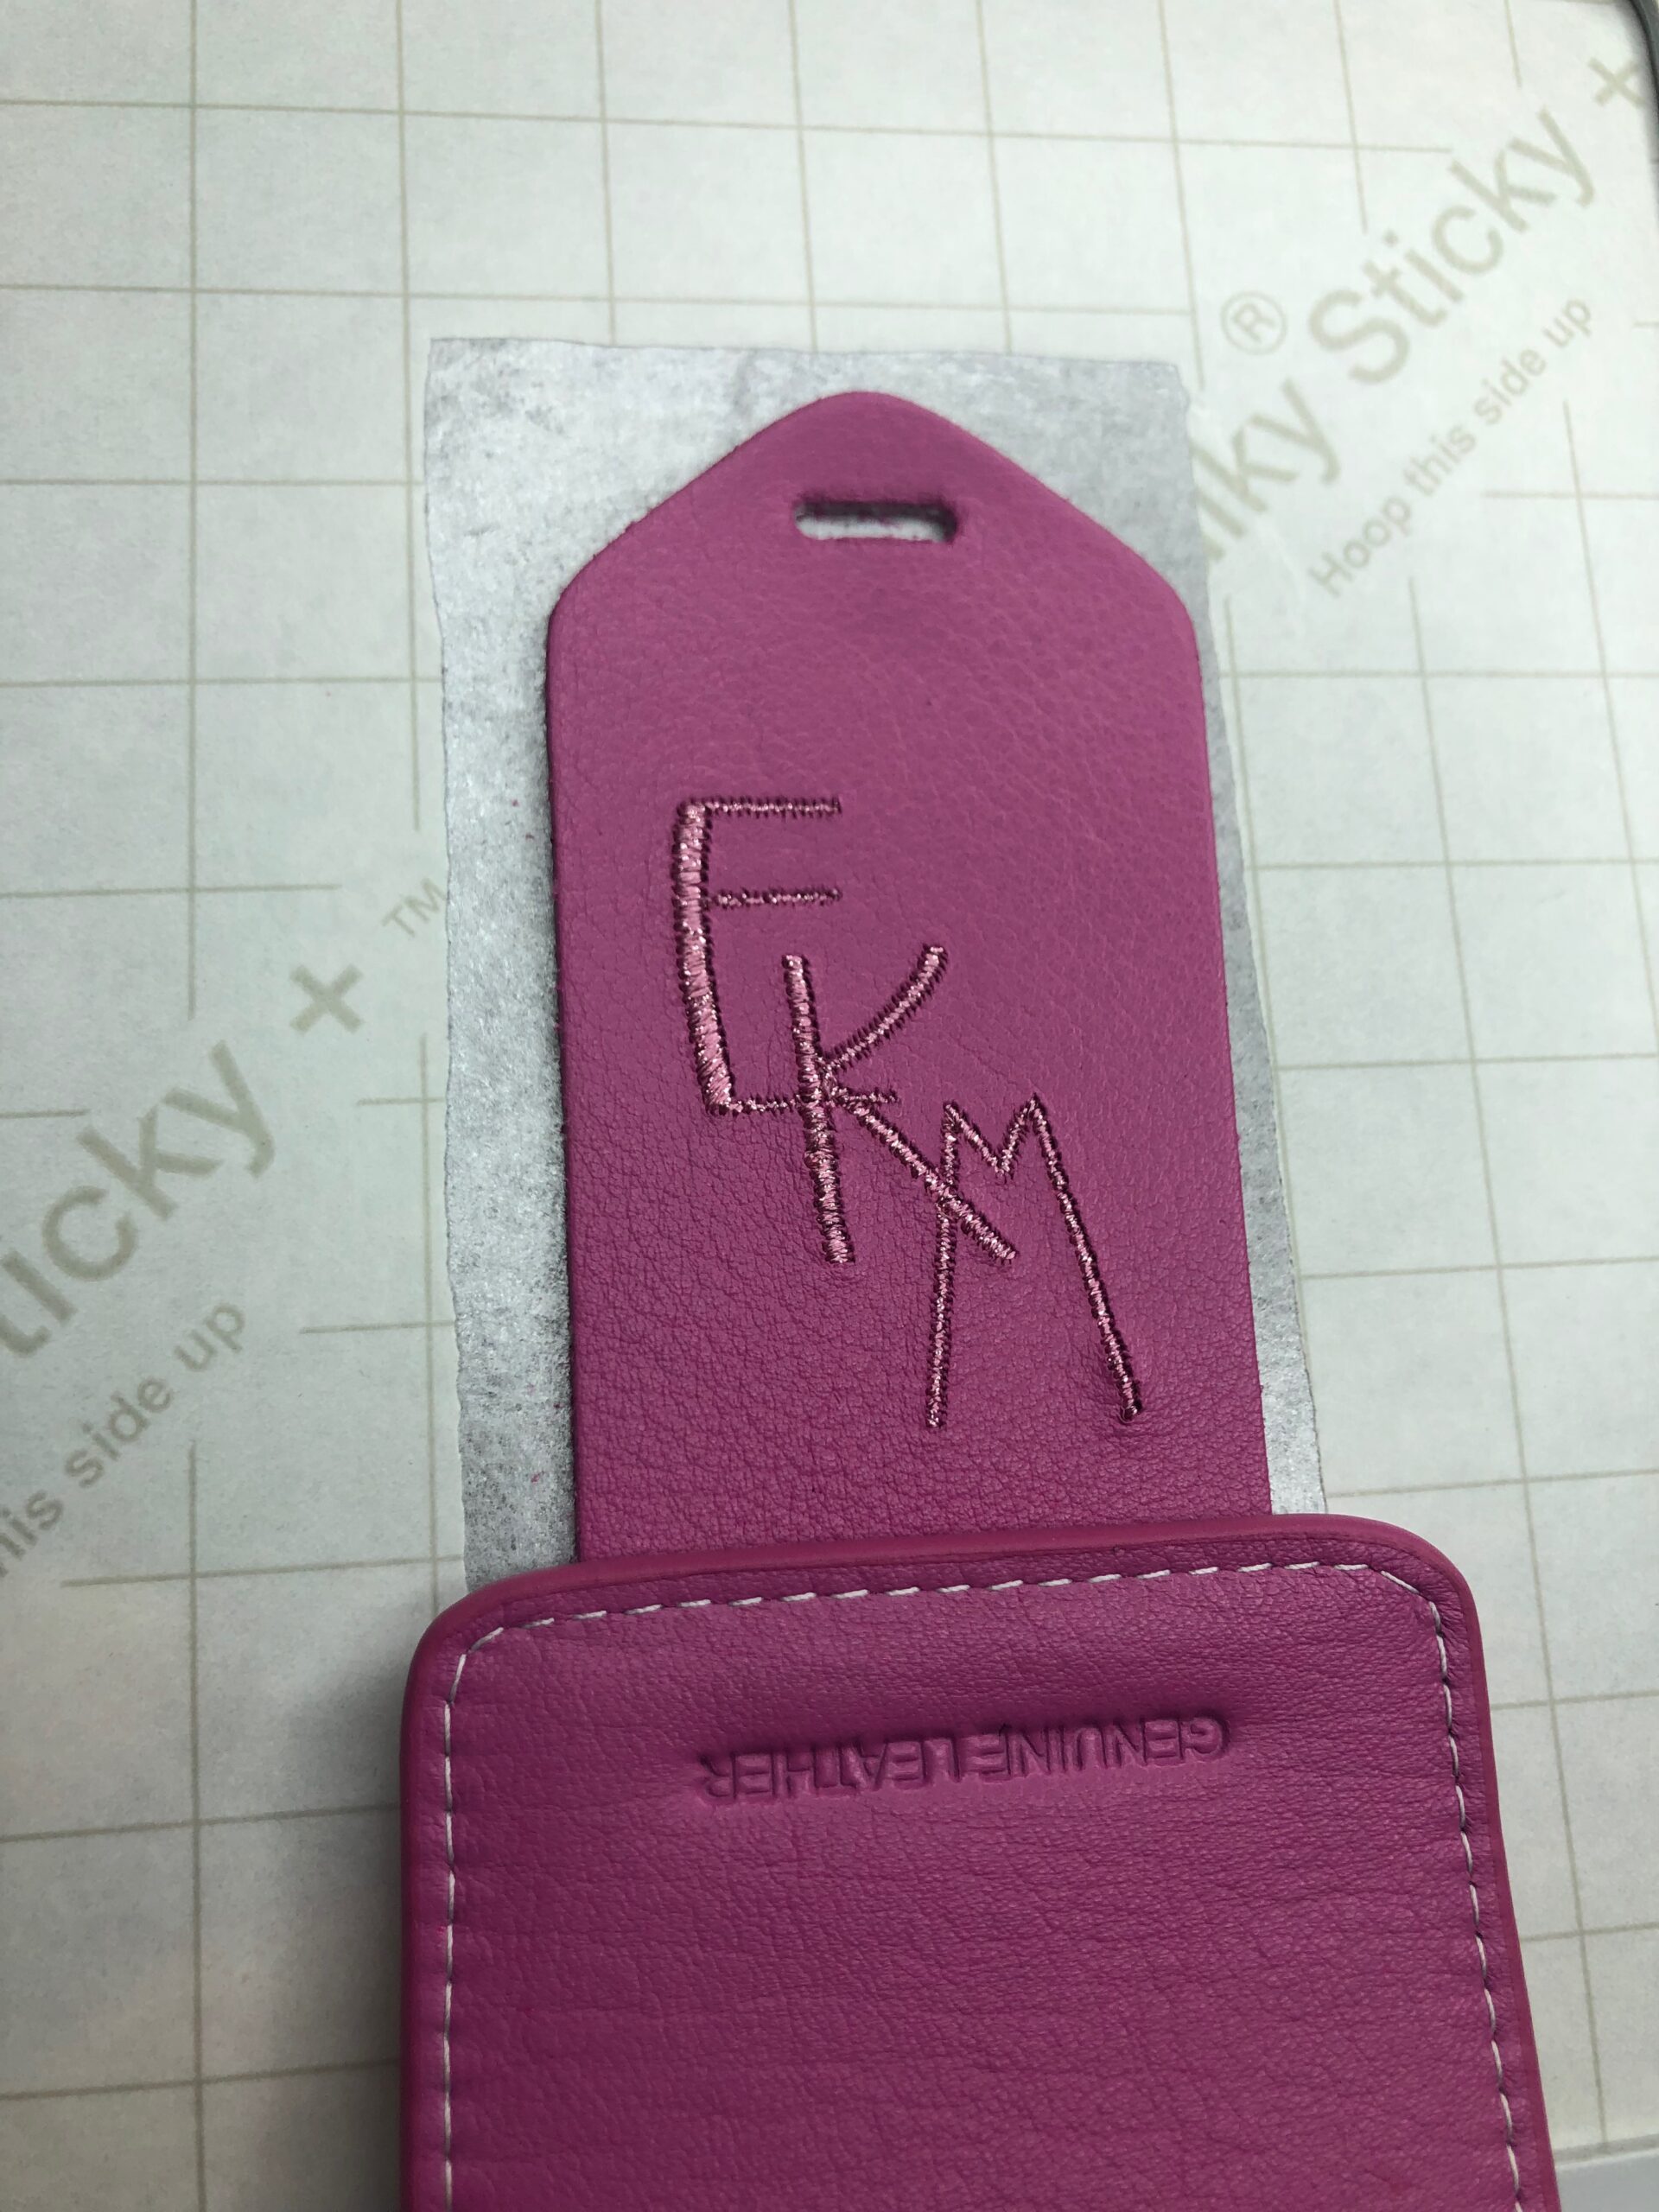
The featured luggage tags measure 4″ x 2 3/4″. Make sure to choose a design that fits within the embroidery area on the tag, which for this luggage tag is 1 3/4″ x 2 1/4″.
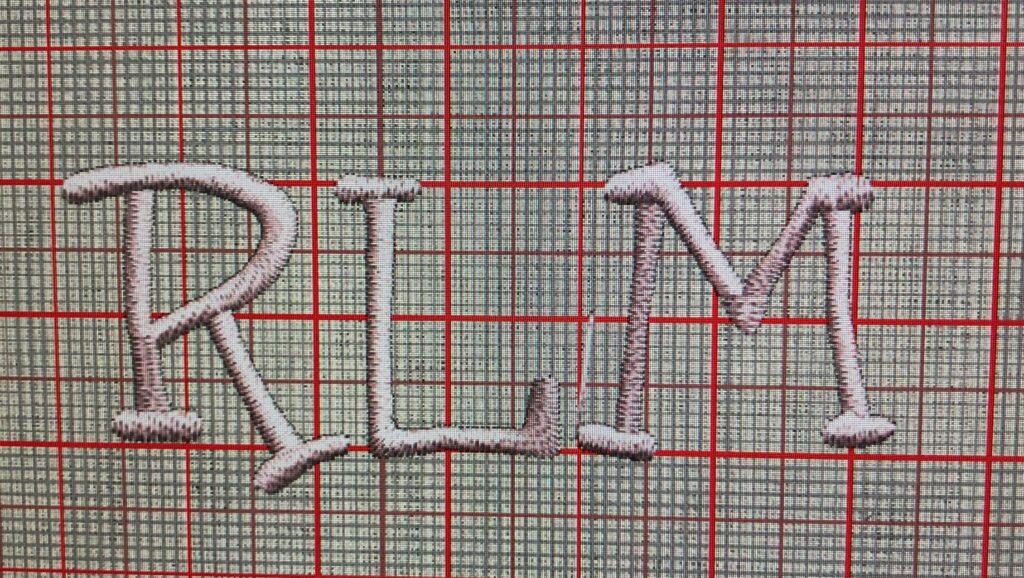
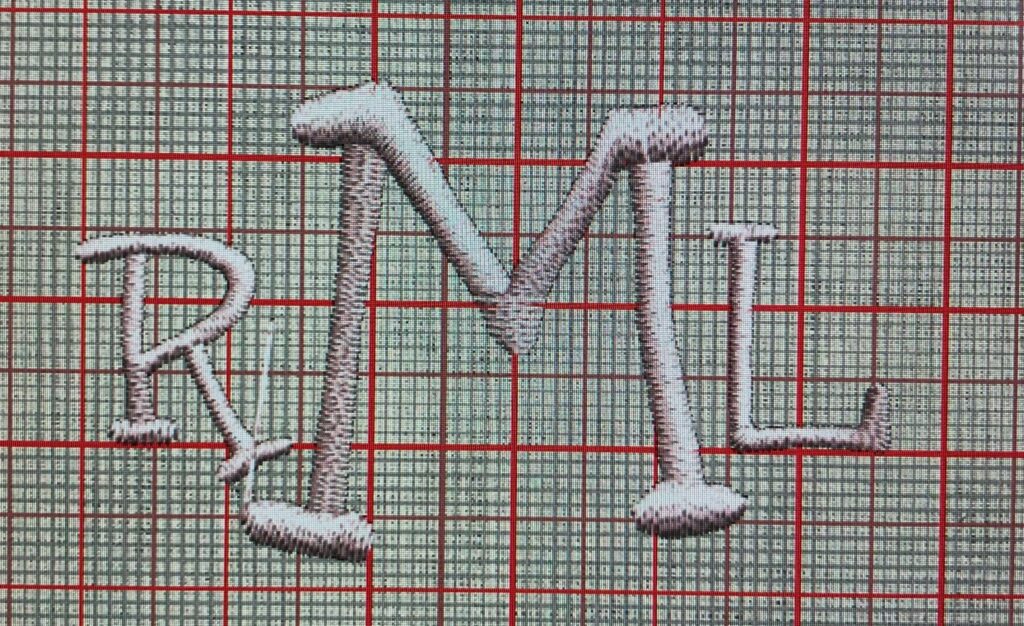
A one- two- or three-letter monogram is a great choice, but make sure the letter elements (swirls, additional motifs), also fit within the available stitching field. Steer clear from designs that have heavy stitch fills, as the leather, faux leather or cork (typically what luggage tags are made of) won’t fit the extra thread, resulting in buckling and puckering.
Use software to combine letters to make your own monogram style.
For more anonymity, embroider a short phrase, much like a license plate phrase, including letters and numbers. For example: SEW4FUN, SEWGIRL, MINE.
A fun motif or licensed character or sports team logo is also a great identifier for your belongings and makes the luggage tag a great gift.
HOOPING FOR EMBROIDERY
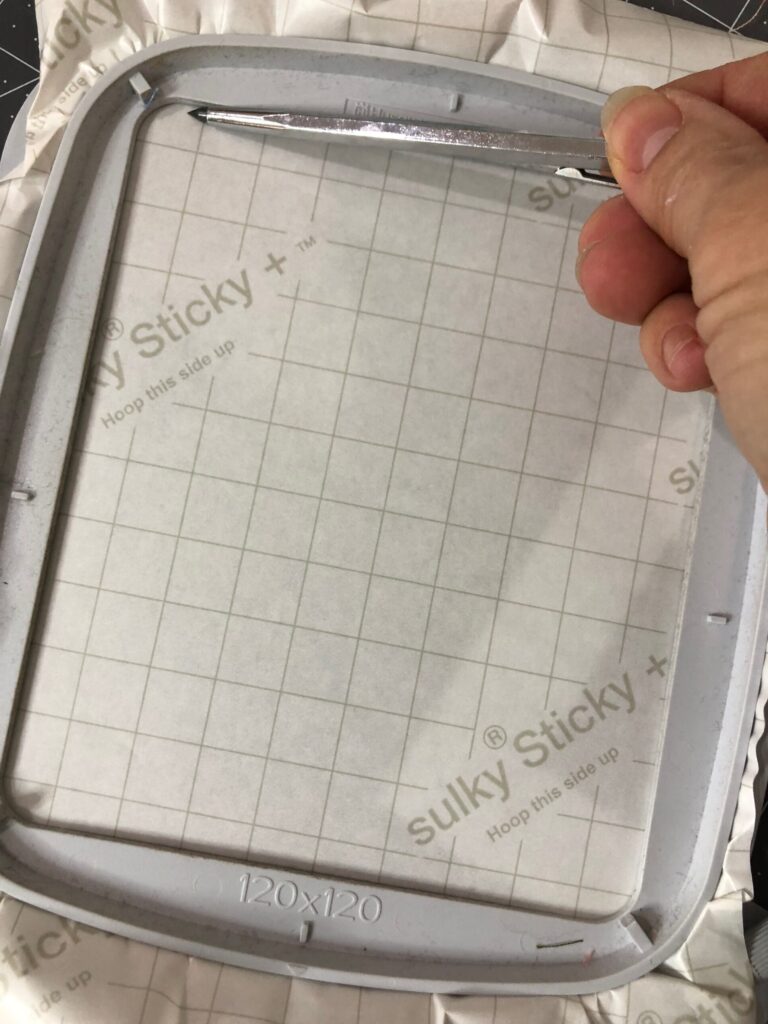
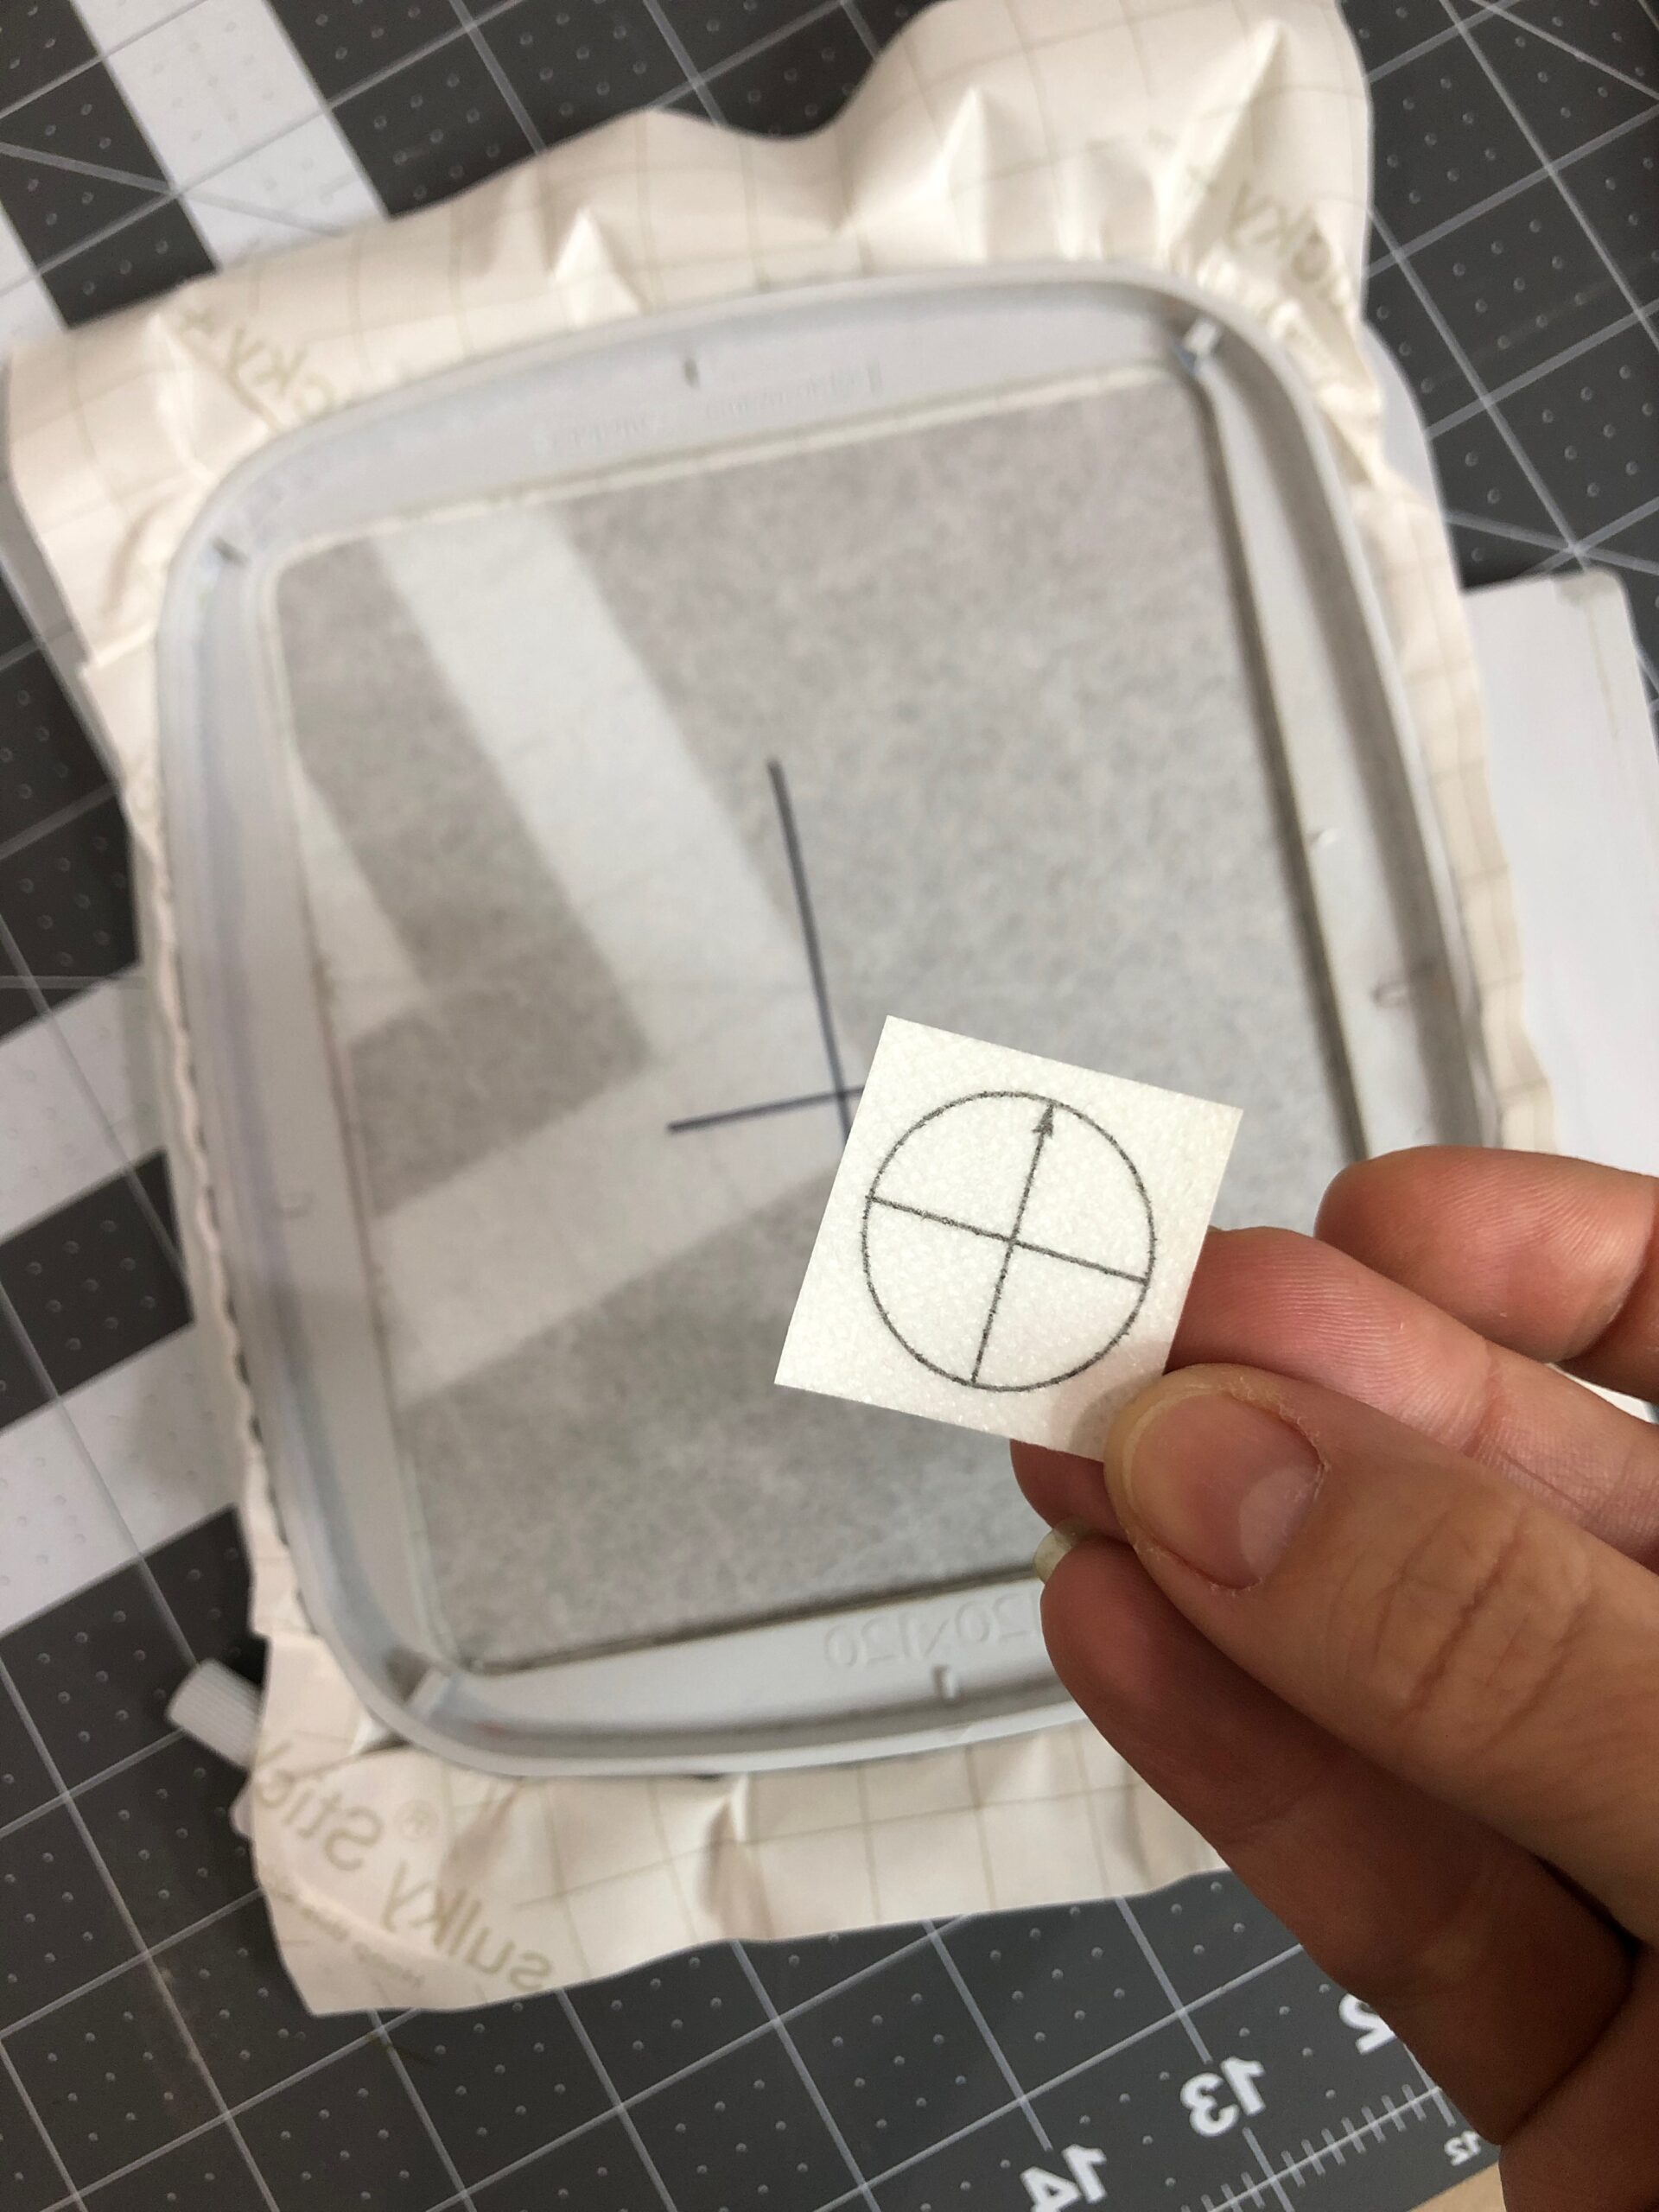
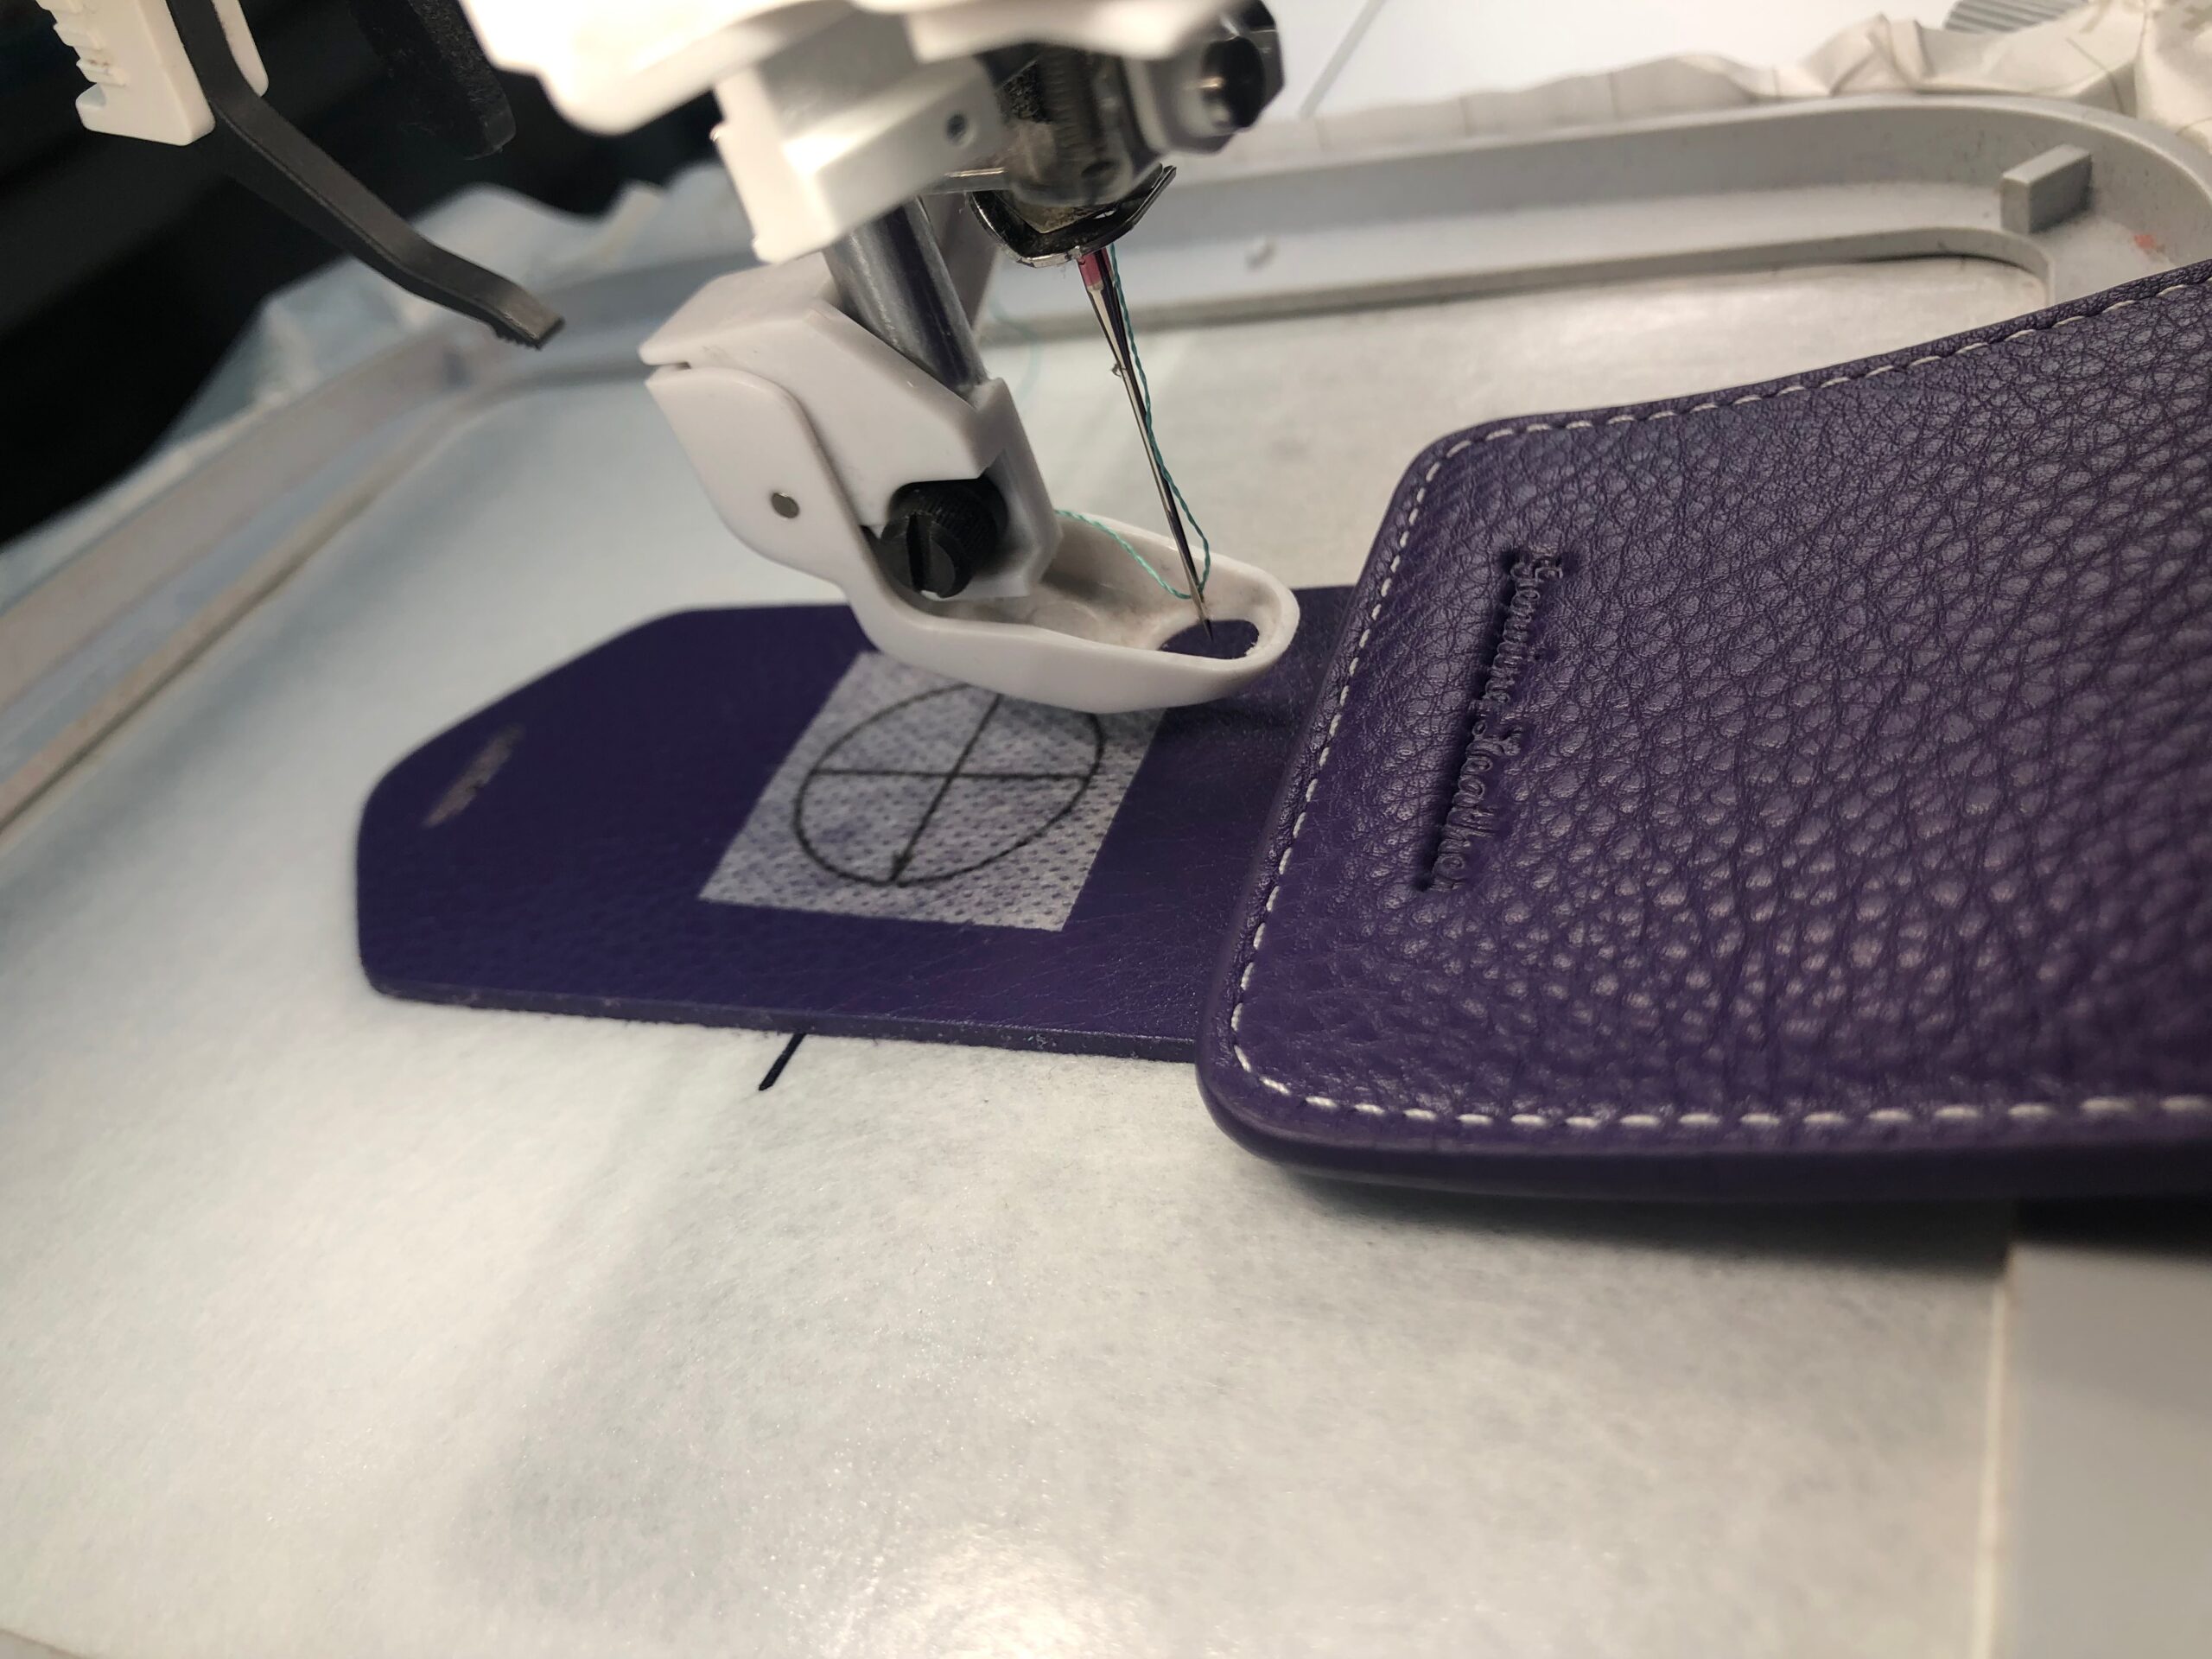
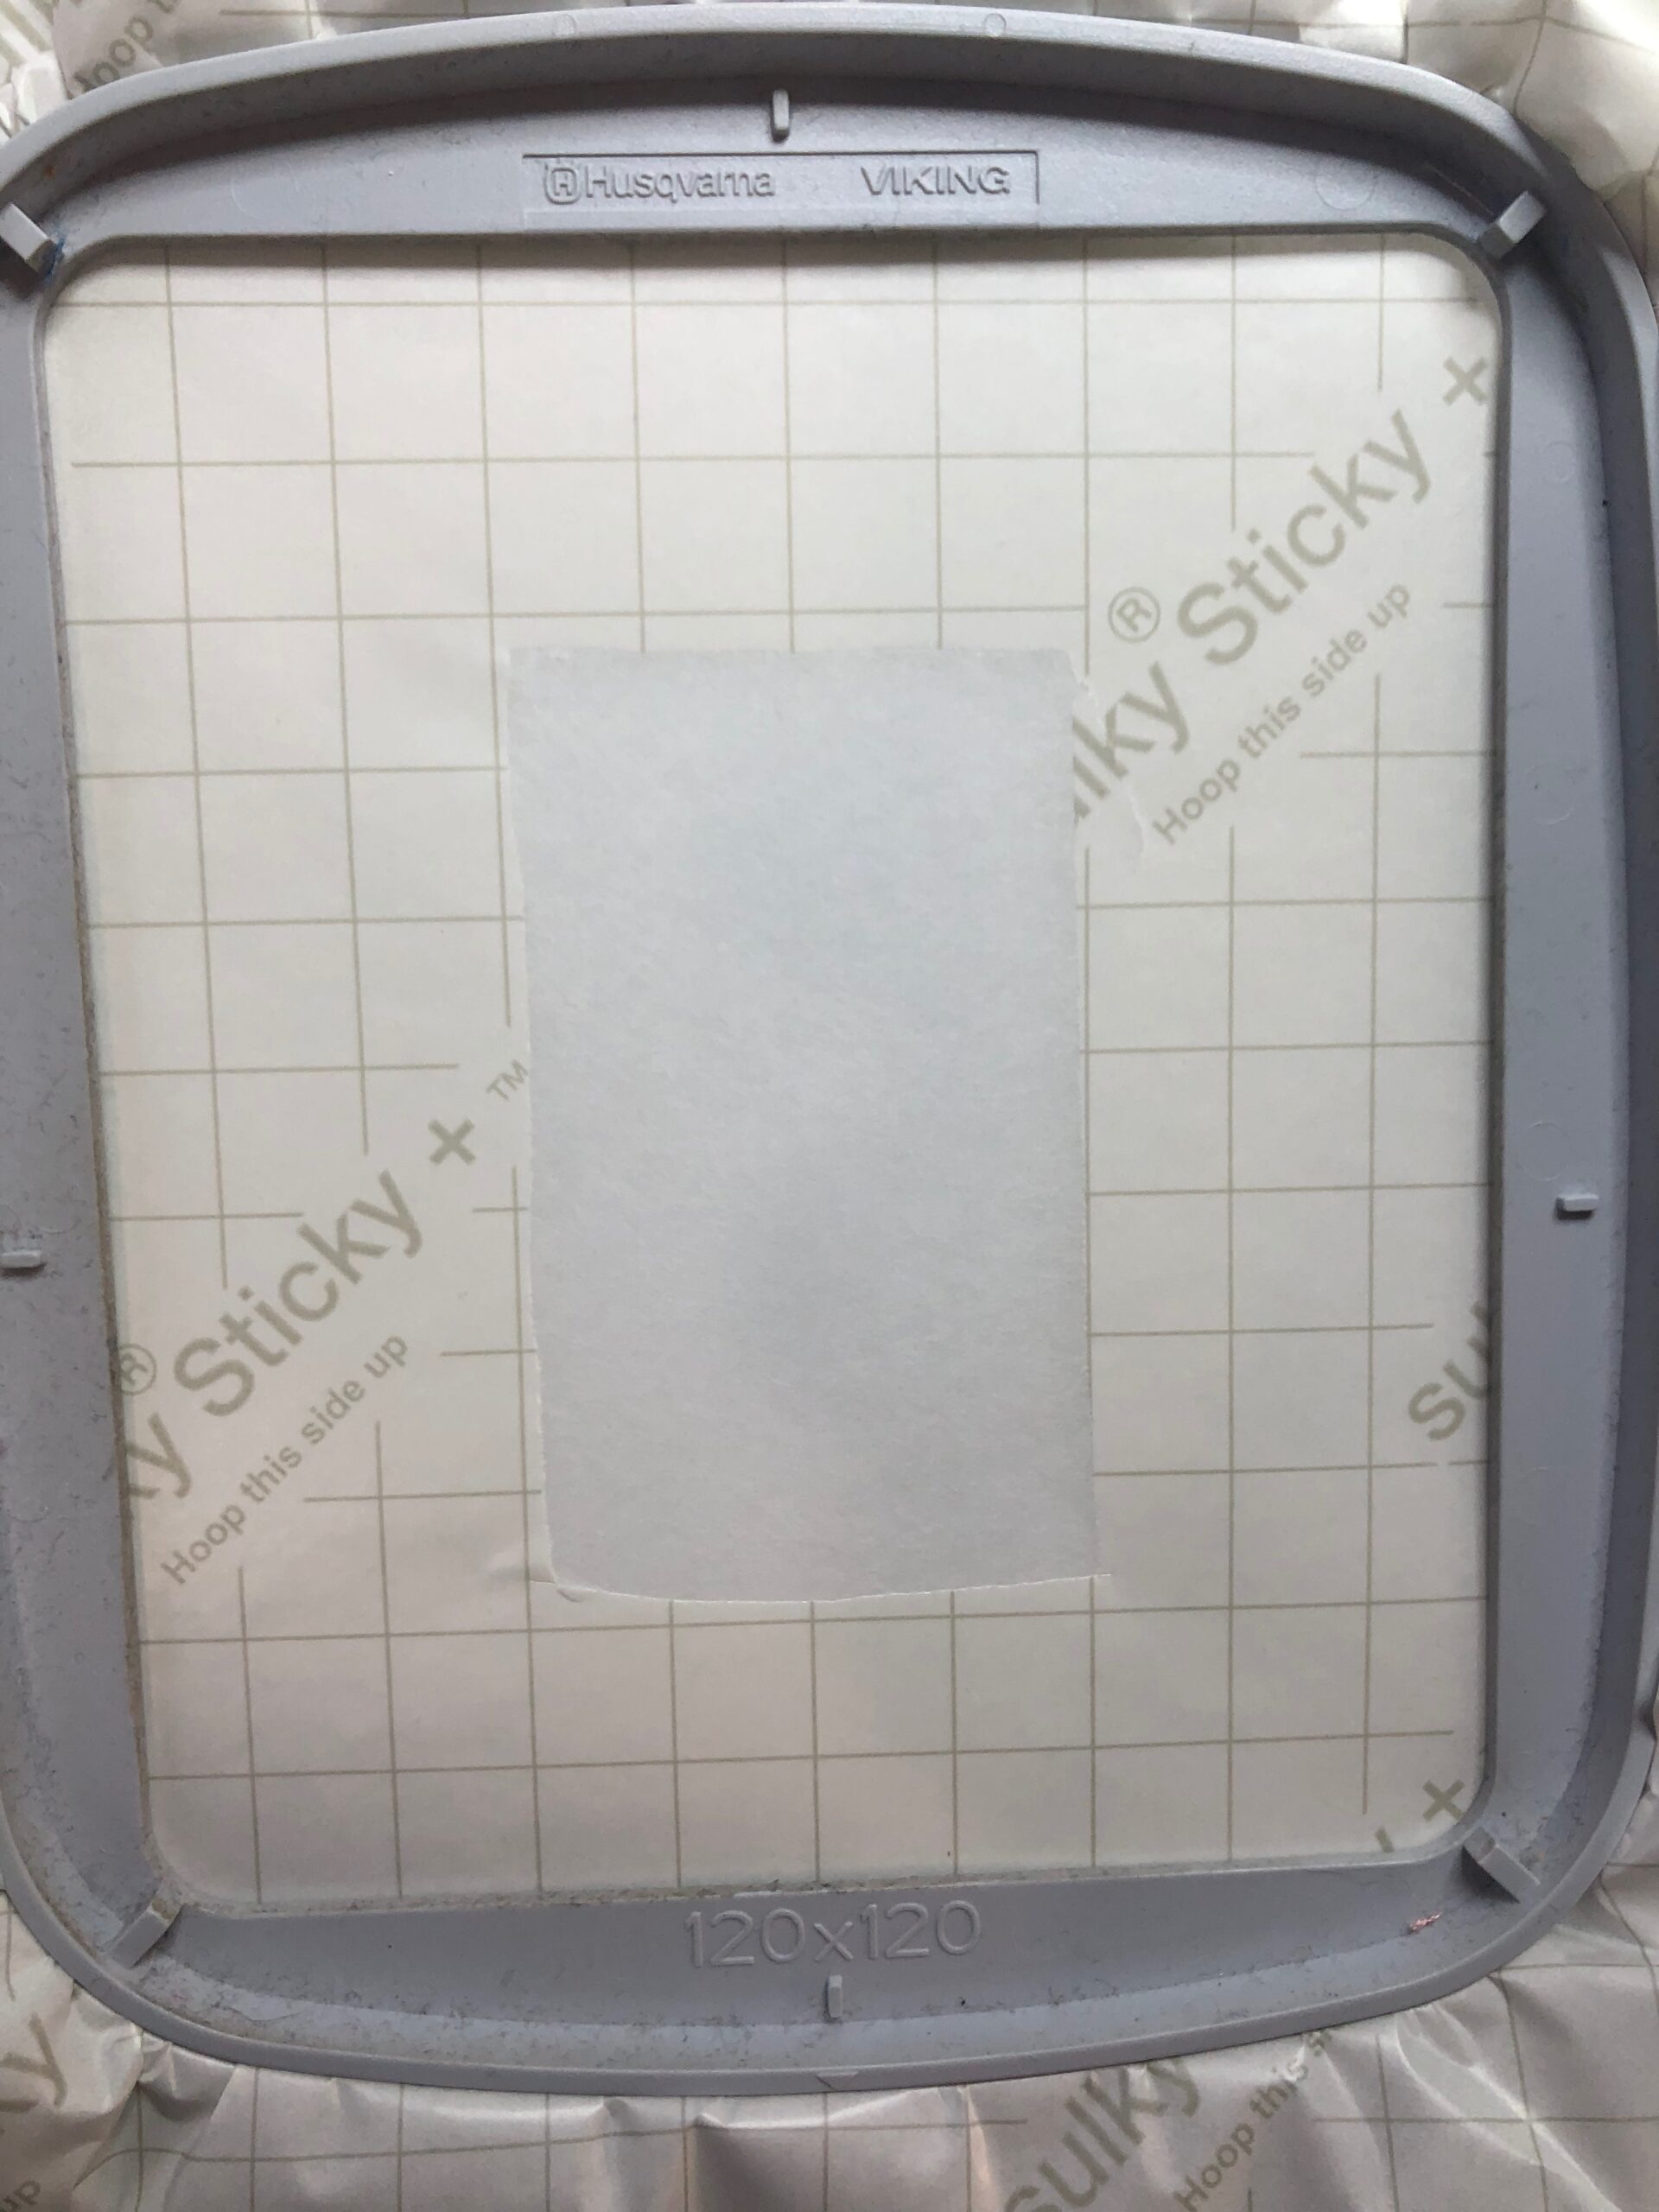
Hoop a sheet of Sulky Sticky+ Stabilizer with the paper facing up.
Use the Sticky+ Slitting Pen to score the paper within the inner hoop ring. Remove the paper backing, revealing the sticky stabilizer surface.
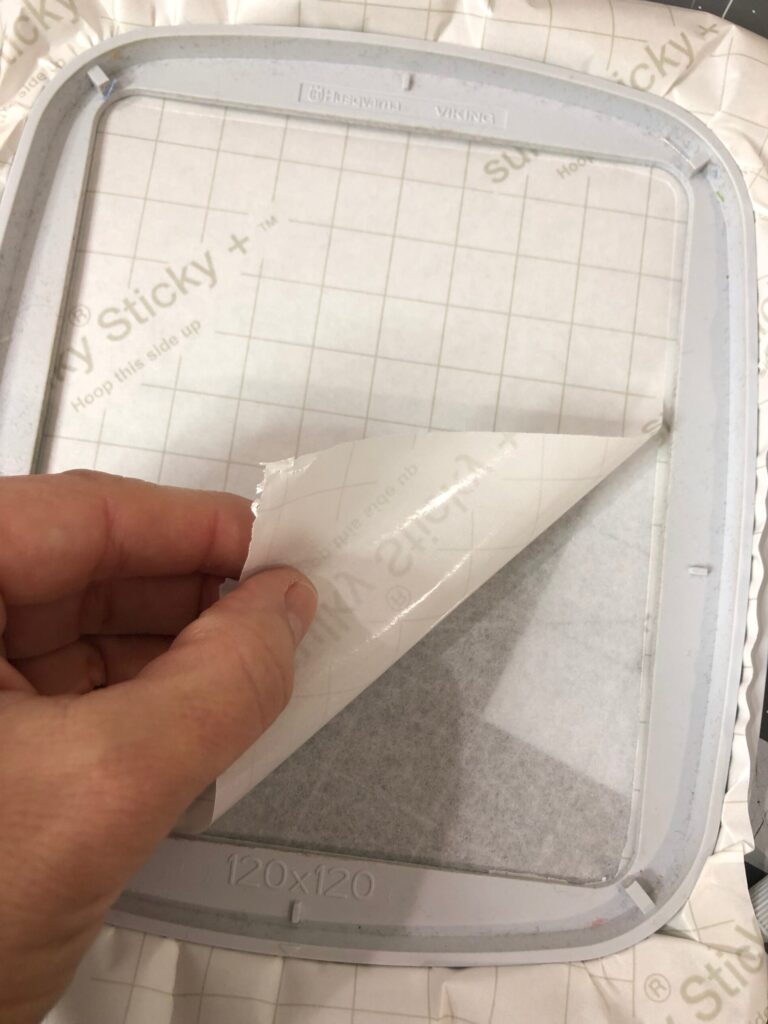
Mark the center cross marks using the hoop markings as a guide. Use a pen or marker that’s easily seen.

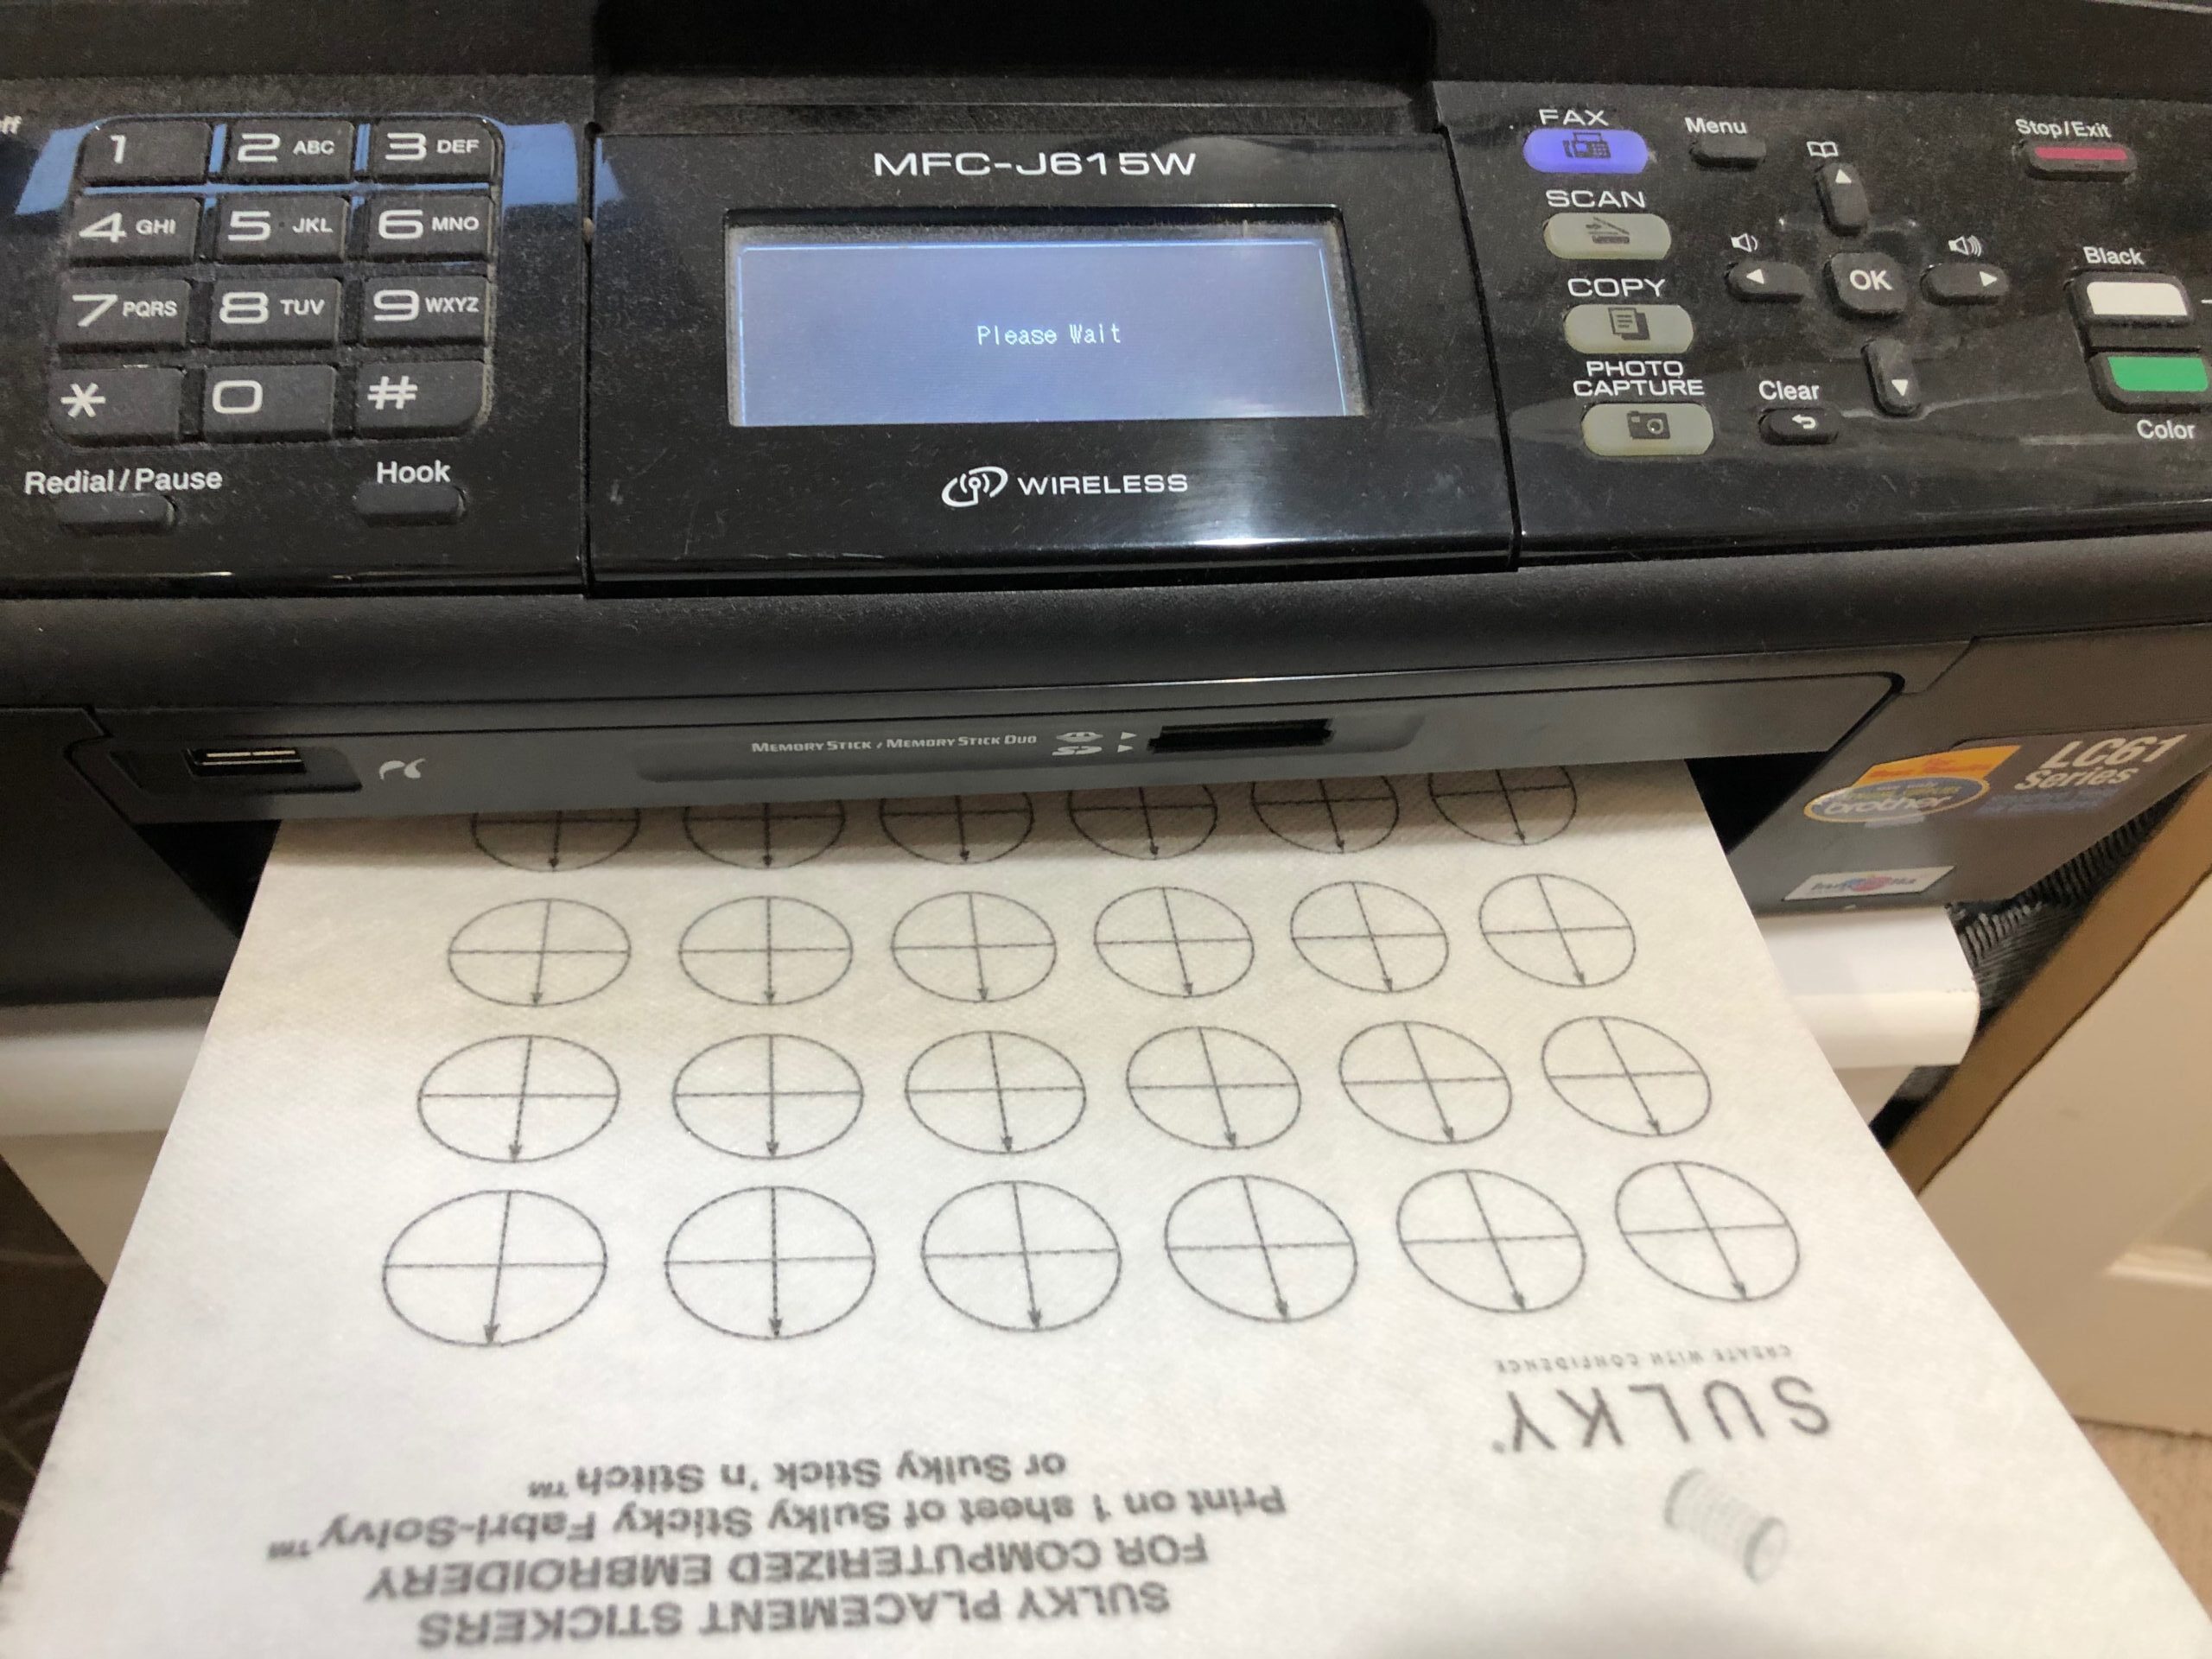
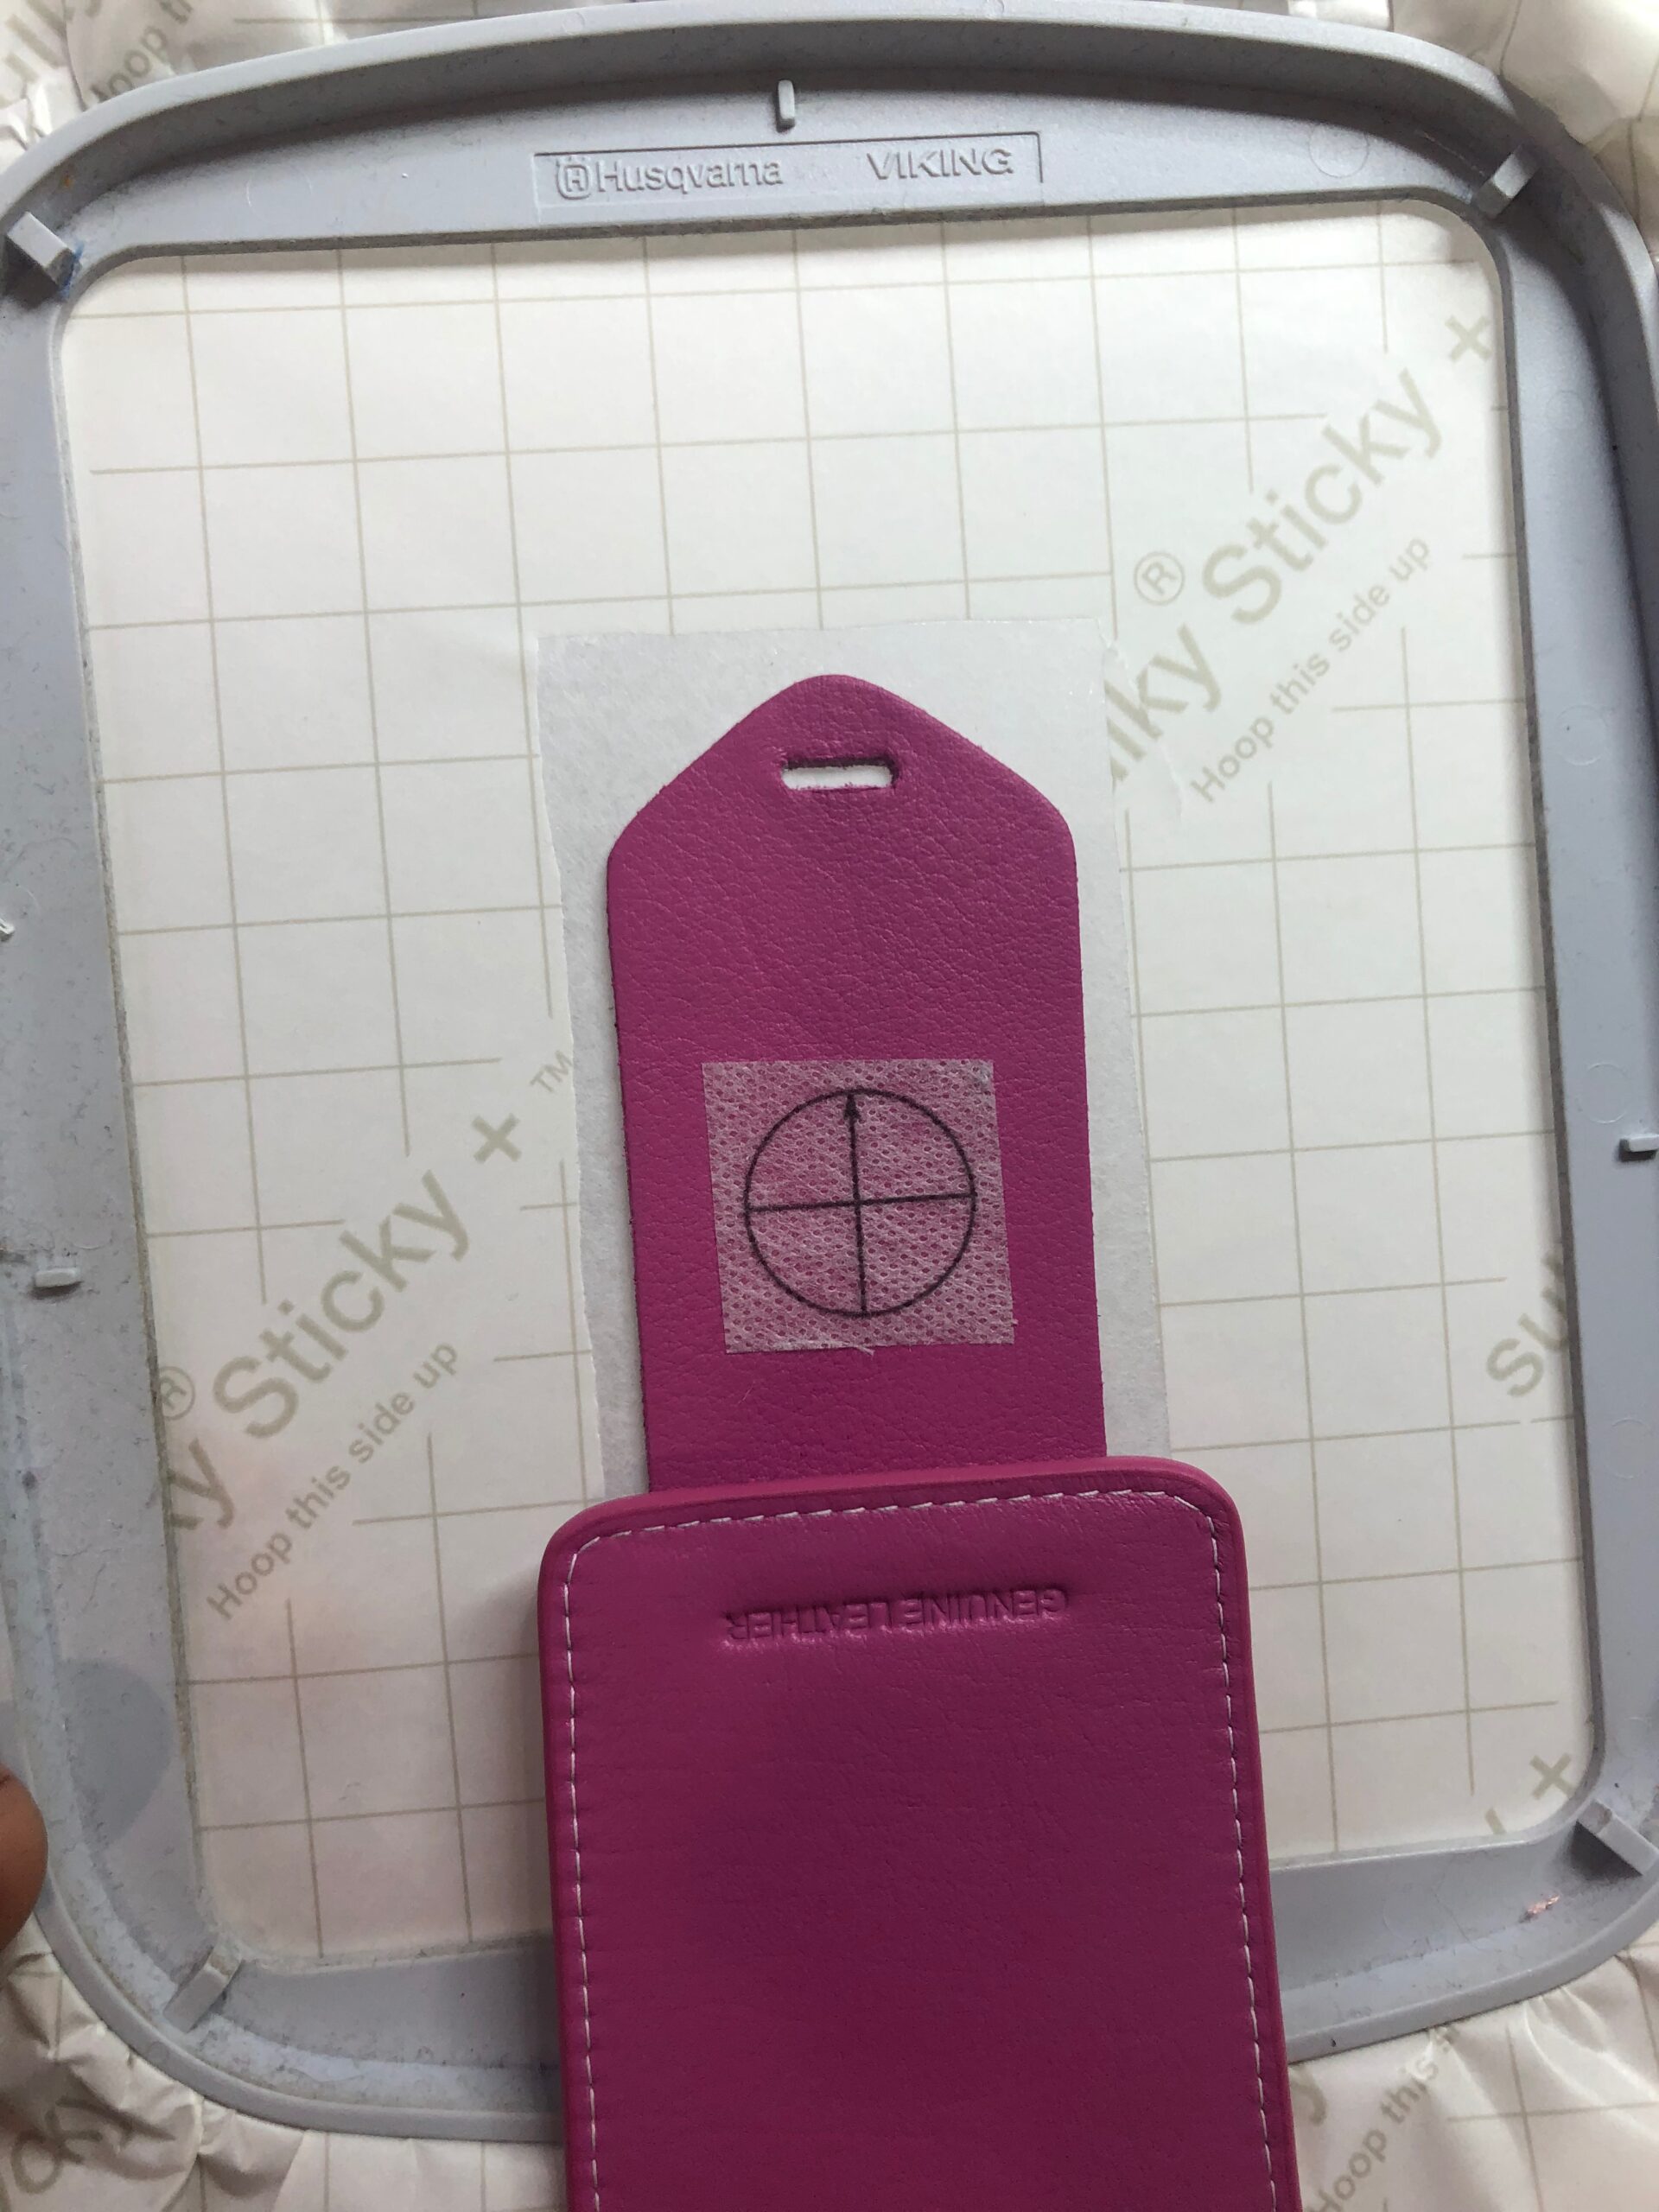
Print the Sulky Embroidery Placement Template onto the fabric-like side of the Stick ‘n Stitch. Cut out a placement sticker and reserve it for the next step.
Remove the buckle loop of the luggage tag. Open the luggage tag front and measure it to find the center. Place the placement sticker at the lengthwise and widthwise center.
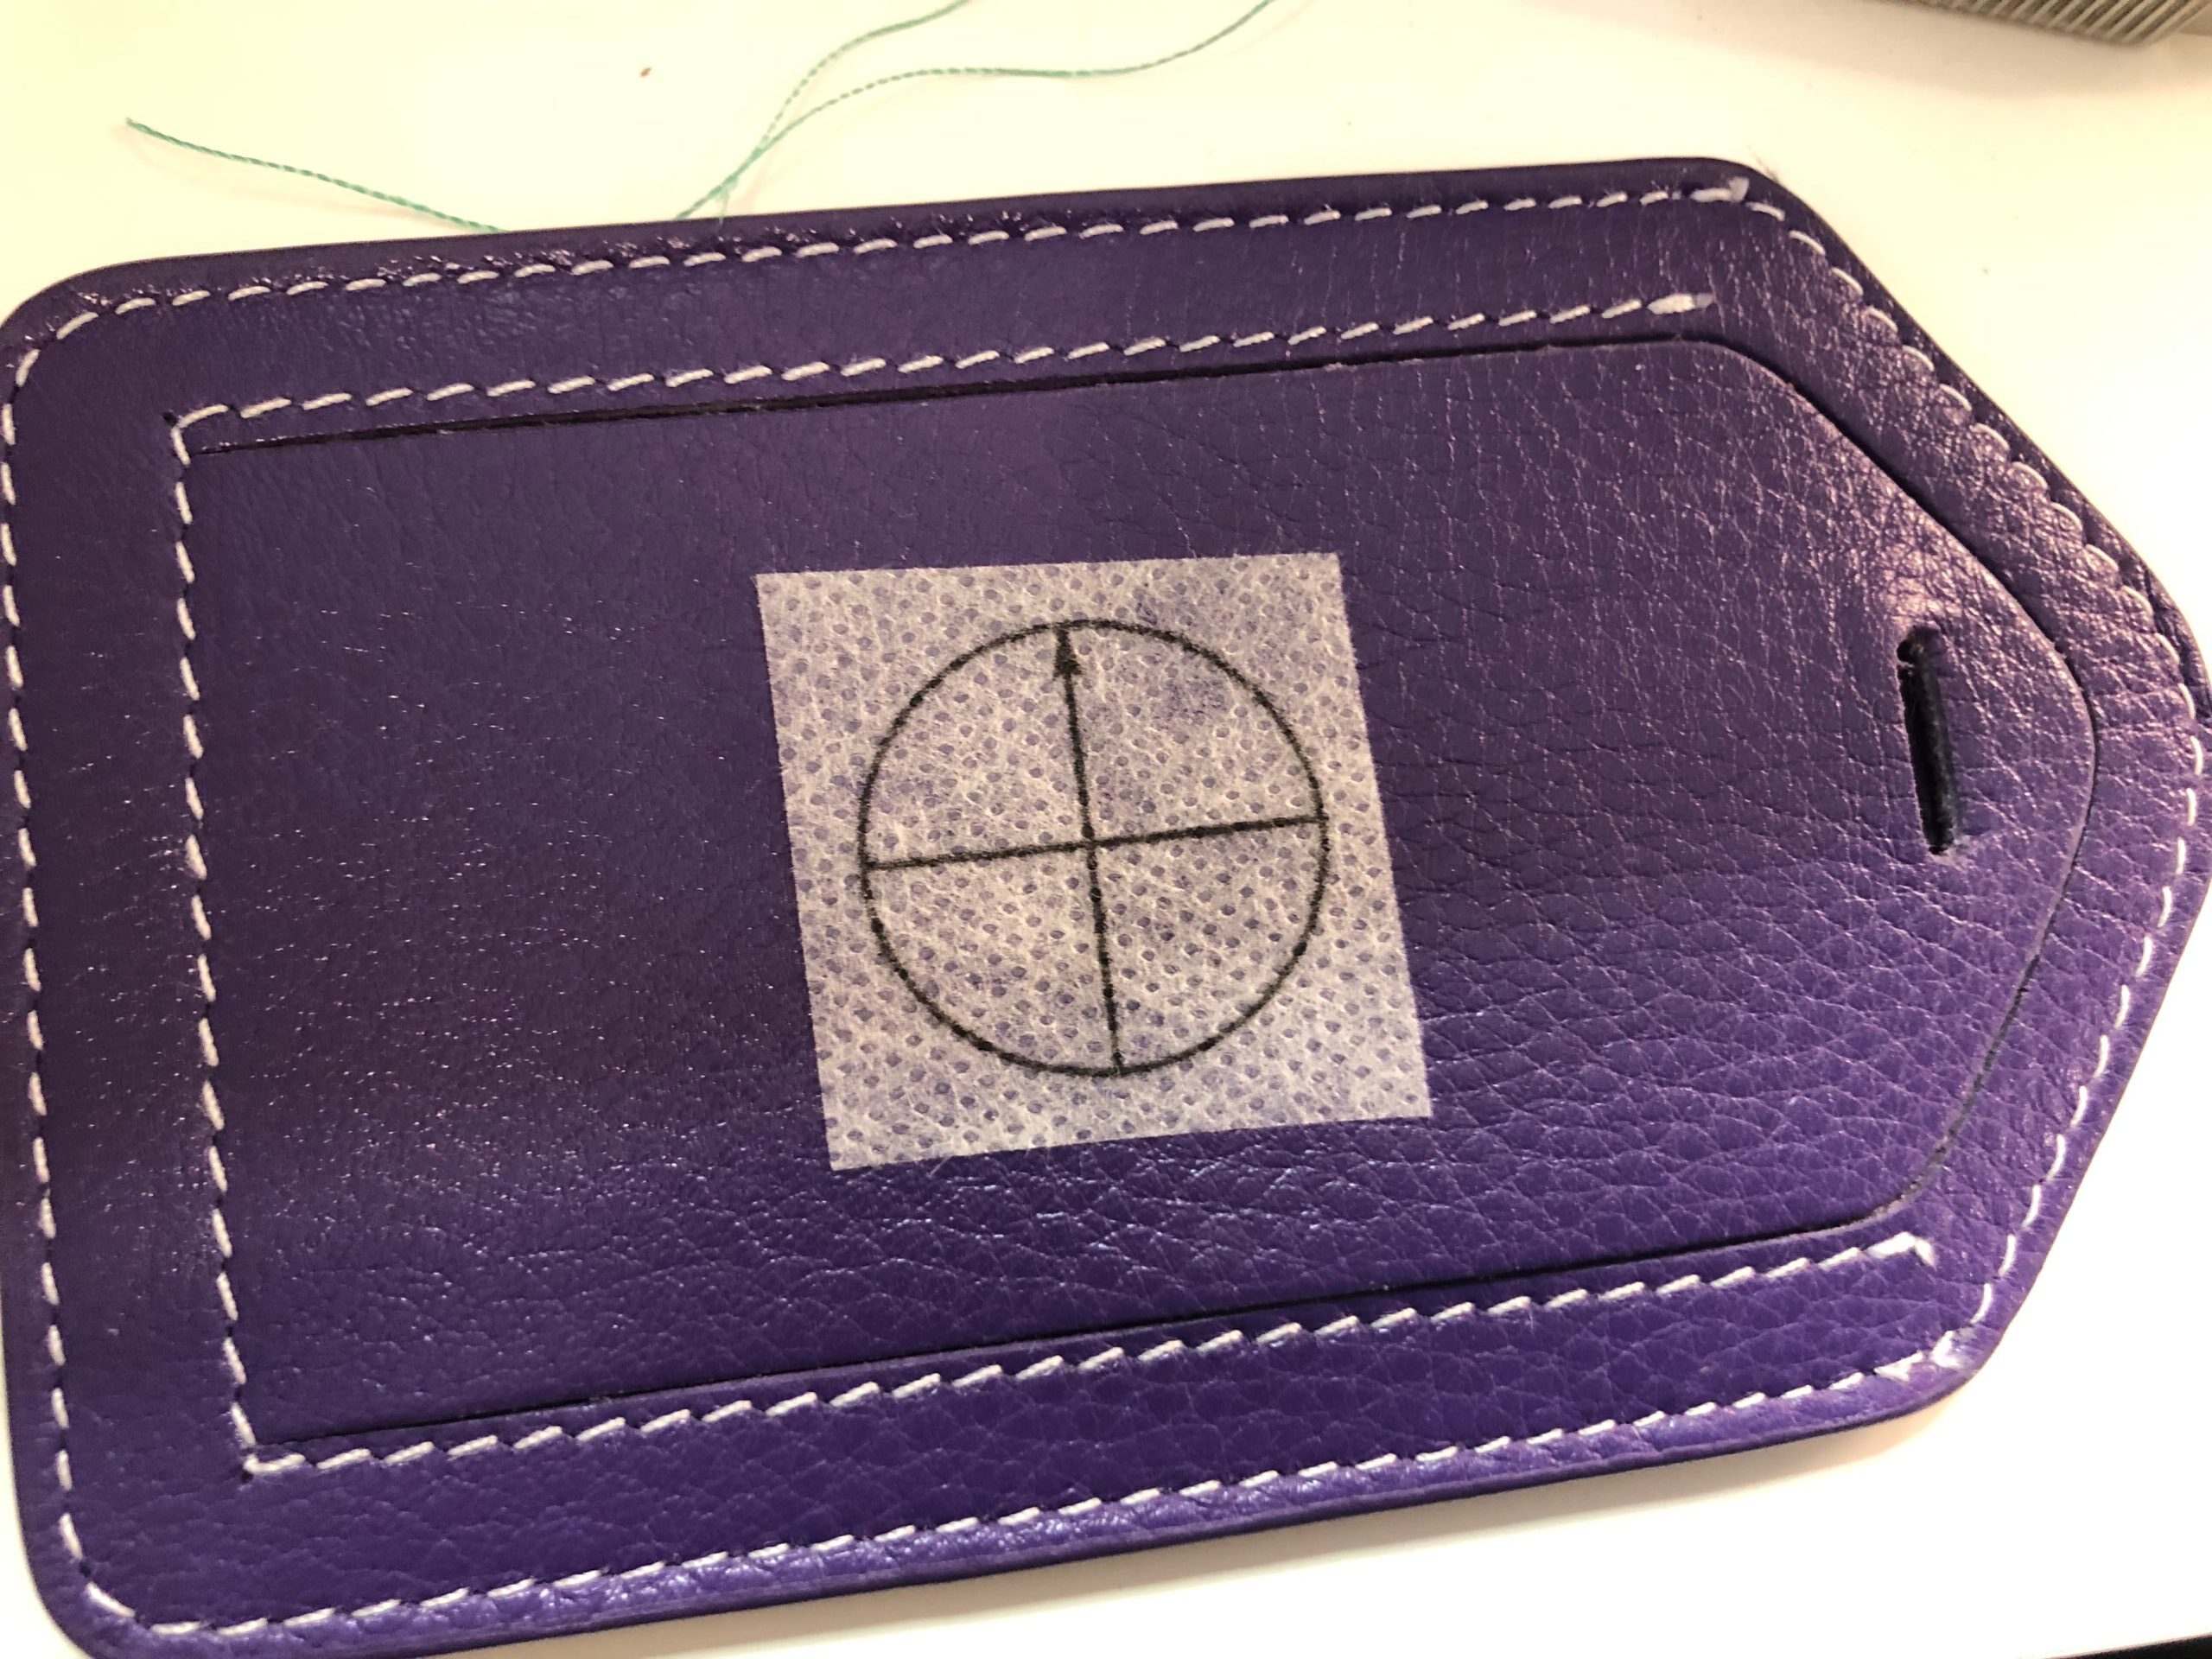
Place the luggage tag front on the sticky stabilizer, aligning the center cross marks.
EMBROIDER THE LUGGAGE TAG
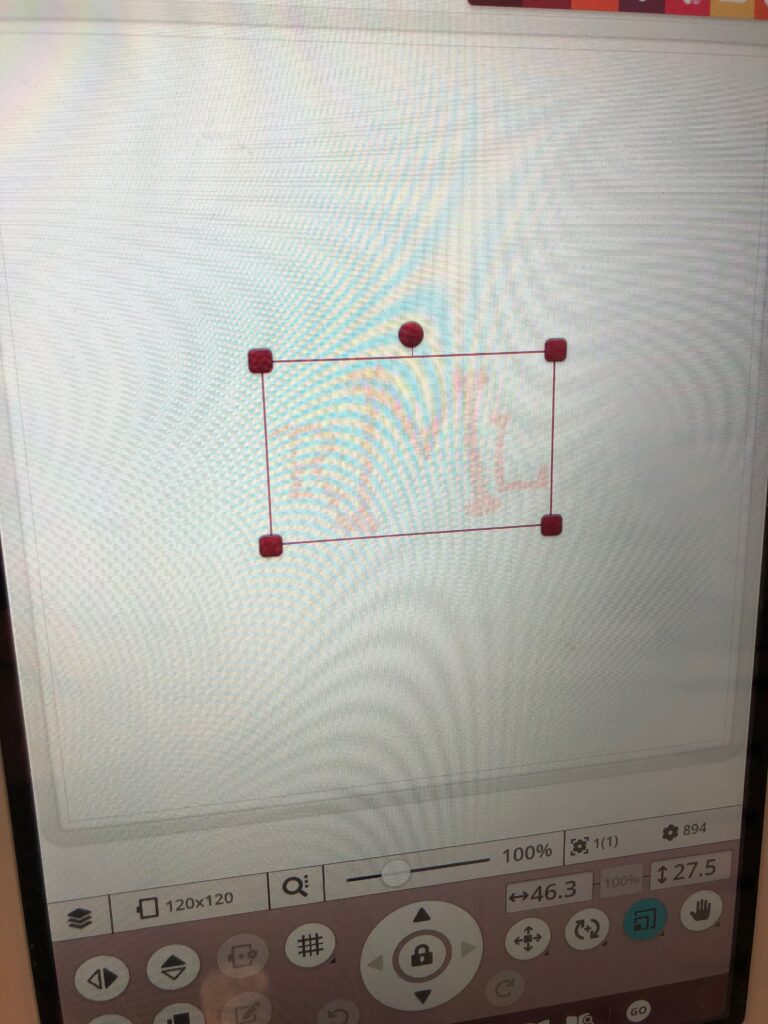
Load the chosen design onto the machine. Orient it as desired (horizontally or vertically, depending on the design and look desired).

Insert a size 75/11 Embroidery Needle onto the machine. Install a bobbin wound with either Sulky Bobbin Thread or Sulky PolyLite™ Thread that matches the top thread. Thread the needle with the first color in the chosen design.
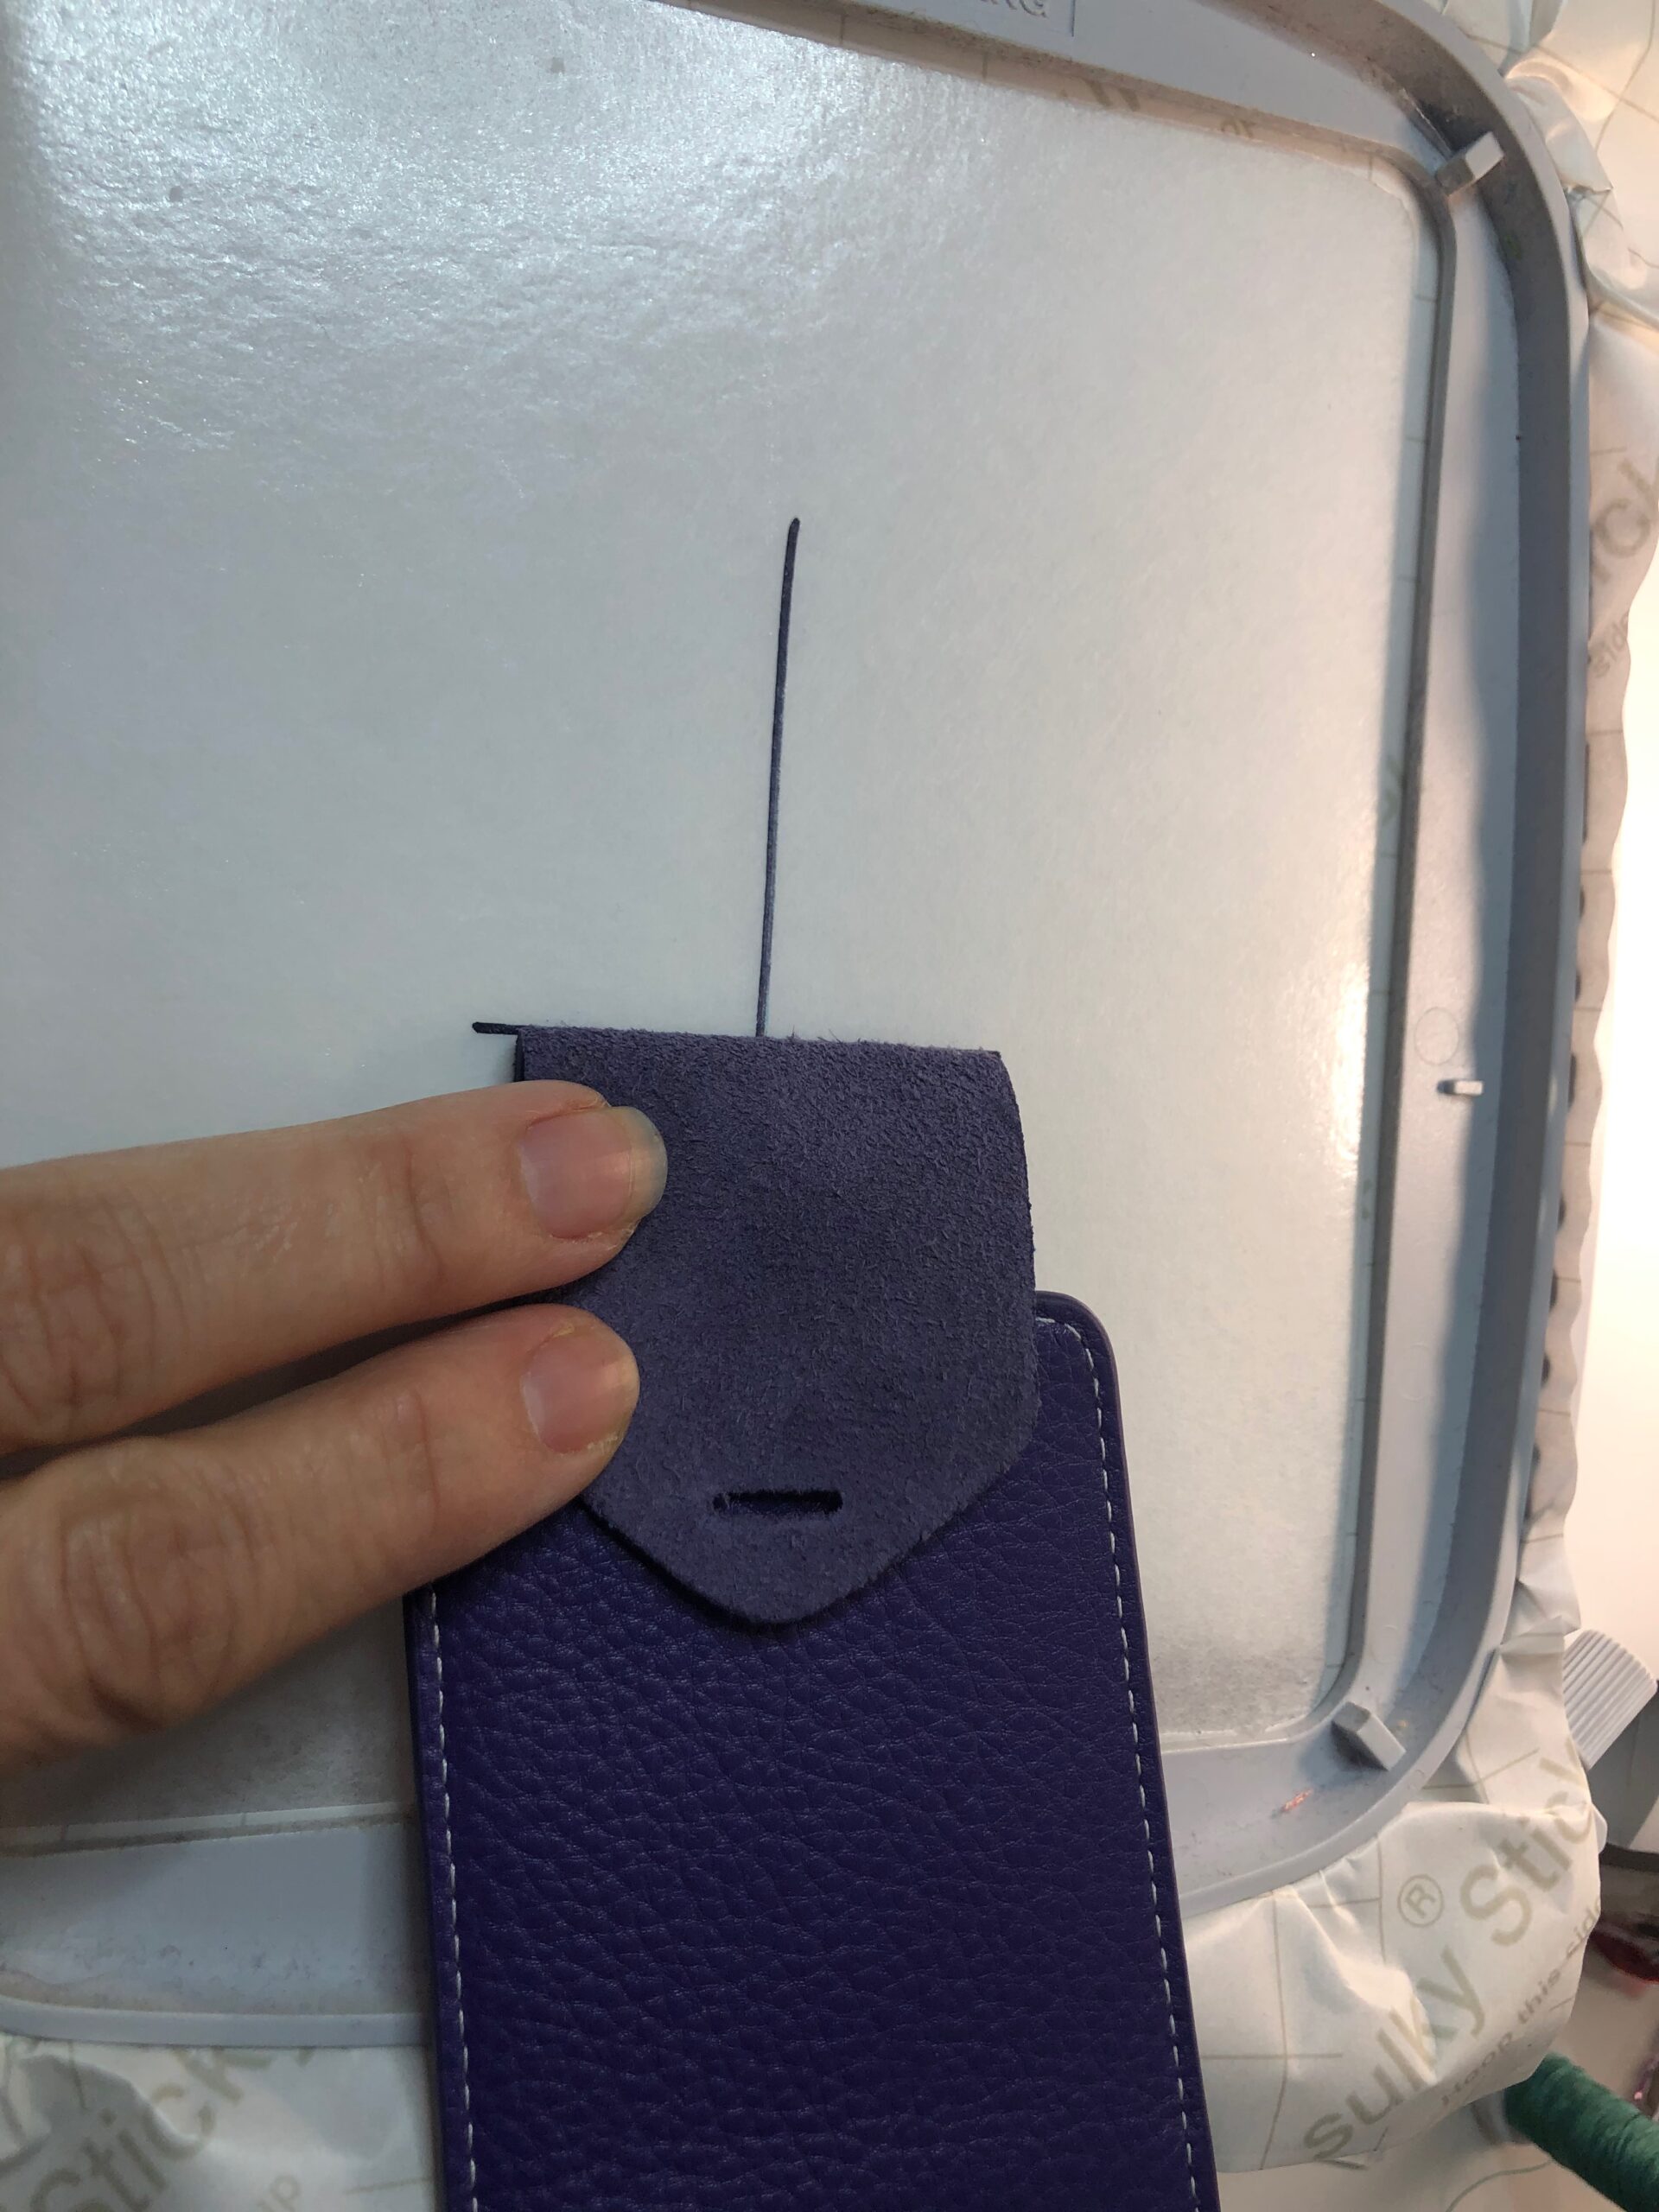
Insert the hoop onto the machine. Direct the machine to hover over the design center to check the placement. If desired, direct the needle to hover over the design perimeter as well, ensuring the design size will fit within the available stitching field.
Remove the placement sticker.

Begin the design. Clip jump threads with each thread change, if using more than one thread color in the design. Also remember to switch bobbin thread colors, if using PolyLite to match the top thread.
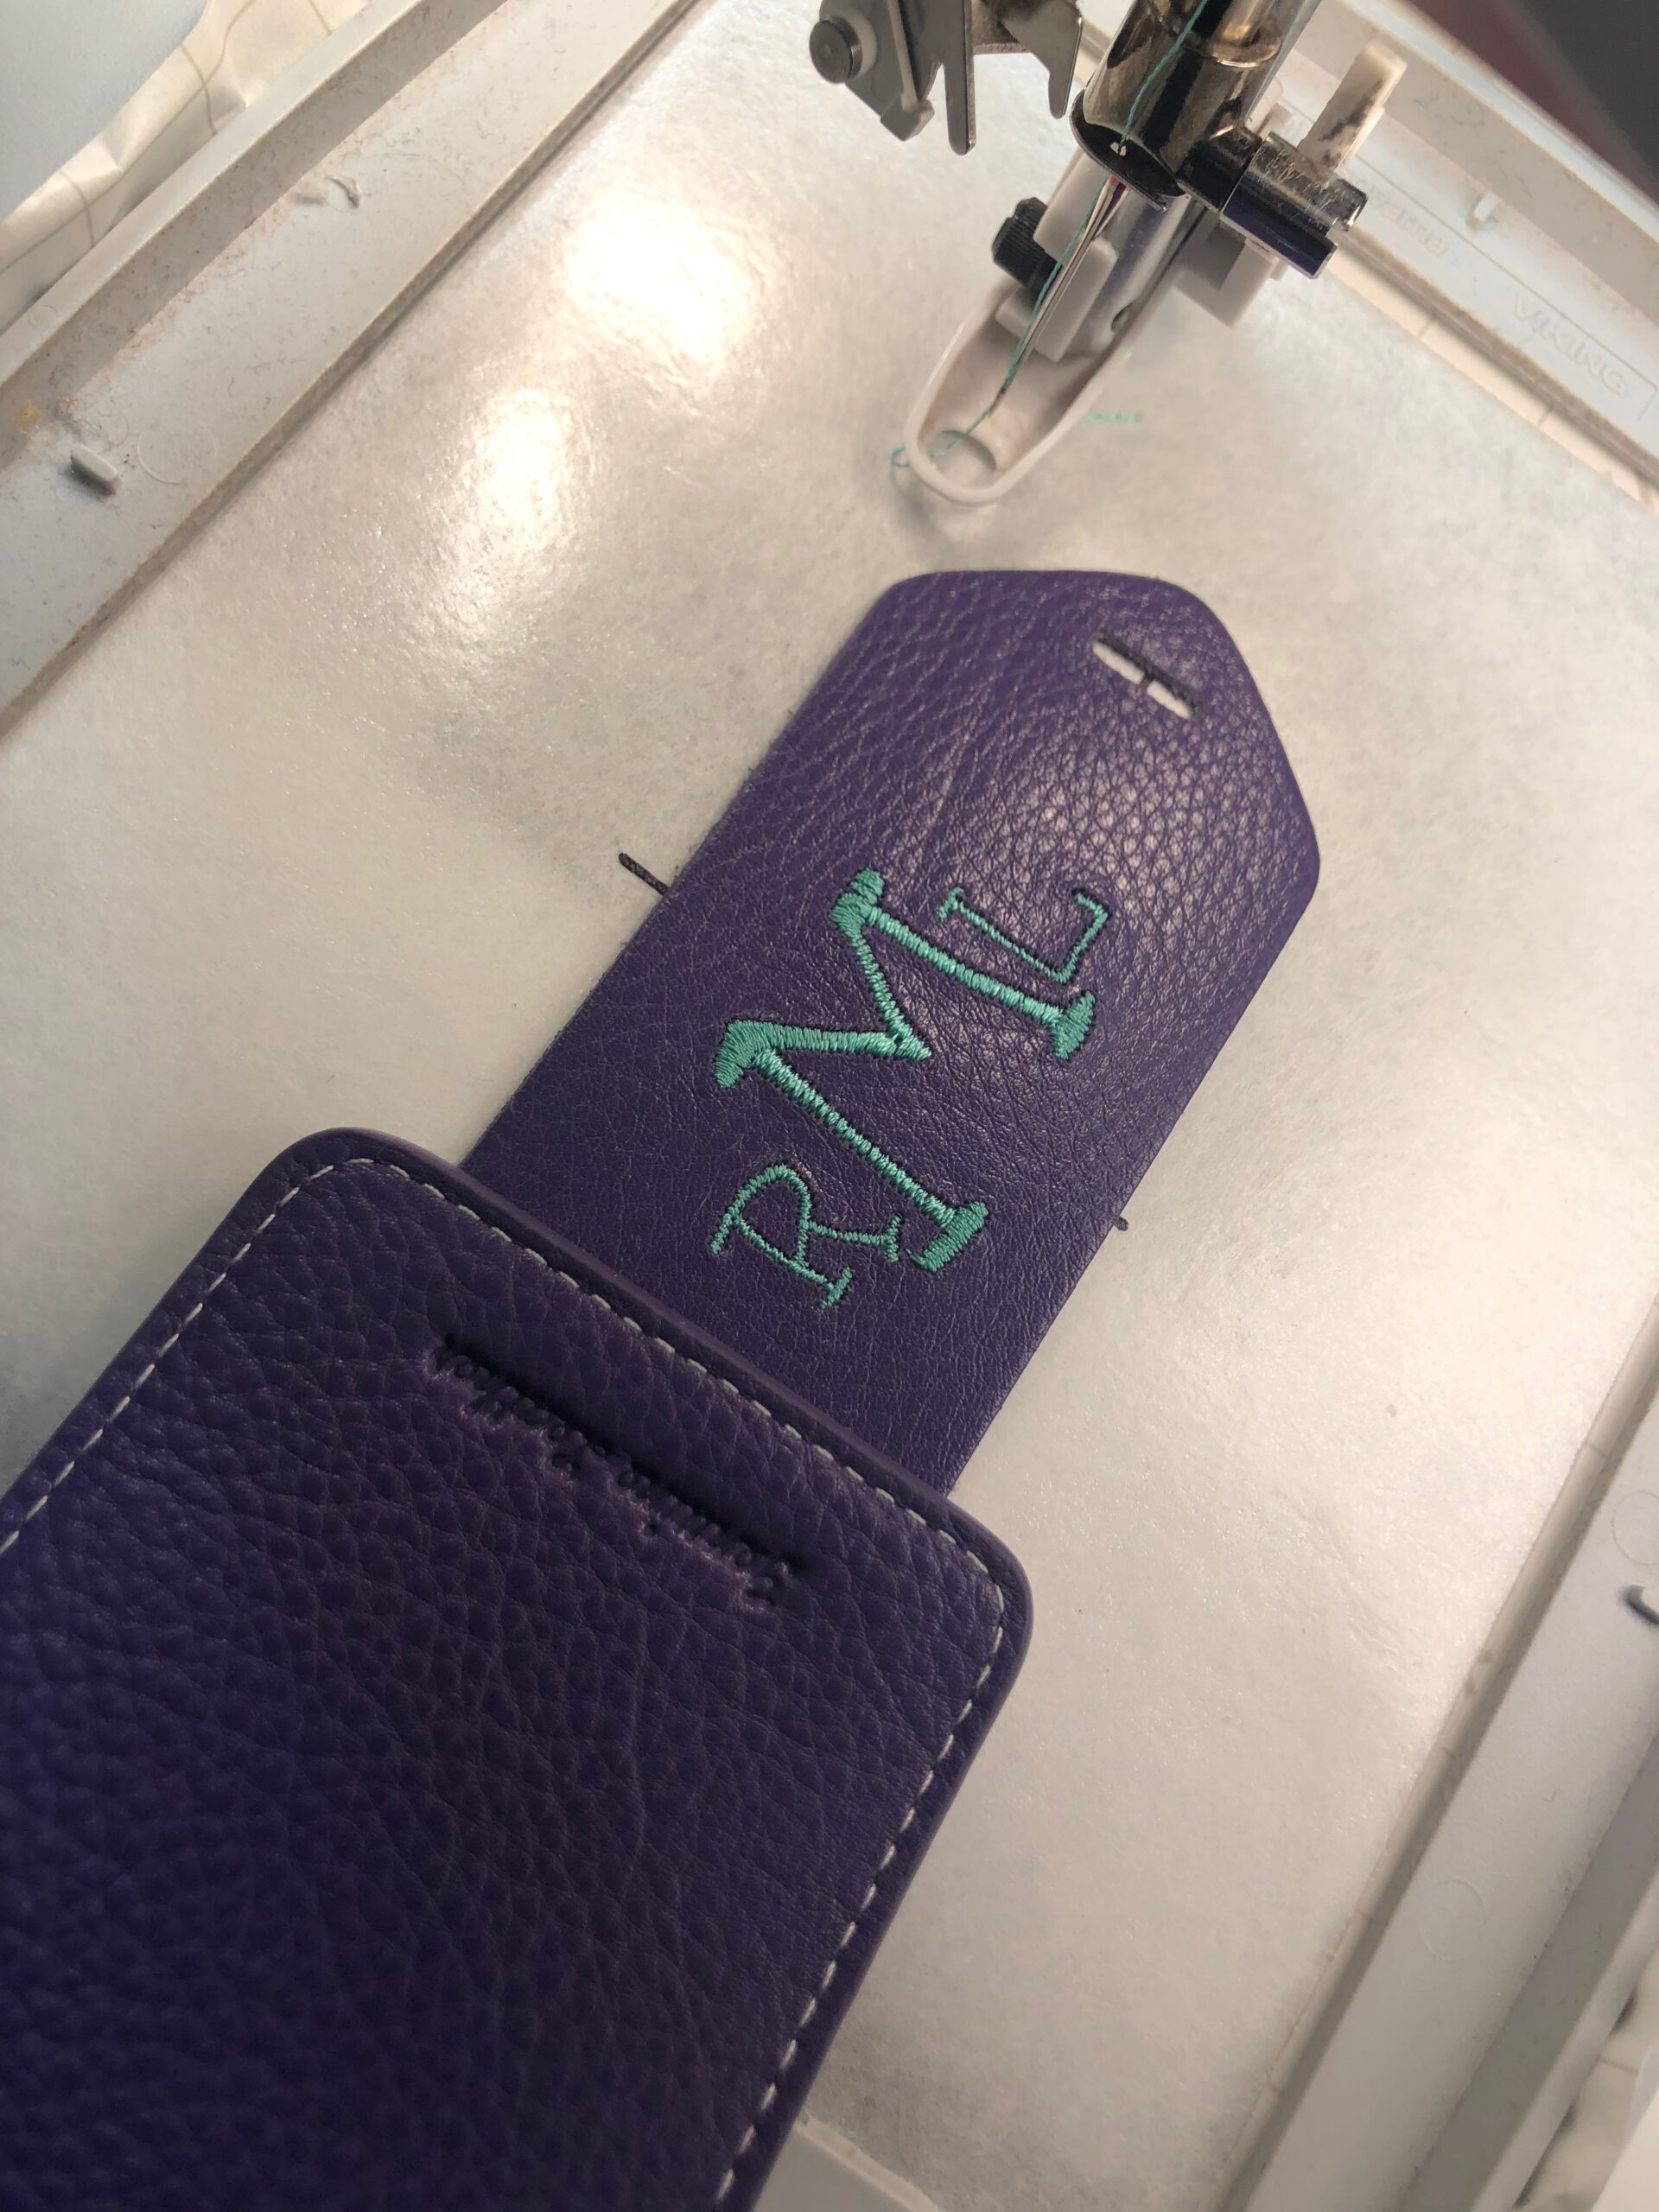
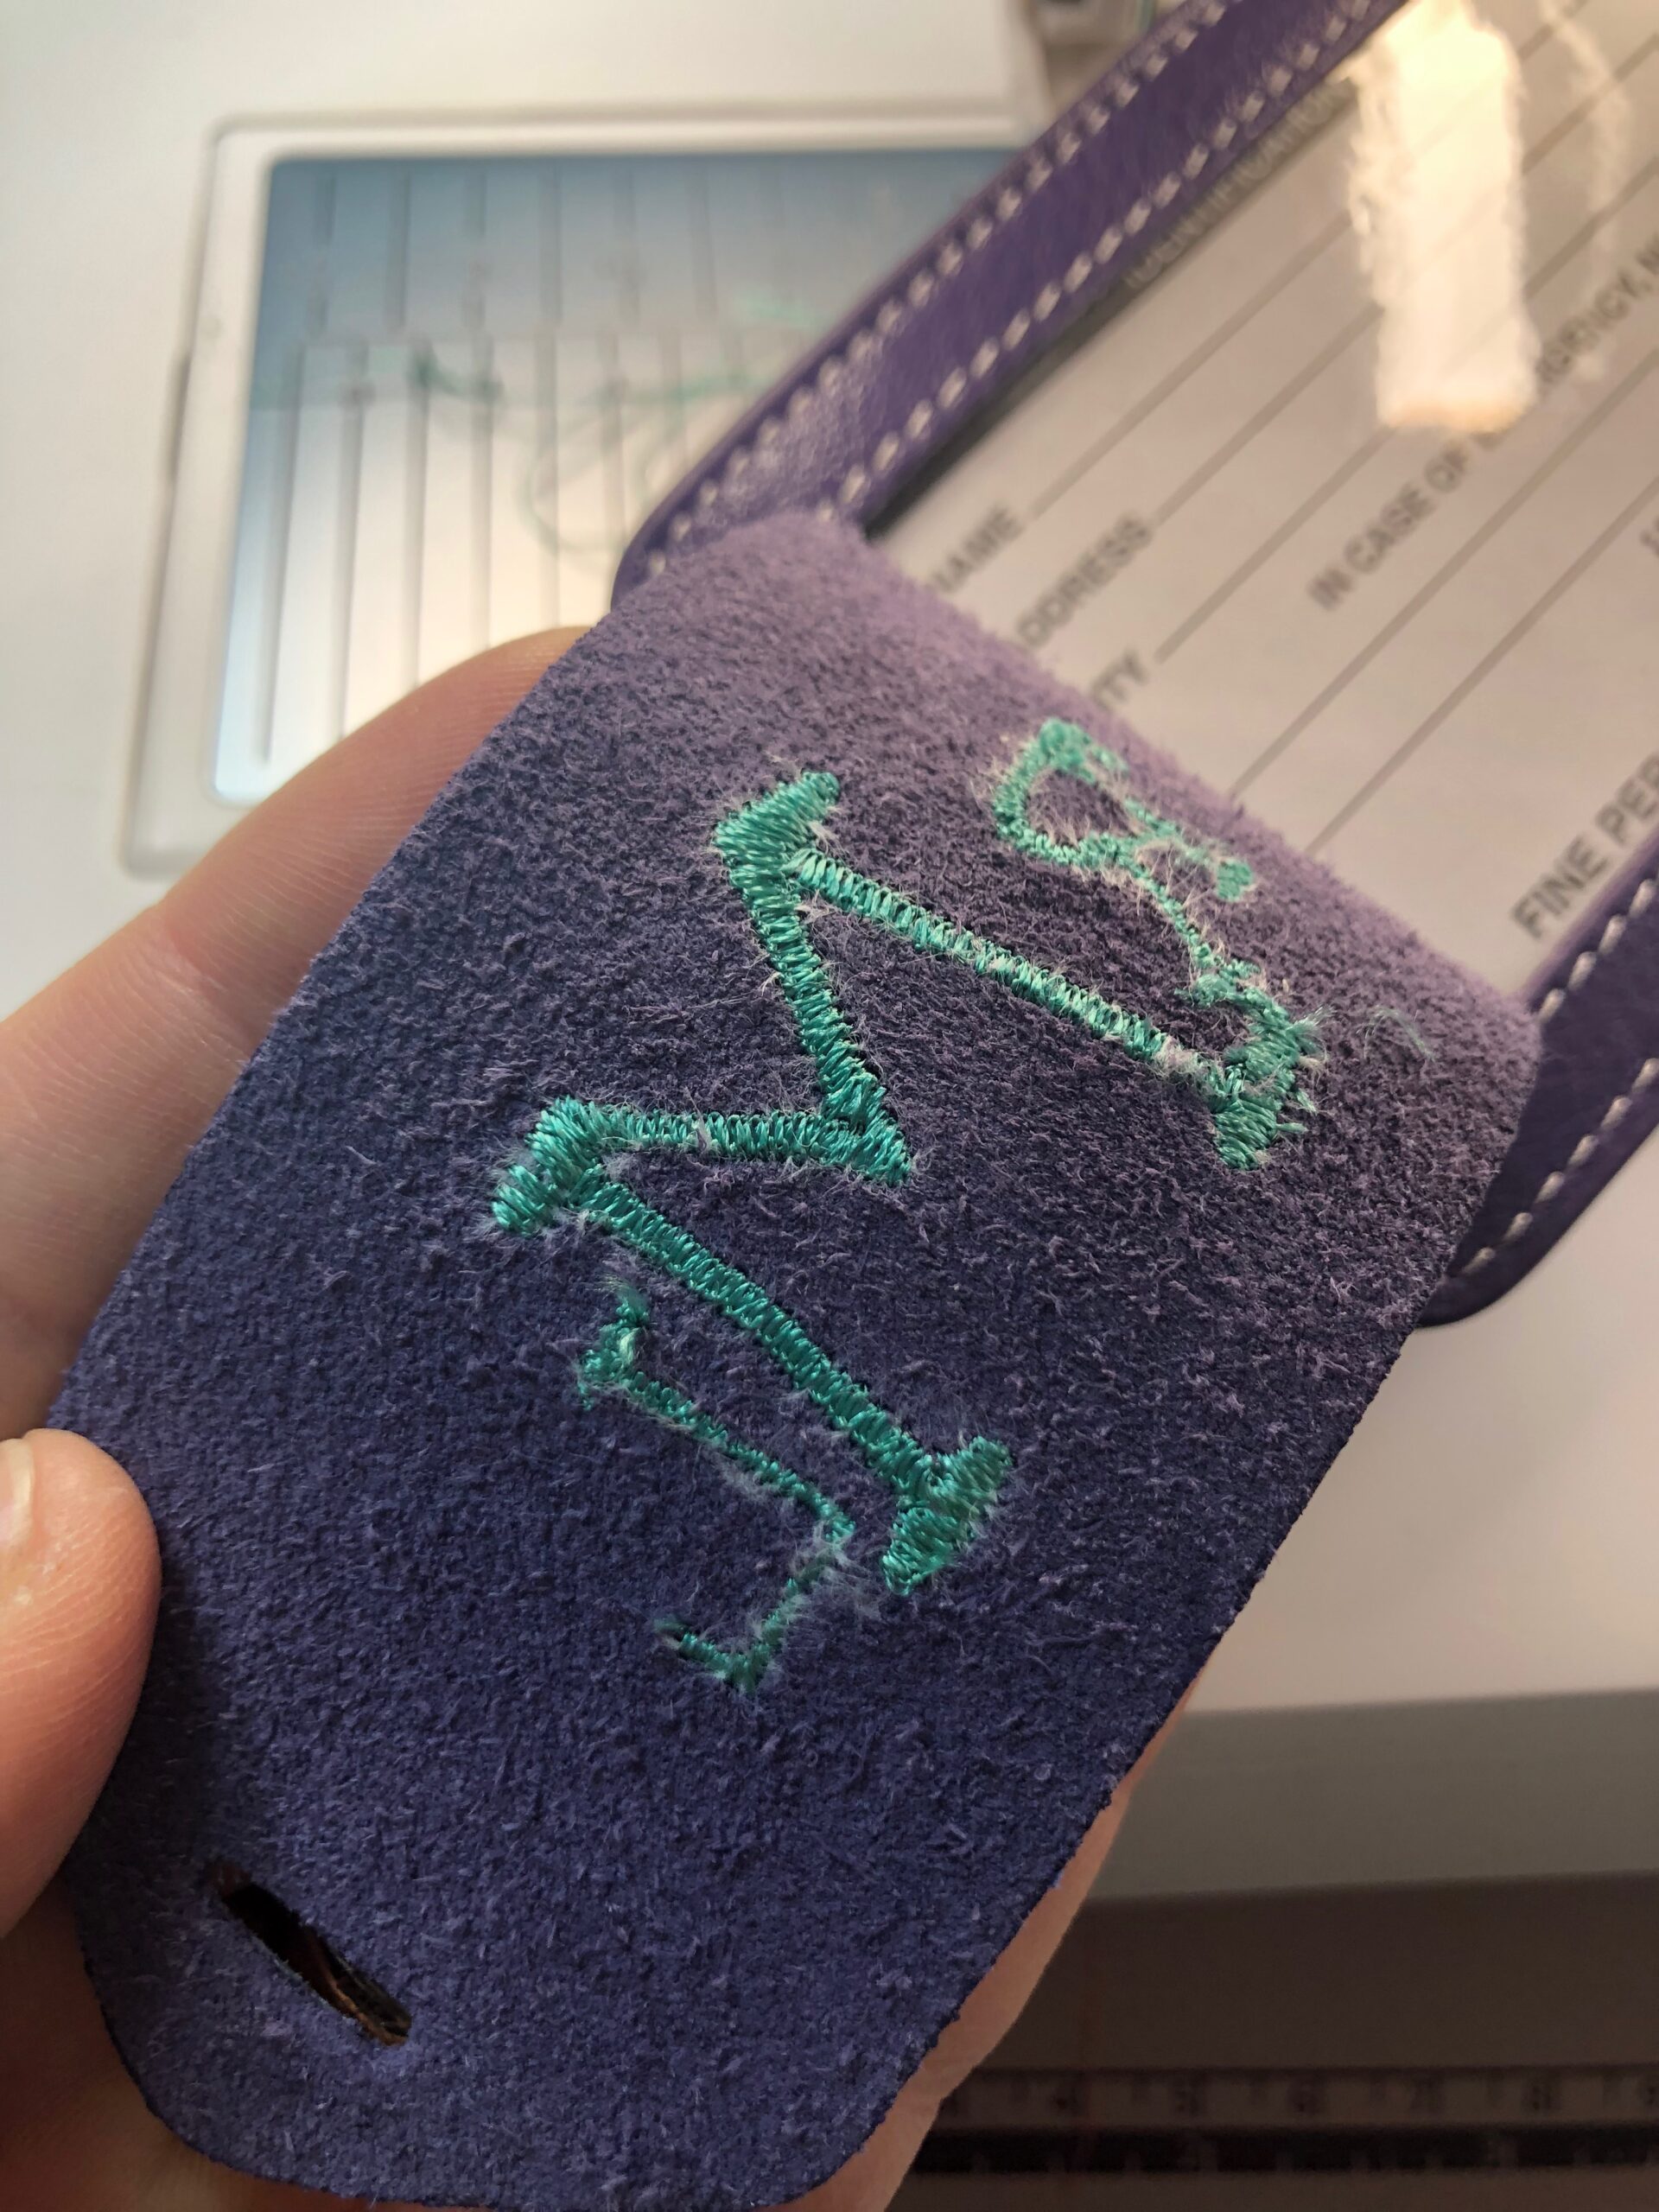
When embroidery is complete, Remove the stabilizer from the hoop. Carefully tear away the luggage tag from the stabilizer.
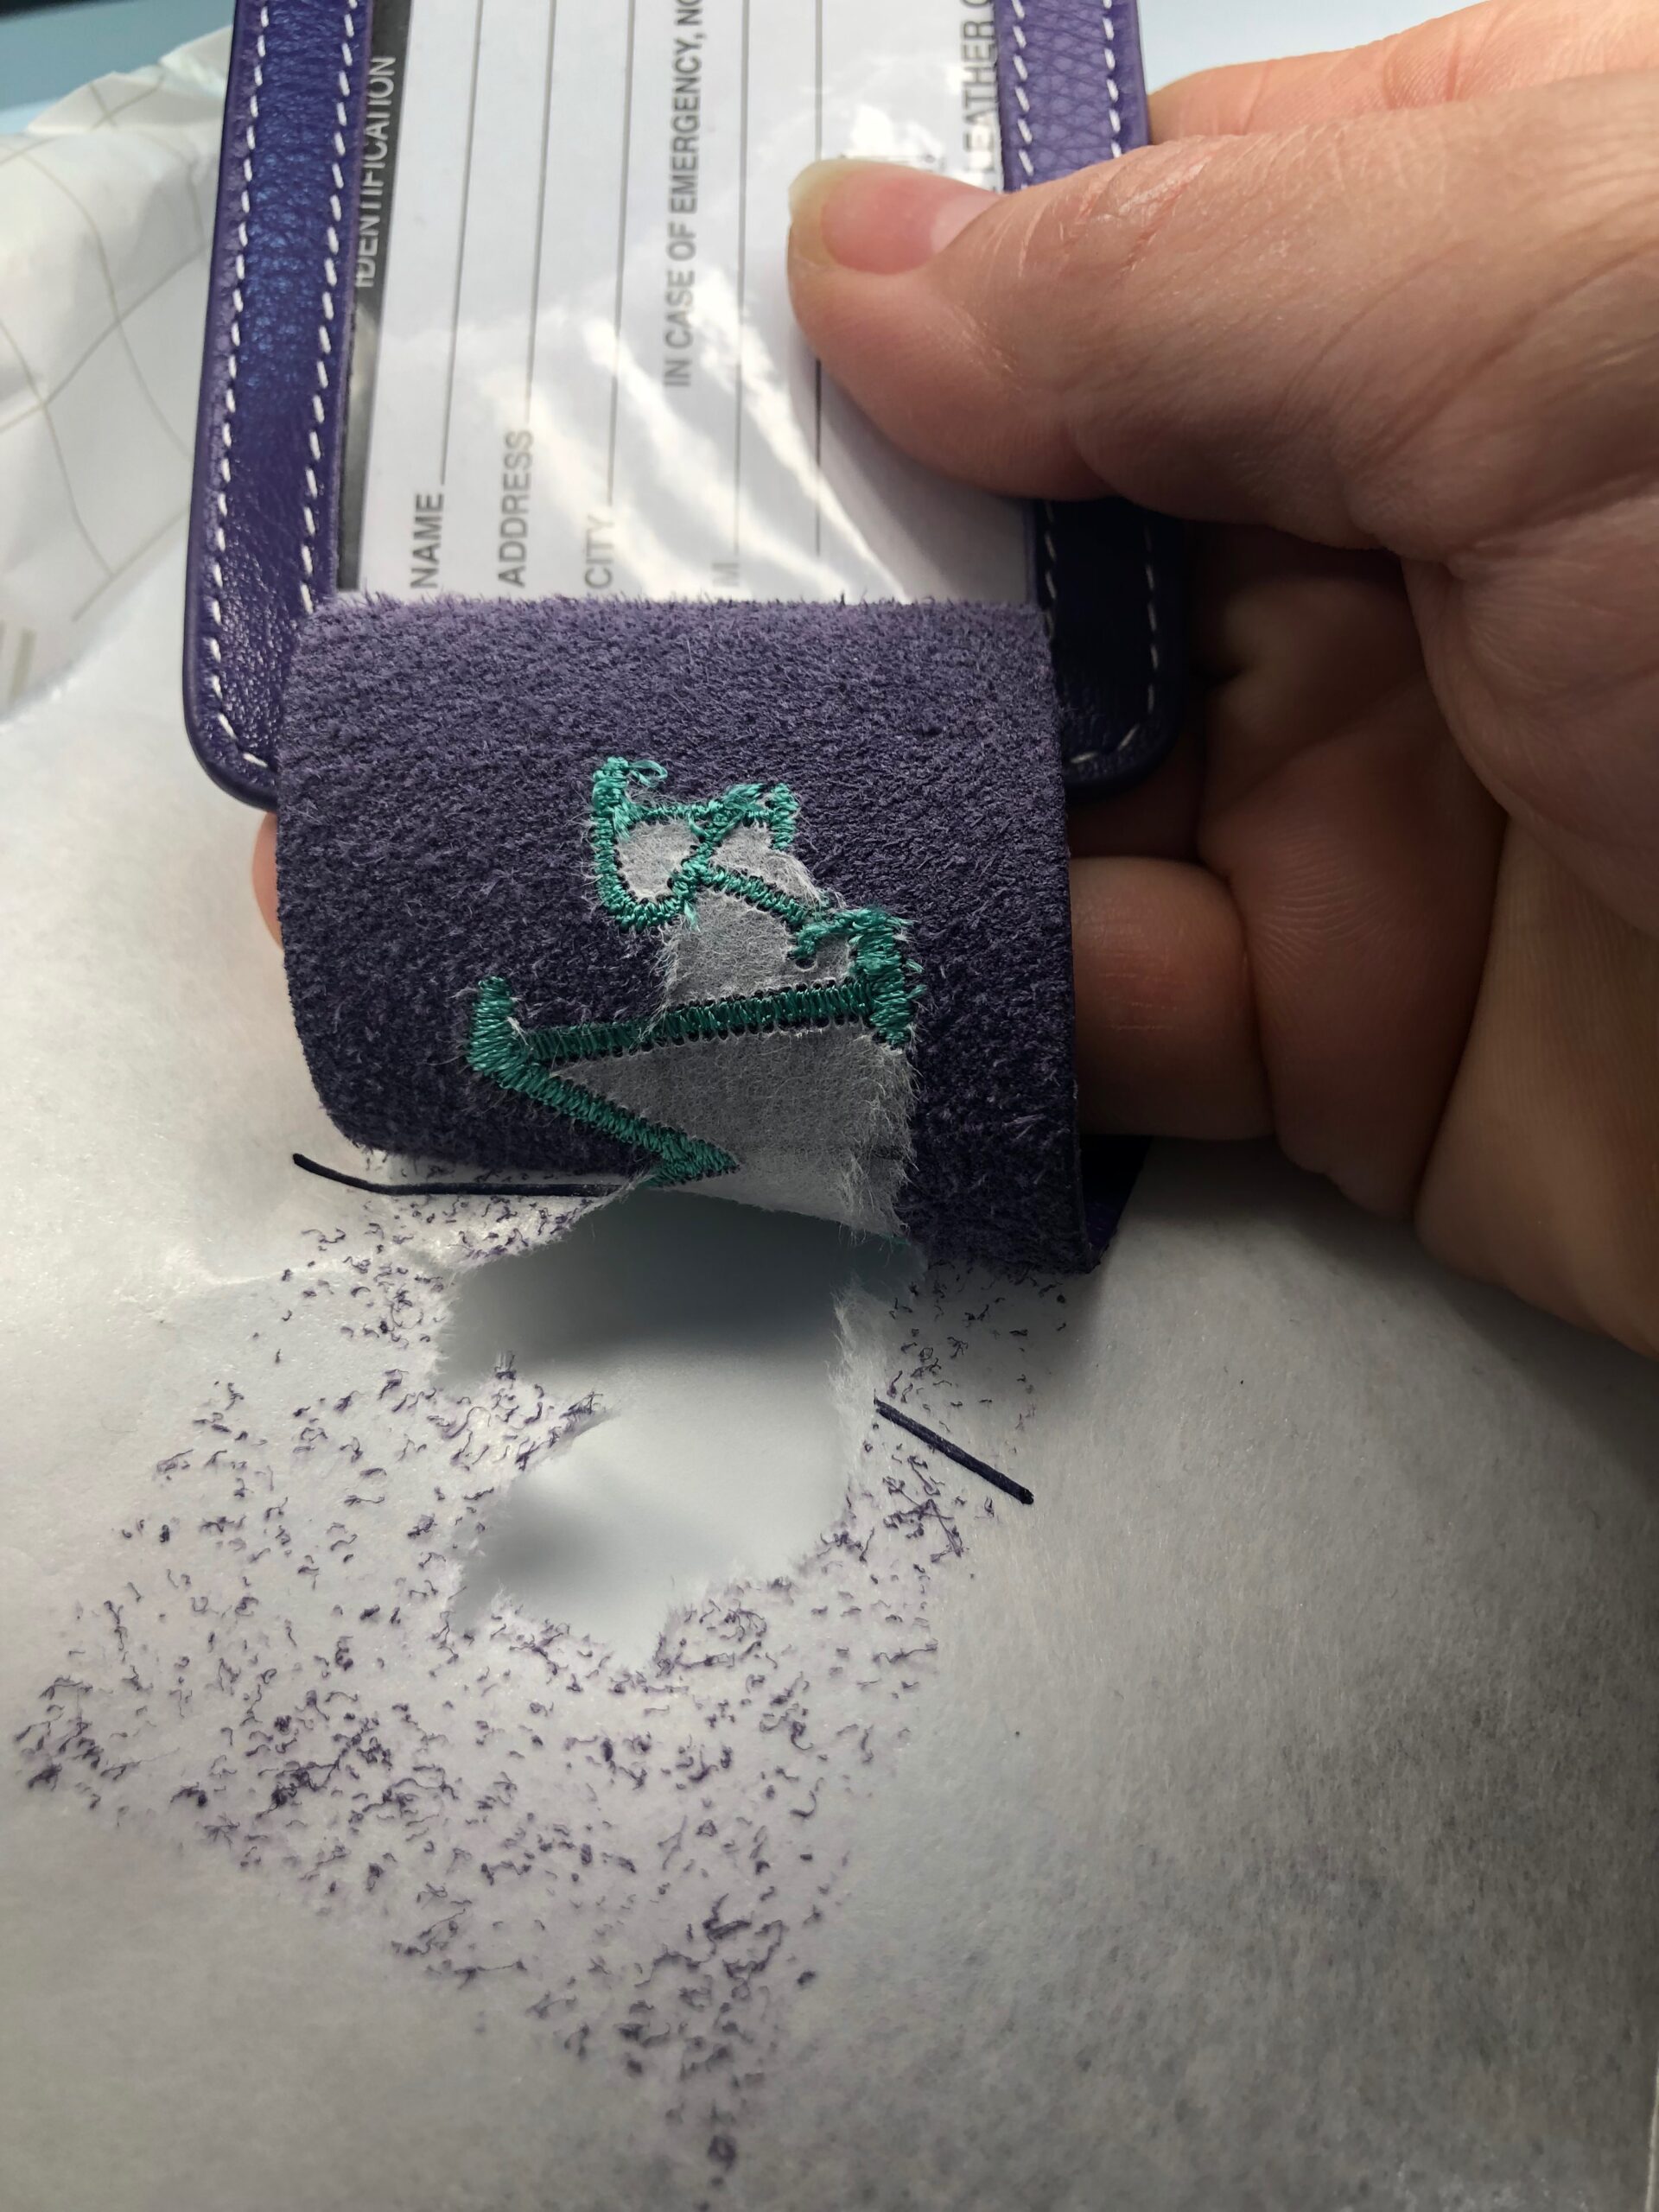
Trim the jump threads on the back of the embroidery design. Remove any excess stabilizer between the letters on the luggage tag back, if needed.
Place the buckle loop back on the embroidered luggage tag.
Repeat to embroider as many luggage tags as desired! Give them as gifts for graduates, Father’s Day, Mother’s Day, birthdays and more! Sport your luggage tags on your suitcase, carryon, sewing tote and more to unify your belongings and make them easier to spot.
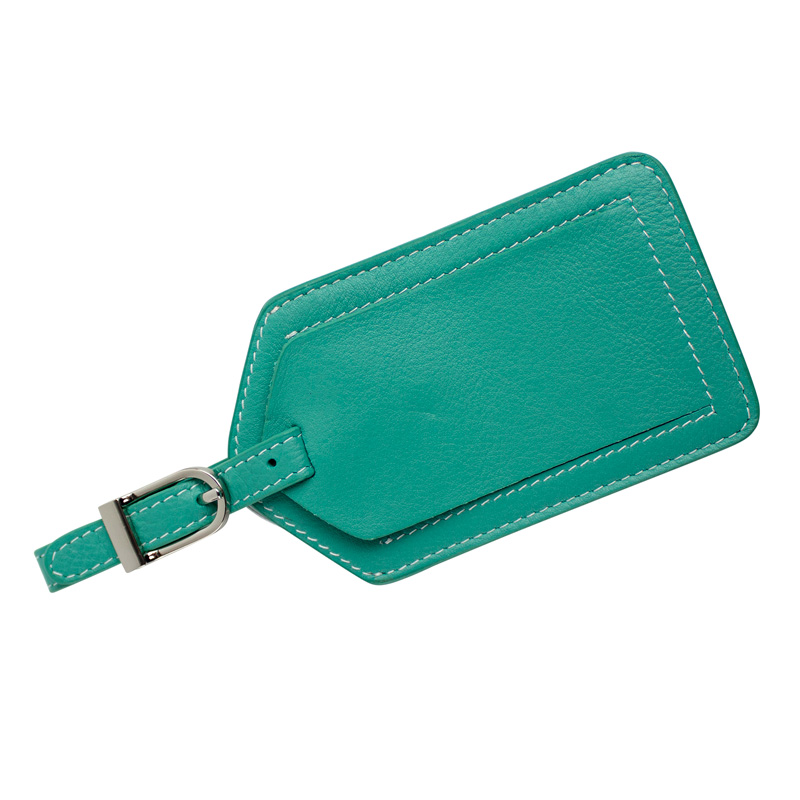
VERTICAL LUGGAGE TAG VARIATION
The luggage tag shown above features Sulky Poly Sparkle™ for the embroidery. This is a 30 wt. Thread, so a 90/14 Needle is recommended. However, when sewing leather, choose a needle size that’s JUST big enough to hold the thread without creating a too-large hole. In this case, a size 80/12 Top Stitch Needle was used with great results. Also choose a design without a lot of stitch fill, as shown. Too many satin stitches that are close together can cause the thread to bunch and break.
When scoring the Sticky+ Stabilizer, it’s also suitable to just score the area where the luggage tag sits. This makes it easier to patch a piece over the top once embroidery is complete, to allow for one more embroidery before a full sheet is needed. This is a great tip when making multiples for gifts.
Place the luggage tag on the stabilizer as previously instructed.
Embroider the design, using a Poly Deco or Poly Lite Thread paired with the Poly Sparkle Thread in the needle.
These make great gifts for Valentine’s Day, Mother’s Day, Father’s Day, Graduation and more!
COME TRAVEL WITH US
If you’re ready to see the world, with hosts who know the countries, safety rules and language, come with Craftours and Sulky to Europe this winter! We’re headed to Germany and Austria to see the sights, taste the food, feel the air and sew the crafts! (I’m teaching a hands-on workshop to commemorate our travels.)
We’re also headed to Greece in 2026! Check out the fabulous itinerary and join us for this trip of a lifetime.


Looking for a bit of clarification. I learned of this blog post from today’s email from Sulky. In the email is a sale about 60 wt PolyLite thread and a link to this blog post, stating “Featured in the Embroider a Luggage Tag — How-tos & Tips.” This post, however, the supplies list contains, “Sulky 40 wt Poly Deco Thread.” Should I be using 60 wt or 40 wt thread? Thank you.
It really depends on the design you’re stitching. If you’re stitching small lettering, 60 wt. PolyLite will work best for a better read. If you’re stitching a different type of design, I’d recommend 40 wt. Poly Deco or Rayon.