Holiday Gift Tags
by Ellen March
Handmade holiday gift tags are the perfect finishing touch to a wrapped present. Even better if you include a message to the recipient, letting him or her know you made what’s inside, too! These cute handmade gift tags are made using Sulky 12 wt. Cotton Petites thread but you can also use 30 wt. or 40 wt. thread for different looks. Download the free printable to use as a hand embroidery template, machine embroidery template, or simply print them out onto card stock and use the tags as-is!
GIFT TAG SUPPLY LIST
Supplies listed are enough to make 6 gift tags, depending on size of craft sheets.
- Sheet of craft felt
- Sheet of stiff craft felt
- Thread: Sulky 12 wt. Cotton Petites & 40 wt. Poly Deco
- Hand embroidery needle
- ¼”-diameter eyelets & eyelet setting tool
- ¼”-wide grosgrain ribbon
- Embroidery Iron-On Transfer Pens (optional)
- Seam sealant (optional)
- Free printable
HOW-TO
Determine the desired holiday gift tag from the free printable. Cut out the tag along the outermost line. From each felt sheet, cut out the gift tag. Transfer the embroidery design onto the craft felt right side using a pencil. Or, print the gift tag pattern in reverse and use Sulky Embroidery Iron-On Transfer Pens to transfer the design onto the felt right side.
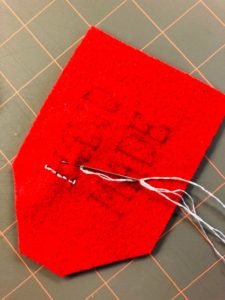
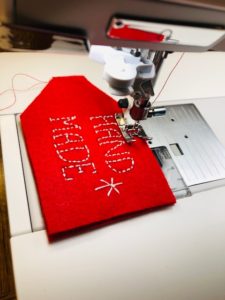
Using a backstitch, hand embroider the design onto the craft felt. Alternatively, set your machine for free-motion stitching by lowering the feed dogs. Thread the machine with 12 wt. thread in the needle and 40 wt. Poly Deco in the bobbin. Install a 90/14 topstitch needle. Stitch the words and/or motif, following the pattern.
Place the stiff craft felt tag over the embroidered felt wrong side; pin the perimeter if desired.
Machine stitch the gift tag ¼” from the perimeter using Poly Deco thread, enclosing and concealing the hand embroidery tails within the layers. Or, hand sew the perimeter using a long running stitch.
Follow the manufacturer’s instructions to insert an eyelet at the marked location on the pattern. Or, cut a small hole according to the pattern and leave the edges raw.
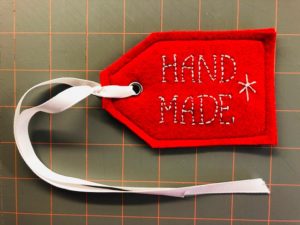
Thread a length of ribbon through the eyelet or hole; knot the ribbon near the hole. Tie the gift tag to the gift as desired. Apply seam sealant to the ribbon ends to prevent fraying.
Here are some different looks, using different thread. Choose your own adventure to make your handmade gift tags!

BOTTOM: Sulky 12 wt. Cotton Petites by machine. If using 12 wt in the machine, load the bobbin with 40-60 wt thread.

I think this might be my favorite!





Please tell me you did not install the eyelet on top of the plastic ruler and cutting mat!
No, Paula. I just photographed it that way. I did it on a block of wood. Thank you for mentioning that! I would hate for other people to ruin their sewing supplies.
This article was very helpful. Thank the author very much.