In-the-Hoop Christmas Stocking
by Pamela Cox

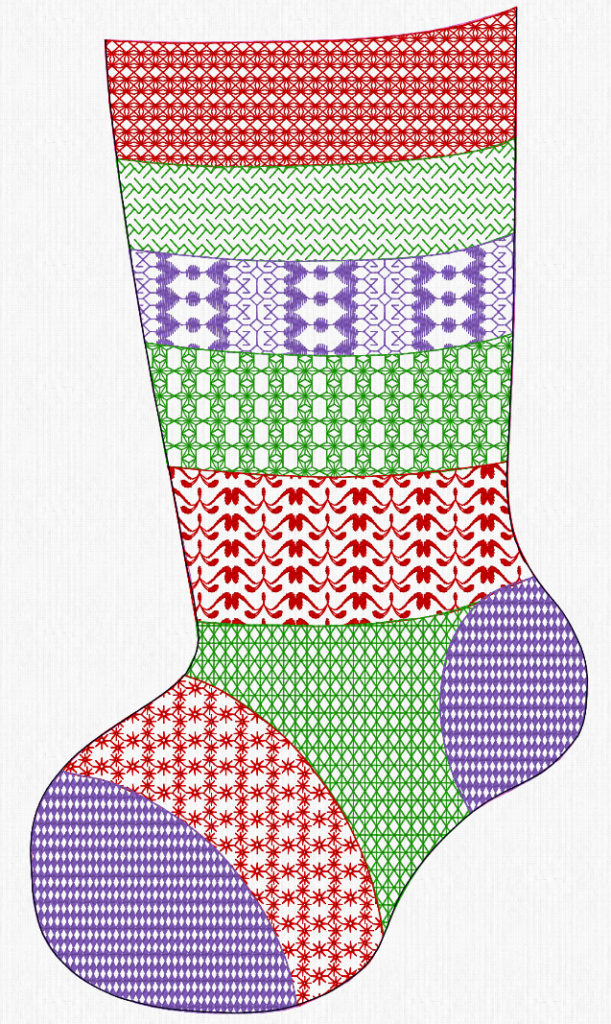
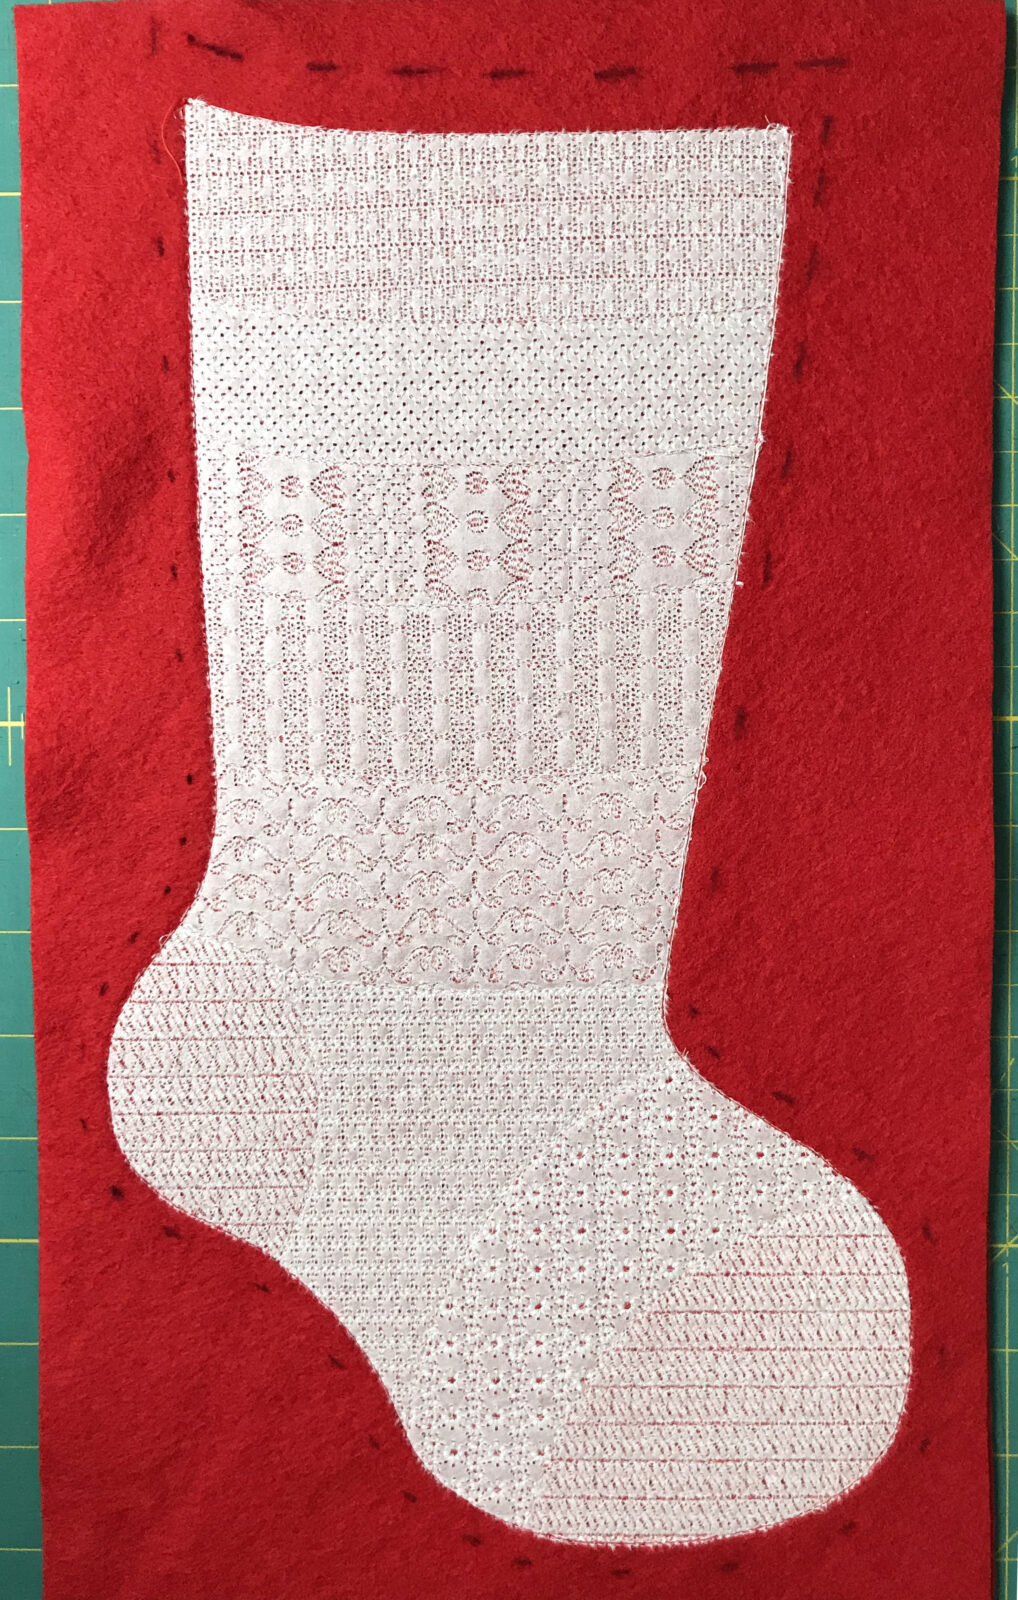
Stitch this Christmas Stocking to use as decoration, a gift, or to fill with goodies! It is made in two “in-hoop” sections: the embroidered stocking, and the lining, with finishing touches stitched on a sewing machine.
Don’t be afraid of the high stitch count for the patterned stocking front. The rows are decorative patterns, so the stitches are all small. It stitches up quicker than you might imagine.

Supplies:
- 1/4 yard wool felt
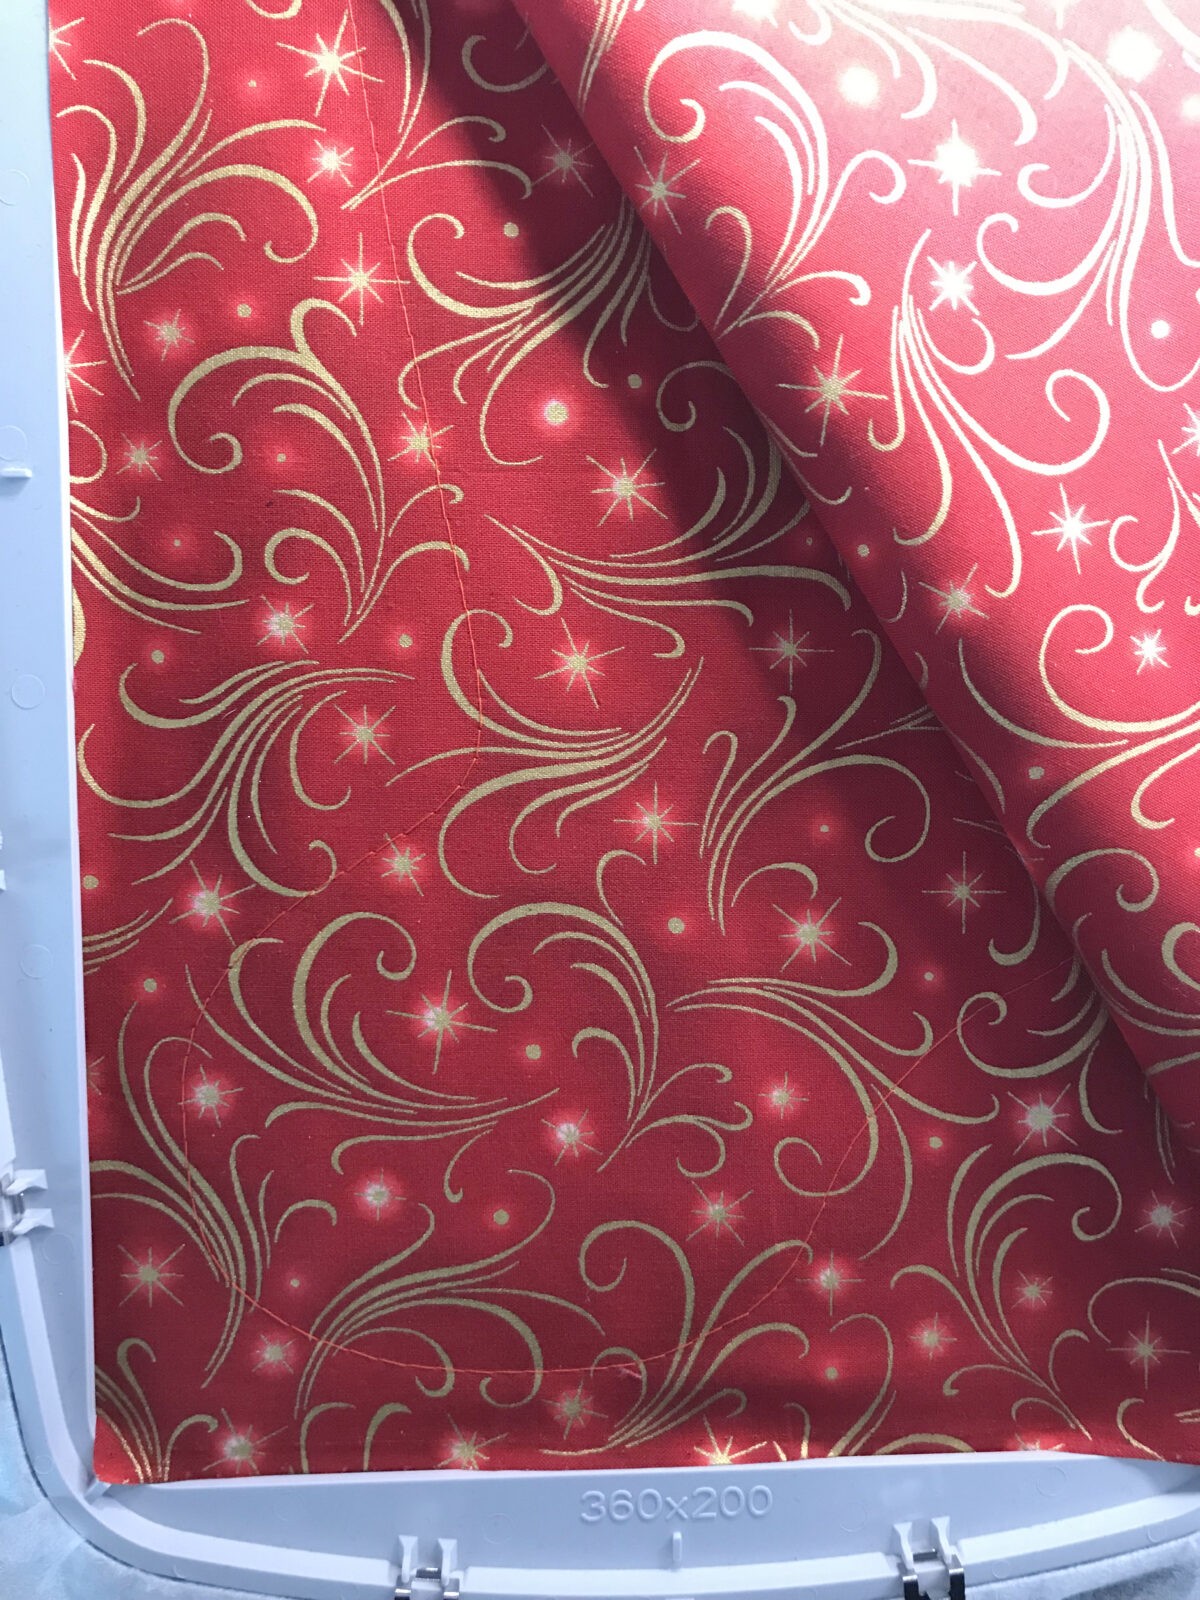
- 1/4 yard lining fabric
- 5-1/2” decorative cording
Topstitch Needles:
Sulky® Stabilizers:
Thread:
- Sulky 40 wt. Rayon Thread – for embroidery
- Optional to include Sulky Metallic Thread to add a little pizzazz!
- Sulky 50 wt. Cotton + Steel Thread – for construction
Sulky KK 2000™ Temporary Spray Adhesive
Stocking Embroidery Designs:
Christmas Stocking Tutorial:
Secure Sticky+ Stabilizer directly in a 360mm x 200mm hoop with the gridded paper side facing up. Gently score the paper inside the frame with a pin and remove, exposing the sticky surface.
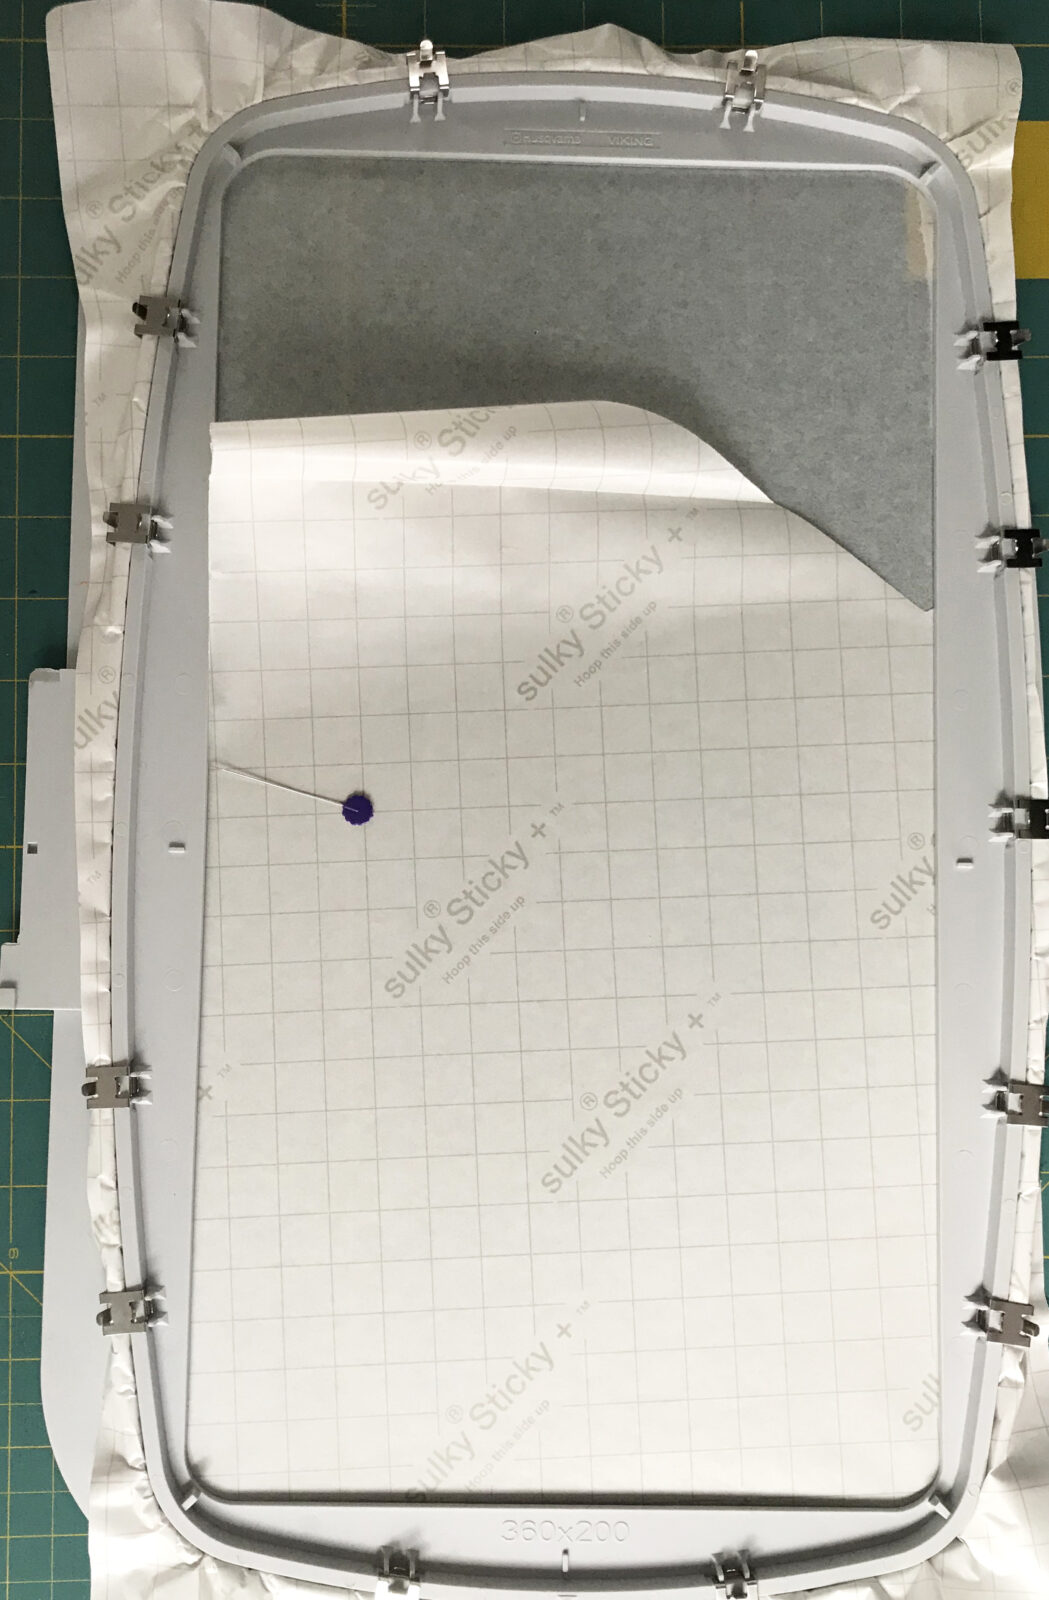
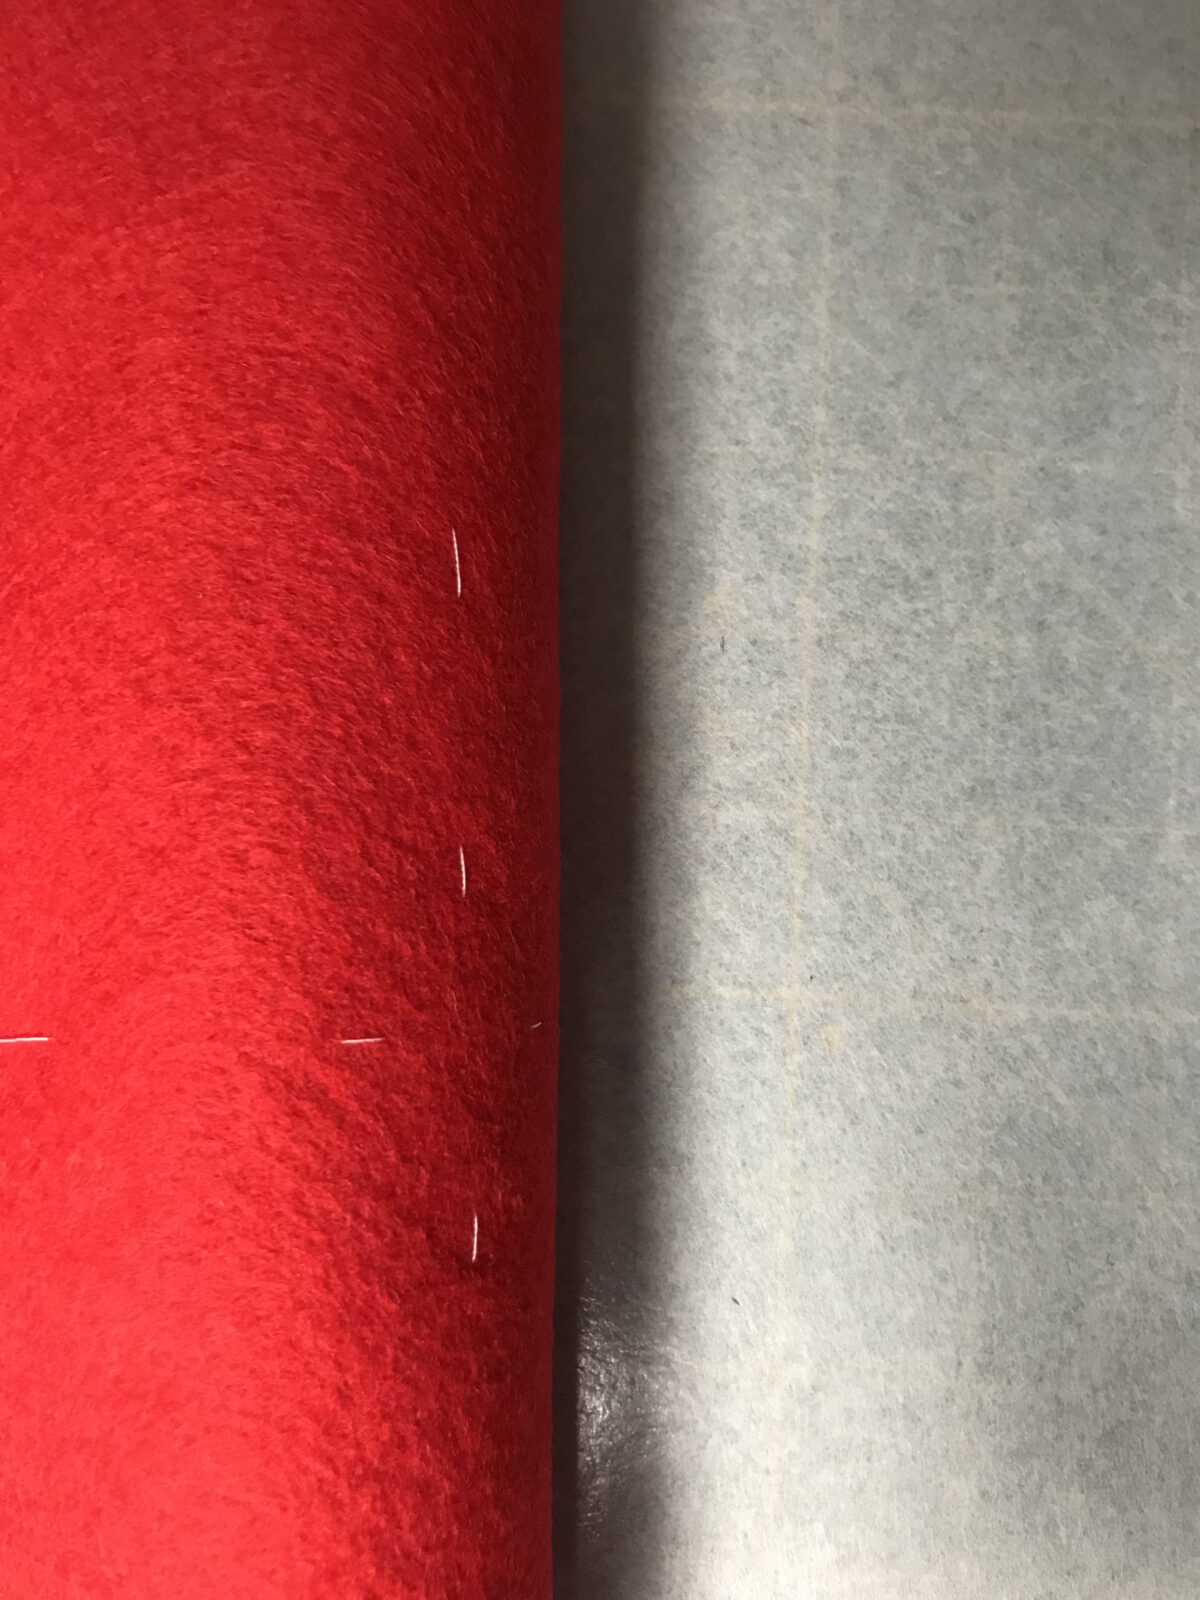
Cut two 15-1/2” by 9” pieces of wool felt. Mark one piece into quarters, by marking the intersecting lines with hand-basted stitches. Match the center of the rectangle to the center markings on the hoop. Firmly press the wool fabric onto the sticky surface, keeping it wrinkle-free.
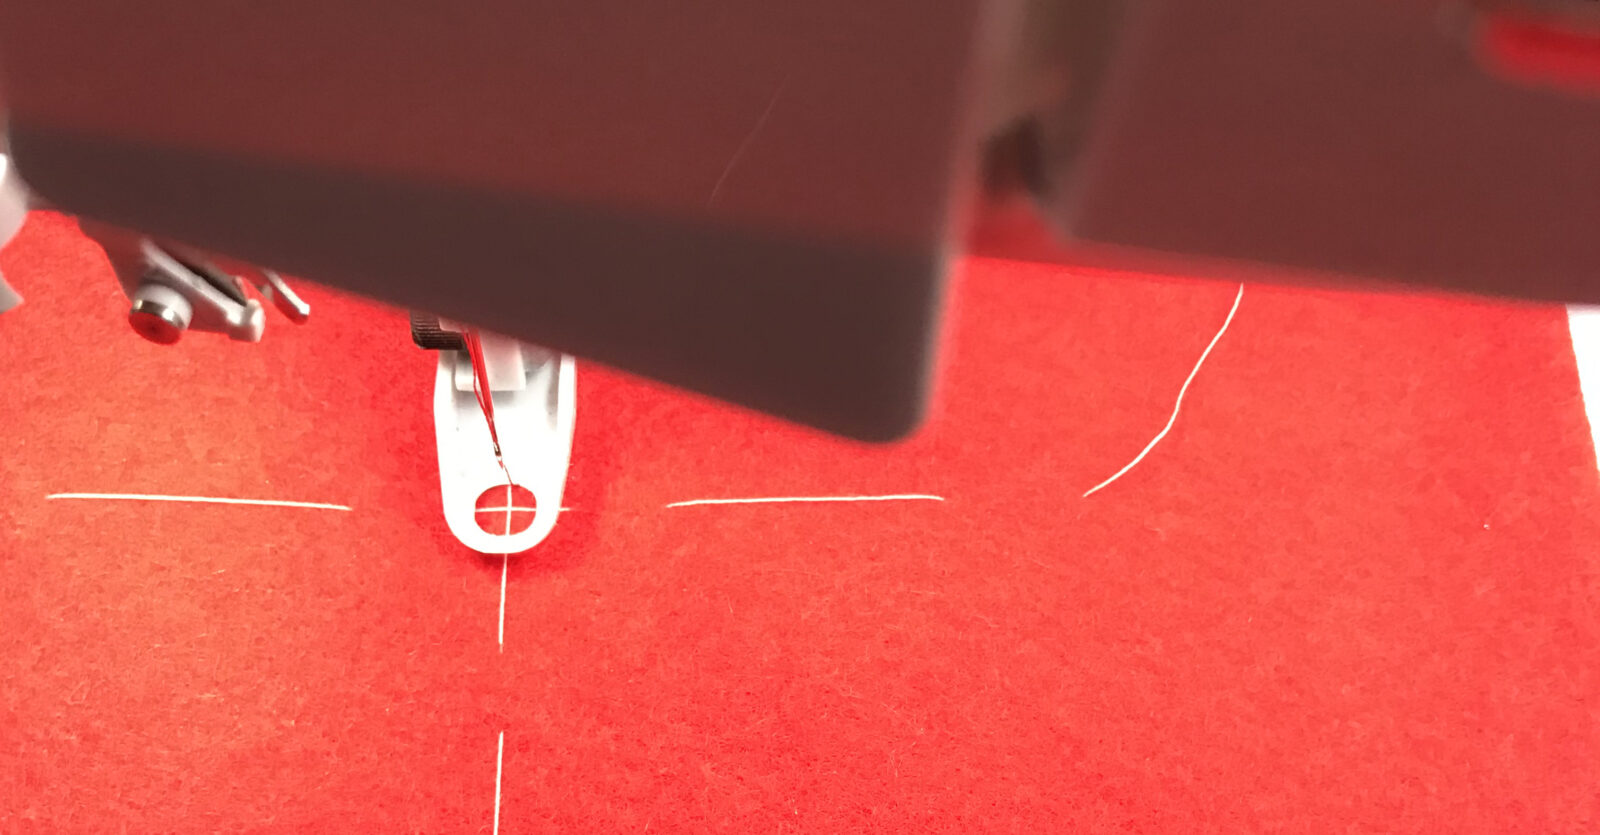
Transfer the embroidery design to your embroidery machine. Match the design needle position of the machine to the center of the wool felt fabric (intersection of basted lines).
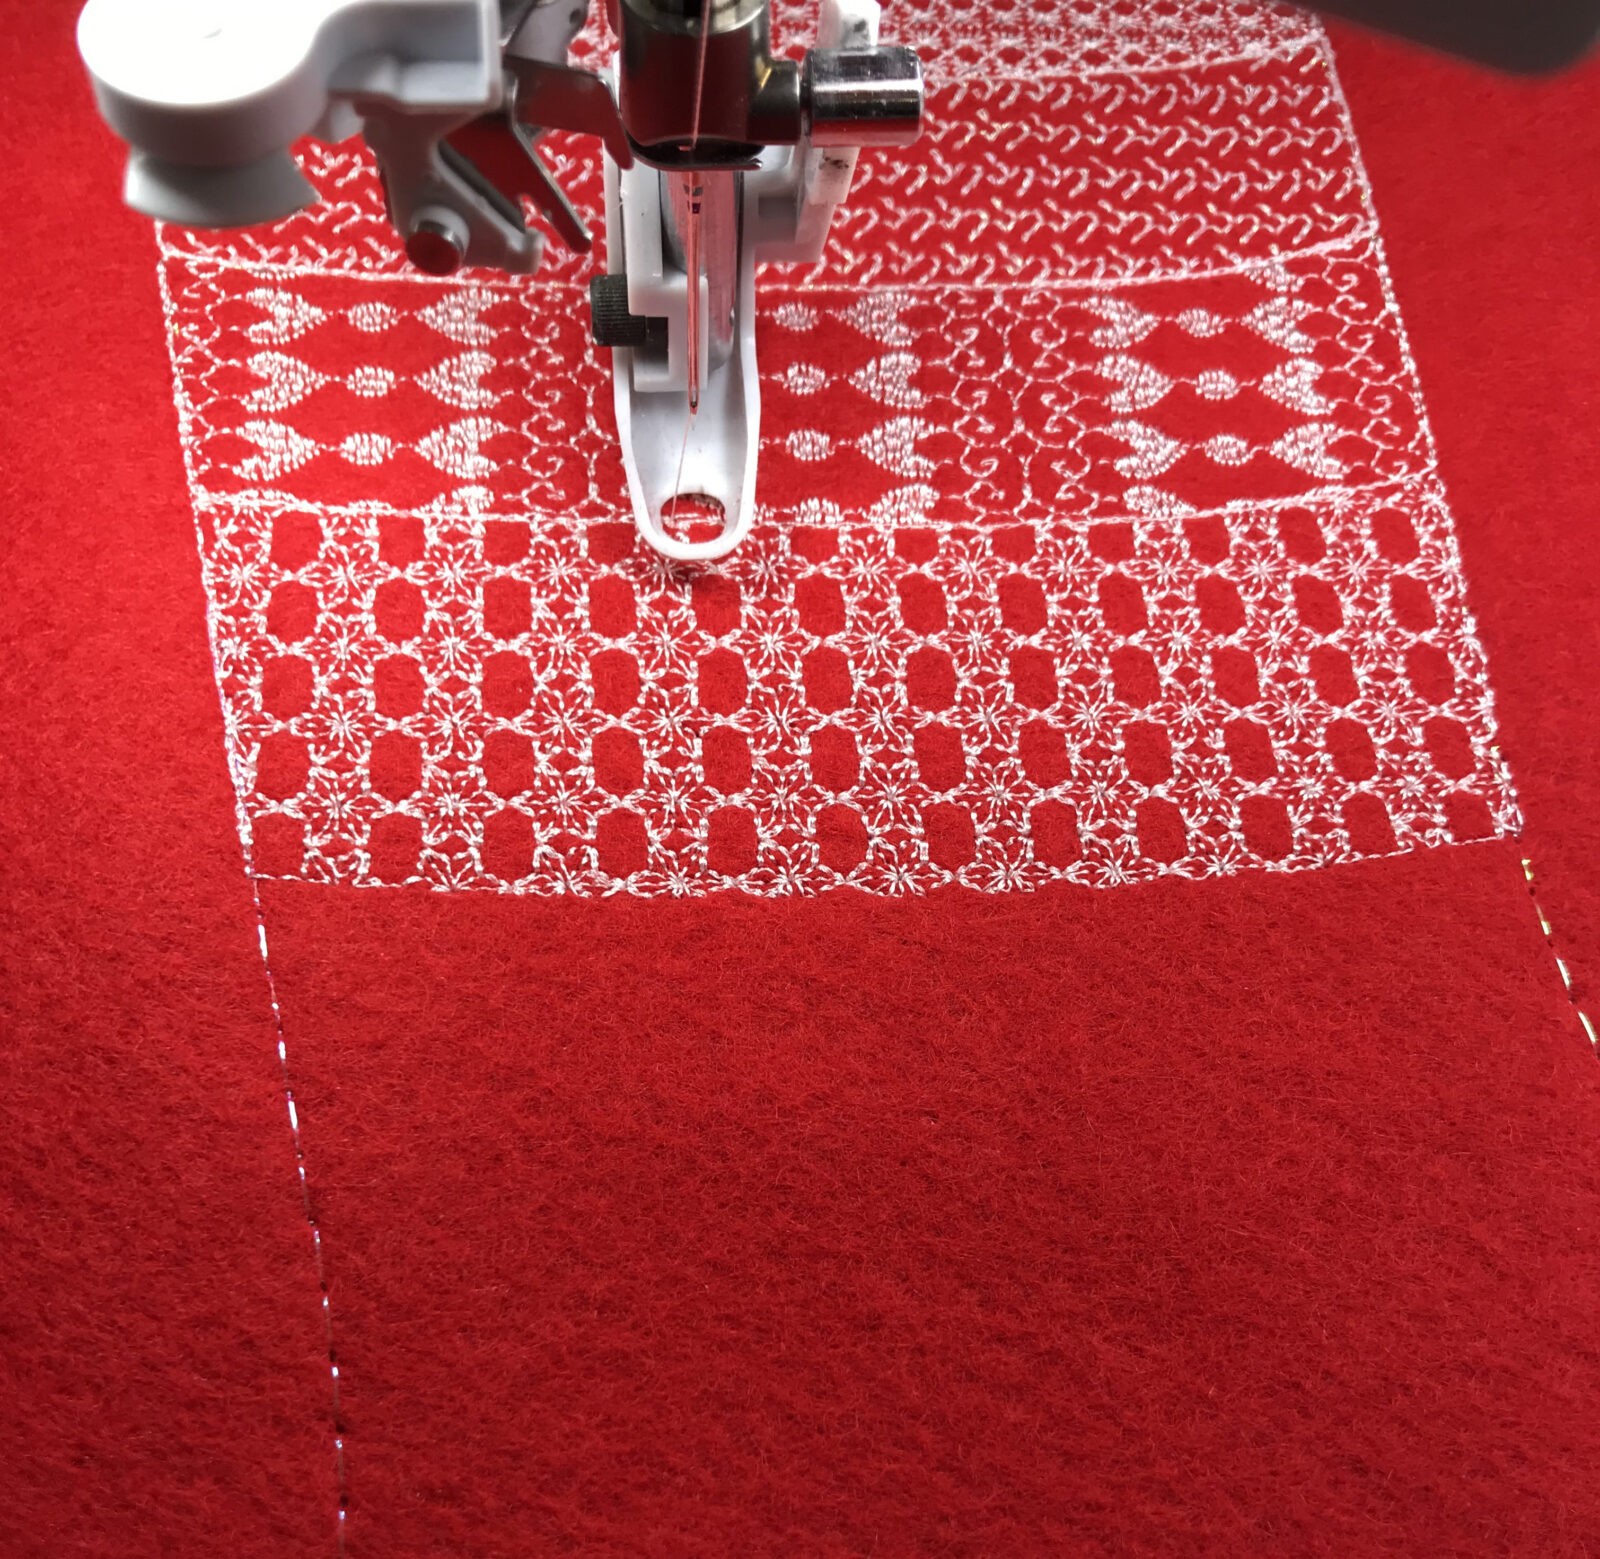
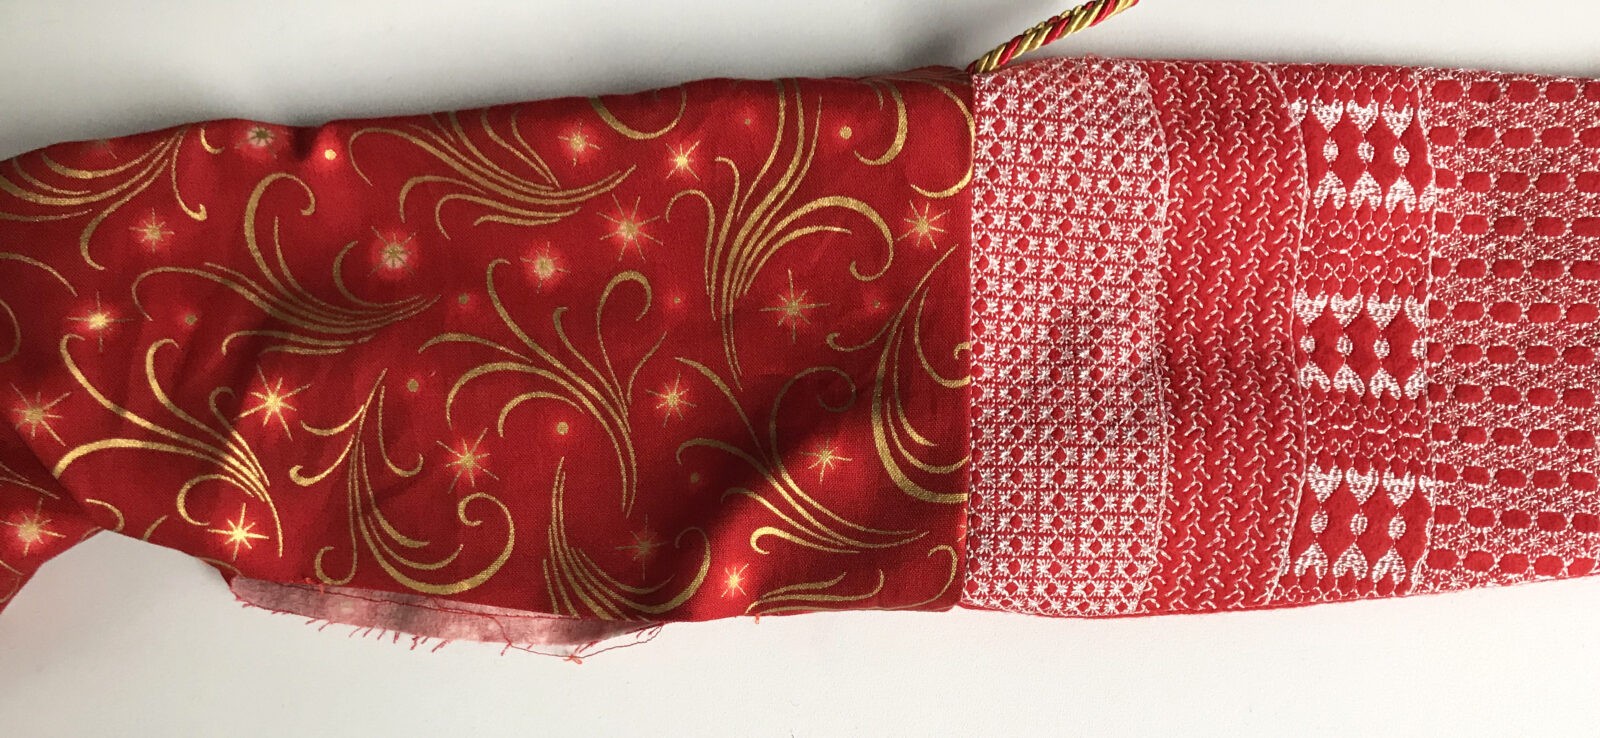
Stitch the patterned stocking front. Refer to the Design PDF file for complete stitching information:
The design can be stitched in one color and type of thread…

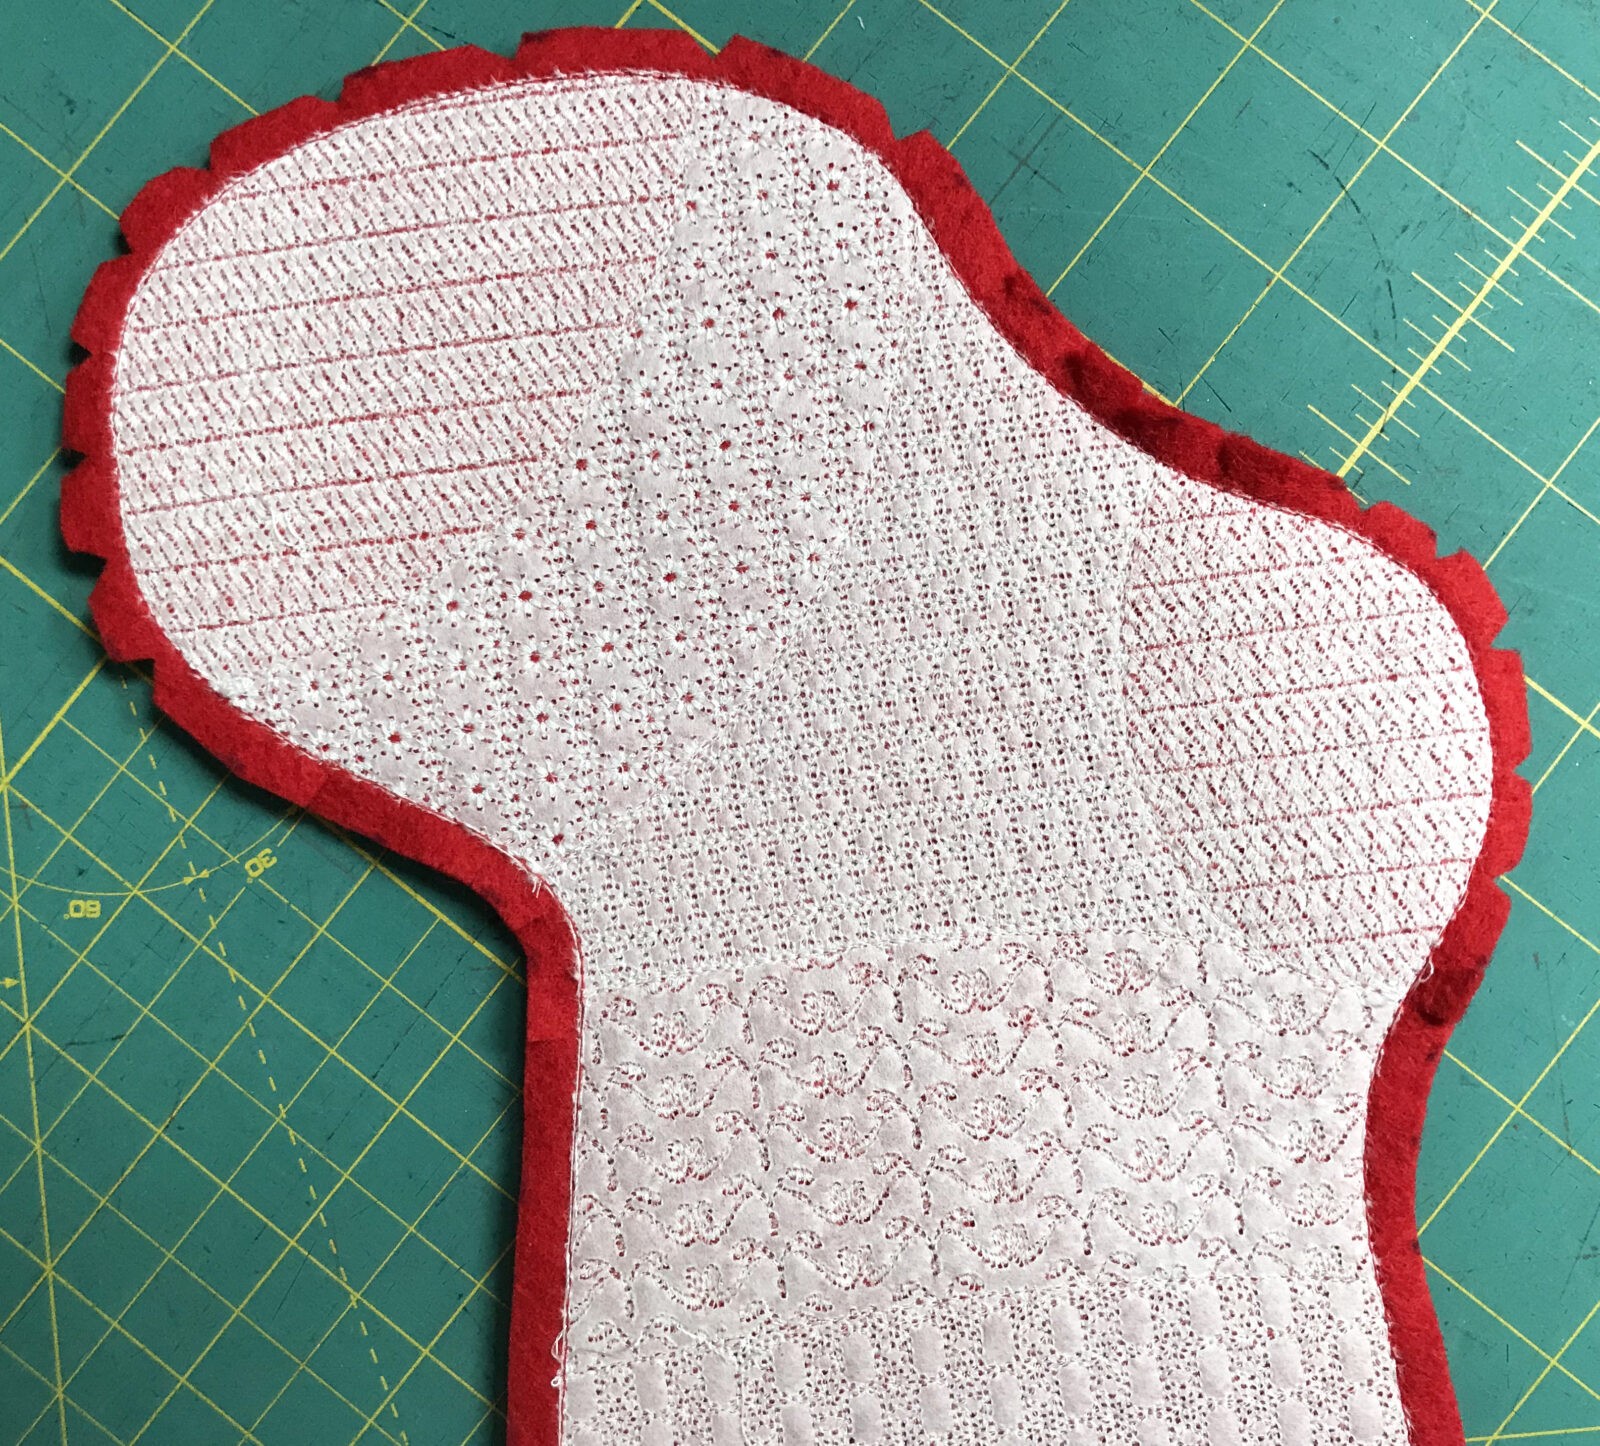
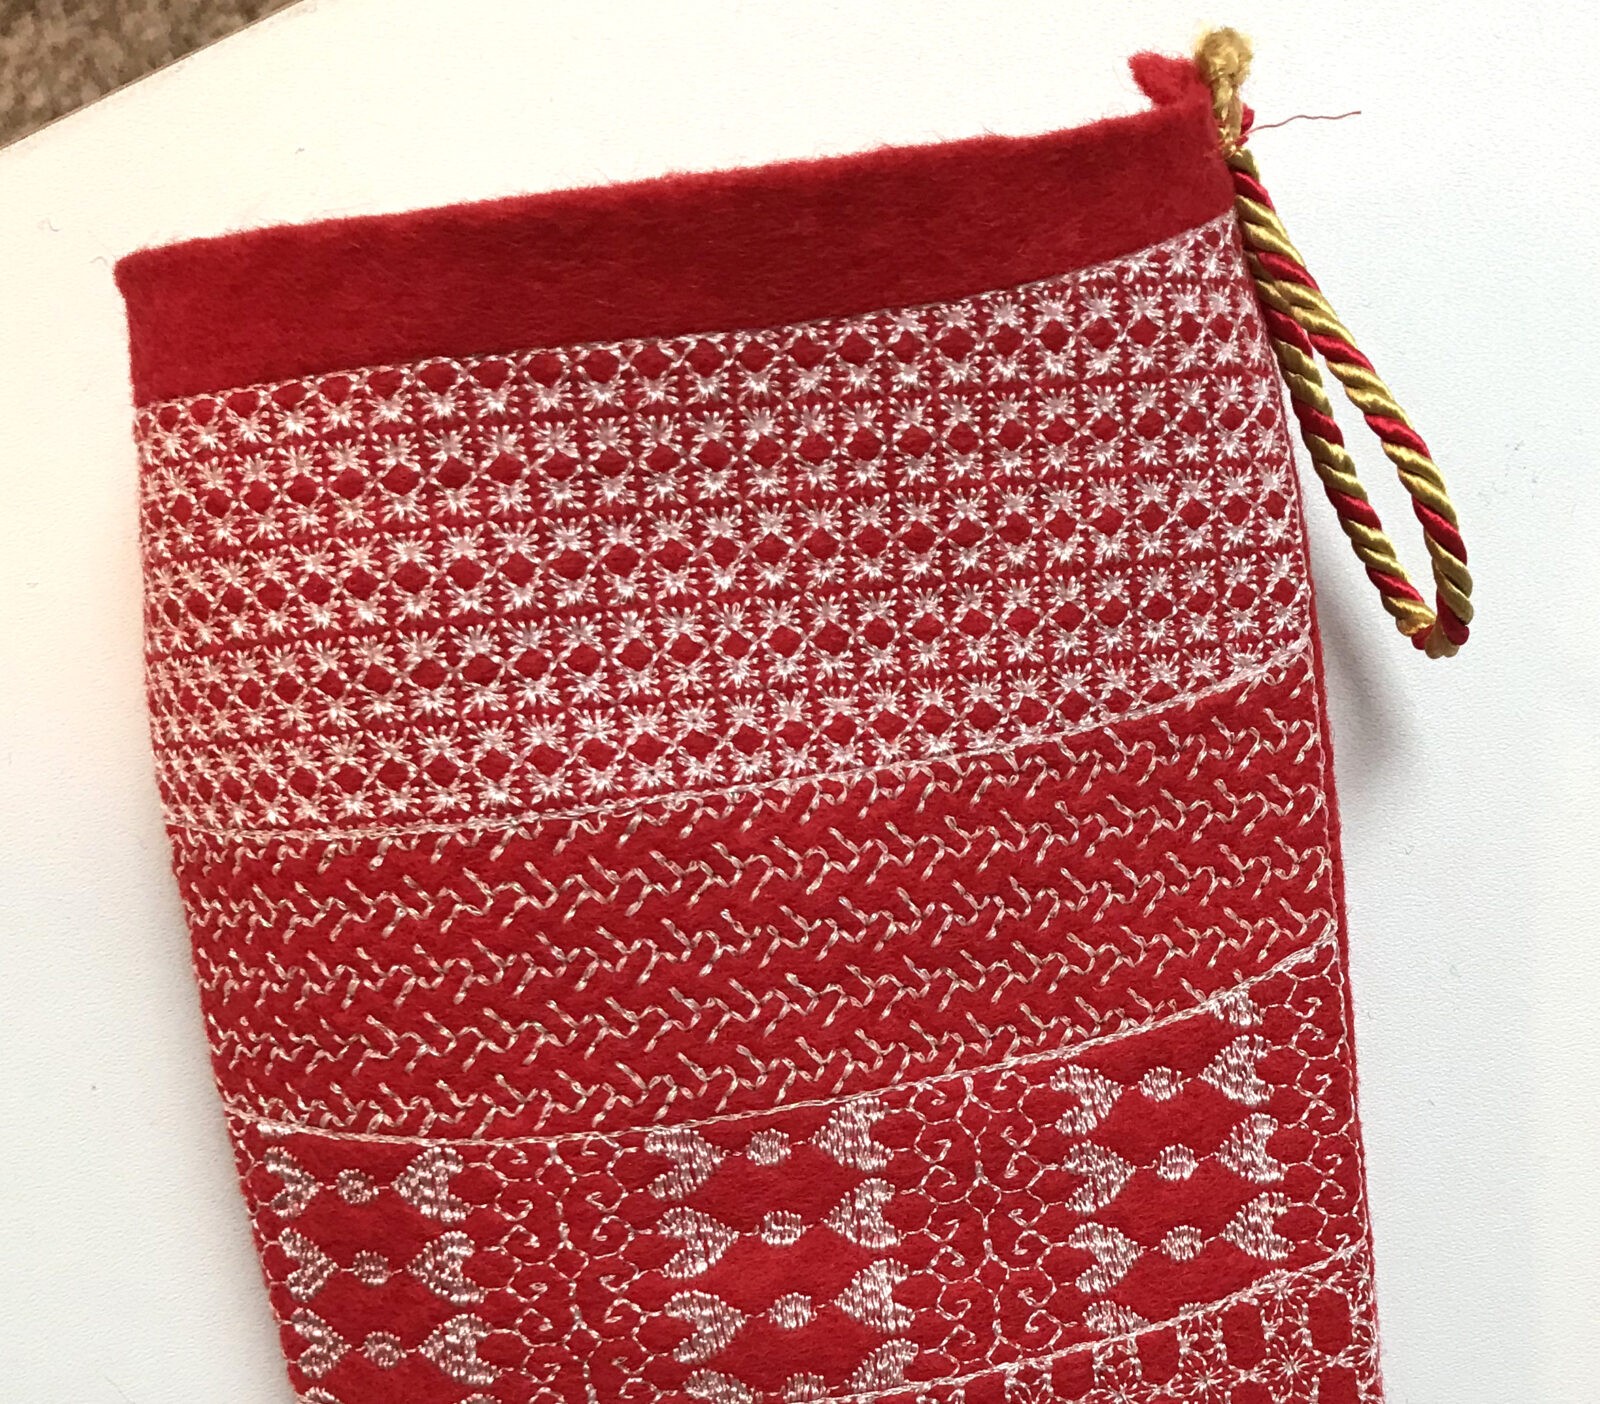
or add a bit of sparkle to a monochromatic theme with one of the Sulky metallic threads. The stitched sample shows Original Metallic #142-7021 on rows 2 and 7, with all other rows stitched in 40 wt. Rayon 942-1002. Patterned rows can also be stitched in color! The choices are yours to make!
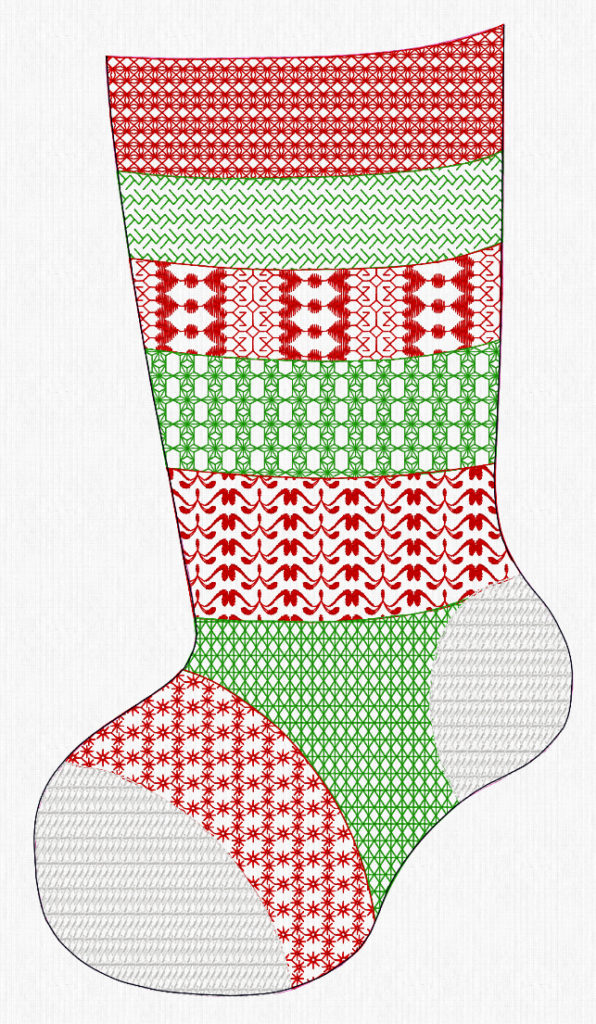
Color Stop #1 outlines the stocking shape and further secures the wool felt to the stabilizer. Continue embroidering until all the pattern rows have been stitched.
Before the final Color Stop #10 is stitched, lightly spray one side of the second wool felt piece with KK 2000™ and press it firmly to the hooped embroidered piece.
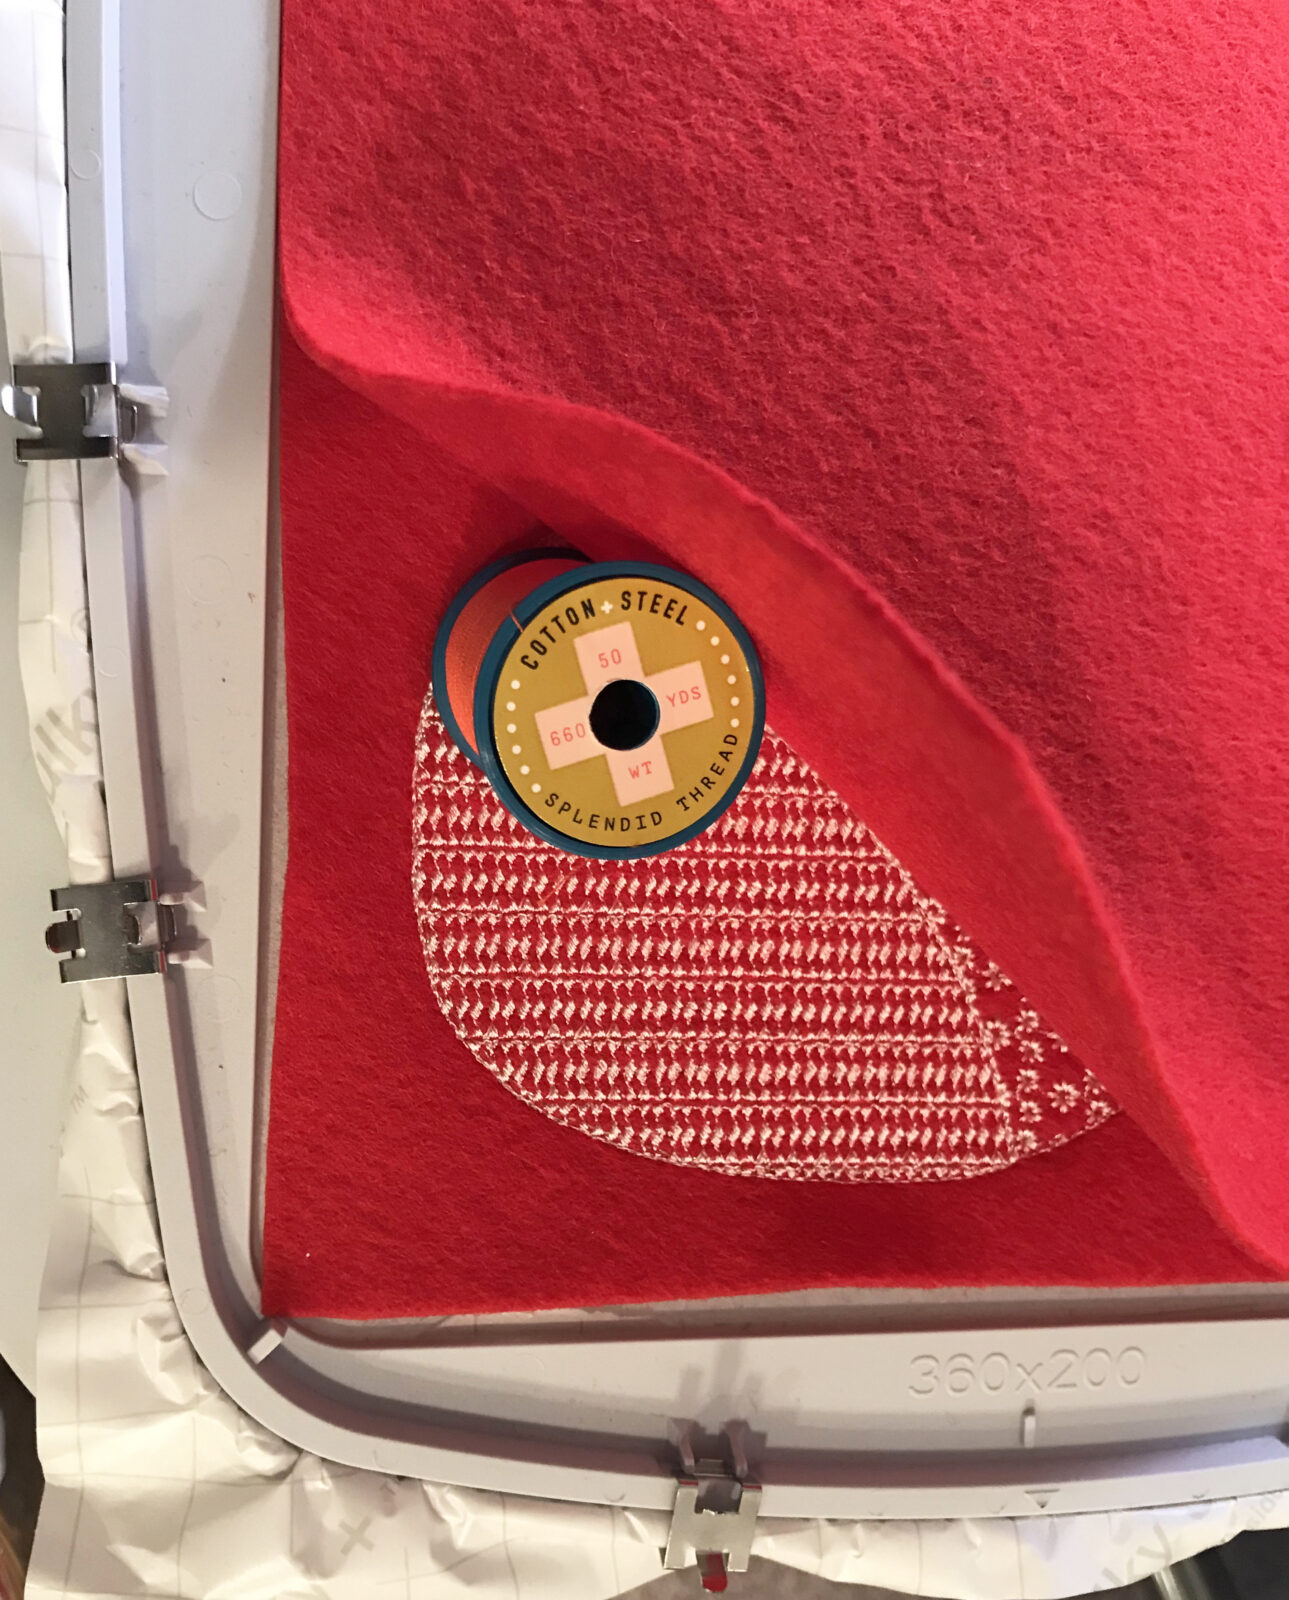
Thread the machine and bobbin with Cotton + Steel thread in a color to match the wool felt. Stitch color #10.
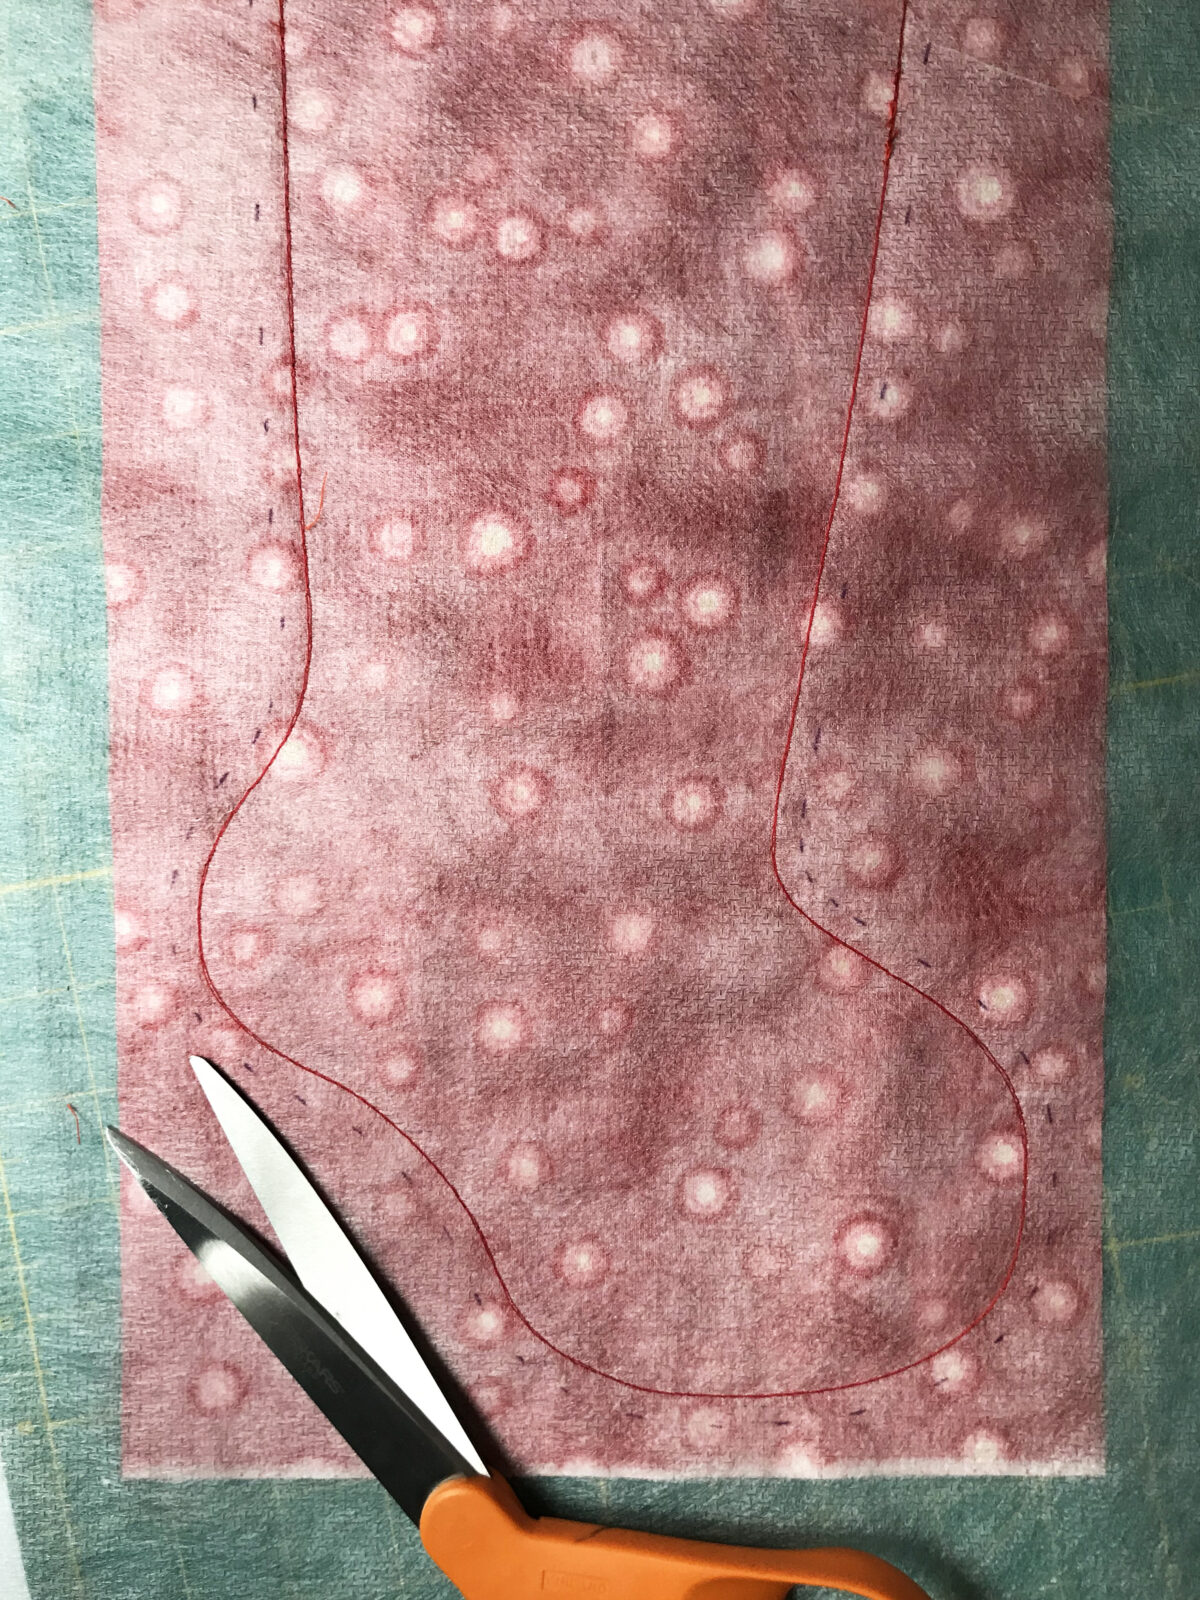
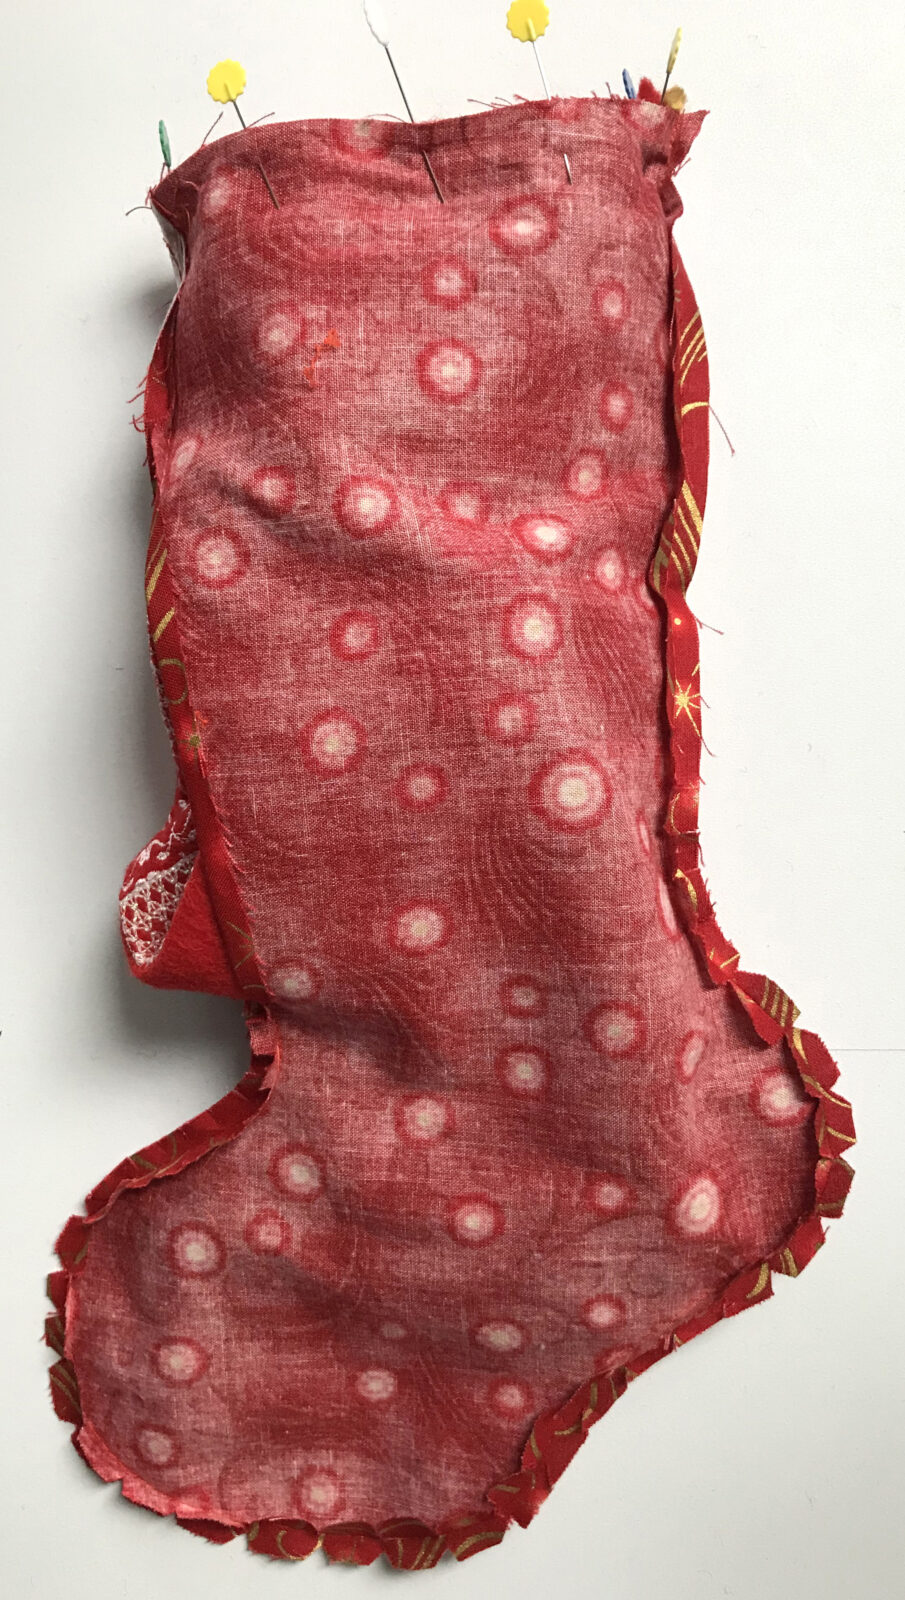
Remove the stocking from the hoop. Trim any long jump threads and gently tear away the excess stabilizer from outside the stocking shape.
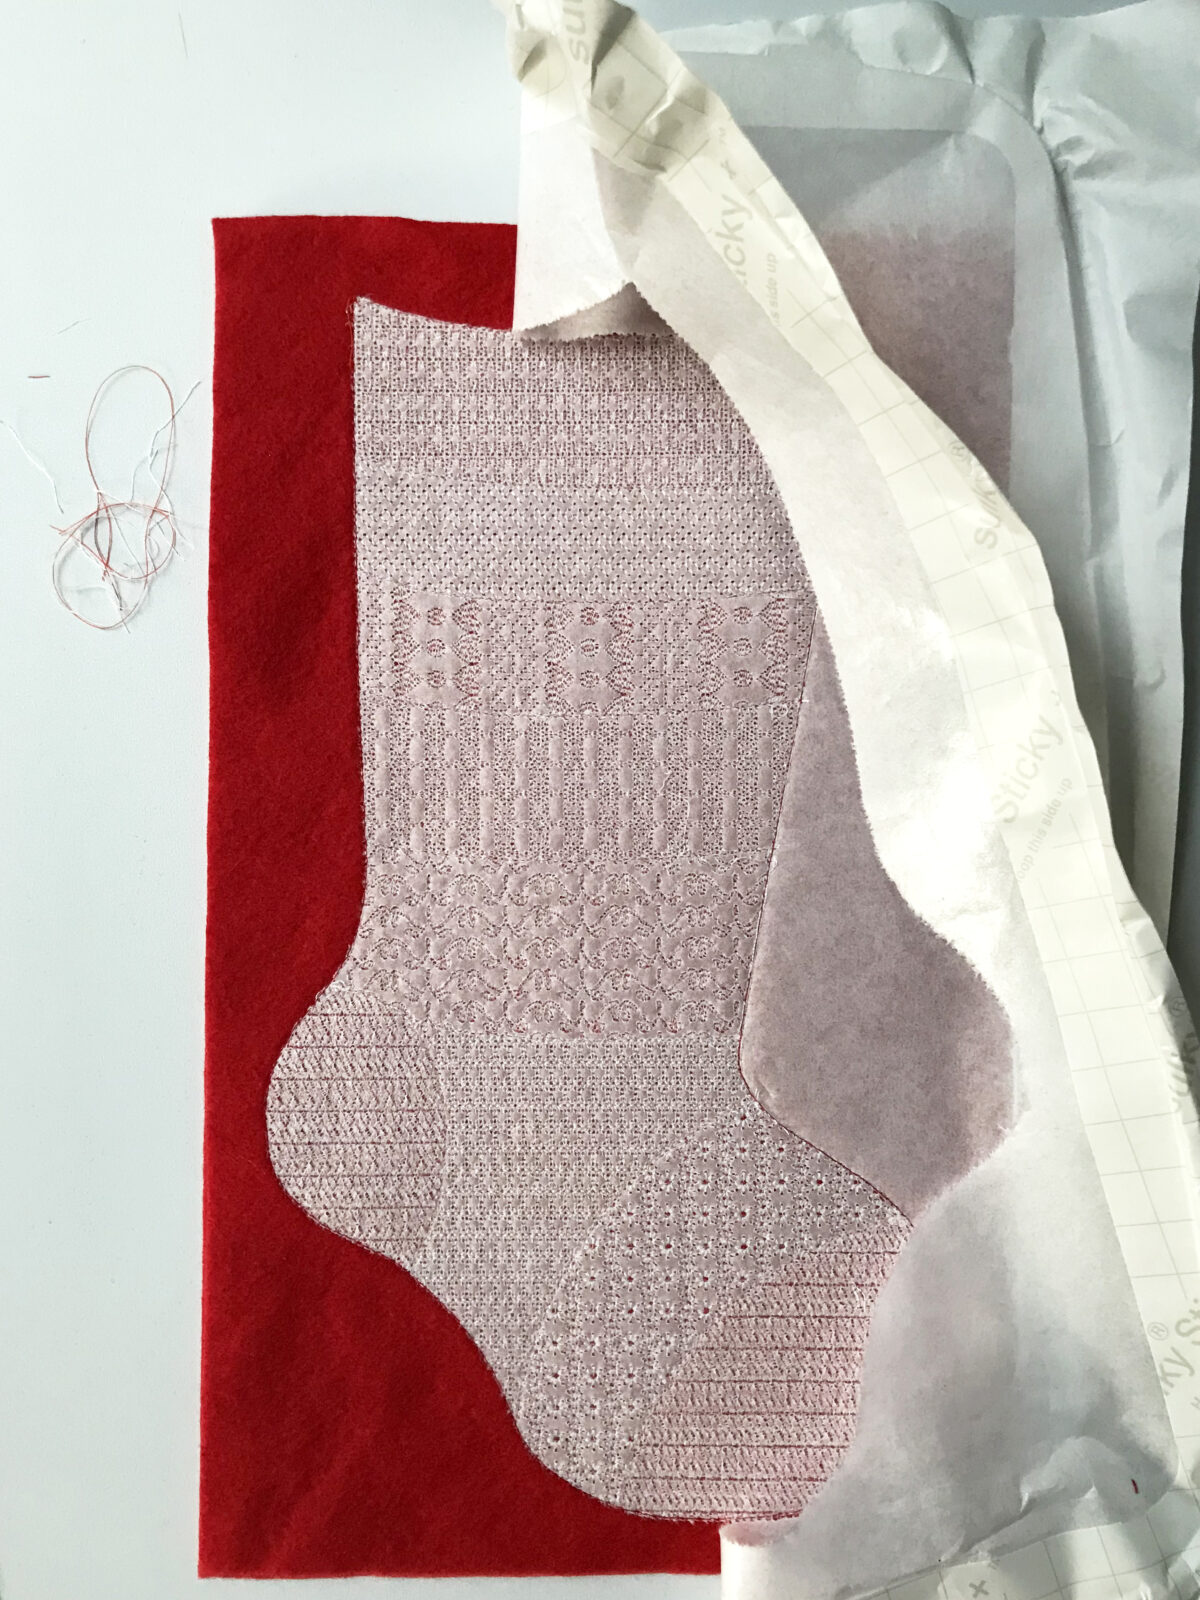
Use the stitches at the stocking’s top as a guide to cut a 1/2” seam allowance.
Cut the stocking shape 1/4” outside of the stocking’s outline stitch
Clip curves and turn right-side out.
Lining:
Secure Soft ’n Sheer Stabilizer directly in a 350mm x 200mm hoop.
Cut two 15-1/2” by 9” pieces of lining fabric. Divide and mark one piece into quarters like you did before.
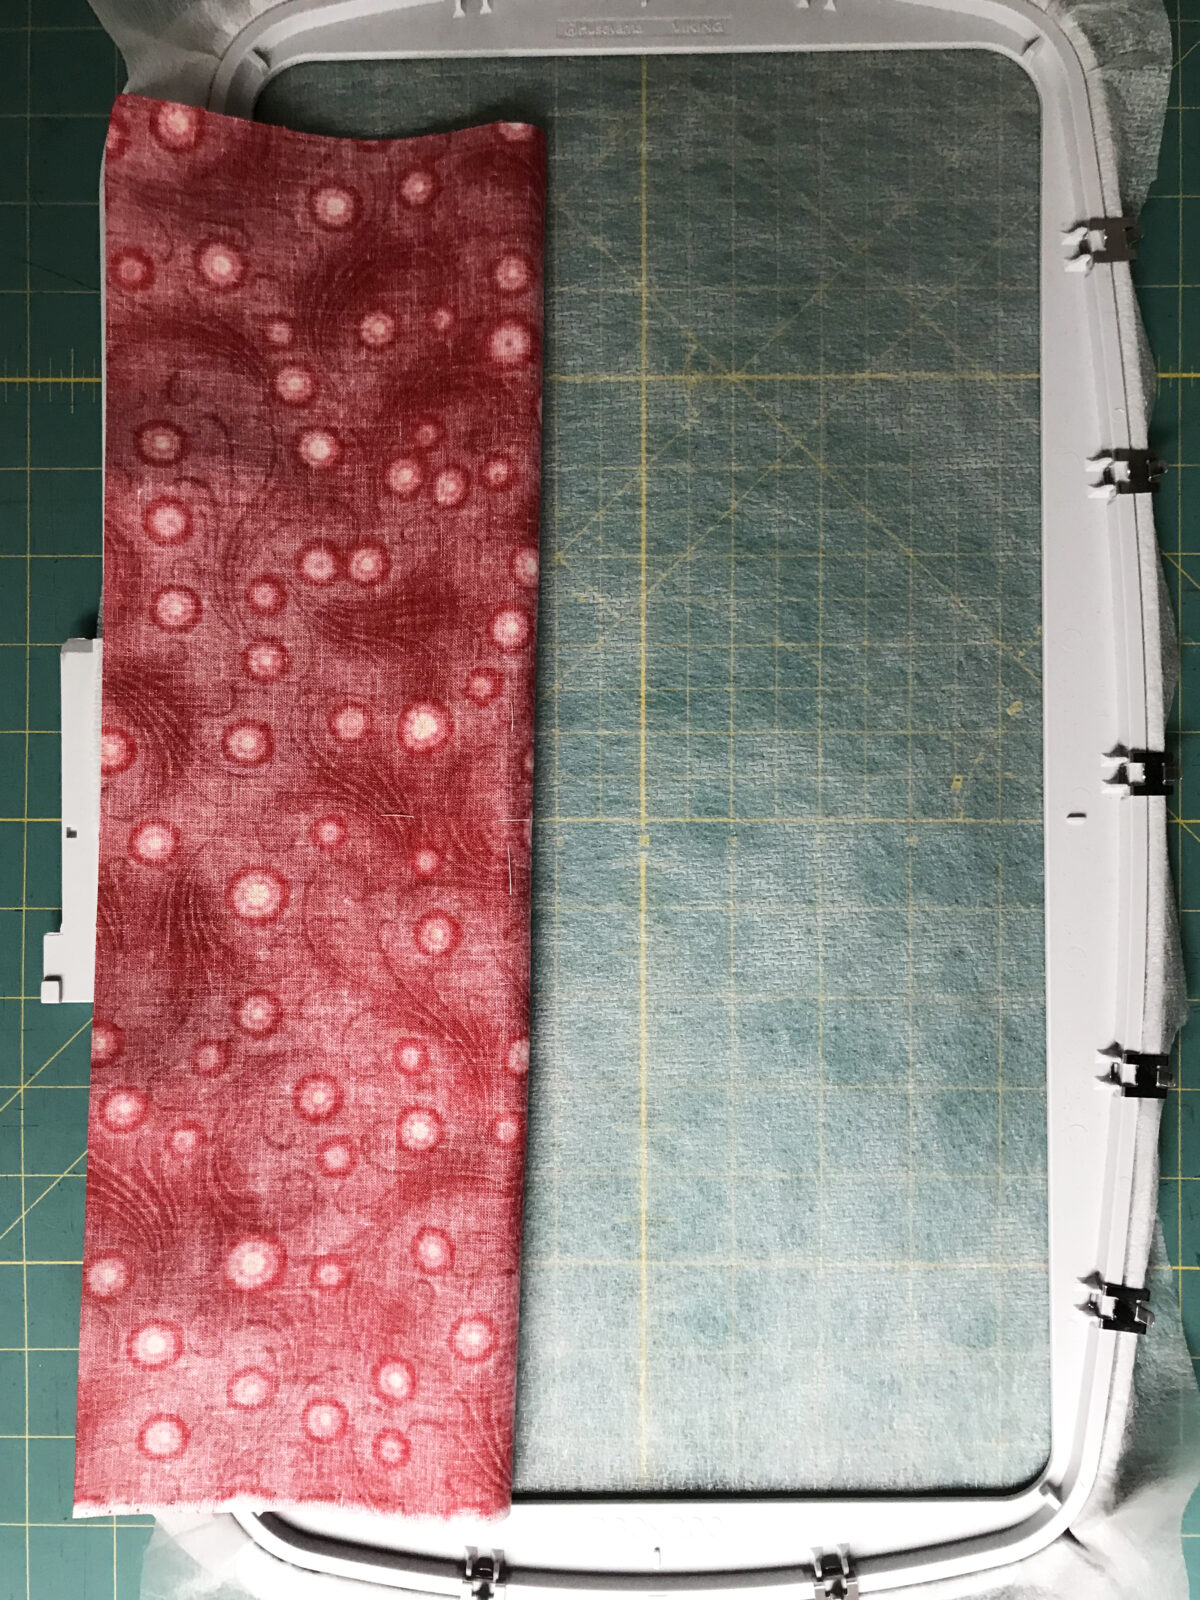
Lightly spray the wrong side with KK 2000, and press it firmly to the hooped stabilizer, centering it in hoop.
Transfer the “lining” embroidery design to the machine.
Stitch both color stops in Cotton + Steel thread (top and bobbin) in a color to match the lining fabric.
Stitch Color Stop #1 – use the foot control to “embroider” this outline. This affords better control and quicker stopping times as the fabric is kept taut and wrinkle free on the stabilizer.
Before stitching the final color stop, lightly spray the right side of the second lining piece with KK 2000. Press it firmly to the hooped lining piece with right-sides facing each other.
Stitch the second Color Stop using the foot pedal.
Remove from the hoop and trim the seams. Use the stitches along the stocking’s top (color stop #1) to cut a 1/2” seam. Cut a 1/4” seam allowance outside of the stocking’s shape.
Clip curves and leave it inside out.
Finishing:
Fold the length of cord in half. With raw edges together, place the loop in the top right-hand side of the stocking (heel side) straddling the side seam.
Within the 1/2” seam allowance, stitch cord ends to secure.
Tuck the stocking into lining (right sides will be facing each other).
Stitch around the top – using a 1/2” seam allowance. Pull the stocking out through opening in the lining.
Close the opening with hand-stitches.
Push lining into stocking.
Press the top seam, creasing top edge.
Hang by the chimney in hopes that Saint Nick will soon be there!

What a simple ITH project. Thanks for the design work too.
Happy Holidays to the team at Sulky.
I’m confused about the embroidery pattern. Do I need to download it, or where do I need to go to find it? Thank you for your help.
The embroidery designs are listed under supplies. The designs are available to download by clicking on the name (print is an orange color). Hope this helps!
Before I download the pattern, willl you tell me hoop sizes?
Both the stocking and the lining require at least a 360mm x 200mm hoop.
When I try to open the PES version, it says can’t open this file. Is there something else I need to do? I have Brother software but it isn’t opening the embroidery. Help?
Do you have embroidery software? If it is still not working, please email your concern to Patti.Lee@Sulky.com.
Thank you for the awesome in the hoop stocking with designs!
I have a brother machine, and need design in Pes.Is this digitized in Pes?
Yes, it is.
Wow nice article very help full easy to learn, awesome embroidery work and thank you for share.
Pingback: Embroidered Christmas Stocking Personalized In the Hoop - Sulky