Paper Pieced Pumpkin Table Runner
by Vicki Holloway
Create a paper pieced pumpkin table runner to display before Halloween and beyond! This table runner will take your decor into Thanksgiving with its pumpkin blocks and beautiful quilting.
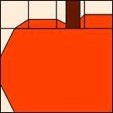
For this paper pieced pumpkin table runner, we’re repurposing the Apple Mug Rug pattern previously published and using different colored fabrics to turn the apple into a pumpkin. Don’t you just LOVE a dual-duty pattern? Me too! This one DOES have a slight variation with the pumpkin stem, so download the pumpkin here.
SUPPLY LIST
- Sulky Paper Solvy
- 50 wt Cotton + Steel thread by Sulky (Cornsilk & Avocado; piecing & quilting)
- ⅛ yard of white or neutral fabric (background)
- ⅛ yard brown fabric (stems)
- ⅜ yard scraps of orange print fabrics (pumpkins)
- ⅛ yard yellow fabric (cornerstones)
- ¼ yard orange fabric (sashing)
- ¼ yard brown fabric (outer border)
CUTTING & PREP
From the yellow fabric, cut ten 2 ½” squares for the cornerstones.
Cut thirteen 2 ½” x 6 ½” strips from the orange fabric for the sashing.
From the brown fabric, cut two 2 ½” x 36″ rectangles and two 2 ½” x14″ rectangles for the borders.
Print four foundation paper piecing patterns onto the Paper Solvy.
CONSTRUCTION
Cutout each paper piecing unit from the Paper Solvy.
Piece each section using orange scraps, background fabric and brown fabric for the stem piece. Assemble the top row of the pumpkin in this order: Unit F,E,A,D,C. Then sew the strip to unit B. Refer to the diagram below. You will end up with four pumpkin blocks.
TABLE RUNNER ASSEMBLY
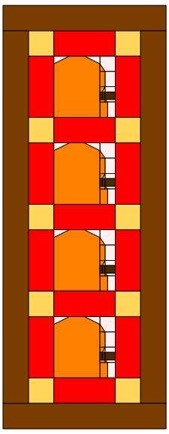
Sew the orange sashing to the left side of each pumpkin block. Then add one orange sashing on the last pumpkin right edge, orienting the pumpkins as shown above.
Assemble the outer sashing using a yellow cornerstone pieced to an orange sashing strip. For the upper and lower sashing, you’ll have a total of 5 cornerstones and 4 sashing strips.
Stitch the upper and lower sashing strips to the pumpkin strip upper and lower edges.
Sew the border to the upper and lower table-runner edges. Add the left border, and then the right. Trim the strips to fit each side as needed. Square up as you go for a nice finish.
QUILTING THE TABLE RUNNER
Quilt ribs on each pumpkin using yellow 50 wt thread.
Then set the machine for free motion. Quilt vines and a leaf on each pumpkin using green 50 wt thread. Practice drawing the leaf and vine on paper, and then transfer to the Paper Solvy. Place the Paper Solvy pattern onto the table runner right side and then quilt through all layers, following the drawn lines.
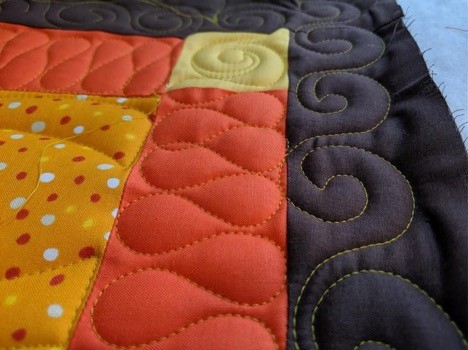
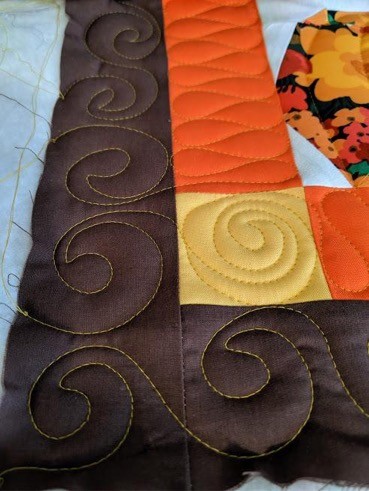
If desired, free-motion quilt ribbon candy in the sashing and swirls in the borders, using yellow 50 wt thread. Make the cornerstones stand out by stitching a spiral in each one.
For more free-motion tutorials, enroll in our Fearless Free Motion classes and watch this free webinar.

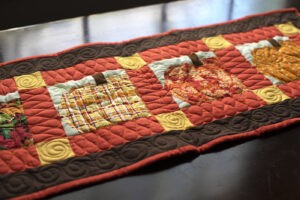
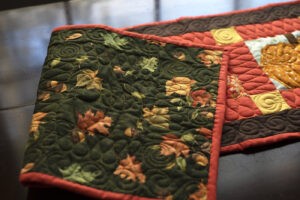
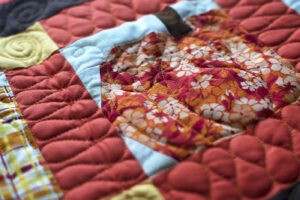

I’m sorry but that table quilt does not look good. It’s got ruffled edges. The batting looks to thick for something so small. It would help it to block it (get wet and pin down to a ridgid surface and let dry completely).
Thank you Jan, we should have steamed it prior to taking the photo! It really is beautiful.
I think it needs a spider web and less quilting.
What a cute idea! Thank you for a delightful tutorial.
I too was shocked at the finished runner in the picture. Not a quilting result to be proud of!