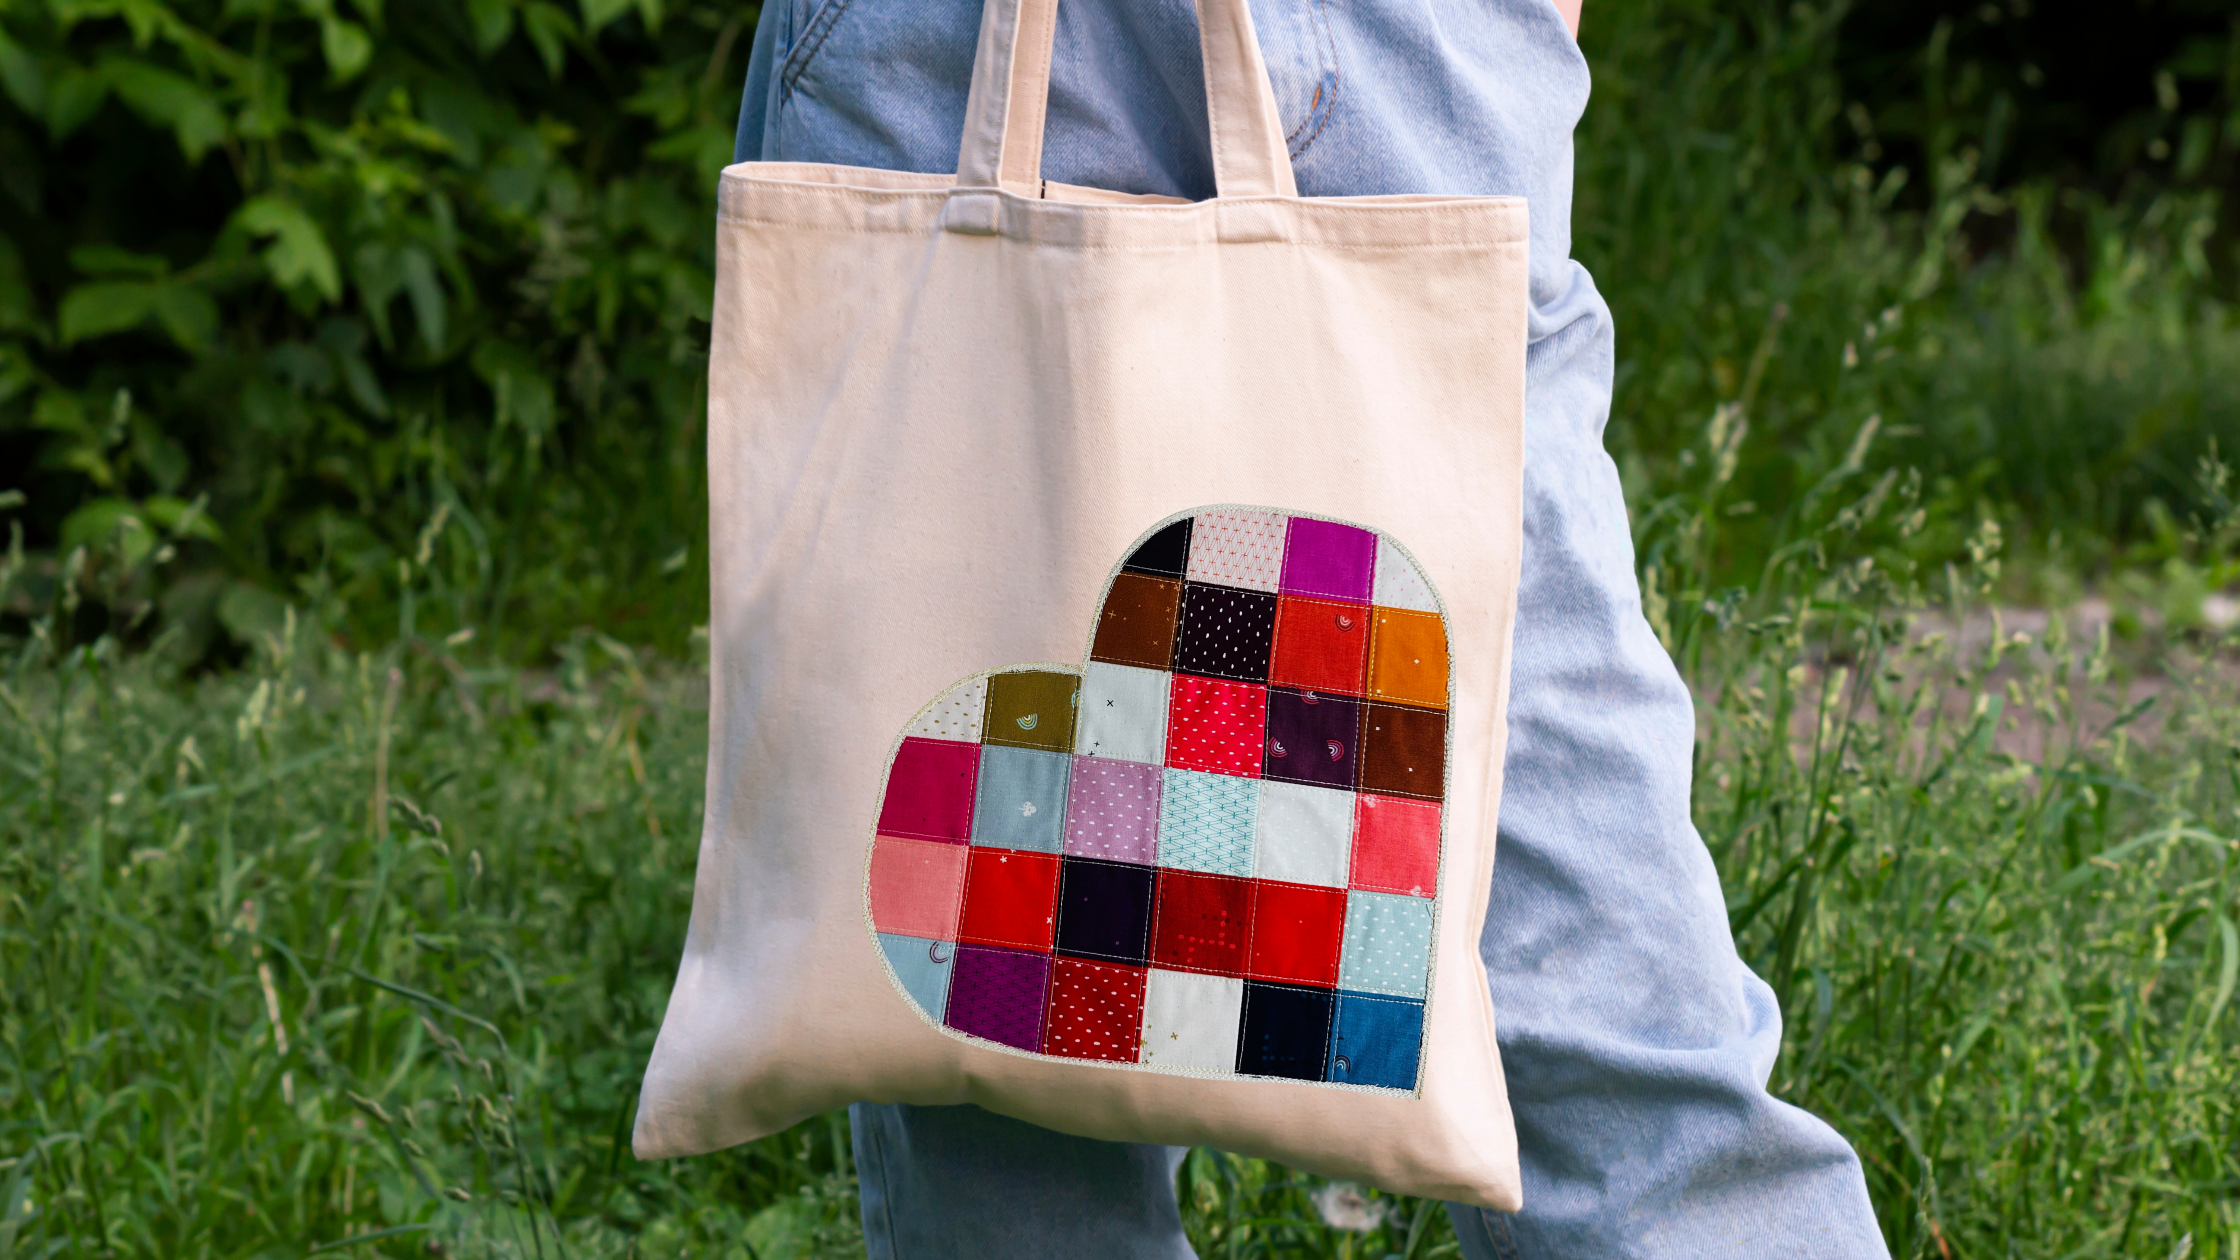
Learn a Reverse Appliqué Patchwork Heart Technique
& create a lovely tote

Create a patchwork heart with reverse appliqué that turns simple fabric into a colorful, textured statement piece .This gridded patchwork technique ensures perfect points and corners every time. Plus, by making your own grid onto Sulky Soft n Sheer Extra Stabilizer, you can use any size fabric square you like! We recommend using precuts, such as mini charm squares. However, larger 5″ charm squares and even smaller 1″ fabric squares can also be used, depending on the desired finished look and project. Once you learn the patchwork technique, you can create a LOVEly tote bag, pillow, sweatshirt or jacket using the same reverse appliqué method.
PATCHWORK HEART SUPPLIES
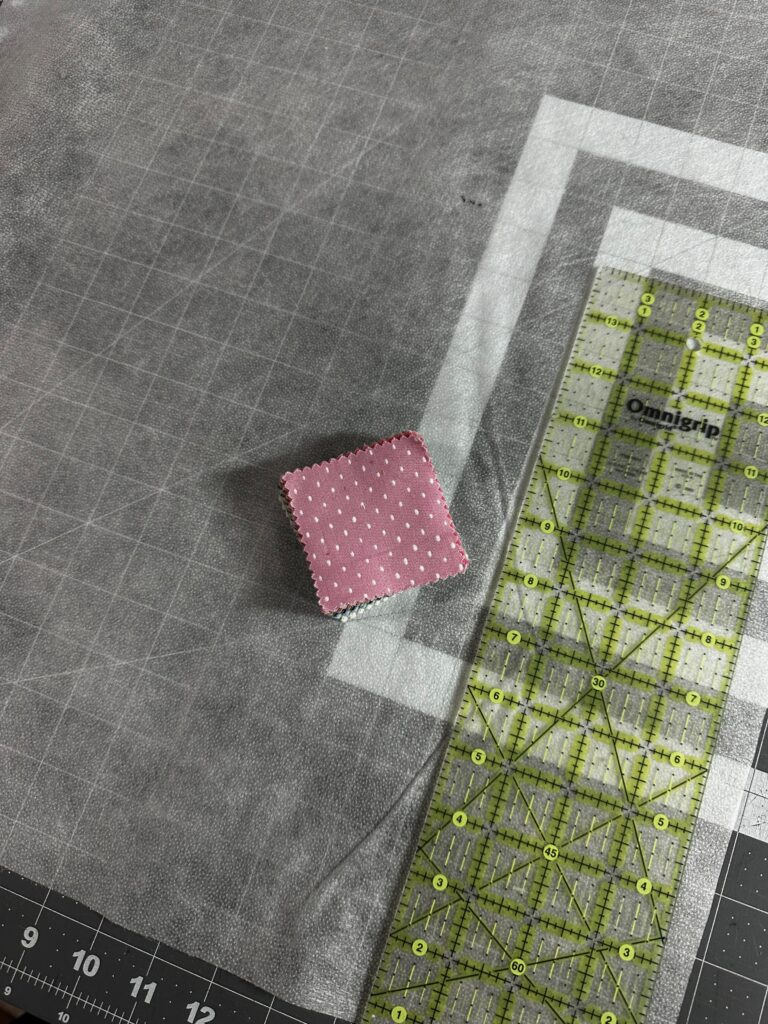
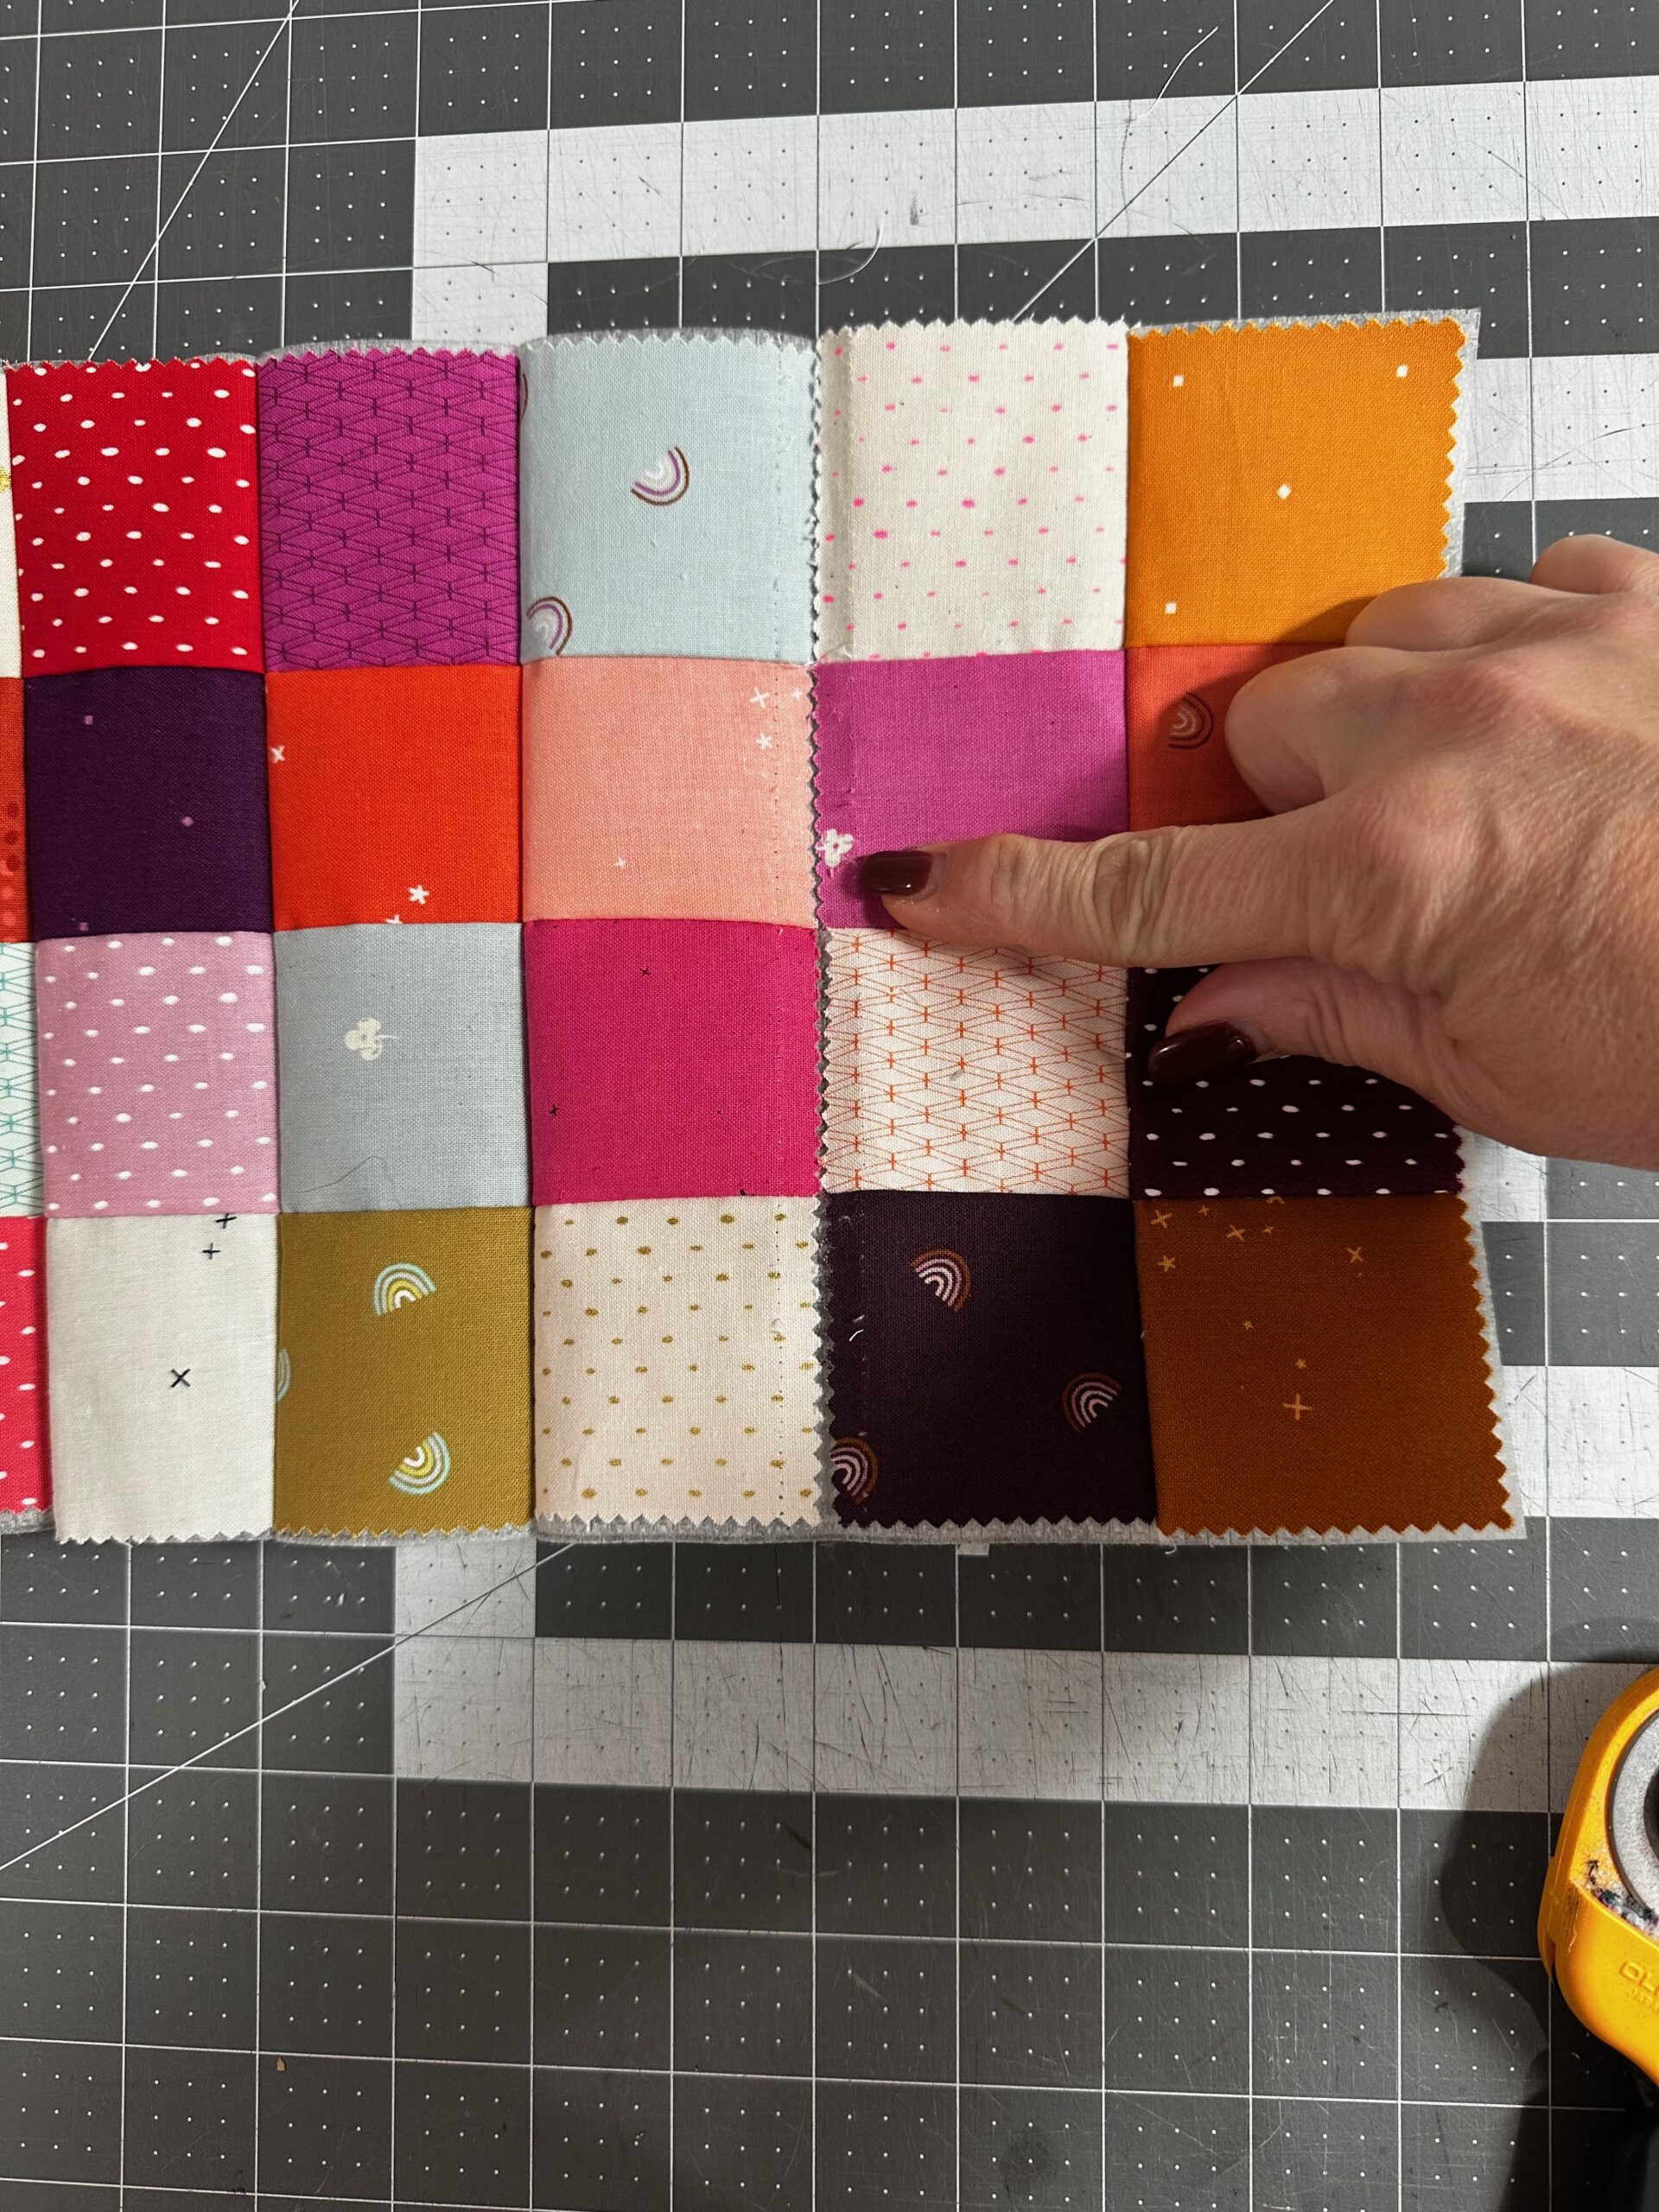
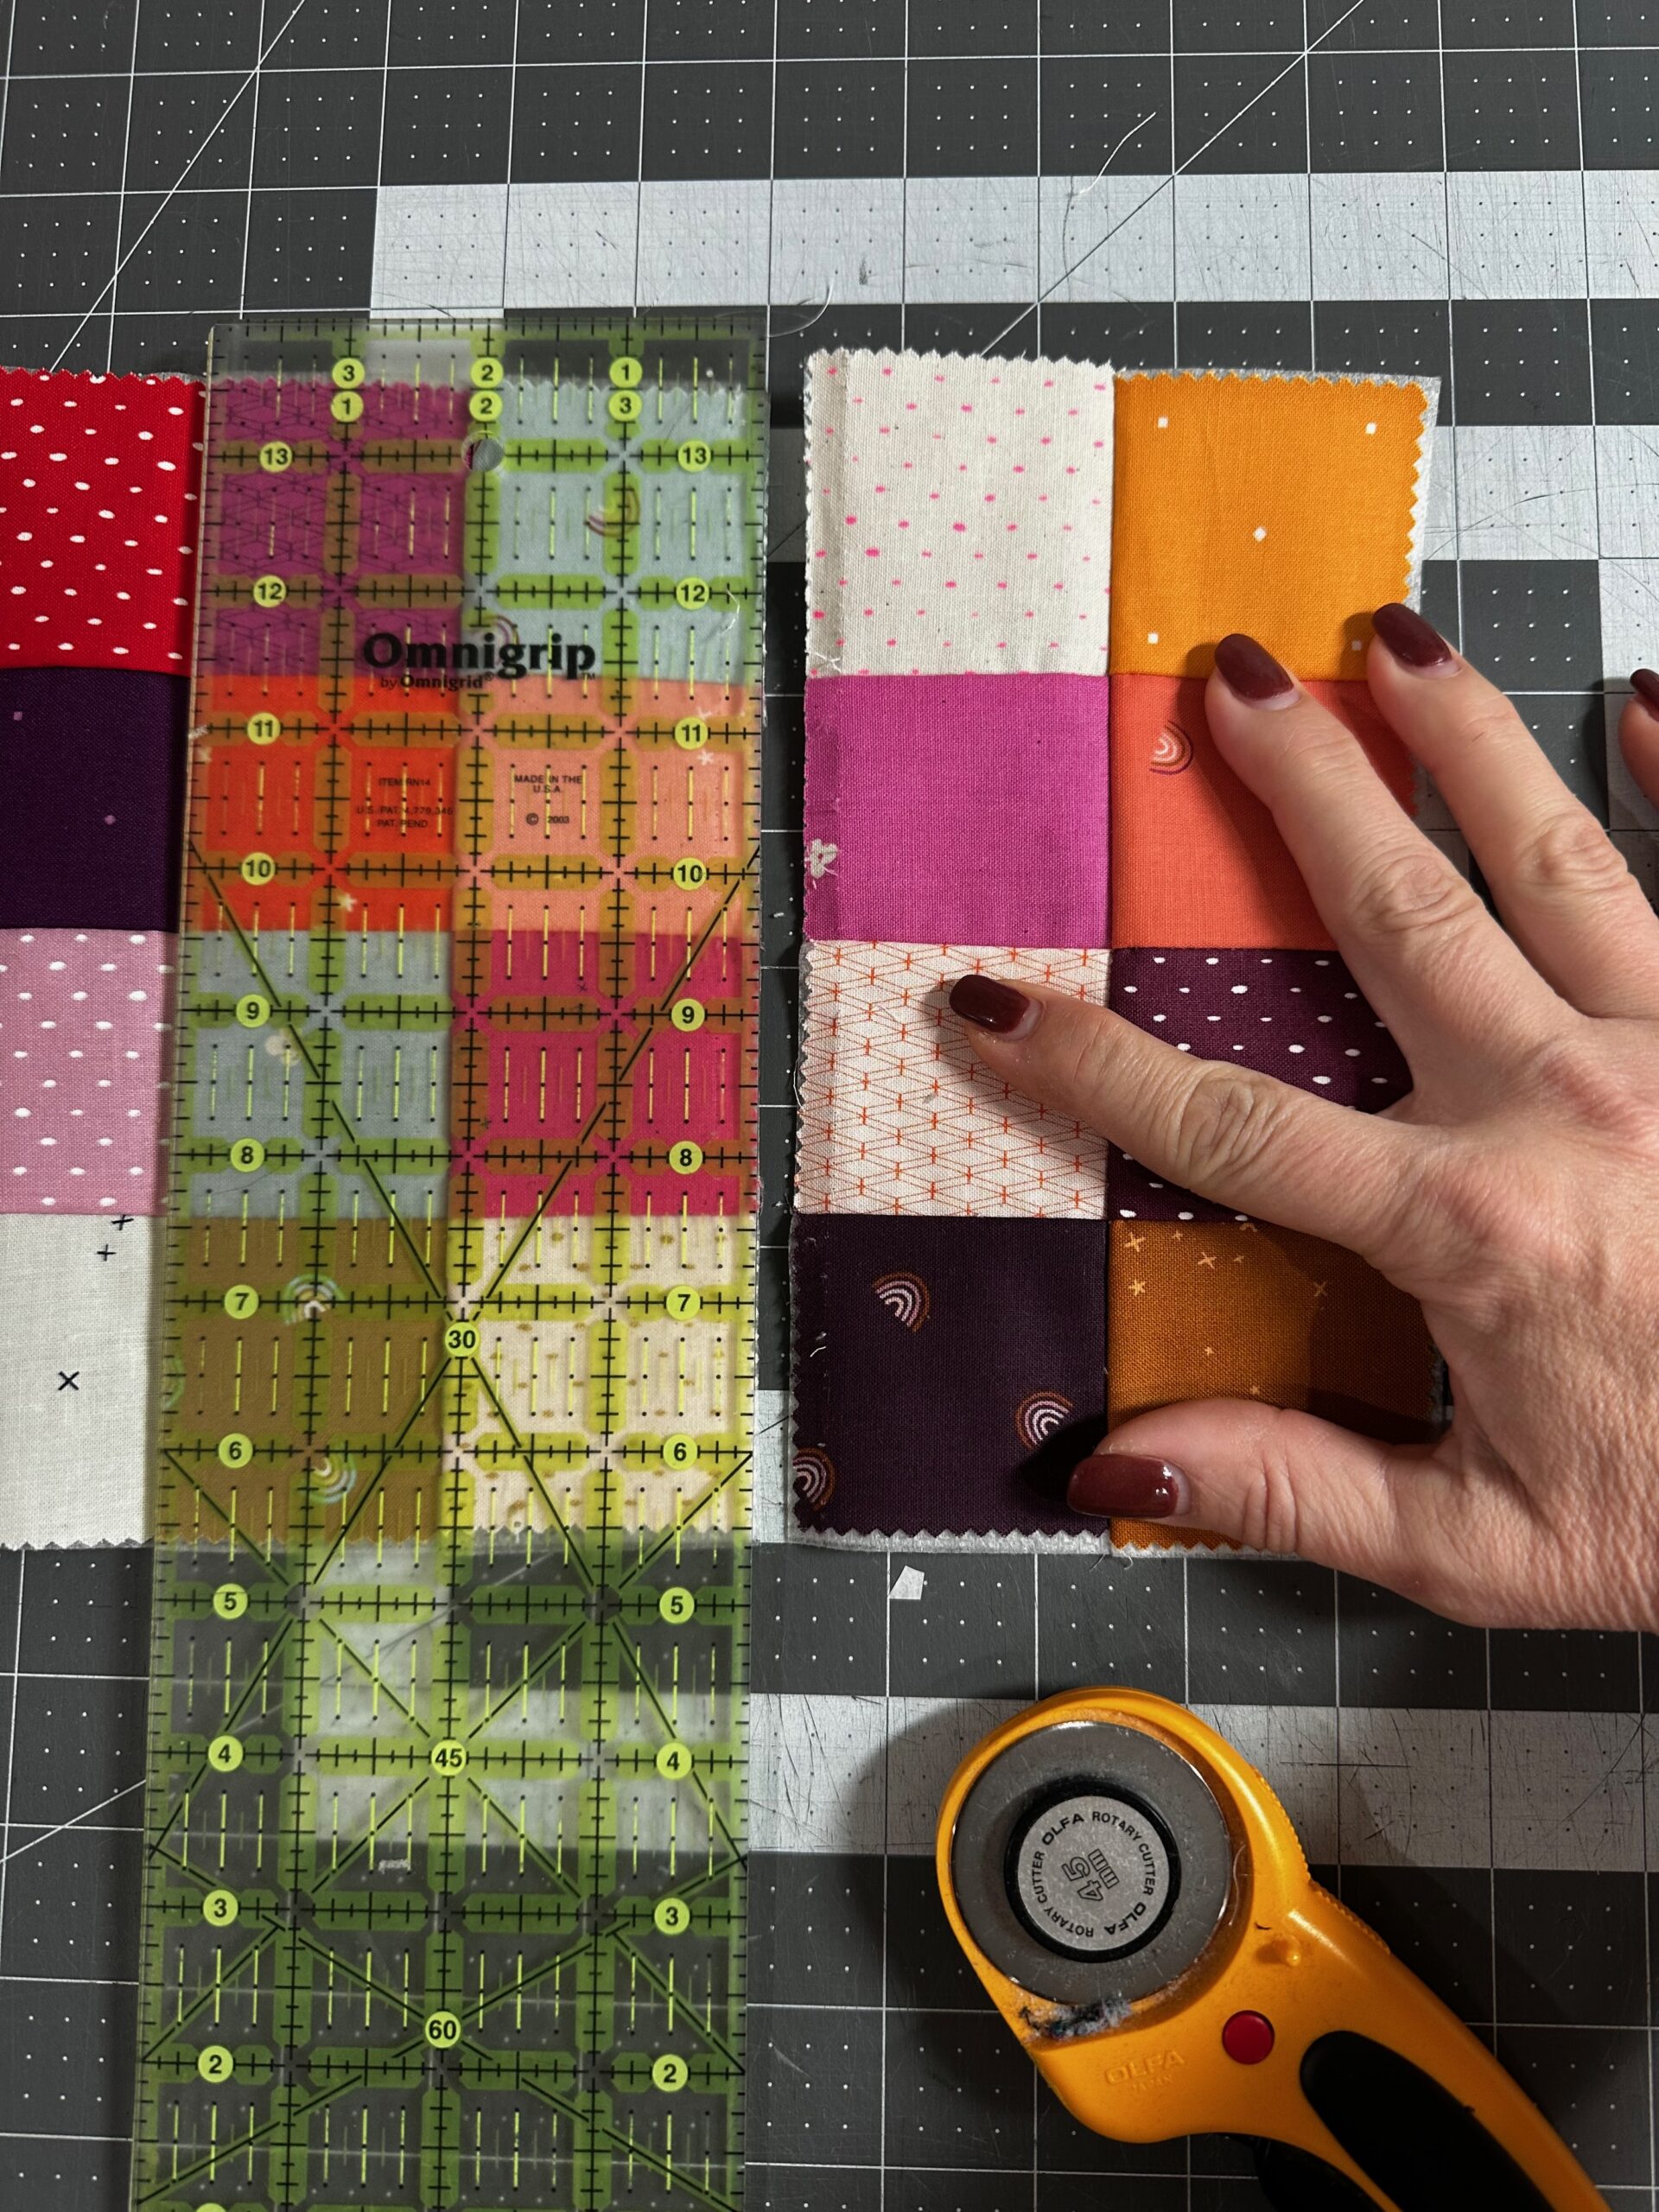
- 32 Mini Charm Squares (2 1/2″ fabric squares)
- Sulky Thread: 50 wt. Cotton (piecing) & 30 wt. Cotton Blendables® (quilting)
- Organ® Needles: size 70/10 Universal (piecing) & 90/14 Quilting
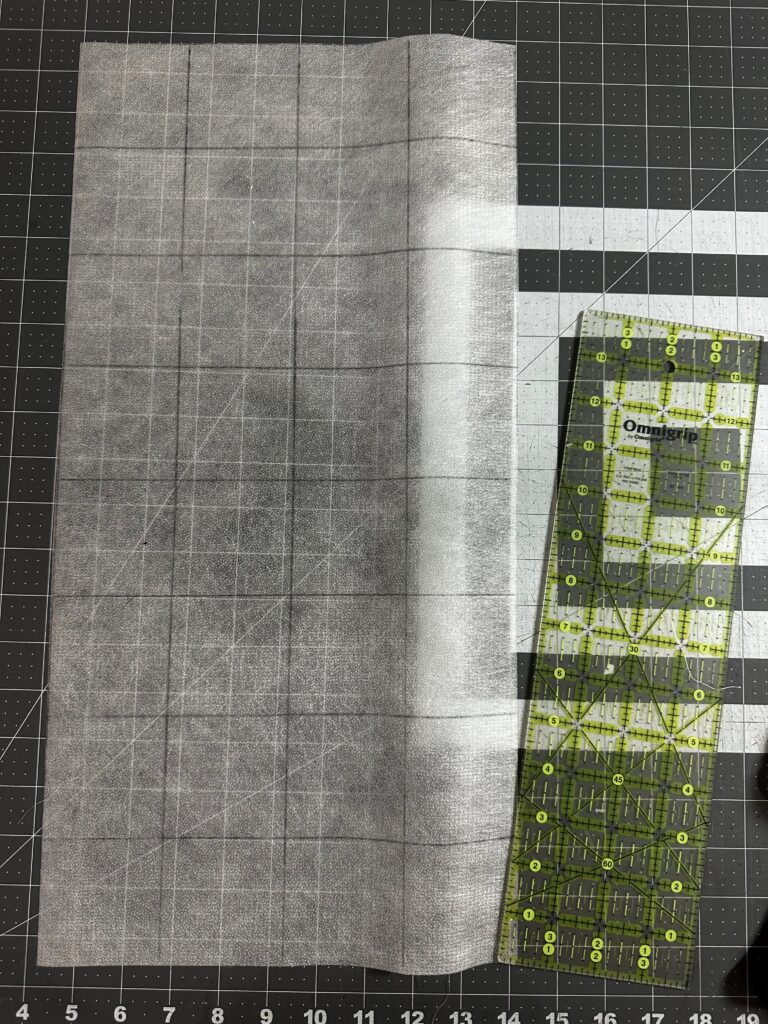
- Sulky Soft ‘n Sheer Extra Stabilizer
- tote exterior fabric (canvas is shown; size determined by tote dimensions)
- batting
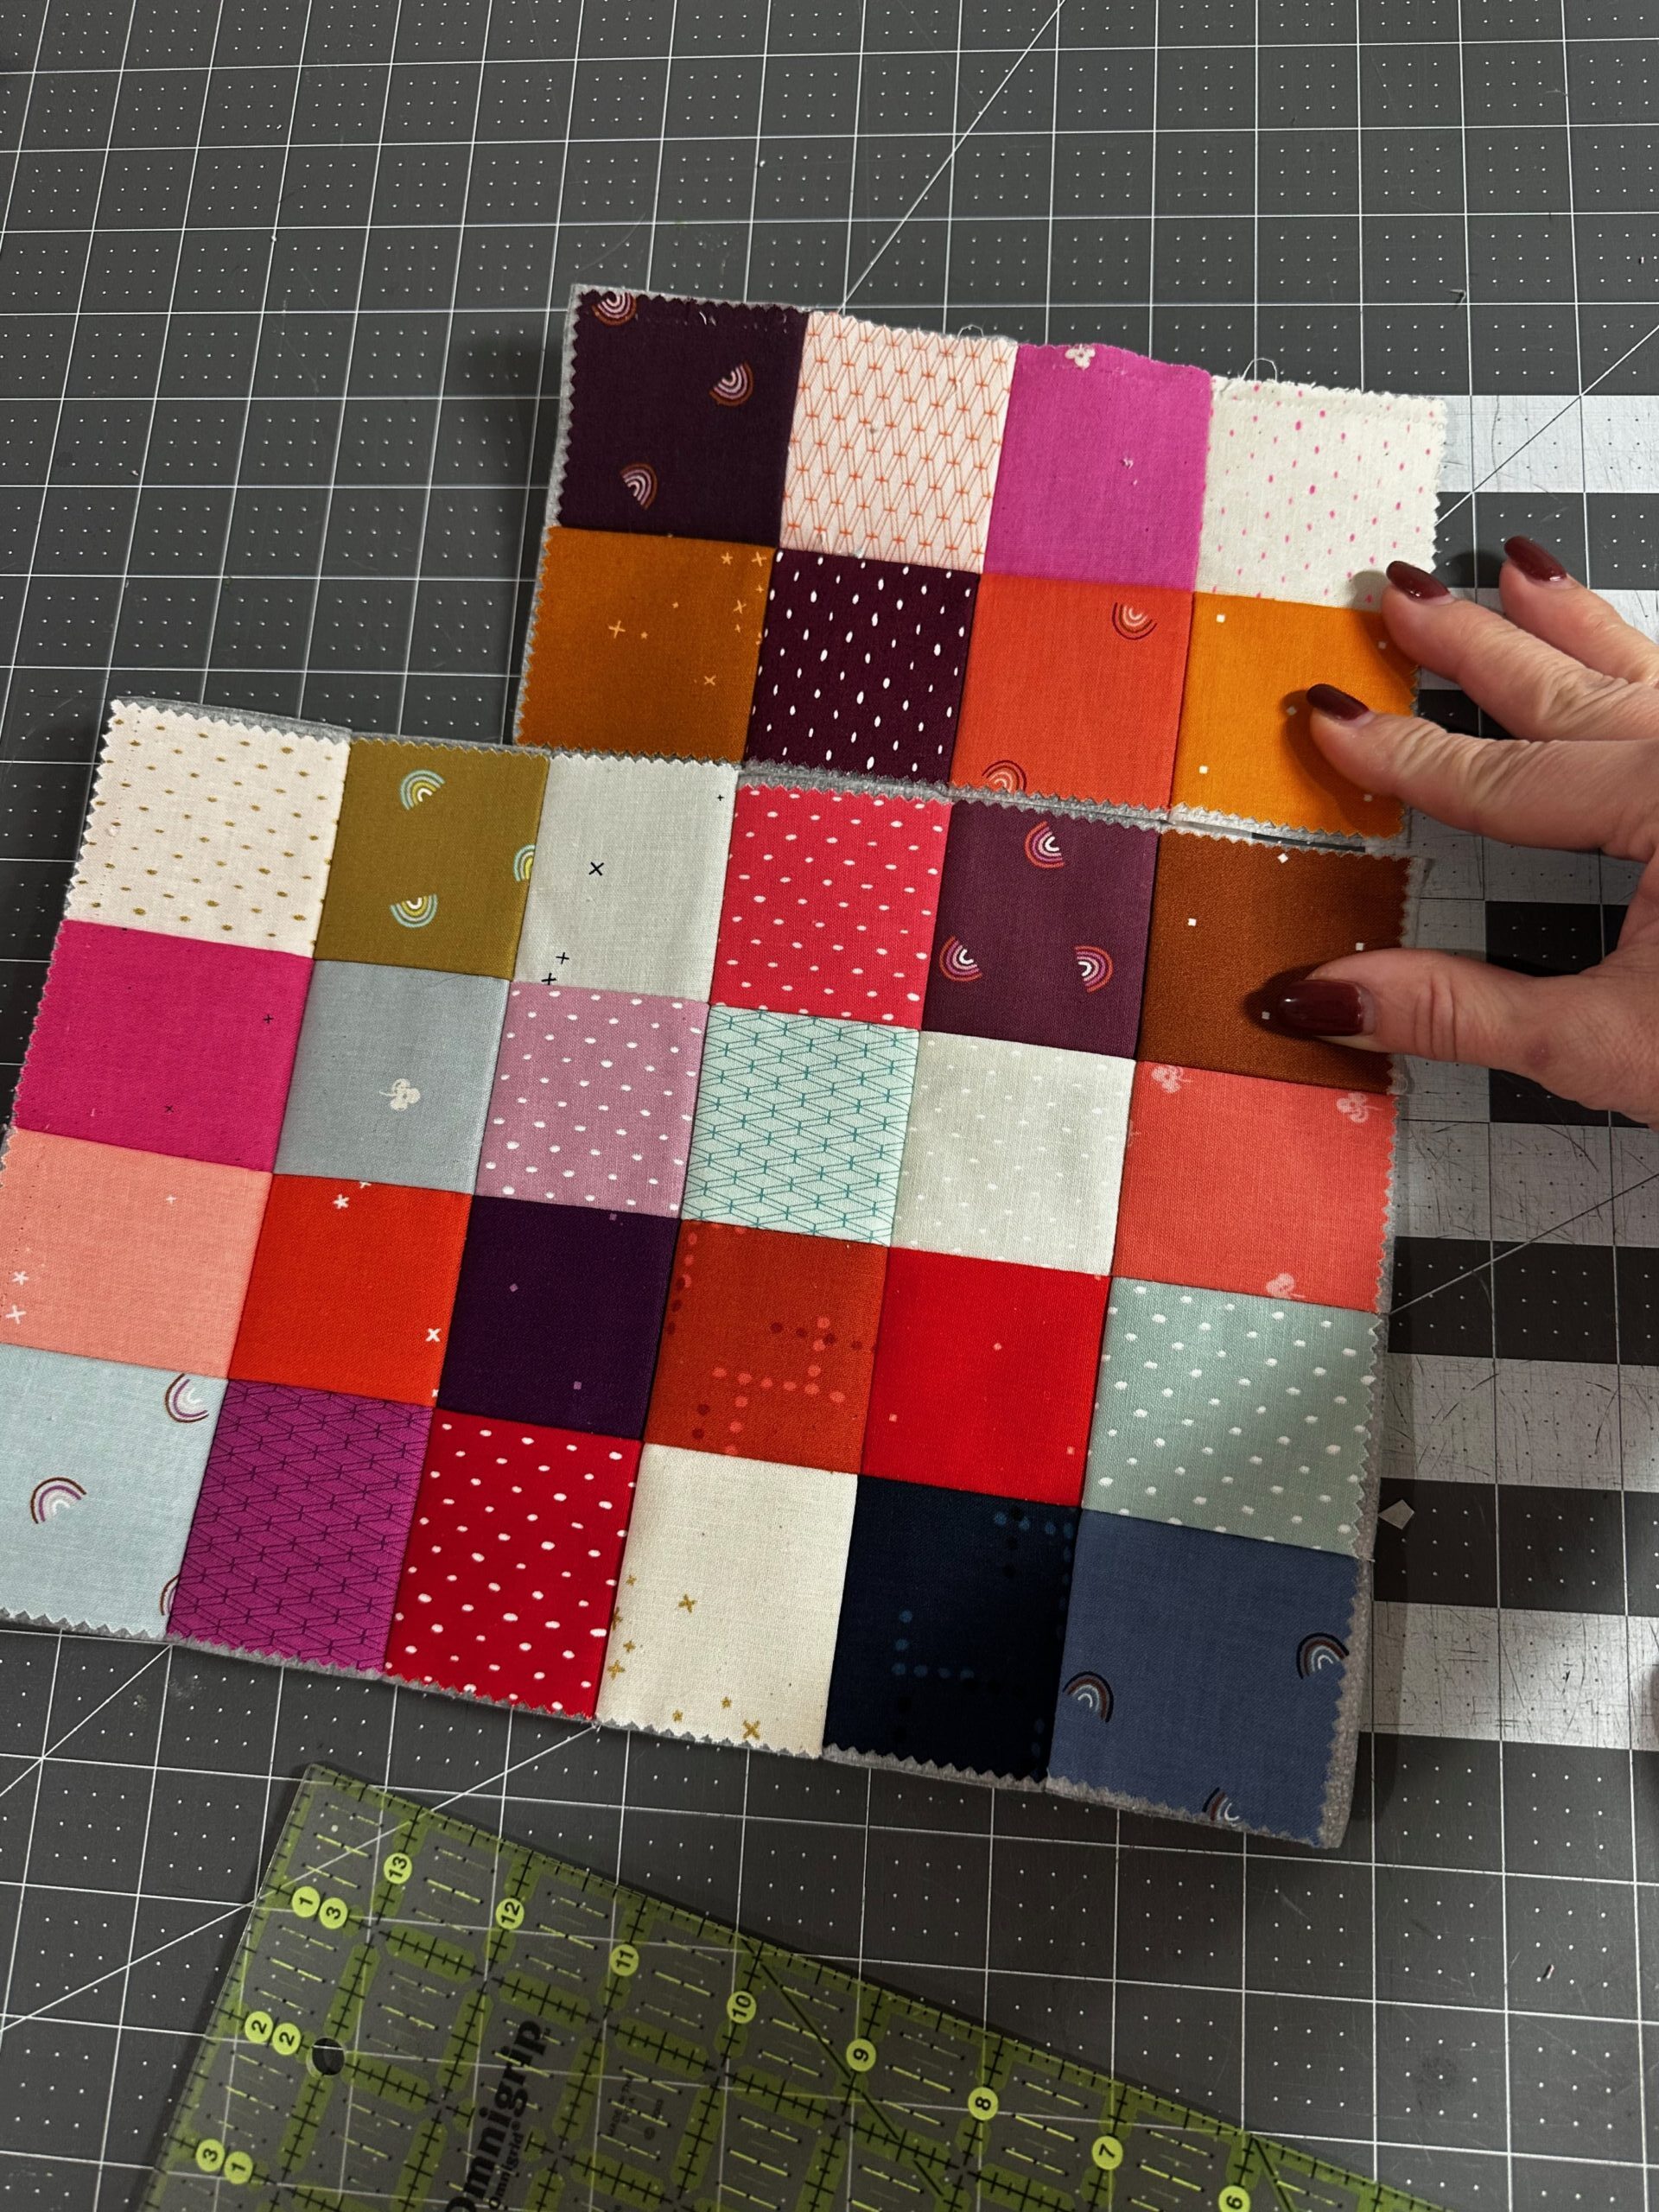
GRIDDED PATCHWORK TECHNIQUE
Follow the instructions in our free Patchwork Christmas Pillow Pattern, but create a 2 1/2″ square grid on Sulky Soft ‘n Sheer Stabilizer that’s 4 squares x8 squares.


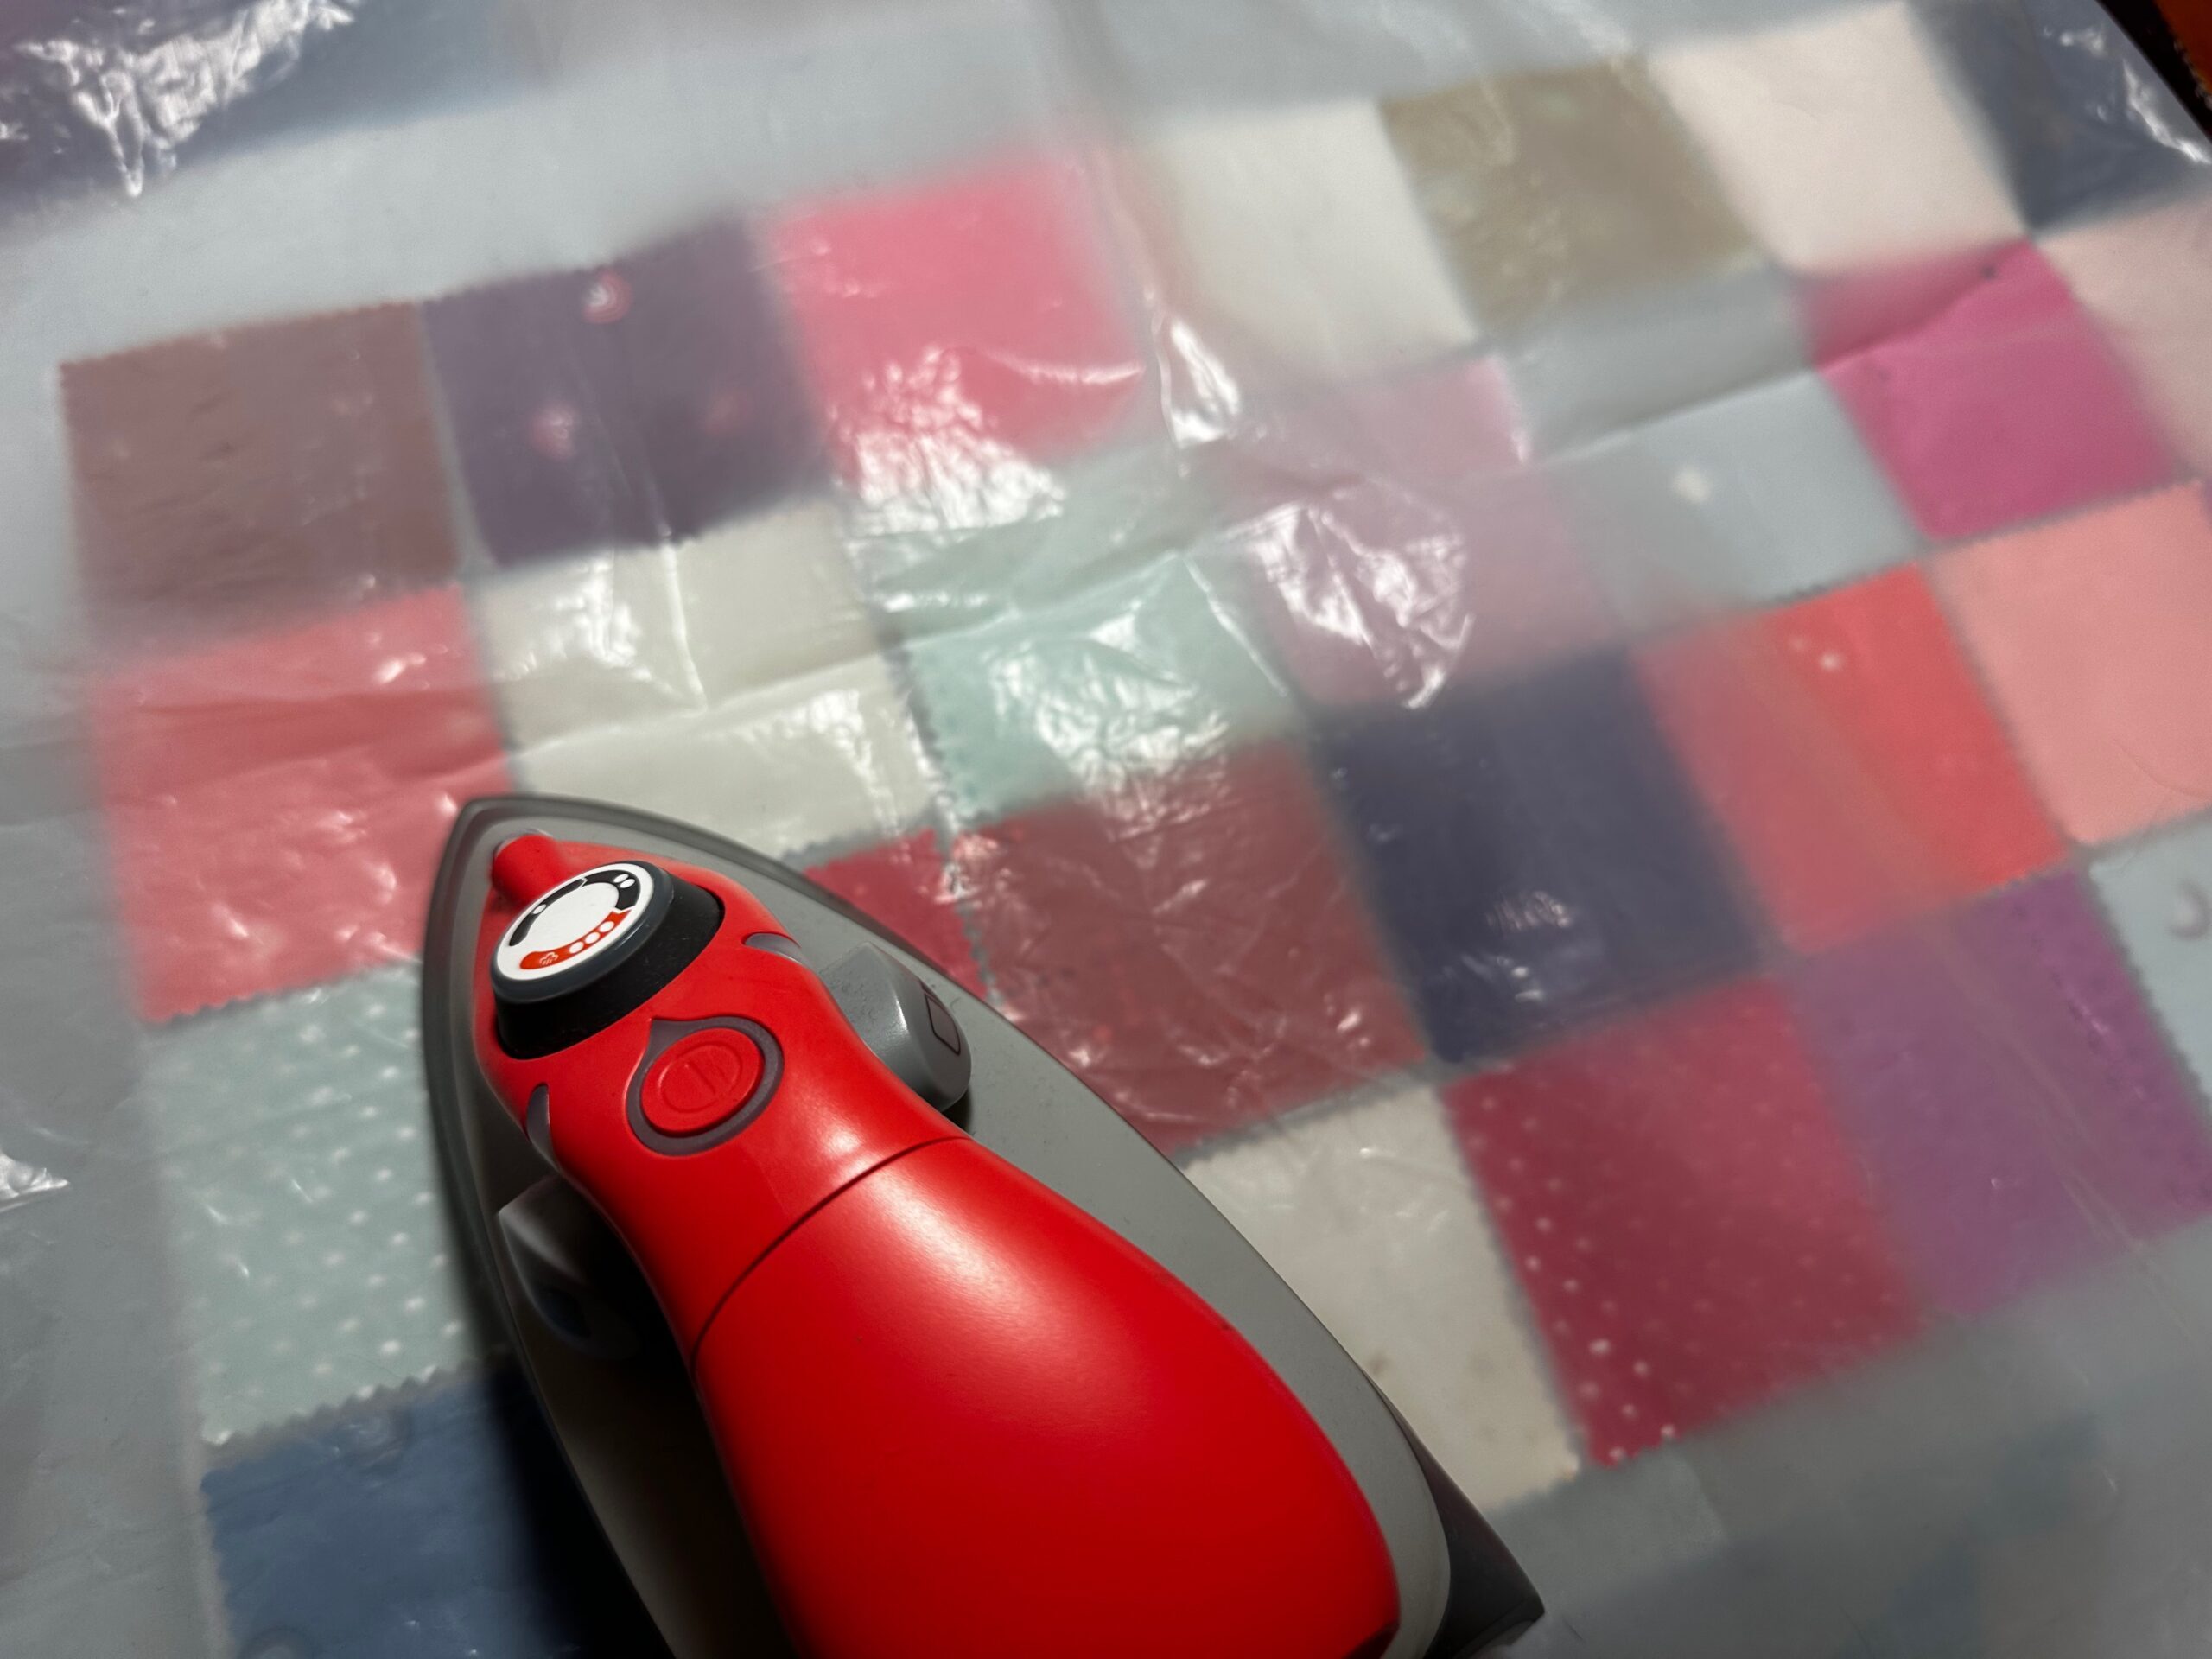
Use a non-stick pressing sheet to fuse the fabrics to the stabilizer, avoiding transferring any stabilizer glue to the iron soleplate.
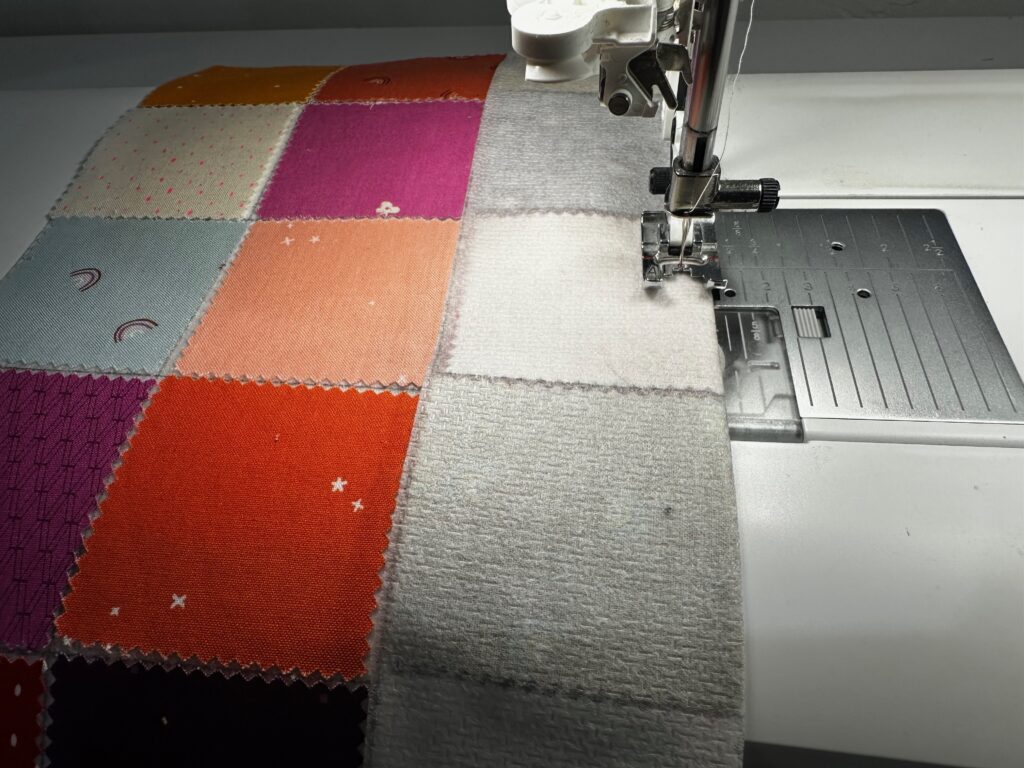
PATCHWORK STITCHING
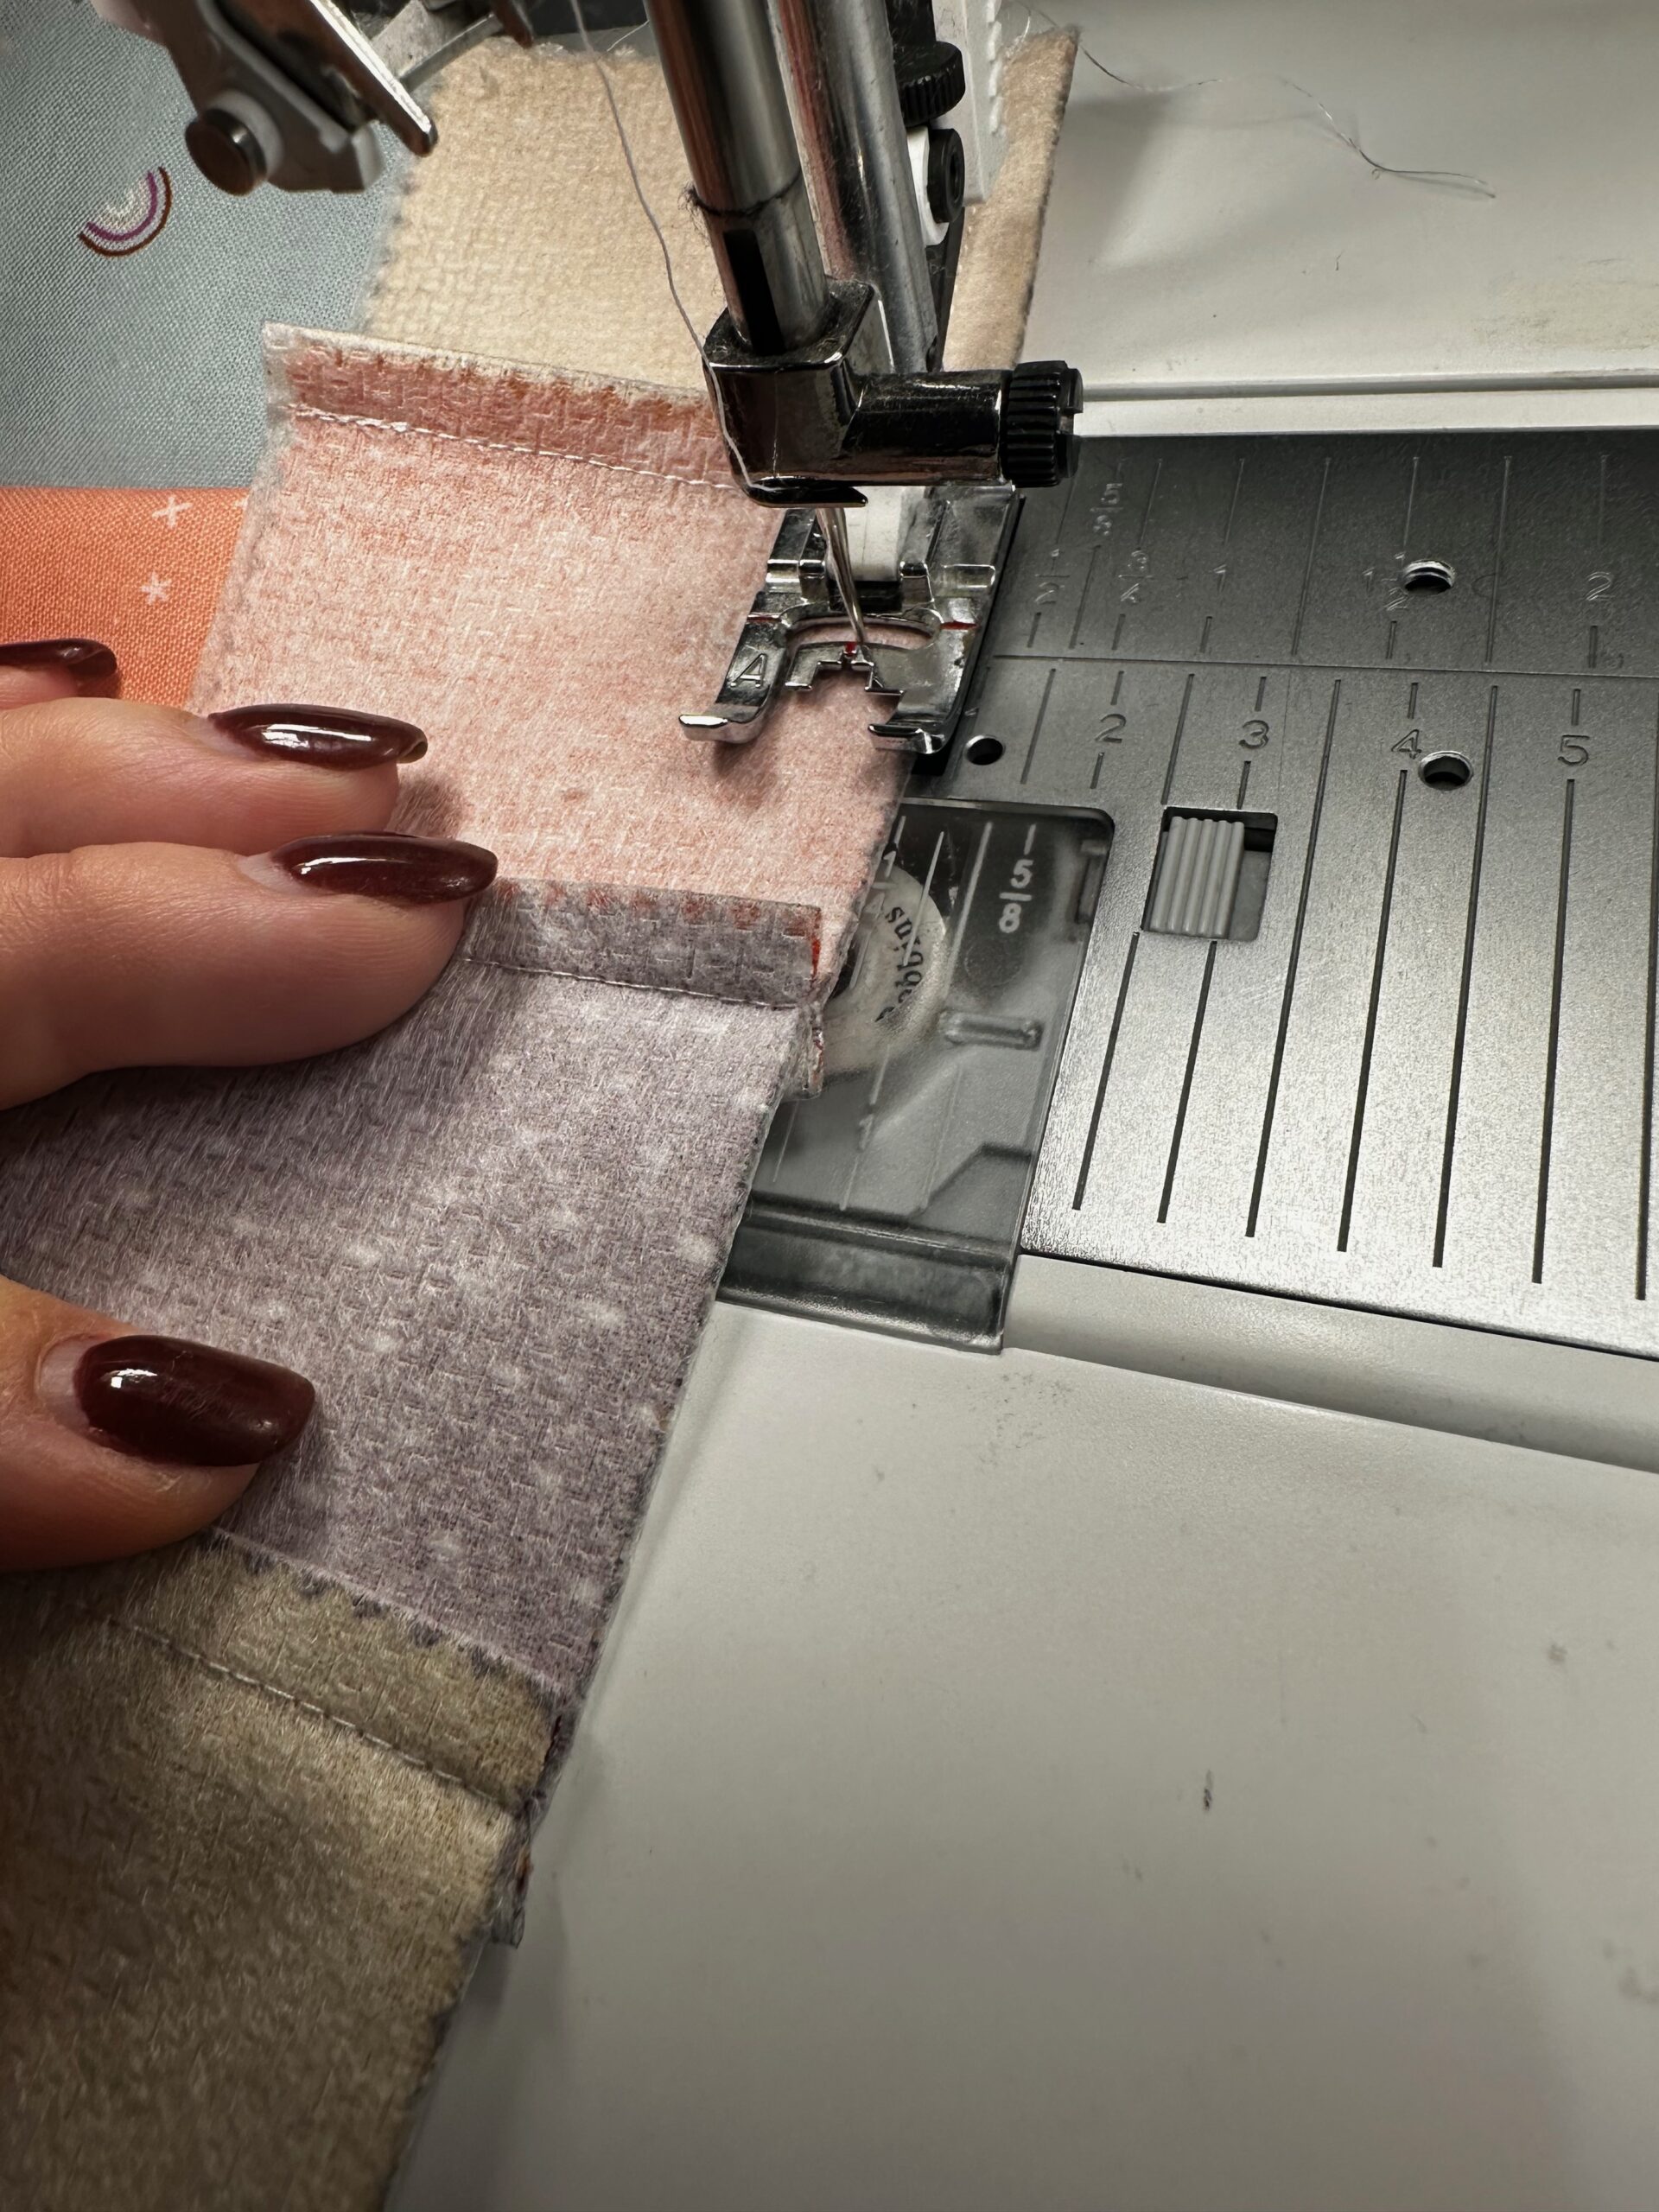
With right sides together, fold the patchwork panel along the first row. Stitch, using a 1/4″ seam allowance and Sulky 50 wt. Cotton Thread.

Next, clip into the seam allowance at each square intersection up to, but not through, the stitching line.
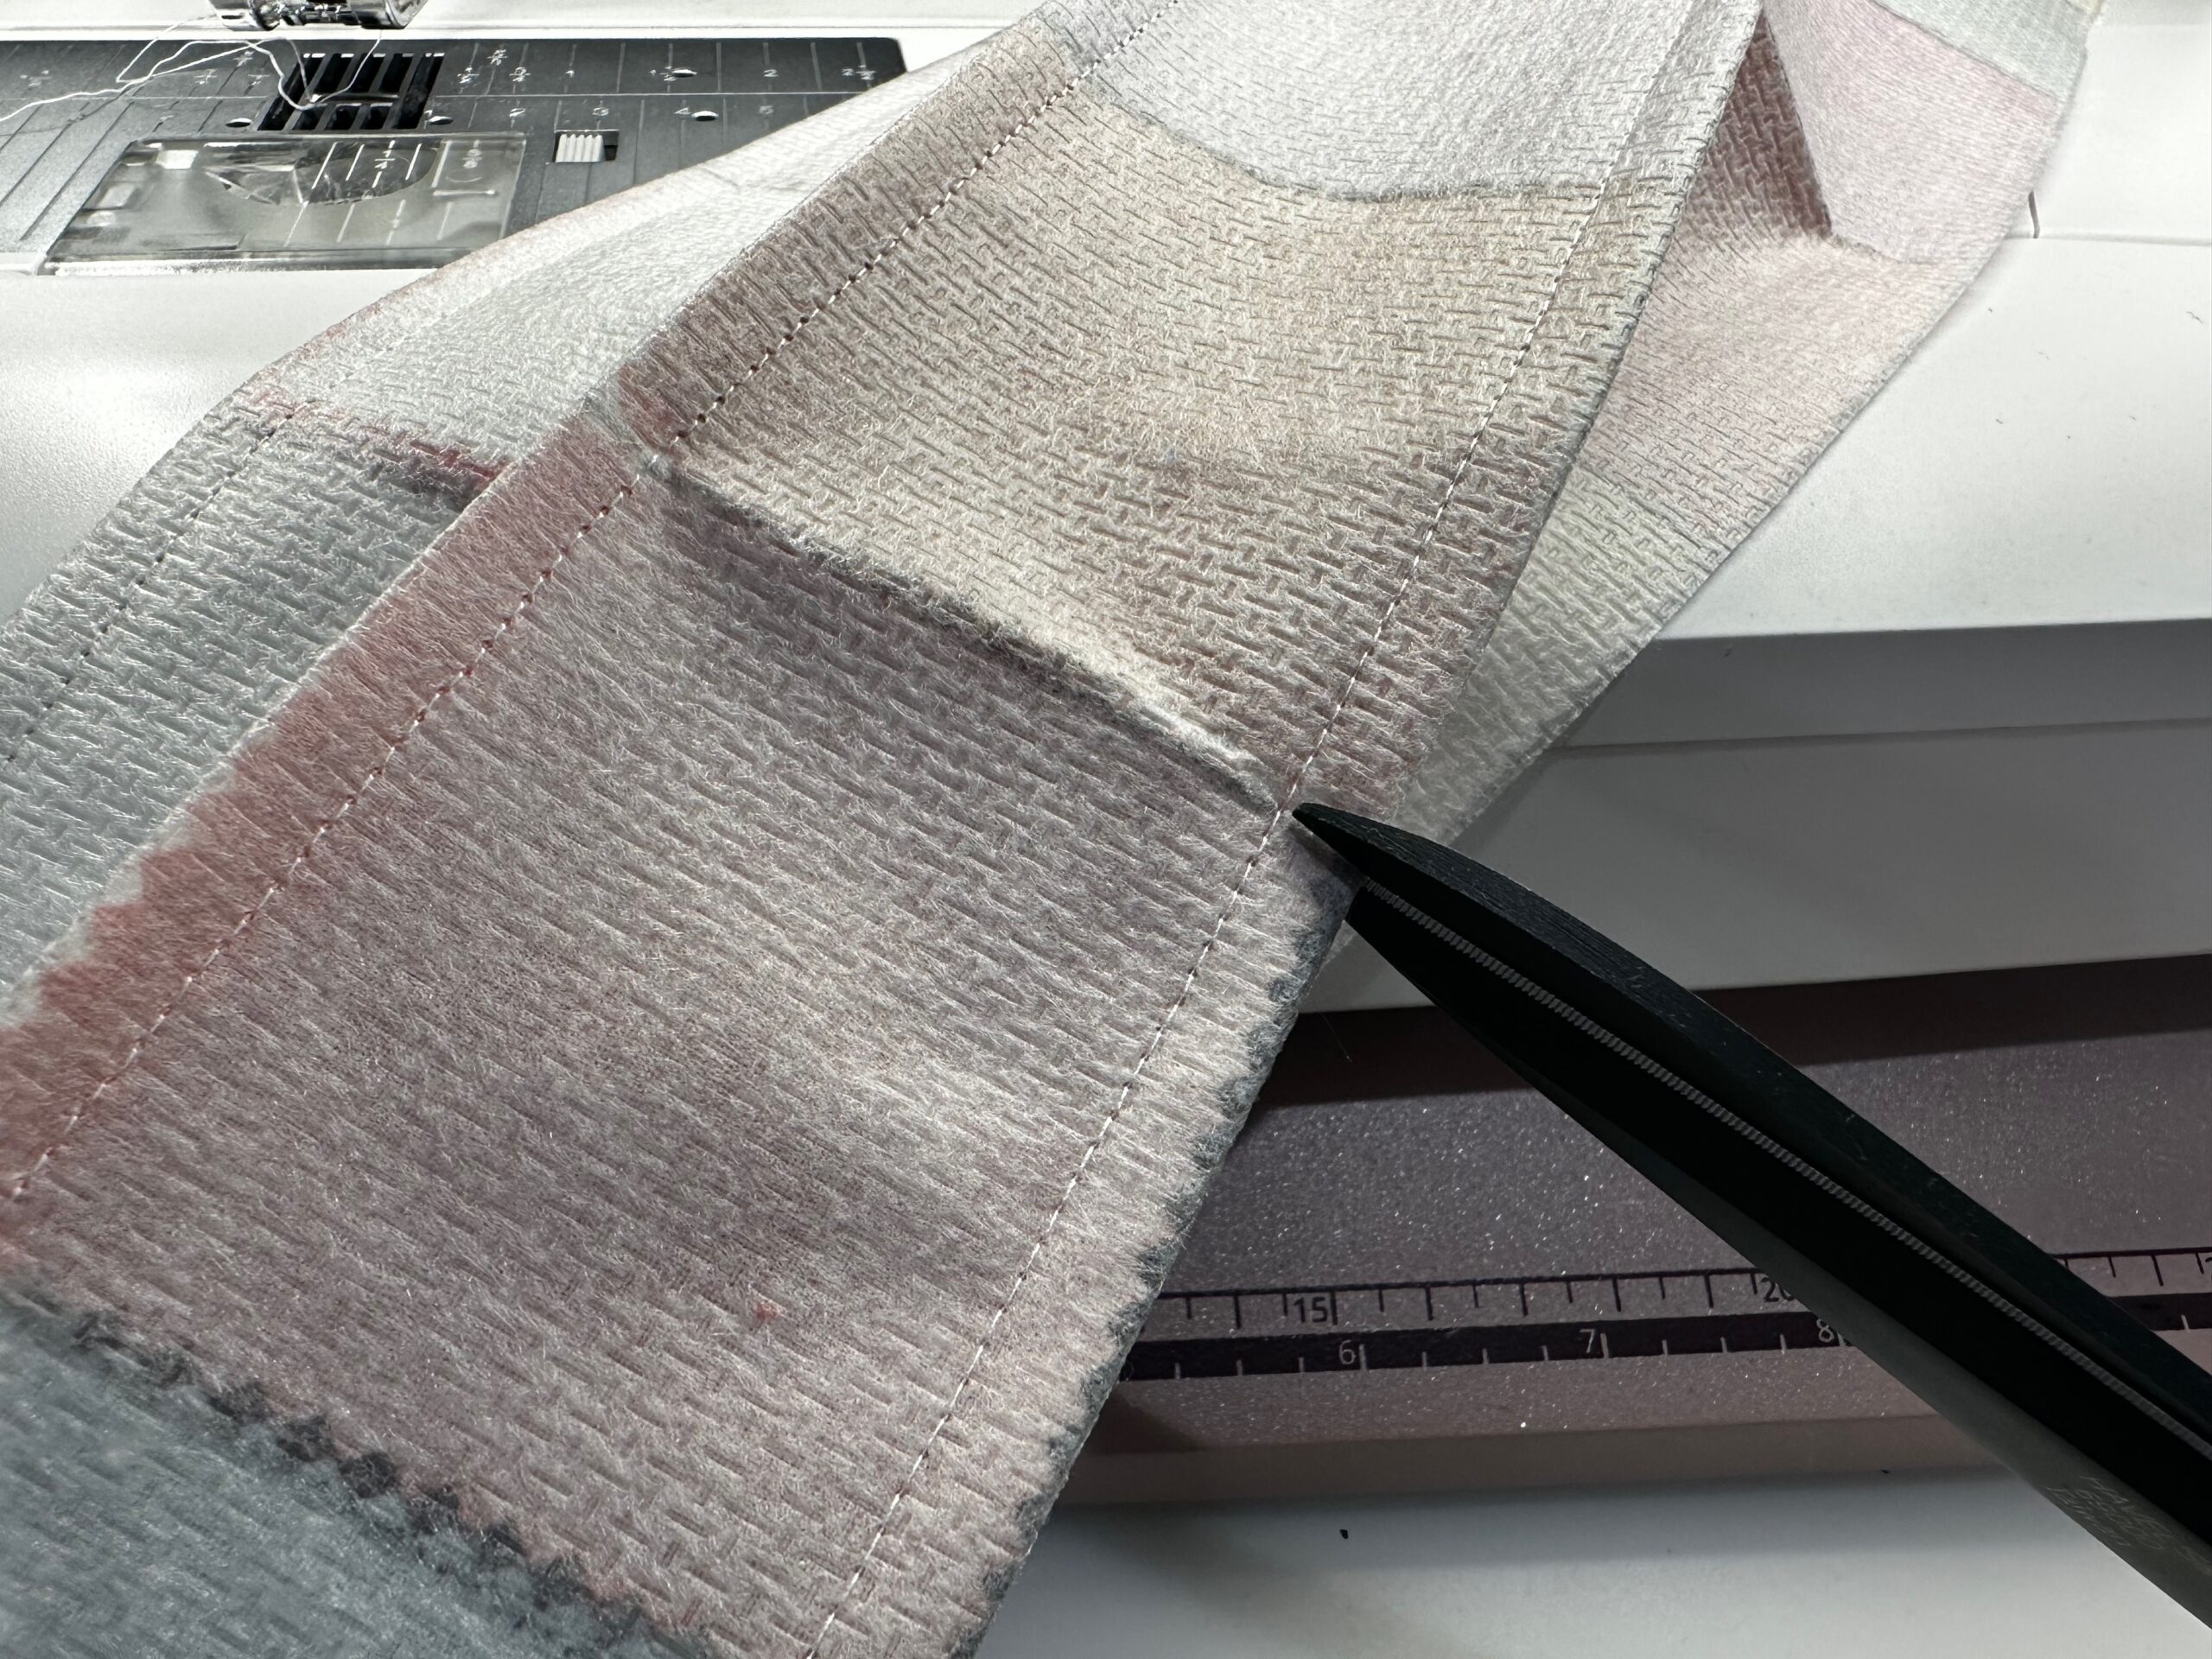
Then, fold the first column with right sides together, alternating the seam allowance direction to reduce bulk.
Next, stitch the columns, making sure the seams are in opposite directions for each row.
Leave the second-to-last column unsewn.
CREATING THE HEART SHAPE
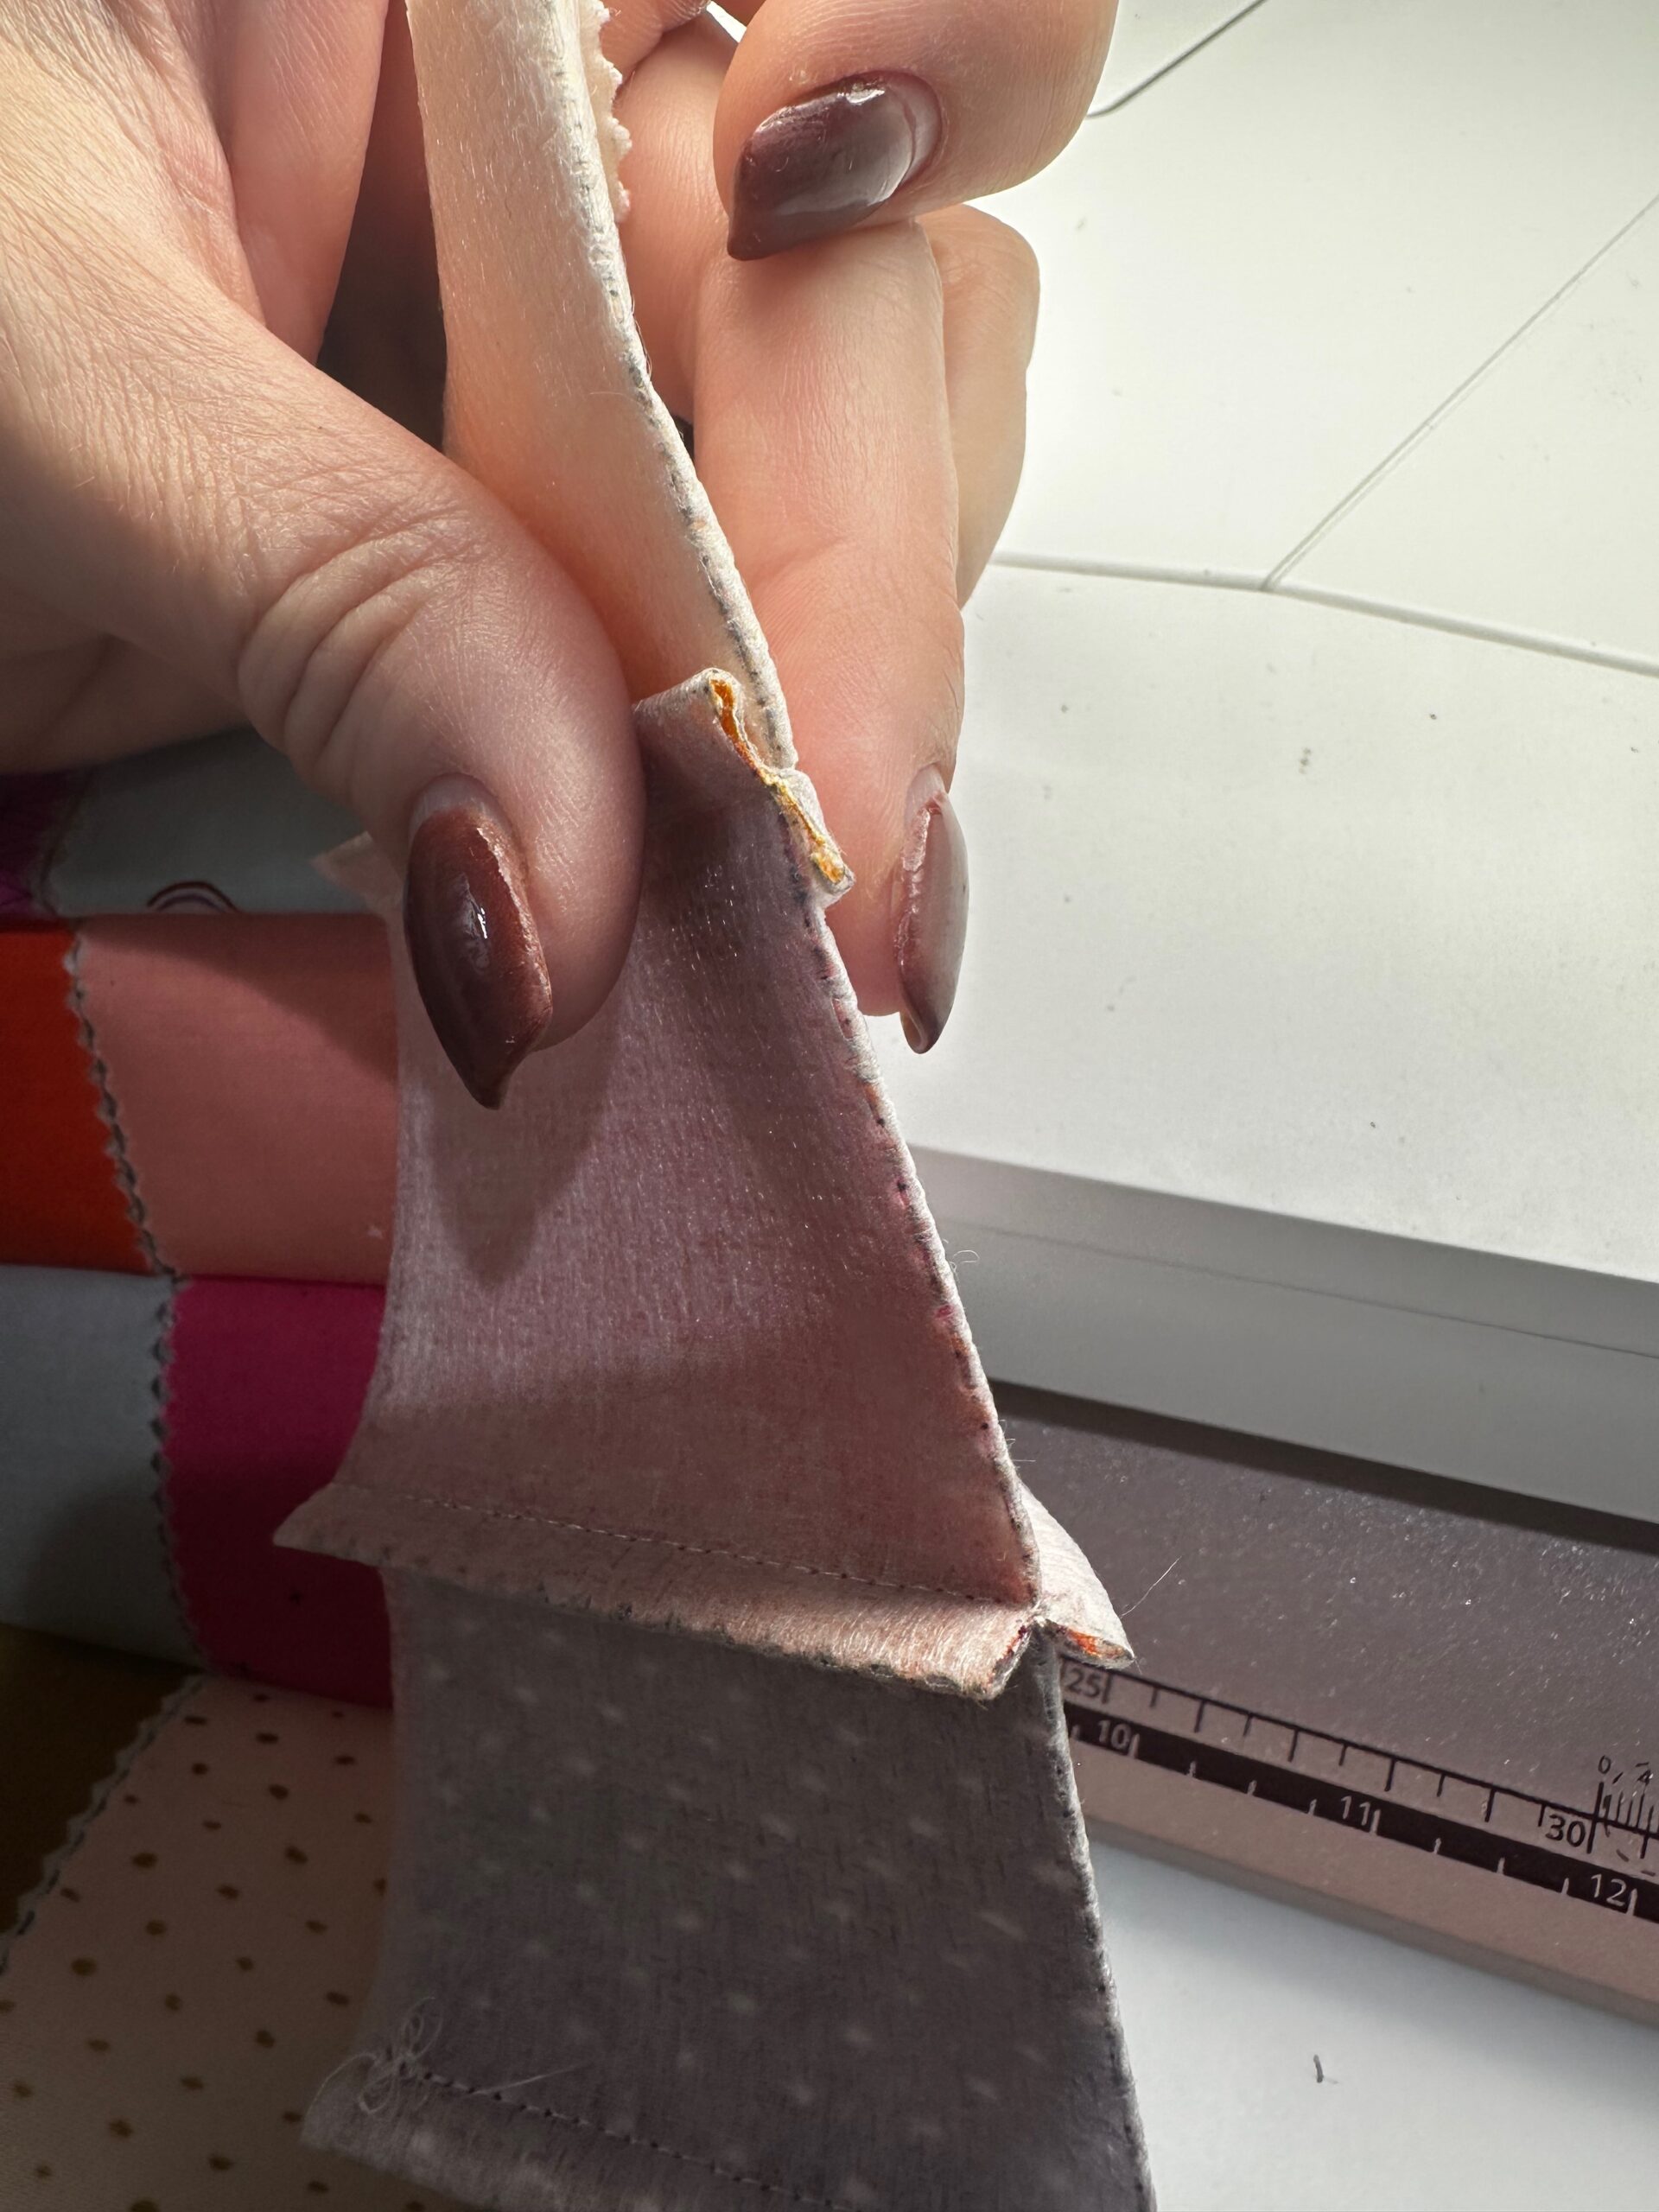
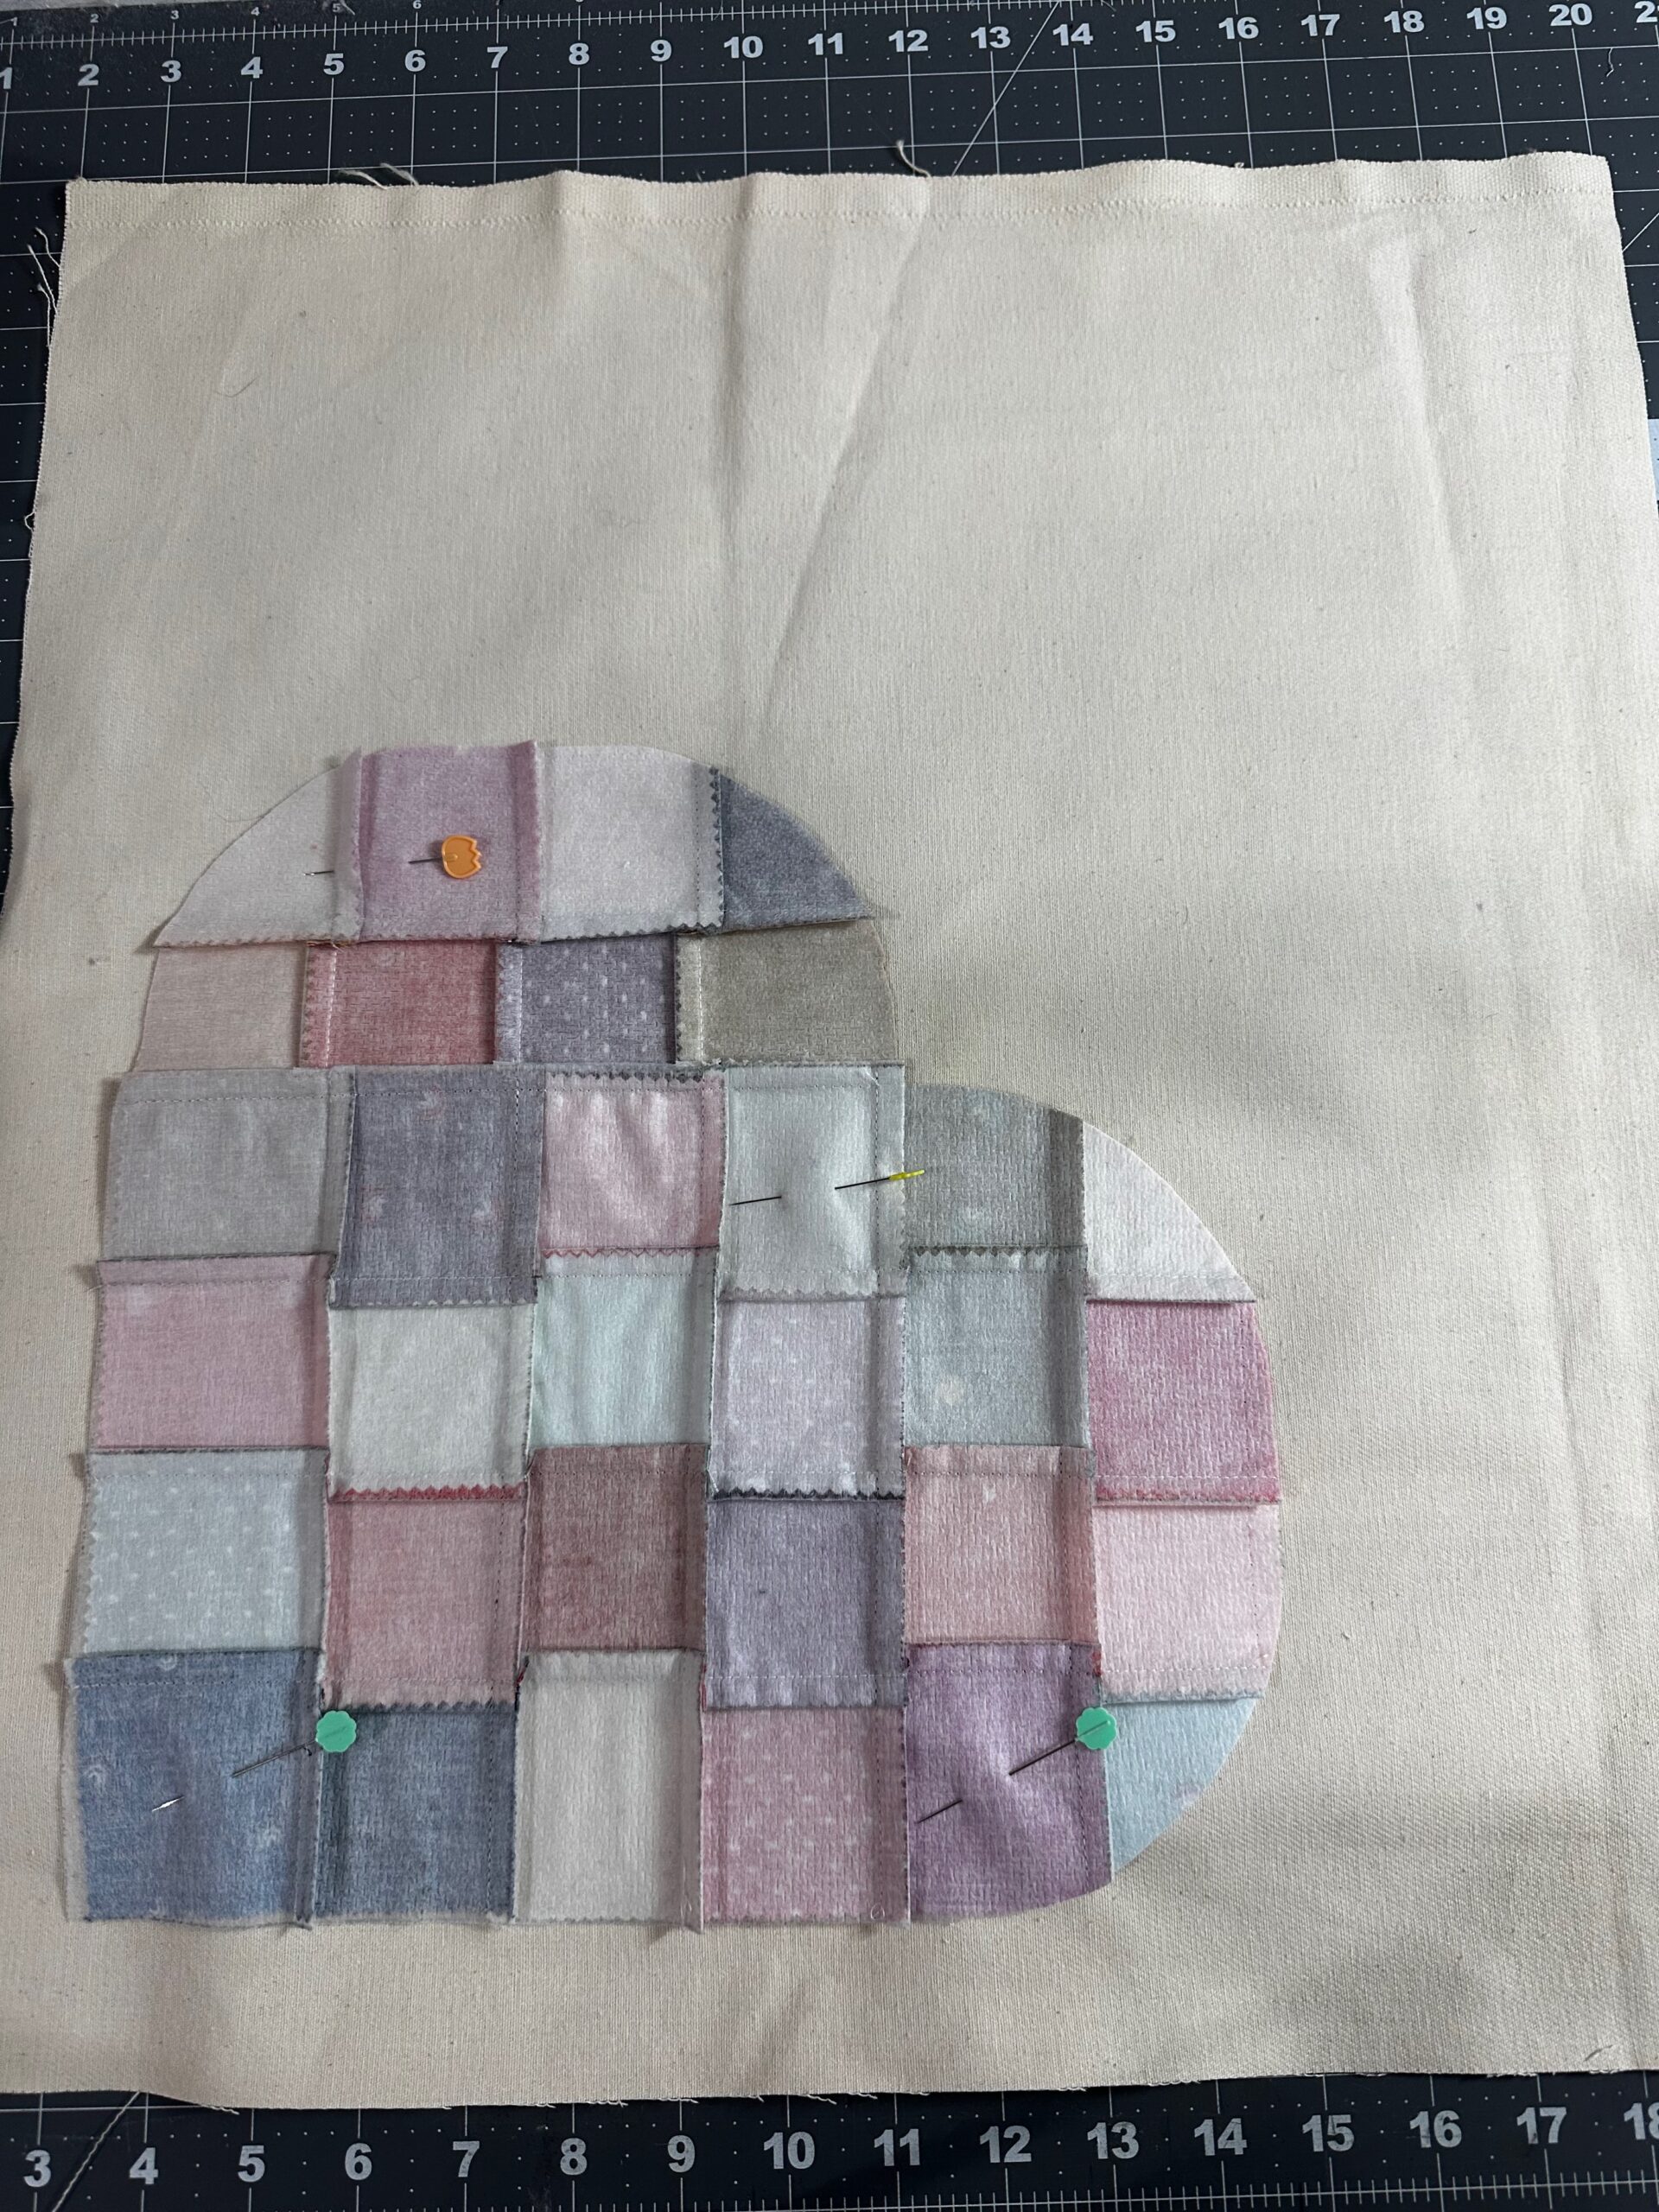
Trim the patchwork panel along the drawn line between the unsewn columns.
Next, rotate and place the trimmed piece along the patchwork rectangle upper right edge.
Stitch the trimmed panel to the larger rectangle, making sure to match the corners and place the seam allowances in different directions.
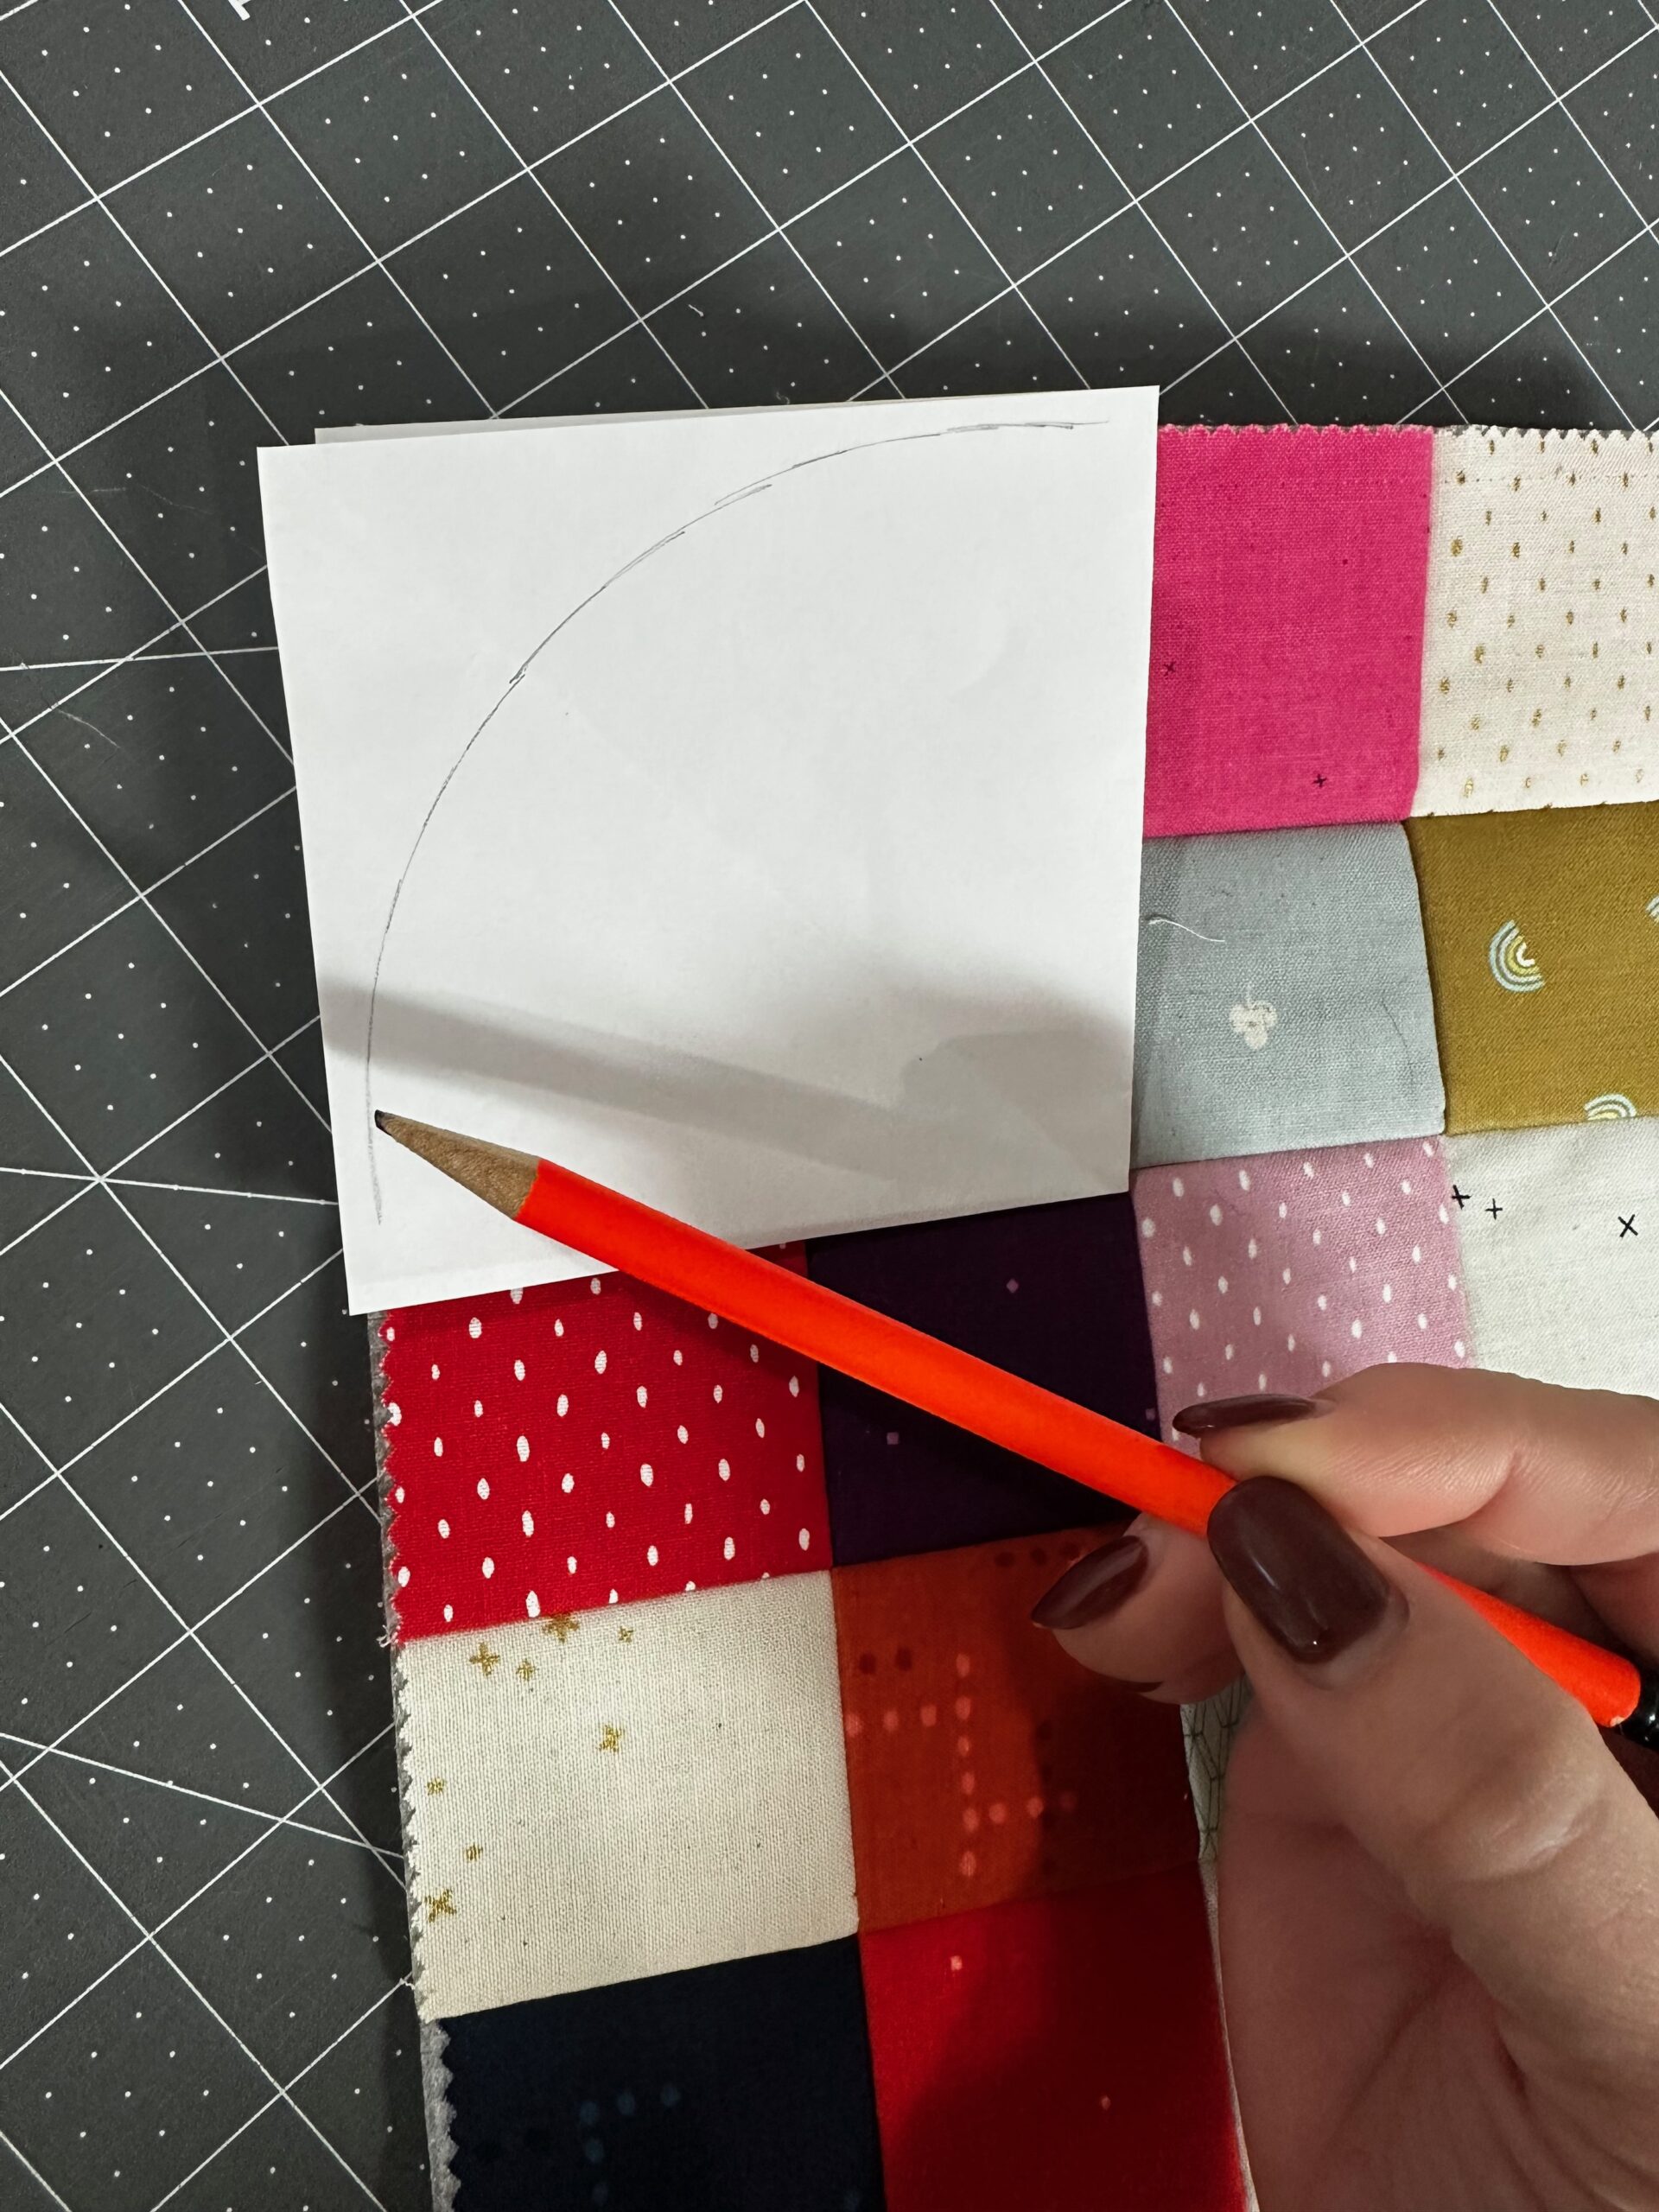
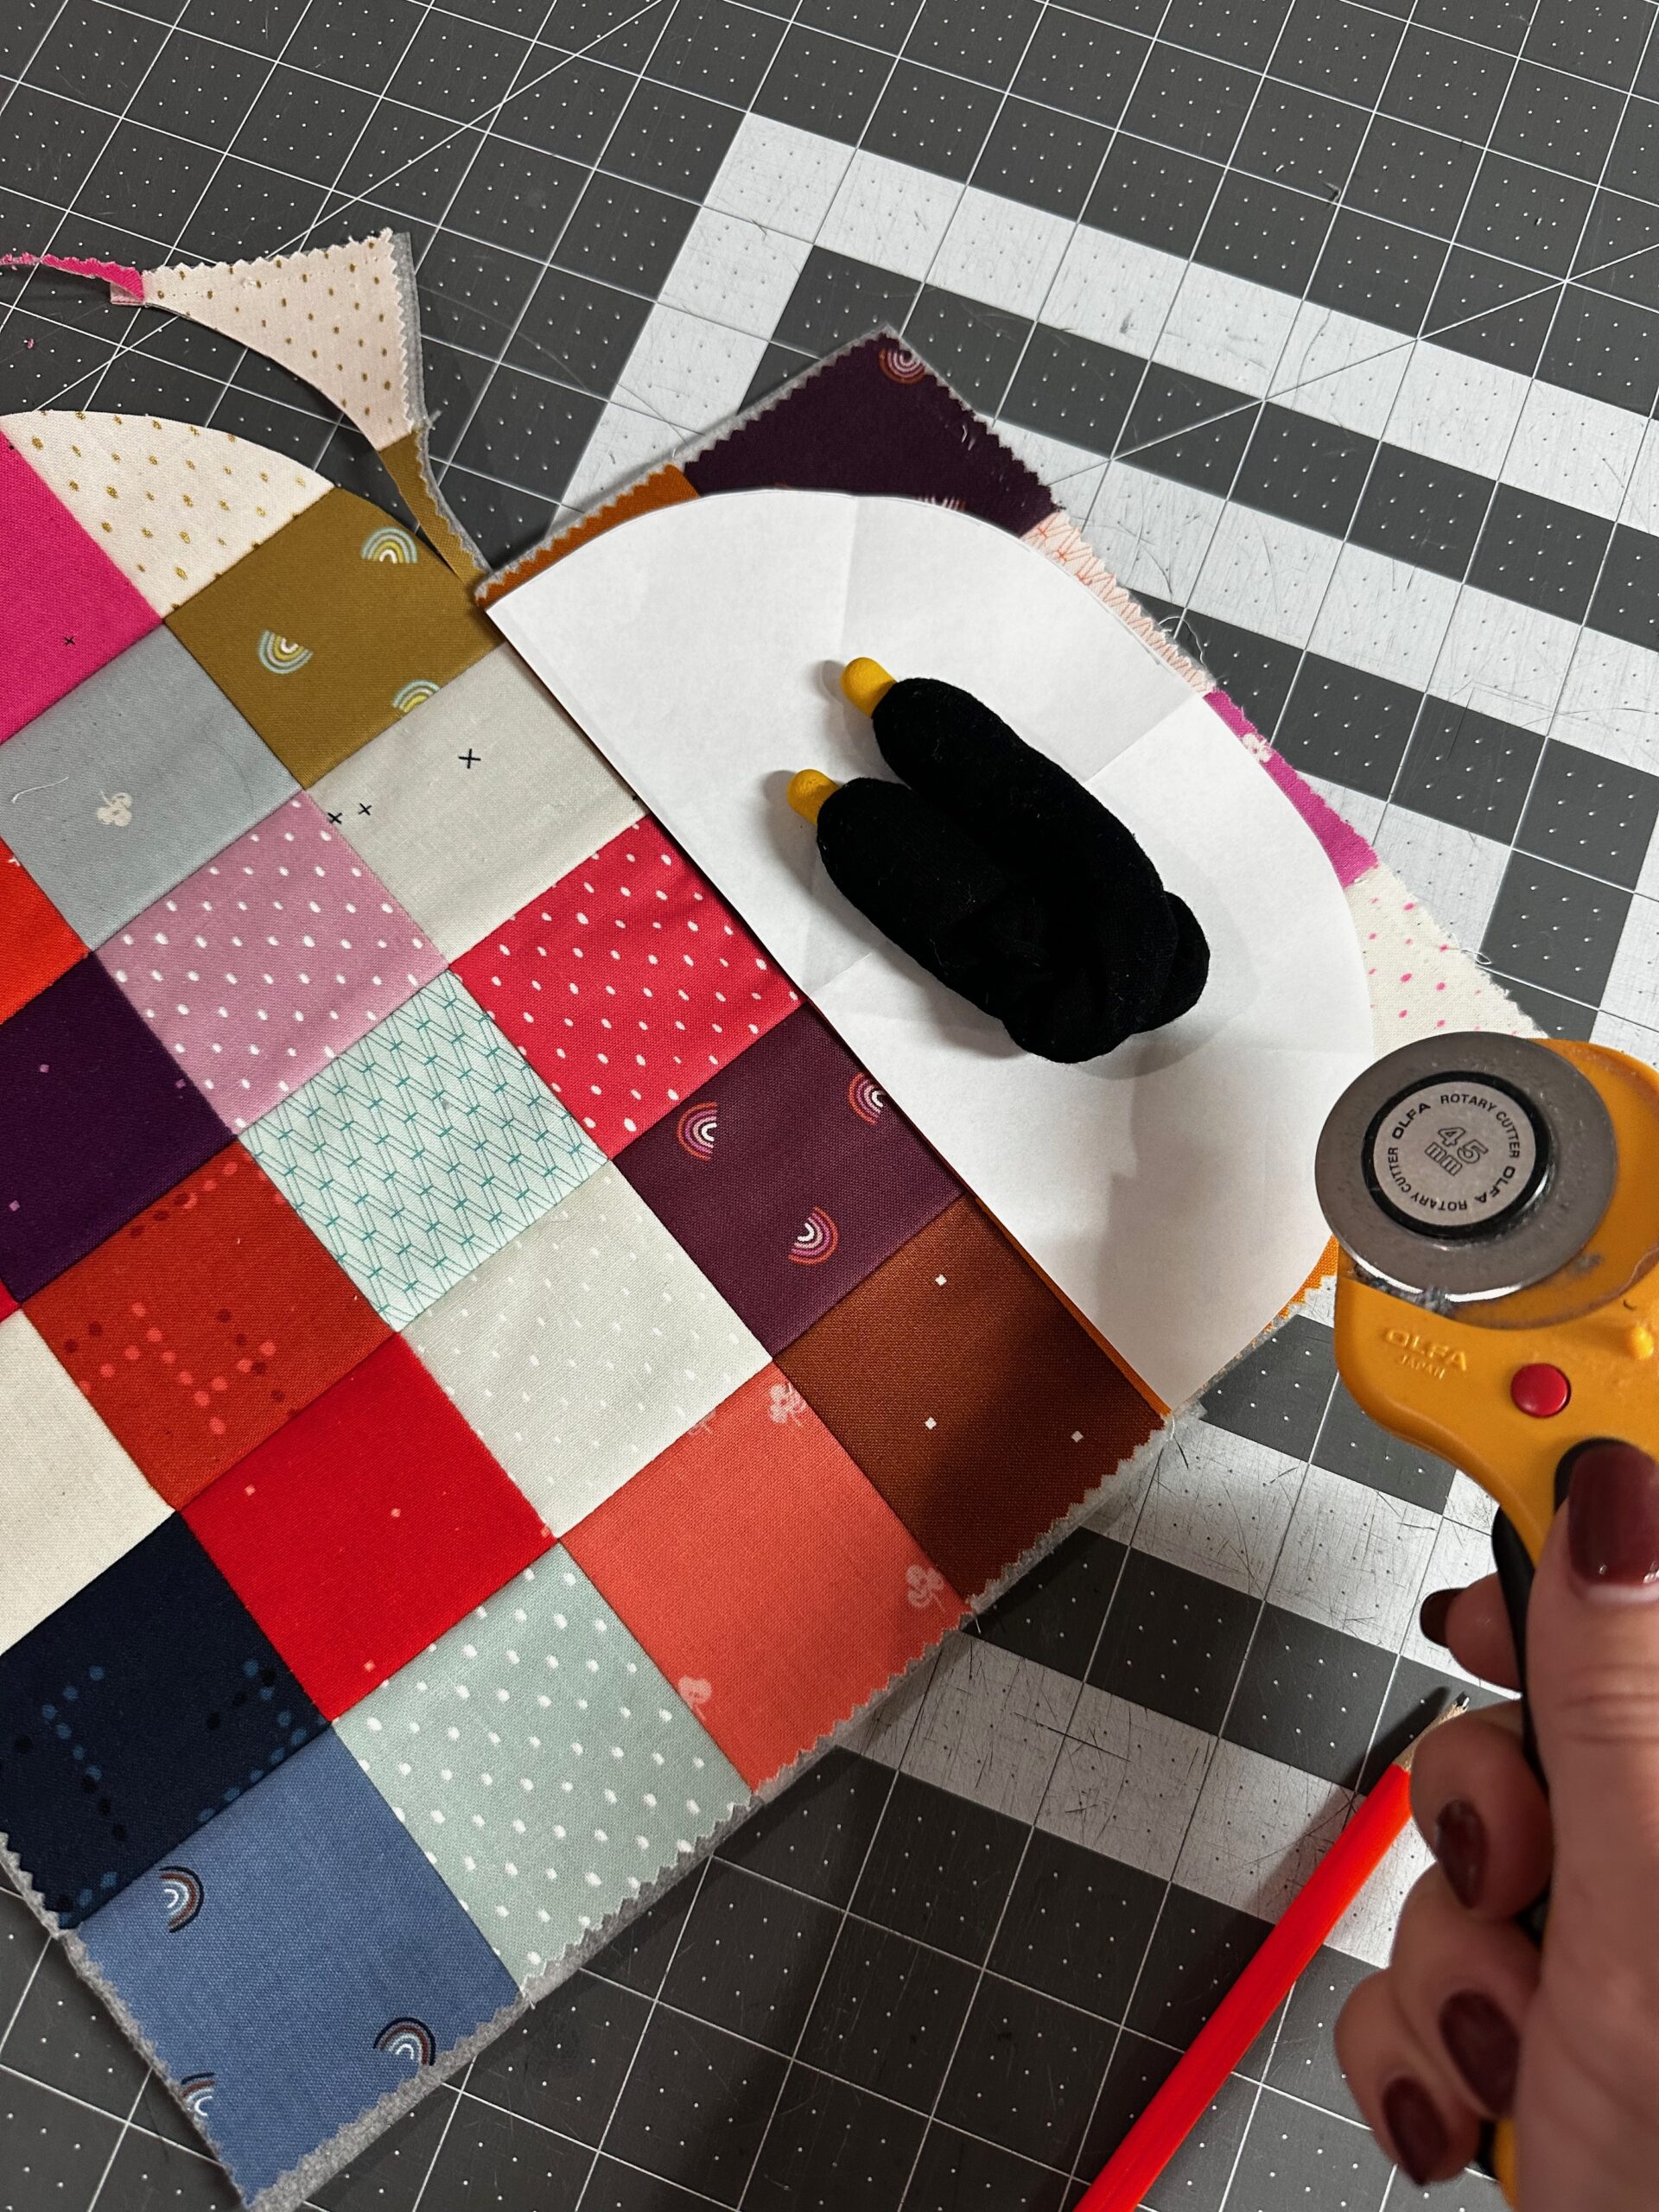
Cut a piece of paper in half widthwise. Then, fold it in half widthwise. Place the folded paper along one patchwork panel upper edge. Draw a curved line to form the heart cutting template. Then, cut along the line and unfold the paper.
Place the half-circle template along the patchwork panel upper edge and cut along the curved line.
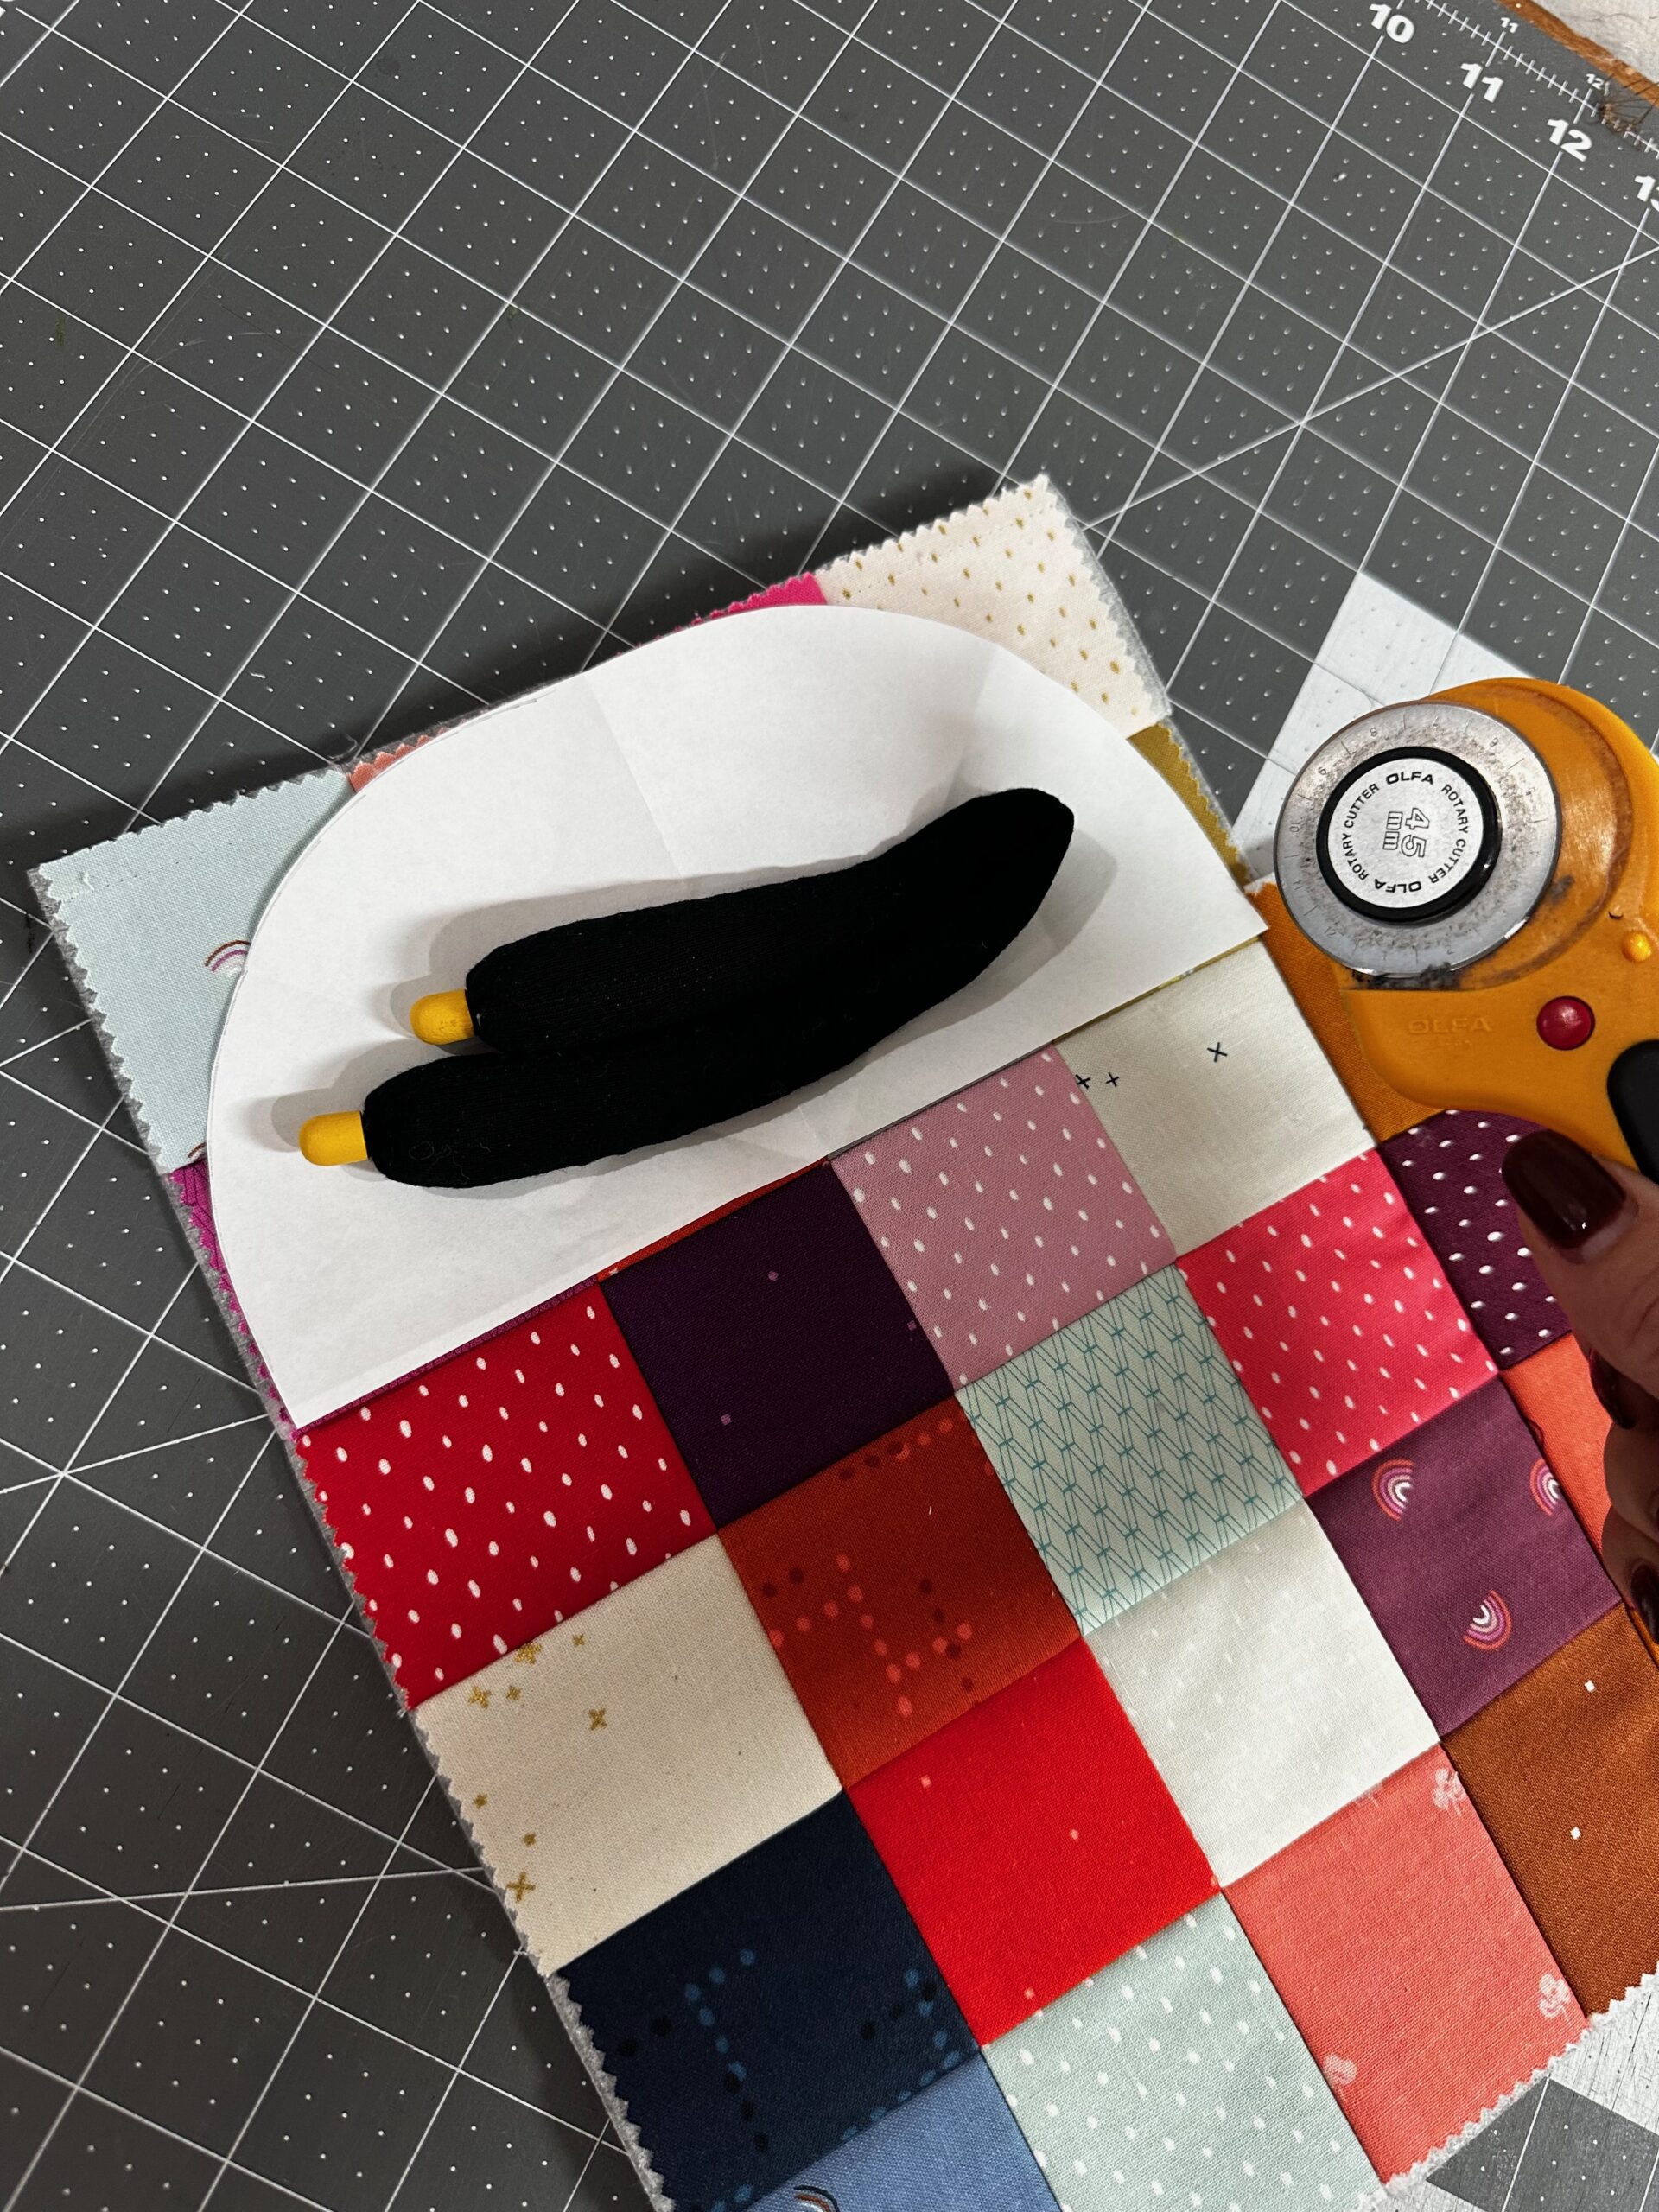
Then, use the same template to cut along the remaining patchwork panel upper edge, creating the heart shape.
REVERSE APPLIQUÉ TECHNIQUE
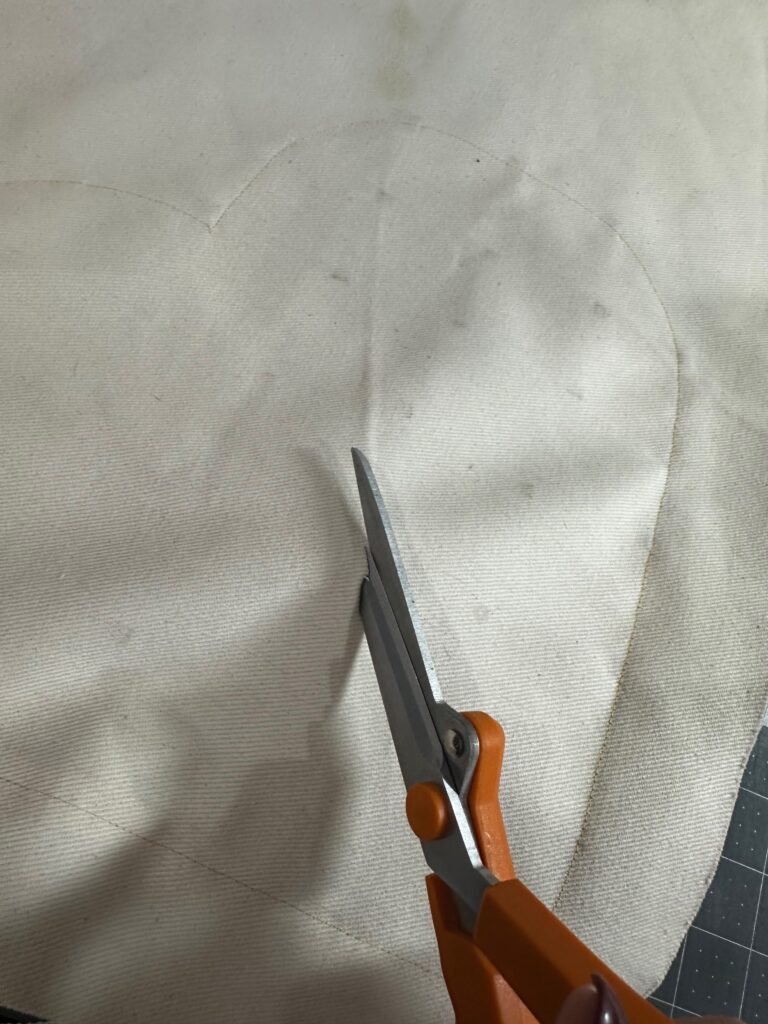
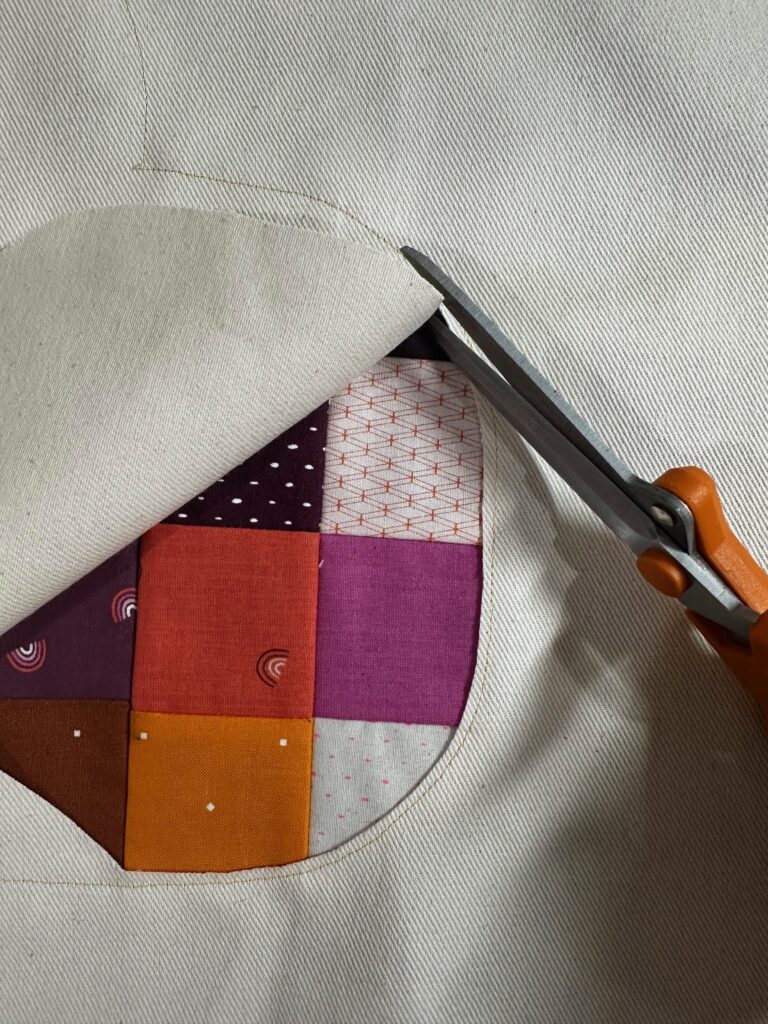
Place the patchwork heart panel wrong side up on the fabric wrong side, positioning the heart where desired. If making a tote, consult the pattern (if using) to ensure the heart won’t interfere with any hardware, straps, seams or boxed corners. To ensure nothing shifts, pin the heart in place.
Thread a size 90/14 needle and bobbin with 30 wt. Cotton Thread. Stitch 1/4″ inside the heart perimeter.

Next, separate the patchwork layer from the fabric layer and snip into the fabric inside the heart. Then, trim away the fabric to expose the patchwork heart piece. Be sure to leave at least 1/8″ of fabric beyond the stitching line.

PATCHWORK HEART QUILTING
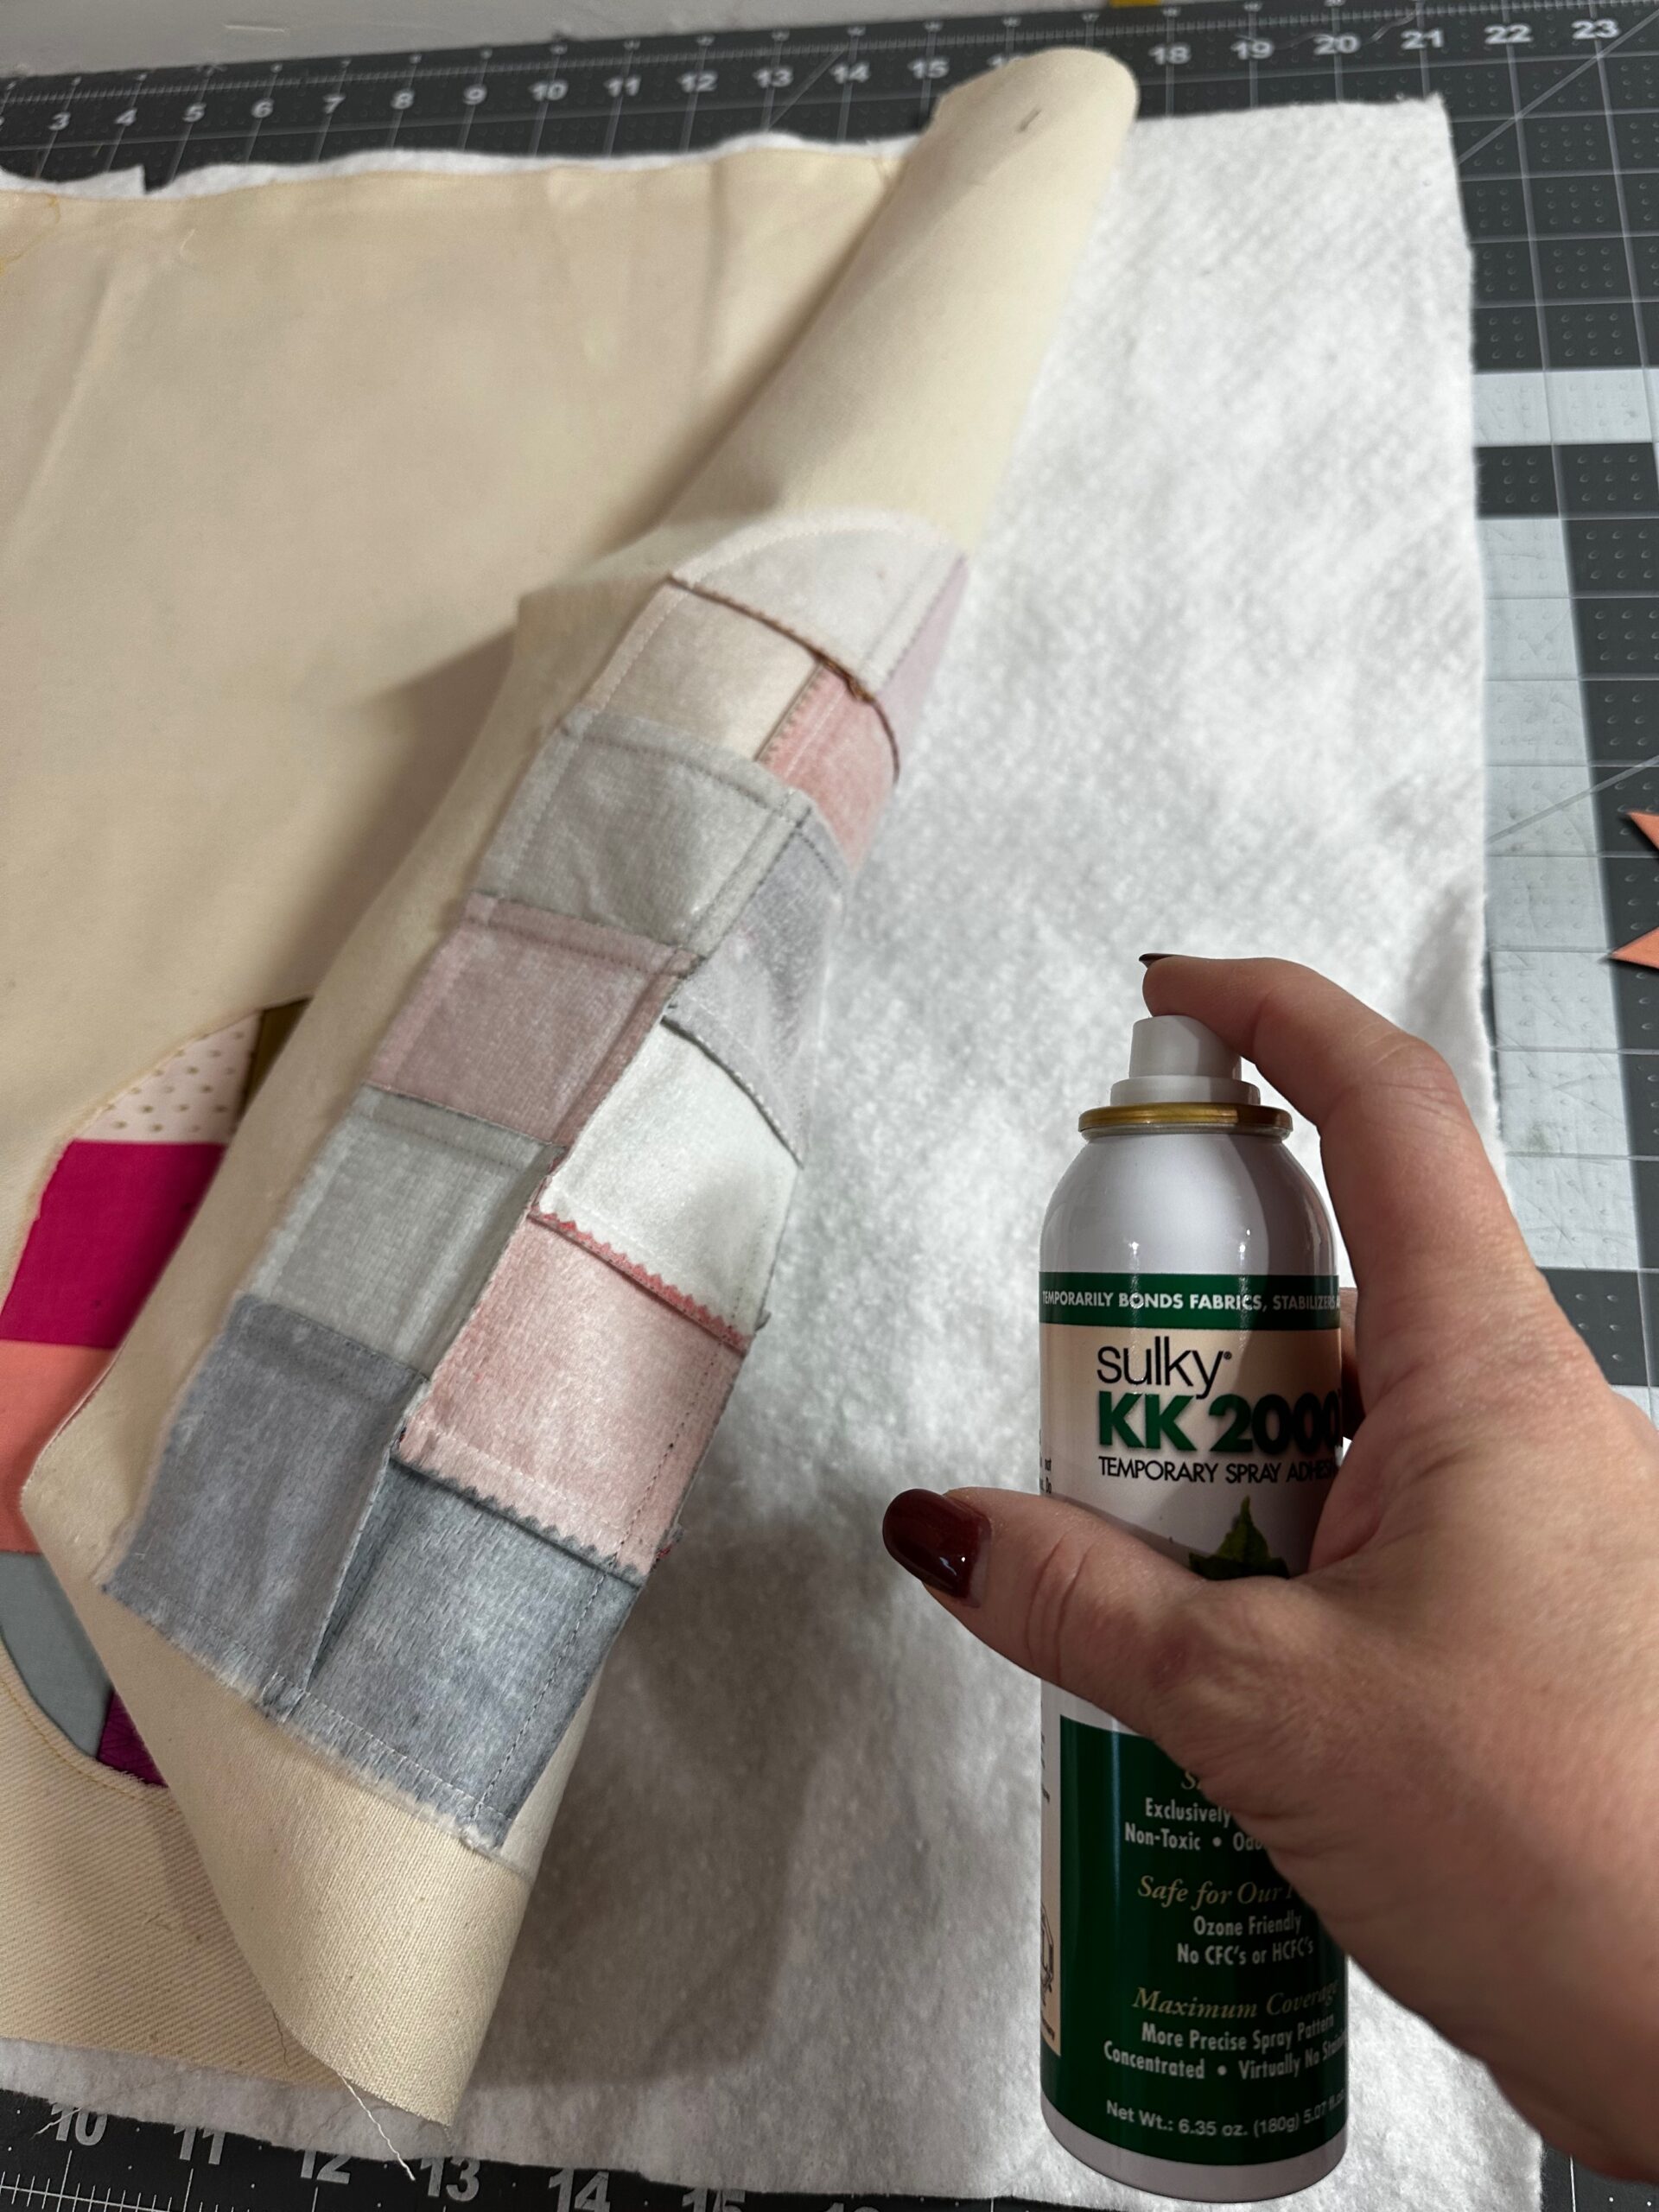
To add quilting, first place a layer of batting behind the fabric. Use Sulky KK 2000 Temporary Spray Adhesive to secure the layers.
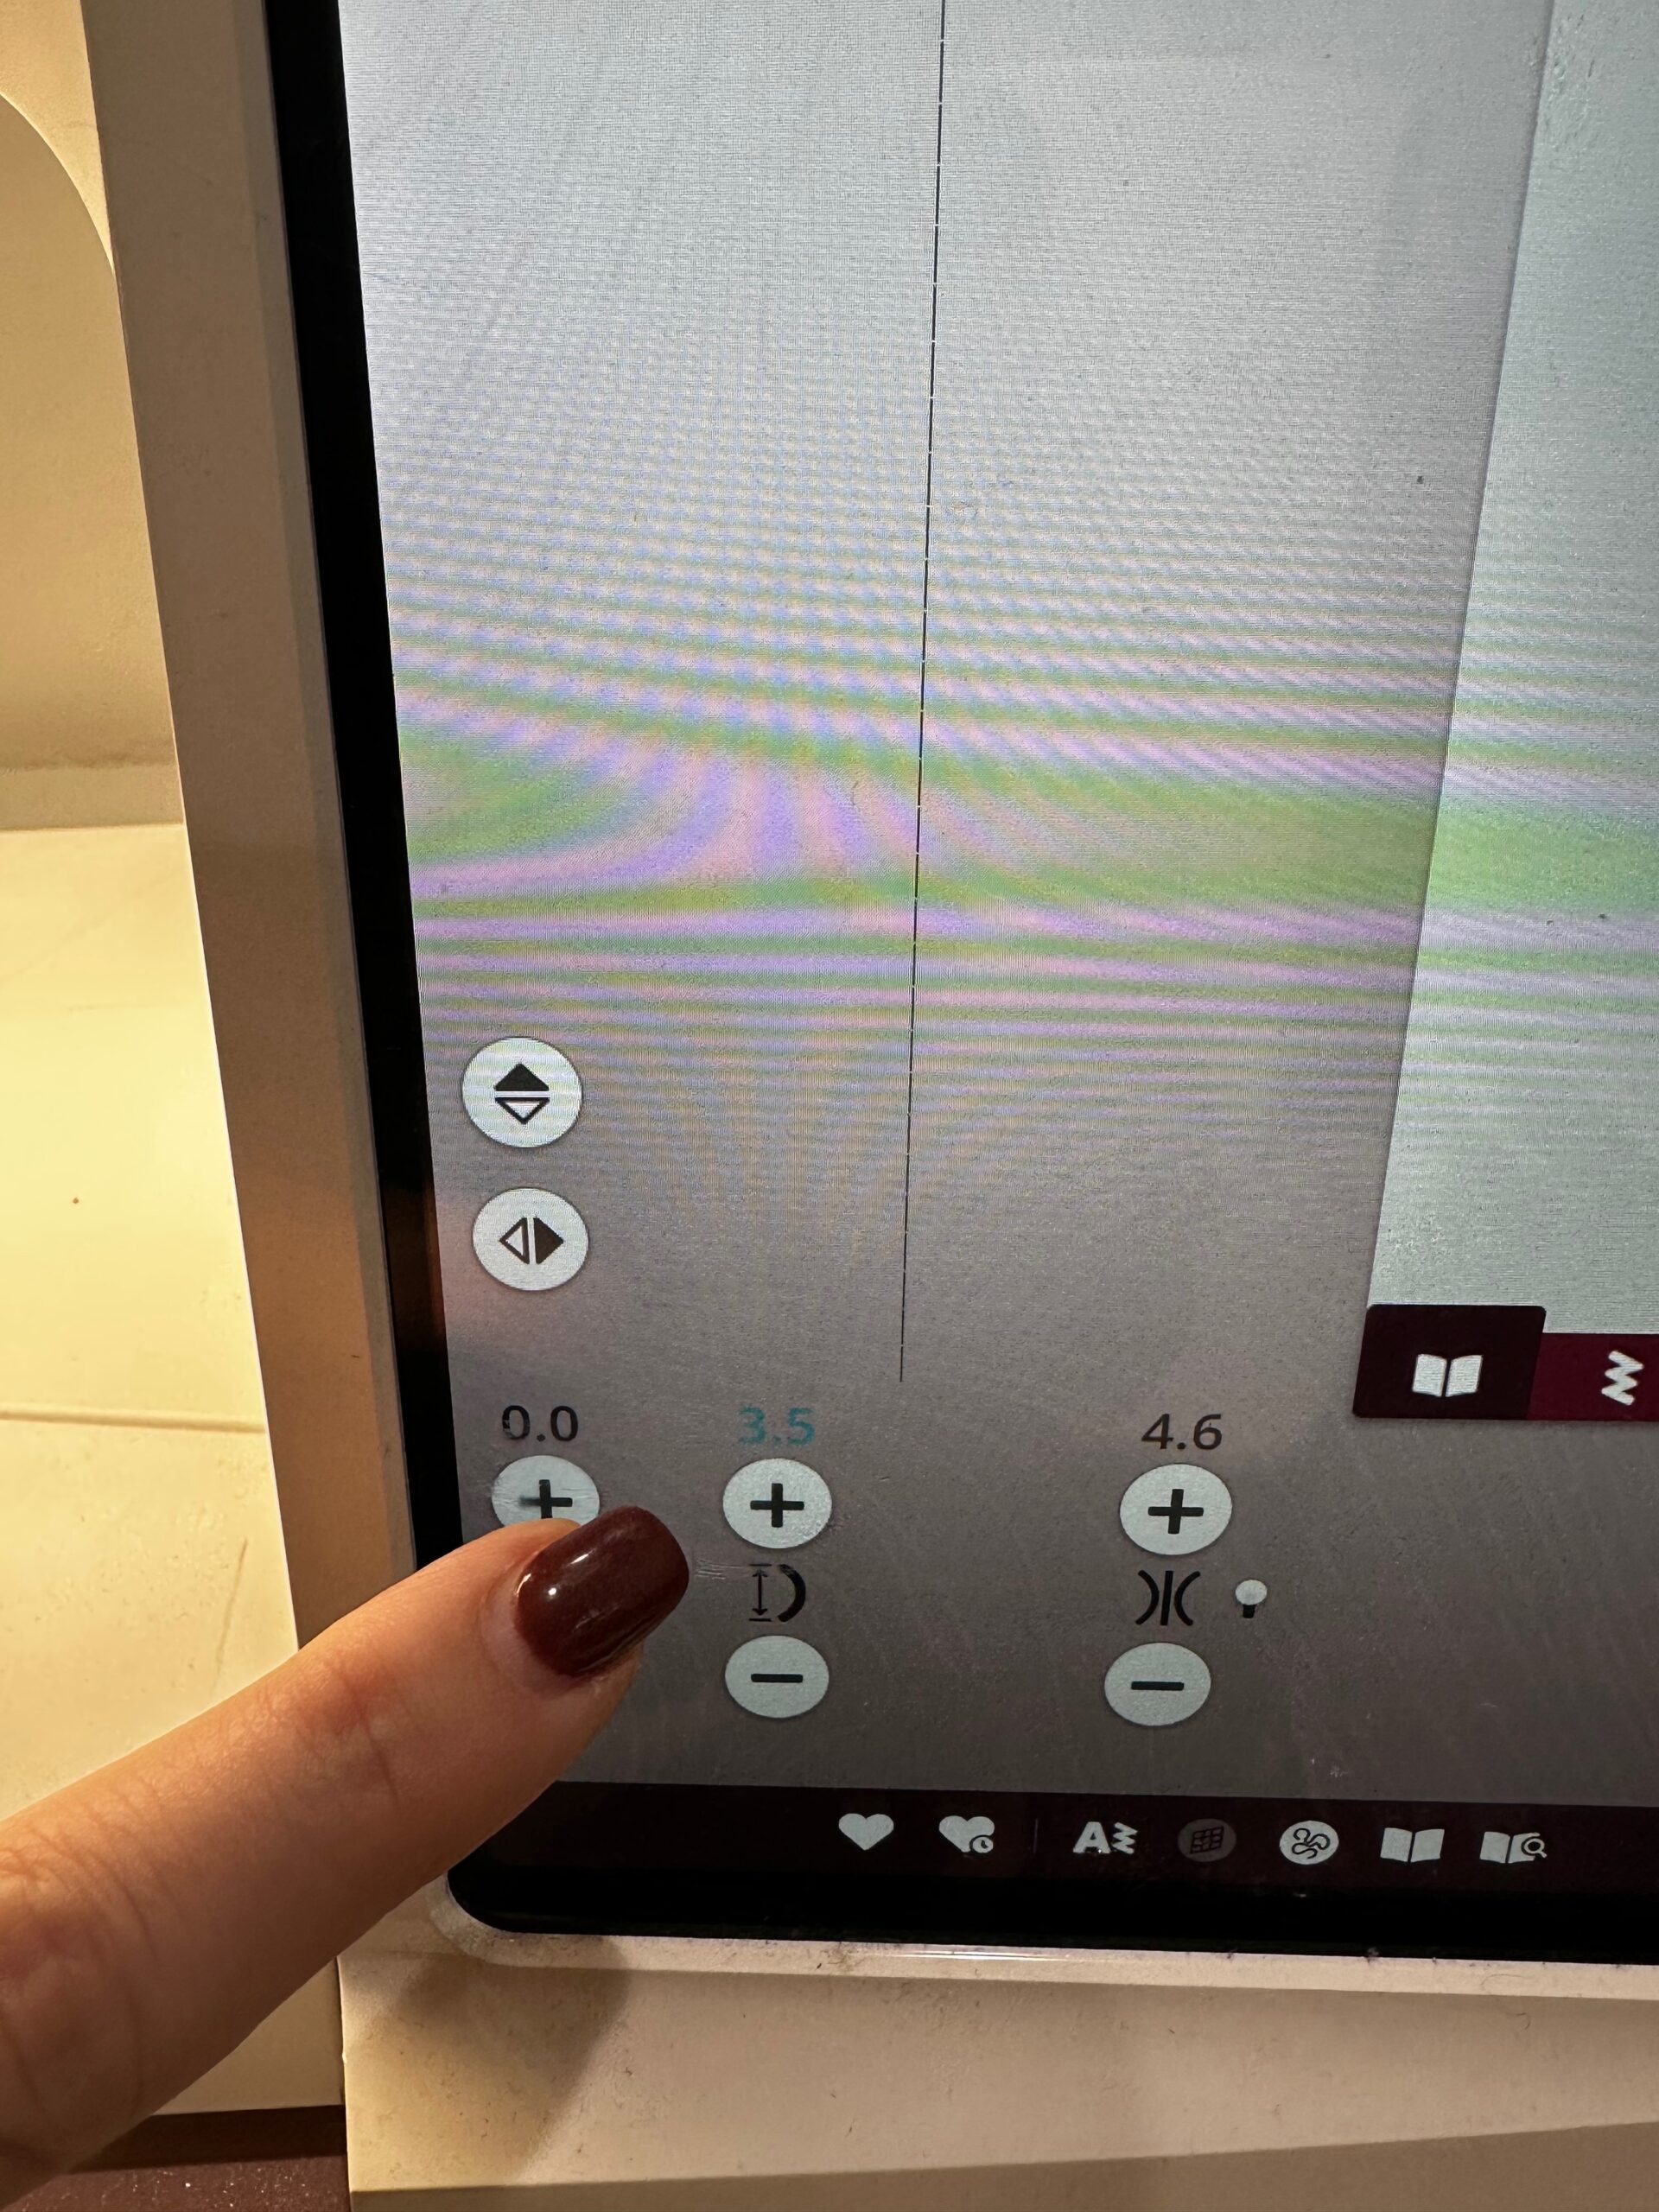
Lengthen the stitch length to 3.5mm and choose the stitch you like best: straight, serpentine, wave, etc.
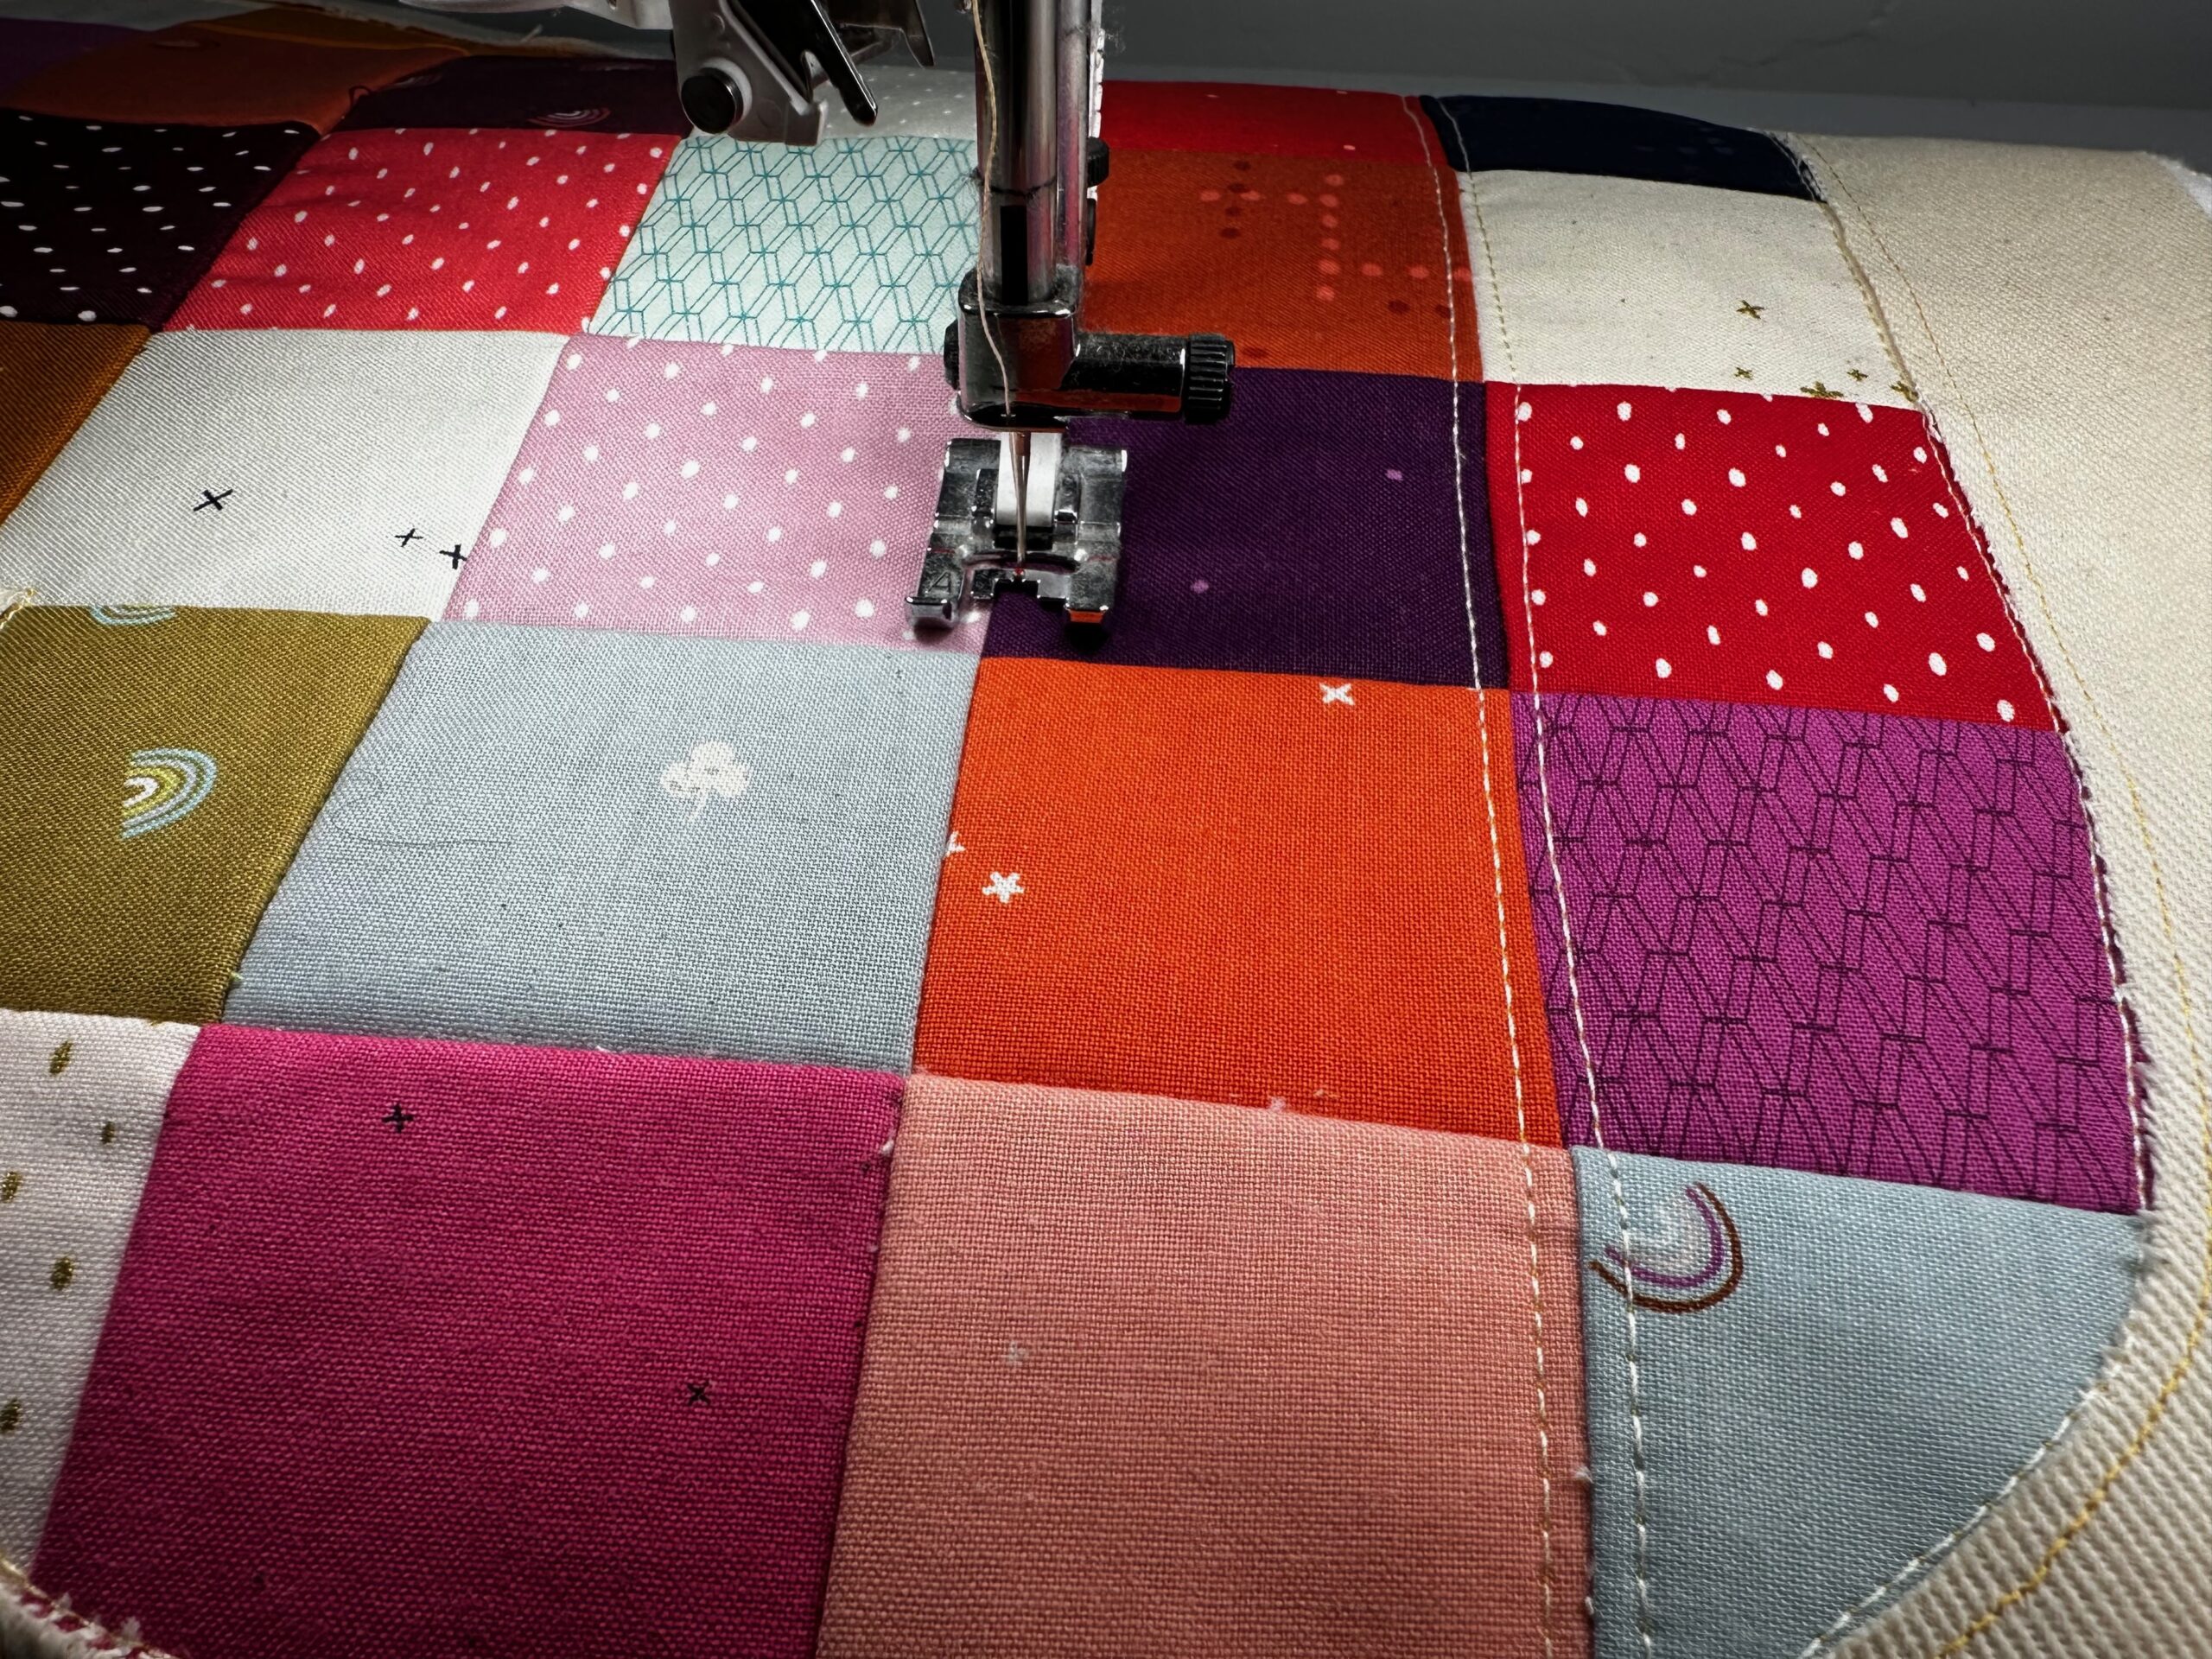
Quilt the heart portion as desired, making sure to outline the heart a few times for extra security.
After quilting is complete, use the fabric for a tote front or decorative pillow.
Then, try the technique on a sweatshirt or jacket to wear on Valentine’s Day!
