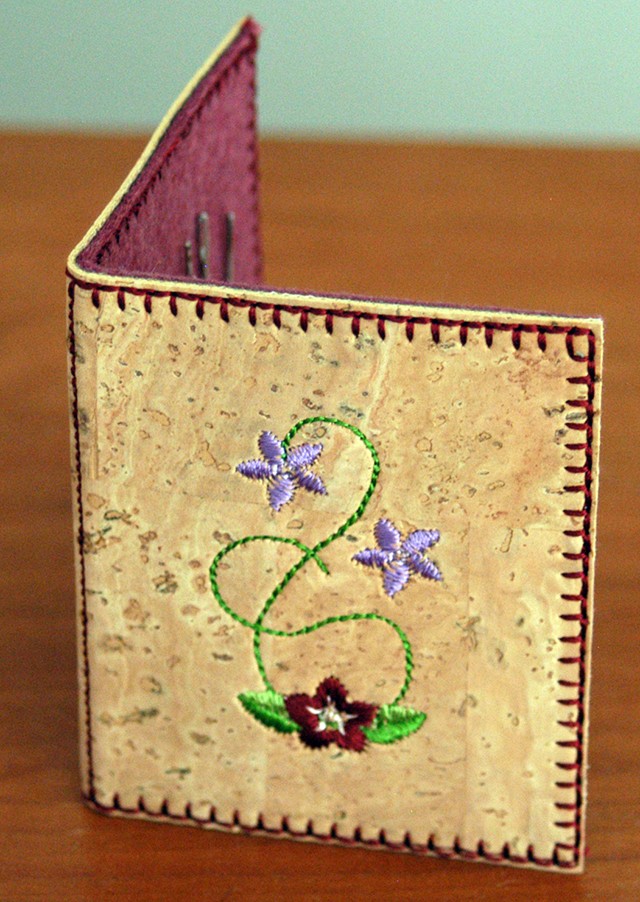
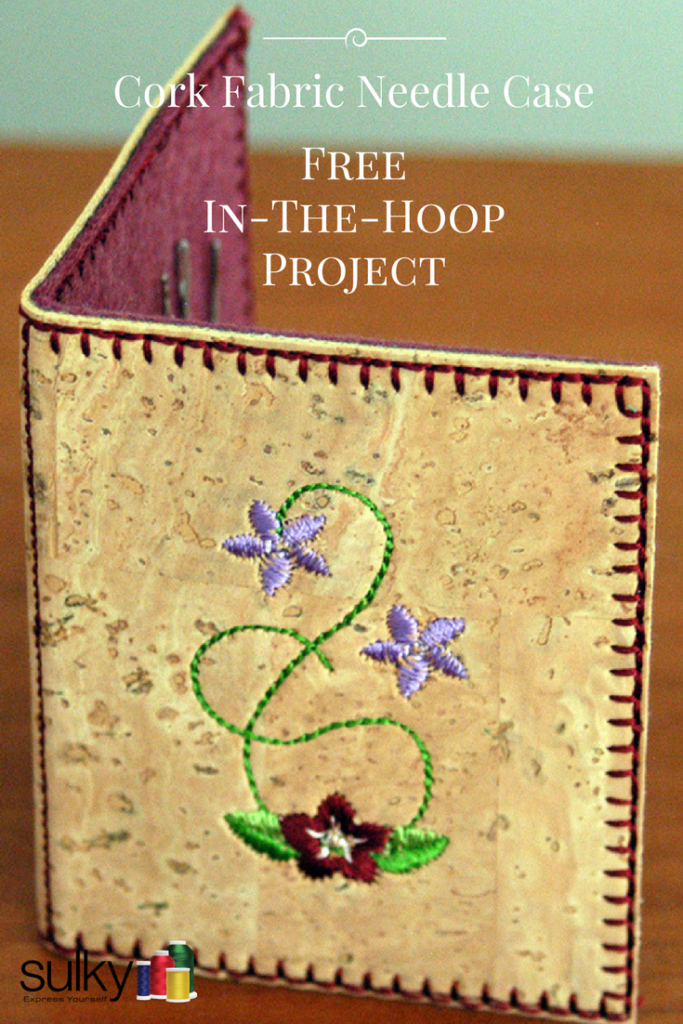
Cork Fabric Needle Case
In-The-Hoop Project by Pamela Cox
Supplies:
3-1/2”x 5-1/4” piece of cork fabric
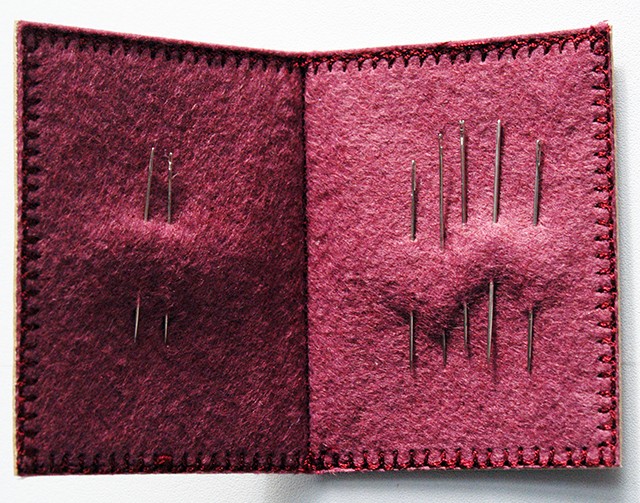
3-1/2”x 5-1/4” piece of felt
Sulky Soft ’n Sheer™ Stabilizer
Sulky KK 2000™ Temporary Spray Adhesive
Basic Needle Case Embroidery Design – Free download (Download is below)
Color Chart for Needle Case – Free download (Download is below)
Embroidery Design of Choice – optional (No larger than 1-1/2”x 2-1/4”.)
Preparation:
- Download both the needle case design and the color chart here: Needle Case Emb Designs
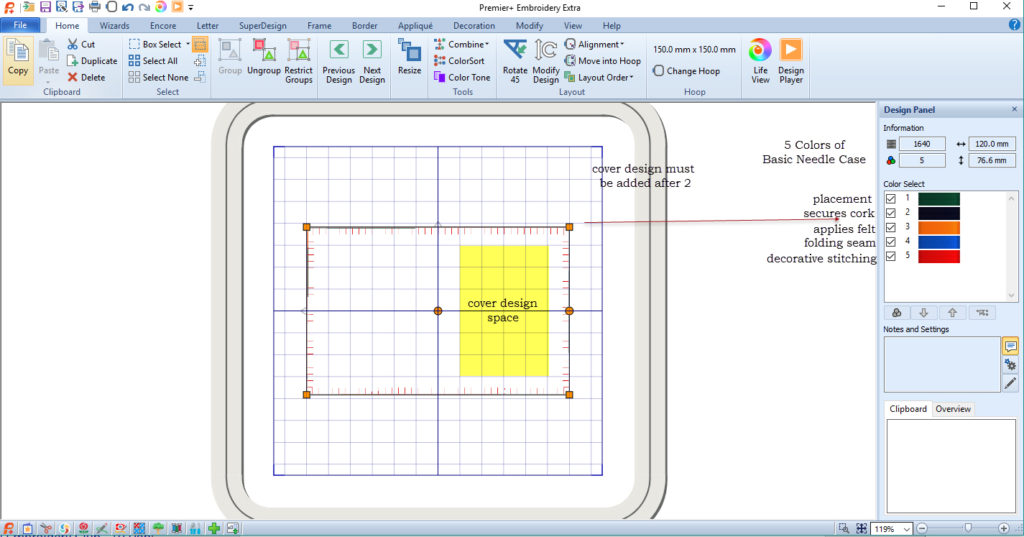
- If a design is to be added to the cover of the needle case, open the basic case design in a software editing program. Be sure to note the maximum design sign above.
 If the case is to be stitched plain, load the design into your embroidery machine.
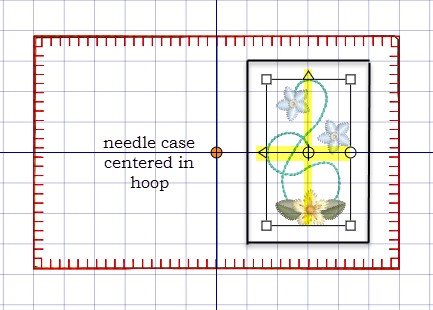
 - Bring the chosen design into work space. I selected Design #16 from a Graceful Embroidery Collection, Graced in Petals – Set 1, available at www.gracefulembroidery.com.
- Center the design within the available front cover space. Use the gridlines and arrows around the new design for placement.
- Combine the two designs. The number of colors will now increase from the 5 basic needle case colors to include as many colors needed to stitch the added design, which, in this example is now 12.
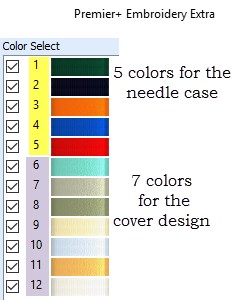
- Not all software operates the same. If possible, such as in Premiere+ Embroidery Extra from Husqvarna-Viking, move colors 3, 4 and 5 to stitch, in their same order, but after the last color of the cover design.
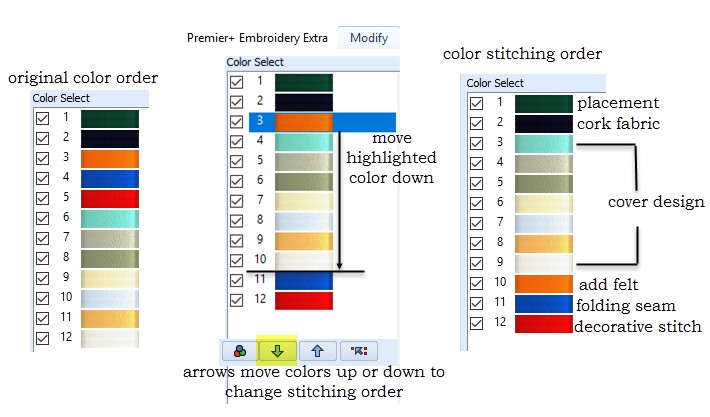 If you are unable to physically change the order, when embroidering, stitch colors 1 and 2, skip over 3, 4 and 5; stitch all the colors needed for the cover design, and backup to 3 to stitch. Finish with 4 and then 5.
In the Hoop Project:
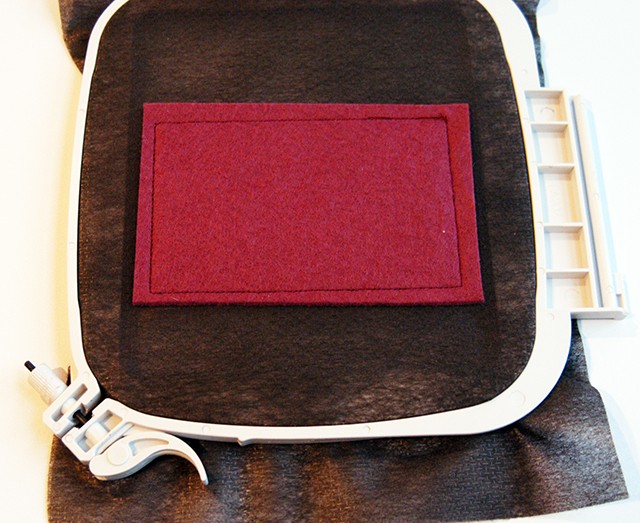
- Securely hoop a piece of Sulky Soft ’n Sheer Stabilizer in a 150 mm hoop. It comes in black and white, and I used black for this project.
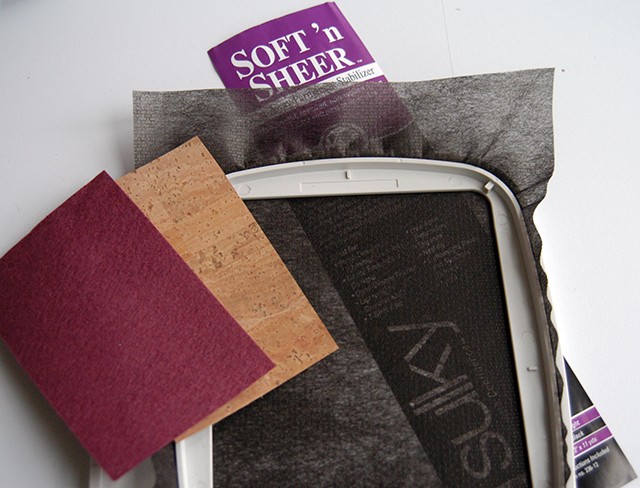 NOTE: If you read this Blog Post on cork fabric, I said that Sulky Sticky+™ is the stabilizer of choice when machine embroidering on cork fabric. This is still true, however, there are always exceptions to the rule and this happens to be one of them. The stabilizer will remain in the final project sandwiched between a layer of felt and cork. This “unsticky” stabilizer prevent the needles from possibly grabbing a sticky surface when they are stored in the case.
 - Lightly spray the wrong side of the cork piece with Sulky KK 2000 Temporary Spray Adhesive.
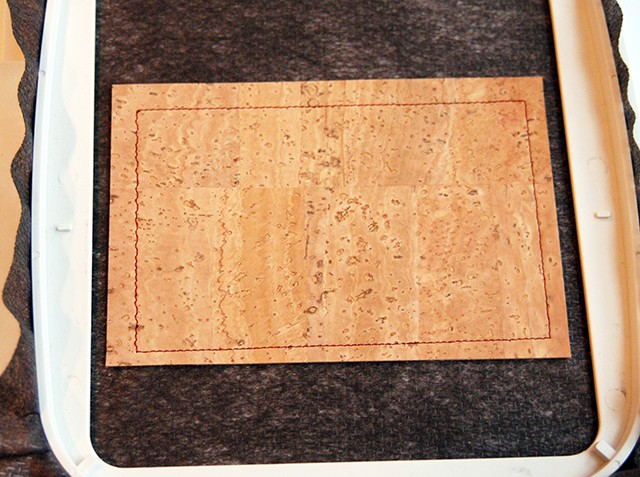
- Stitch color #1, placement lines, directly on the stabilizer.
- Press the cork, right side up, firmly on the stabilizer covering all placement lines.
- Stitch color #2 to further secure the cork to Soft ’n Sheer Stabilizer.
 NOTE: If a cover design has been incorporated, make sure it completely stitches before going on to the gold thread color – originally color #3
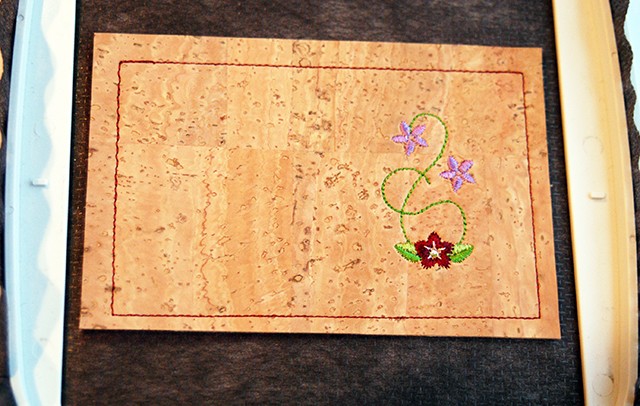
- Lightly spray one side of the felt piece with KK 2000 Temporary Adhesive. Remove the hoop from the machine and press the sticky side of the felt to the underneath side of the hoop. Cover the placement lines.
- Return the hoop to the machine and finish stitching the needle case colors which were originally #3, #4 and #5.
- Once all stitching is completed, remove the project from the hoop. Using a straight edge and a rotary cutter, trim through all layers just outside of the decorative stitching. Be careful to not cut into the stitching.
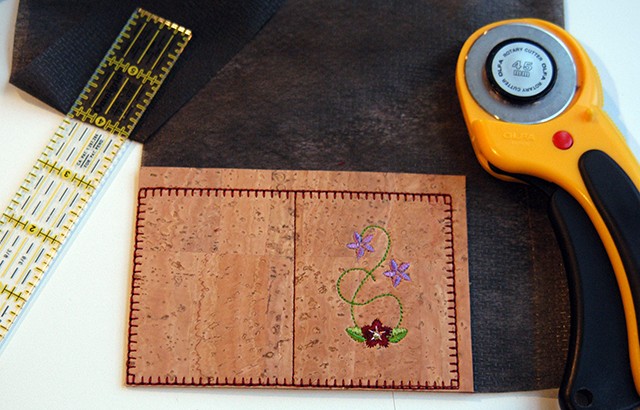
- Crease in half. Place case under a heavy weight overnight to help crease the case.

This is amazing Pamela. I see my Graced in petals design on the front!
from Hazel at Graceful Embroidery
looks neat. thanks for sharing.
Very interesting, I think it looks great on a wallet. Thank you for showing me it.
it is so nice to use and looking forward to making this project up!
Love the pattern, wondering if there is a printable file?
Yes, there is a printable color chart in the download
Thank you for this neat project
Love this. Thank you for sharing !! I wanted to try as my first cork project and first machine!!! Cork fabric is new to me, what thickness did you use??
You want “maker’s medium” or around 1mm cork fabric to ensure it’s pliable enough for sewing.