
Easy as Pie Potholders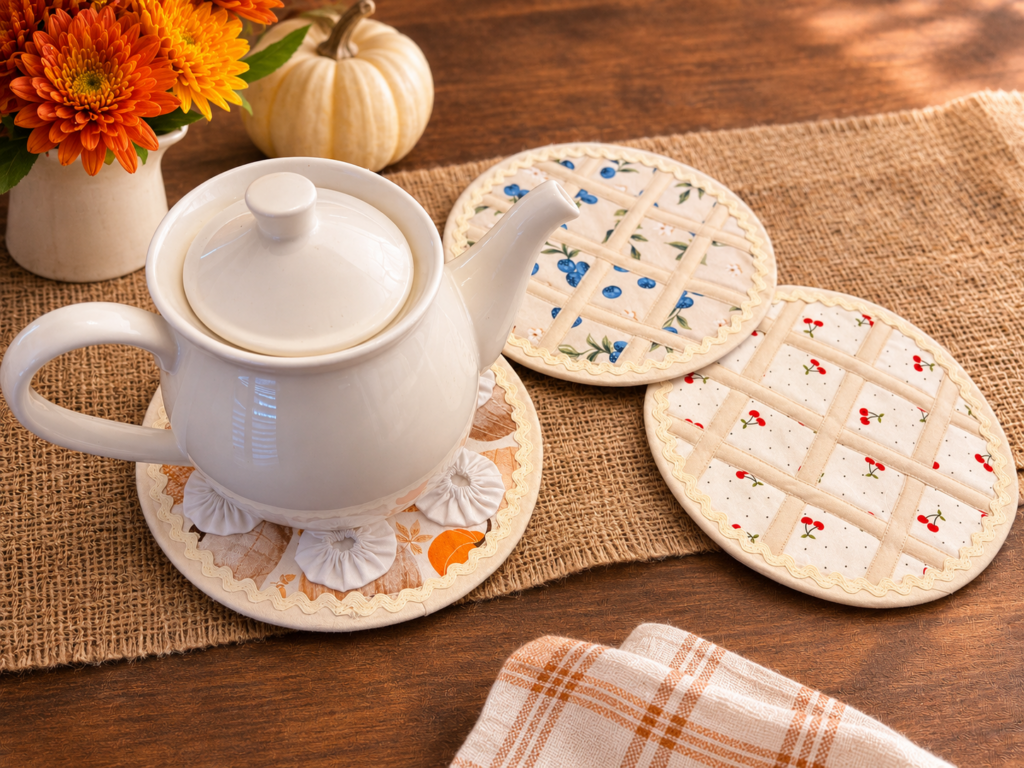
A Sweet Thanksgiving Sewing Project!
Whip up a batch of adorable pie-inspired potholders that look good enough to eat! These Easy as Pie Potholders are a fun way to dress up your Thanksgiving kitchen, add a handmade touch to your holiday table or create a thoughtful hostess gift for whoever is preparing the feast.
Whether you’re partial to pumpkin, cherry, blueberry or apple pie, these sweet little hot pads are easy to customize with your favorite fabrics, colors and embellishments. Add a woven lattice crust to your favorite fruit pie, or top a pumpkin pie with fluffy fabric “whipped cream” for a realistic finishing touch.
Best of all, this project uses simple sewing techniques, making it a great way to use up fabric scraps and practice working with bias tape, rickrack and hand stitching. Make one for yourself, then stitch up a few extras to give away. After all, who wouldn’t love a homemade pie that lasts forever?
Easy as Pie Potholders: Supplies
For each potholder:
- Two 8½” circles of cotton fabric (one for the pie top and one for the backing)
- Two 8½” circles of cotton quilt batting
- One 8½” circle of Insul-Bright insulated batting
- Double-fold bias tape for the outer crust & optional lattice topping
- Rickrack trim
- Coordinating Sulky Thread for construction & decorative stitching
For the pumpkin pie whipped cream topping:
- Six 4″ circles of white cotton fabric
- White thread for gathering & hand stitching
- Hand-sewing needle
TIP: An 8½” round salad plate makes a perfect template for cutting the pie circles! Simply trace around the plate onto your fabrics, batting and Insul-Bright, then cut along the marked lines.
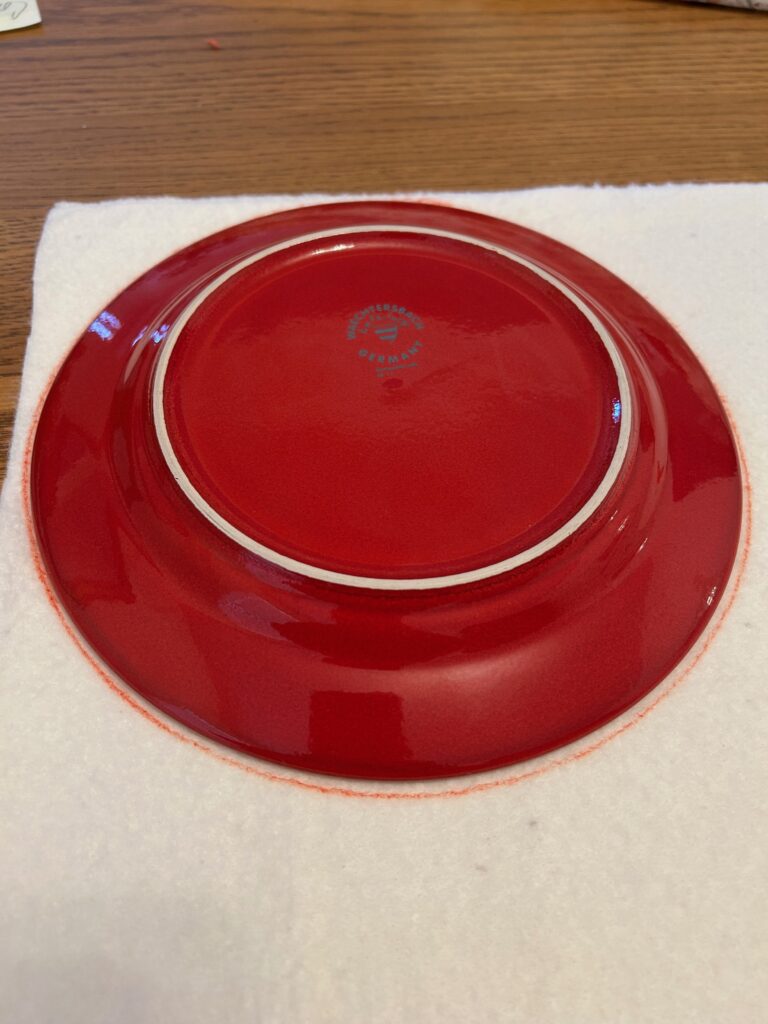
Cut the Pie Layers
Every good pie starts with a great crust, and these potholders are no exception!
Begin by choosing your fabrics. Look for colors and prints that resemble your favorite Thanksgiving desserts. Rusty orange cotton is perfect for pumpkin pie, while deep red, burgundy or purple fabrics make convincing cherry and berry fillings. Consider using print fabrics with fruit or gourd motifs.
For the backing, choose a coordinating cotton fabric. This is a great opportunity to use a fun Thanksgiving print or a fabric that complements your kitchen décor.
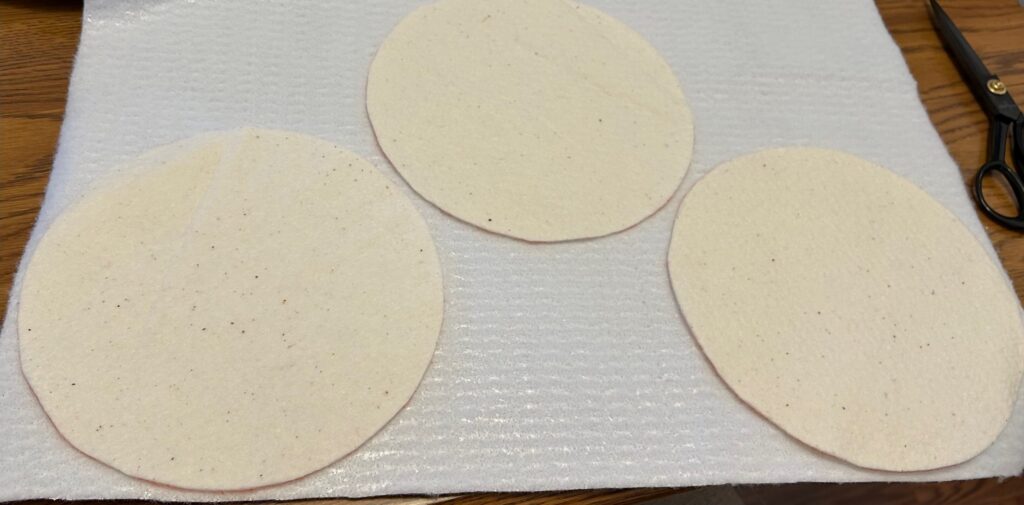
Using your 8½” plate template, cut five circles:
- One cotton fabric circle for the pie top
- One cotton fabric circle for the backing
- Two cotton quilt batting circles
- One Insul-Bright circle
These five layers create the body of the potholder, giving it a softly padded appearance while providing insulation for everyday kitchen use.
Safety note: Insul-Bright is heat-resistant batting, but it is not heatproof. Use 100% cotton fabrics, batting and thread for hot-contact areas, and avoid polyester or metallic decorative threads where hot cookware may touch. These decorative potholders should not be used for handling very hot cookware unless the finished construction has been verified for that use. They are not intended for direct flame or stovetop contact.
Layer & Baste the Potholder
Now it’s time to assemble your pie!
First, layer the five circles in the following order, from bottom to top:
- Backing fabric, right side facing down
- First layer of cotton quilt batting
- Insul-Bright insulated batting
- Second layer of cotton quilt batting
- Pie-top fabric, right side facing up
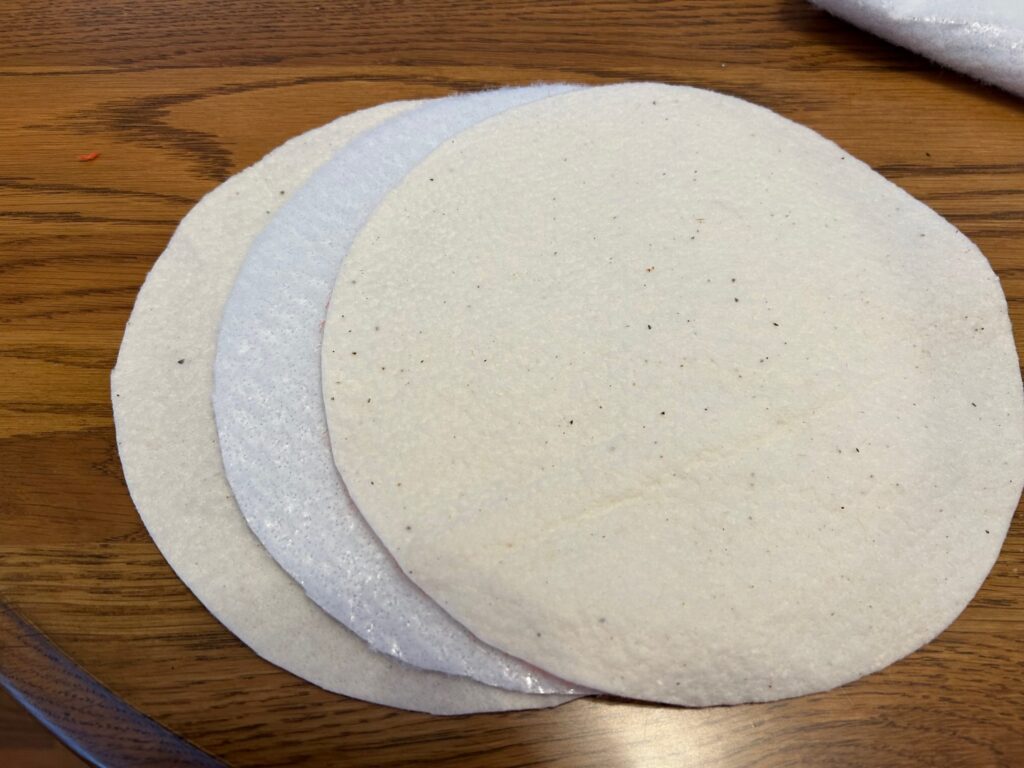
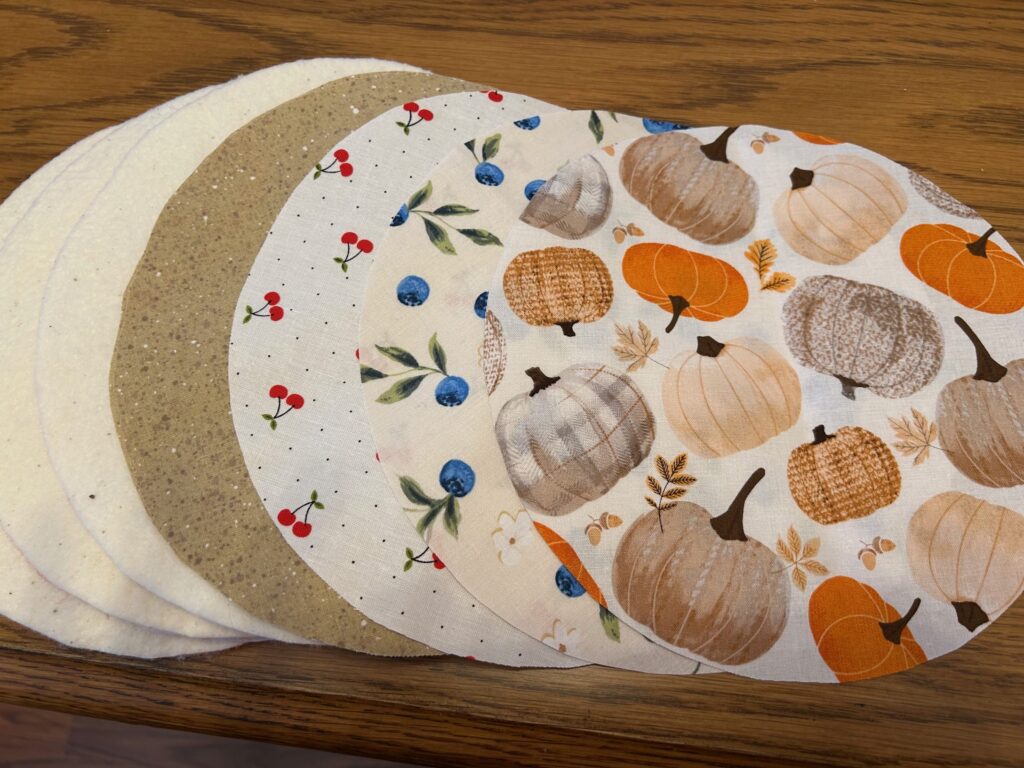
Both cotton fabrics should have their right sides facing outward. Carefully align all five circles, smoothing away any wrinkles or puckers. Secure the layers with quilting clips or pins to prevent shifting.
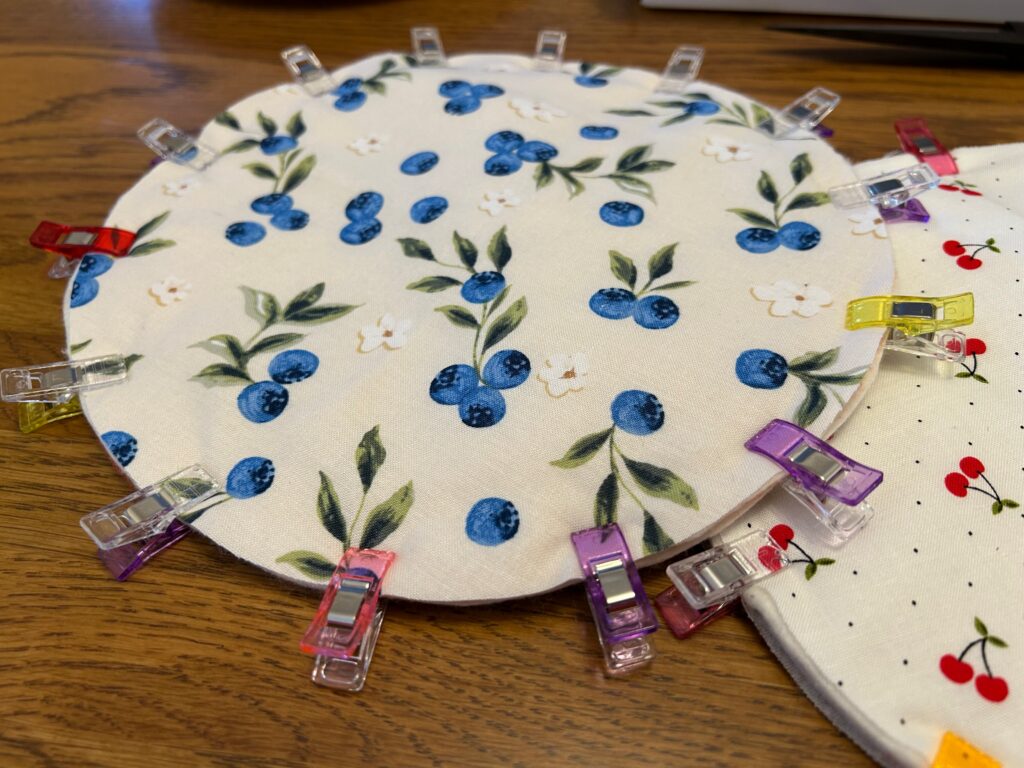
Using a ¼” seam allowance, stitch around the entire outer edge of the circle. This basting seam holds all five layers together and makes the next steps much easier.
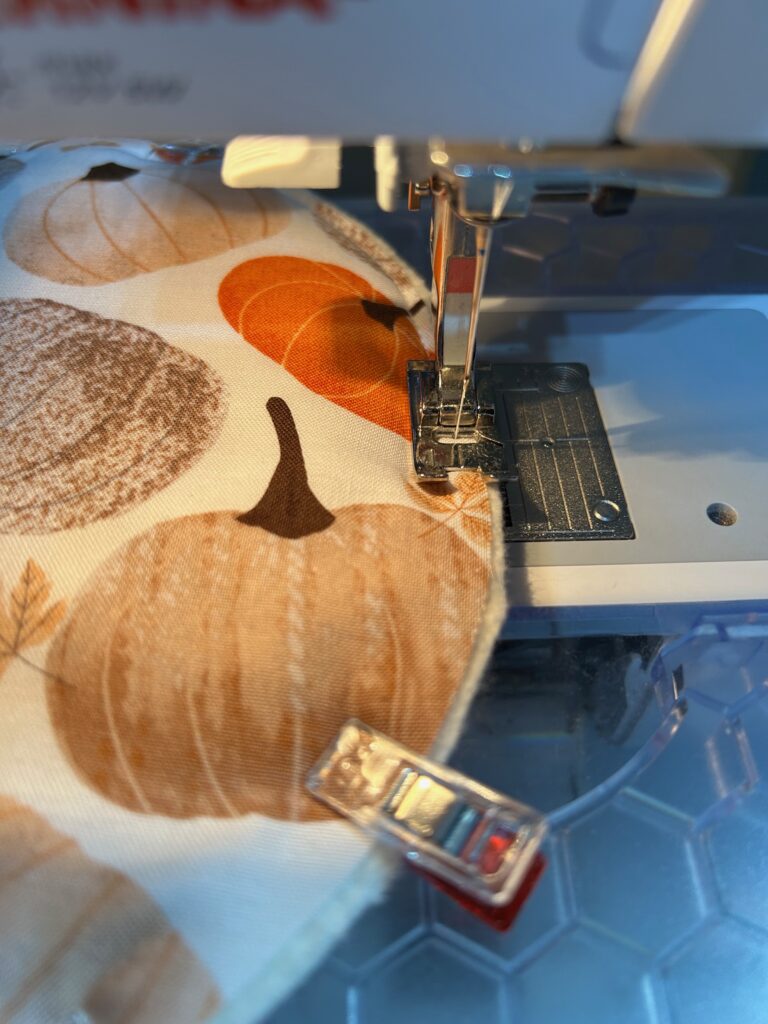
Tip: Because you’re stitching through several layers, sew slowly and use a slightly longer stitch length if needed. A walking foot can also help feed the layers evenly through the sewing machine.
Adding Woven Lattice Crust
If you’re making a cherry, apple or blueberry pie, a woven lattice topping adds that unmistakable homemade-pie appearance!
For a pumpkin pie, skip this step and head straight to the outer crust. Pumpkin pie typically has a smooth filling, so no lattice is needed.
To create the lattice, use bias tape in a color that resembles golden-brown pastry. Cream, tan or light brown are great choices.
Here’s how to build your lattice:
- Lay several strips of bias tape across the pie top, spacing them evenly. The number of strips is entirely up to you, depending on how open or intricate you want the lattice to appear.
- Use a ruler to keep the strips straight and evenly spaced. Secure each strip with pins.
- Add a second set of strips running perpendicular to the first set.
- Weave the second set over and under the first set, alternating the pattern to create the classic lattice effect.
- Adjust the strips until the design is balanced and the fabric “filling” shows through the openings.
- Stitch along both long edges of each bias-tape strip to secure the lattice to the potholder.
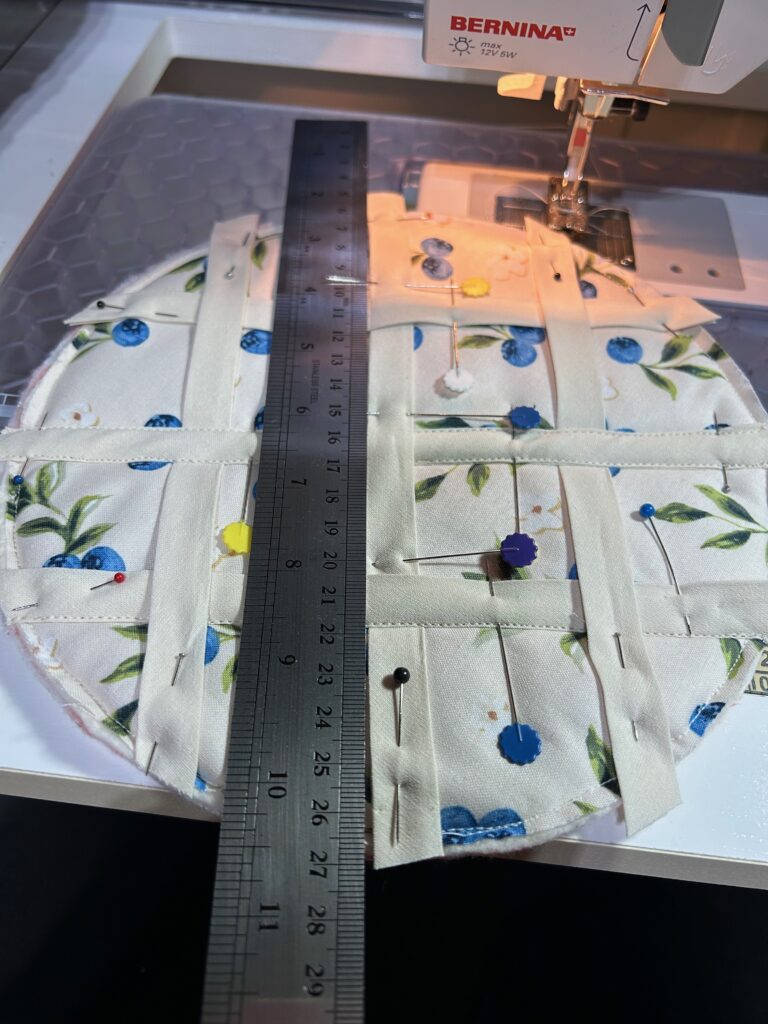
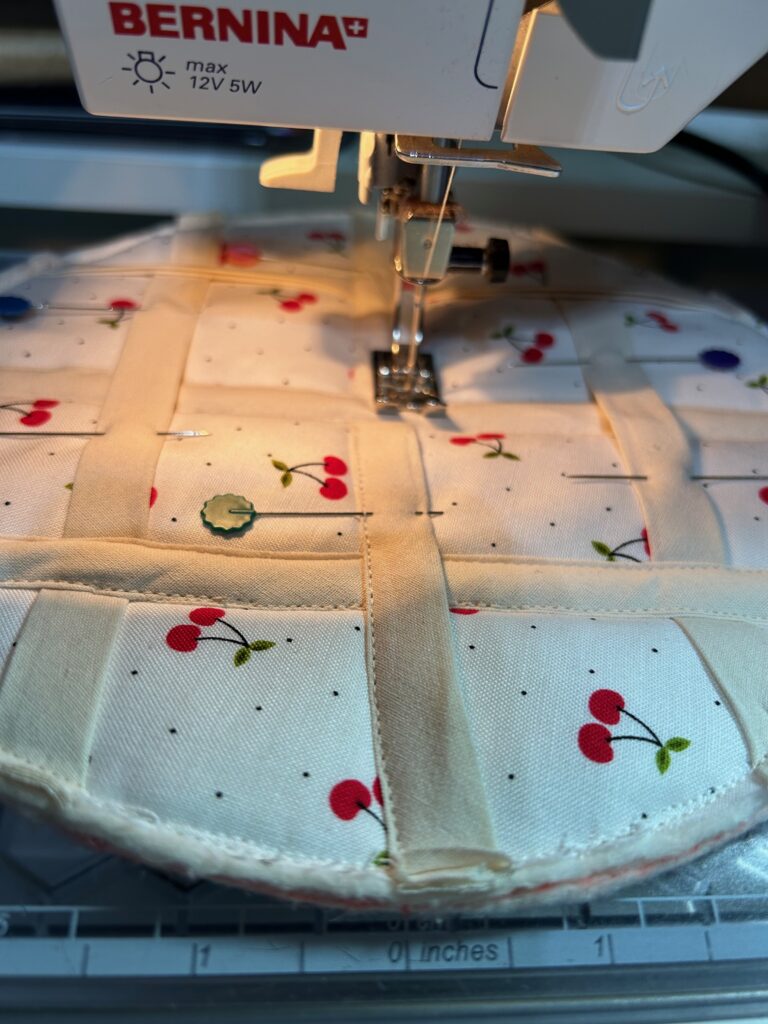
Keep the bias tape flat as you sew, and remove pins before they reach the presser foot. Once the lattice is stitched, trim any excess tape flush with the outer edge of the circle.
Creative Idea: Try varying the width of your lattice strips for different looks. Narrow strips create a delicate, intricate crust, while wider strips give the pie a rustic, farmhouse feel.
Binding
Every pie needs a crust! The outer binding creates a neat, finished edge while helping your potholder resemble a freshly baked pie.
Choose double-fold bias tape in a coordinating crust color.
Begin by opening one folded side of the bias tape. Position the opened edge against the raw outer edge of the potholder on the underside, with right sides together. Leave a short folded-under tail at the beginning, then stitch the bias tape around the entire circumference, following the first crease of the tape.
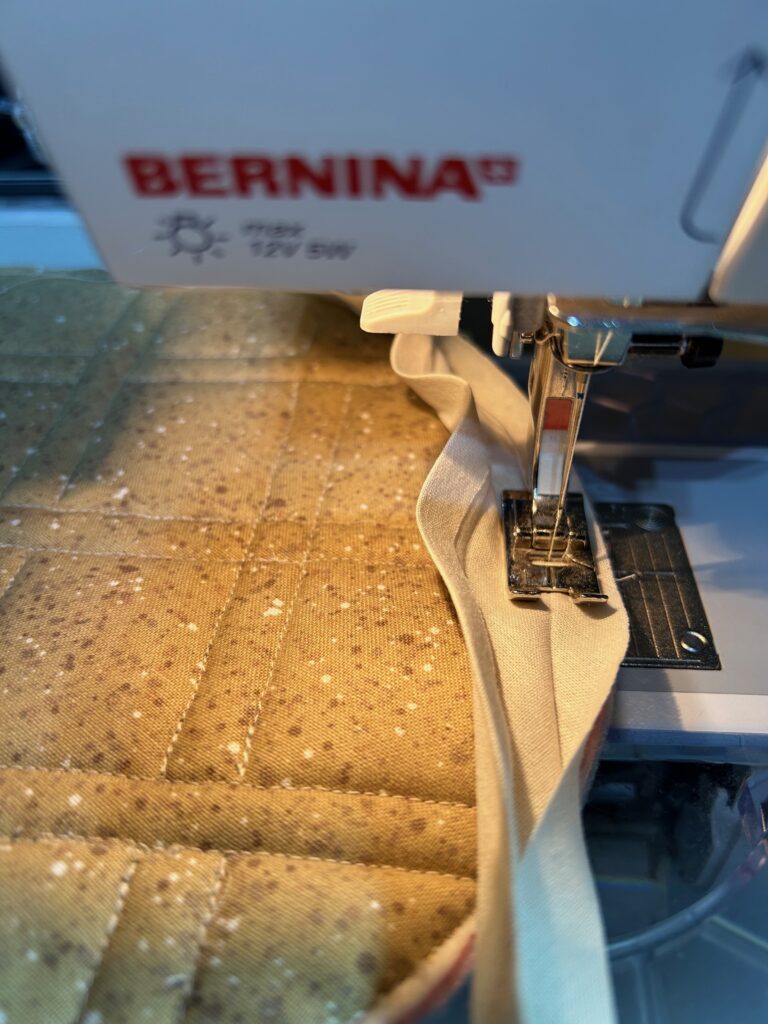
As you sew, gently guide the tape around the circular edge. Bias tape naturally stretches and curves, making it ideal for finishing round projects.
When you return to the starting point, overlap the beginning with the remaining end of the bias tape, folding under the raw end for a clean finish.
Next, bring the bias tape around to the right side of the potholder. Fold it along its center crease so it wraps neatly over the raw edges and covers the previous stitching.
Secure with pins or quilting clips, then stitch close to the folded edge of the bias tape all the way around the circle.
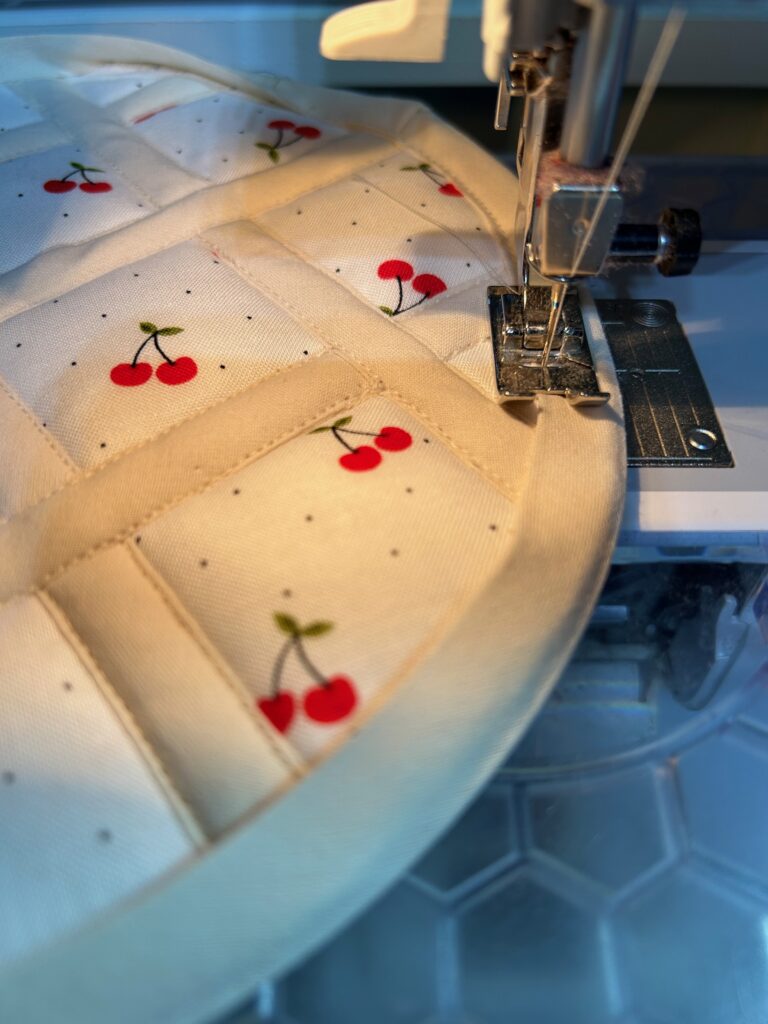
Take your time with this step. A smooth, evenly stitched binding gives the potholder a polished finish.
Crimped Crust
Here’s where your potholder really starts to look like a pie!
Rickrack trim is the secret to creating a fun, dimensional edge that resembles the crimped crust of a homemade pie. Choose rickrack in a color that complements your bias-tape binding. A warm beige or golden tan is especially convincing.
Position the rickrack on top of the outer binding, following the circular edge of the potholder.
Stitch down the center of the rickrack, keeping the trim evenly positioned as you sew. When you reach the starting point, fold under the remaining raw end and secure it with a few additional stitches.
The zigzag shape of the rickrack creates a scalloped, crimped appearance without any complicated sewing techniques.
TIP: For an extra decorative touch, use a contrasting thread color to highlight the rickrack stitching. This is a great place to experiment with Sulky Thread colors that coordinate with your fabric choices.
Fabric Whipped Cream for Pumpkin Pie
What’s pumpkin pie without a generous dollop of whipped cream?
For the pumpkin pie version, skip the lattice and add fluffy white fabric yo-yos to resemble whipped cream. These simple gathered fabric circles add dimension and a playful finishing touch.
To make six fabric yo-yos:
- Cut six 4″ circles from white cotton fabric.
- Thread a hand-sewing needle with white thread and knot the end.
- Sew a running stitch around the entire circumference, folding the edge under as you go. Keep your stitches approximately ⅛” to ¼” long.
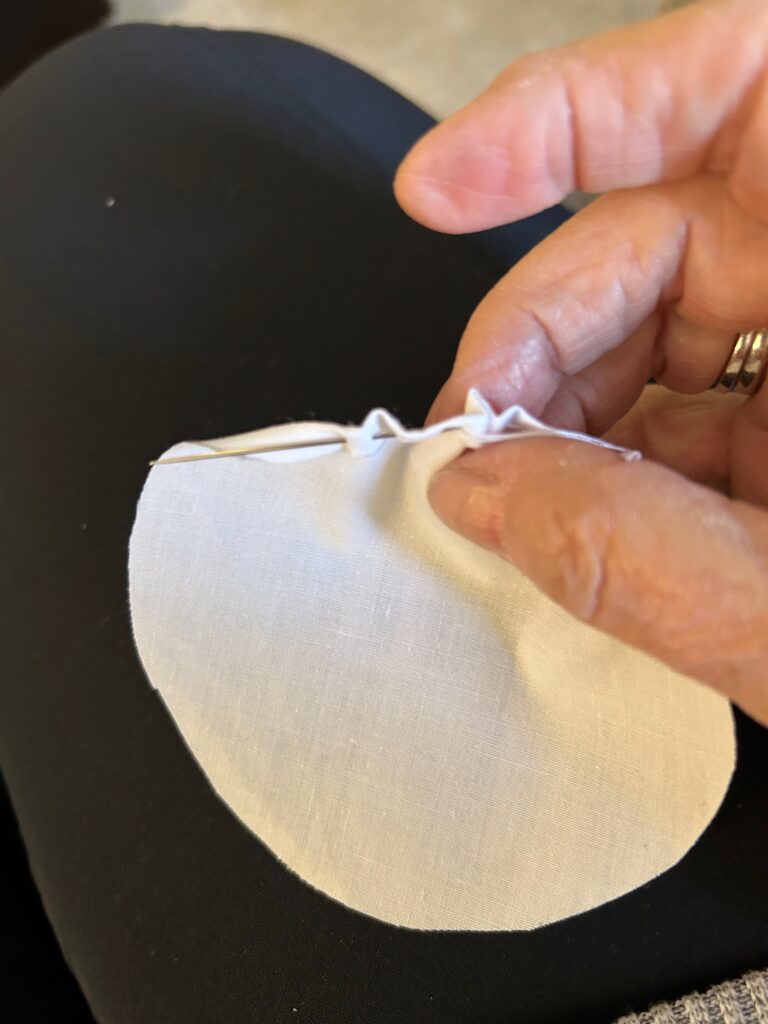
- Once you’ve stitched around the circle, gently pull the thread to gather the fabric toward the center.
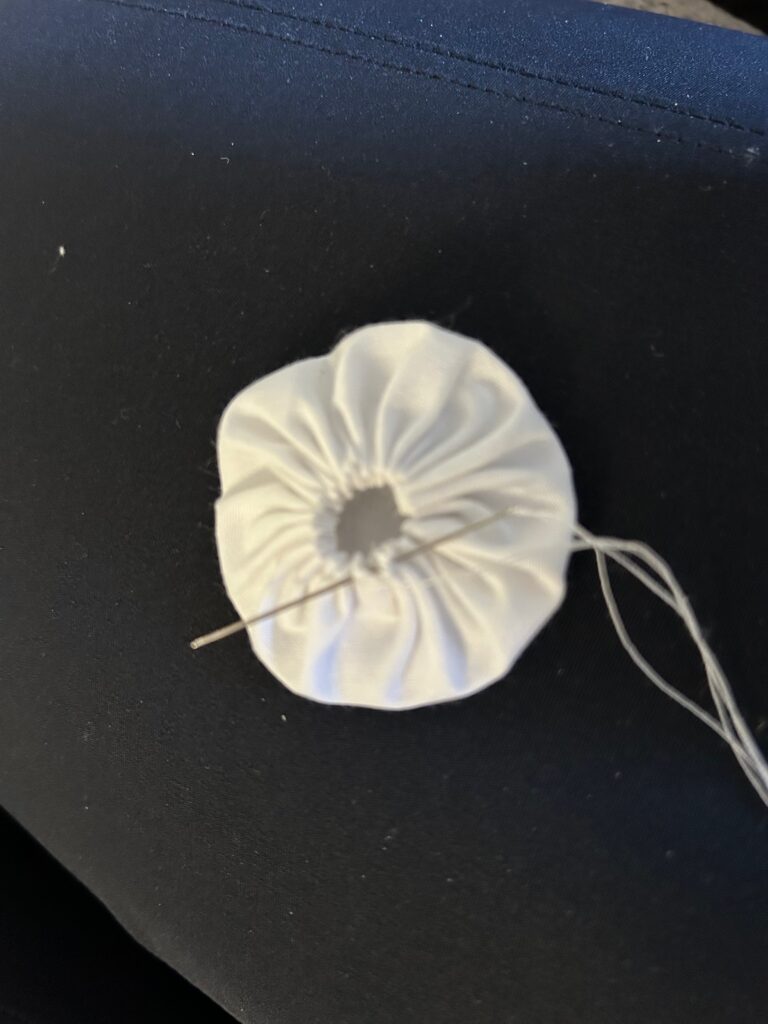
- Adjust the gathers until the yo-yo forms a puffy, rounded shape with a small gathered opening in the center.
- Secure the gathers with a few small stitches and knot the thread.
Repeat with the remaining five circles.
Don’t worry if your yo-yos aren’t perfectly identical. Just like real whipped cream, a little variation makes them look more natural!
Attach the Whipped Cream
Arrange the six yo-yos evenly around the top of your pumpkin pie potholder. Once you’re happy with their placement, pin in place.
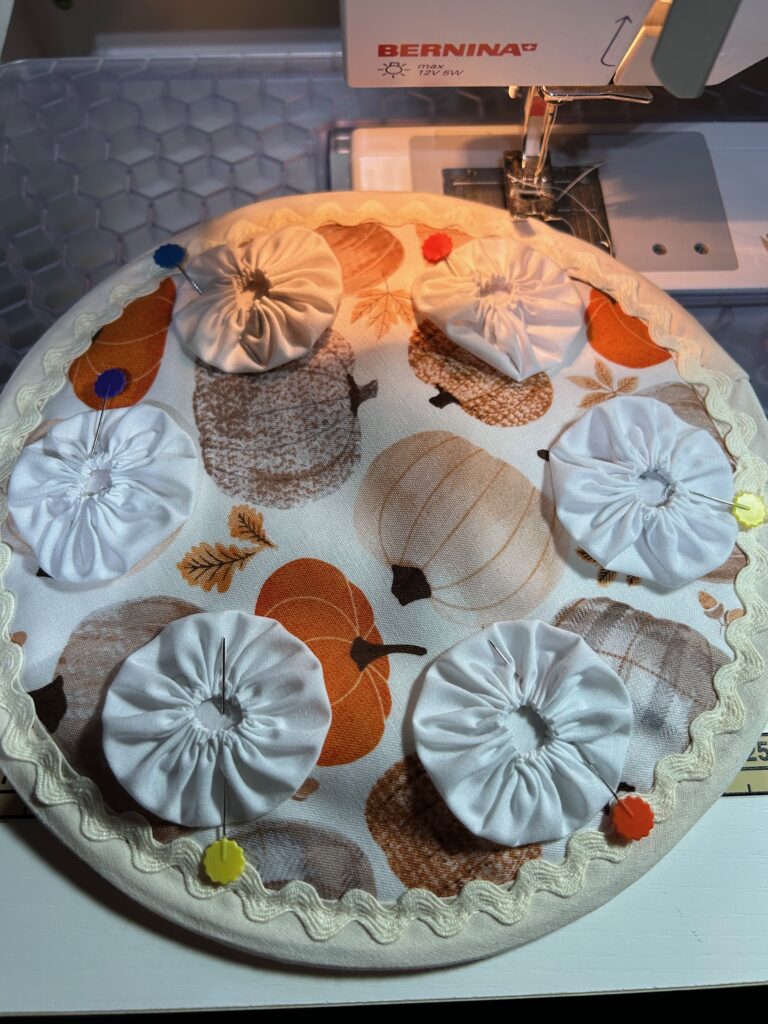
Then, hand stitch each yo-yo to the pie top using small, hidden stitches along its underside.
Try to catch only the top fabric and a little of the batting rather than stitching all the way through the potholder. This keeps the backing neat and free of visible hand stitches.
When finished, your pumpkin pie will have six fluffy dollops of fabric whipped cream that look almost good enough to eat!
TIP: The yo-yos are decorative embellishments. Keep this version for display or use only in ways that won’t expose the raised embellishments to hot cookware.
Make a Whole Batch of Pies!
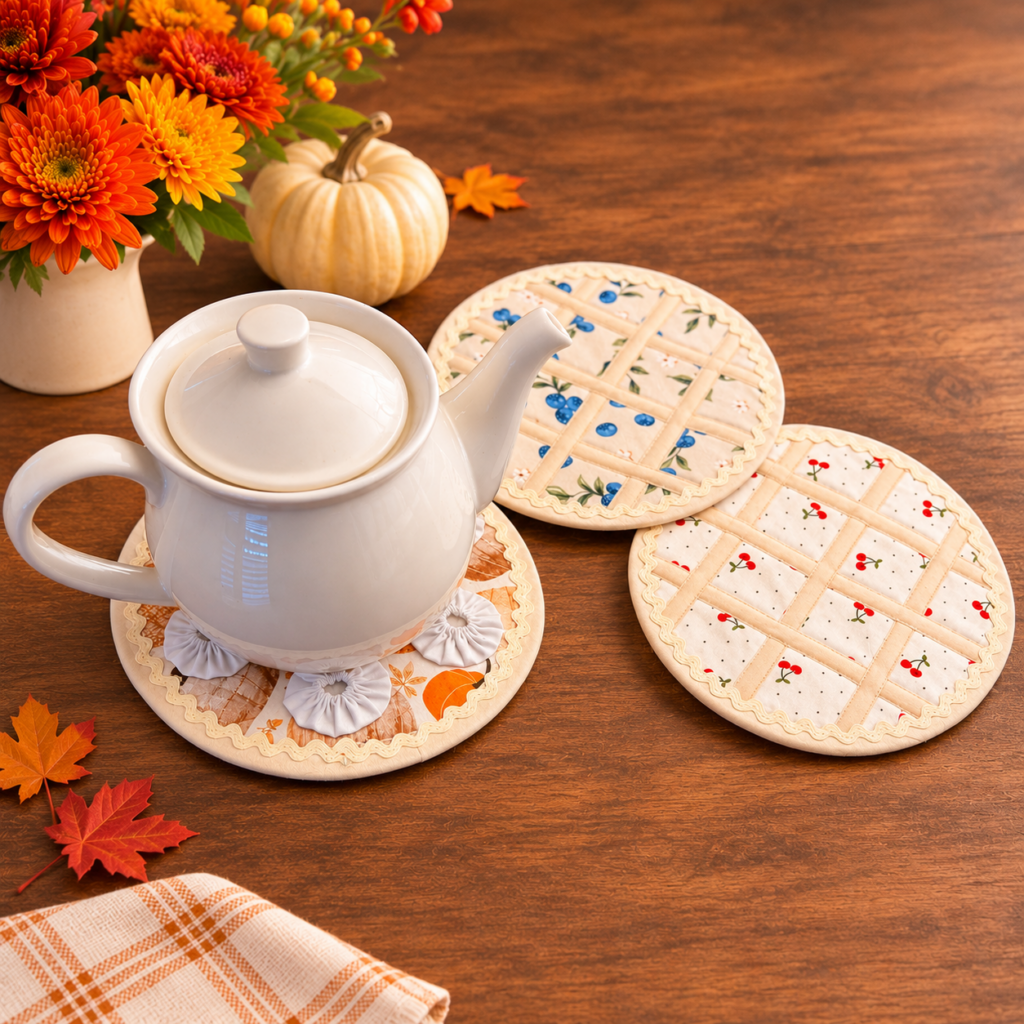
Once you’ve made one potholder, it’s hard to stop! Try creating a whole assortment of pie flavors for a festive Thanksgiving display.
- Pumpkin Pie: Rusty orange cotton with a golden crust and fluffy white yo-yo whipped cream
- Cherry Pie: Rich red fabric with a woven tan lattice and crimped rickrack edge
- Blueberry Pie: Deep blue or purple fabric with a traditional lattice crust
- Apple Pie: Warm golden or cinnamon-colored fabric with a classic woven topping
- Mixed Berry Pie: A playful berry-print cotton with coordinating crust details
Mix and match fabrics to suit your holiday décor, or make a coordinating set using the same crust fabric and different pie fillings.
A Handmade Thanksgiving Hostess Gift
Looking for a thoughtful gift to bring to Thanksgiving dinner? These Easy as Pie Potholders are a sweet alternative to the usual bottle of wine or bouquet of flowers.
Create a coordinating set of two or three pie-inspired hot pads, tie them together with a pretty ribbon and tuck in a favorite pie recipe. You could even pair them with a pie plate, a bag of specialty baking ingredients or a handwritten note thanking your host for making the holiday special. These handmade gifts are perfect for Thanksgiving hosts, neighbors, teachers, sewing friends or anyone who appreciates a little homemade goodness.
These Easy as Pie Potholders combine simple sewing techniques with creative embellishments for a project that’s fun to make and even more fun to give. Whether you create a single pumpkin pie for your kitchen or stitch up an entire bakery’s worth for friends and family, each one is sure to bring a smile.
