Kraft-tex Laptop Case
by Ellen March
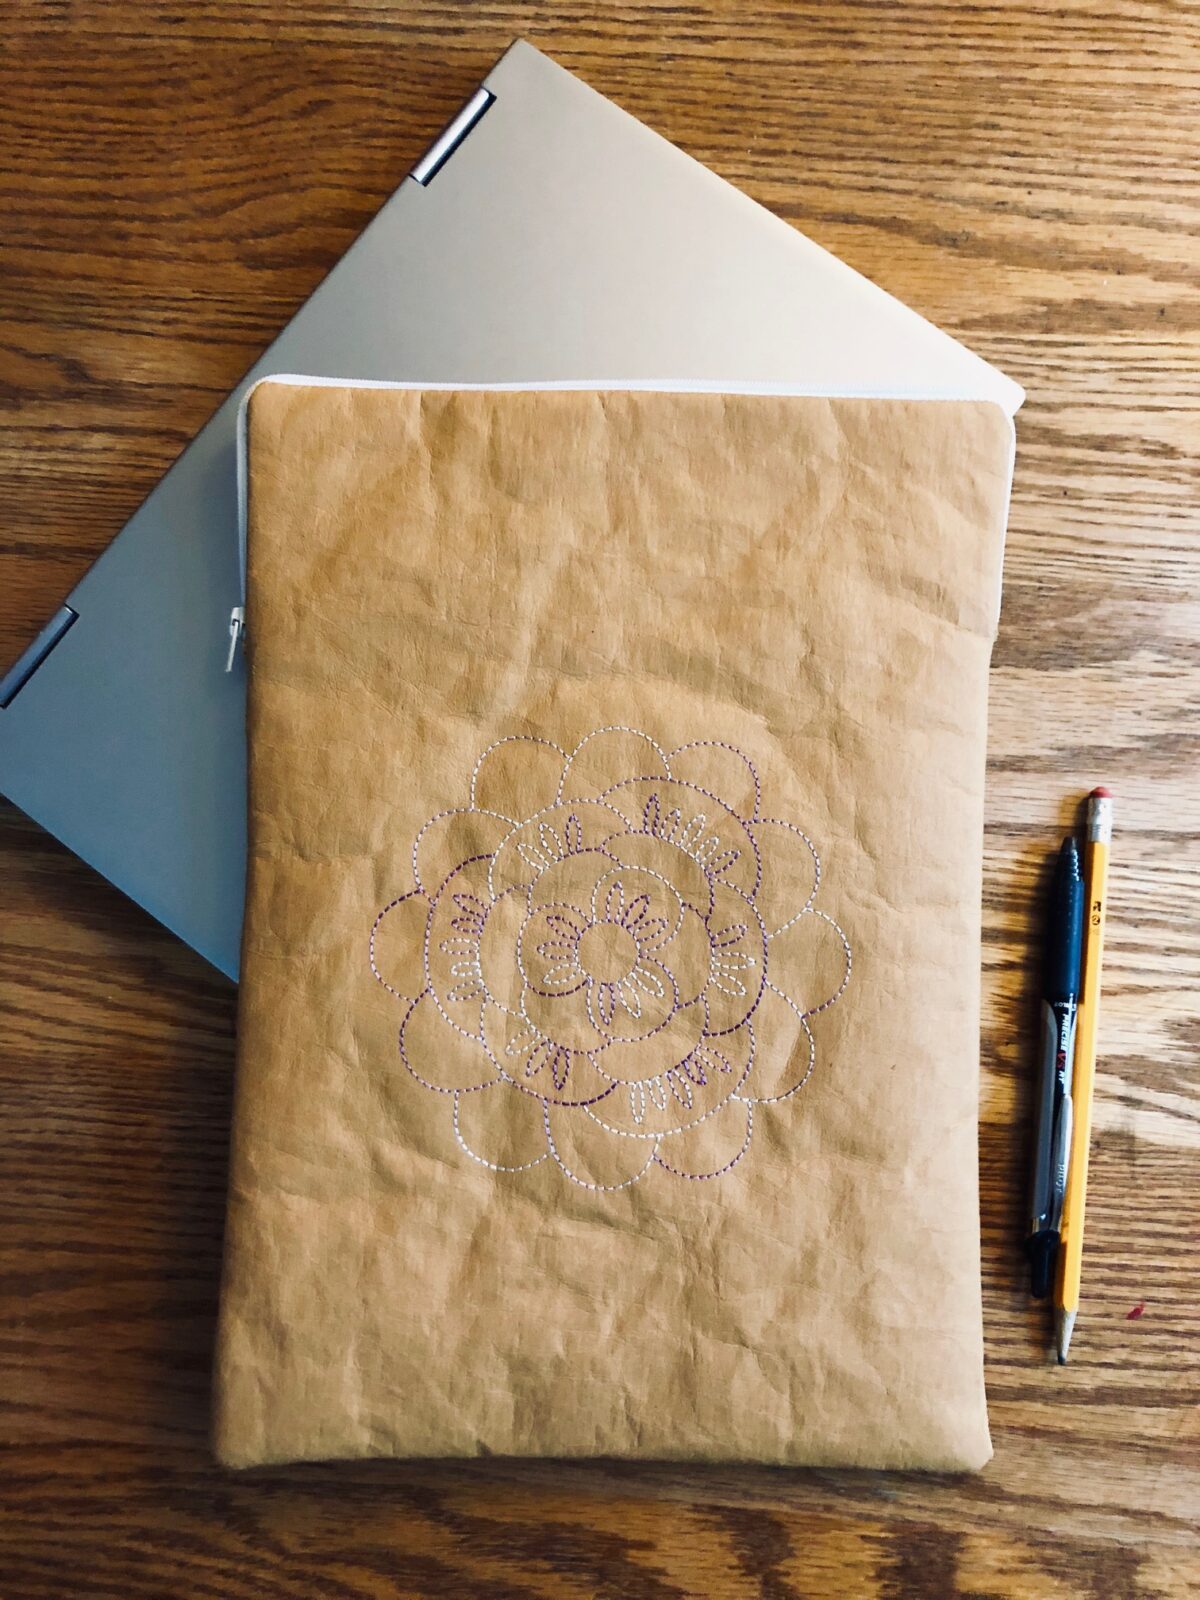
Learn how to embroider a Kraft-tex laptop case for a great gift idea. If you’re looking for gifts to make for teachers, friends, dads or teens, look no further than this laptop case. It’s easily customized using different embroidery designs and fabrics. Plus the Kraft-tex mimics the look of leather and has a unique texture that lends something special to an otherwise basic project.
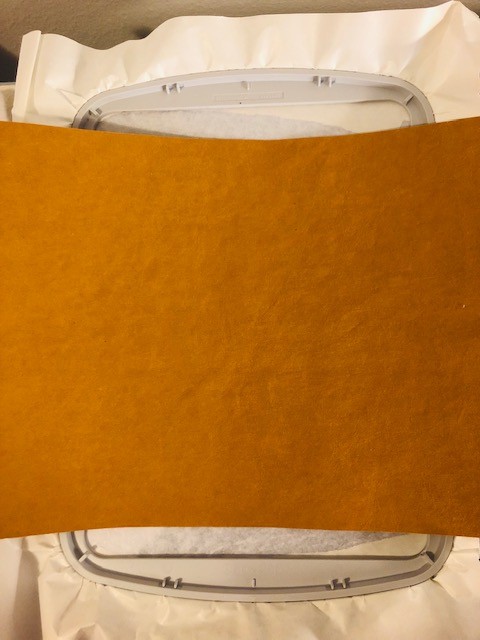
Kraft-tex is an interesting material that comes in different colors, either washed or unwashed. It looks like leather but sews, acts and washes like fabric. It has a stiff hand but also is pliable and resilient, easily manipulated to insert zippers, turn right side out and embroider. Read on to create a laptop case using Kraft-tex and discover how to machine embroider Kraft-tex to add a personal touch.
Embroidery on Kraft-tex
Adding machine embroidery to Kraft-tex is rather simple, providing you follow a few simple tips.
- Don’t hoop Kraft-tex . The hoop will cause permanent damage, also known as “hoop burn,” and it will never regain its initial shape.
- Use a new embroidery needle to ensure there are no burrs or bends and the thread will pass through the material without snagging. Choose the needle size based on the thread weight you’ve chosen.
- Choose a simple design without a lot of fill stitches. As you become more comfortable with Kraft-tex embroidery, proper stabilization will allow you to stitch heavier thread-dense designs. But to begin, stick with something simple that’s sure to not perforate the material.
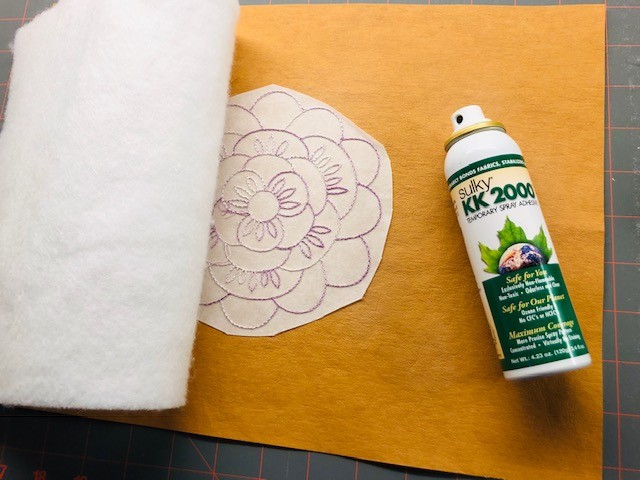
- Needle holes are permanent. Don’t use the baste-in-the-hoop function to secure the Kraft-tex to the stabilizer. Perform hoopless embroidery, using Sulky Sticky +, a self-adhesive sticky backed tear-away stabilizer, or Sulky Tear Easy paired with KK 2000 to secure the Kraft-tex to the hooped stabilizer.
Laptop Case
The featured case was created using a Husqvarna Viking Designer Epic sewing and embroidery machine, embellished with a built-in design.
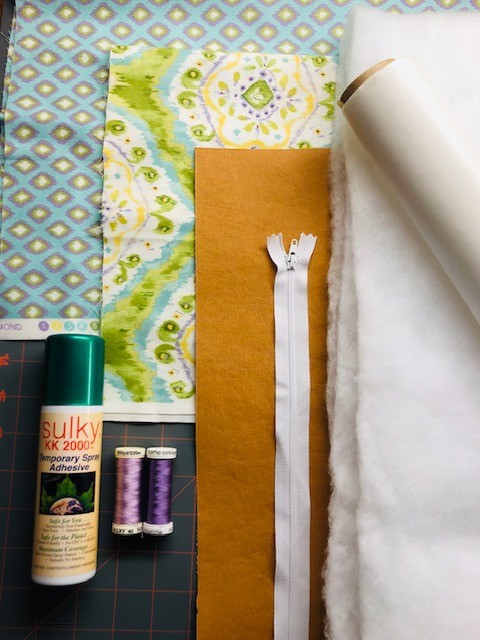
Supplies
- 19″x 1 1/2 yard roll of Kraft-tex
- Lining fabric (amount determined by laptop measurements)
- Muslin
- Low-loft batting
- KK 2000 temporary spray adhesive
- Coordinating Fabric Scraps
- 19”-long Zipper
- 40 wt. Poly Deco thread
- Sulky Sticky + (self-adhesive, sticky-backed tear-away stabilizer)
- Machine Embroidery Design (large enough to cover the majority of the case front, accounting for seam allowances)
- 40 wt. Rayon Embroidery Thread (colors according to design and/or fabric) or 30 wt. Cotton Blendables (featured color: Pale Amethyst)
- Quilt clips or binder clips (such as Clover Wonder Clips)
How-Tos
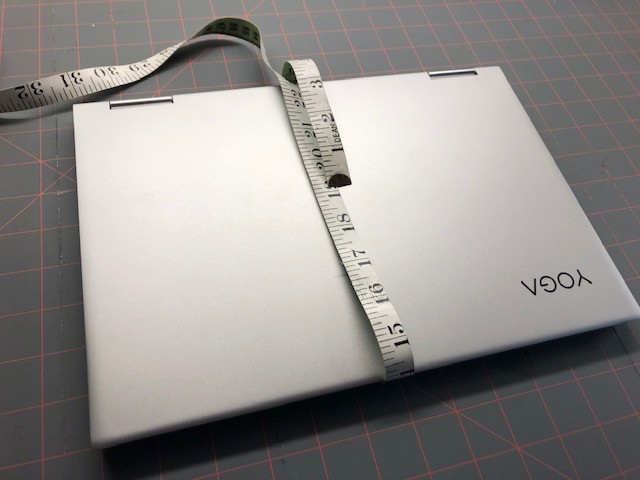
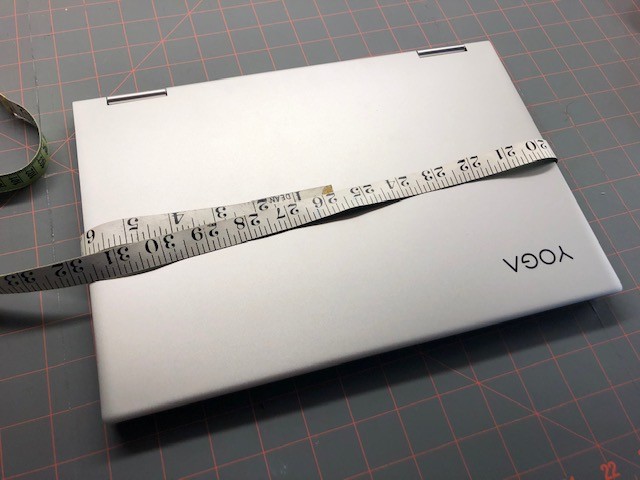
Measure the laptop circumference along the length and width. Divide each number in half; add 1 1/2”, and then record as the length and width measurements.
Cut one Kraft-tex rectangle and one muslin rectangle according to the measurements for the laptop case back.
For the laptop case front, Divide the width measurement in half; add ½” and then record as the lower front width. Divide the lower front measurement in half; add ½” and then record as the upper front length.
MATH TIP: If you end up with any 16th inch or 32nd inch measurements, round the initial number up by 1/8” to ¼” for ease of measuring. The extra ease won’t hurt a thing and you can cut it away before assembling if you want a more snug fit.
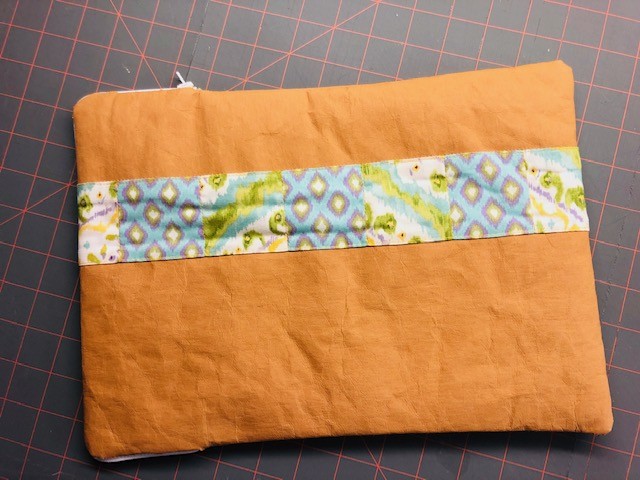
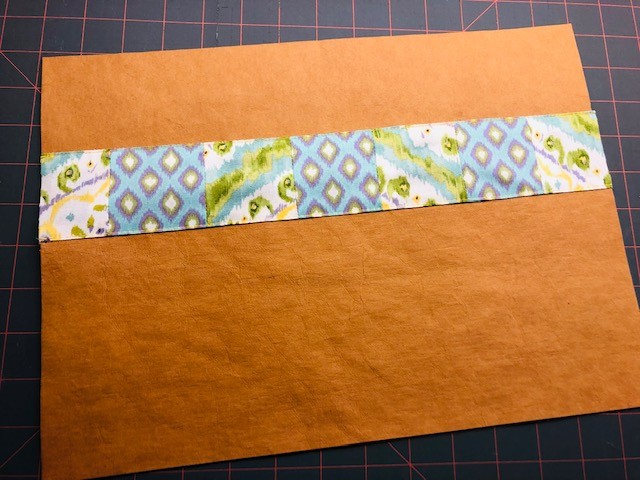
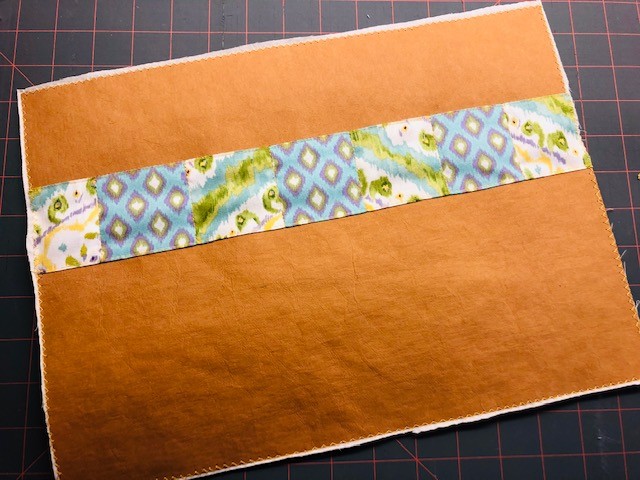
Piece together enough fabric scraps to create a rectangle measuring the upper-front length. Piece fabric strips of various widths, equal squares or half-square triangles. Or improve piece the rectangle as desired. If piecing isn’t your thing, cut a rectangle according to the measurement from the lining fabric.
With right sides facing, place the Kraft-tex upper front and pieced upper front together along one long edge. Stitch, using a ½” seam allowance. Press the seam toward the Kraft-tex, and then topstitch 1/8” from the seam on both sides.
Repeat to stitch the pieced upper-front lower edge to one Kraft-tex lower-front long edge, creating the laptop case front.
Cut two rectangles of batting 1” smaller than the case-back length and width.
Center the batting over the case-front wrong side. Use KK 2000 to adhere the batting to the laptop case front.
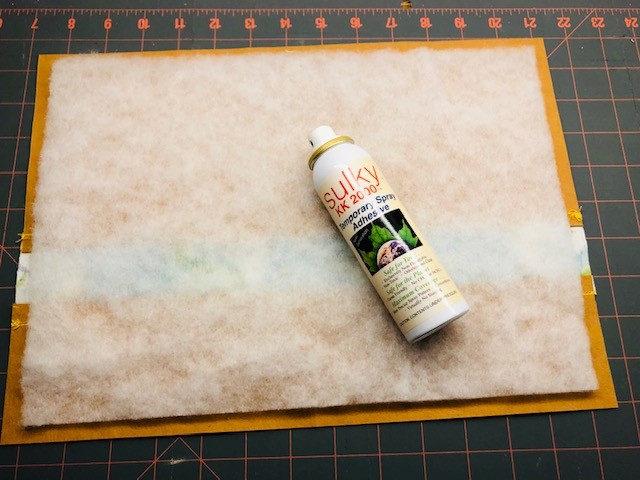
Adhere the muslin rectangle to the batting, sandwiching it between the Kraft-tex and muslin.
Quilt the laptop case front along the pieced rectangle as desired. Zigzag-or serge-finish the laptop case front perimeter so the layers act as one. Set aside.
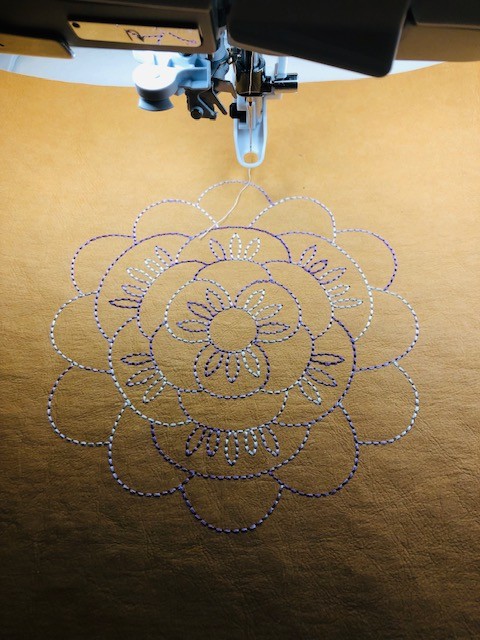
Embroider the Laptop Case
Choose an outline quilting motif embroidery design for the case back (ensuring it fits well within the seam allowances). Load the design onto the machine. Use the machine editing screen to enlarge or otherwise edit the design, if desired. Print a template of the design and audition it over the case back until the desired placement is achieved. Tape in place using clear tape or masking tape.
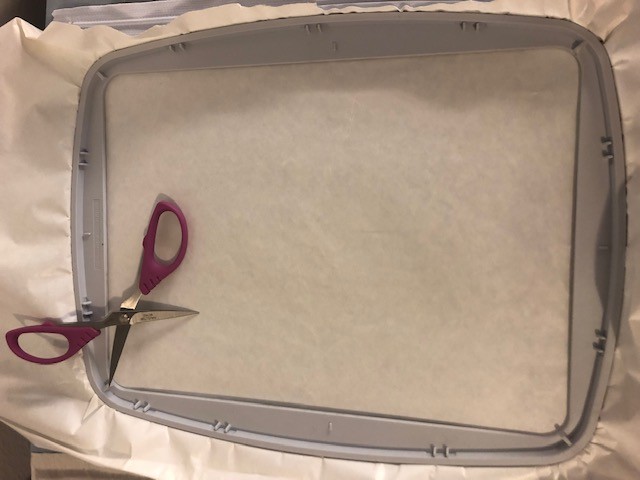
Hoop a piece of Sulky Sticky + with the paper side facing up. Score the paper within the hoop, being careful not to pierce through the stabilizer. Carefully tear away the paper from within the hoop inner ring, exposing the adhesive.
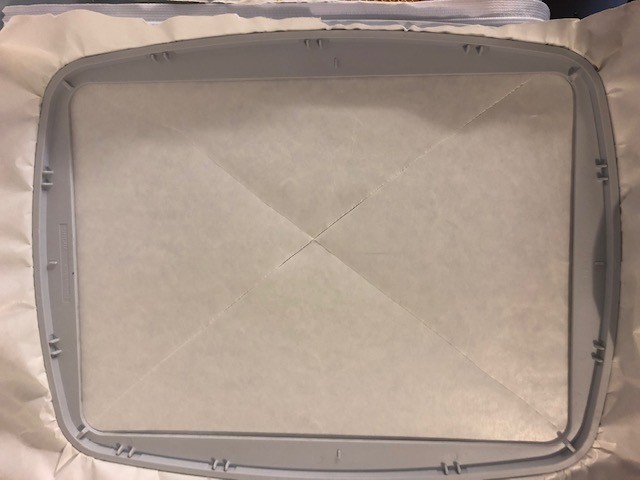
Center the template on the laptop case back inside the hoop inner ring with the Kraft-tex side facing up; finger-press lightly to adhere to the stabilizer. Place the hoop onto the machine. Double check the placement by inserting the needle into the Kraft-tex and making sure it pierces the material at the same place as intended and shown on the machine screen (if applicable). Remove the template.
Embroider the design. Trim any jump threads and thread tails on both sides of the case back.

Remove the hoop from the machine and the stabilizer from the hoop. Carefully cut or tear away the excess stabilizer from the wrong side.
Zipper Installation
Center the remaining batting rectangle over the Kraft-tex wrong side; use KK 2000 to temporary secure the batting.
Place the remaining muslin rectangle over the batting with the right side facing up; spray with KK 2000 to secure. Zigzag- or serge-finish the back perimeter.
Center the zipper face down along one case-front side edge. Use quilt clips or binder clips to secure the zipper tape to the case-front seam allowance, clipping into the zipper tape so it follows the corners.
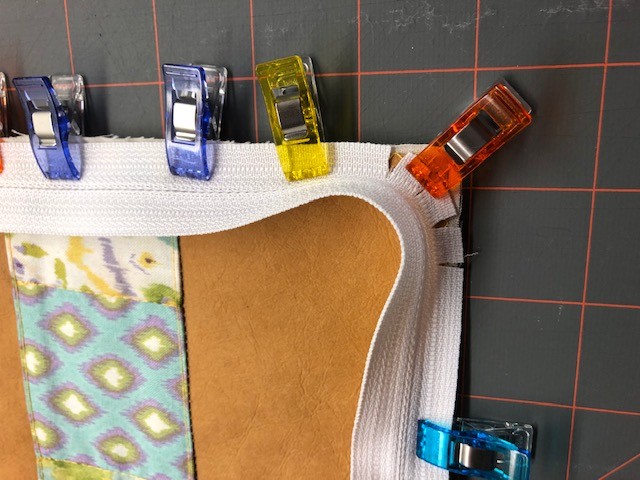
Fold the zipper ends at a diagonal, extending the ends into the seam allowance so they’re concealed when the laptop case is stitched to the lining.
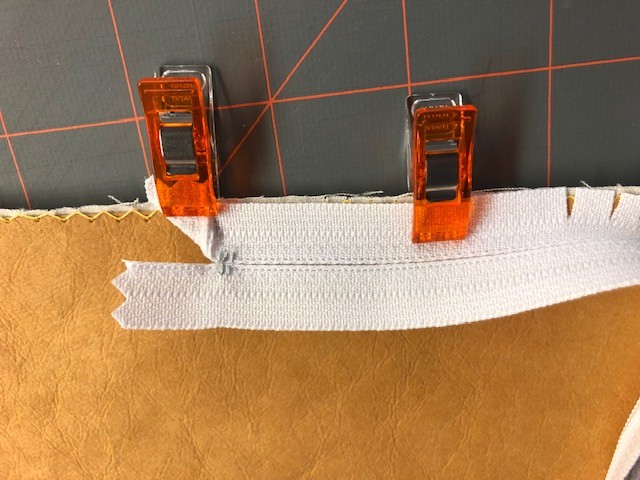
Install a zipper foot and baste the zipper tape in place. Don’t sew as close to the teeth as possible—leave a bit of room for the next step.
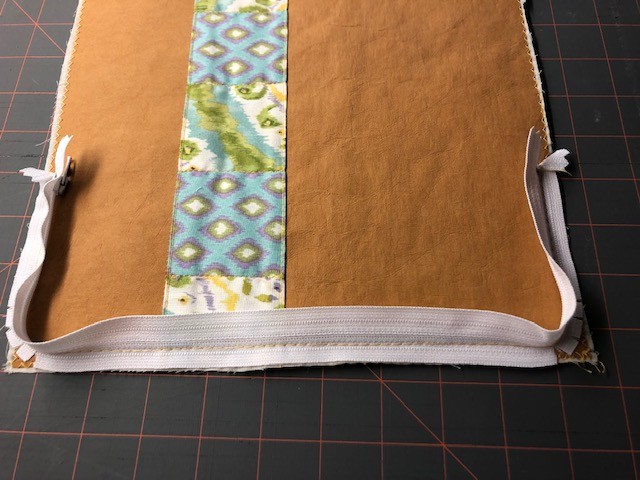
Unzip the zipper. Place one lining rectangle over the laptop case front with right sides facing and edges and corners aligned; clip the perimeter using binder clips or quilt clips. Stitch just inside the previous stitching using a standard stitch length, moving the zipper pull as needed to maneuver the needle around it. Then clip the Kraft-tex corners close to, but not through, the stitching.
Finishing
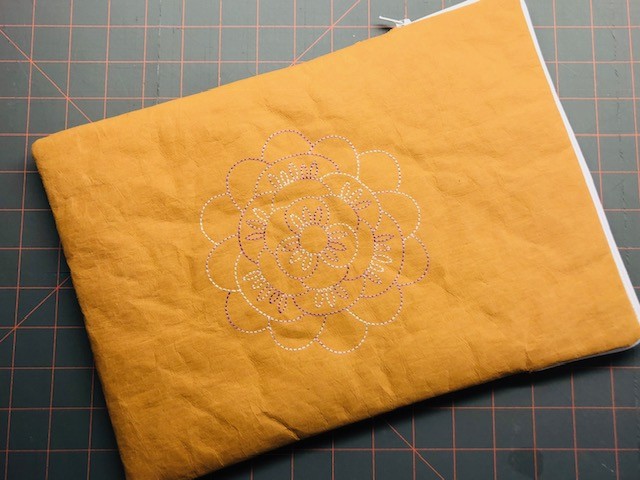
Turn the case front right side out, and zip the zipper; press from the lining side.
Place the laptop case back over the case front with right sides facing and edges and corners aligned. Unzip the zipper. Using quilt or binder clips, clip the laptop-case-back side edge to the opposite zipper-tape edge, following the instructions for the laptop case front. Baste, unzipping the zipper as needed to maneuver the case under the presser foot.
Follow the previous instructions to stitch the lining to the zipper tape. Then zip the zipper partway.
Place the laptop case front and case back right sides together, extending the lining pieces. Stitch the front and back together from zipper end to zipper pull.

Repeat to stitch the lining pieces, leaving a 4” opening in the lower edge for turning.
Then clip the remaining two corners.
Turn the laptop case right side out through the opening. Take your time, as the Kraft-tex is a bit stiff and it takes a bit of care to push out the corners without popping the stitching.
Hand or machine stitch the lining opening closed. Then push the lining into the laptop case, matching corners and seams.
Lastly, Insert your laptop and zip up the laptop case.
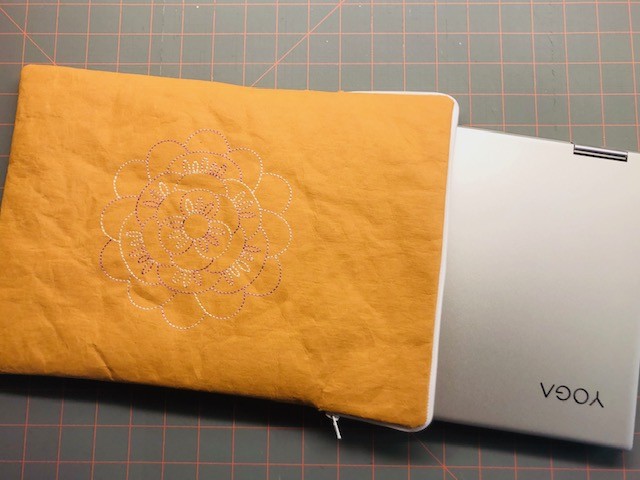
Once you work with Kraft-tex, you’ll love how it sews and looks.
For 27 more Kraft-tex project ideas, look to the book, Kraft-tex Style, published by C&T Publishing. And view our free webinar with Alyssa Thomas: Owner of Penguin & Fish to make a zippered Kraft-tex pouch embellished with 12 wt. cotton Petites. Grab the convenient kit to make the webinar project while supplies last!
