POPSICLE KOOZIE

Samples by Judy Briley
Create a personalized popsicle koozie to keep your frozen treat cold while protecting little hands. Made of Sulky Felty, these koozies are easily embellished with machine embroidery. They also make great party favors for summer birthdays!
Note: These popsicle koozies fit standard freezer pops.
KOOZIE SUPPLIES
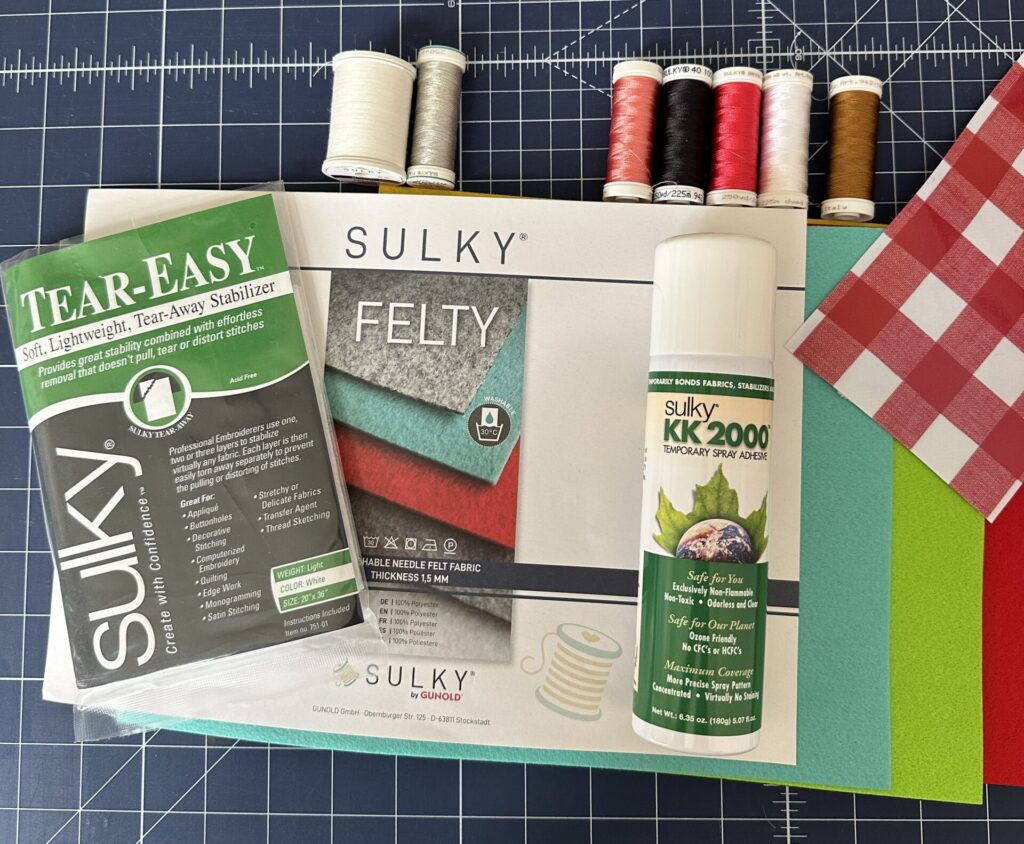
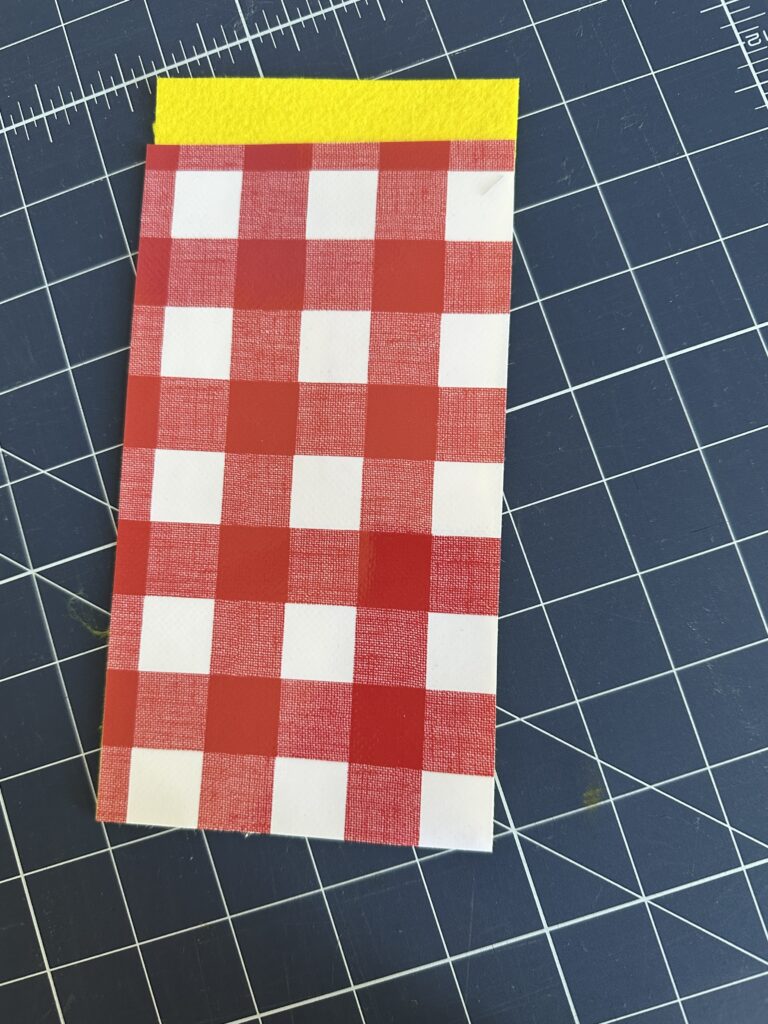
- 4½” x 8” rectangle of Sulky Felty (try the Rainbow Assortment Pack and make several in different bright colors)
- 4½” x 7¼” rectangle of laminated cotton or oilcloth fabric (make sure it’s quite silky and not “sticky”)
- Sulky Tear-Easy™ Stabilizer
- Sulky KK2000™ Temporary Spray Adhesive
- Sulky Thread:
- 40 wt. Poly Deco™ (construction)
- 40 wt. Rayon (machine embroidery; featured colors: 942-0562, 942-1056, 942-1020, 942-1257, 942-1234)
- 60 wt. Bobbin (machine embroidery)
- Organ® Needles
- 80/12 Universal (construction)
- 90/14 Embroidery (machine embroidery)
- Machine Embroidery Design no larger than 1¾” x 4” (featured design is Ice Cream Social Popsicle from Embroidery Library)
- Removable fabric marker or chalk
DESIGN PLACEMENT
Load the design into the machine. Direct the machine to perform a “design perimeter baste” function prior to the stitchout.
Install a size 90/14 Embroidery Needle. Thread the needle with the first thread in the design (in this case, 942-0562). Use Sulky Bobbin Thread in the bobbin.
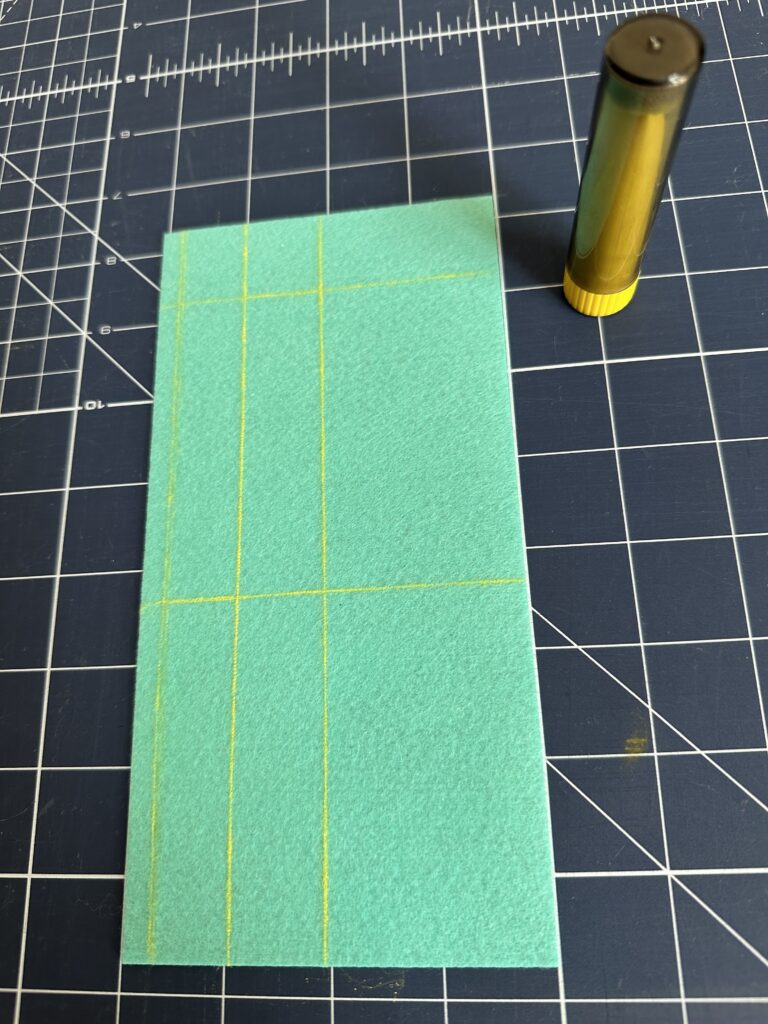
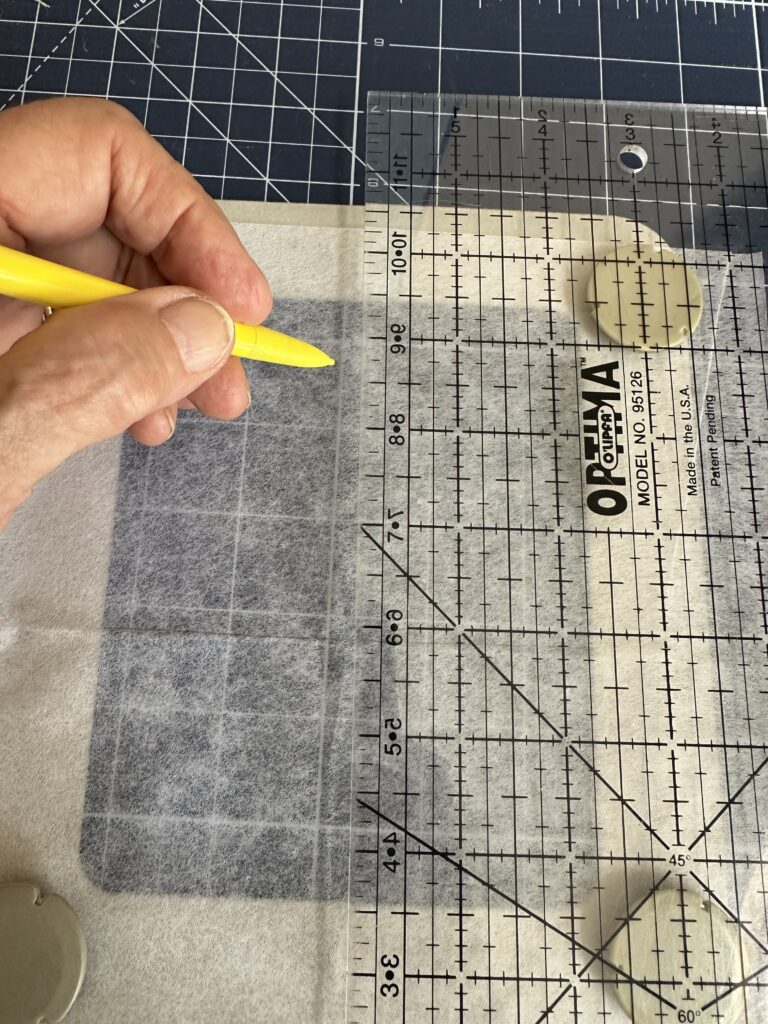
Mark the design placement on the wrong side of the Felty rectangle (choose one side as the wrong side). Note: Marking on the wrong side makes it easier to conceal the markings on the Felty when the embroidery and sewing is complete. First, draw a vertical centerline down the rectangle. Then, draw a vertical line ¼” from the right edge to denote the seam allowance.
Then, locate and mark a vertical line on the right half of the Felty, centered between the seam allowance line and the marked centerline. This is the horizontal design placement line.
From one short end, measure 1″ down and draw a horizontal line across the entire rectangle width; this marks the koozie upper-edge hem allowance.
Next, on the half of the Felty containing the vertical centerline, draw another horizontal line centered between the hem allowance line and the opposite short end.
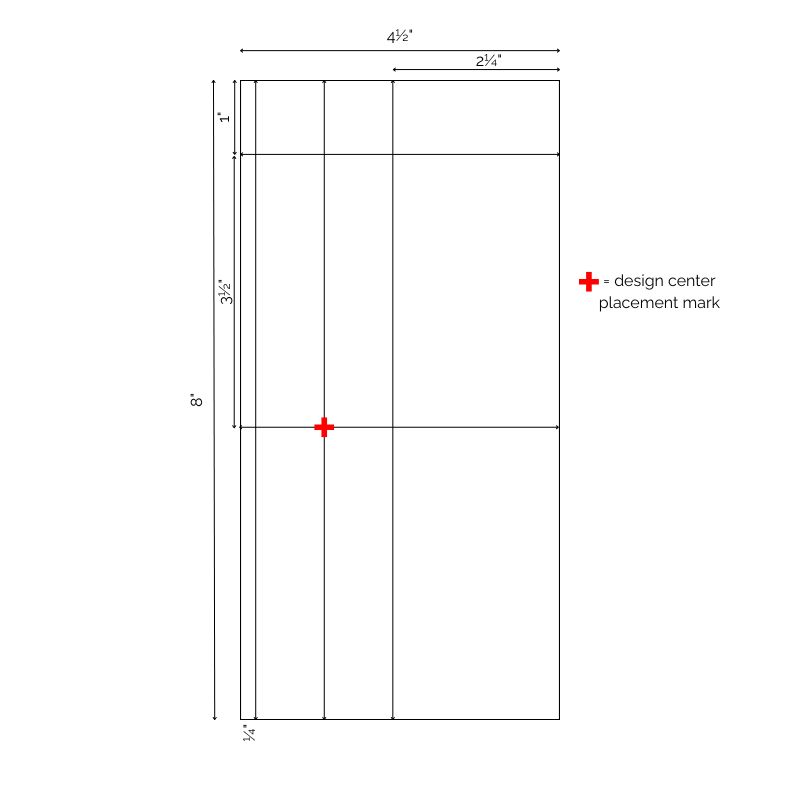
The intersection of these horizontal and vertical lines creates the design center crosshairs for placement.
EMBROIDERY
Hoop a piece of Sulky Tear-Easy Stabilizer.
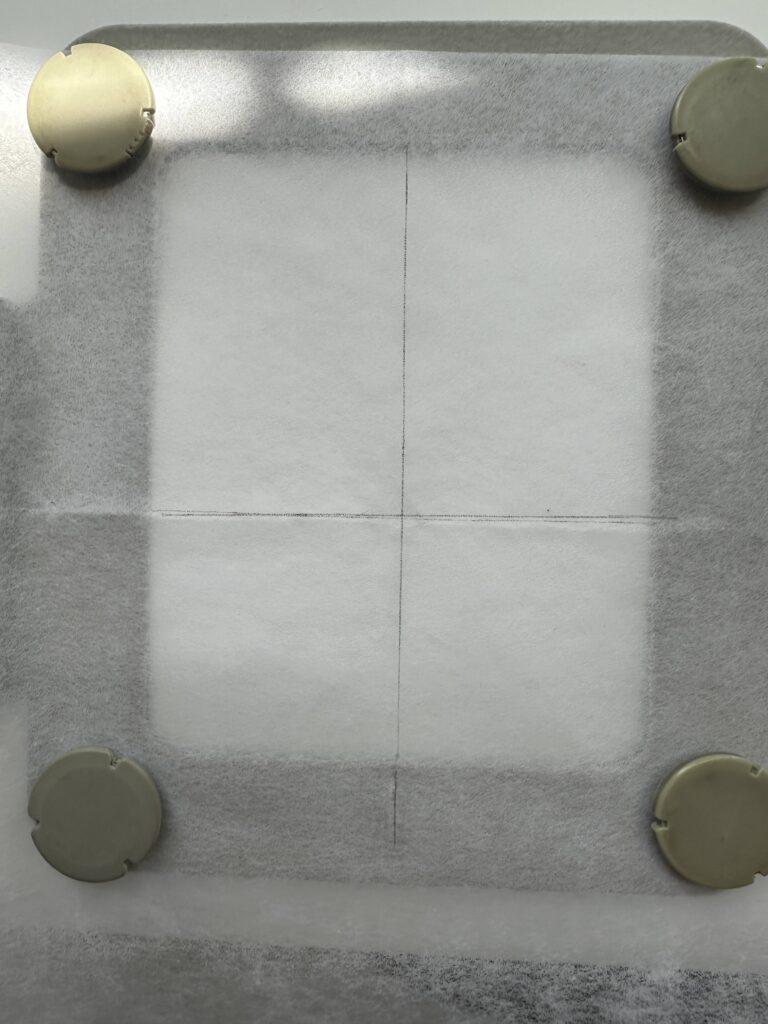
Mark the vertical and horizontal centerlines on the stabilizer, using the hoop notches or other placement tool.
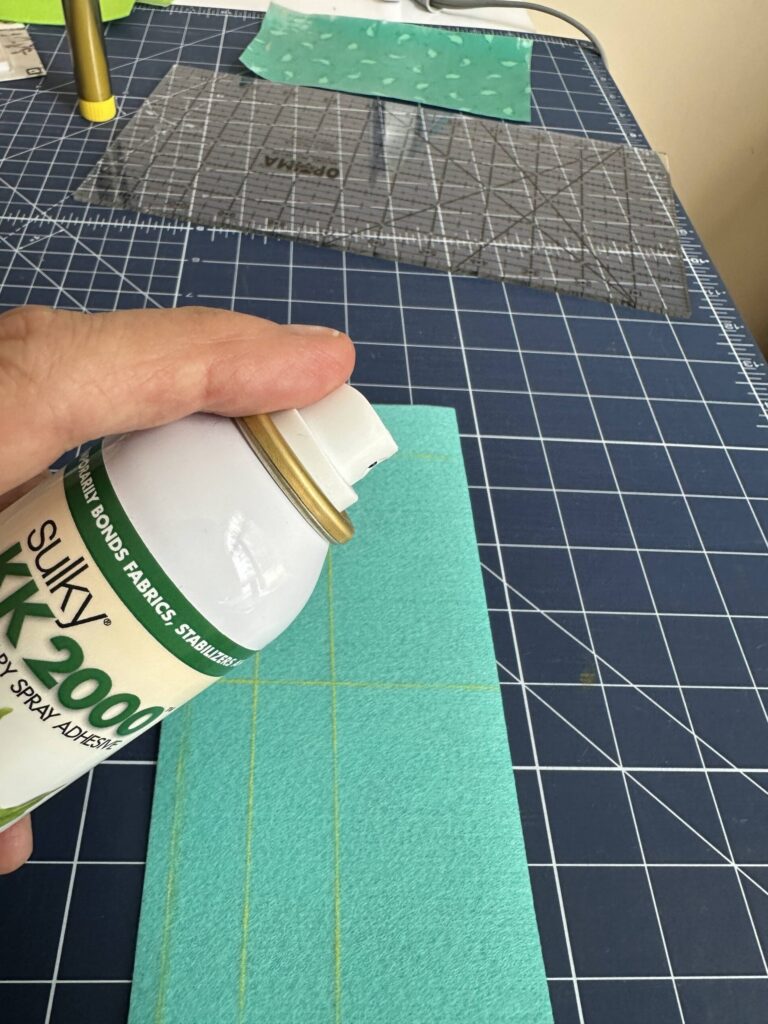
With the Felty right side up, align the marks on the Felty with the hoop markings. (The Felty markings are on the wrong side, so you’ll need to lift the Felty corners and edges a bit to ensure proper placement.) Once satisfied with the placement, secure the Felty in place with Sulky KK2000 Temporary Spray Adhesive.
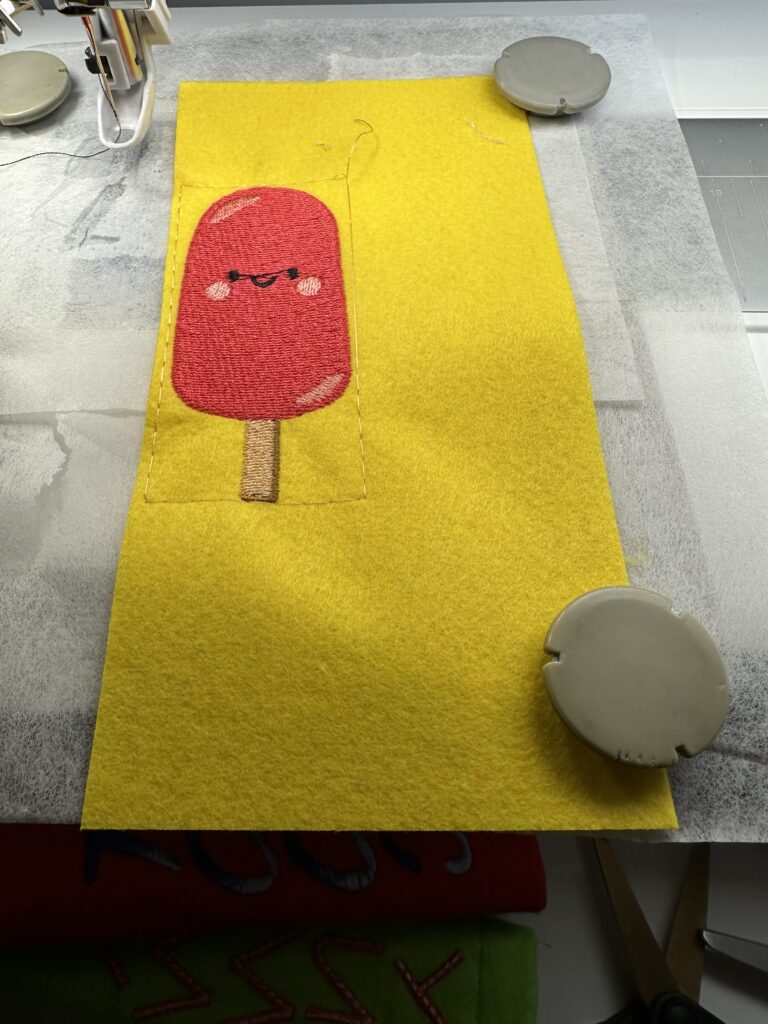
Place the hoop onto the machine. Perform the design perimeter baste function to further secure the Felty to the stabilizer and double-check the design placement. The design should be centered on one half of the Felty rectangle, 1” below the upper edge.
Embroider the design, switching thread colors as directed by the design color chart and clipping jump threads as needed with each color change.
TIP: Create your own design by combining letters to create fun phrases, such as “yum,” “cool,” or a name (great for party favors!). Be sure to orient the letters vertically and size them appropriately to fit on one half of the Popsicle Koozie width.
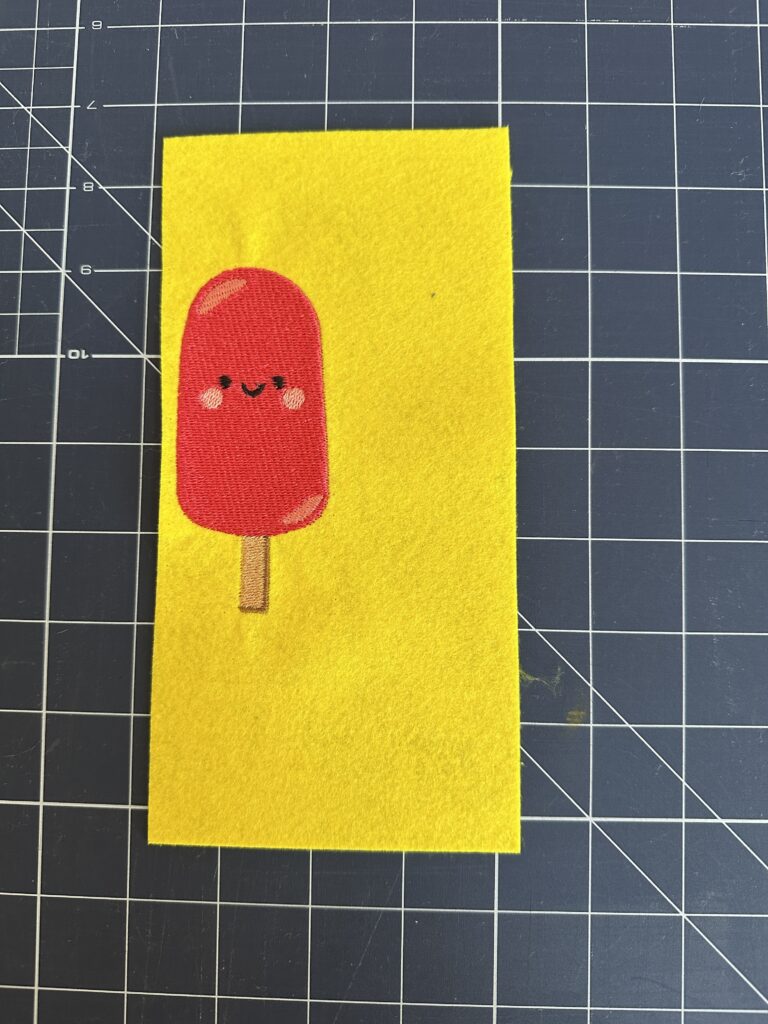
When the embroidery is complete, remove the hoop from the machine and the stabilizer from the hoop. Gently tear away the stabilizer beyond the design edges.
KOOZIE CONSTRUCTION
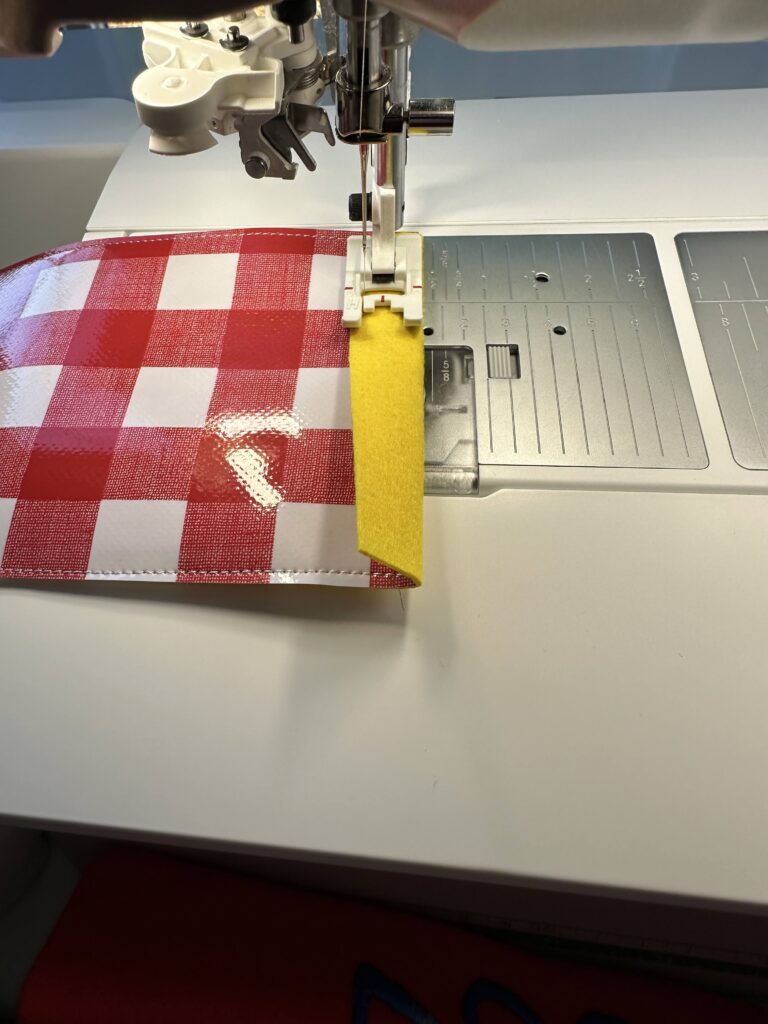
Install a size 80/12 Universal Needle. Thread the needle with Sulky Poly Deco Thread. Use the same thread in the bobbin.
Place the laminated cotton rectangle right side up over the Felty rectangle wrong side. Align the sides and lower edges, and secure the layers with Sulky KK2000.
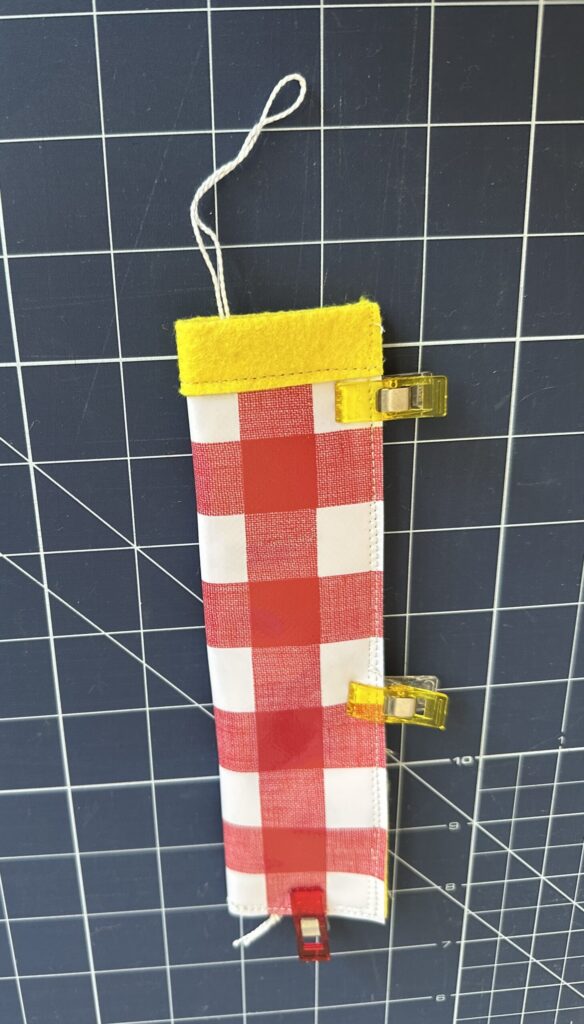
Round the lower corners, using a thread spool to mark along before trimming. Then, baste 1/8” from the sides and lower edge.
Fold the Felty upper edge 1” toward the wrong side. The Felty edge will overlap the laminated cotton edge by approximately ¾”. Topstitch along the raw edge to secure the hem.
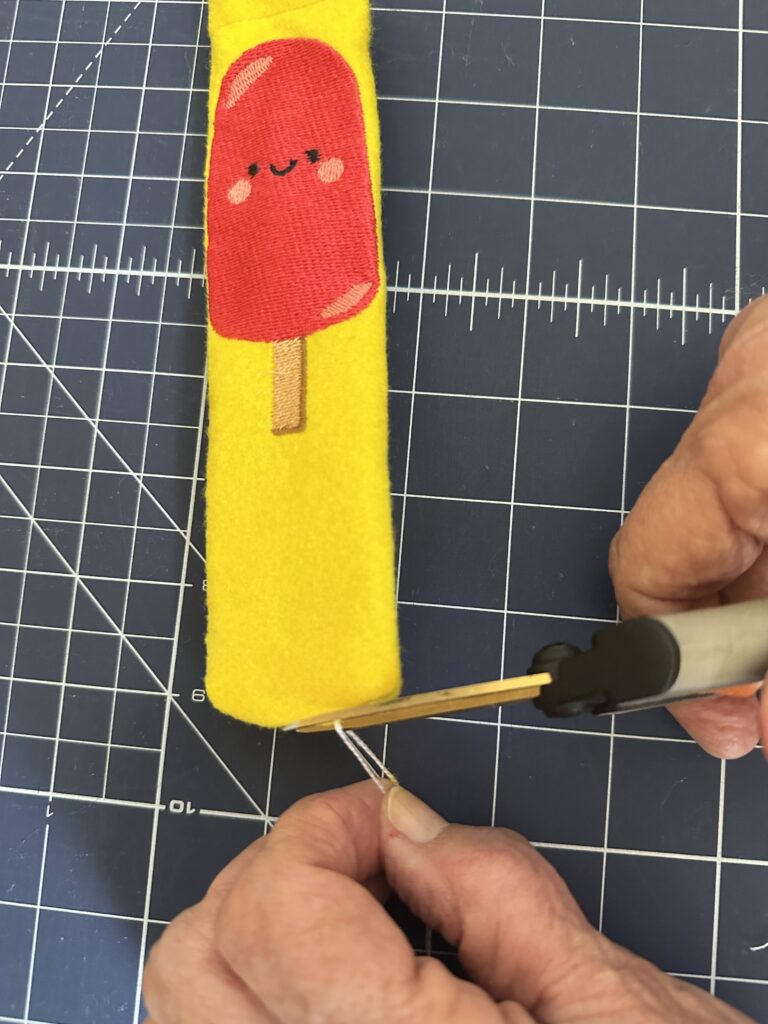
Next, fold the Felty rectangle in half lengthwise with right sides together. Stitch the long edge and lower curved edge using a ¼” seam allowance. TIP: For easier turning, secure a piece of ribbon, floss or twine into the lower-edge seam, extending it beyond the opposite koozie edge. This will give you something to grab onto when turning it right side out.
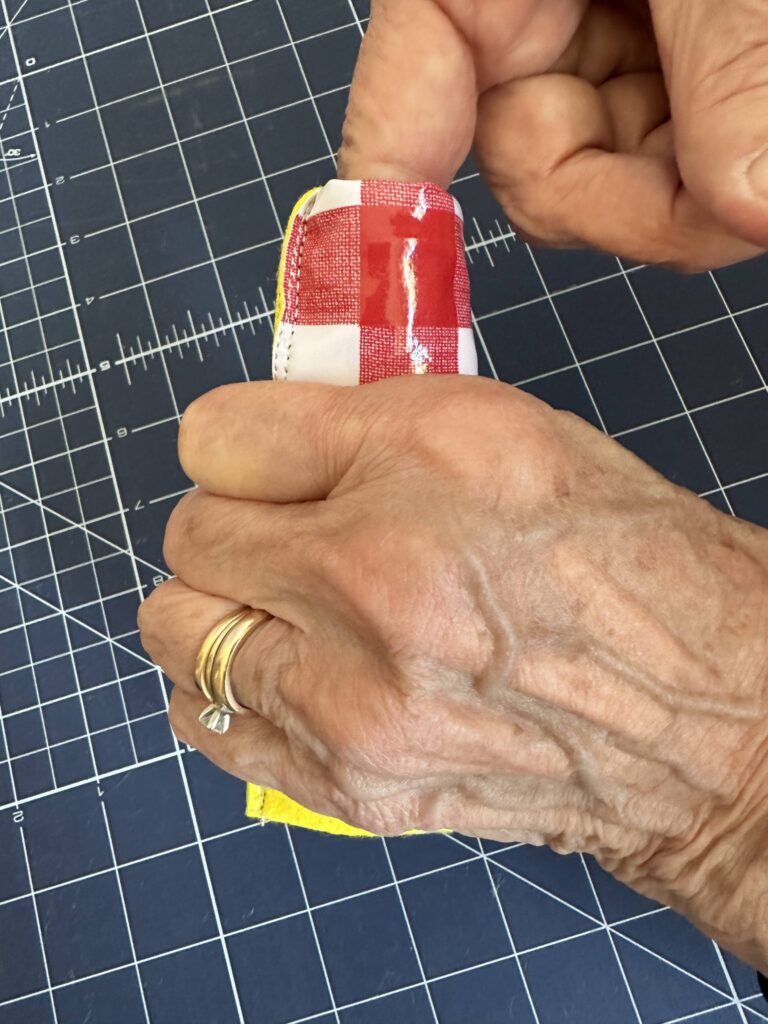
Trim the seam allowance to 1/8”.
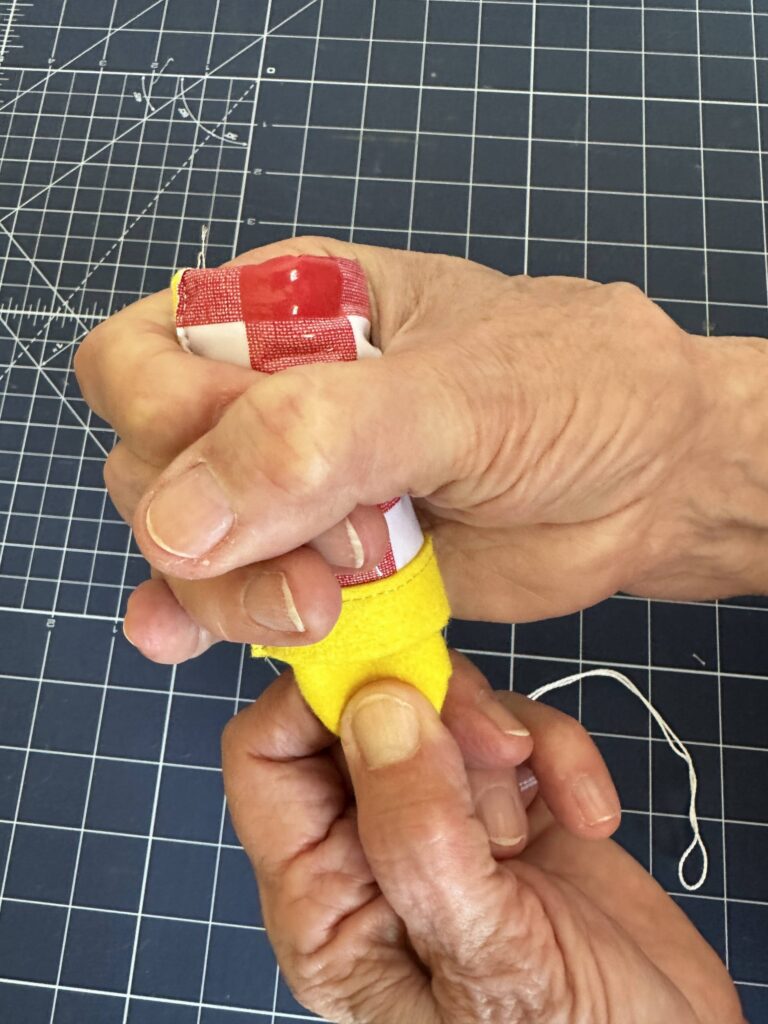
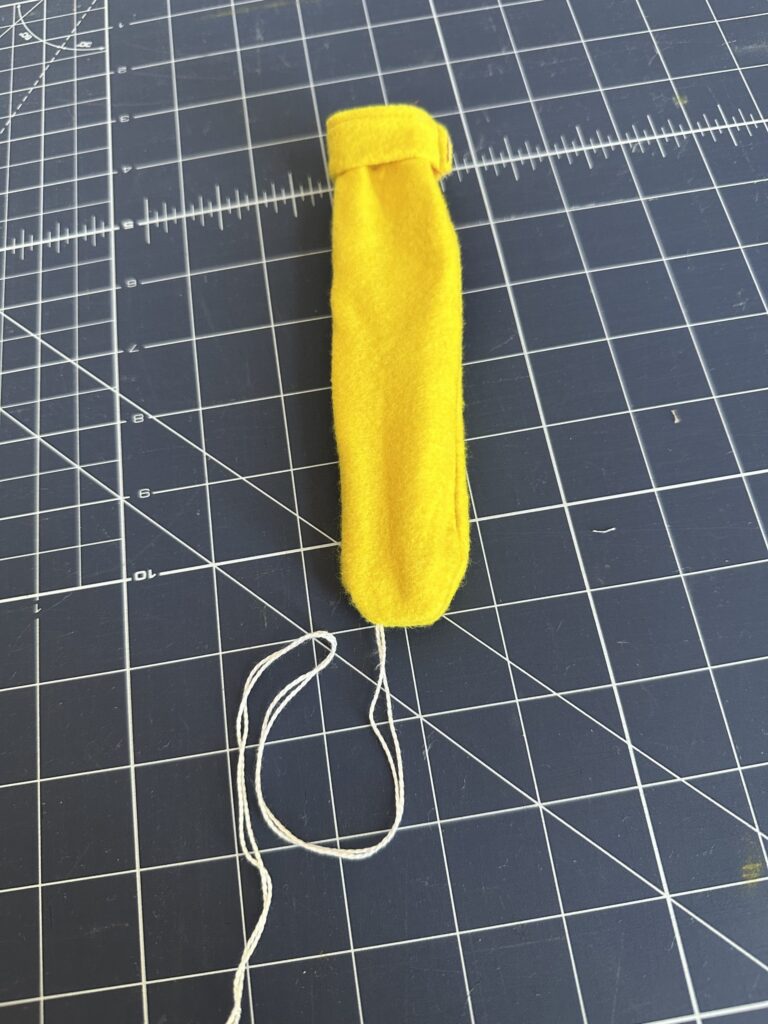
Turn the Koozie right side out.
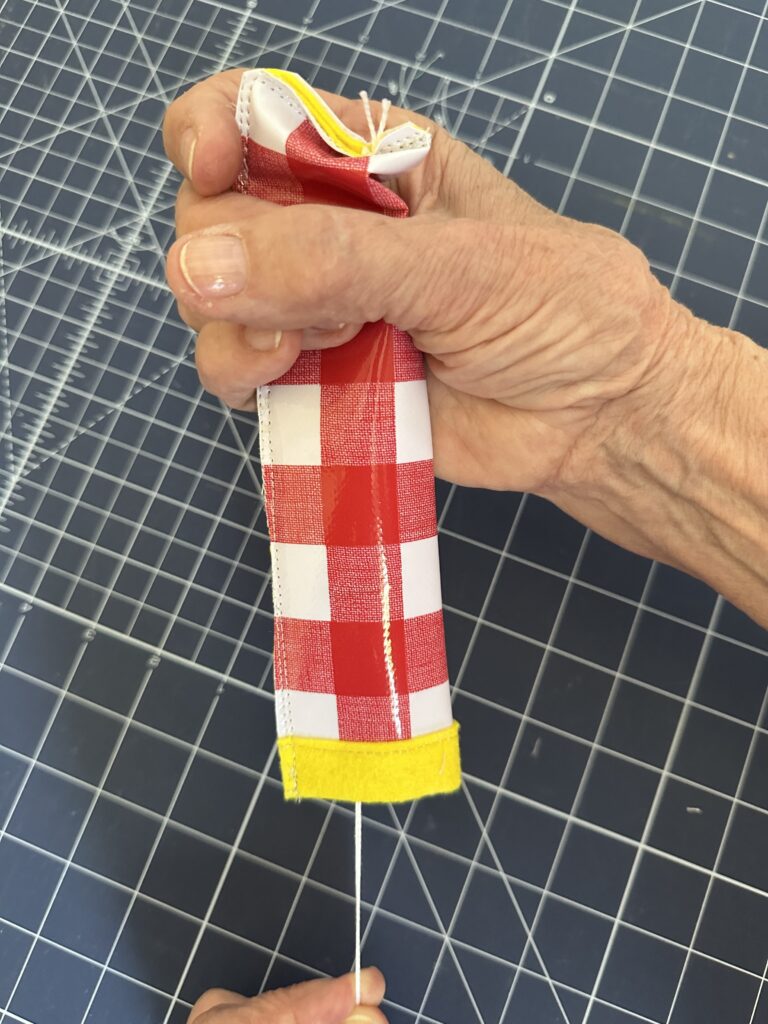
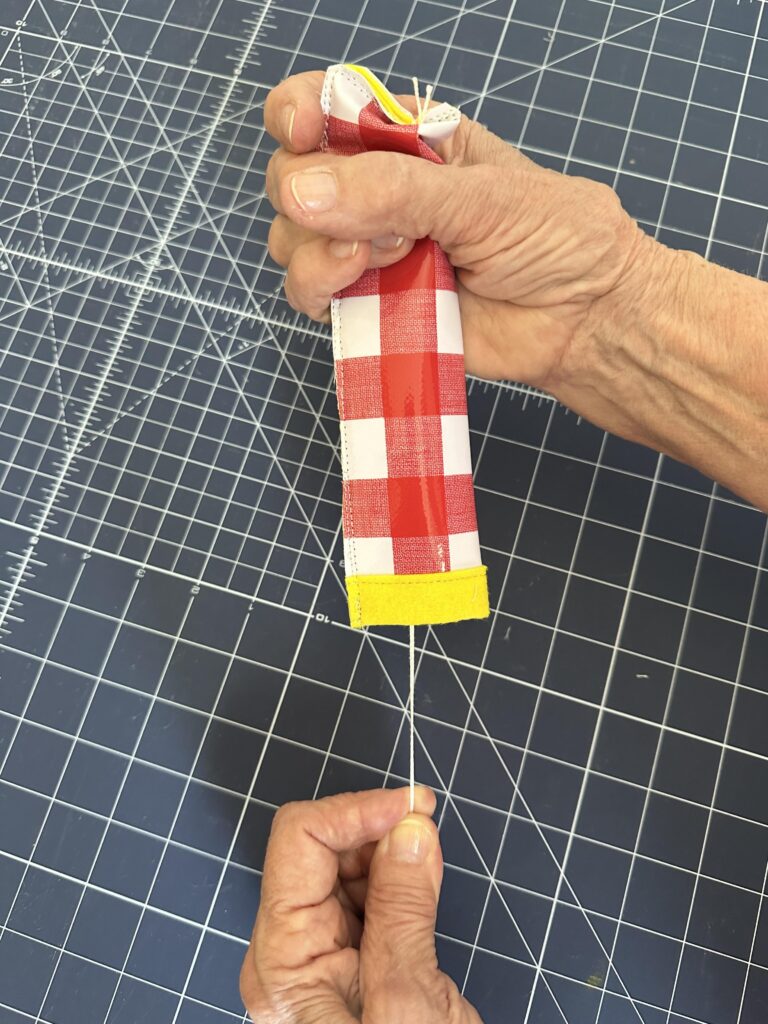
If you inserted a piece of ribbon, floss or twine into the lower-edge seam to help turn the Koozie right side out, carefully snip it off.
Roll the seams between your fingertips to flatten them. Repeat to create as many Popsicle Koozies as desired.
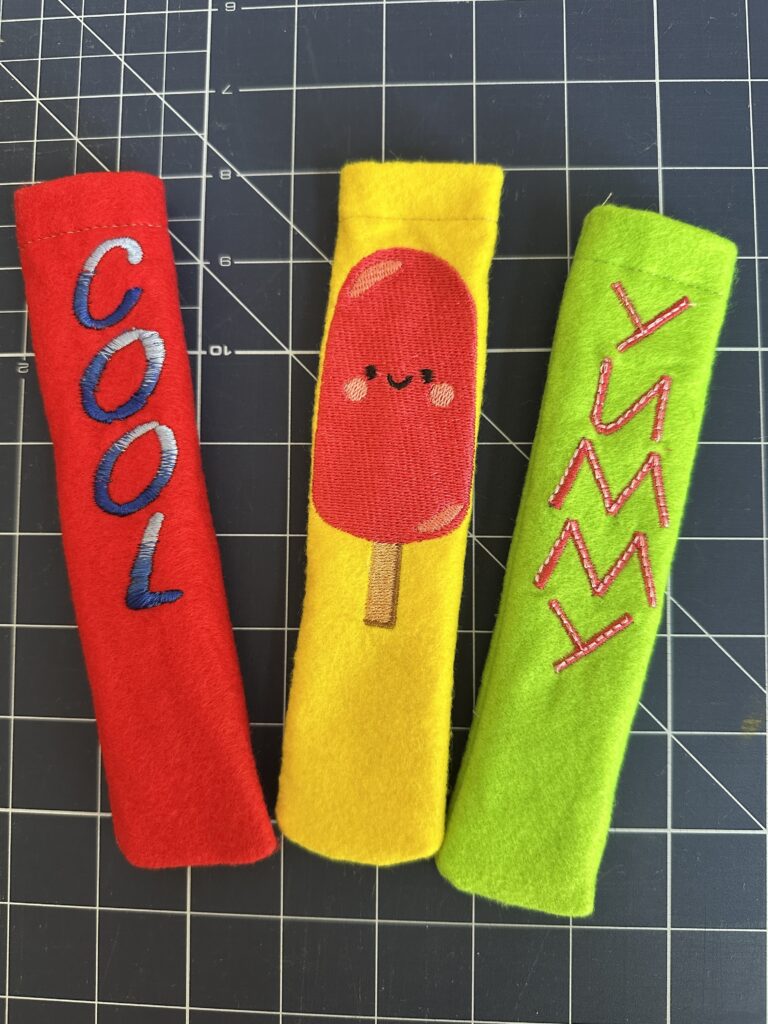
Insert a freezer pop into the Koozie and enjoy your sweet treat!
