Festive Towels with Machine Embroidery for the Holidays
Festive Towels for the Holidays
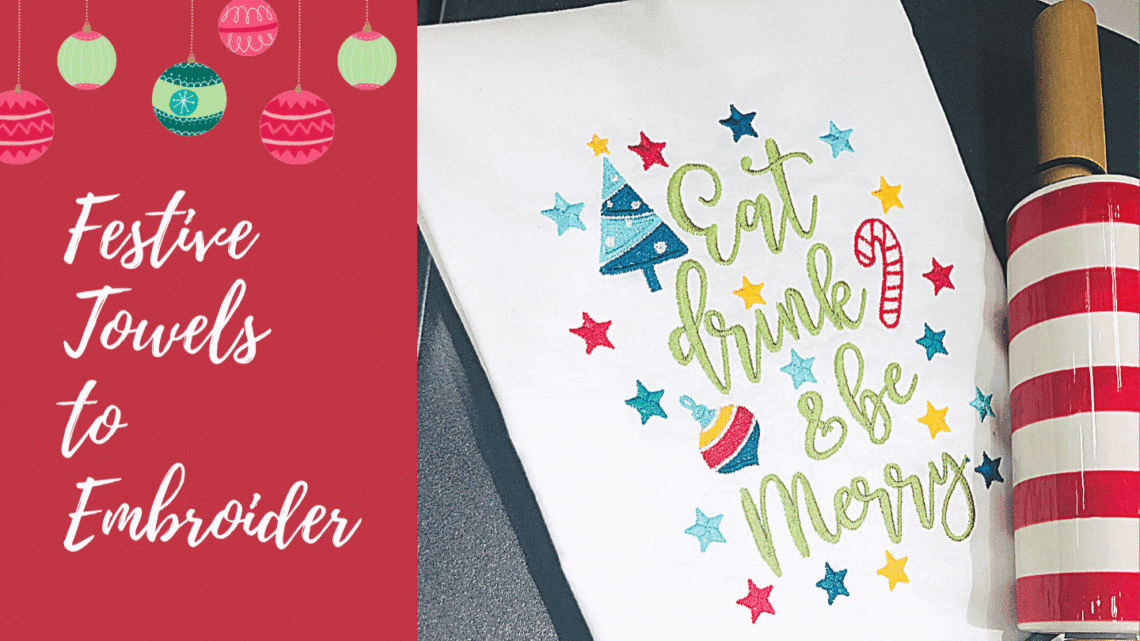
Make festive towels with machine embroidery to add some festive cheer to your kitchen this holiday season. The following directions are for making your own towel out of fabric. But it’s equally as impressive to add a machine embroidery design to an embroidery blank. Choose one of our Santa Sayings embroidery designs or make six towels to showcase the entire collection and give some away as gifts, complete with your favorite cookie recipe.
Finished size: approx. 13 ¼” x 23 ¼”
SUPPLIES FOR TOWELS
Supplies listed are enough to make one kitchen towel.
- 50 wt. Cotton Thread (to match towel or trim flange fabric)
- Santa Sayings Machine Embroidery Palette
- Sulky Bobbin Thread (color to match large fabric rectangle)
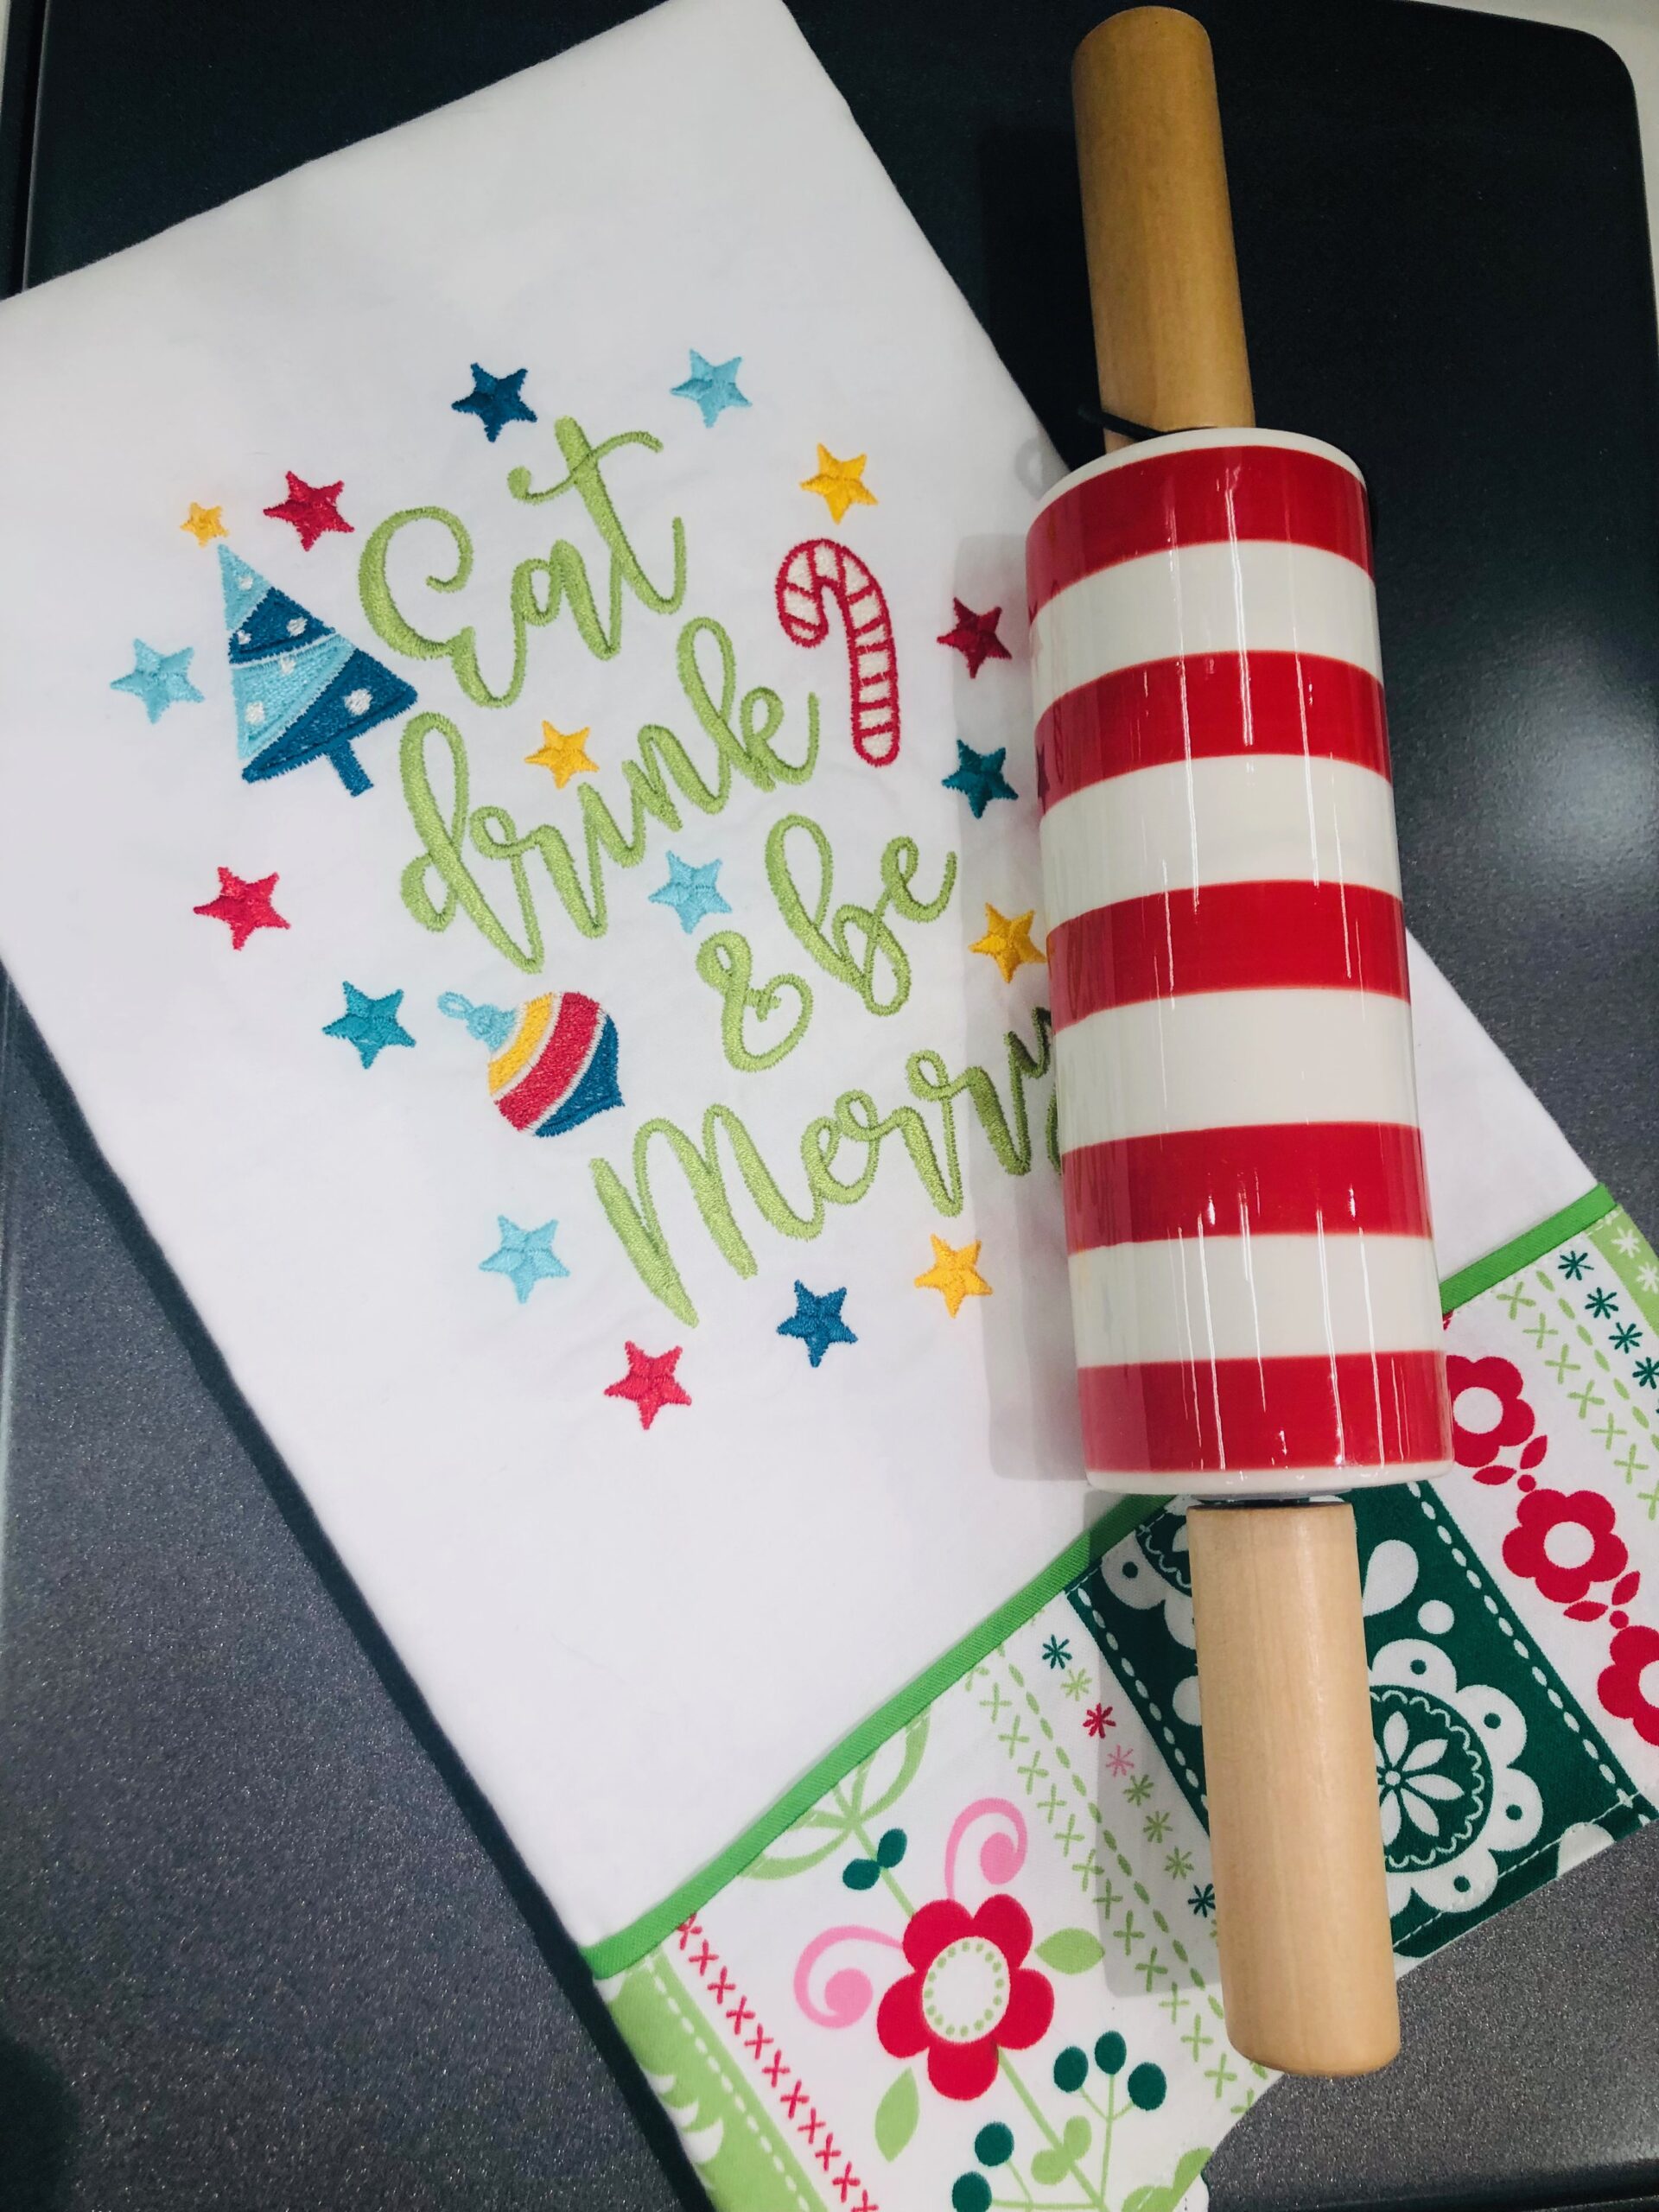
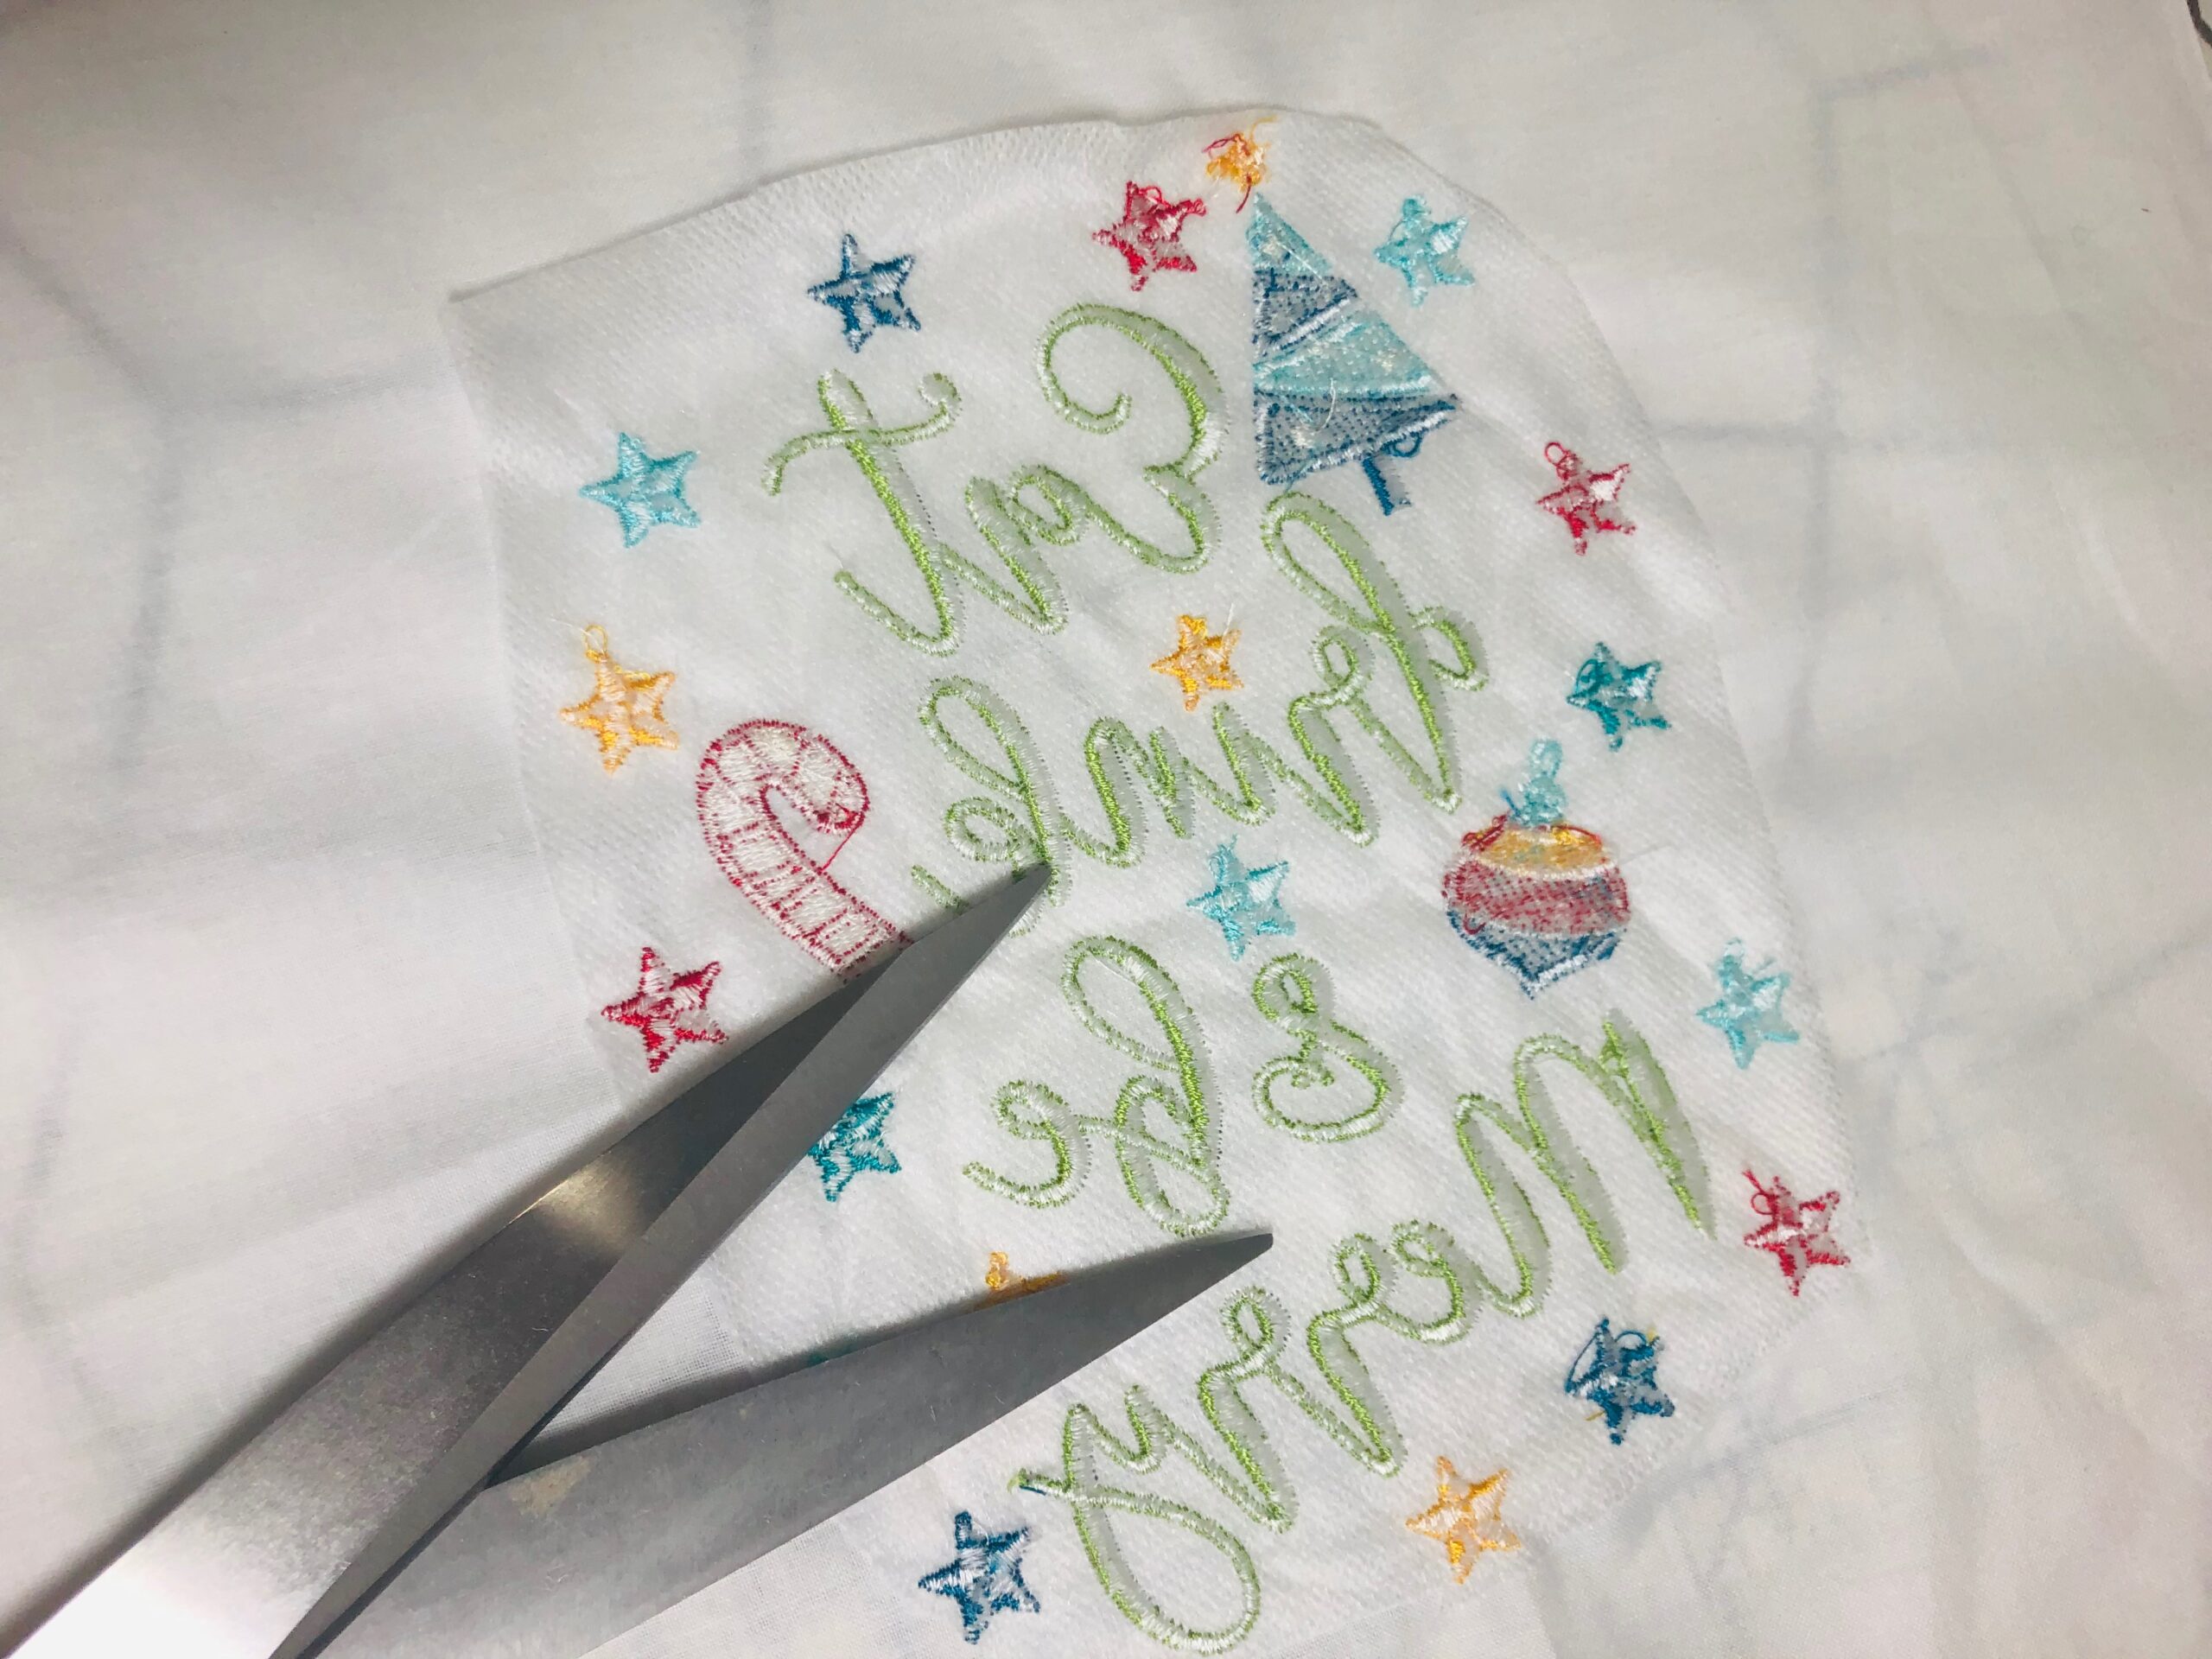
- Machine Embroidery Design (featured design from Santa Sayings Machine Embroidery Collection: Eat, Drink & Be Merry), measuring approx. 4.69” x 5.63”)
- Sulky Fabri-Solvy™ Stabilizer
- Clover Hot Ruler (optional)
- Needles:
- 80/12 Top Stitch (embroidery)
- 70/10 Universal (construction)
- Fabric:
- 14 ½” x 22 ½” rectangle of fabric (towel front)
- 18” x 24” rectangle of fabric (towel back)
- 4” x 14 ½” rectangle (trim)
- 1” x 14 ½” strip (trim flange)
NOTE: For the featured project, the design listed was enlarged 20% to measure 142.8mm x 171.6mm.
EMBROIDERY FOR TOWELS
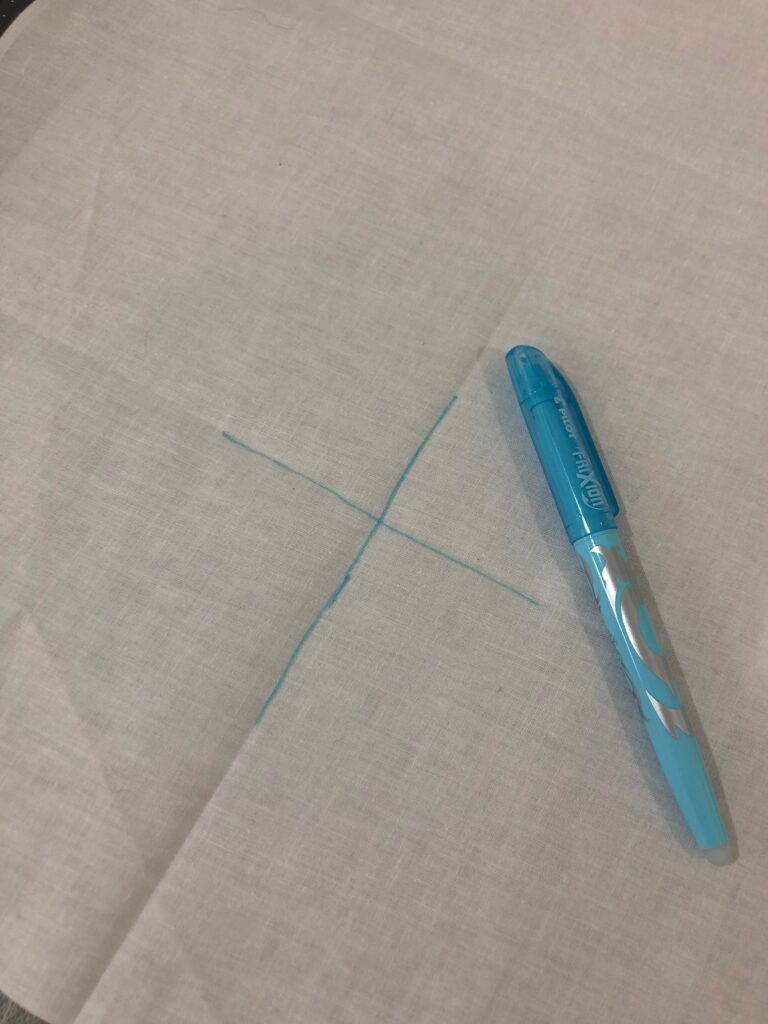
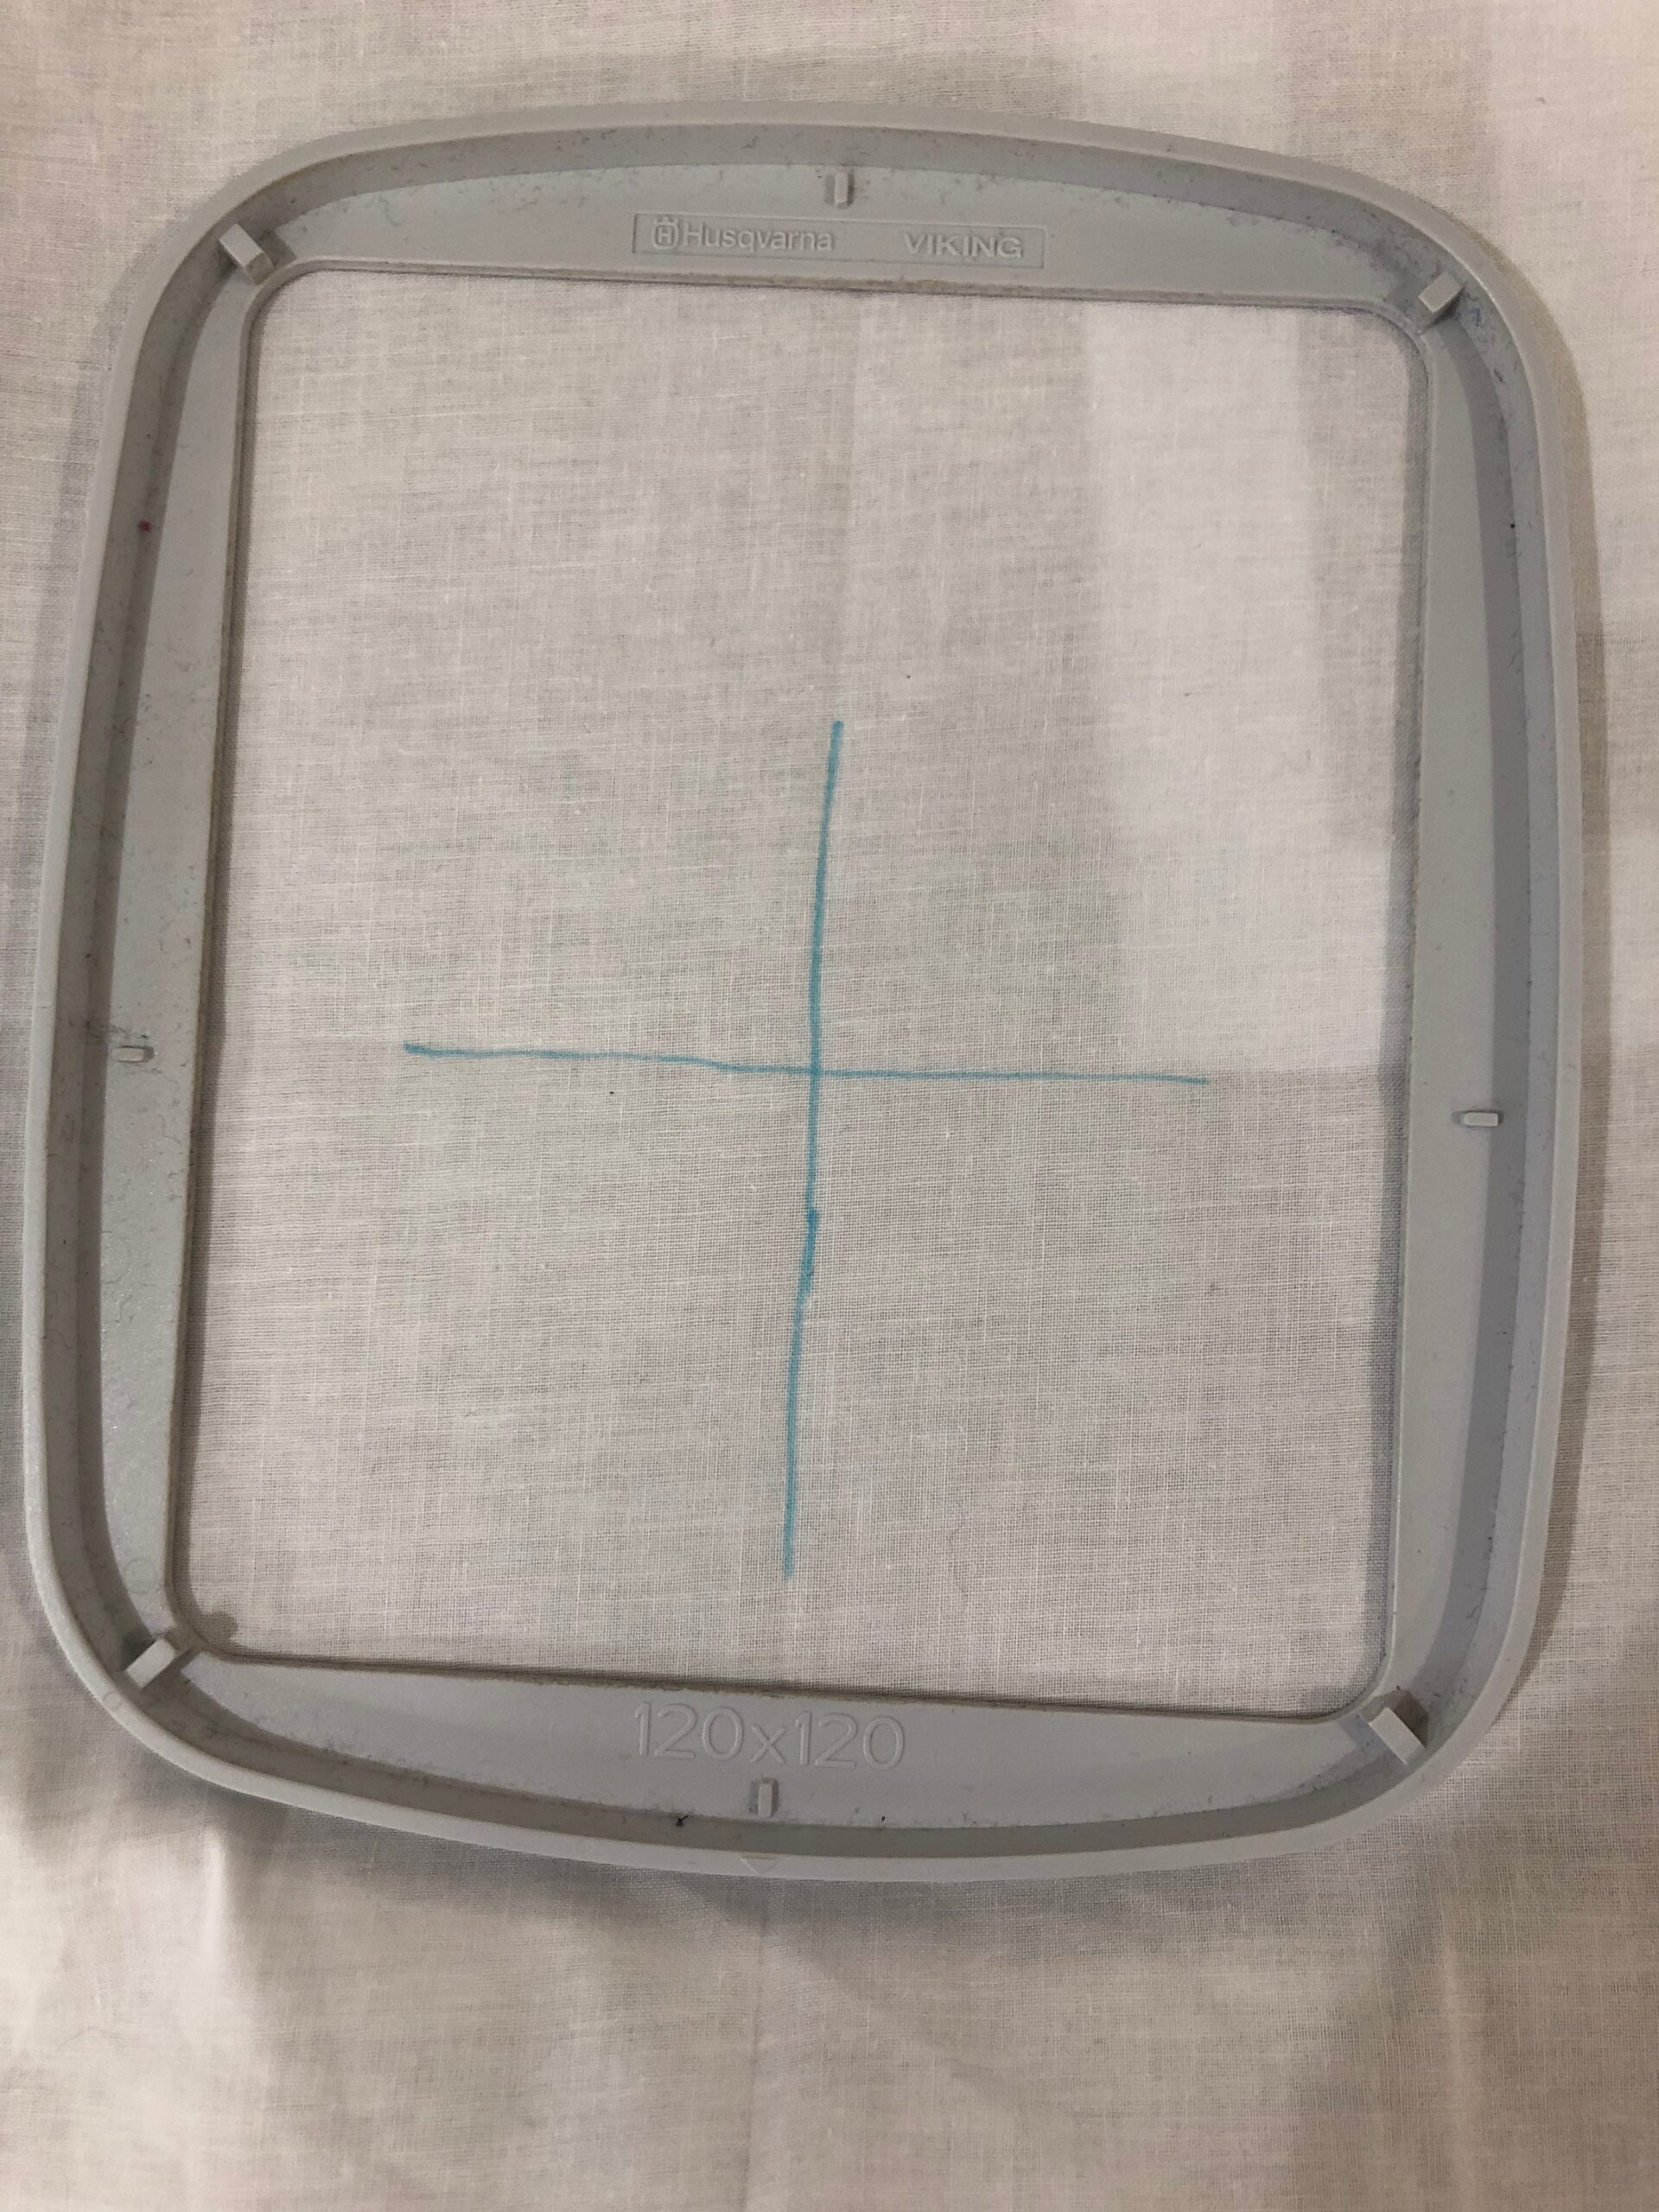
Fold the large rectangle in half widthwise; unfold to reveal the crease. Fold the lower half in half widthwise to find the center of the lower half; press to mark with a foldline, and then unfold. Fold the rectangle in half lengthwise; press to crease. Mark the center cross-marks along the lower half center using a removable fabric marker.
Load the chosen design into the machine. Modify or resize as desired.

Install a size 80/12 Top Stitch Needle. Thread the needle with the first color of the design. Thread the bobbin with Sulky Bobbin Thread.
Hoop the fabric with a layer of Fabri-Solvy, aligning the marked cross marks with the inner hoop ring center marks.
Embroider the design, clipping jump threads on the right and wrong side with each thread change.

After embroidery is complete, remove the fabric from the hoop. Trim the stabilizer close to the design perimeter.
Leave the remaining stabilizer intact. Any excess stabilizer that remains will wash out with the first wash cycle.
Remove the fabric marker. For the featured Frixion Highlighter, the tips of the iron is all that’s needed to remove the marker with heat.

ADDING FESTIVE TRIM
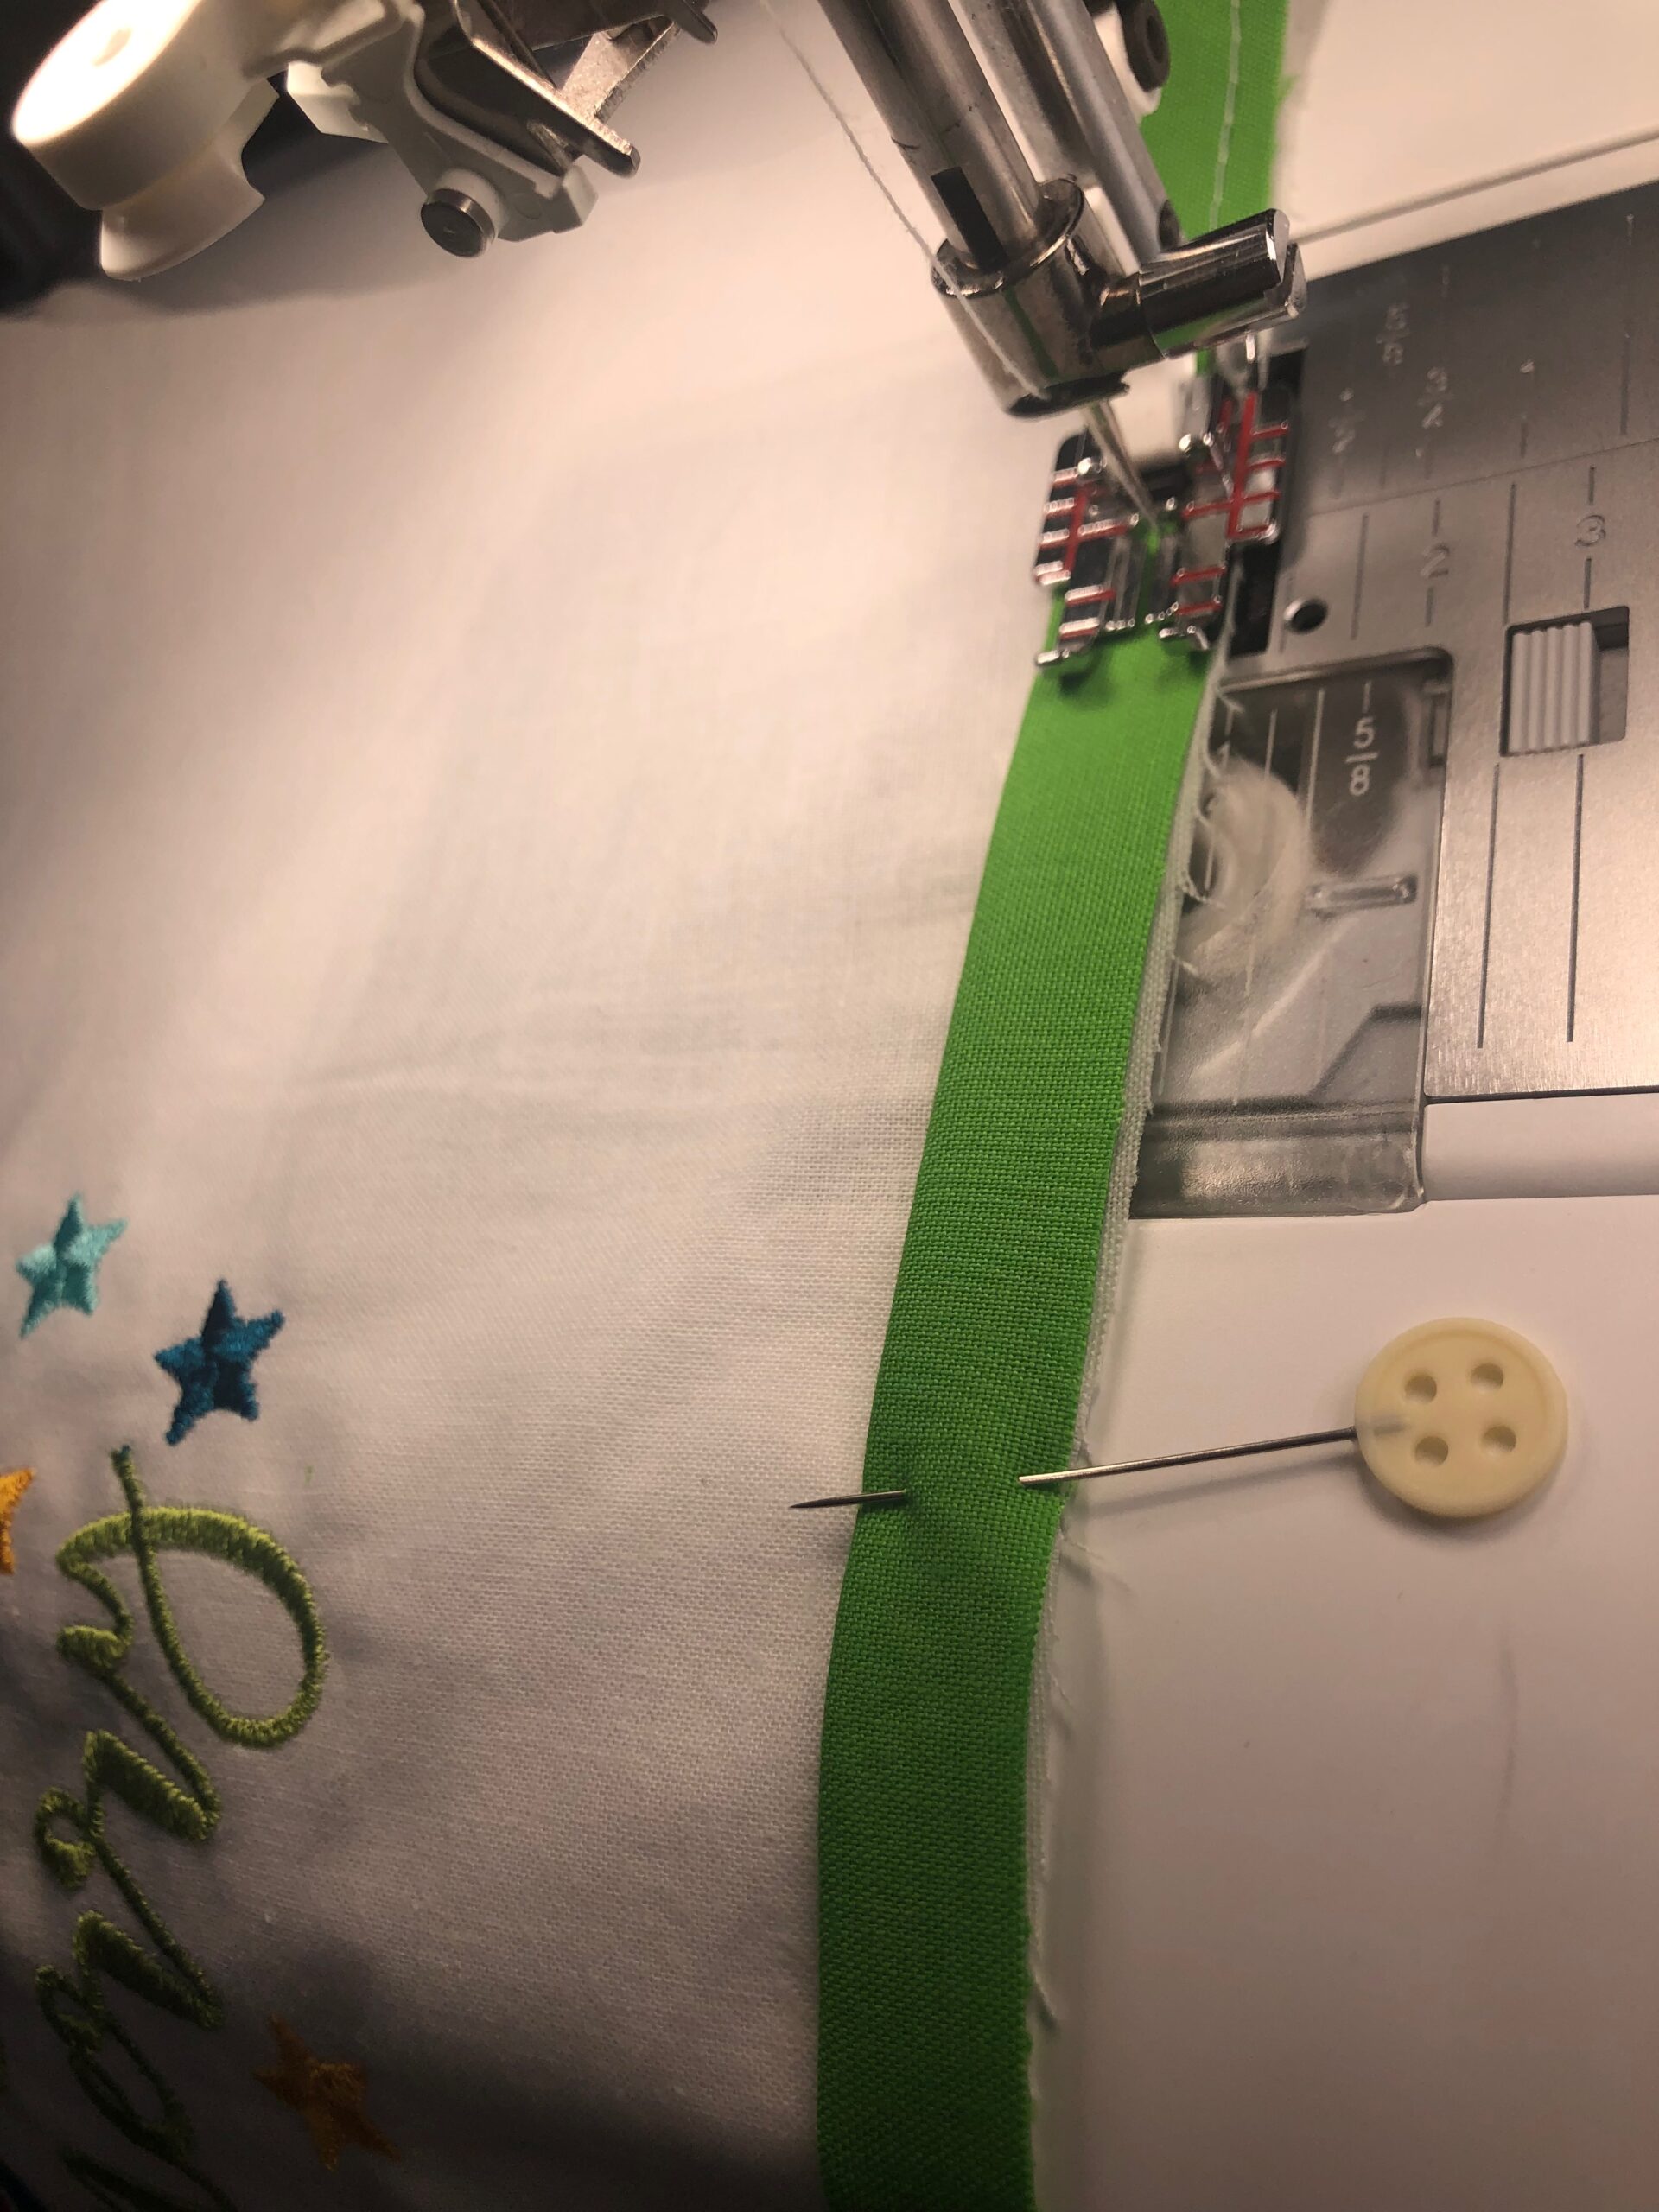
Set the machine for sewing mode. Install a size 70/10 Universal Needle. Thread the needle and bobbin with 50 wt. Cotton Thread.
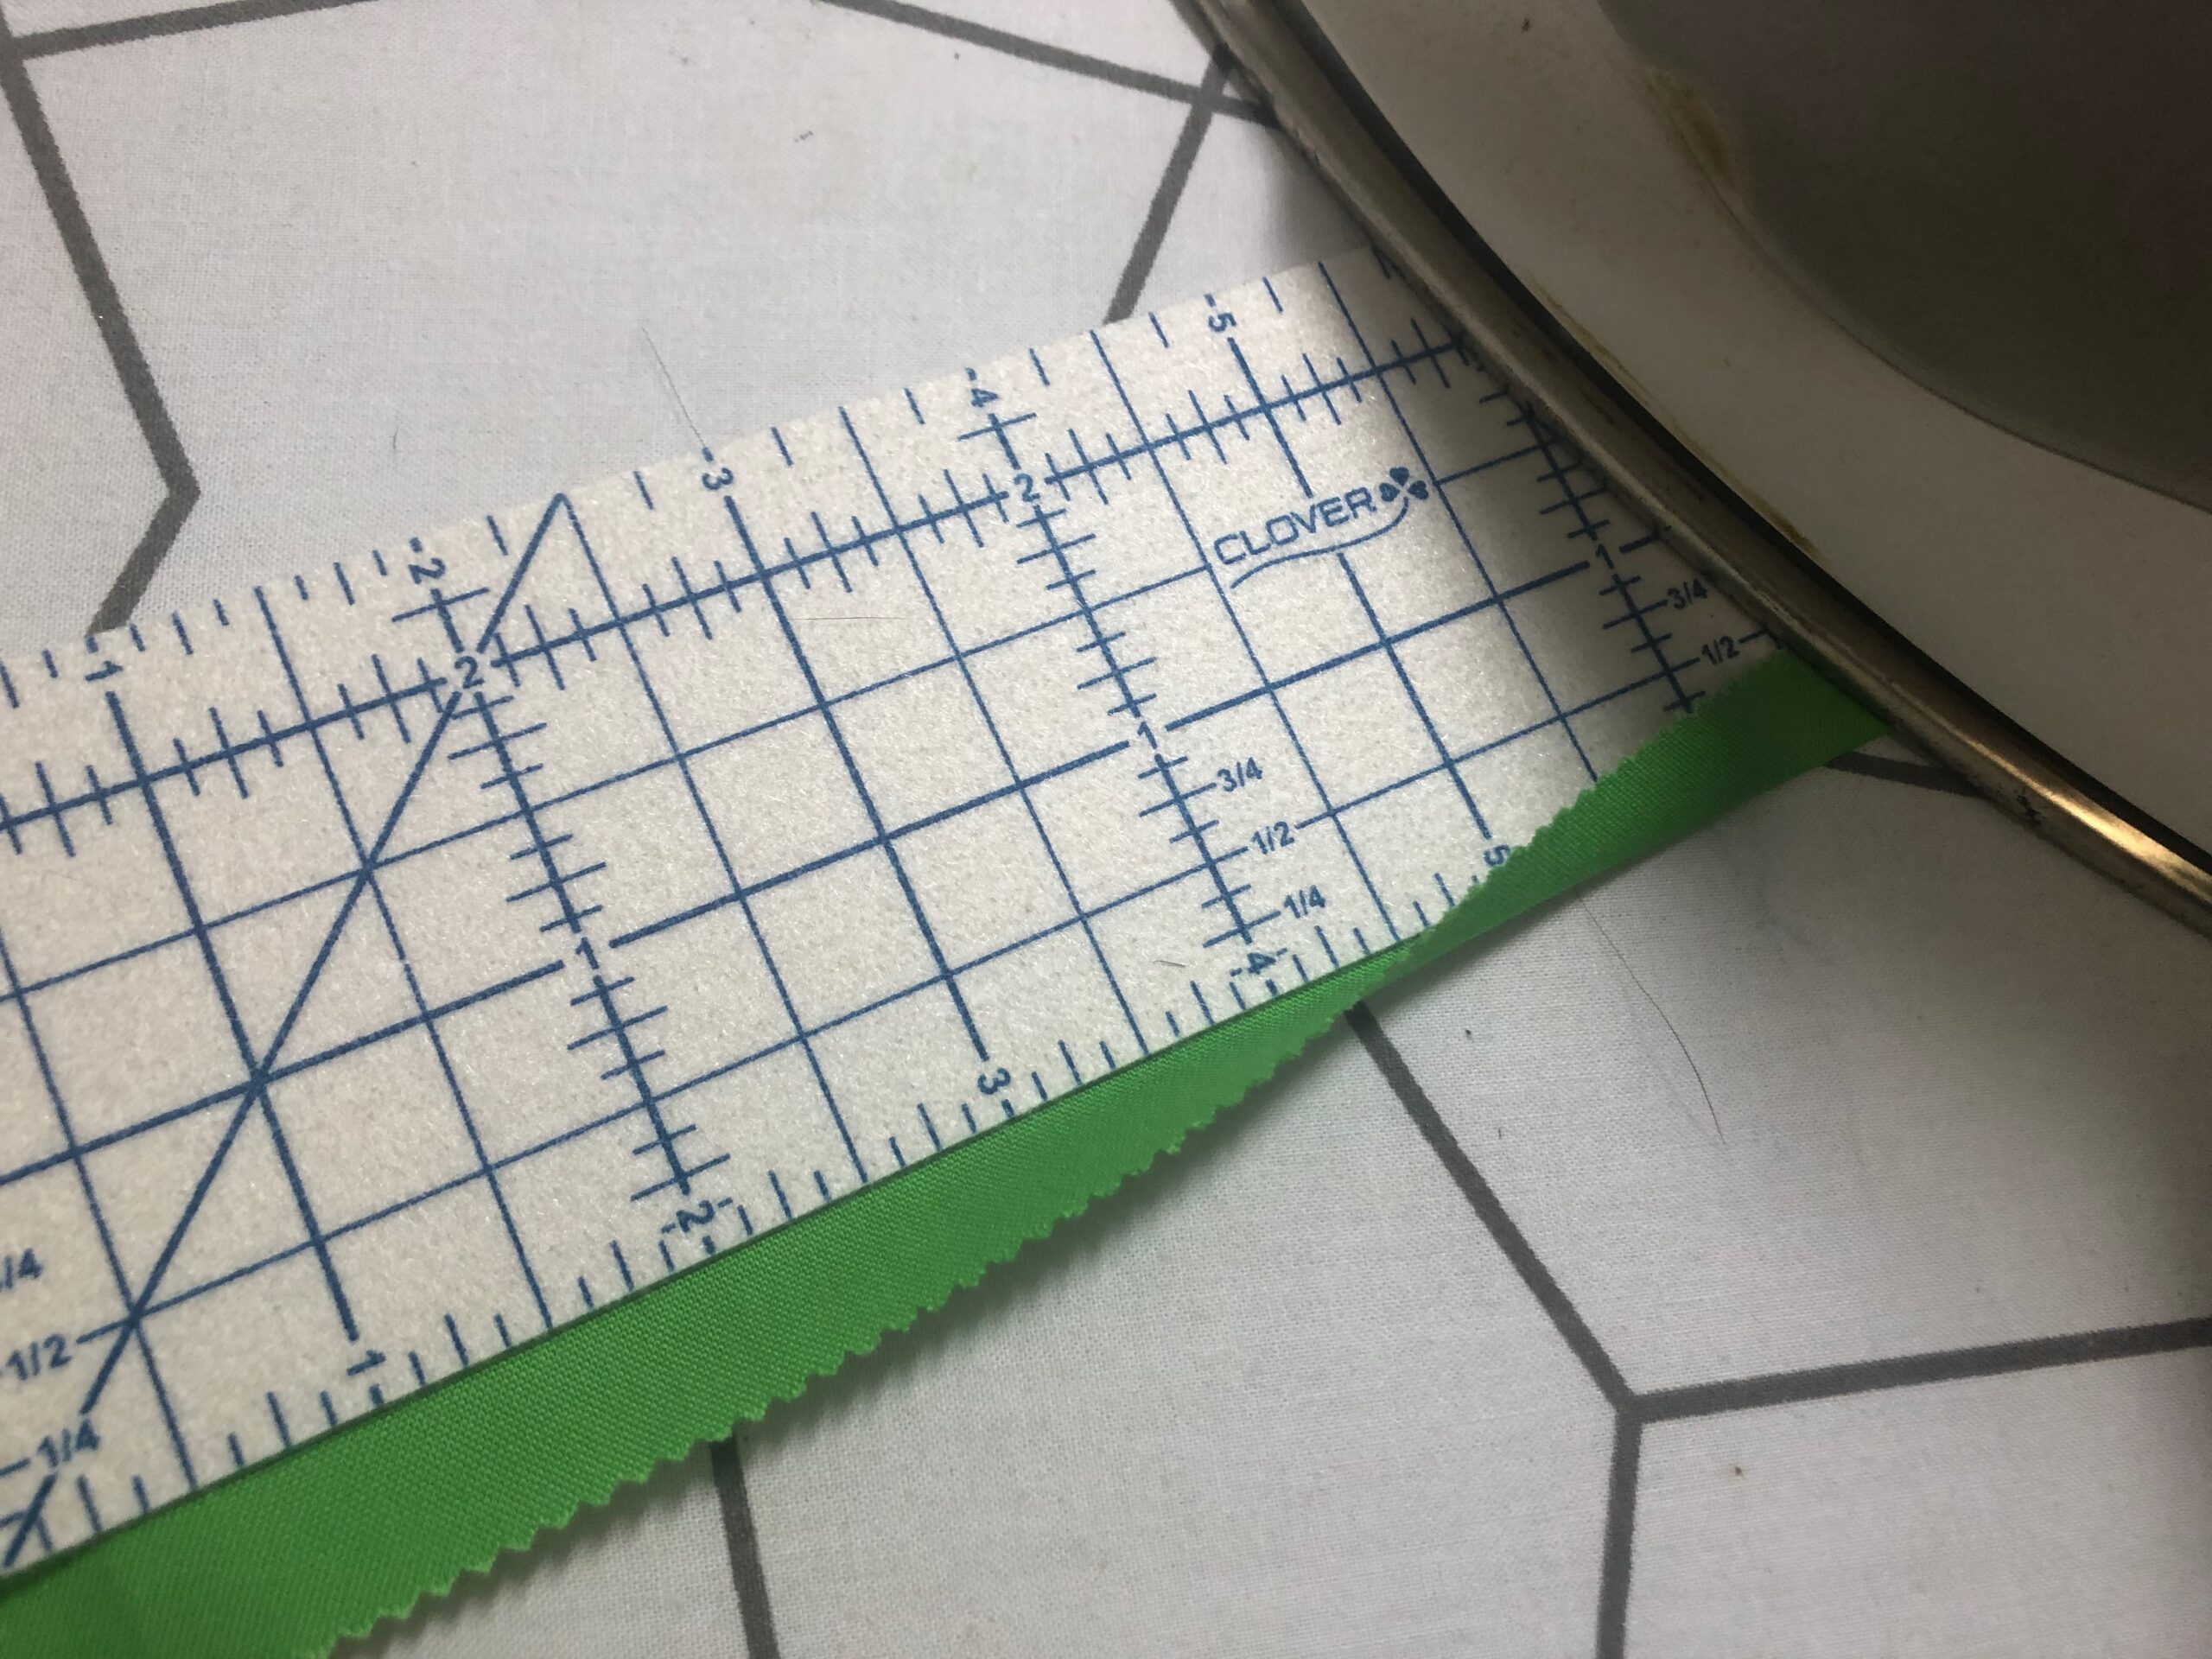
Choose one long edge of the trim fabric rectangle as the lower edge (if using a directional print, make sure it’s facing the correct direction).
Fold the fabric strip in half lengthwise with wrong sides together; press, using a Clover Hot Ruler for accuracy and ease, if desired.
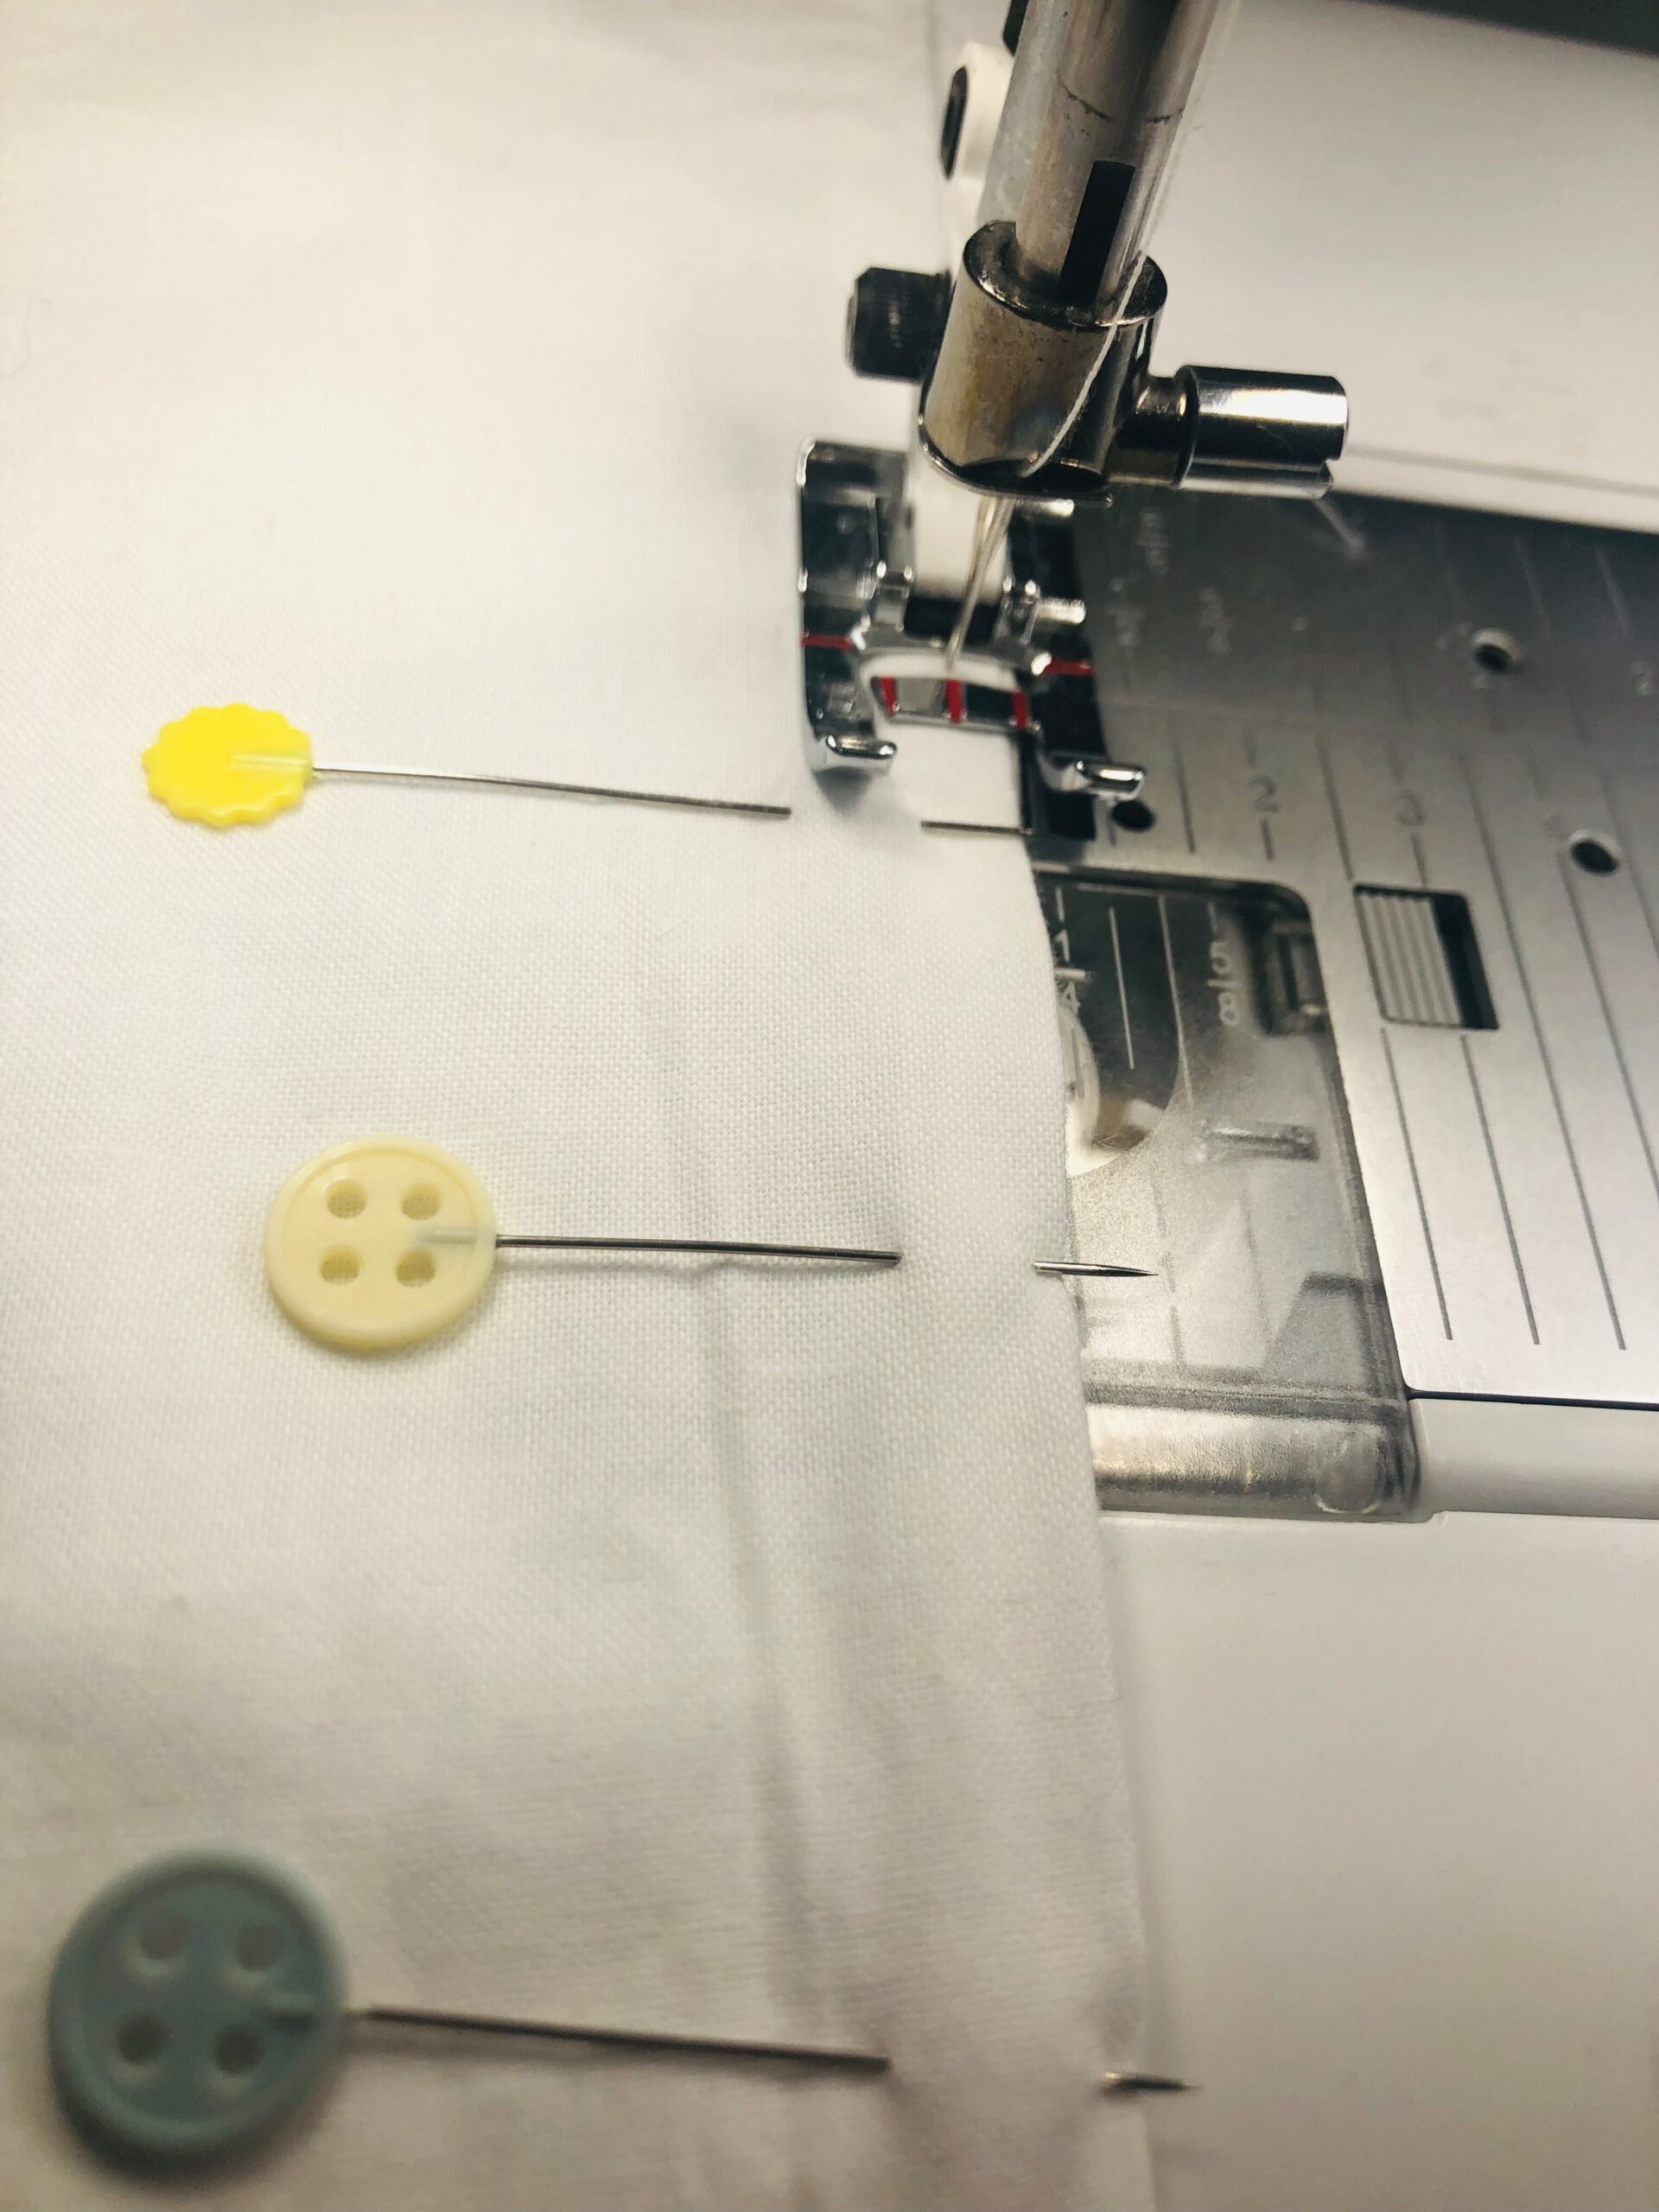
Place the folded fabric strip raw edge right side facing the towel-front lower edge; pin.
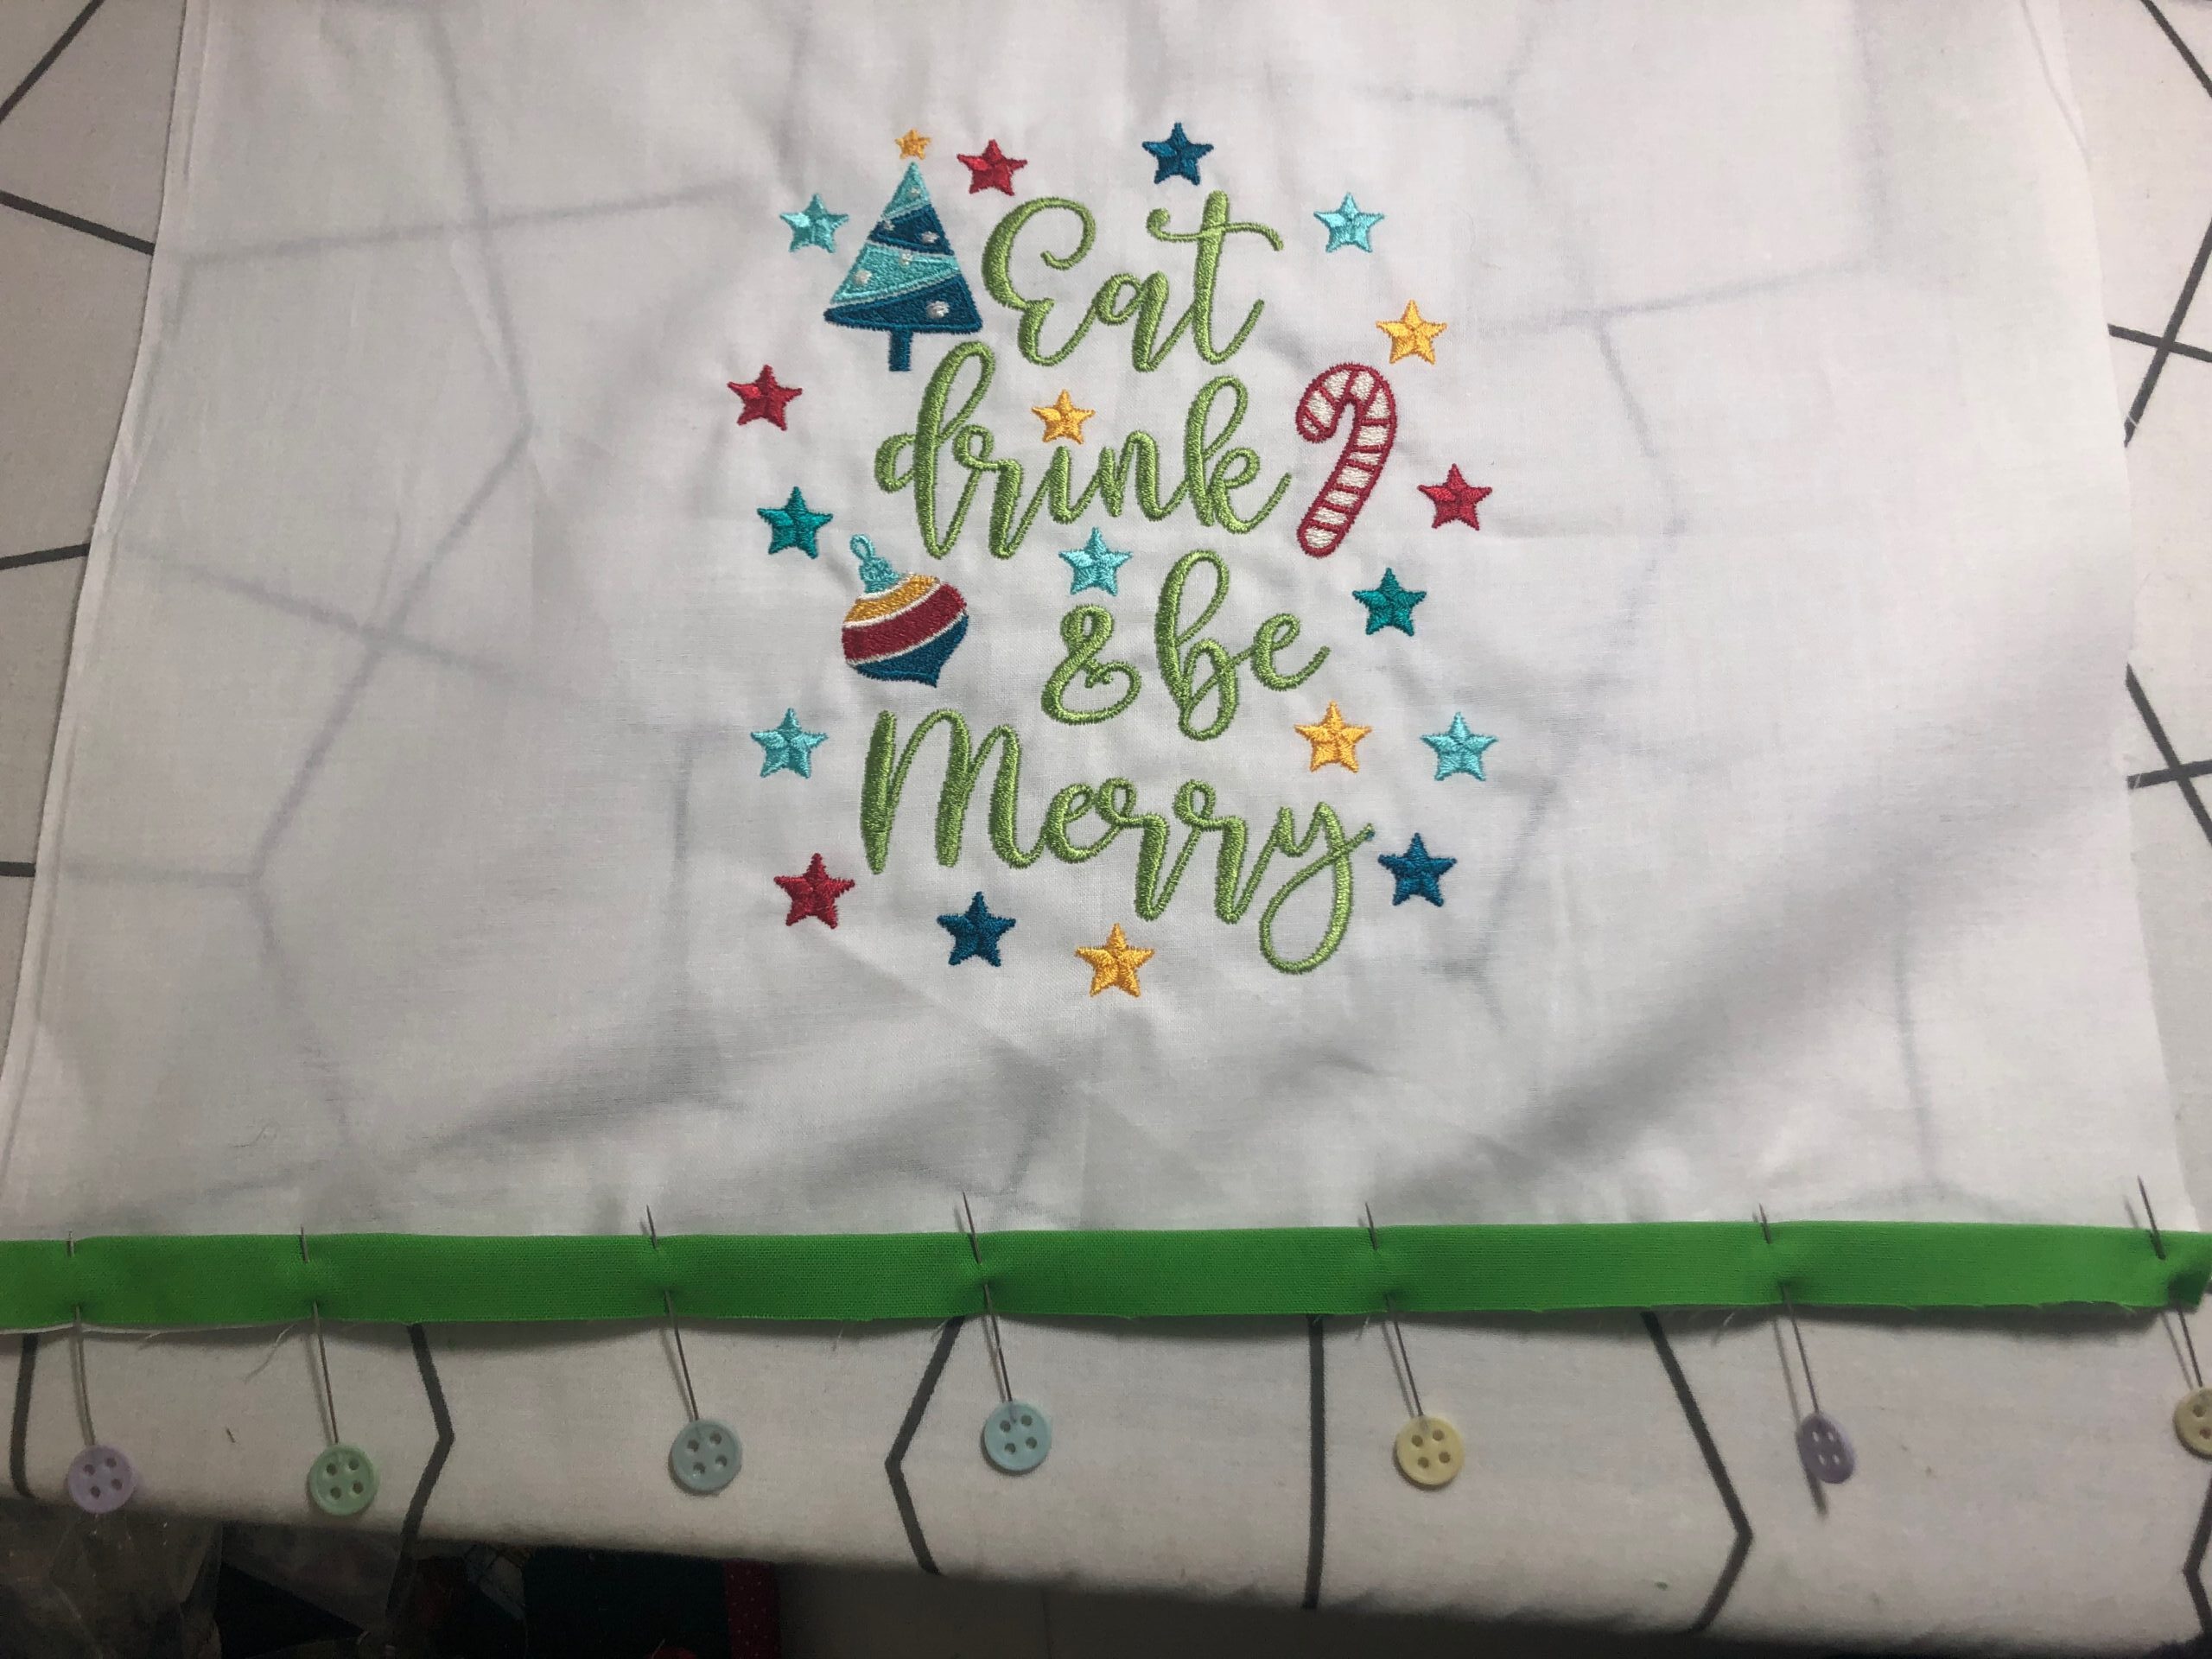
Baste the folded strip to the towel using a 1/8” seam allowance, removing the pins as you reach them.
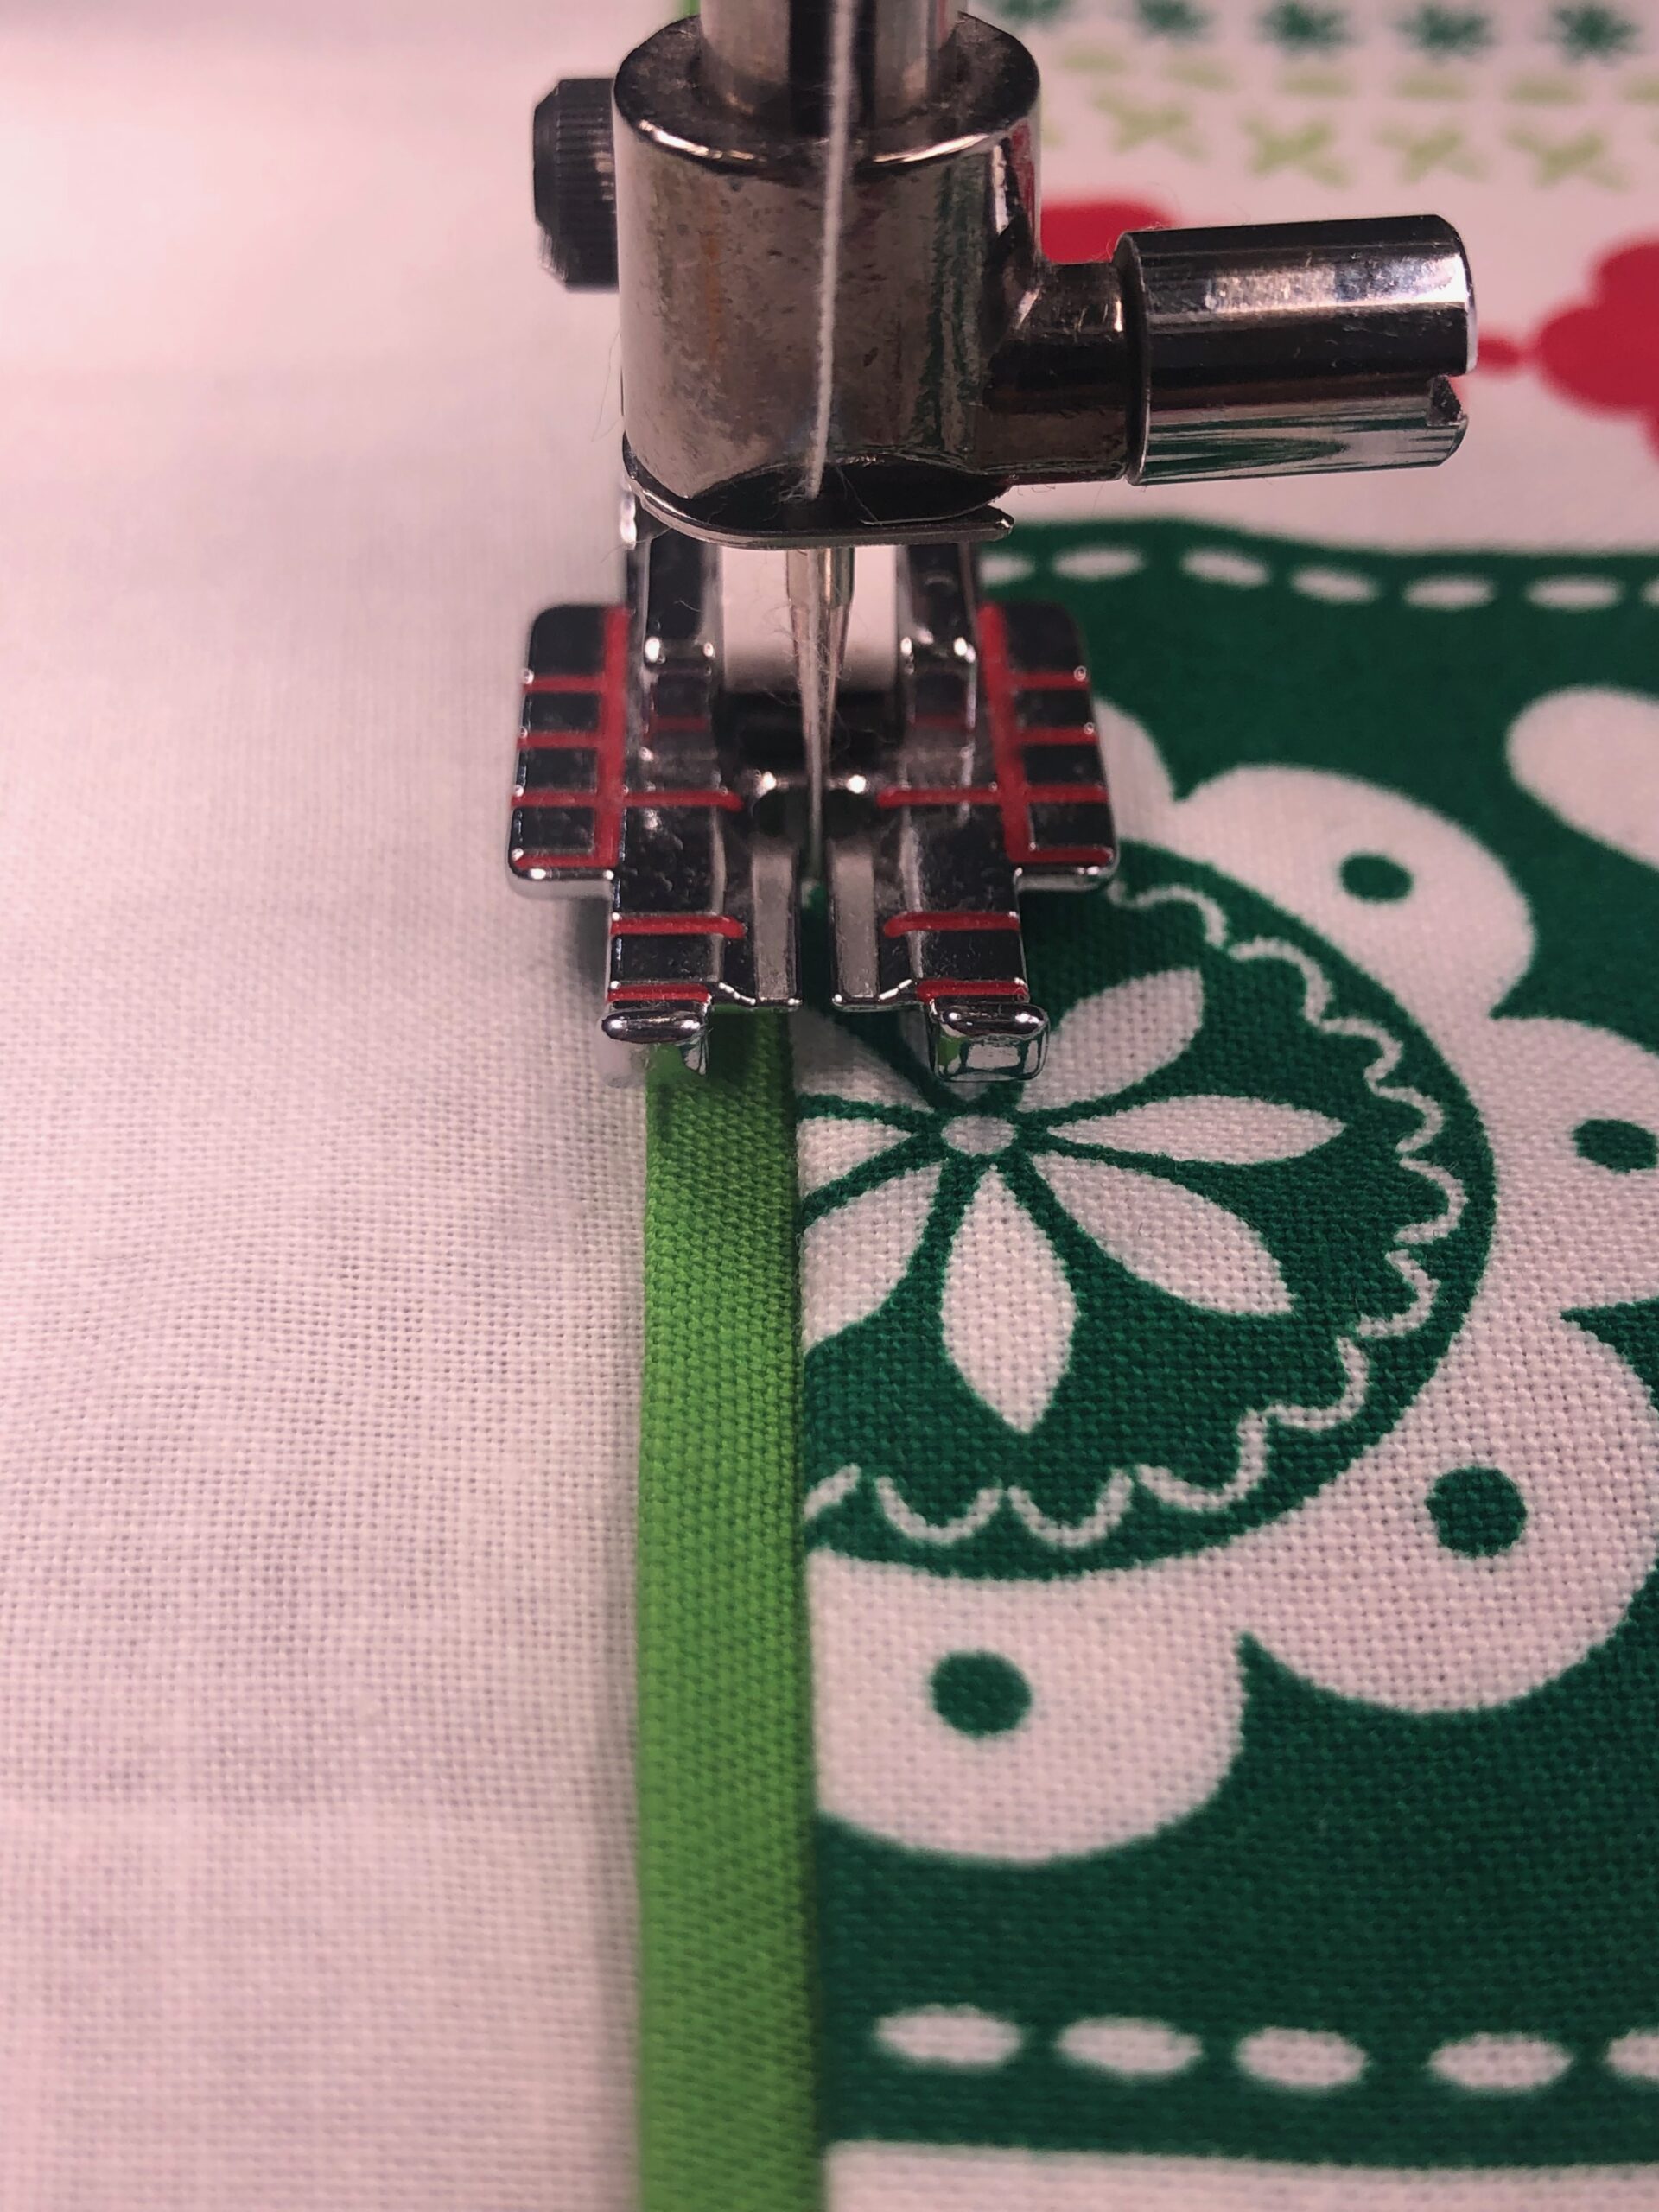
Place the rectangle upper raw edge over the towel lower edge, sandwiching the strip.
Using a ¼” seam allowance, stitch the rectangle upper raw edge to the towel-front lower edge with right sides together. Press the seam toward the lower edge. Topstitch the trim upper edge.
Place the towel front right side up on a flat work surface. Position the towel back over the front with right sides facing and all edges aligned. Pin the perimeter. Stitch the towel perimeter, leaving an opening along one side edge for turning. Clip the corners.
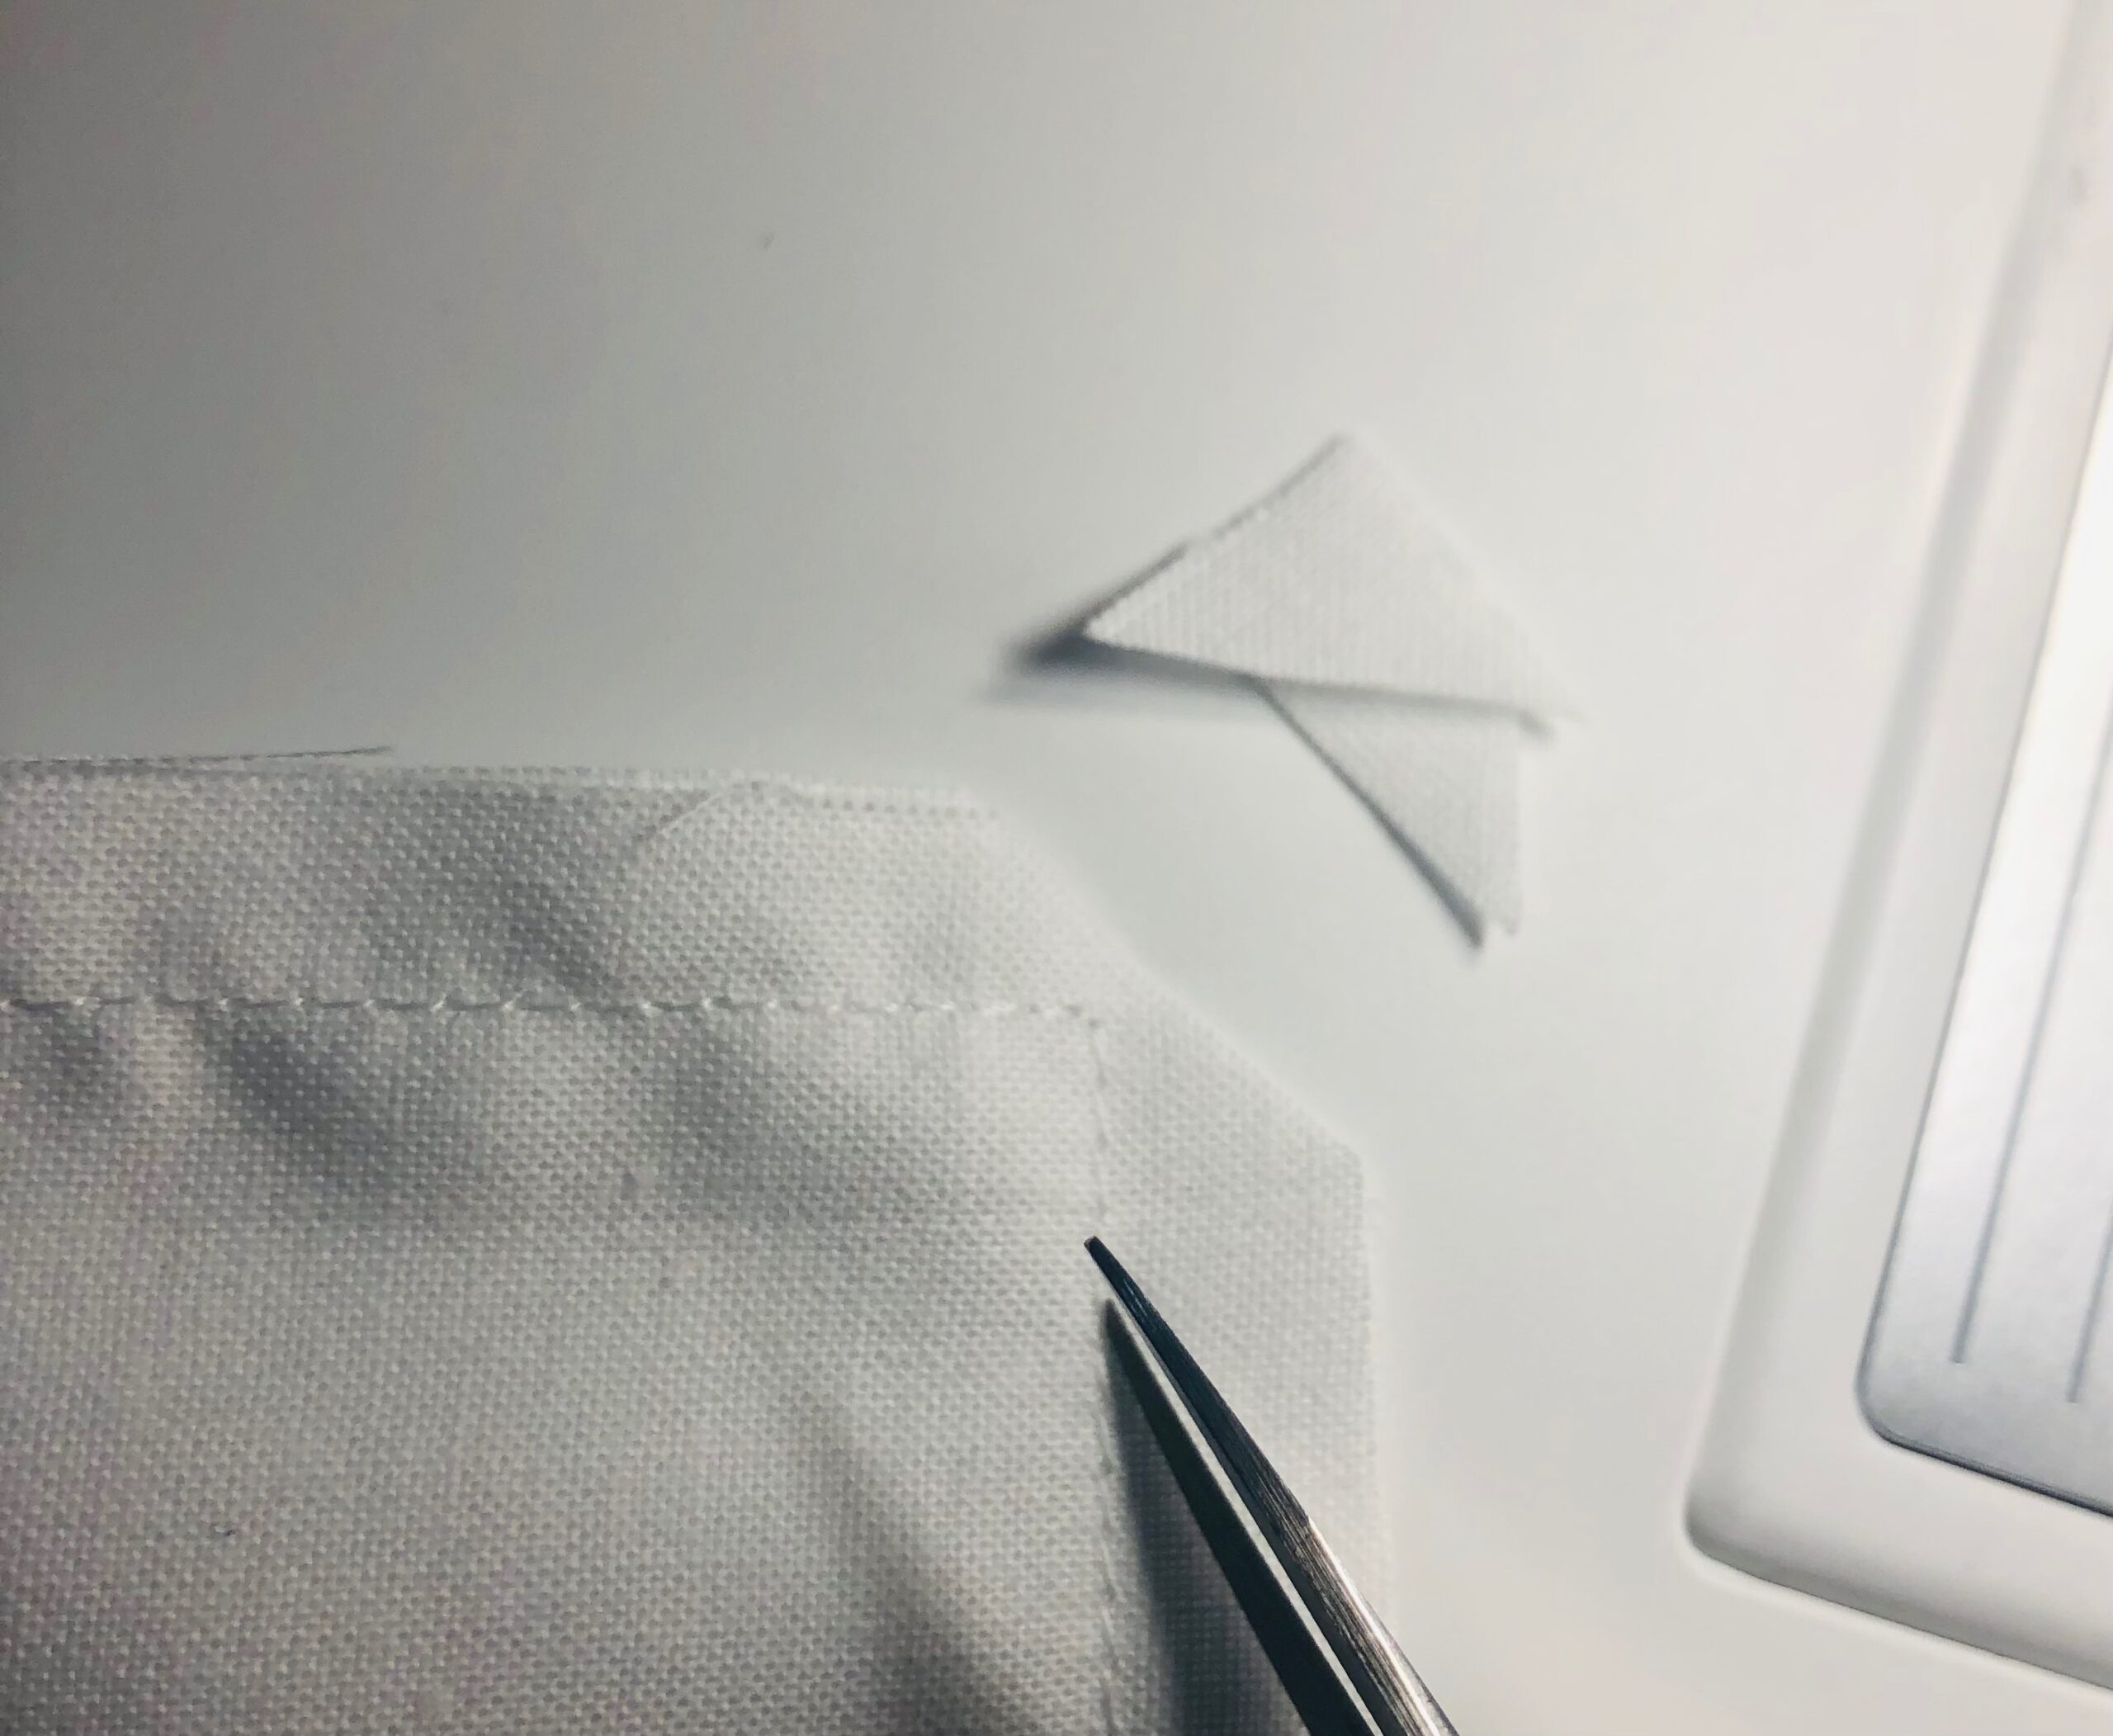
Turn the towel right side out through the opening; press the towel flat. Press the opening seam allowances toward the wrong side, and then pin shut. Topstitch the towel perimeter, closing the opening with the stitches.
Press the towel, keeping the iron away from the stitching if possible. Avoid using steam around the embroidery where stabilizer is still intact, if applicable. Steam will cause the stabilizer to shrink up, making the design appear puckered (see below!). However, if this happens, once the towel is washed the puckering will disappear when the stabilizer dissolves in water.

Display the finished festive towel where desired, or gift it to a friend with a cute rolling pin and baking sheet or pack of decorative spatulas.

TIP: Instead of making your own towel, choose from several festive towel embroidery blanks, with or without trim. SHOP OUR BLANKS>

Ellen March
I am the Director of Content for Sulky of America. The former Editor in Chief of Sew News and Creative Machine Embroidery magazines, I hosted Sew it All TV on PBS for nine seasons. I've appeared on It's Sew Easy on PBS, DIY Network's Uncommon Threads, Hallmark's Marie Osmond Show, MacPhee Workshop and more! Come sew with me!


8 Comments
michele crews
What kind of fabric did you use to make the towel? I would like to purchase some like it. Did you prewash it? Thank you for such a great project idea.
Ellen March
I used white Kona Cotton for the towel. Yes, I pre-washed it.
Thanks for reading!
Mary Gloede
Loved it
Ada Rodriguez
I love your show. But have a problem when it comes to embroidery does one have to have the machine that does this? I have a Janome I know can do some but haven’t tried it yet. If the machine is not an embroidery do I need a patter so I can put on fabric? The same with cross stitch. Please explain this to me I’m a beginner. Thank you.
Ellen March
Hi Ada,
For machine embroidery, yes you have to have an embroidery-capable machine to accept the design formats and stitch out the designs. The machine will come with an embroidery module, which swaps with the machine bed and communicates with the machine to move where it needs to go to create the pattern. Cross-stitch can be done by hand or machine embroidery, if the design is digitized specifically for cross-stitches. If machine embroidery is not an option for you, you can either do free-motion embroidery on your machine (search this term in our blog search tool for lots of posts on free-motion techniques), hand embroidery (by following a pattern or your own design), or appliqué. Your choice!
Joan Shriver
I didn’t see anywhere you said to hoop the stabilizer.
Yvonne Bluthardt
Hi Ellen, have you been able to post the directions to complete the wall hanging with the same wording from the Santa collection and if so where please. It’s the one you did last Tuesday on Sew What with the wool garland. Thanks and have a blessed weekend!
Ellen March
Hi Yvonne,
It’s coming up soon! Stay tuned!
~Ellen