Easy Log Cabin Quilt
for Beginners & Beyond
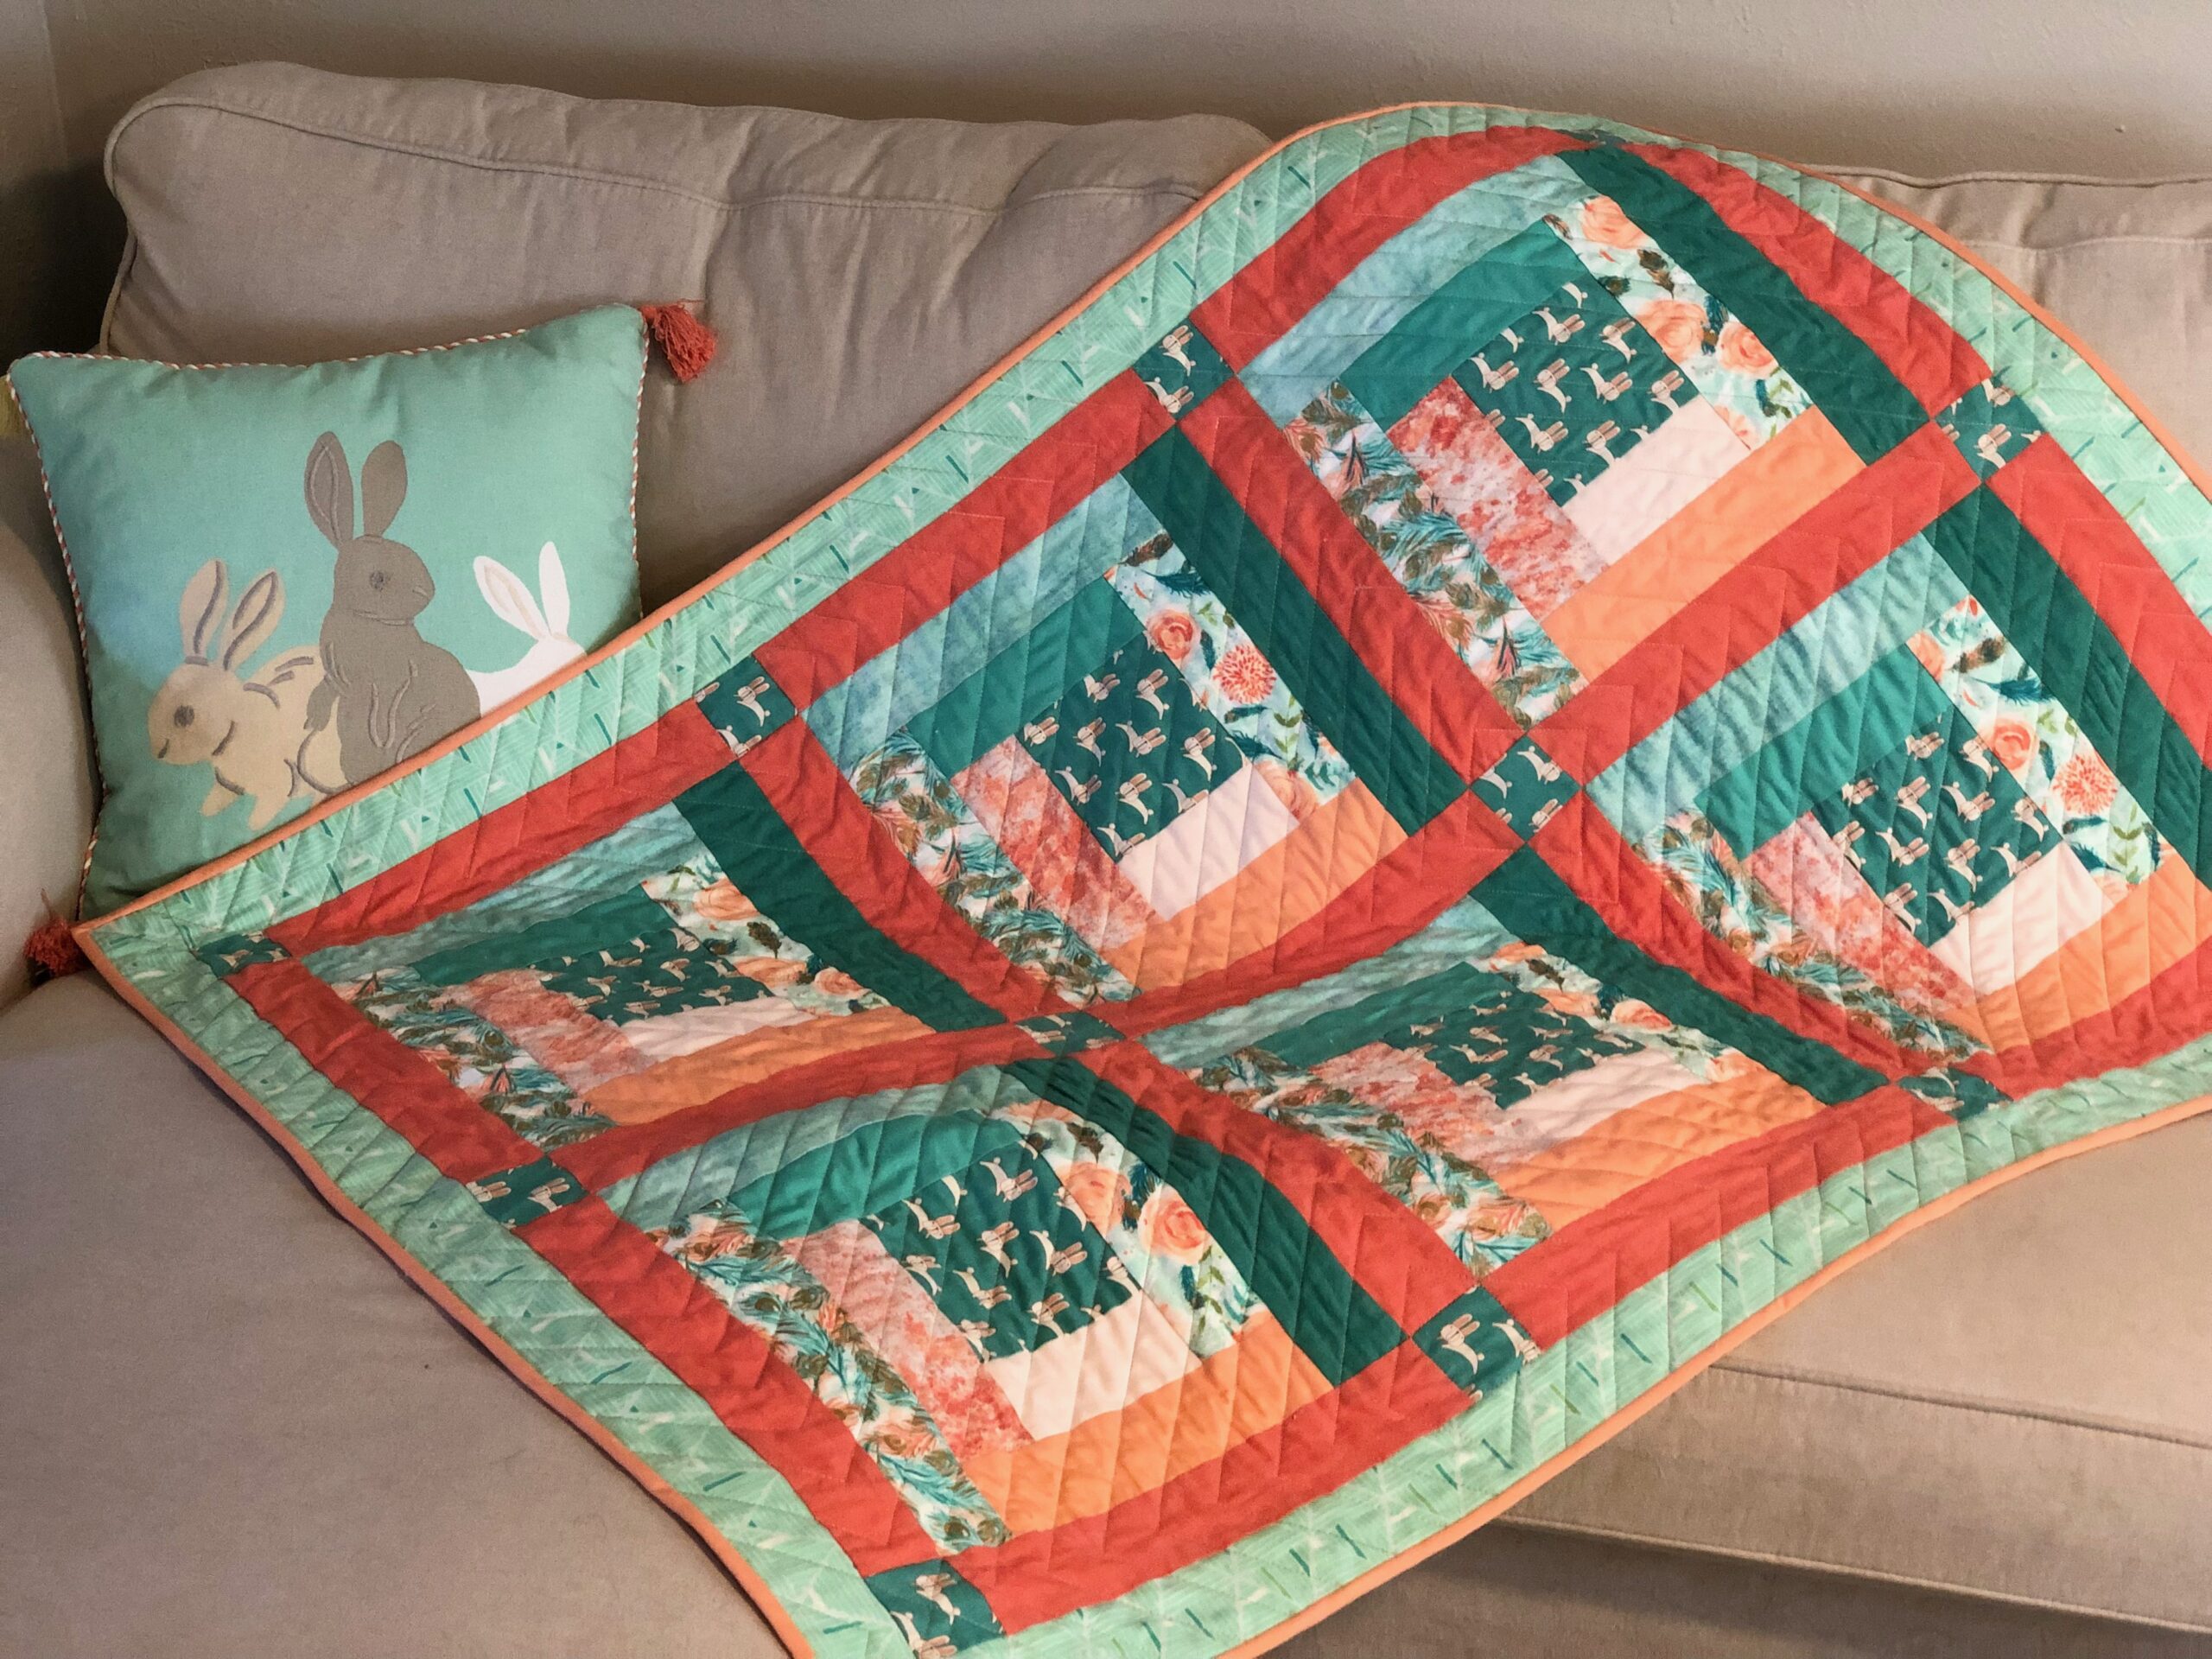
A Log Cabin quilt is a great beginner-friendly quilt that is easily completed with repeating pieced blocks sewn together in a pleasing arrangement. The same can be said for many quilt patterns, but a Log Cabin quilt is also perfect for precut fabrics, making it even faster to sew. Add cornerstones, sashing and a border to create a quilt “recipe” you’ll use again and again to make all sorts of quilts that vary in size and design.
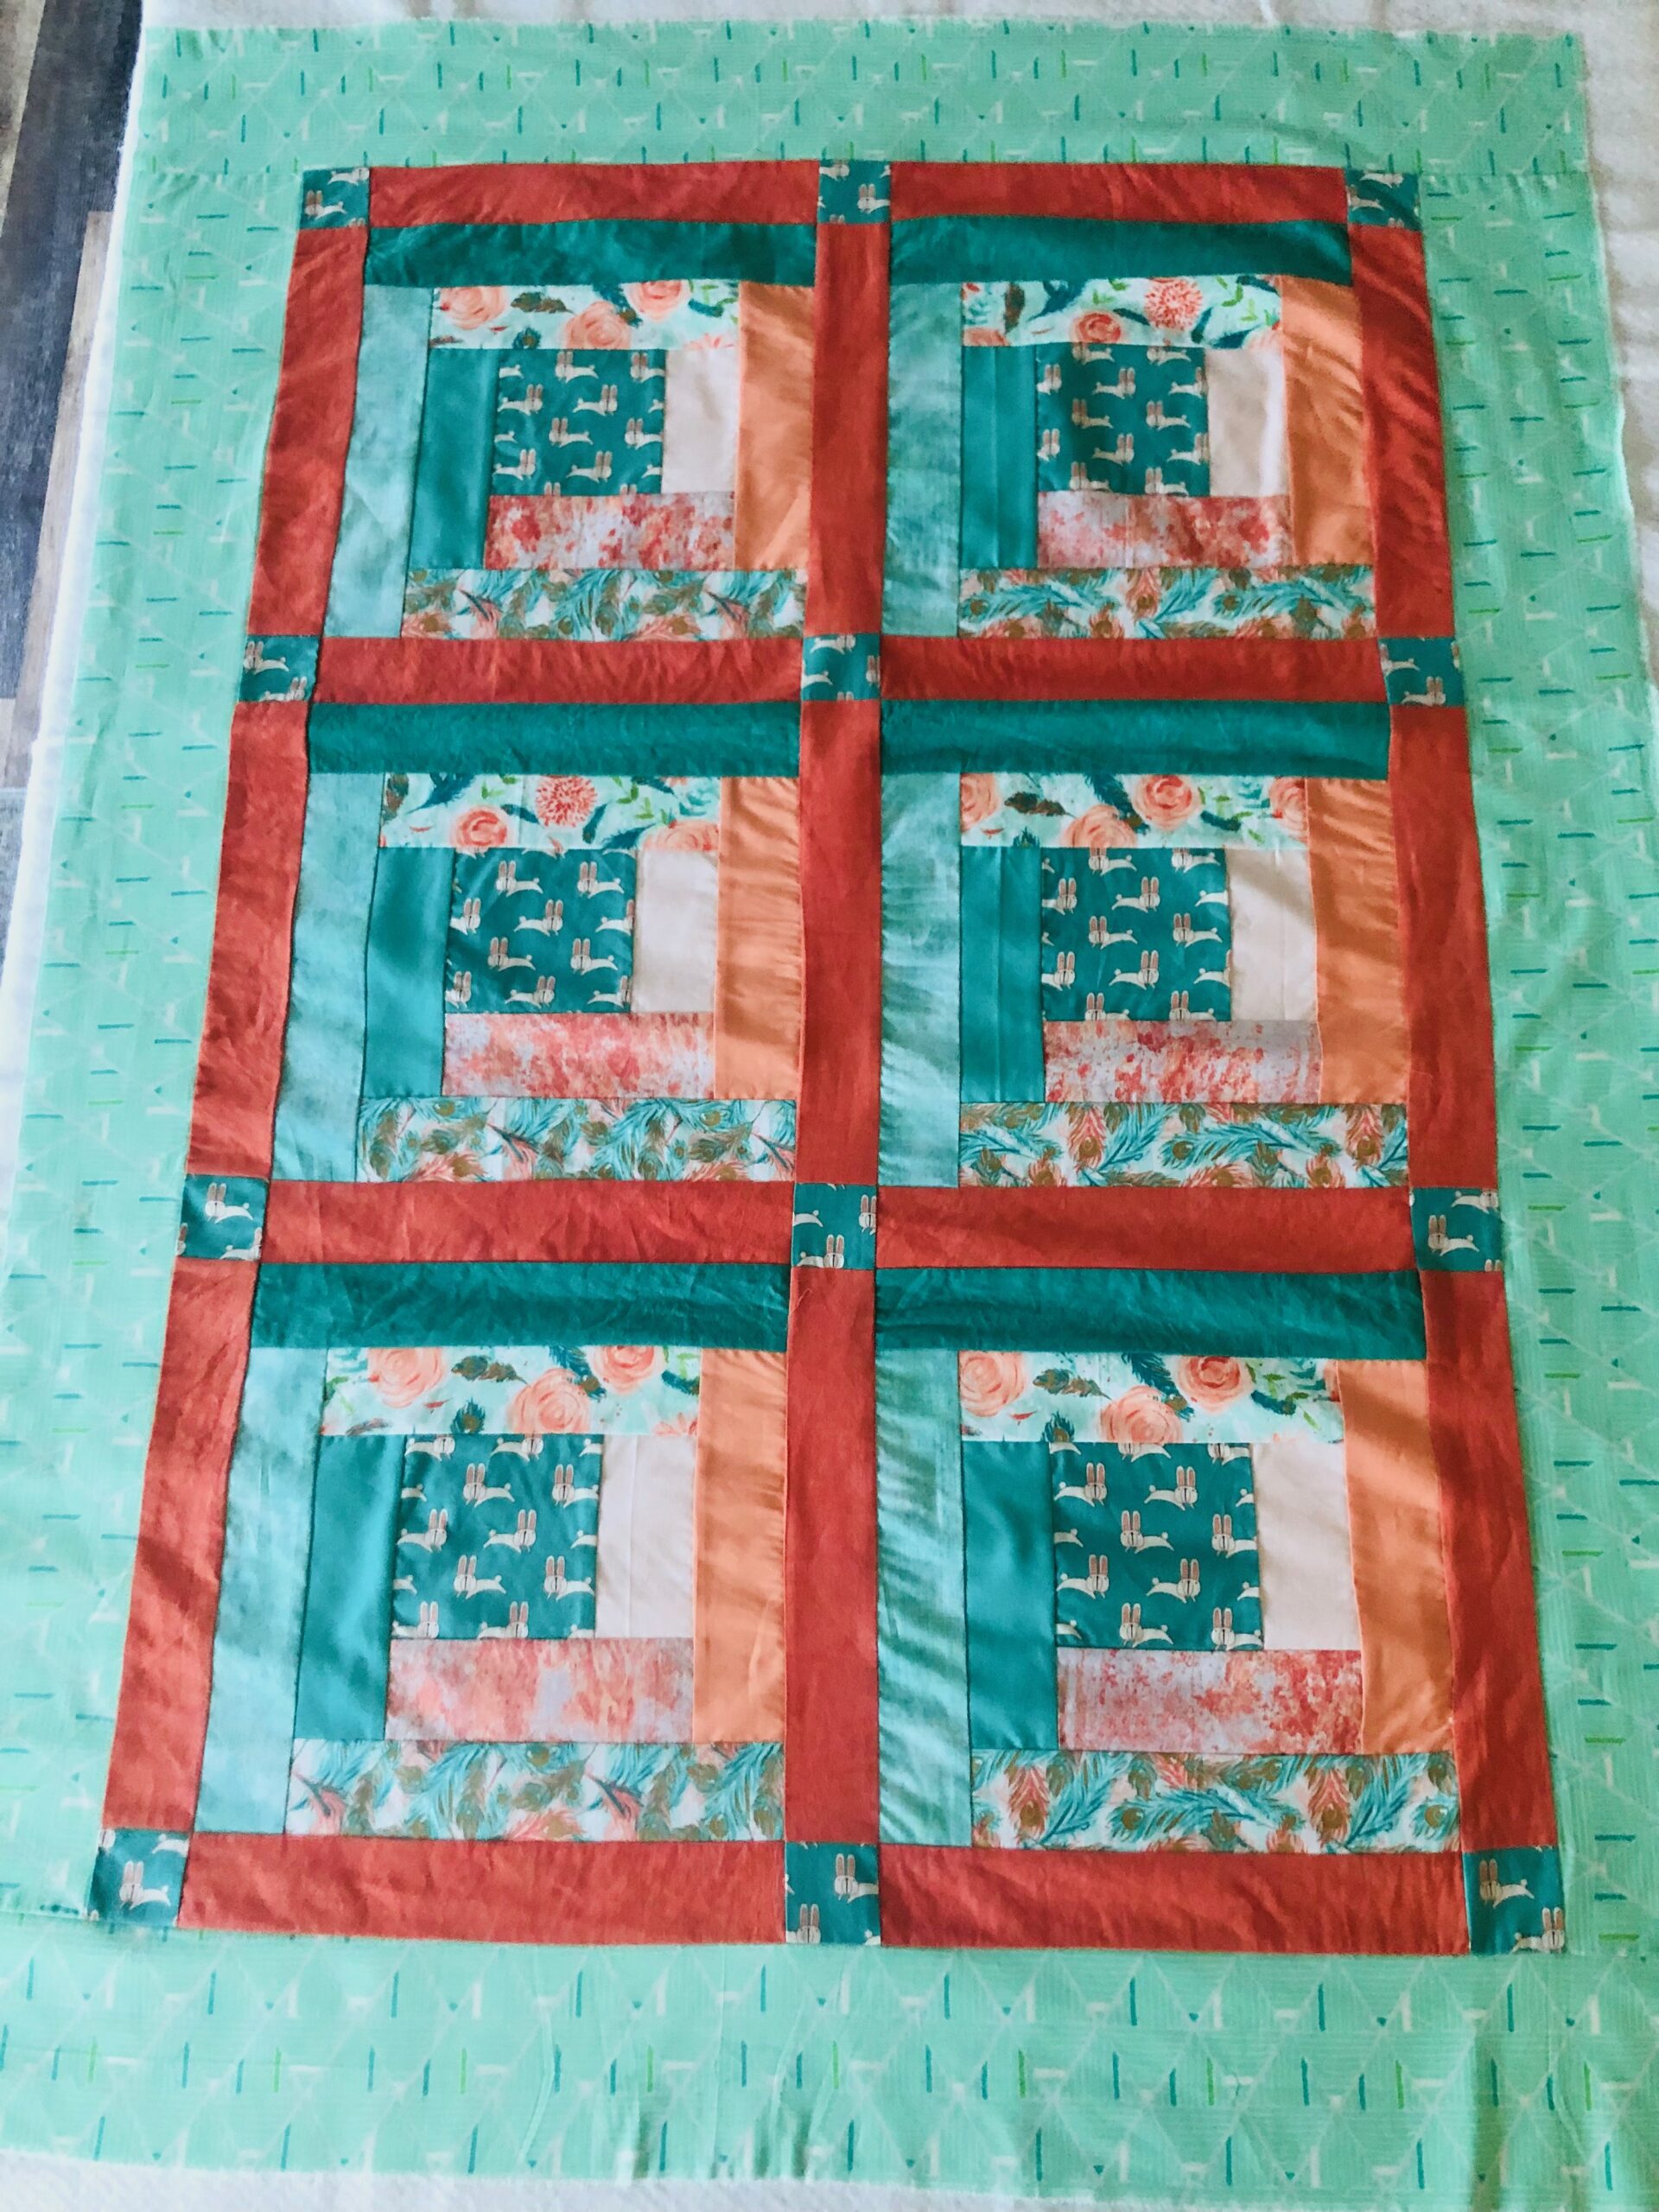
The featured quilt measures 34″ x 48″ and includes six log cabin blocks, sashing, cornerstones and borders. Your ideal “recipe” of these “ingredients” will vary based on the block arrangement and size you desire.
LOG CABINS & JELLY ROLLS
Jelly Rolls are precut fabric bundles in 2 1/2″ strips. So if using a Jelly Roll, you’ll have less cutting to complete before piecing and less guesswork when matching prints and patterns. Typically Jelly Roll bundles are comprised of fabrics from the same collection and designer, often in one colorway or two coordinating colorways, depending on the bundle size. But random Jelly Rolls are also offered, which have a mix of solids and prints or coordinating prints in the same colorway from different designers. Precuts, whether a Jelly Roll, Charm Pack or Layer Cake, are great for quilting newbies who don’t have a large fabric stash to sew from. They’re also great when you have a color story in mind for your quilt but not enough coordinates on hand for the desired size quilt.
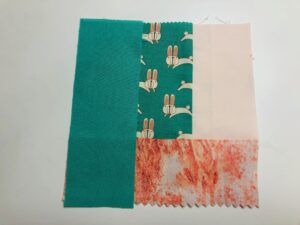
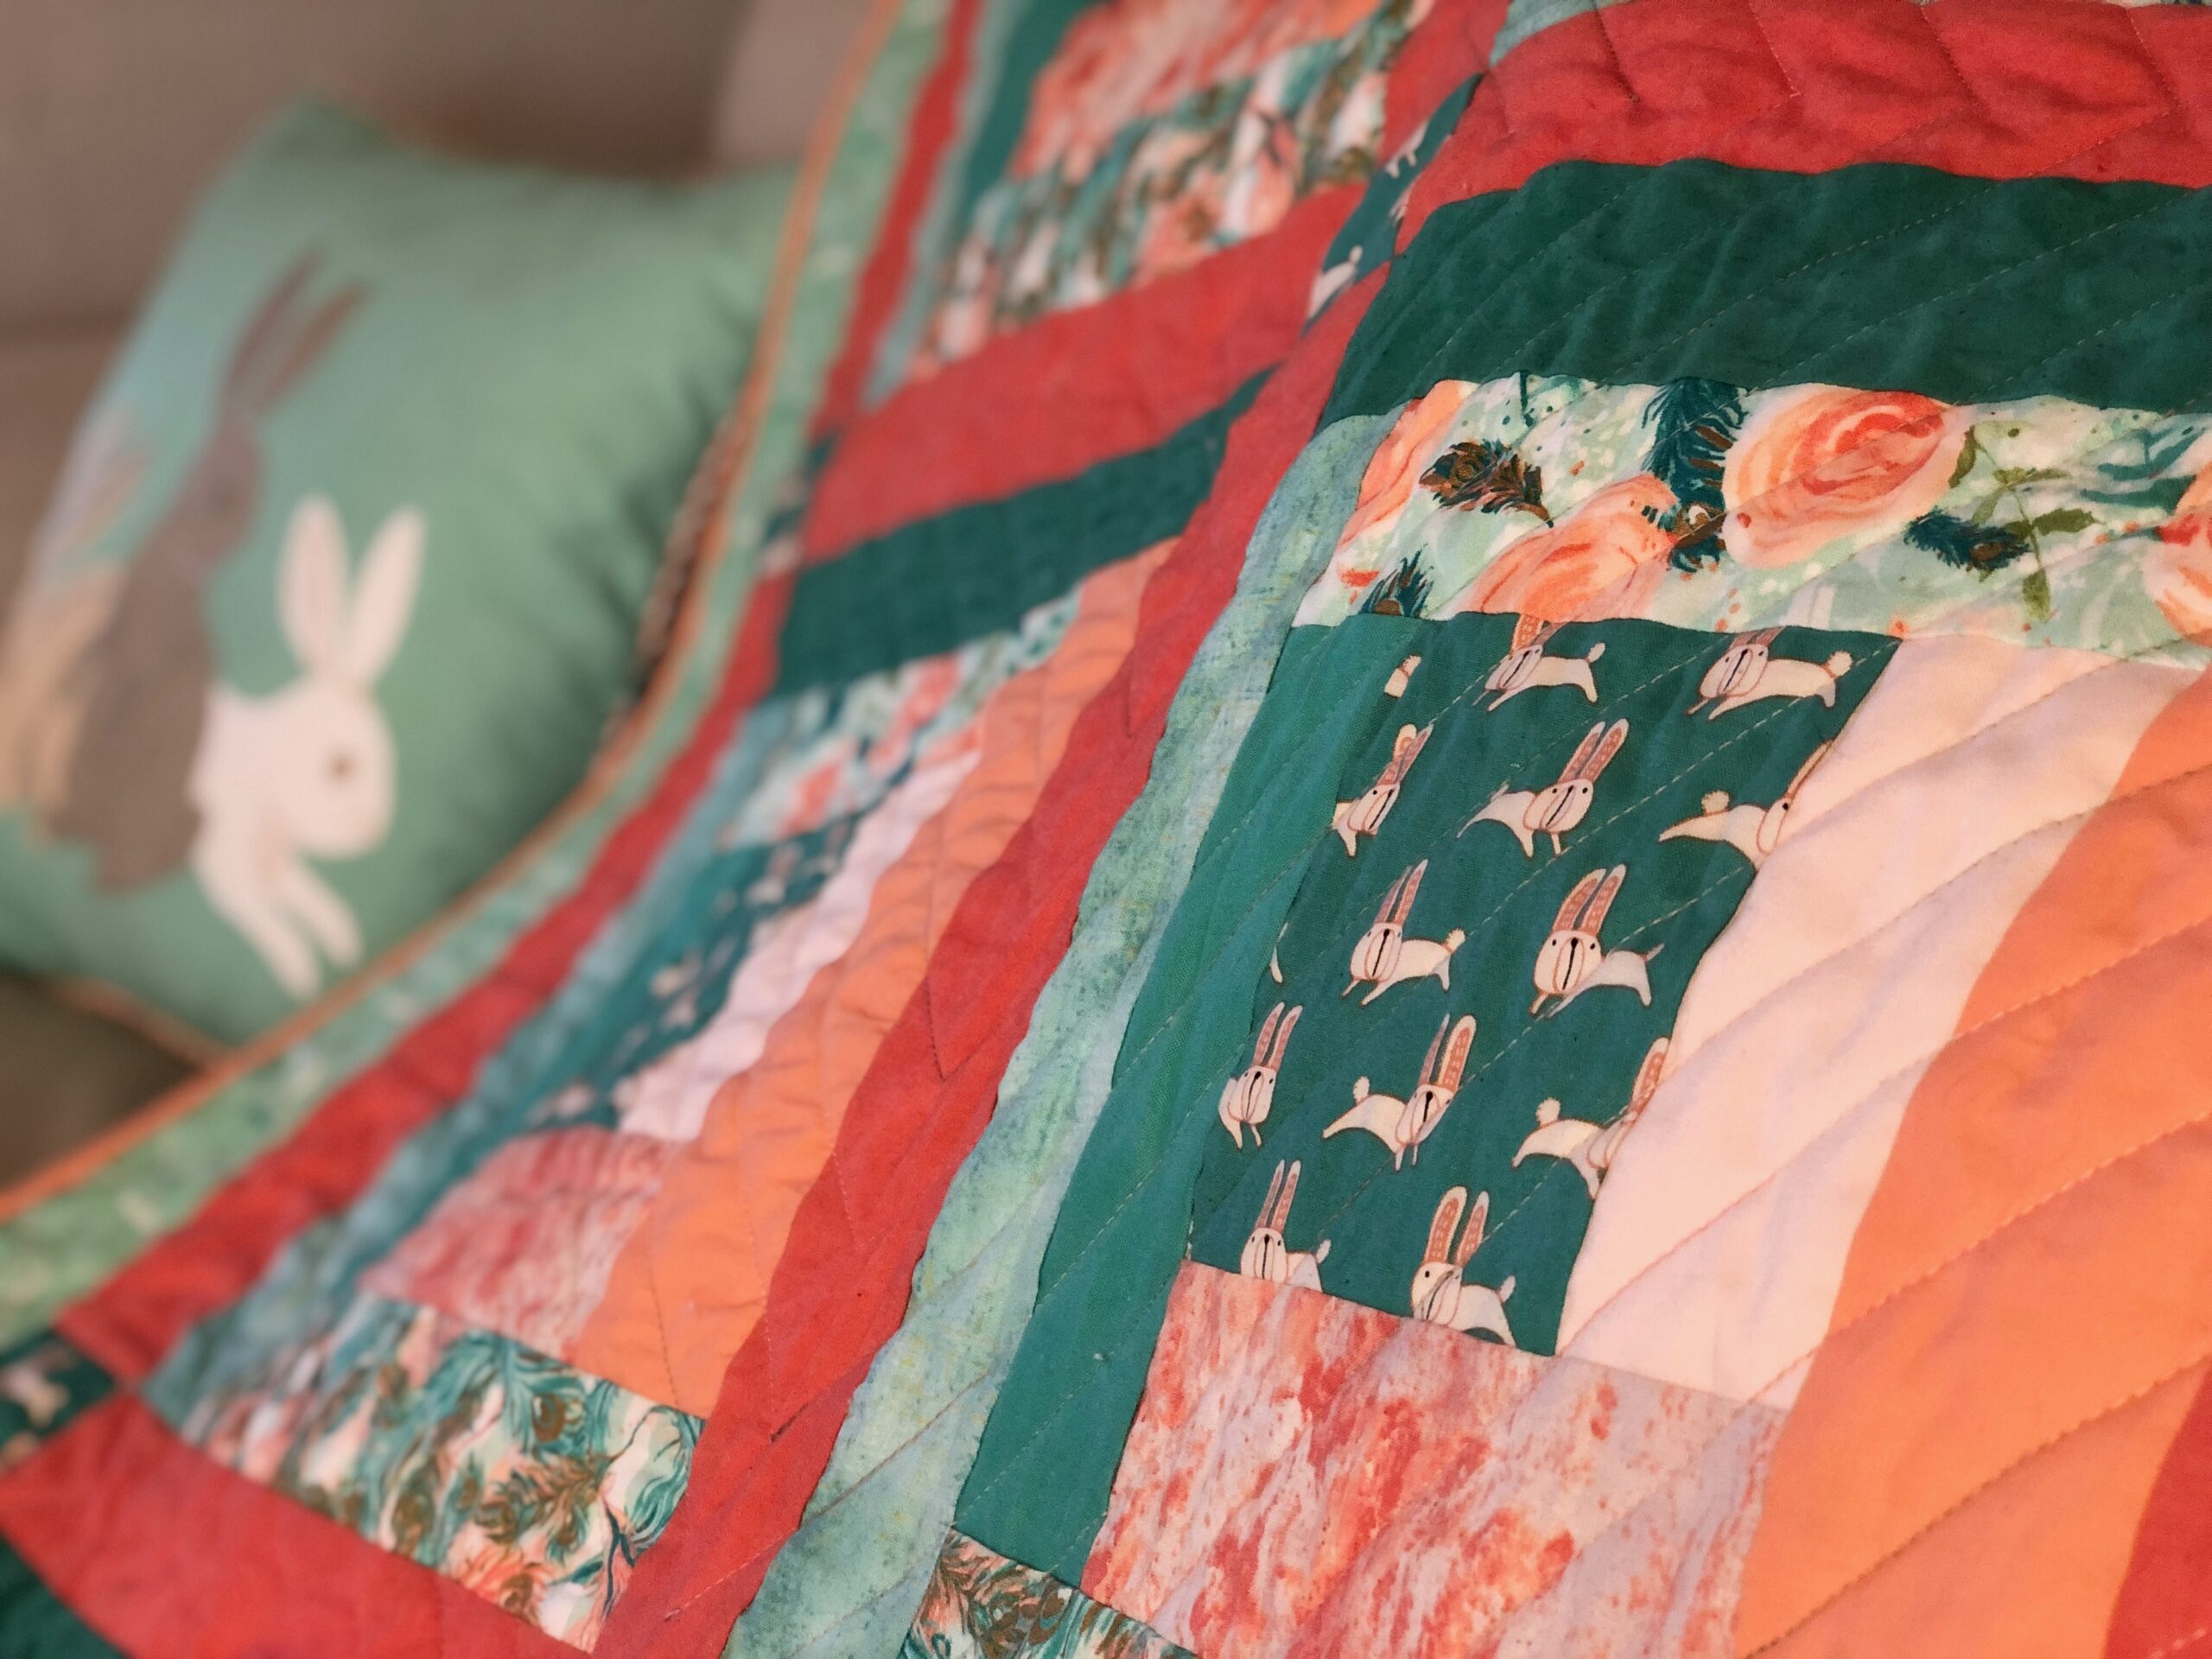
A Log Cabin quilt block begins with a fabric square, and then fabric strips are added to the square often with two sides in a lighter fabric and the opposite sides in a darker fabric. But anything goes, really, so choose fabric strips based on the colors you want to feature in your quilt, the fabrics you have in your stash or the Jelly Roll you’ve chosen (if using).
The size of the center block square is your personal preference and determined by the desired finished quilt size. For ease of construction, the featured quilt below begins with a 5″ Charm Square in the center of each quilt block, surrounded by 2 1/2″-wide Jelly Roll Strips that are trimmed as you go. (Instead of using precuts, you can certainly cut squares and strips of fabric yourself!) Choose a super fun print for the center square to guide your creativity, and then build the log cabin block around it.

FUNNY BUNNY LOG CABIN QUILT SUPPLIES
- Sulky Thread: 50 wt. Cotton (for piecing), 30 wt. Cotton Blendables® (for quilting)
- Piecing fabrics: assorted prints & solids (one 5″ square & eight 2 1/2″-wide fabric strips per block; yardage depends on desired finished quilt size)
- Sashing & cornerstone fabrics (amount depends on desired finished quilt size)
- Border fabric (amount depends on desired finished quilt size)
- Backing & binding fabric (amount depends on desired finished quilt size)
- Organ® Needles Eco-Pack Quilting Assortment
- Sulky KK 2000™ Temporary Spray Adhesive
- Quilt batting (such as Warm & Natural; size depends on desired finished quilt size)
- Optional sewing machine feet: 1/4″ foot, walking or even-feed foot
- Clover Wonder Pins (optional)
- Sulky Sticky Fabri-Solvy™ (optional)
Note: Our Beginner Quilting Kit includes six neutral colors of Sulky 50 wt. Cotton Thread, a 1″ x 6″ Omnigrid ruler, a pack of assorted Quilting Needles and a can of KK 2000, all packaged inside a hard-sided zipper pouch that reads “I {heart} Quilting.” Grab this kit while supplies last!
LOG CABIN BLOCK ASSEMBLY
Use 1/4″ seams.
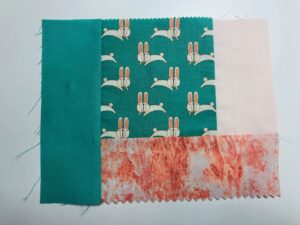
Place one 5″ square right side up on a flat work surface. Plan the placement of each strip by auditioning them around the block until the desired look is achieved. Or decide to randomly place each strip, using different colors, prints and solids for a unique design.
Thread a size 75/11 Quilting Needle with Sulky 50 wt. Cotton Thread that matches or contrasts with the chosen color palette. Then load the bobbin with the same thread. Install a 1/4″ foot, if using. Set the machine for a 2.5mm straight stitch.
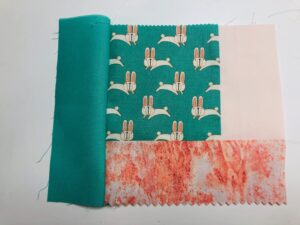
Stitch one strip to one square edge with right sides together. Press the seams toward the darker fabric. If using a directional print for the center fabric square, make sure to orient it to your liking when stitching the strips.

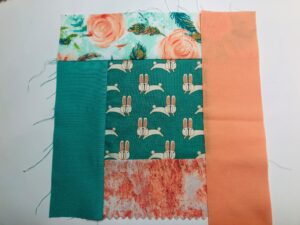
Stitch the next strip to the adjacent square edge. Press the seams toward the darker fabric.

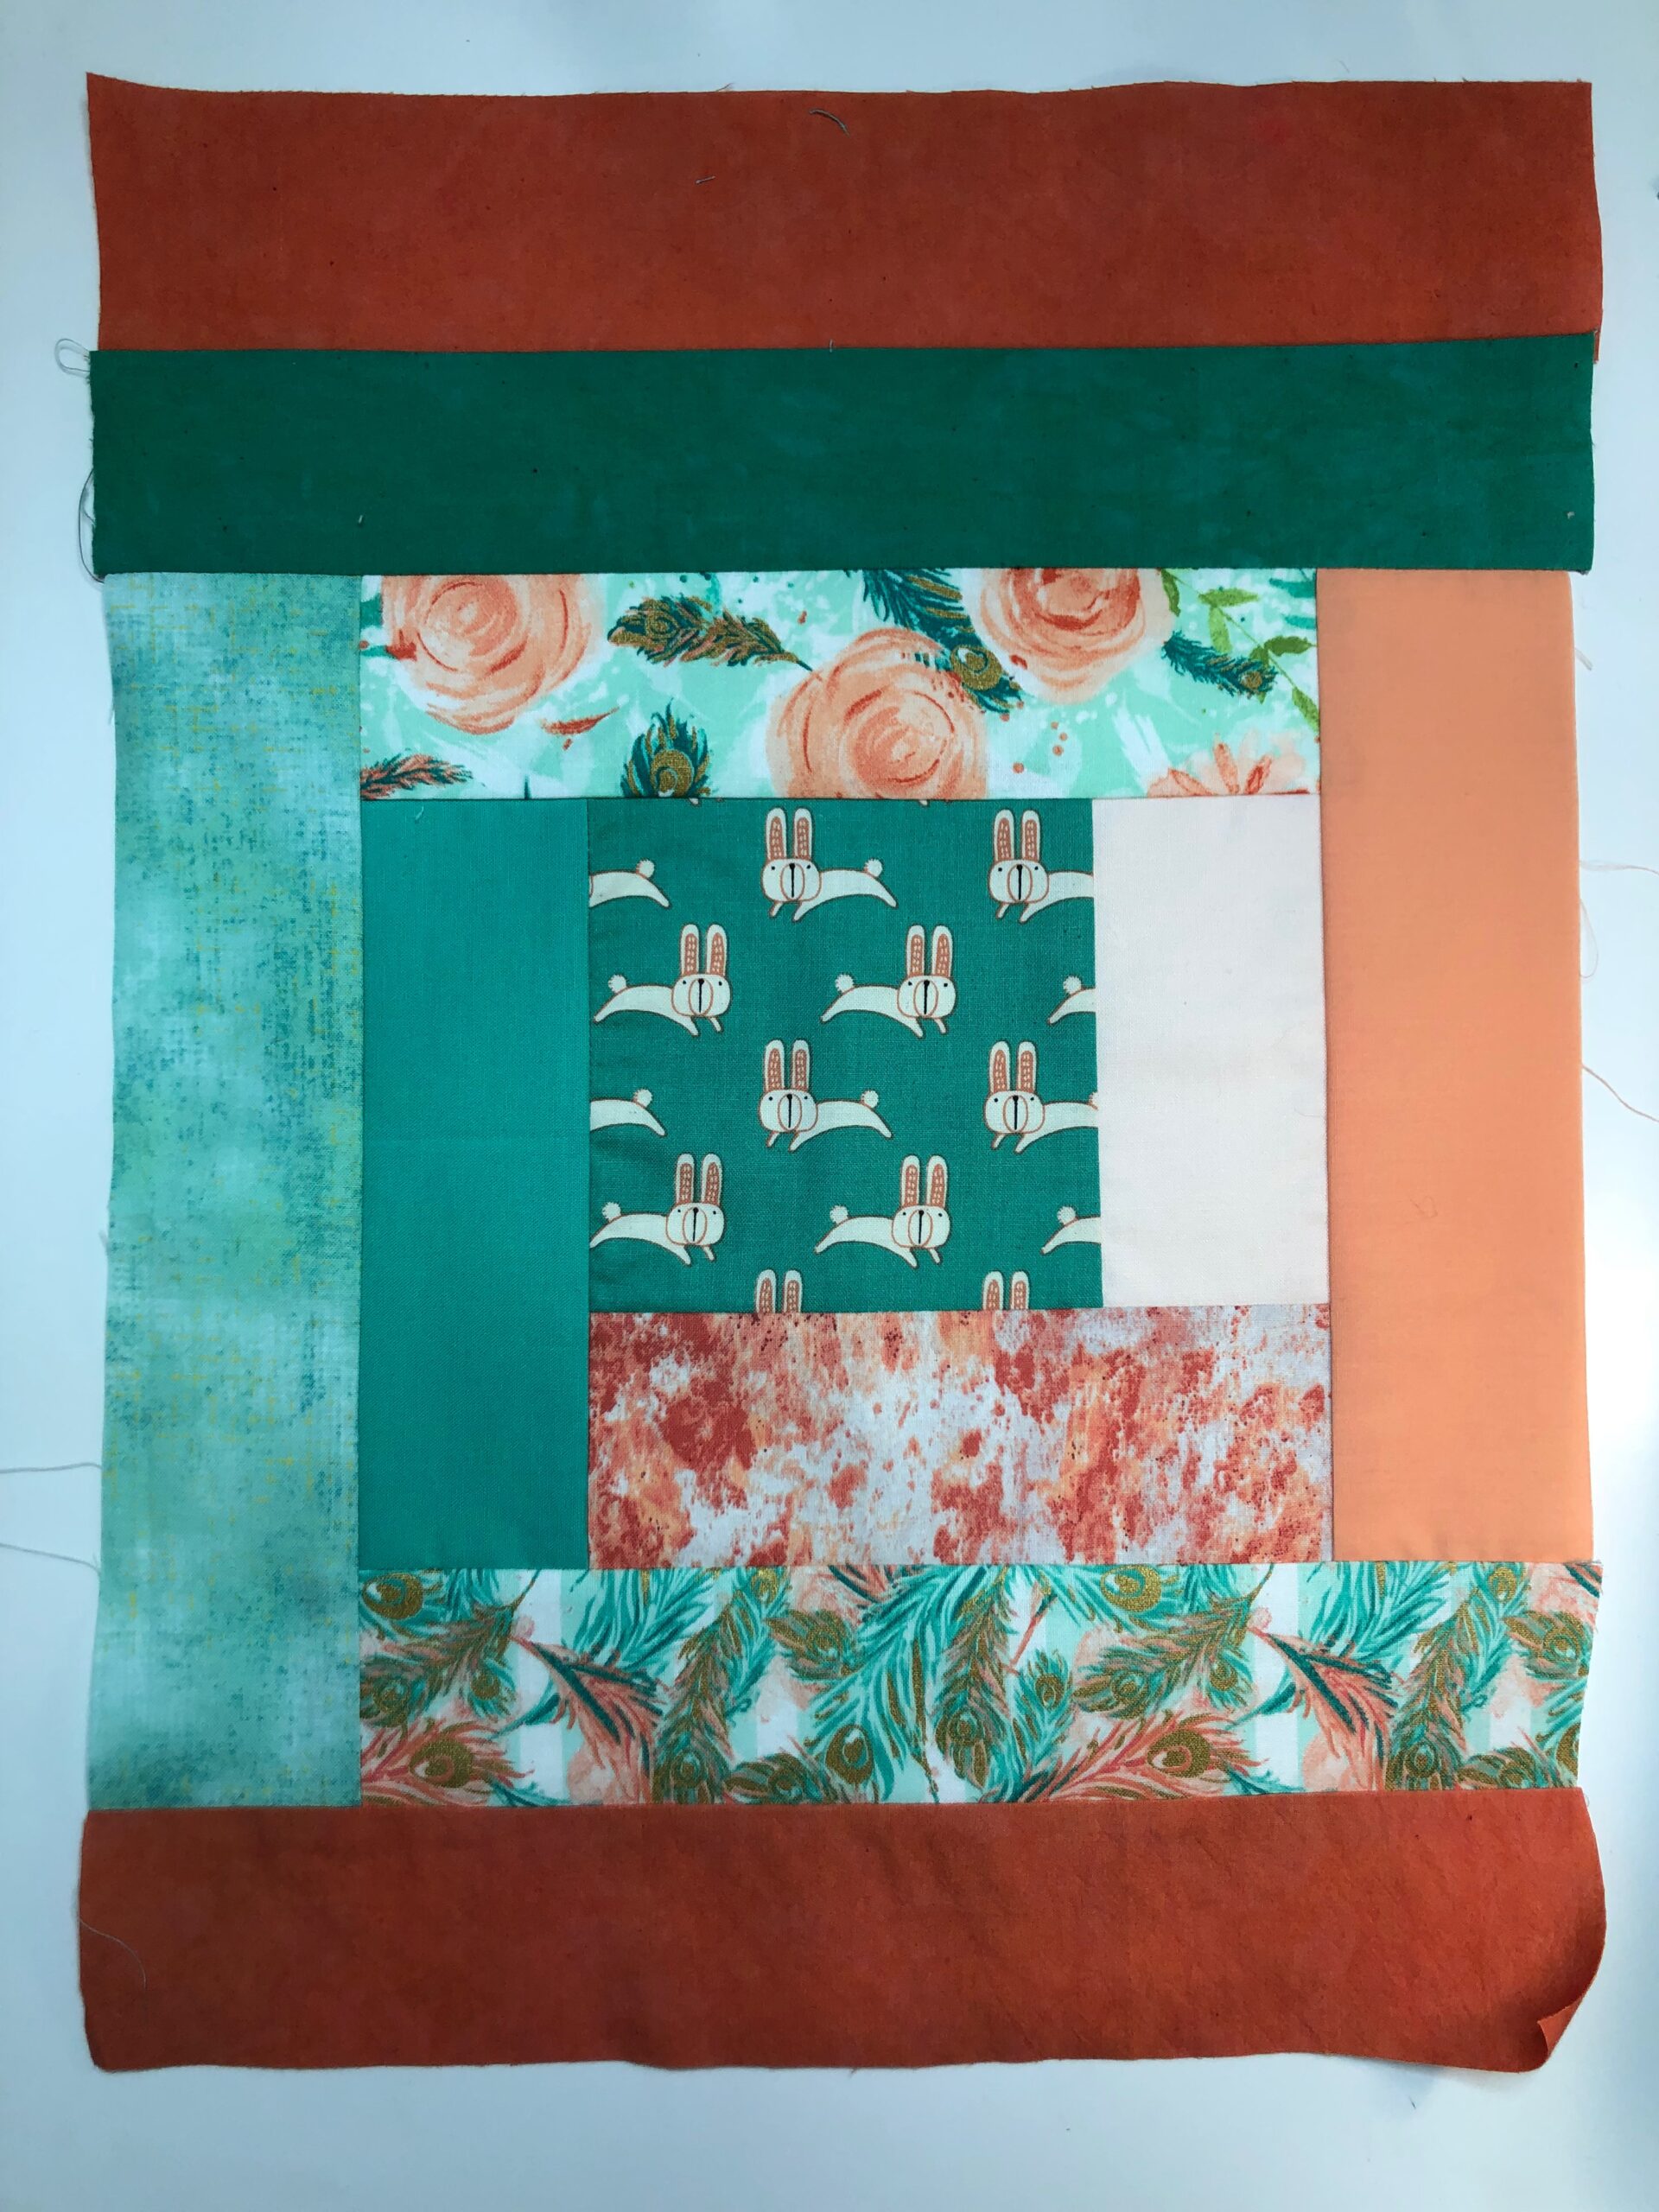
Repeat to stitch 8 strips to form the Log Cabin block. Then, repeat to create six blocks. If desired, create more blocks to create a larger quilt.


Arrange the six quilt blocks on a flat work surface (or quilt wall, if you have one) until the desired design is achieved. Try rotating the blocks to create different looks and/or color pops. Log Cabin blocks can look like stairs or a double helix when pieced together, depending on the arrangement and the fabrics used.

SASHING & CORNERSTONES
Solids work best for sashing, though this is certainly debatable (as is everything in quilting!). Choose the fabric for your sashing strips that speaks to you and the blocks you’ve pieced. Either use Jelly Roll strips (in the same solid or print) for the sashing or cut 2 1/2″-wide strips from yardage. You’ll need enough to border each block side edge to create two rows, and then enough strips to border the rows.
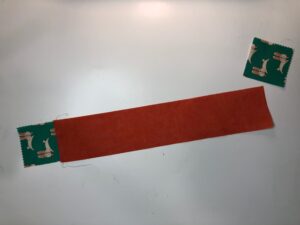
For the cornerstones, it’s nice to tie in another print featured in the Log Cabin blocks. The center block is easiest and, if you’re using 5″ squares, easy enough to cut into four 2 1/2″ squares. The cornerstones are pieced to the row sashing strips to create three long strips. These long strips are pieced to the rows, matching all seams.
QUILT BORDERS
Adding borders is another matter of personal preference. You may love the quilt top as-is, without borders. Or you may want to stretch the length or width (or both) and add wider (or narrower) borders. For your quilt “recipe,” you do you.
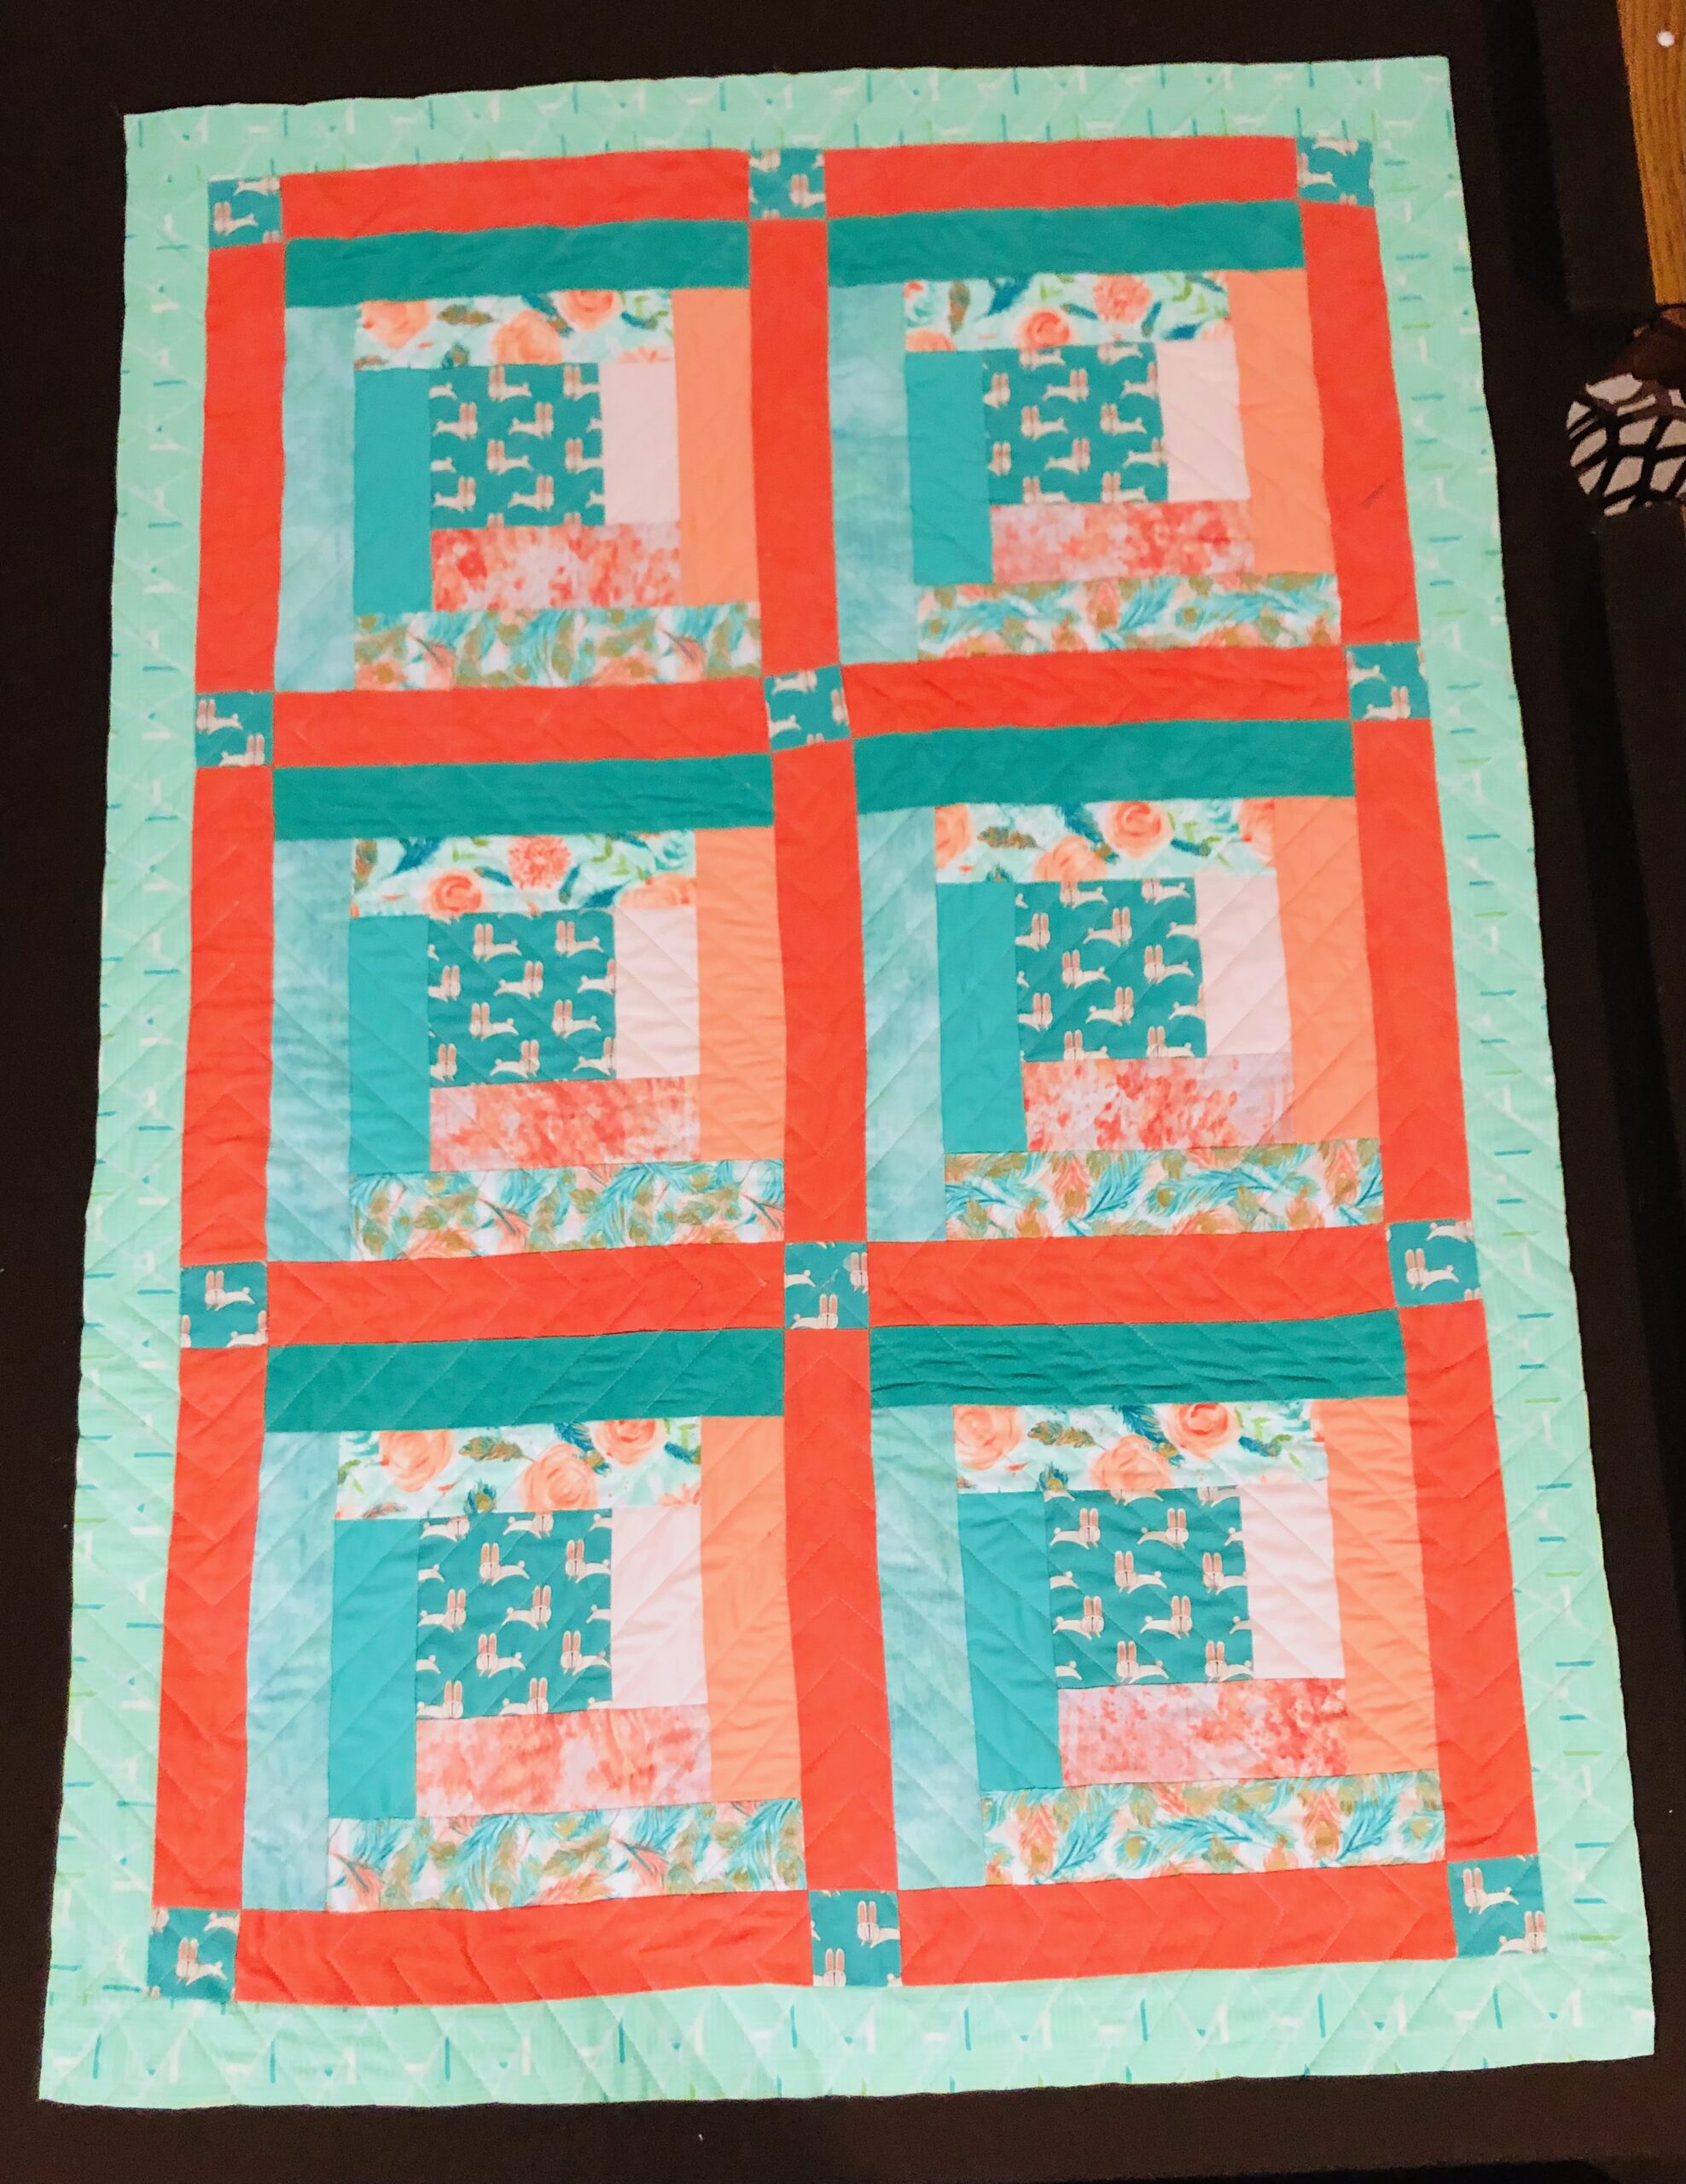
For the featured quilt, two border strips are stitched to the upper and lower edges, and then two border strips are stitched to the sides. I usually like borders that are twice the width of the sashing strips, in this case 5″-wide. But, once I sewed them to the quilt the balance was off.
So, I trimmed them to 2 1/2″-wide after quilting and I preferred the result.
Choose the border width based on your preference. You’re the designer!
After stitching the borders, or choosing to omit them, it’s time to create the quilt sandwich.
QUILT SANDWICH
Place the backing fabric wrong side up on a flat work surface. If needed, piece the backing fabric to achieve the needed dimension. The backing fabric should be at least 4″ wider than the quilt top on all sides to allow for quilting.
Spray the backing wrong side with KK 2000 Temporary Spray Adhesive. Then, center the batting over the backing, smoothing gently to remove any wrinkles or puckers.
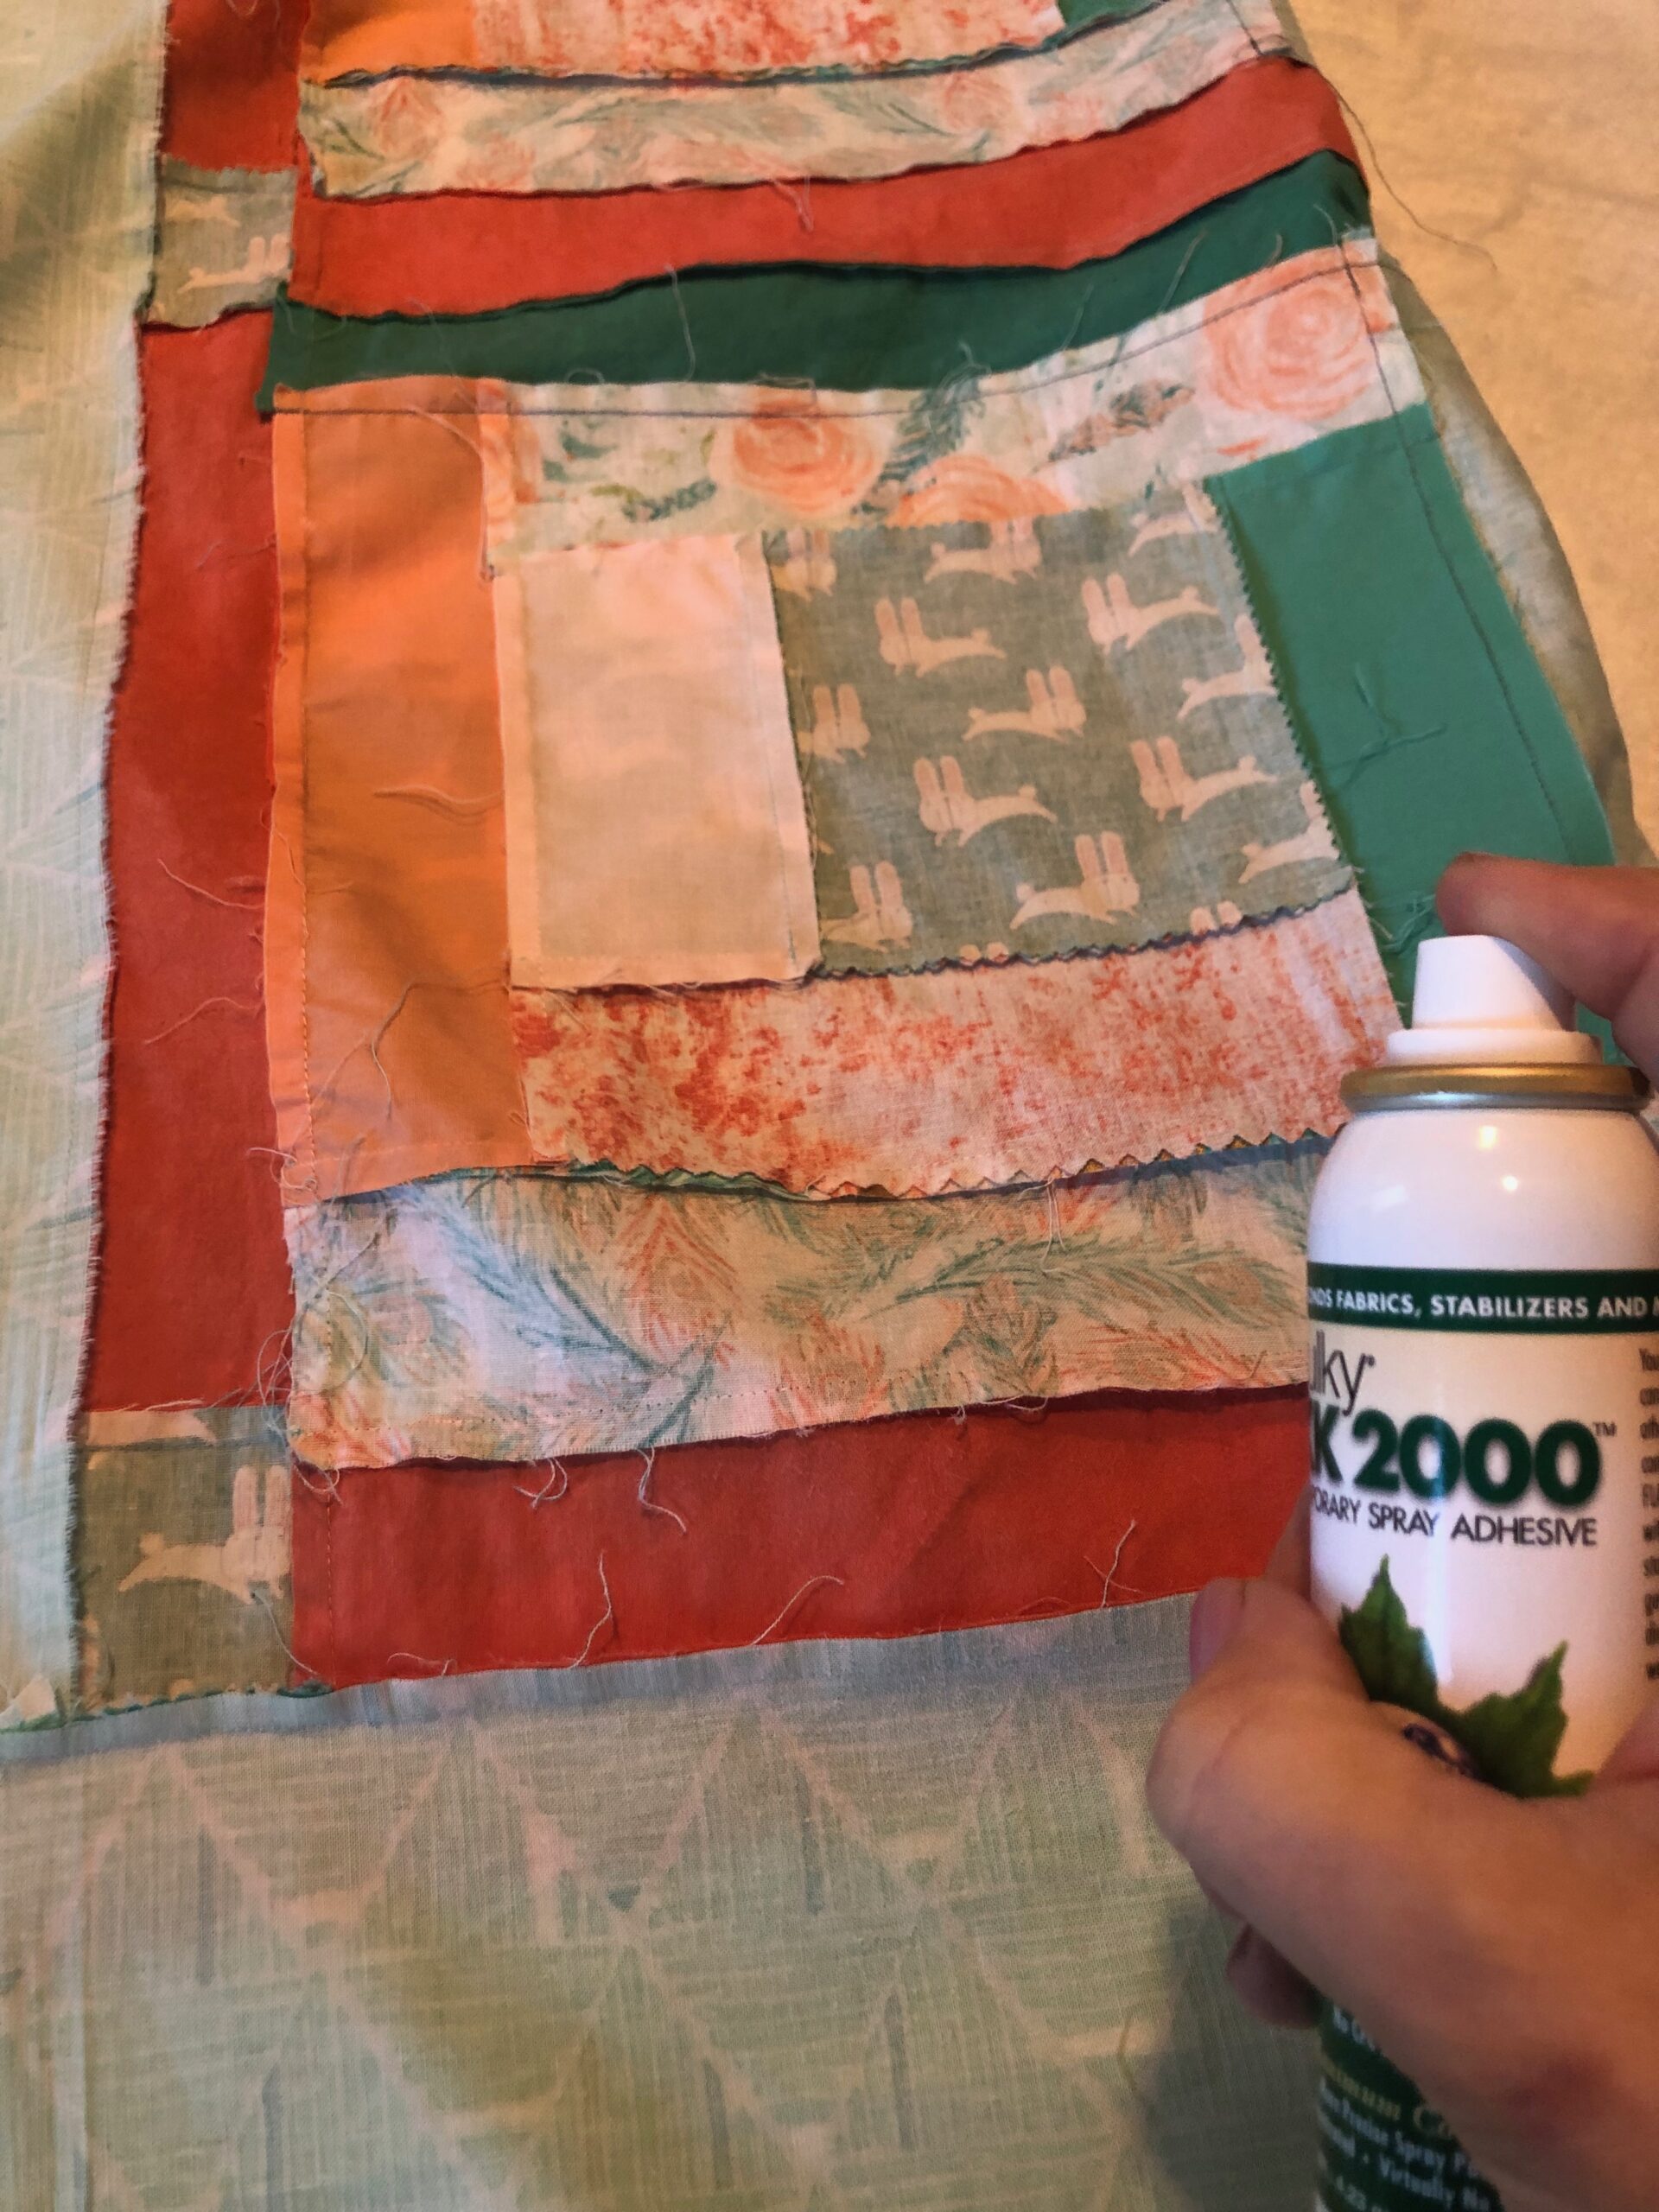
Spray the batting and quilt-top wrong side with more KK 2000. Center the quilt top on the batting, smoothing gently to remove any wrinkles or puckers.
Pin through all layers every 5″ to 8″ across the quilt top for extra security, if desired. The spray adhesive is air-soluble, so it dissipates within 48-72 hours. If it takes longer to quilt the quilt, you’ll want pins to ensure nothing shifts. Clover Wonder Pins are great for securing quilt layers without having to lift the quilt or move it. Simply insert the pin through the quilt sandwich, and then the curved pin travels to the quilt top. Then secure the pin by pressing down toward the quilt in one motion.
QUILTING THREAD
The amount of quilting stitches and where and how to quilt your quilt is another choice you get to make as the designer. Because we are taking it nice and slow, don’t feel the need to challenge yourself right off the bat with free-motion techniques or elaborate design details. Straight-line quilting, which is evenly spaced stitching rows across the quilt, is a simpler approach that still yields an impressive result.
Sulky 30 wt. Cotton Thread is a nice choice for quilting. The thicker thread ensures the quilting stitches are a prominent feature in the finished design. Plus, 30 wt. Cotton Thread also comes in a Blendables® variety, allowing you to incorporate more color into the quilt without switching thread spools midway through your process.

When quilting with 30 wt. Cotton Thread, install a size 90/14 Quilting Needle. Use either the same thread in the bobbin or a thinner thread, like the 50 wt. Cotton used for piecing. This thread is seen on the quilt back, so it’s up to you whether you want to really see it or have it blend into the fabric.
QUILTING TECHNIQUE
Install a walking or even-feed foot, if possible. This ensures the quilt layers will feed through the machine at the same rate, reducing slippage and shifting. If you only own a standard presser foot, you may find it helpful to raise the presser foot to accommodate the quilt layers. Test stitch on a small quilt sandwich made of scraps. If the layers bunch under the presser foot, raise it and try again until the layers feed evenly.
Begin in the center of the quilt. Roll up the quilt edges to keep them out of the way of the stitching path (this also gives you something to grip during quilting).
Stitch in the ditch of each sashing strip, working in the centermost point and out toward the quilt edge. Then rotate the quilt 180 degrees, place the needle in the same center point, and stitch to the opposite edge. Continue stitching in the ditch of each seam, or straight-line quilt equidistant lines across the quilt as desired.
TIP: Nervous about stitching straight lines? Cut strips of Sulky Sticky Fabri-Solvy™ and place them on the quilt right side like stickers. Cut the strips the desired width of the quilting stitches. Stitch on either side of each strip along the quilt. Then, remove the strips when quilting is complete. If you happen to stitch over some of the strips, simply moisten them along the stitching to lift the off the quilt without damage.

When quilting is complete, trim the backing and batting even with the quilt top.
BINDING & FINISHING
Create your own binding using 2 1/2″-wide fabric strips. A fun way to add a scrappy binding is by using any leftover strips from the Jelly Roll, if applicable. Or choose a solid or print of your choice for a binding that’s all one color/pattern. If not using the jelly Roll strips, cut fabric strips on the bias, which is at a 45 degree angle from the selvage edge, to have a bit of stretch and aid in mitering the corners. Or, cut the strips on the straight or cross grain. (Bias-cut binding is only really necessary when the quilt corners are rounded, as the bias edge will stretch to fit without distorting the quilt.)
Stitch the strips together along the short ends, with right sides facing. Stitching the ends together at a 45 degree angle is more inconspicuous and pleasing to the eye. Just remember to account for seam allowances. (Click on “DIY Binding Technique” below for step-by-step photos of this.) Then, fold the resulting long strip in half lengthwise; press. Use this folded strip to bind the quilt. The strip length needed depends on the quilt circumference, plus about 10″ to 12″ extra to account for either overlapping or piecing the ends together where they meet.

Many quilt patterns state to “bind in the manner of your choice,” because again this is a matter of personal preference. But many beginners are frustrated by this directive. We have a few binding tutorials you can choose from to finish your first quilt like a pro.
Proudly display your Log Cabin quilt or gift it away and make many, many more!

Beautiful
Thank you!
Really enjoyed today’s Sew What with Ellen. Thanks! I don’t find the price for the kit here. Where can I find it?
Thanks! Which kit are you referring to?