Machine Embroidery Fonts + Wall Art Project
Fun with Machine Embroidery Fonts
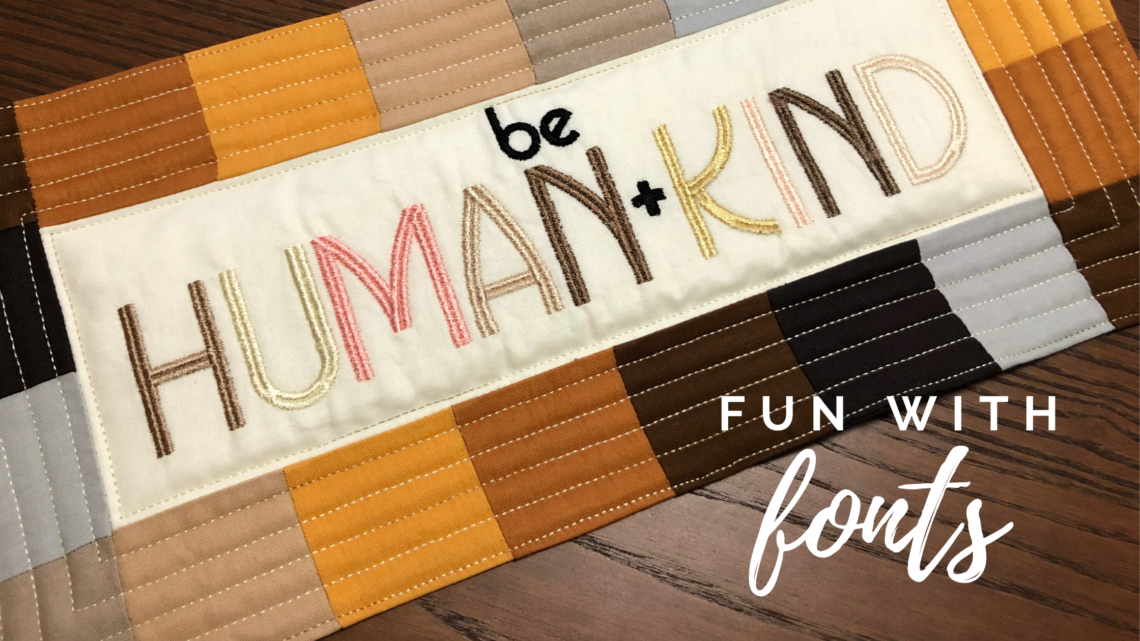
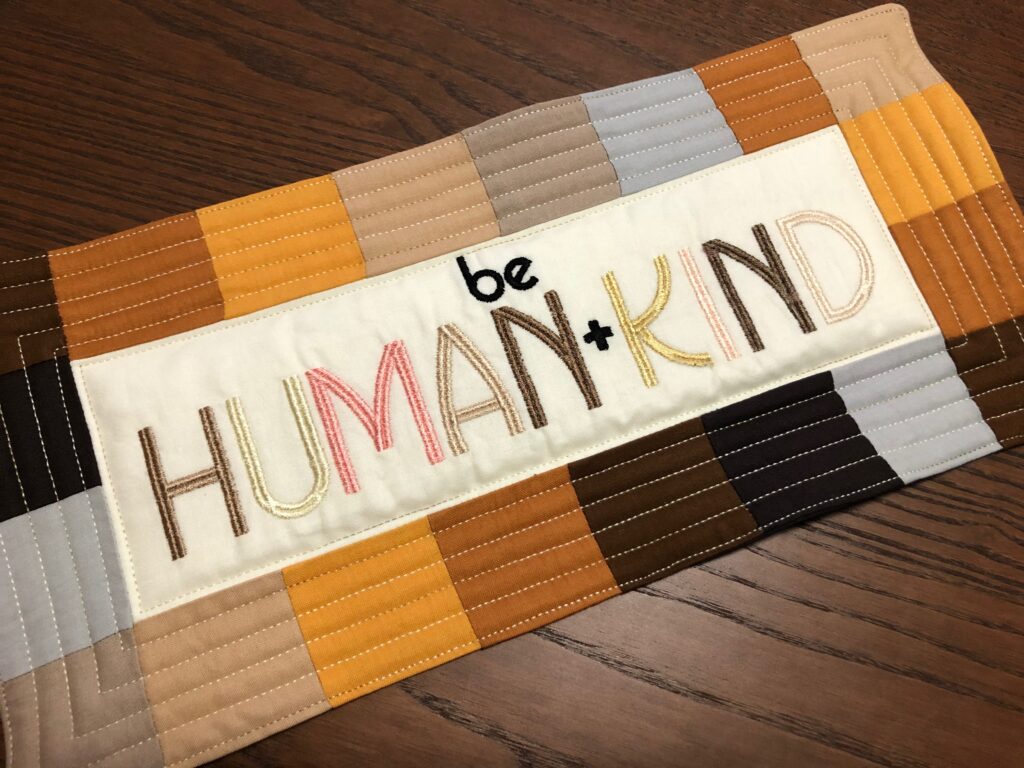
Lettering designs are some of the most fun machine embroidery designs out there because you truly have the freedom to personalize any creation with a name, monogram or phrase. Scroll through the built-in fonts on your machine or find fun machine embroidery fonts online to play with and create hanging wall art for any occasion or season.
SUPPLIES
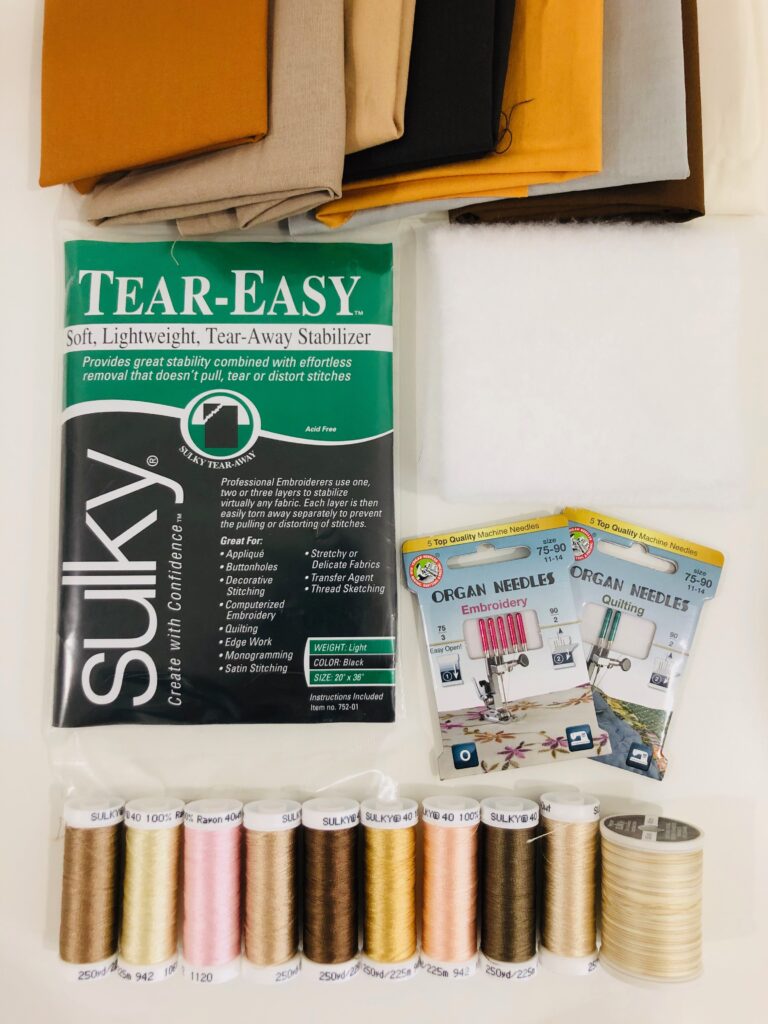
- Sulky 40 wt. Rayon thread (featured colors from Flesh-tone Collection)
- Bobbin thread (white or black, depending on the upper thread color and/or fabric color)
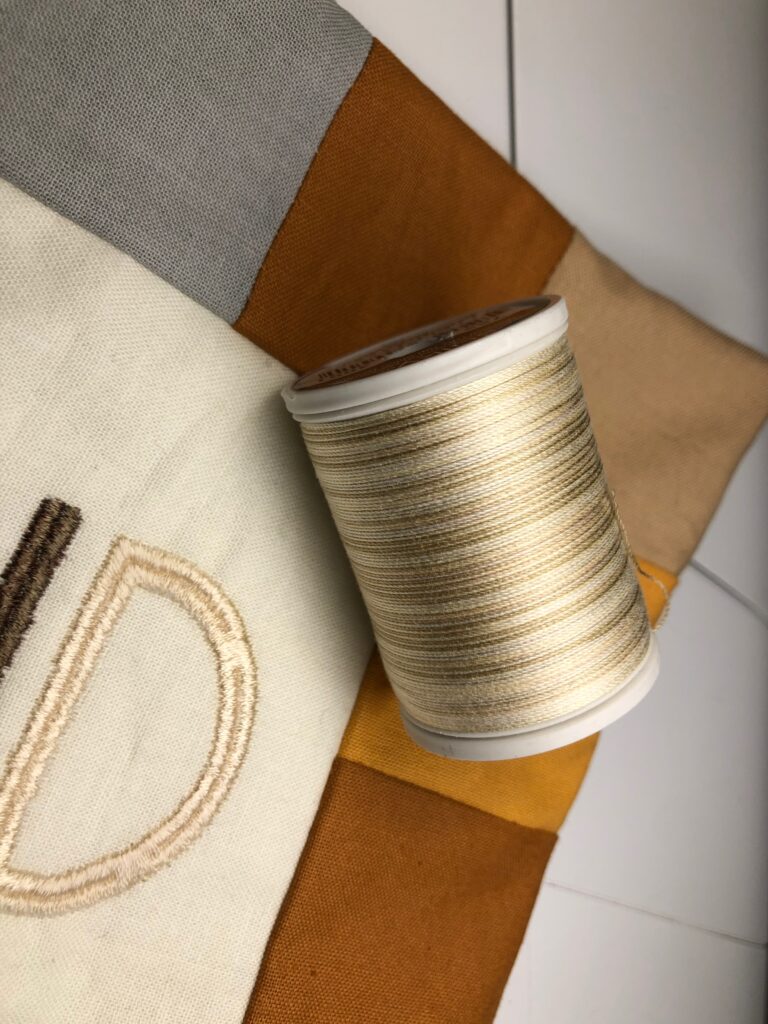
- Sulky 30 wt. cotton Blendables (featured color: Parchment)
- Sulky stabilizers: Sticky Fabri-Solvy™ & Tear-Easy™
- Two 5″ x 14″ rectangles of quilting-cotton fabric (for embroidery & backing; use a larger piece to hoop the entire fabric, and then cut to size if desired)
- Organ needles: size 90/14 Embroidery & Quilting or Top Stitch
- Various fabric scraps (border strips)
- 5″ x 14″ rectangle of quilt batting
- Sulky KK 2000 Temporary Spray Adhesive (optional)
MACHINE EMBROIDERY FONTS
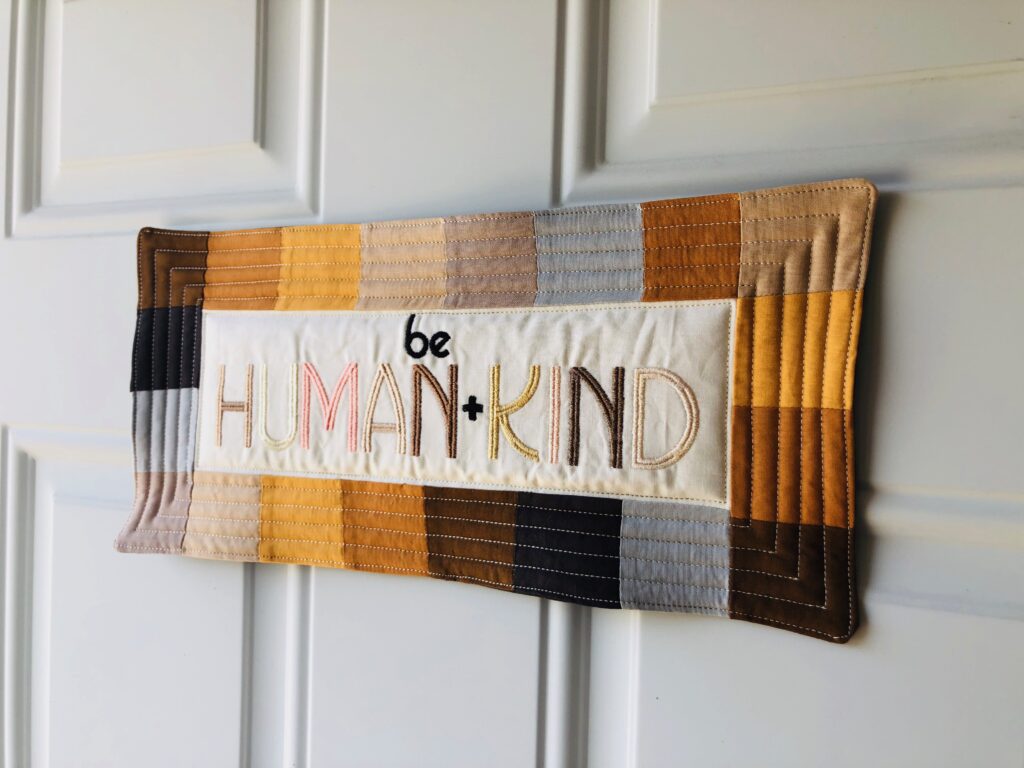
Using machine embroidery fonts is a fun way to personalize your handmade creations. However, spacing letters to create words oftentimes requires the use of software to ensure the resulting word looks pleasing to the eye. Spacing letters equidistantly doesn’t always work, depending on the font and the word you’re spelling. You may have to adjust the spacing to account for swirls or other design elements, depending on the chosen font. Using software is optional, and a lot of adjustments can also be made on the machine screen. However, if you do have software, it’s a good idea to adjust and tweak the spacing until the word looks the way you want it to. Plus, you can assign a different color to each letter, as shown in the finished sample, as well as combine letters into one design, such as “be” in the featured project.
For the featured phrase, and with the use of Creative DRAWings X, the hoop was rotated 90° to allow the phrase to run horizontally rather than stacked. Your machine screen may allow for this, as well. Using software, the design elements could be resized beyond the parameters of the machine screen, if needed. Conversely, without software the letters could only size up or down by 20%, and stitch distortion or density may result.
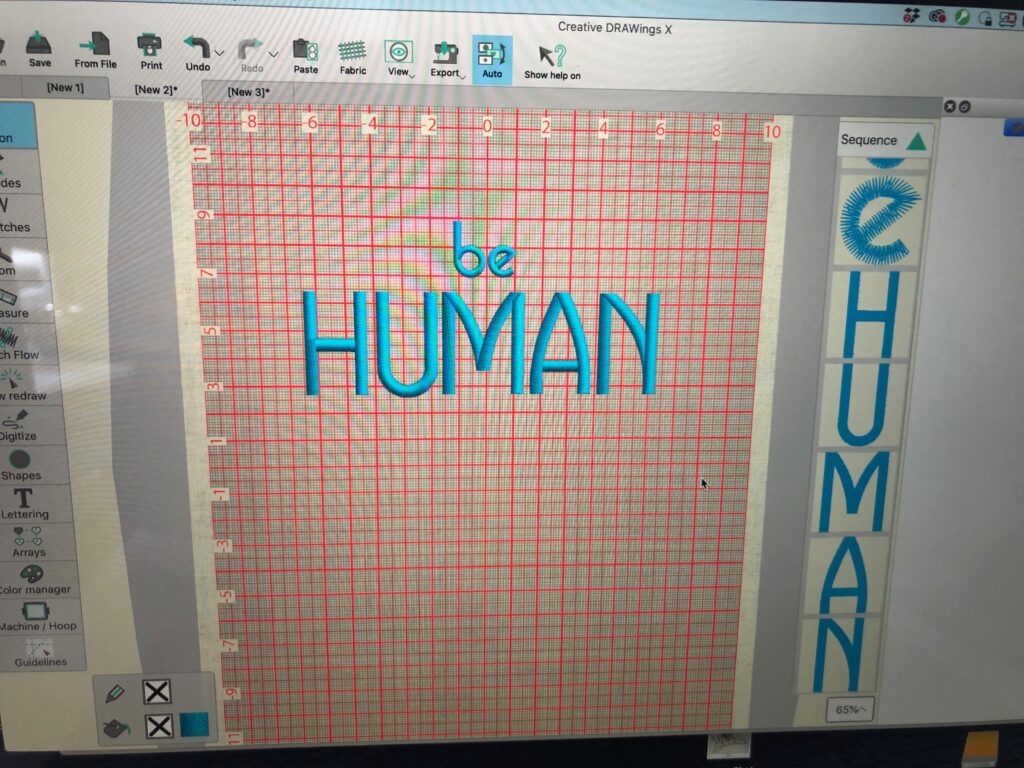
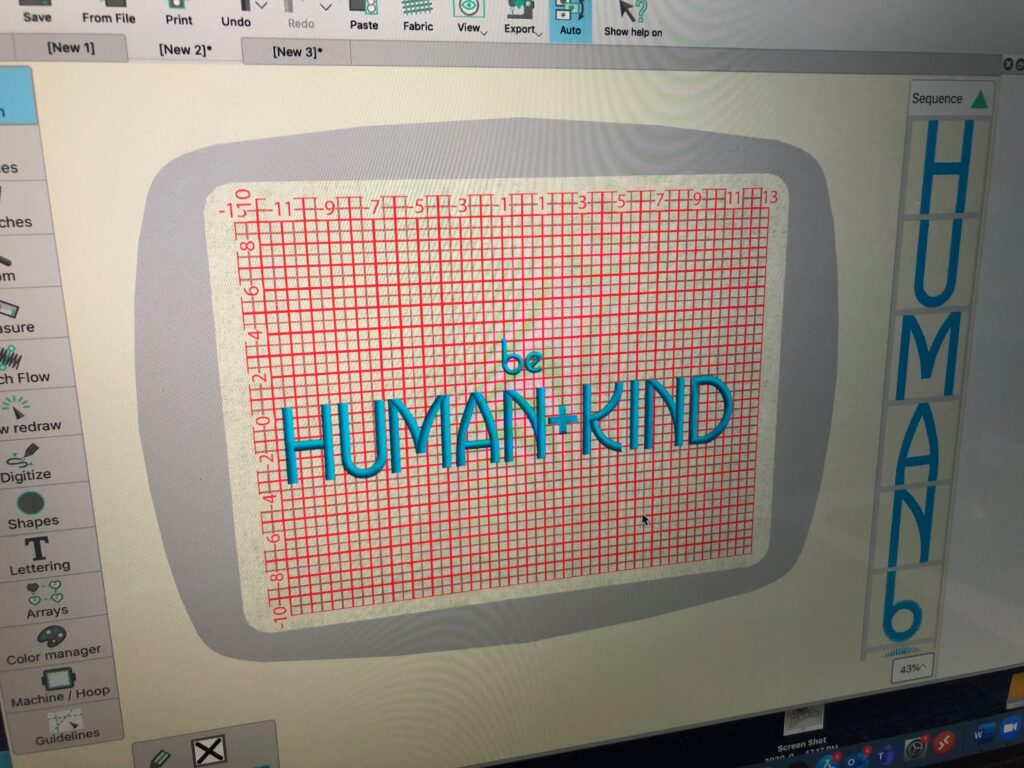
Choose a font that is approximately 2″ tall. The featured Drake font from Designs by Juju comes in various sizes, allowing you to add smaller letters to the larger words to create different phrases with a different emphasis for different words. For example, the 1″ font was used for the word “be,” and the 2″ font was used for the words HUMAN and KIND.
Decide on the phrase you’d like to feature in your wall art and either combine letters on the machine screen or in software until satisfied with the placement. Export your finished design in the desired machine format and transfer to your machine.
STABILIZING FOR MACHINE EMBROIDERY
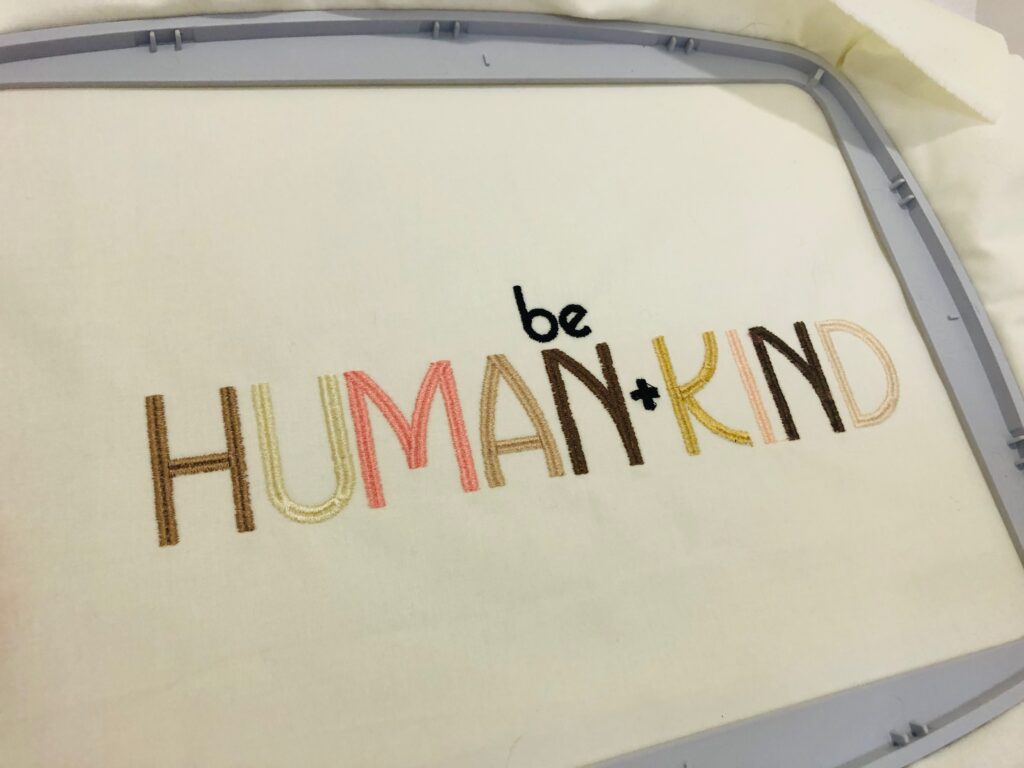
Quilting cotton needs at least one layer of Sulky Tear-Easy for the machine embroidery fonts design. If embroidering a rectangle that’s smaller than the hoop, place Sulky Sticky Fabri-Solvy in the hoop, with the paper side facing up. Score the paper within the hoop ring, and then remove the paper to reveal the adhesive.
Be sure to mark the fabric rectangle to denote the desired design center horizontal and vertical axis.
Position the fabric rectangle on the hooped stabilizer. Then center the marked fabric center within the hoop, using the hoop markings as a guide. Use your hand to gently adhere the fabric to the sticky stabilizer.
Float a piece of Sulky Tear-Easy beneath the hoop for extra stabilization.
EMBROIDERY FOR WALL ART
If using a fabric rectangle large enough to hoop, apply a rectangle of Sulky Sticky Fabri-Solvy to the fabric wrong side. Hoop the fabric with a layer of Tear-Easy.
Place the hoop onto the machine. Check the center needle placement to ensure the phrase will stitch as intended. If desired, and for additional placement confidence, use the perimeter basting function to outline the design perimeter with stitches.
Once satisfied, embroider the design, clipping jump threads with each color change. For the featured machine embroidery fonts, the bobbin thread was changed from white to black depending on the upper thread color.
Remove the fabric from the hoop. Gently tear away the Tear-Easy from the design perimeter. Rinse to remove the Sticky Fabri-Solvy completely. Roll the fabric in a towel to remove excess moisture. Lay flat to dry, and then press fro the wrong side.
WALL ART WITH MACHINE EMBROIDERY FONTS
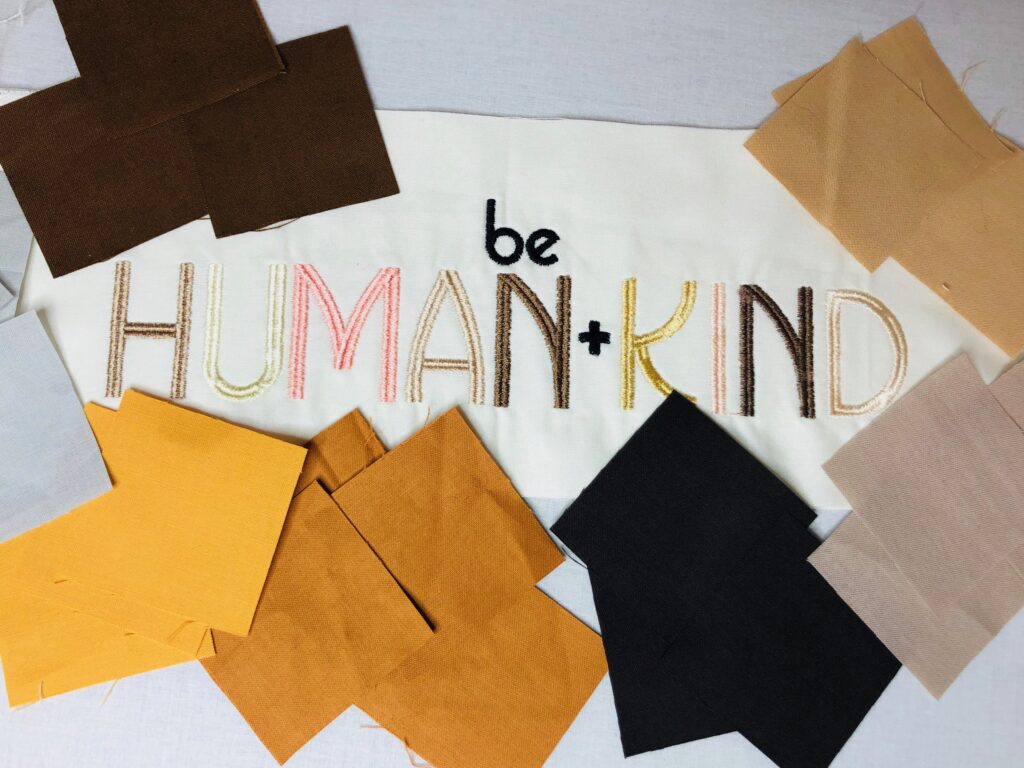
Trim the embroidered fabric even. (If your phrase is shorter, change the dimensions to fit your machine embroidery font, leaving 3/4″ of fabric beyond the phrase perimeter.)
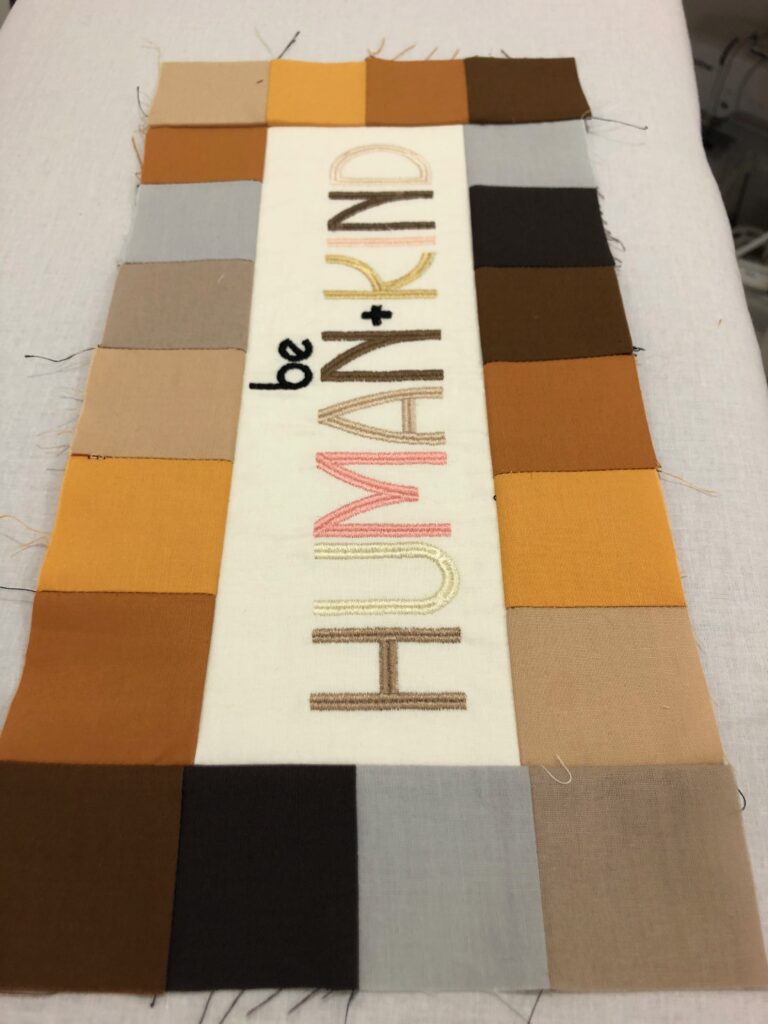
To create the patchwork border, piece together various fabrics to create two short strips to match the rectangle short ends and two long strips to match the rectangle upper and lower edges.
 Stitch the short patchwork strips to the embroidered rectangle short edges, with right sides facing. Press the seam toward the strip.
Stitch the long patchwork strips to the embroidered rectangle long edges, with right sides facing. Press the seam toward the strip.
Place the embroidered rectangle and backing rectangle on a flat work surface with right sides facing. Place the batting rectangle over the upper rectangle, matching corners and edges. Use KK 2000 Temporary Spray Adhesive to secure the layers, if desired.
Stitch the rectangle perimeter, using a 5/8″ seam allowance. Leave a 3″ opening along the lower edge for turning. Clip the corners and trim the seam allowance to 1/4″ everywhere but the opening.
FINISHING THE WALL ART
Turn the wall art right side out through the opening. Fold the opening seam allowance raw edges toward the wrong side; pin.

Topstitch the wall art, closing the opening with the stitches.
If desired, quilt through all layers, keeping the stitching within the topstitching. Begin stitching at the centermost point where quilting is desired and work your way toward the outer edges to avoid pulling in different directions.
Try using Sulky 30 wt. Blendables for the quilting for interest. The thread is dyed randomly every 3″ to 5″, which makes great straight line quilting! Parchment is a great neutral Blendables color. Use a 90/14 Top Stitch or Quilting needle for best results.
Alternatively, add quilting before finishing the wall art by layering the pieces like a quilt sandwich, and then bind the wall art like a quilt.
Hand stitch a narrow hanging sleeve to the wall art wrong side for hanging on a dowel. Or hand sew ribbon ends to each upper-edge corner, and then tie the opposite ends into a bow.
To finish, hang the wall art where desired.

Ellen March
I am the Director of Content for Sulky of America. The former Editor in Chief of Sew News and Creative Machine Embroidery magazines, I hosted Sew it All TV on PBS for nine seasons. I've appeared on It's Sew Easy on PBS, DIY Network's Uncommon Threads, Hallmark's Marie Osmond Show, MacPhee Workshop and more! Come sew with me!


2 Comments
CHRISTINE A GANT
I love this project, Ellen. It’s quick and easy, even for a beginner.
Sheron Mehl
Hints on fonts really helped me.