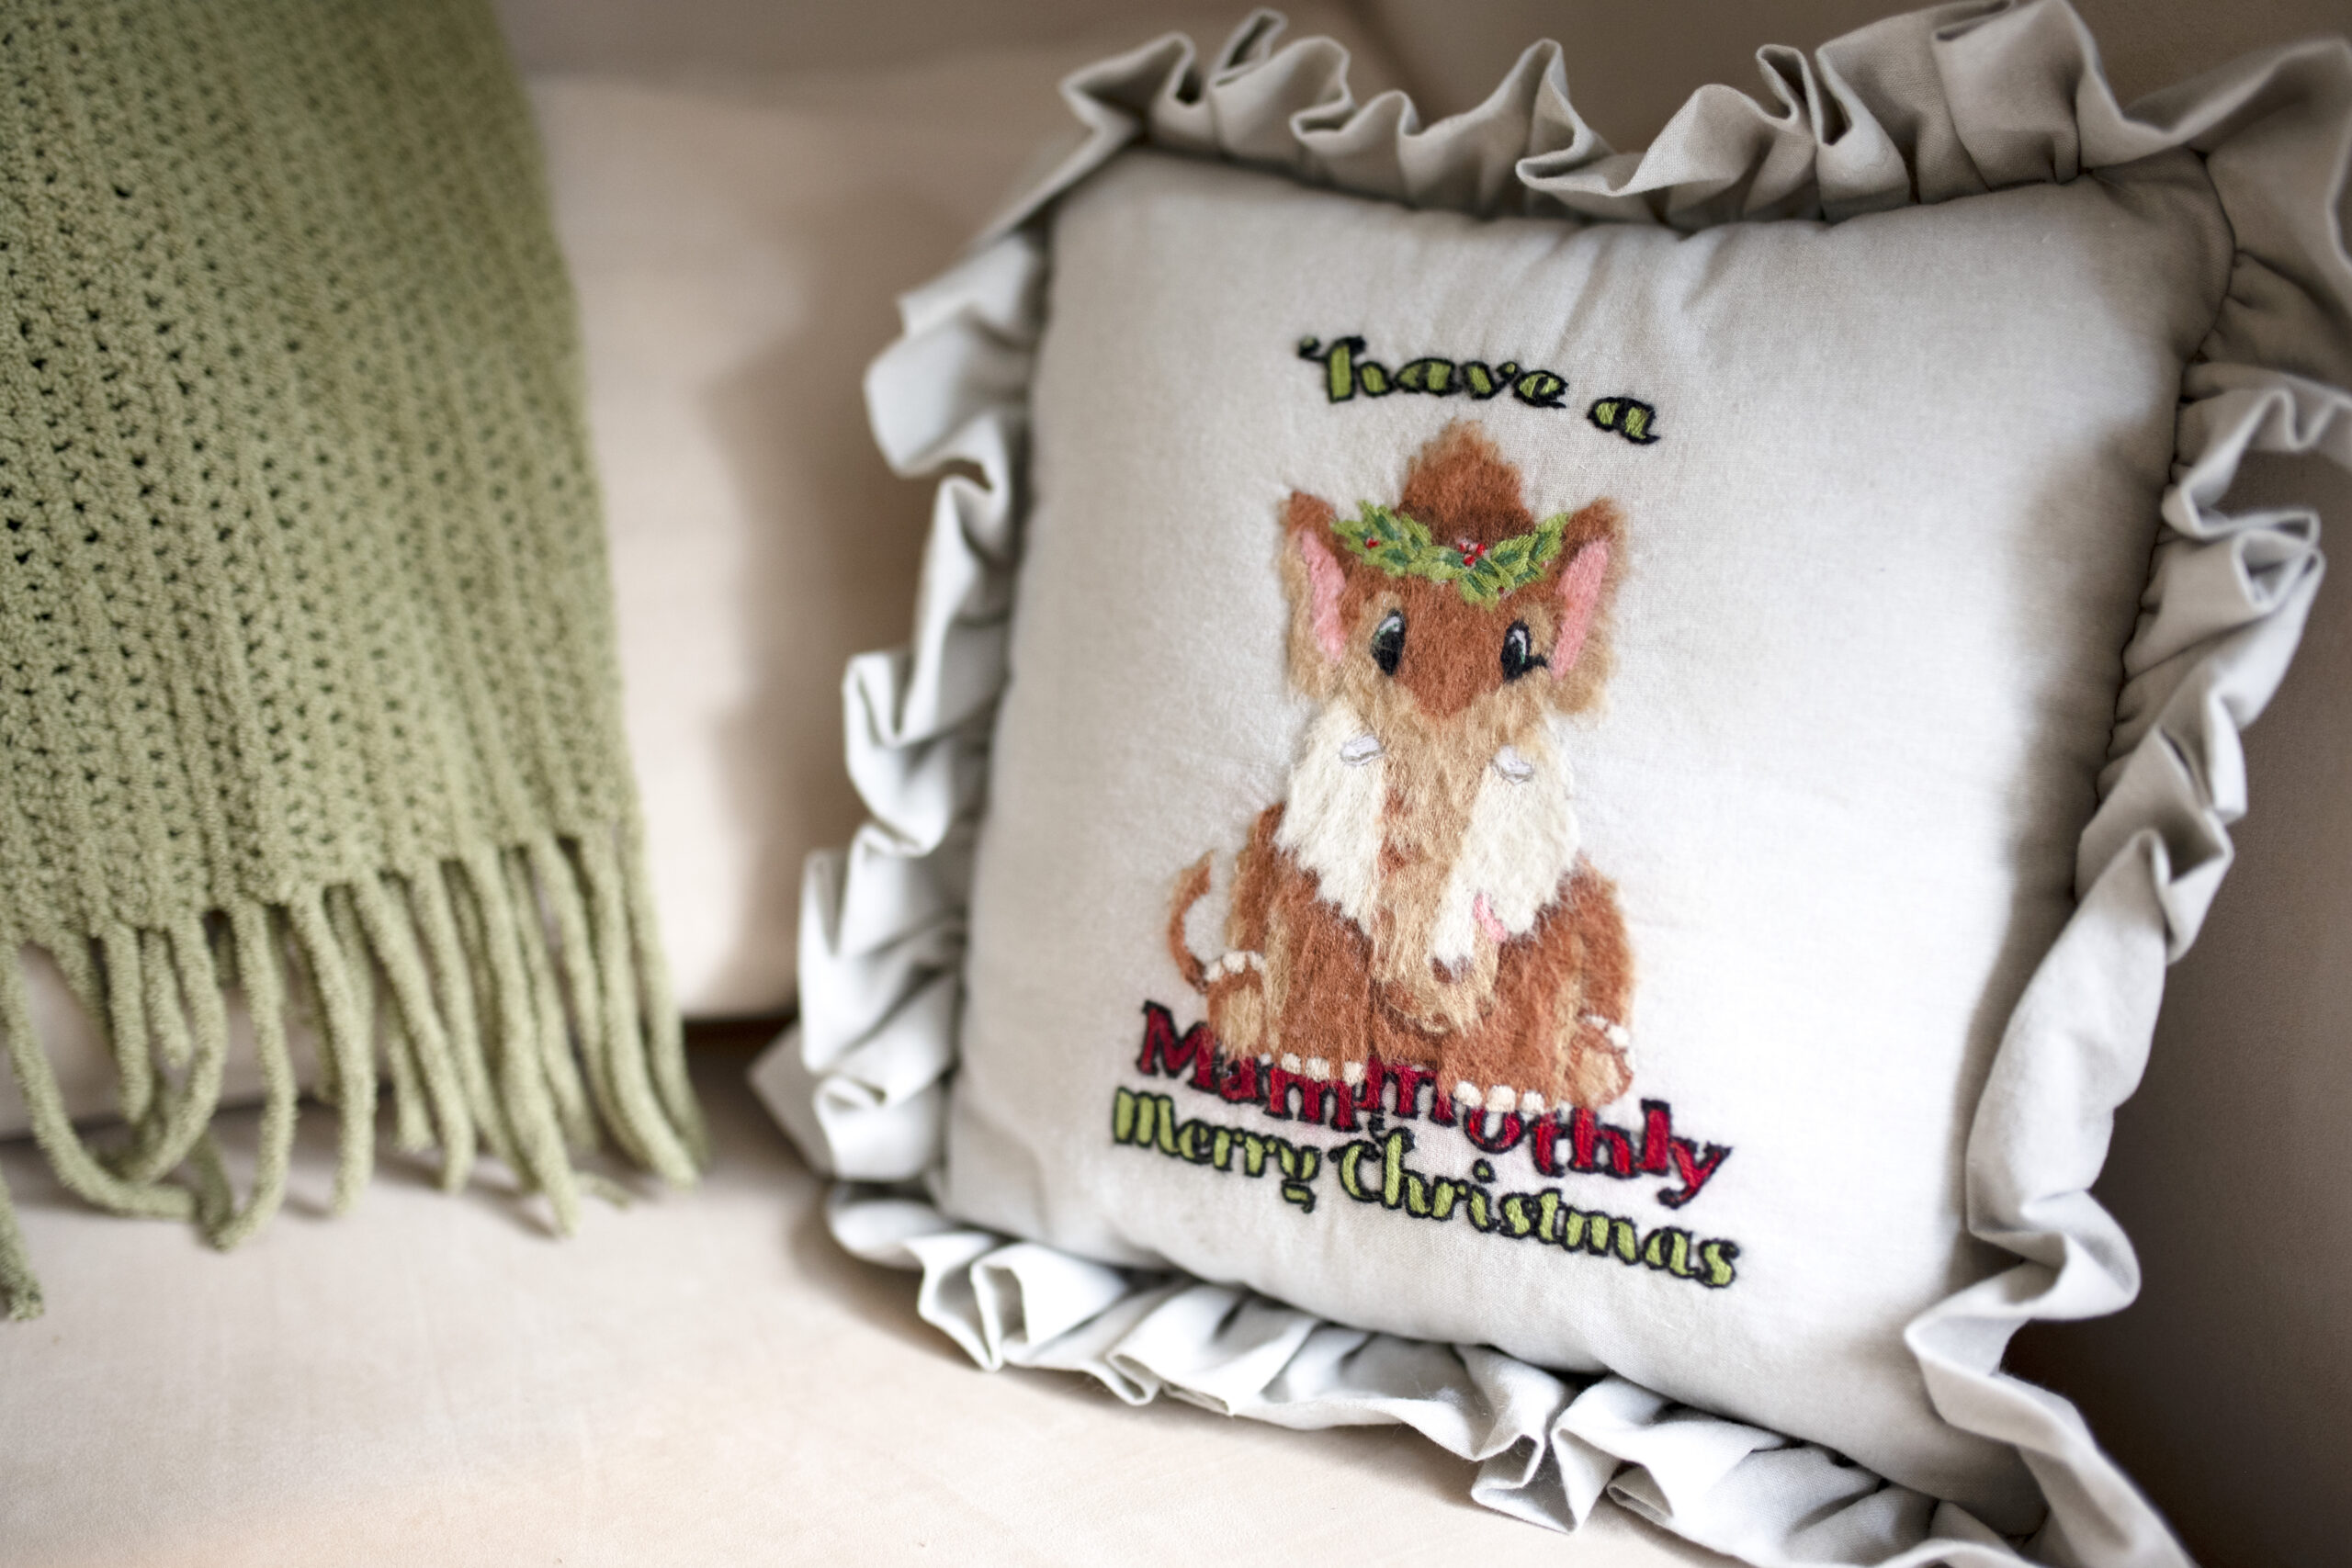
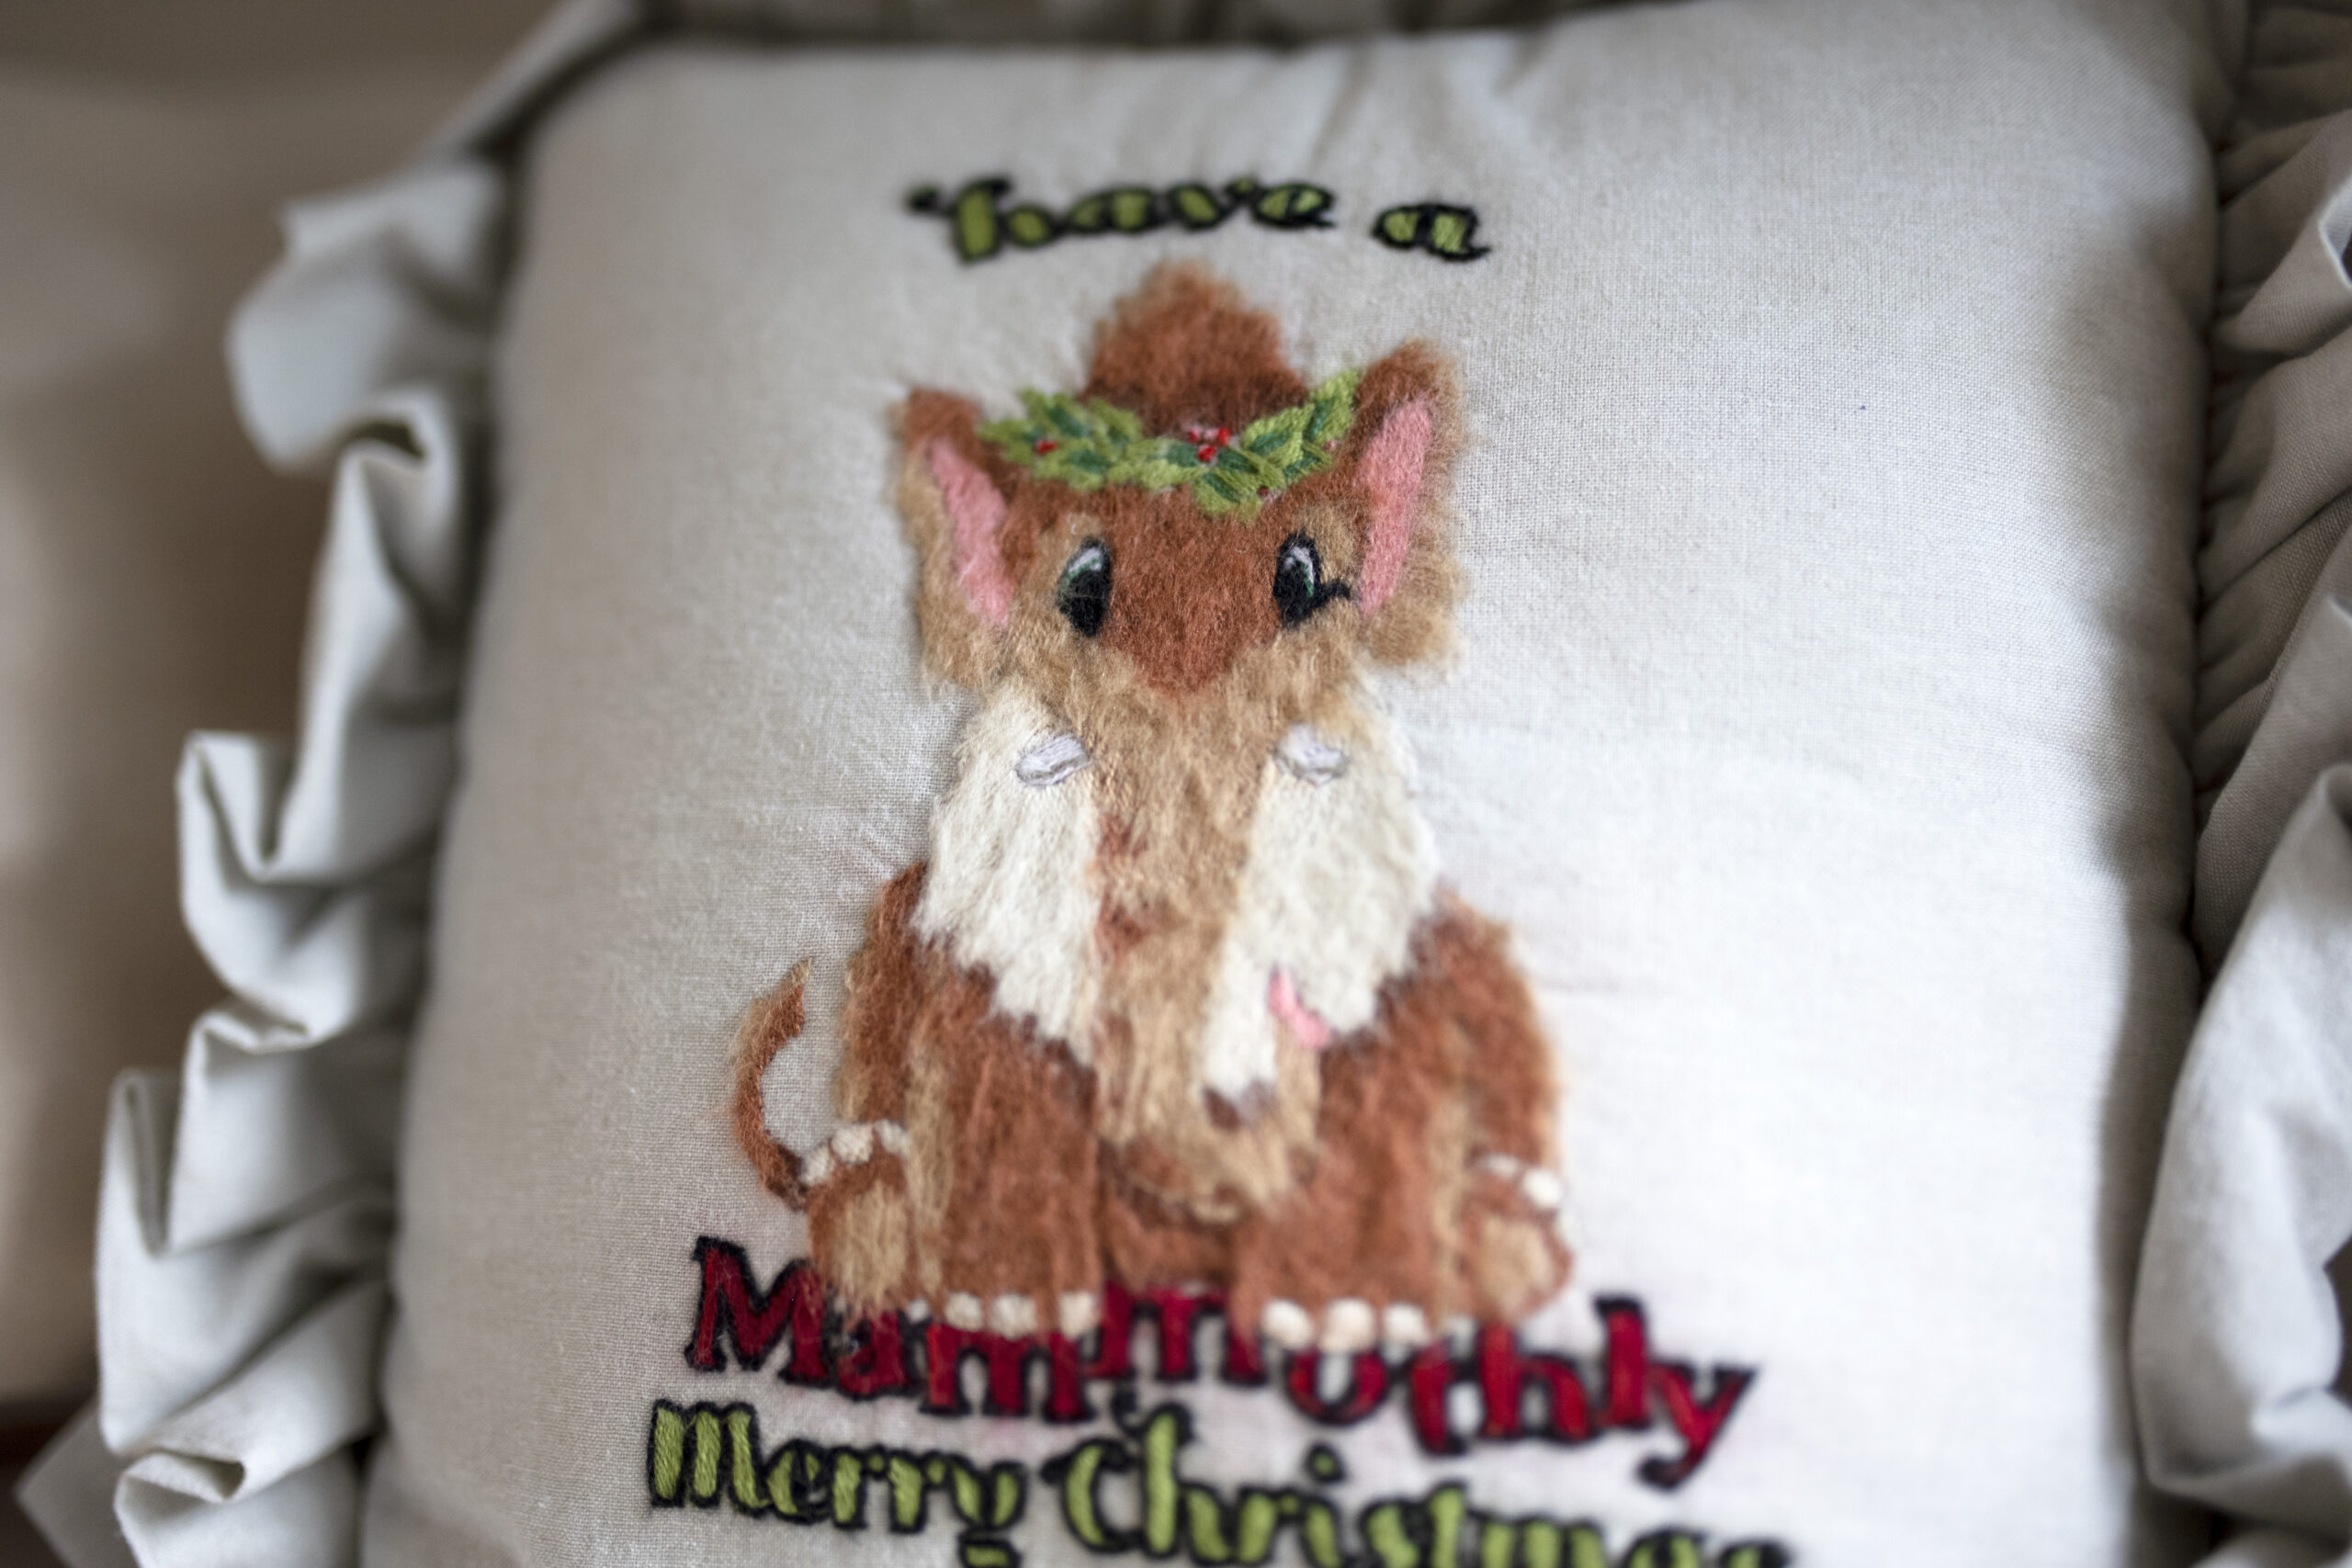
Free Hand Embroidery Mammoth Holiday Design
Free Hand Embroidery Mammothly Merry Christmas Design

by Jennifer Carson of Fur & Feather Friends
What’s better than free hand embroidery designs, especially for the holidays? Jennifer Carson, of Fur & Feather Friends, designed this Mammothly Merry Christmas pillow pattern and hand embroidery design for Sulky. It features Sulky 12 wt. Filaine Thread, which “blooms” when brushed to create the look of faux fur.
Download the freebie and print the design page onto a sheet of Sulky Stick ‘n Stitch Stabilizer for the easiest transfer method ever! Follow Jennifer’s color chart and begin stitching, creating a large-scale design for a pillow or wall hanging.
The free hand embroidery design also comes with instructions for creating the ruffled pillow as shown. This simple pillow design is easily replicated with a design of your choice for any holiday, too.
HAND EMBROIDERY SUPPLIES
Sulky Filaine Thread (threads also listed in color chart)
- White #1000
- Vanilla #3401
- Ecru #3122
- Dark Ecru #3412
- Tuscan #3418
- Dark Tawny Tan #3435
- Black #1001
- Carmine Red #3863
- True Red #3900
- Medium Peach #3860
- Pistachio #3992
- Garden Green #3524
- Avocado # 3521
- Dark Gray Khaki #3514
Misc.
- Sulky Stick ‘n Stitch Stabilizer
- 24” fabric square (cotton linen blend or similar)
- Hand embroidery needles
- Filaine Wire Brush
- 12” square of fusible fleece
HAND EMBROIDERY DESIGN NOTES
When printing the design page, set the printer to the lowest ink setting, sometimes referred to as “draft,” if possible. The stabilizer doesn’t need to be saturated with ink; you just need to be able to see the design.
Print the design in color to have a visual clue when you need to change thread colors. There are a lot of thread colors in this design, so this is super helpful!
Choose the hand embroidery stitches you prefer for each portion of the design. The mammoth looks just as cute outlined rather than filled; however, the effect of the Filaine Thread will not be achieved unless you create dense fill stitches.
If you want to brush out some areas but not others, embroider those areas first. Then brush them out, and then continue with the rest of the design. This ensures you won’t accidentally brush out portions of the design you wish to keep “plain.”
Since the featured thread is nice and thick, you can create longer stitches and still have great coverage. Longer stitches are best when brushing out as they create easier “fluff.” Be careful to not snag the stitches when brushing.
PILLOW PATTERN NOTES
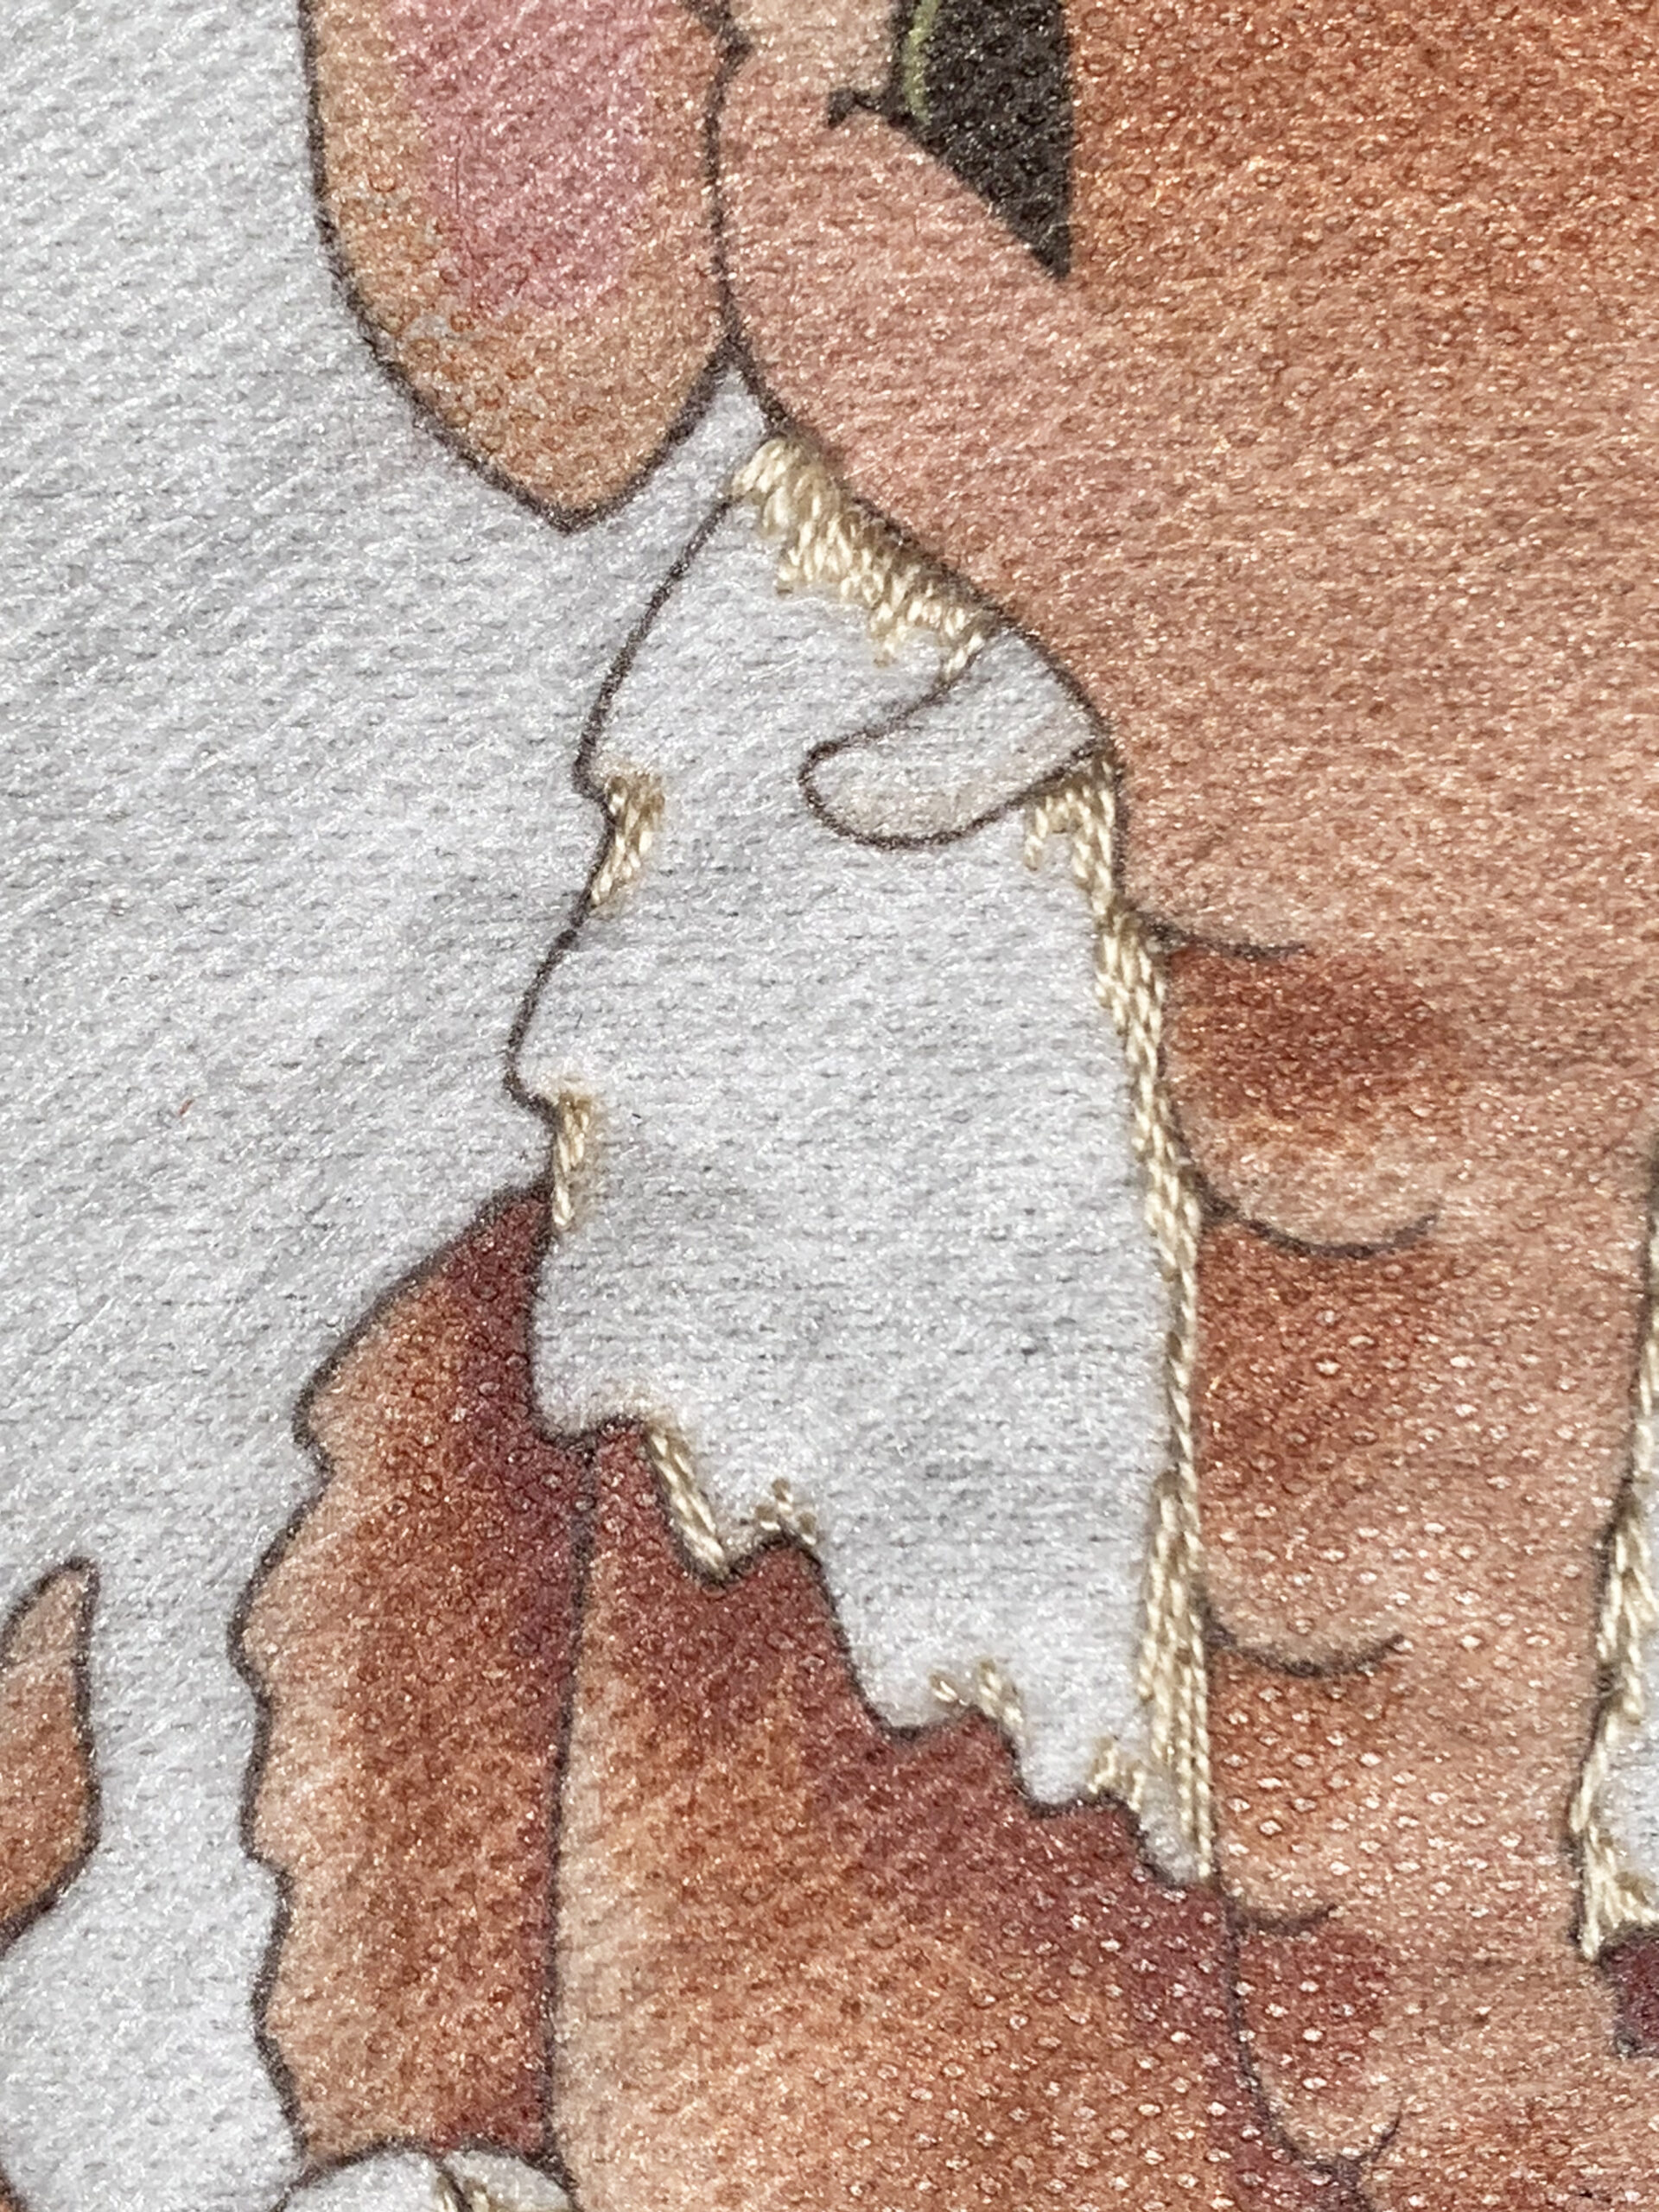
The pillow fabric for the free hand embroidery design is a cotton/linen blend. This fabric tends to fray when worked and handled a lot. Consider serge- or zigzag-finishing the perimeter of each piece before embroidery to ensure the fabric retains its shape and doesn’t fray.
A stable woven quilting cotton is also suitable. Consider adding a layer of lightweight fusible interfacing to this fabric substrate for hand embroidery to add stability and longevity to the design after it’s stitched. Or fuse a piece of Sulky Tender Touch to the embroidery wrong side after stitching is complete. This seals the stitching and provides a layer of lightweight stability all in one.
Enjoy this free project and try your hand at stitching this design! DOWNLOAD THE FREEBIE >>
If machine embroidery is more your thing, look to our Mammothly Merry Christmas Machine Embroidery Design, available in all formats.

Ellen March
I am the Director of Content for Sulky of America. The former Editor in Chief of Sew News and Creative Machine Embroidery magazines, I hosted Sew it All TV on PBS for nine seasons. I've appeared on It's Sew Easy on PBS, DIY Network's Uncommon Threads, Hallmark's Marie Osmond Show, MacPhee Workshop and more! Come sew with me!