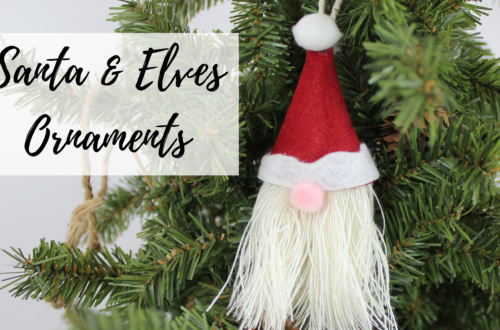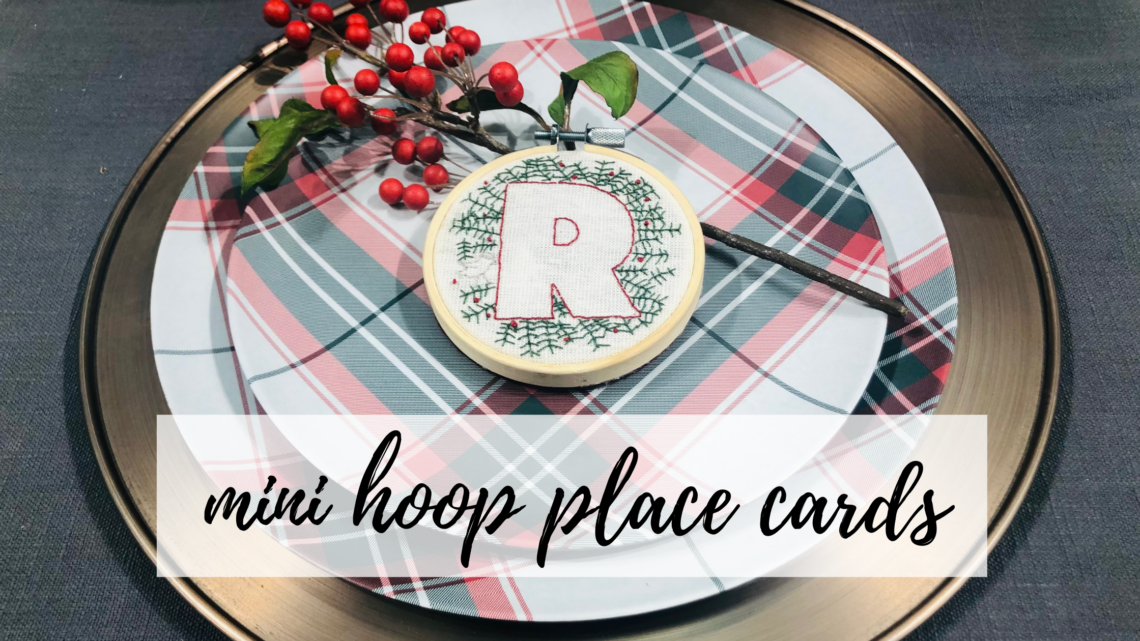
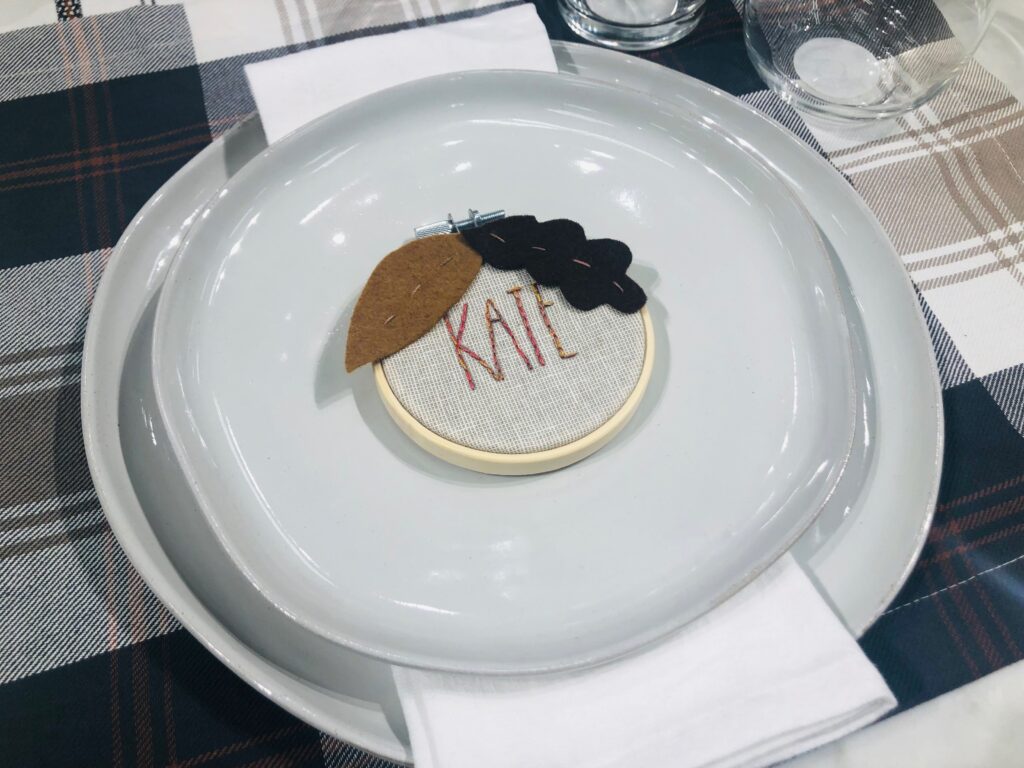
Mini Hoop Place Cards for the Holidays
MINI HOOP PLACE CARDS
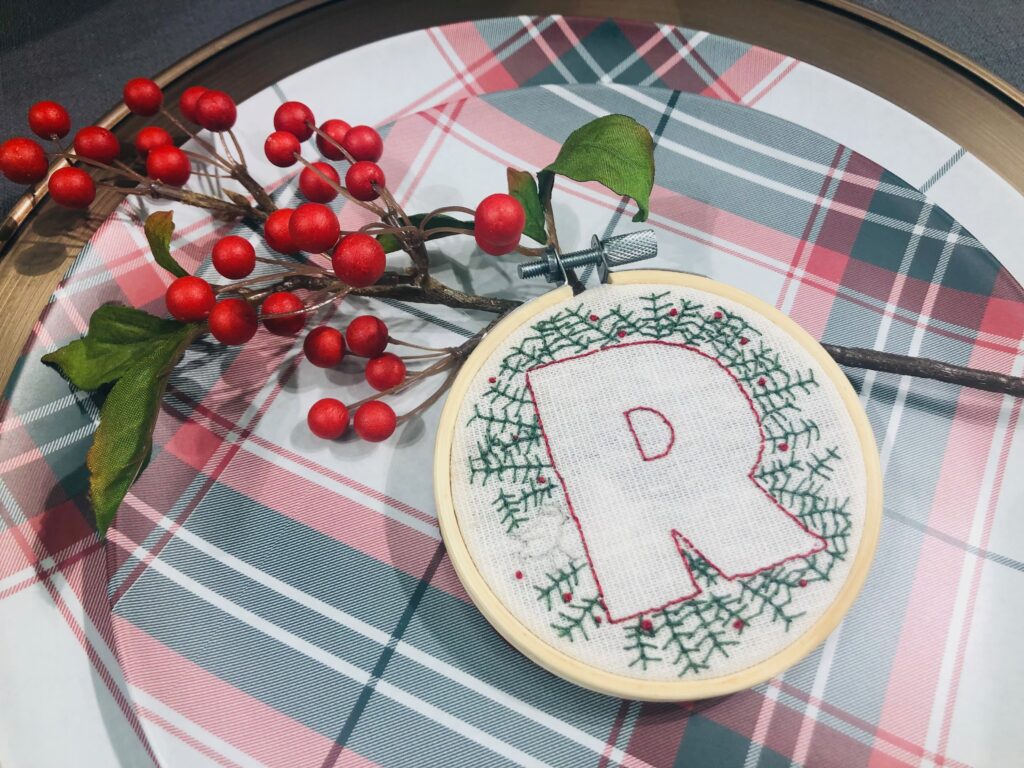

with hand embroidery (or try machine embroidery!)
Create personalized place cards for a dinner party or holiday soiree. The mini embroidery hoop used for embroidery remains intact to complete the adorable project. Further embellish the hoop using trims, ribbons, felt motifs or greenery and add a hanging loop to double as an ornament once the meal is complete!
HAND EMBROIDERY SUPPLIES
Materials listed are enough to create one place card.
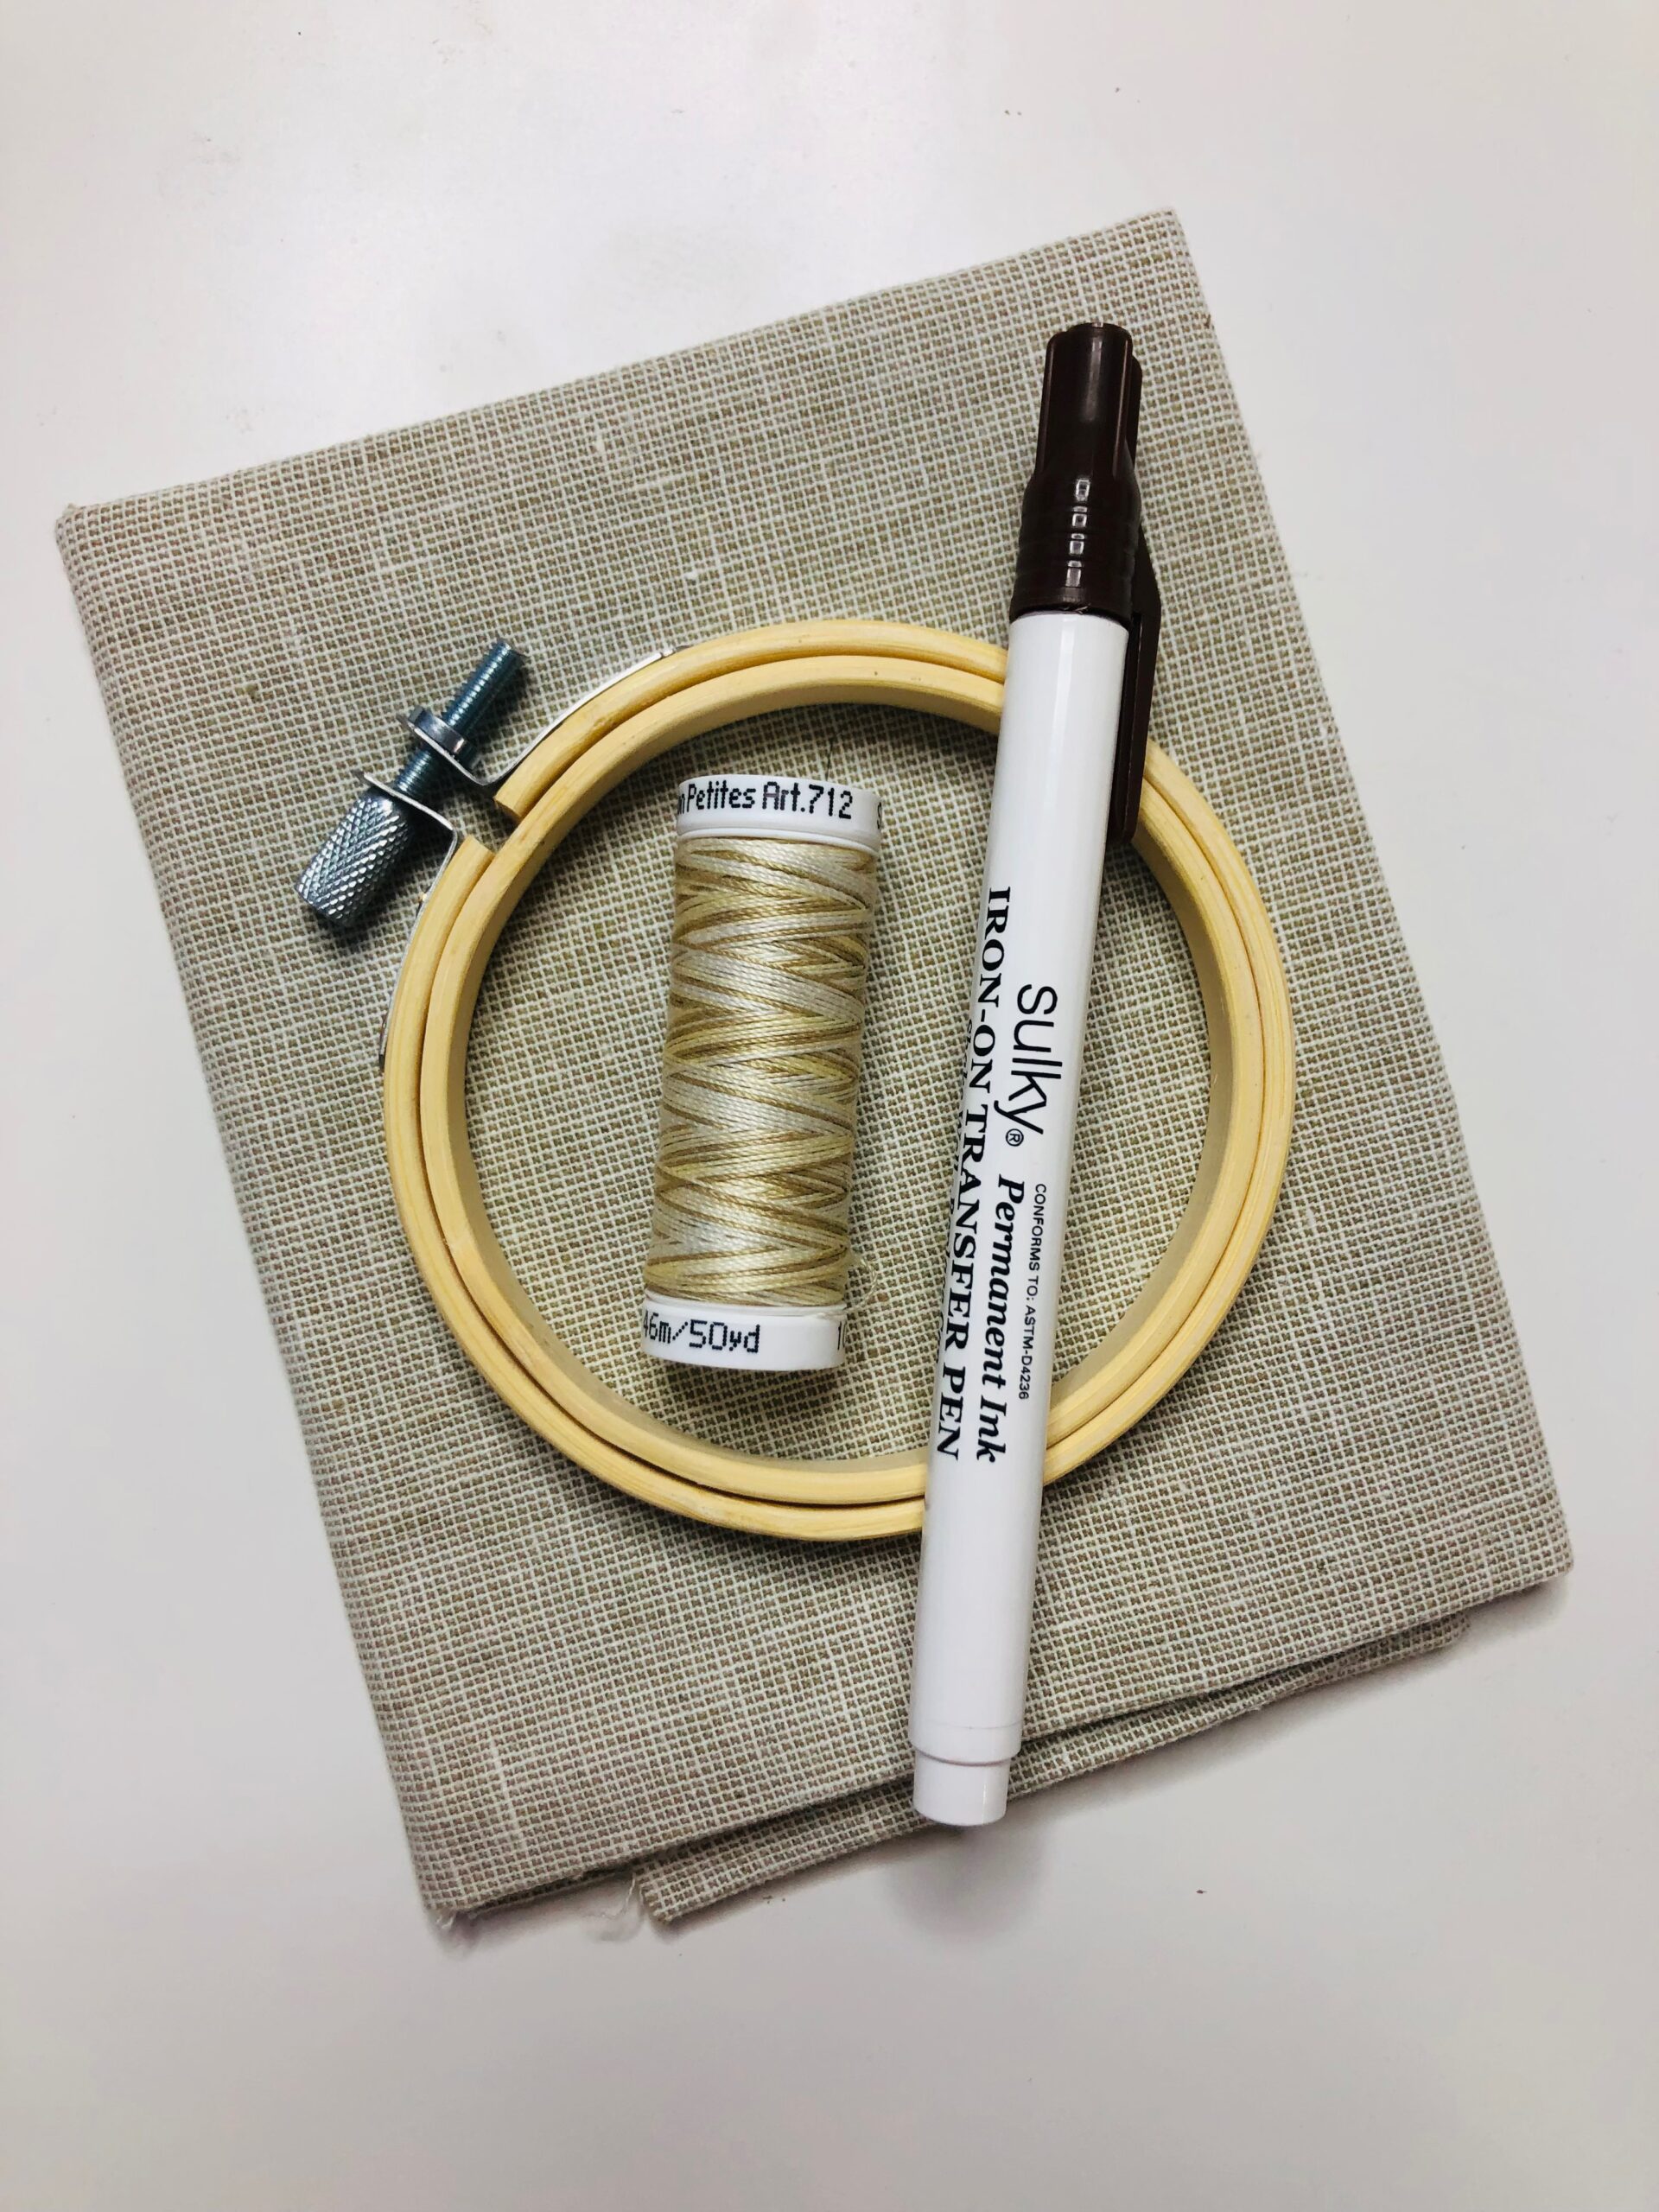
- 3” Mini Embroidery Hoop
- 12 wt. Cotton Petites™ Blendables® Thread (featured color: Autumn)
- Sulky Iron-On Transfer Pen (color that matches fabric and/or chosen thread) or Sulky Stick ’n Stitch Stabilizer
- 5” square (or larger) of fabric (featured: Robert Kaufman Essex Linen in Flax)
- Sulky Tender Touch™ Stabilizer (optional)
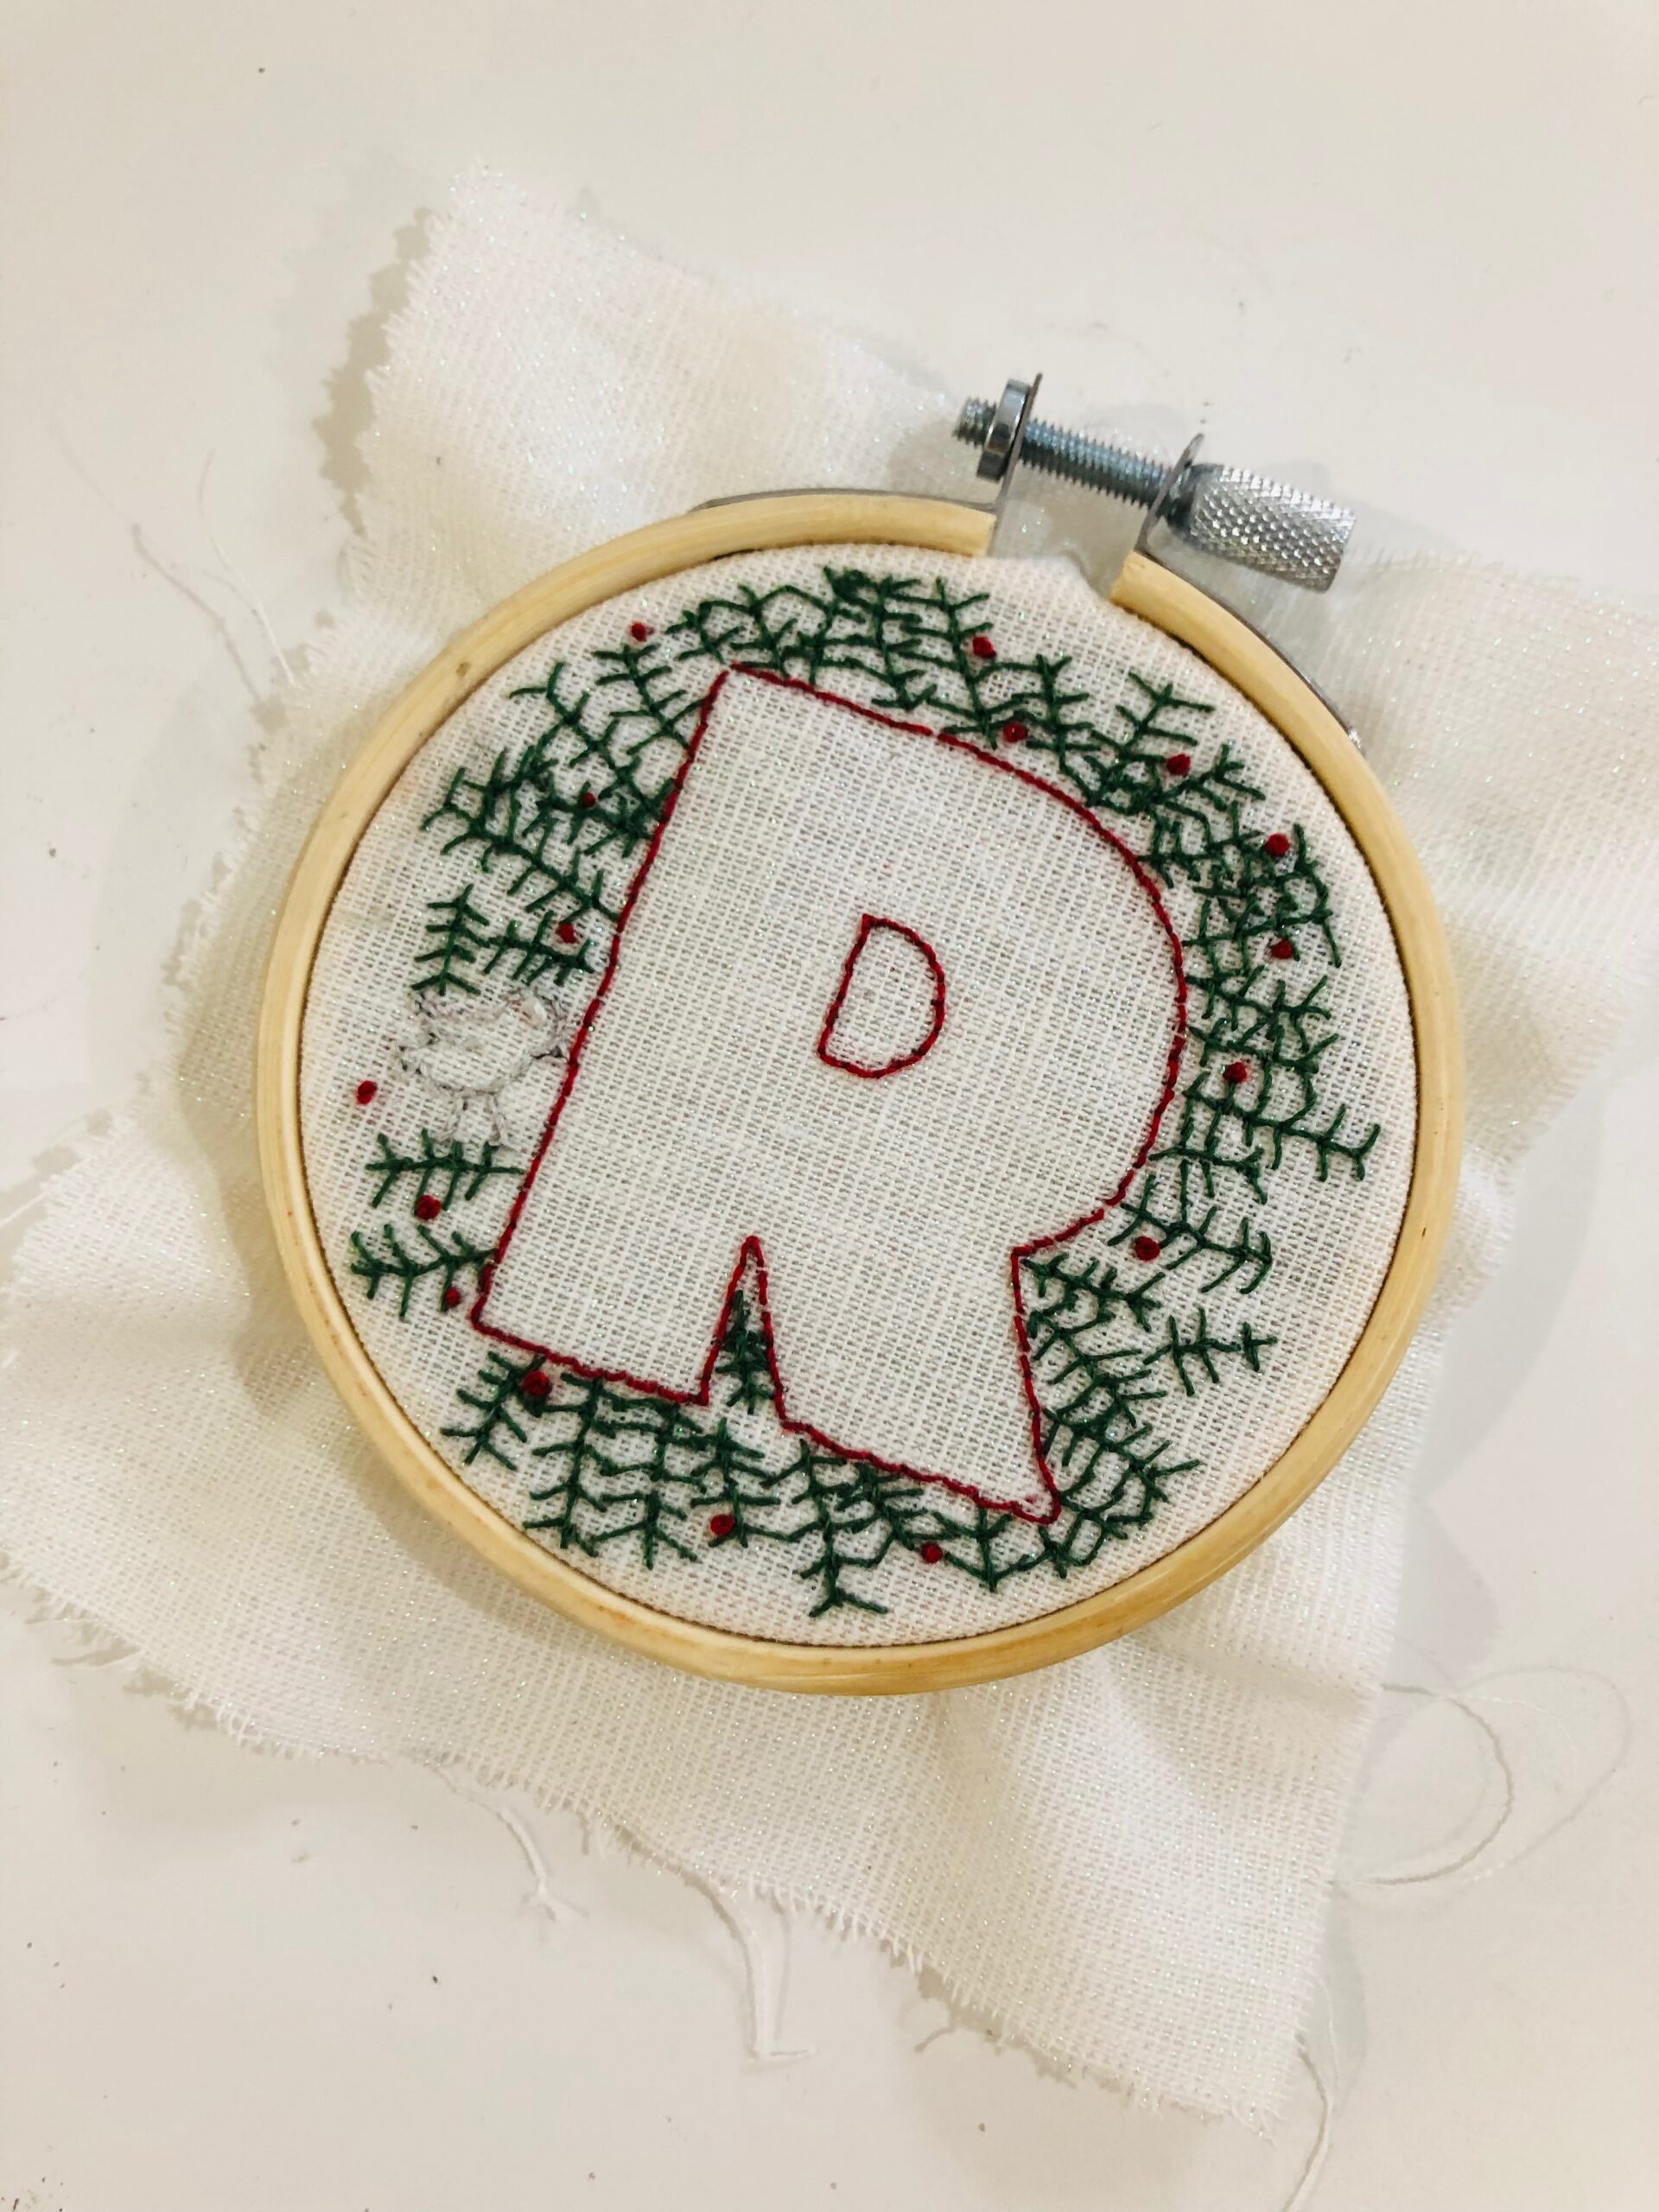
- Winter Greens Hand Embroidery Collection (optional; used for the featured R monogram)
- Hand sewing needle
- Pinking shears (optional)
- Wool blend felt for backing & embellishments (optional)
- Craft glue (optional)
MACHINE EMBROIDERY SUPPLIES (OPTIONAL)
- 3″ Mini Embroidery Hoop
- Sulky Rayon Thread (colors per embroidery color sequence chart)
- Winter Greens Machine Embroidery Collection (chosen design should be 2 3/4″ diameter or smaller to fit inside hoop rings; resize the chosen design as needed)
- Sulky Soft ‘n Sheer™ Extra
- Fabric (featured: Robert Kaufman Essex Yarn Dyed Metallic; finished square is 5″x5″ so start with a larger piece for hooping, and then trim down to fit inside the hoop rings)
- Sulky Tender Touch™ Stabilizer (optional)
- Pinking shears (optional)
- Wool blend felt for backing & embellishments (optional)
- Craft glue (optional)
TRANSFER PEN HAND EMBROIDERY METHOD
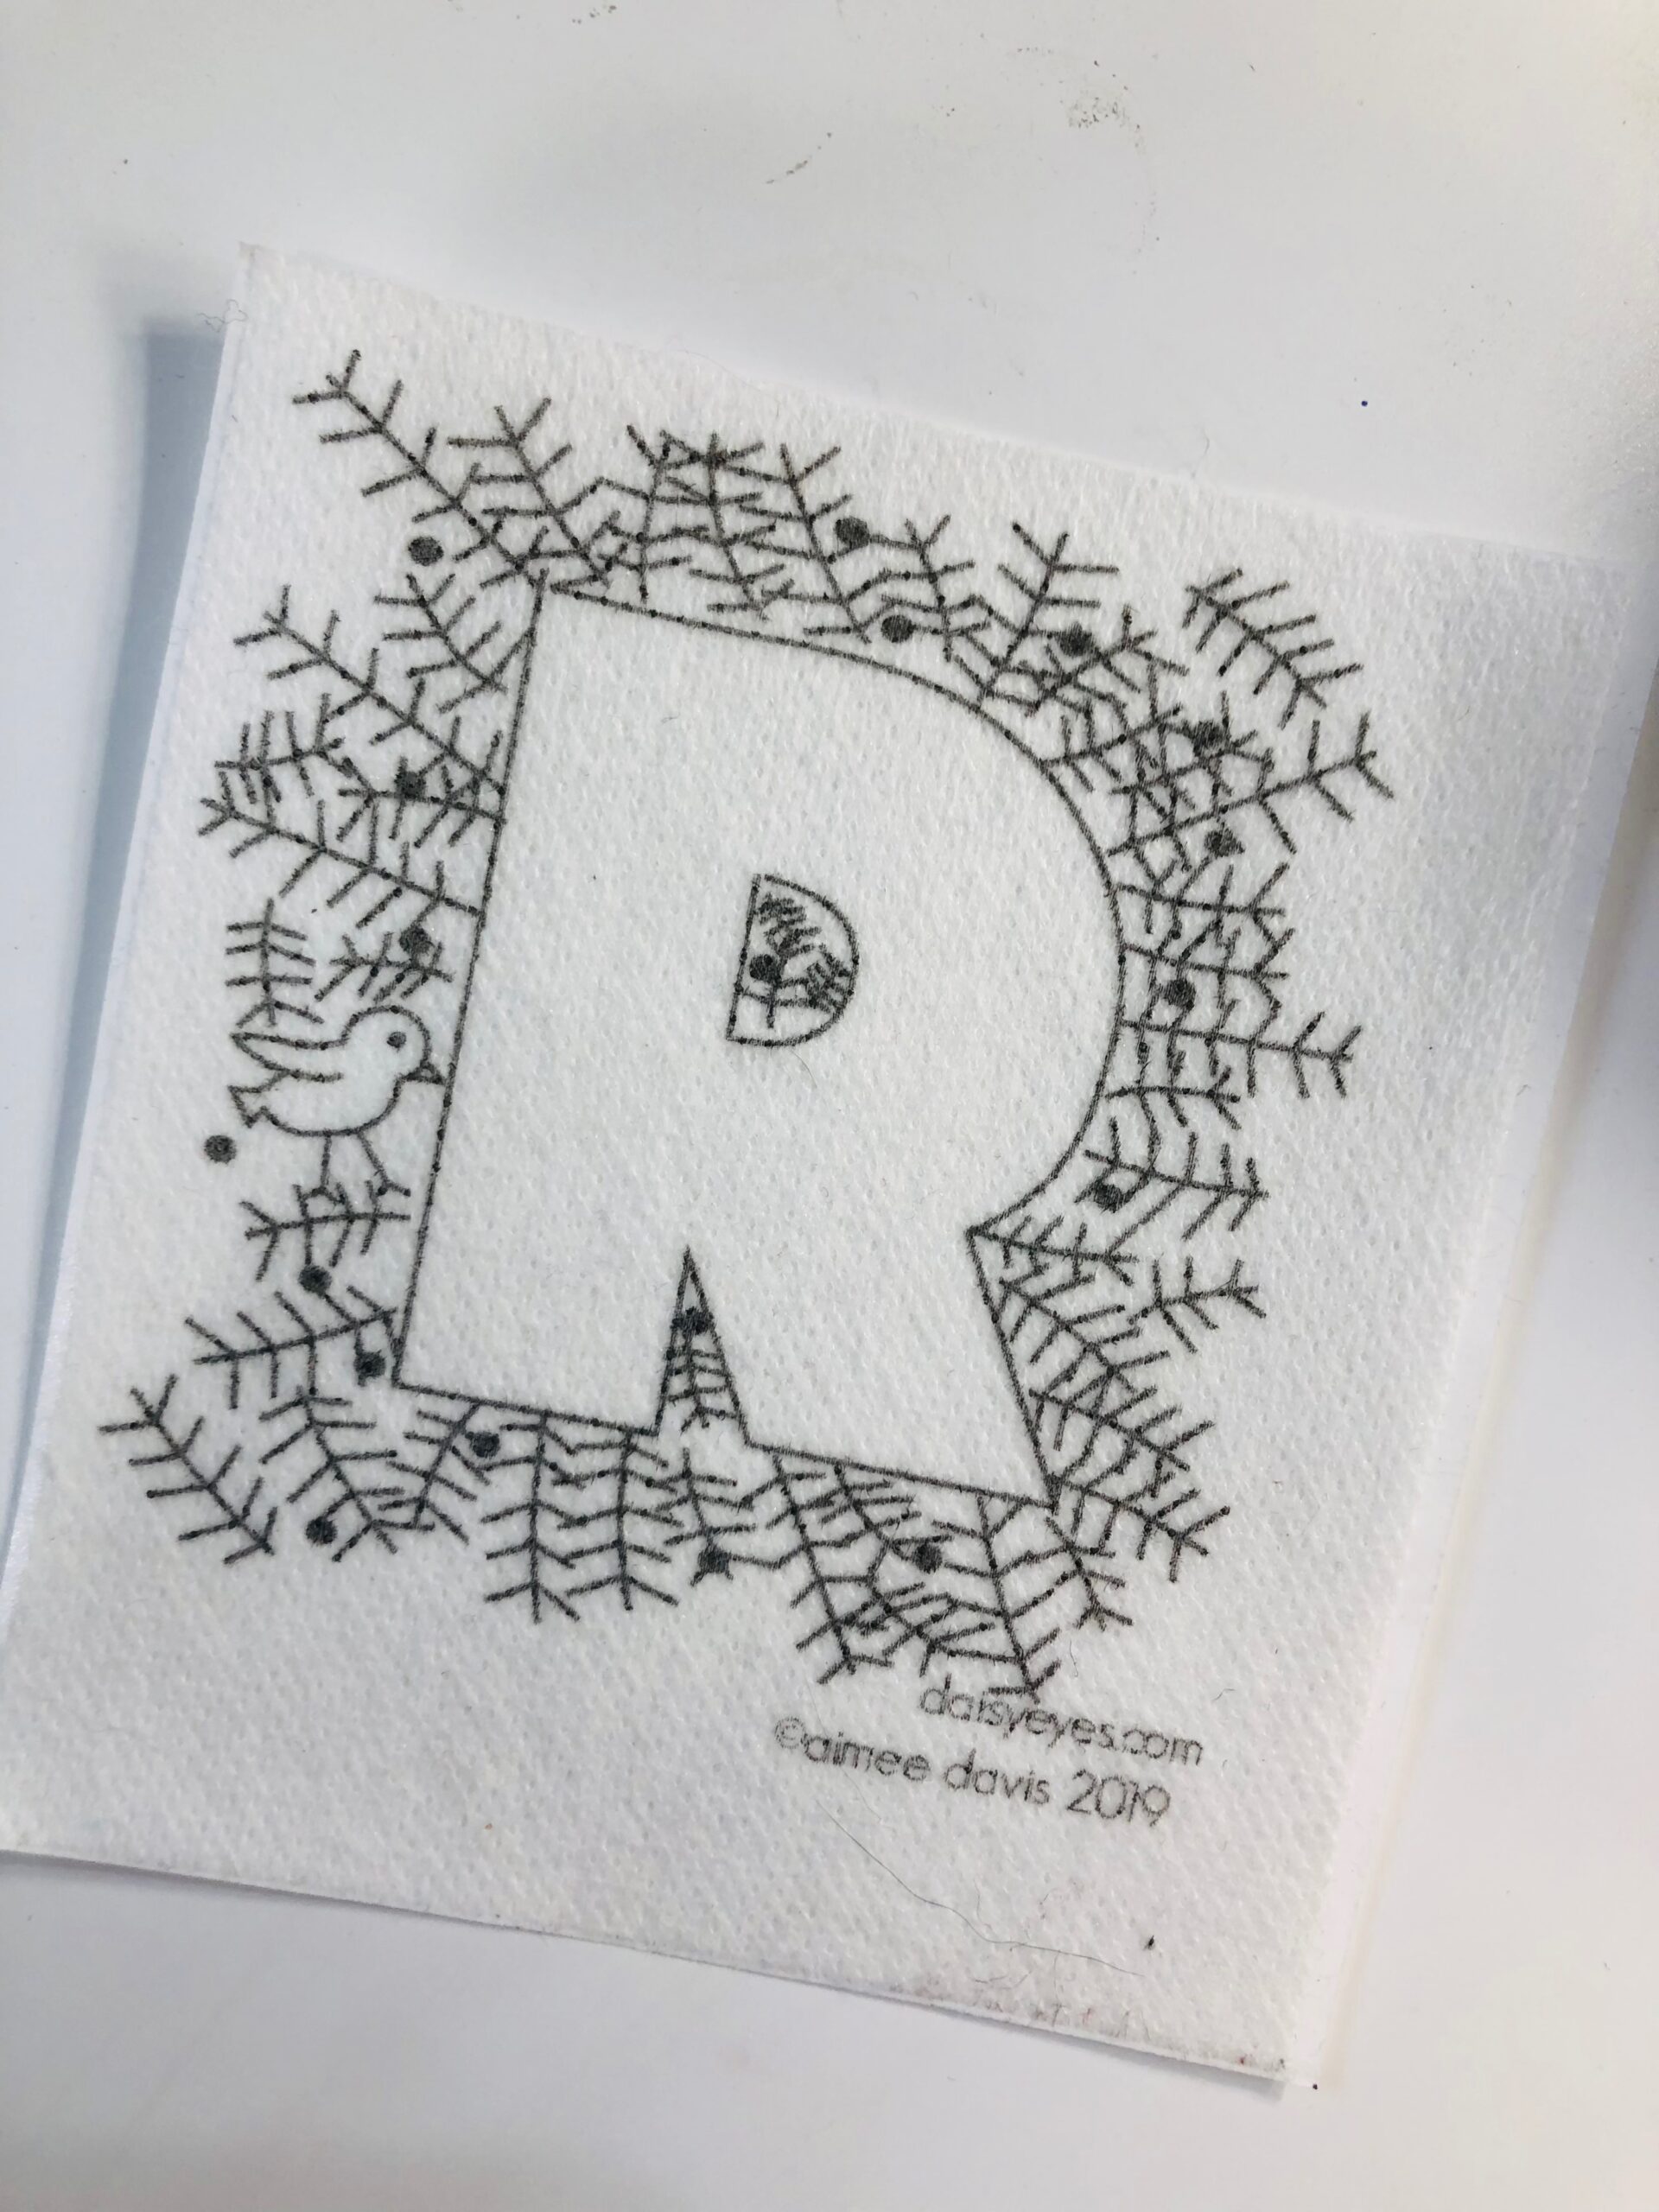
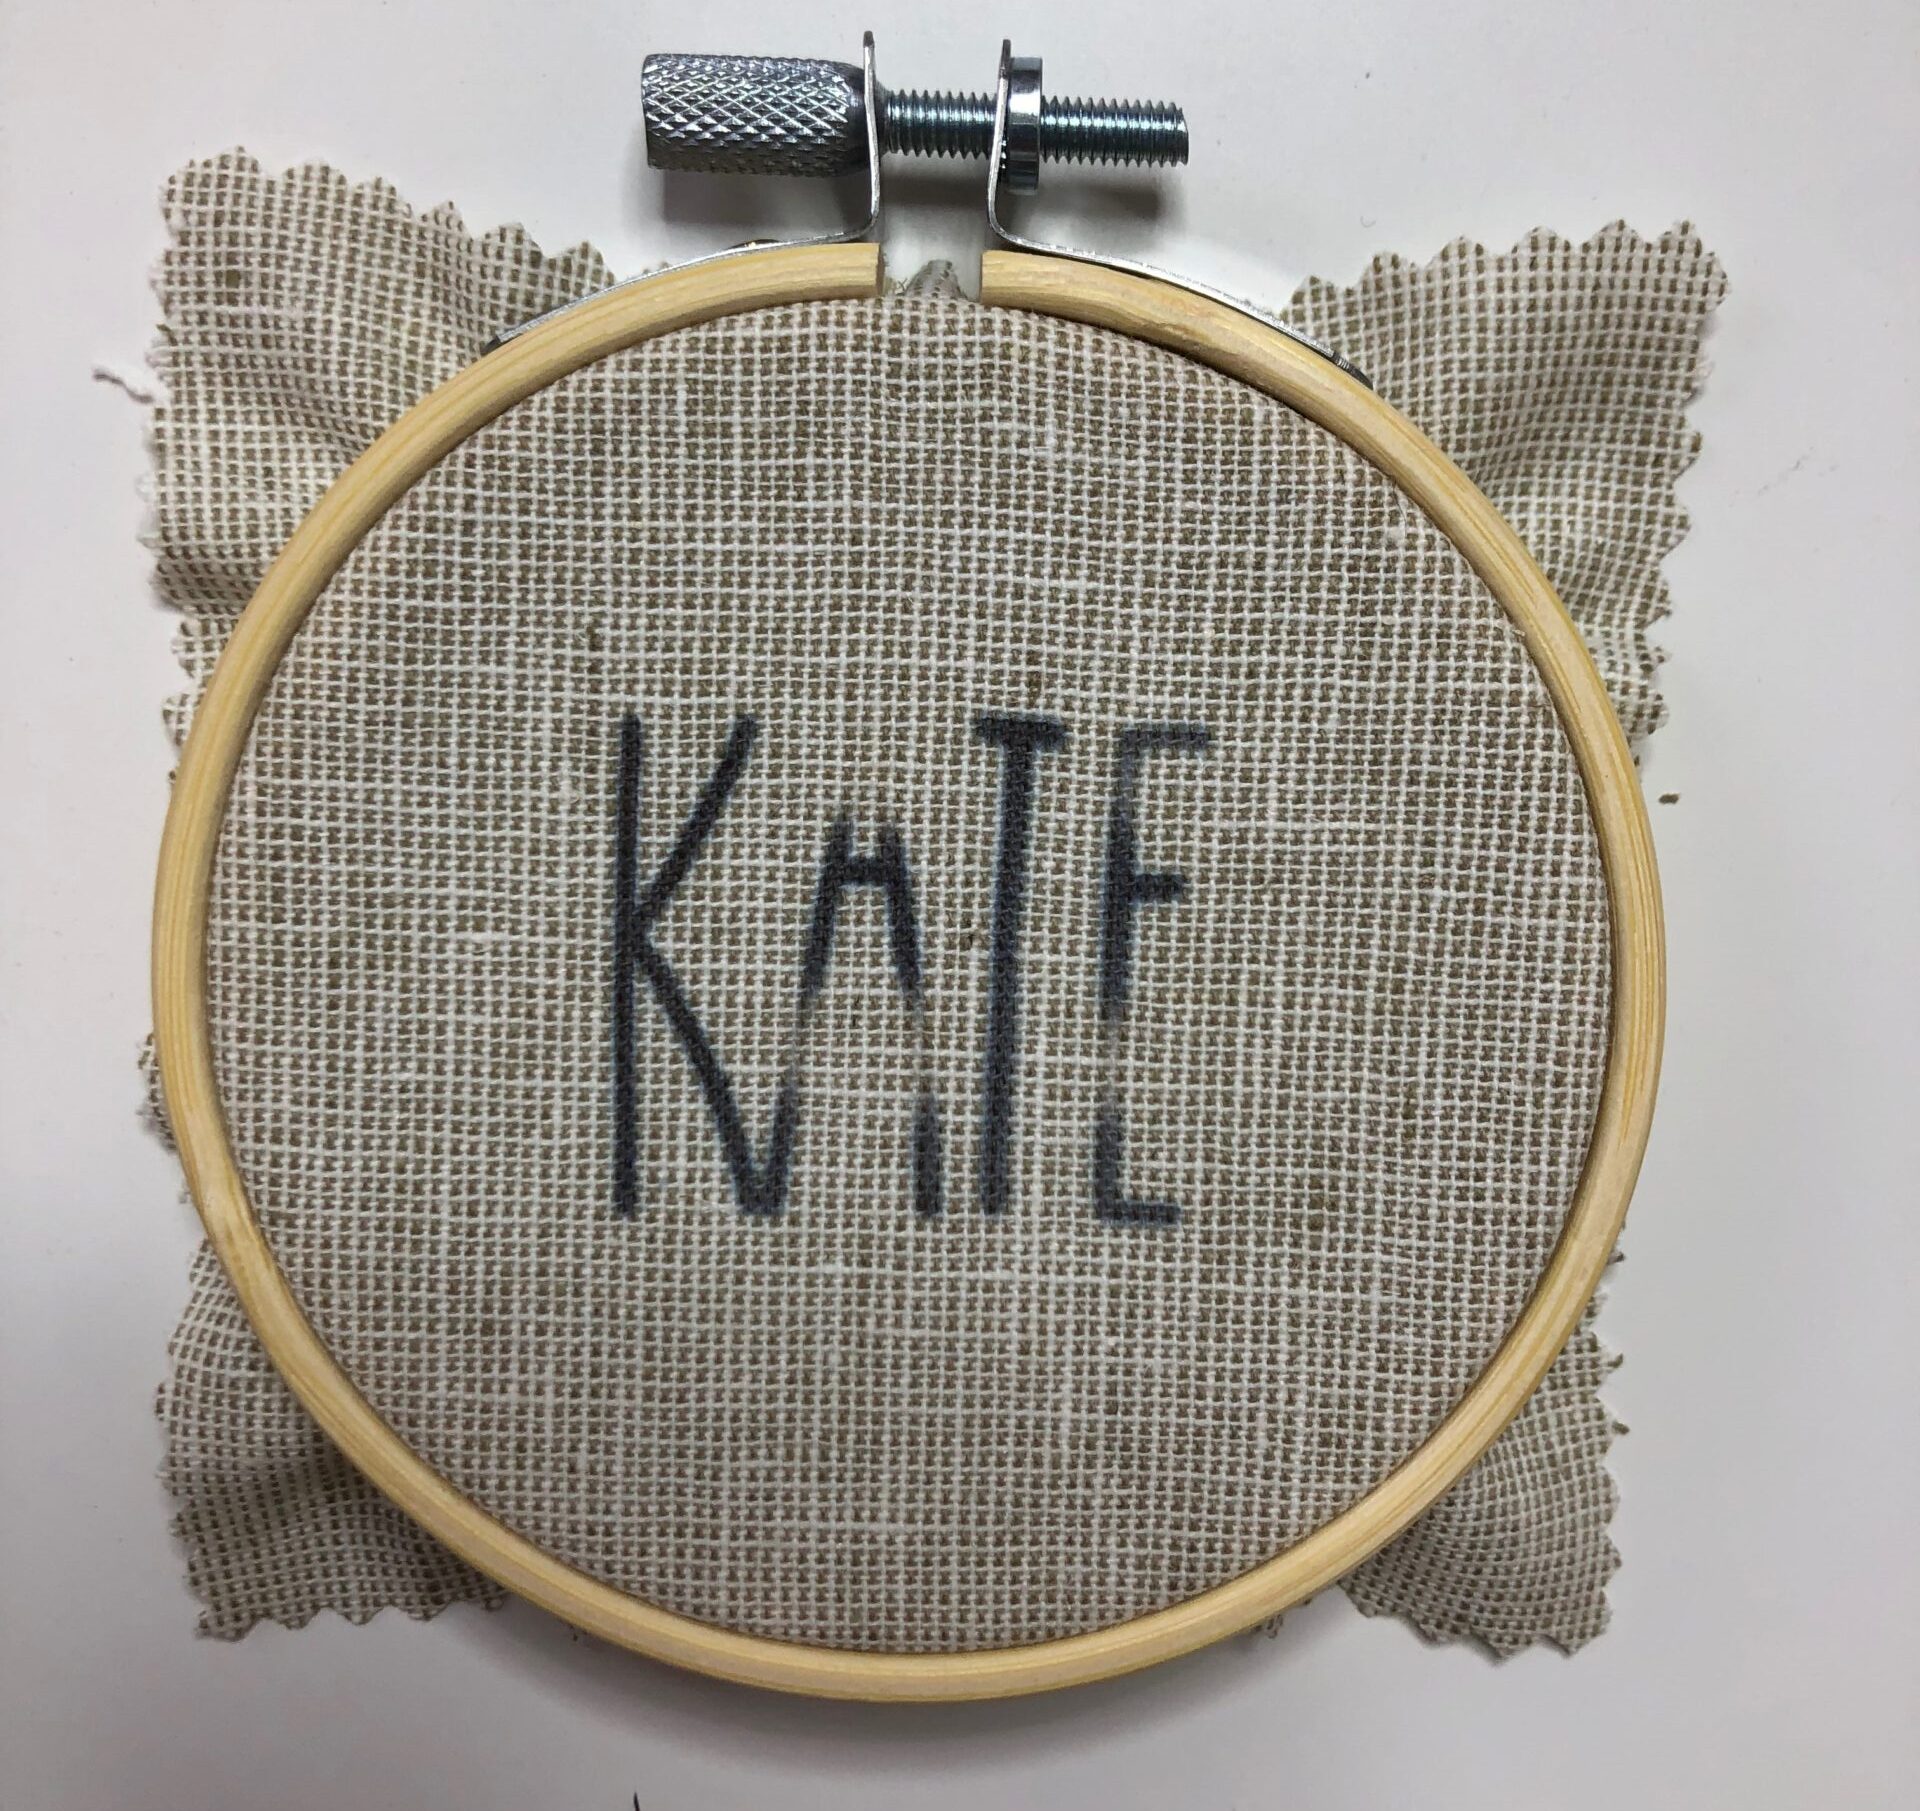
Choose a font from your computer and type the chosen name for the place card. Make sure the name will fit within the 3” inner hoop ring, with at least a ¼” border around all sides. Alternatively, choose one letter or monogram design (featured “R” design from the Sulky Winter Greens Hand Embroidery Design Collection).
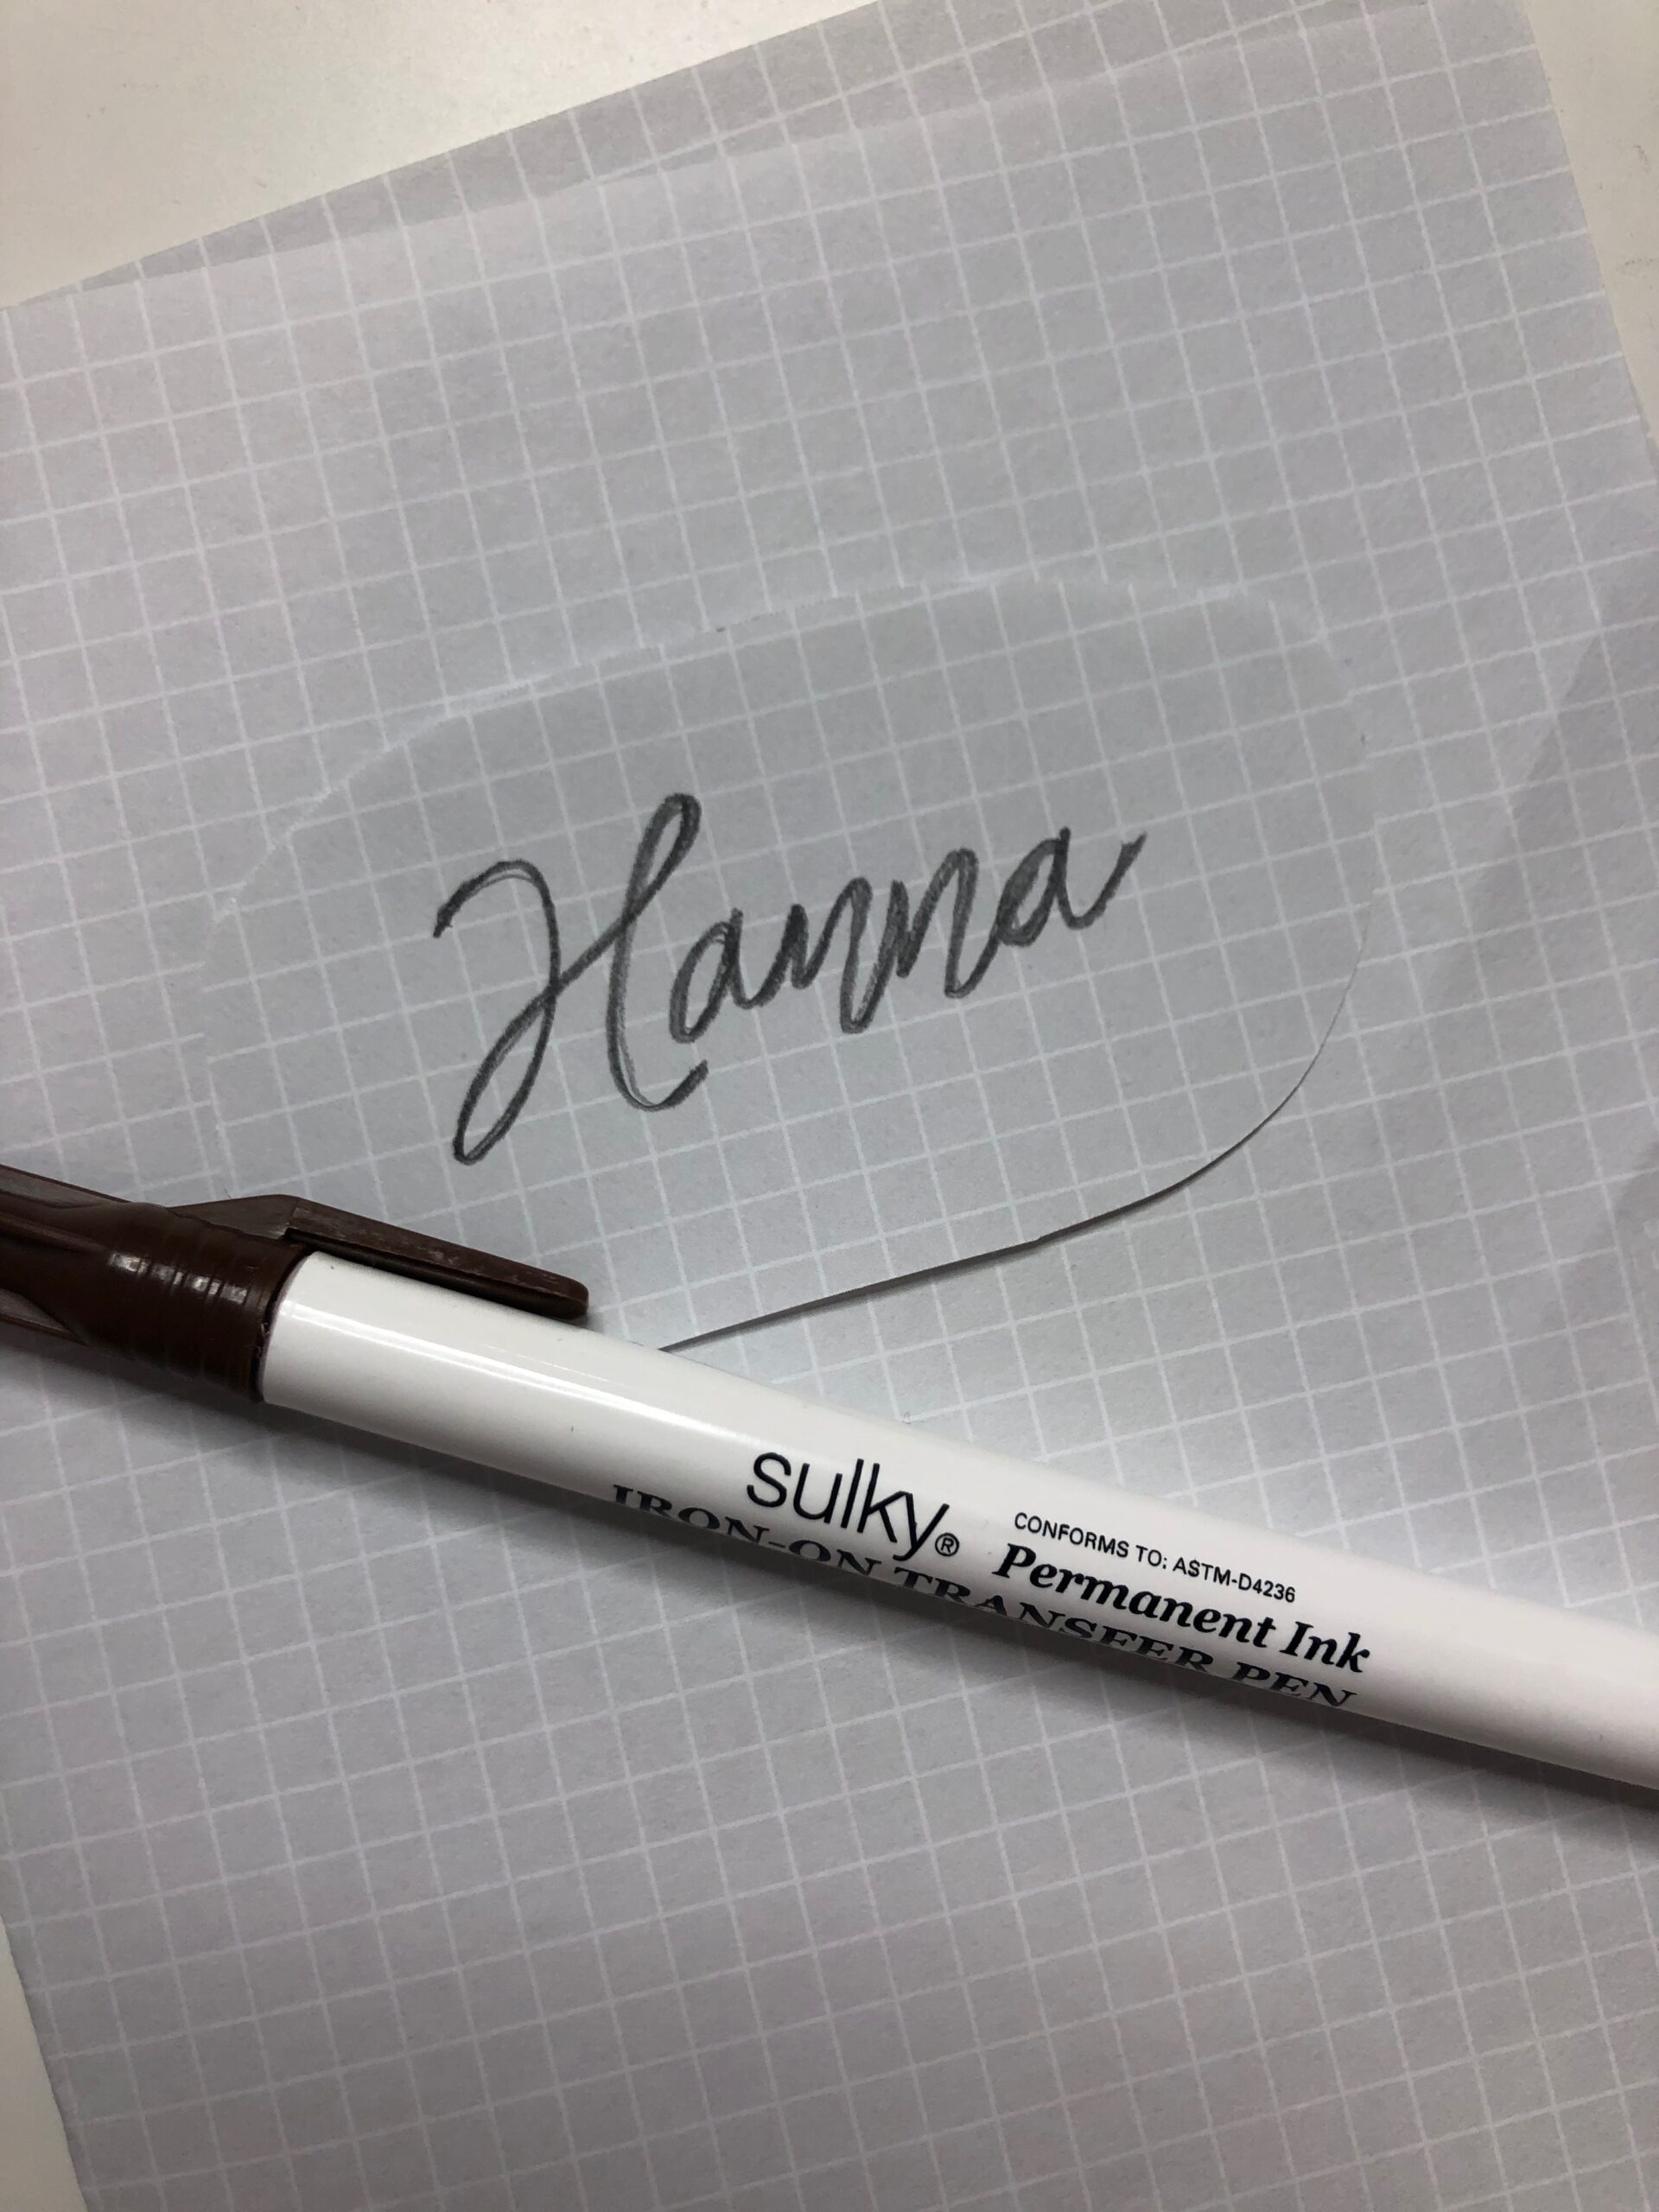
Once satisfied with the font and size, print the name onto a sheet of paper. Alternatively, write the name in your own handwriting onto a sheet of clean, white paper. Use a pen or marker that’s dark enough so you can read it from the wrong side. Or plan to use a lightbox to view the name for embroidery transfer.
Cut out the name, leaving a ½” border around all edges. Reserve the extra paper for starting and testing the transfer pen.
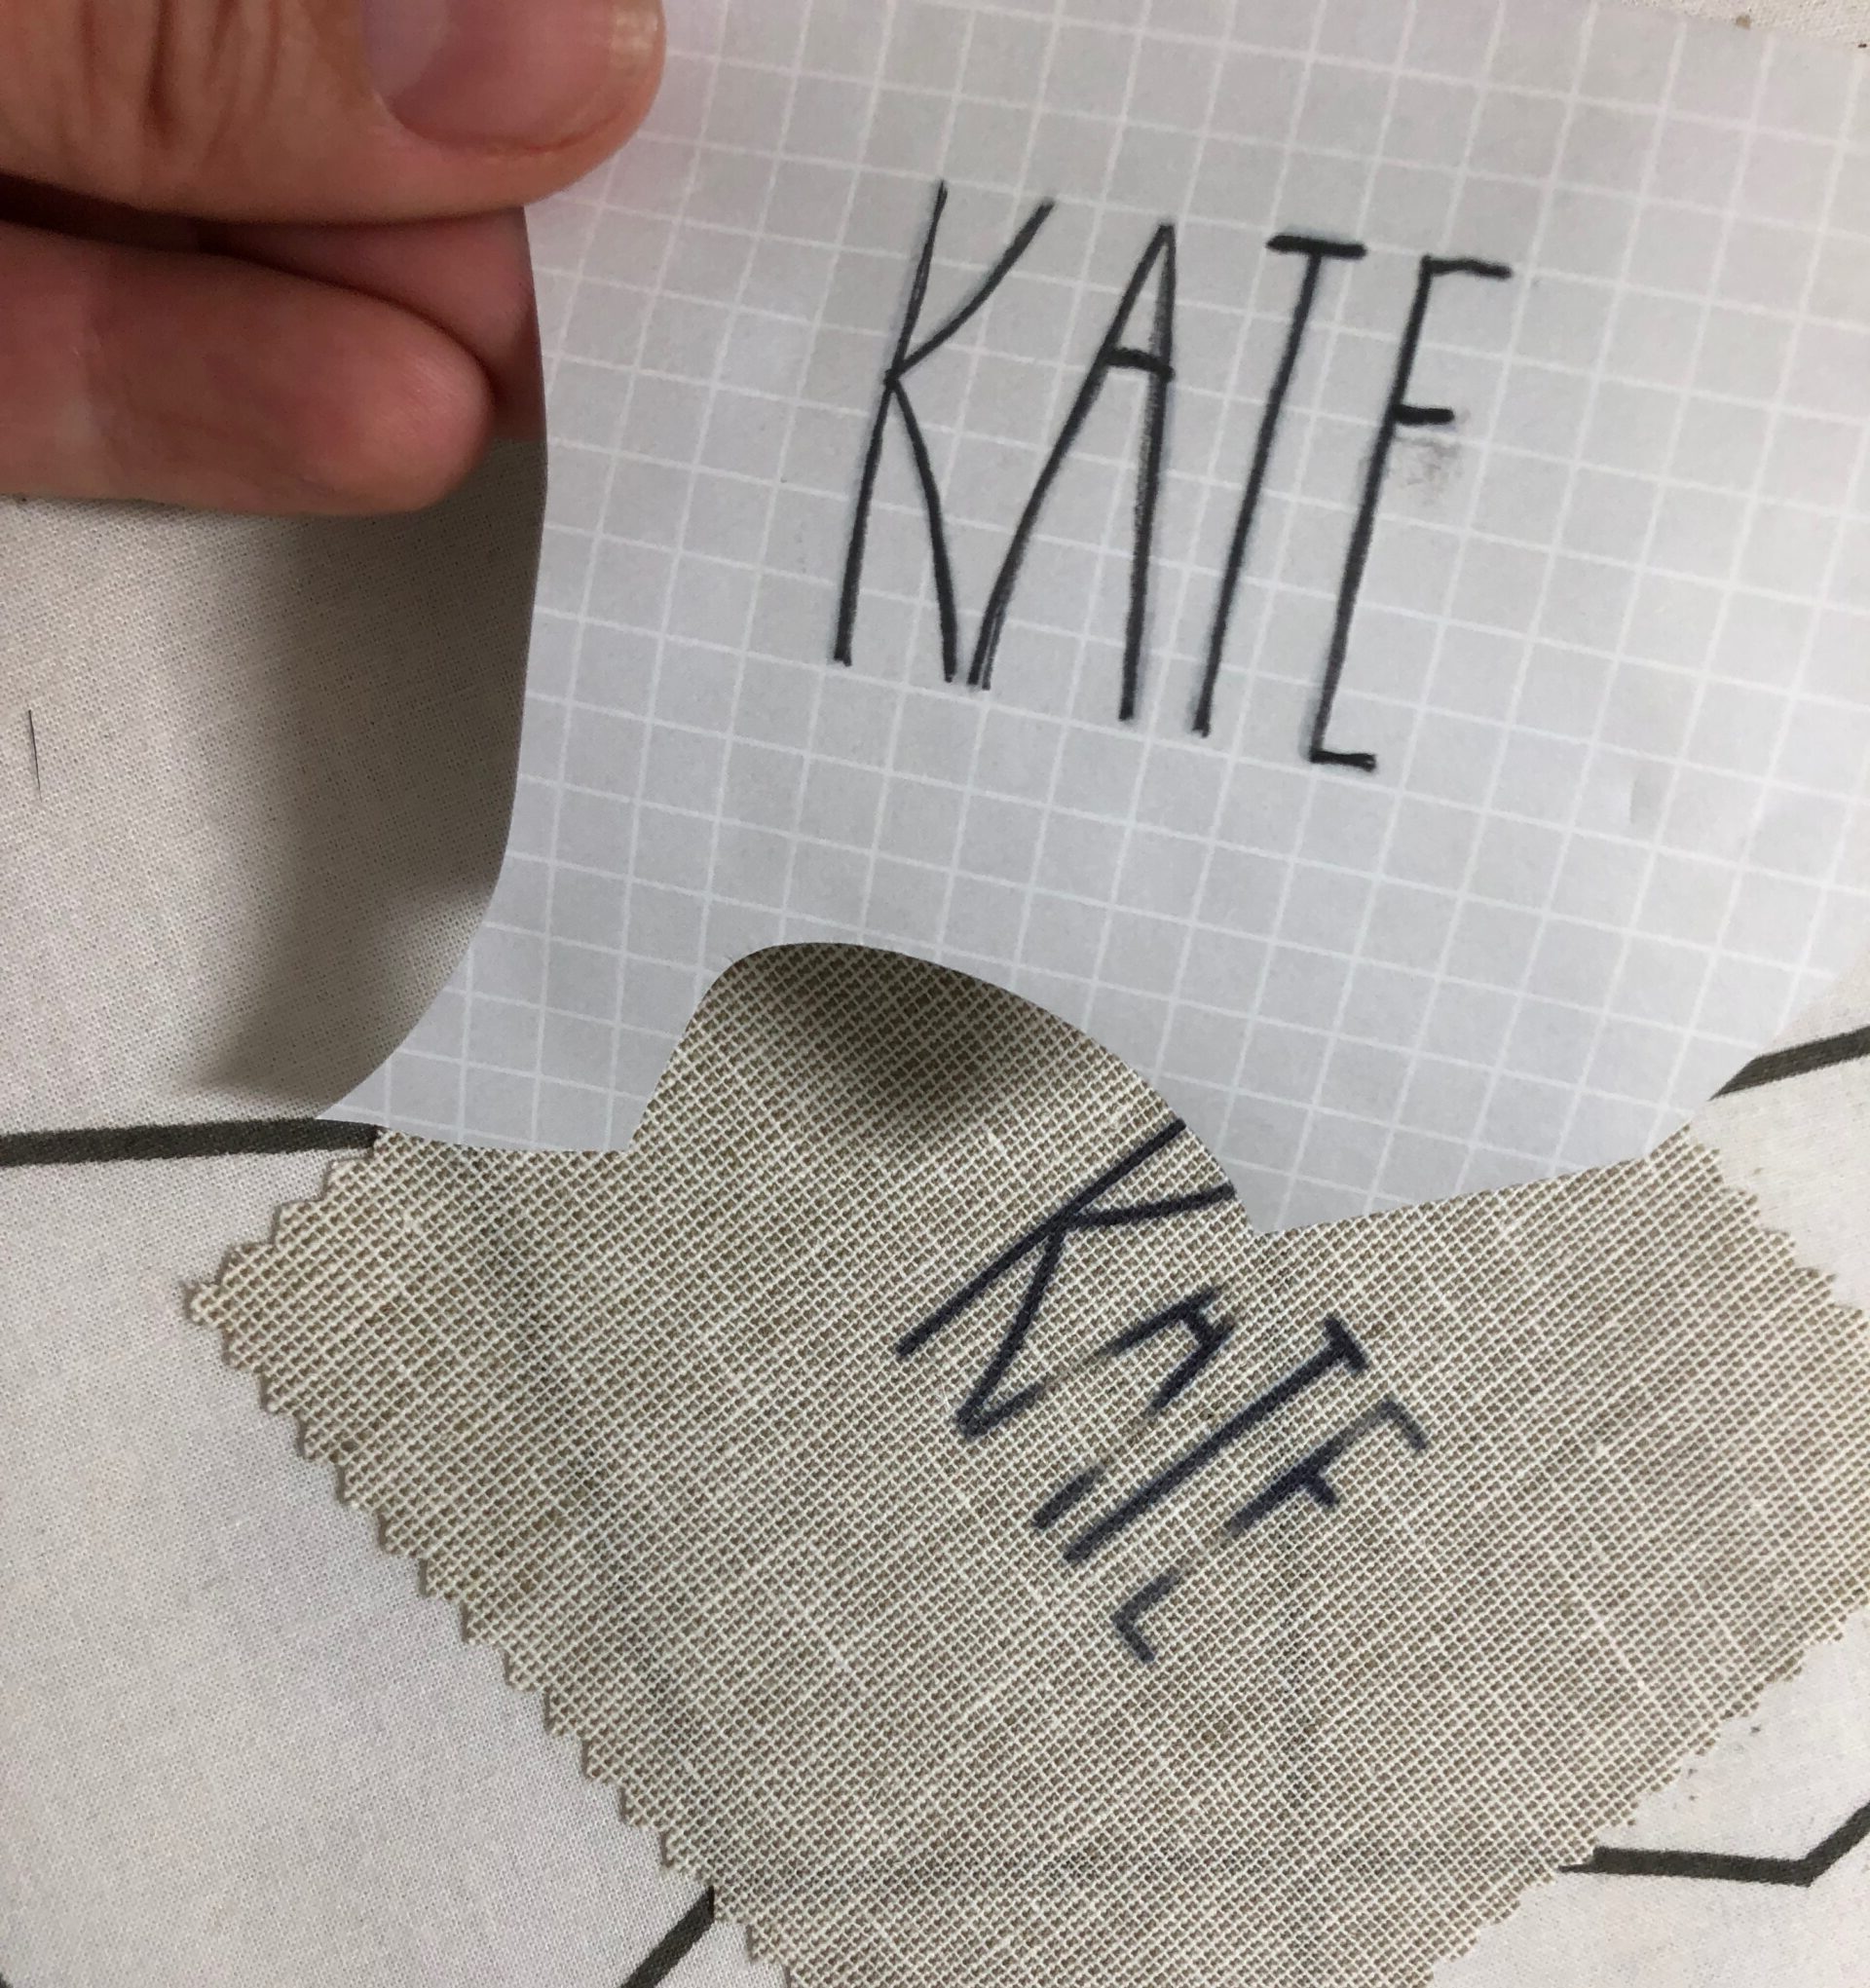
Flip over the paper so the wrong side is facing up.
Shake the transfer pen a few times before opening. Using the reserved scrap paper, press the transfer-pen felt tip down onto the paper slightly until the tip is saturated. Test the pen to ensure the ink flows from the tip as desired.

Trace the name backwards (from the paper wrong side) using the transfer pen. If the ink runs out, repeat to press the tip gently onto the scrap paper until the ink flows freely again.
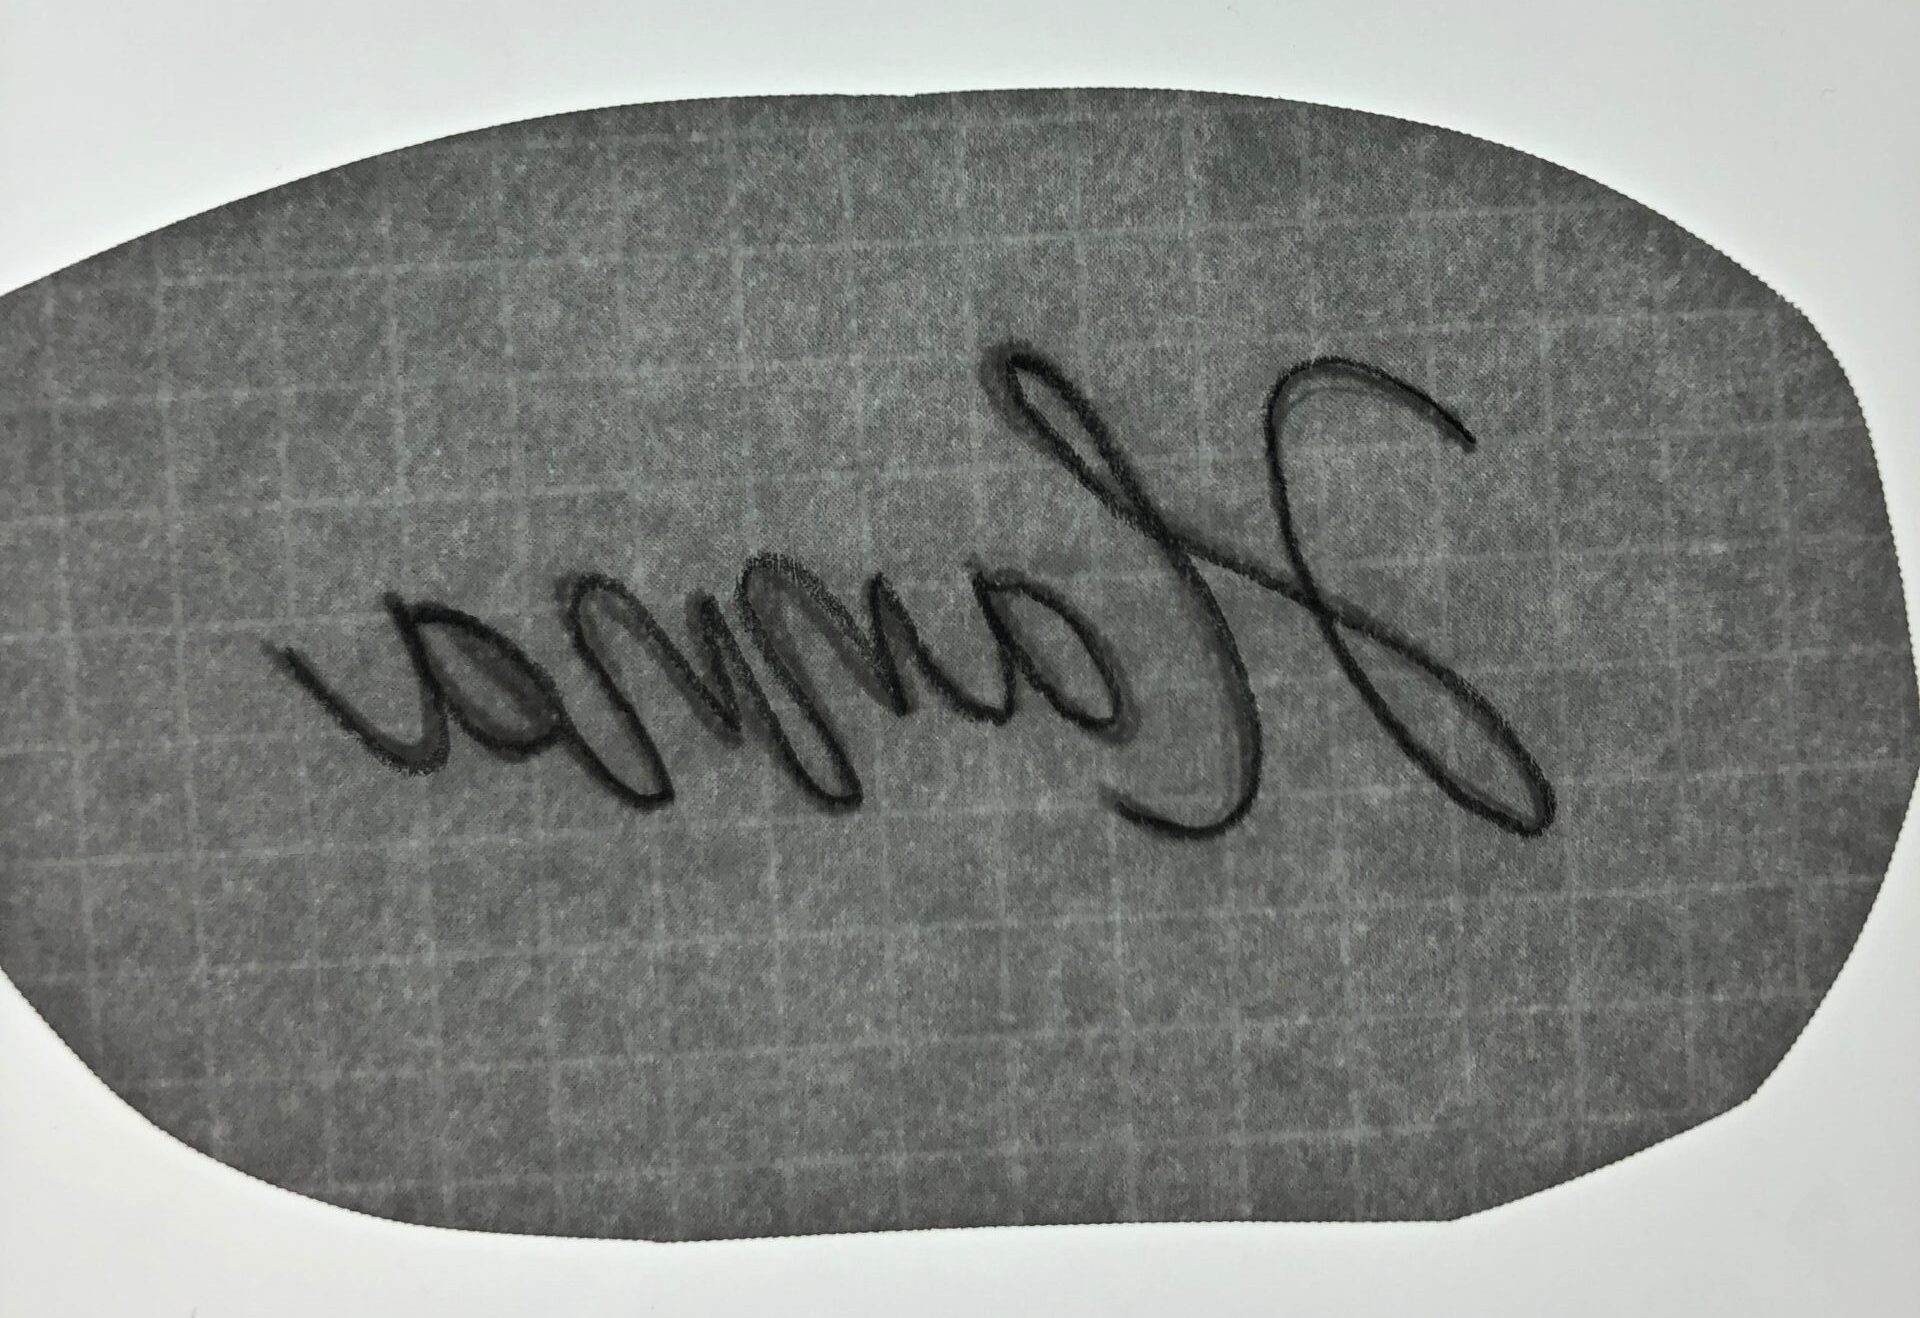
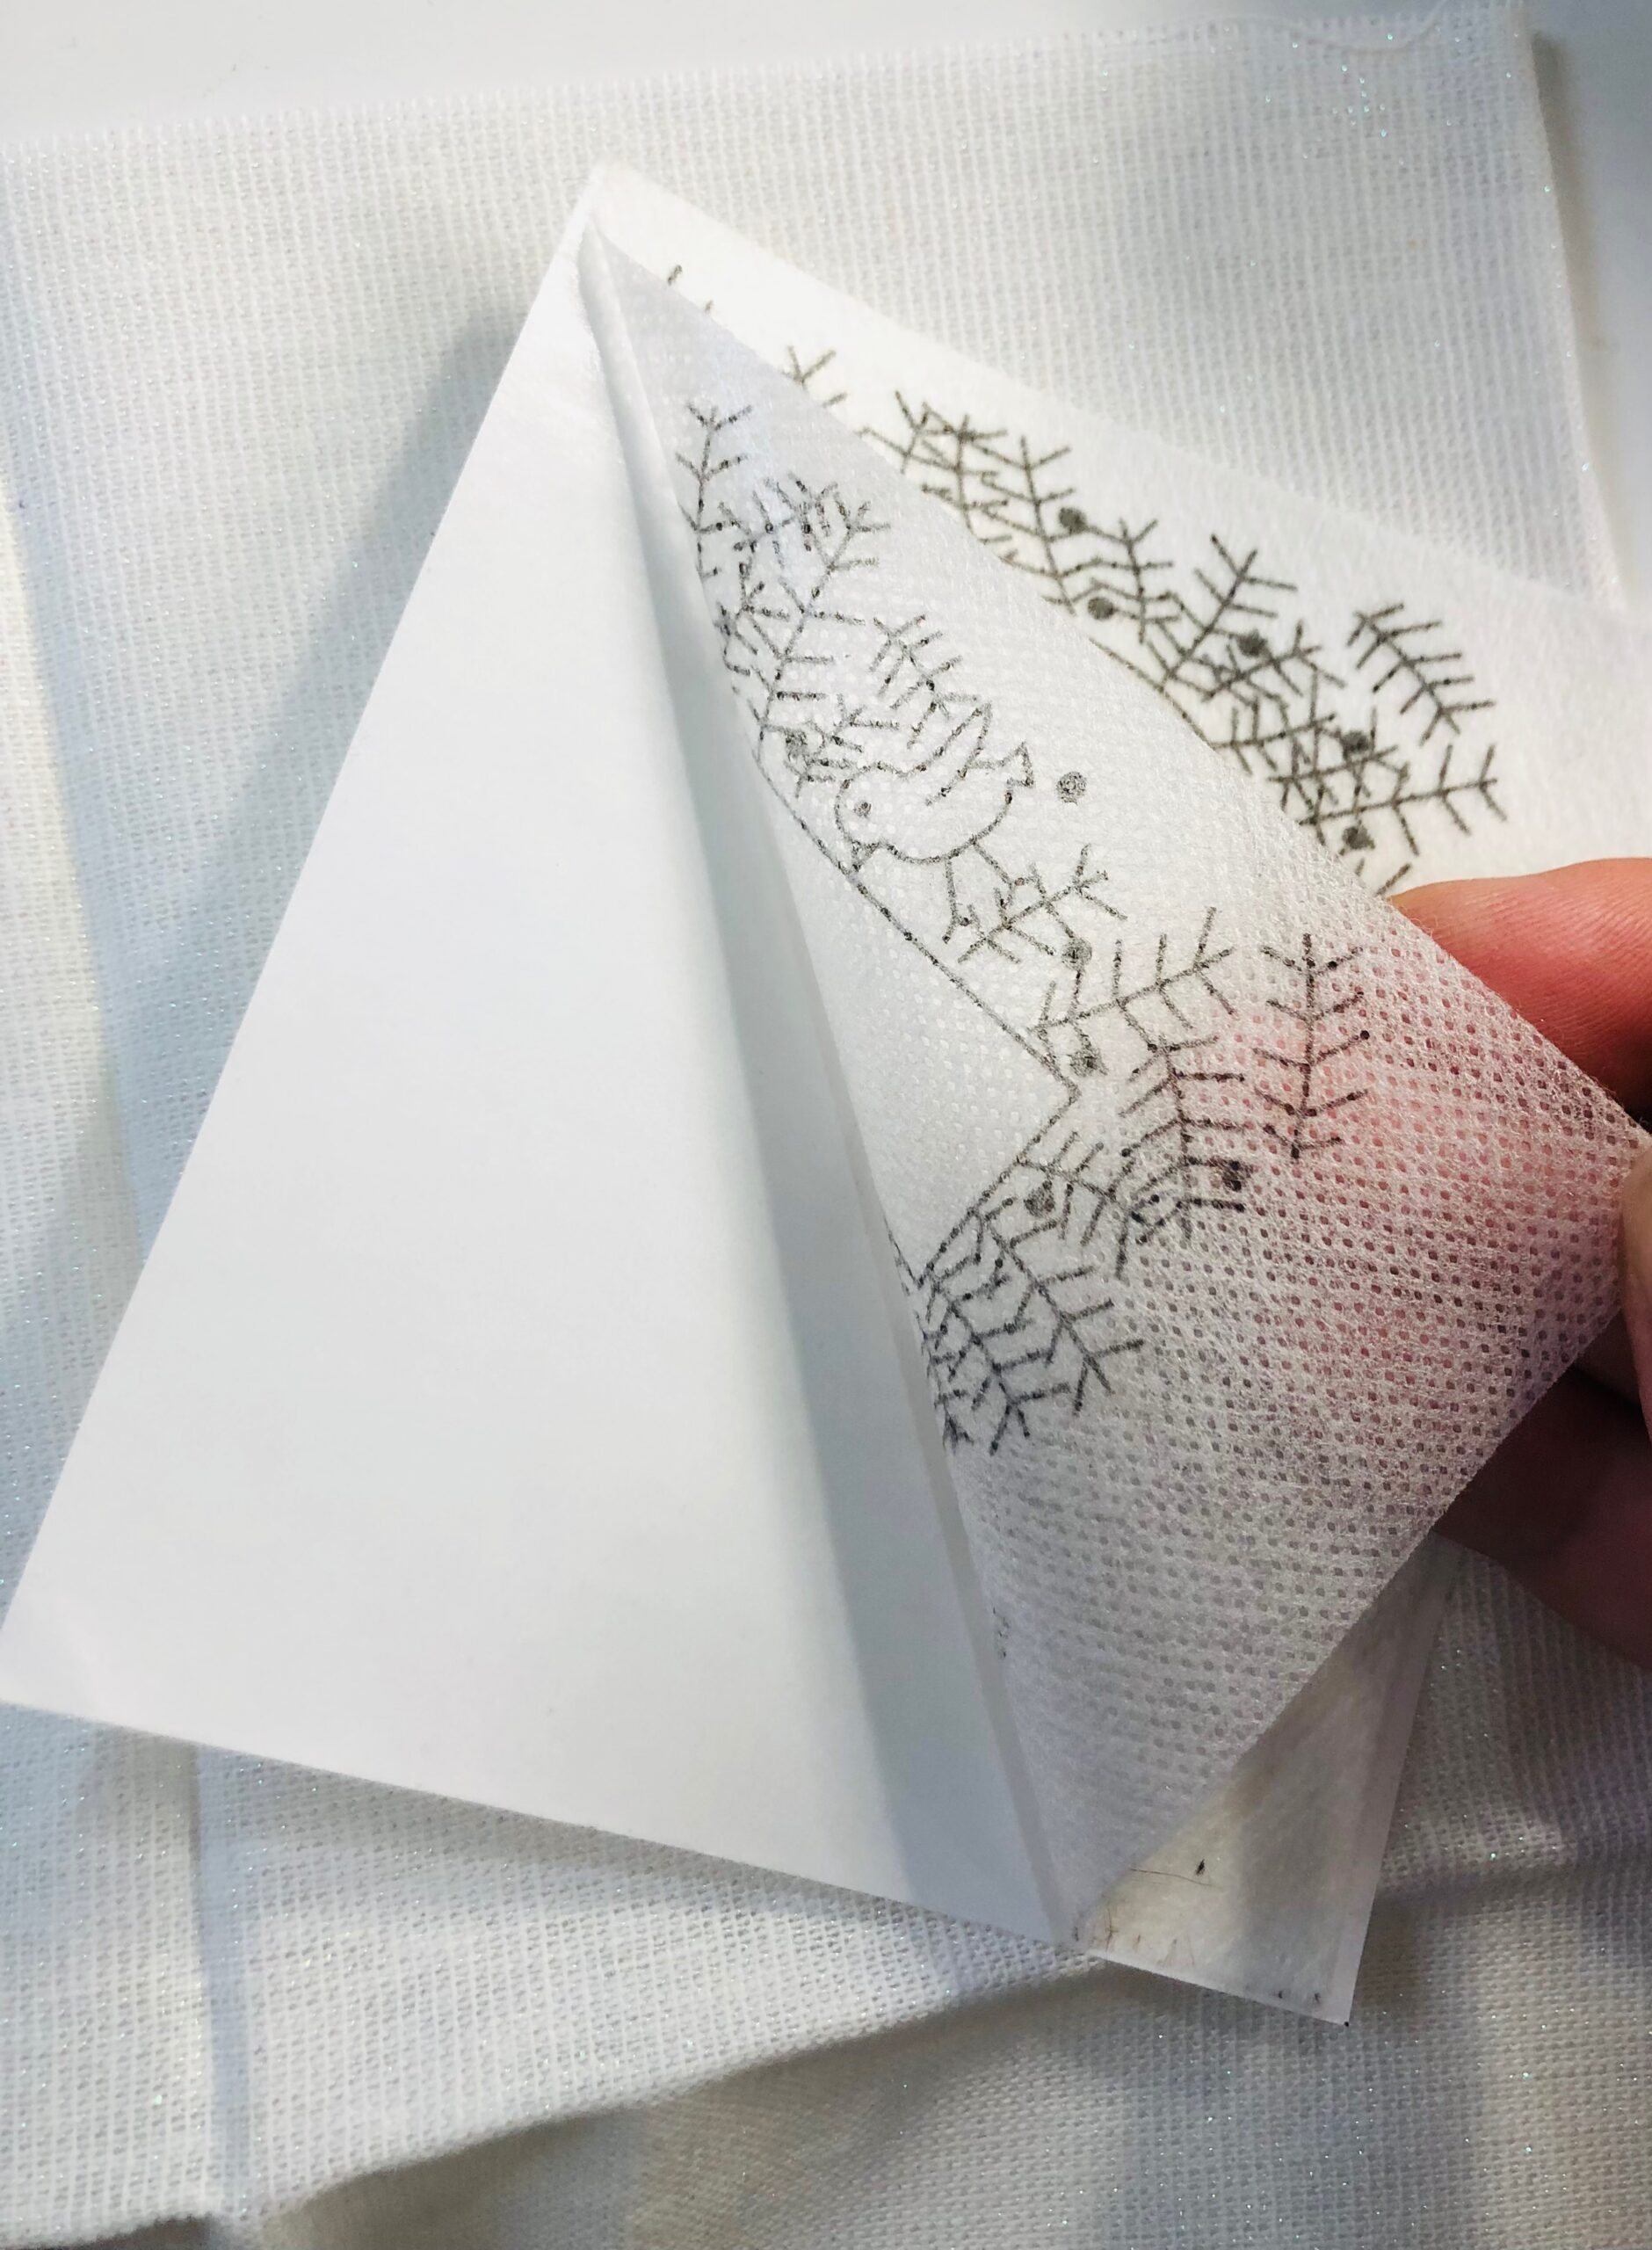
Once the name is traced, center the paper right side up over the fabric right side.
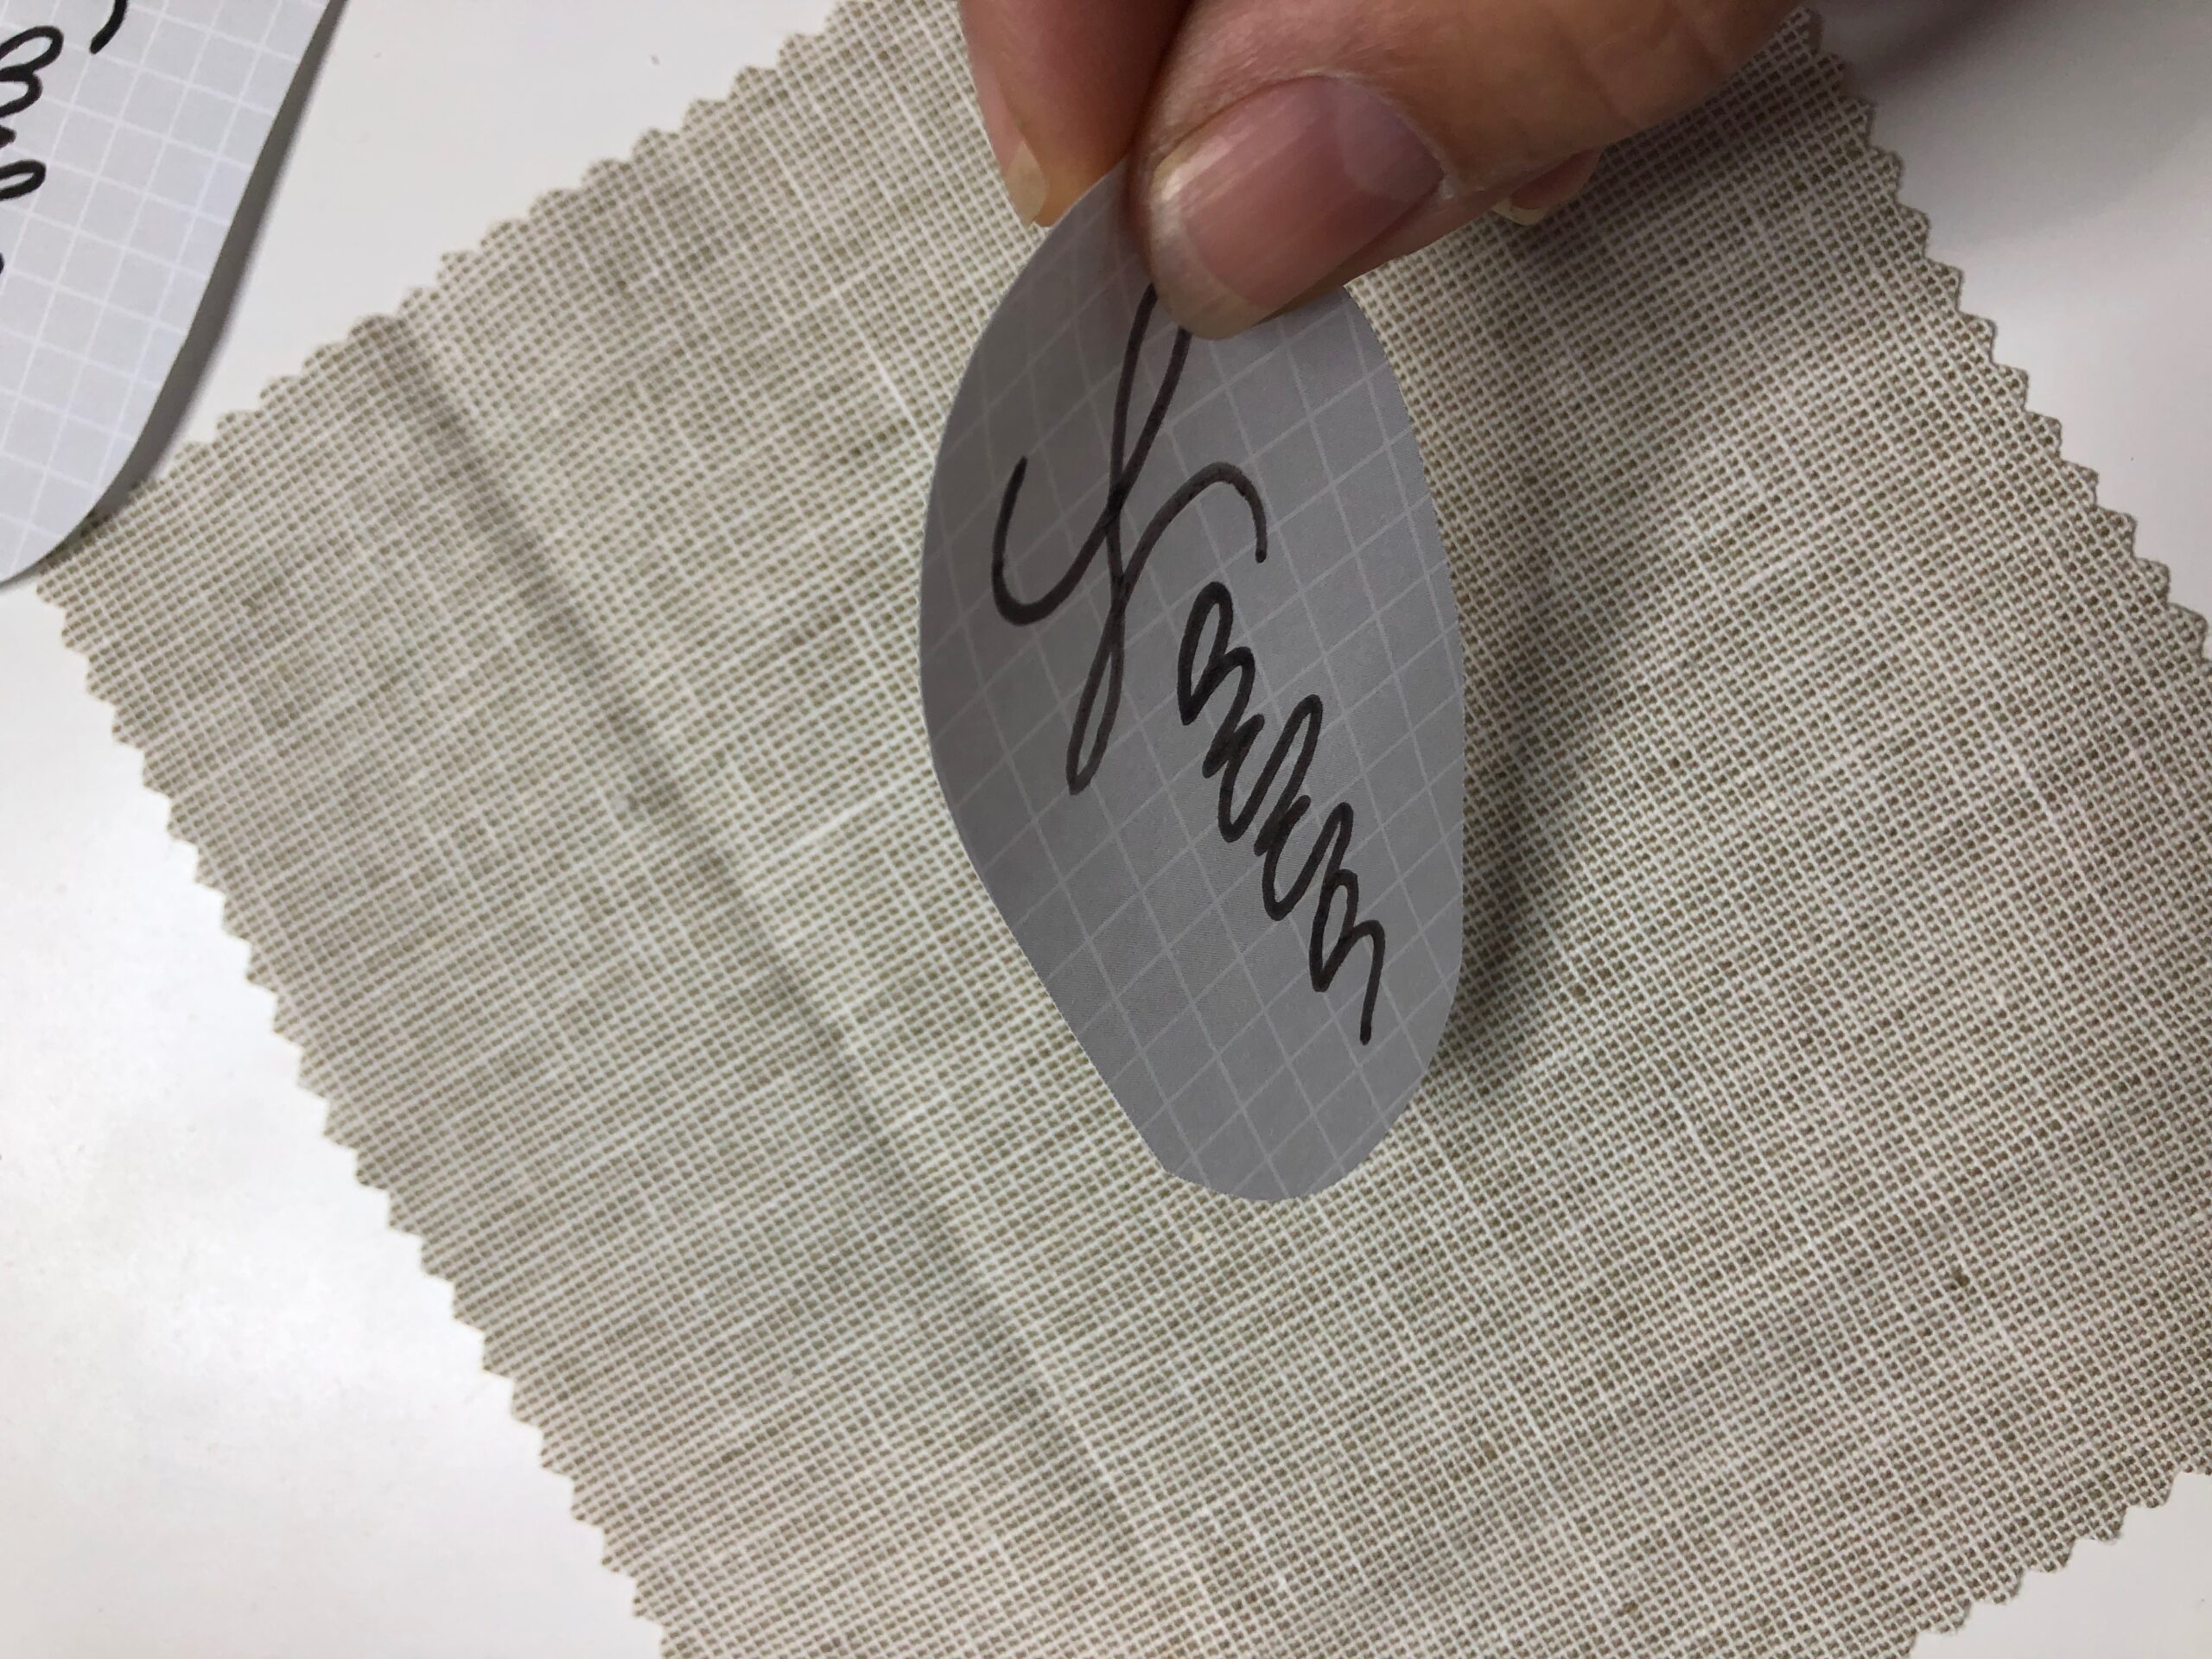
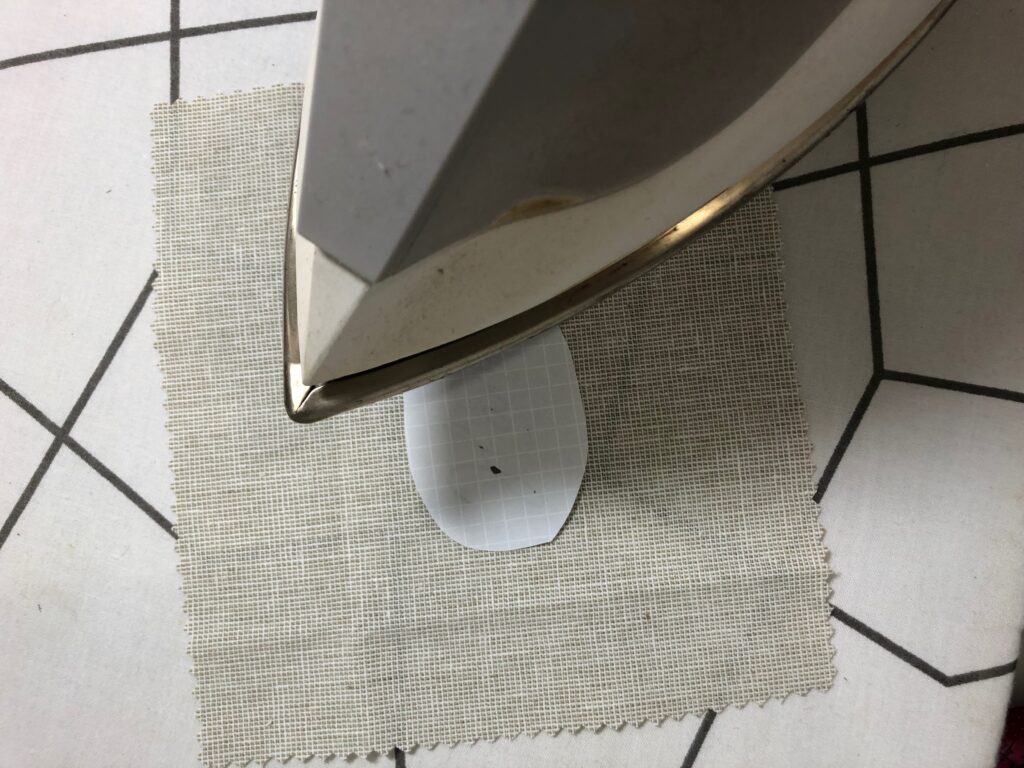
Use a medium-heat iron to heat-set the design to the fabric. Don’t iron back and forth; rather lift the iron up and down until the design has transferred to the fabric.
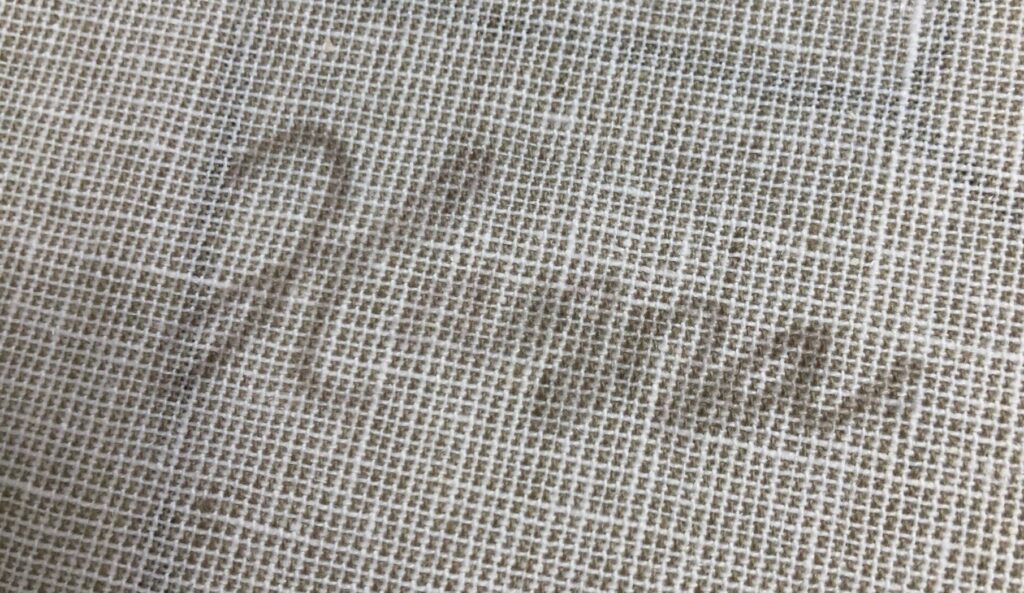
The above image is shown using a brown Iron-On Transfer Pen. Using a darker color may be easier to read but may be more visible once the design is stitched.
STICK N’ STITCH HAND EMBROIDERY METHOD
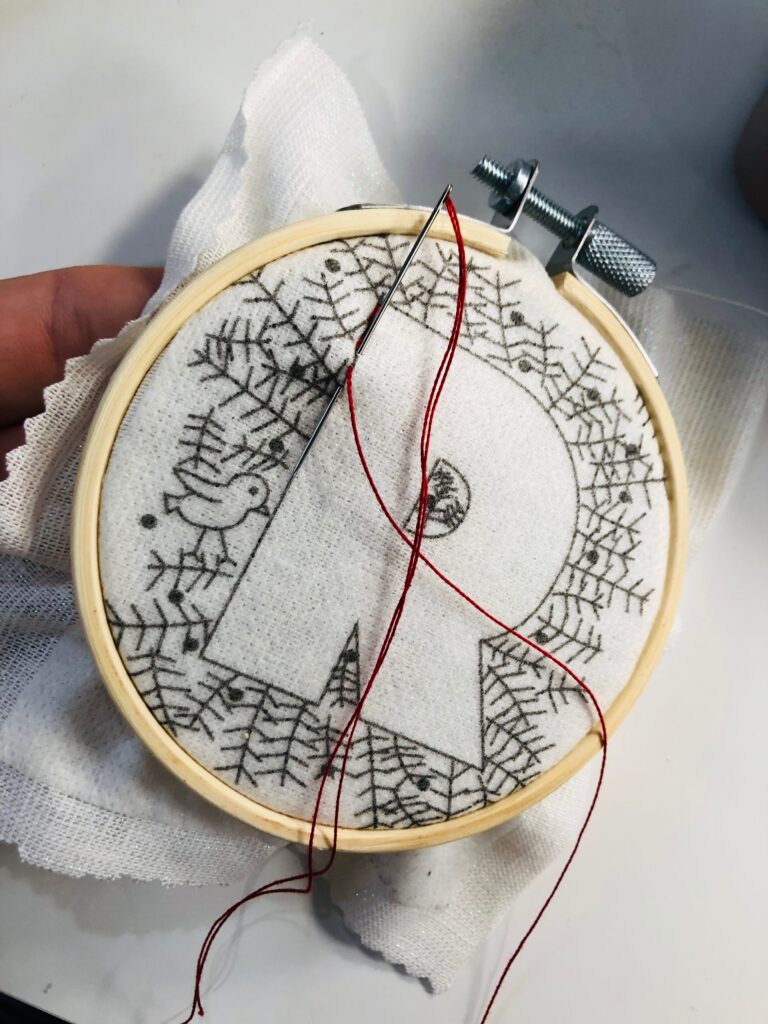
Choose a font or hand embroidery design and print the chosen name or design directly onto Sulky Stick ’n Stitch Stabilizer. Print on the fabric-like side, and set the printer to the lowest ink setting, sometimes called “Draft.”)
Cut out the name or motif from the stabilizer, leaving a bit of a border beyond the design perimeter.
Remove the paper backing from the stabilizer.
Stick the stabilizer to the fabric square right side, centering the design.

Follow the instructions under “Hand Embroidery.” Note: Some portions of the featured design were omitted to accommodate the hoop along the outer edge.
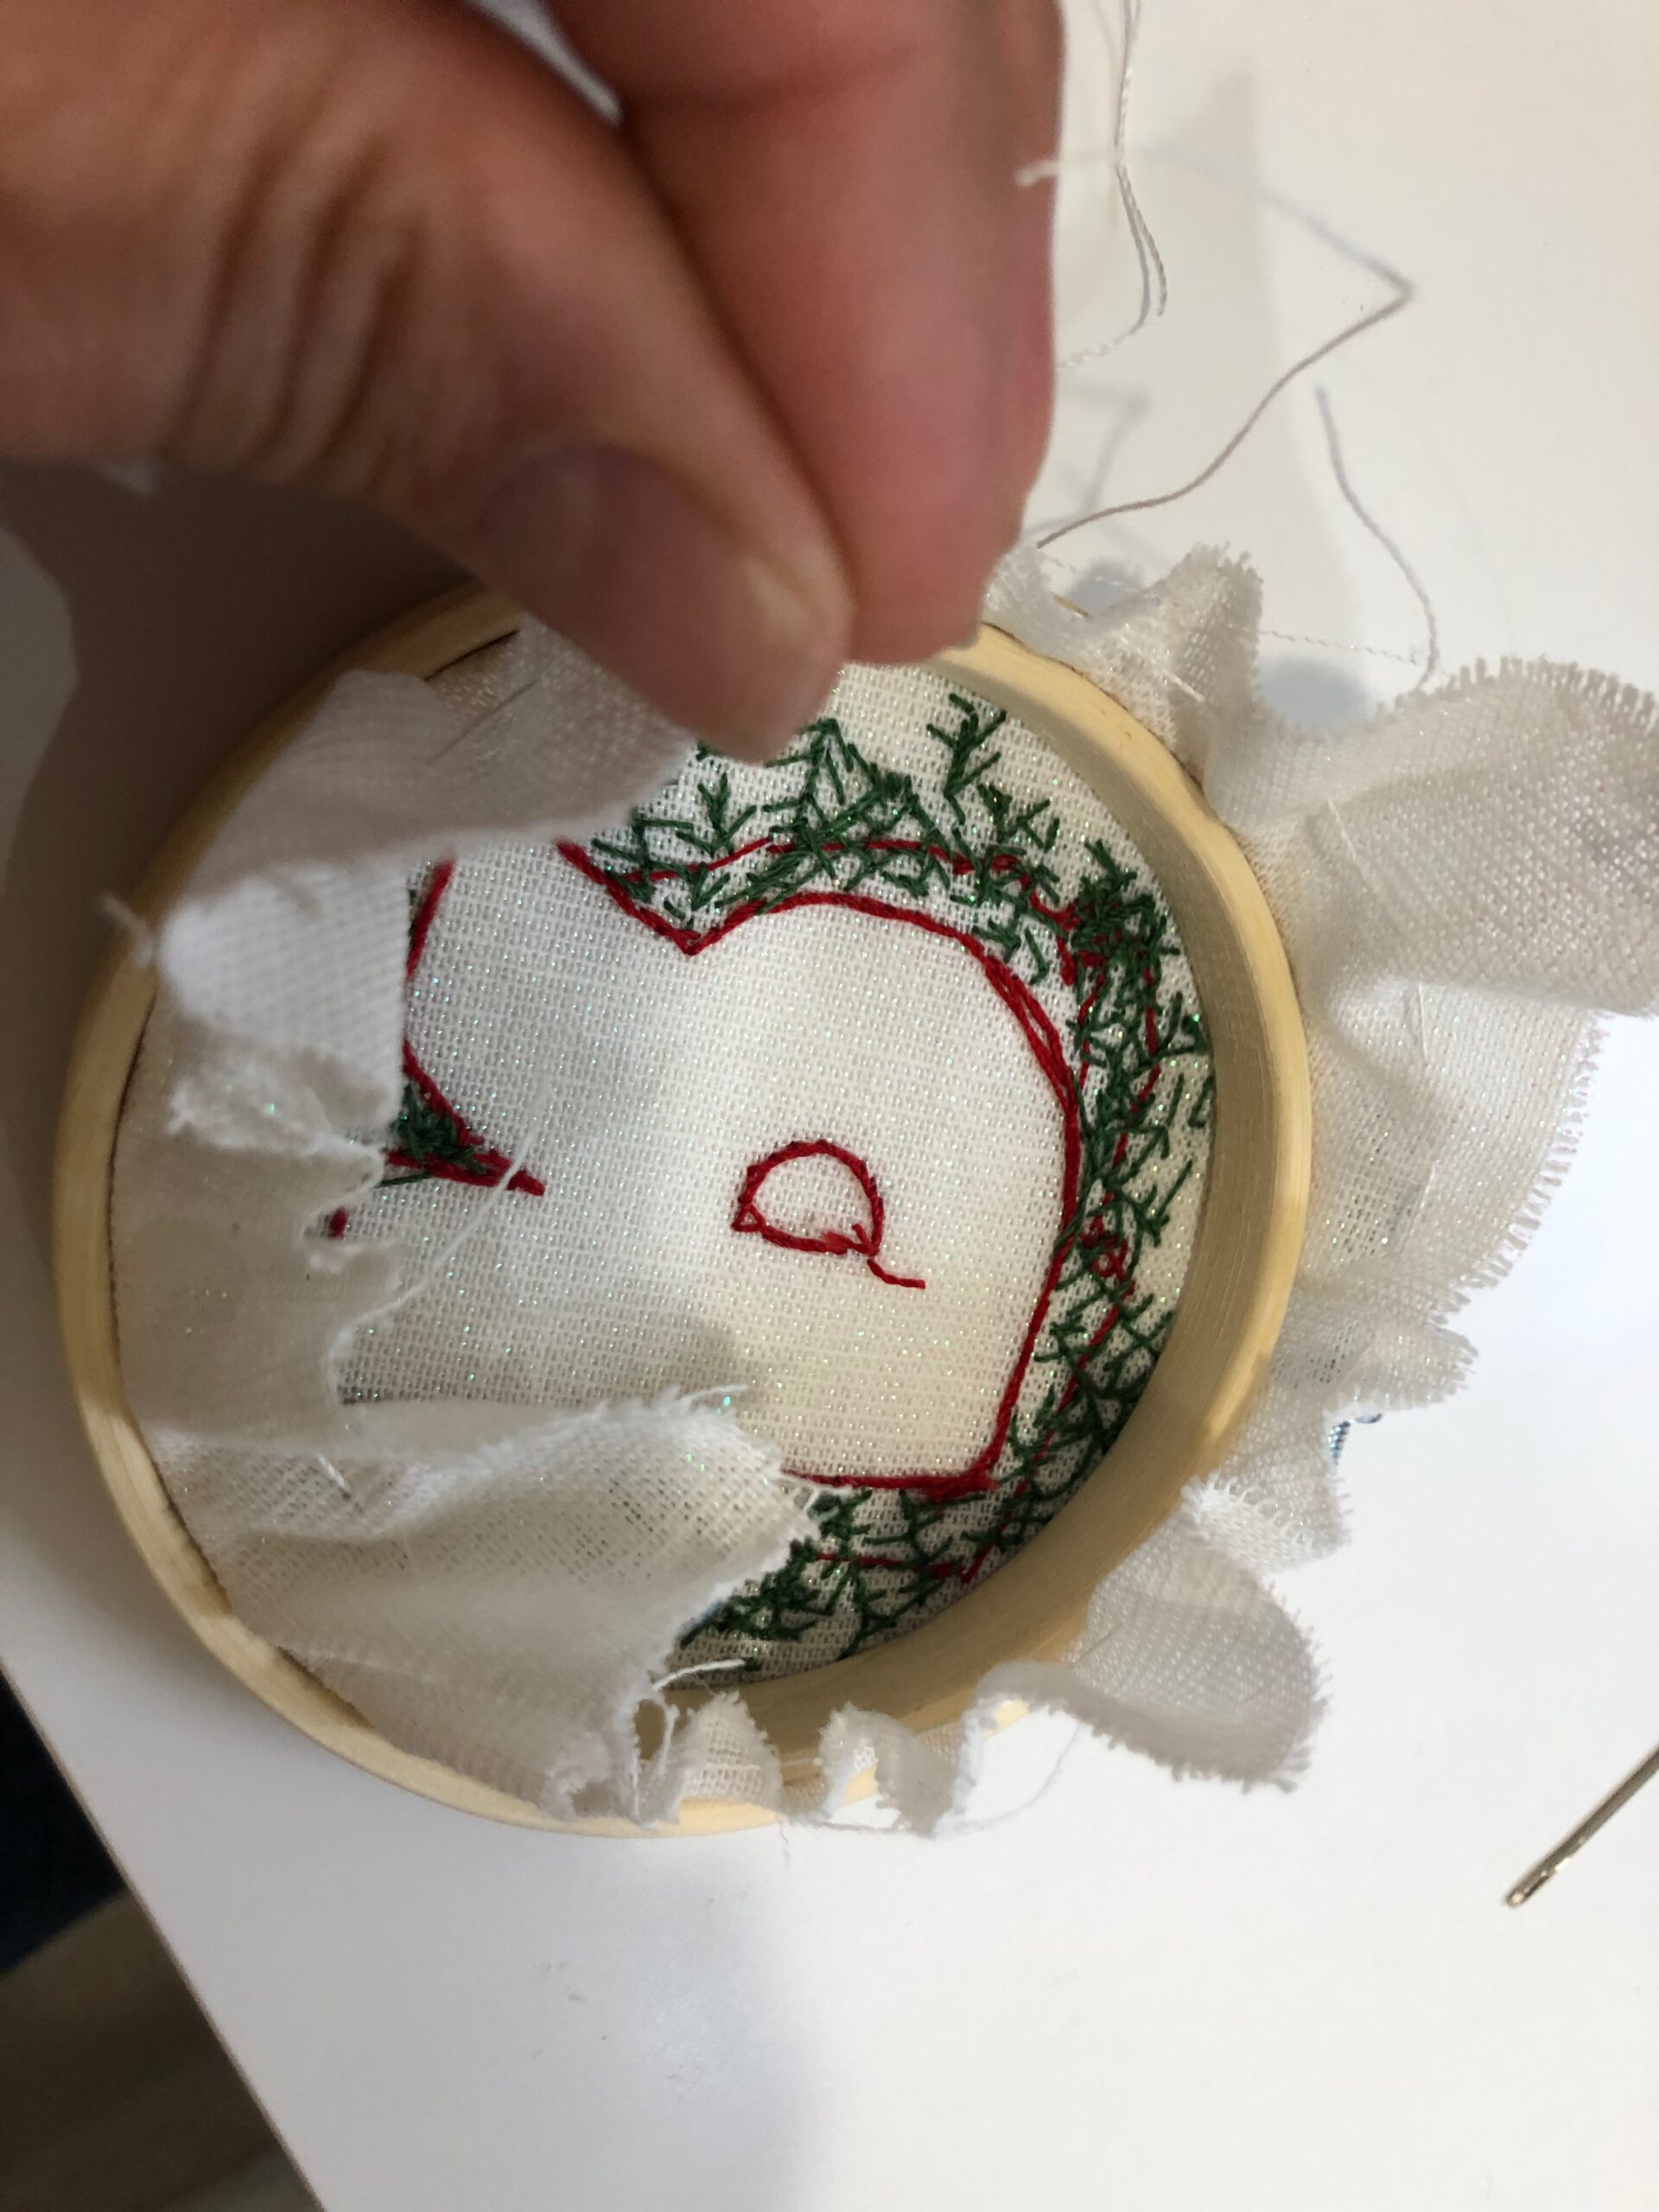
When embroidery is complete, remove the fabric from the hoop. Then, rinse away the Stick ’n Stitch under running water until dissolved.

Place the fabric onto a towel and roll it up to release most of the moisture. Then, let dry flat on the towel. When dry, gently press from the wrong side to remove wrinkles.
Rehoop the finished piece, centering the design. Continue with the “Finishing” instructions.
HOOPING
Use pinking shears, if desired, to trim the fabric edges and reduce fraying during embroidery & use.

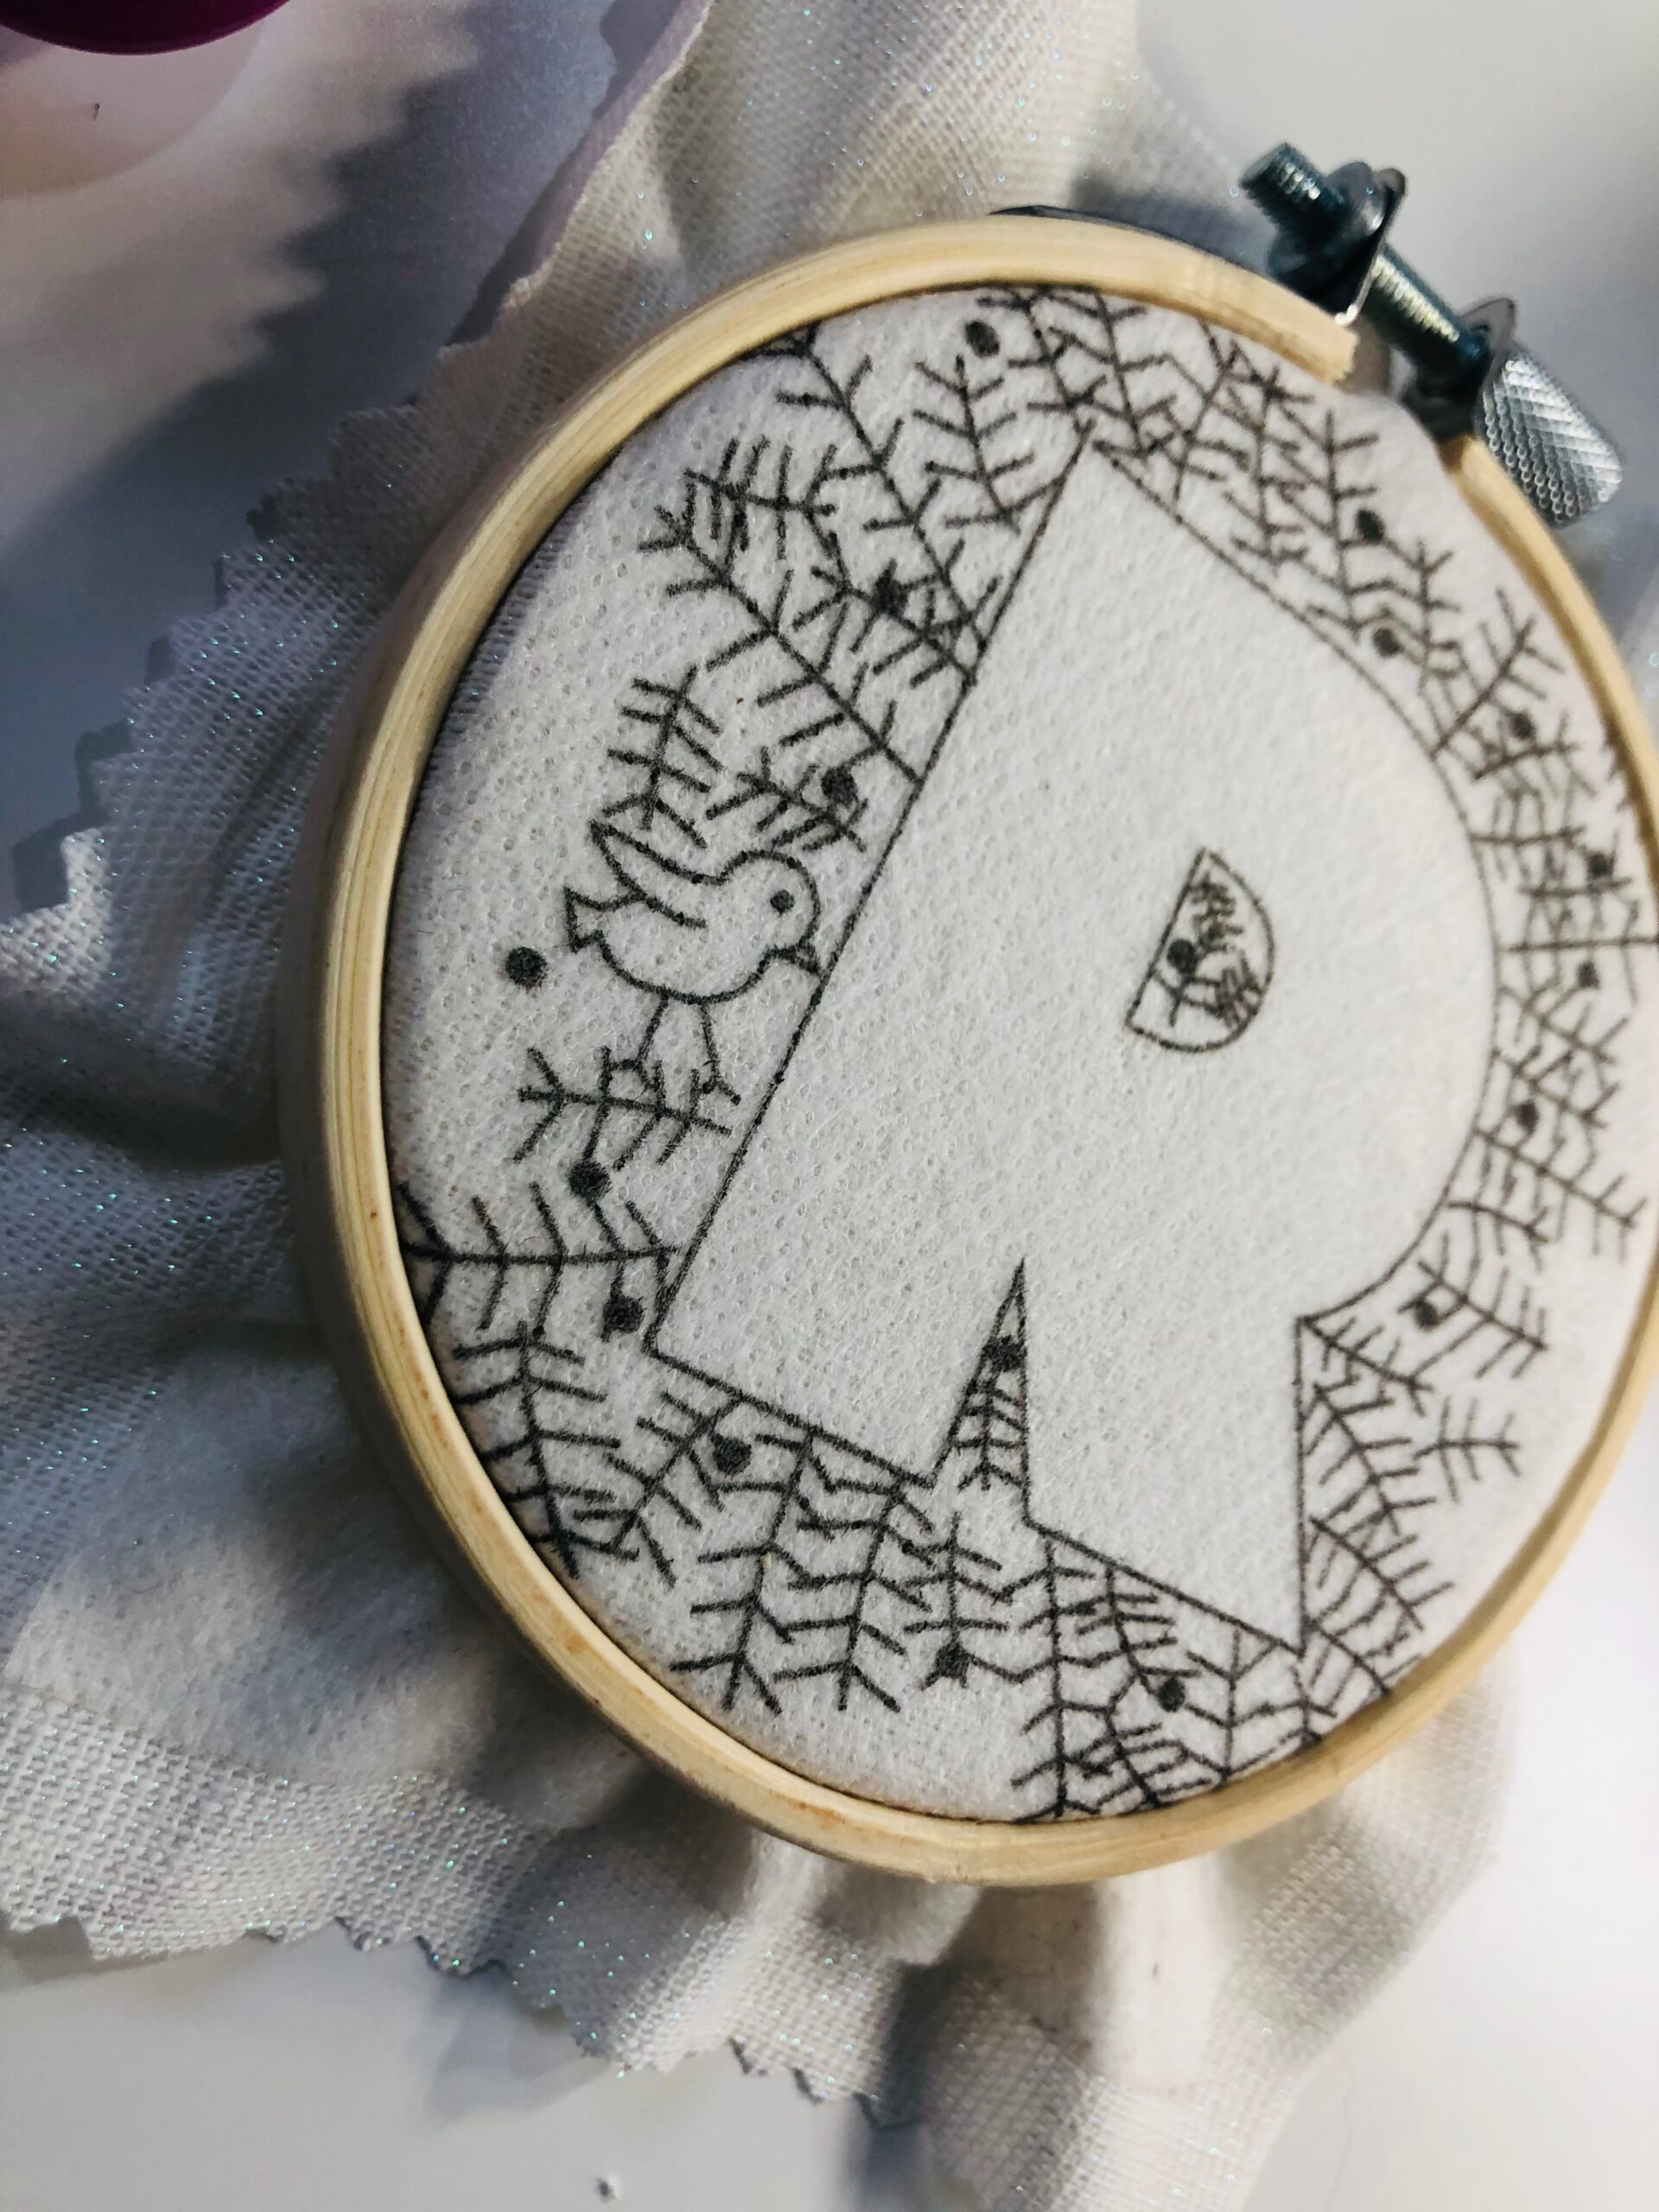
Place the fabric over the inner hoop ring, centering the design. Then, place the outer hoop ring around the inner hoop ring, loosening the tension screw as needed. Make sure there are no folds or ripples in the fabric, and then tighten the screw. Do not pull the fabric edges or corners to tighten it further in the hoop. If it’s not as tight as desired, start again to hoop it properly.
HAND EMBROIDERY
Thread the hand sewing needle with one (or two) strands of Cotton Petites Thread. Remember, one strand acts as two strands of traditional embroidery floss. If working with a thicker line-weight font, two strands may be preferred.
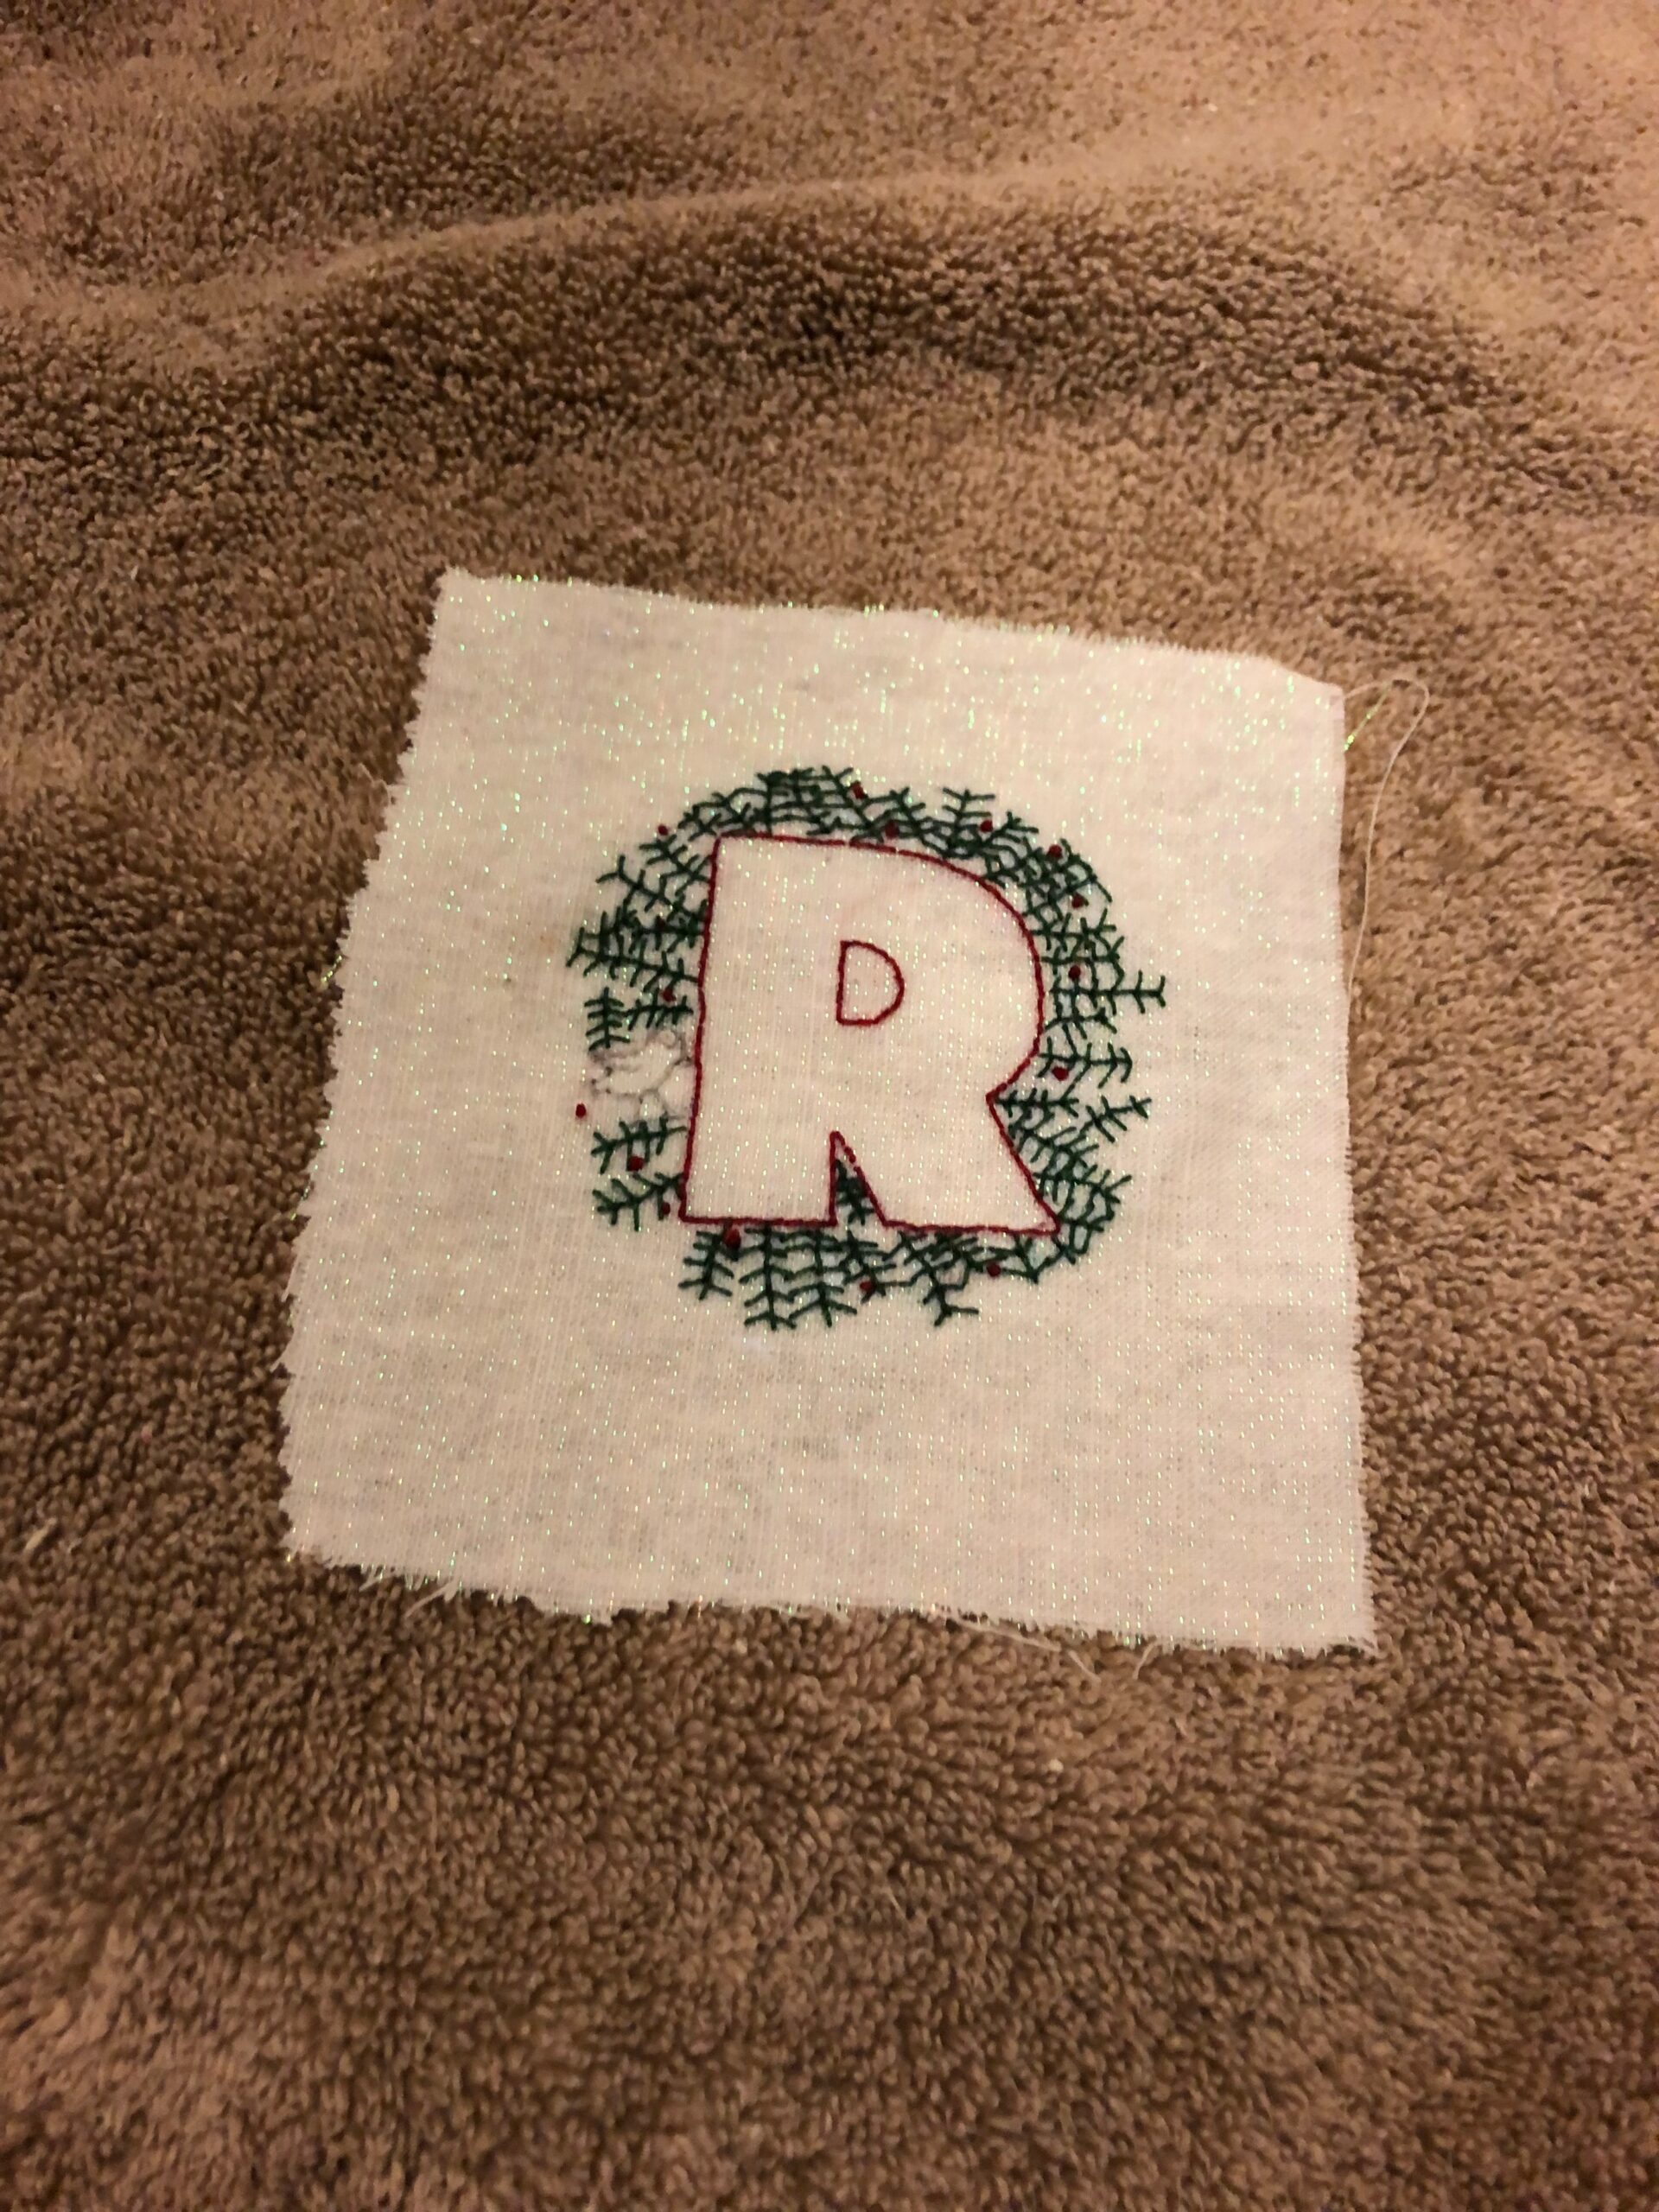
Embroider the design using the desired stitches. Stem stitches are great for scripty fonts, as the stitches follow curves well. Backstitches are great for block letters.

MACHINE EMBROIDERY OPTION
If desired, embroider a design, name or phrase to the fabric and place the finished embroidery inside the mini hoop for display and gifting.
Fuse a piece of Sulky Soft ‘n Sheer Extra to the wrong side of the fabric. Then, hoop the fabric in the hoop determined by the embroidery machine; choose the smallest hoop available for the intended design.
Embroider the design, clipping jump threads with each thread change.
When embroidery is complete, remove the fabric from the hoop and press lightly from the wrong side to remove any hoop marks.
Finally, trim the fabric to 5″ square, centering the design.
FINISHING
Stitch a row of gathering stitches along the fabric perimeter, and then pull gently to gather the thread around the back of the hoop. Then, tie of the thread ends to secure.
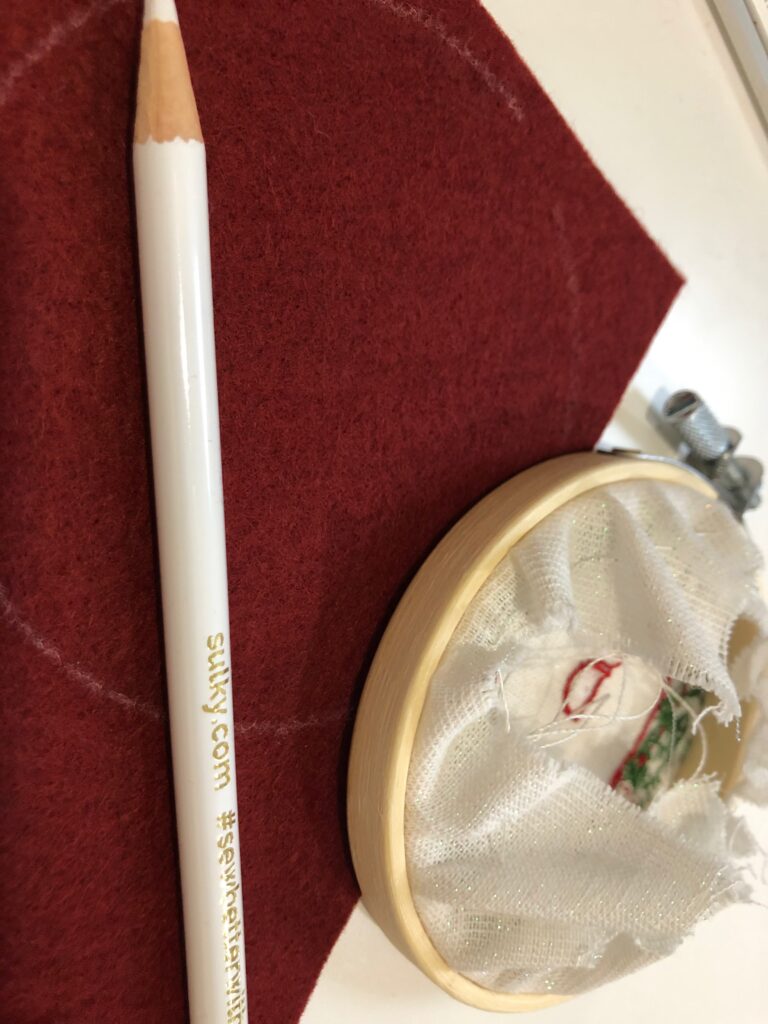
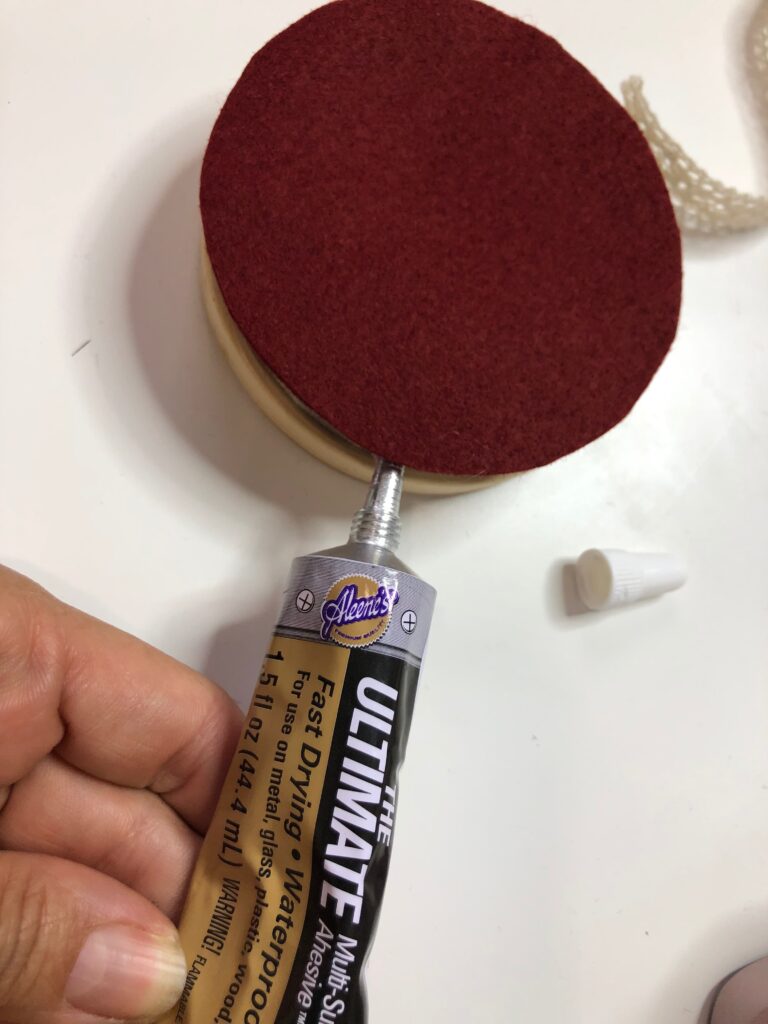
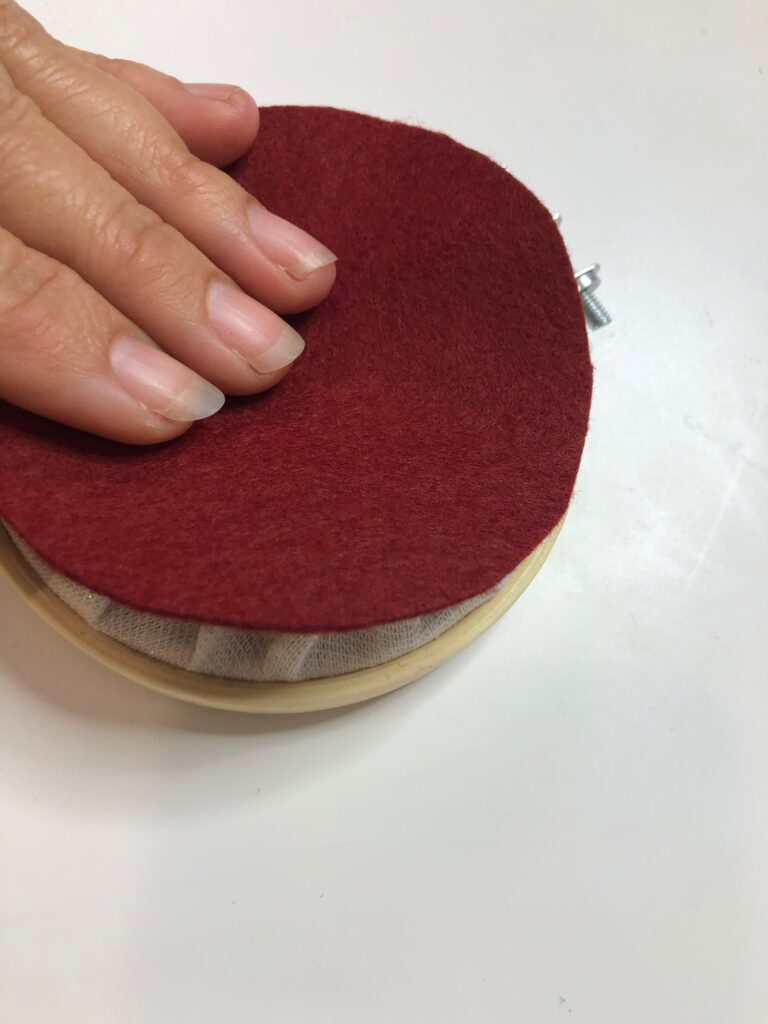
If desired, glue a felt circle to the hoop outer edge to conceal the stitching and complete the gift. First, outline the hoop circle onto a piece of felt using a chalk pencil. Then, cut out and place a bit of glue along the outer hoop ring. Finally, use your hand to press the felt circle in place over the glue.
Add embellishments, such as felt leaves or greenery, to the hoop upper edge.
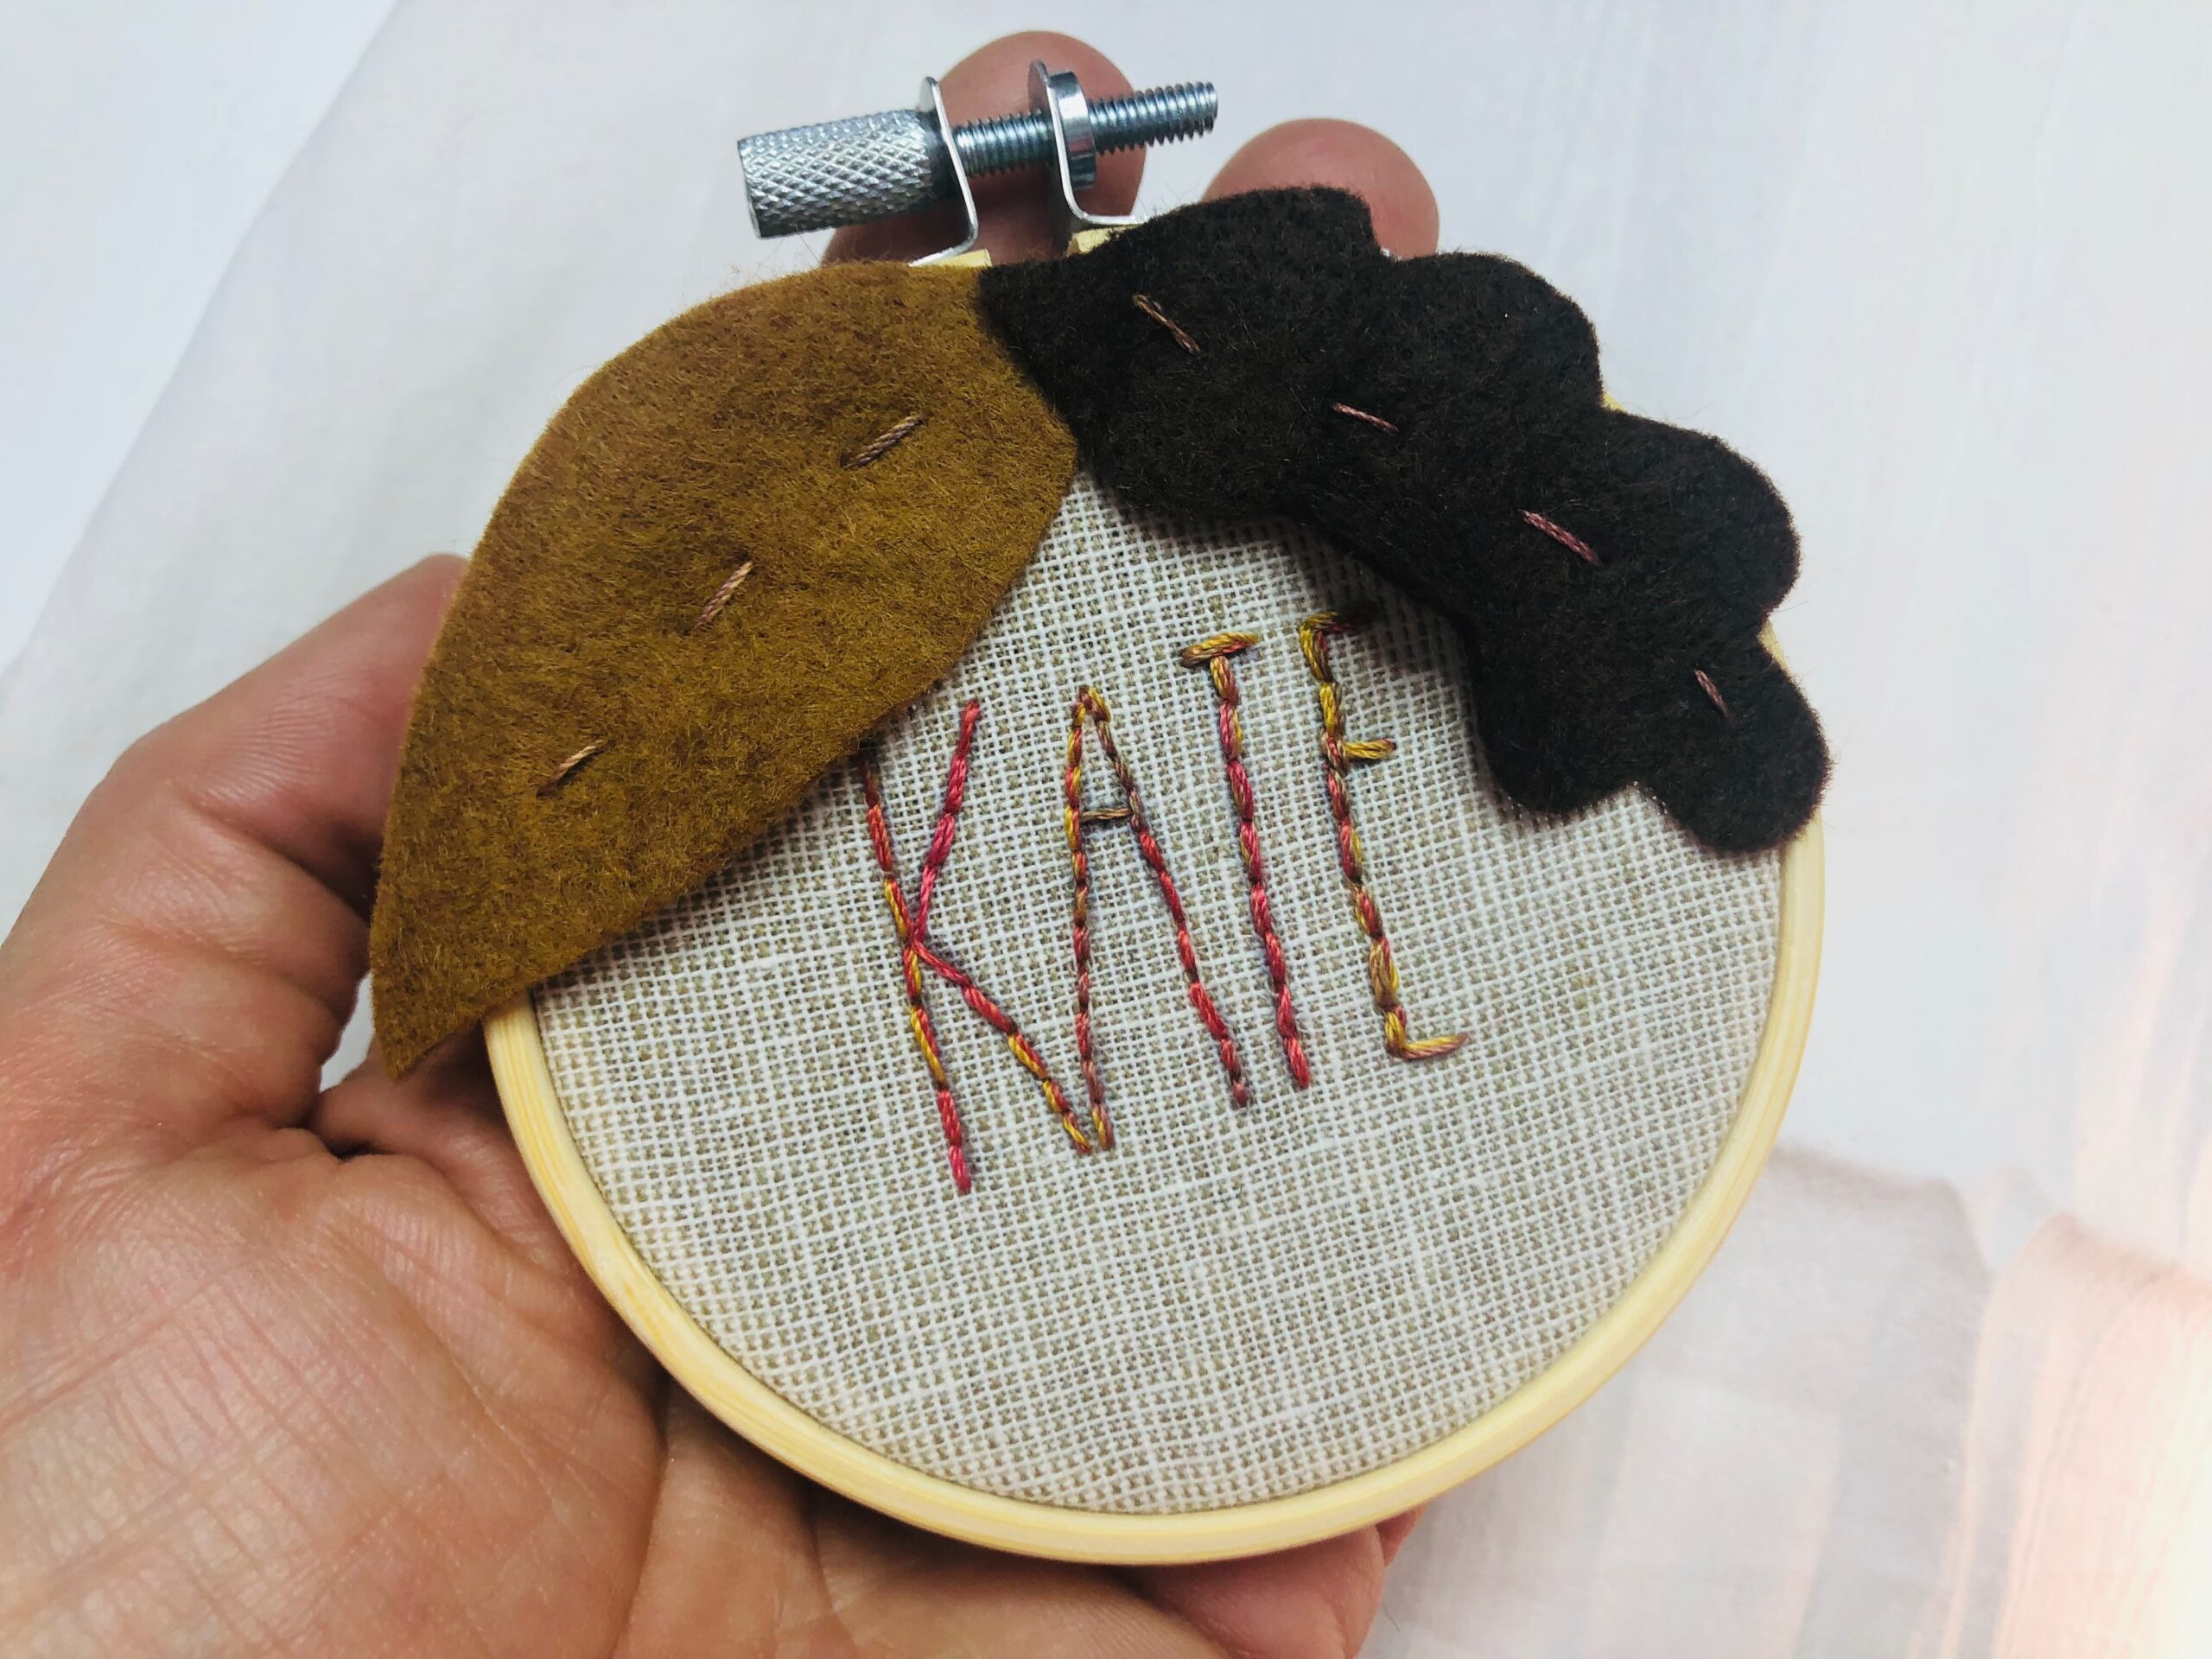
Add a hanging loop and gift away the mini hoop place card so the recipient can use it as an ornament. Or tie the mini hoop to a wrapped present for a unique gift tag.
TIP: Leave the project halfway stitched and let the kid’s table finish their own embroideries! Include a threaded needle in progress so they can pick up where you left off.


Ellen March
I am the Director of Content for Sulky of America. The former Editor in Chief of Sew News and Creative Machine Embroidery magazines, I hosted Sew it All TV on PBS for nine seasons. I've appeared on It's Sew Easy on PBS, DIY Network's Uncommon Threads, Hallmark's Marie Osmond Show, MacPhee Workshop and more! Come sew with me!