Patriotic Bunting
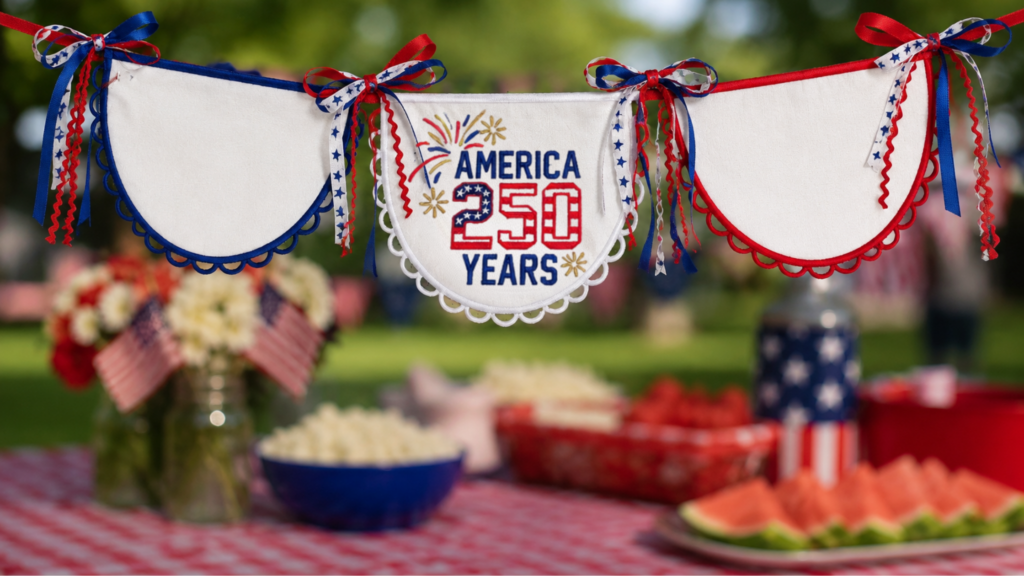
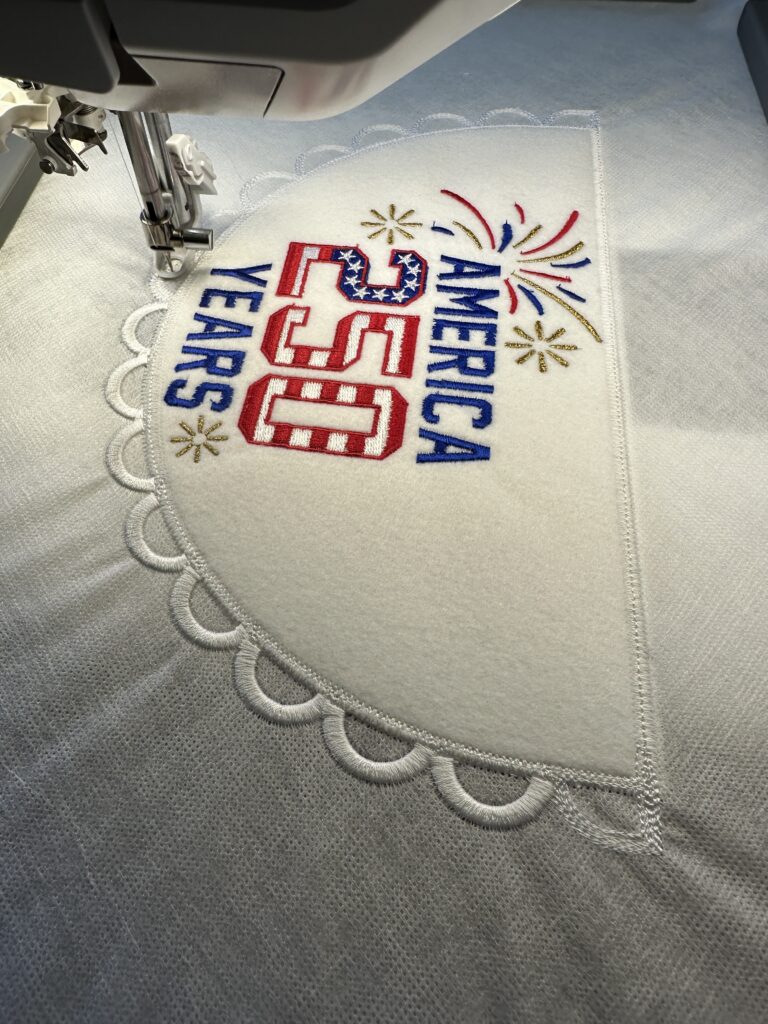
Celebrate America’s 250th birthday with a festive in-the-hoop bunting featuring the all-new Sulky “America 250” machine embroidery design. String together several patriotic bunting pieces to showcase your red, white, and blue spirit at holiday gatherings, front-porch displays and year-long commemorations of this historic milestone.
PATRIOTIC BUNTING SUPPLIES
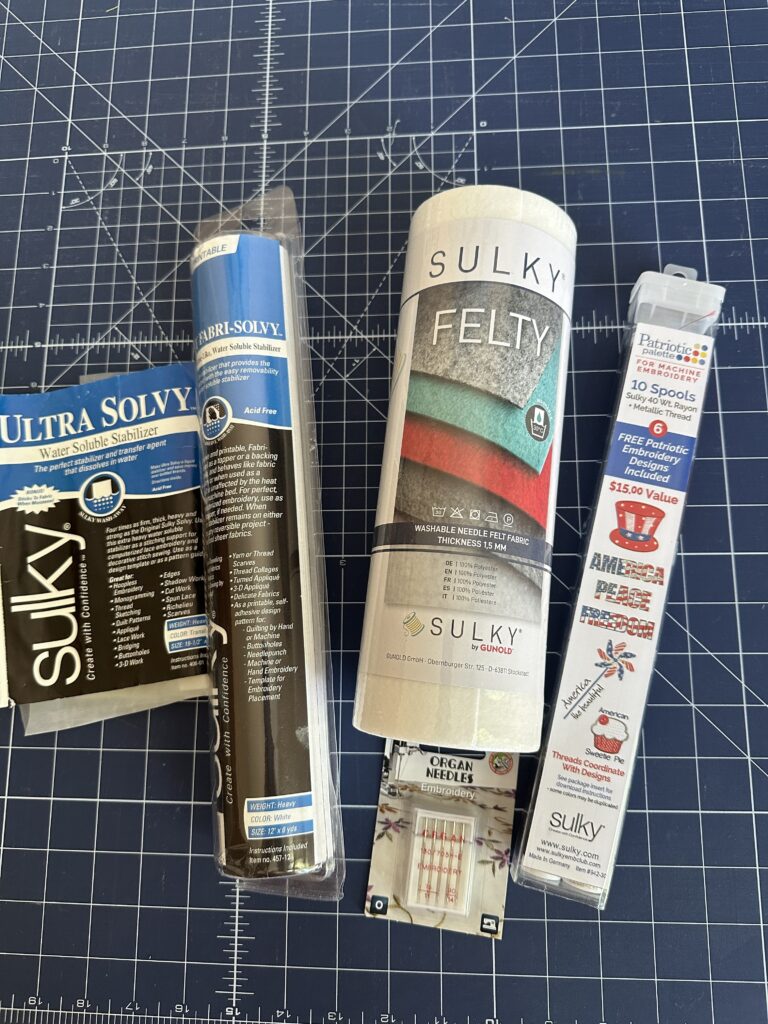
- FREE America 250 Machine Embroidery Design by Sulky
- Patriotic Machine Embroidery Palette (includes 10 spools of Sulky Rayon and Metallic Threads)
- 60 wt. Bobbin Thread
- Sulky Fabri-Solvy™ Stabilizer
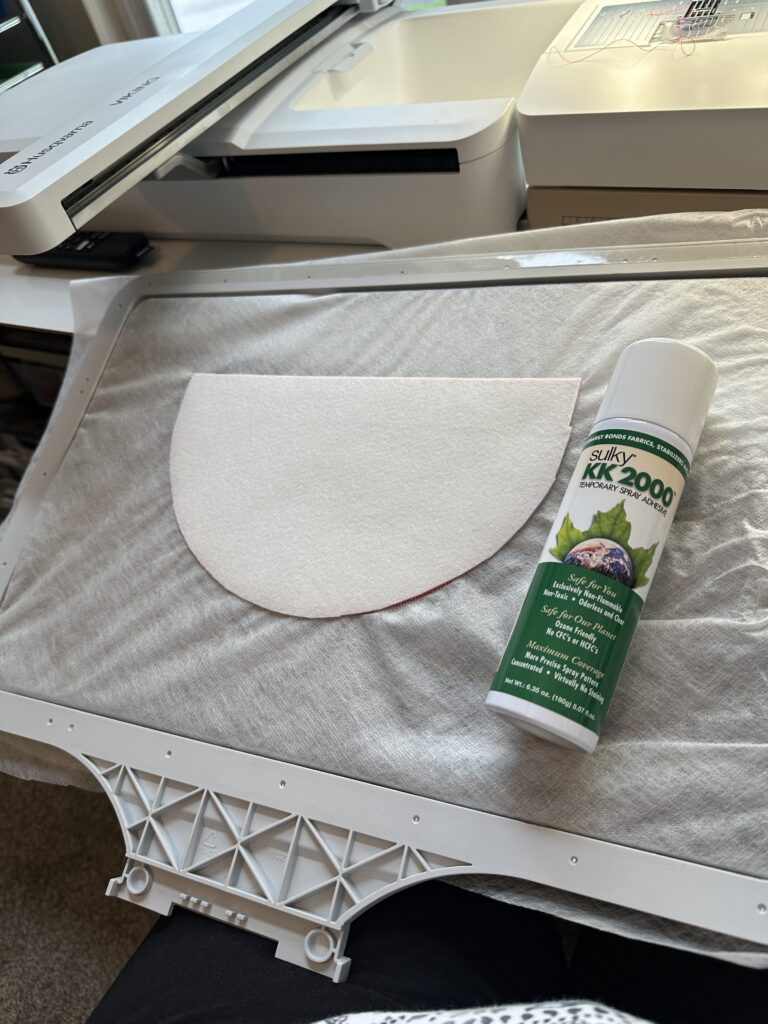
- Sulky Felty™
- KK2000™ Temporary Spray Adhesive
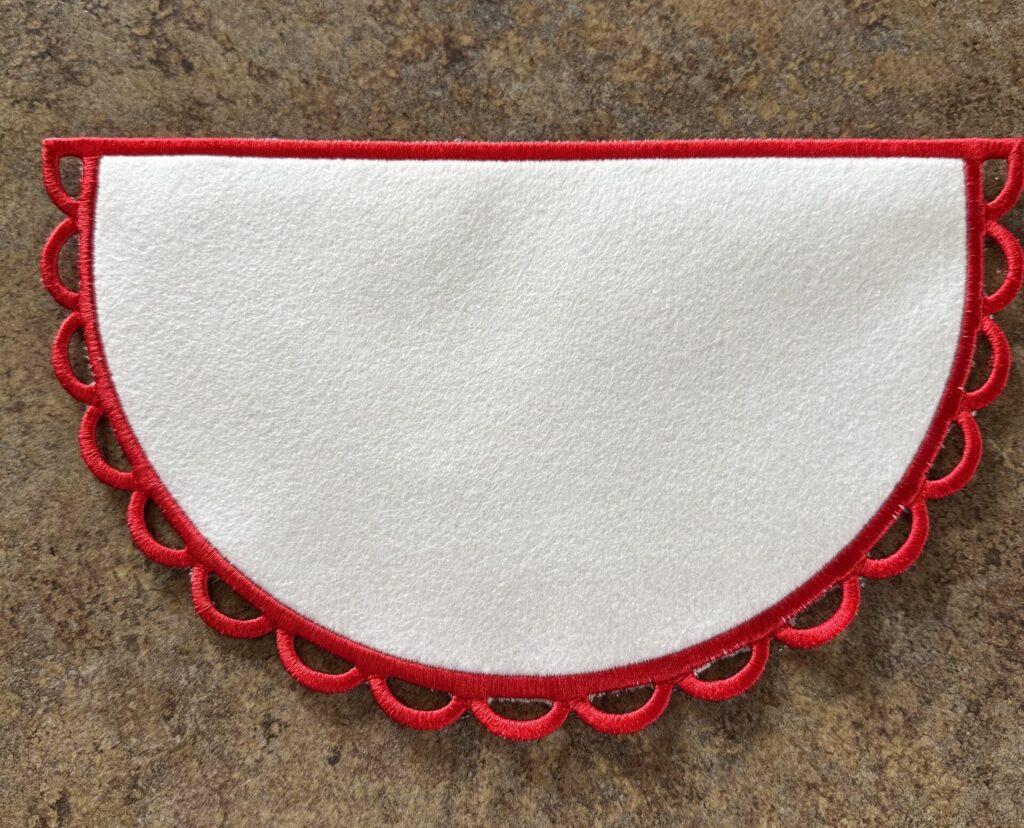
- In-the-Hoop Bunting Design (featured design is Blank Half Circle Bunting by Embroidery Library)
- Sulky Clear Embroidery Tape
- Ribbon (optional; for stringing multiple bunting pieces together)
BUNTING PREPARATION
If using the featured in-the-hoop bunting design, cut two bunting half circles from white Felty.
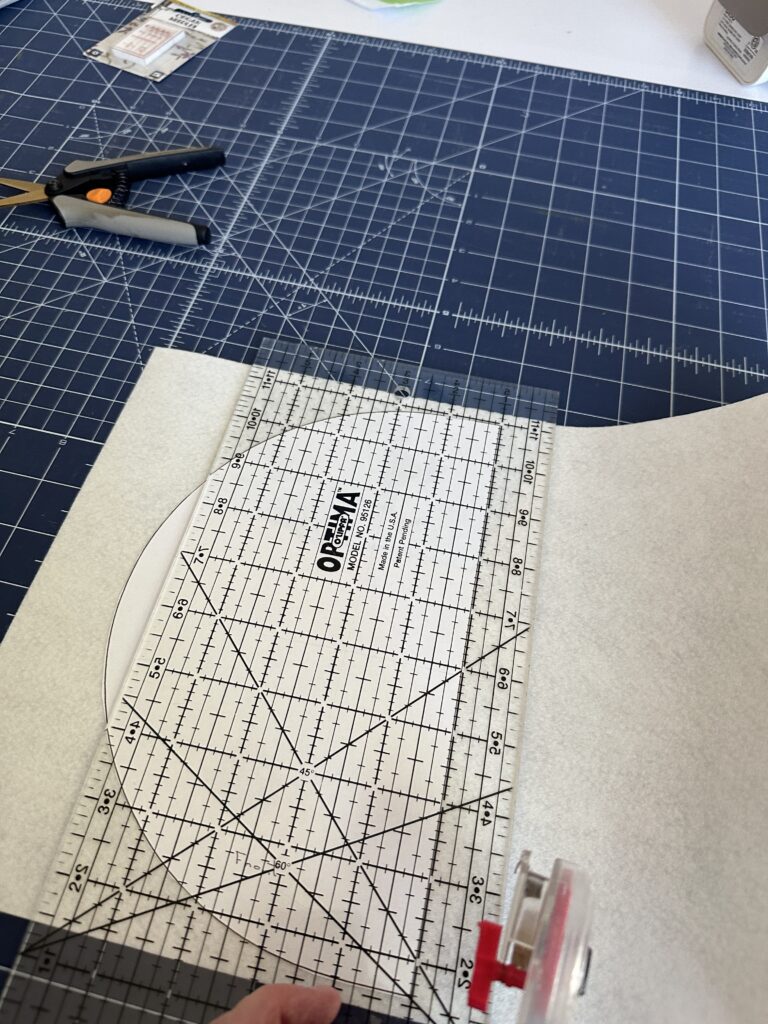
If not using the in-the-hoop design for the bunting, cut a half circle from one sheet of Felty (you will need to ensure the half-circle will be large enough to accommodate the machine embroidery design. The featured design size is the 5×5 hoop size.).
Install a size 90/14 Embroidery Needle and thread it with the first color in the bunting design. Use Sulky 60 wt. Bobbin Thread in the bobbin.
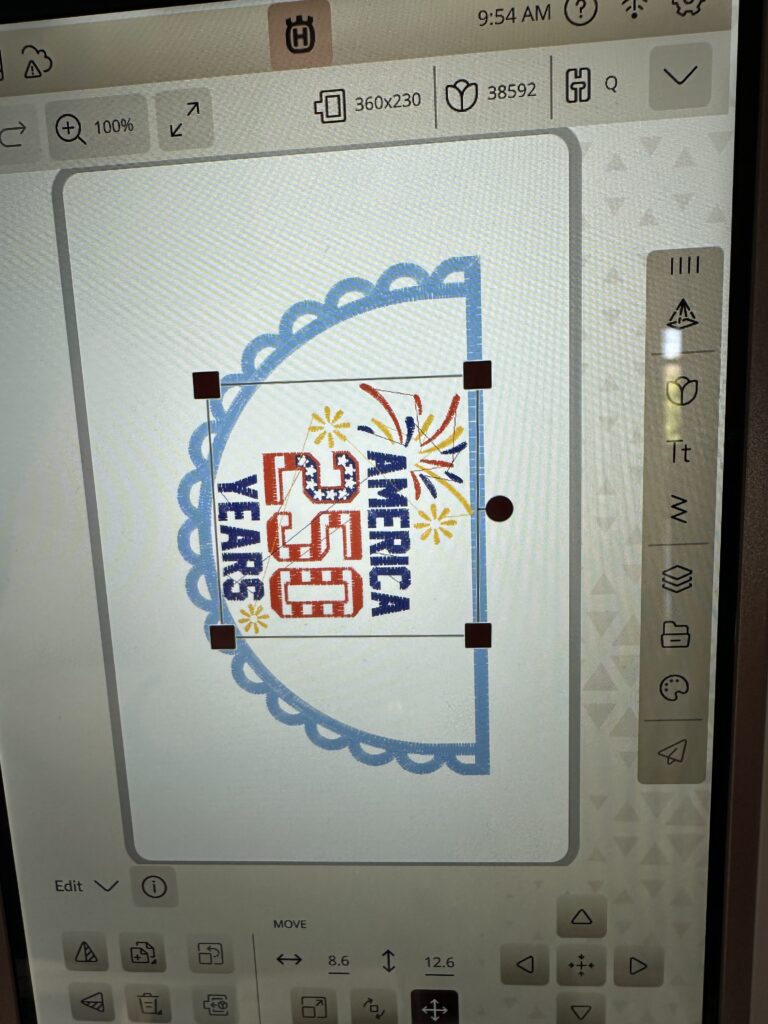
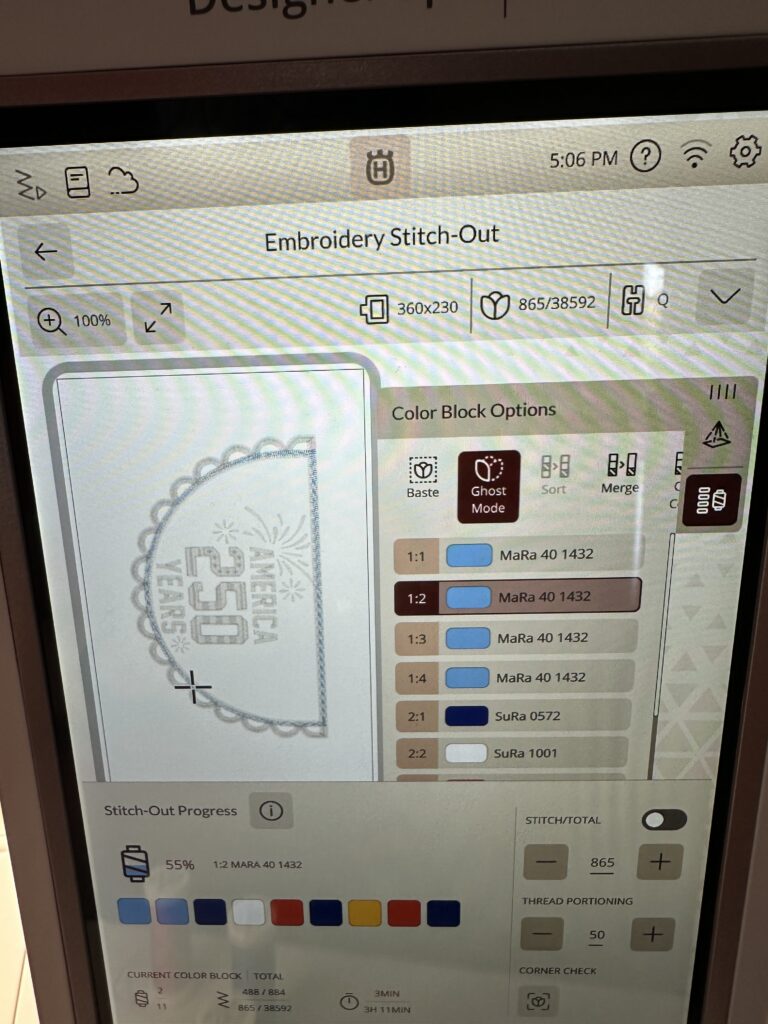
Load the Bunting design into machine. Next, load the Sulky America 250 design into machine. The featured design size is the 5×5/medium size.
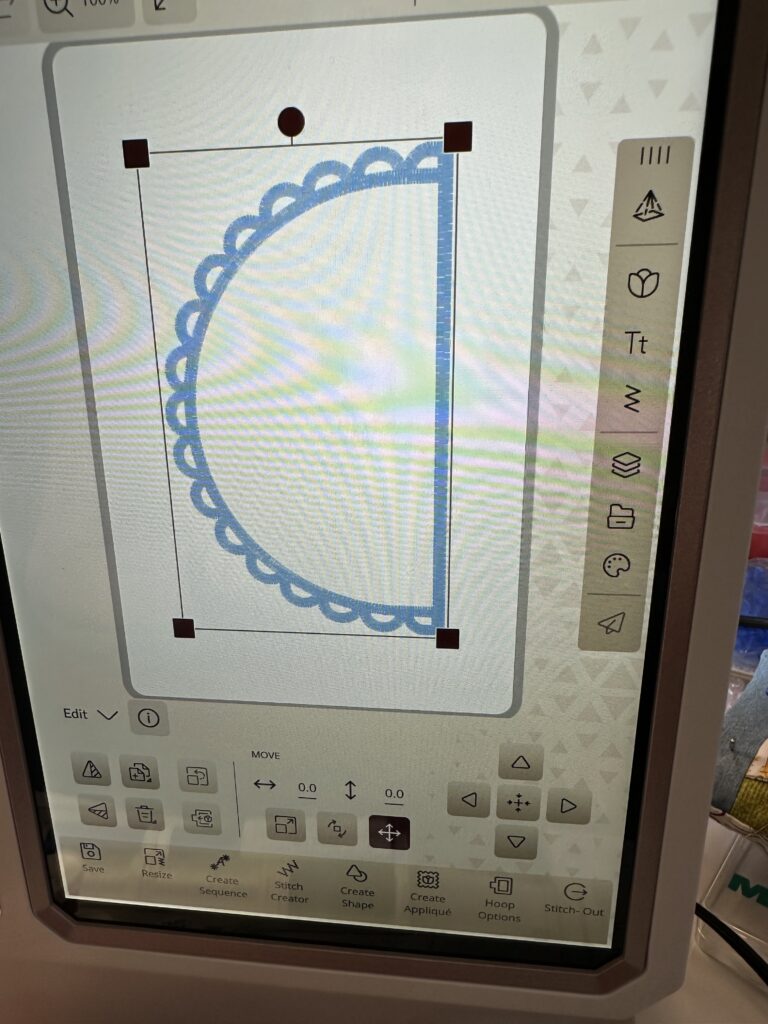
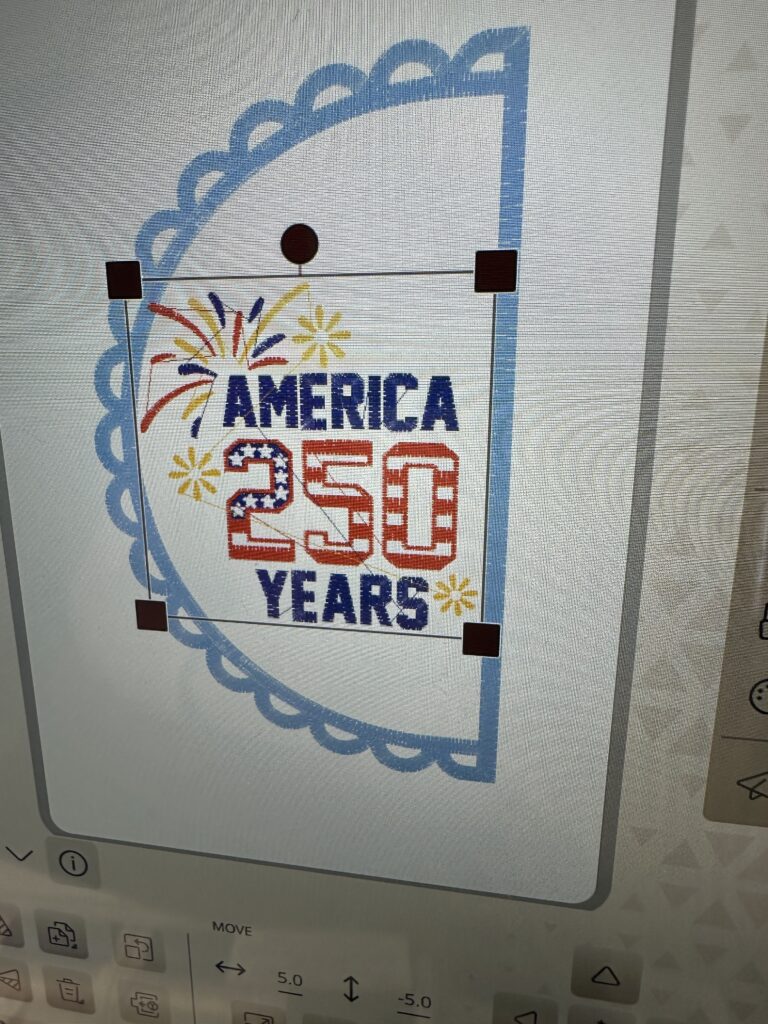
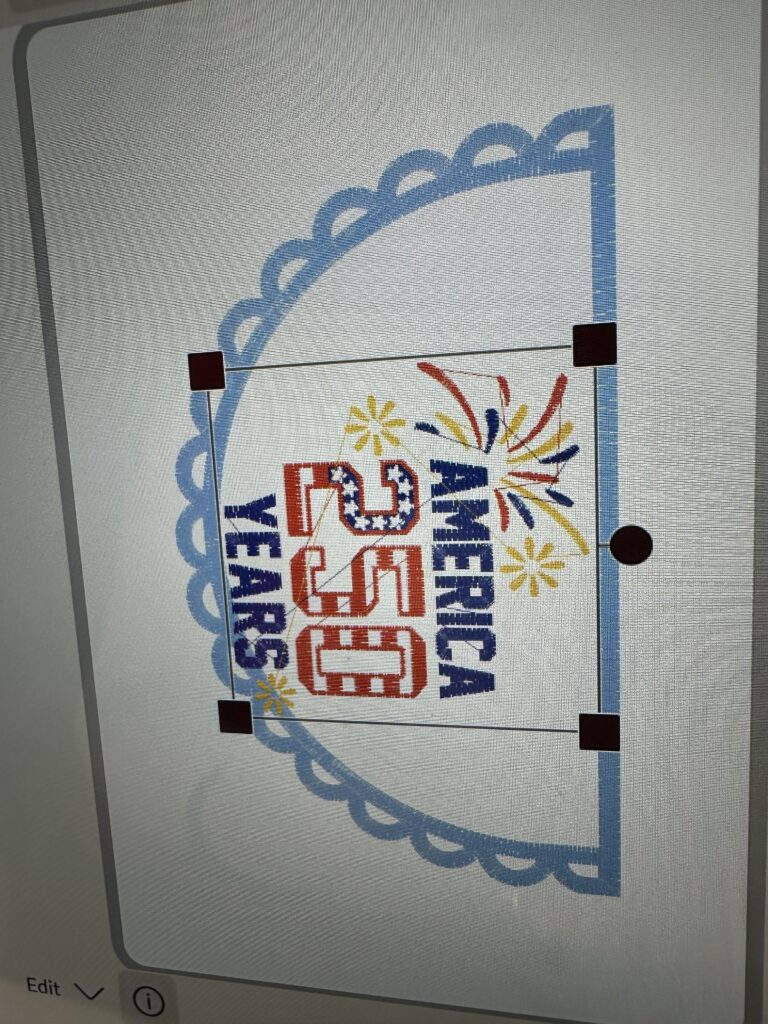
Using the machine screen functions, rotate the design so it’s oriented properly within the Bunting design. Center the design (it just fits).
BUNTING EMBROIDERY
Hoop two layers of Fabri-Solvy.
Stitch Bunting color 1 on the Fabri-Solvy, which is the placement line for the Bunting front.
Place the Bunting Front piece within the outline. Then, secure it using Sulky KK2000 Temporary Spray Adhesive.
Stitch Bunting color 2.
Skip Color 3 and 4 and go to the first color of the America 250 design.
Next, embroider the design, clipping jump threads with each thread change.
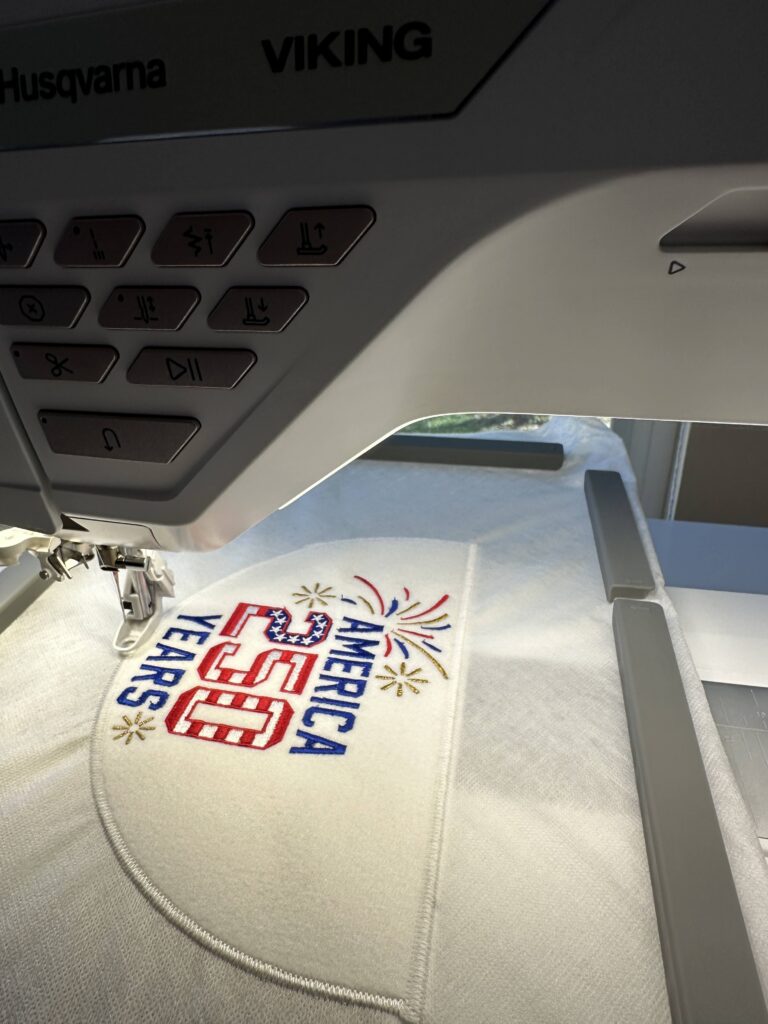
When the America 250 design is complete, DO NOT REMOVE THE HOOP OR ERASE THE DESIGN FROM THE MACHINE.
Go back to color 3 of the Bunting design.
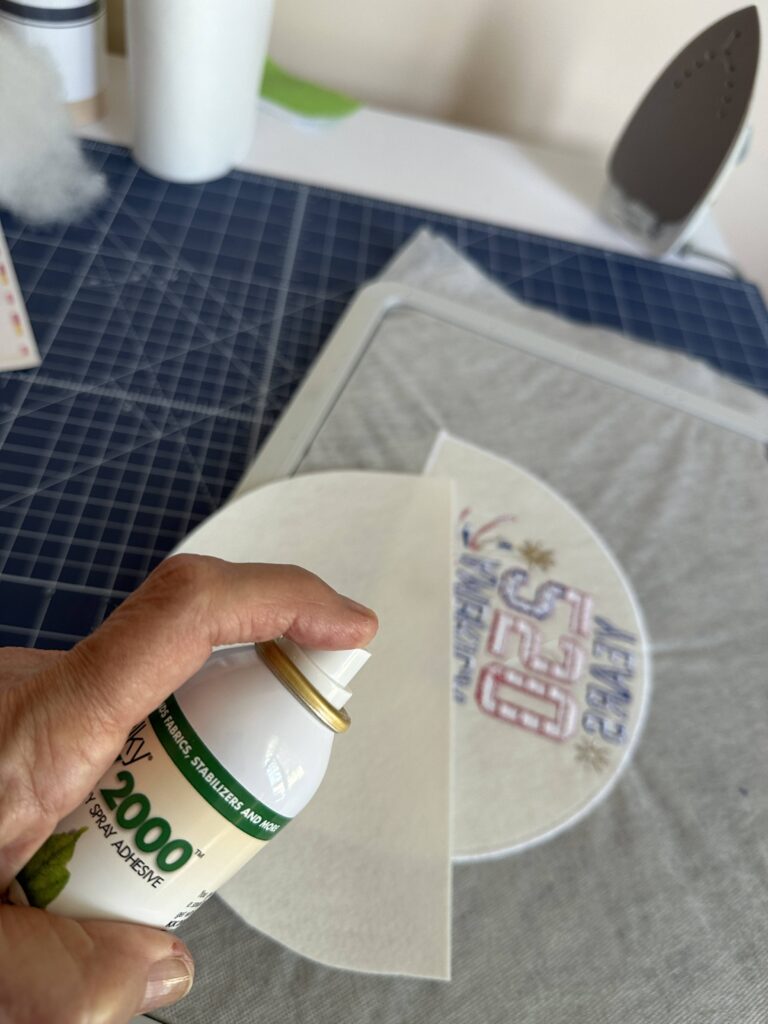
Remove the hoop from the machine, and then place the back Felty piece over the previous stitching on the wrong side of the hoop. Secure in place with KK2000 and Sulky Clear Embroidery Tape.
Swap the bobbin so that the bobbin thread matches the top thread. Next, stitch steps 3 and 4.
PATRIOTIC BUNTING FINISHING
Remove the stabilizer from the hoop. Trim away the Fabri-Solvy Stabilizer, getting as close to the stitching as possible without slicing through it.
To remove the Fabri-Solvy, use an small artist paint brush dipped in hot water and paint around the edge of the bunting. This will remove all the Fabri-Solvy from the Bunting perimeter.
Place the Bunting piece on a paper towel. Then, use the paint brush to remove the excess stabilizer from inside the half-circle border of the Bunting.
Let the Bunting piece dry flat.
Repeat the steps to create more Bunting pieces until the desired Bunting length is achieved. Either keep the remaining Bunting pieces blank or add more/different designs to them.
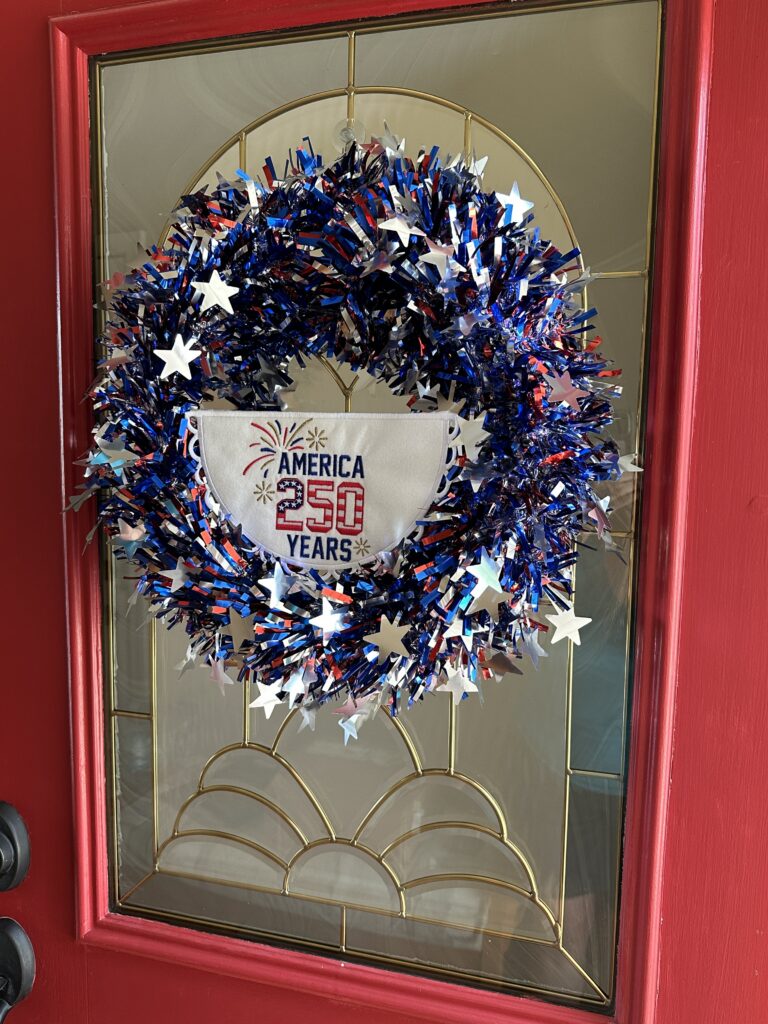
If desired, string together multiple Bunting pieces using ribbons. And/or display one Bunting piece inside of a wreath.