Create a Personalized Backpack
Send the kids back to school with a personalized backpack that shows off their individuality. Choose an appliqué alphabet or a built-in font or monogram. A personalized backpack is a great way to stand out on the first day of school and prevents your kiddos from accidentally taking home someone else’s belongings throughout the school year.
PERSONALIZED BACKPACK SUPPLIES
- Basic backpack (plain or minimal print with accessible front pocket or upper front with no existing logo)
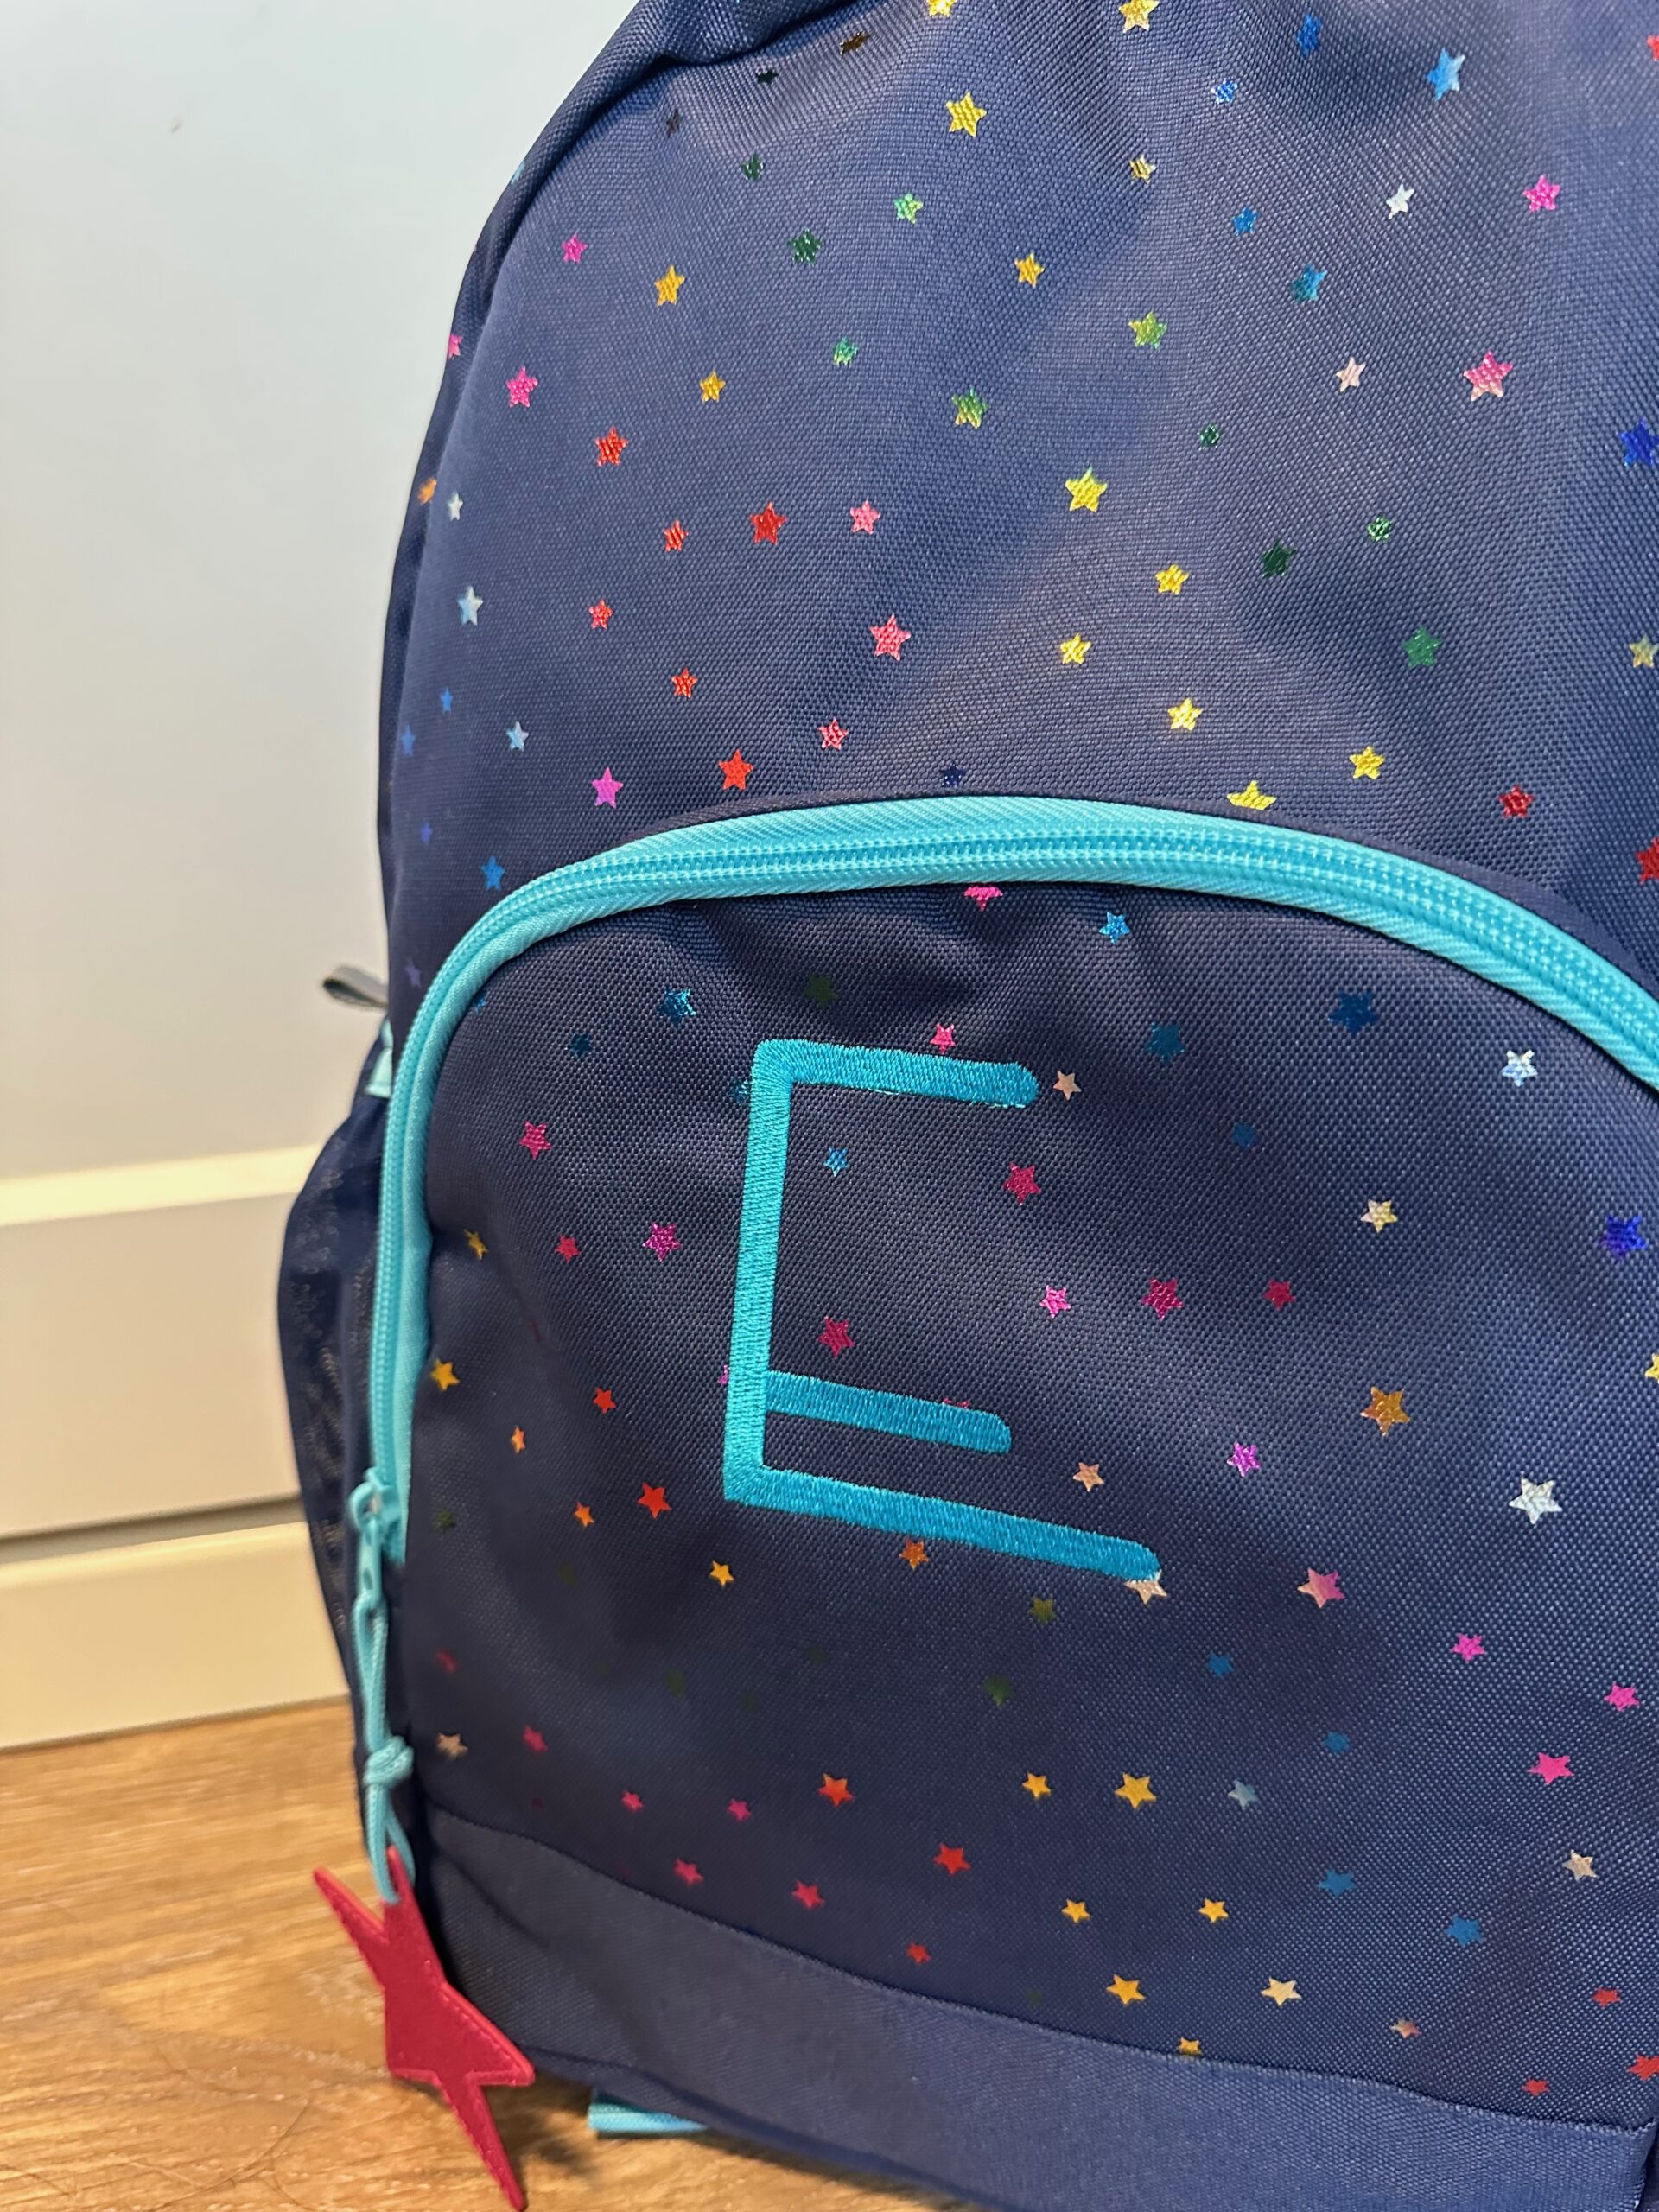
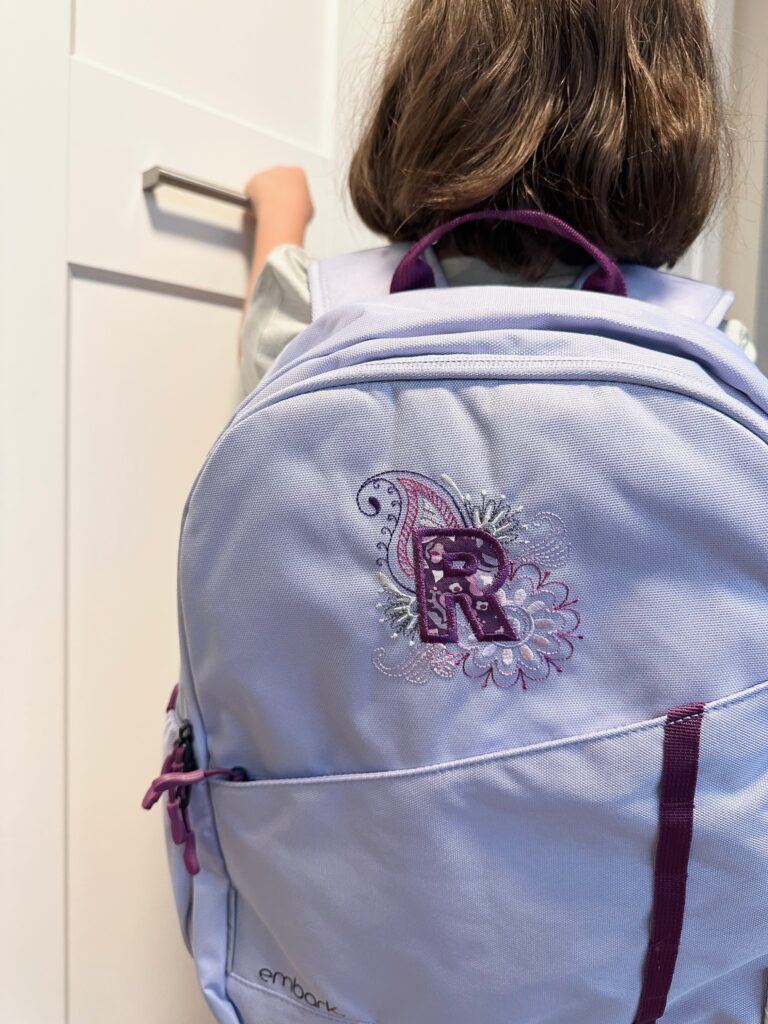
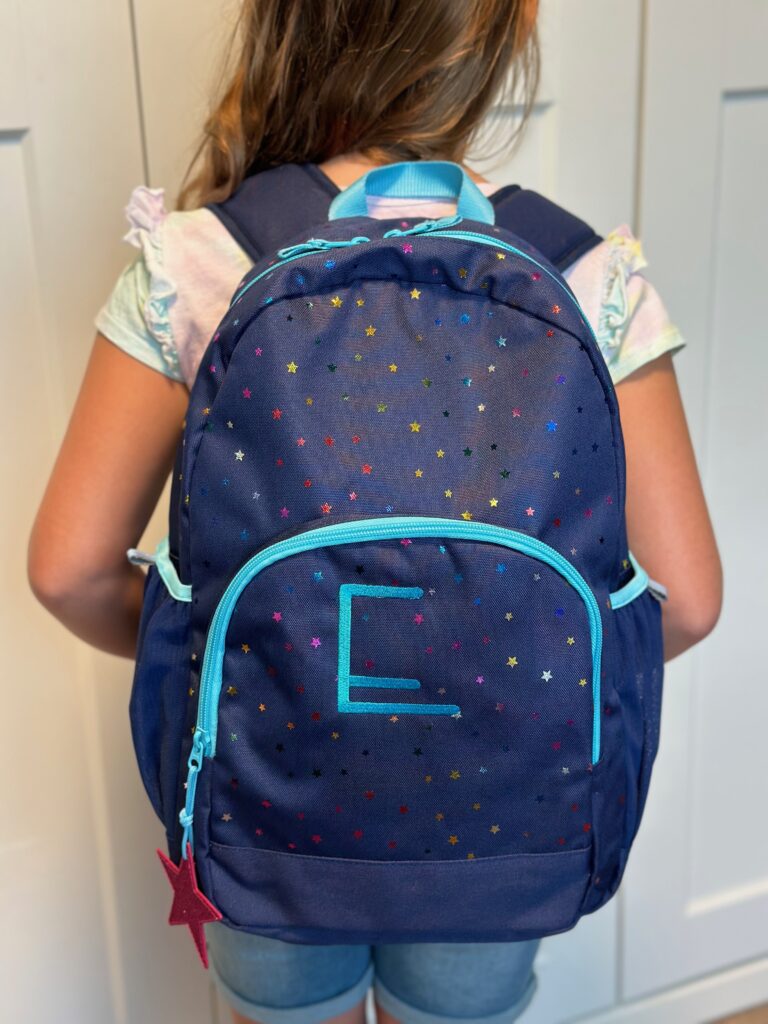
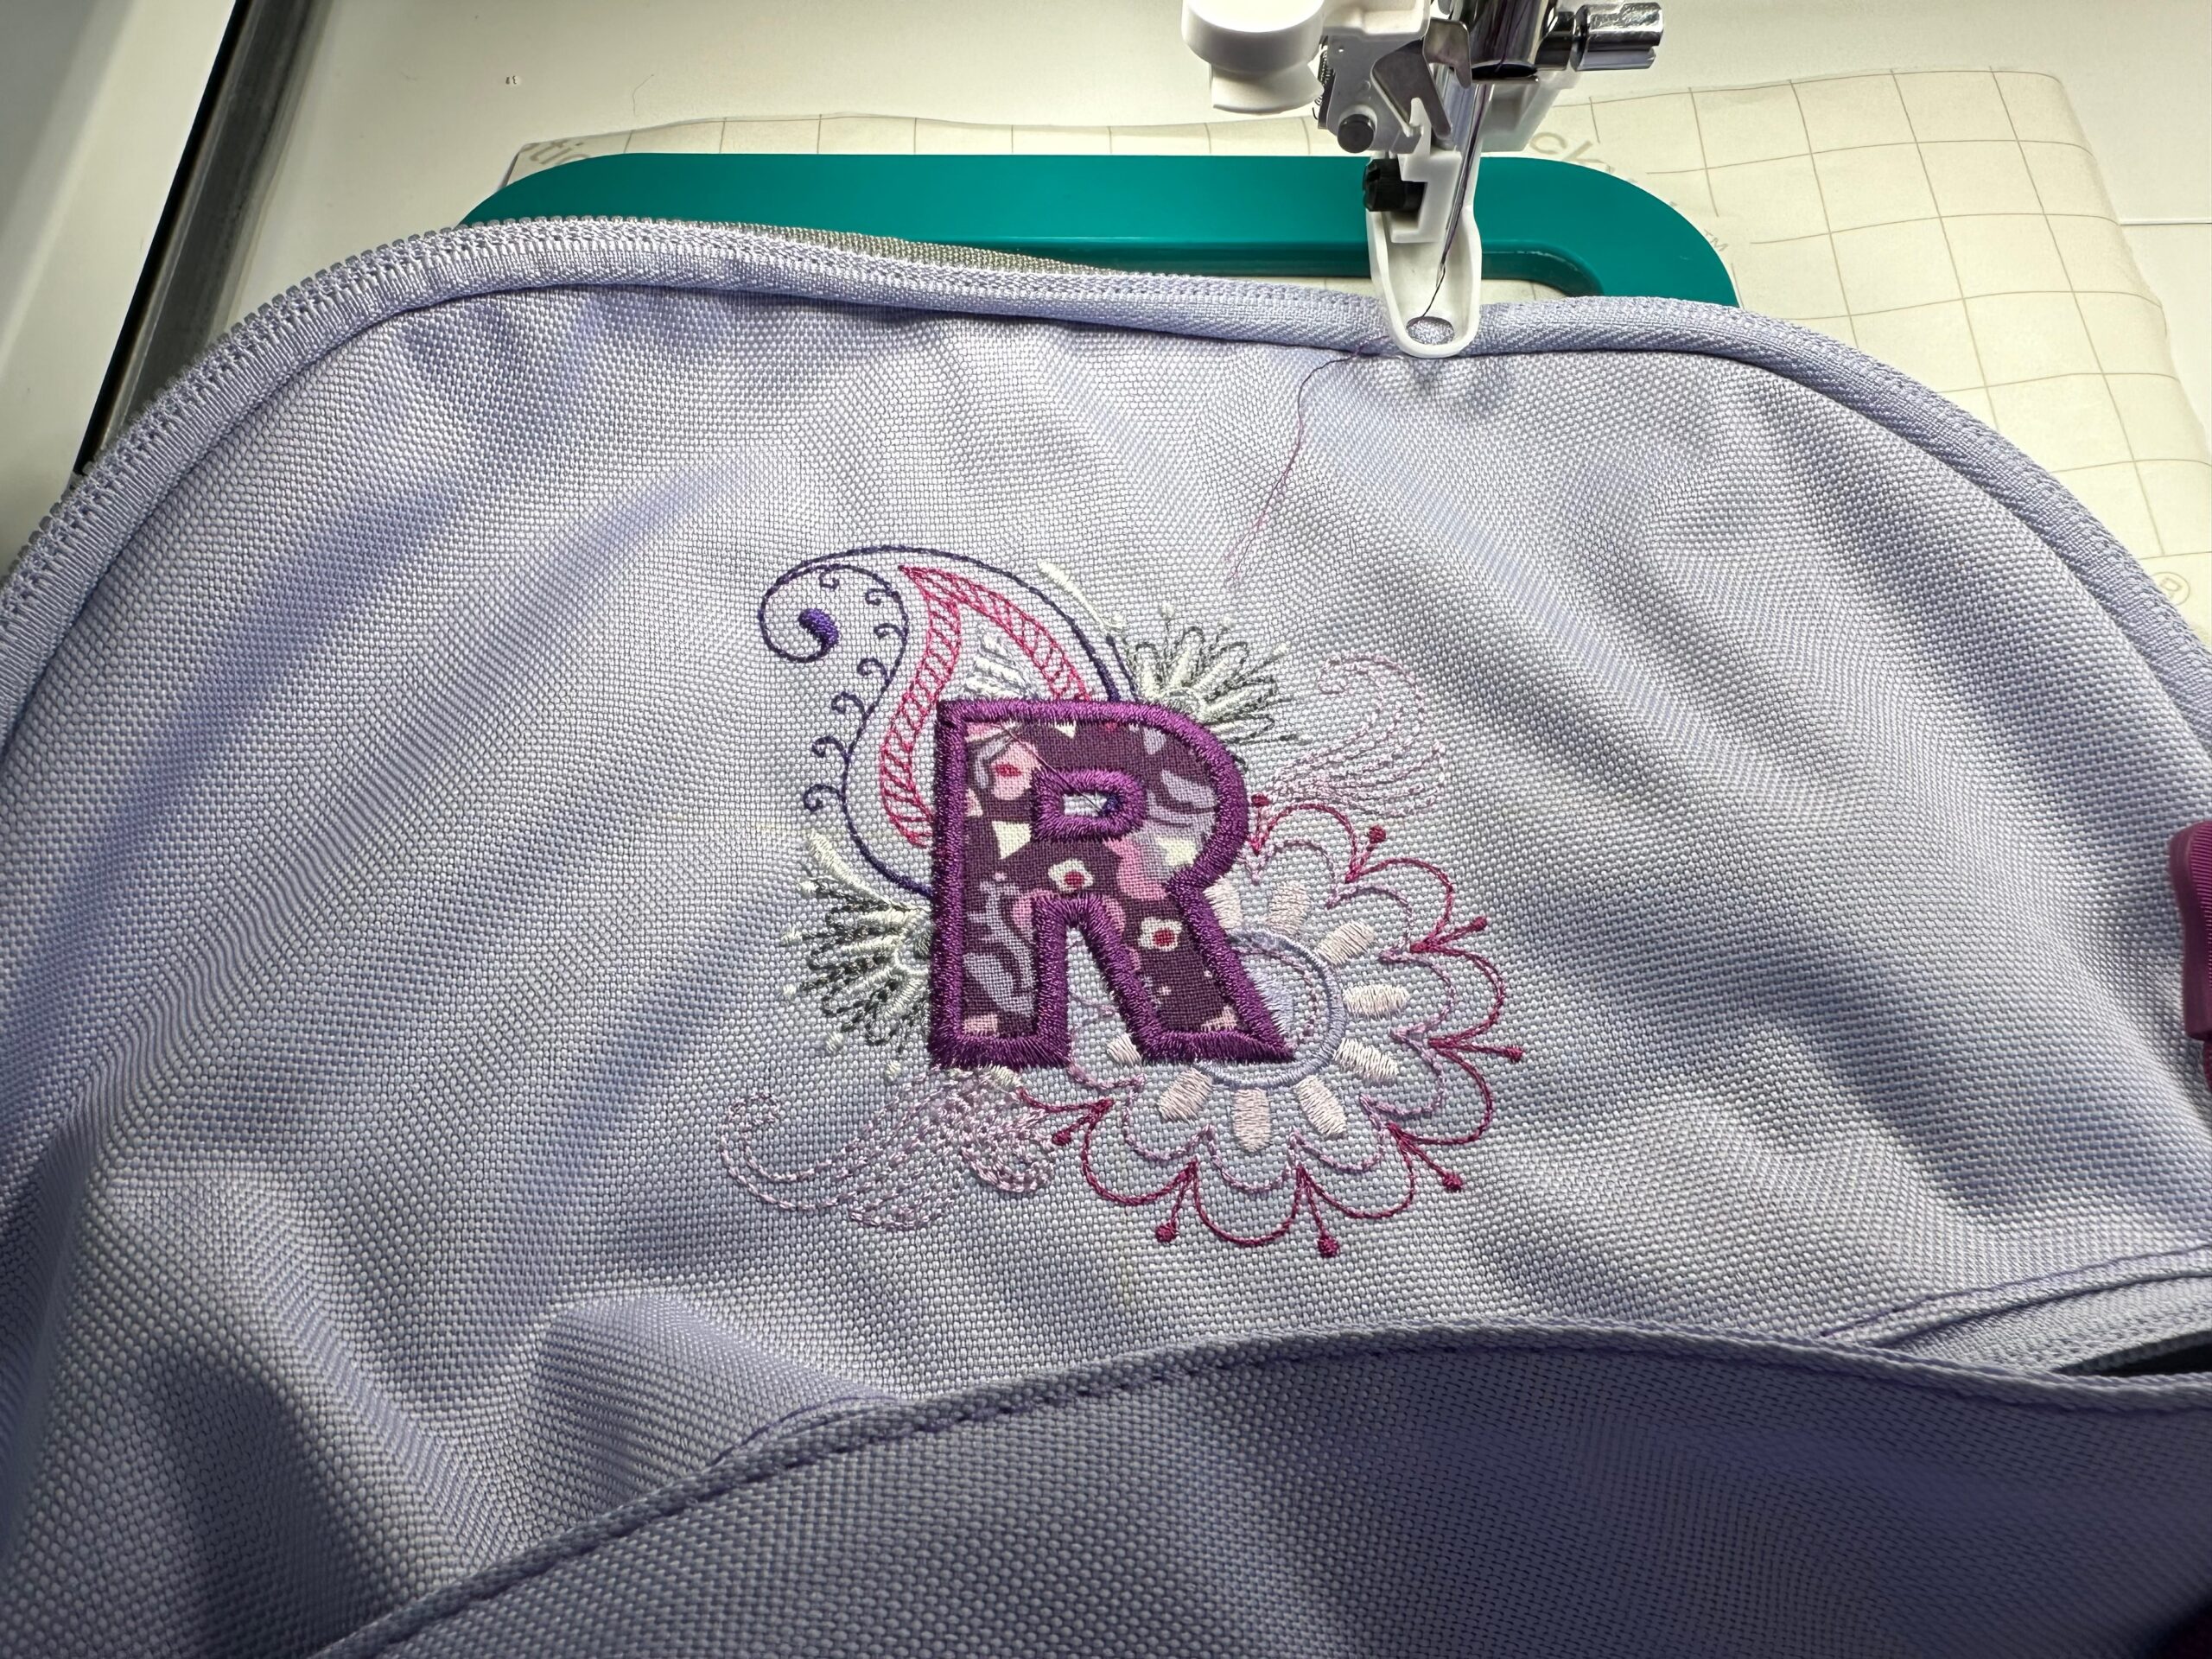
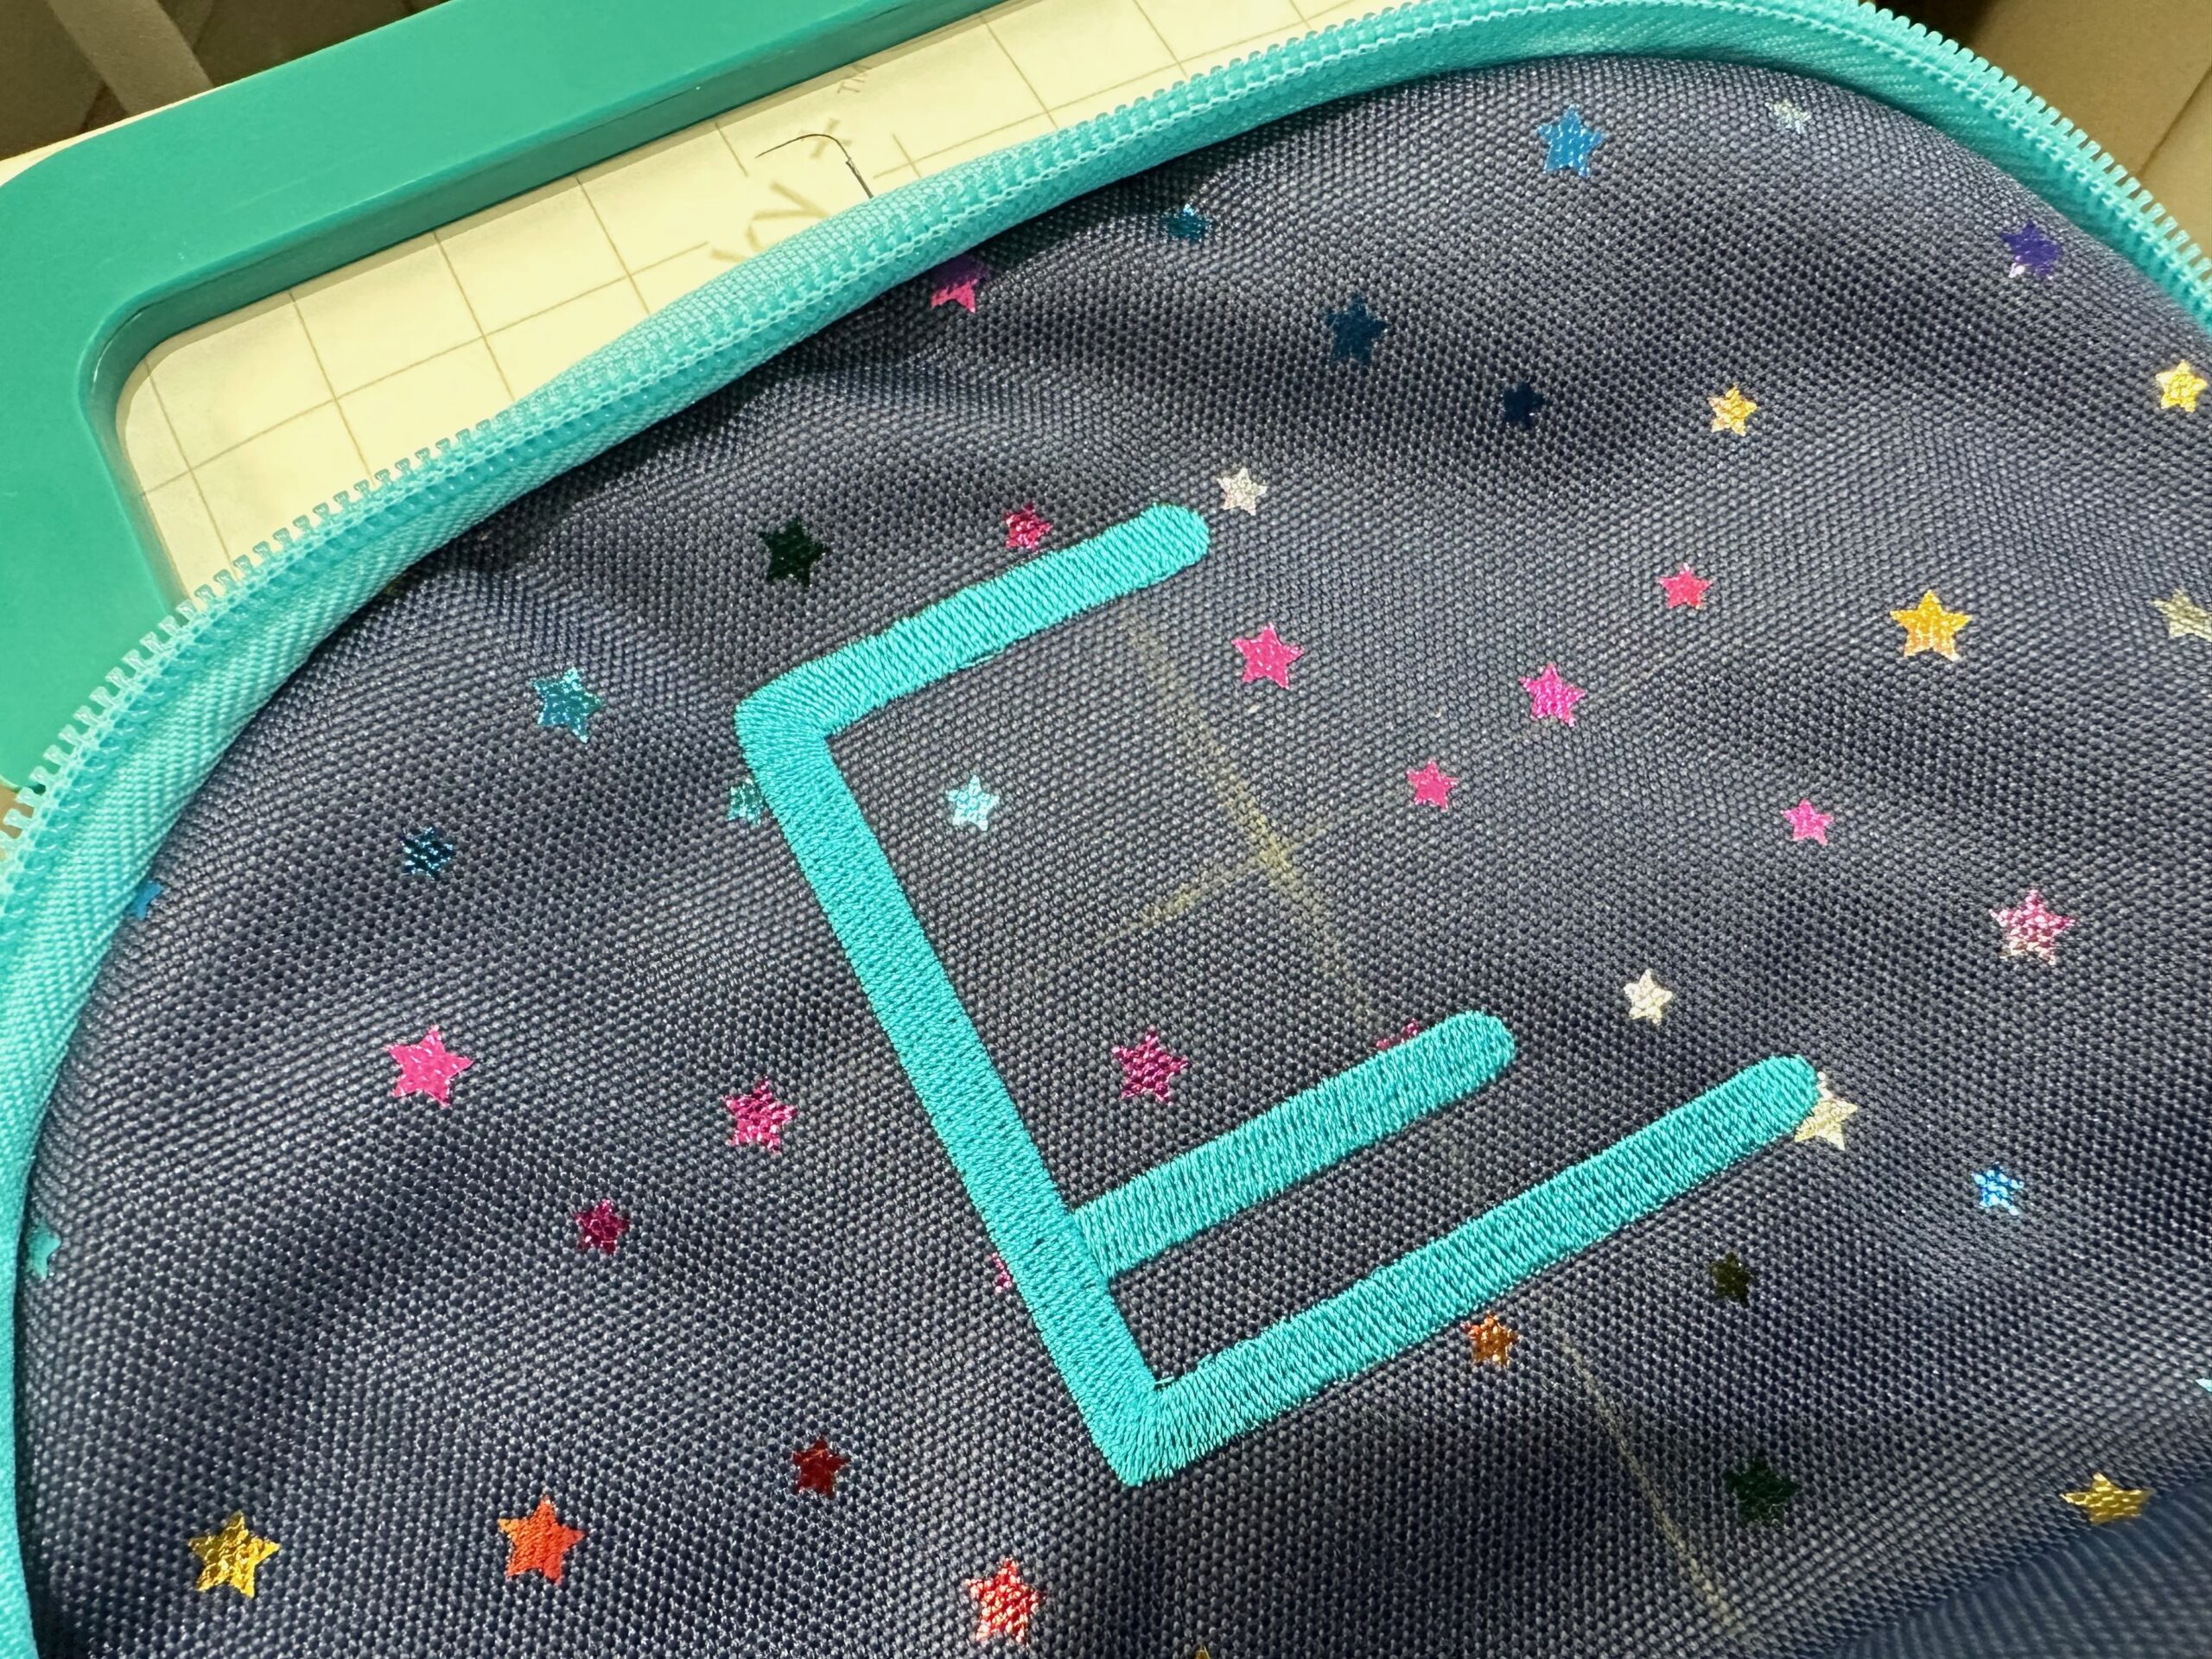
- Alphabet, font collection or letter machine embroidery design (Featured “R” design is Mehndi Backgruond Applique Monogram from Designs by Juju; Featured “E, M and A” designs are from the Sleek and Modern Alphabet Design Pack from Embroidery Library)
- Sulky Rayon or Poly Deco Threads (colors per the chosen embroidery design(s)
- Sulky Bobbin Thread
- Organ size 80/12 Top Stitch Needle
- Sulky Sticky Stabilizer
- Sticky+ Slitting Pen
- Sulky Stitch ‘n Seal Stabilizer
- Removable fabric marker or chalk
Some of the above links are affiliate links. We may receive a commission if you choose to make a purchase through those links.
BACKPACK CHOICE
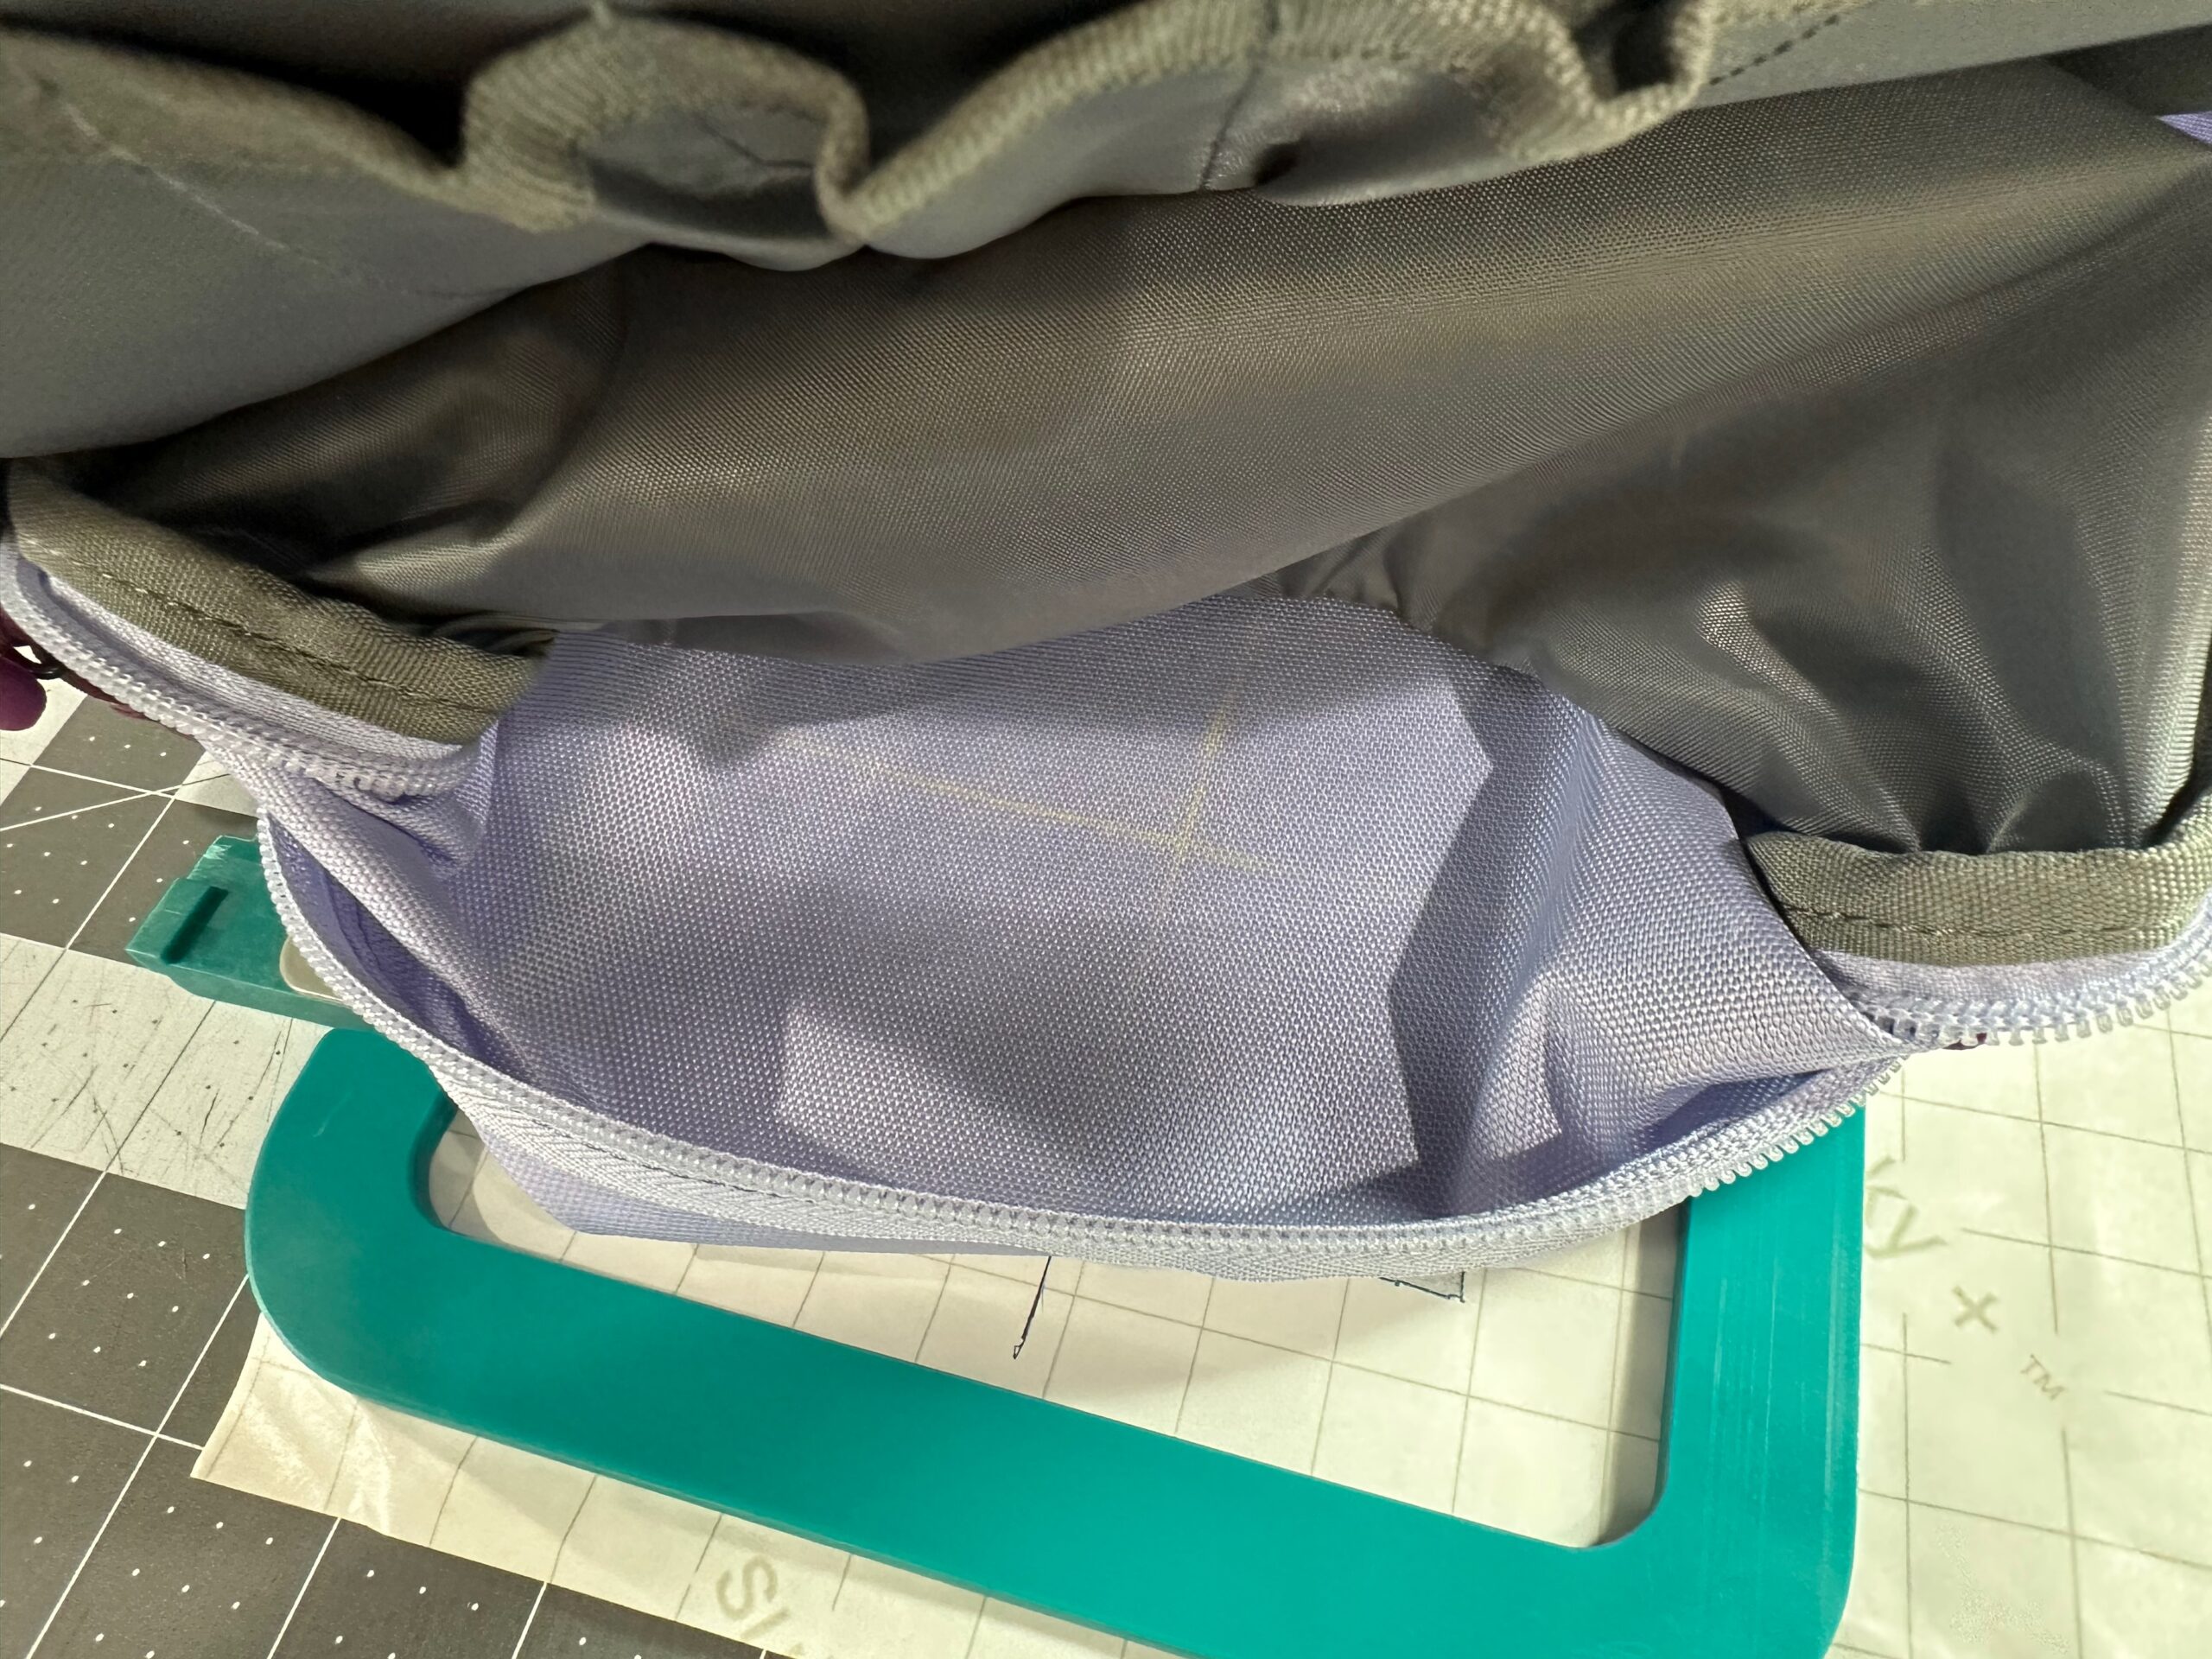
When searching for suitable backpacks for embroidery, make sure there is no existing motif or logo prominently displayed on the backpack front that will ultimately compete with the added embellishment. If you plan to personalize the front pocket, which is a great placement choice, unzip the pocket to ensure no other elements will interfere with the stitching. Also unzip the backpack fully wherever the embroidery is planned (the upper front or outer pocket) to see if it opens enough to accommodate “hoopless” embroidery (more on this later).
Most backpacks have a lining. Either plan to embroider through it or check to see if you can easily undo some of the stitching and re-attach it rather easily after embroidery is complete. For the featured backpacks, the embroidery was added through the lining with a protective stabilizer backing added to slightly conceal the embroidery wrong side and maintain the water-resistant properties of the backpack.
DESIGN PLACEMENT
Depending on the size of the backpack, you’ll want to choose a design that’s ideally no larger than 4″ tall. Measure the area you want to personalize to determine the best monogram or letter size to choose. The featured Mehndi Background Letter fits within a 4″ square along the backpack upper front. For the featured Sleek and Modern Alphabet, each letter is 3″ tall. If spelling an entire name or if the monogram is longer/larger, you’ll have to adjust the sizing of each letter and/or element to fit the embroidery area.
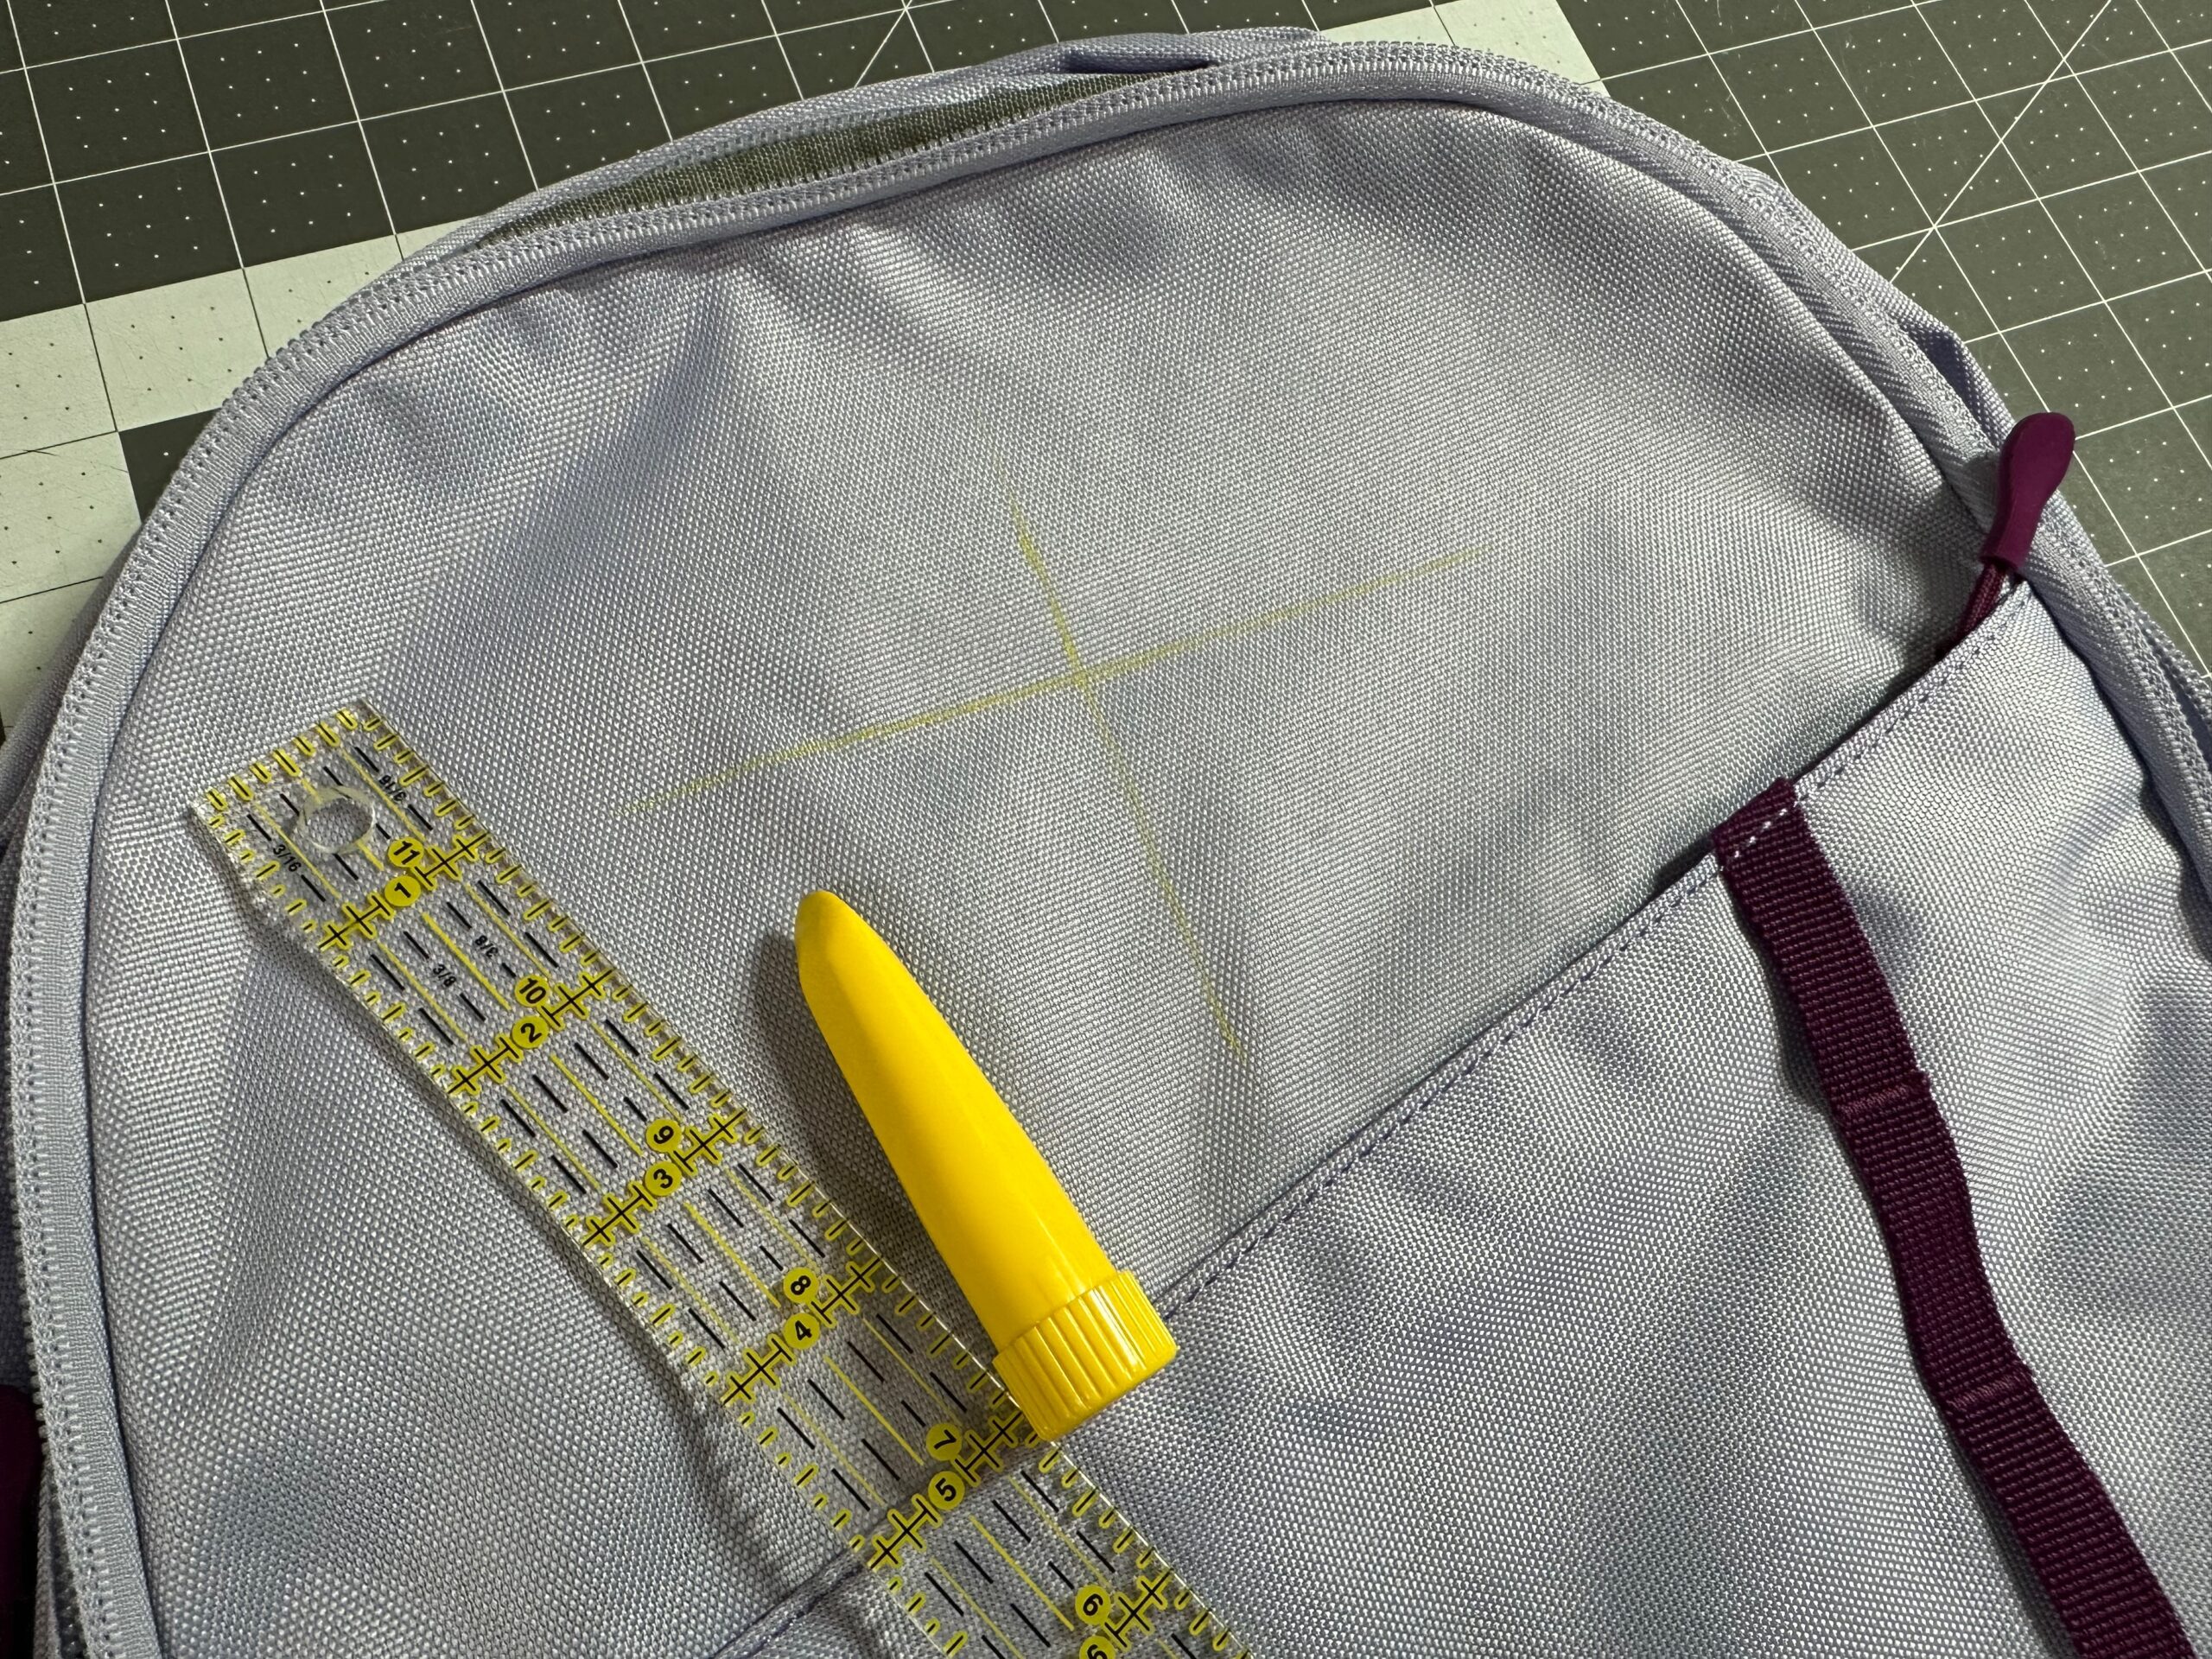
Once you’ve determined the chosen design(s) and the desired embellishment area for personalizing the backpack, mark the horizontal and vertical design placement on the backpack right side using a removable fabric marker or chalk.
HOOPLESS EMBROIDERY
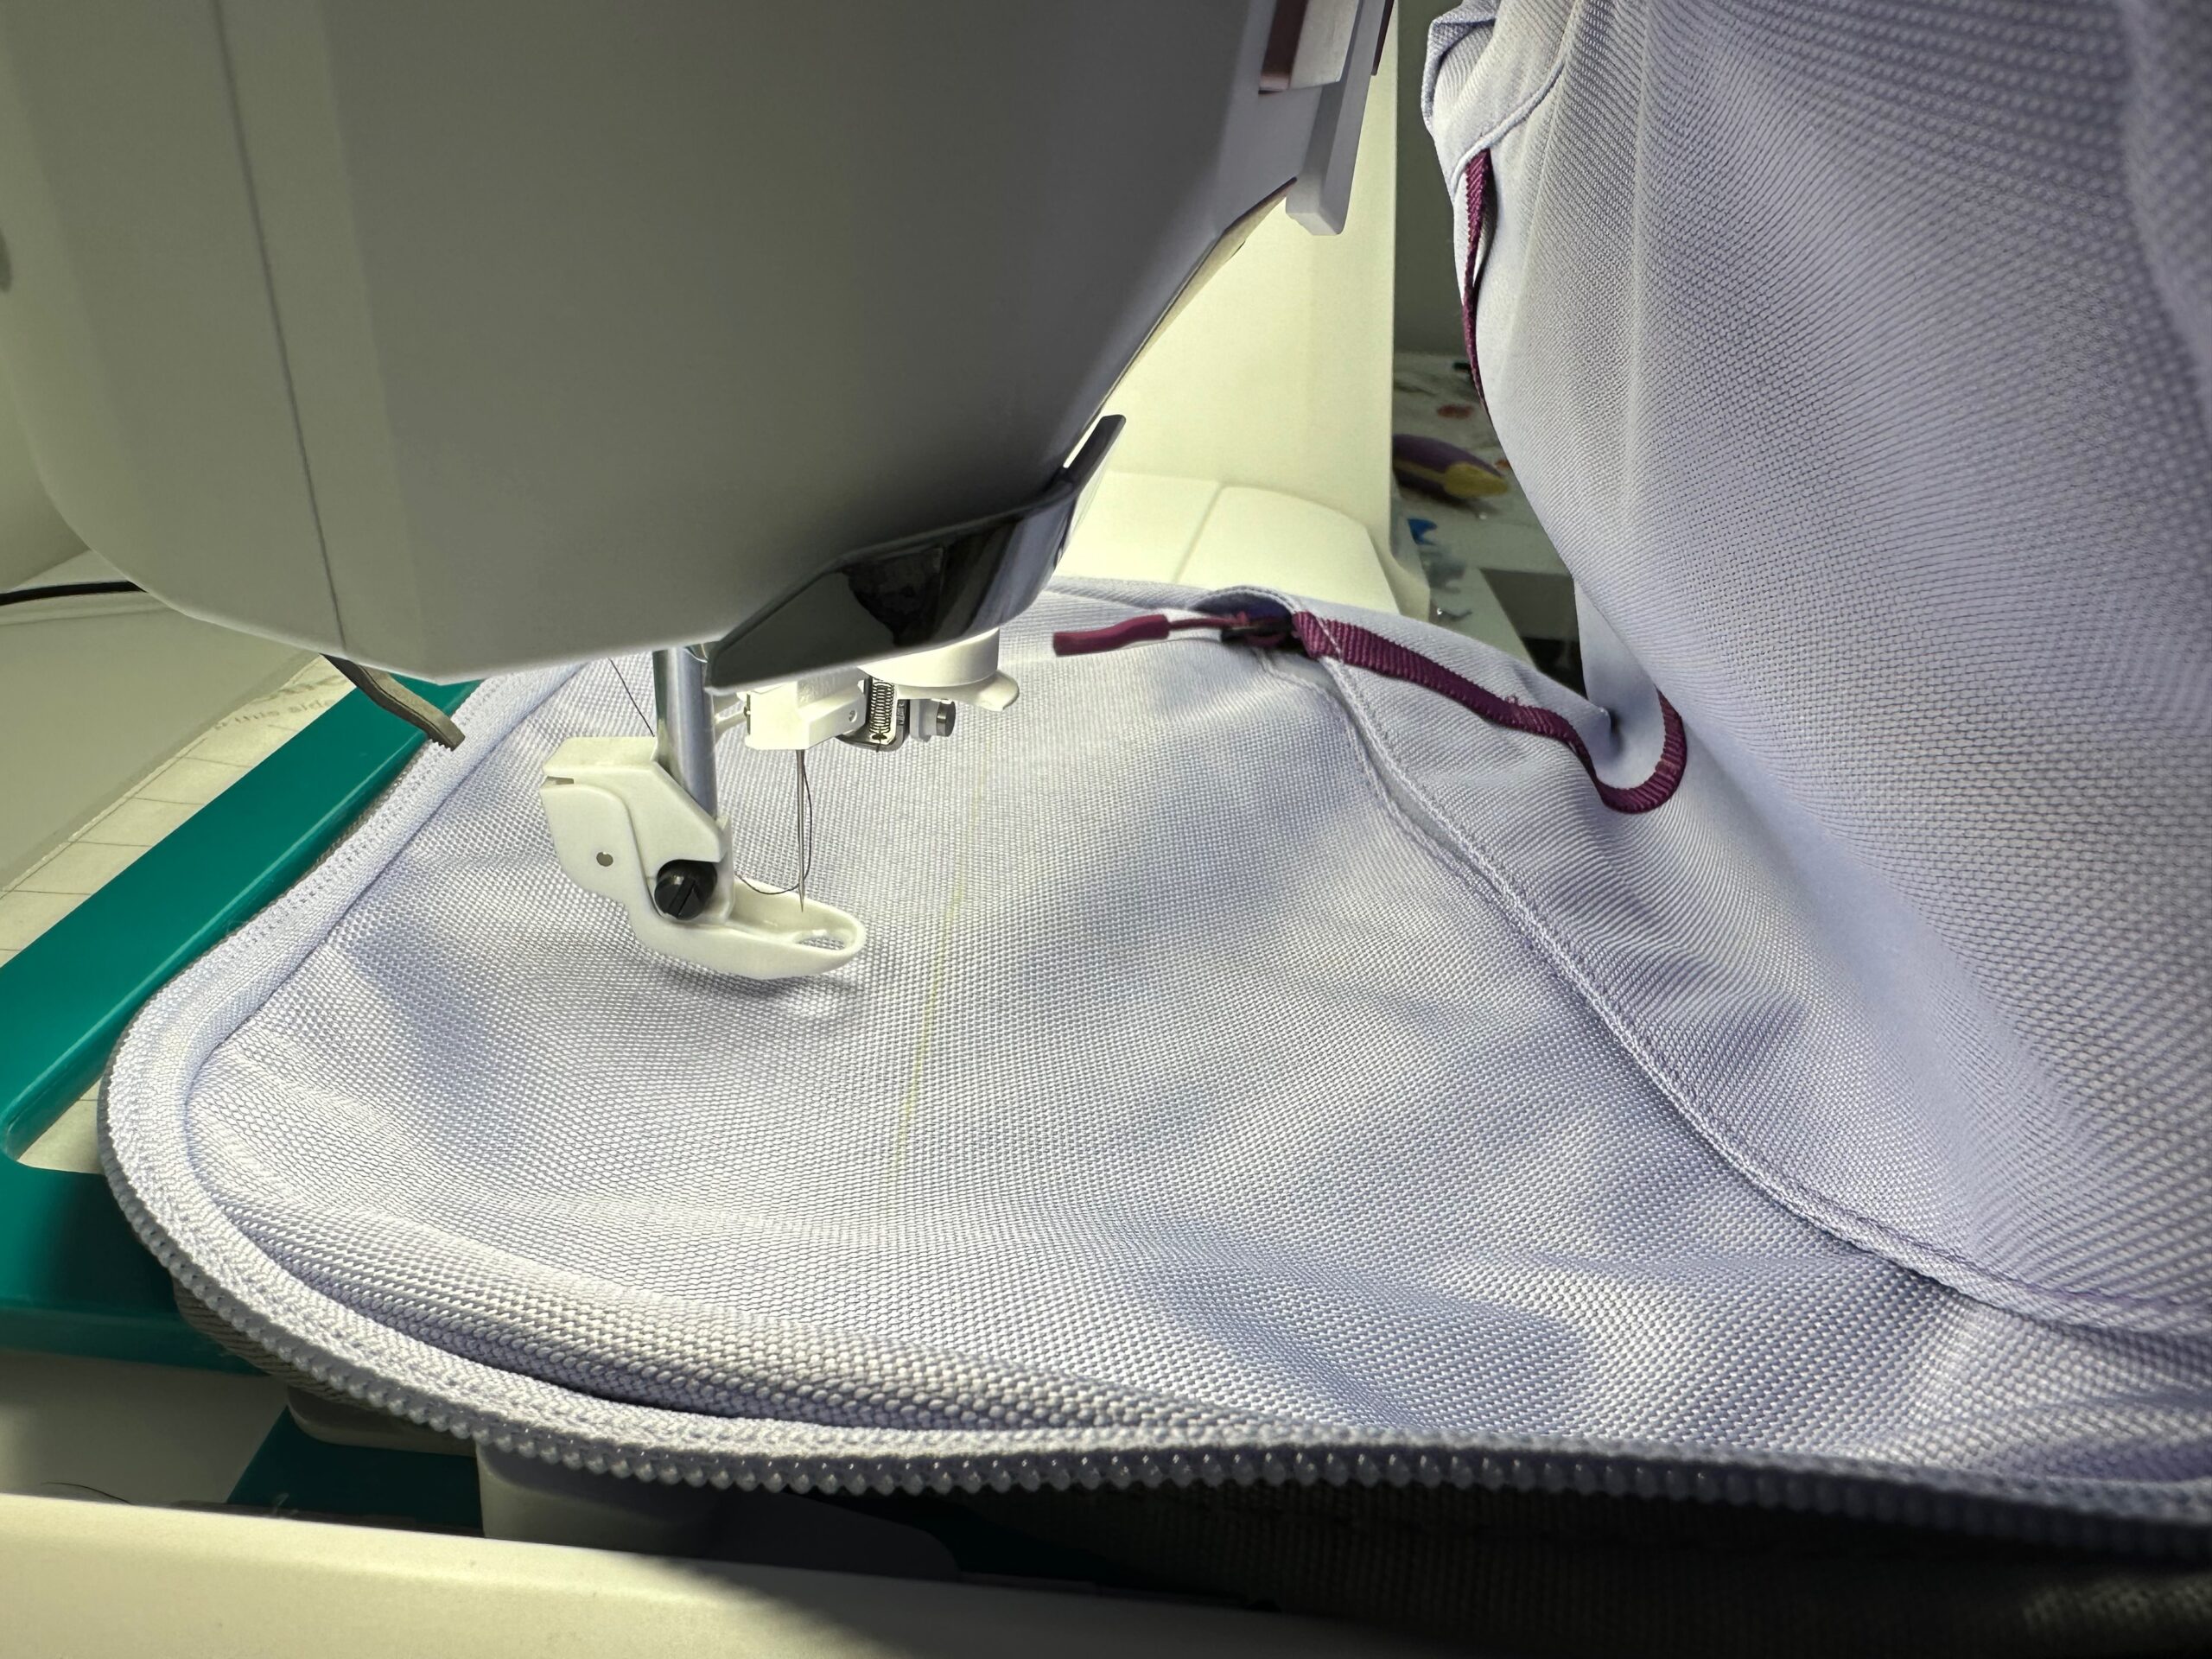
“Hoopless” embroidery means we’re not hooping the project itself, but rather the stabilizer only. Then, the project is adhered to the stabilizer for the stitchout. Something like a backpack, with existing lining, zippers and not-so-easily-accessible interior, simply cannot fit in the hoop for embroidery.
Instead, hoop a piece of Sulky Sticky+ Stabilizer. This is an adhesive, paper-backed stabilizer that tears away cleanly after the embroidery is complete.
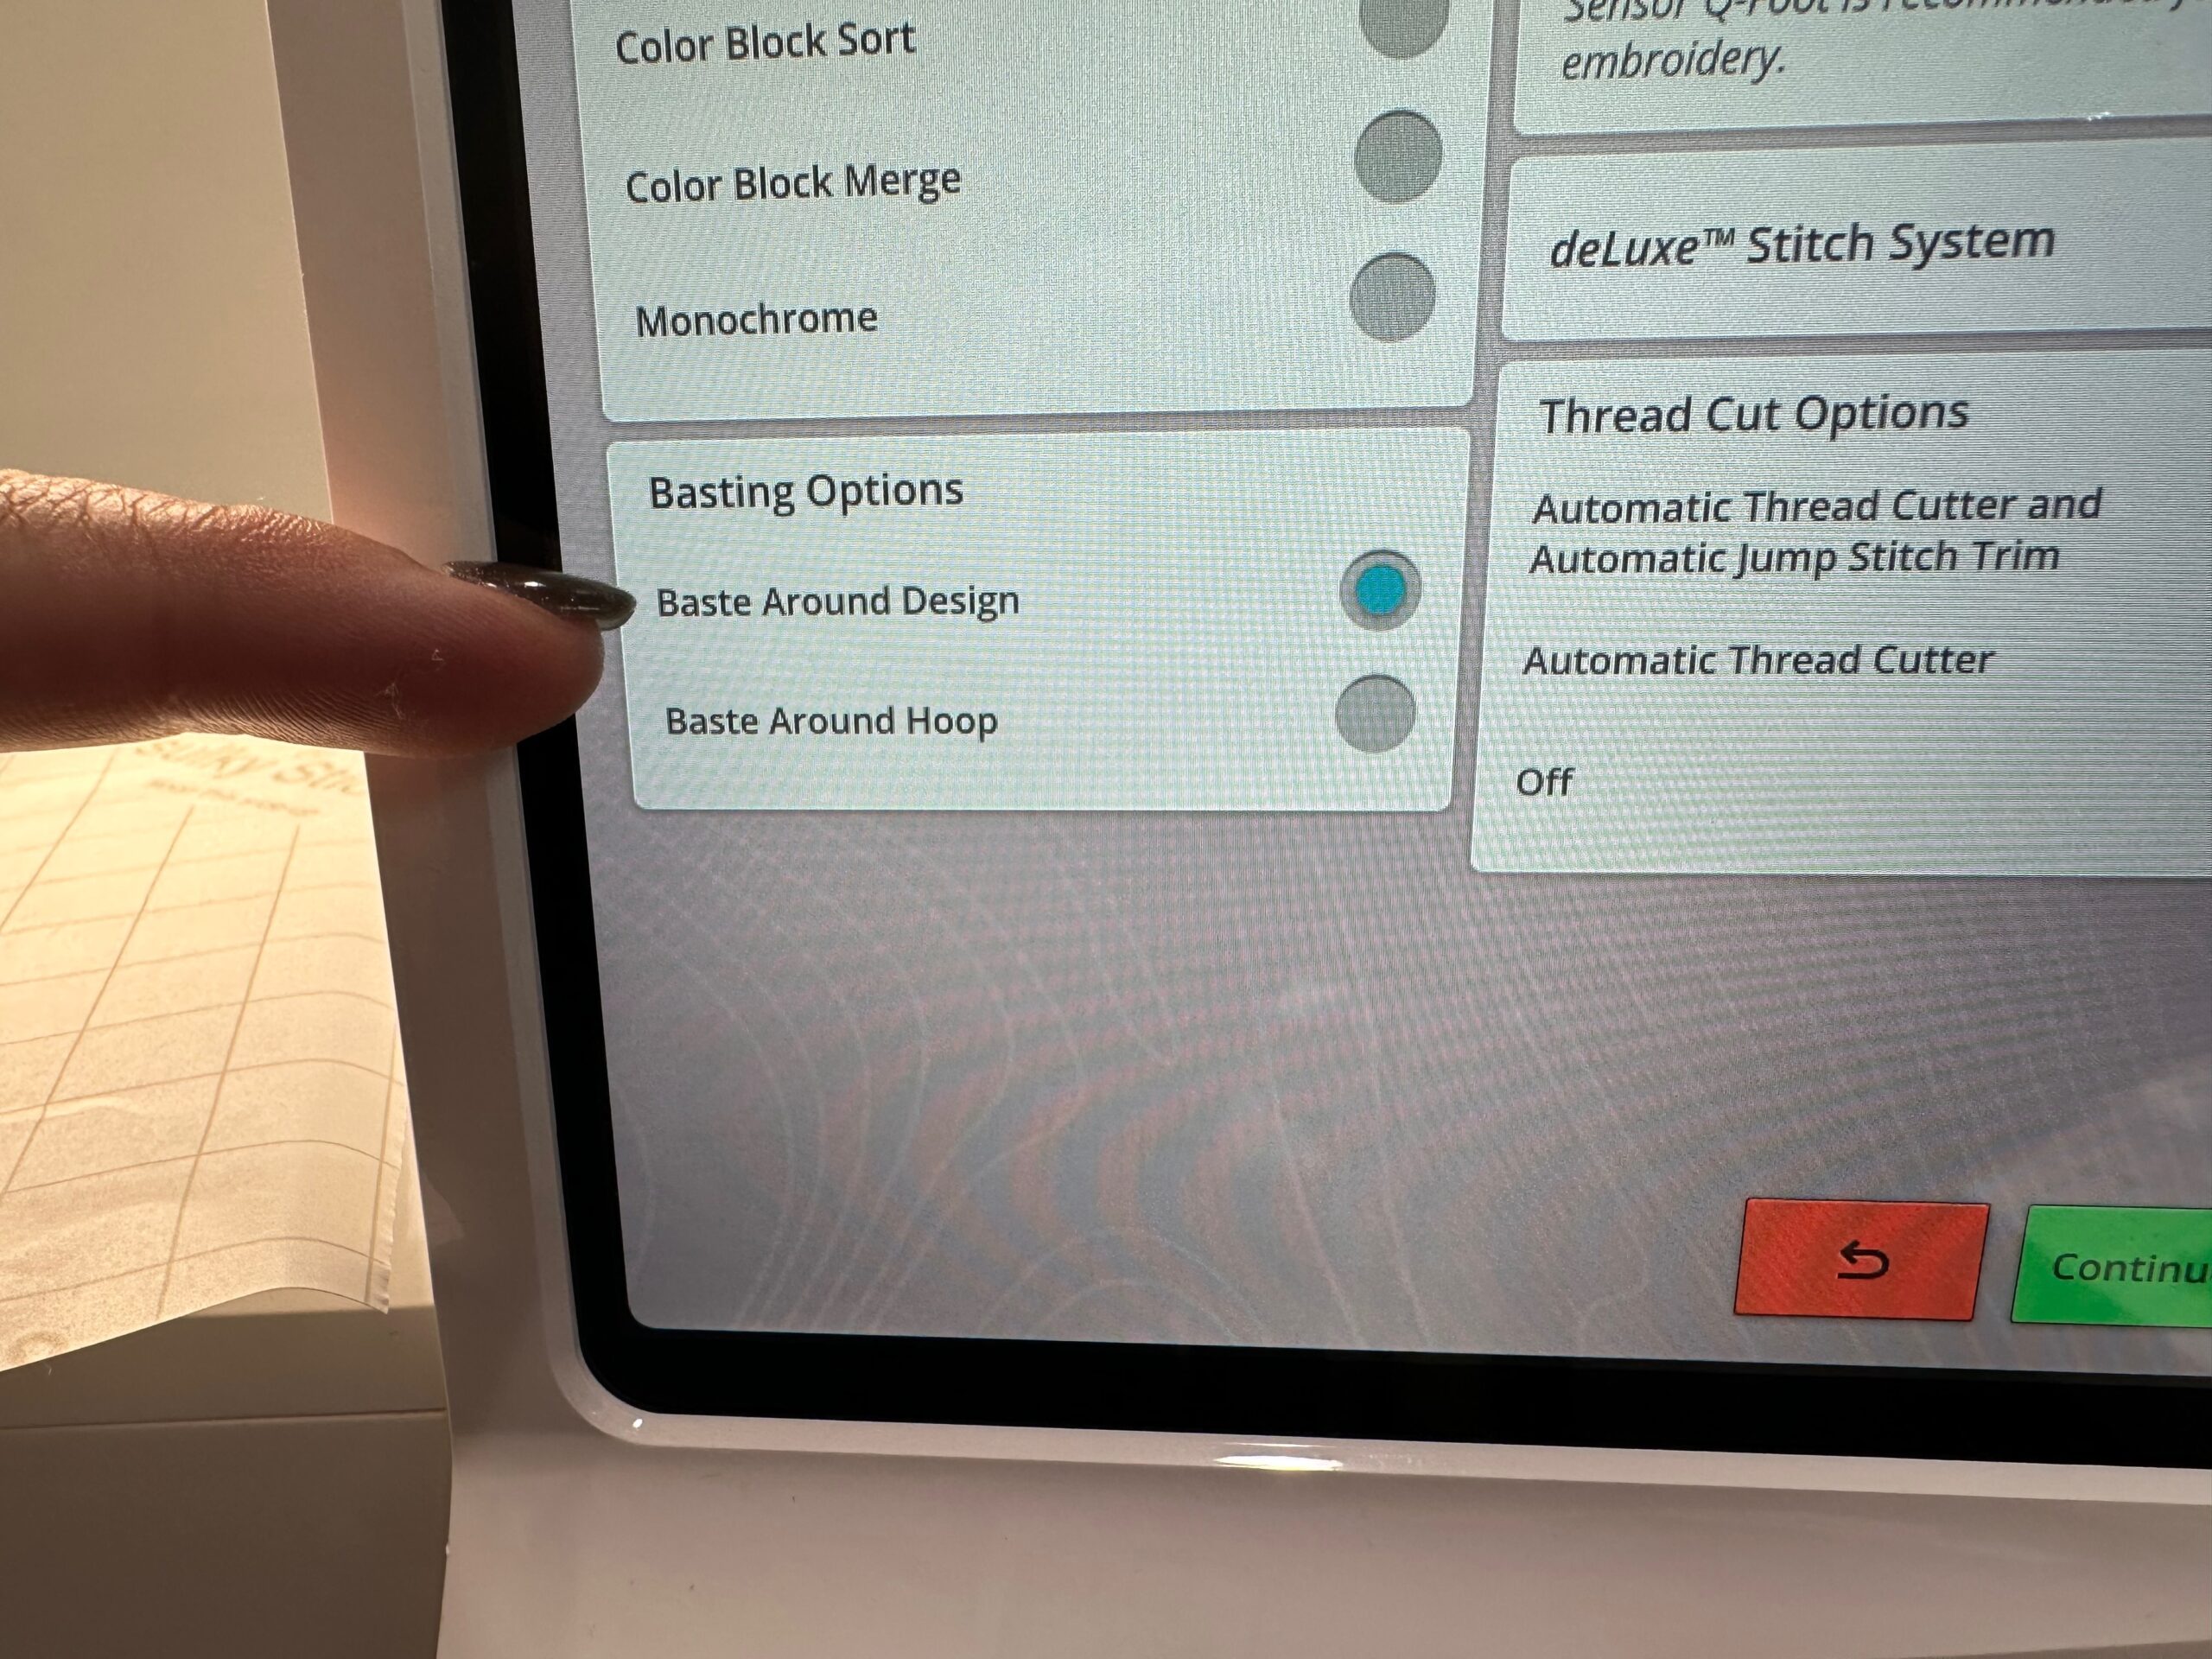
Add a “perimeter basting” function to the stitchout so the design will stitch a basting line around the design.
Place the hoop onto the machine.
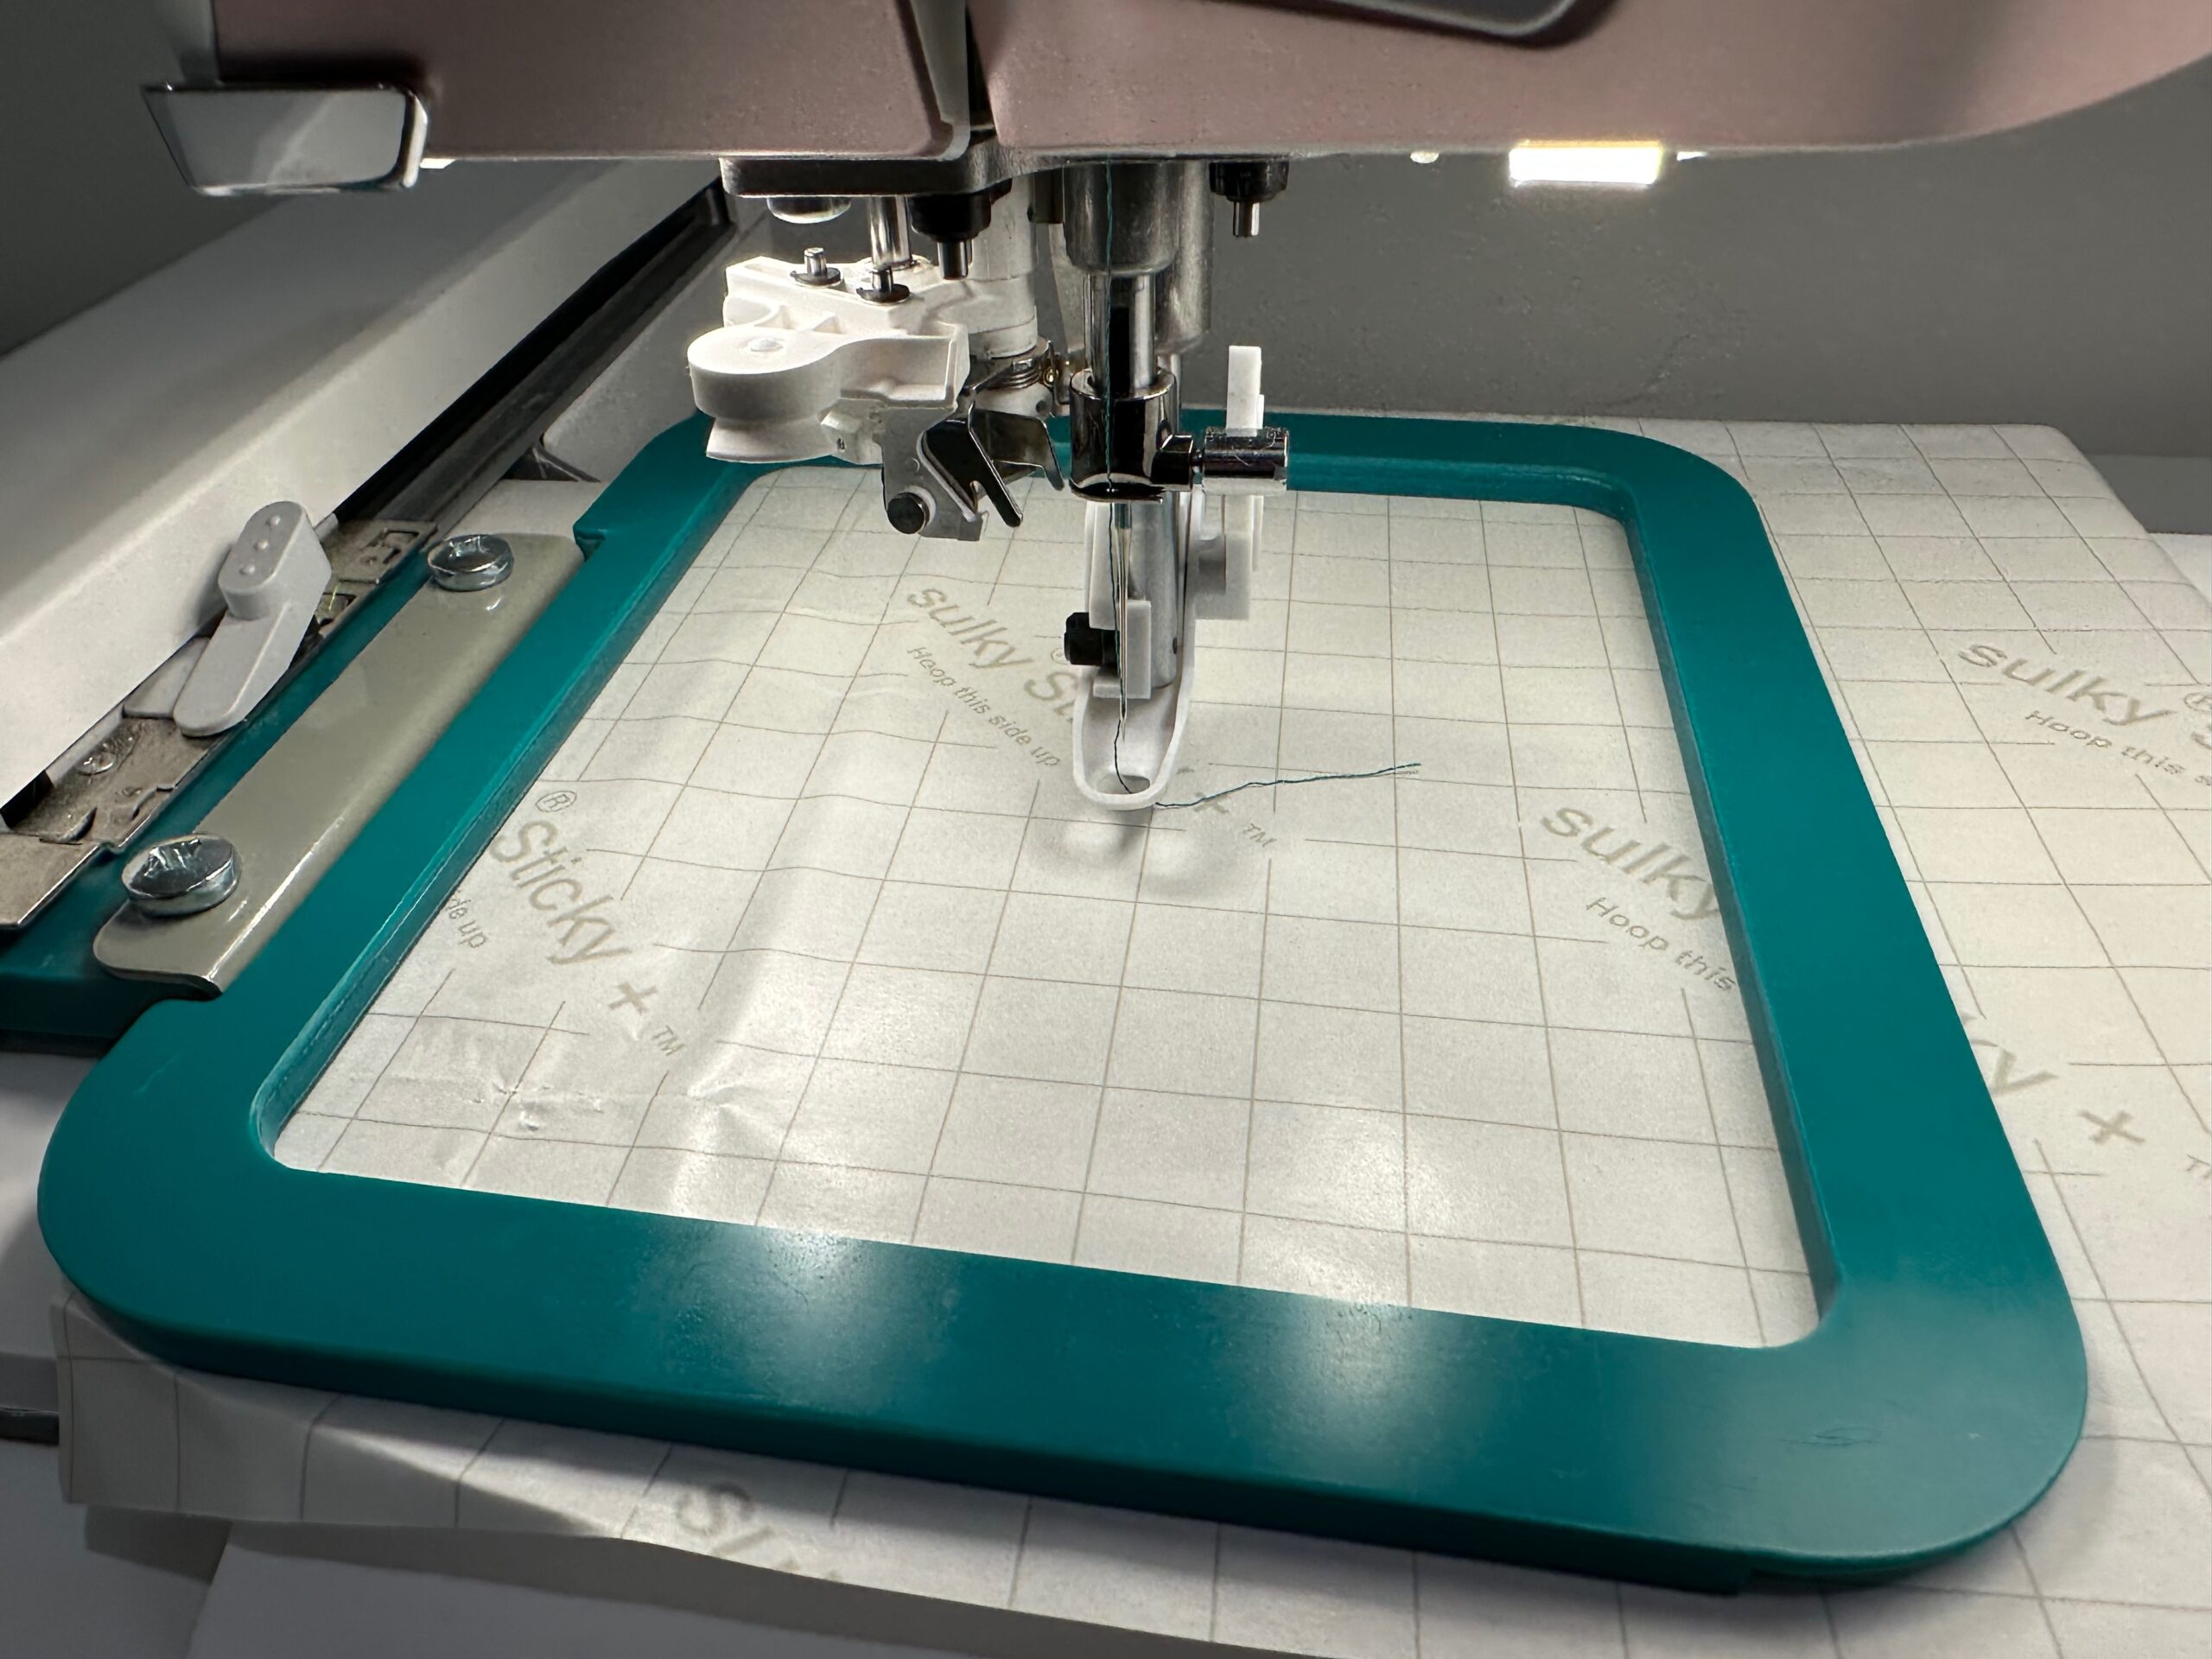
Then, stitch the basting line directly onto the stabilizer.
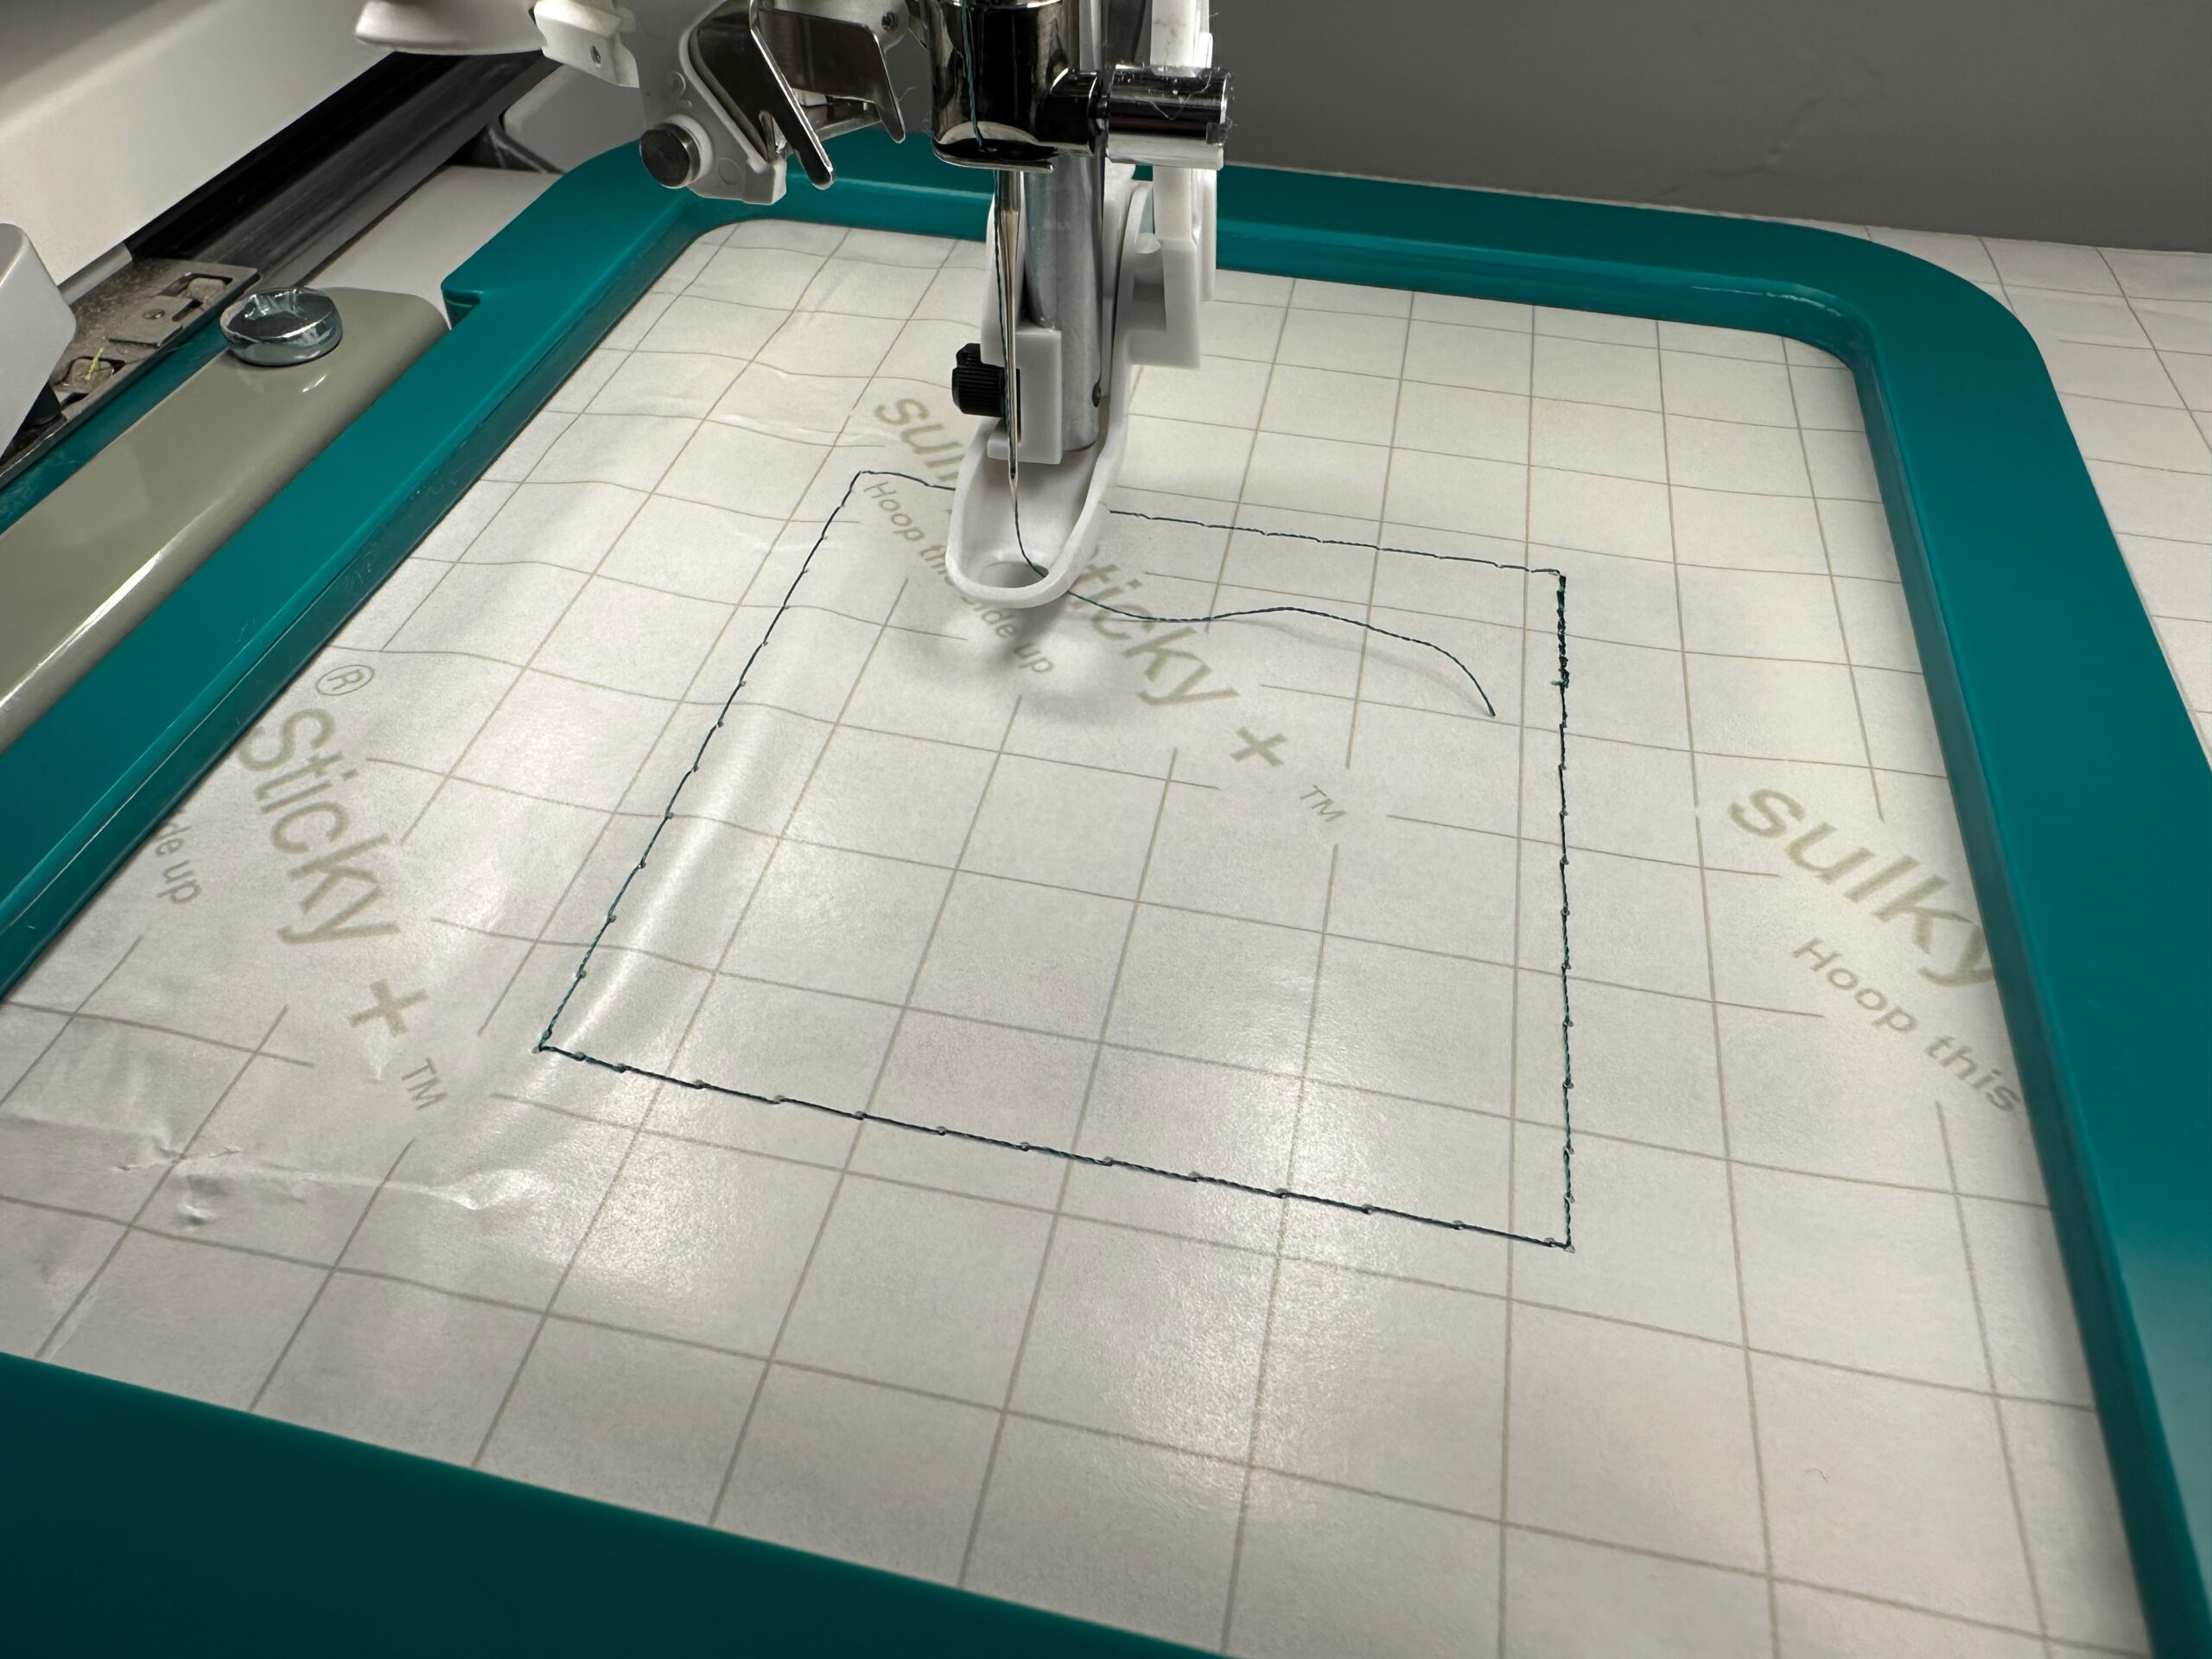
Remove the hoops from the machine. Using the Sticky+ Slitting Pen, score the paper along the needle perforations on the basting stitch lines. If you accidentally slice through the stitching, that’s ok. It’s only used as a placement tool and you actually don’t even need to have thread in the needle for the basting stitch!
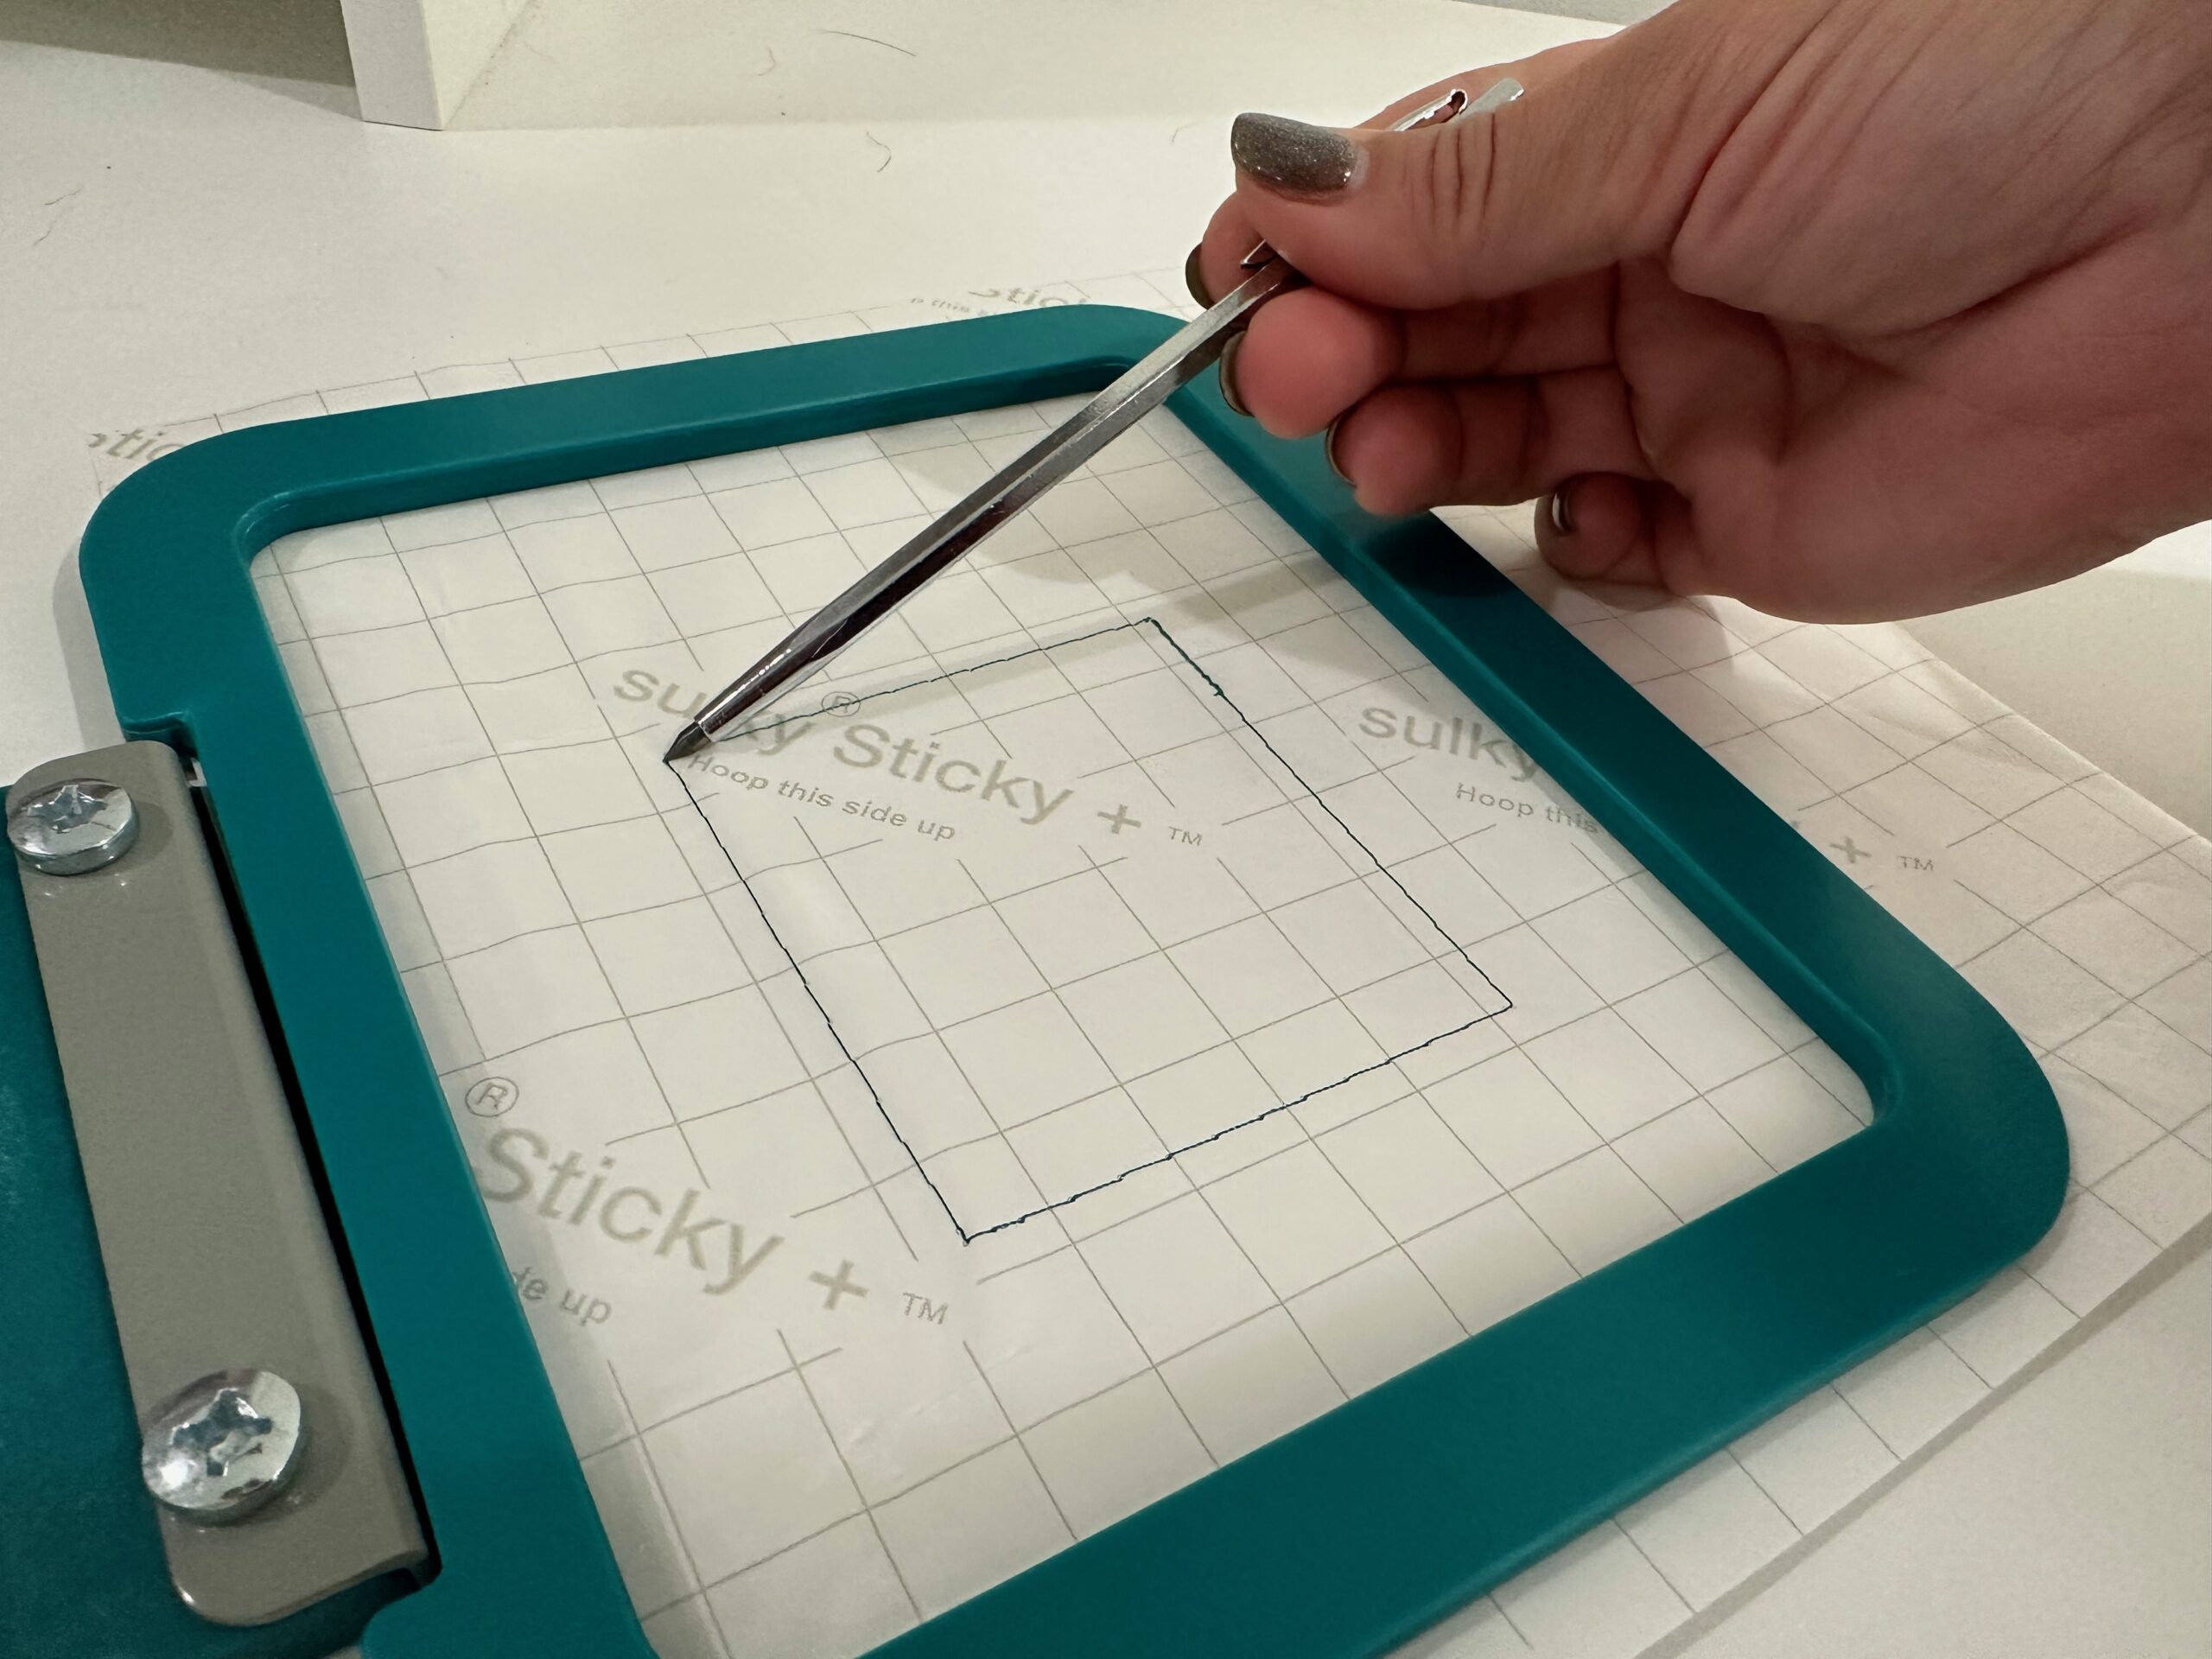
Carefully lift up the paper within the scored area to expose the sticky stabilizer underneath.

Place the backpack onto the sticky stabilizer, centering the design cross marks as needed inside the inner hoop ring. Note: The inner hoop ring has notches to indicate the design center. These notches are most often NOT in the exact center of the hoop. Pay attention to those notches to ensure the design is placed where desired. In the featured images, a magnetic hoop is used that does NOT have markings; your magnetic hoop comes with stickers that have these markings so it’s recommended to add those after purchasing a magnetic hoop, following the manufacturer’s instructions. You can also draw the hoop center cross marks onto the stabilizer surface, extending them to the hoop edge so they’re easier to see when placing the backpack. (A magnetic hoop is NOT required for this project.)
PERSONALIZING THE BACKPACK
Wind a bobbin with neutral Bobbin Thread. Install a new size 80/12 Top Stitch Needle and thread it with either Rayon or Poly Deco Thread, depending on your preference. Both threads are 40 wt. and shiny. Rayon looks almost like silk; Poly Deco is colorfast. They both perform expertly during the stitchout process.
Place the hoop onto the machine. Double check to ensure the backpack is placed in the hoop correctly. If desired, run the basting stitch again to further secure the backpack to the stabilizer.
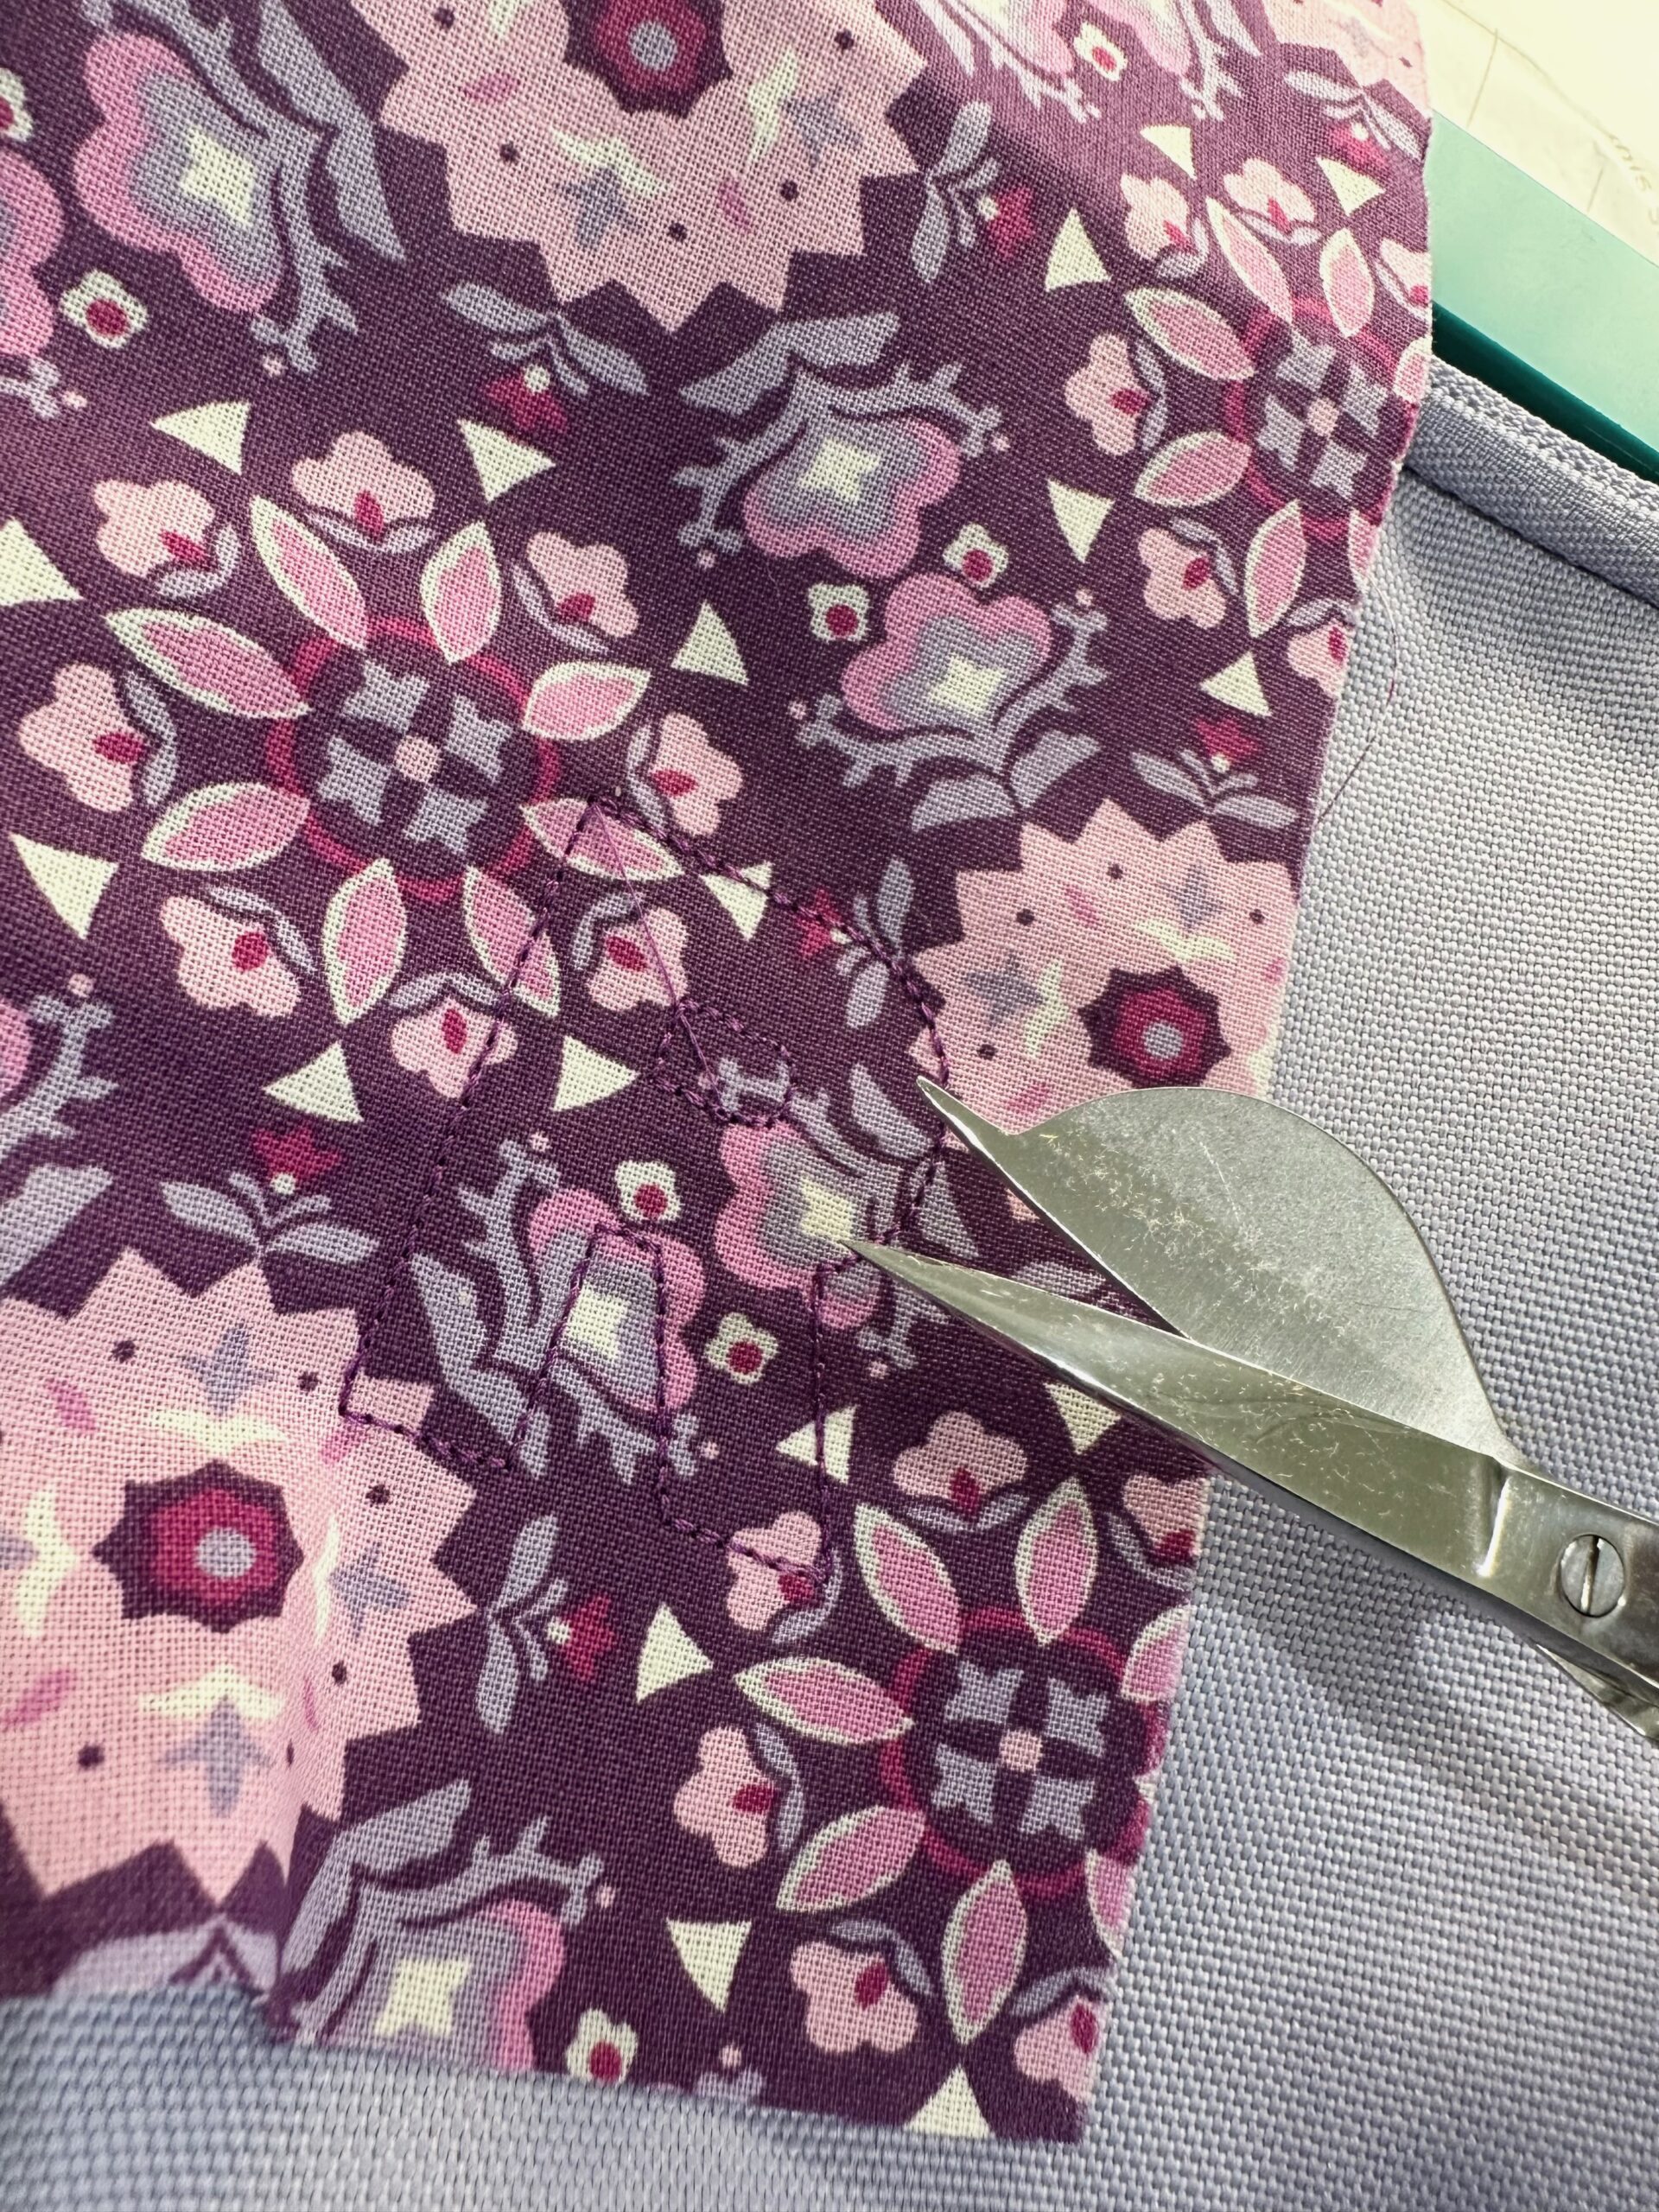
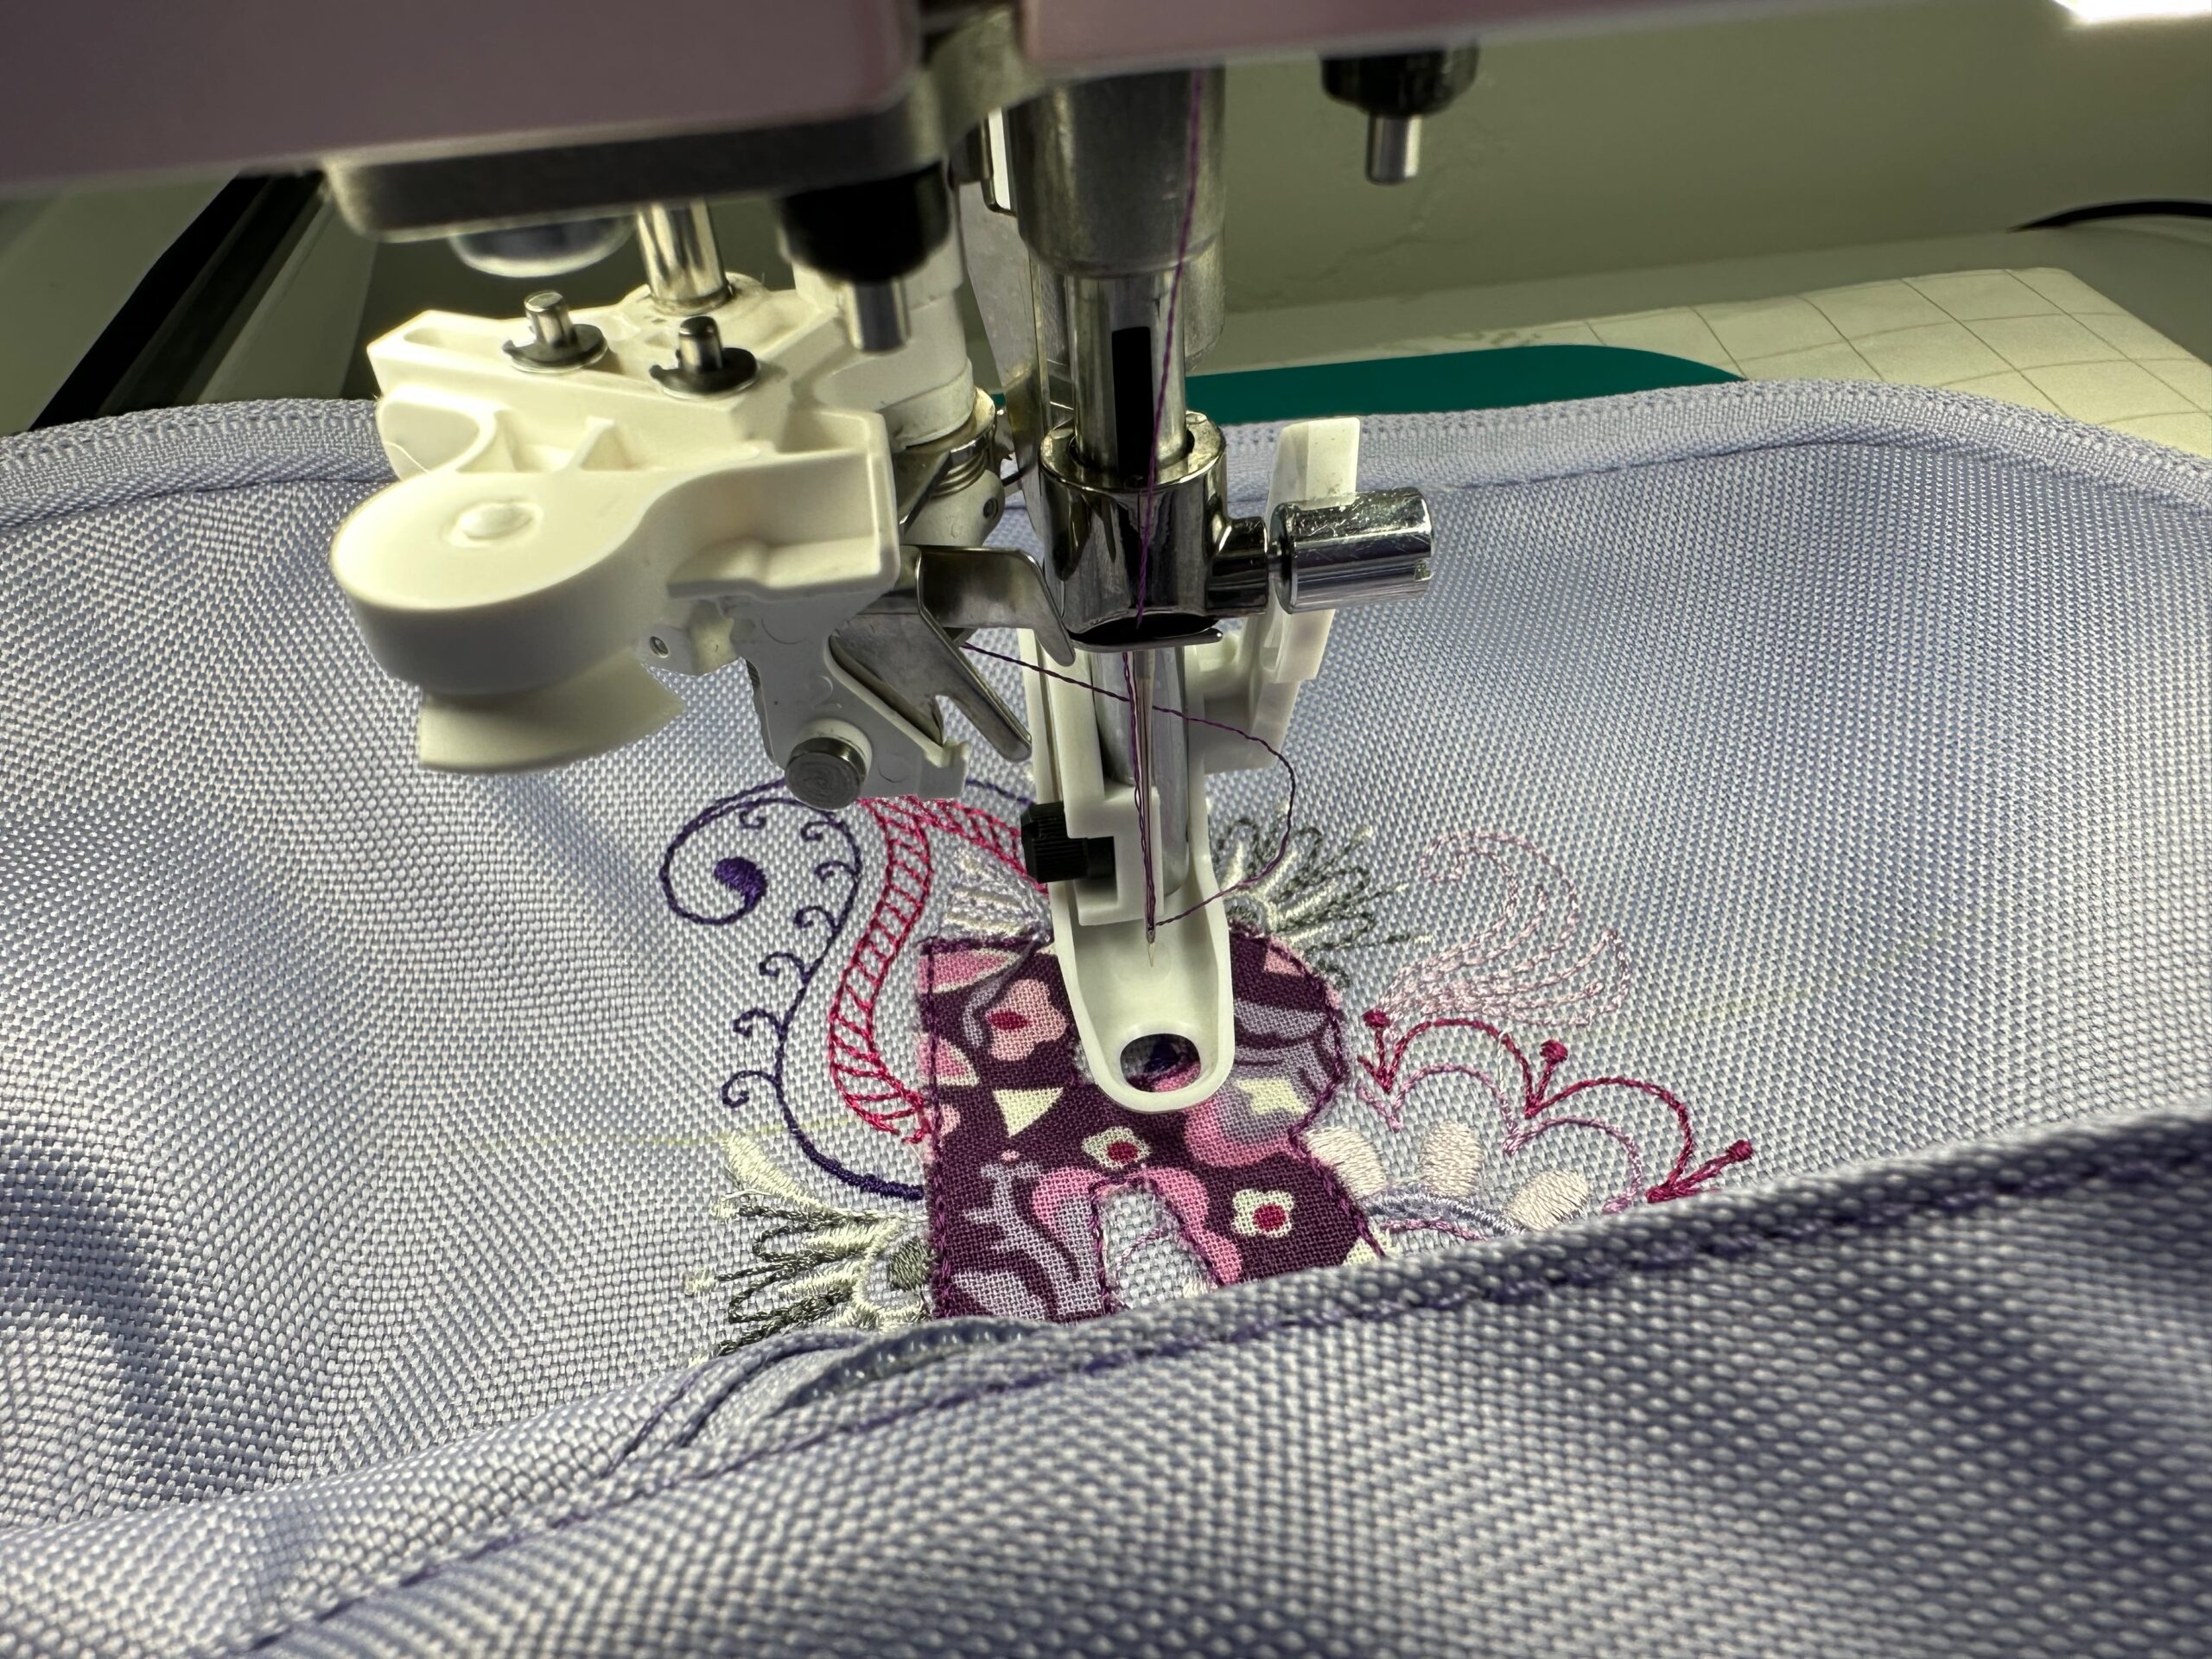
Begin the stitchout. If using an applique design, fuse Sulky Perfect Applique to the wrong side of the chosen applique fabric prior to placing it over the placement stitches in the design. This reduces the chance of fraying fabric edges, and eliminates show-through on lighter colored fabrics. Be sure to use applique scissors when trimming the fabric in the hoop. This way you can get very close to the tacking stitch line without slicing through it.
Finish embroidering the design, following the color chart or your own color combination. Be sure to stay with the project during the entire stitchout to make sure no part of the backpack moves and/or interferes with the embroidery arm, needle or hoop edges.
When the embroidery is complete, remove the hoop from the machine.
EMBROIDERY FINISHING
Remove any fabric marker or chalk.
Carefully tear away the stabilizer beyond the design perimeter.
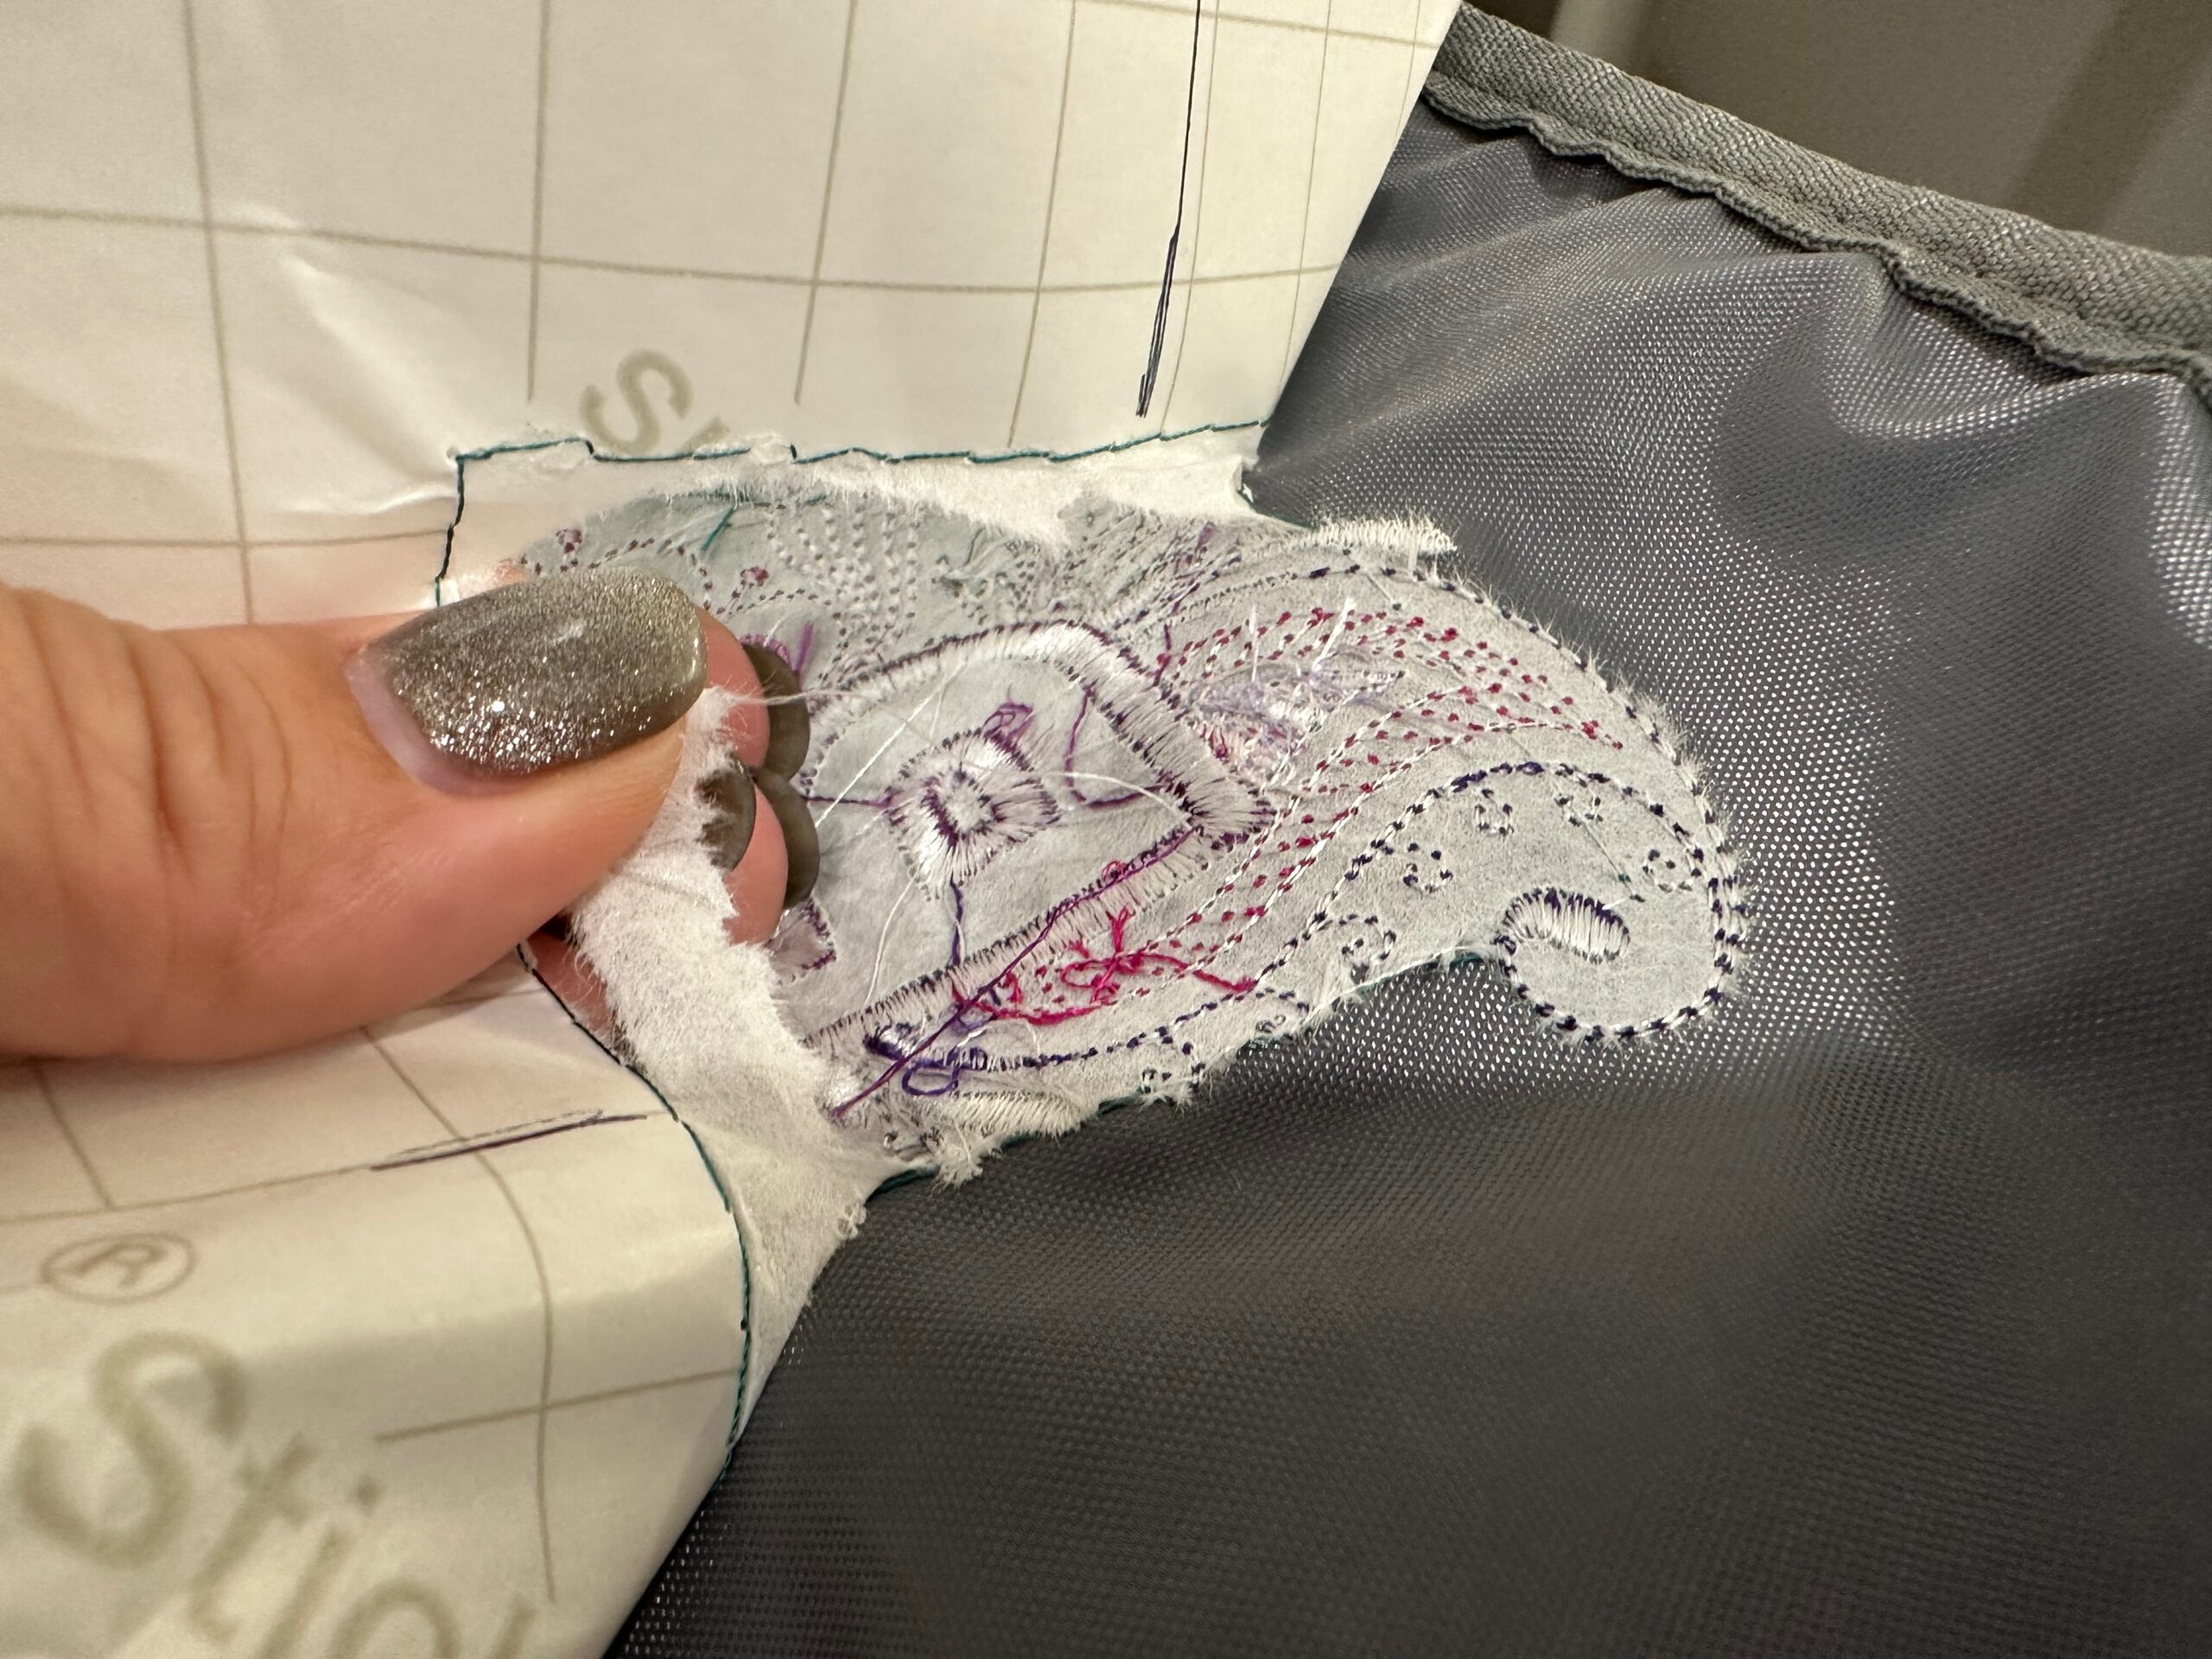
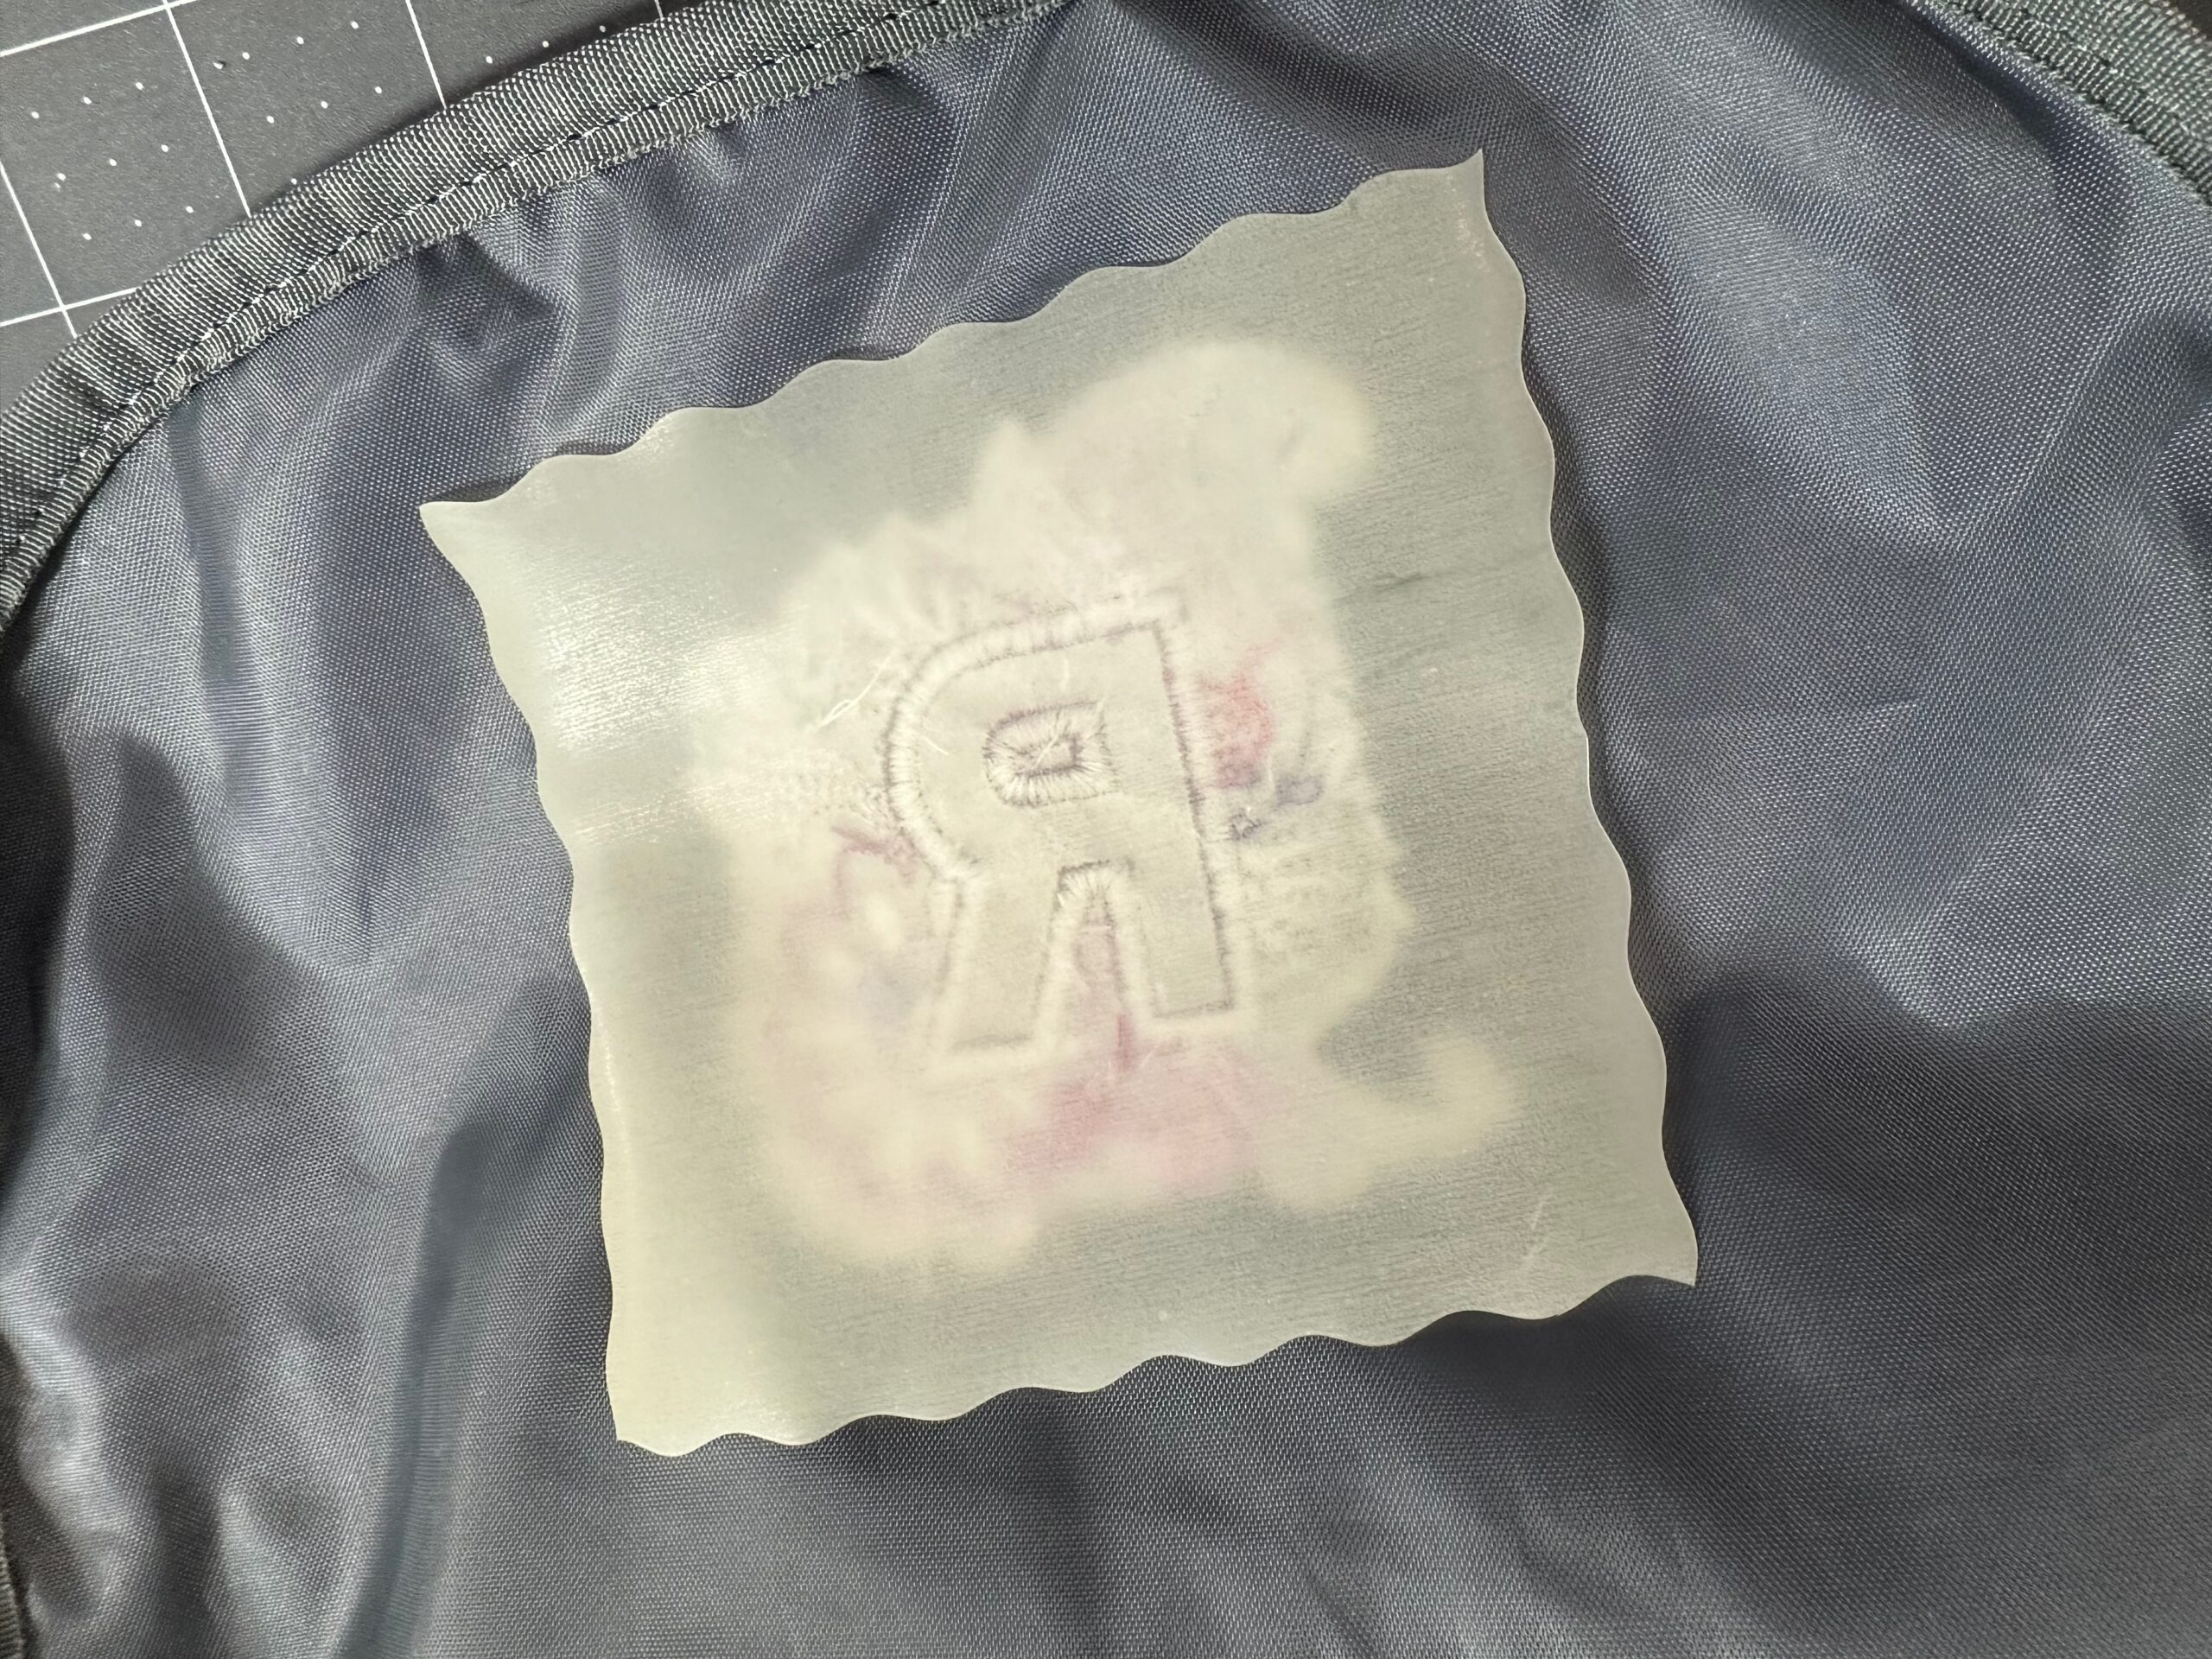
When all or most of the stabilizer is removed, cut a piece of Sulky Stitch ‘n Seal Stabilizer slightly larger than the design perimeter.
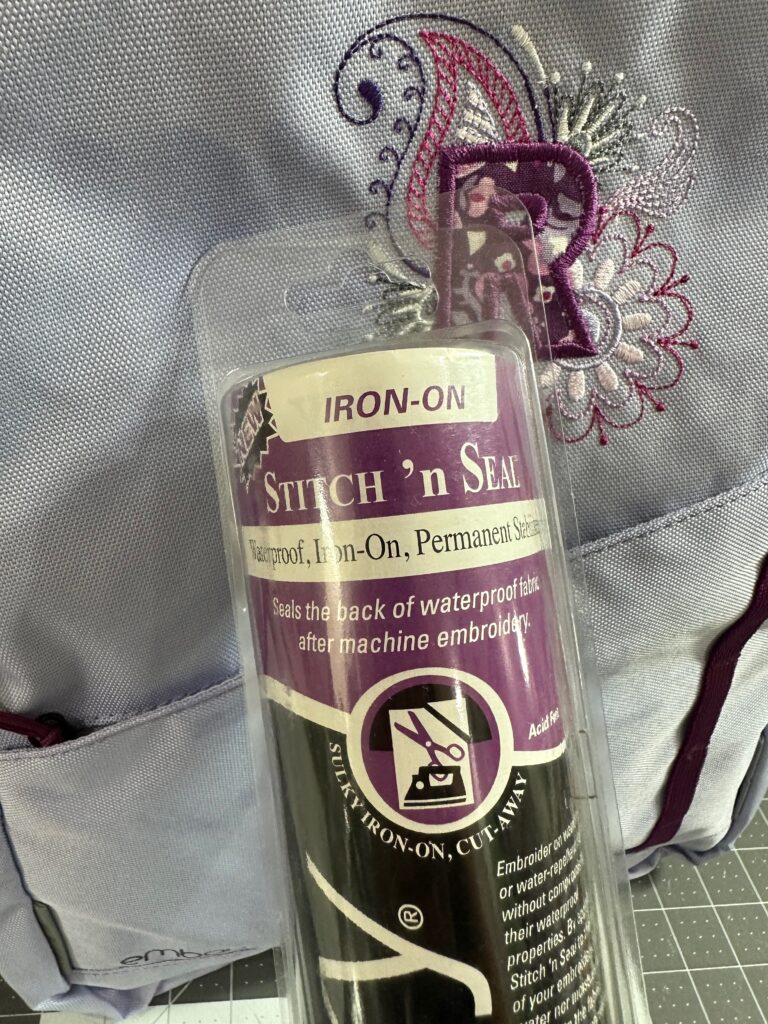
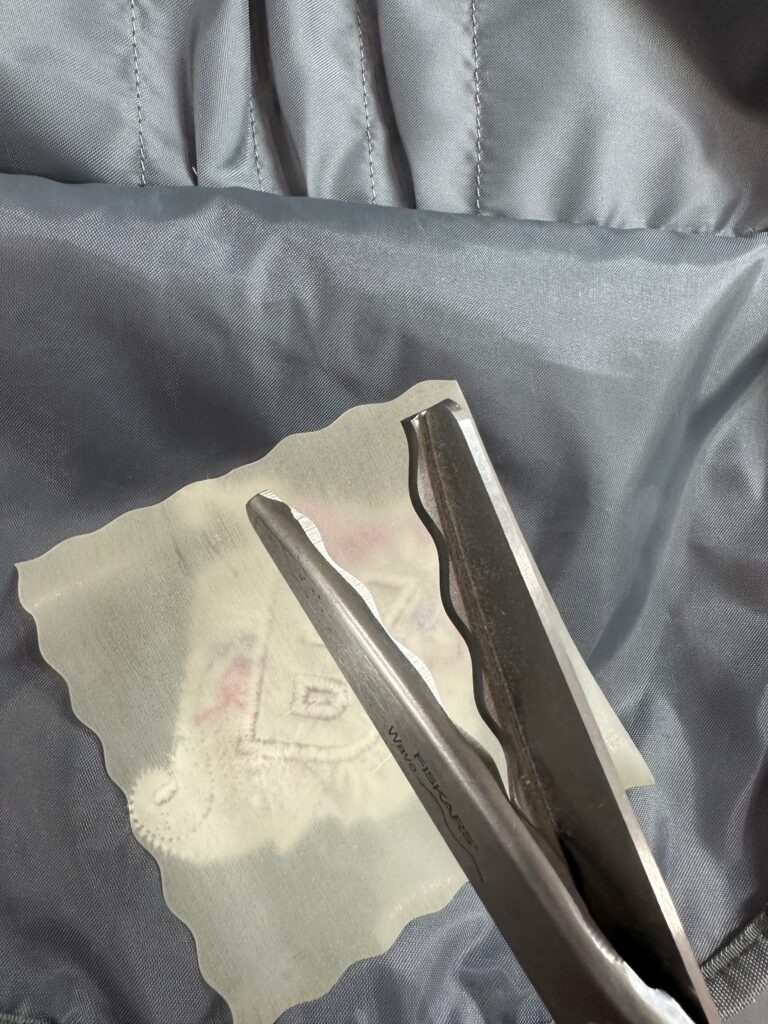
Use wavy blade scissors or pinking shears to cut the stabilizer. This ensures a better, more permanent bond over time.
Place the stabilizer shiny side down over the embroidery wrong side.
Using a press cloth, fuse the stabilizer to permanently adhere it to the backpack. (It will look prettier if you trim the bobbin stitches after embroidery is complete (wink, wink).
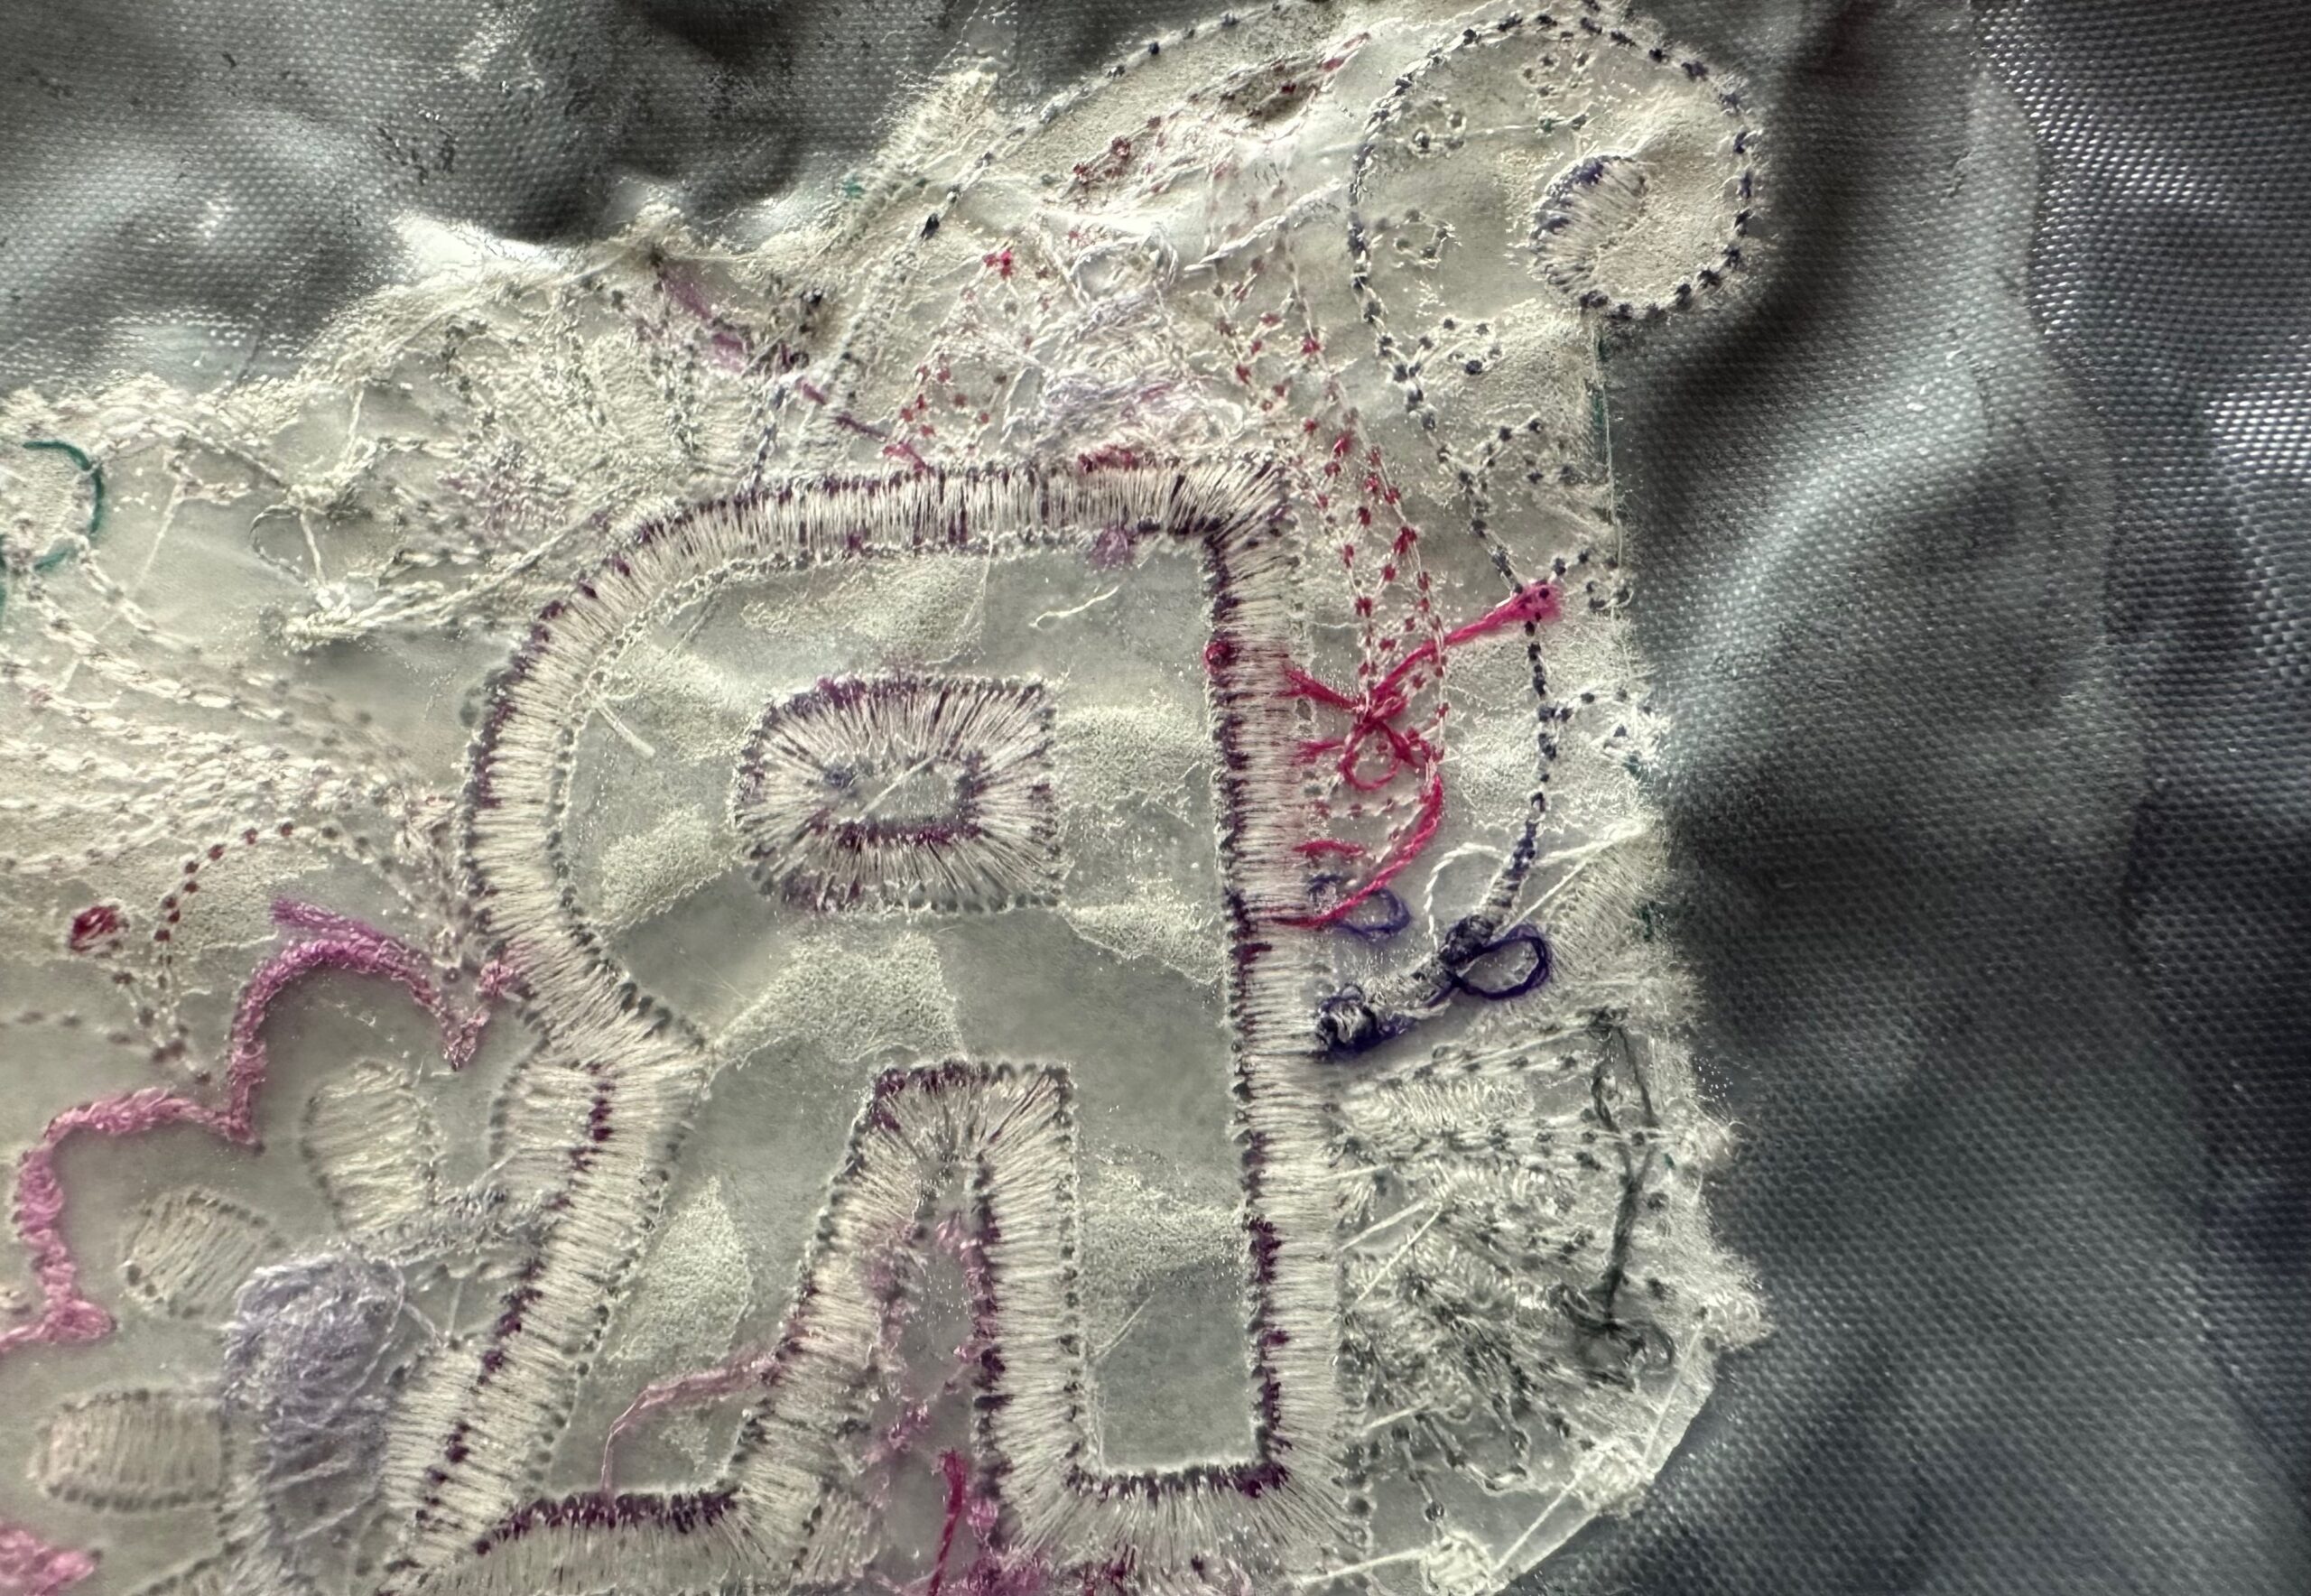
Stitch ‘n Seal not only protects the embroidery wrong side, but it also helps retain the water-resistant property that most backpacks have. The more stabilizer you remove, the more inconspicuous the embroidery back will be (and the Stitch ‘n Seal will adhere more evenly and with a better permanent bond.)
Alternatively, or additionally, you can create a fabric applique over the back of the embroidery. Just keep in mind that if you stitch the fabric applique down, you’ll likely see that stitching on the backpack front.
After fusing is complete, so is the personalized backpack!