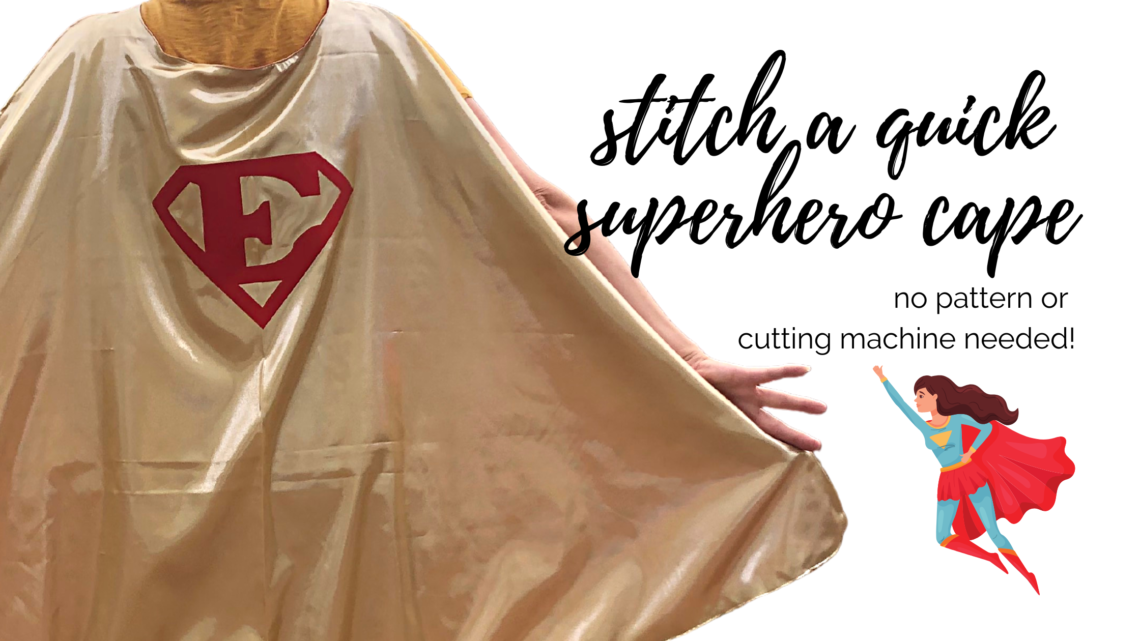
Quick Cape Costume for Halloween
Quick Cape Costume
your super simple solution to dressing up this Halloween (or every day you need some superhero energy)!
CAPE COSTUME DETAILS
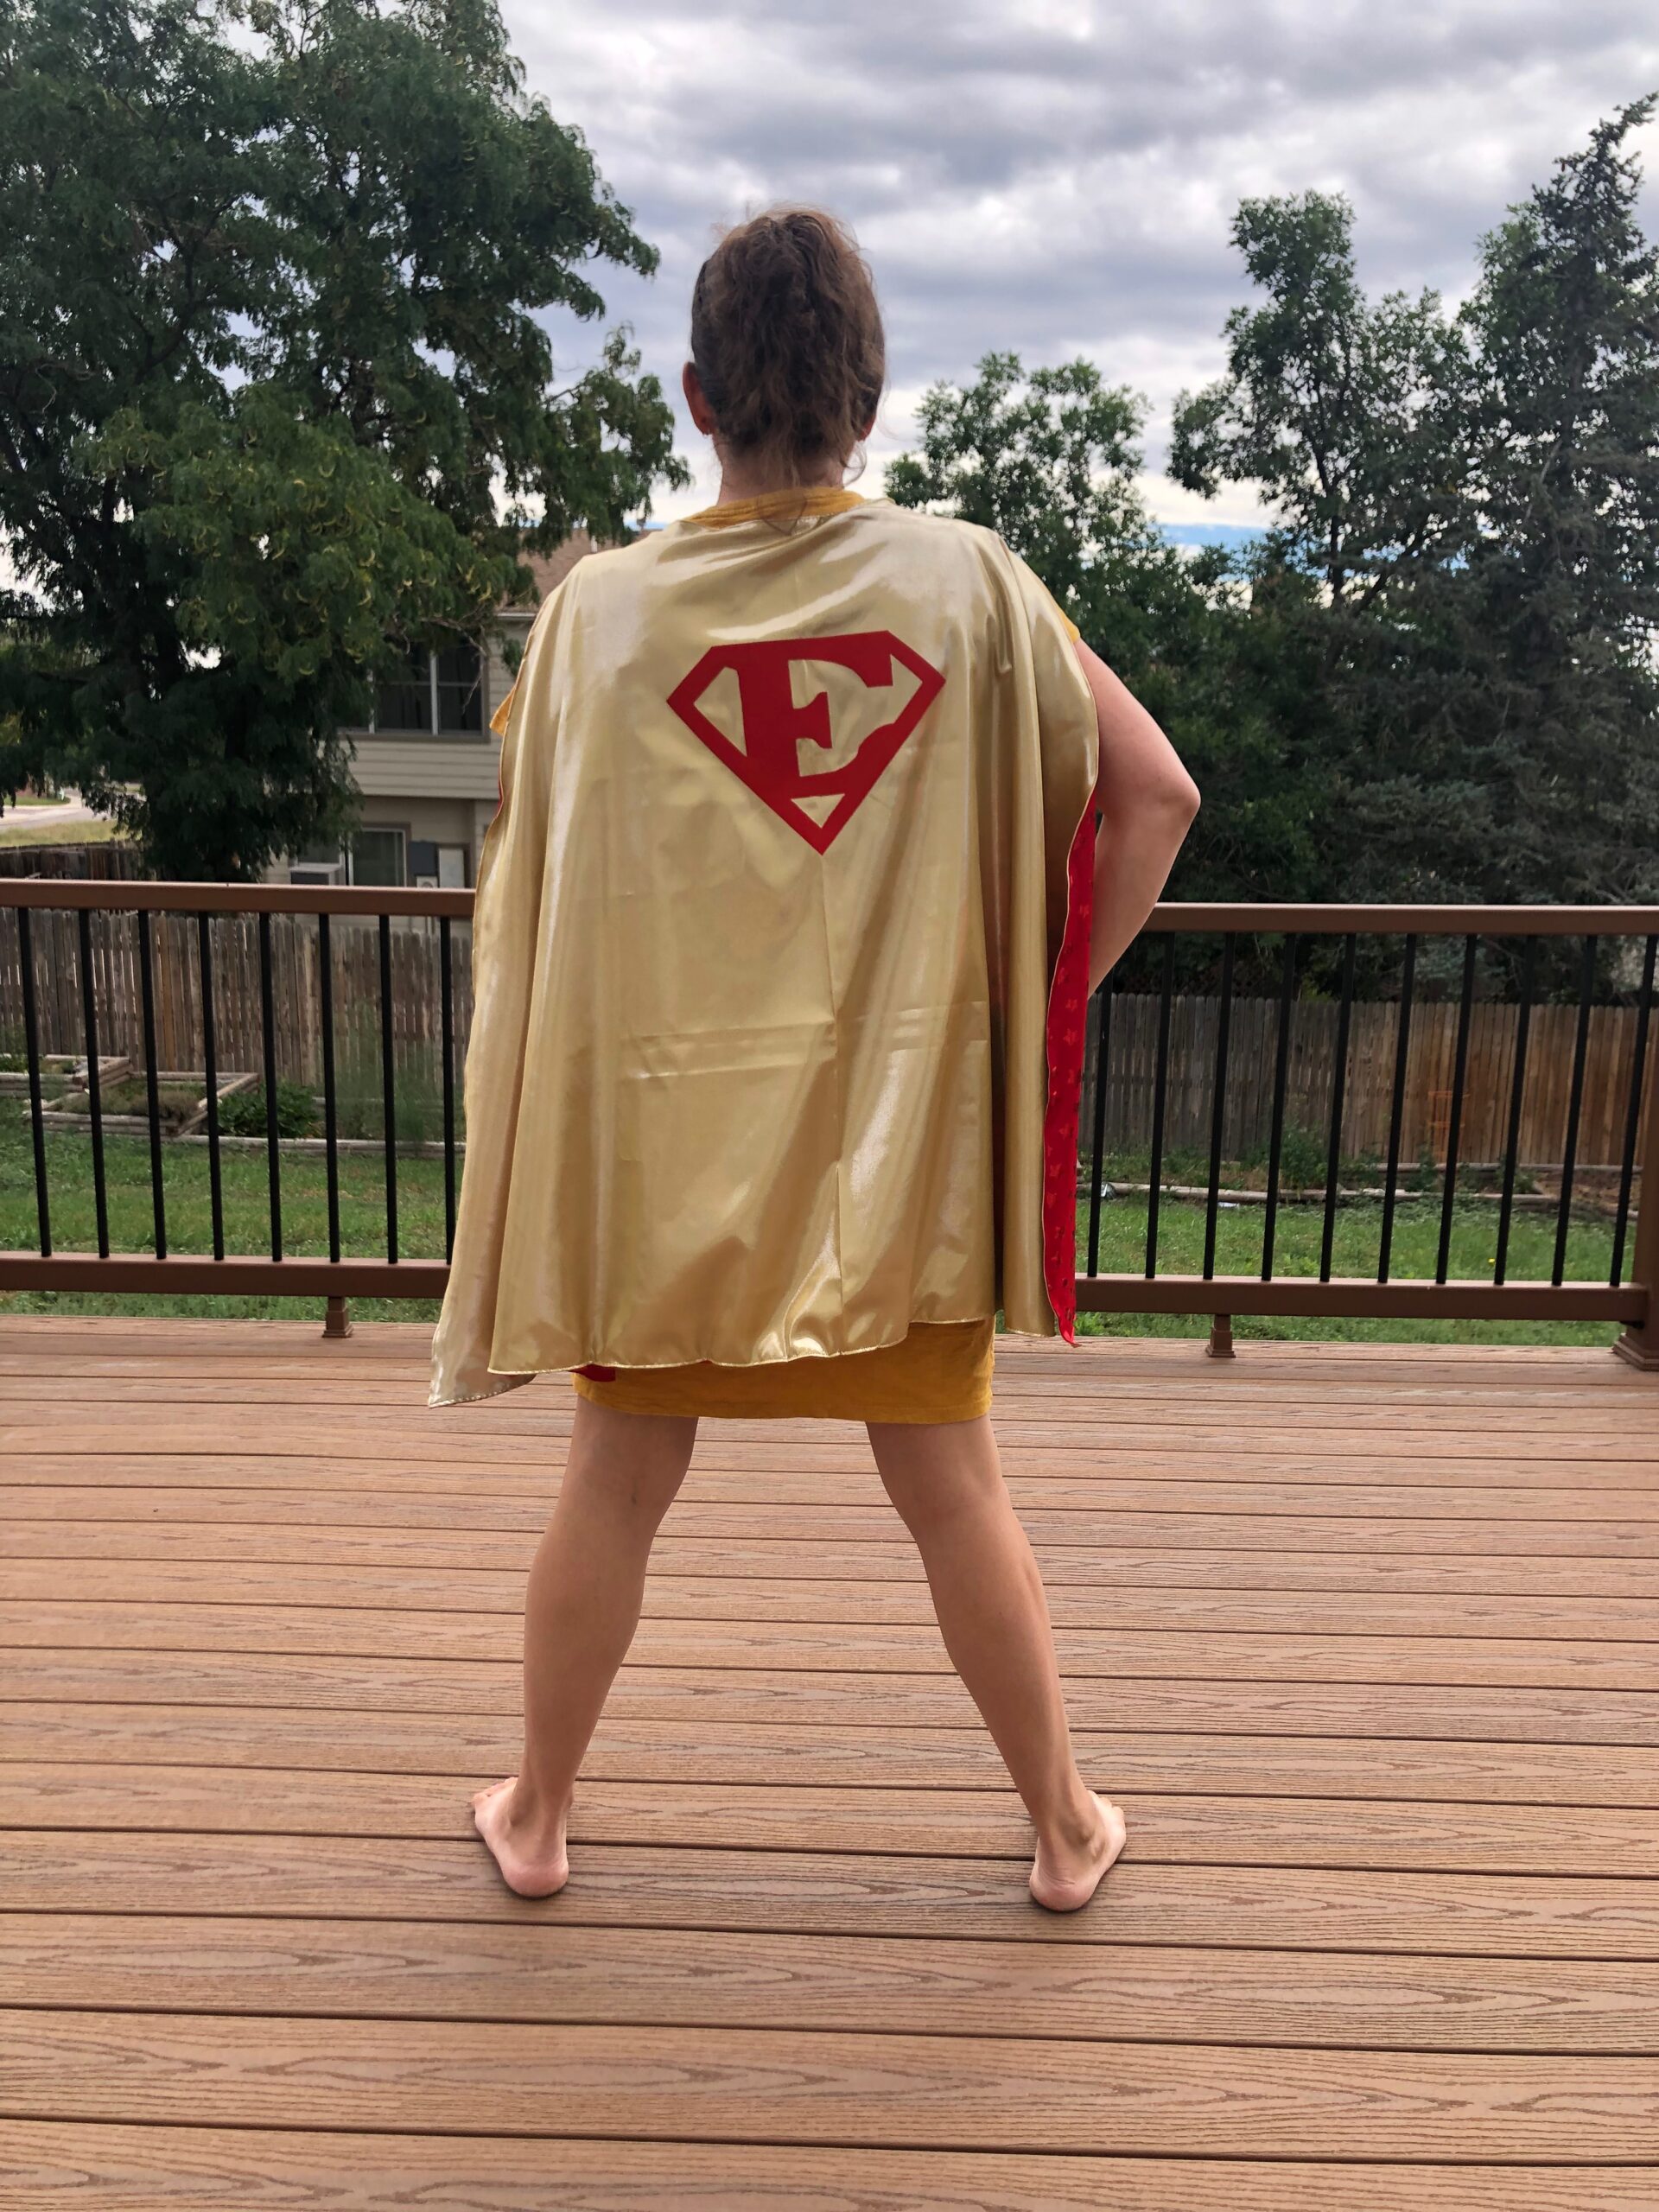
This cape is sized for an adult, but easily adaptable for a kid’s costume. Draft a quick pattern, and then sew. Include a superhero-inspired motif, monogram or appliquéd letter to the cape back for fun personalization. No cutting machine is needed for this glittery motif, but if you have one – now’s your chance to use it! It’s easier to use the vinyl shimmer sheet than a fabric appliqué, especially if working with a fabric that can’t tolerate the heat needed for fusible web. Plus, the sticker is removable if you want to use the cape for a different person or purpose in the future.
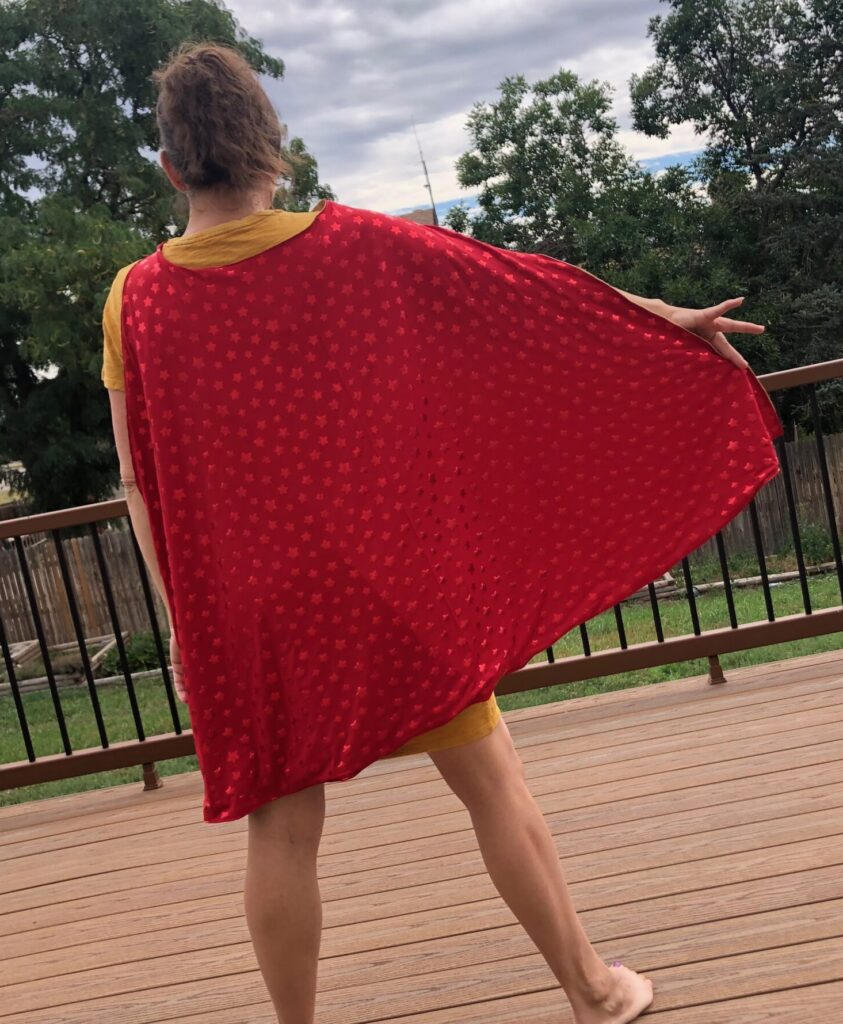
This quick cape costume is also reversible. So choose a fun print to showcase for the lining and then flip it next year for another costume without the need to sew a new one.
CAPE SUPPLIES
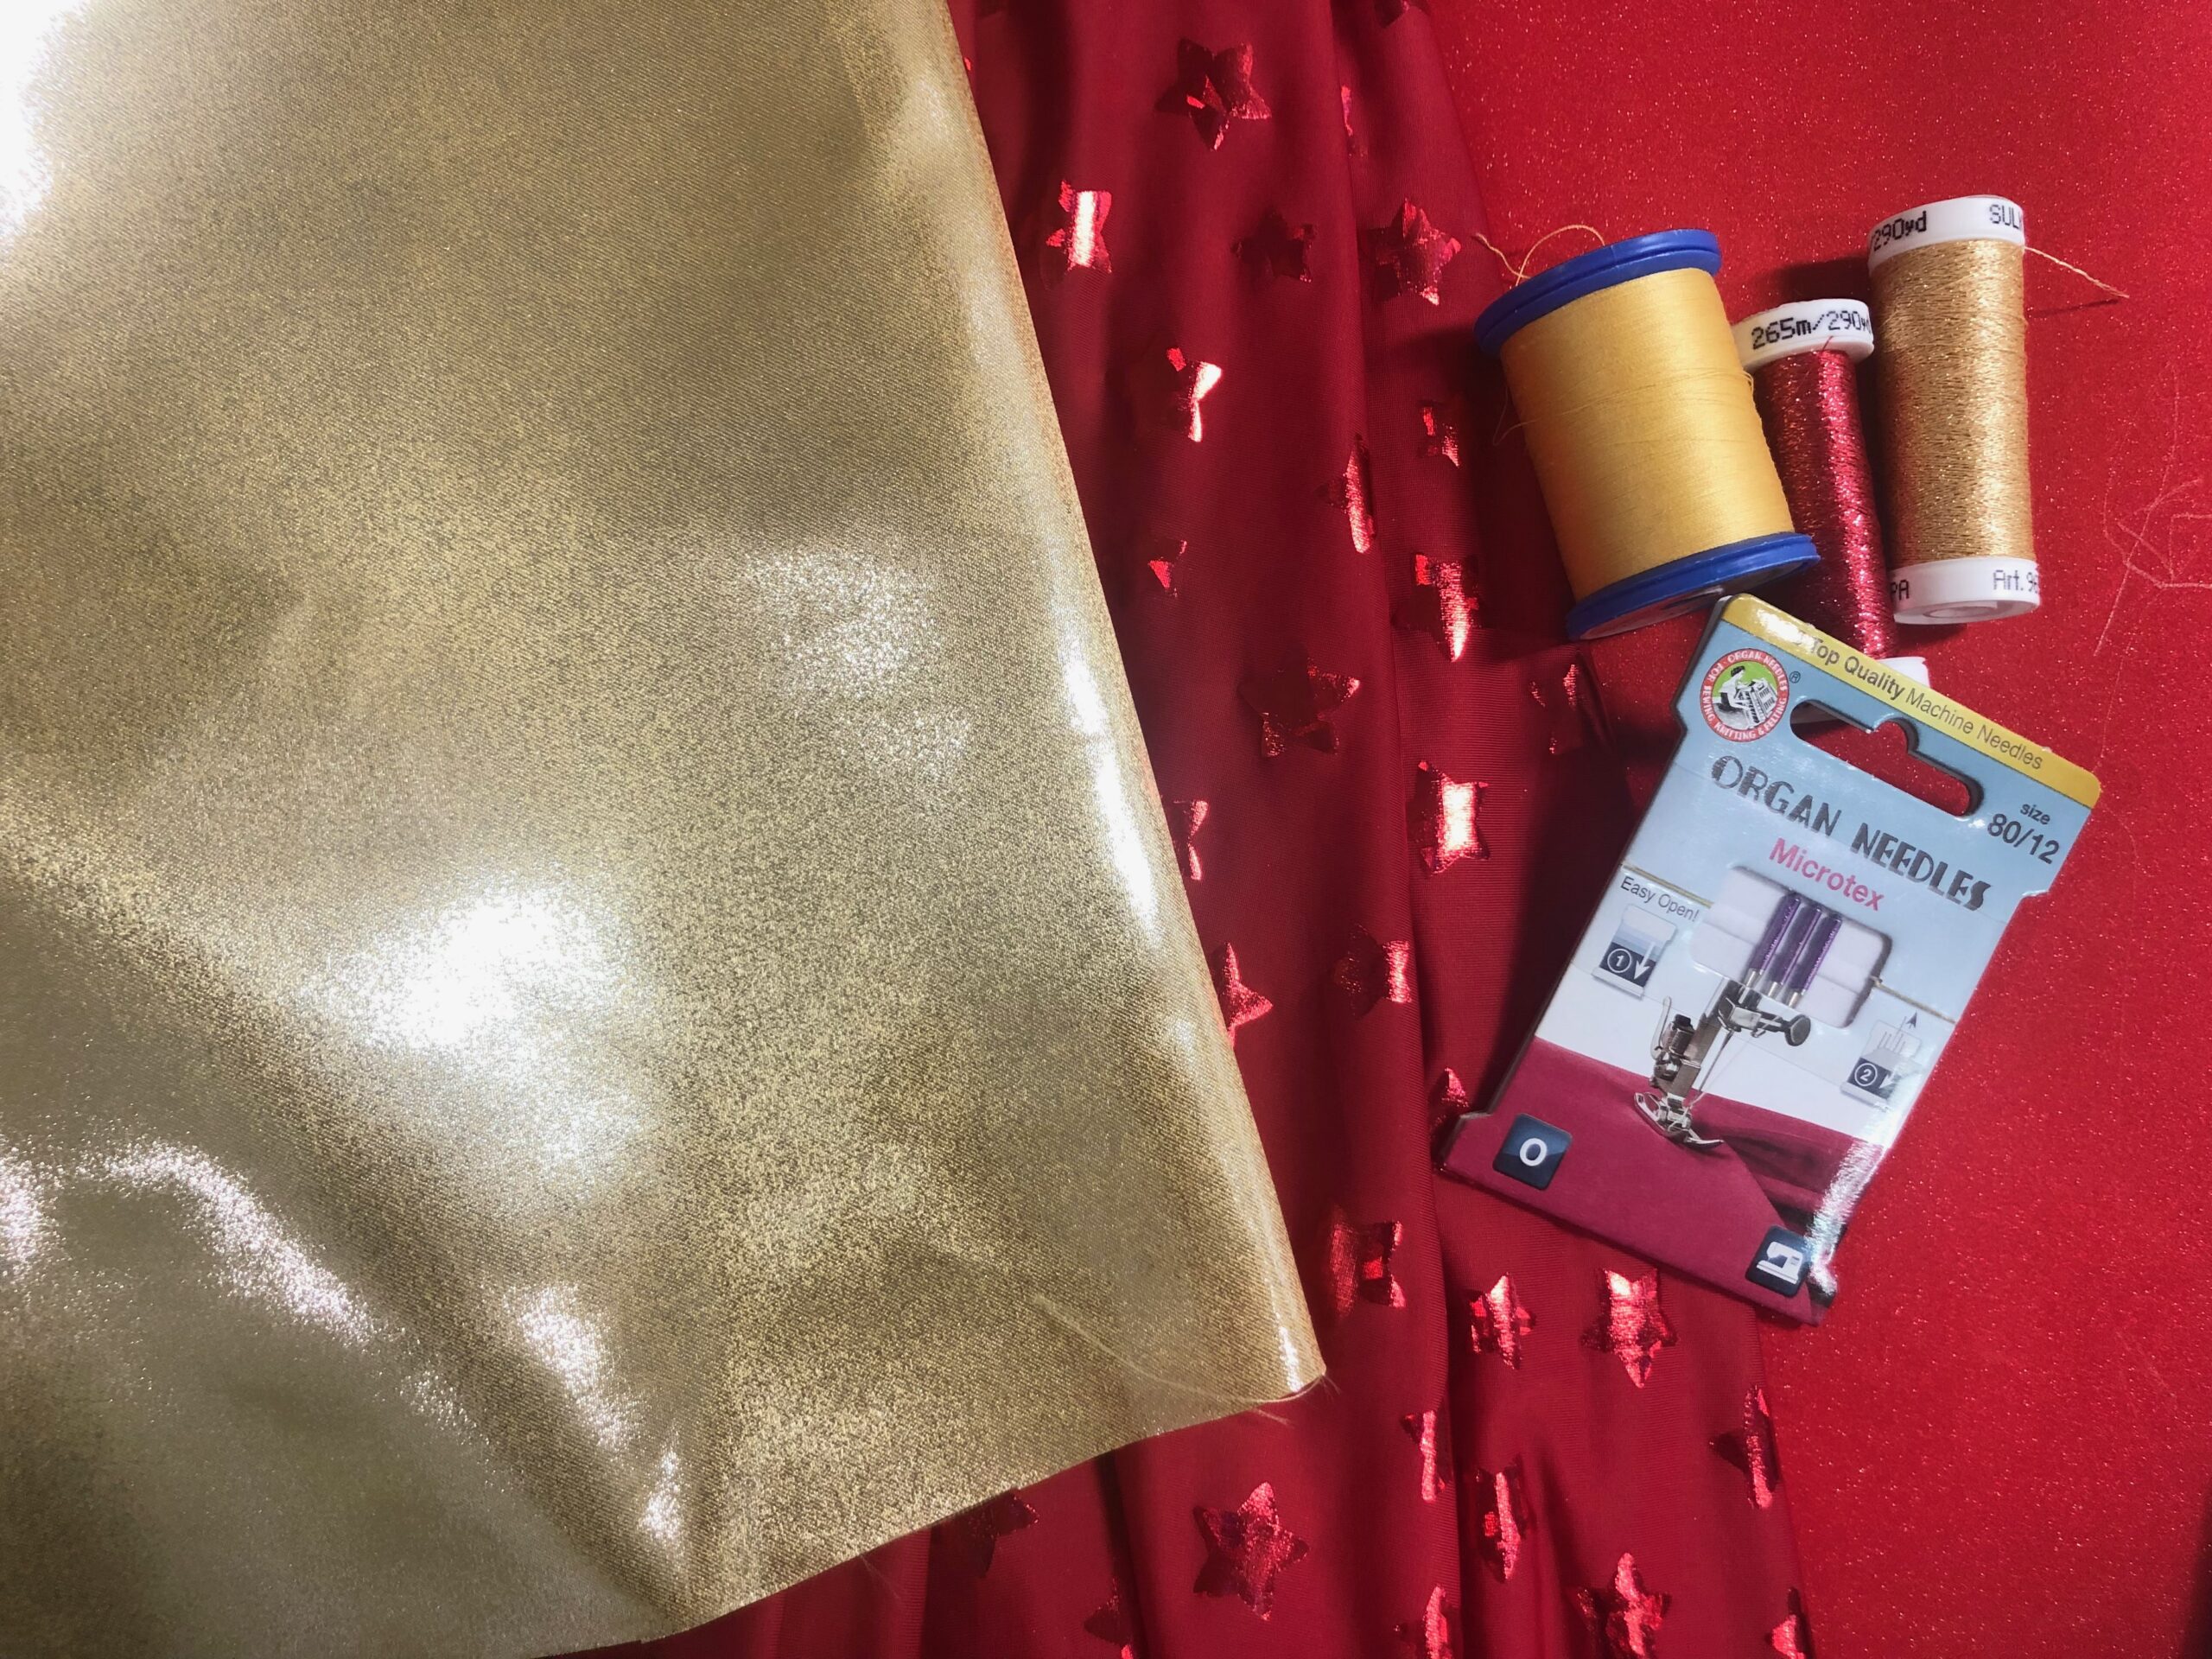
- Sulky Thread: Poly Deco™ or 50 wt. Cotton (construction), Poly Sparkle (embellishment; optional)
- Organ® Needles: size 75/11 or 70/10 Microtex or Jersey; size 90/14 Top Stitch
- 1 yard each of 2 coordinating 54”-wide fabrics (stretch knit, cosplay lame poly spandex)
- Vinyl Shimmer, Adhesive Foil or Glitter Sticker Transfer sheet or roll (such as Cricut Premium Vinyl Shimmer)
- Cutting machine (optional; or Olfa Touch craft knife and/or Sulky Sticky+ Slitting Pen)
- Hand sewing needle
*We may earn an affiliate commission on items purchased through the above links.
CAPE COSTUME PATTERN CREATION
Fold the outer or lining fabric in half with right sides together, matching the selvages.
Round the upper corner along the foldline using a round object, such as a lid.

Mark the fabric upper edge approximately 1” from the rounded edge.
Tie a length of string or heavyweight thread onto the eraser end of a pencil or removable fabric marker. Place the pencil end along the lower-edge fold.

Hold the string taut at the upper-edge mark that’s 1” beyond the rounded edge. Draw a curved line from the lower-edge fold to the selvage edge, using the pencil like a protractor. Then connect the line from the selvage edge to the upper-edge mark that’s 1” beyond the curved edge.
Cut out the cape from the outer fabric, and then cut out another cape from the lining fabric.

APPLIQUÉ CREATION
If you don’t have a cutting machine, follow these directions for creating the appliqué.
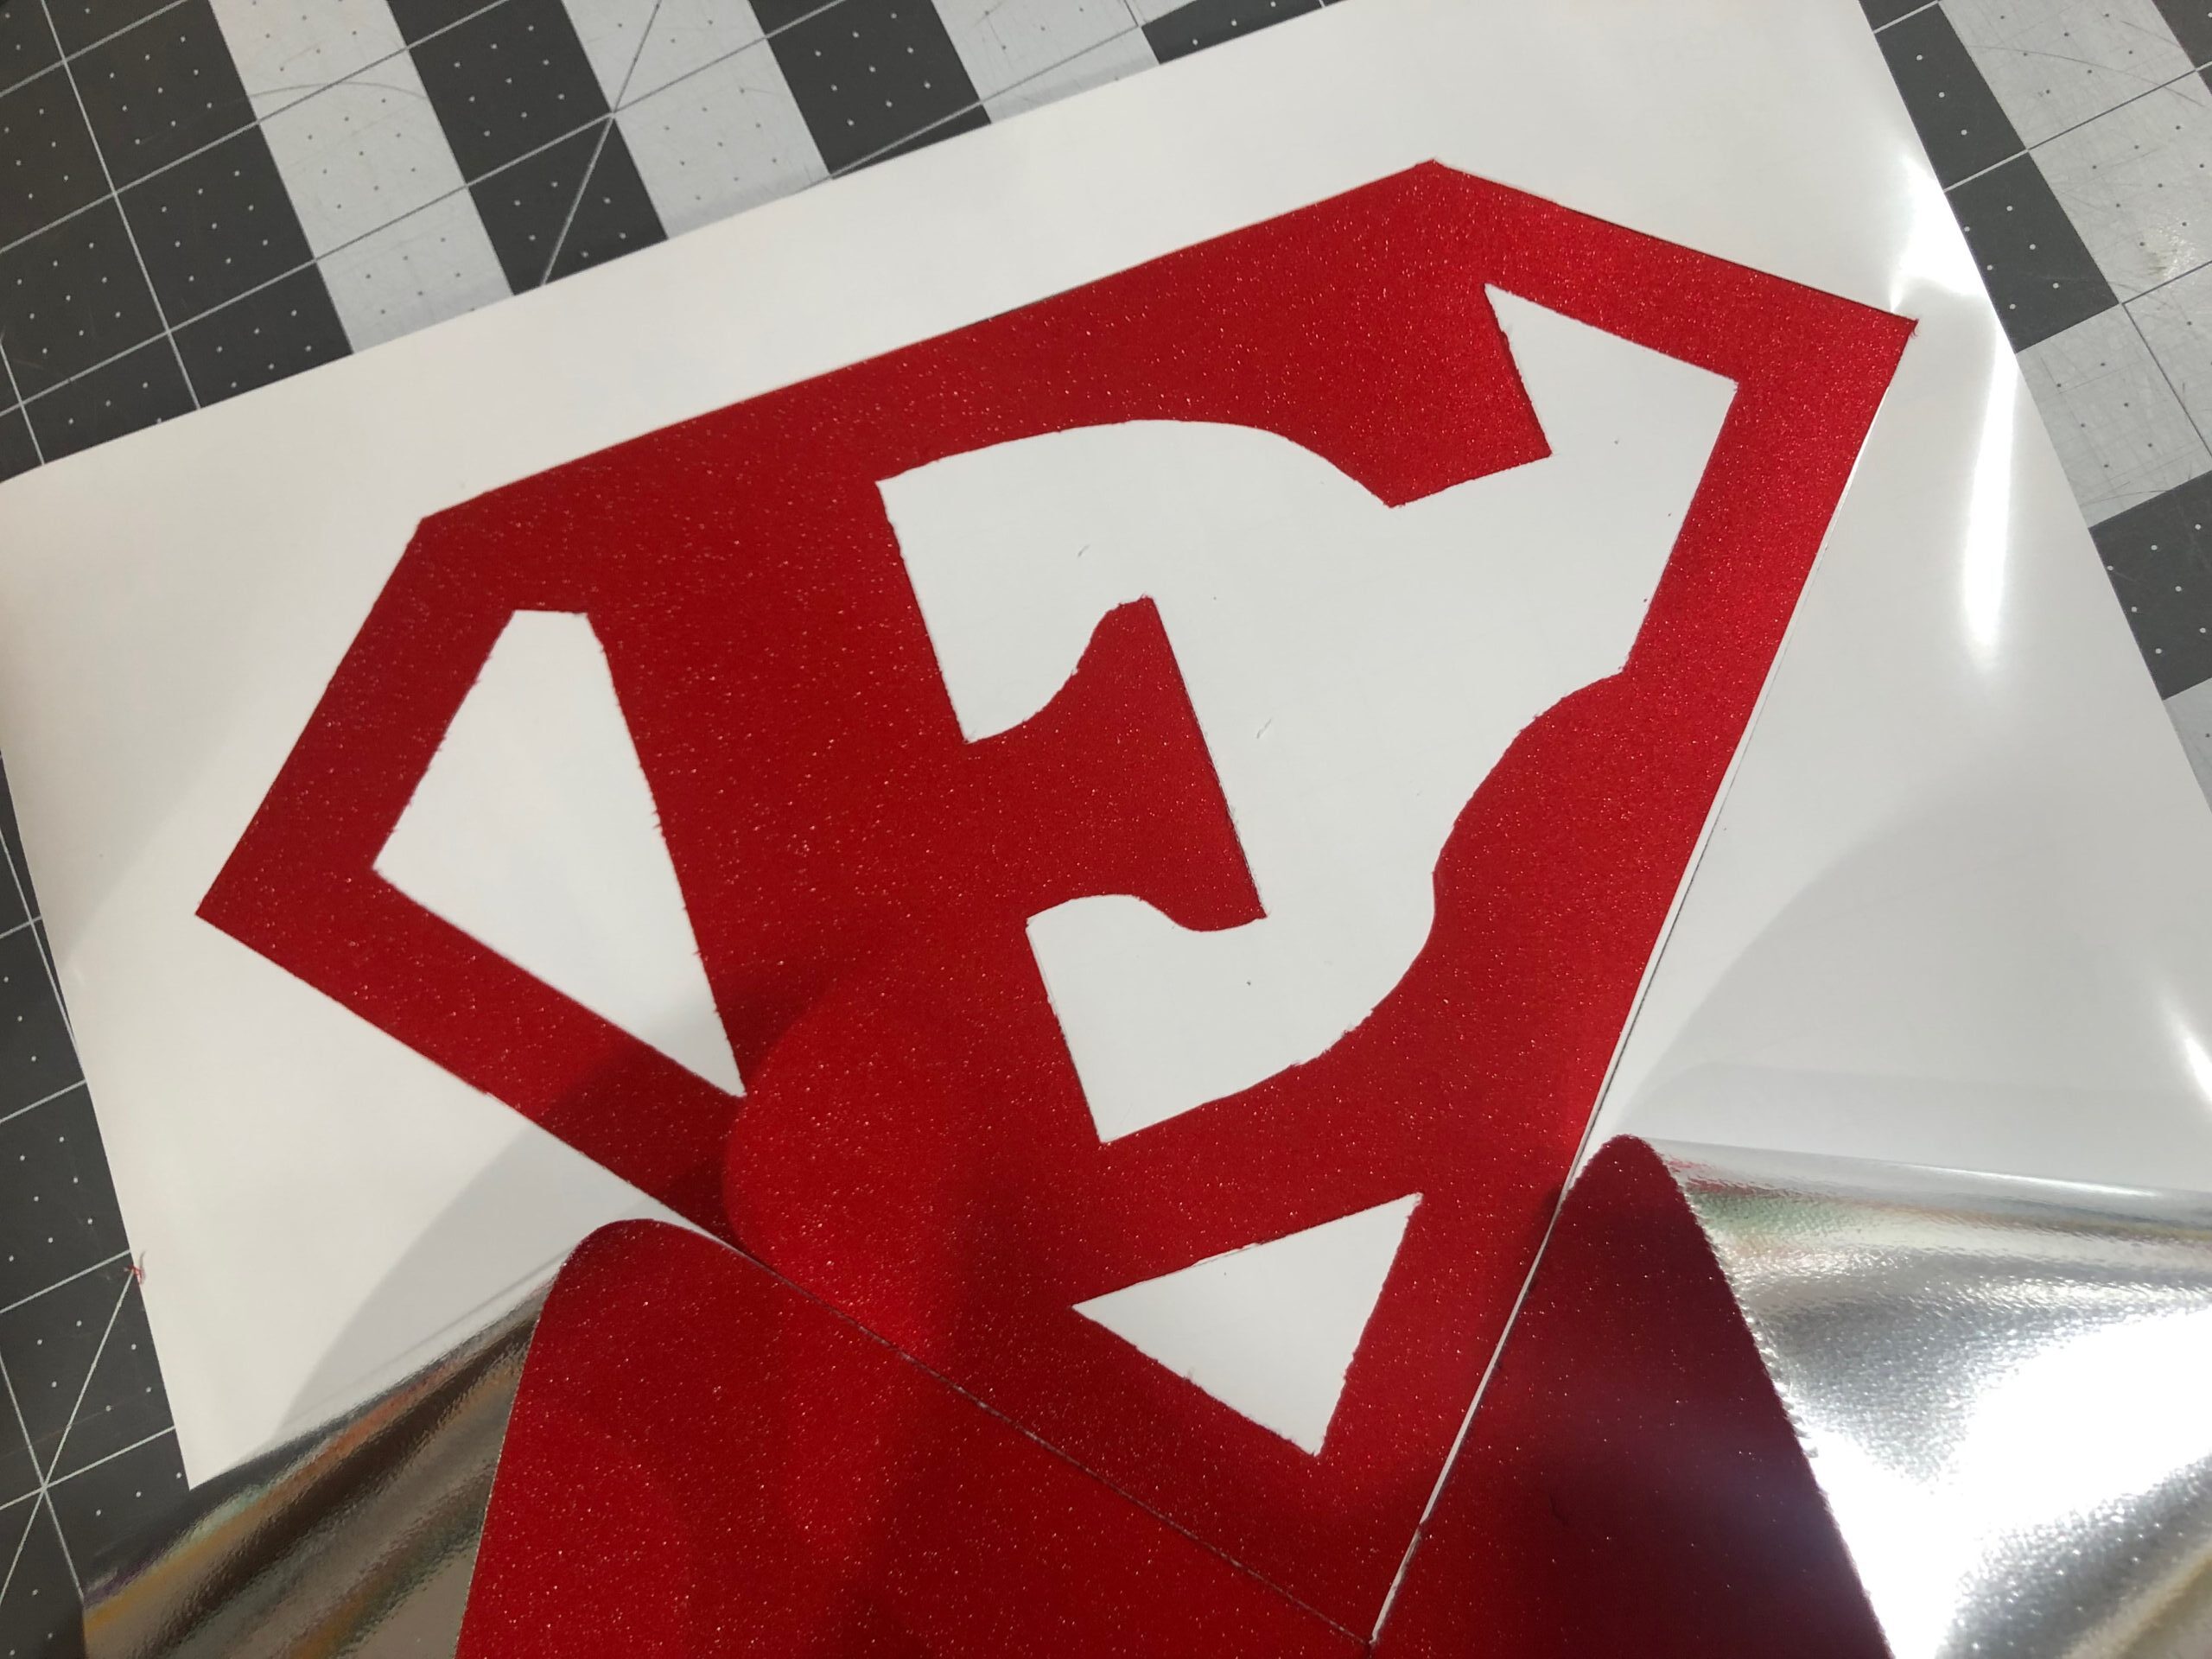
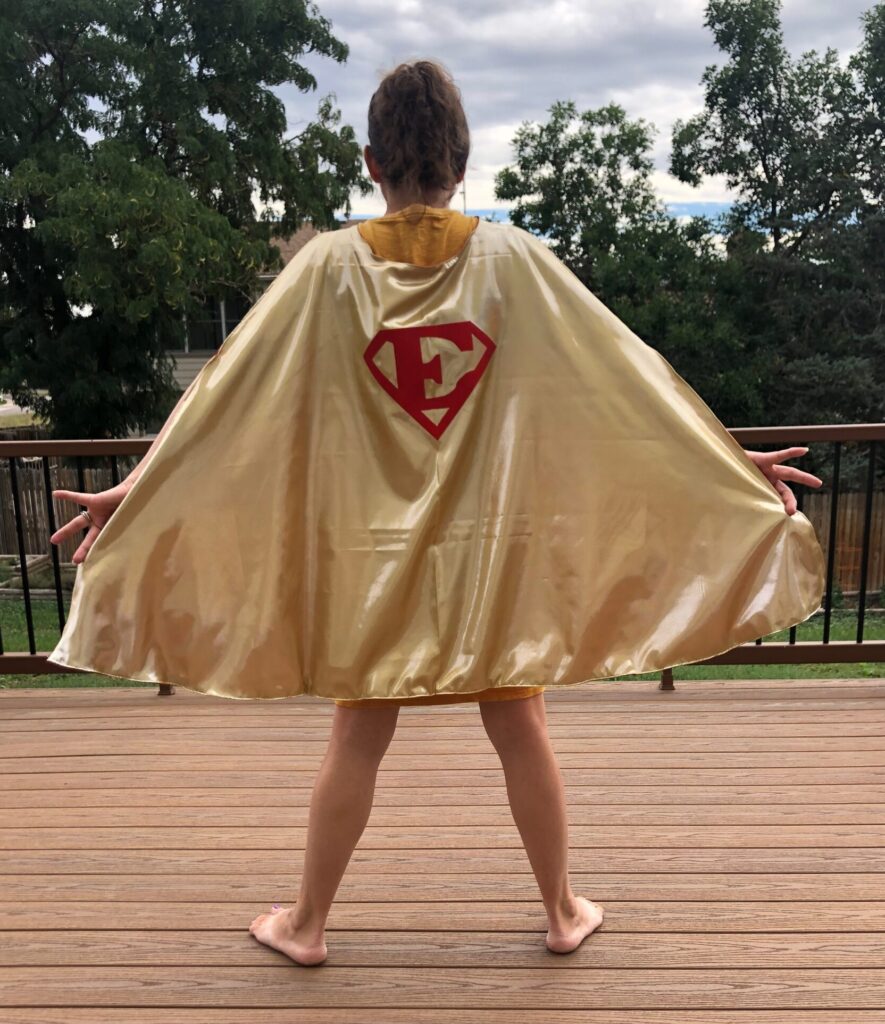
Decide on the desired motif for the cape appliqué. Choose one large letter, and print it out in the font of your choice. Or create your own superhero letter artwork, as for the featured cape.
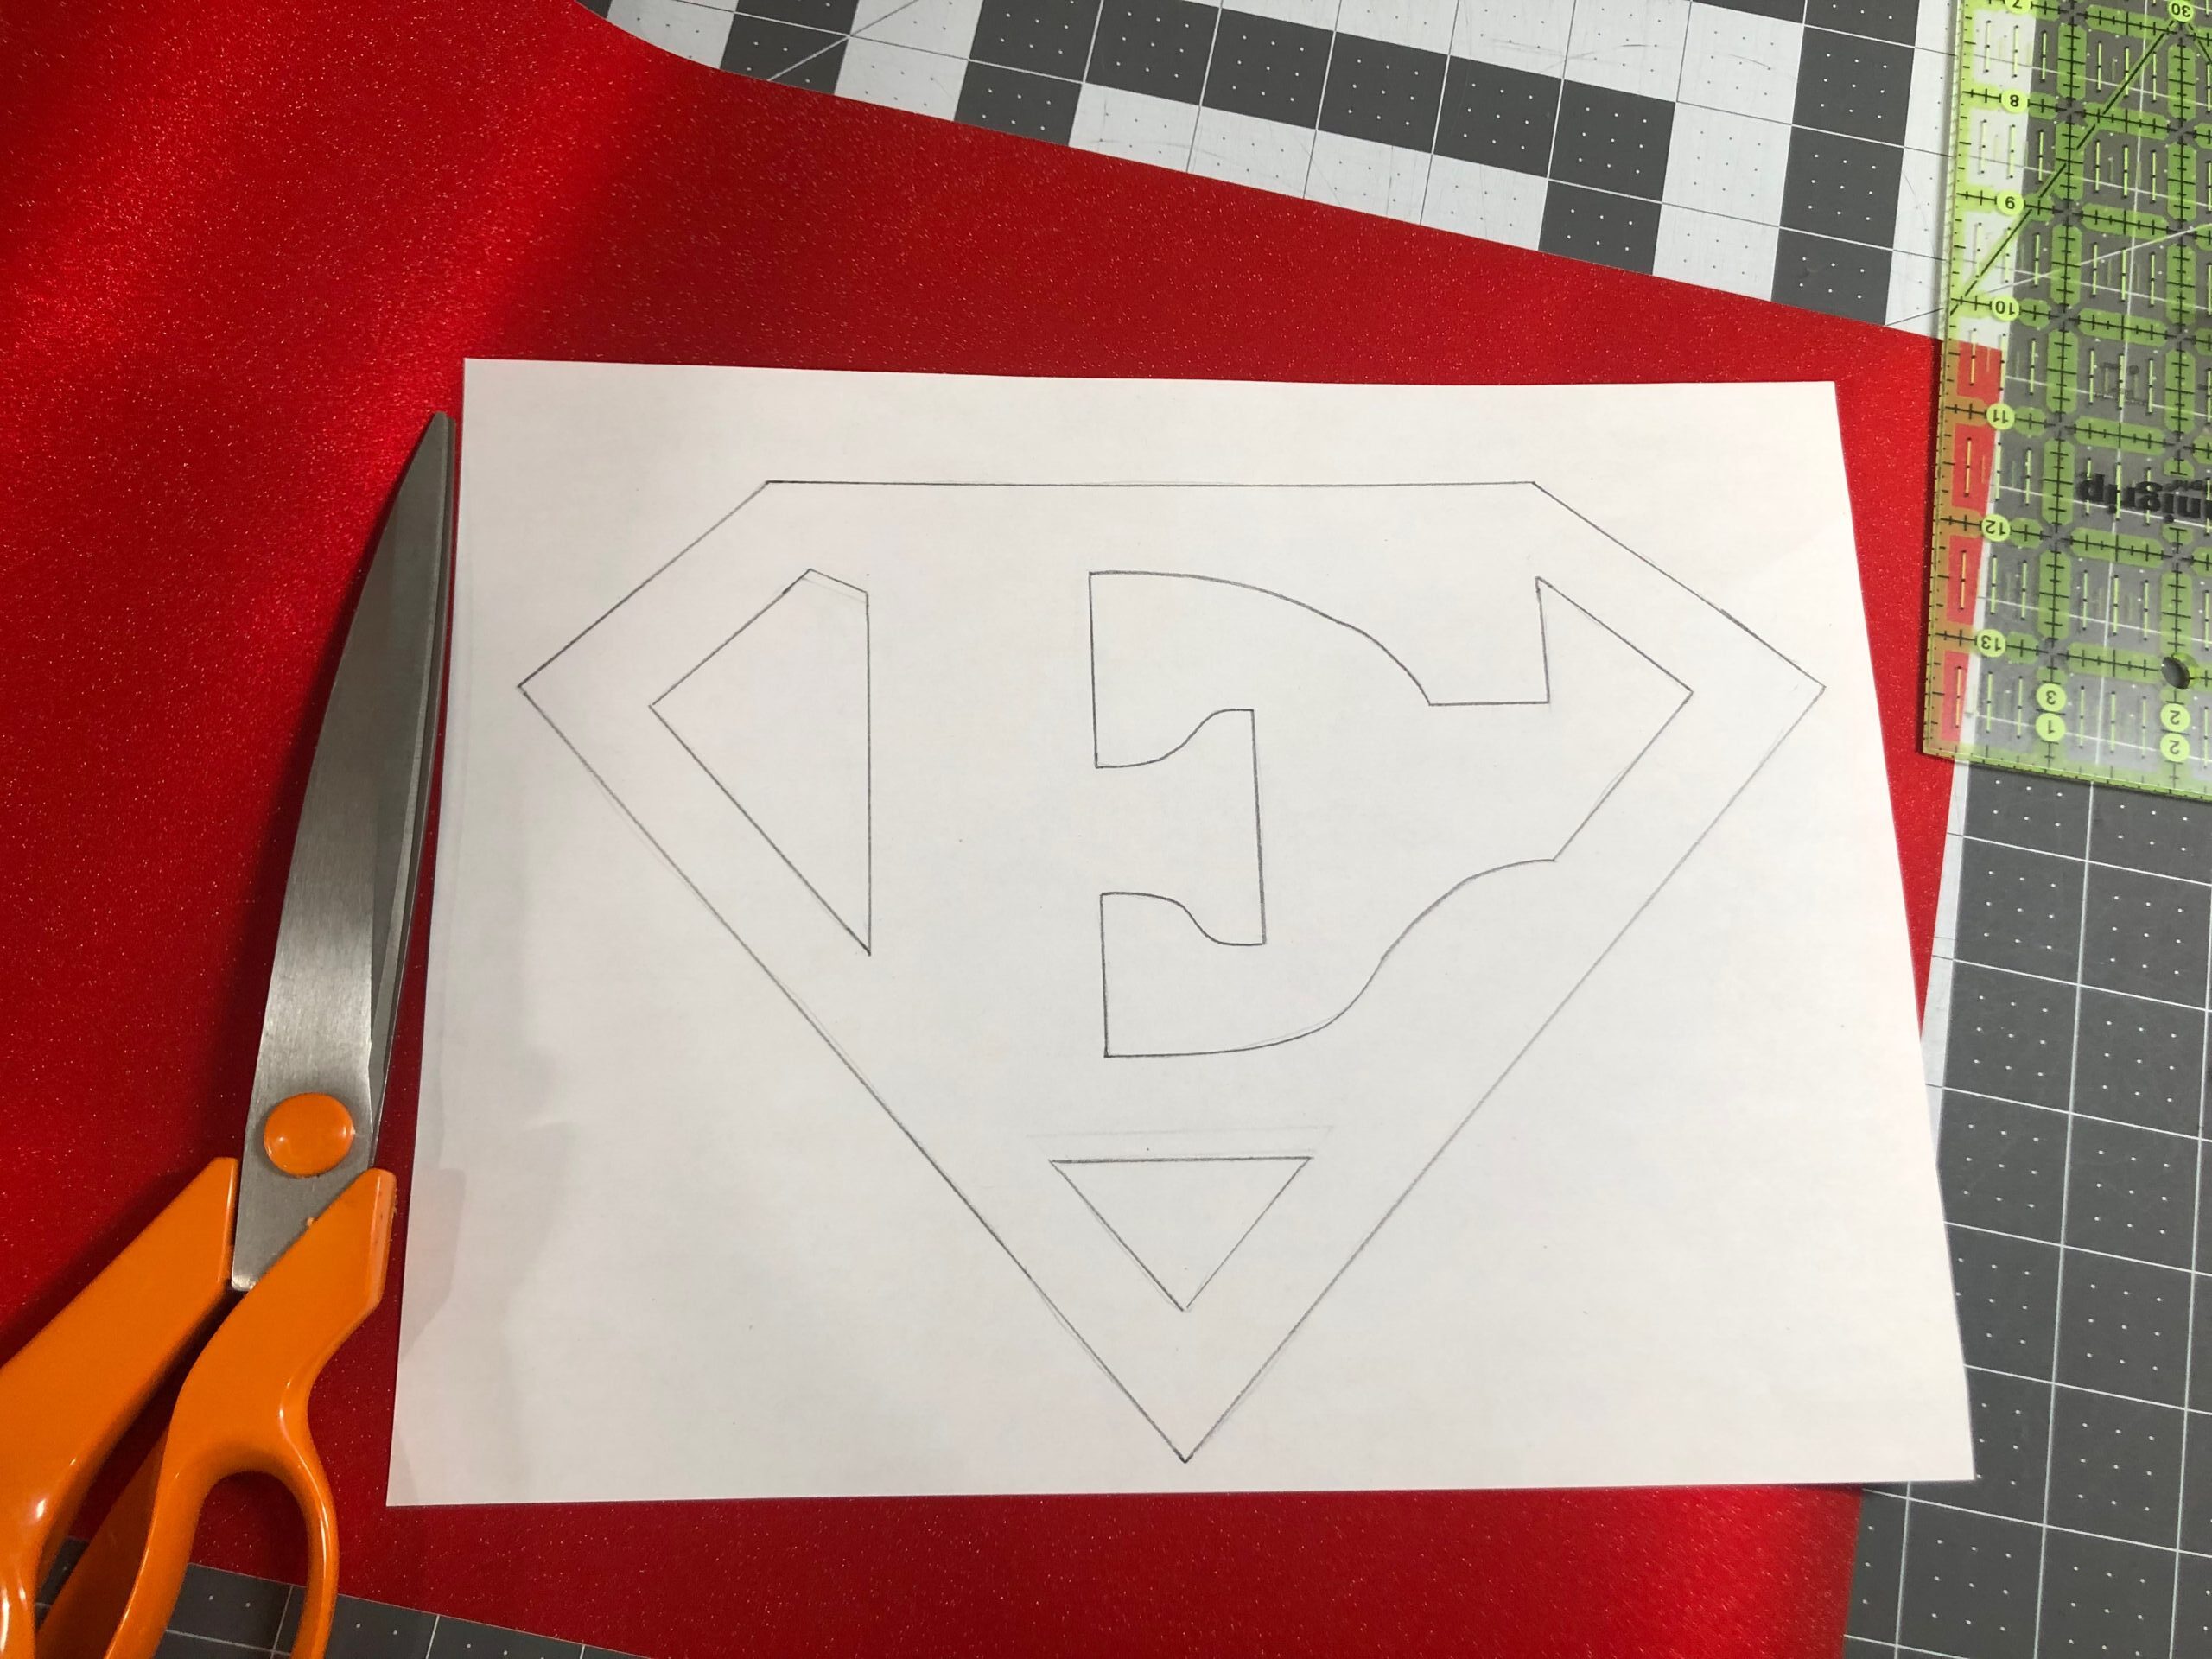
Transfer the design to the vinyl shimmer sheet. Use a craft knife and/or a Sulky Sticky+ Slitting Pen to “draw” along the motif outer edges, cutting through to the vinyl sheet underneath.
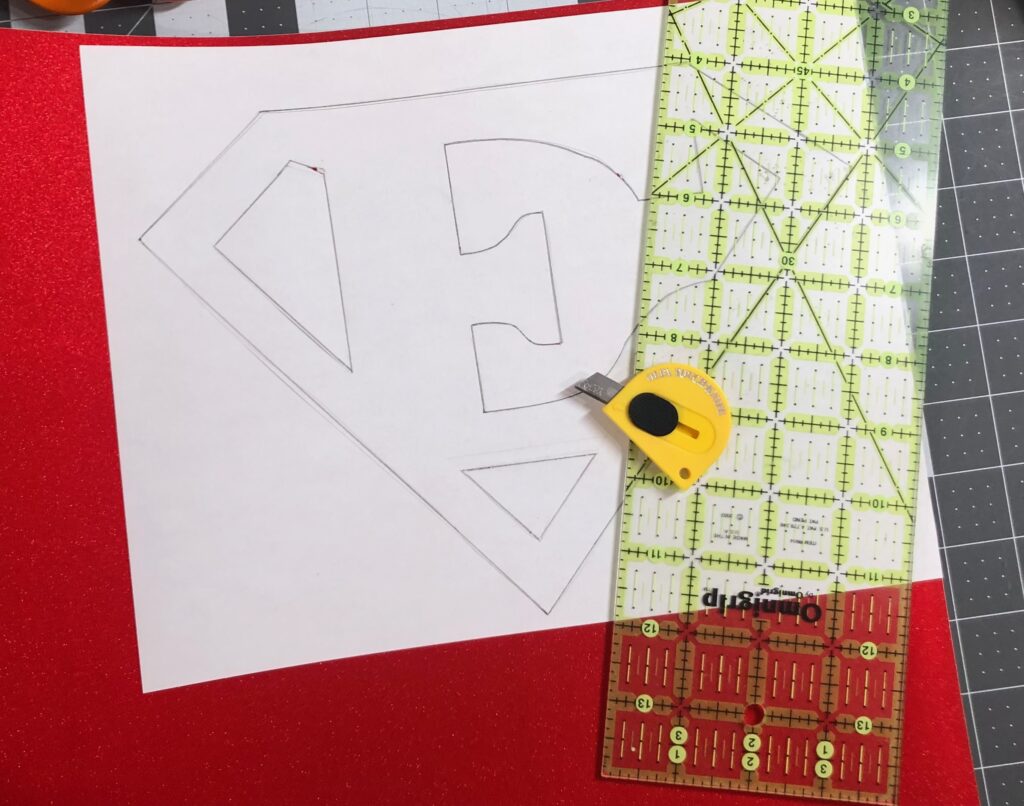
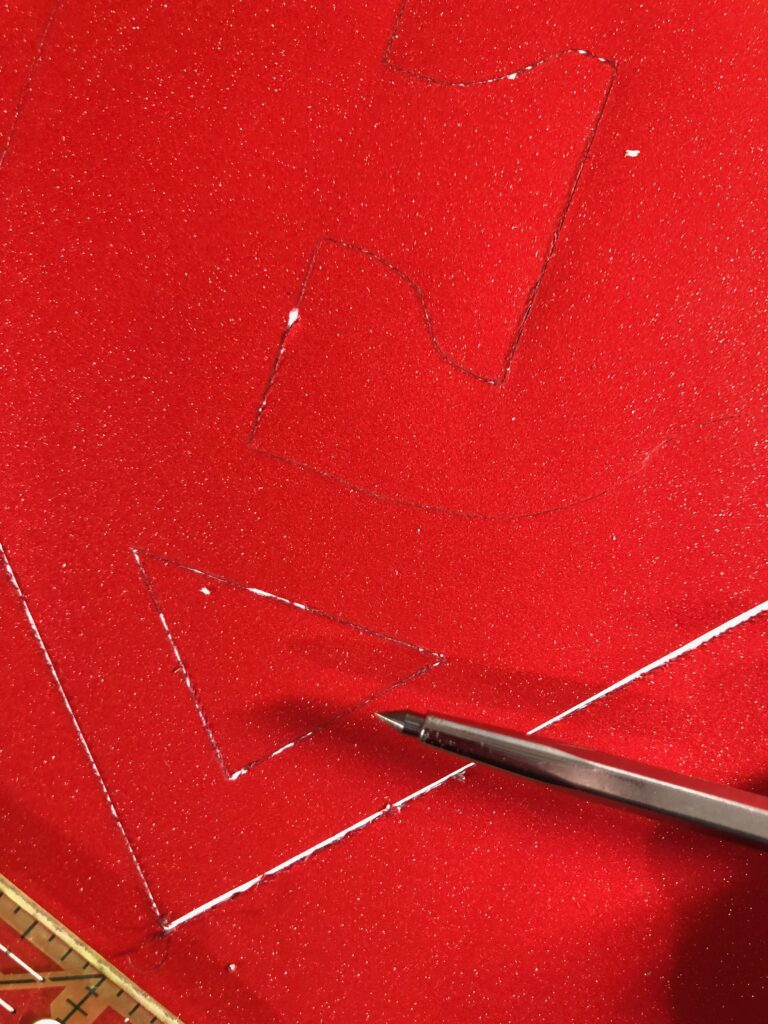
Remove the template, and then go over the etched lines again to ensure the vinyl shimmer sheet is cut cleanly along all lines. (You can see by the images above that a cutting machine would have made much cleaner cuts; however, the craft knife and Slitting Pen combo did a pretty good job. You can certainly also use scissors and just cut along the lines to ensure your cuts are smooth and accurate.)
Remove the negative spaces of the motif (called “weeding”) from the vinyl shimmer backing, leaving the final “sticker” that will become the cape appliqué.
If you have a cutting machine, find the desired cape motif and follow the manufacturer’s instructions to cut out the motif from the Vinyl Shimmer sheet.
CAPE COSTUME APPLIQUÉ
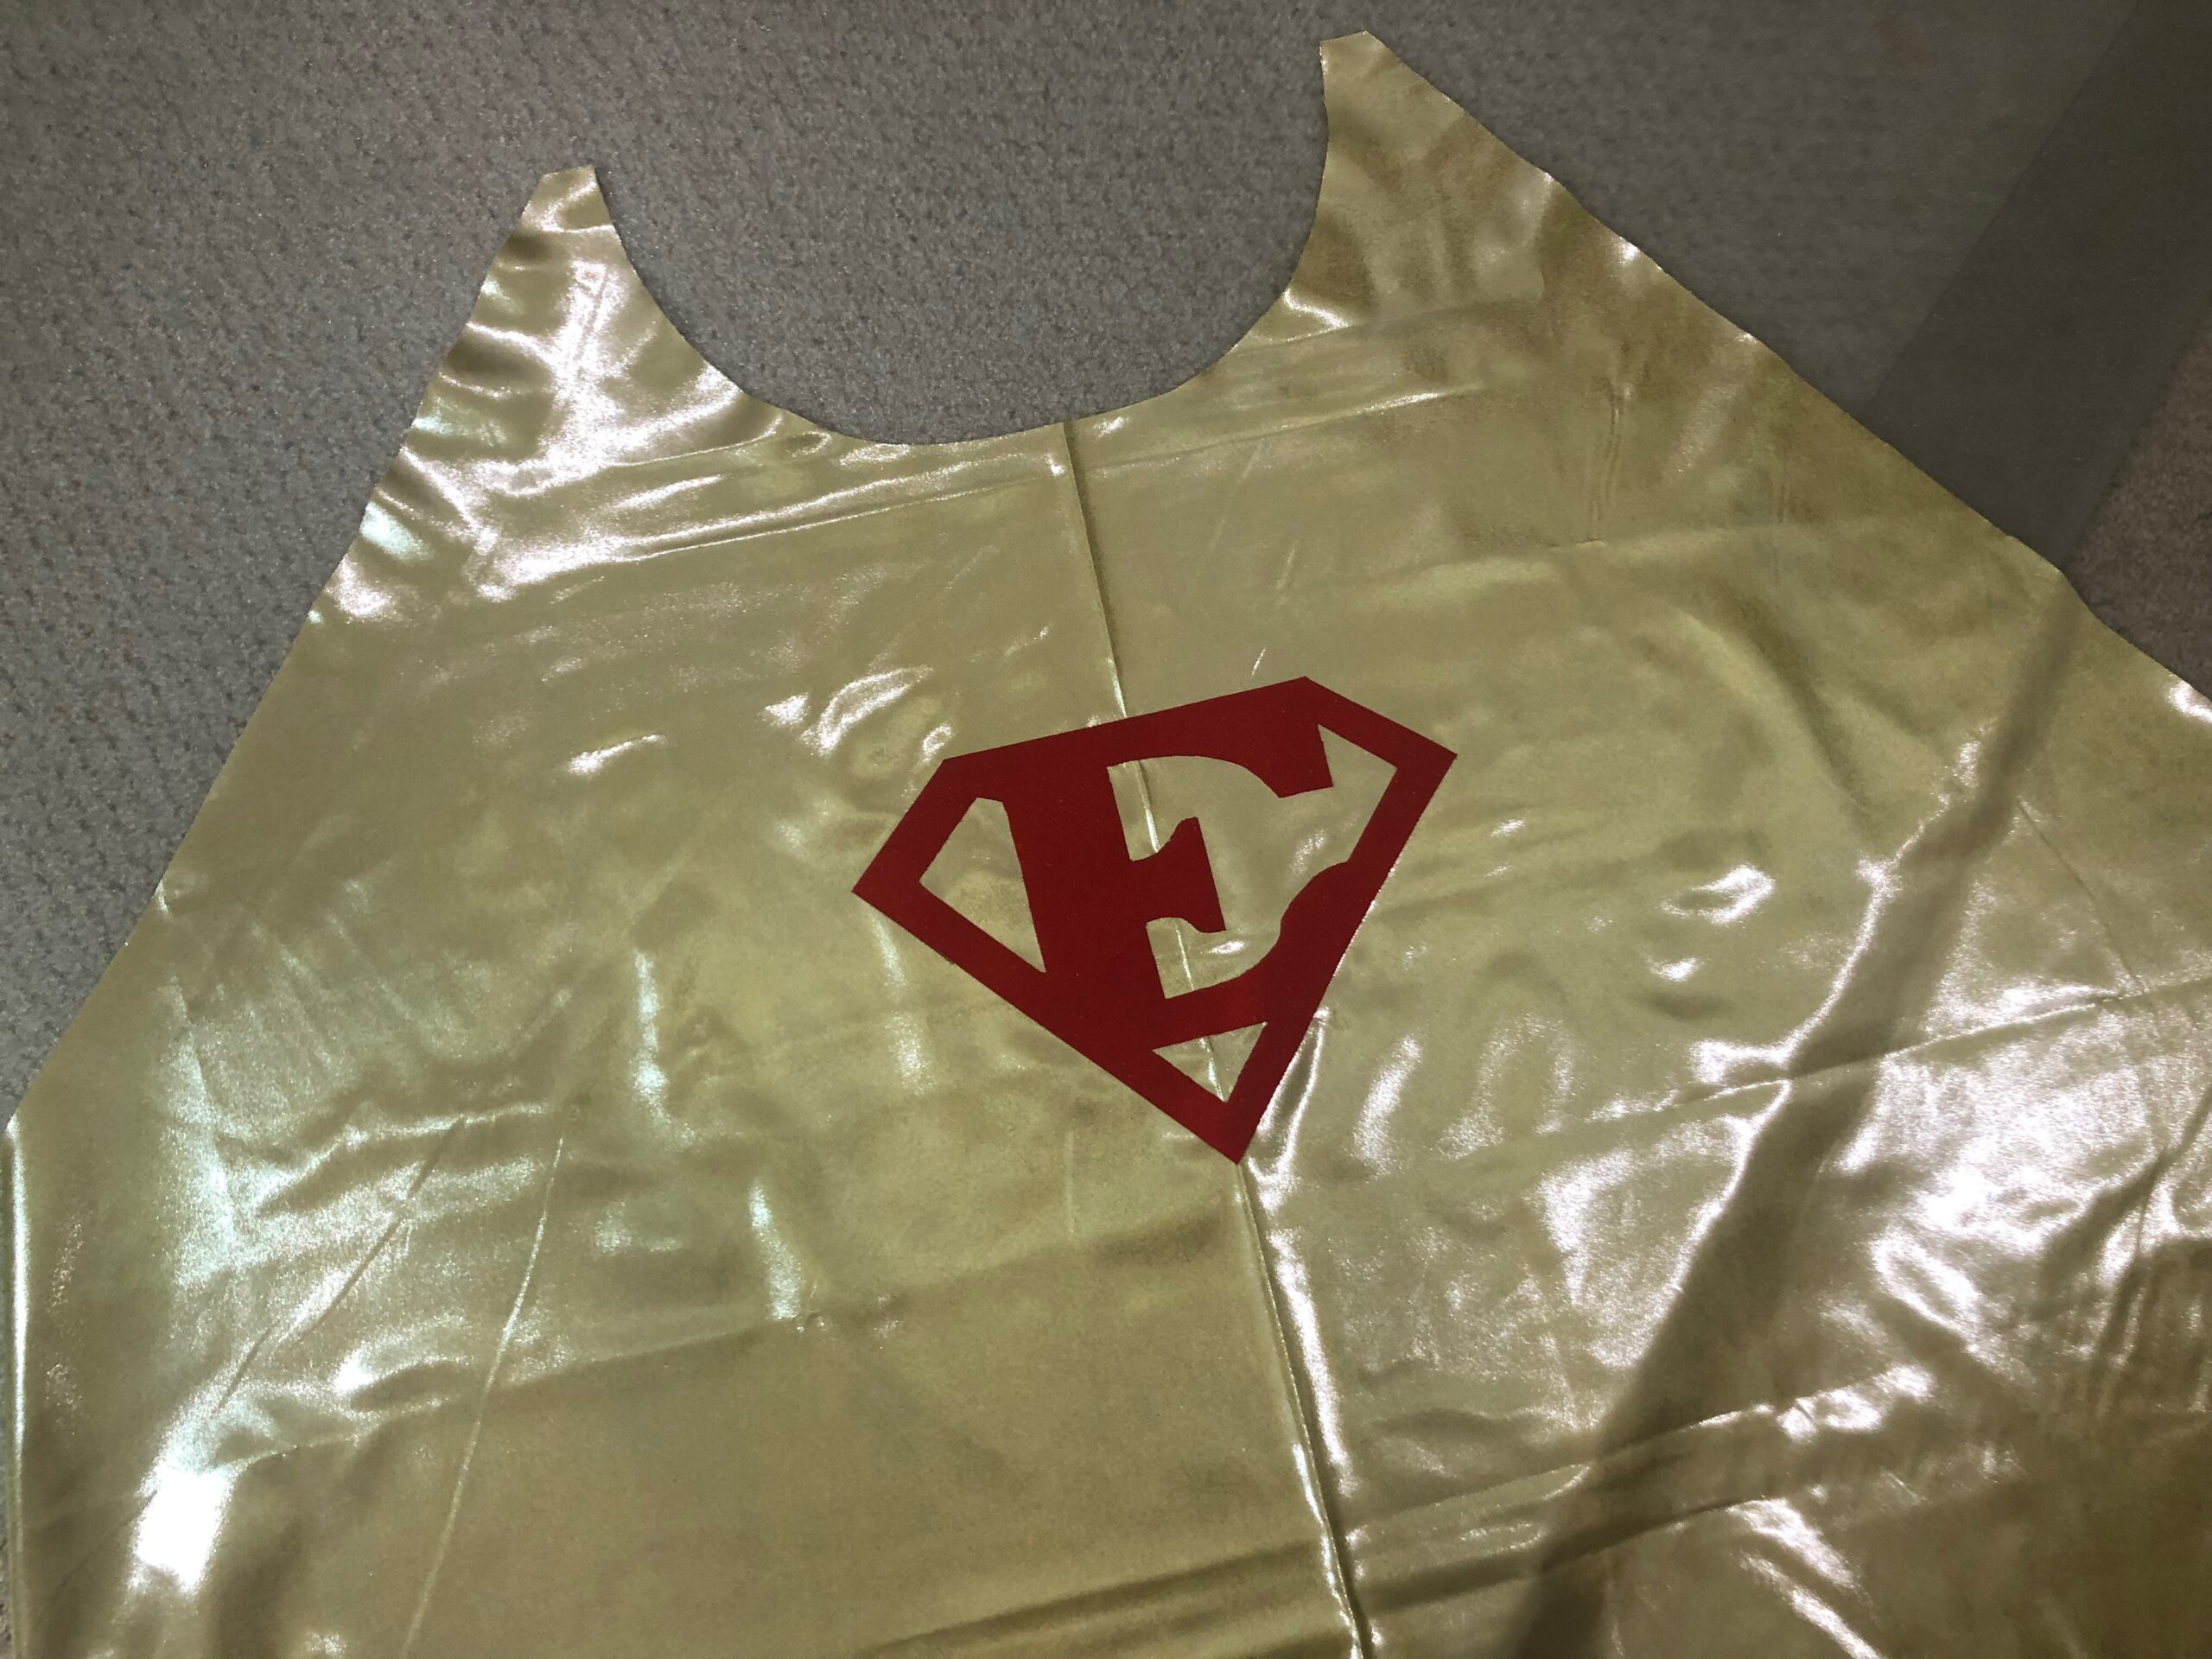
Fold the outer cape in half lengthwise to find the center; finger-press a centerline beginning about 5” from the cape neckline.
Center the Vinyl Shimmer appliqué sticker on the cape, aligning the sticker upper edge with the top of the 5” mark.
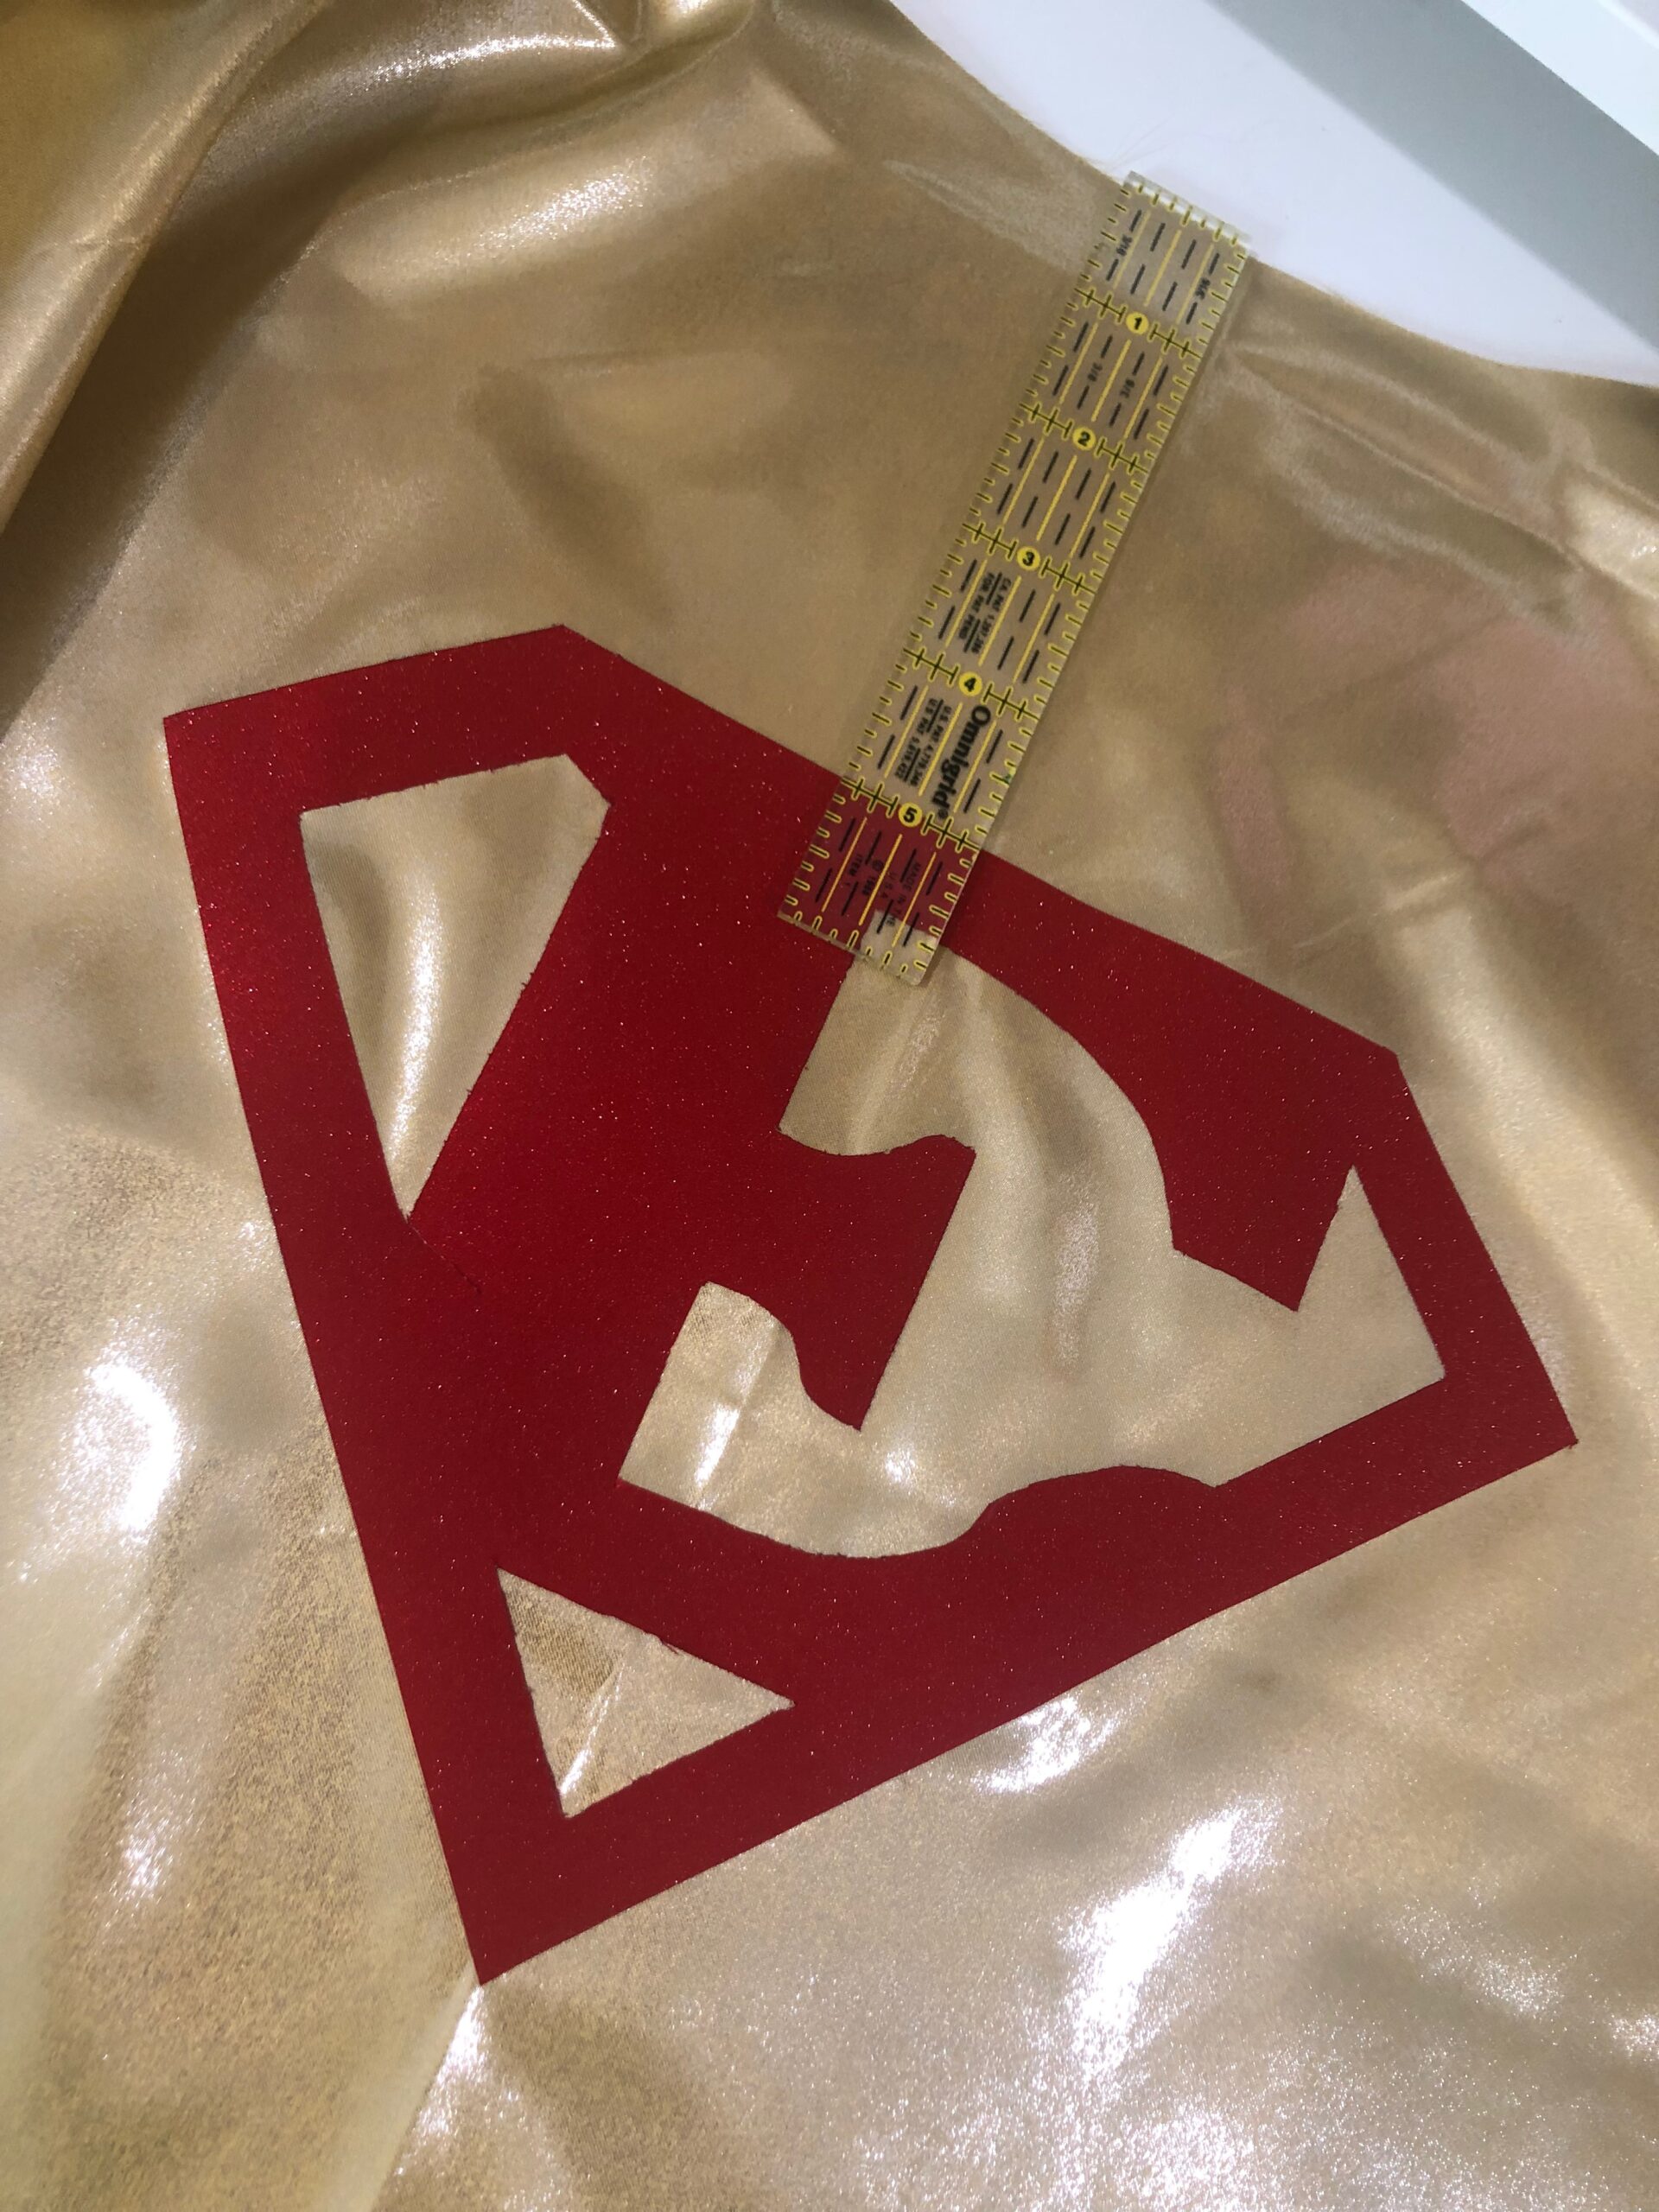
Stick the vinyl to the cape fabric.
If desired, sew a straight stitch just inside the vinyl sticker for a designer touch. Or leave the sticker as-is. It’s very strong and will last! Yet it’s removable if you want to repurpose the cape for different people and superheroes year after year.
To remove the pressed centerline, gently remove half of the sticker where it overlaps the foldline, and press using low heat (or whatever heat setting the chosen fabric will tolerate). Then, restick the sticker appliqué.
MAKE THE CAPE TIES
Install a size 70/10 or 75/11 Microtex or jersey Needle, depending on fabric choice. If using a stretchy knit, use a jersey needle. If using a lightweight, yet more stable, fabric, use a Microtex needle.
Thread the needle and wind the bobbin with either 50 wt. Cotton or Poly Deco Thread that matches either the outer or lining fabric. Use Poly Deco if working with a synthetic polyester blend fabric; use cotton us using cotton knit.
From the leftover lining fabric, cut one 1 ½” x 36” strip (on the bias or straight grain).

Fold the strip in half lengthwise with wrong sides together. Stitch the long edge using a 1.0mm x 3.0mm stretch stitch, if working with stretch or knit fabric, and a straight stitch if working with woven fabric.
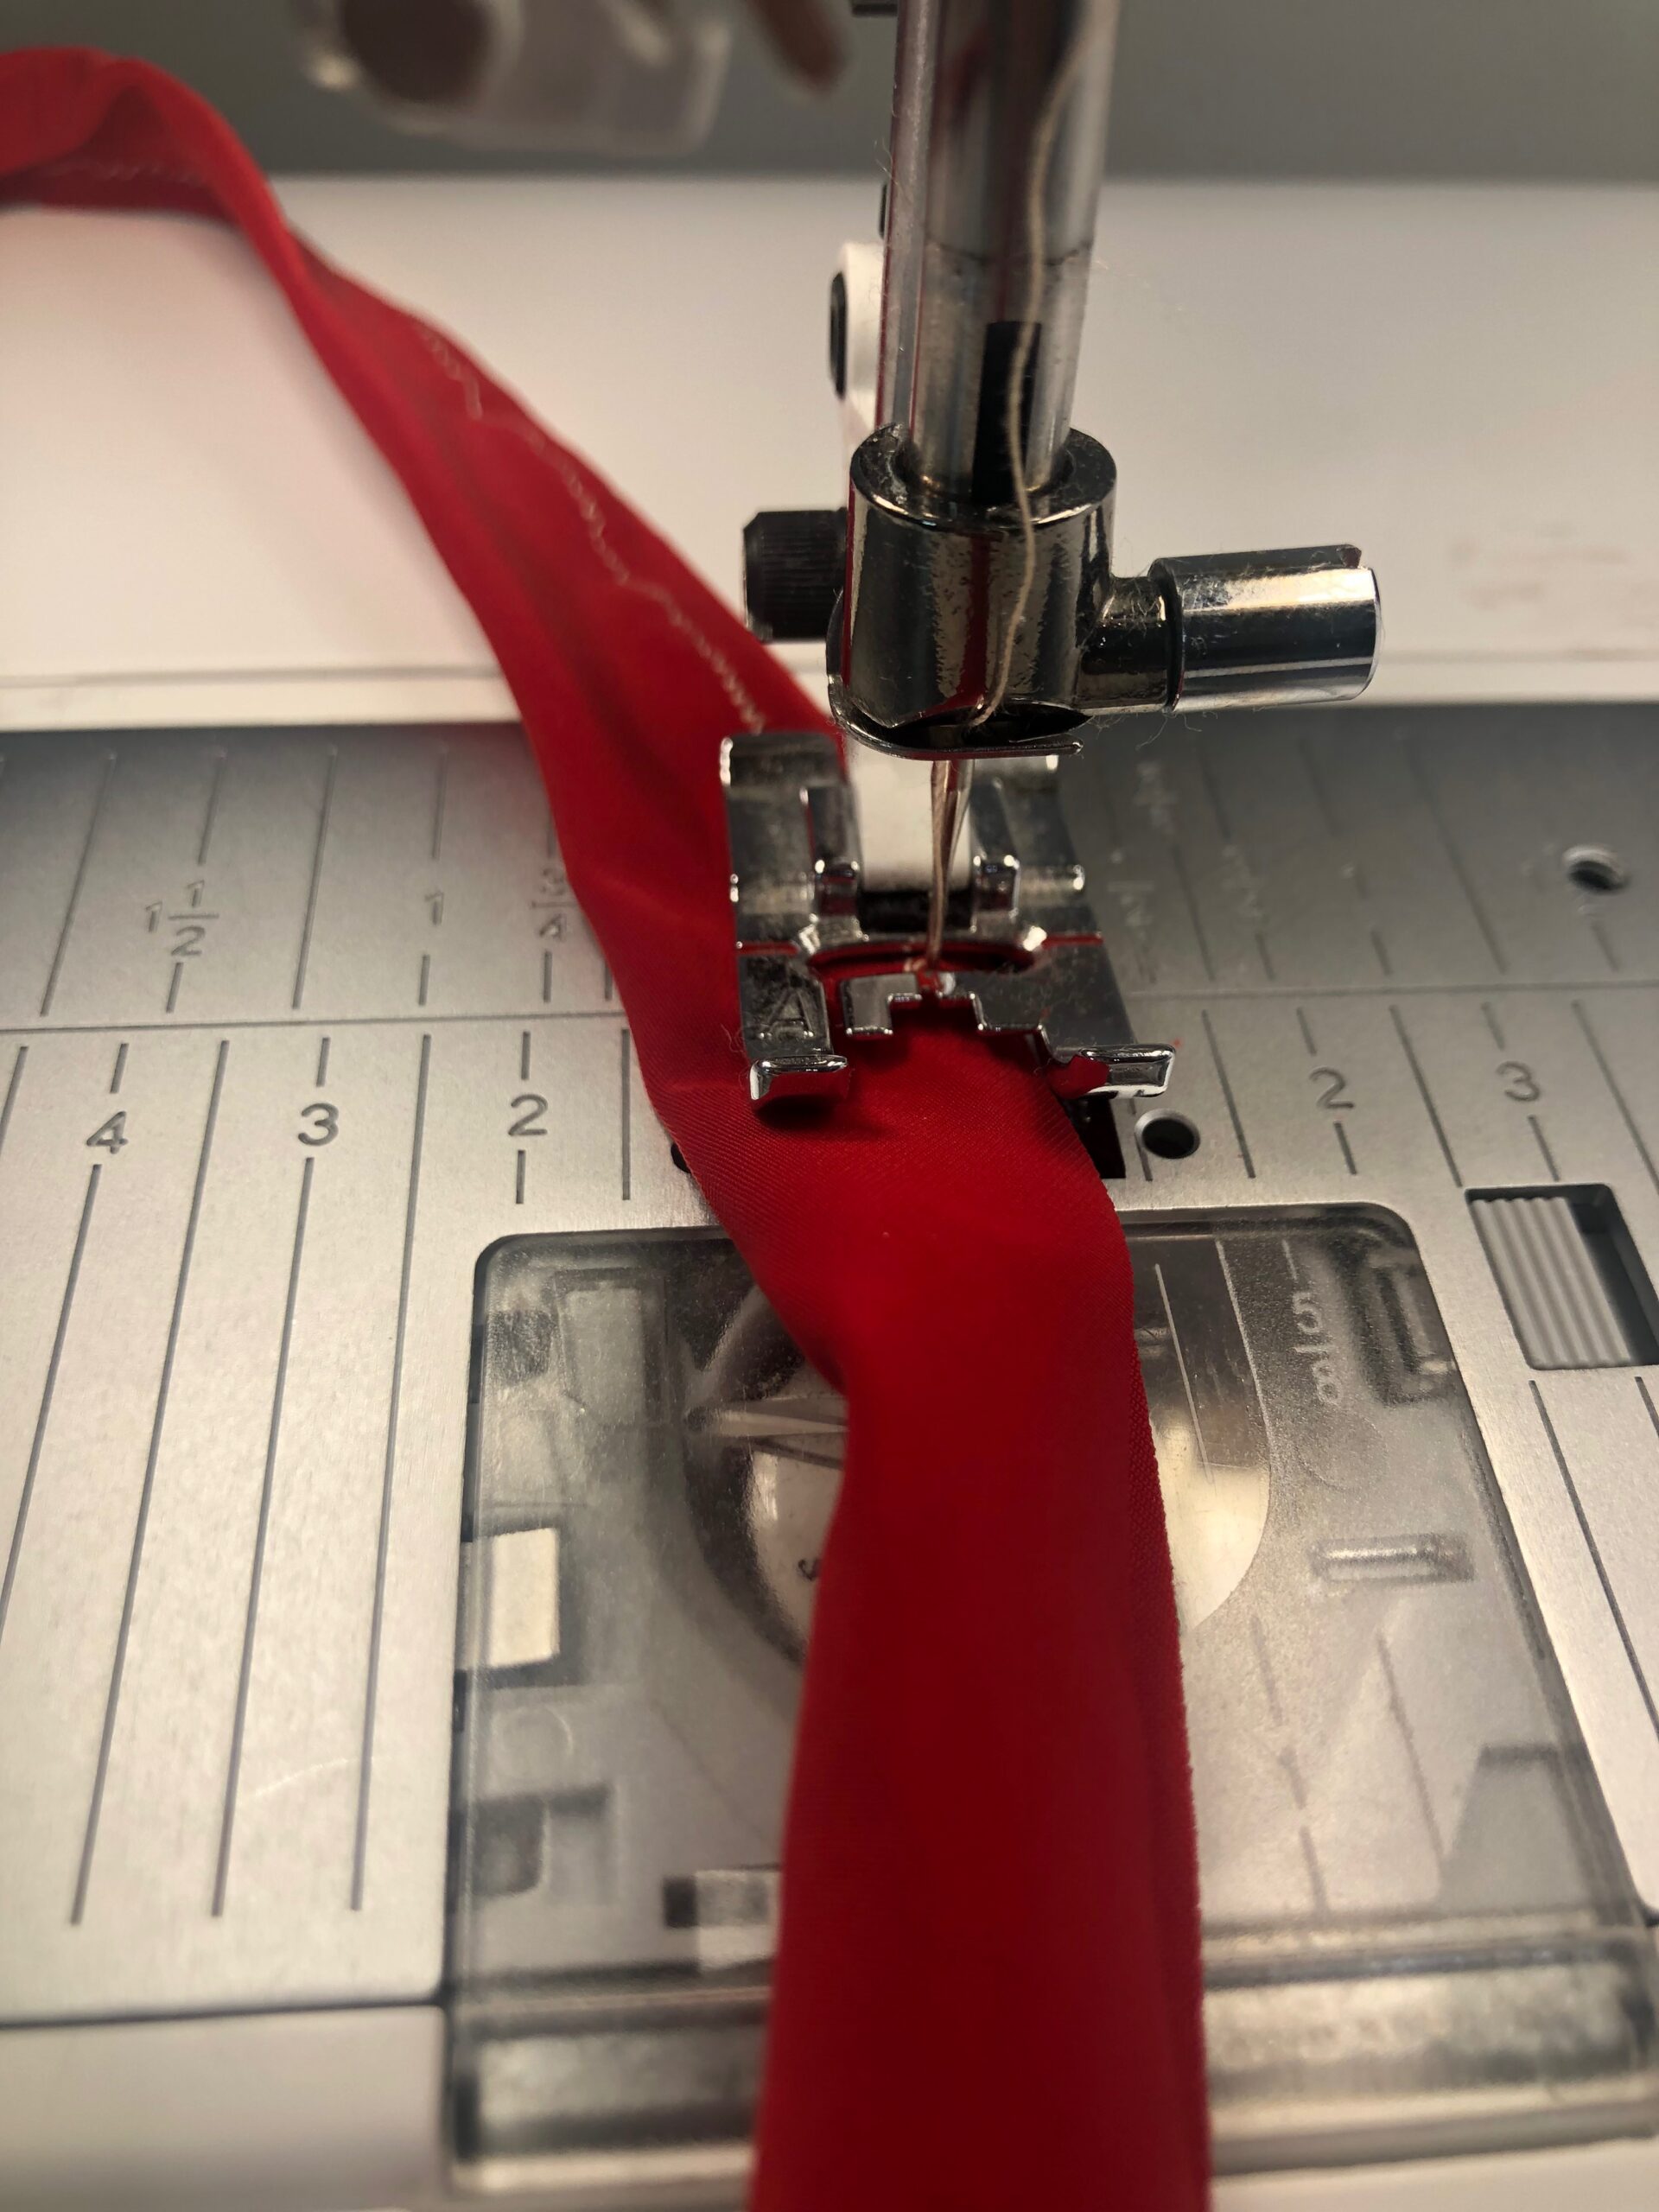
Use a turning tool, blunt knitting needle or chopstick to turn the fabric tube right side out.

Knot both ends, if working with knit or no-fray fabric, and then cut the strip in half to create two ties. If working with woven fabric, tuck the ends into the strips to conceal the raw edges, and then either knot or topstitch the ends shut.

ATTACH TIES
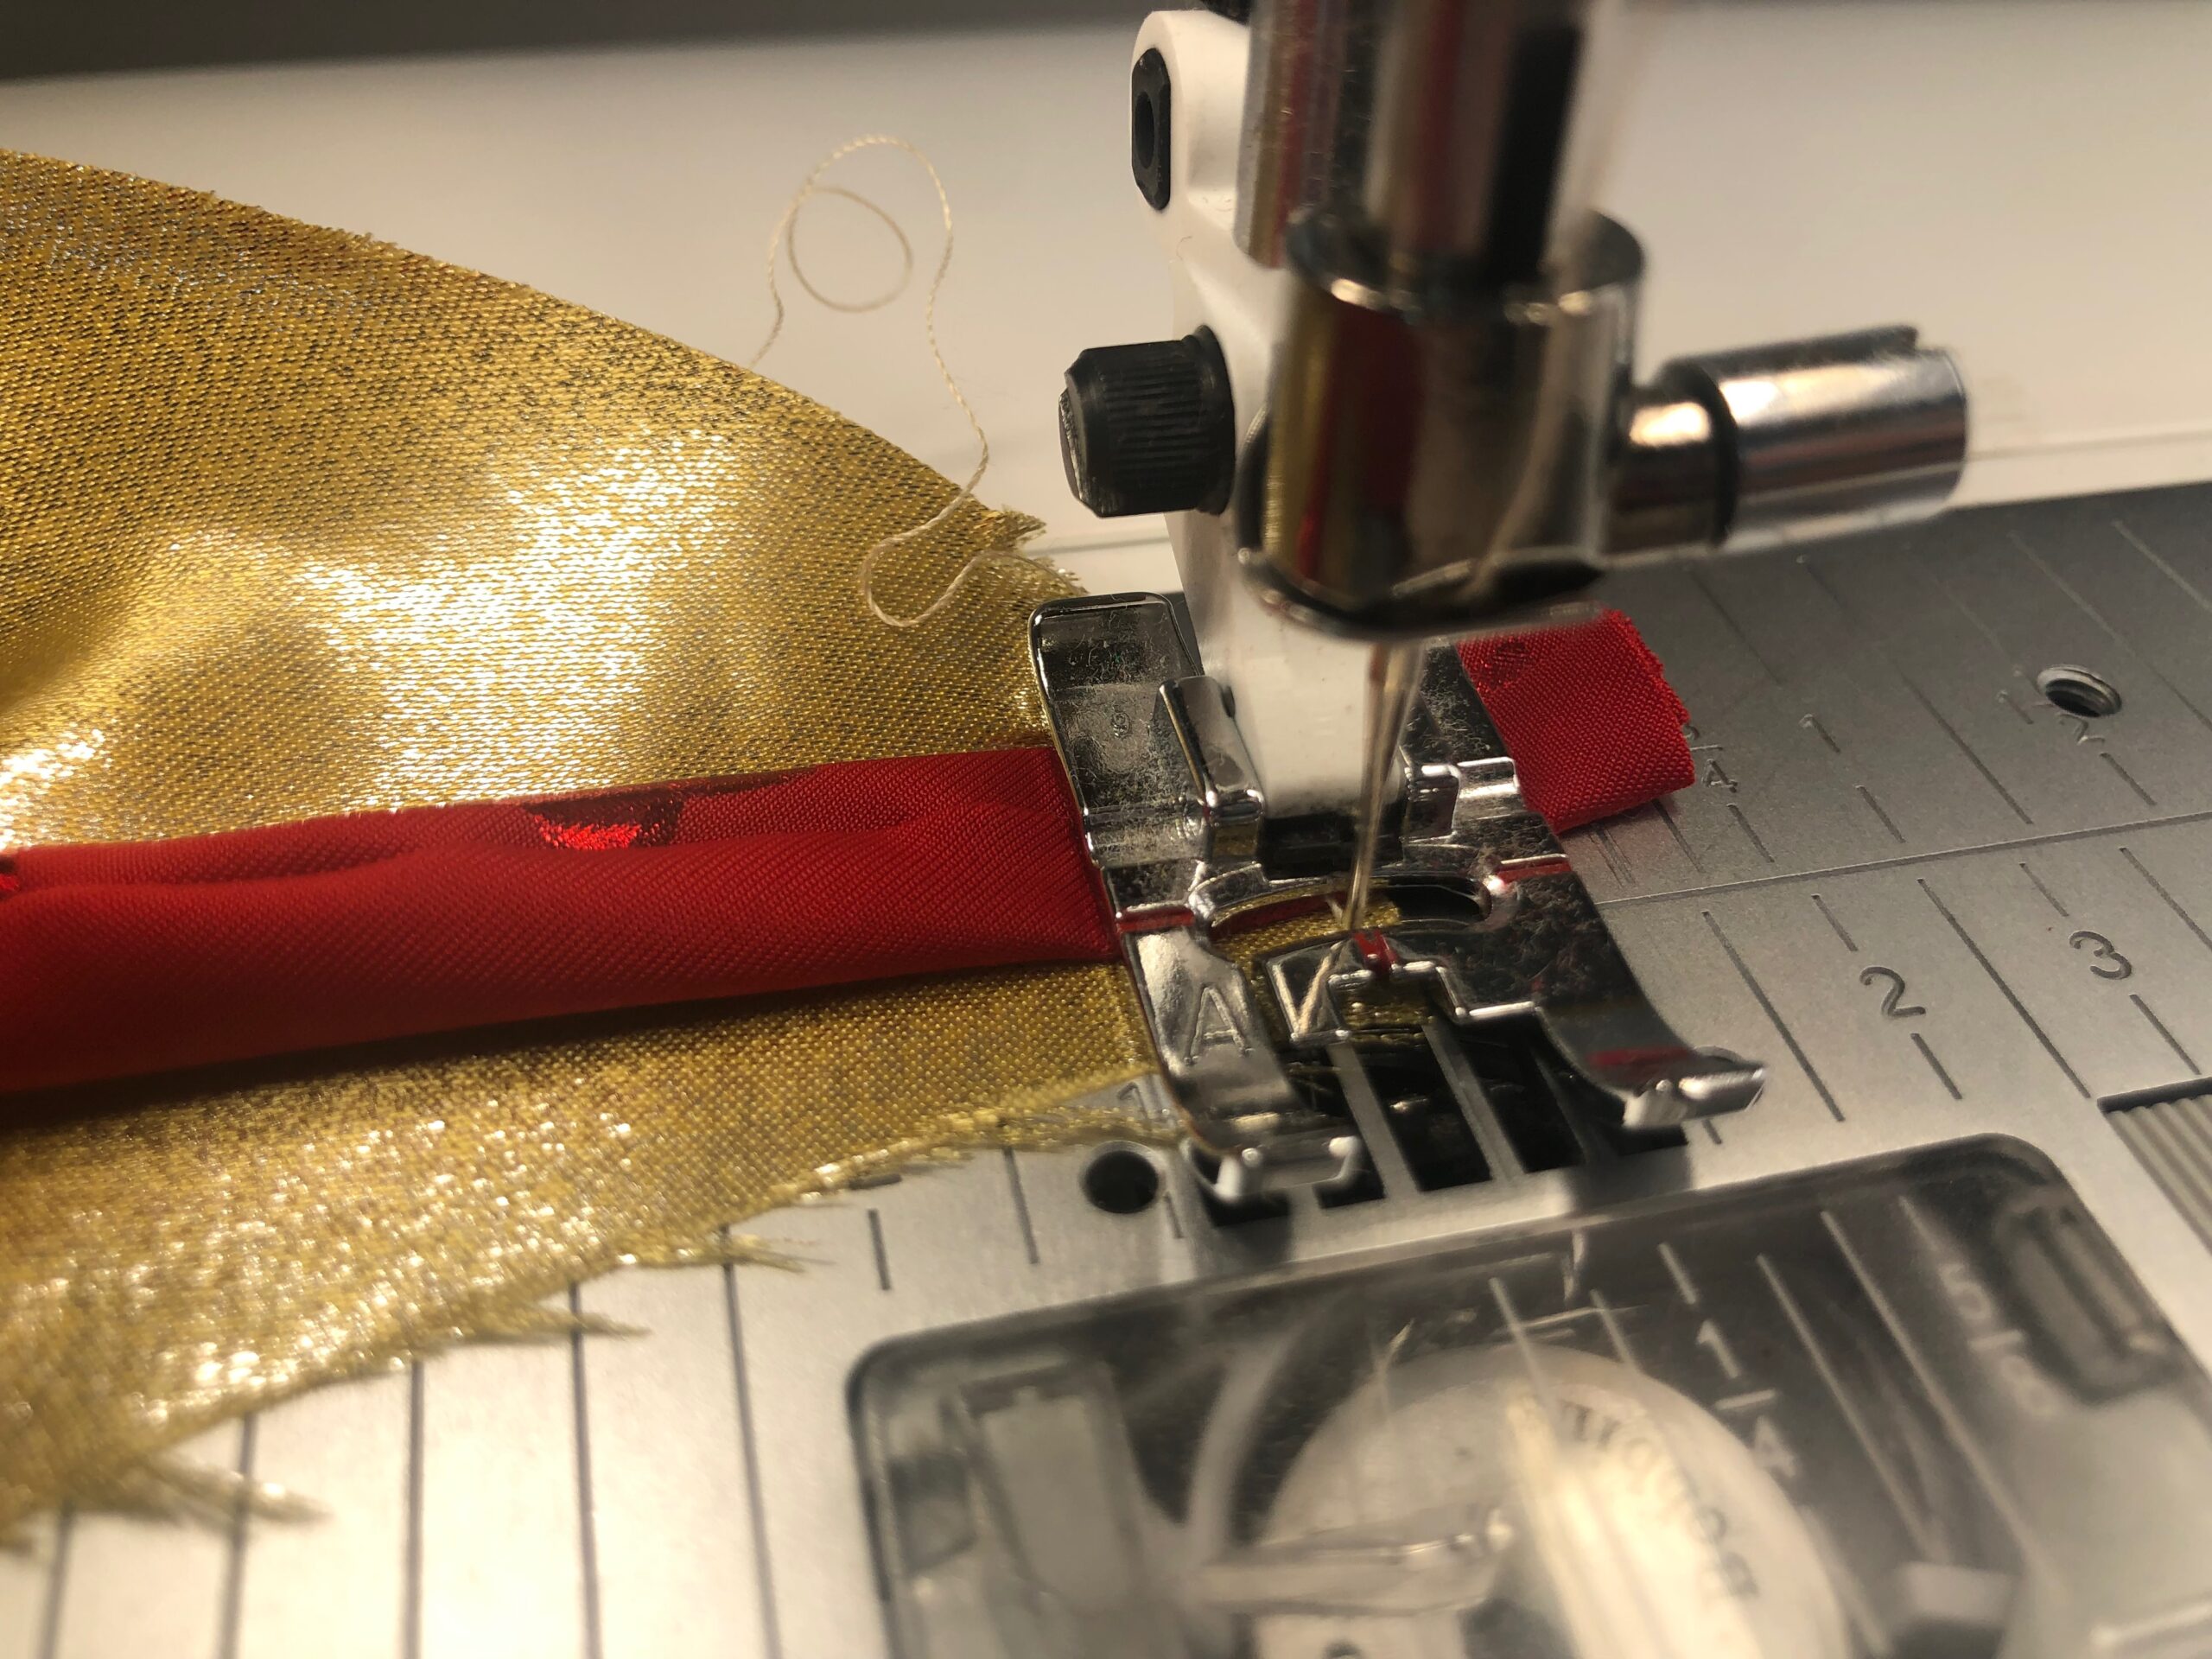
Center the seam of each tie along one side; this is the wrong side.
Place each tie end along the outer cape upper straight edges on either side of the curved neck.
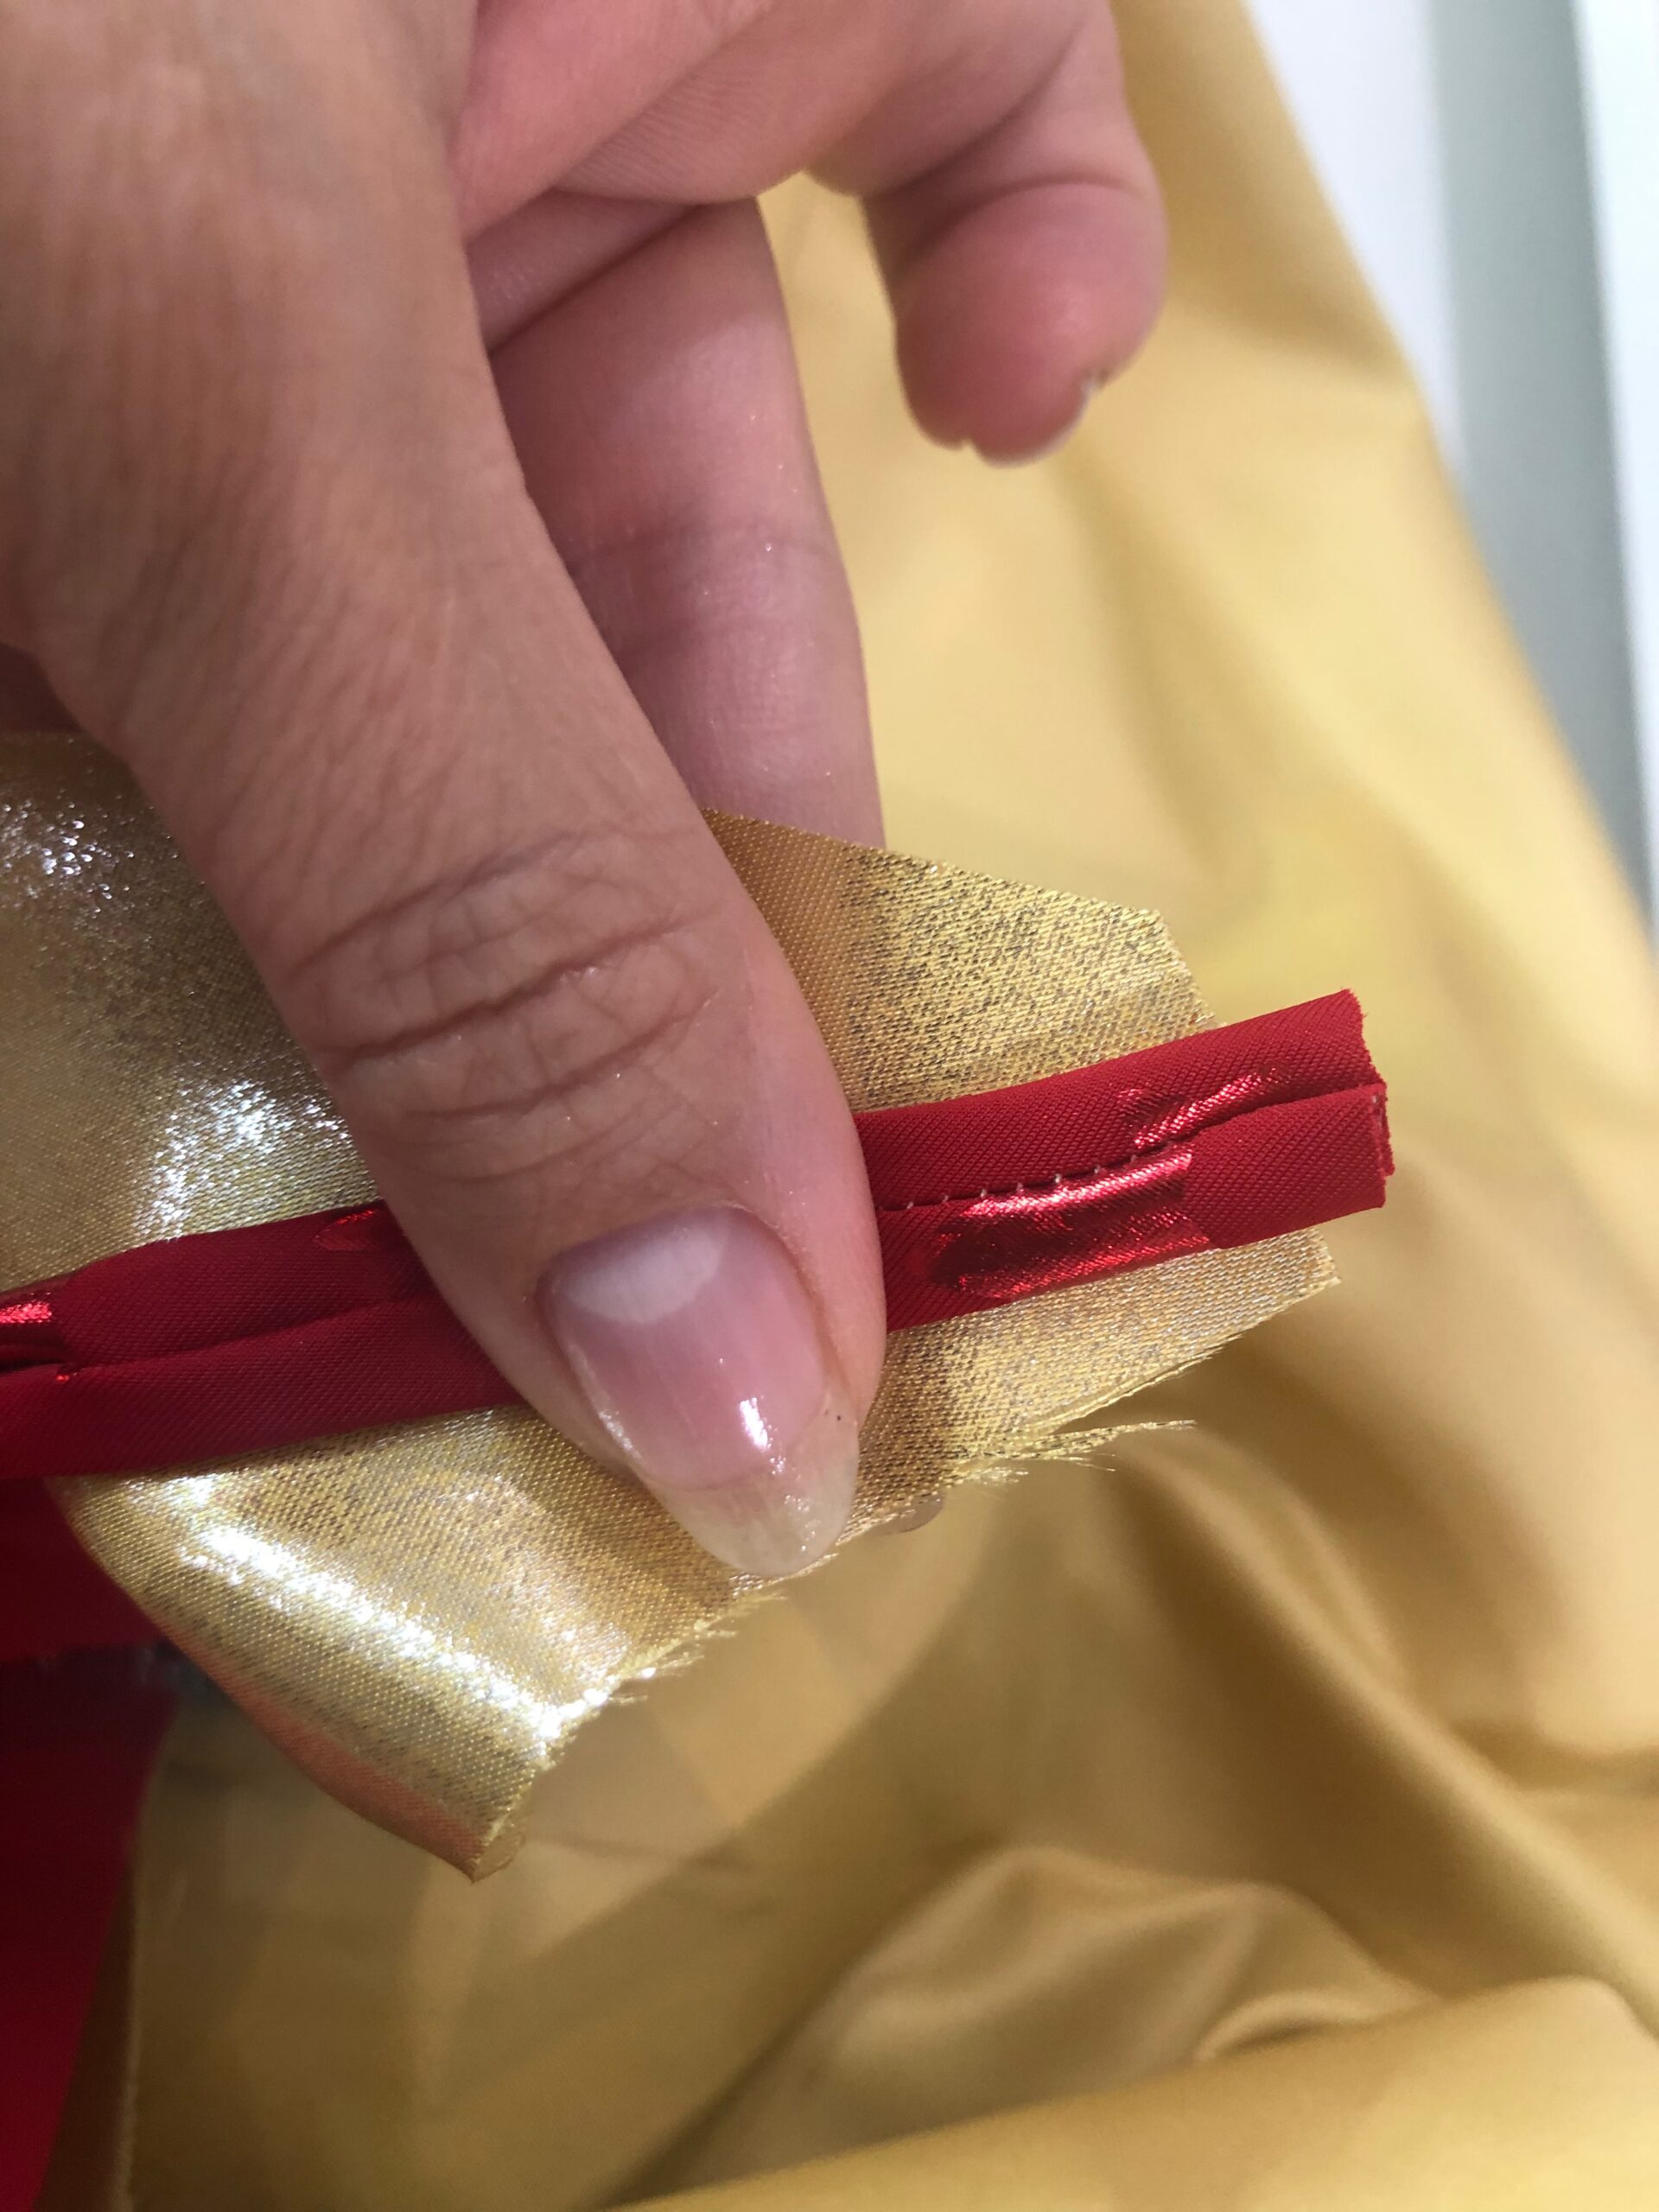
Baste the ties to the outer cape.
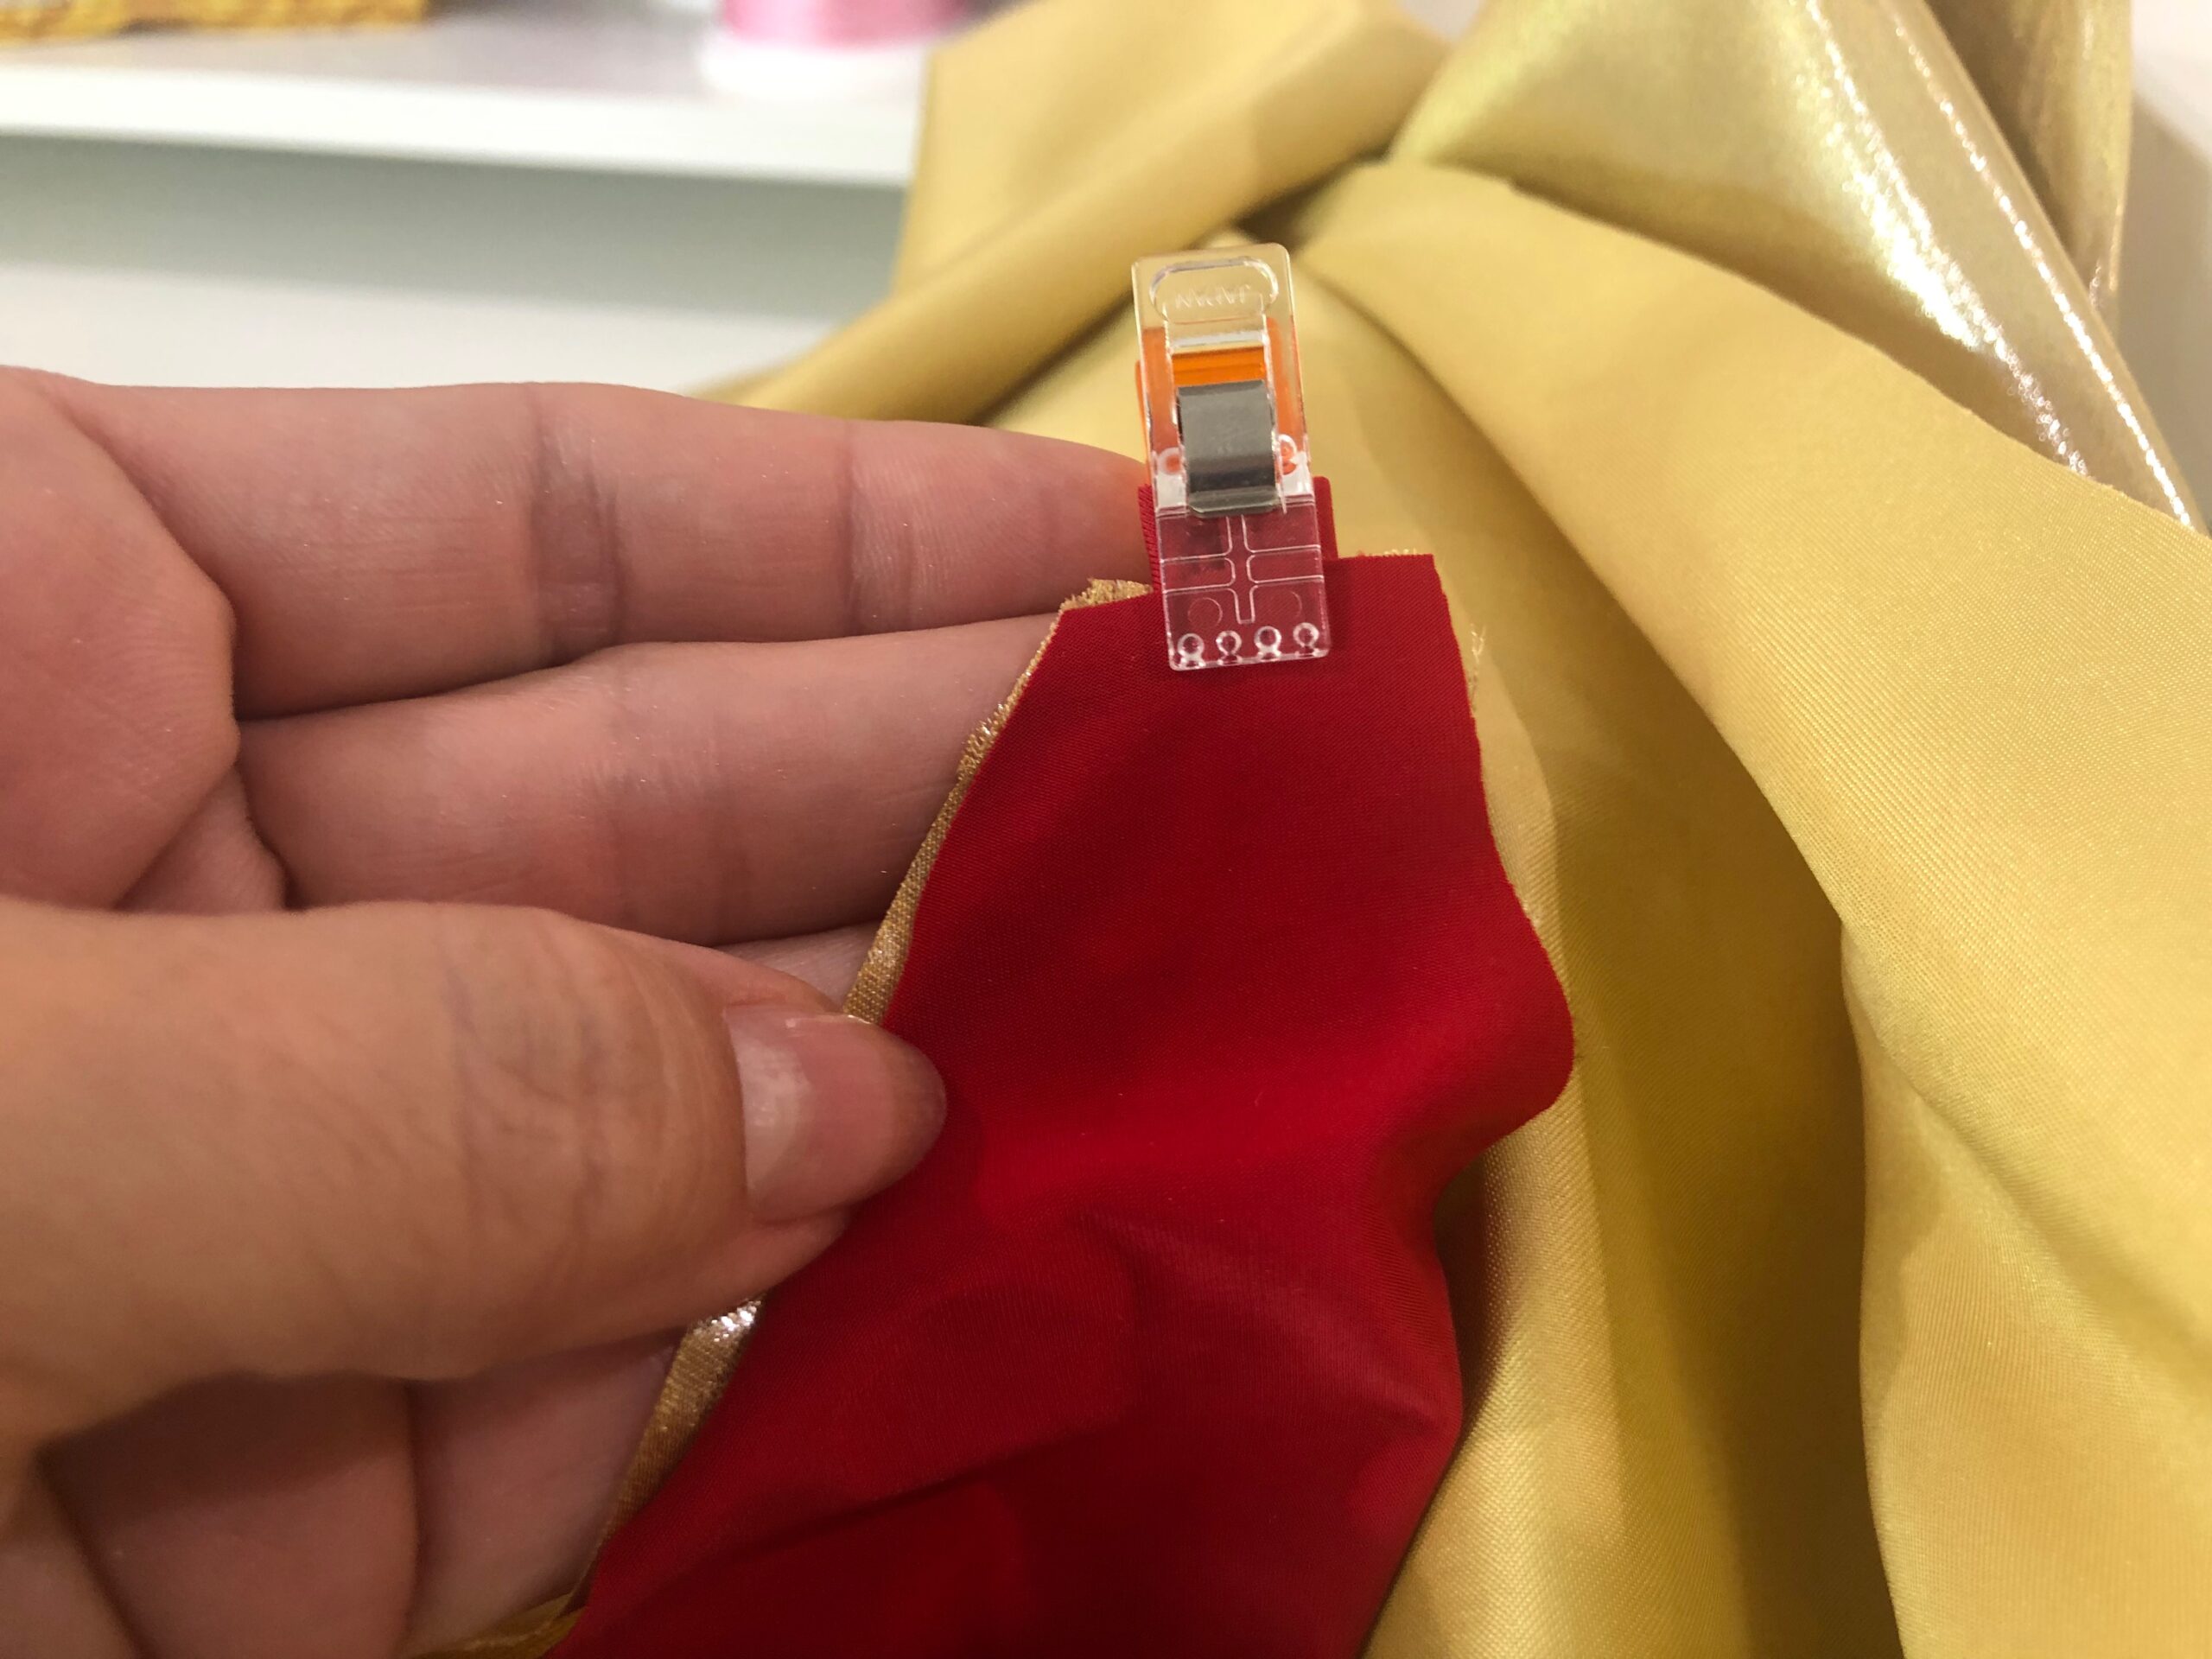
Place the cape lining over the outer cape with right sides together and edges and corners aligned. Use Wonder Clips to secure.
CONSTRUCT CAPE COSTUME
Set the machine for a stretch stitch if working with a stretch and/or knit fabric. Set the machine for a straight stitch if working with a woven fabric.
TIP: If you have a serger, use it to construct the cape, especially if working with a stretchy or slippery fabric.
Stitch the cape perimeter using a ½” seam allowance. The wider seam allowance is easier to navigate when working with tricky, slippery fabrics. Leave a 5” opening along one straight edge for turning.
Clip the curved neck edge up to but not touching the stitching line.
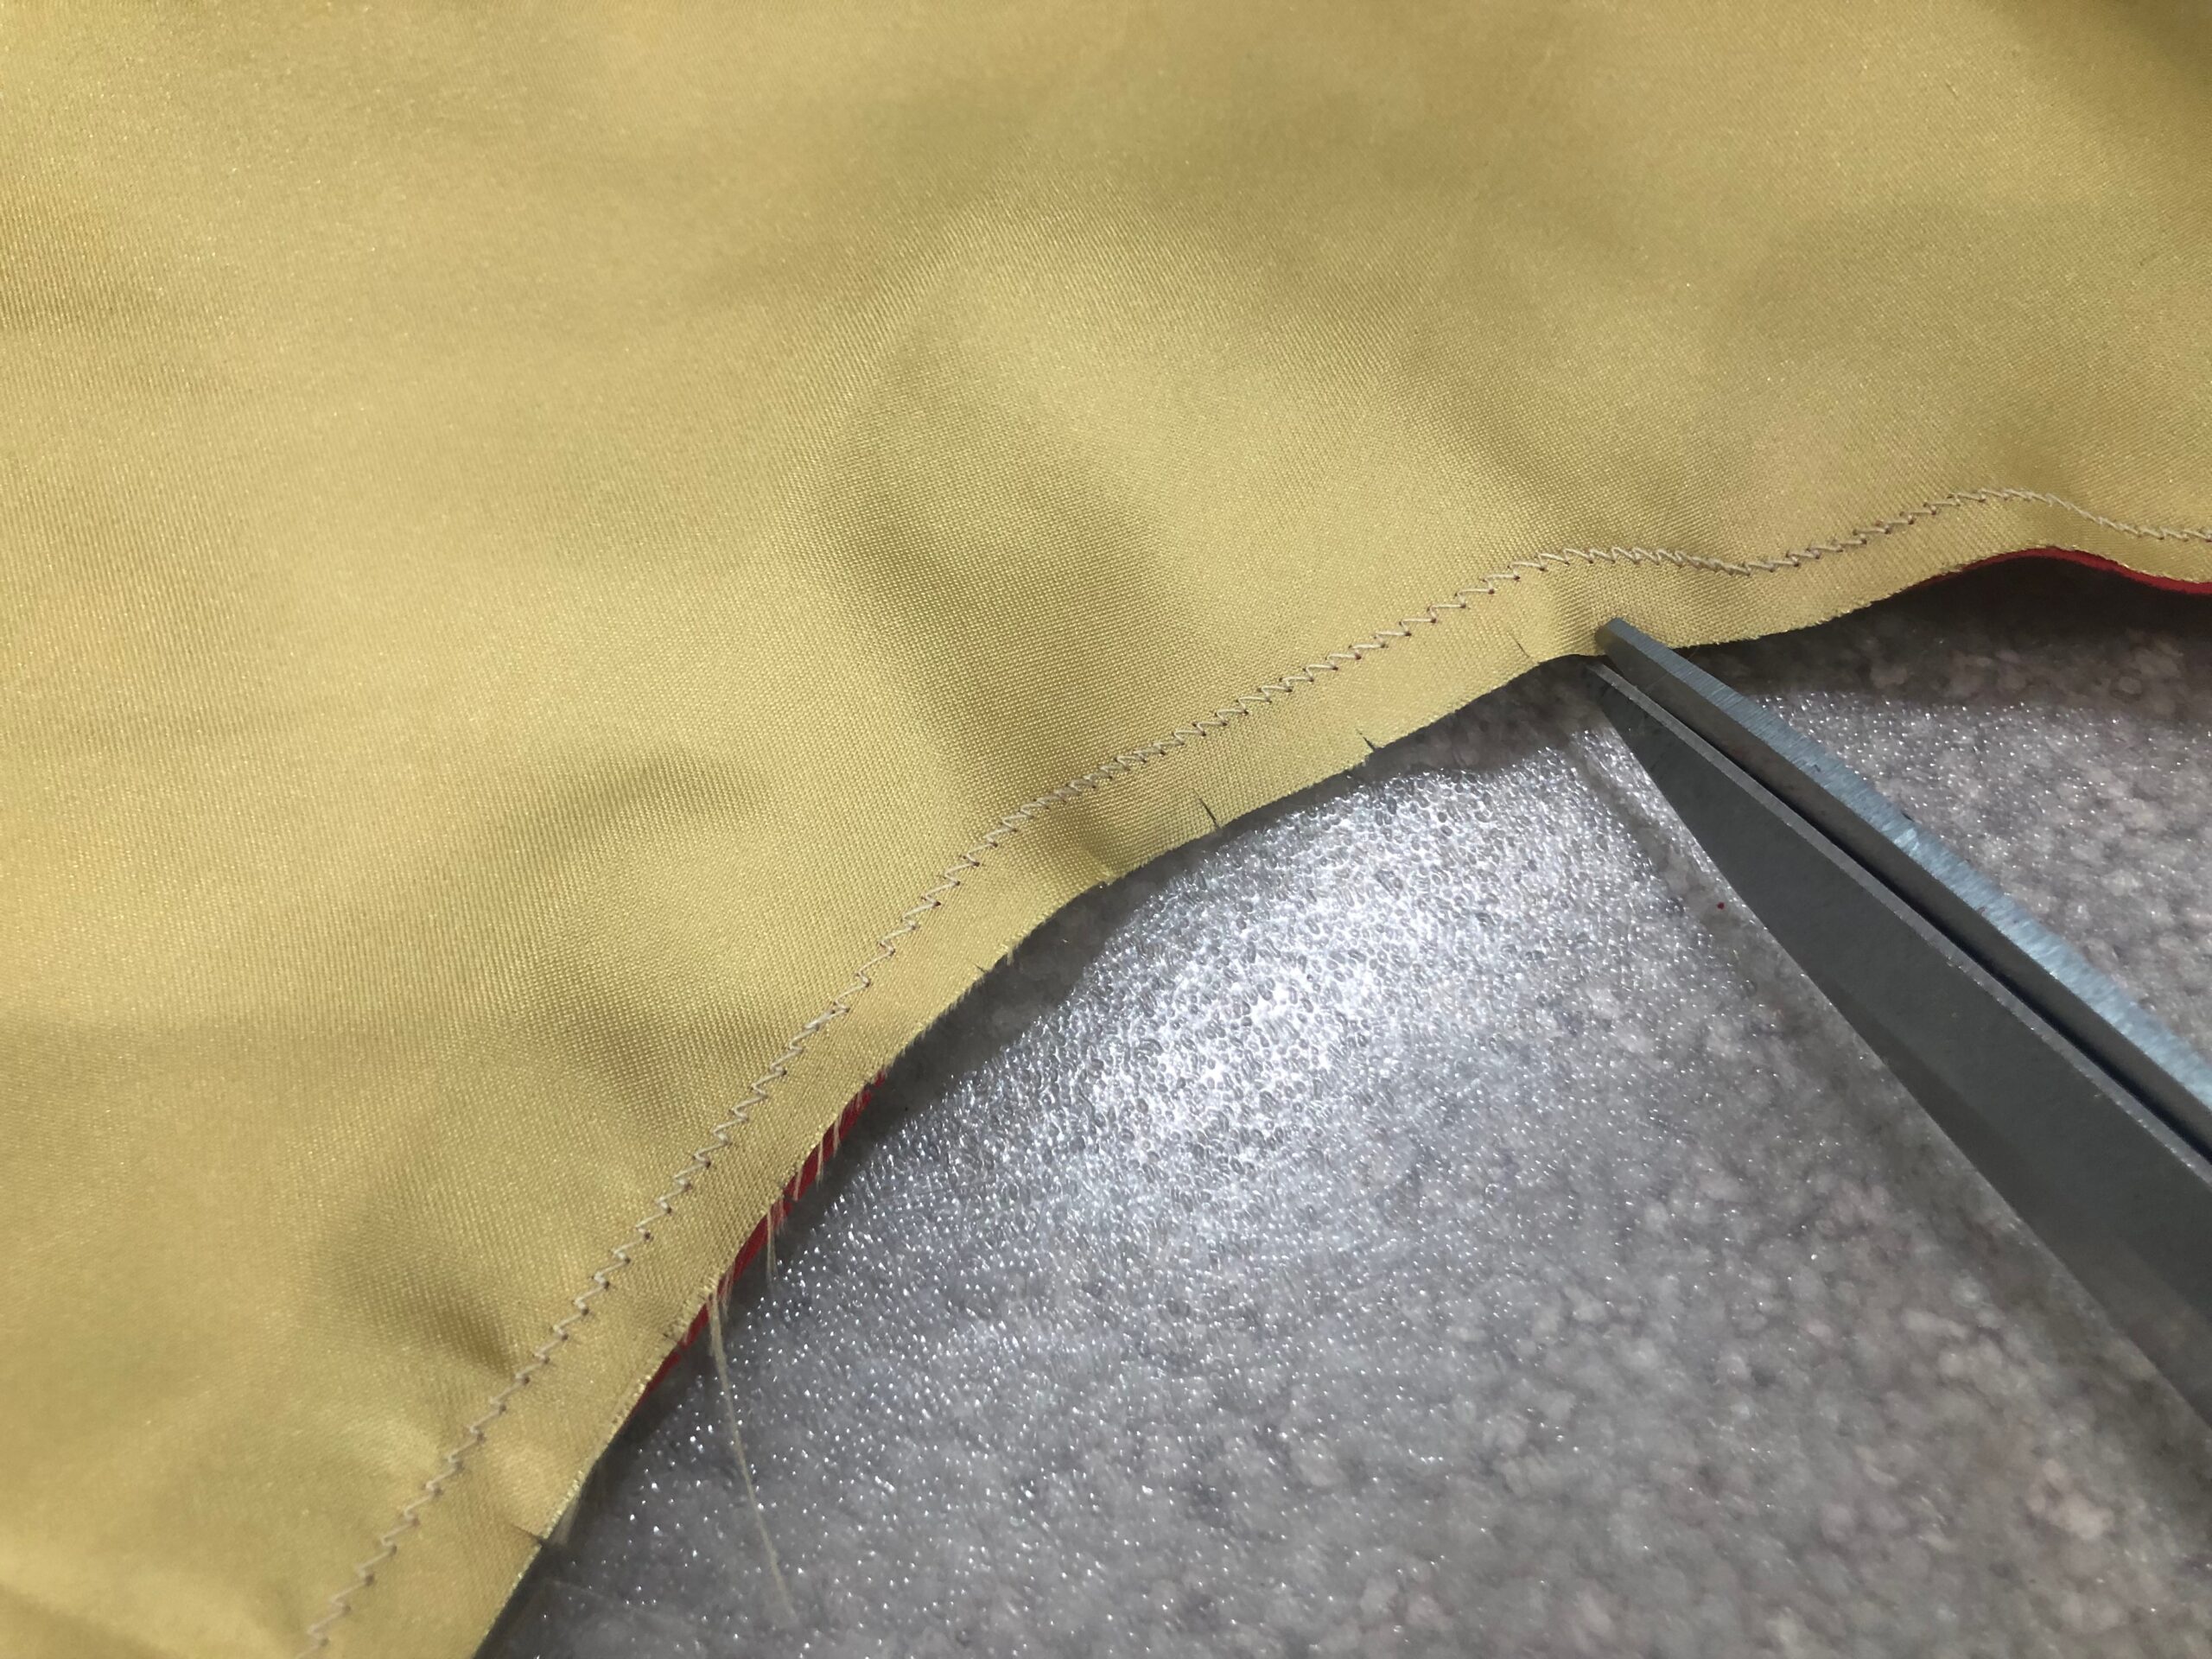
Trim the seam allowances to ¼”, save for the opening.
Turn the cape right side out through the opening. Turn the opening seam allowances toward the wrong side; clip to close. Hand stitch the opening shut using a slipstitch or ladder stitch.
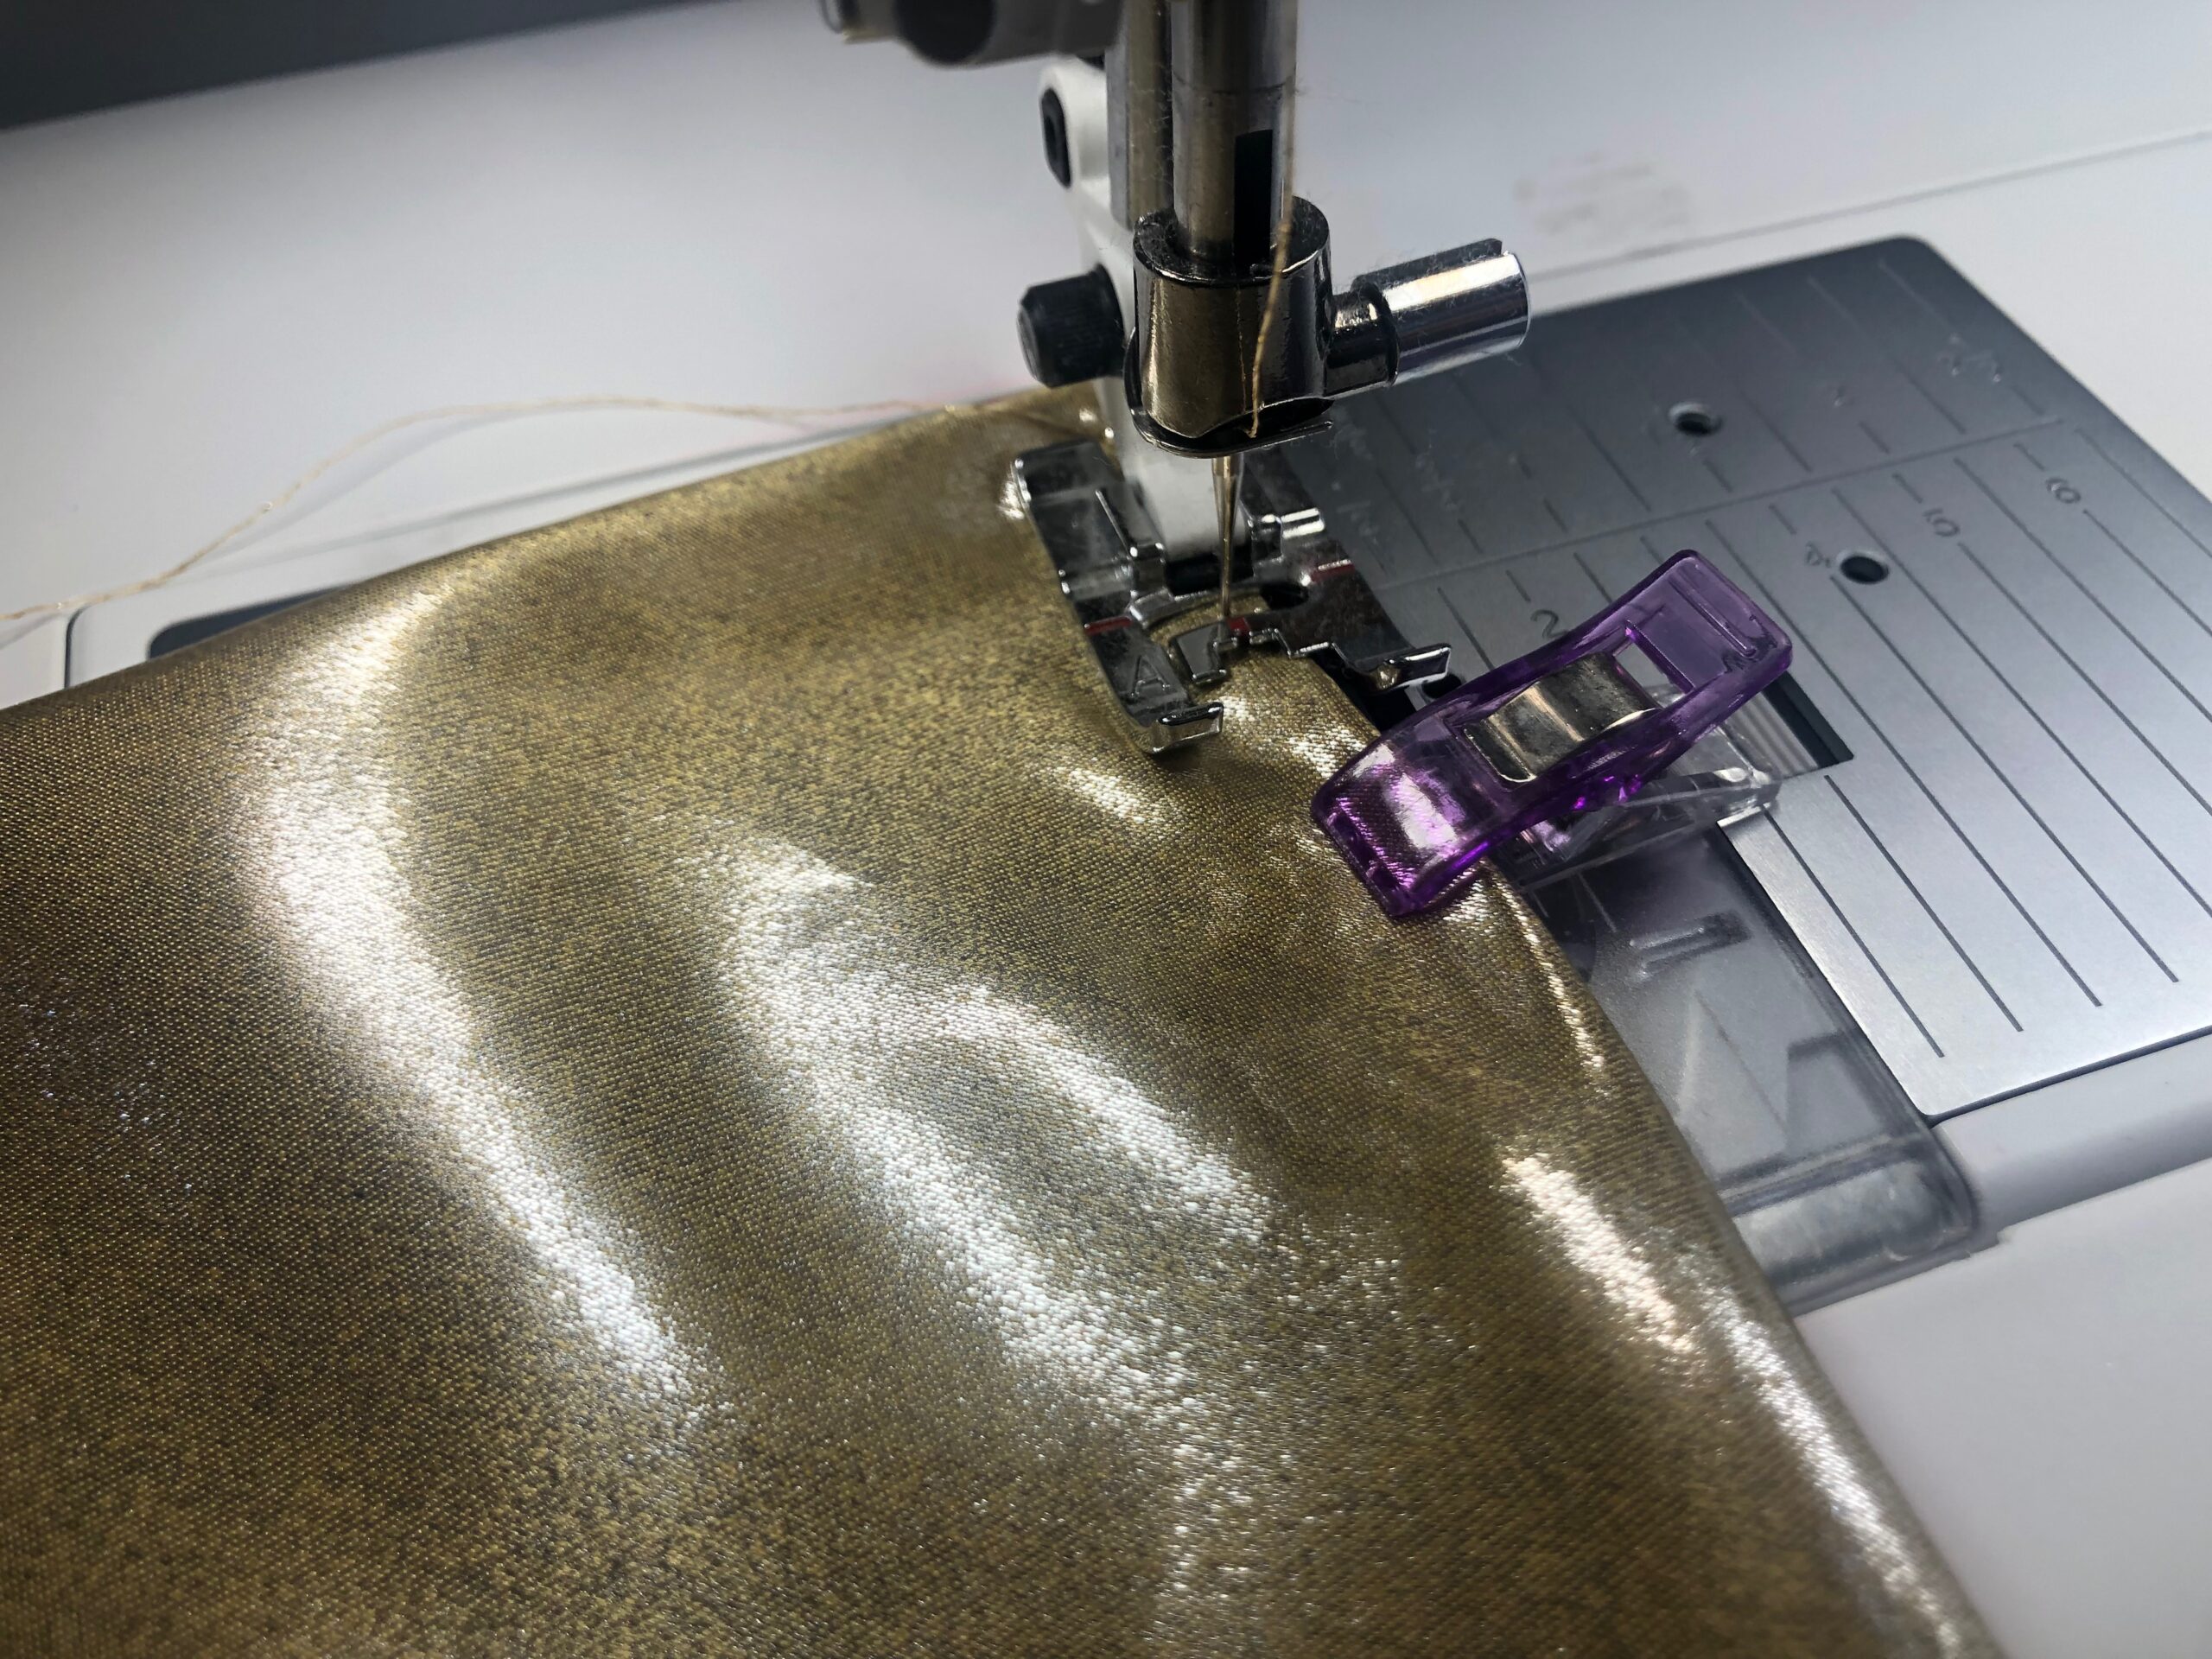
Install a size 90/14 Top Stitch Needle. Thread the needle and wind a bobbin with Sulky Poly Sparkle Thread in the color that matches or contrasts the outer cape.
Set the machine for a 3.0mm straight stitch. Topstitch the cape perimeter, making sure the ties are away from the stitching.
Try on your cape and choose either the lining side or appliqué side to show off first.

Now the only thing your superhero needs is a personalized treat bag. CHECK OUT OUR TREAT BAG BLANKS>

Ellen March
I am the Director of Content for Sulky of America. The former Editor in Chief of Sew News and Creative Machine Embroidery magazines, I hosted Sew it All TV on PBS for nine seasons. I've appeared on It's Sew Easy on PBS, DIY Network's Uncommon Threads, Hallmark's Marie Osmond Show, MacPhee Workshop and more! Come sew with me!