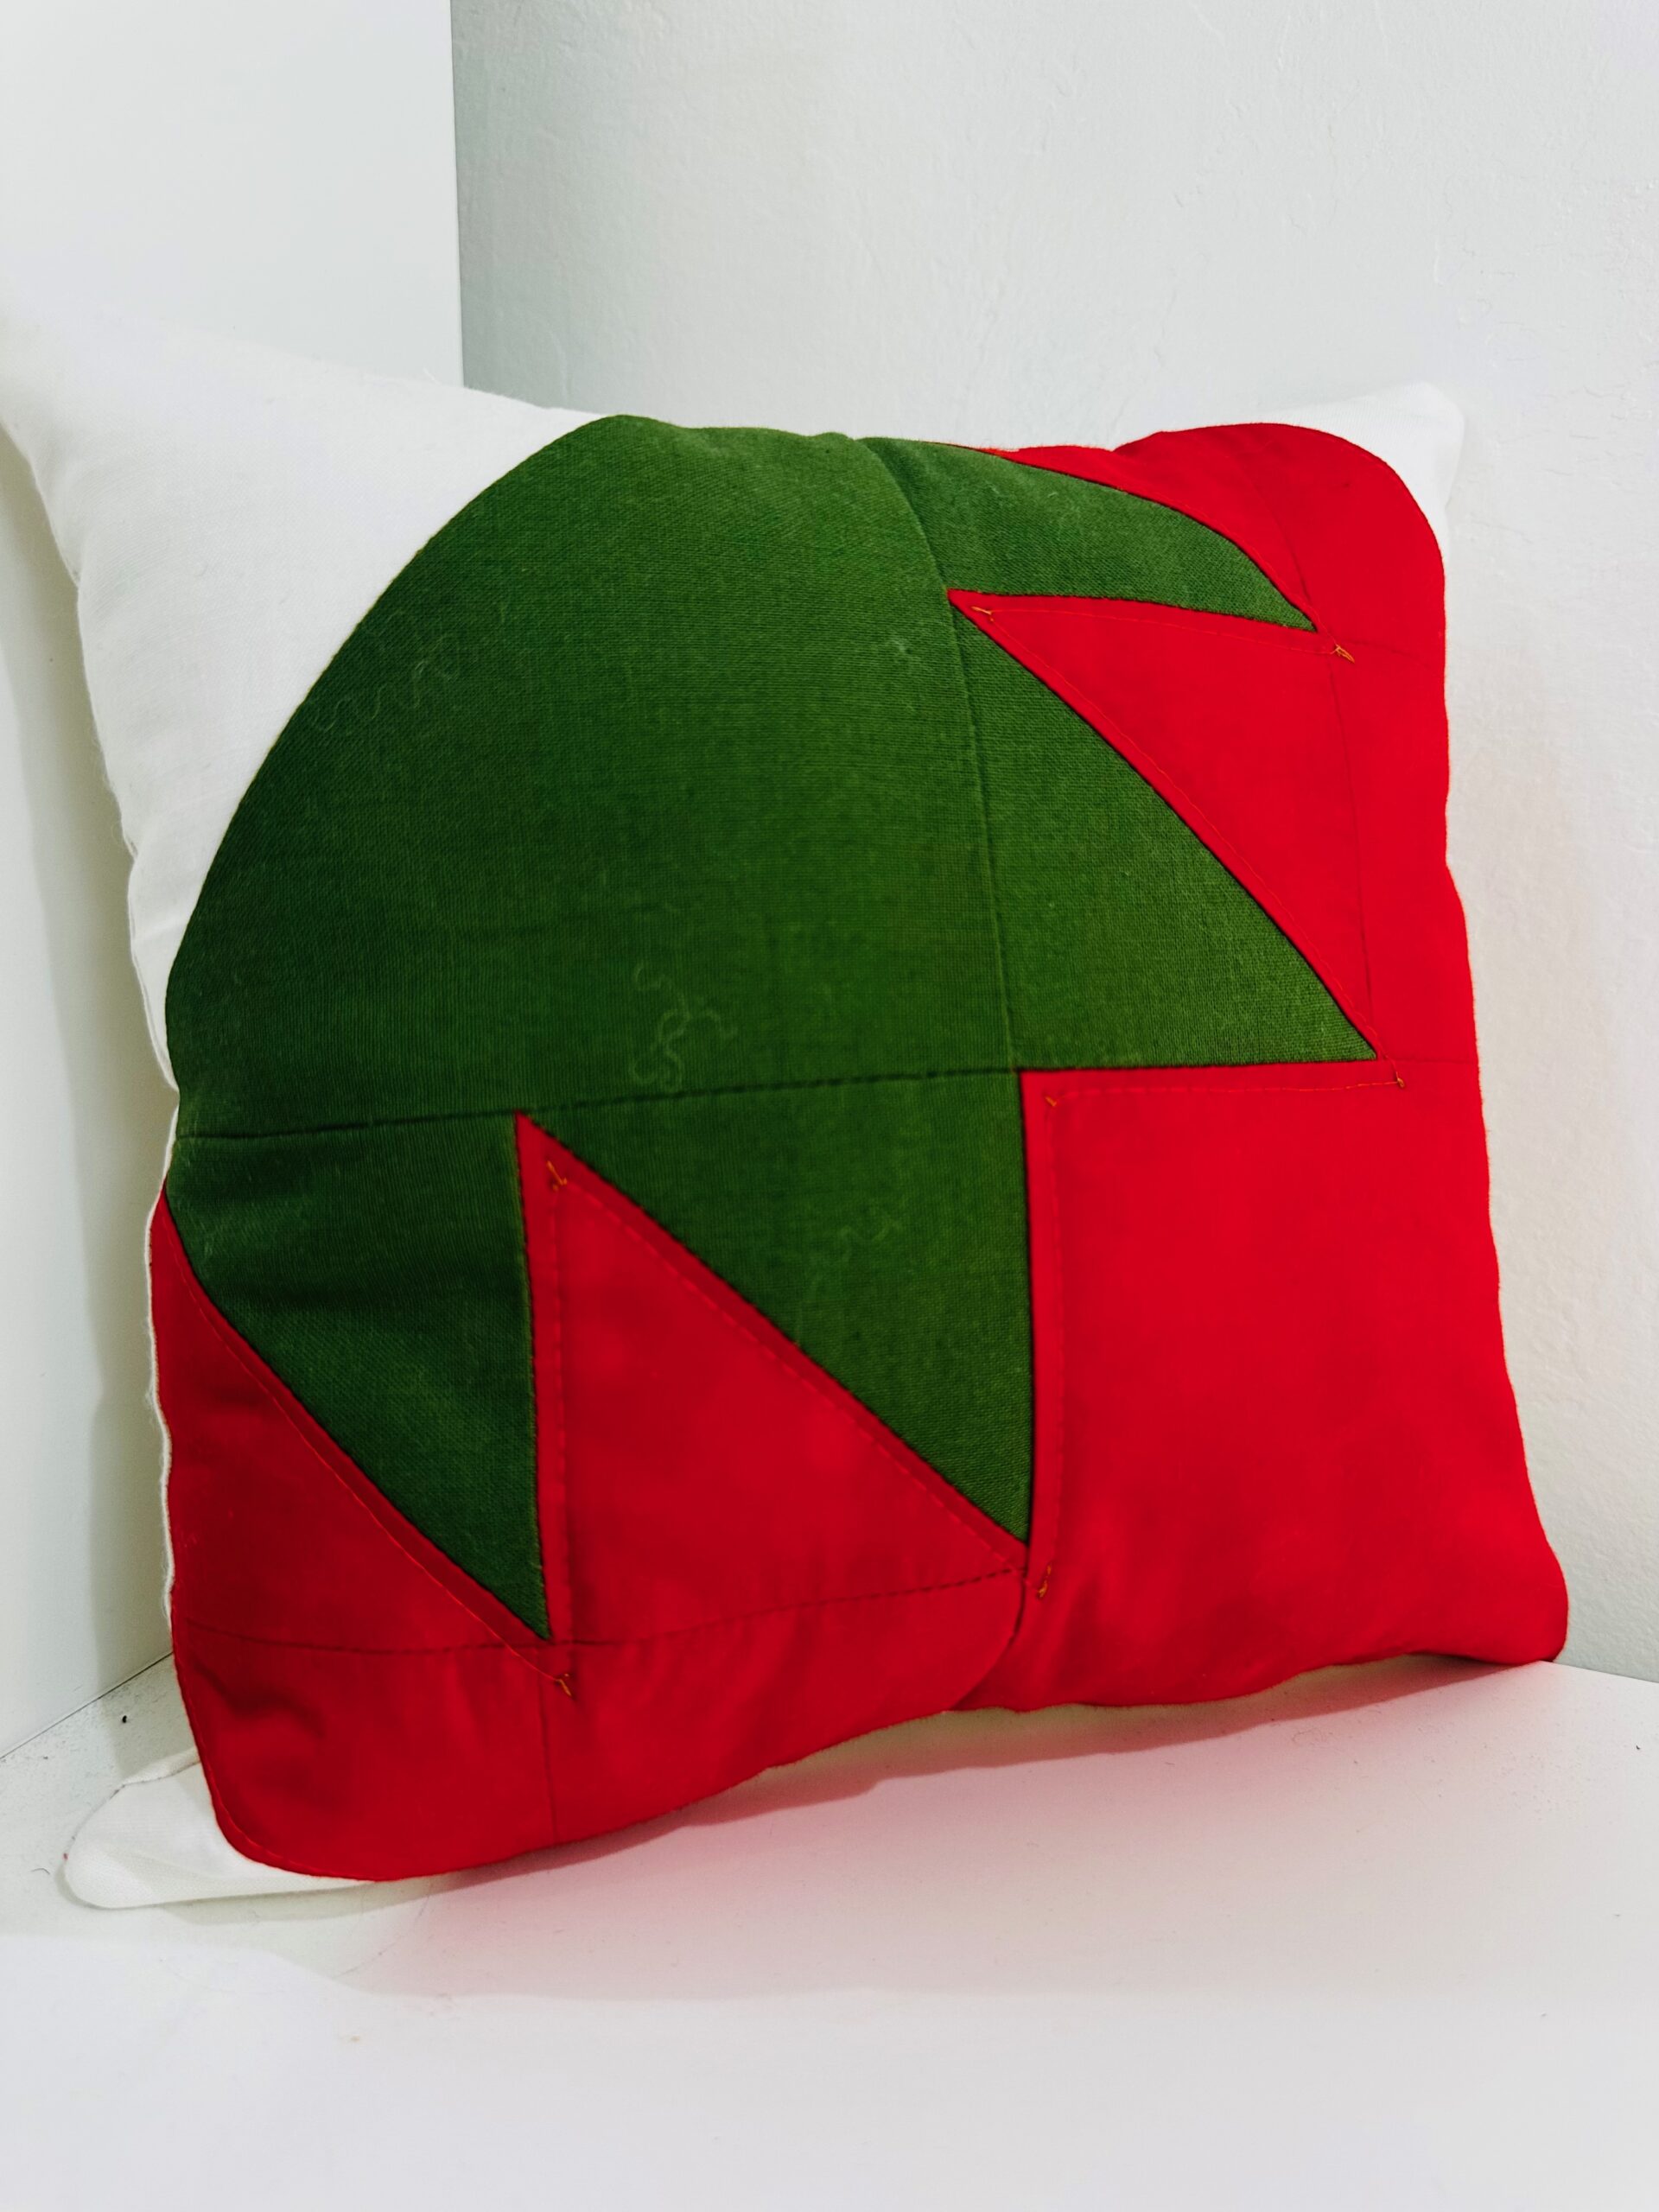
Strawberry Porch Pillow
From strawberries and cherries to citrus slices and watermelons, fruit motifs are everywhere this spring and summer. It’s easy to see why! Bright, cheerful, and just a little nostalgic, these playful prints and designs bring a sense of sunshine and whimsy to everything from fashion to home décor. Whether it’s a breezy sundress dotted with lemons or a set of strawberry-themed kitchen accents, this trend leans into color, simplicity and feel-good creativity.
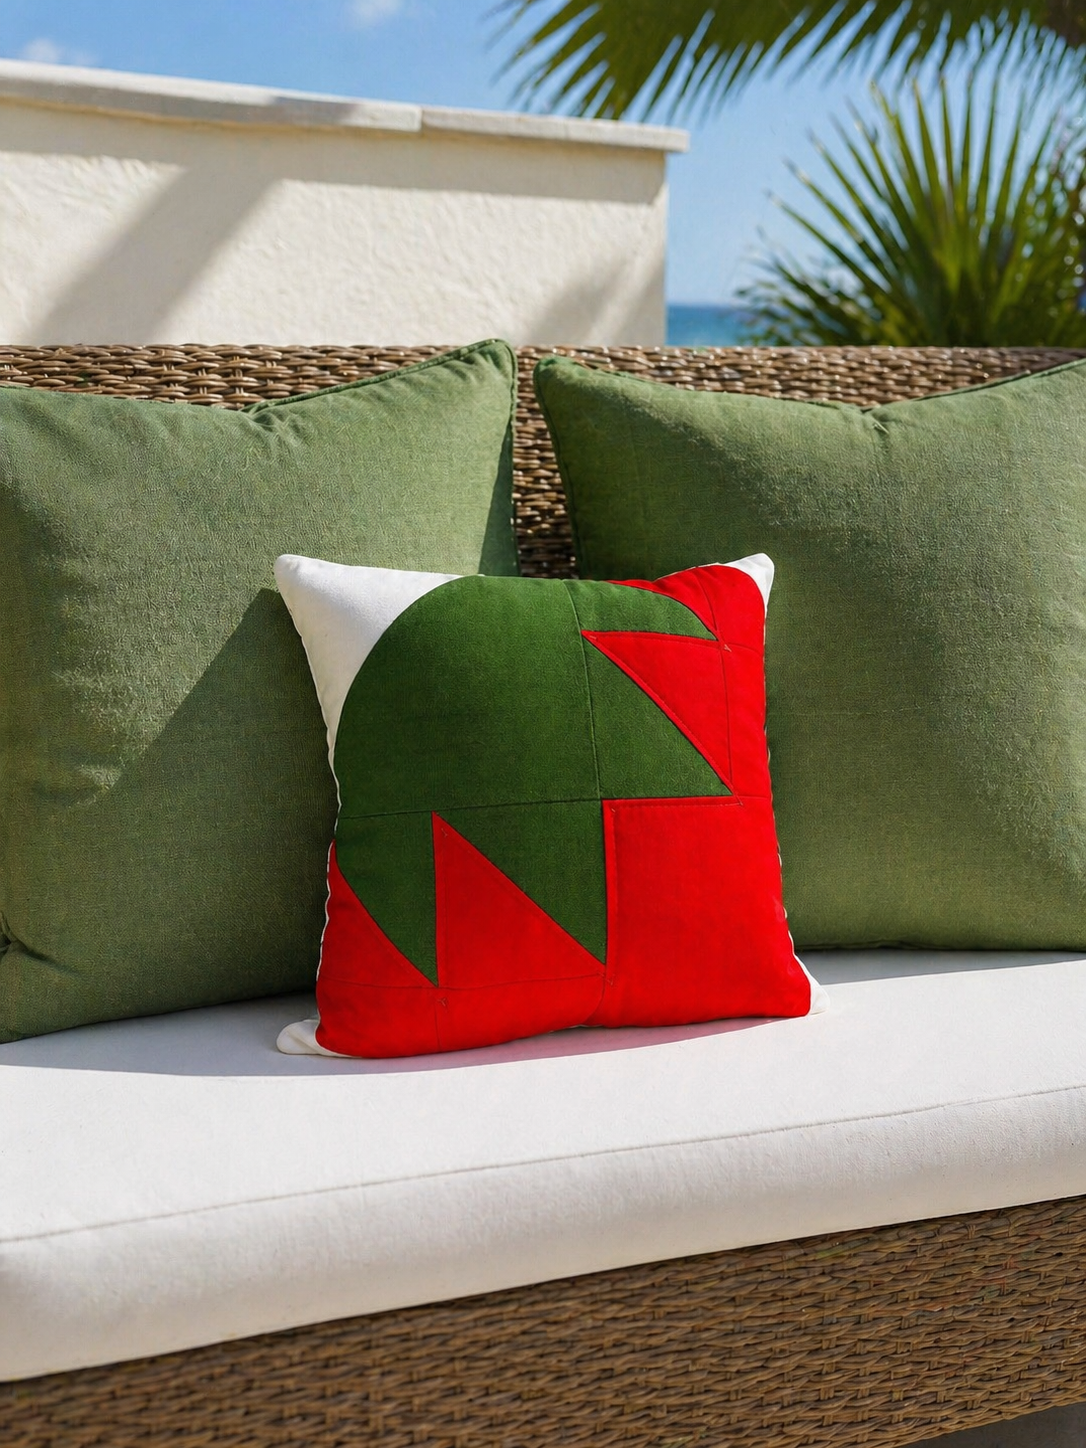
Fruit shapes, motifs and colors are perfect for spring and summer projects like pillows, table toppers and bags. They’re playful without being childish, trendy without being fleeting, and they invite you to experiment with color placement, contrast and scale. Use this juicy inspiration and turn a classic strawberry block into a sweet Strawberry Porch Pillow. It’s the perfect project for adding a pop of summer to your outdoor space.
Project Inspiration
This Strawberry Porch Pillow is a cheerful sewing project with a fresh summer vibe. And it all started with the Berry Good Pot Holder tutorial by All People Quilt. Originally designed as an 8″ pot holder featuring a charming strawberry block, this project lends itself beautifully to scaling up. And, with just a few thoughtful tweaks, you can transform it into a statement-worthy porch pillow.
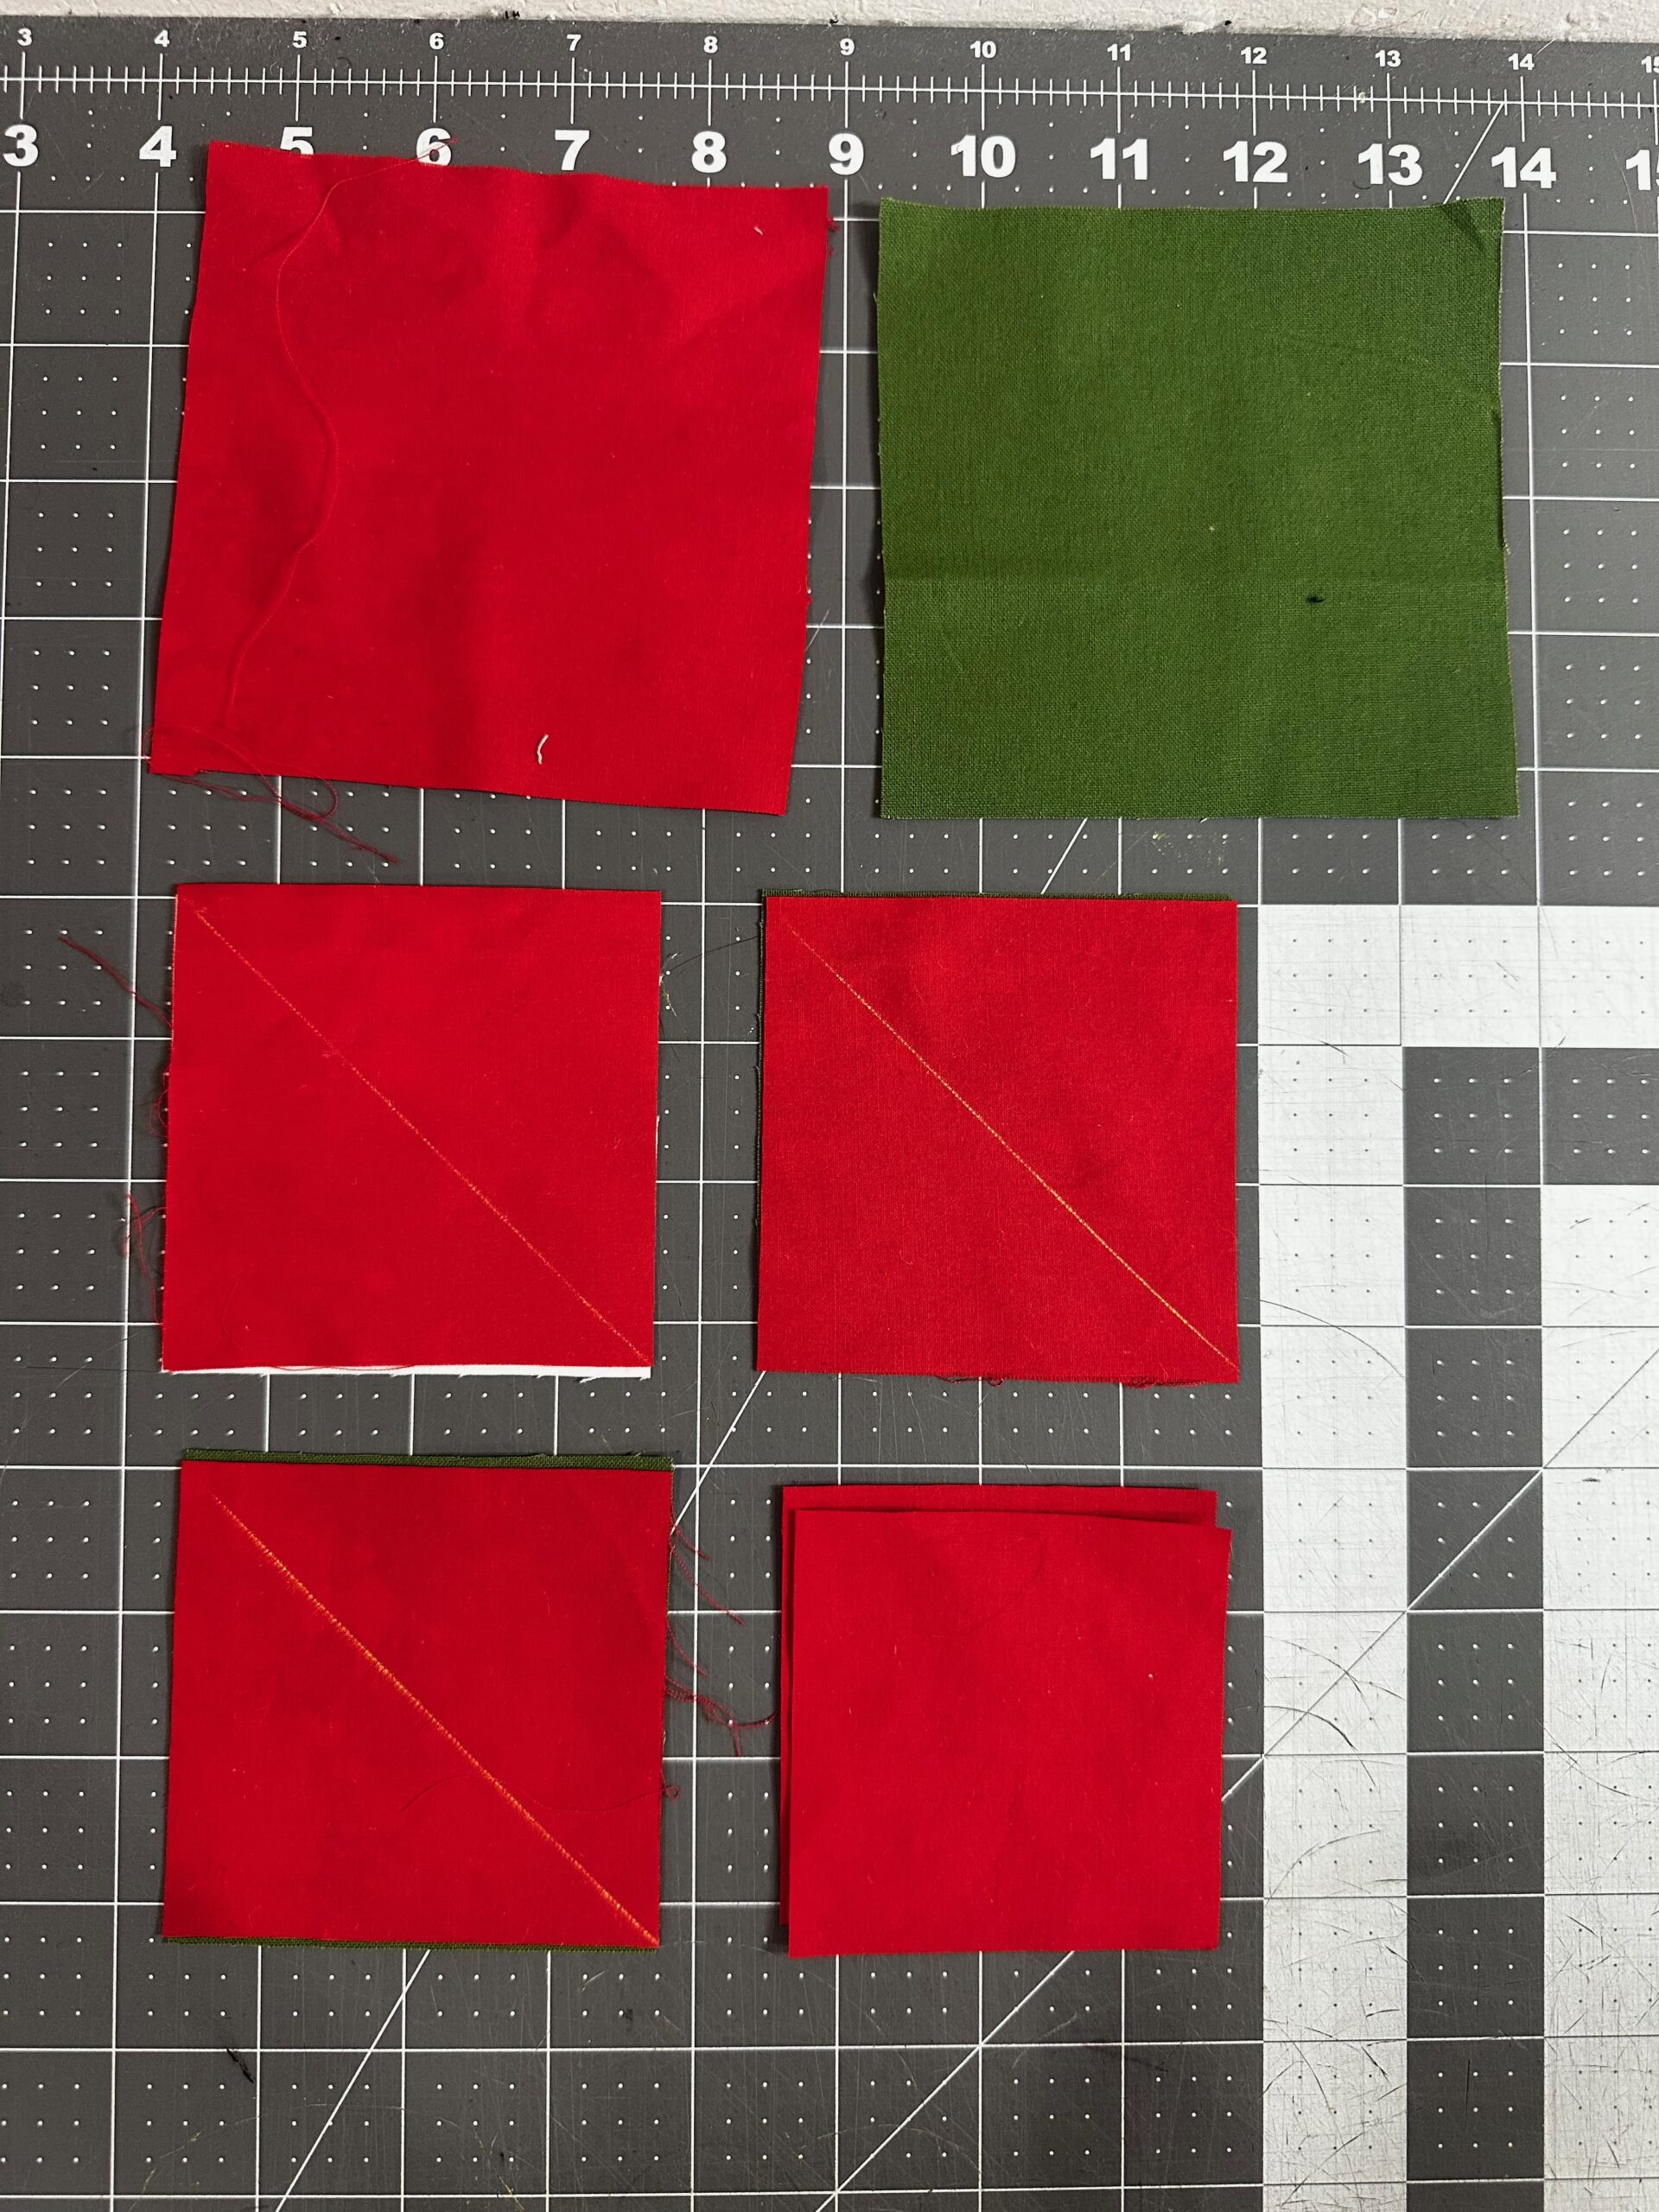
The magic of this transformation begins by enlarging the block. Instead of the original cutting sizes, increase nearly every square by 1″. This simple adjustment gives the block more presence and makes it suitable for a pillow rather than a small kitchen accessory. The only exception? The two largest solid fabric squares. Those should each be increased by 2″ to maintain proper proportions in the final layout.
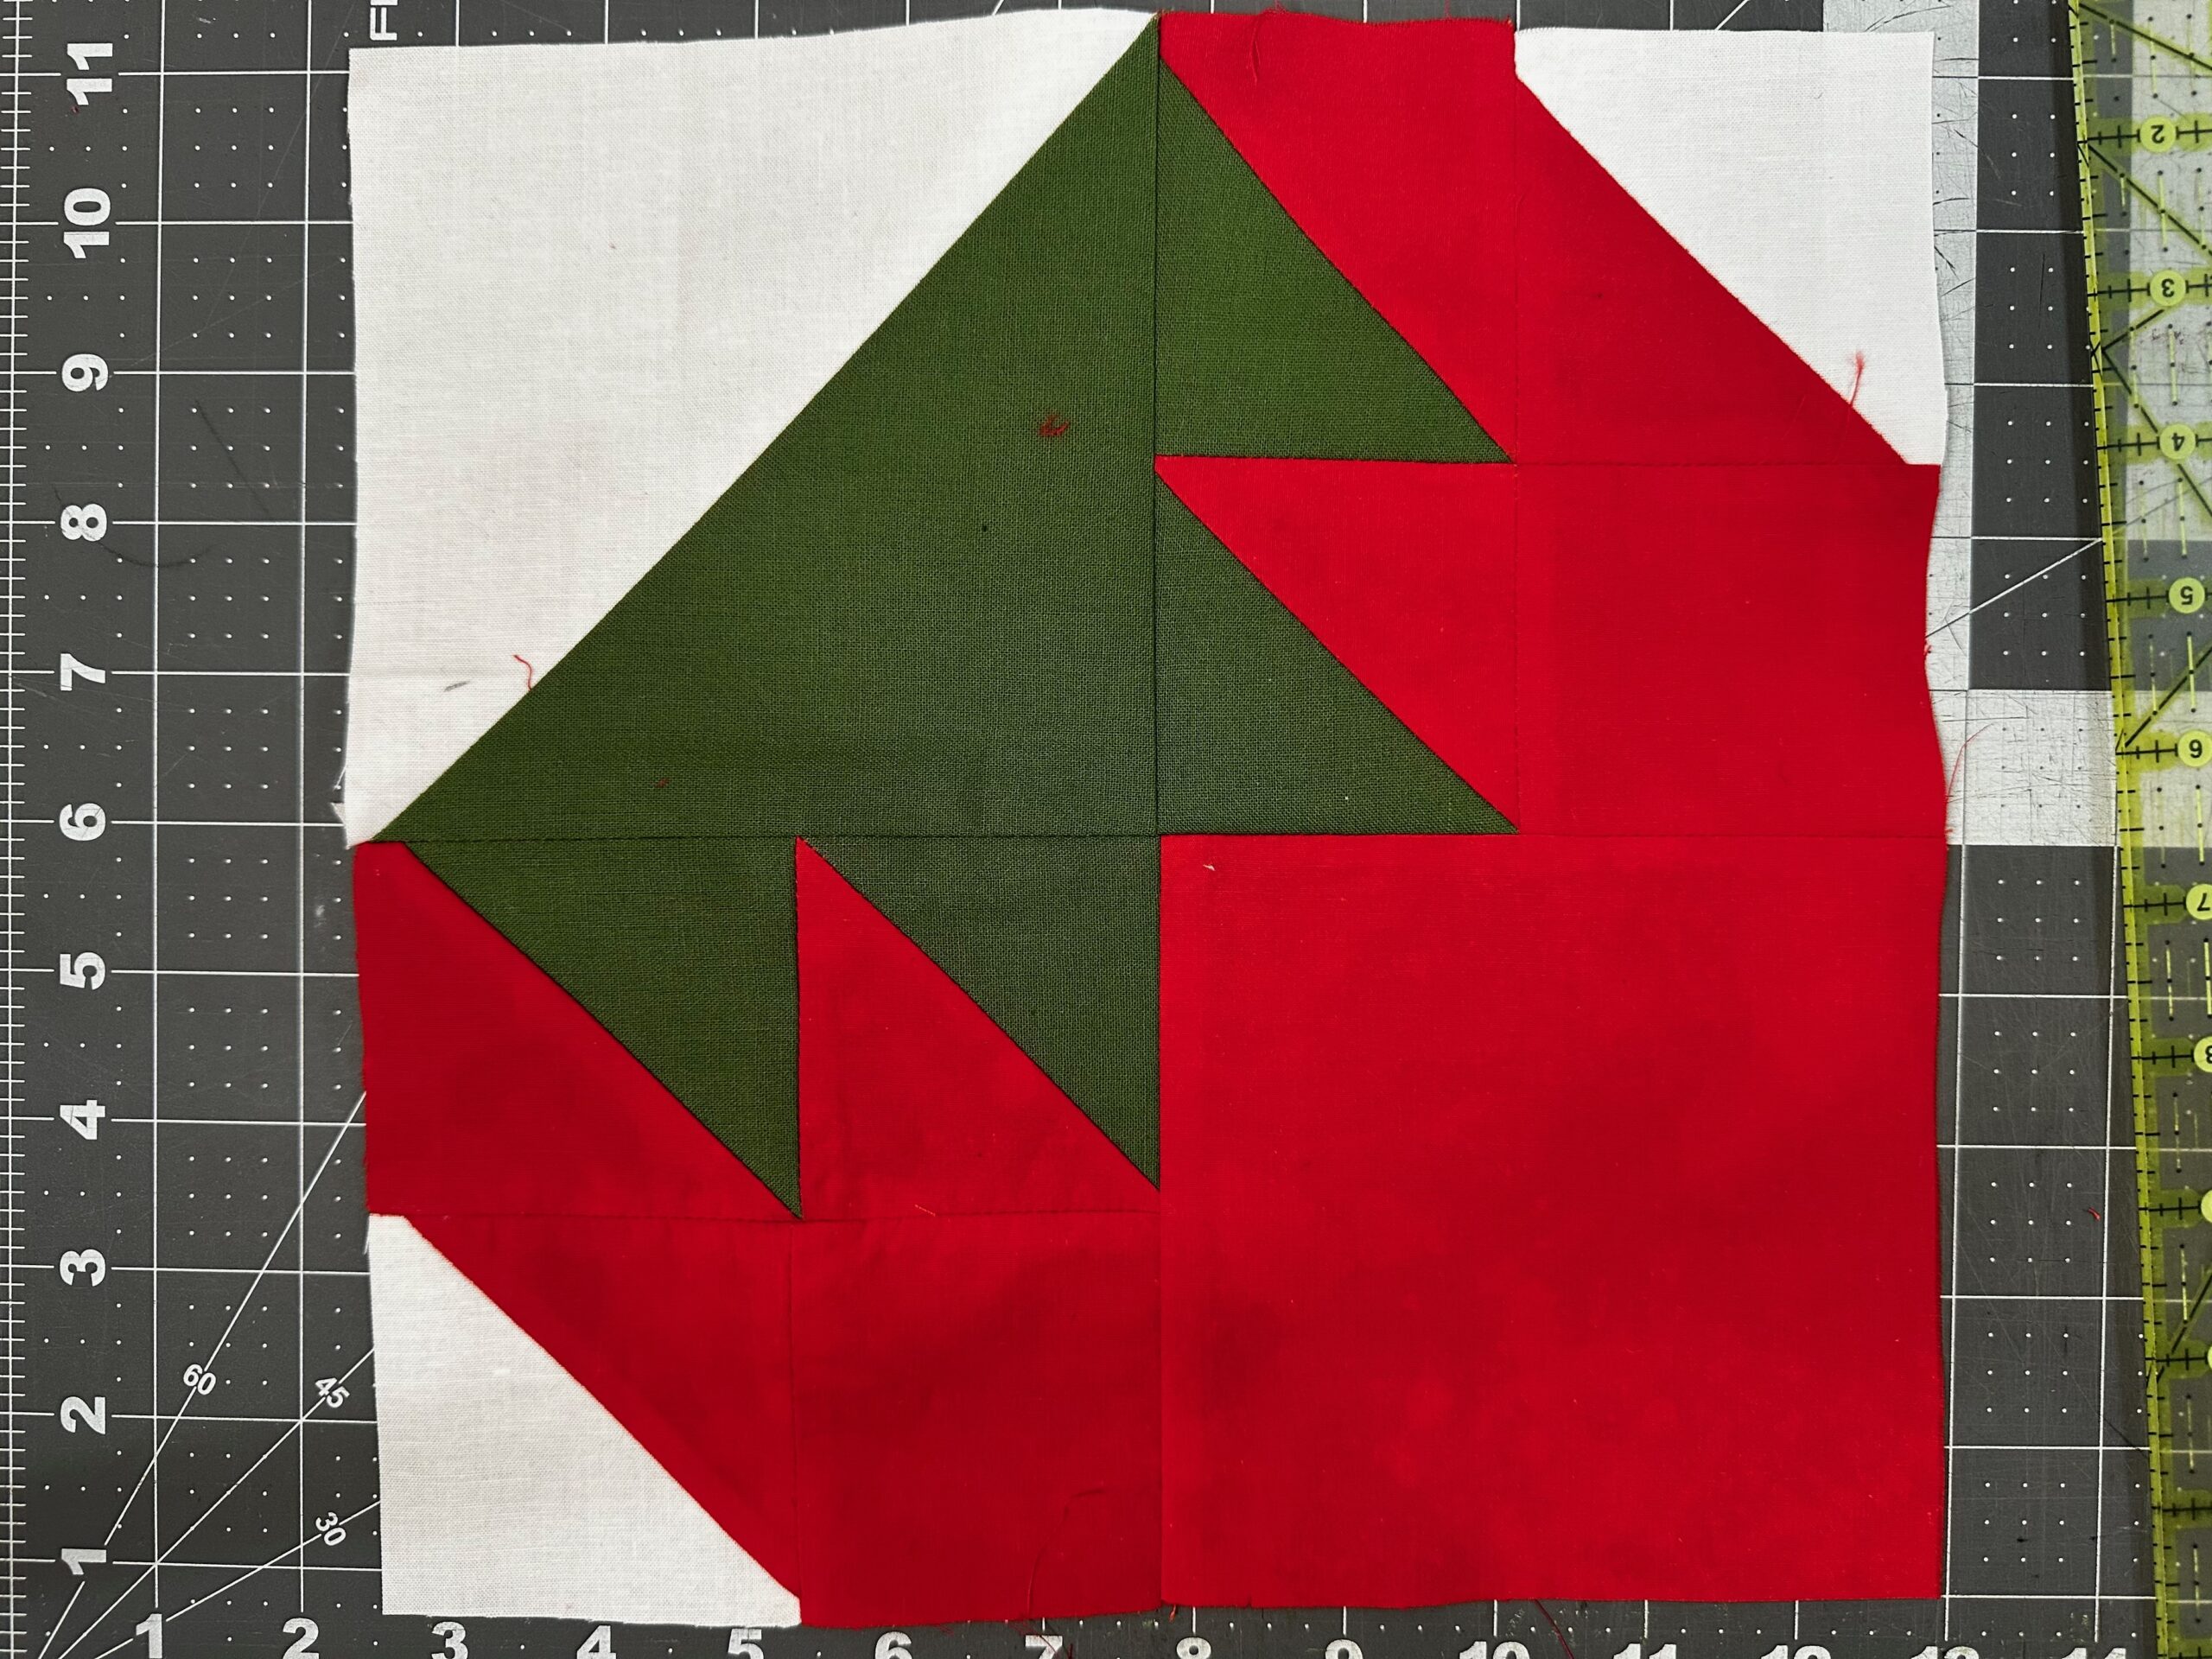
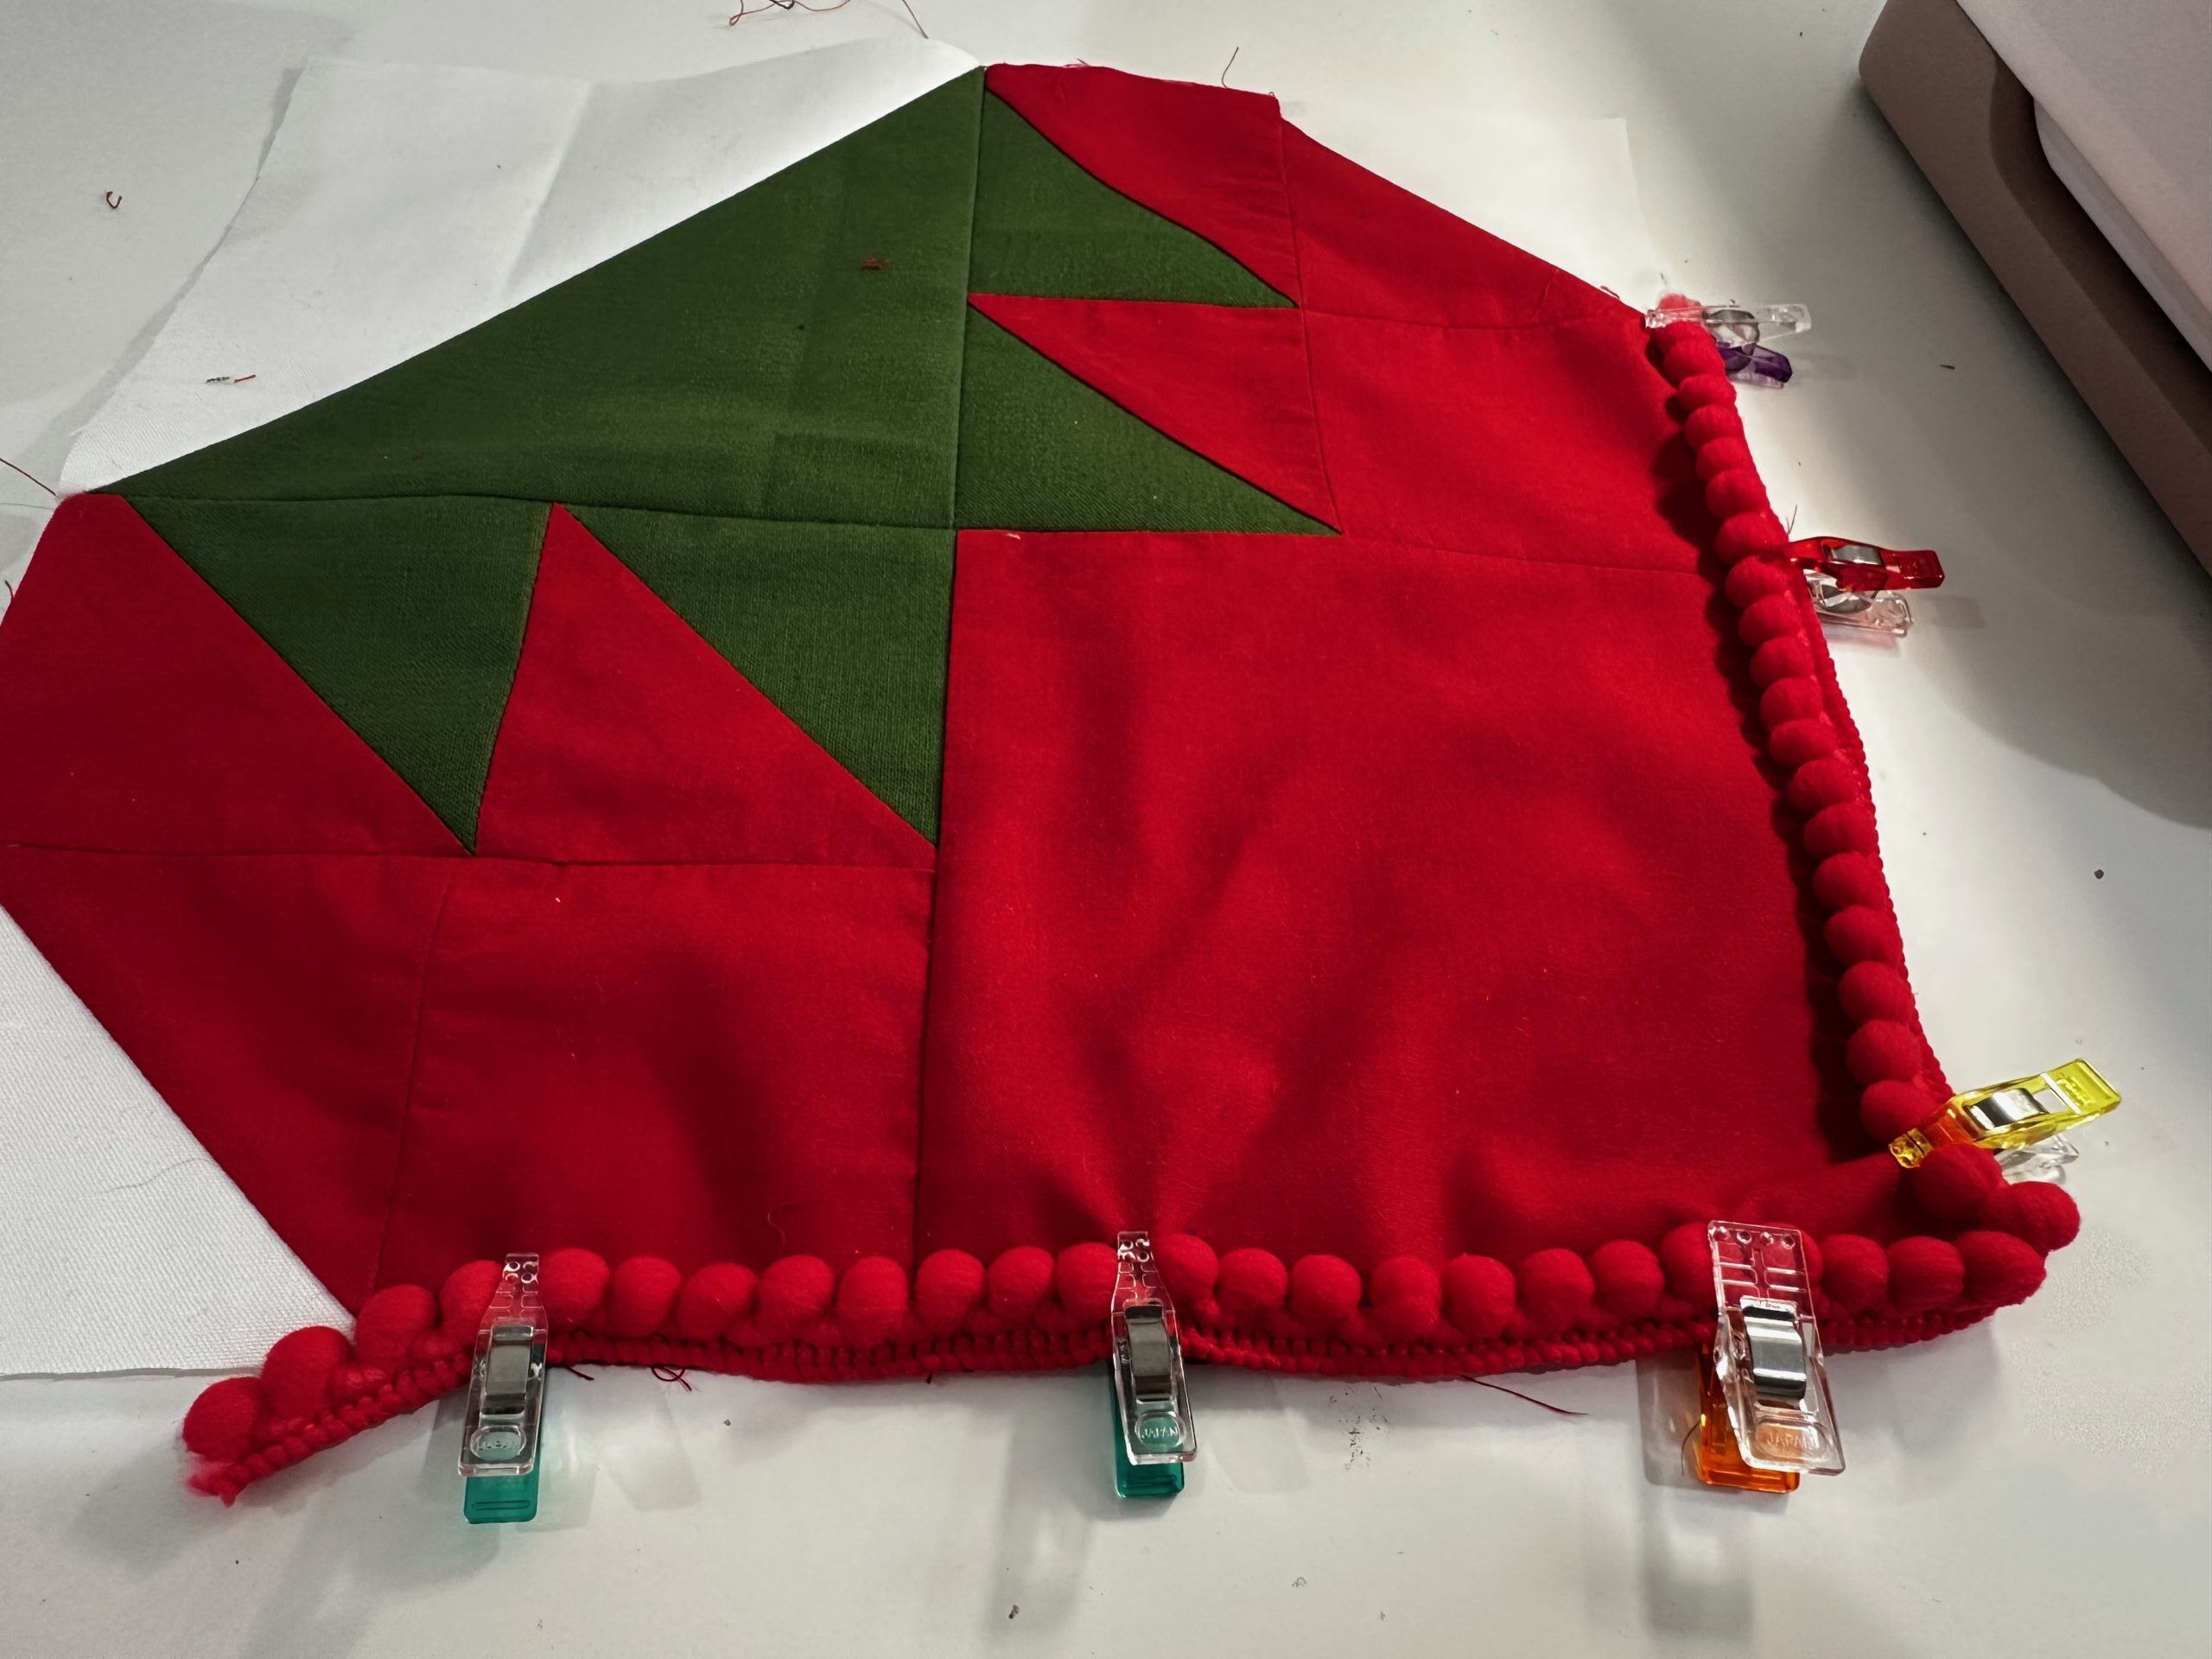
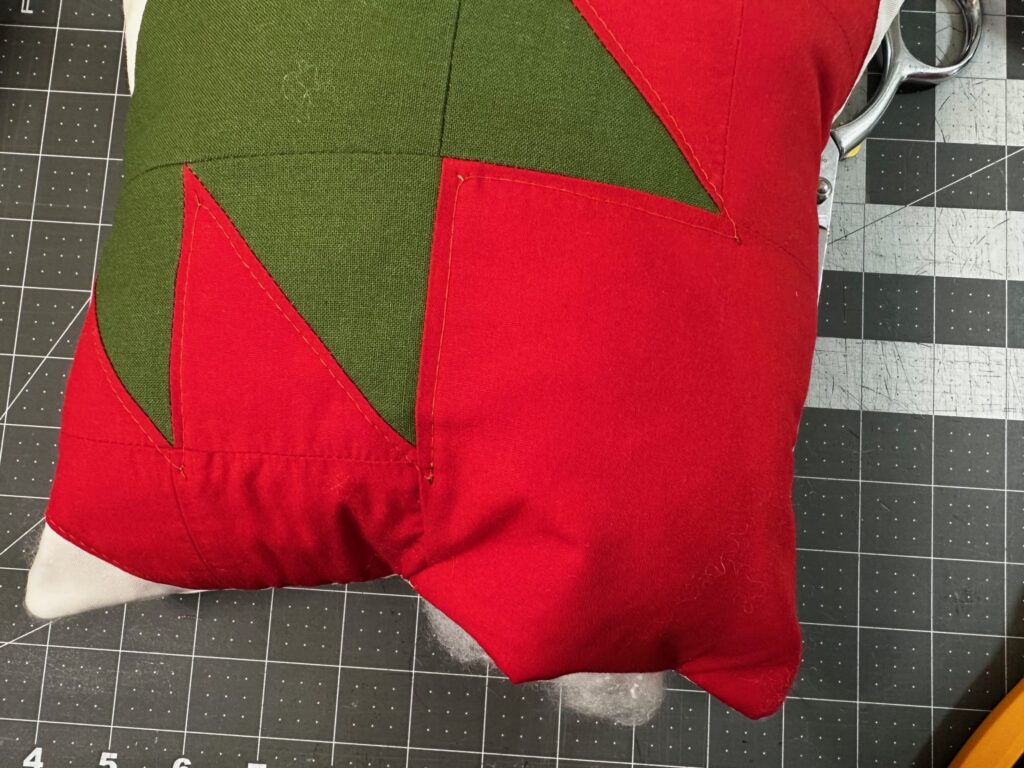
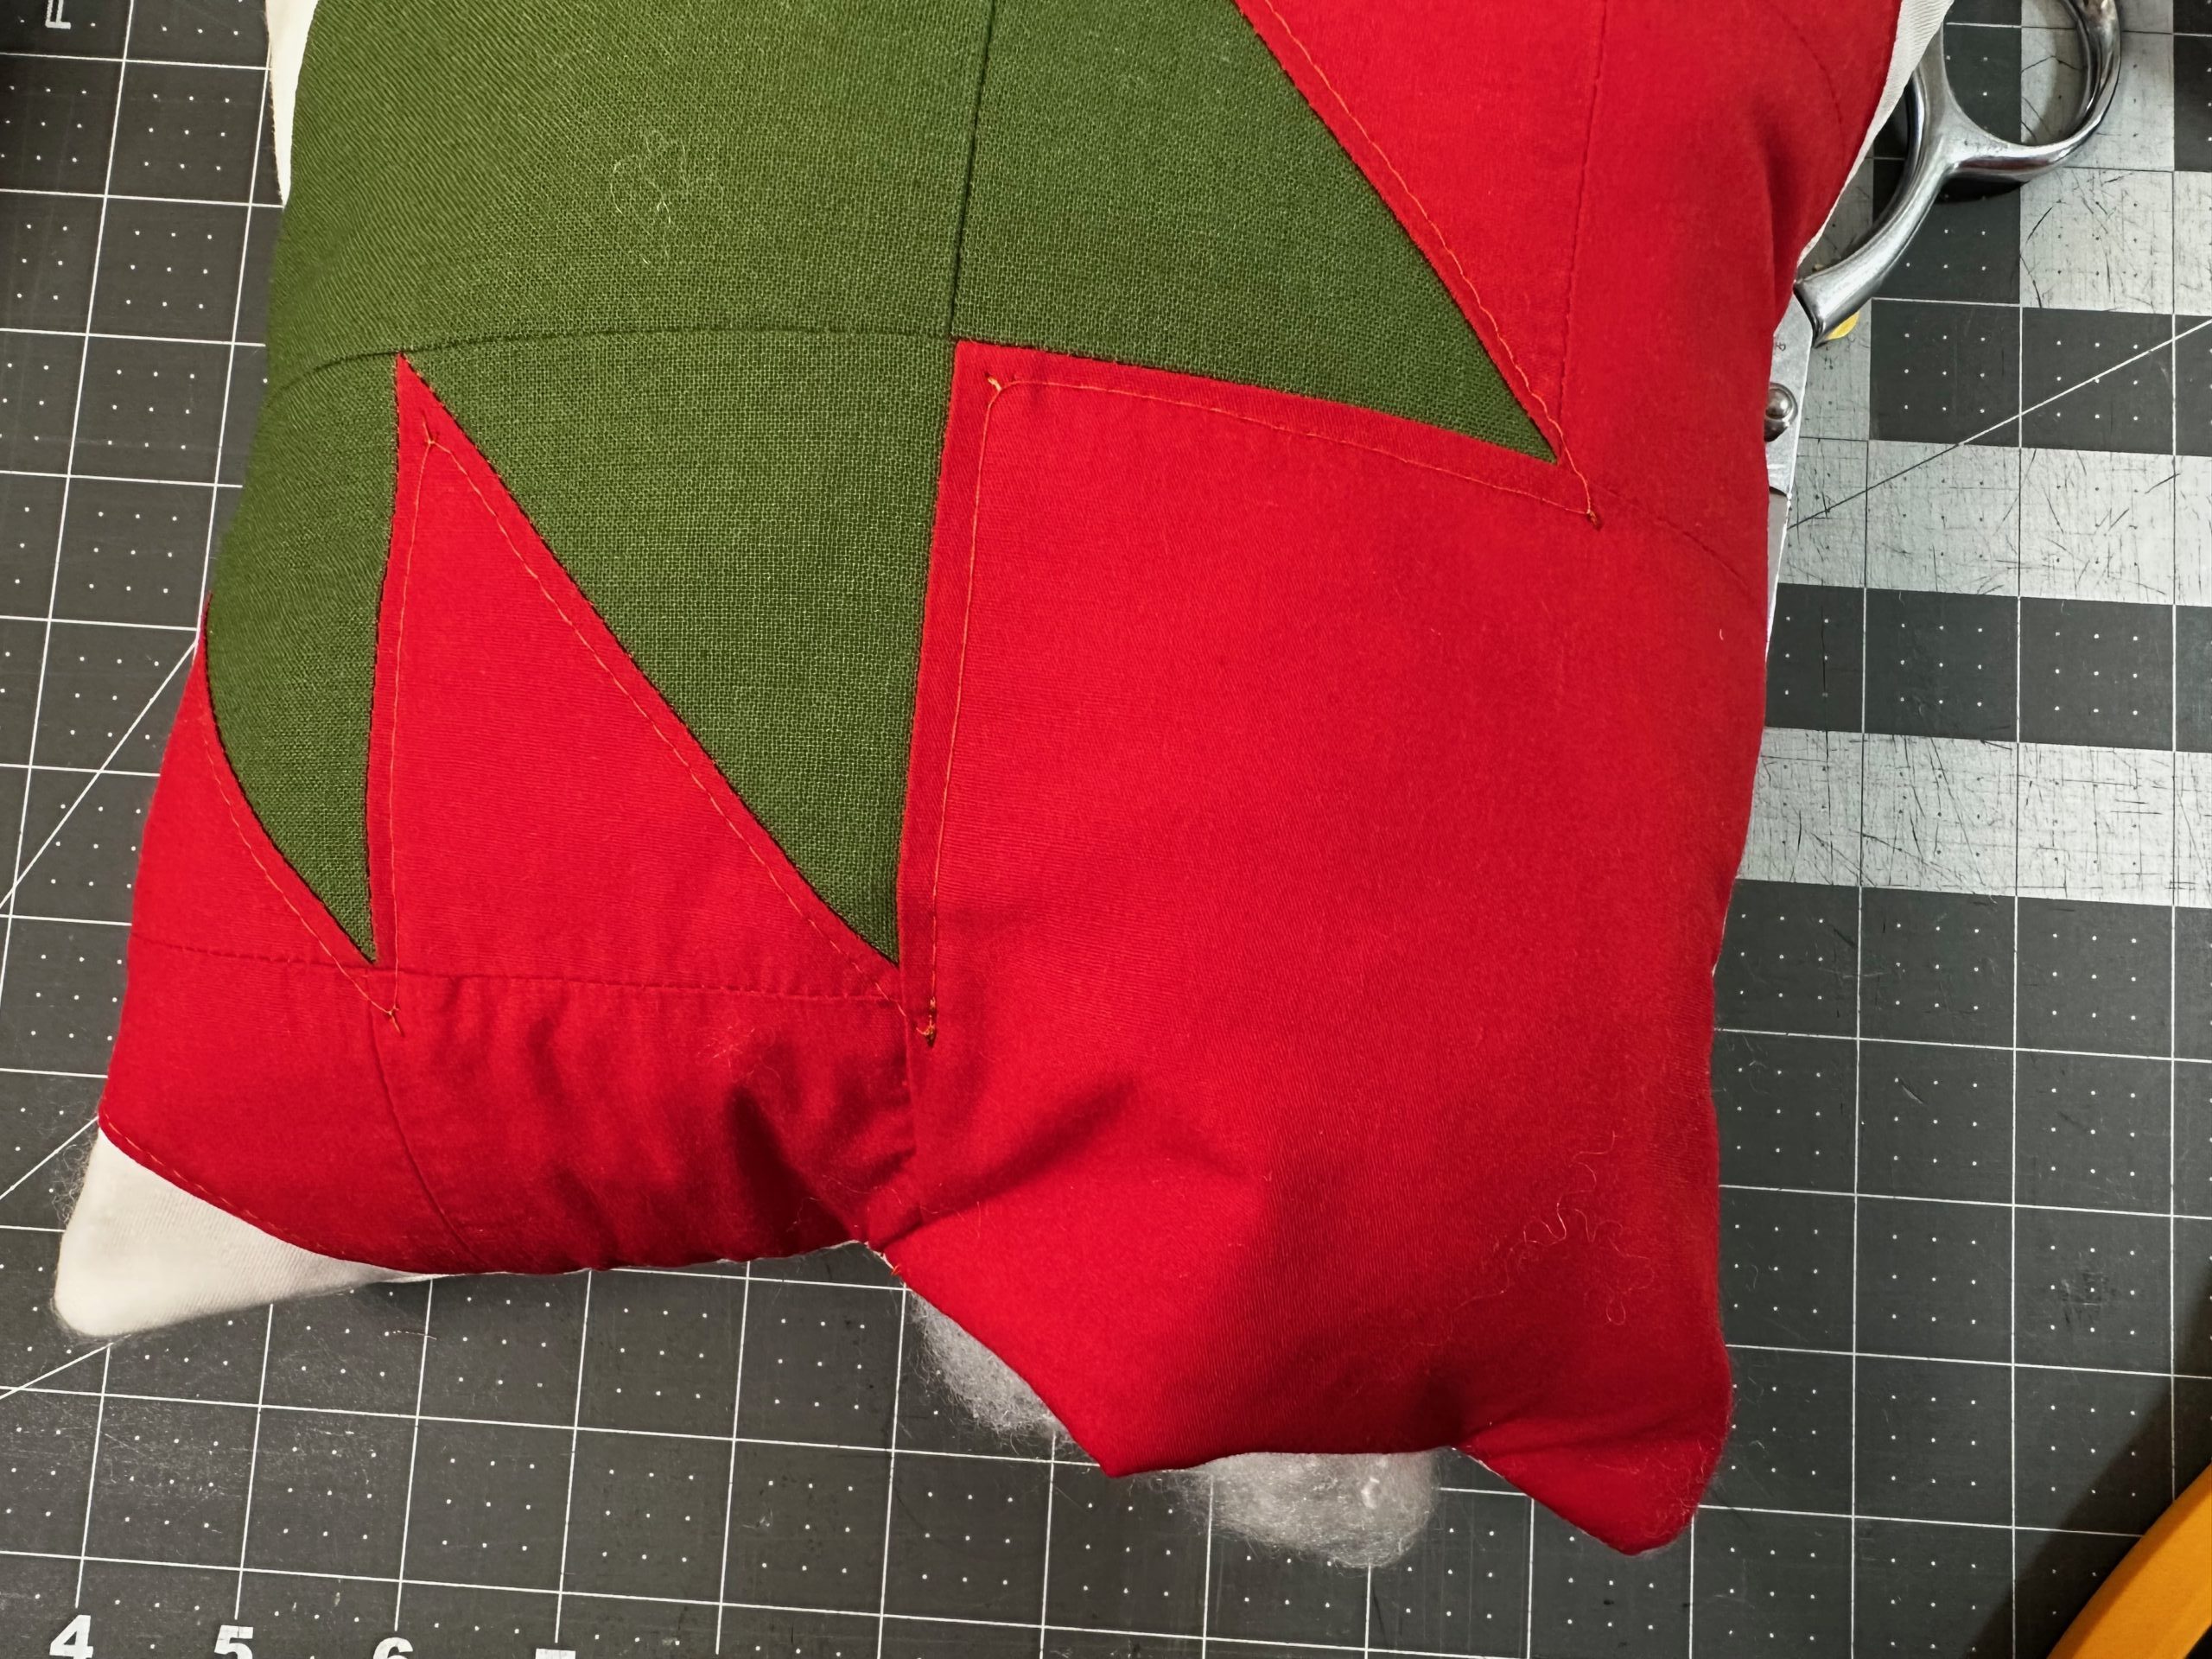
One of the most noticeable design changes happens in the upper-left quadrant. In the original pattern, this area is a solid green square. For the pillow version, swap that out for a half-square triangle (HST) made from green and white fabric. This small modification adds contrast, visual interest, and a slightly more modern look, all while still keeping the recognizable strawberry motif intact.
Assembling the Strawberry Block
Use a lightweight thread for the piecing (and quilting, if desired). This ensures there is no telltale thread “bump” along each seam. Sulky 50 wt. Cotton Thread is the best choice. Pair this thread with a size 70/10 or 75/11 Needle for best results.
Follow a similar construction method as the original tutorial. Create triangle-squares (HSTs), assemble units and join them into the full strawberry block. The original pattern walks through layering squares, stitching on either side of a diagonal line, and cutting apart to create precise triangle units.
Because the fabric pieces are larger for this pillow, you’ll find the process even more beginner-friendly. The added size makes trimming, aligning seams and pressing easier, which is especially helpful if you’re newer to quilting.
Lay out all units following the original strawberry design layout, with the following changes:
- Arrange the red and green HSTs to form the strawberry shape
- Place the *new* green/white HST in the upper-left quadrant
- Double-check orientation before sewing
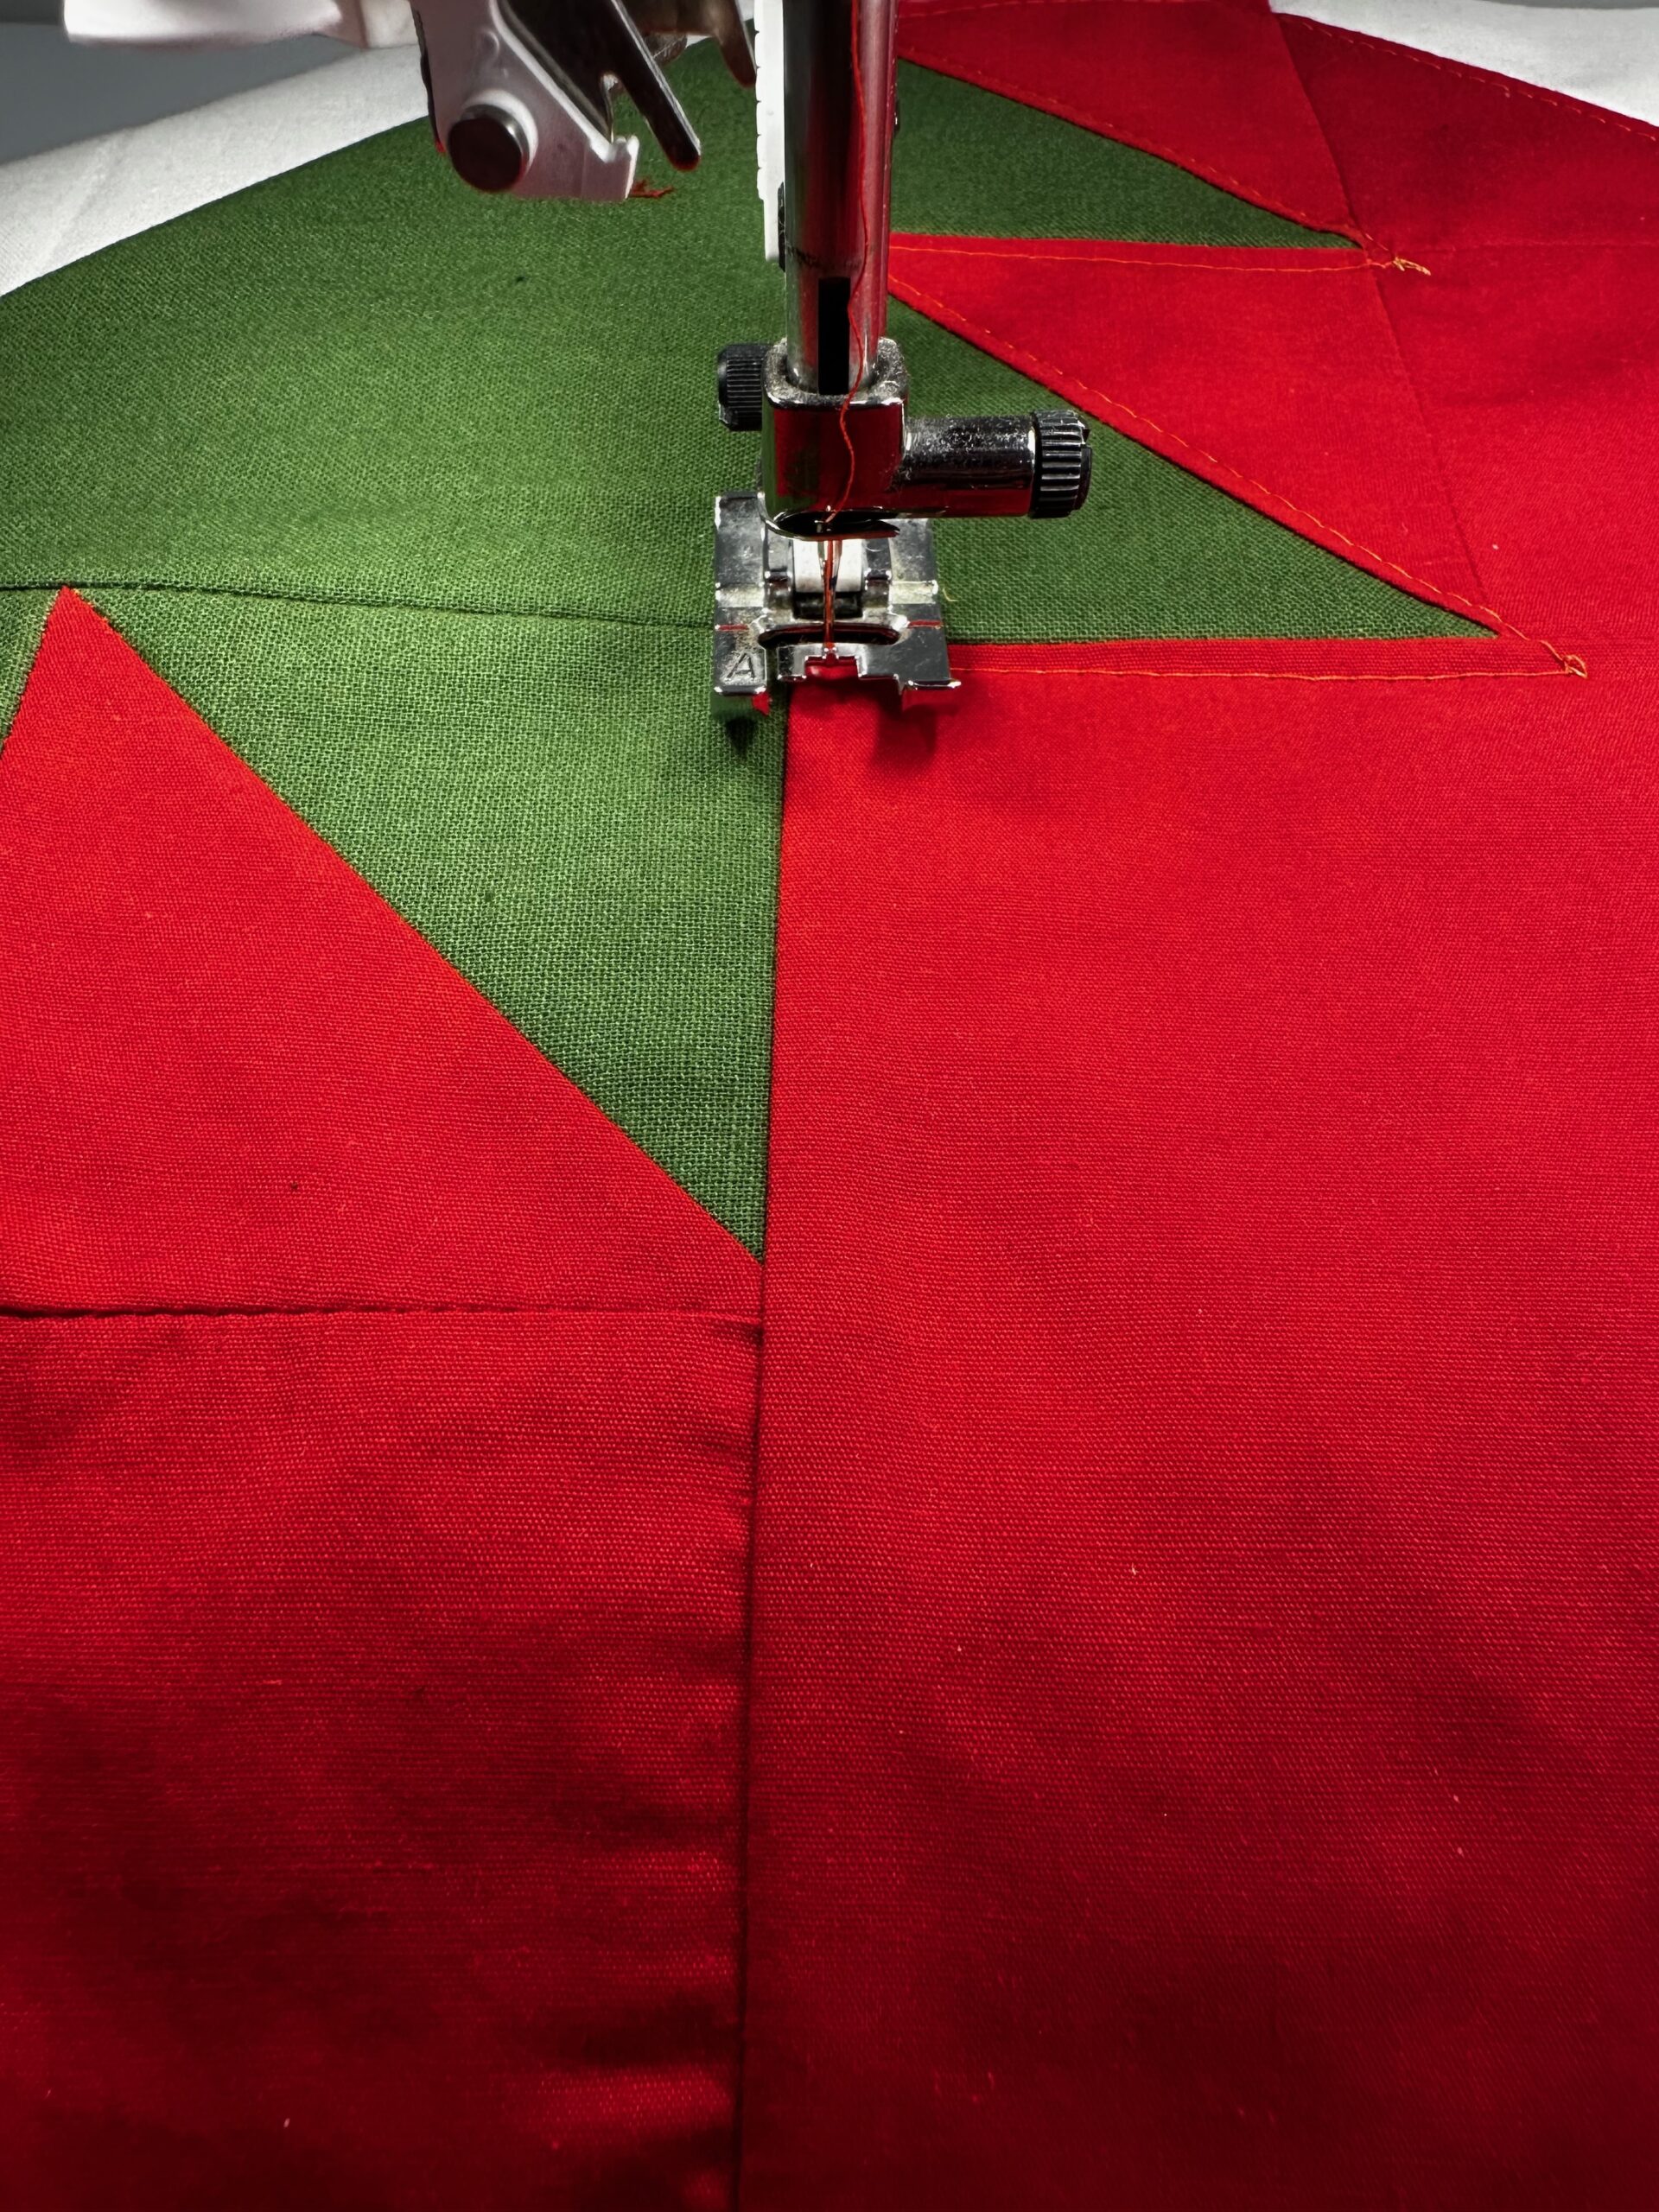
Sew the quadrants together in rows. Then, join the rows to complete the block.
Press the seams flat as you go, except when adding the larger solid/HST blocks. Press those seams toward the solid fabrics to reduce bulk.
TIP: If desired, add pom-pom fringe to all (or some) of the block edges.
Quilting the Pillow Front
Once the enlarged (and slightly modified) strawberry block is complete, create a quilt sandwich. Layer the block with batting and a backing fabric, using KK2000 Temporary Spray Adhesive to secure. Quilt as desired. Outline quilt the strawberry stem, add straight-line quilting or stitch-in-the-ditch to keep the focus on the bold geometric strawberry design.
This step replaces the insulated batting used in the original pot holder (which is meant for heat resistance) with standard quilt batting, since this project is decorative rather than functional for the kitchen.
When quilting is complete, trim the quilted piece so all edges are even.
Pillow Construction
Instead of adding borders, loops or binding for the pot holder, finish the Strawberry Porch Pillow as follows:
- Cut a backing fabric square the same size as the quilted front.
- Place the front and back right sides together.
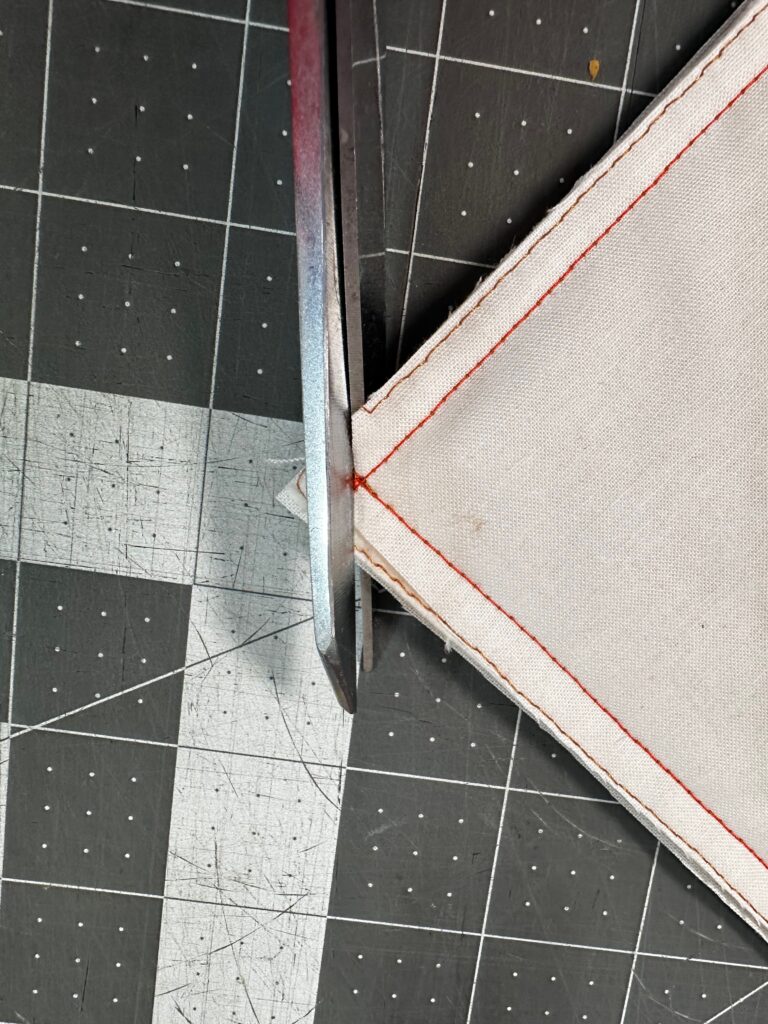
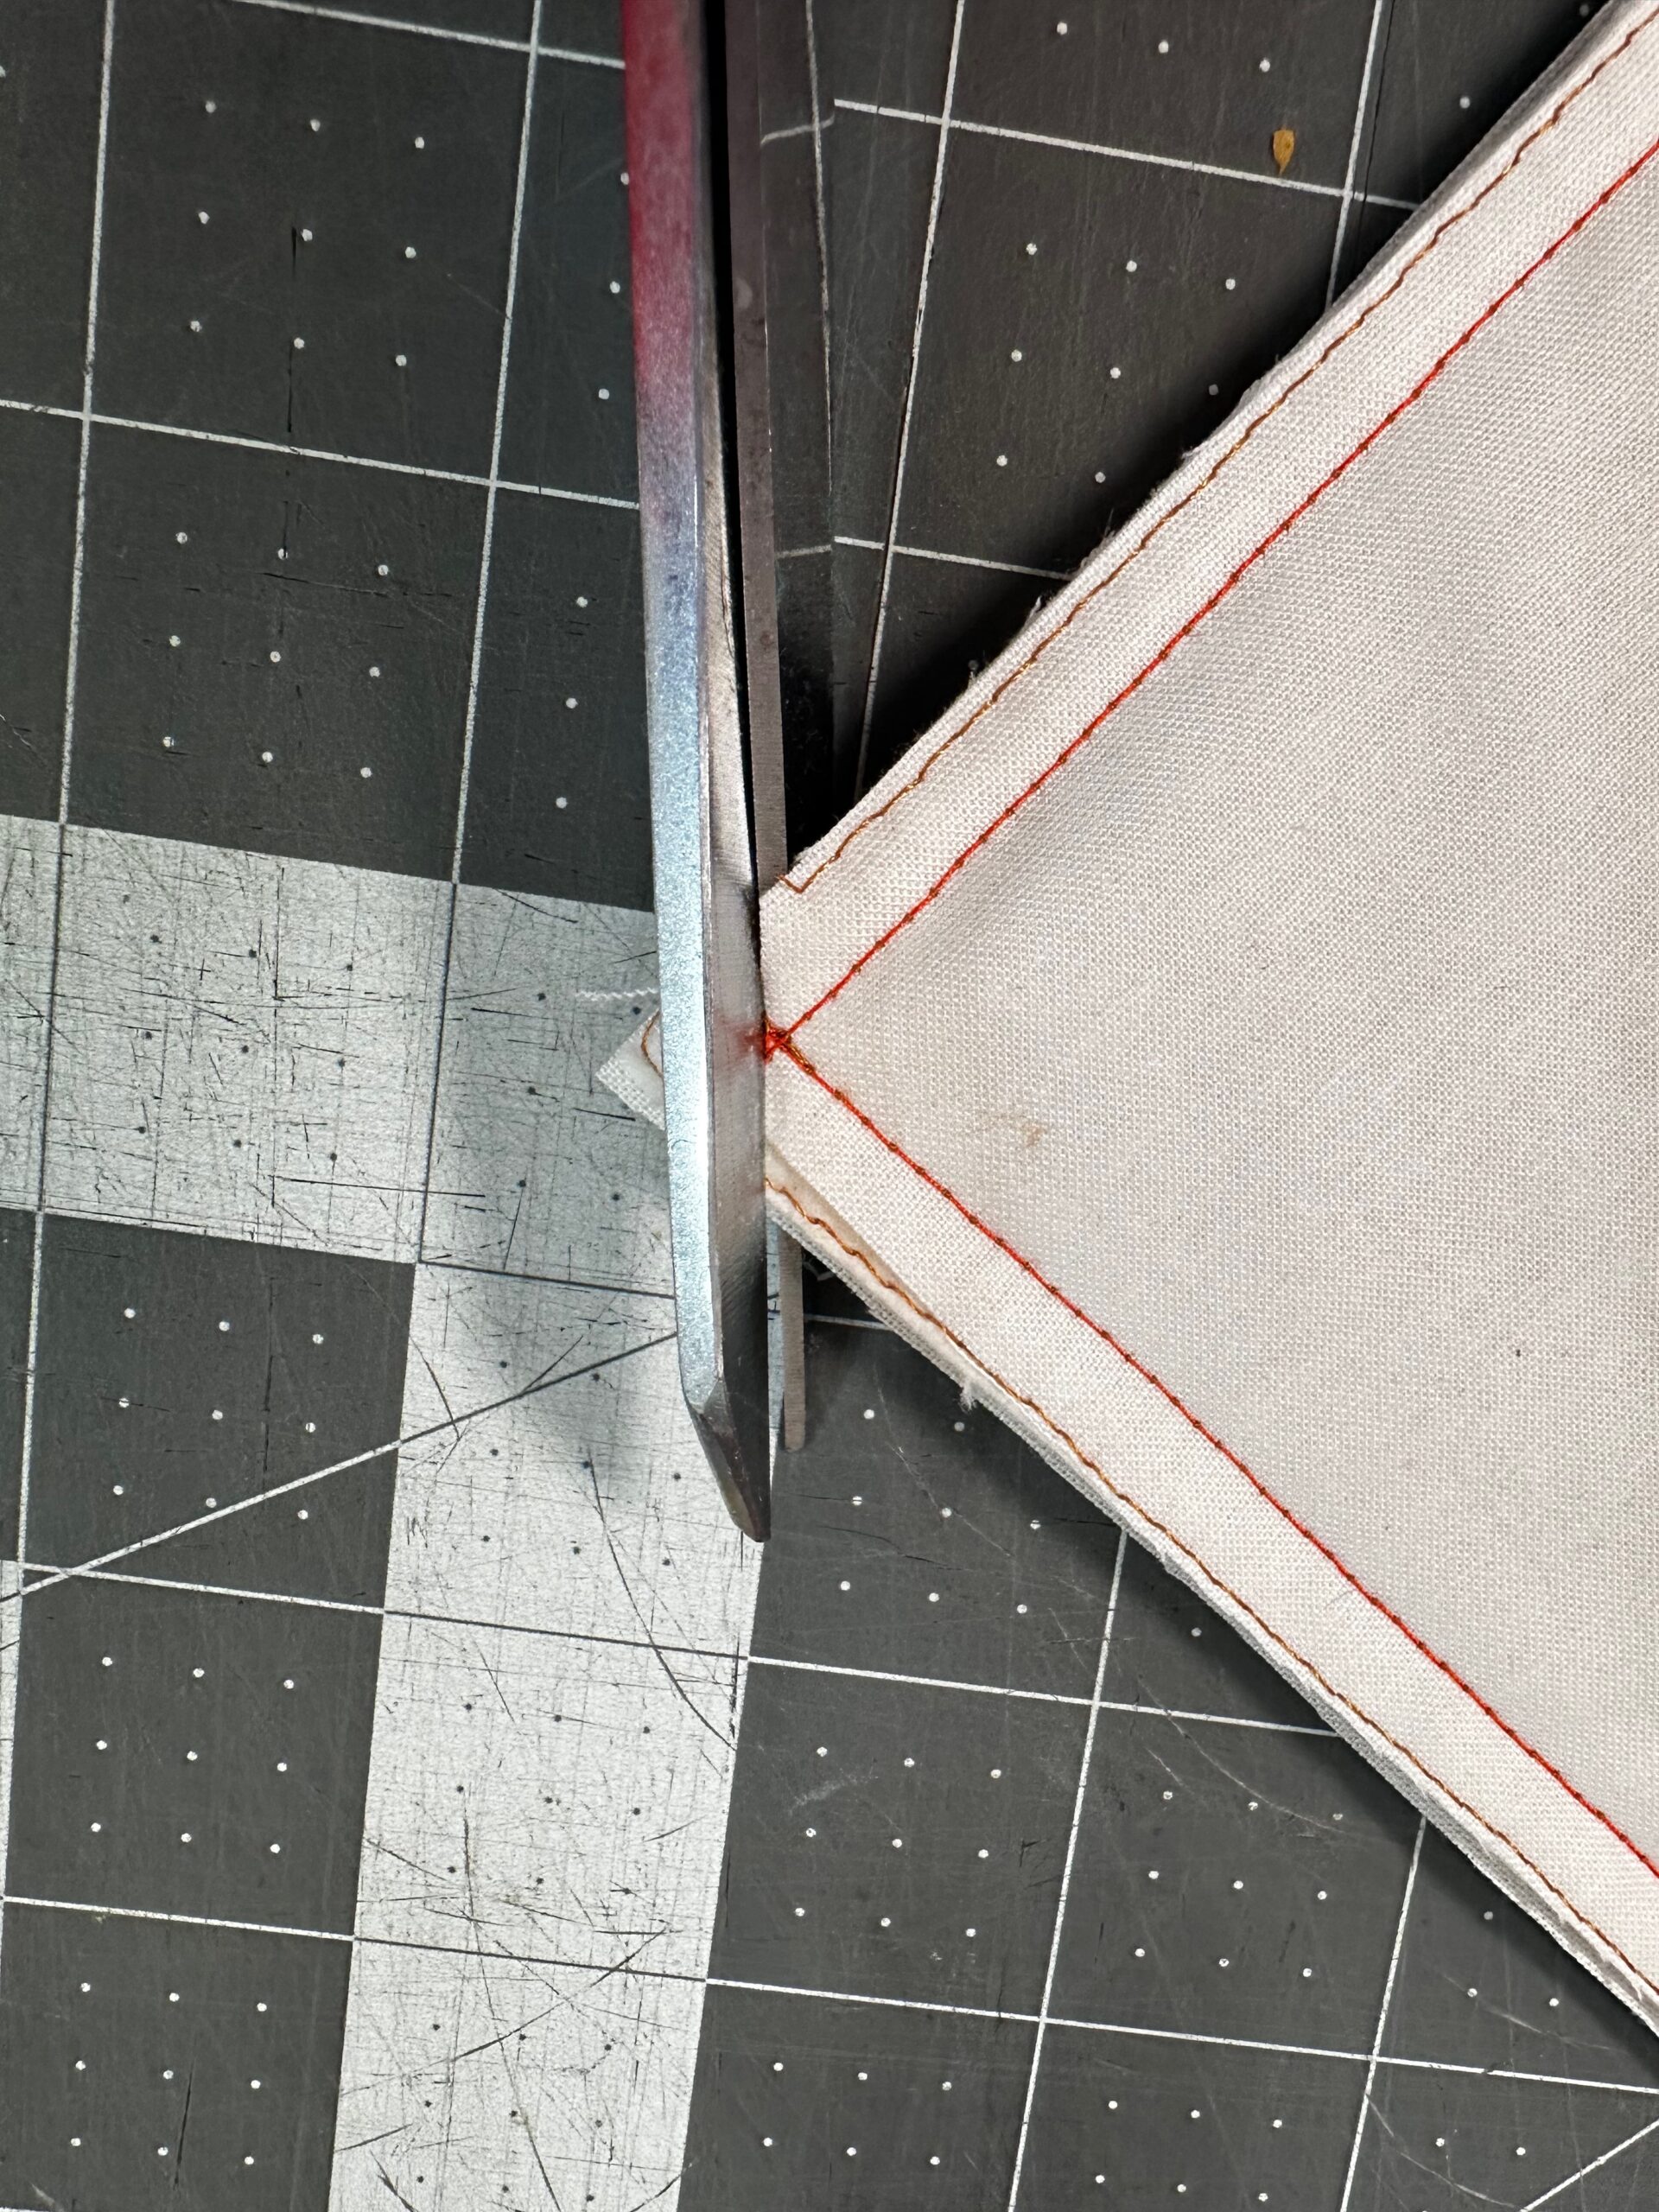
- Stitch the perimeter using a 1/4″ seam allowance, leaving an opening for turning along one edge.
- Clip up to each corner.
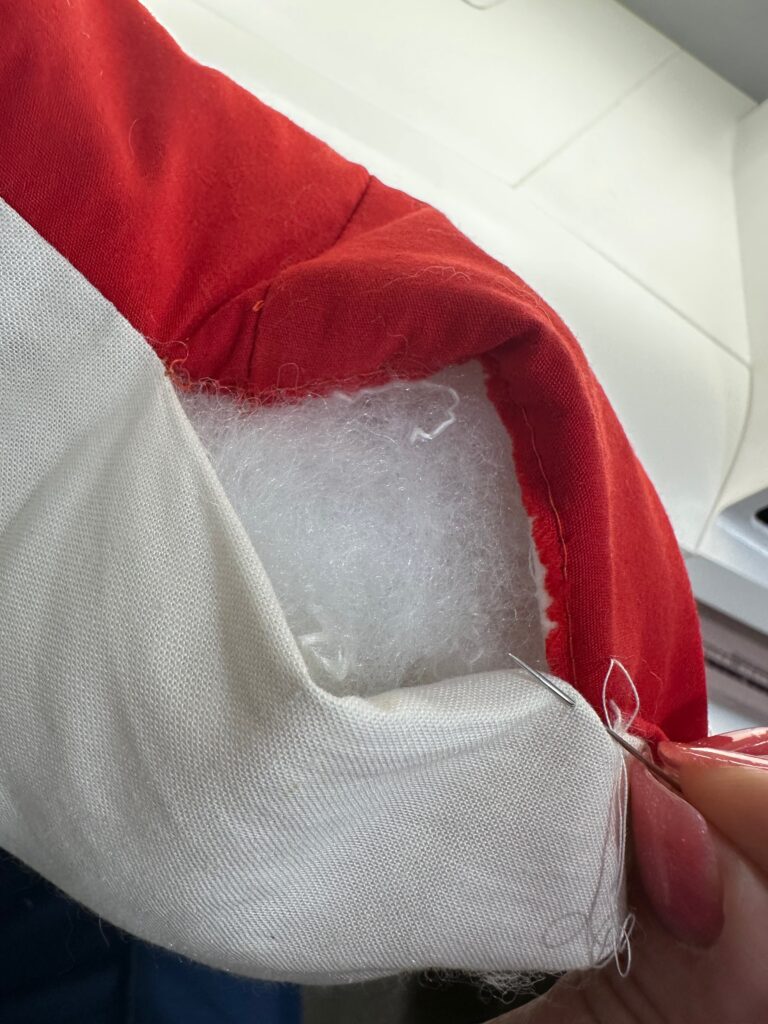
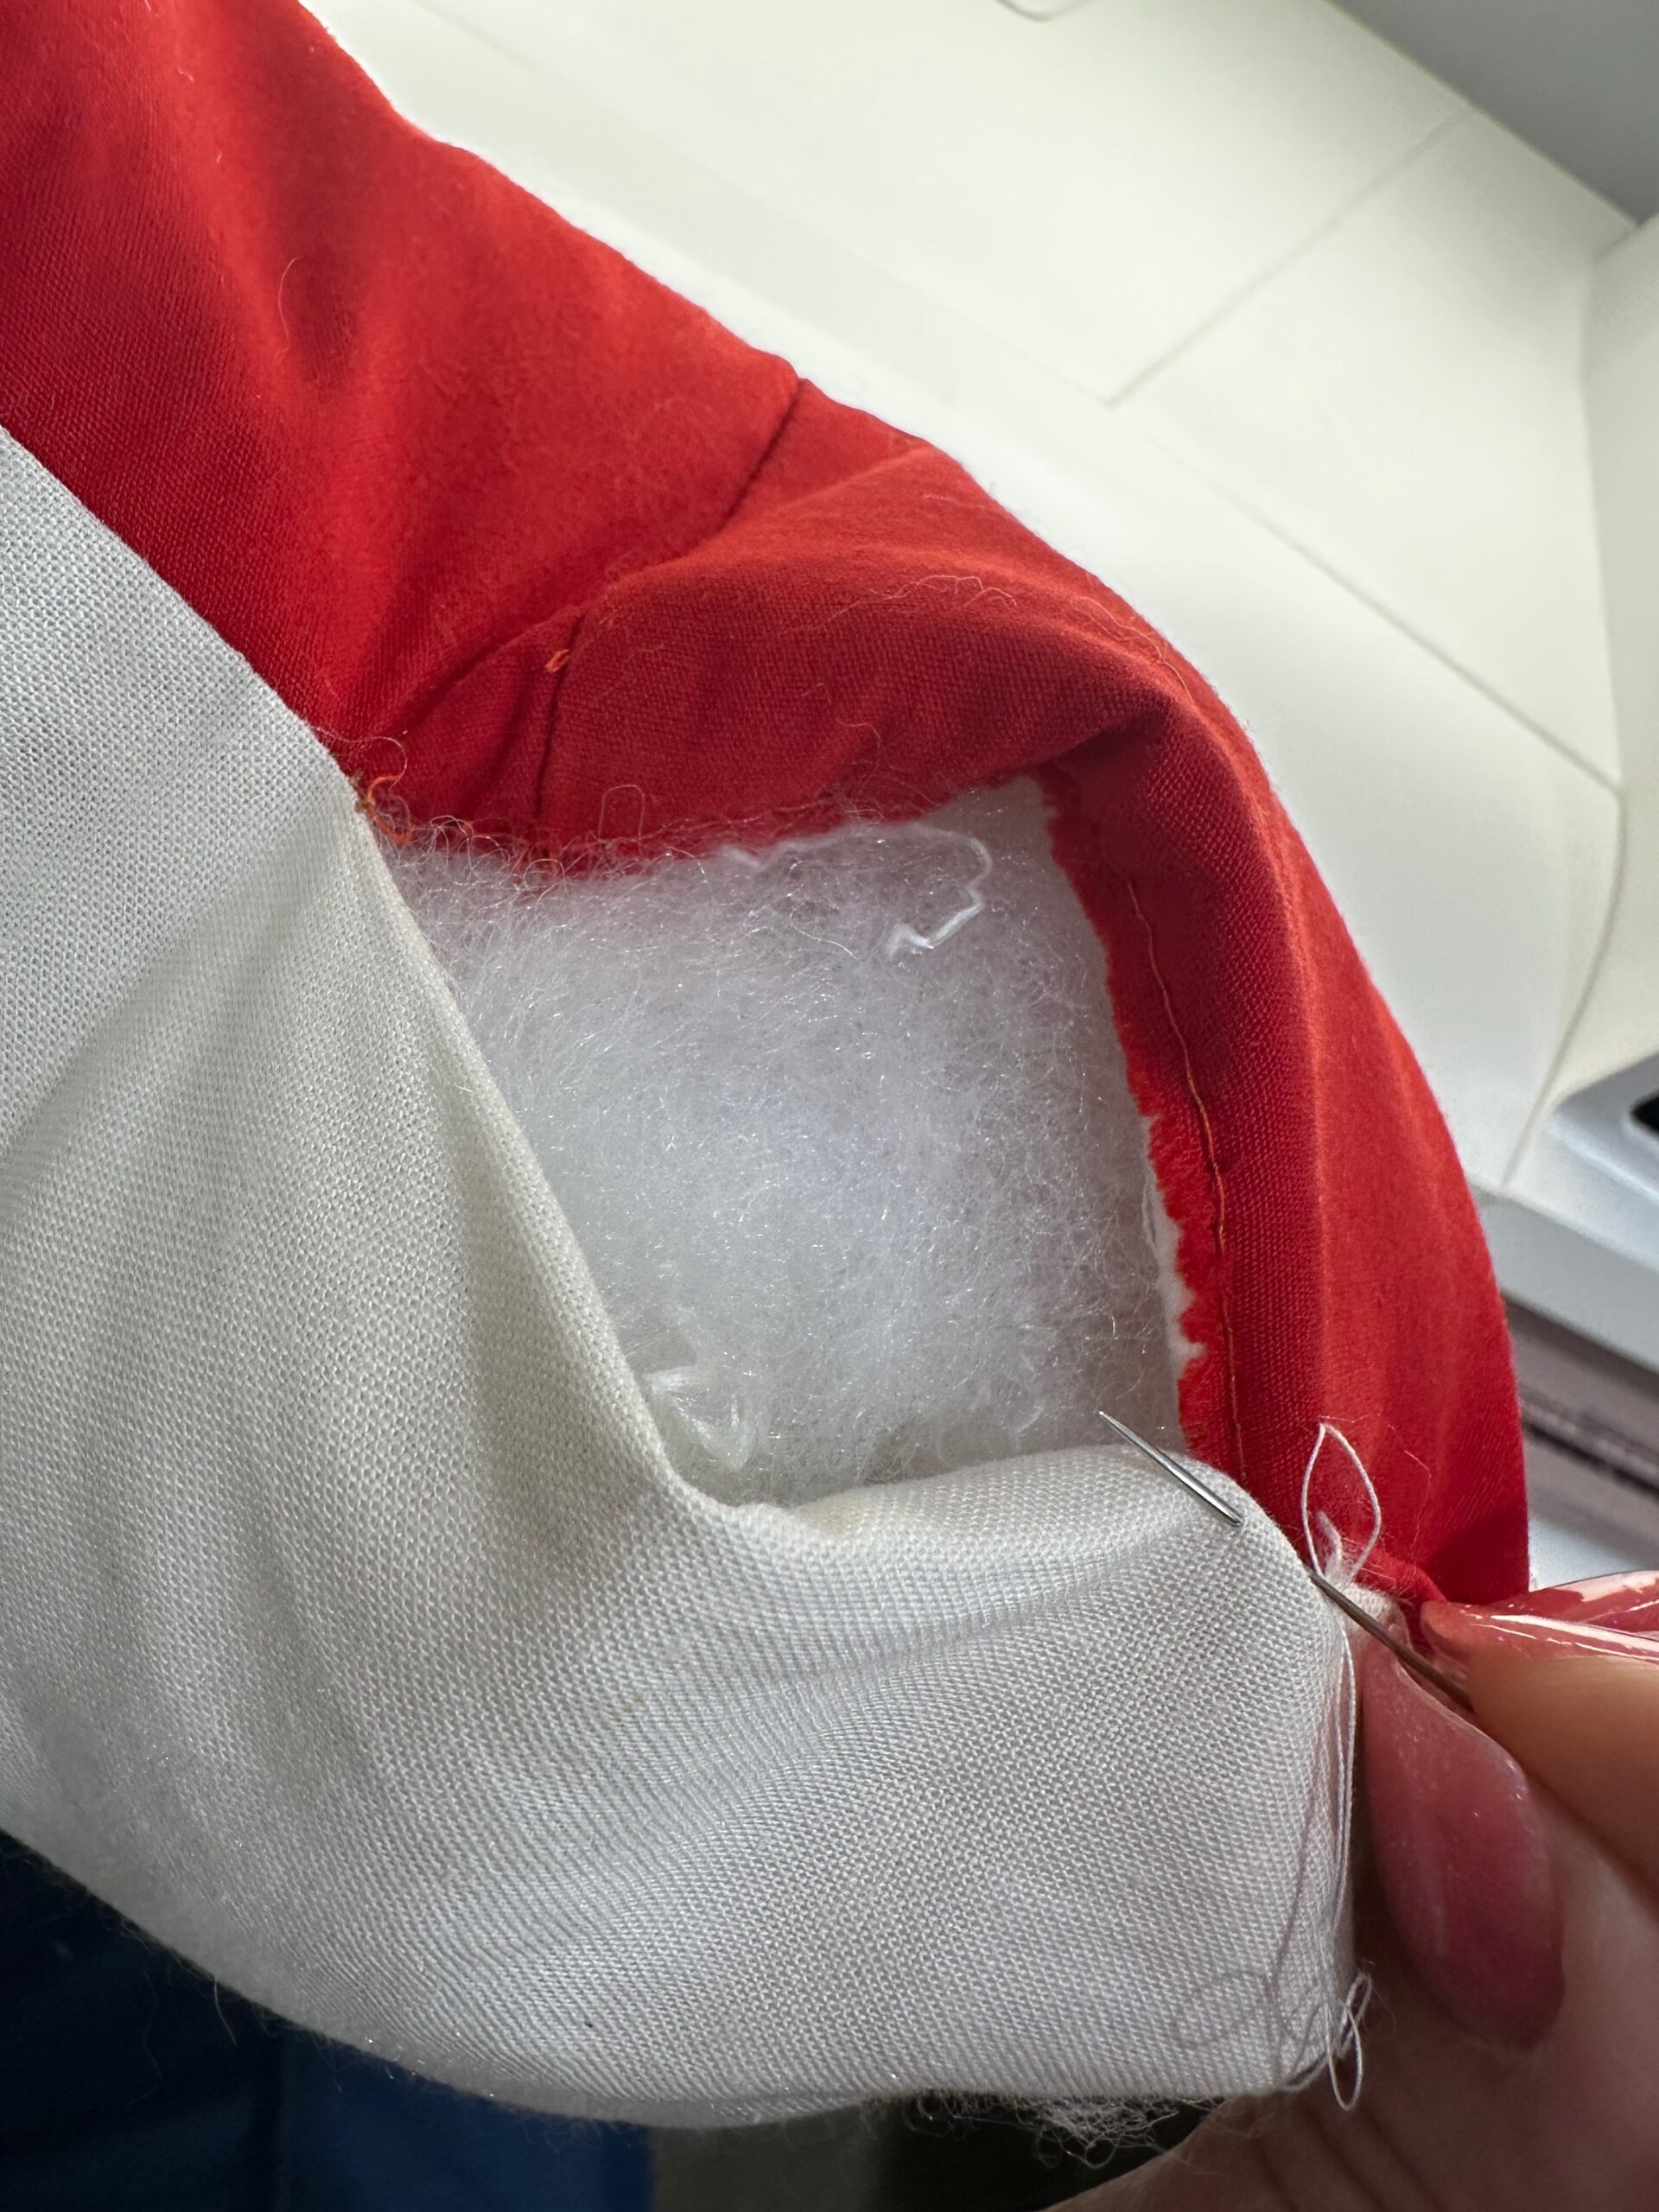
- Turn the pillow right side out, and gently push out the corners.
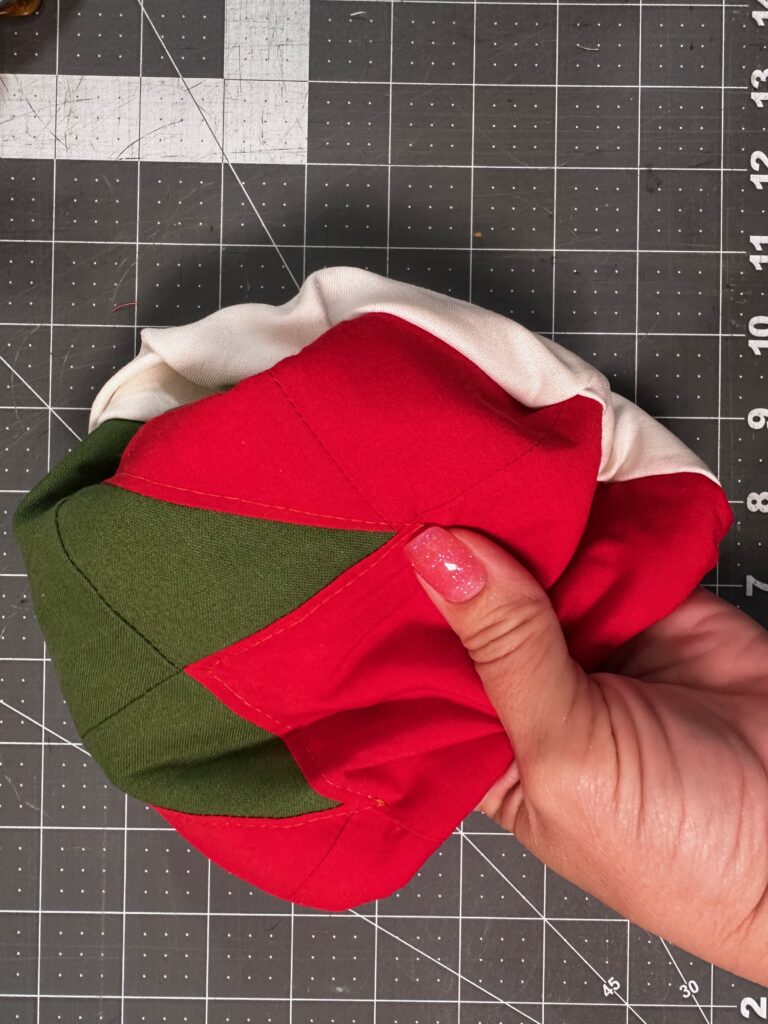
- Fill with stuffing to the desired firmness.
- Hand stitch the opening closed.

A Fresh Take
The original strawberry block is playful and compact, but when scaled up and slightly modified, it becomes a bold, summery accent piece. Some other ideas? Create several strawberry blocks and piece them together for a fun table topper. Add borders to the larger block along each side edge to create placemats. Fold the block raw edges toward the wrong side and topstitch the block to the back of a jacket or tote bag like this one.
Try playing with different color palettes, scale the block even larger (or smaller), or swap in other fruit-inspired variations for a fresh twist. Whether you keep it classic or make it completely your own, this project is a fun way to explore creativity and bring a little sweetness into your space.