Hand Embroidered Neckline
for sweatshirts, sweaters & t-shirts
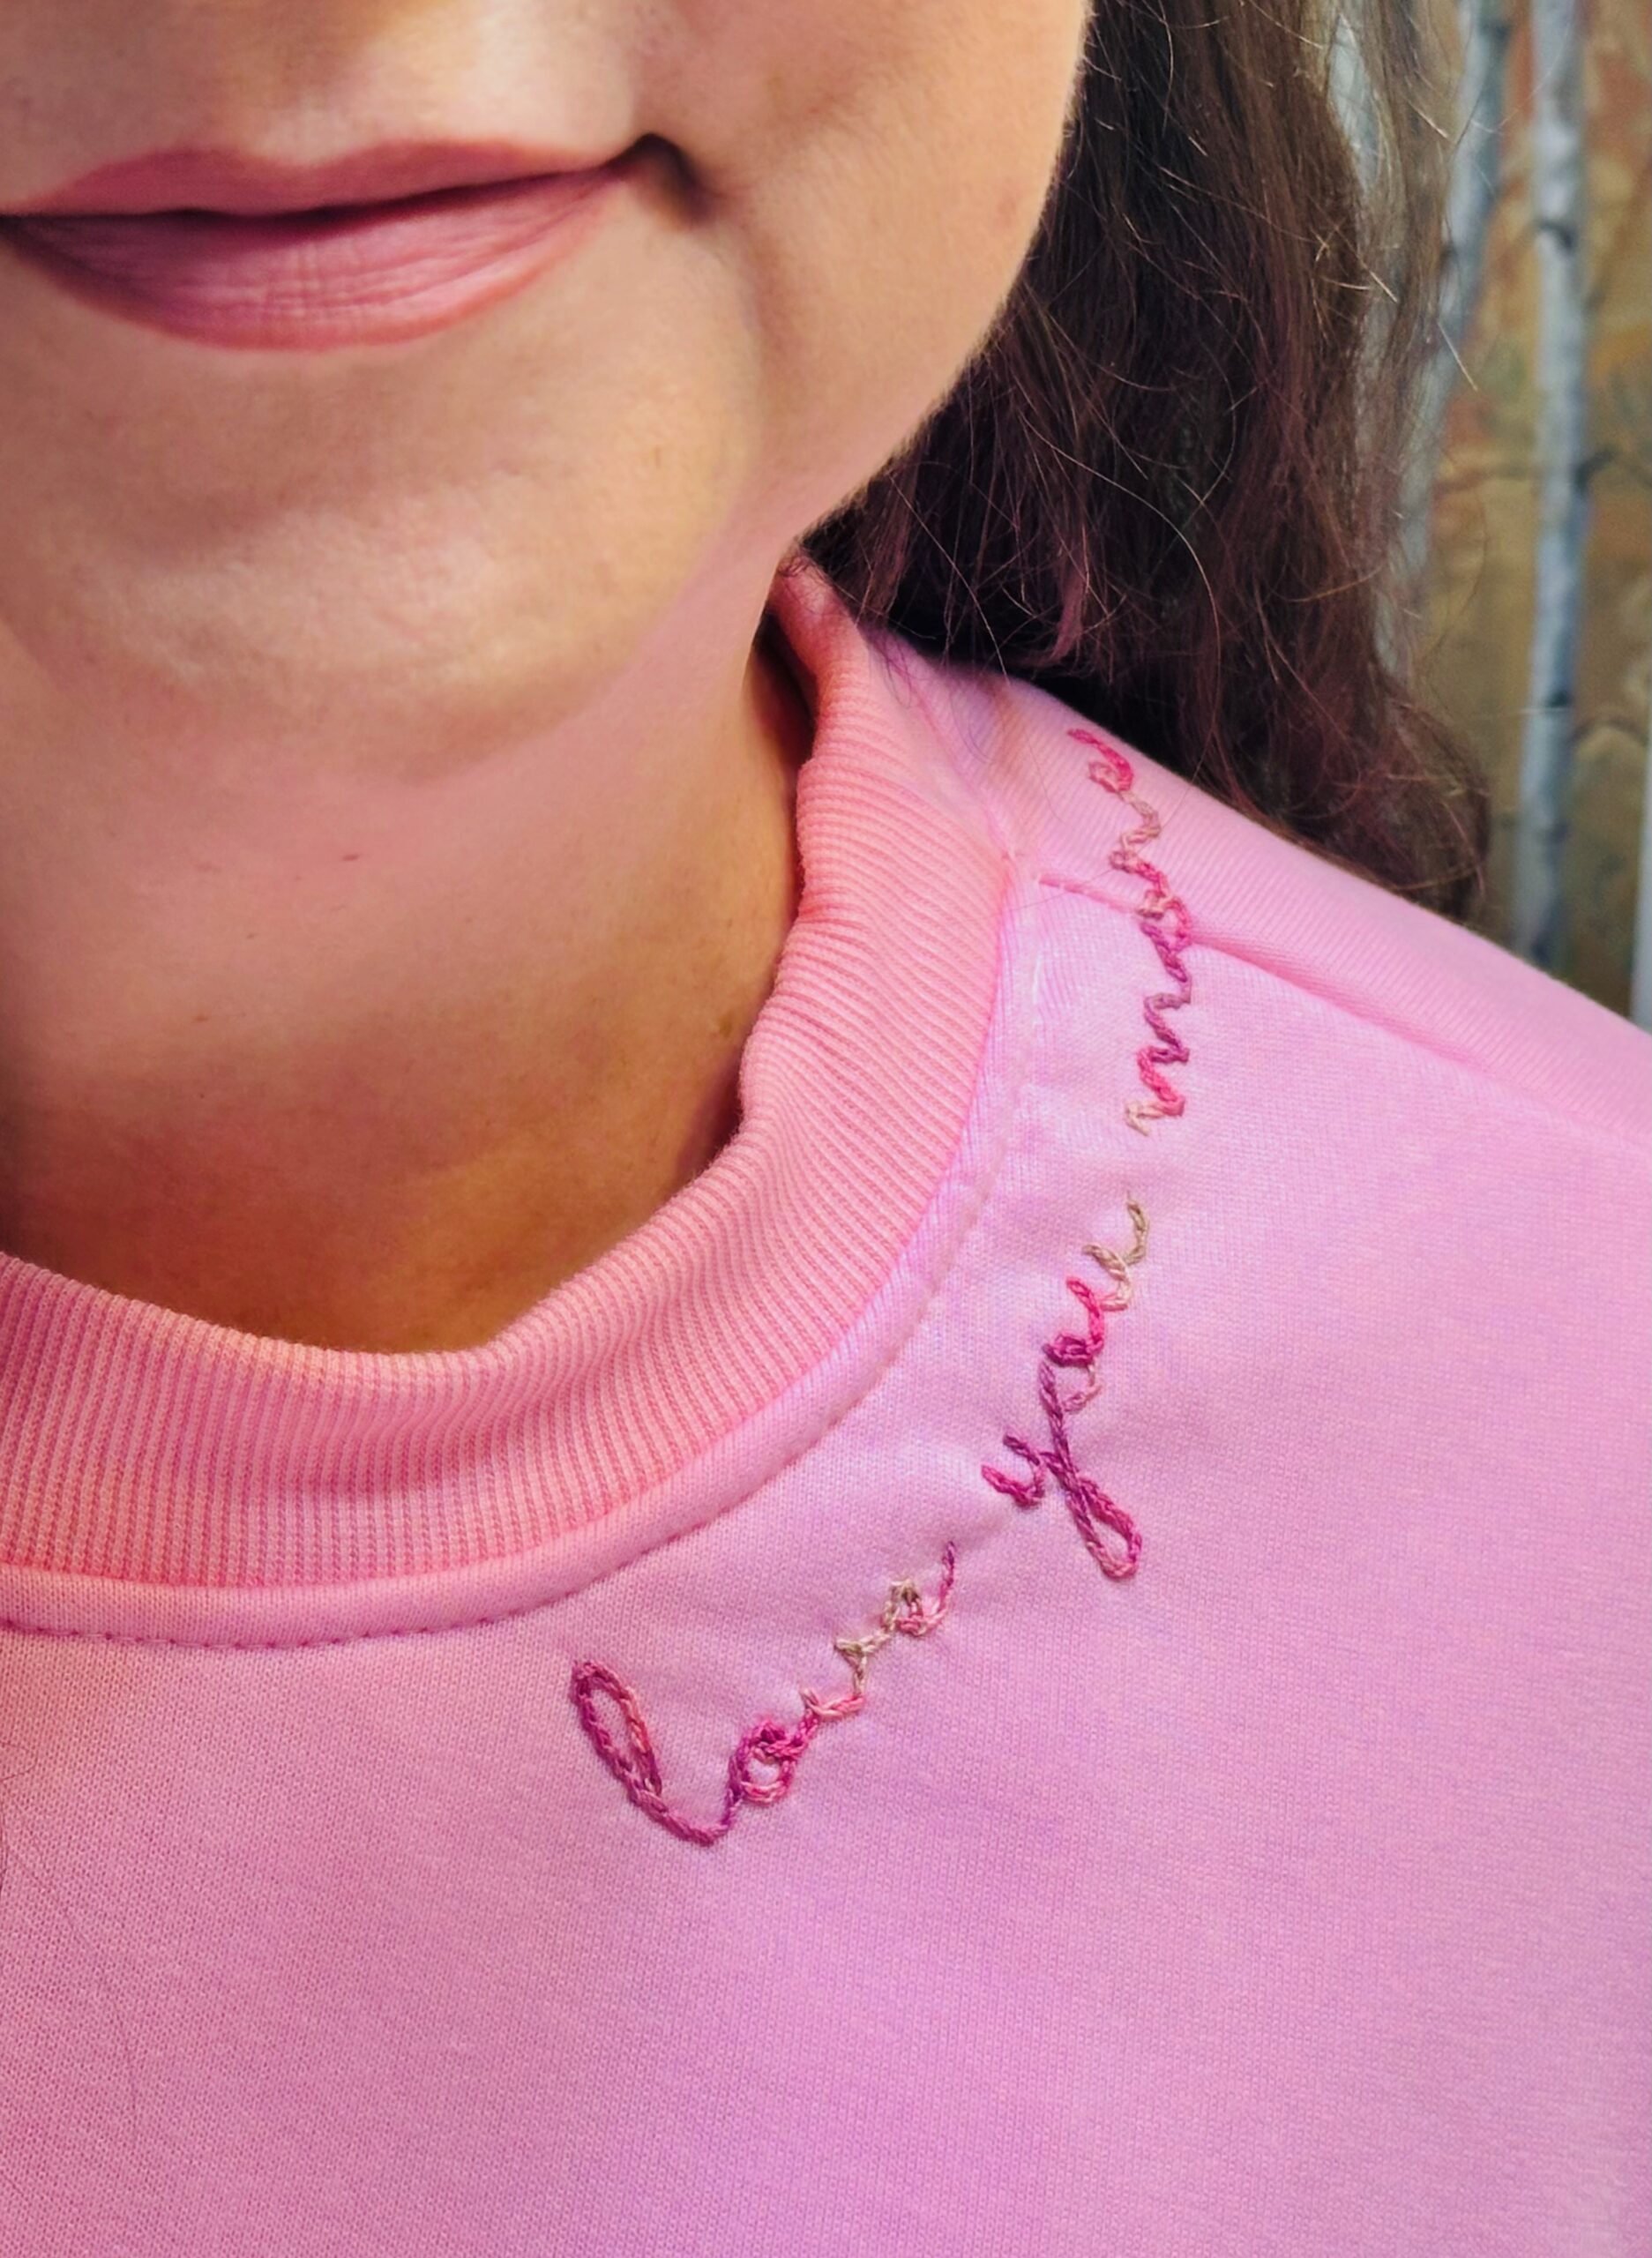
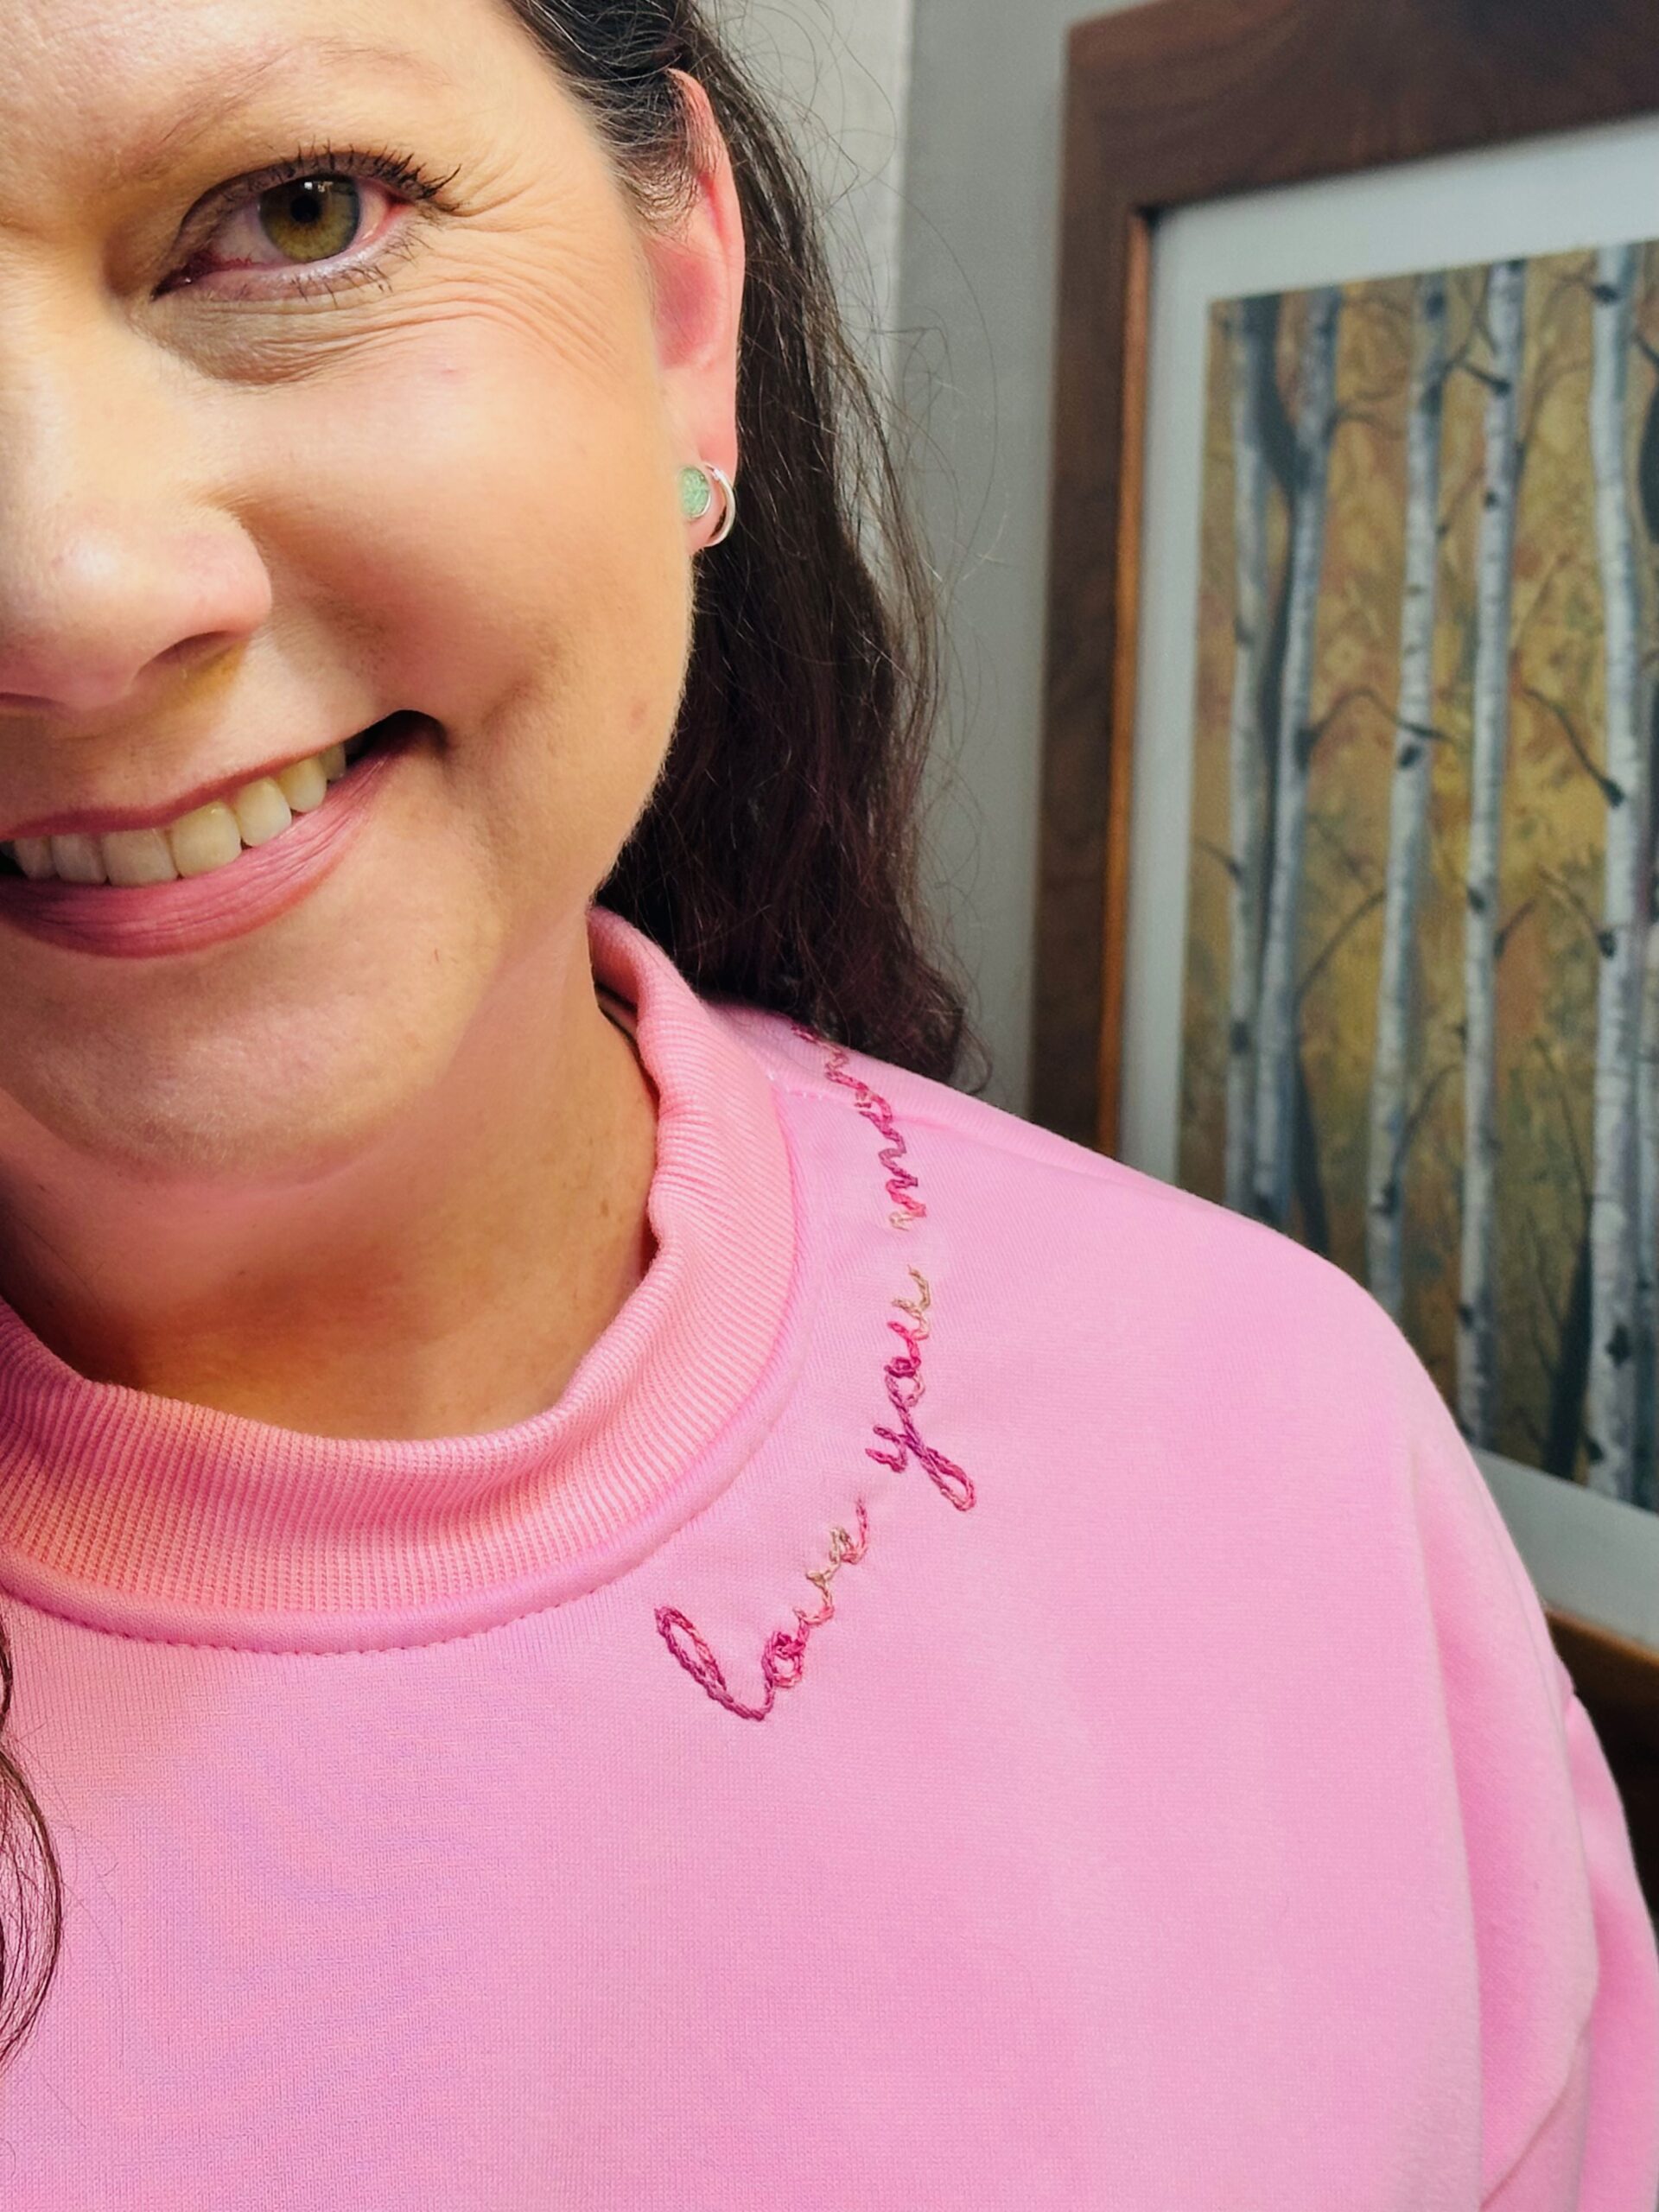
A hand embroidered neckline is a sweet sentiment for a store-bought sweatshirt, sweater or basic t-shirt. Create the saying of your choice in a word processing program, print it onto Sulky Stick ‘n Stitch Stabilizer, place it onto the garment and stitch through all layers. This project makes a great gift to support someone going through a cancer diagnosis, so we’ve used our Sulky Pink Ribbon Thread Sampler and the phrase “love you more” for the featured sample.
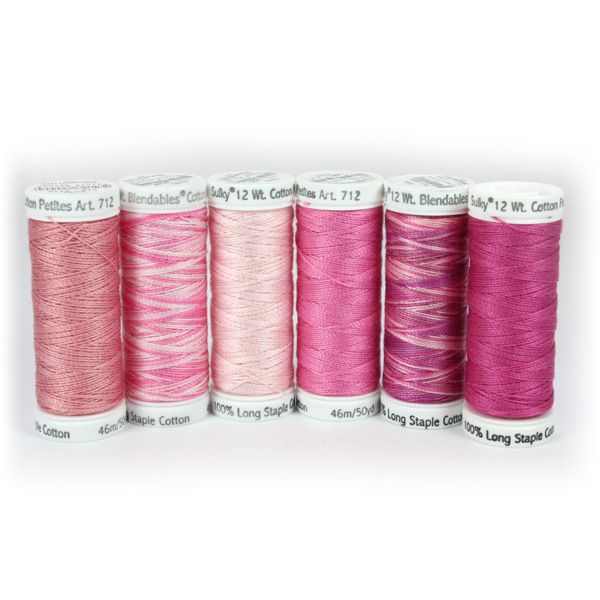
October is Breast Cancer Awareness Month, and during this month, 10% of proceeds from our Pink Thread Collections goes to the National Breast Cancer Foundation. Choose from 12 wt. Cotton Petites™ Thread (shown here), or a variety of other collections in various shades of PINK.
HAND EMBROIDERED NECKLINE SUPPLIES
- Garment of your choice (sweatshirt, sweater, t-shirt)
- Sulky Stick ‘n Stitch Stabilizer
- Sulky Pink Ribbon Thread Sampler
- Hand Embroidery Needle
- Embroidery Hoop (optional)
PRINT EMBROIDERY DESIGN
Decide on the embroidery you want to feature on the neckline. Open a word processing program and type the phrase. Experiment with different fonts (shown is Sacramento). Size the design appropriately for the shirt size.
Once satisfied with the design, print it onto a sheet of Sulky Stick ‘n Stitch Stabilizer. Be sure to print on the fabric-like side and set the ink setting for “draft,” if possible, to avoid over-saturating the product with ink.
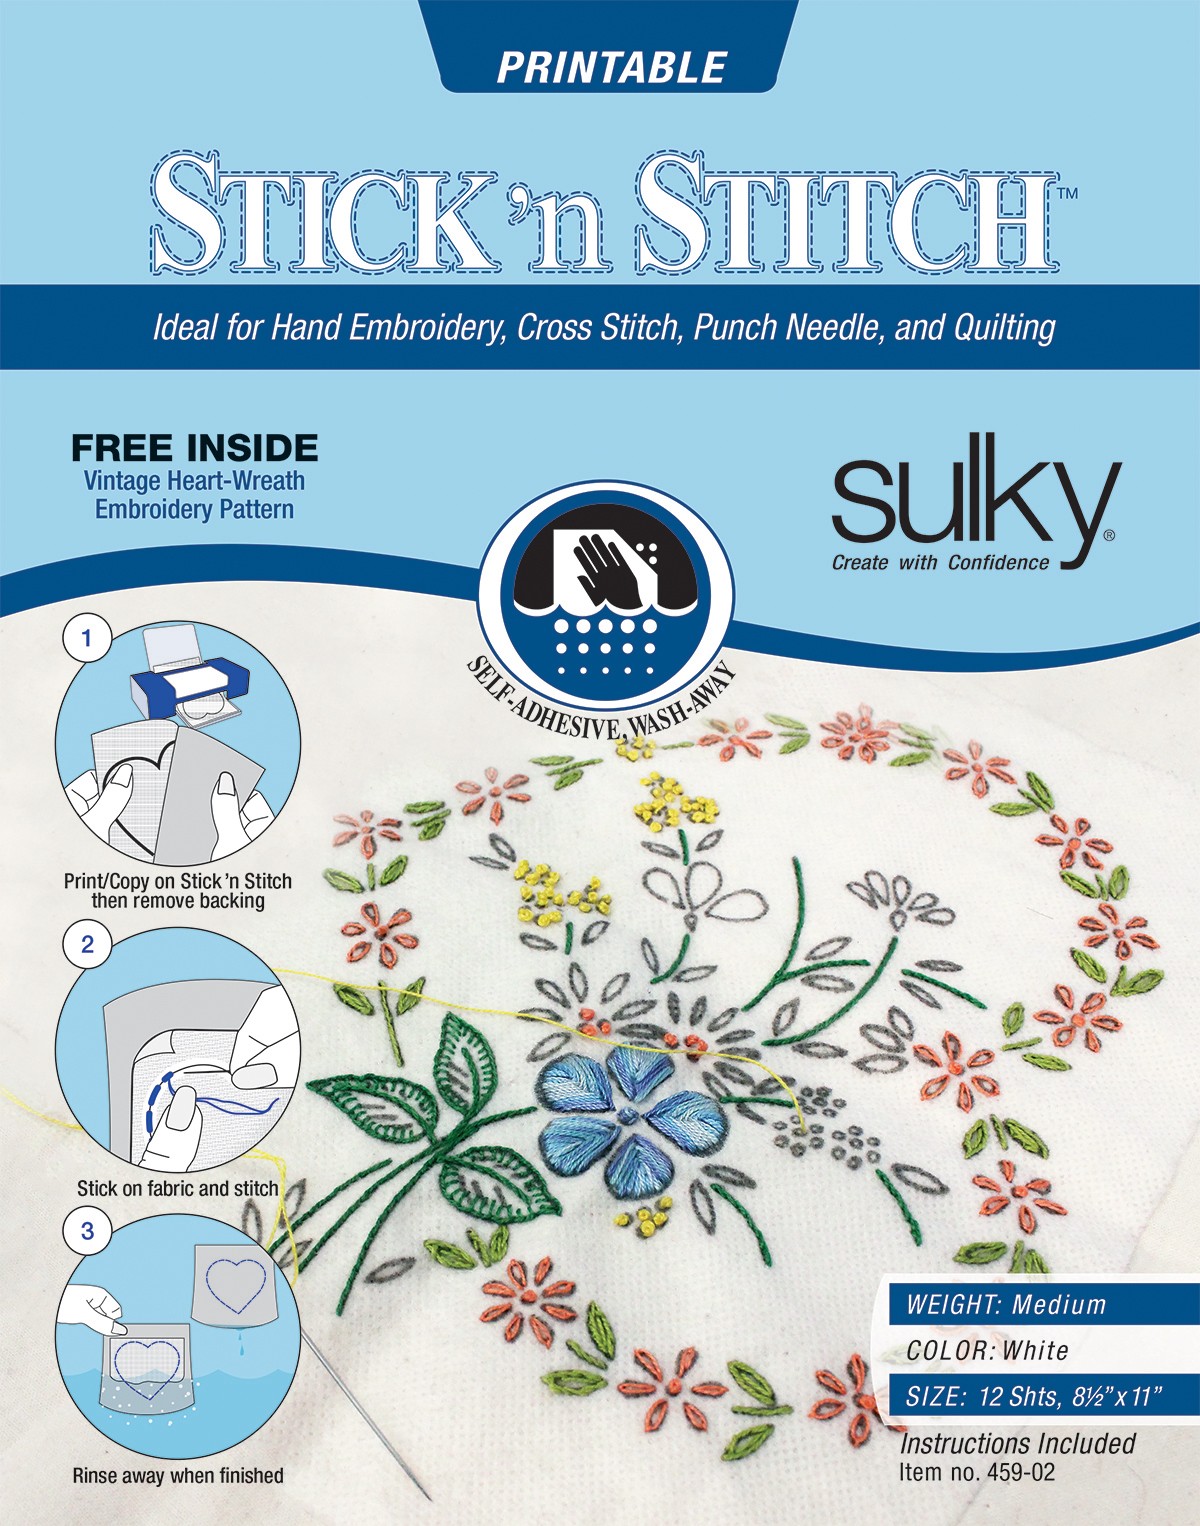
Cut out the design, leaving ample border around the letters/motif.
TIP: If you want to stitch a motif rather than a saying, look to our Hand Embroidery Transfers that are already printed with cute designs!
EMBROIDERED NECKLINE PLACEMENT
Determine the desired placement for the neckline embroidery. Audition the sticker where desired until the desired placement is achieved. It may be helpful to try on the garment while auditioning the design placement.
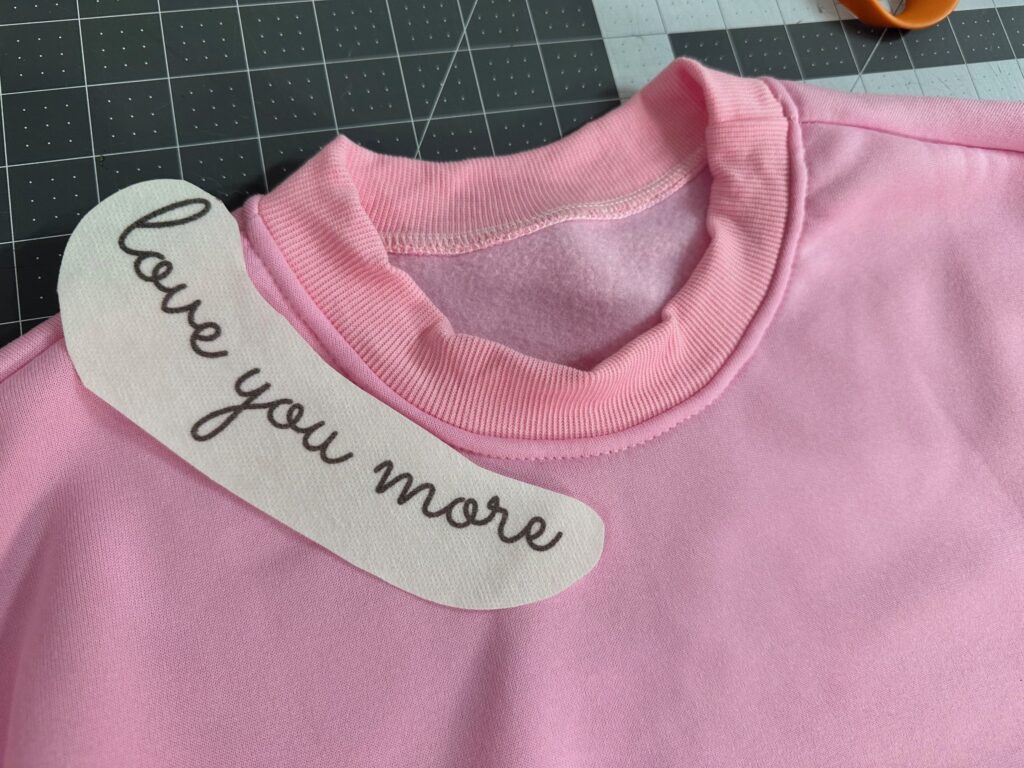
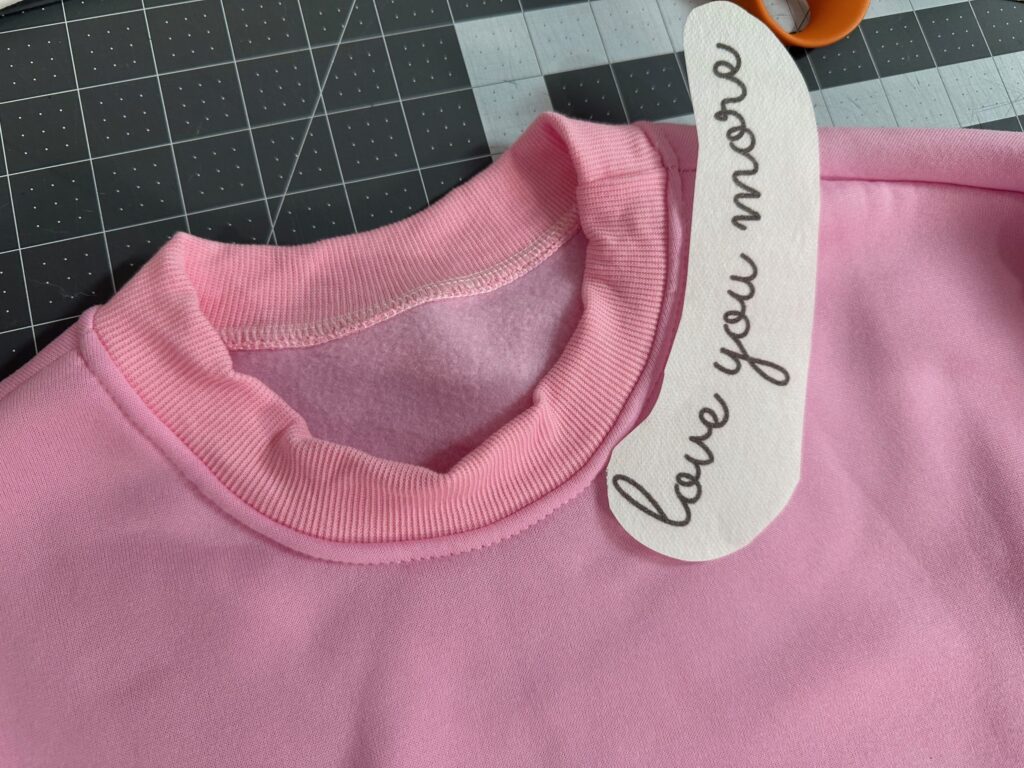
After determining the placement, stick the transfer to the garment with both right sides facing up.
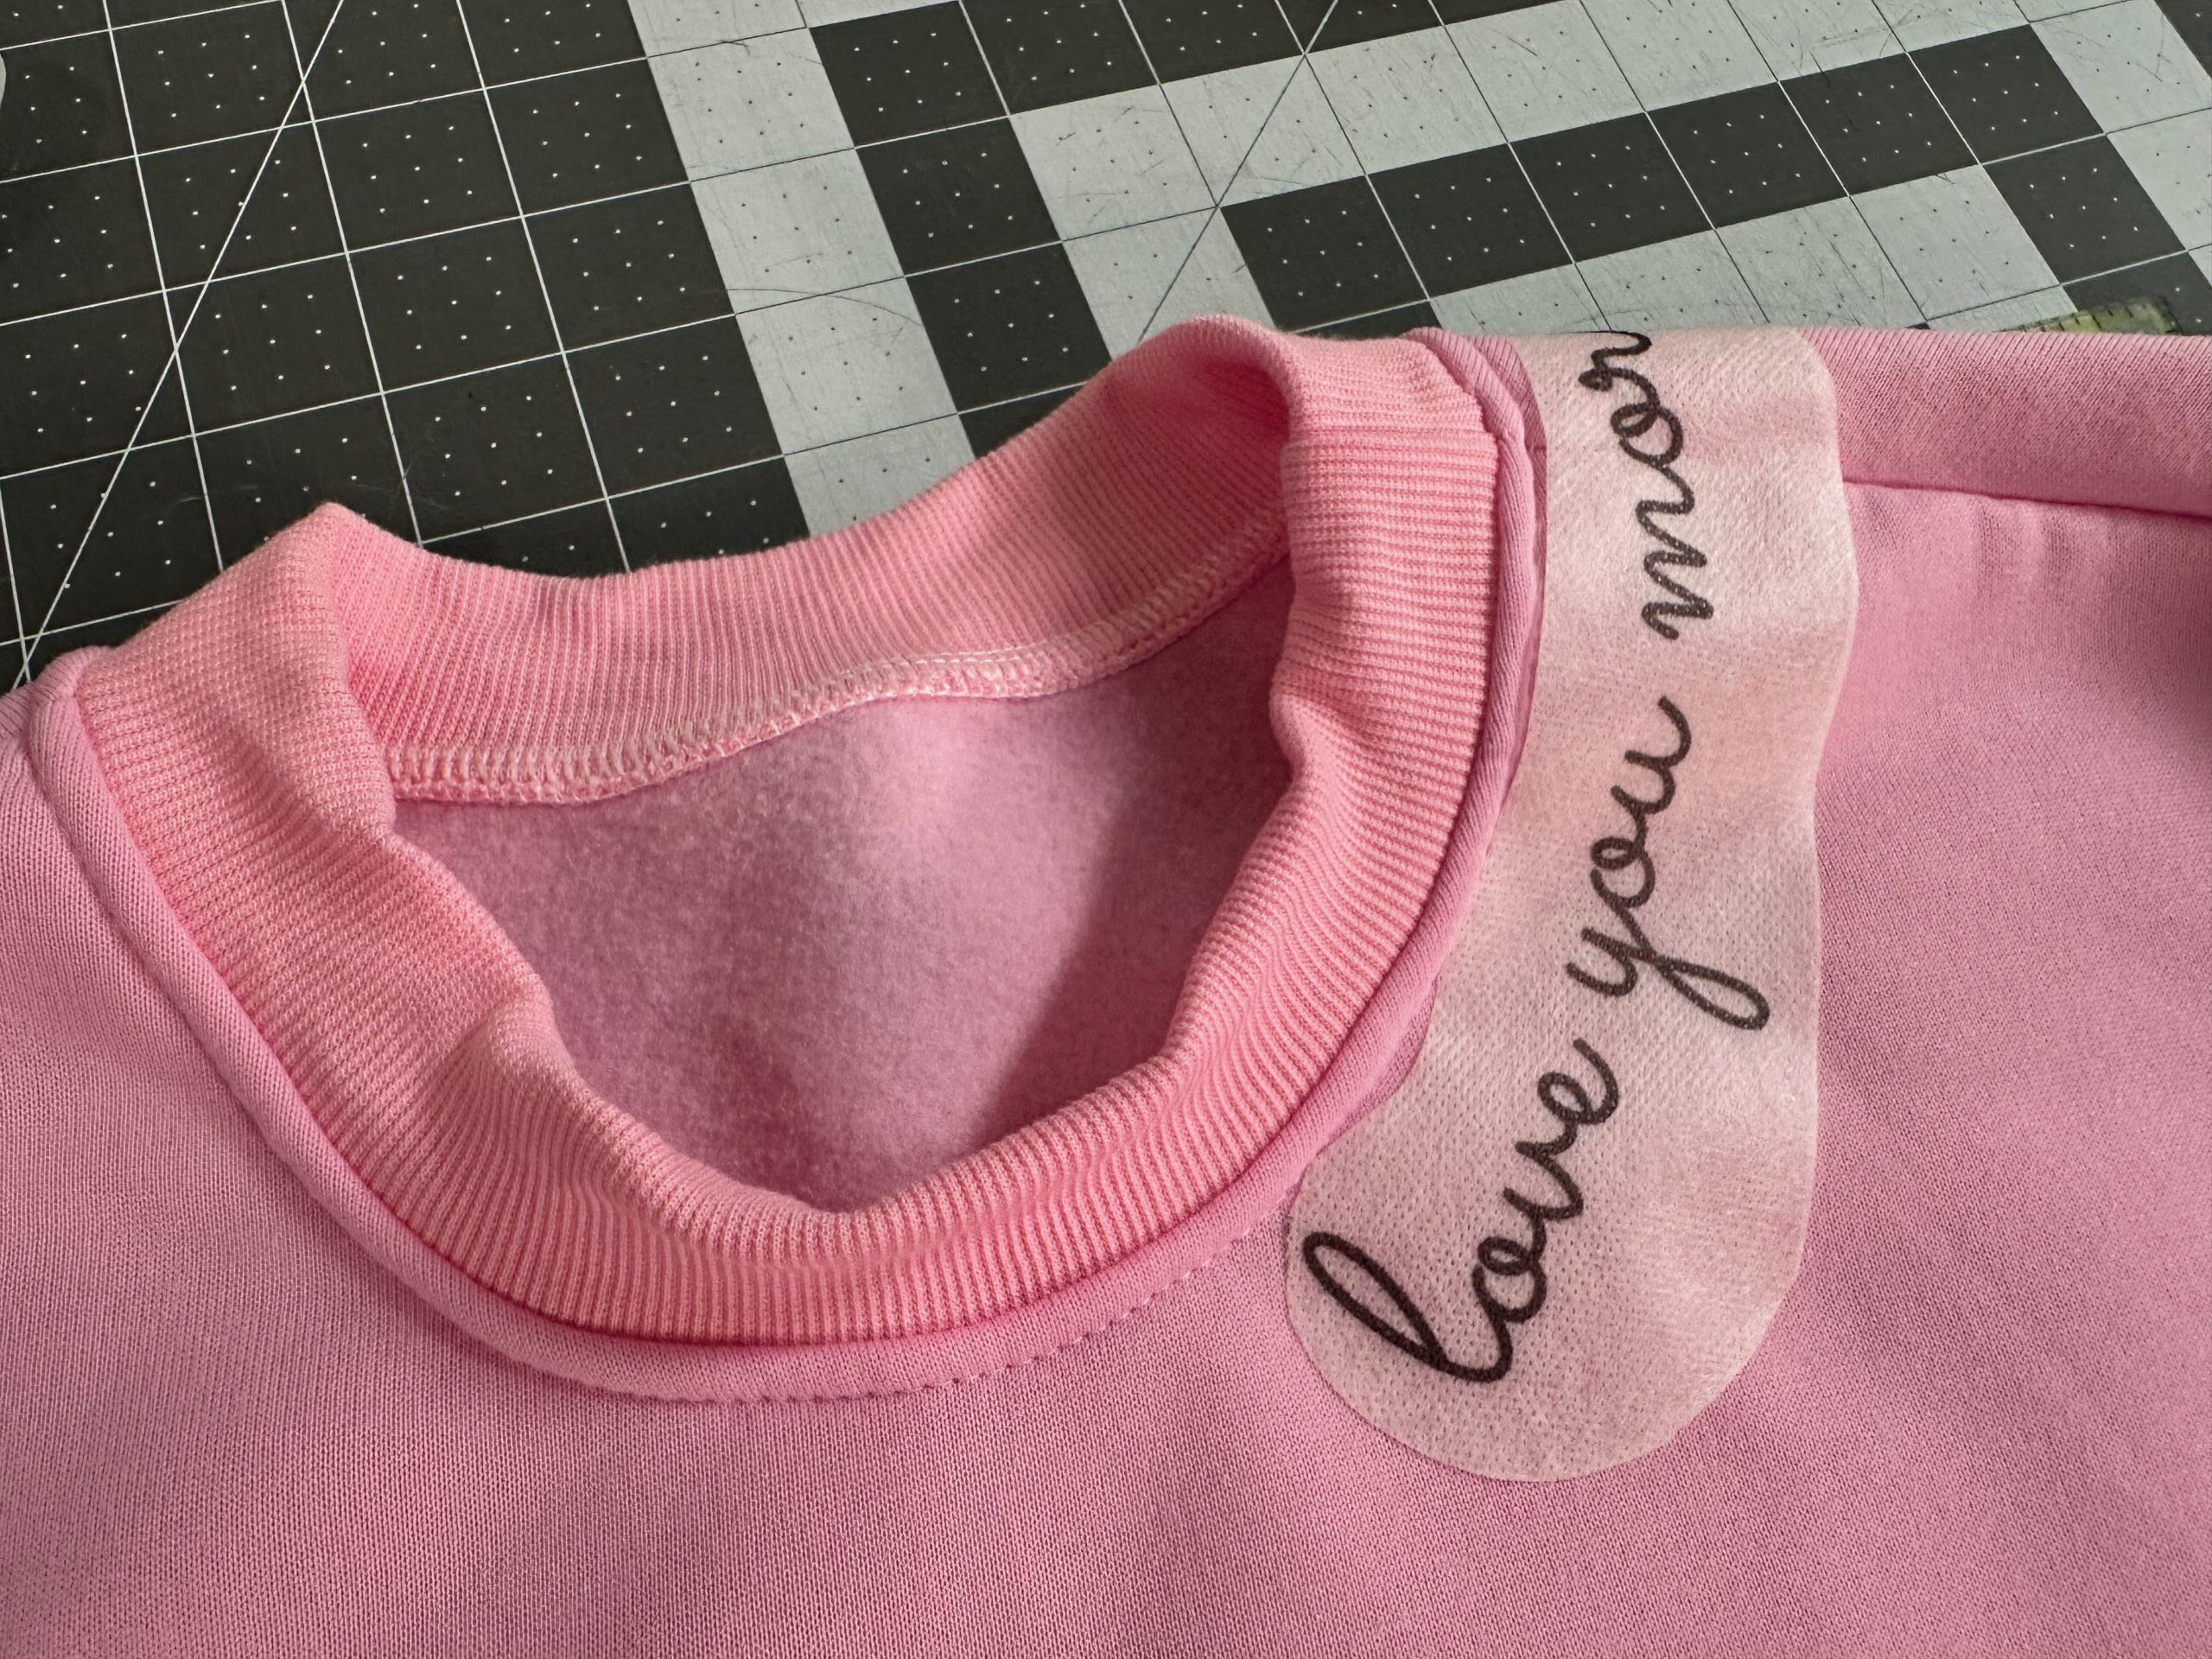
NECKLINE EMBROIDERY
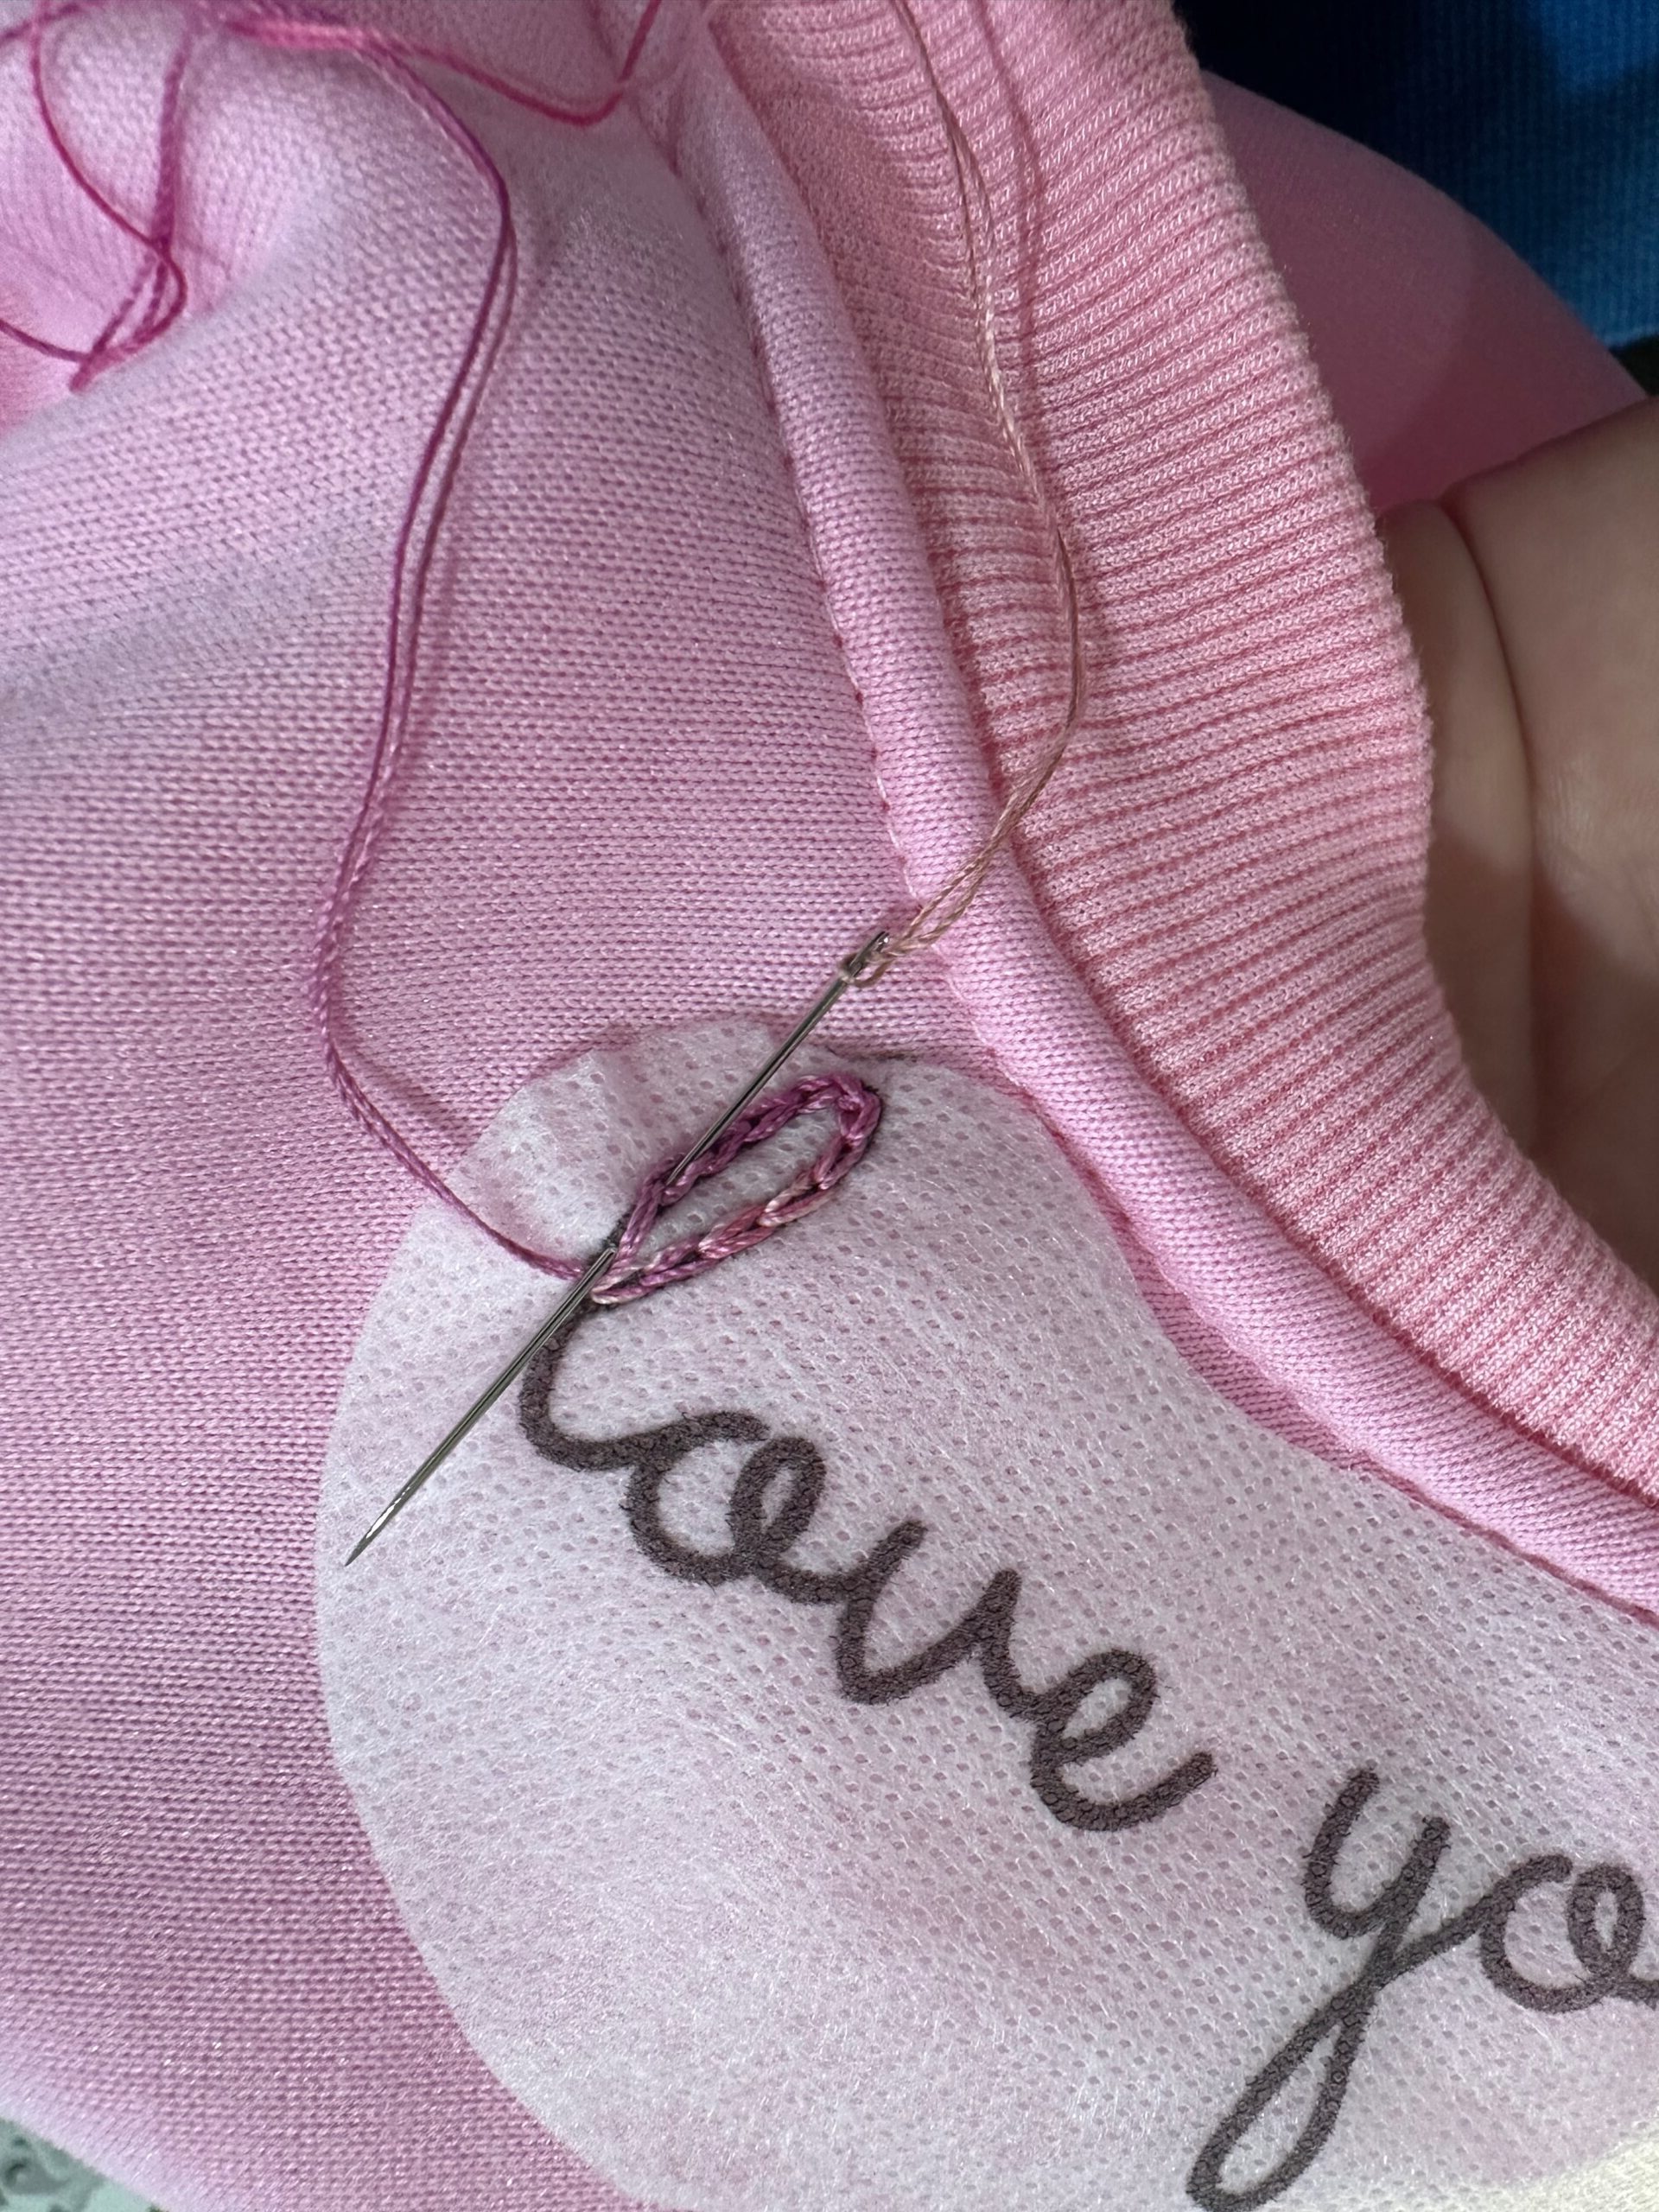
Begin stitching along the printed lines, pulling the threaded needle up from the garment wrong side. Leave long thread tails are hte stitching beginning and weave them through the stitching on the garment back after stitching is complete.
Use one or two strands of Sulky 12 wt. Cotton Petites Thread for embroidery. One strand is equal to two strands of traditional floss, so two strands will give you even more coverage.
Choose a Blendables® Thread color from the Sulky Pink Ribbon Thread Sampler (as shown) to incorporate a lot of shades into the design without changing threads. Or go with a solid in the same palette for a different look.
Straight stitch or use a more decorative embroidery stitch, if preferred. The featured sample showcases a chain stitch.
When the embroidery is complete, leave long thread tails at the stitching end. Weave the thread tails in through the previous stitching on the garment back.
NECKLINE EMBROIDERY FINISHING
To remove the Stick ‘n Stitch Stabilizer, rinse the embroidered neckline under warm, running water until the stabilizer dissolves. It’s very important to rinse the stabilizer away from the stitching and garment to avoid transferring any leftover ink to the garment fabric during removal. Do not submerge the garment in a pool of water to avoid this.
Next, let the garment dry flat on an absorbent towel.
The end result? A wearable with a sweet saying that you can wear and “sew” your support for cancer victims, survivors, those in active treatment and more.