
Trimmed Tea Towel with Valentine Embroidery
Create a Trimmed Tea Towel for Valentine’s Day Decor
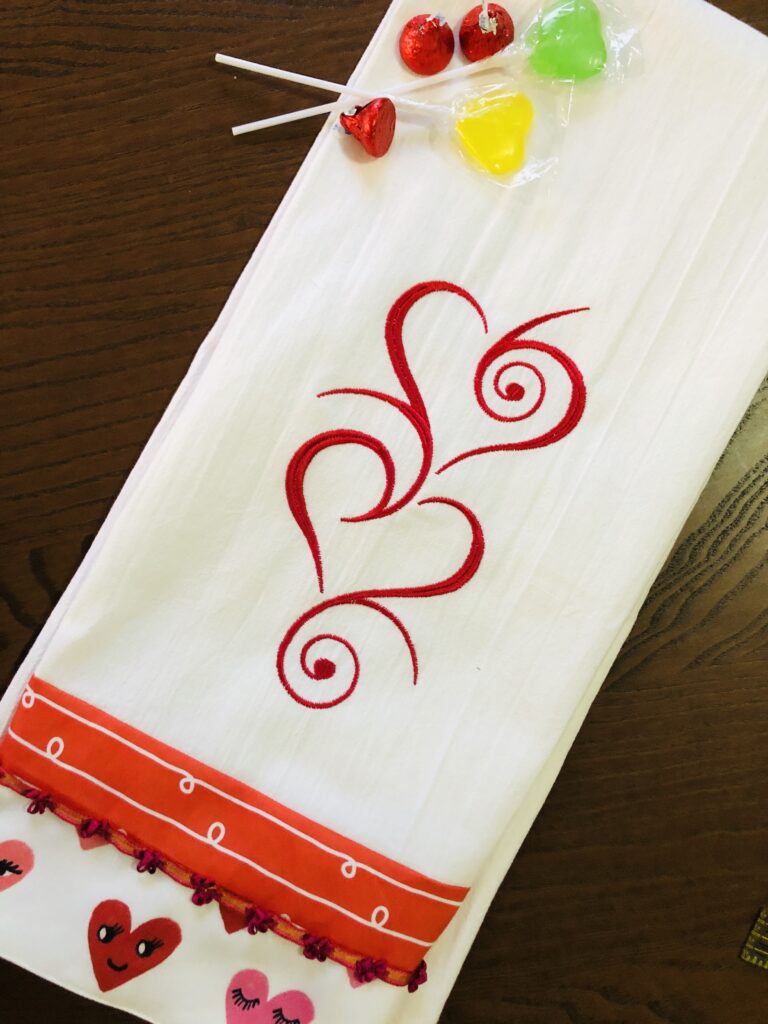
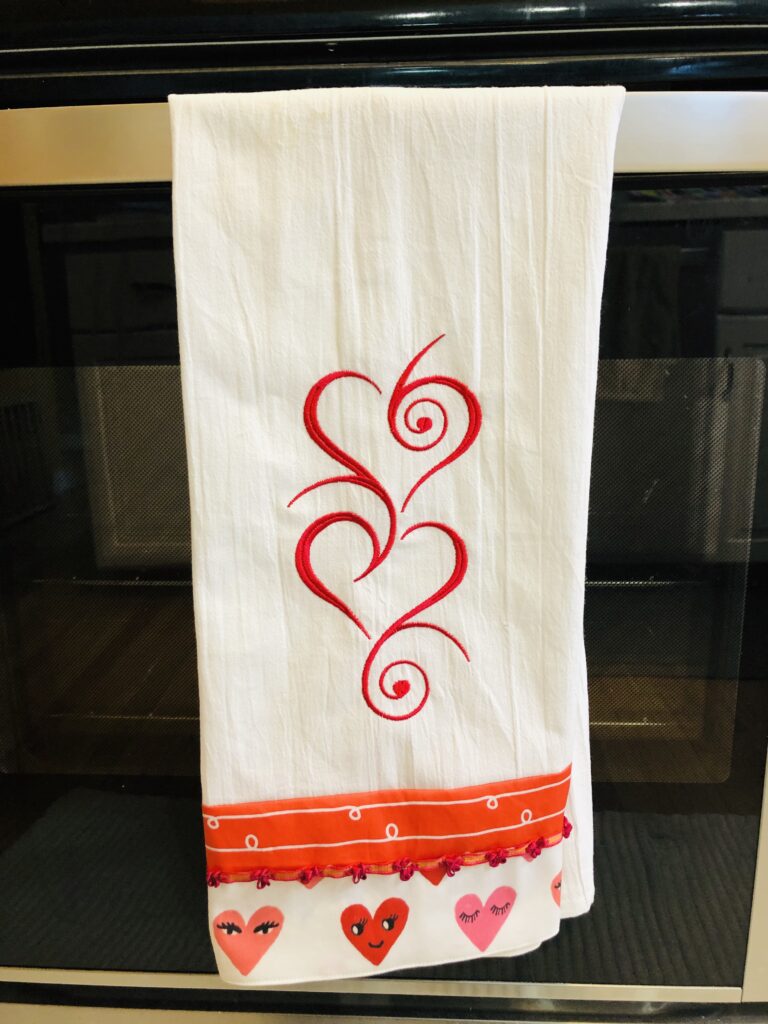
This trimmed tea towel is adorned with cute Valentine’s Day themed fabrics, ribbon or trim, and embroidered with one of seven designs from the Sulky Scrolling Hearts design collection. The “I Heart You” thread palette includes the entire Scrolling Hearts design collection, along with 10 spools of Sulky rayon and metallic threads. Create several coordinating tea towels, using different designs for each, to display in your home for Valentine’s Day.

SUPPLIES
- Sulky I Heart You thread palette
- Cotton + Steel thread by Sulky (to match towel and/or fabrics)
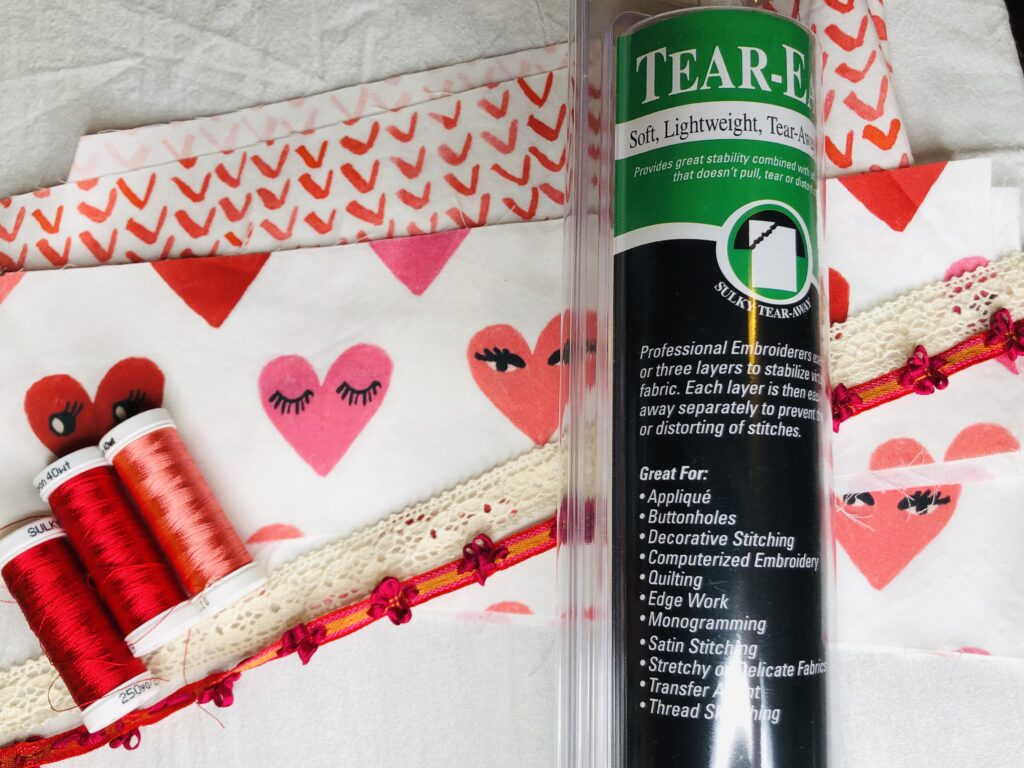
- Sulky Tear-Easy™ stabilizer
- Size 90/14 Organ embroidery needle & 70/10 Universal needle
- Sulky Invisible Thread (optional)
- Tea towel
- Assorted Valentine-themed fabrics (approximately 1/4 yard); featured fabrics by Spoonflower
- Coordinating ribbon or trim (approx 36″, depending on tea towel length)
- TIP: Try tiny pom-pom fringe trim for a cute look! Ruffled ribbon is also a great choice.
- Embroidery scissors
- Water-soluble fabric marking pen
Sulky may earn an Affiliate Commission if you purchase something through recommended links on our post. Don’t worry – this does not increase your cost.
TRIMMED TEA TOWEL EMBROIDERY
Prewash and press the tea towel. Plot the embroidery placement and mark the tea towel to denote the design center orientation using a removable fabric marker.
Hoop the tea towel with a rectangle of Sulky Tear-Easy stabilizer.
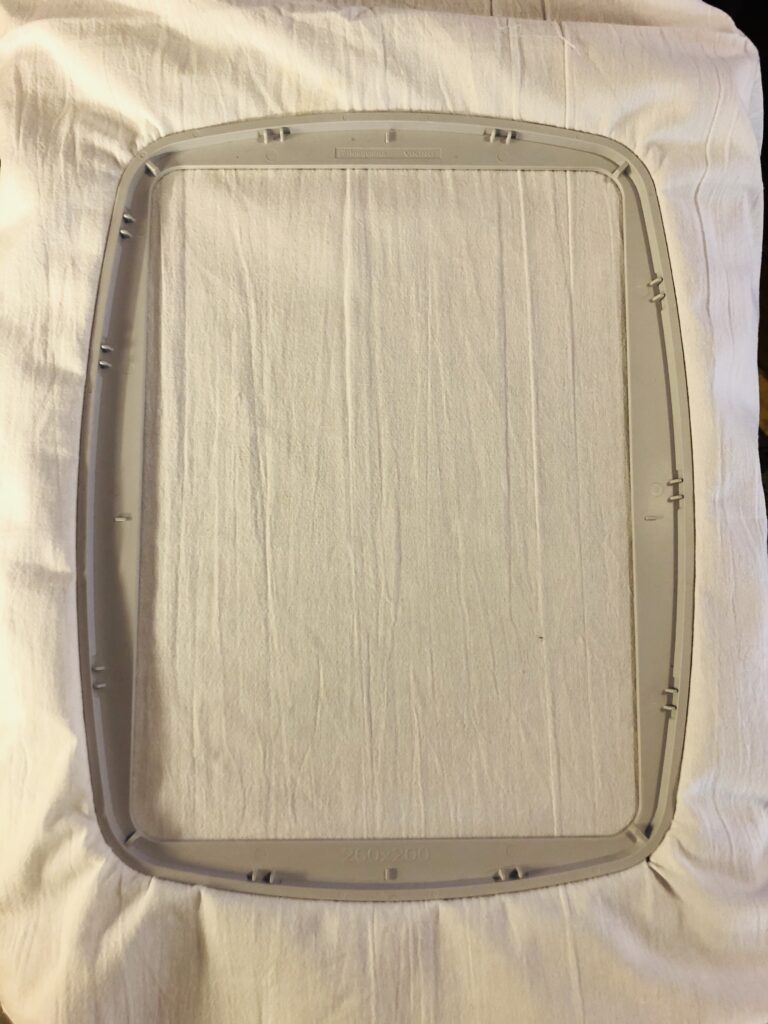
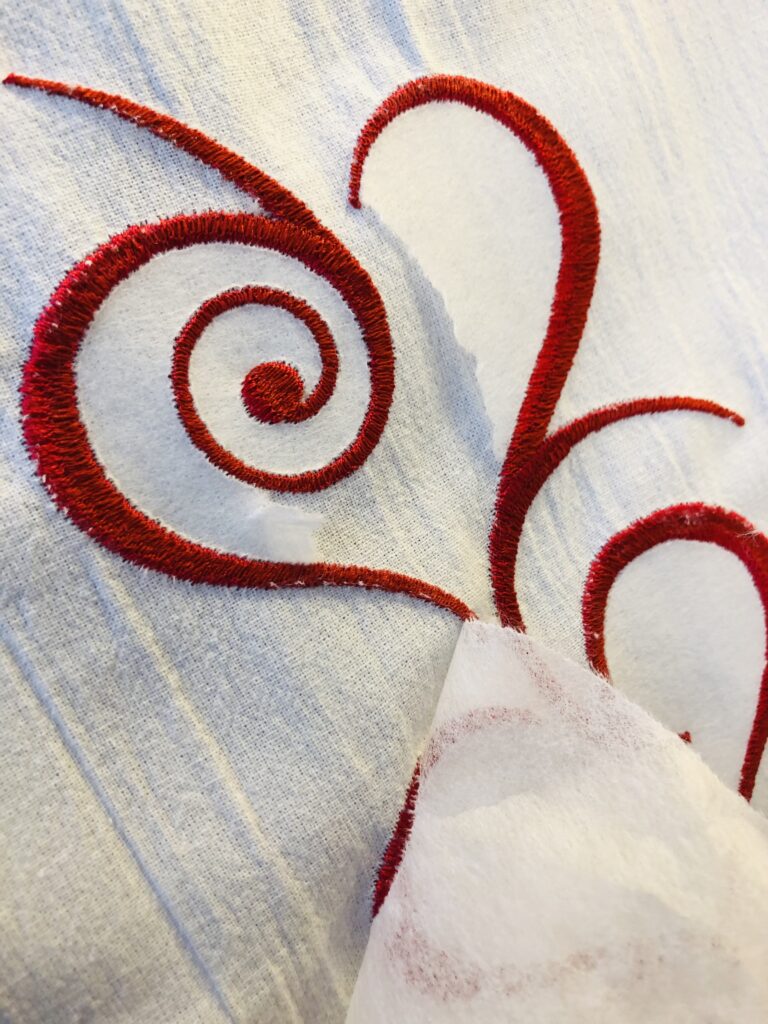
Load one of the Scrolling Heart designs into the machine. Enlarge the design up to 20%, if desired. For the featured tea towel, the design was centered in a 260×200 hoop and enlarged 20%.
Wind the bobbin with red rayon thread from the I Heart You palette. Install a size 90/14 Organ embroidery needle. Then thread the needle with the same red thread.
Embroider the design, changing thread colors in the needle and bobbin and clipping jump threads with each color change (if applicable).
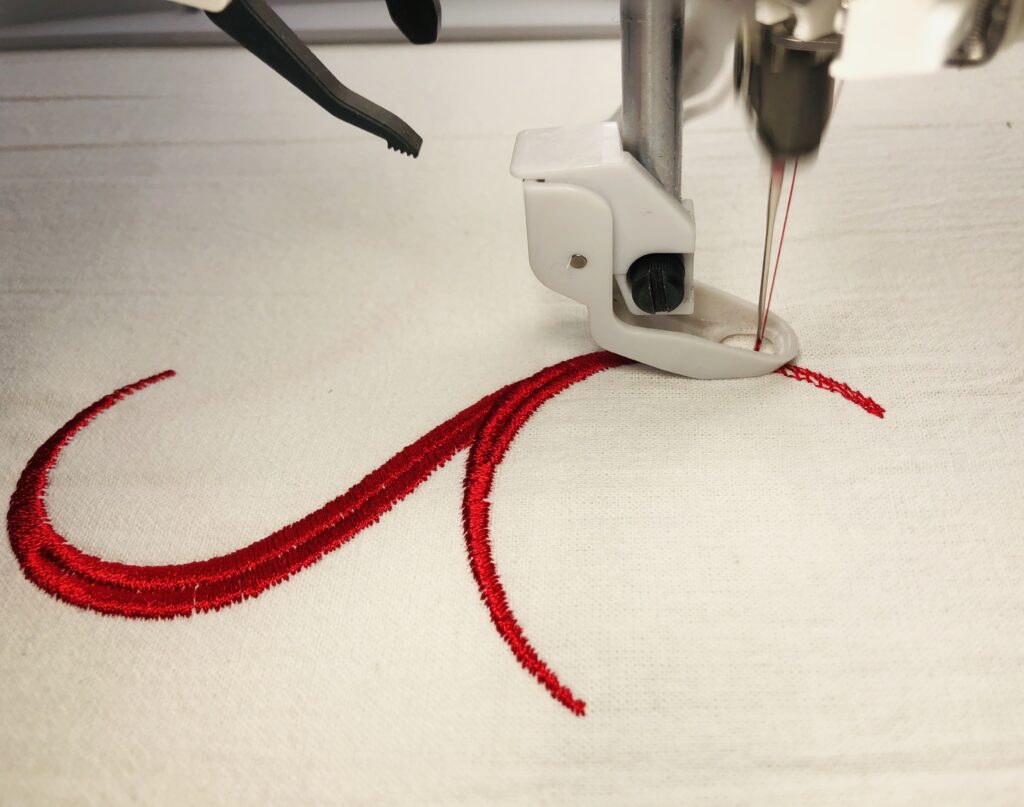
When embroidery is complete, remove the towel from the hoop. Then gently tear away the stabilizer beyond the stitches along the tea towel wrong side.
Finally, press the towel from the wrong side, avoiding the thread so as to not crush it with the heat of the iron.
TRIMMED TEA TOWEL FABRIC EMBELLISHMENT
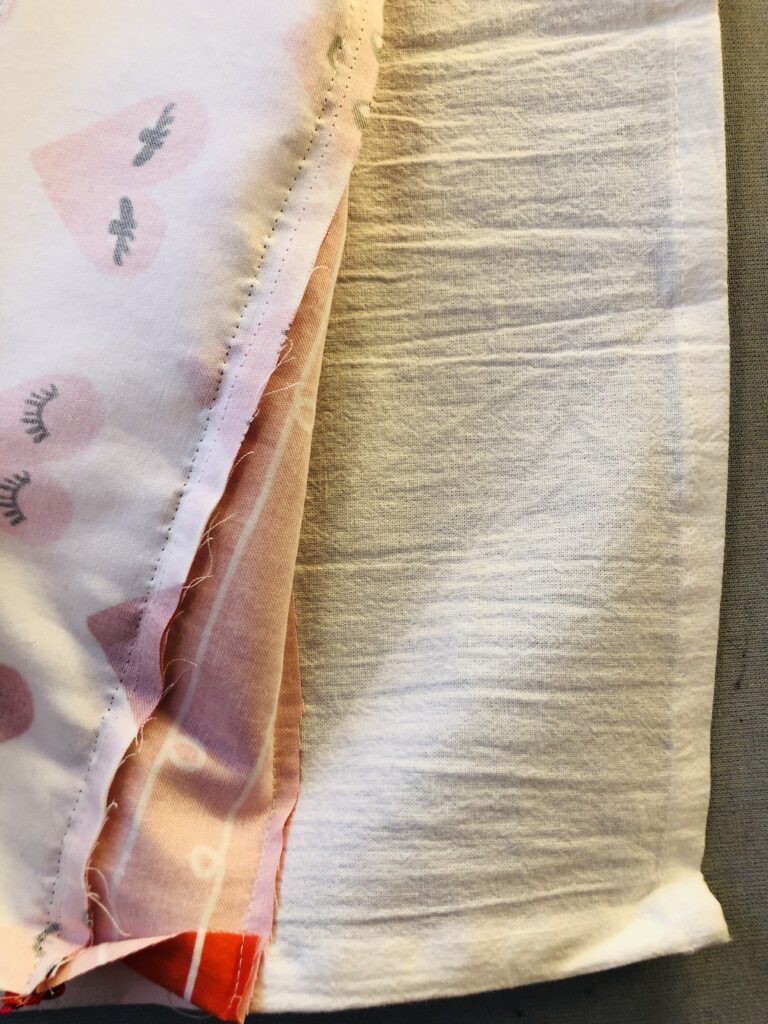
Measure the tea towel lower edge; add 1/2″ and record. Cut a strip of fabric measuring 2 1/4″ x the recorded lower-edge length. Also cut another coordinating fabric strip measuring 3 1/3″ x the recorded lower-edge length. Cut a length of ribbon or trim to the lower-edge length.
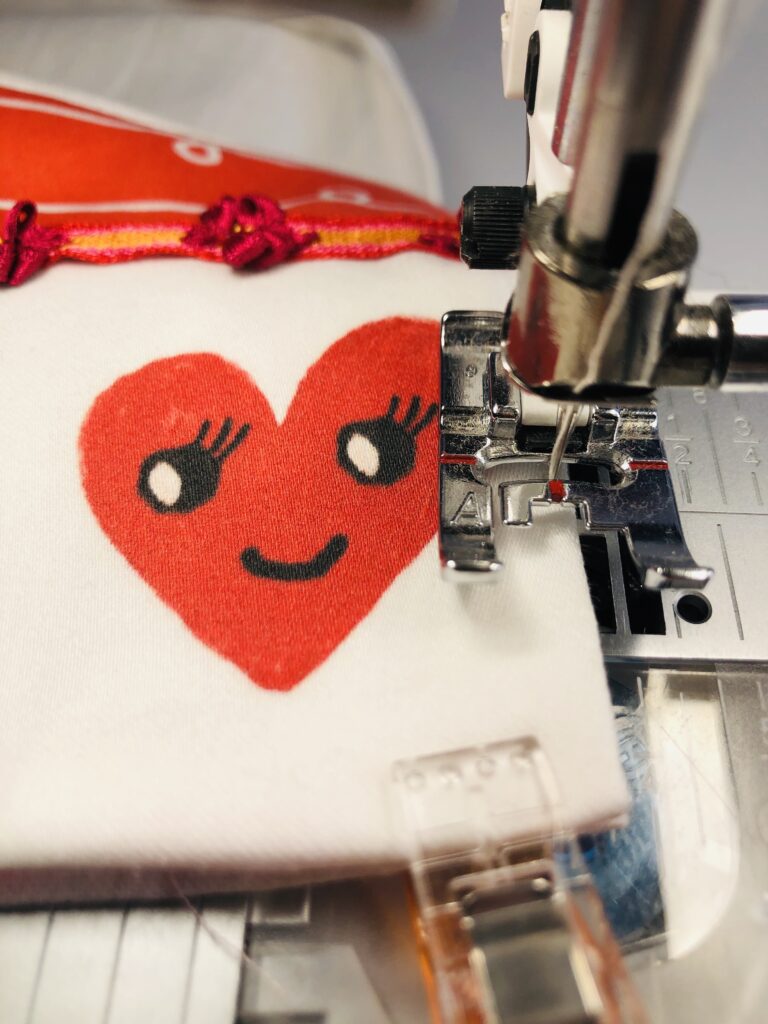
Change the machine to sewing mode. Install a size 70/10 Universal Organ needle. Thread the needle and bobbin with Cotton + Steel thread by Sulky in a color that matches the towel and/or fabrics.
Stitch the fabric strips together along one long edge using a 1/4″ seam allowance, taking the fabric print direction into account. When stitching is complete, press the seam allowance toward the darker fabric.
FINISHING TRIMMED TEA TOWEL
Center the ribbon or trim over the seam along the fabric-strip right side. Topstitch the trim along each long edge or down the center, depending on the trim width and desired look.
TIP: Use Sulky Invisible Thread for stitching the trim in place if using a dimensional or otherwise decorated trim. One stitch down the center of the trim length will secure it to the fabric trim, without interfering with the embellishments.
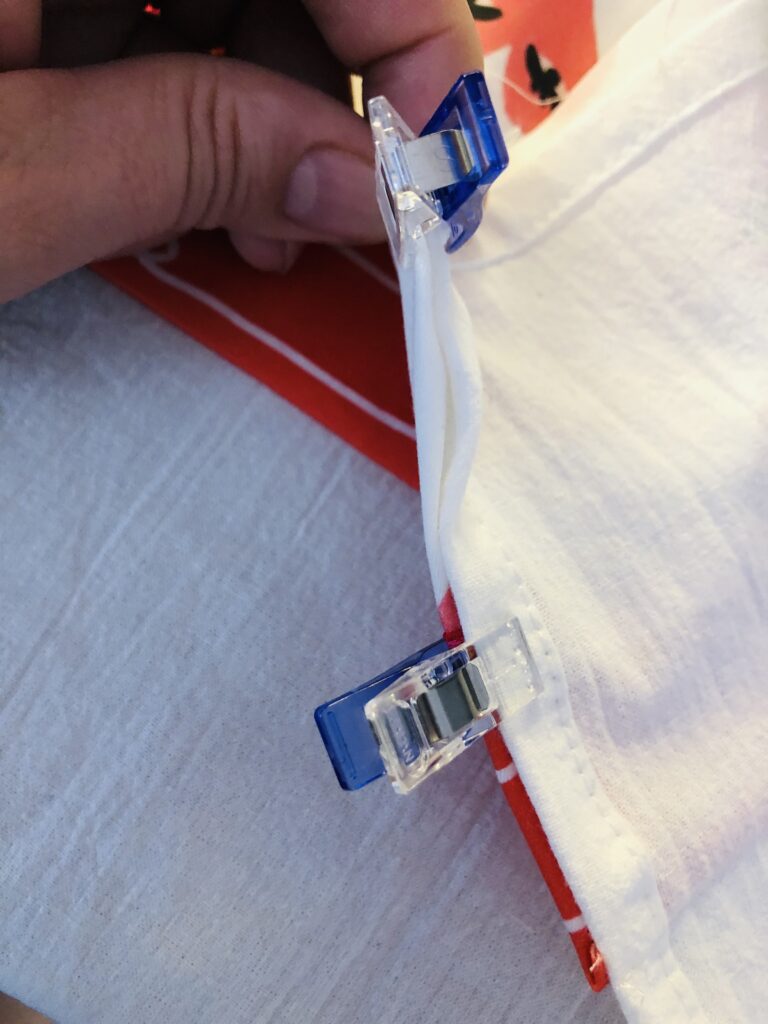
Fold the strip upper and lower edges 1/4″ toward the wrong side; press with lots of steam. Unfold the upper edge.
Fold the strip side edges 1/4″ toward the wrong side; press with lots of steam.
Place the fabric band along the towel with right sides together, extending the fabric-band width toward the embroidery. Make sure the fabric-band upper-edge placement is such so the folded lower edge will abut the towel lower edge when the fabric band is turned right side up.
Stitch the upper fabric-band edge, following the previous fold line. Flip the fabric band so the right side is facing up and the lower-edge fold abuts the towel lower edge.
Topstitch the fabric-band upper edge. After stitching, press the remaining band flat over the towel, making sure the sides and lower-edge fold align with the towel finished edges; pin or use quilt clips to secure. Make any adjustments to refold and re-press the sides or lower-edge folds as needed.
To complete the tea towel, edgestitch the fabric-band sides and lower-edge to the towel.
If desired, for extra security, topstitch along each trim or ribbon long edge, following the previous stitching lines.
Repeat to create additional trimmed tea towels to create a set or give as gifts!

Ellen March
I am the Director of Content for Sulky of America. The former Editor in Chief of Sew News and Creative Machine Embroidery magazines, I hosted Sew it All TV on PBS for nine seasons. I've appeared on It's Sew Easy on PBS, DIY Network's Uncommon Threads, Hallmark's Marie Osmond Show, MacPhee Workshop and more! Come sew with me!


4 Comments
joycedia
I would like the hearts embroidery design. Not the whole kit. Where is it available?
Ellen March
Hello! Unfortunately the design is only available with the entire collection of thread. There are lots of designs with this palette that you will enjoy!
Glenda Mitchell
I got the I heart you palette thread but can not find where to download the embroidery
Ellen March
Hi Glenda,
Take all the spools out of the package and inside you will find a sticker with the URL to download your designs. Enjoy! If you’re still having trouble, please email info@sulky.com.