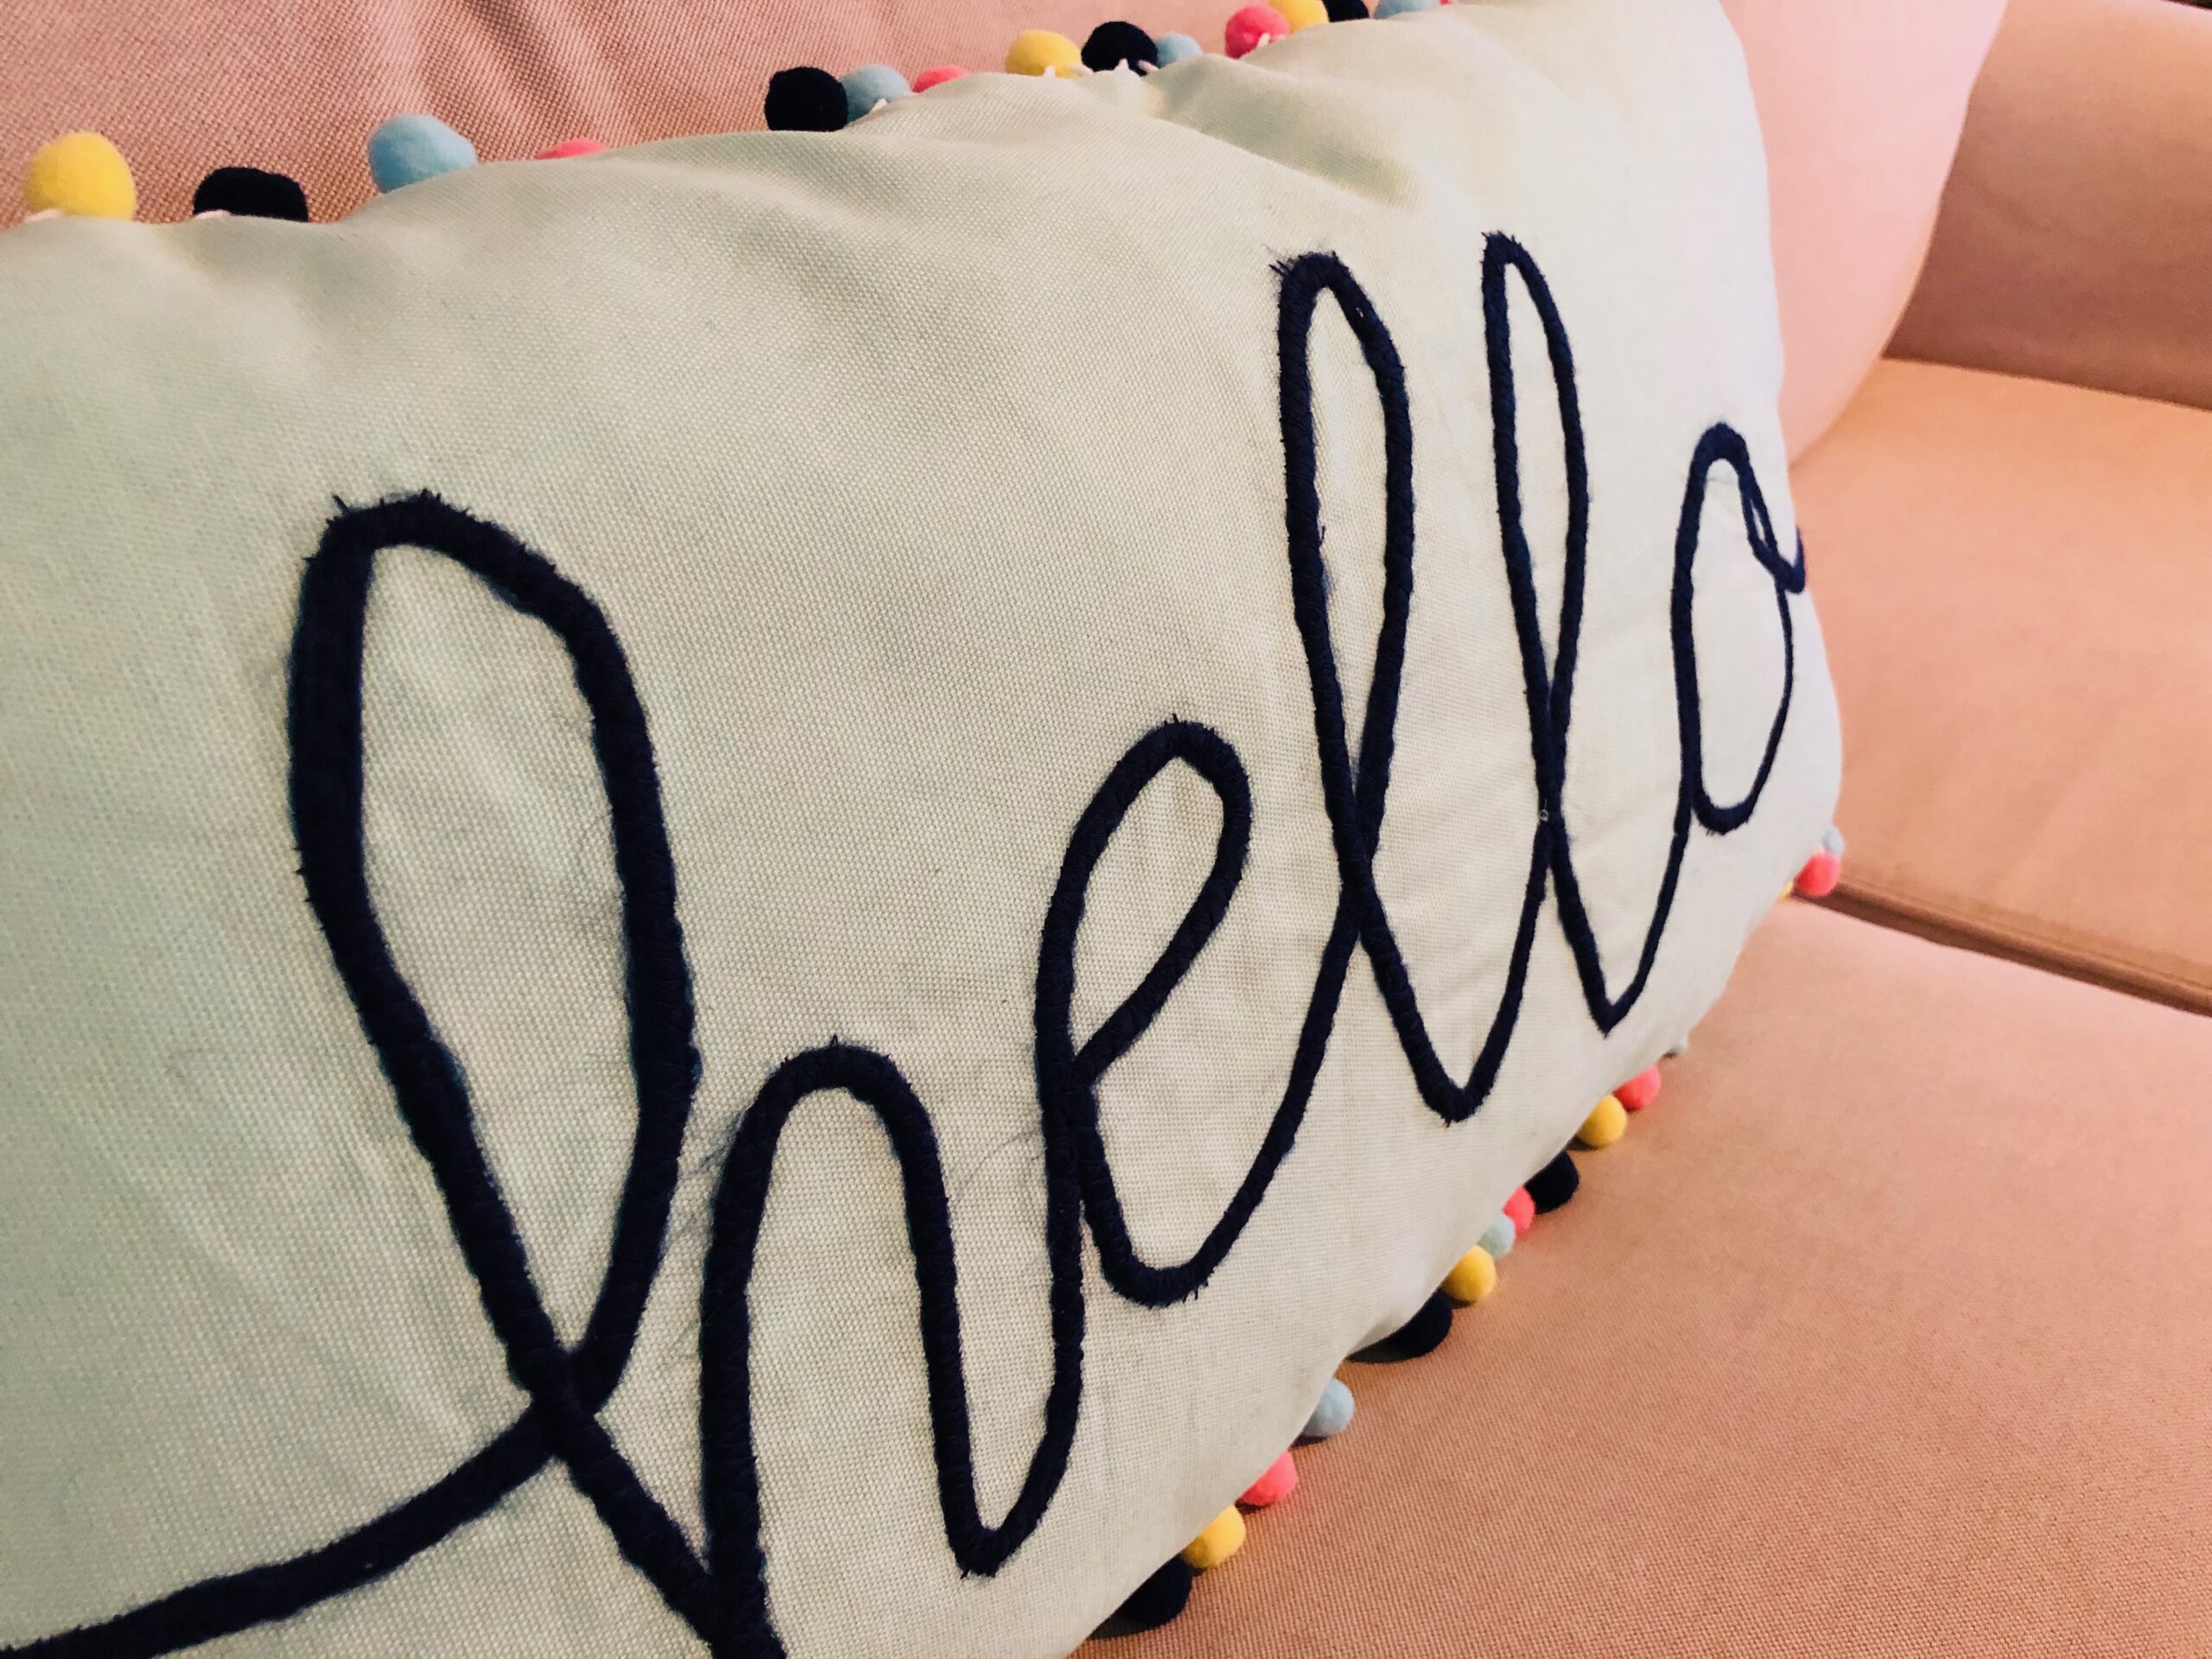
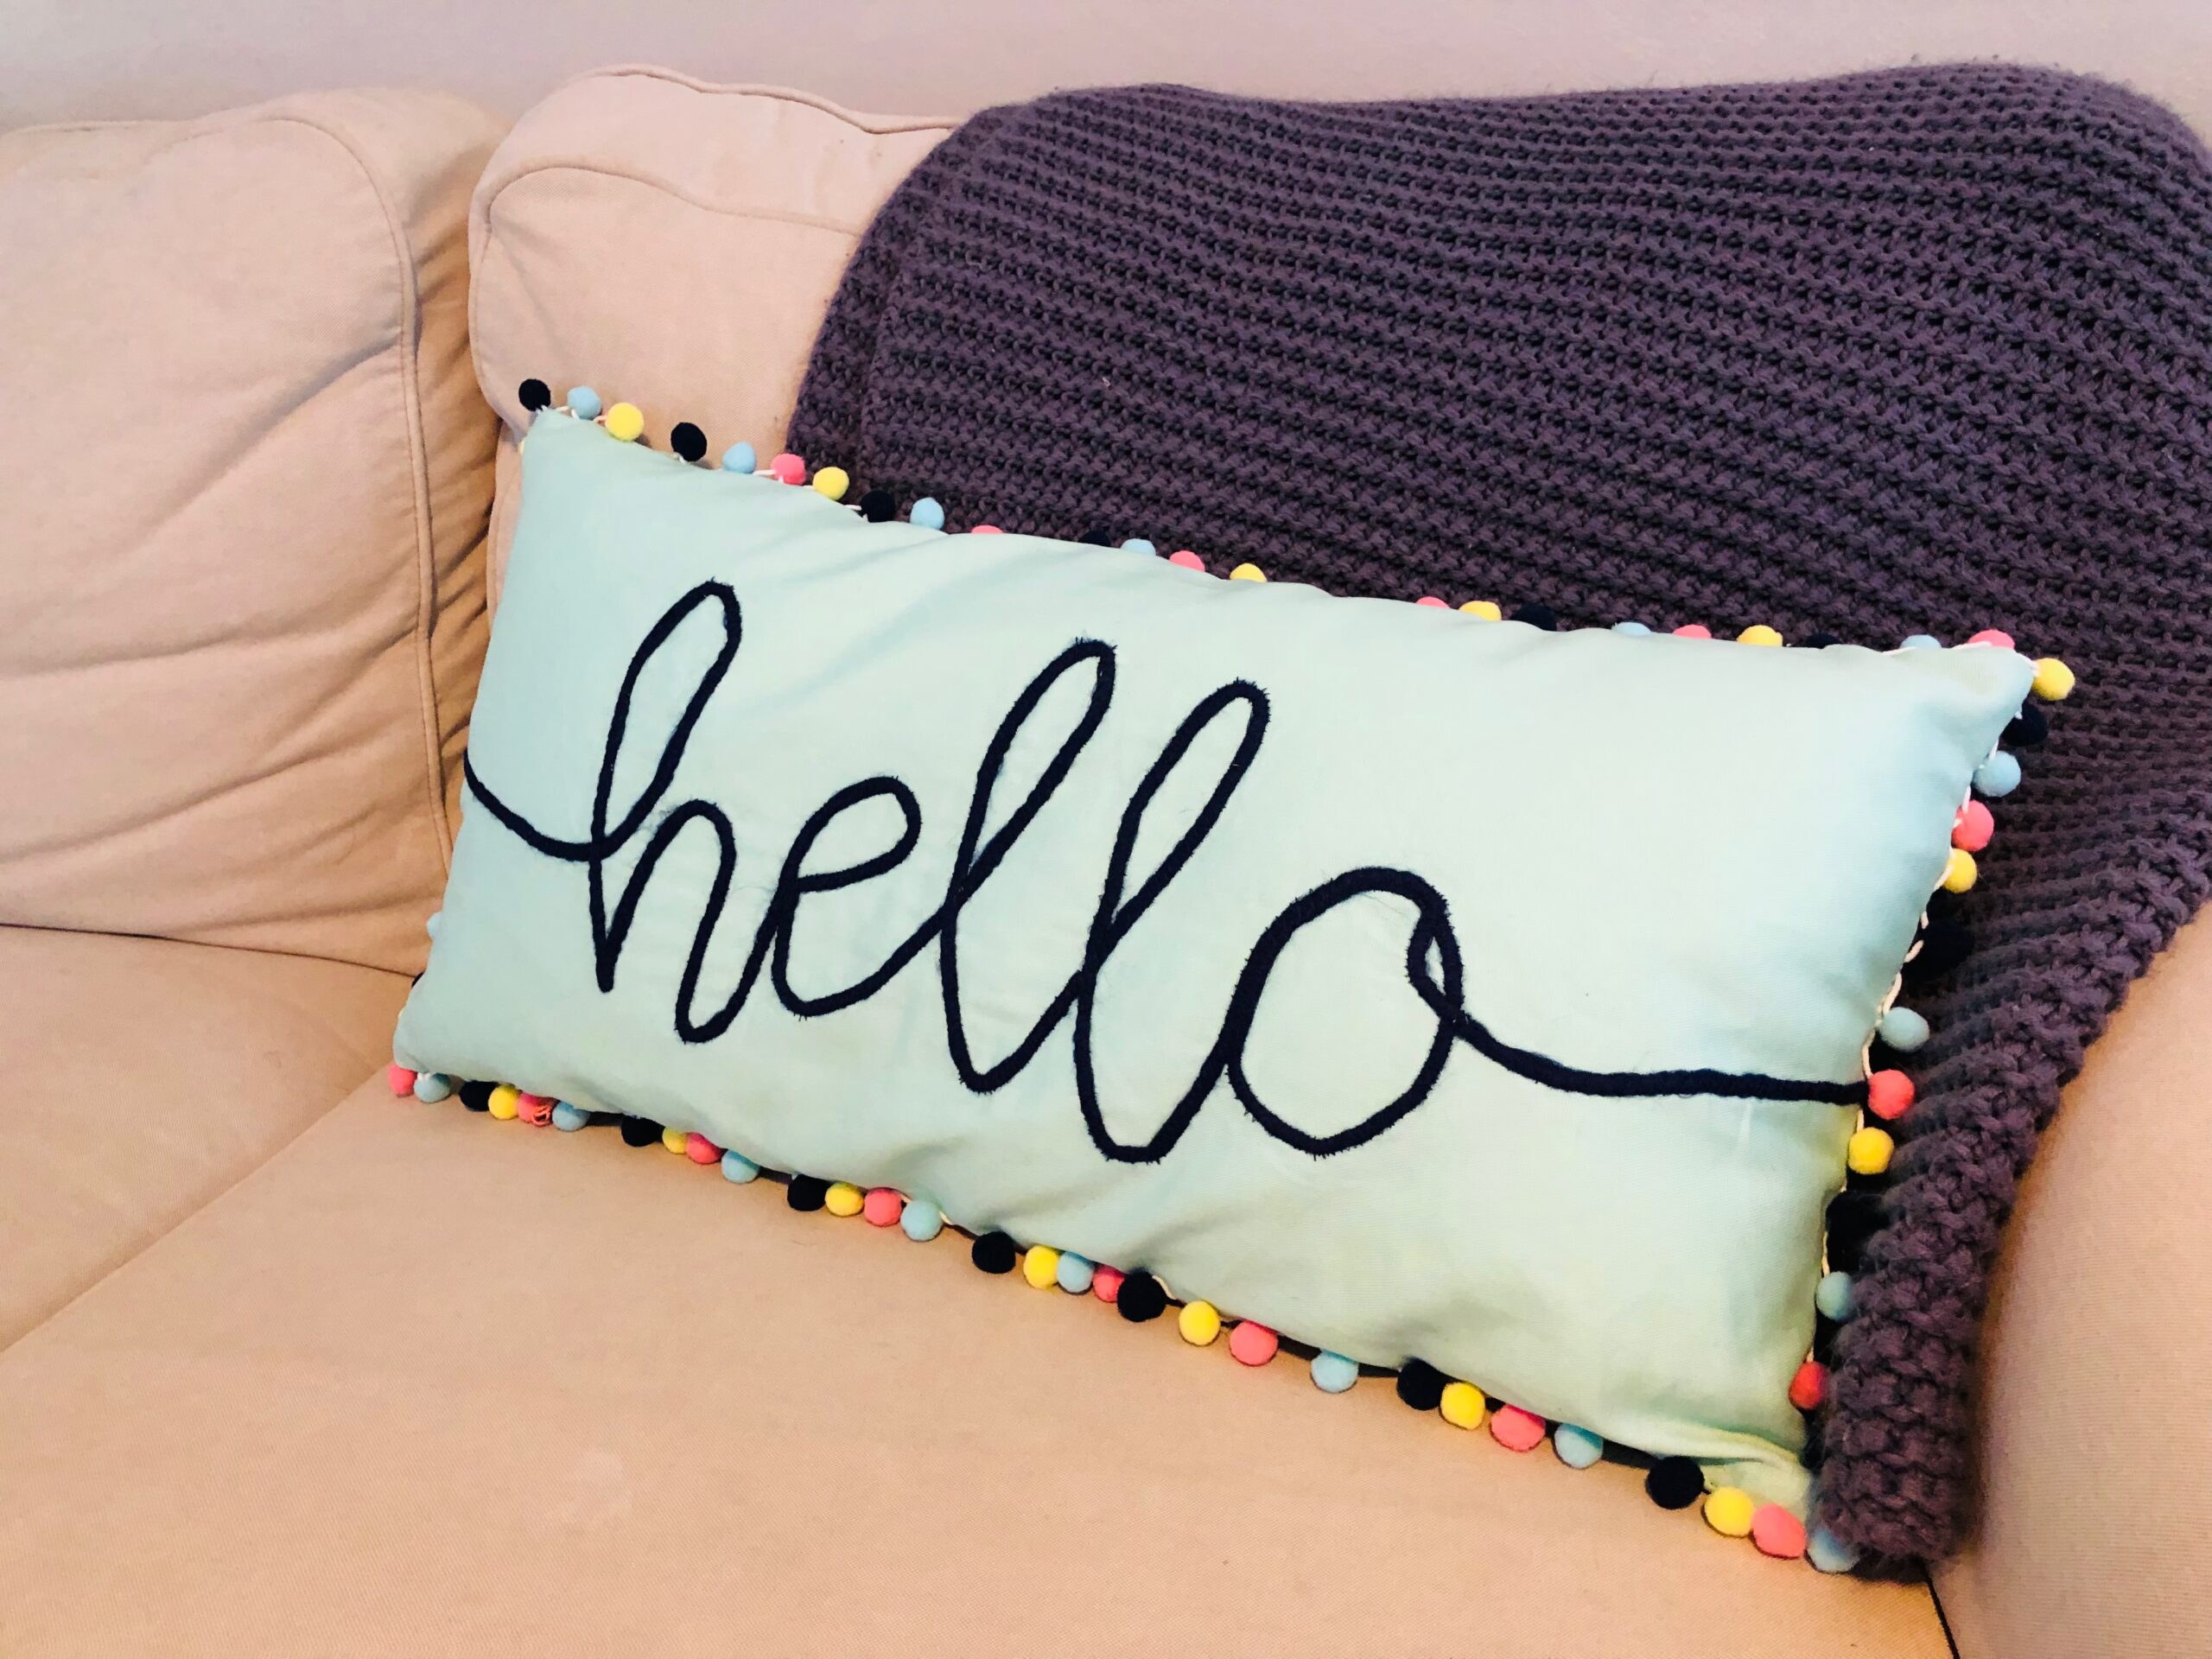
Yarn Couching Pillow for Spring

Experiment with yarn couching and create a springy pillow that literally says hello. The lettering is couched onto the pillow fabric using Sulky Invisible Thread, which allows the fuzzy yarn texture to take center stage. The pop of pom-pom fringe brings all the colors together with a fun accent for your couch or outdoor dining set.
WHAT IS YARN COUCHING?
Couching is a decorative technique whereby a fiber (yarn, in this case) is laid over a fabric and stitched in place. Many machine brands offer couching, sometimes called braiding, feet and/or attachments for your sewing machine that make the process even easier.
There are several suitable thread choices for couching. Use a thread that matches the yarn, or fiber. Or choose a variegated Rayon or 30 wt. Blendables® Thread to bring more color to the party. Invisible Thread is a great choice that allows the yarn to take center stage without competing with any other colors or textures.
PILLOW SUPPLIES
- Sulky Sticky Fabri-Solvy Stabilizer
- 1-yard pack of Sulky Soft ‘n Sheer Stabilizer
- 7/8 yard of fabric (outdoor weight, lightweight canvas or denim)
- 200g chunky weight yarn
- Sulky Thread: Invisible or coordinating 50 wt. Cotton (couching) & 40 wt. Poly Deco (construction)
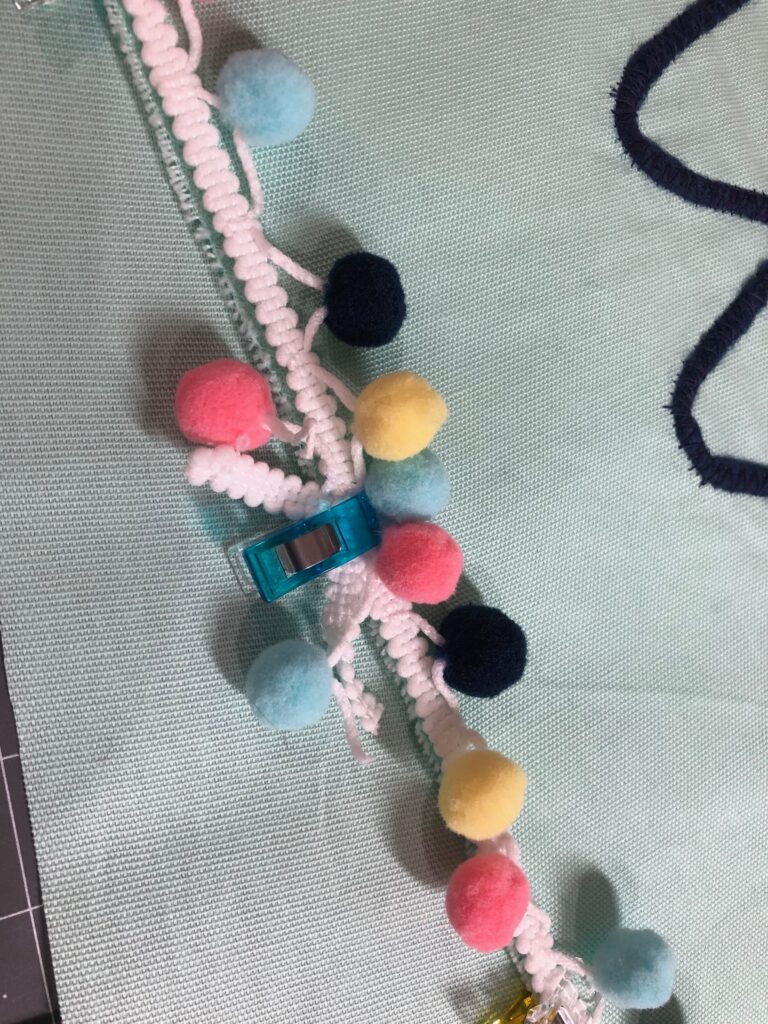
- 2 ½ yards of jumbo pom-pom fringe trim
- 14 x 28 pillow form
- 28 long zipper
- Organ® Needles: size 90/14 Top Stitch (for Invisible Thread), size 75/11 Top Stitch (for 40 wt. Poly Deco & 50 wt. Cotton Thread)
The above supply list contains affiliate links. We may make a commission if you decide to purchase something from the list.
CUTTING
Prewash, dry and press the fabric.
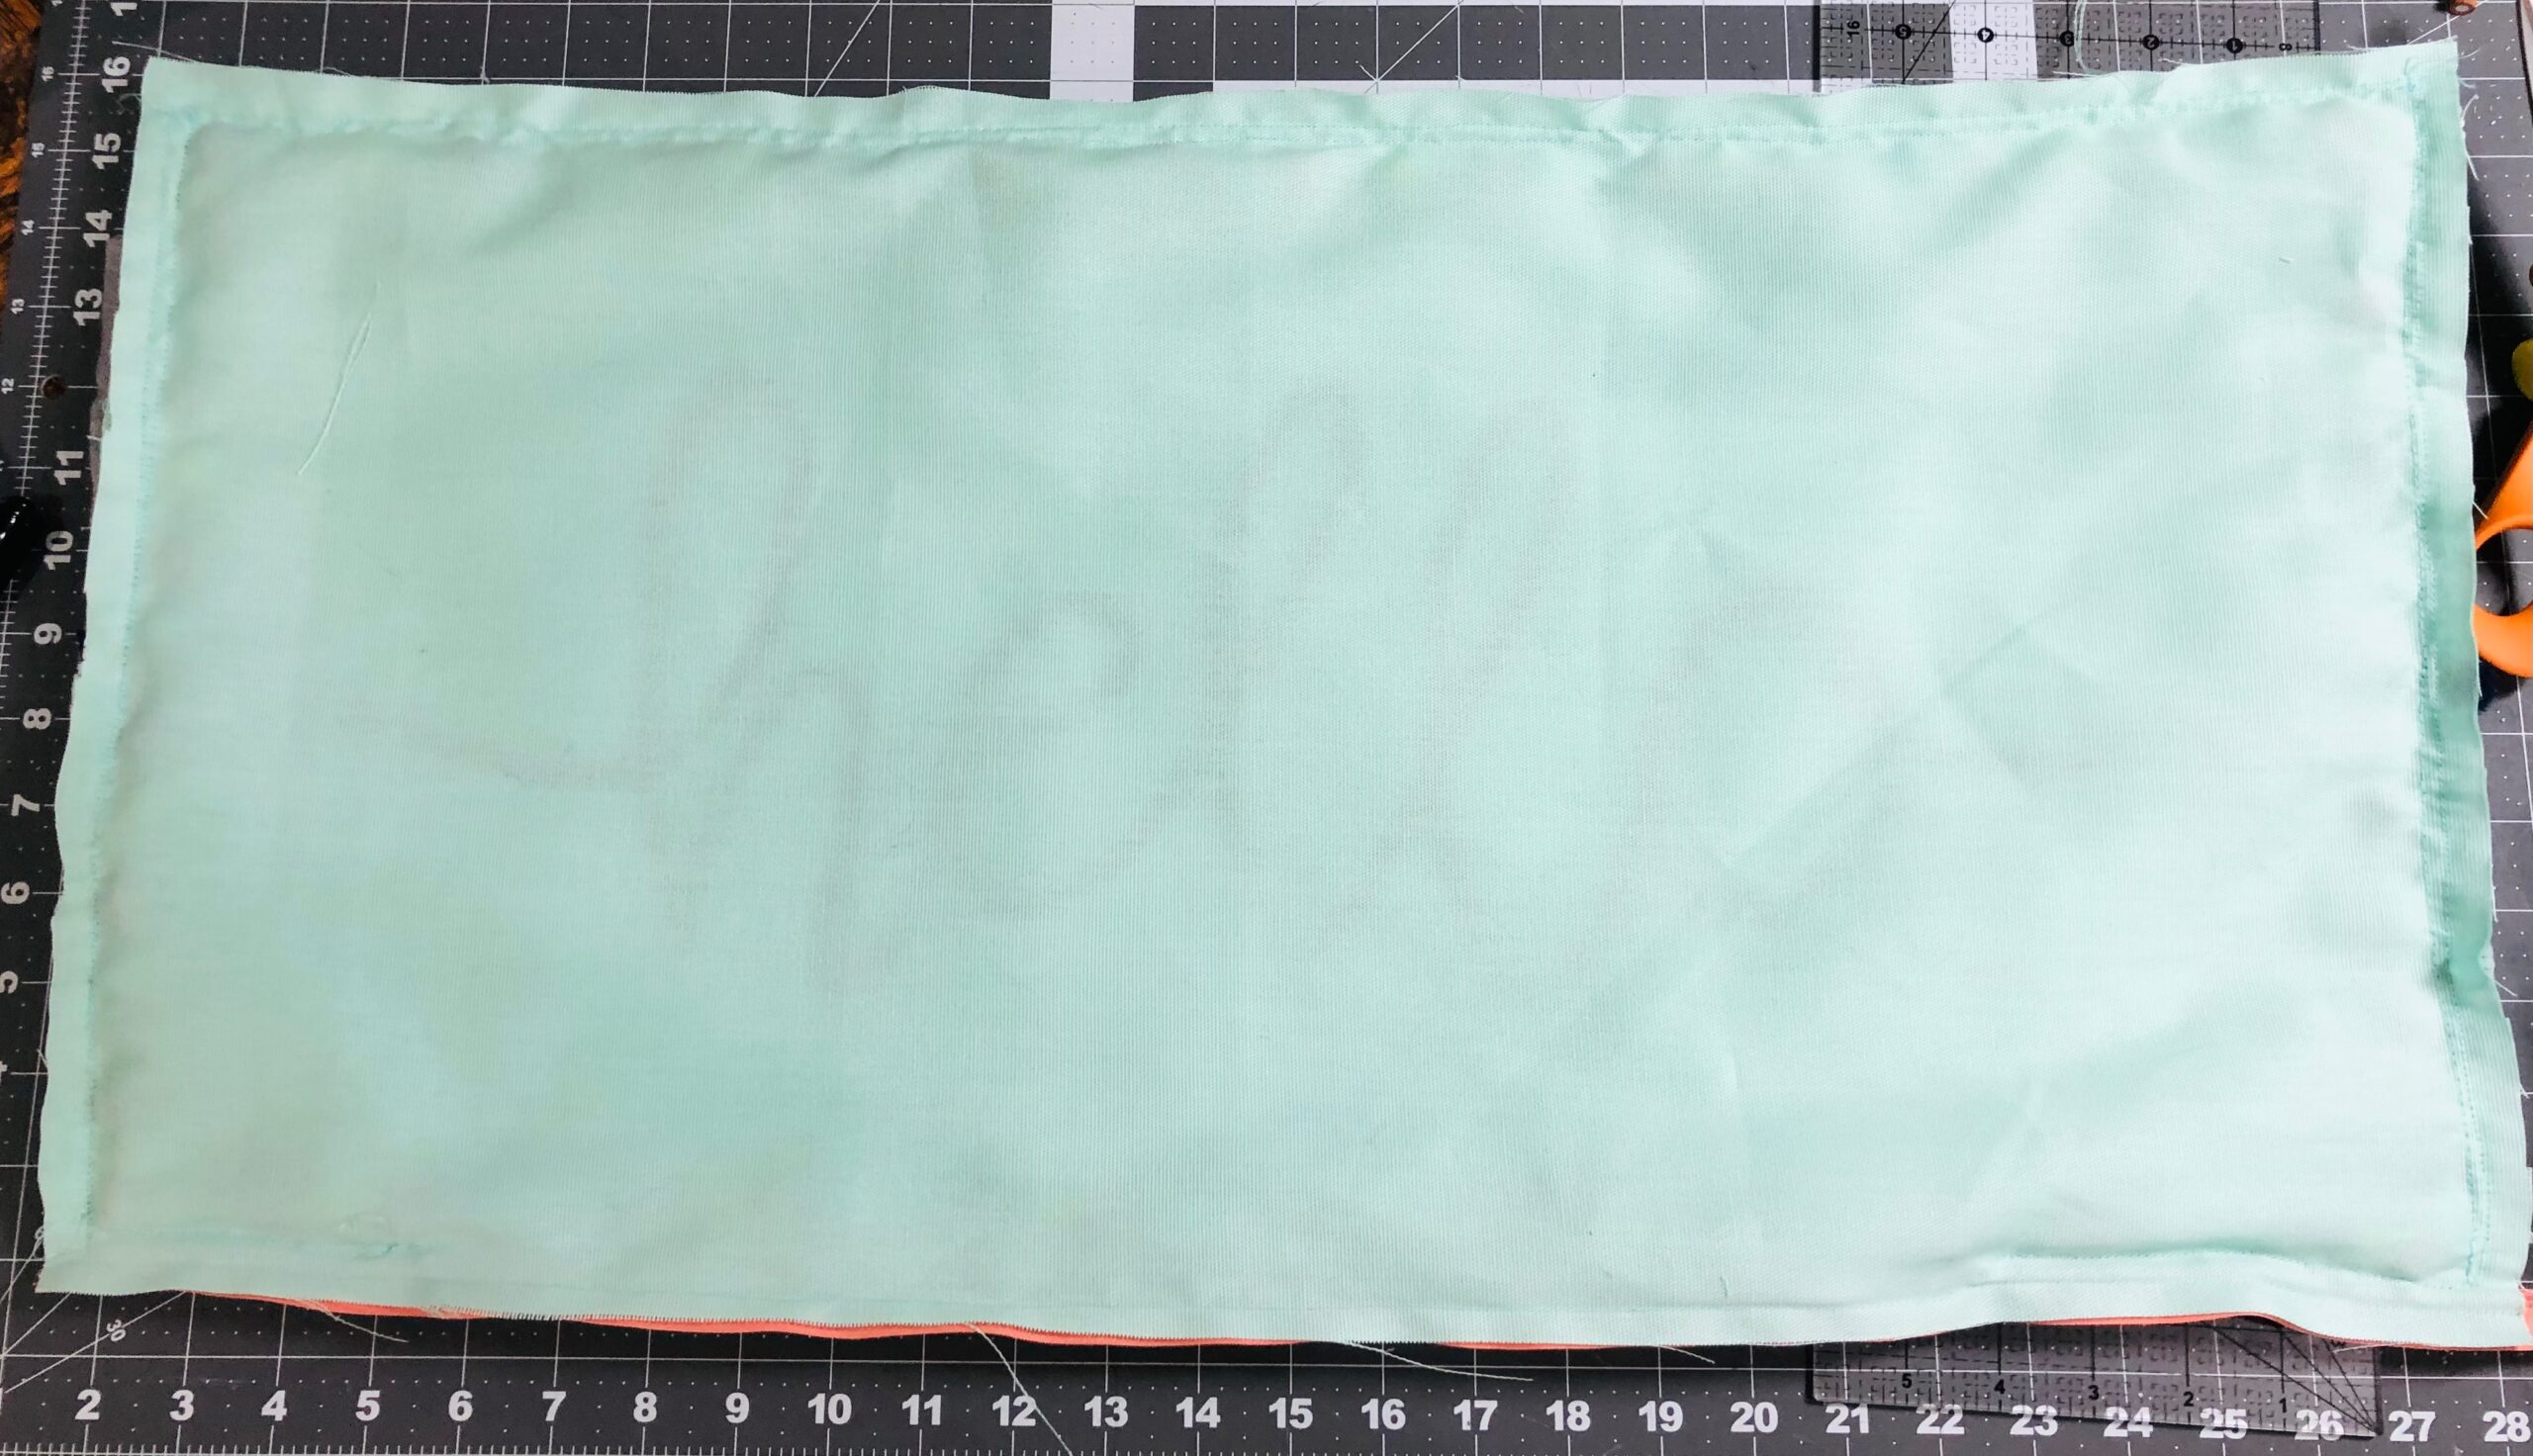
From the fabric, cut two 14 ½ x 28 ½ rectangles.
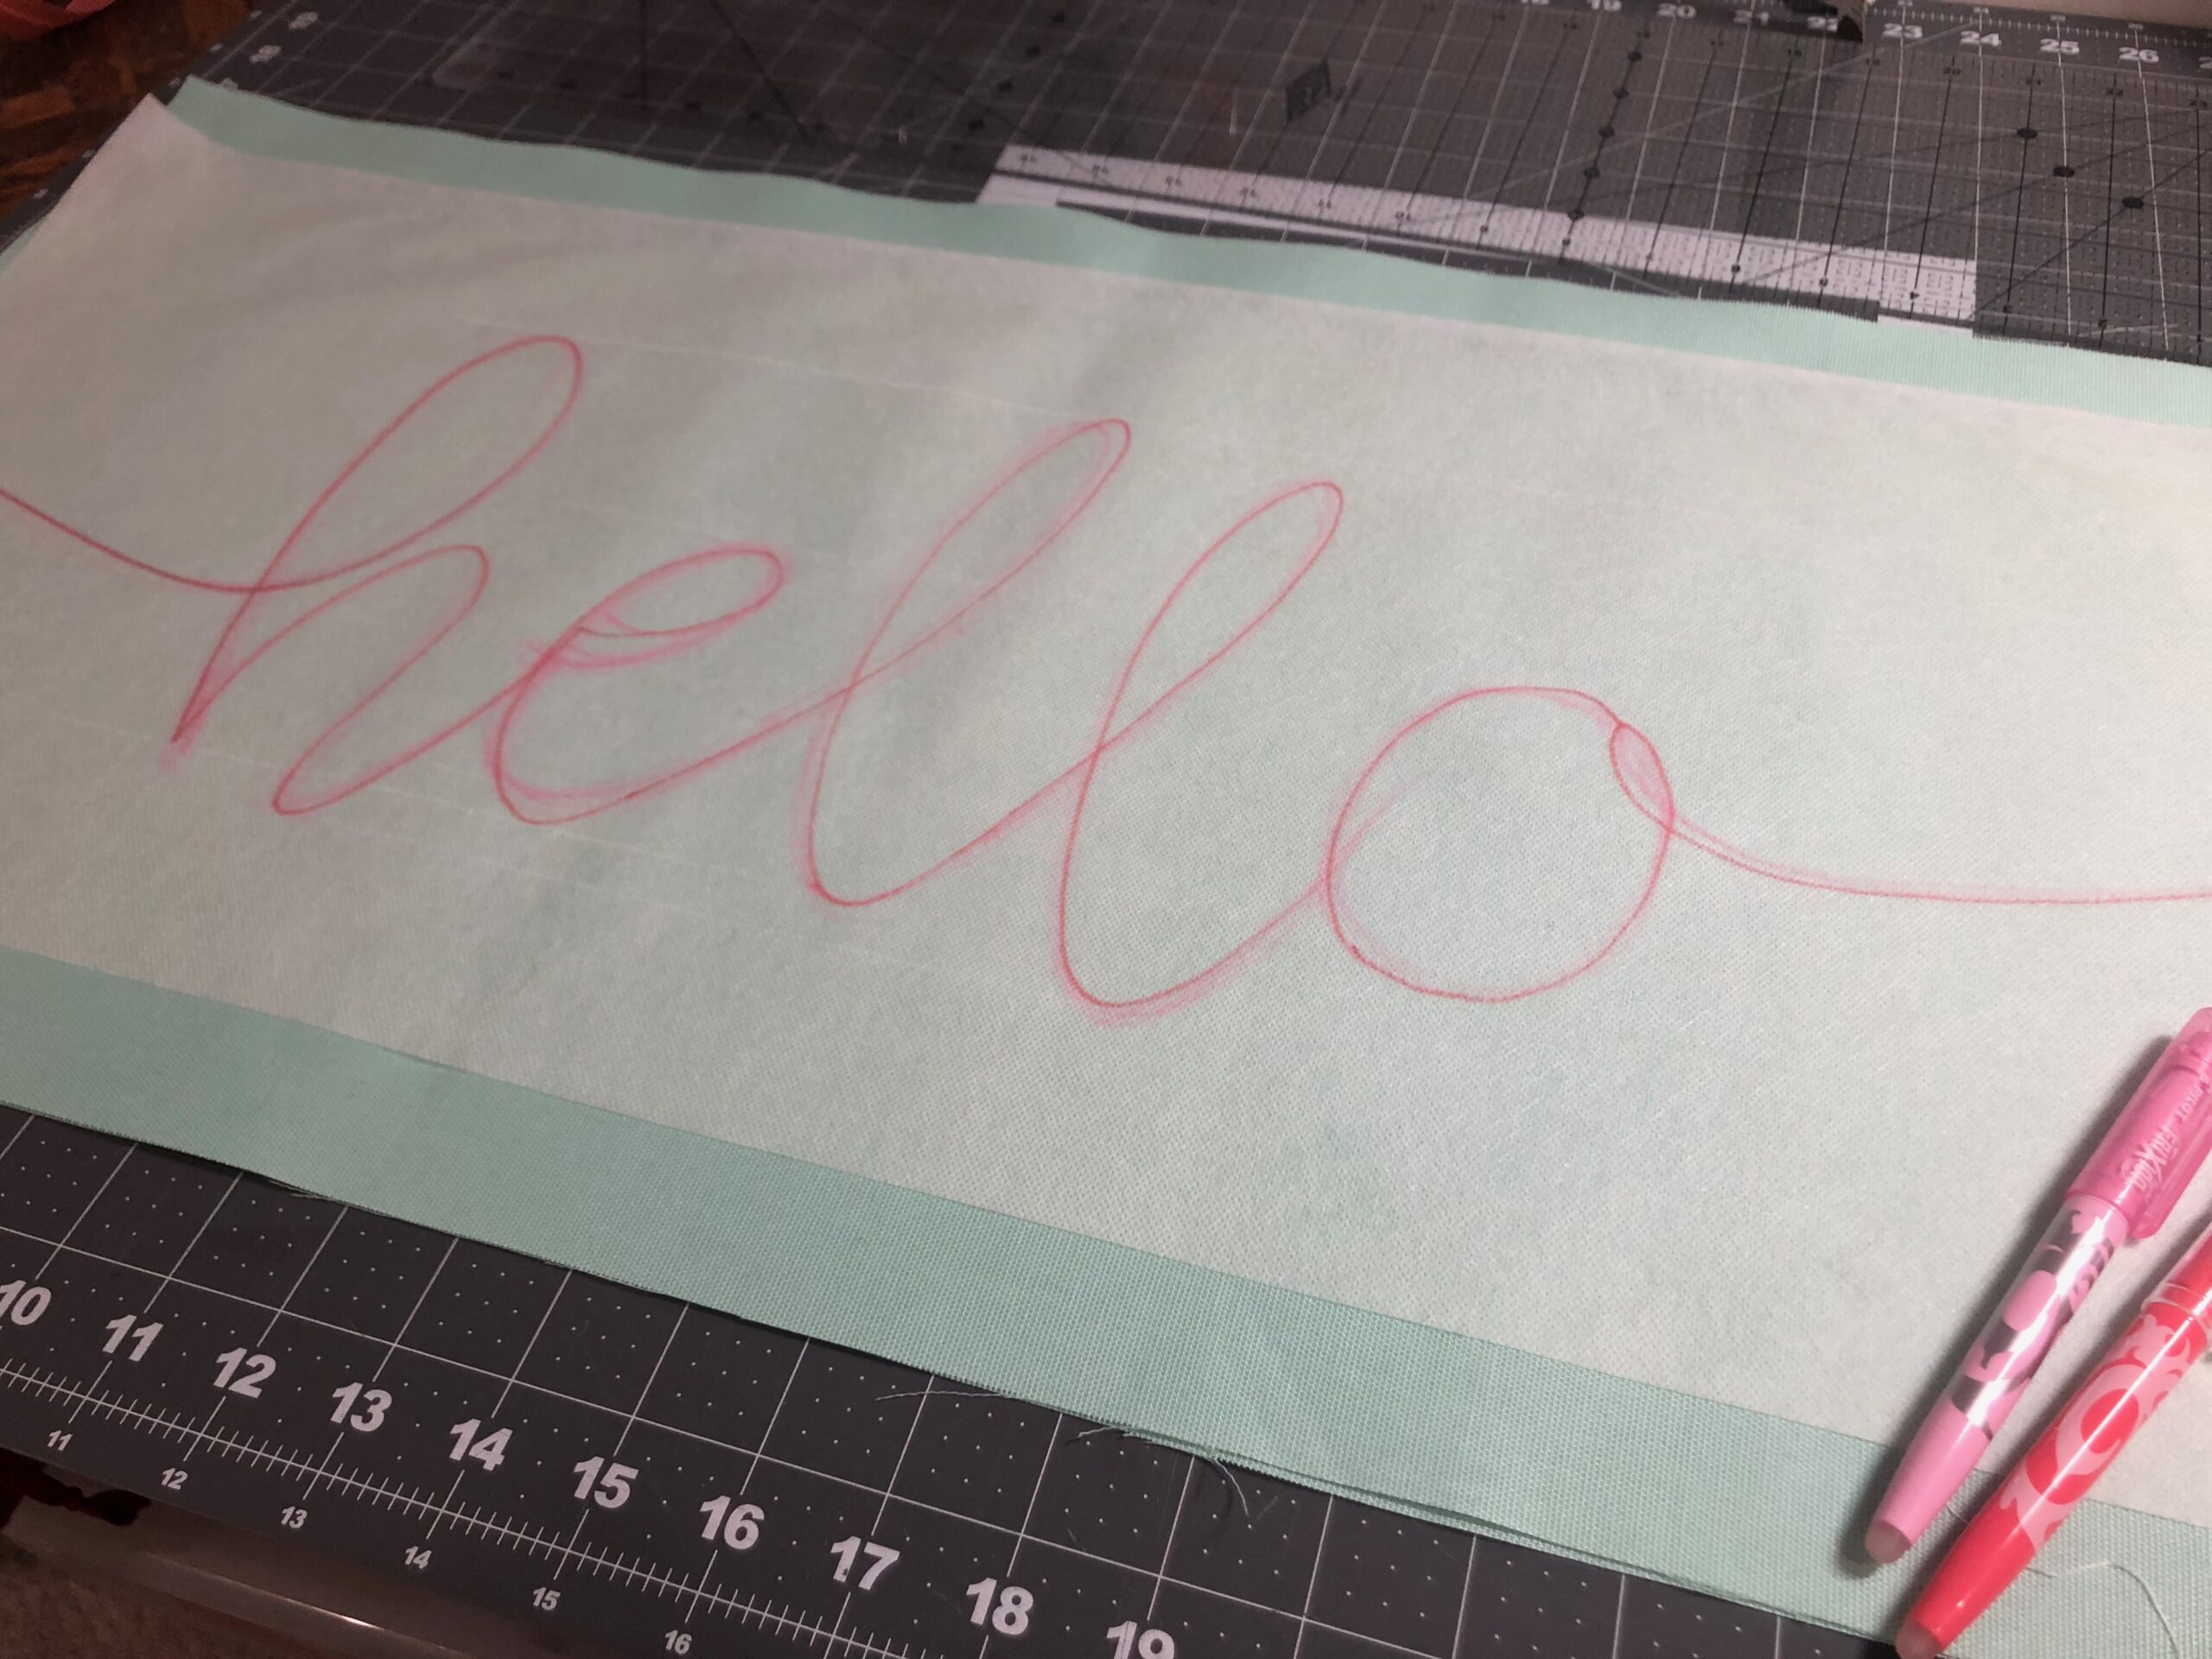
From the Sticky Fabri-Solvy, cut one 12 x 26 rectangle.
Center and stick the Sticky Fabri-Solvy rectangle to the right side of one fabric rectangle; this is the pillow front.
Center a rectangle of Sulky Soft ‘n Sheer Stabilizer along the pillow back.
PREPARING FOR COUCHING
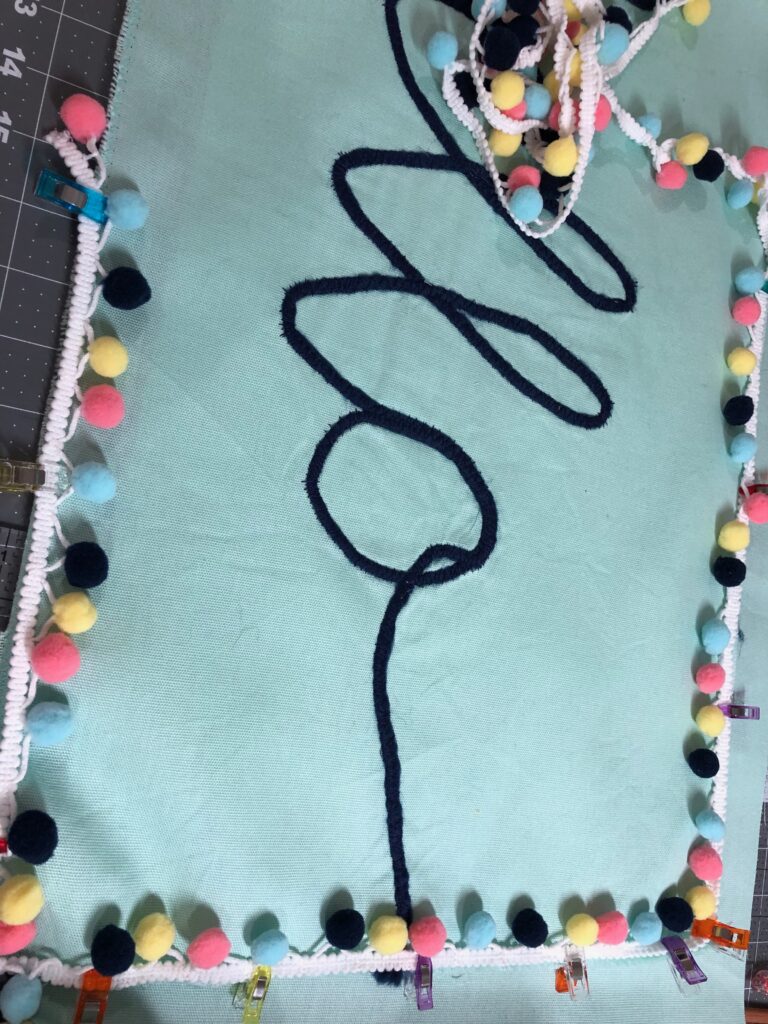
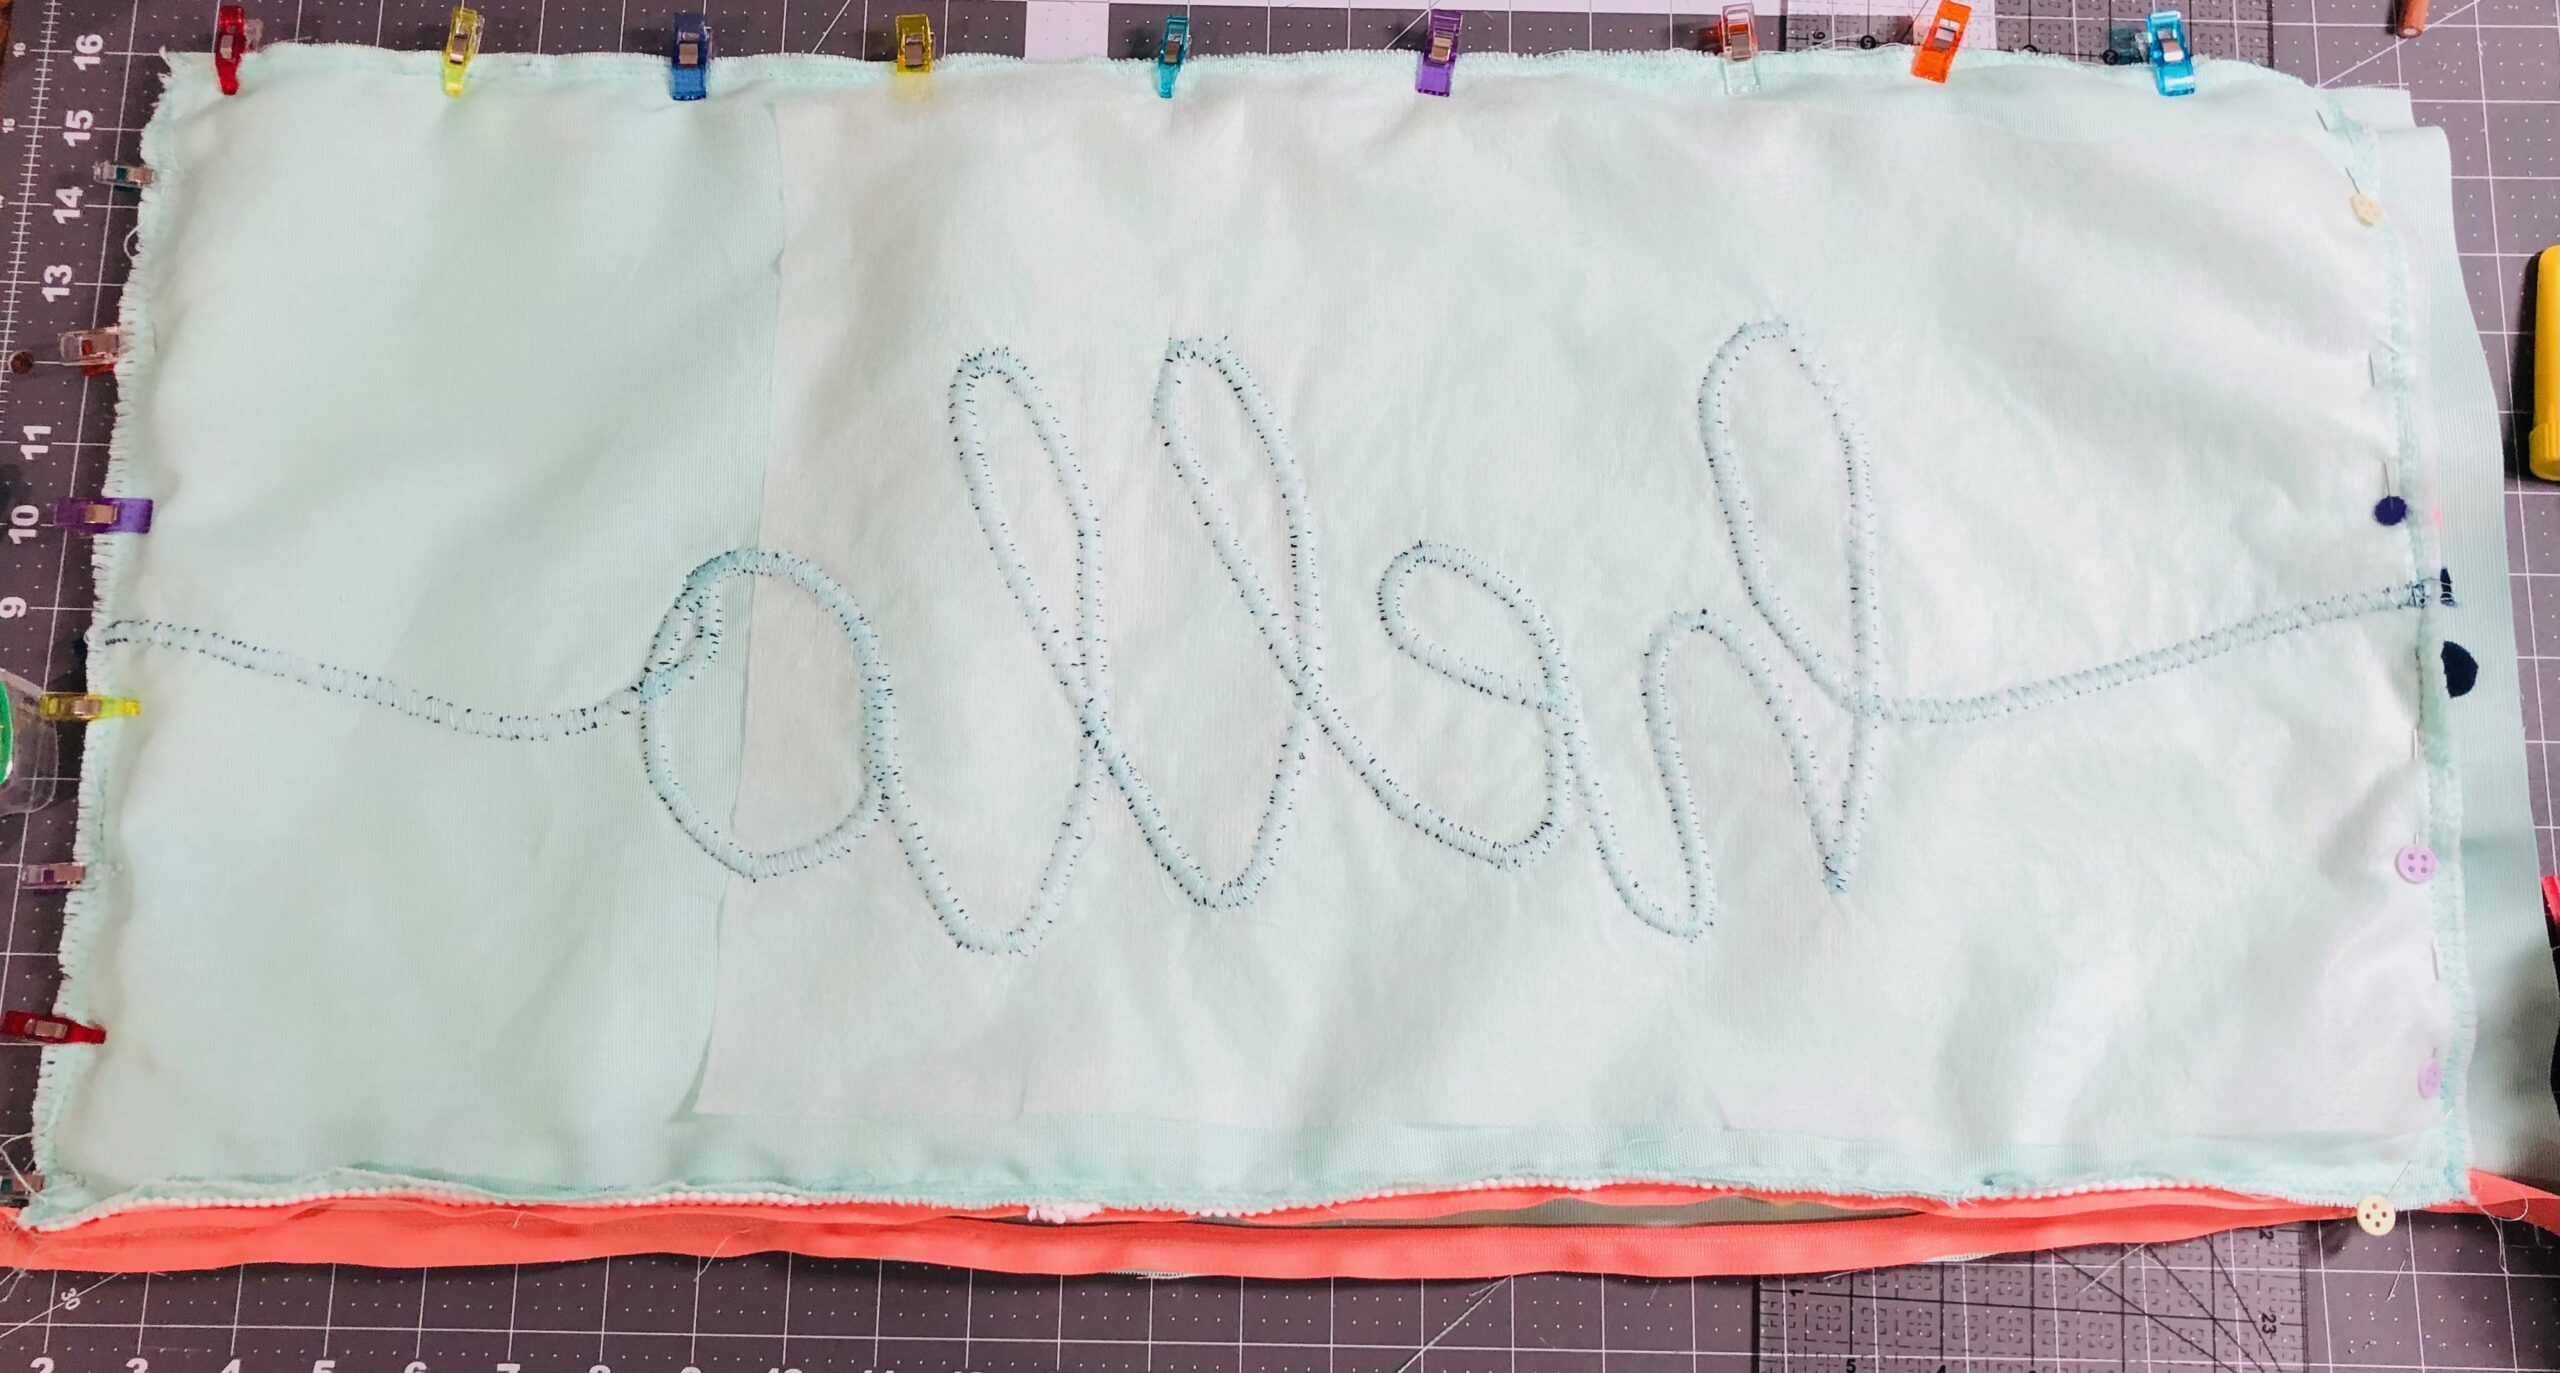
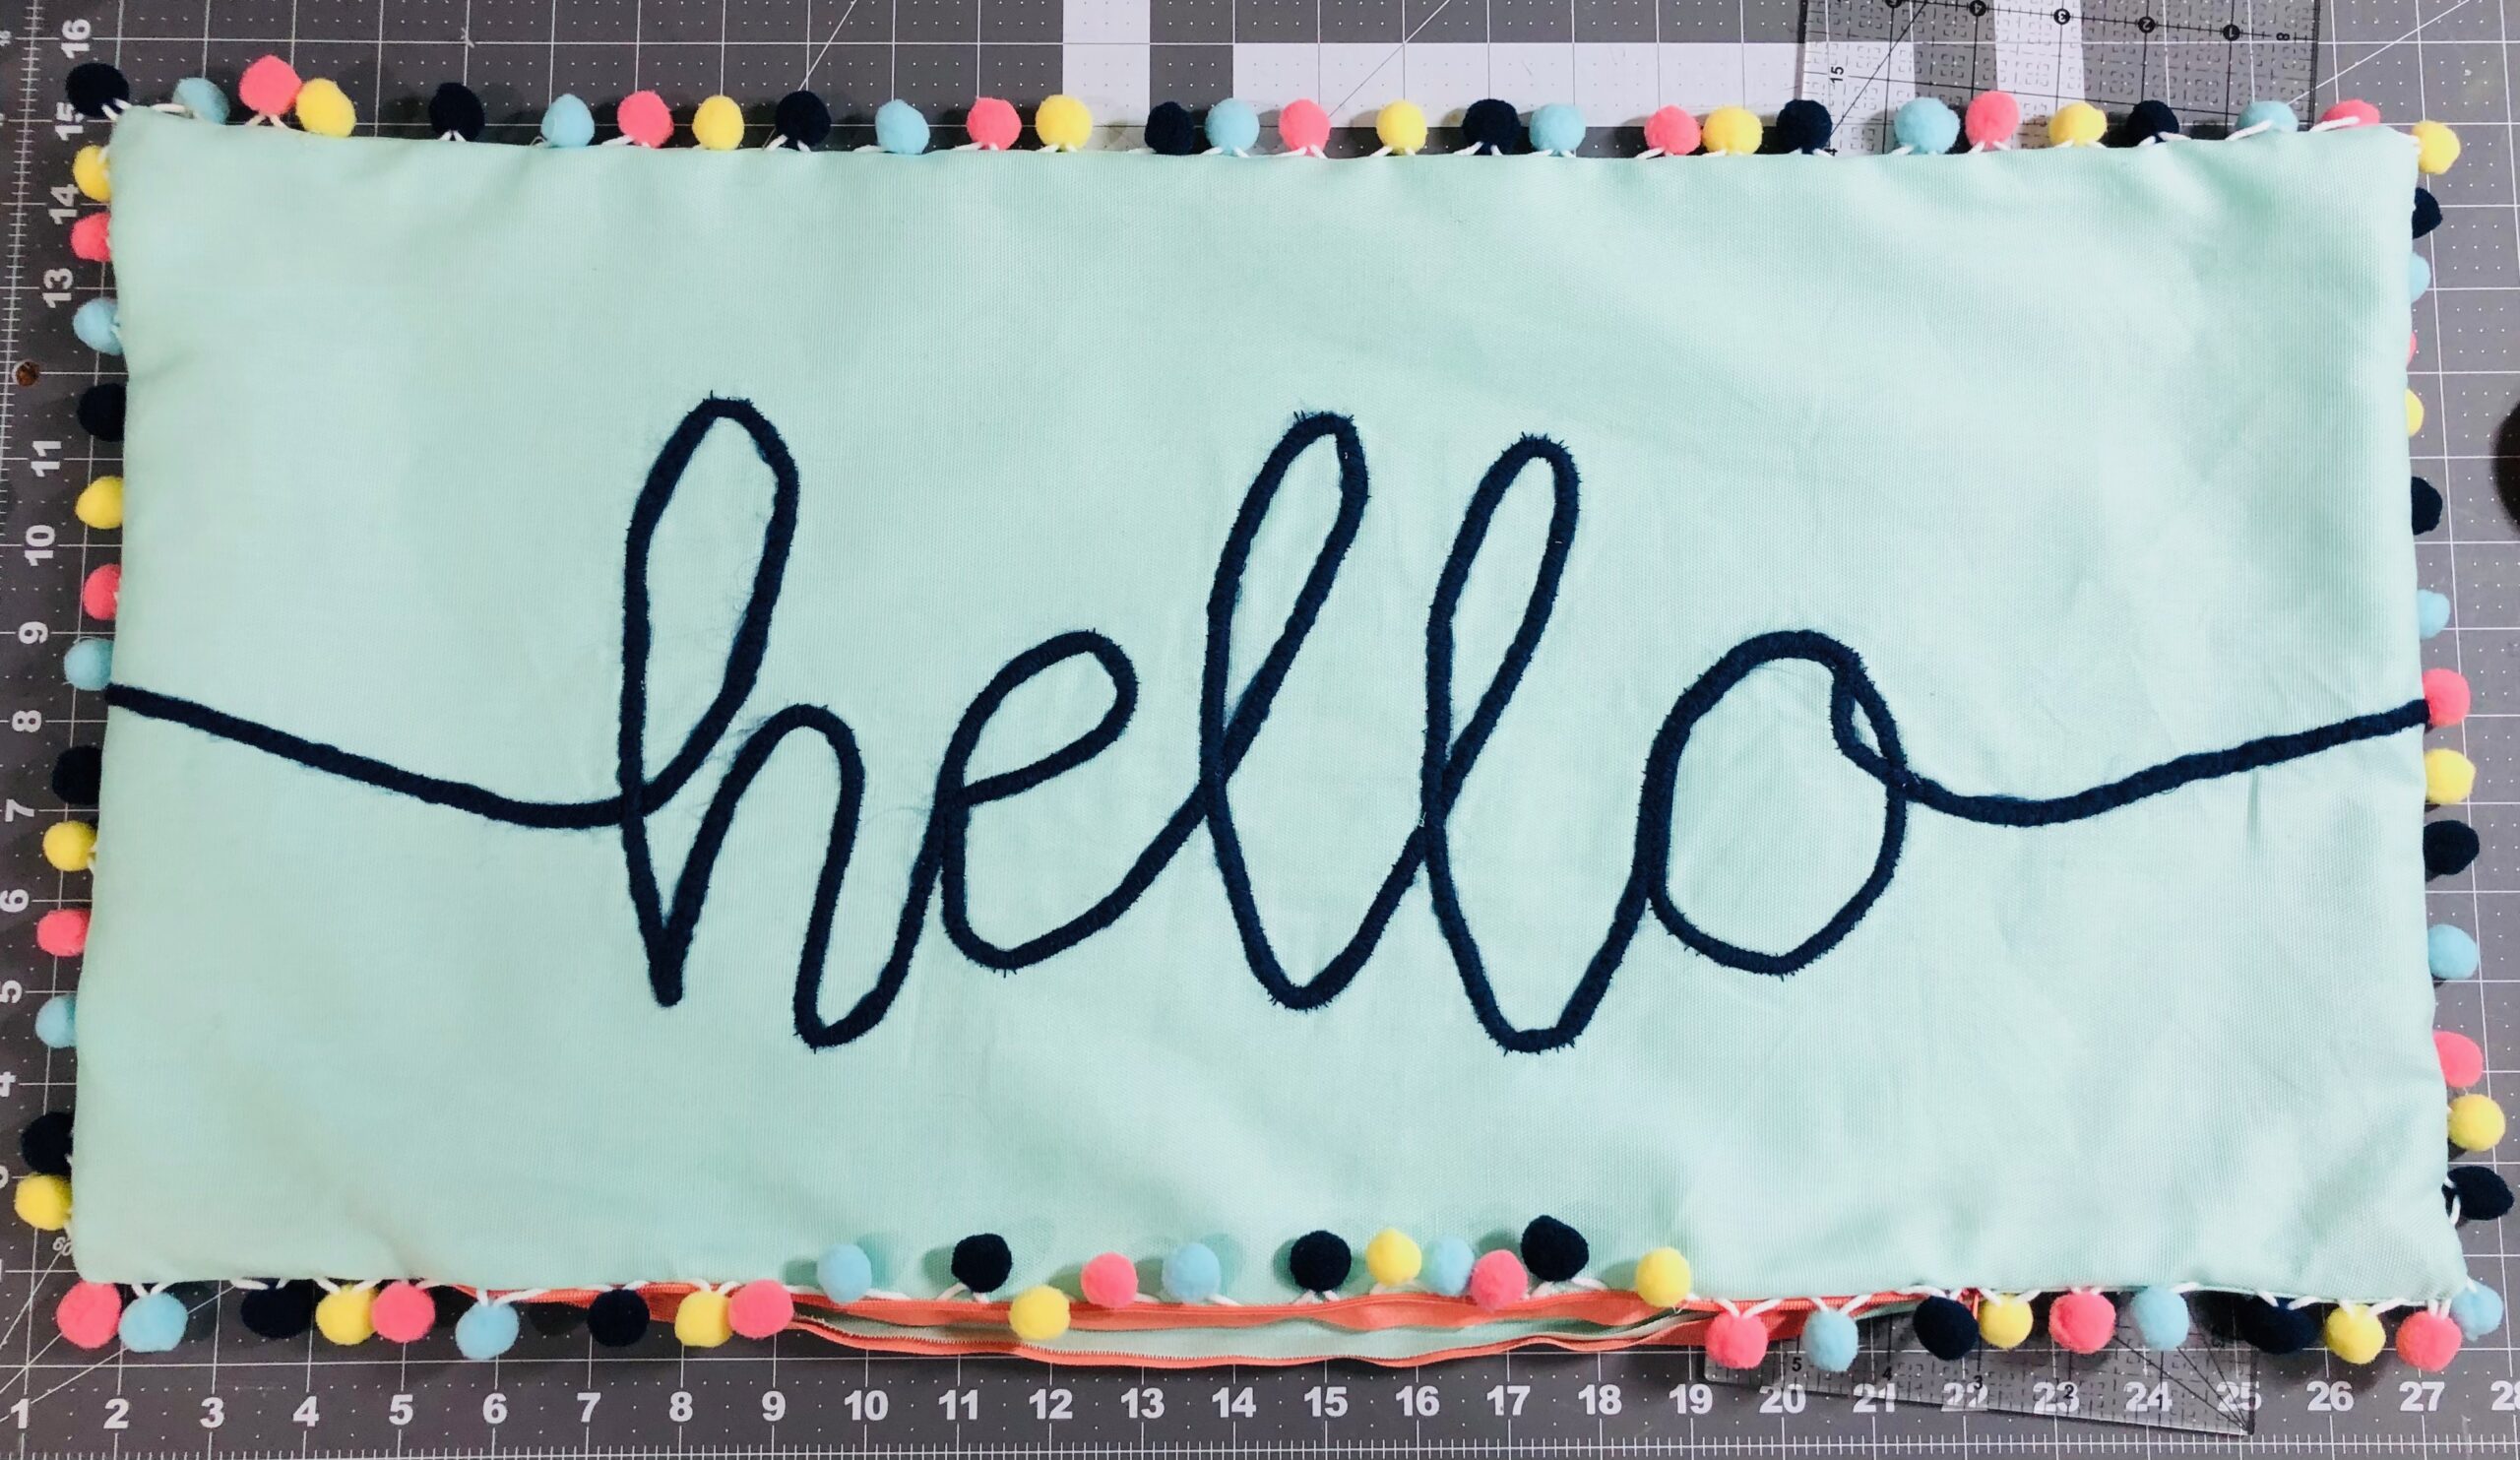
Write the word hello in the center of the Sticky Fabri-Solvy rectangle. It’s easiest to use a cursive font so the letters are all connected along one continuous row. Extend a straight or curvy line from the lower-left line of the ha out to the center of the left side seam allowance. Extend a straight or curvy line from the upper-right line of the out to the center of the right side seam allowance. (This will secure the yarn ends within the side seams.)
Thread the 90/14 Top Stitch needle and bobbin with Invisible Thread. Note: when winding a bobbin with Invisible Thread, slow the machine speed as low as it goes and only wind the bobbin halfway. Or, if preferred, thread a size 75/11 Top Stitch Needle with Sulky 50 wt. Cotton Thread that matches the yarn and the bobbin with 50 wt. Cotton Thread that matches the pillow fabric.
Set the sewing machine for a wide zigzag stitch. Perform a test-stitch using a short length of yarn and a fabric scrap to ensure the zigzag stitch width catches on either side of a yarn length. Place the yarn length under the presser foot, over the fabric. Place the presser foot down and begin sewing. The zig should catch the left edge and the zag should catch the right edge, so the yarn length is caught in the stitching. Make any needed adjustments to the stitch length and width until satisfied. (For the featured yarn, a 6.0mm-wide zigzag stitch was used.)
STITCHING
If using a couching foot, refer to the manufacturer’s instructions for installation and use. The following instructions are for a standard presser foot.
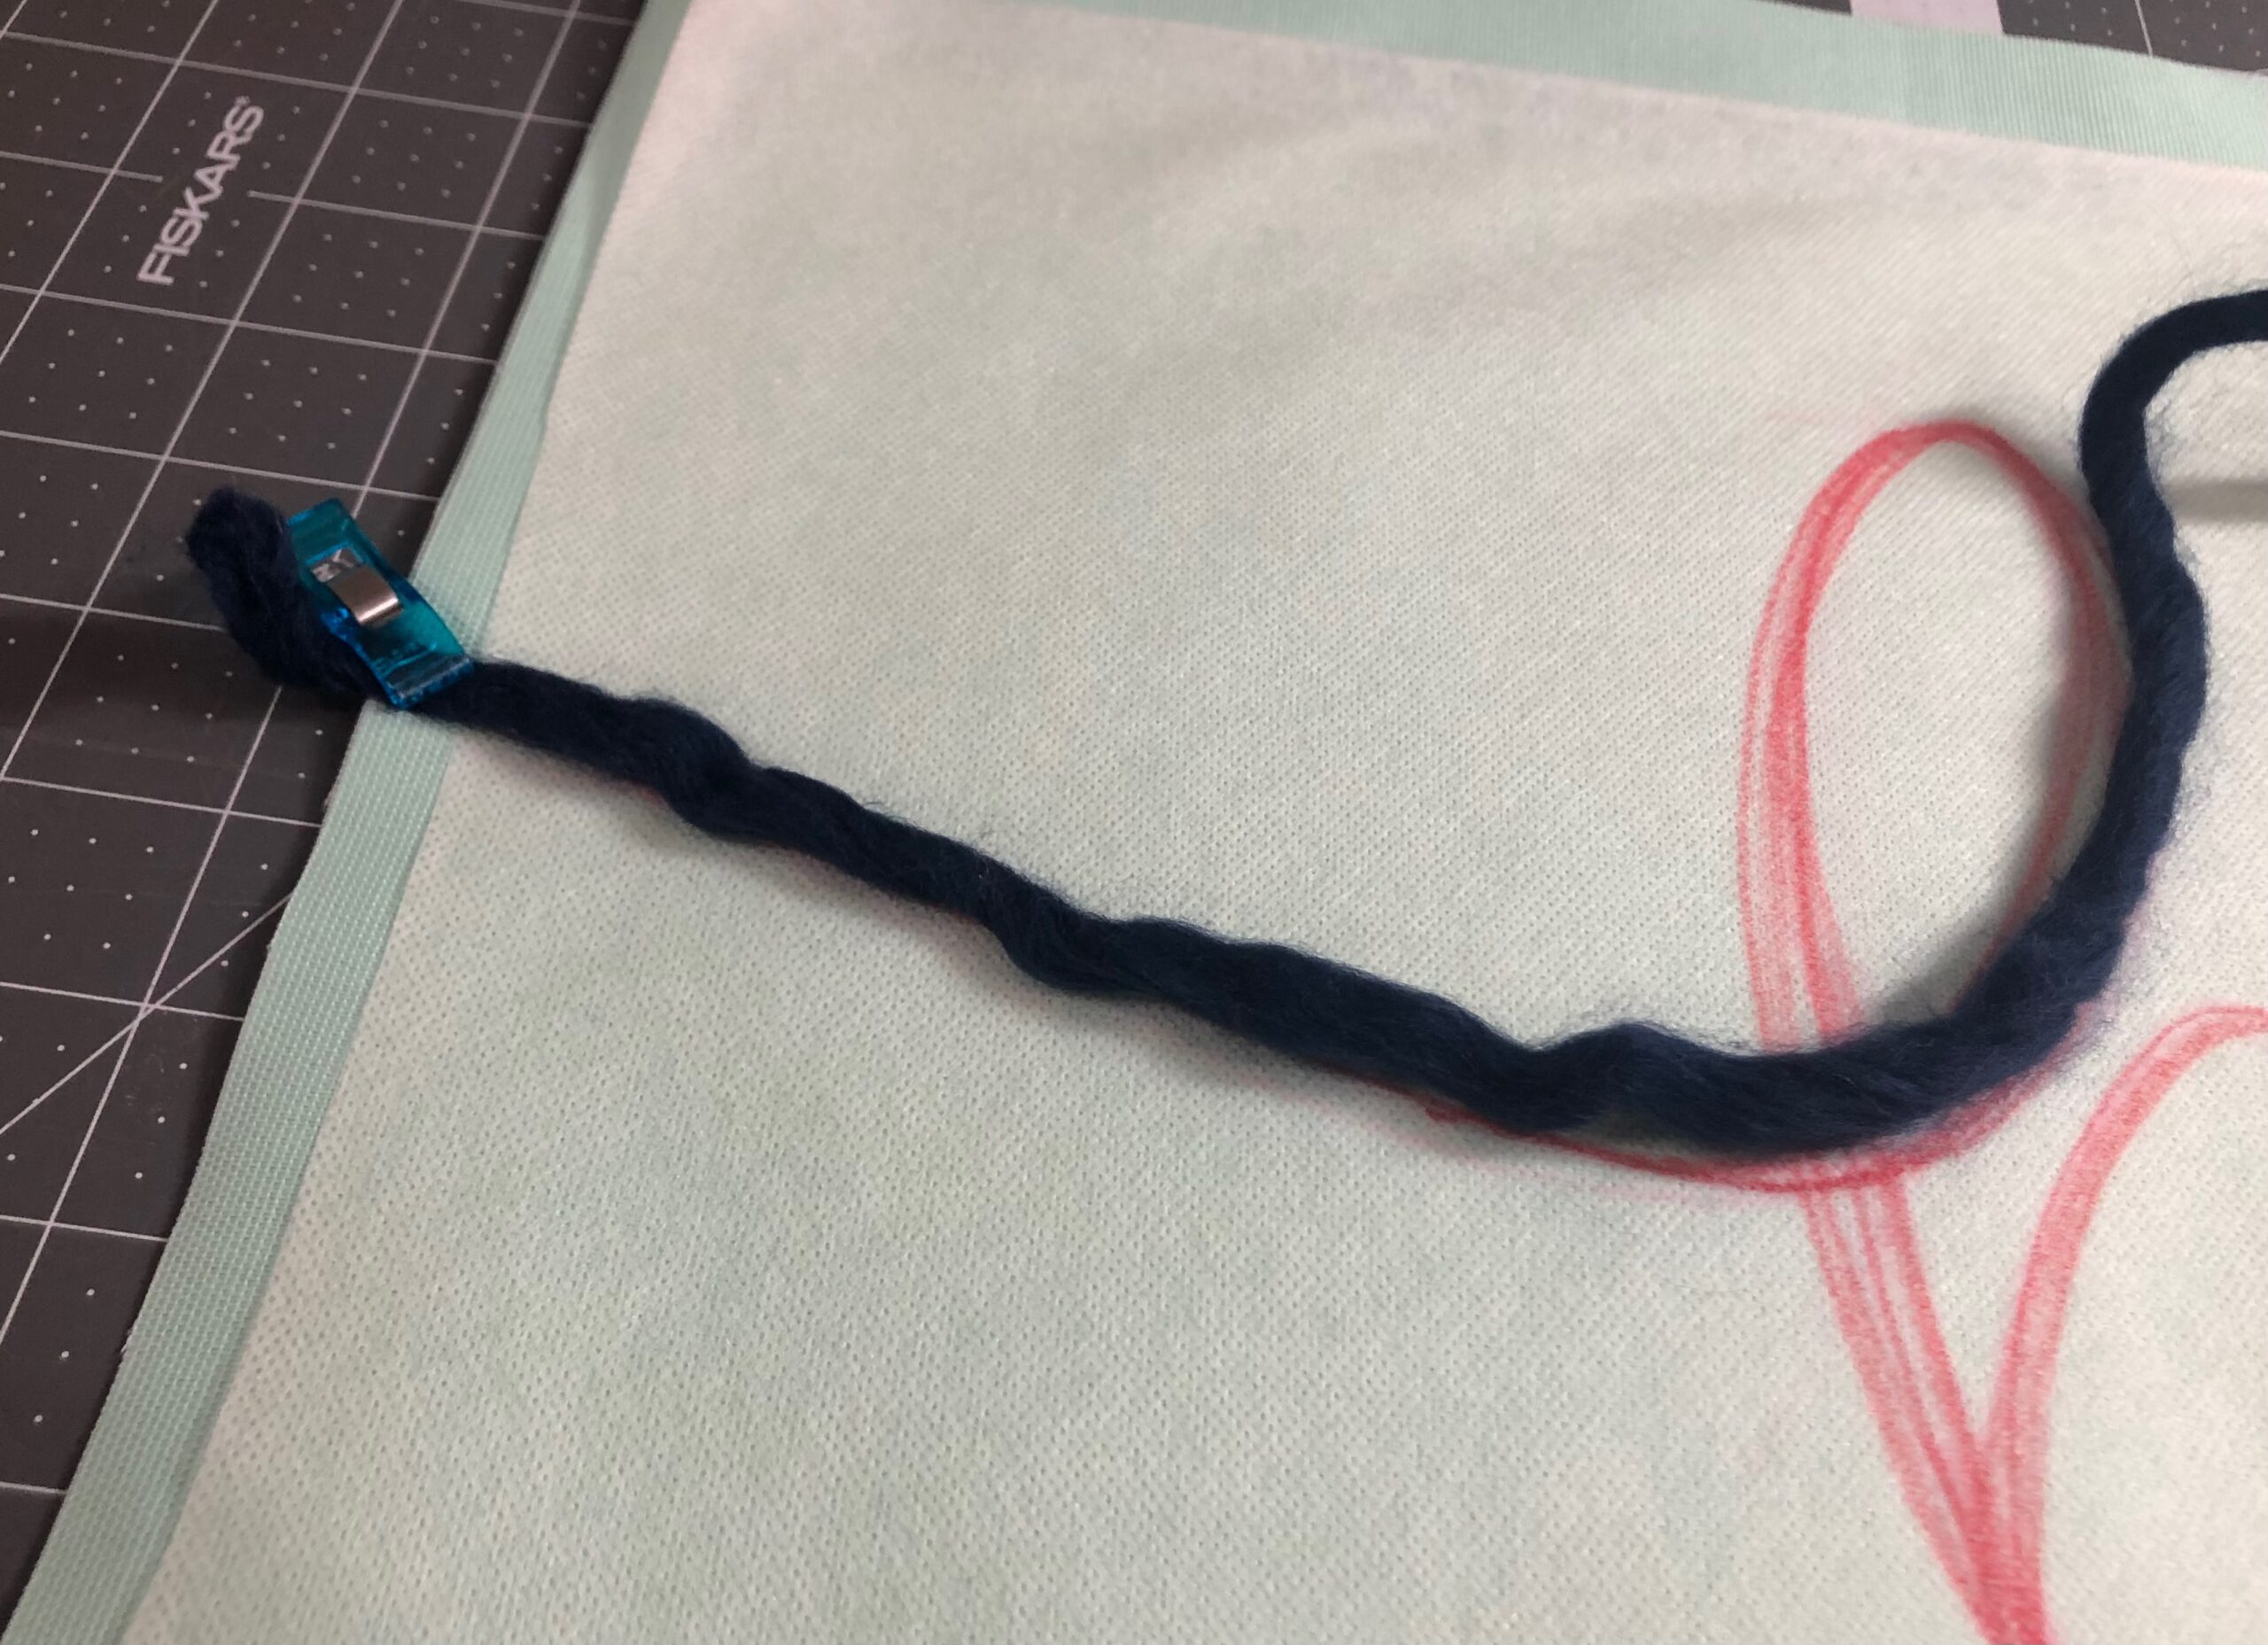
Extend the yarn end slightly beyond the seam allowance along the left rectangle edge; clip or pin in place. Lower the presser foot so it secures the yarn in place, about ¼ from the rectangle left edge. Stitch back and forth a few times to secure the yarn.
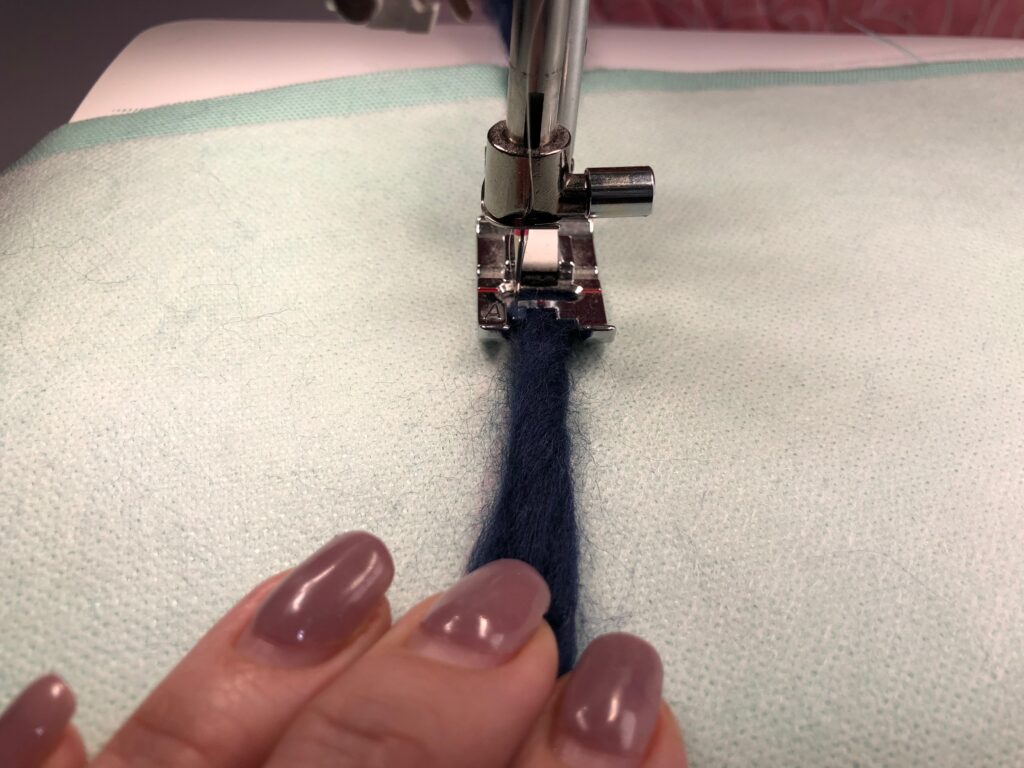
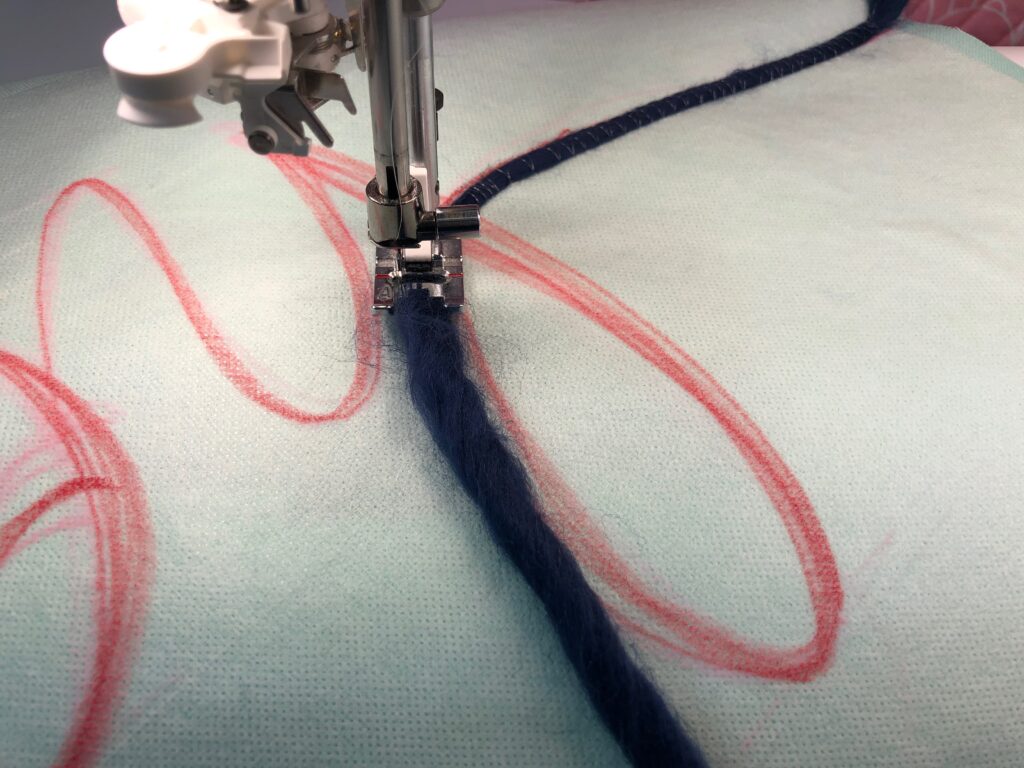
Begin stitching along the marked line and over the yarn. Guide the yarn under the presser foot and pull it slightly taut as you sew, without stretching, so it covers the marked lines. Stitch slowly and carefully, moving the fabric and yarn as needed.
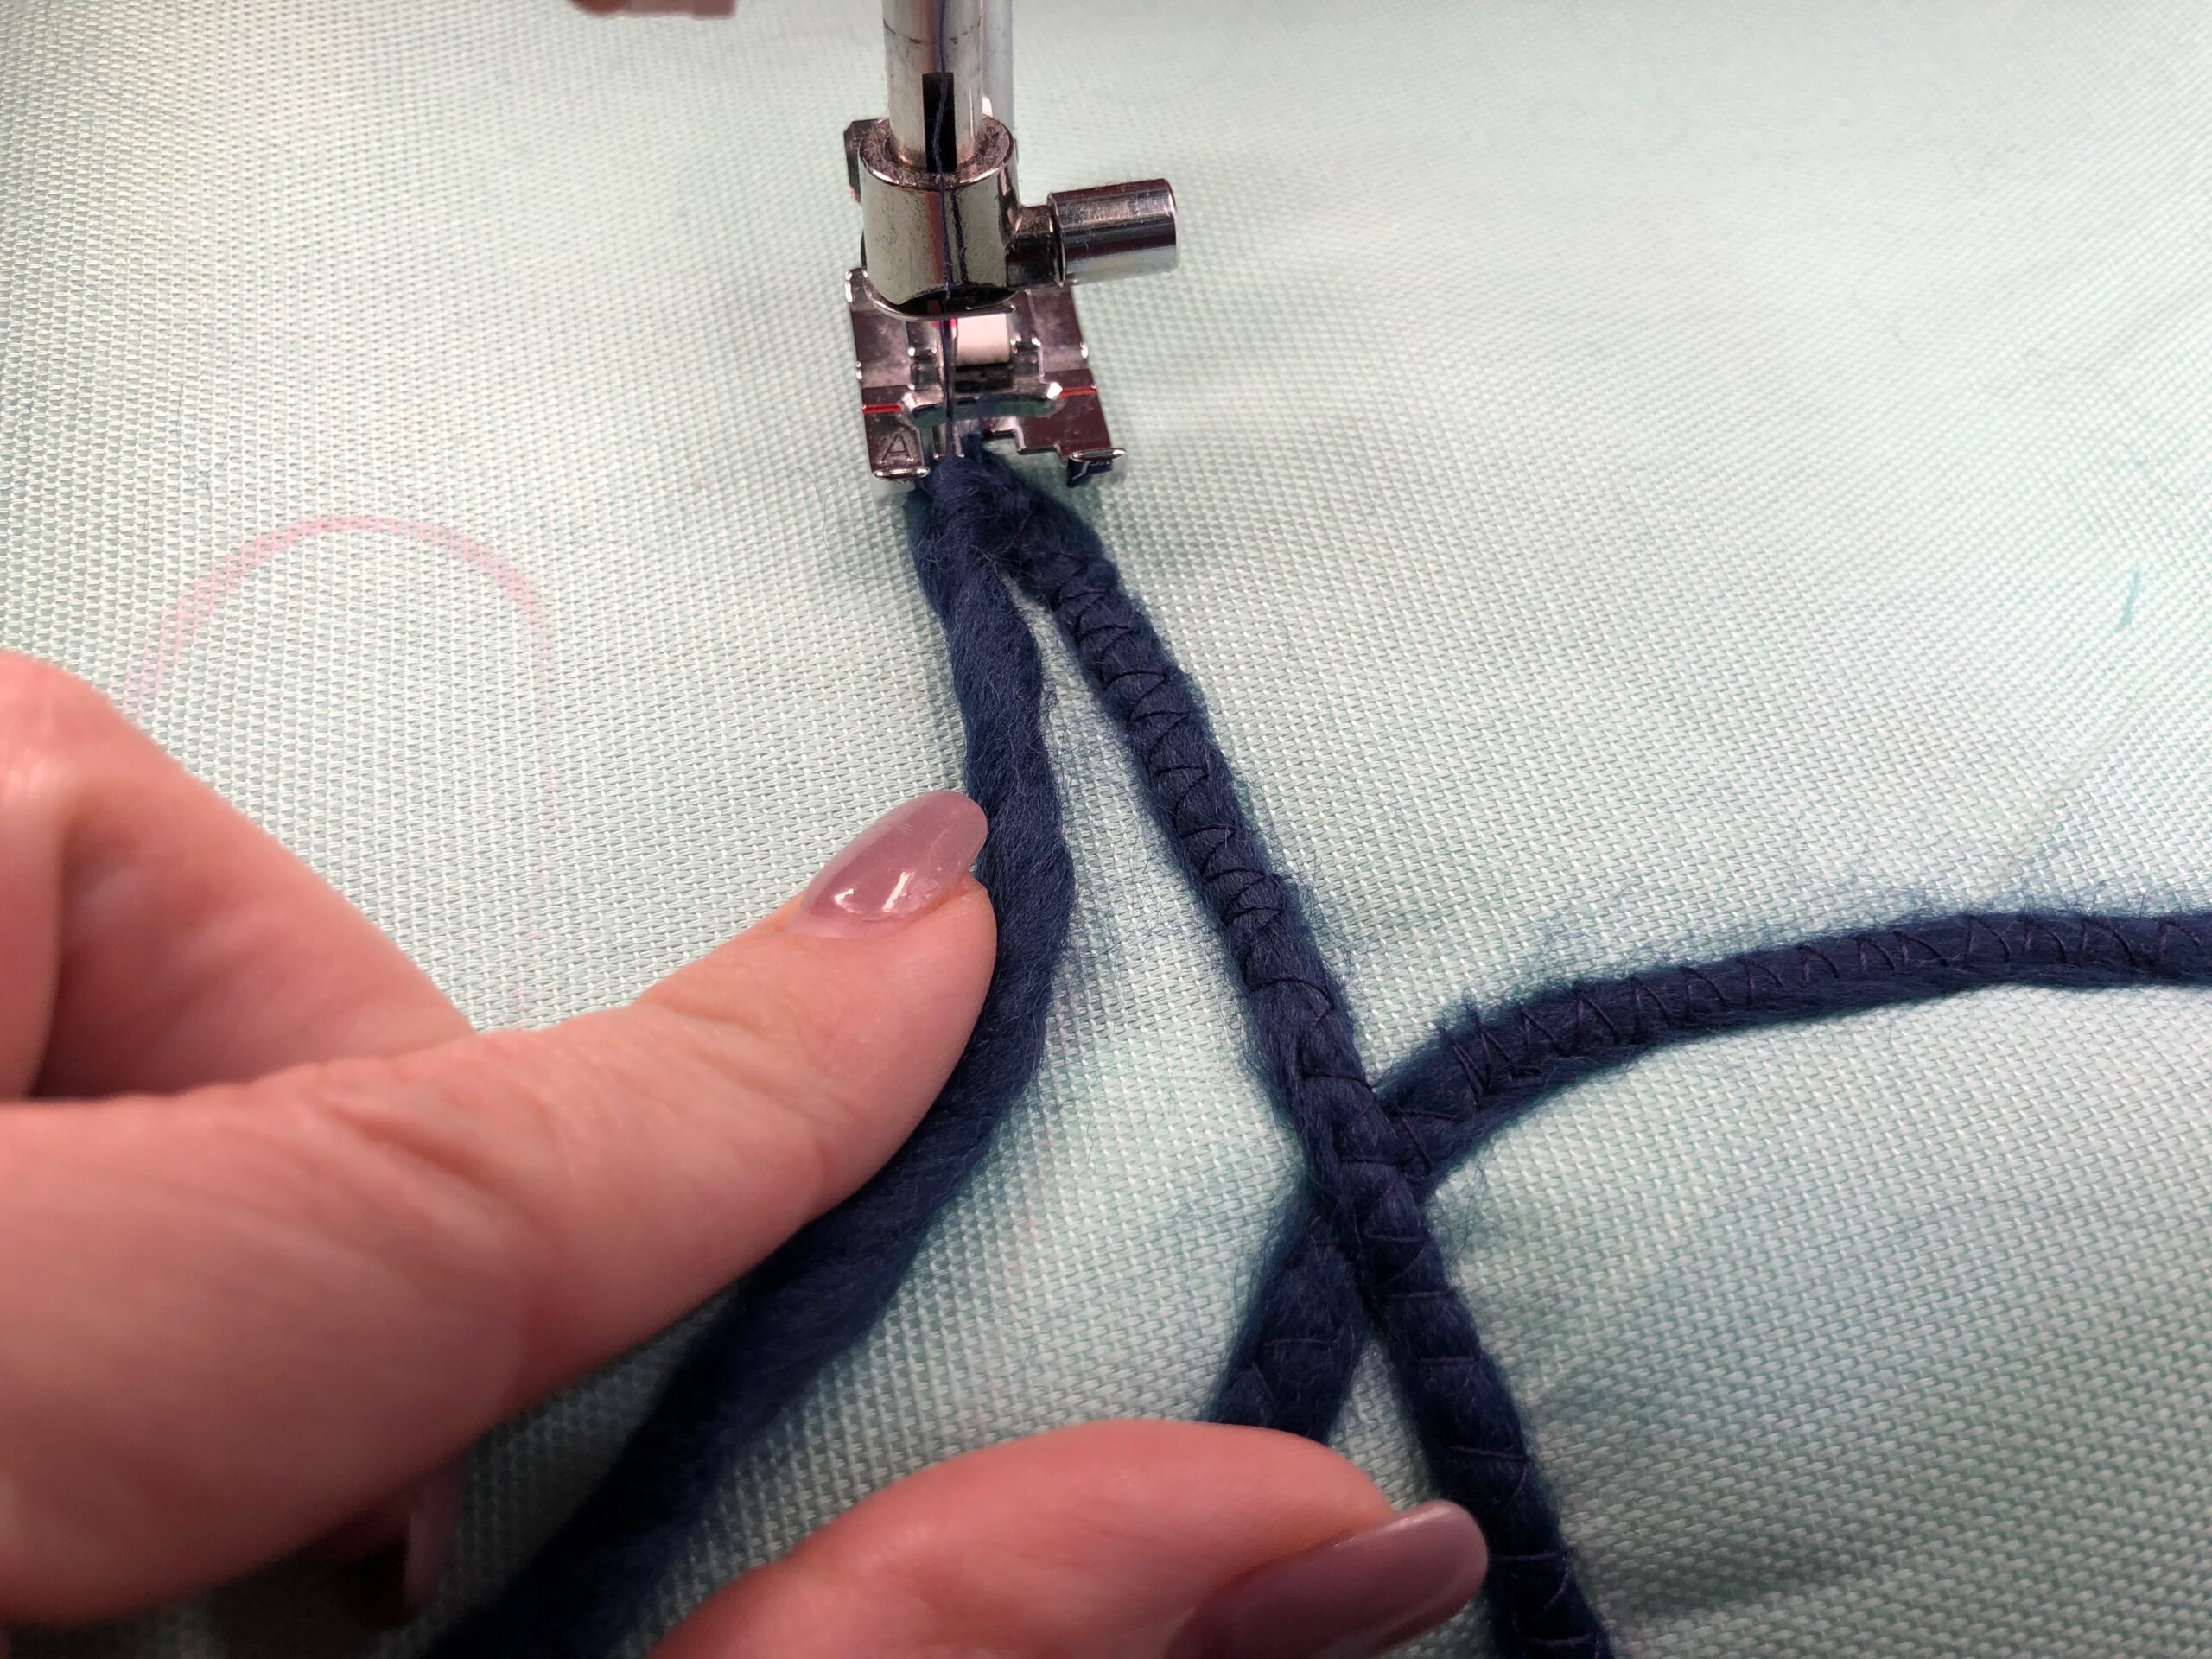
At the opposite rectangle edge, finish couching the yarn with a few backstitches. Trim the yarn about 1 beyond the fabric edge.
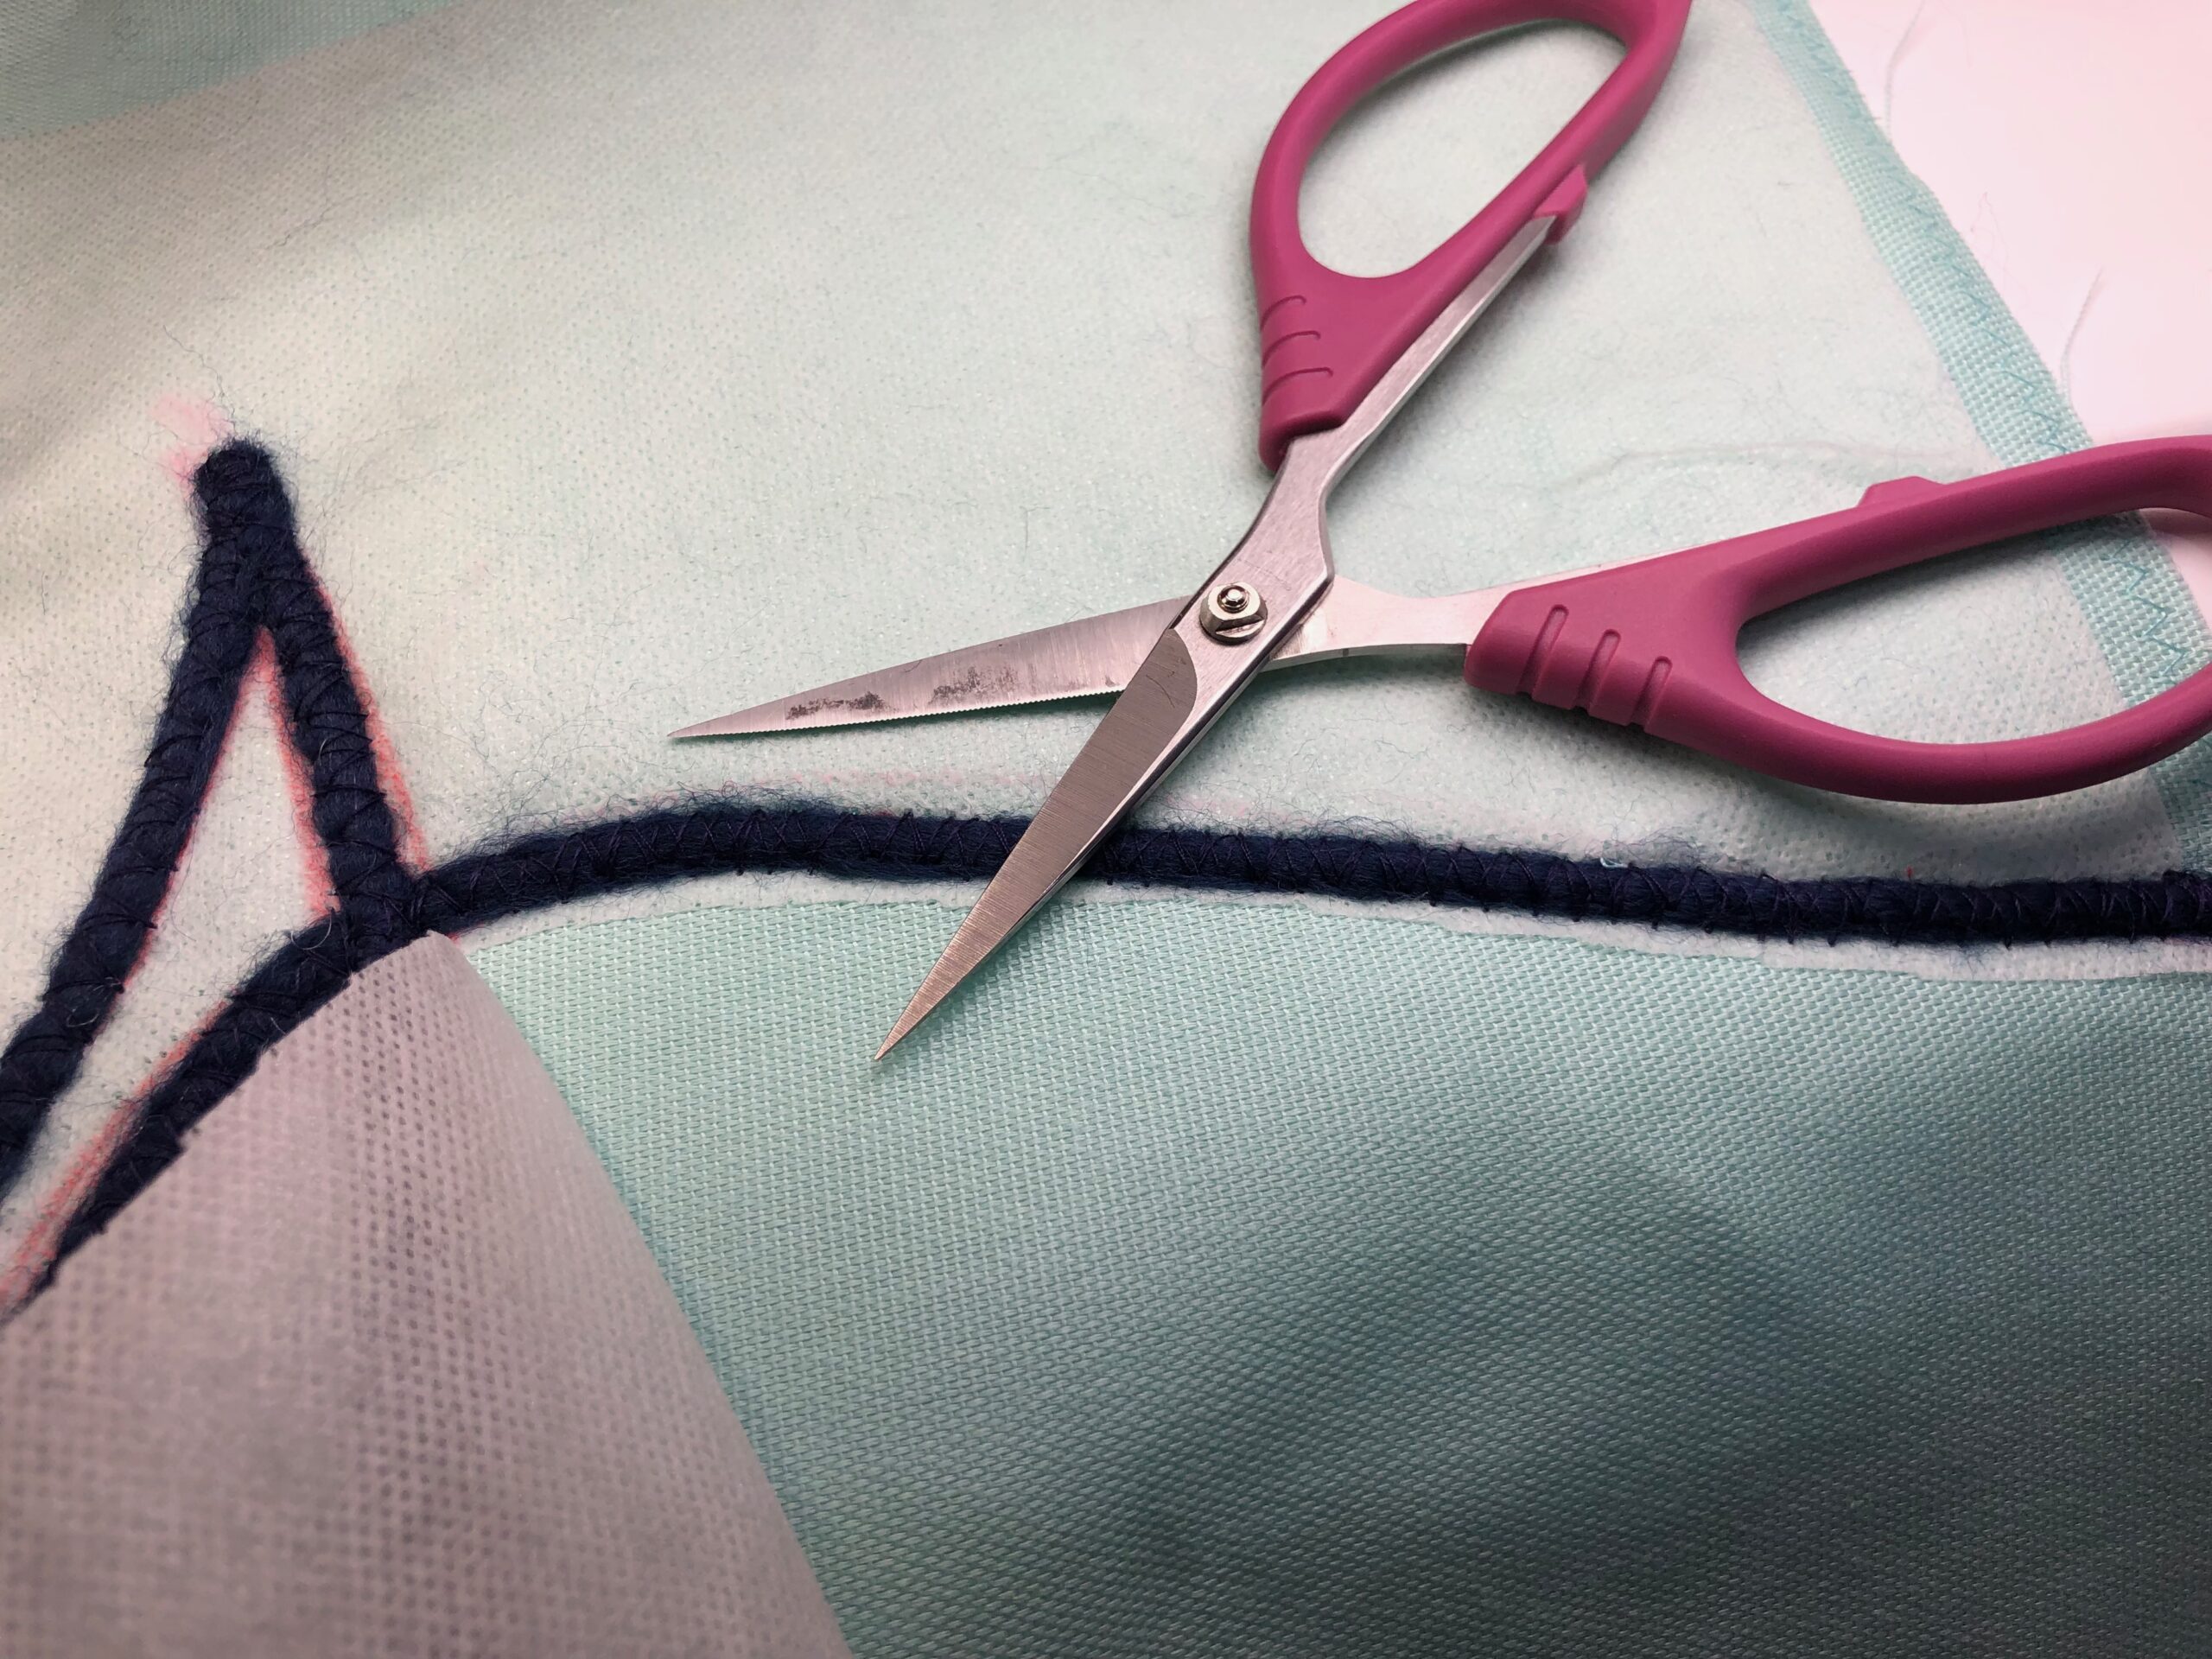
Then, trim away the Sticky Fabri-Solvy slightly beyond the yarn. Trim as much away as possible, being careful to not nick the fabric.
Rinse away the stabilizer until it’s completely dissolved. Let dry. If needed, press the fabric lightly around the couching to remove any wrinkles.
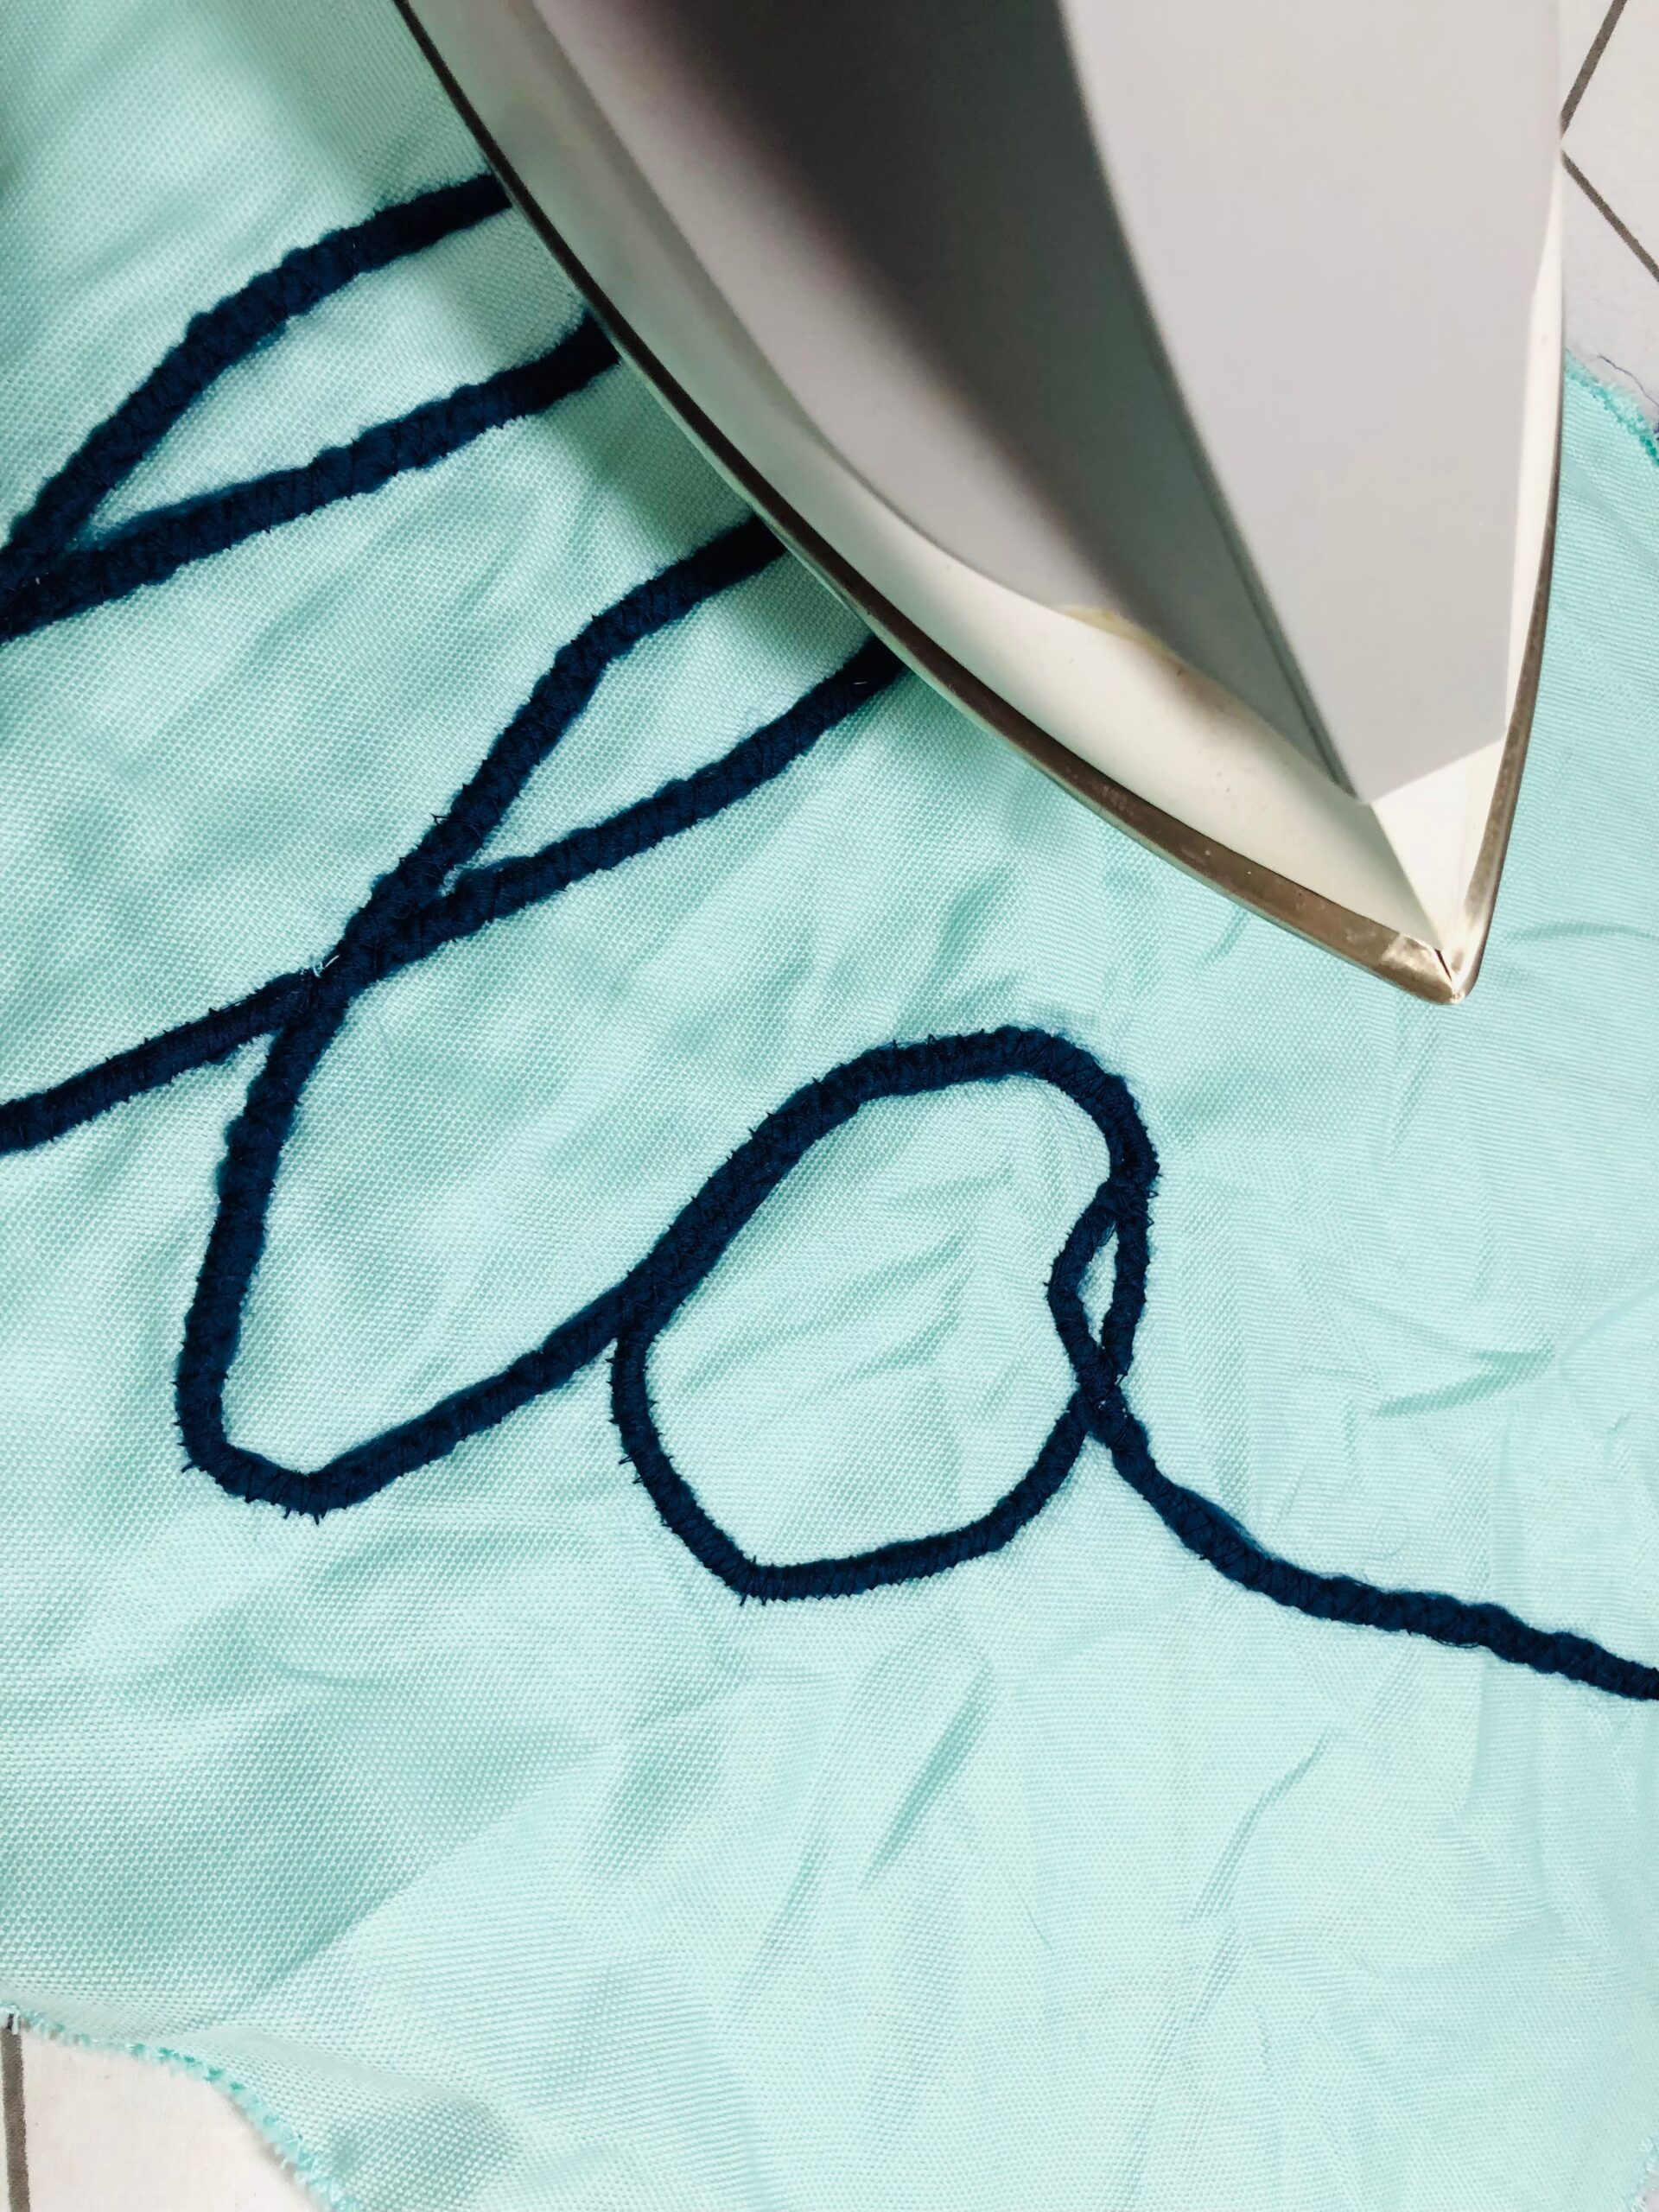
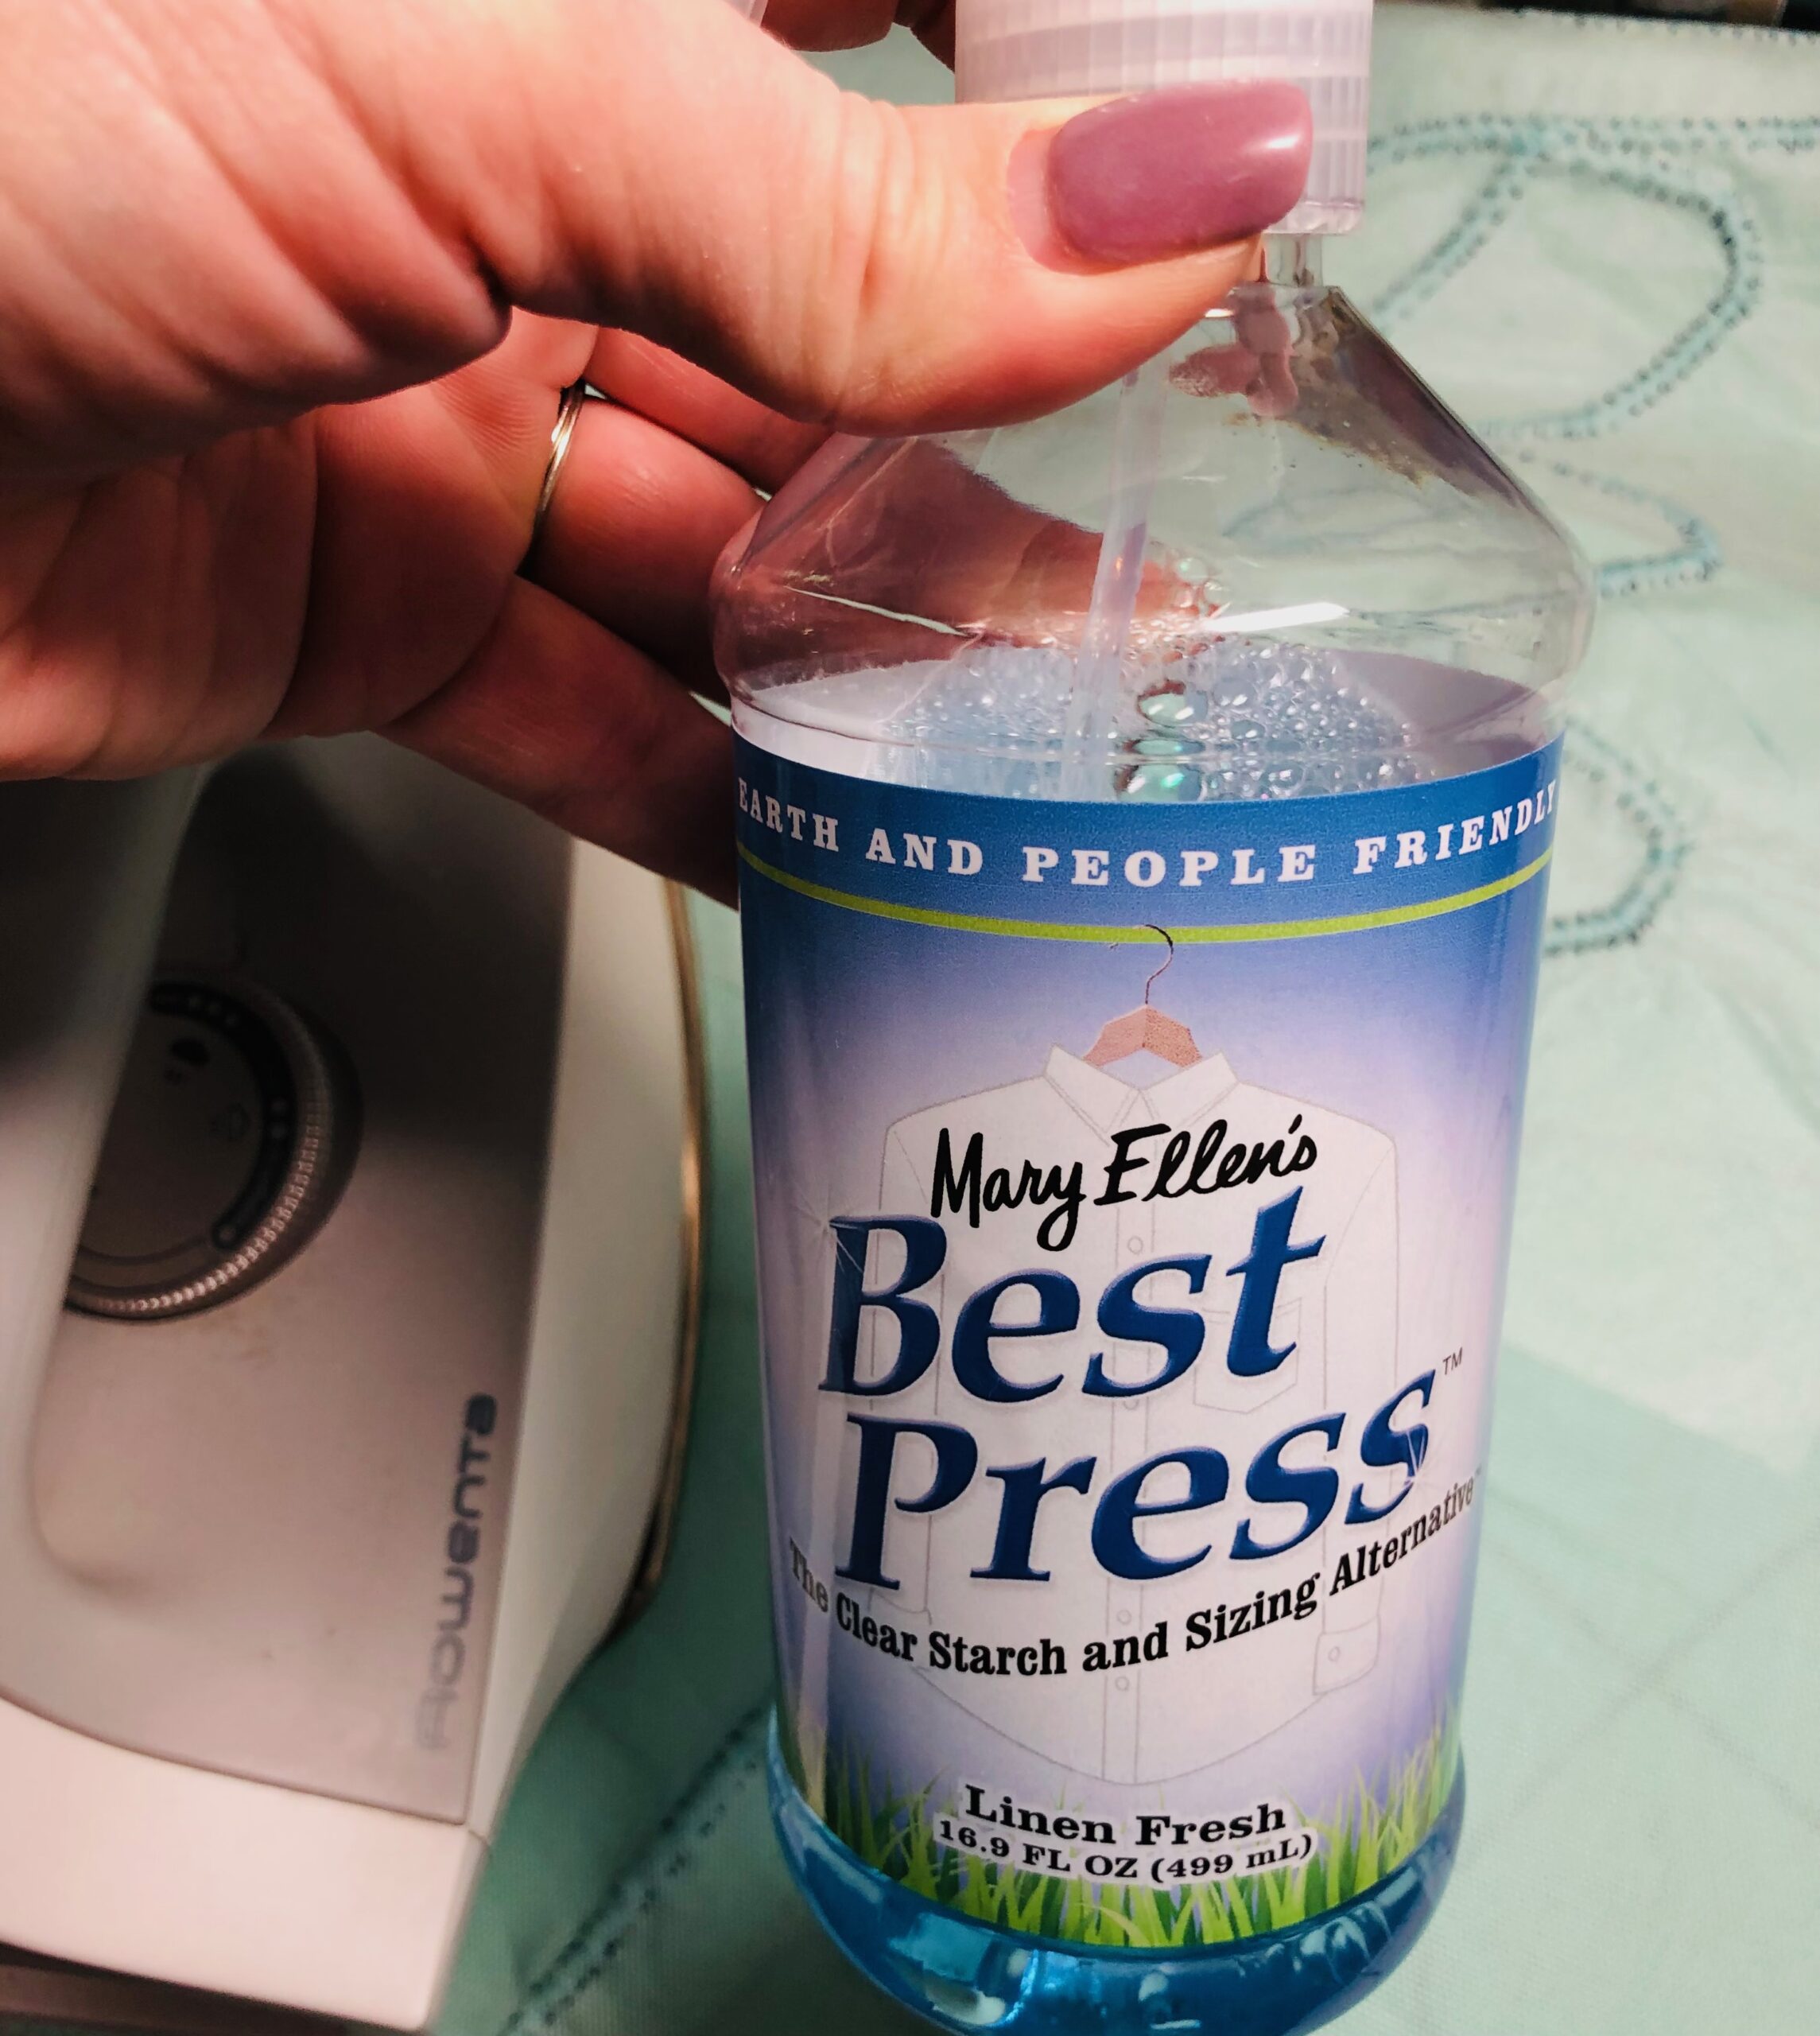
TIP: Mary Ellen’s Best Press is a good spray starch for medium- to heavyweight fabrics that have stubborn wrinkles after washing and stabilizer removal.
PILLOW CONSTRUCTION
Thread the needle and bobbin with 40 wt. Poly Deco Thread. Set the machine for a straight stitch with a 5.0mm stitch length.
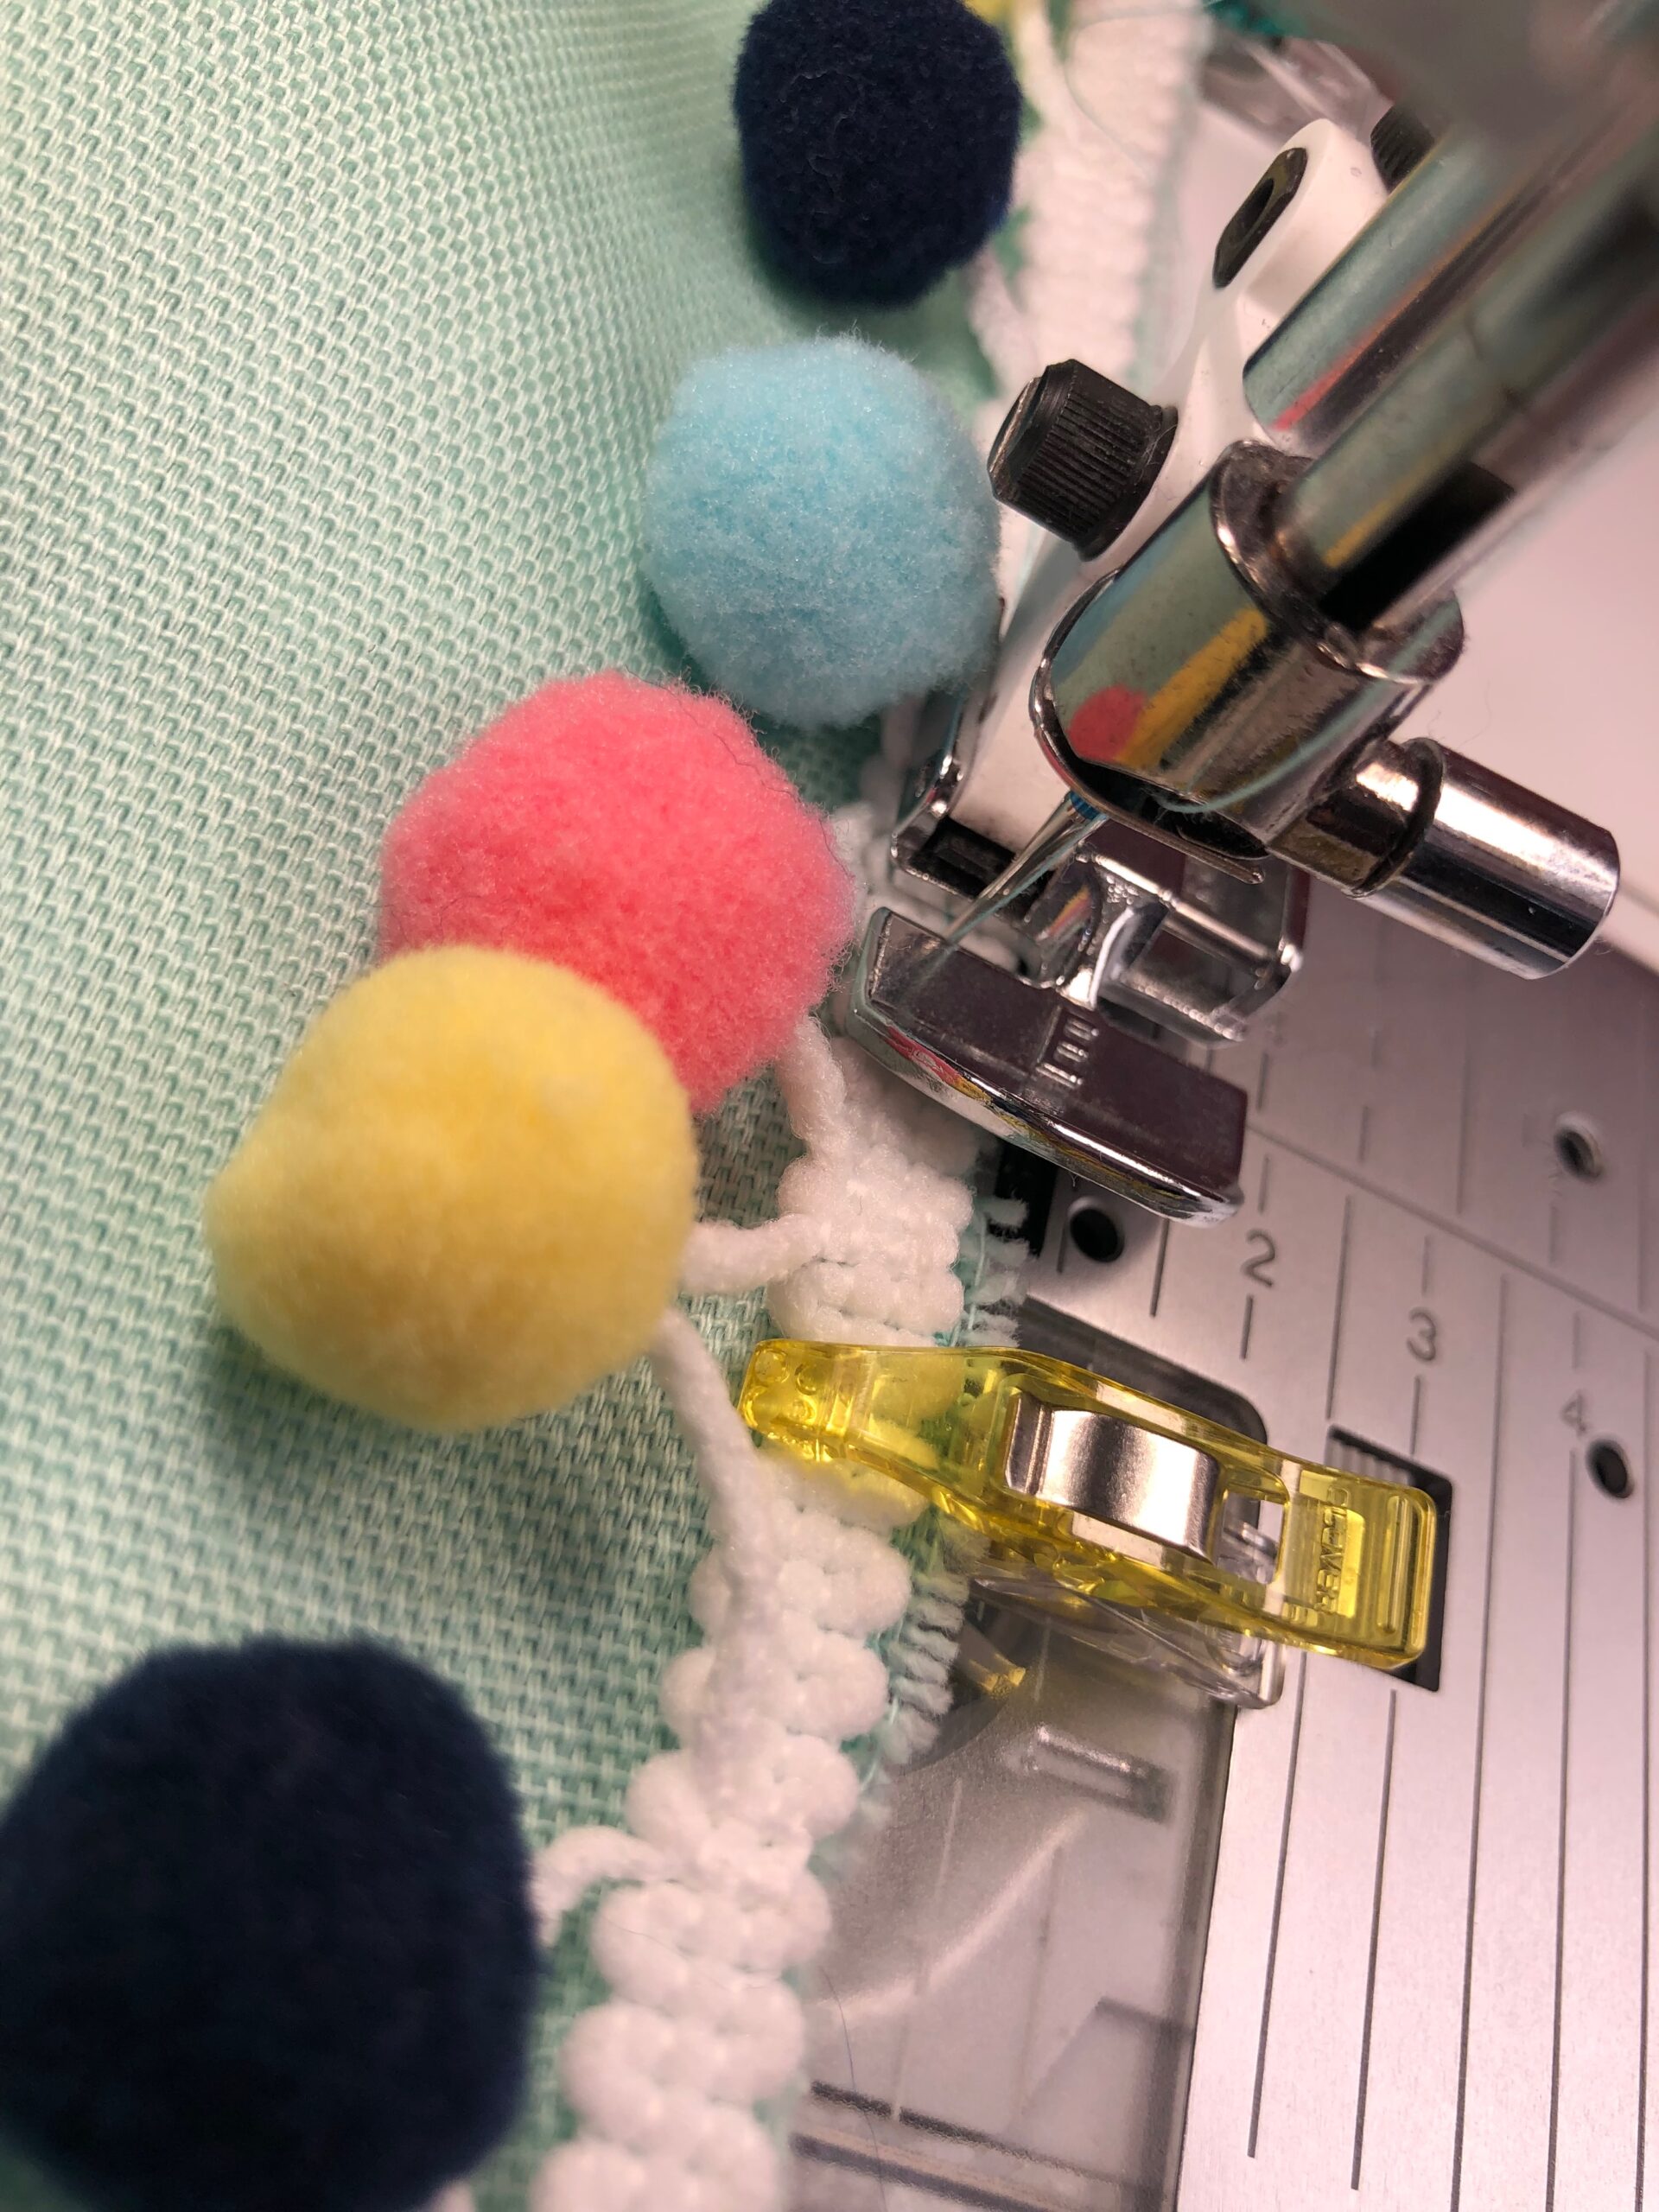
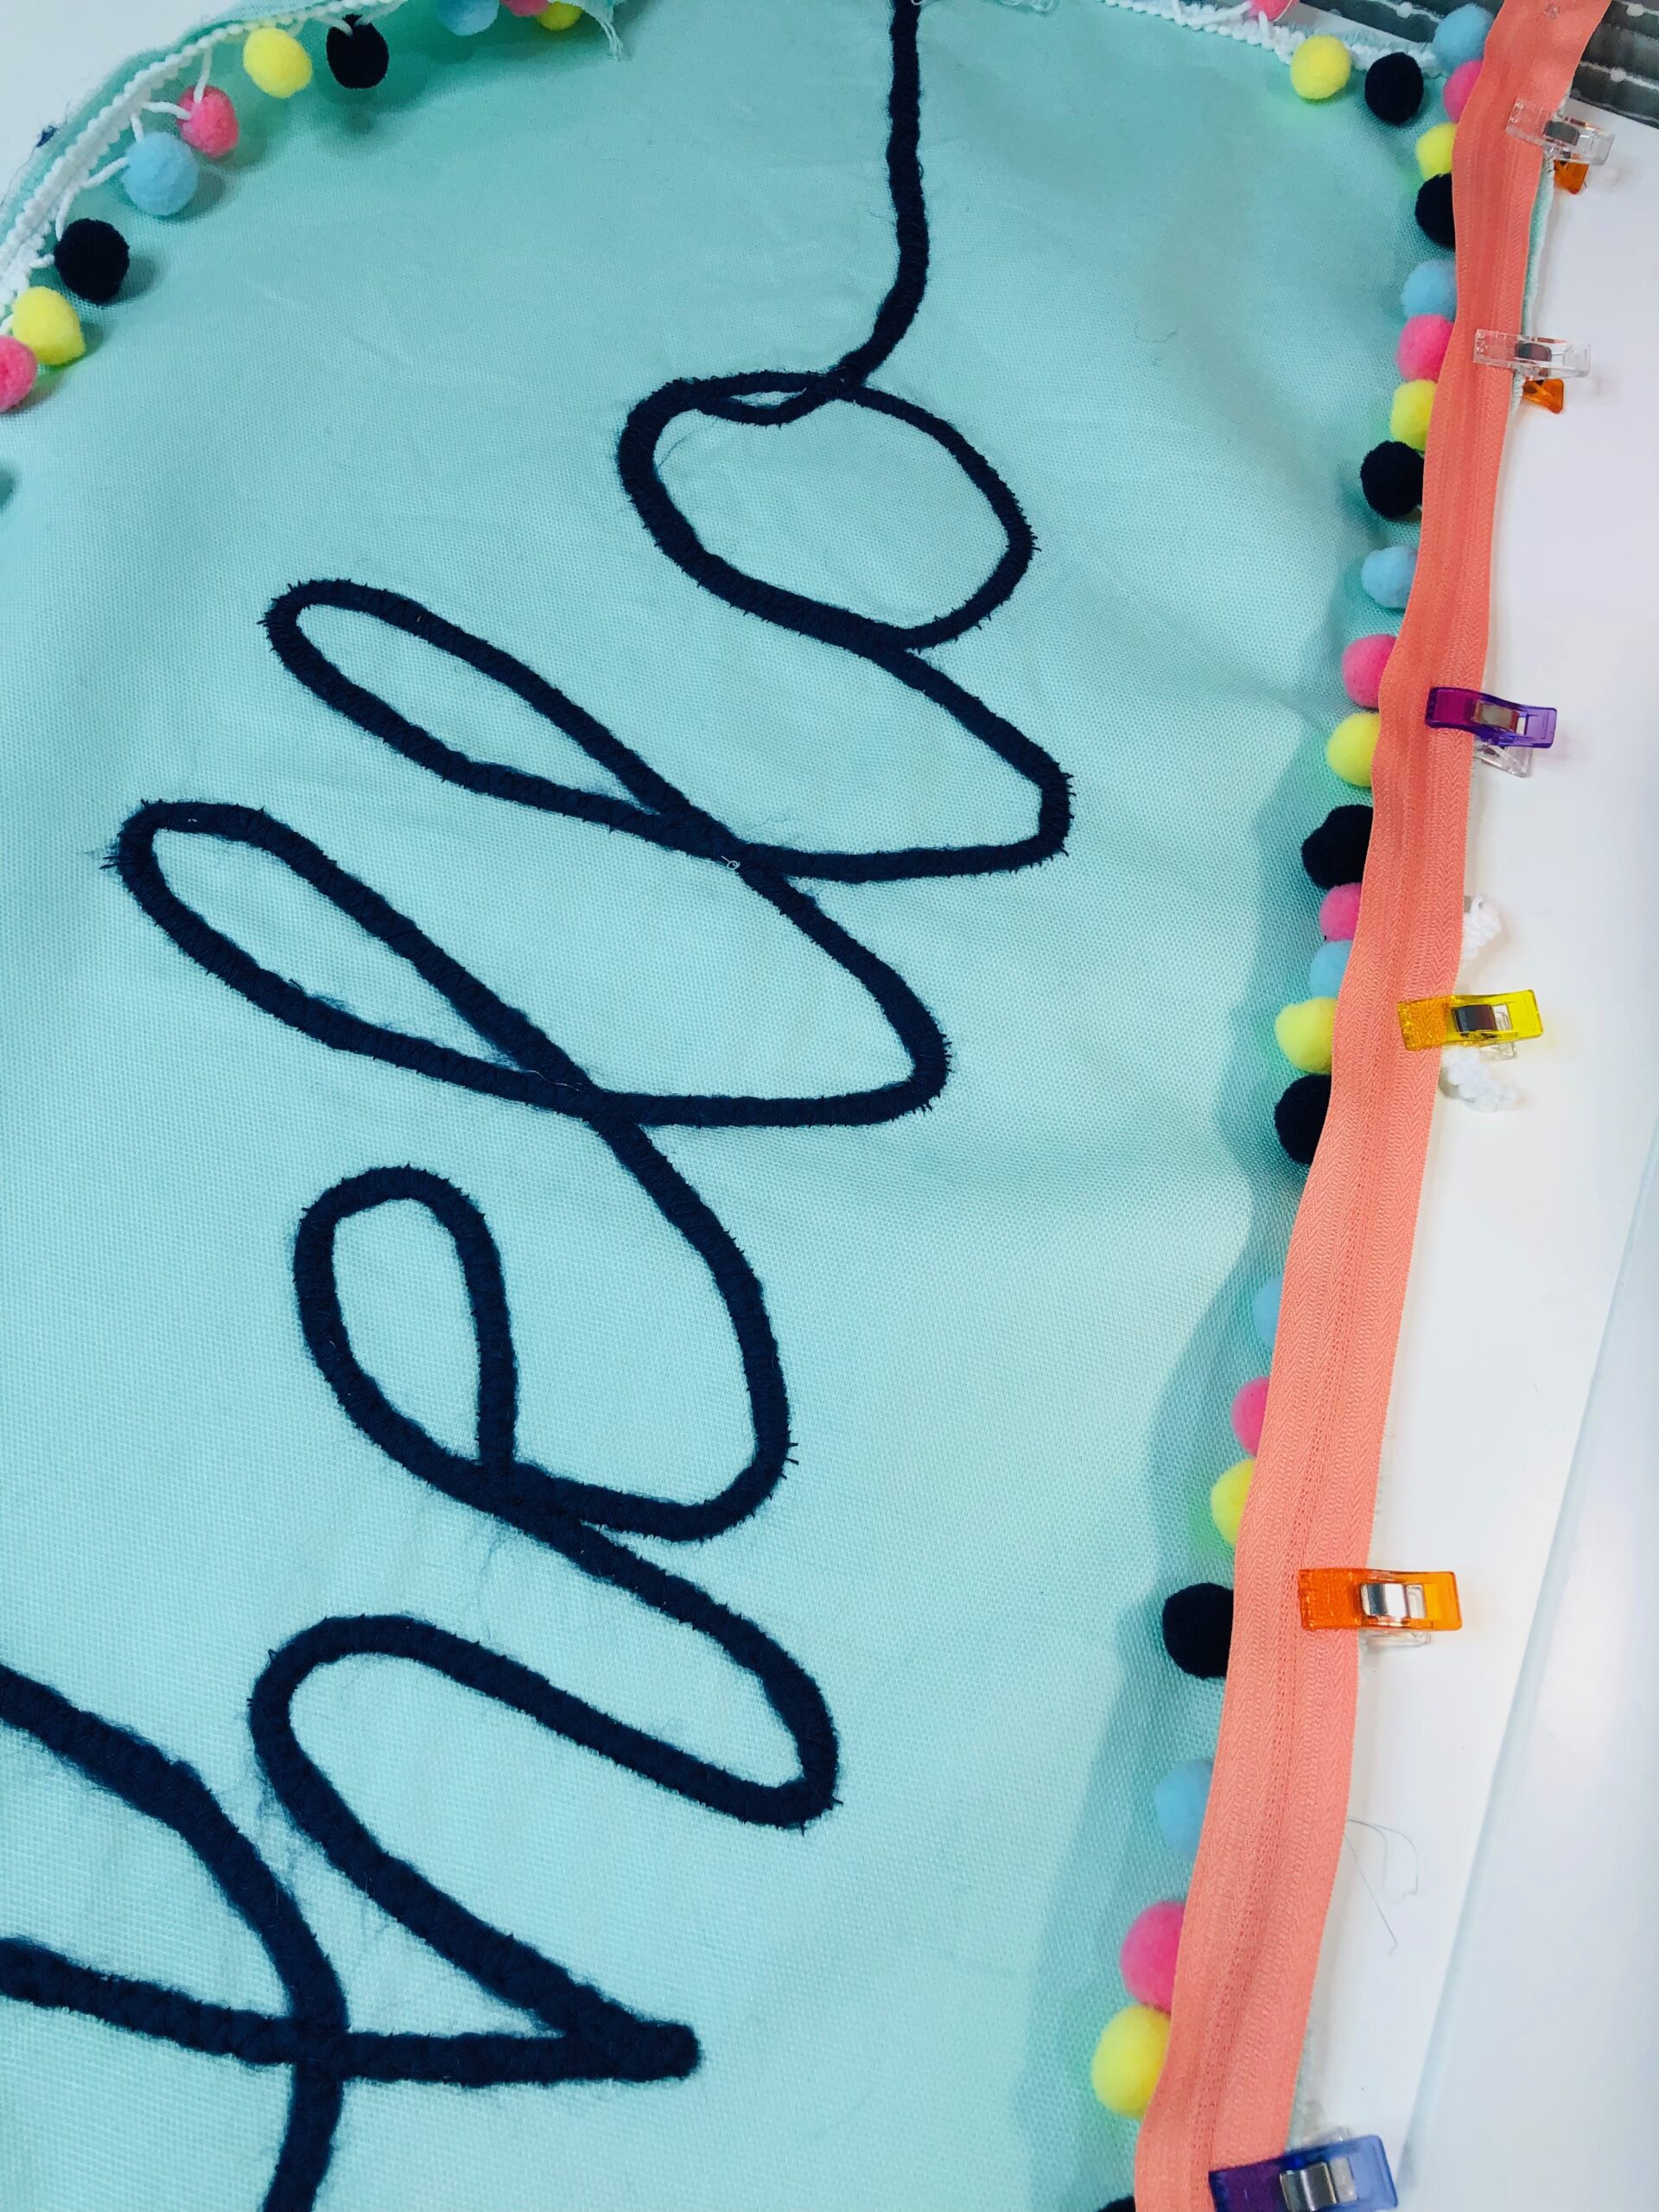
Place one pom-pom trim end along the front rectangle lower-edge center. Make sure the pom-poms are facing in toward the pillow embellishment. Pin or clip generously to secure the trim to the pillow perimeter. When you reach the trim beginning, overlap the trim ends in a crisscross manner. Trim the ends, leaving at least 2 overlapping.
Baste the trim in place, using a zipper foot if needed.
Install a zipper foot.
Set the stitch length to 2.5mm.
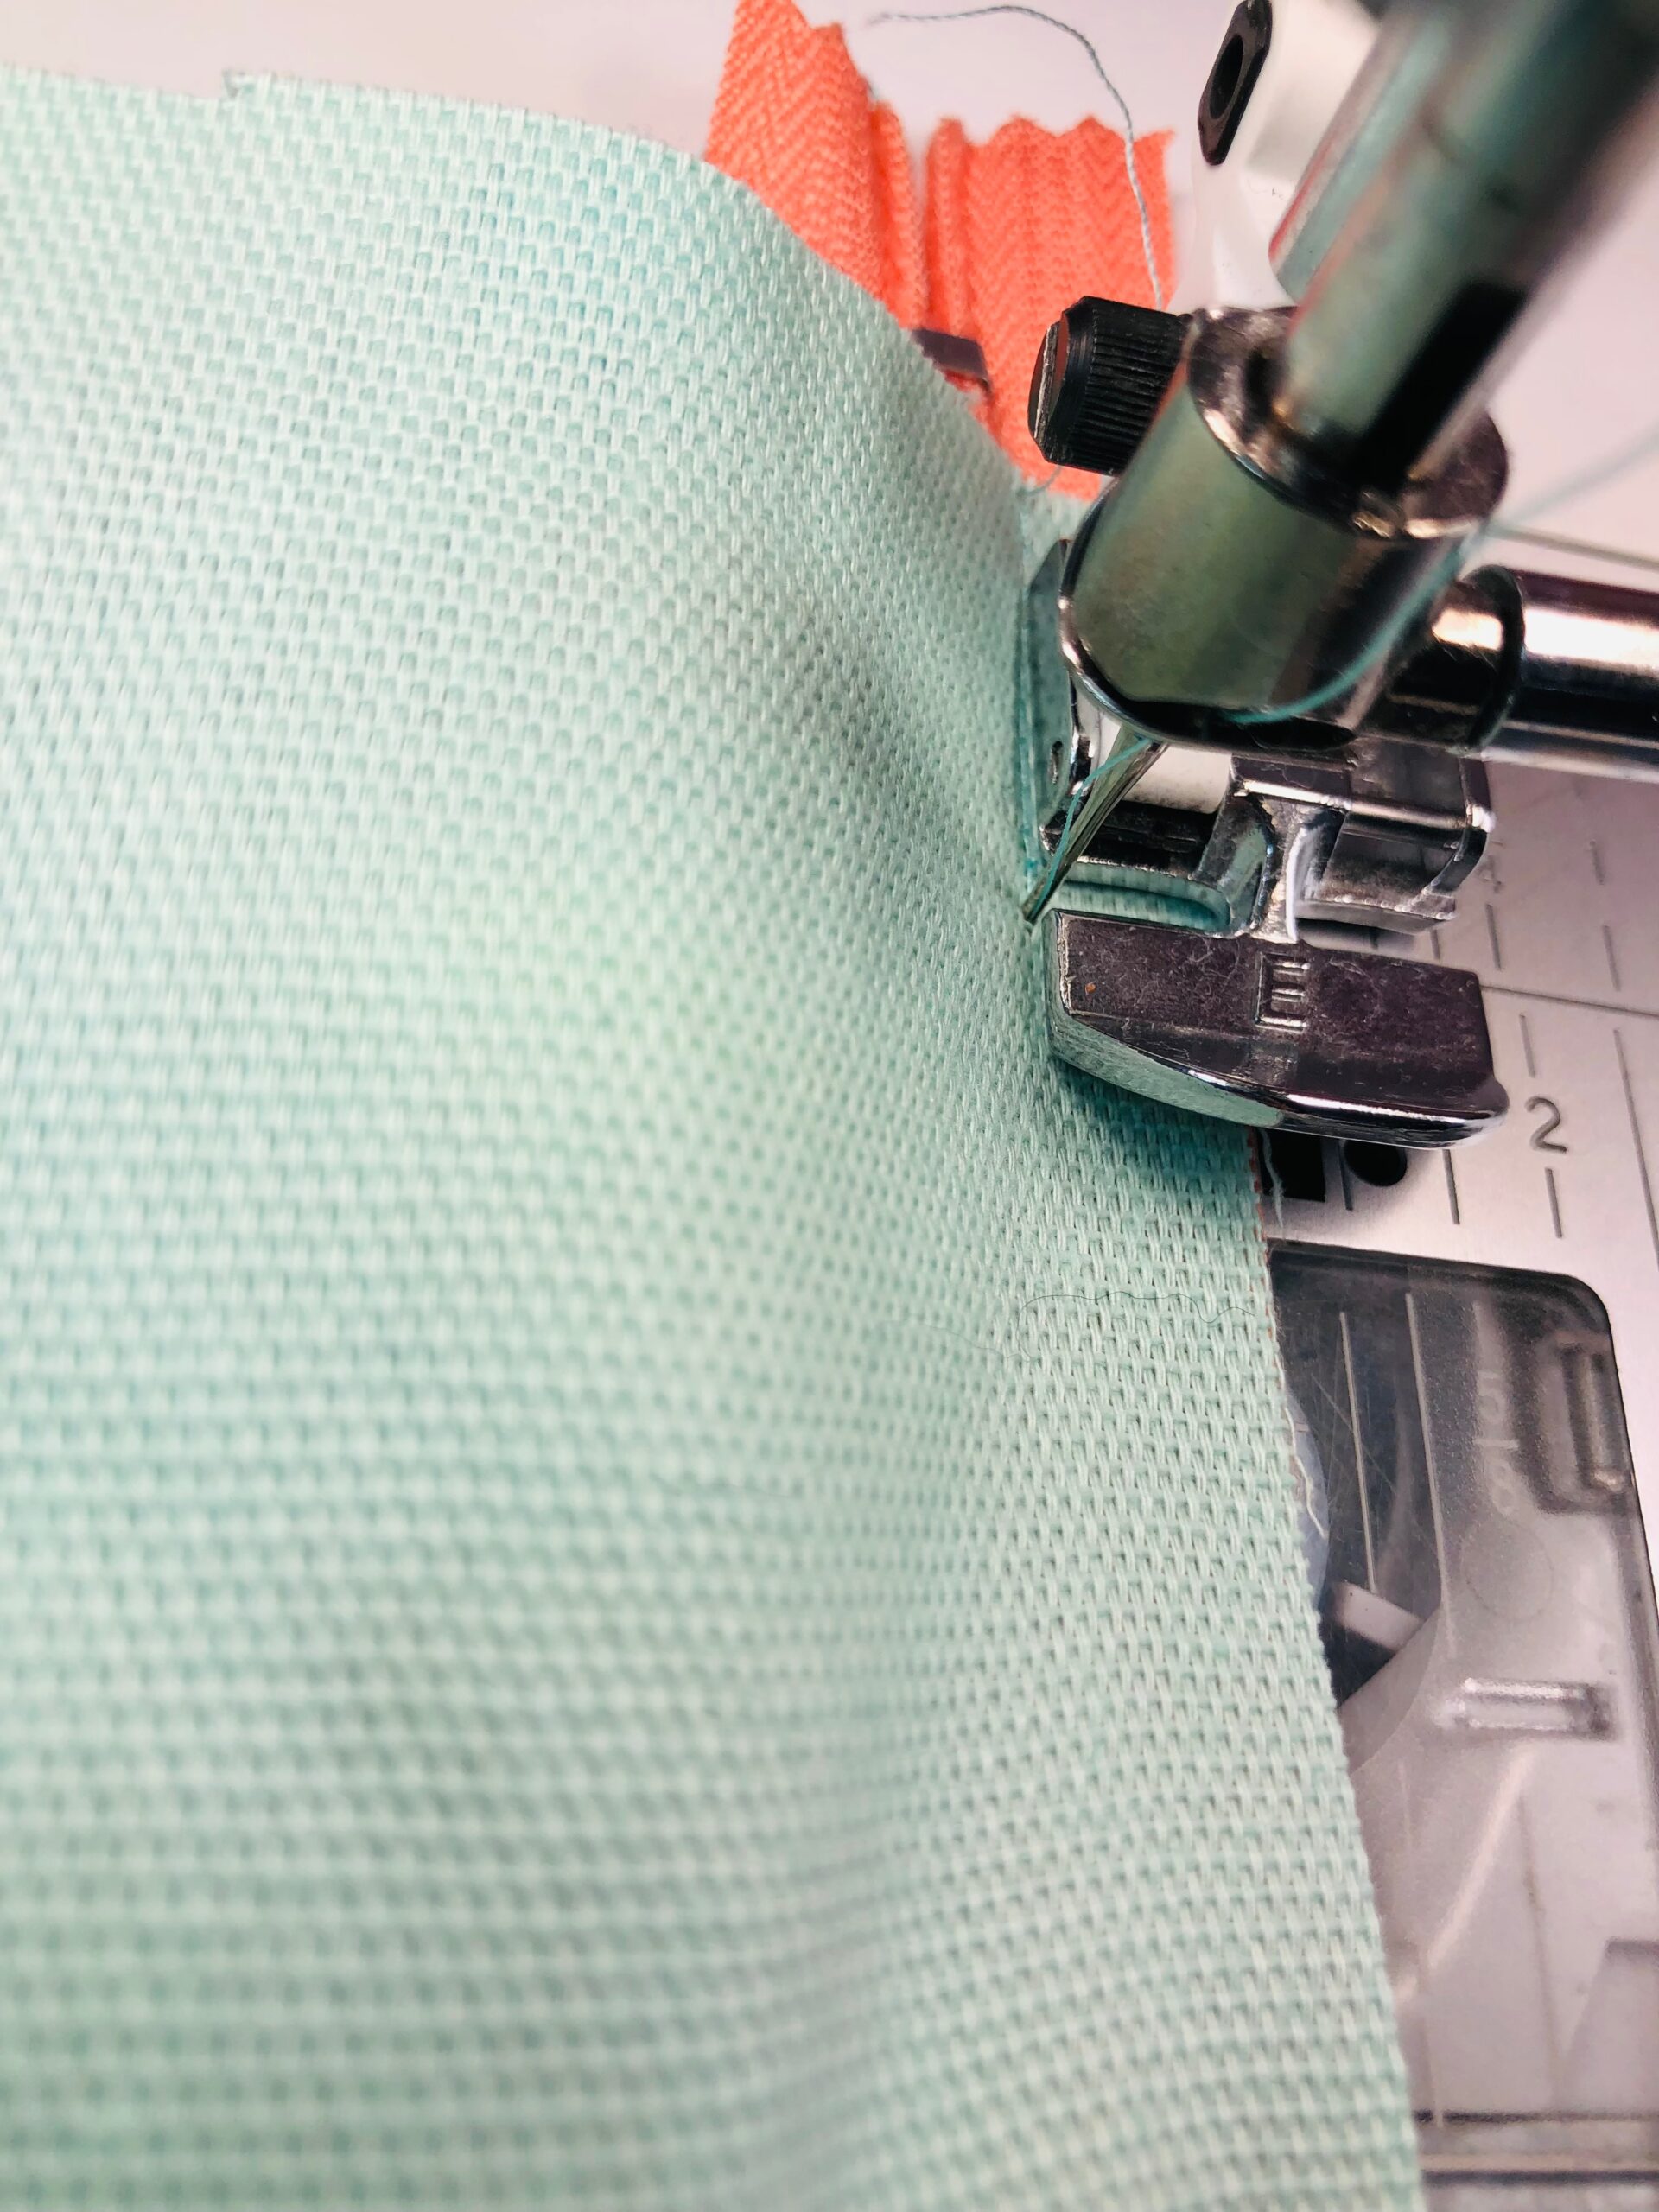
Center the zipper over the rectangle lower edge (with trim sandwiched between), with right sides together. Pin or use double-sided basting tape to secure the zipper tape. Then, stitch the zipper tape to the rectangle lower edge, using a ¼ seam allowance.
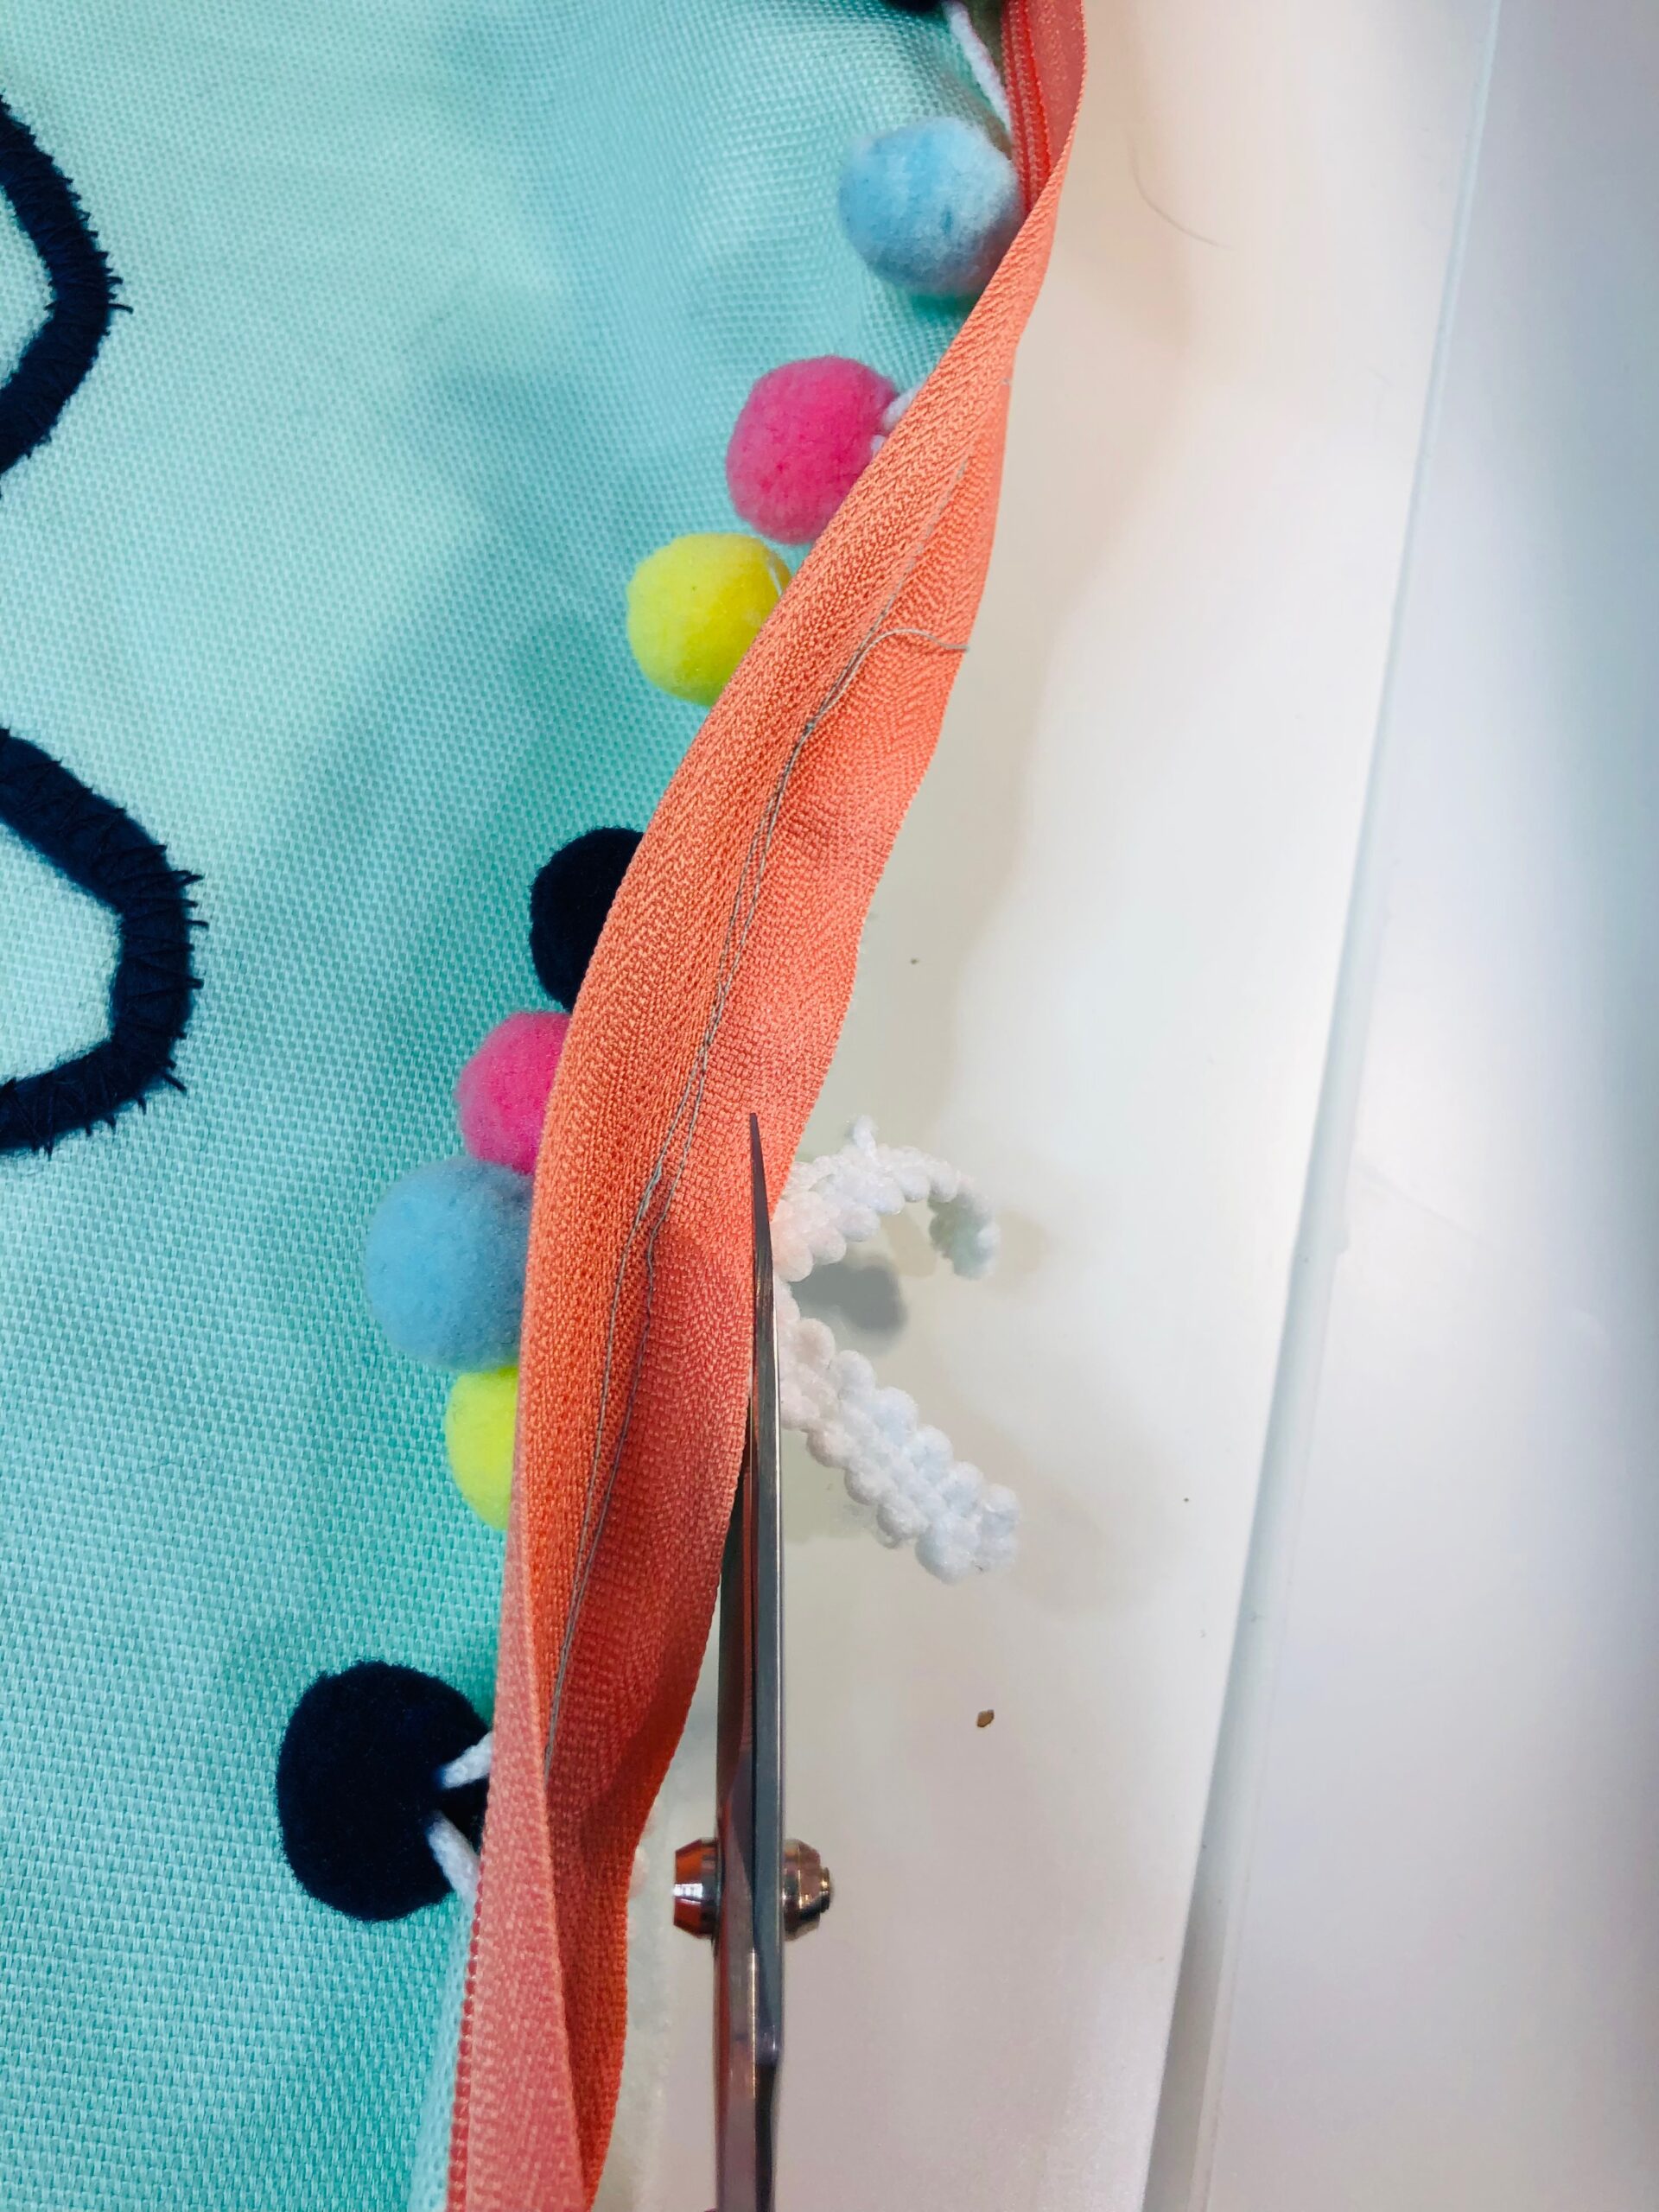
Trim the overlapped trim ends flush with the fabric edge.
Center the opposite zipper-tape edge along the remaining fabric-rectangle lower edge. Pin or use double-sided basting tape to secure the zipper tape. Then, stitch the zipper tape to the rectangle lower edge, using a ¼ seam allowance.
Unzip the zipper halfway.
PILLOW FINISHING
Place the fabric right sides together, aligning all corners and edges. Pin or clip to secure.
Stitch the pillow perimeter with a 3/8 seam allowance, beginning and ending 5″ from the zipper ends. Backstitch at the beginning and ending stitches.
Turn the pillow right side out through the zipper.
Insert the pillow form. Zip the pillow closed.

I wish you had printable versions of your directions
Hi Peg,
There is a printer-friendly version of each blog post. At the end of the post on the right-hand side you will see an option to print. Let me know if yu need further assistance with this.
Enjoy!