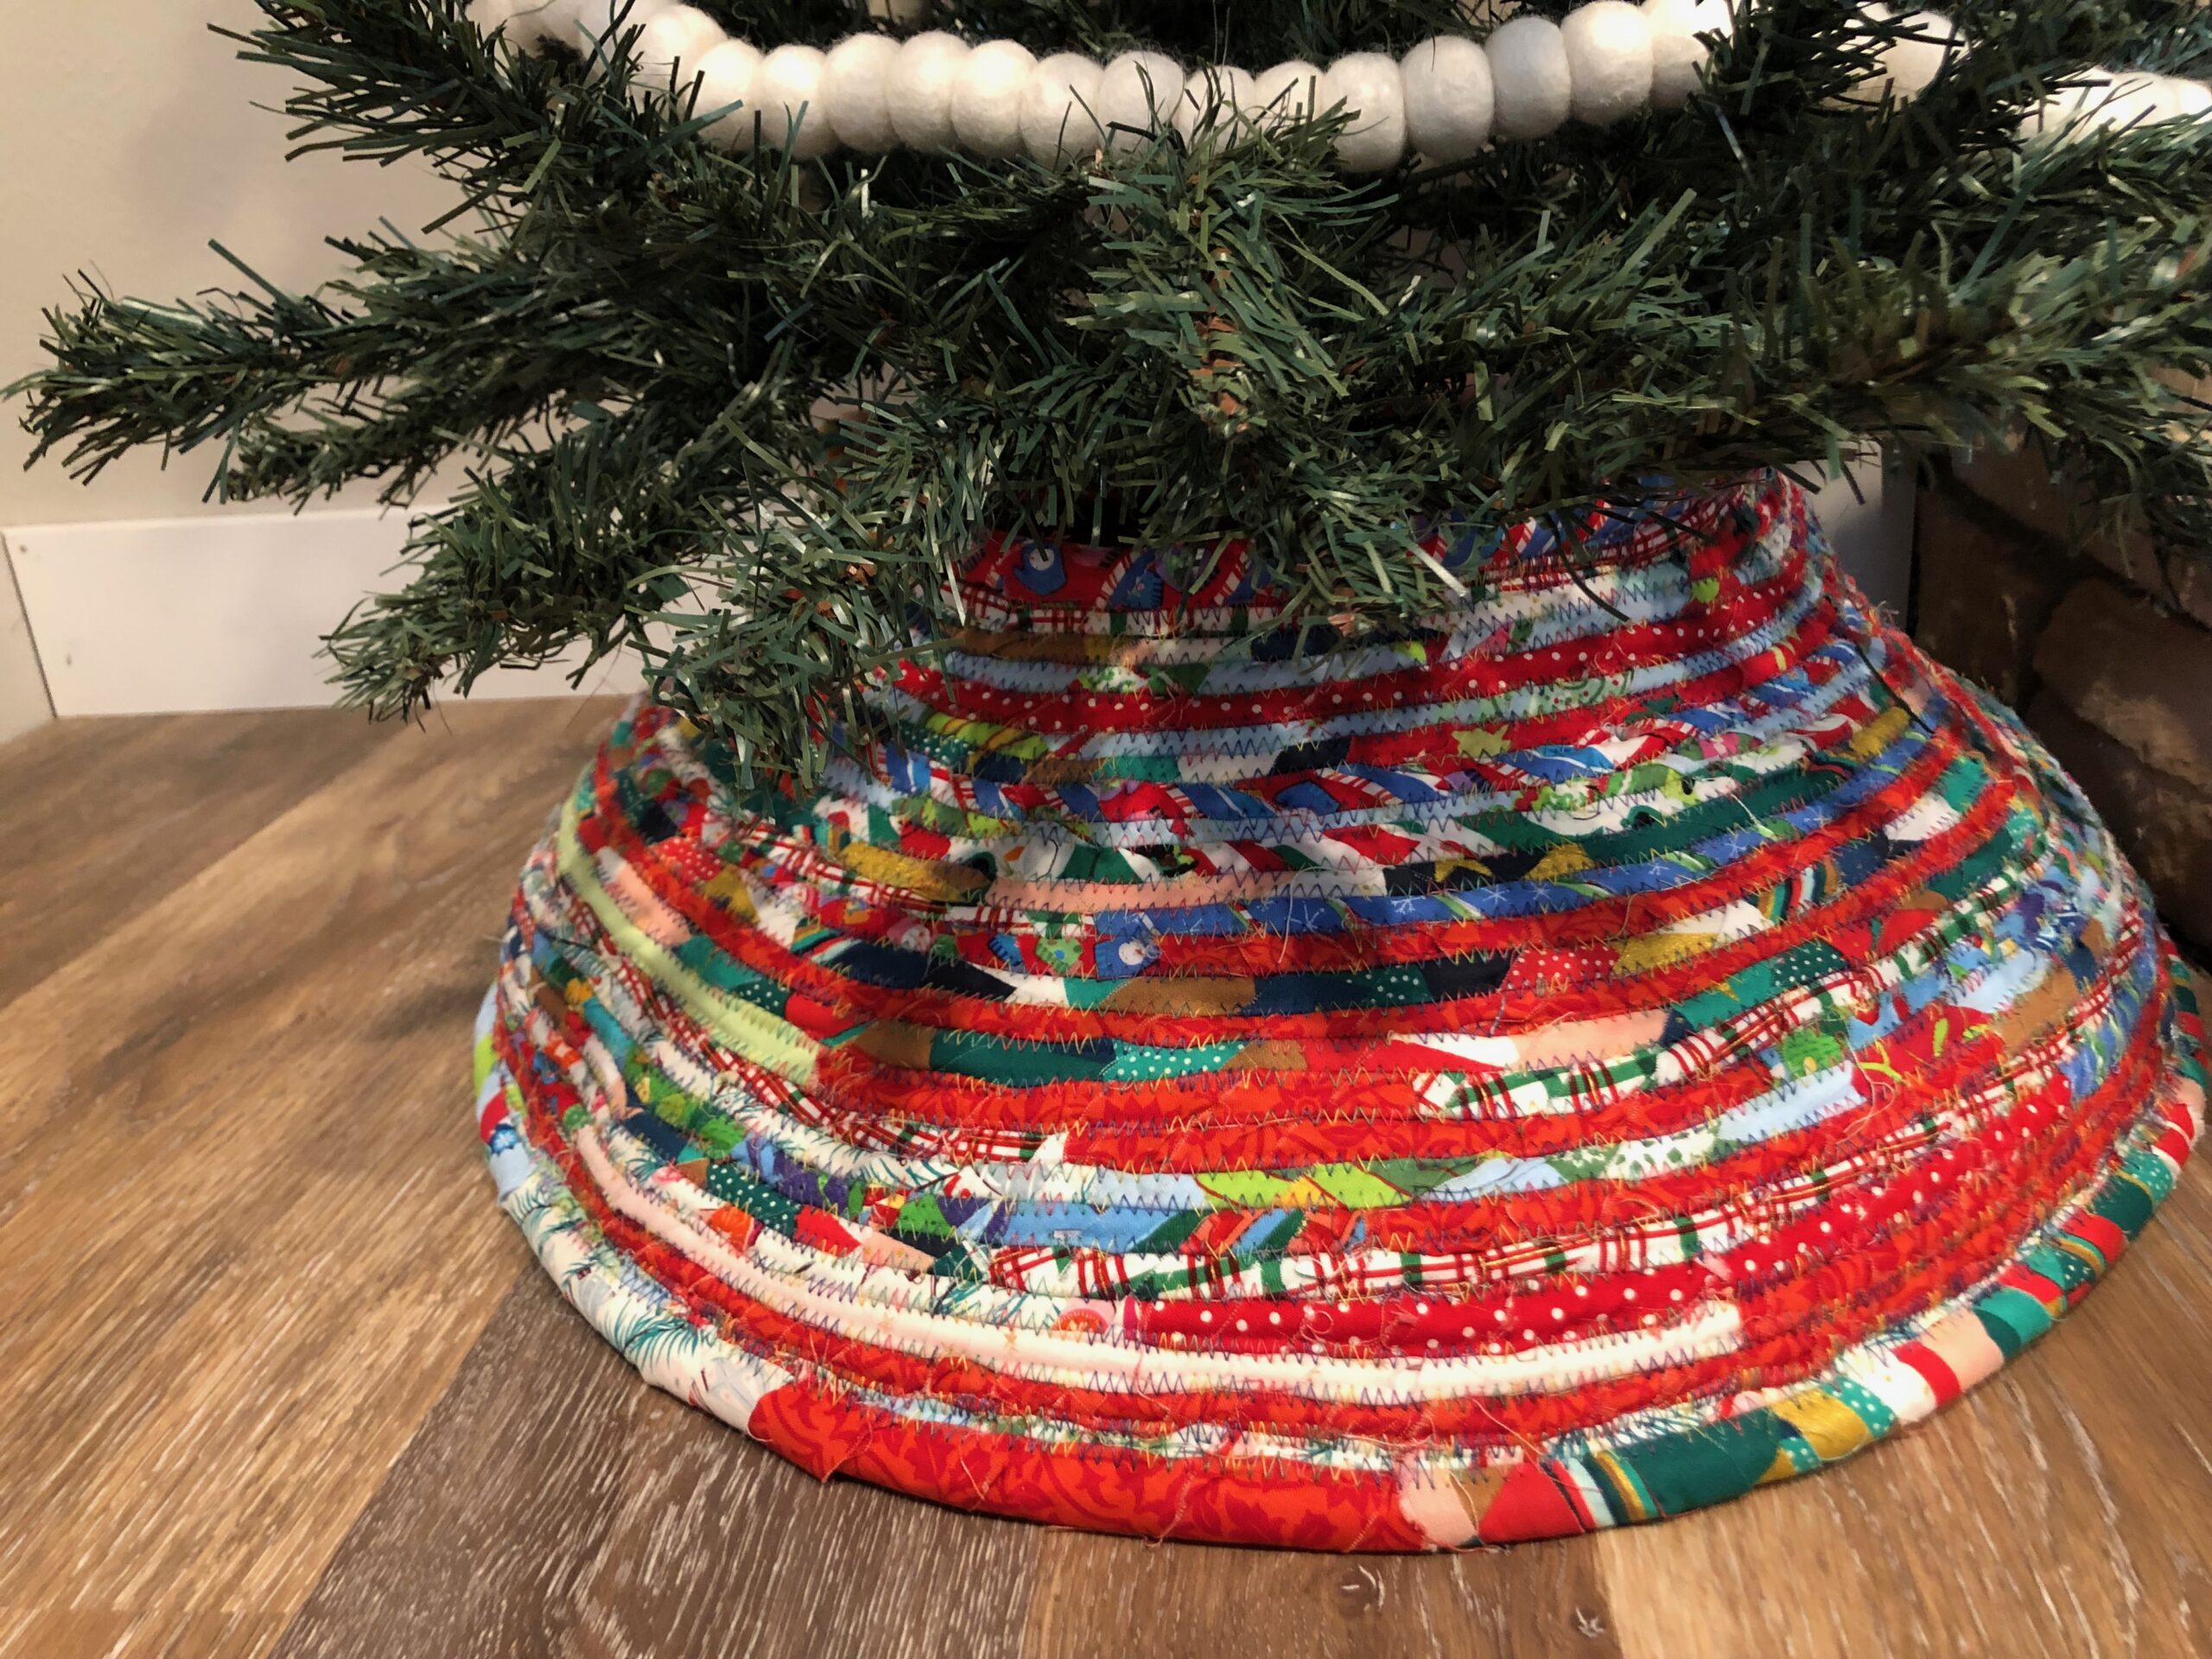
DIY Tree Collar
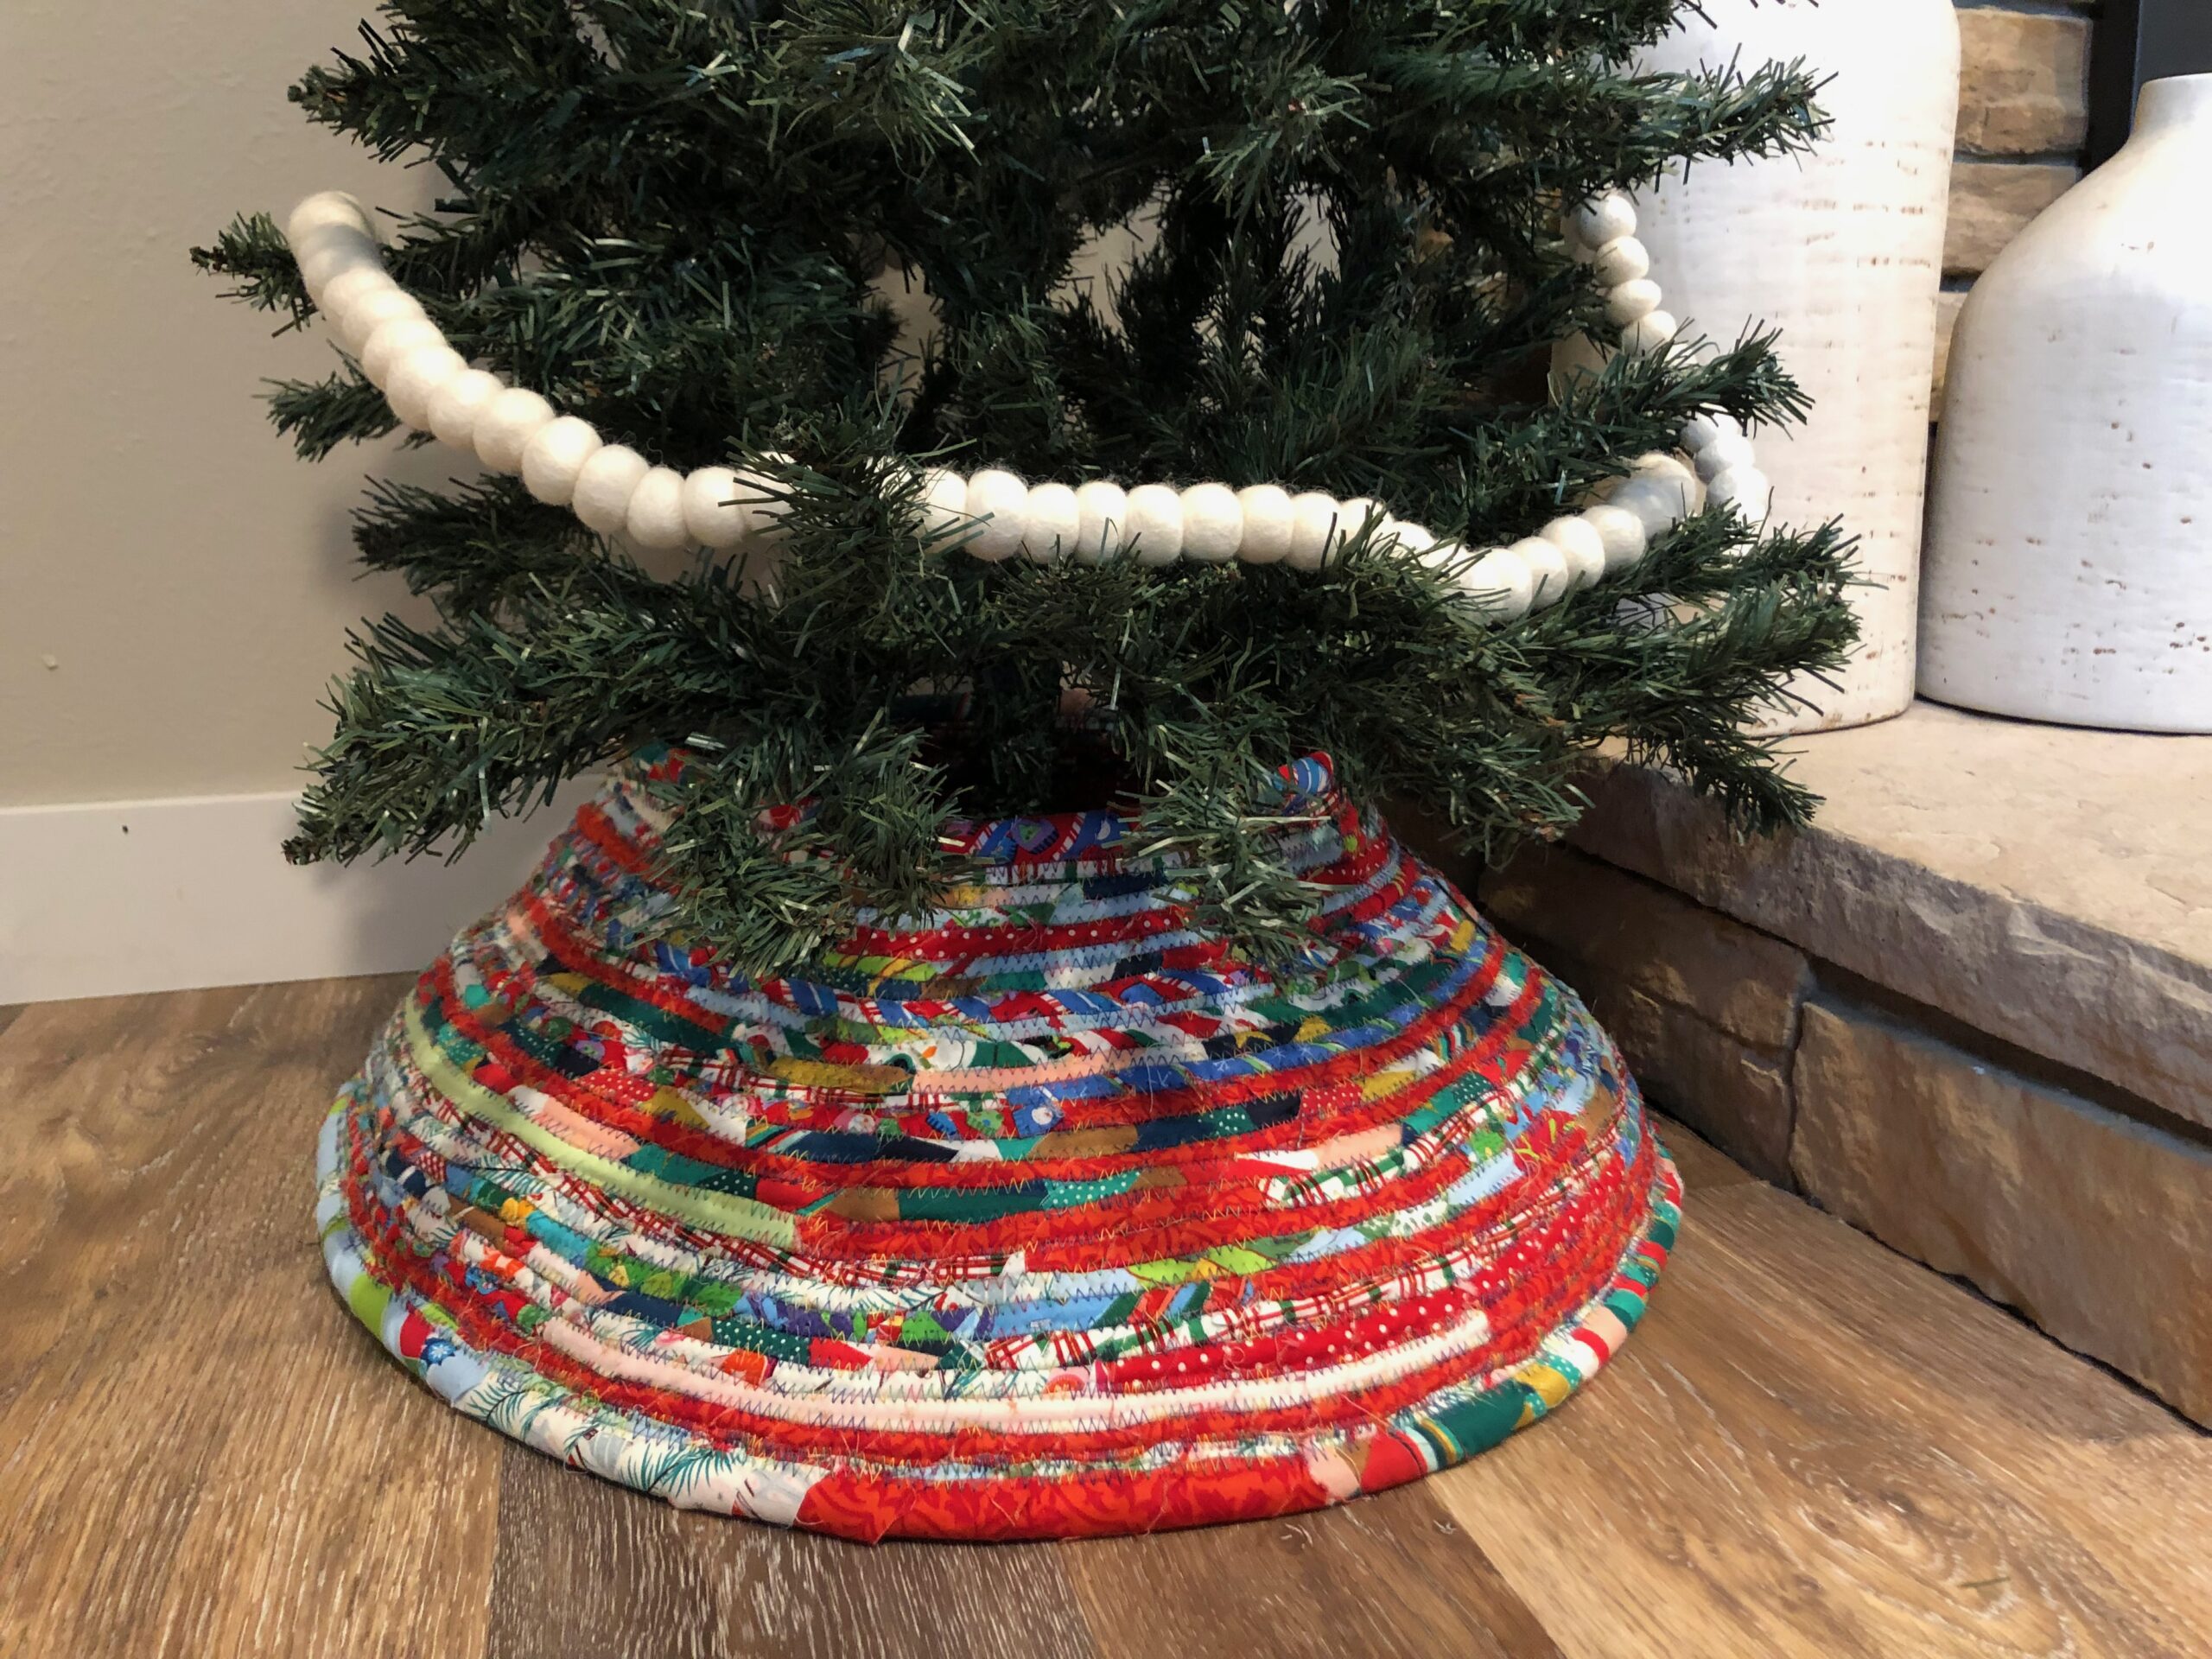
Make a DIY Tree Collar and put your fabric scraps to good use! If you remember the fabric covered cording used for sewing baskets and rugs, this is the same concept. However, there’s a hole in the center that’s big enough for your tree to fit inside.
WHAT’S A TREE COLLAR?
A tree collar is an updated take on a tree skirt. You’re probably seeing them in stores made out of various metals, plastics and basket materials. By making your own tree collar, you can customize the size and shape (oval or circle) and use up loads of fabric scraps in the process.
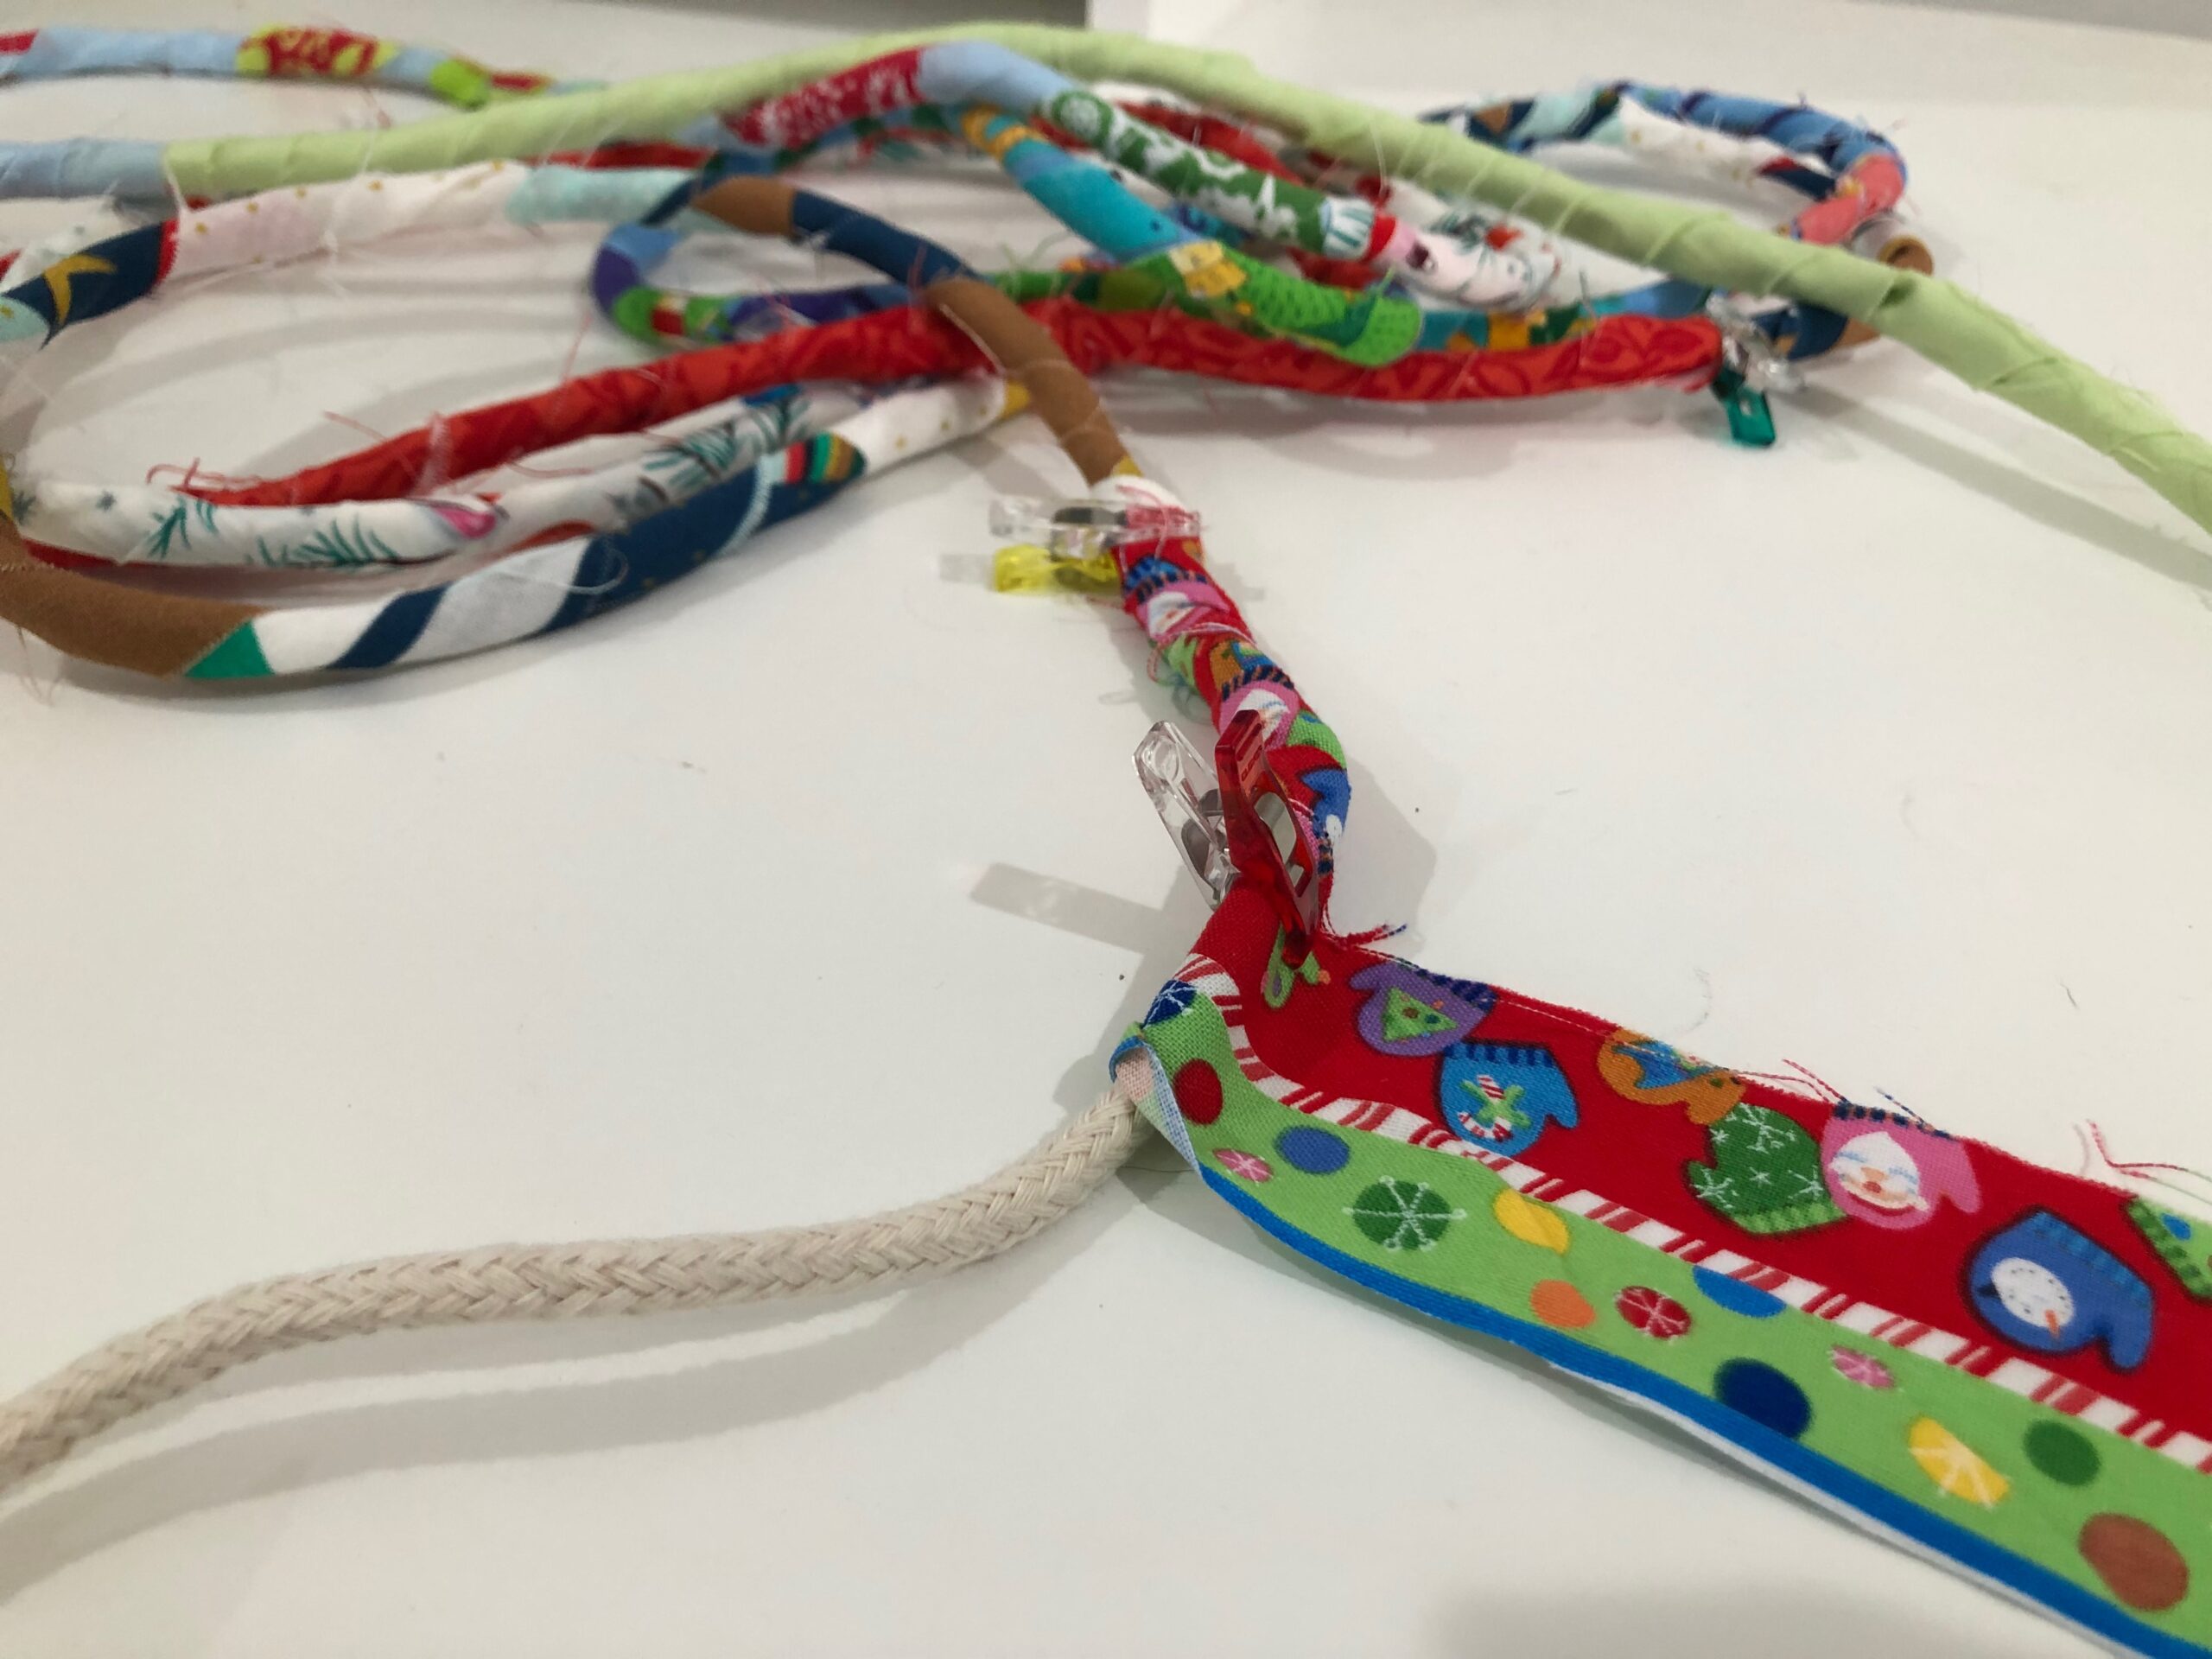
Dive into your fabric scrap bin and search for like colors. They don’t even have to be holiday prints, as once the strips are wound around the cording the motifs are barely recognizable. If you save fabric selvages, this is a great use for those, too.
How many fabric strips you’ll need is very subjective. The amount depends on how tightly you wrap the cording, how wide the strips are cut and how large and tall you want the tree collar. Have some random coordinating fabric prints and/or solids on hand if you need to cut more as you go along (if you happen to run out of scraps).
TREE COLLAR SUPPLIES
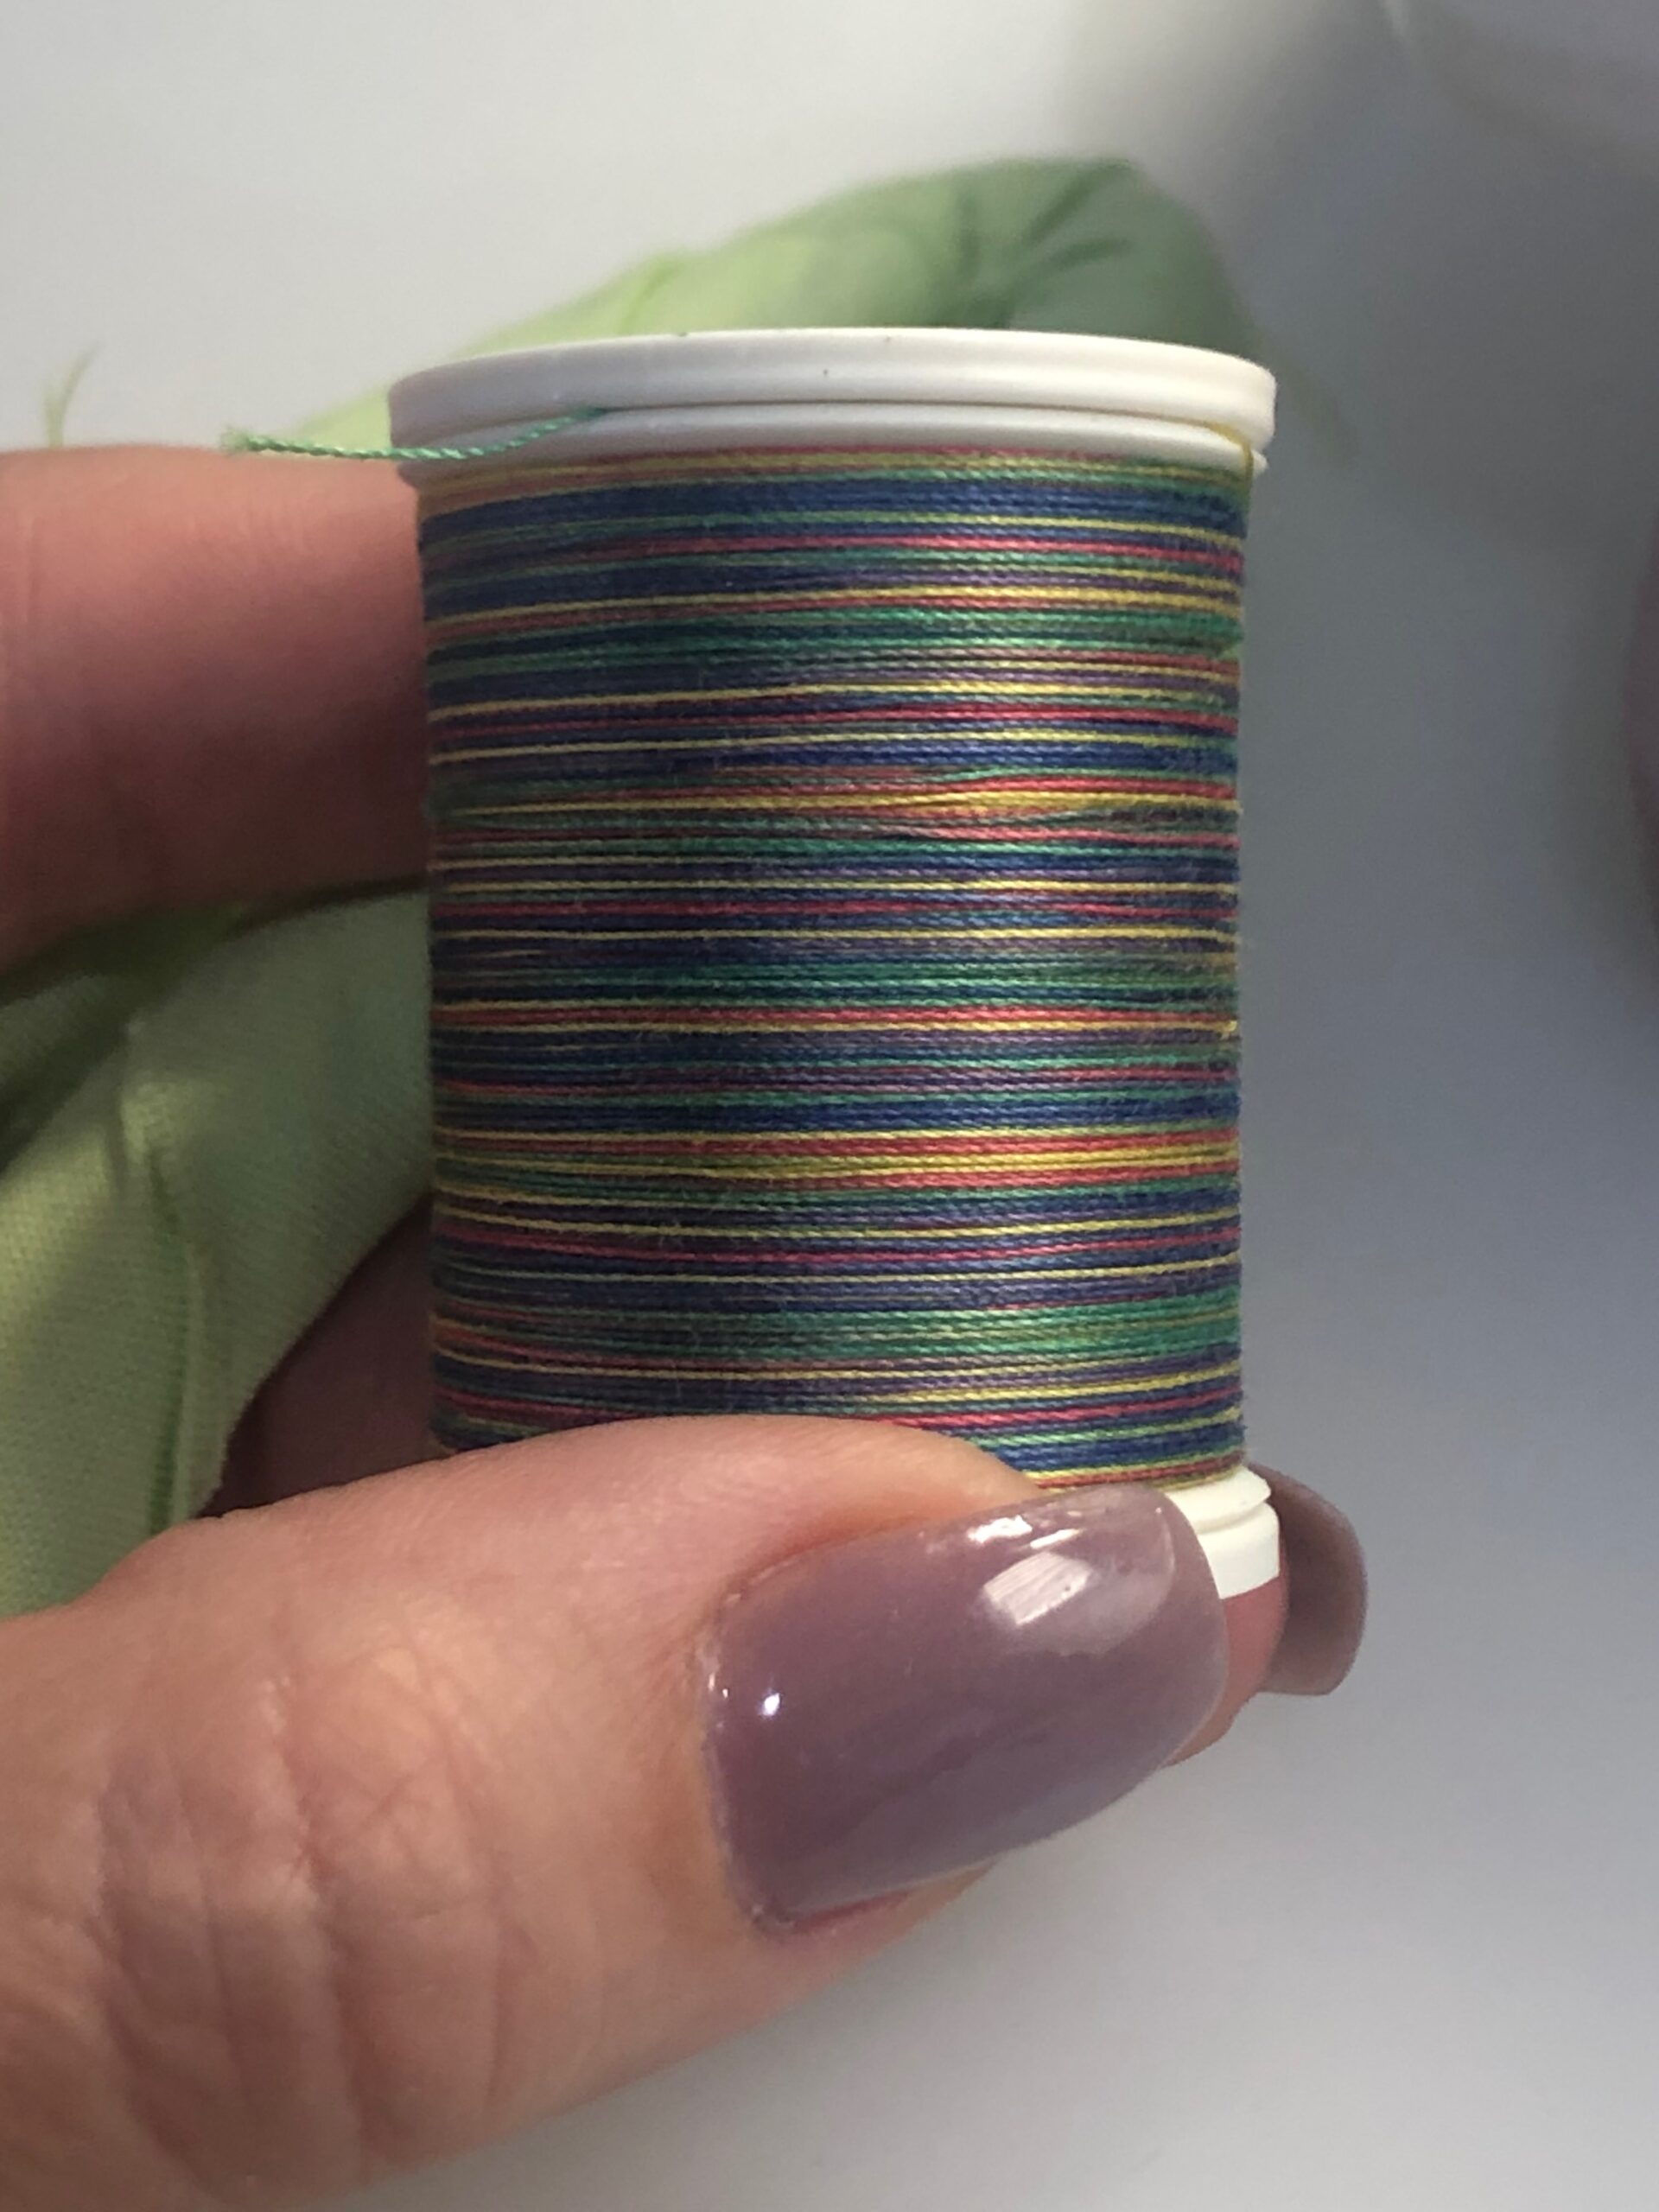
- Sulky 30 wt. Cotton Blendables® Thread (choose a color combination that works with the fabrics)
- Various fabric prints & solids (quilting cottons work best), cut into at least 1″ to 3″ strips (length doesn’t matter)
- Approximately 100′ of clothesline or 3/16″-diameter cotton cording
- Approximately 20′ of 1/2″-diameter cotton cording
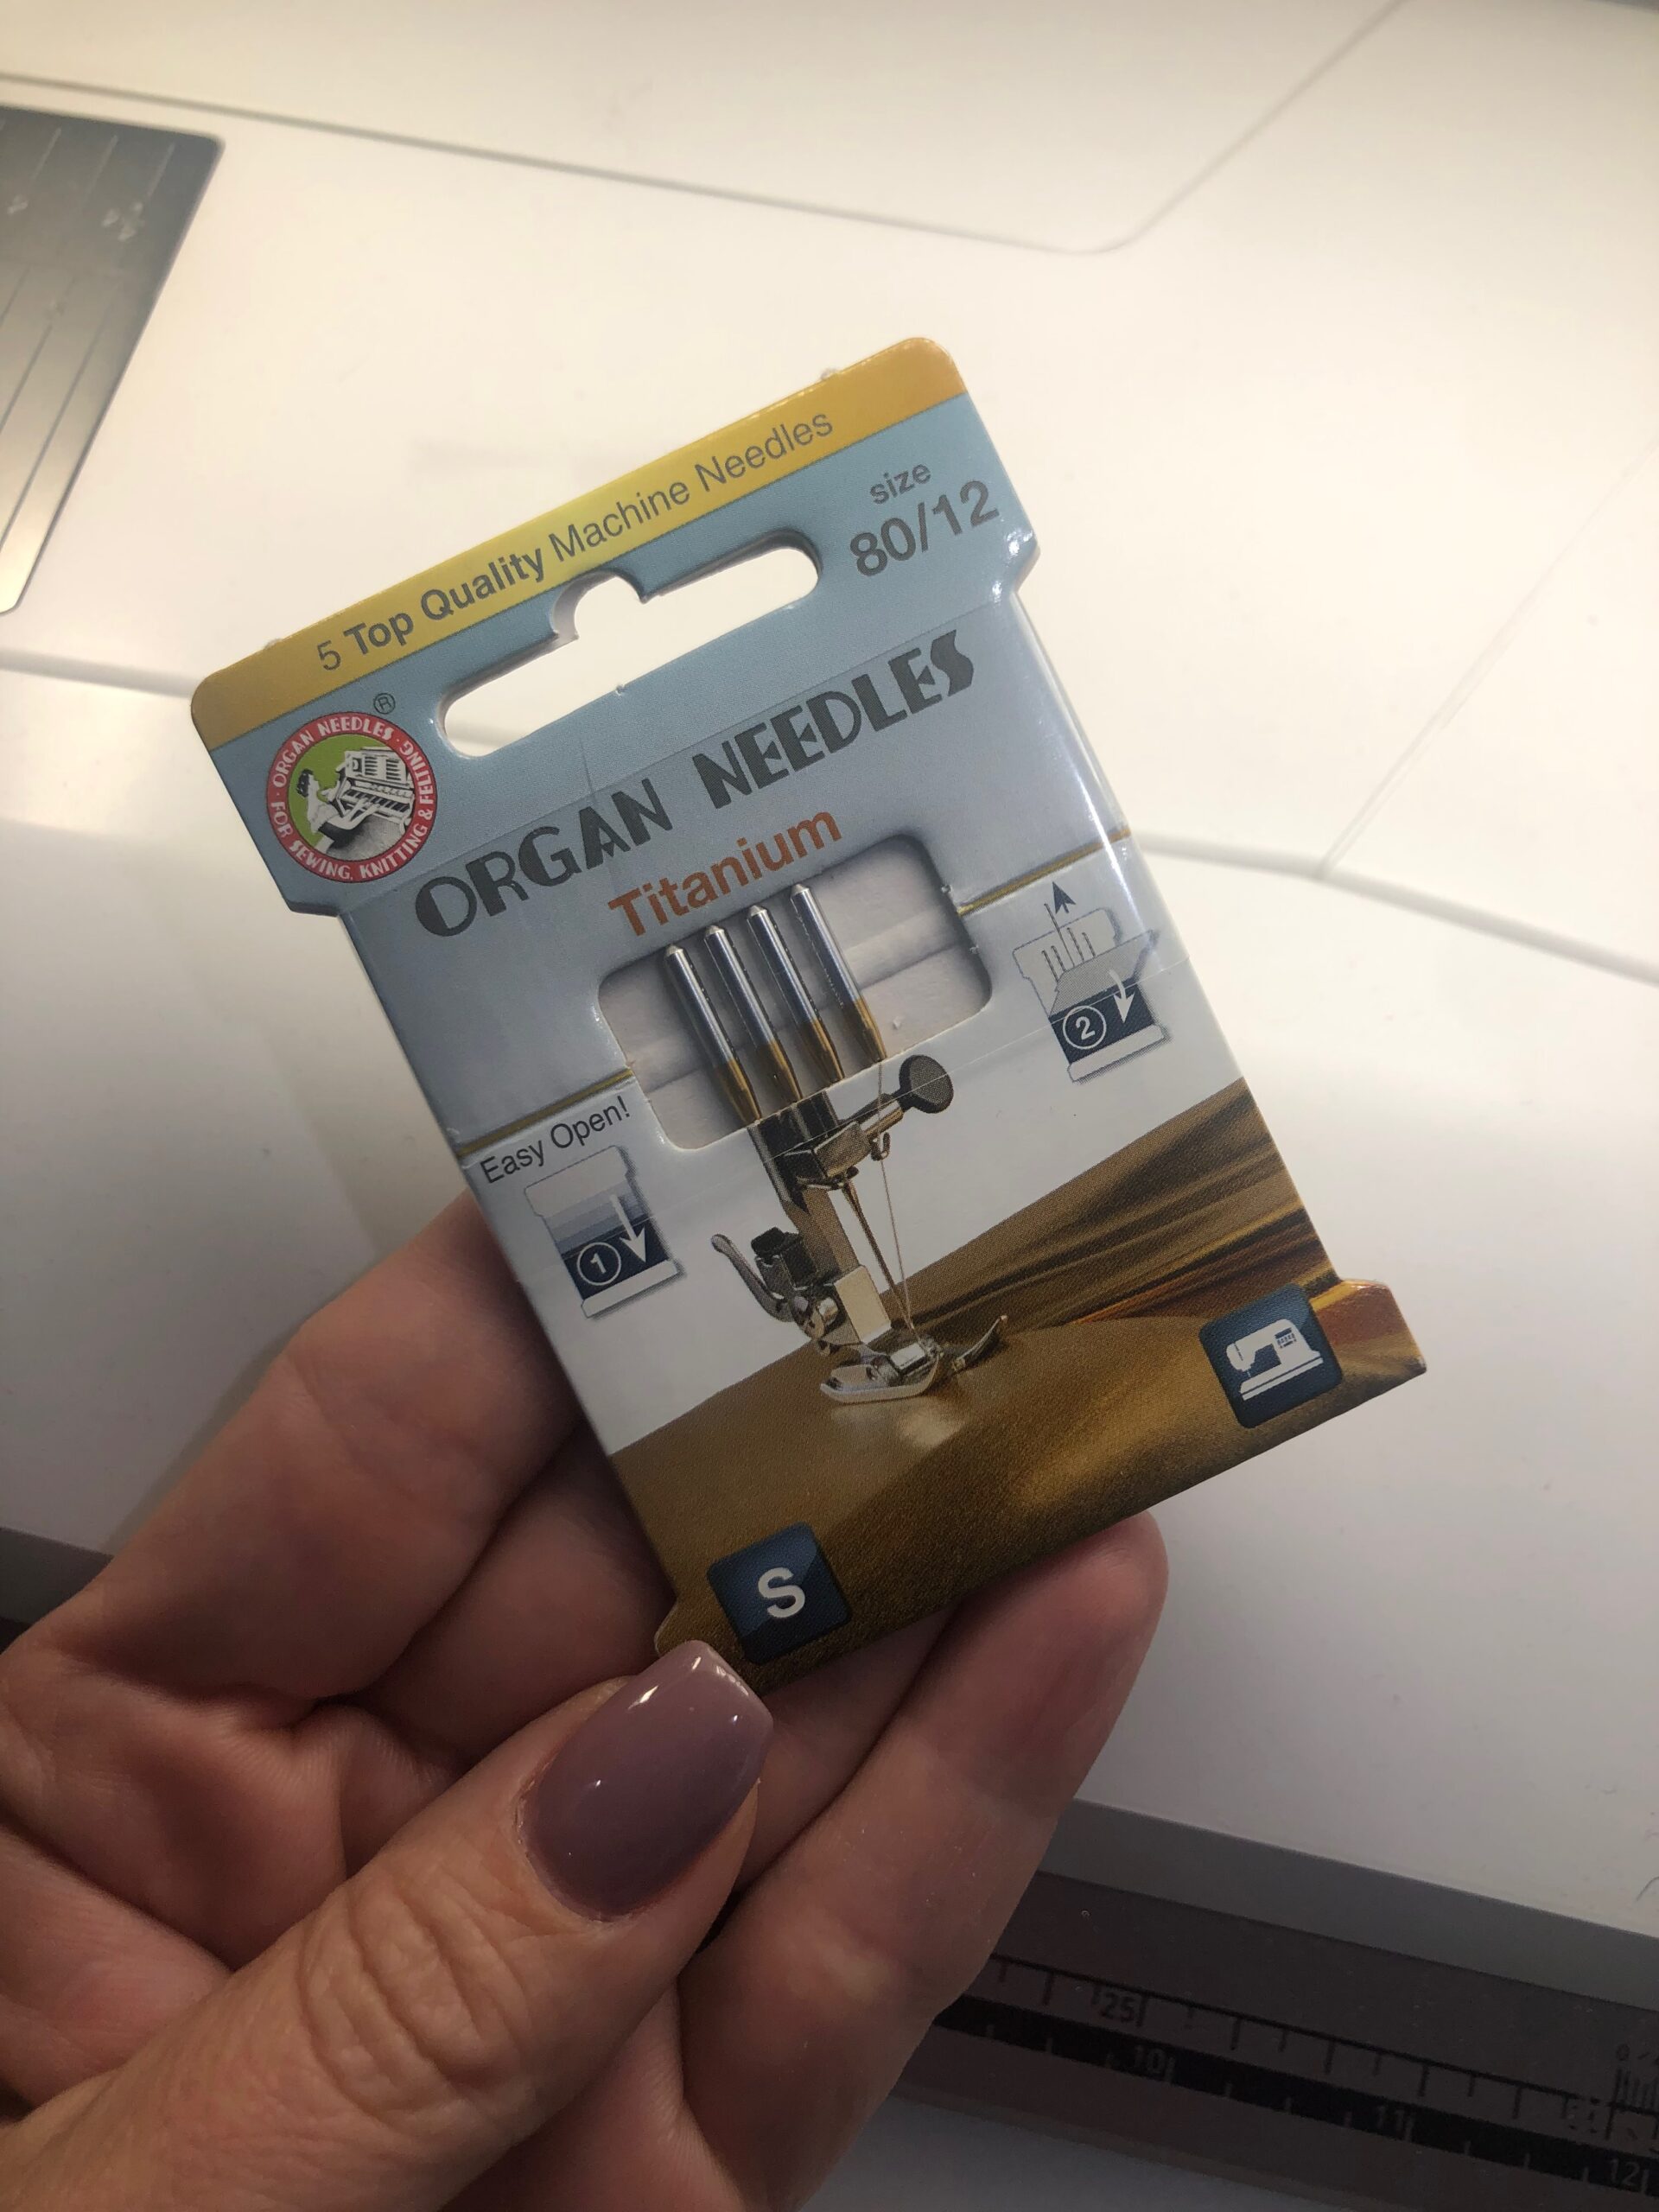
- Organ® Size 80/12 Titanium Top Stitch Needles
- Clover Wonder Clips
*We may earn a commission for purchases made through the above links.
MACHINE SET-UP
Install a size 80/12 Titanium Top Stitch Needle. This needle is super strong and will pierce through the heavier cotton cording when sewing the upper and lower edges of the tree collar.
Wind a bobbin and thread the needle with 30 wt. Cotton Blendbles Thread. The featured color is Primaries. It has blues, yellows, greens and reds, which went with the various holiday fabric prints used for the featured sample.
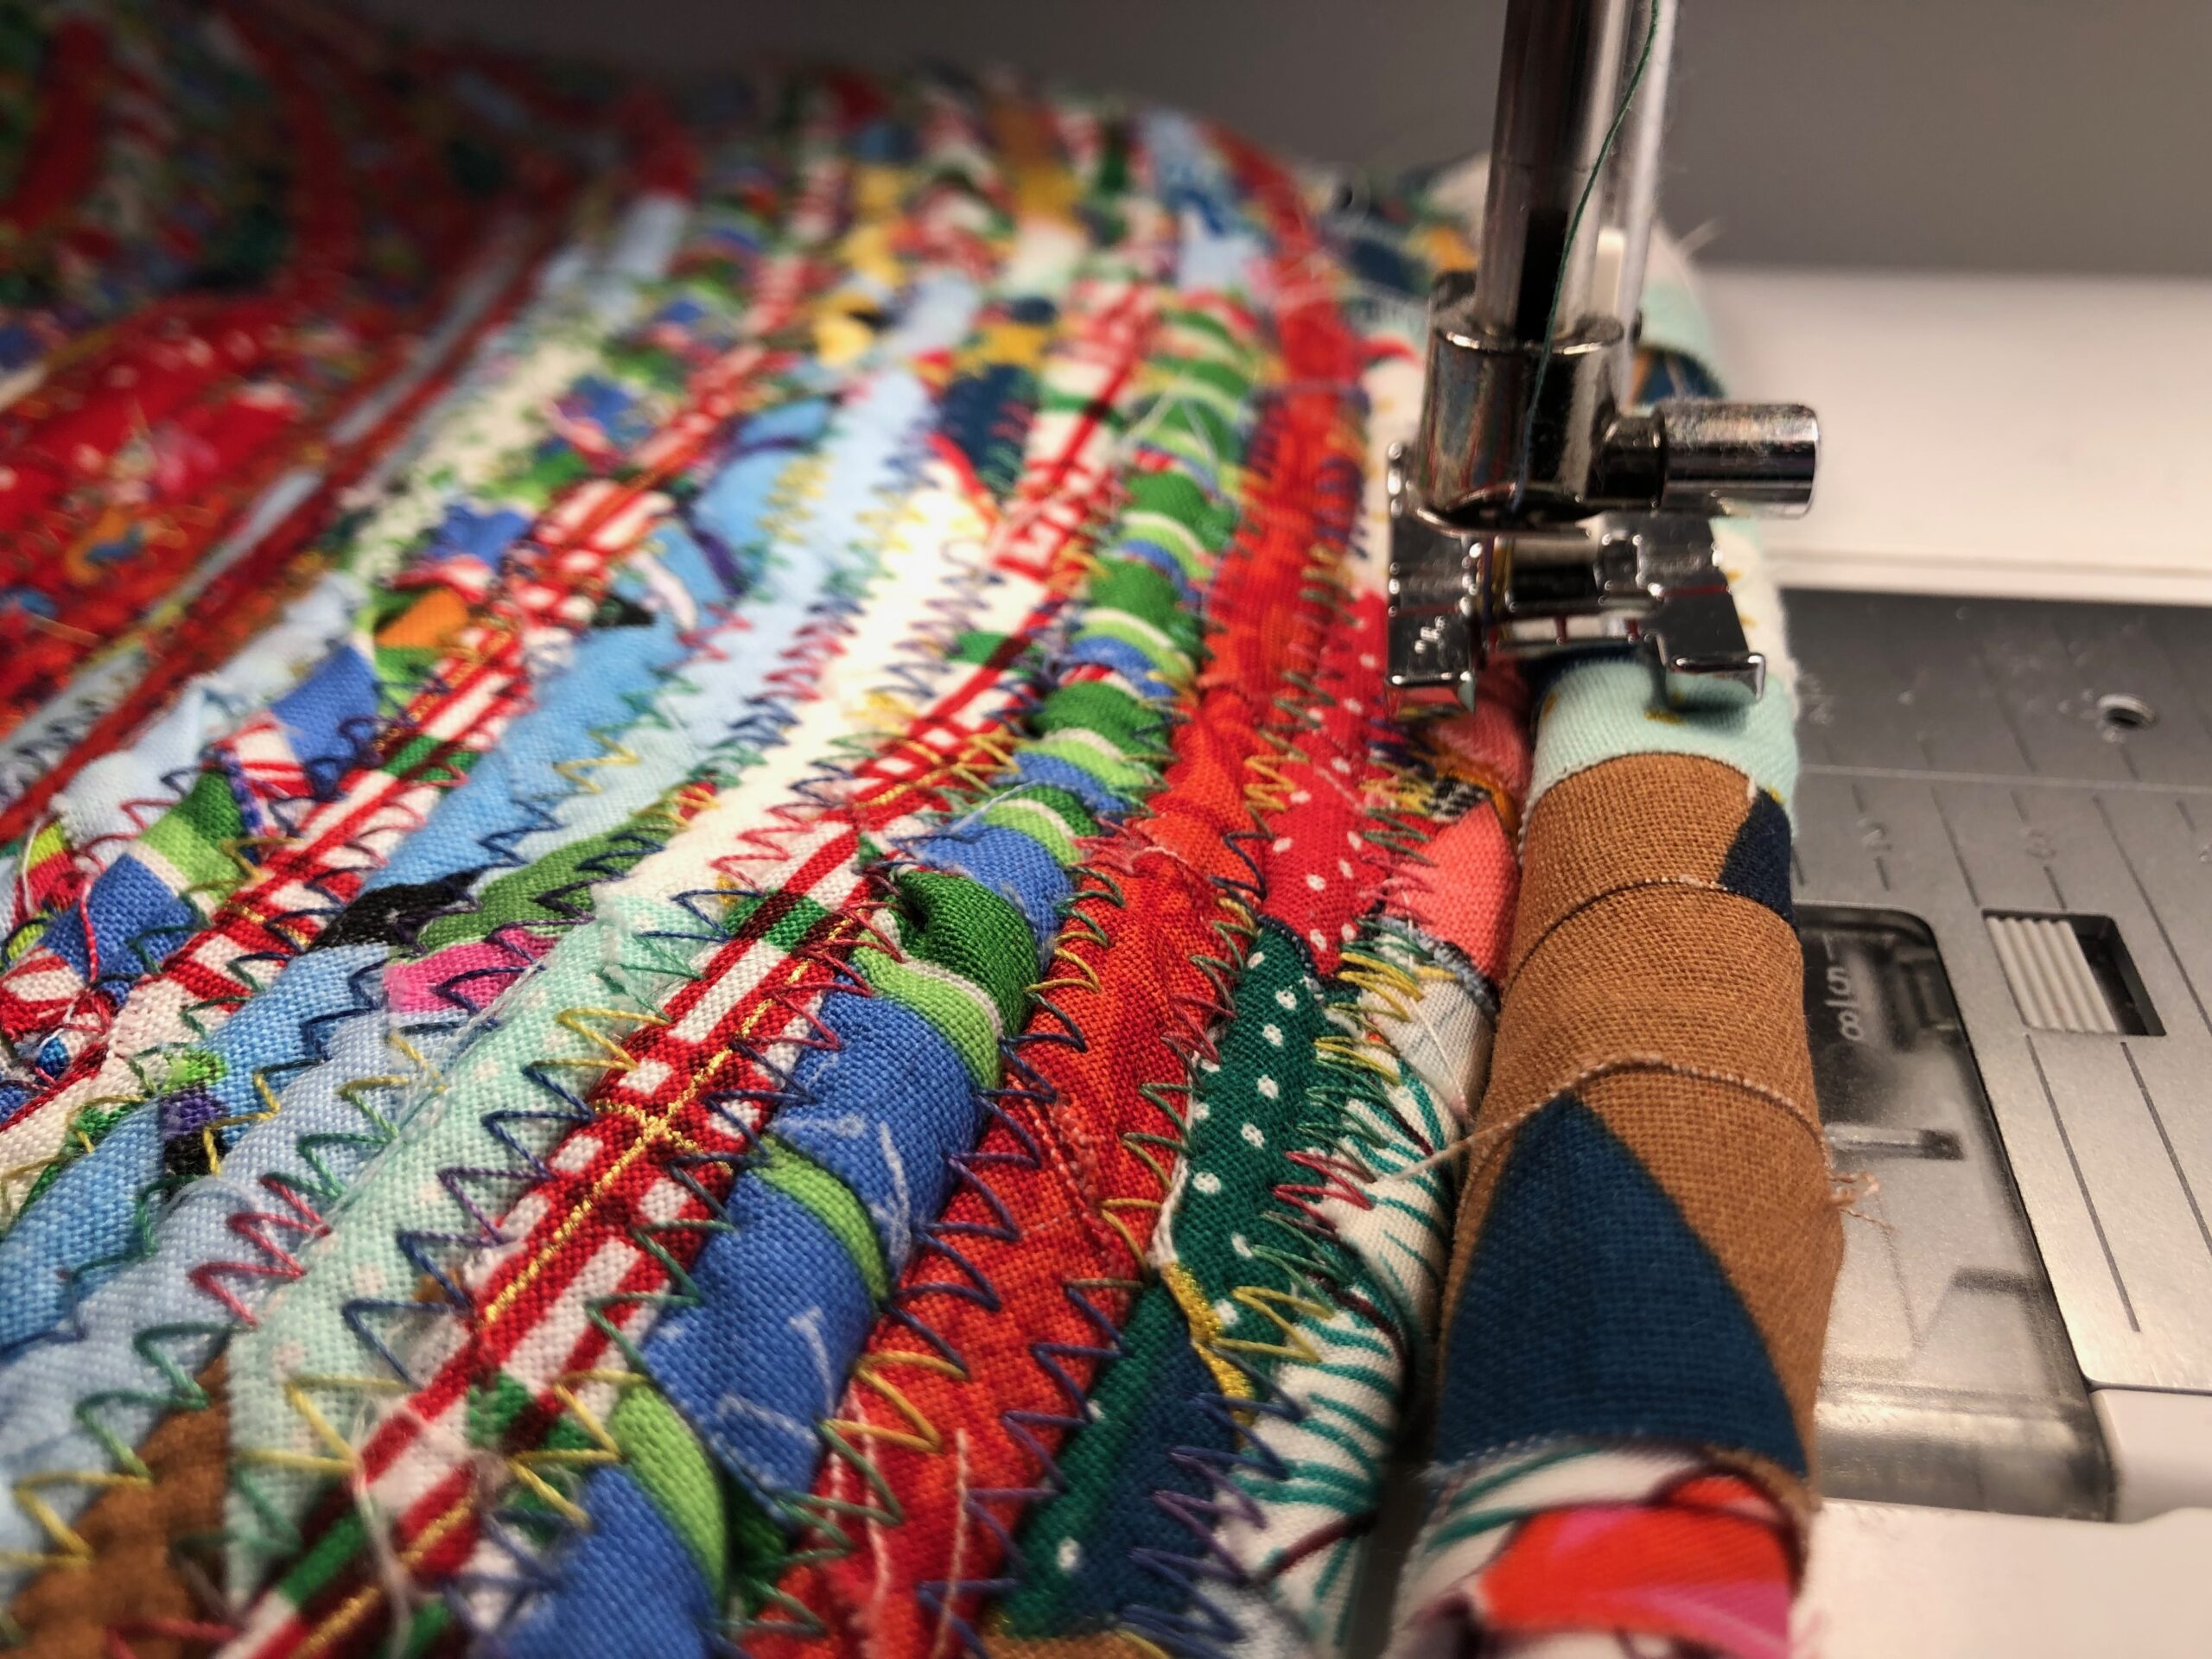
Set the machine for a wide zigzag stitch and make sure to install a foot that accommodates the stitch width. Use a 6.0mm width and 4.0mm length.

COVERING THE CORDING
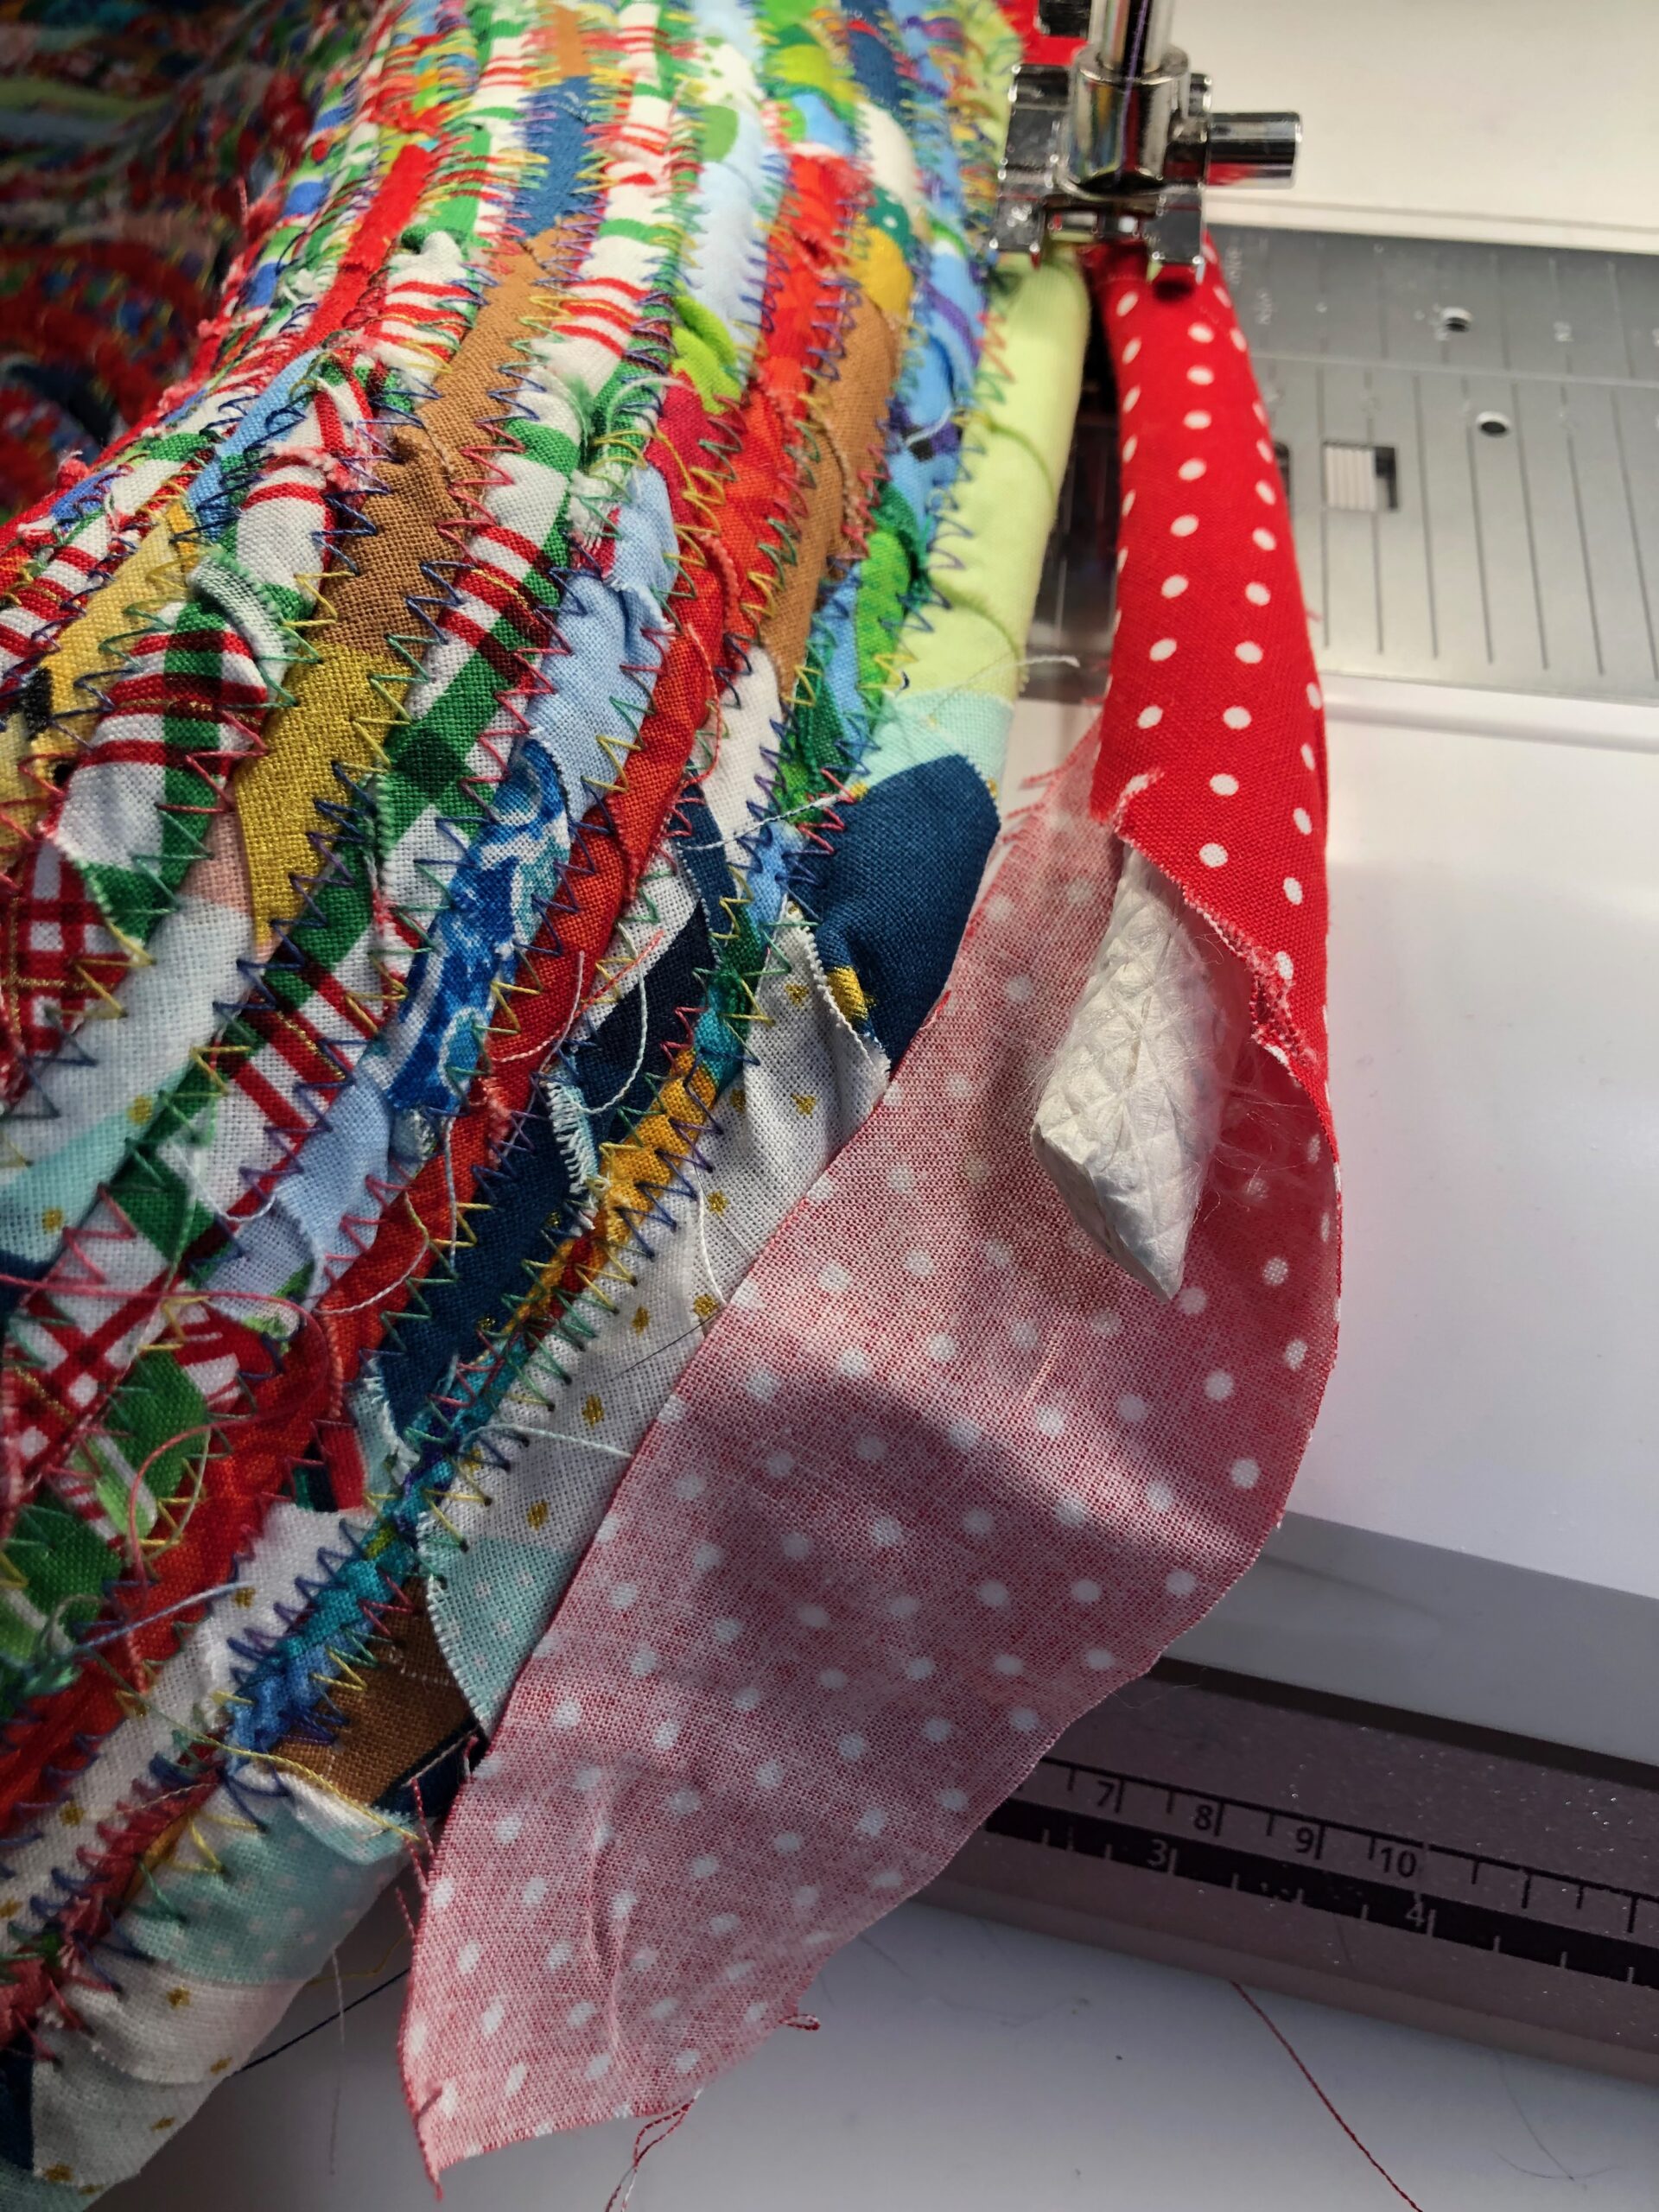
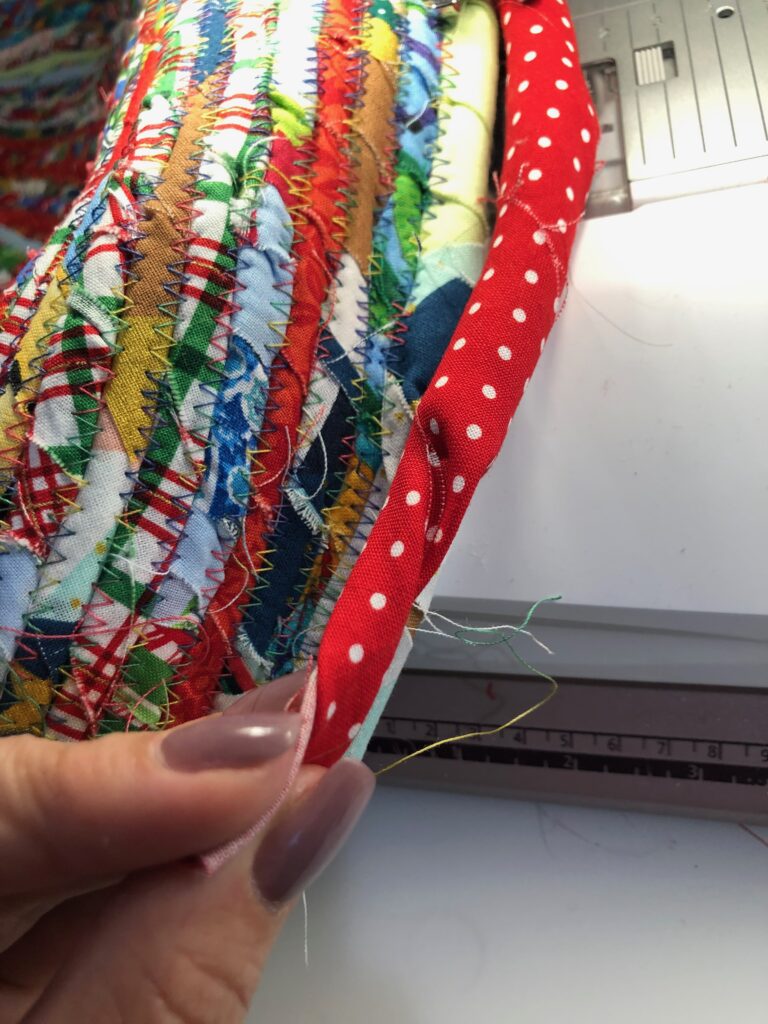
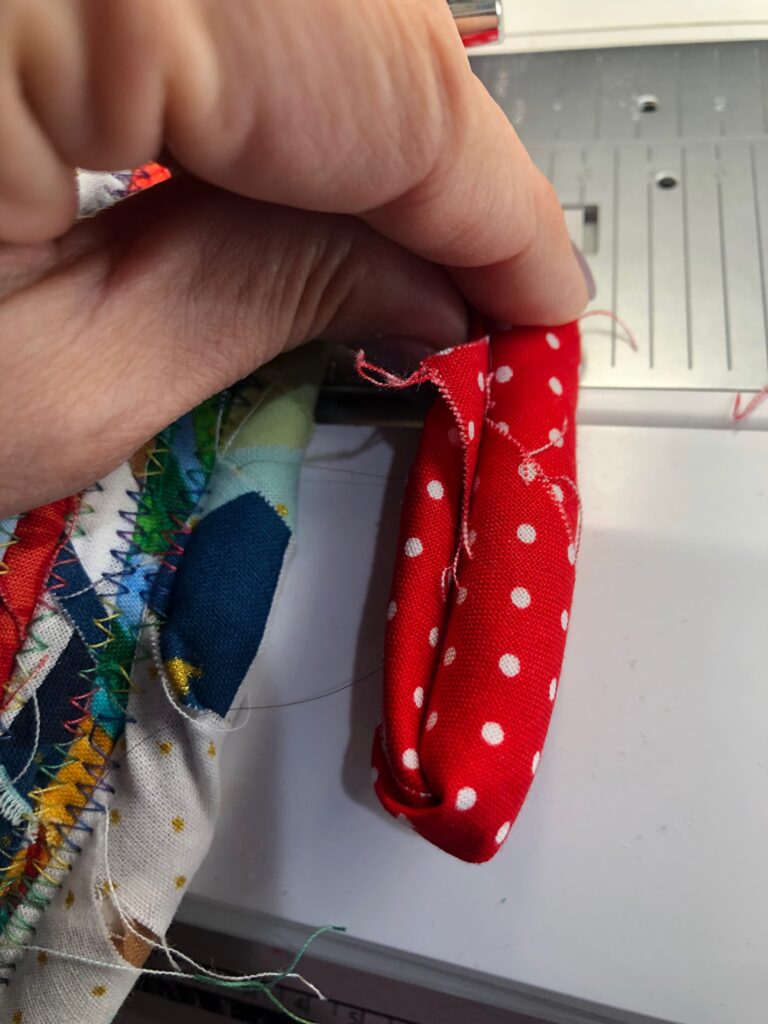
Begin at one small cording end. Extend one fabric strip at least 6″ belong the end, and then start wrapping the strip around the cording with the fabric right side facing out.
Wrap the fabric at an angle, covering all the cording with each pass, overlapping the outer edges to ensure adequate coverage.
Use Clover Wonder Clips at each fabric end/beginning so nothing unravels as you work.
Continue to wrap the cording with the fabric until the entire 100′ length is covered.
Repeat the process to wrap the 1/2″-diameter cording, without leaving a fabric tail at the beginning. The needed large cording amount depends on the tree collar upper- and lower-edge circumference, so wrap an estimated amount of cording (between 10′ to 20′) and leave a fabric tail at the end so you can wrap more as needed when reaching the final steps for the tree collar construction.
TREE COLLAR CONSTRUCTION
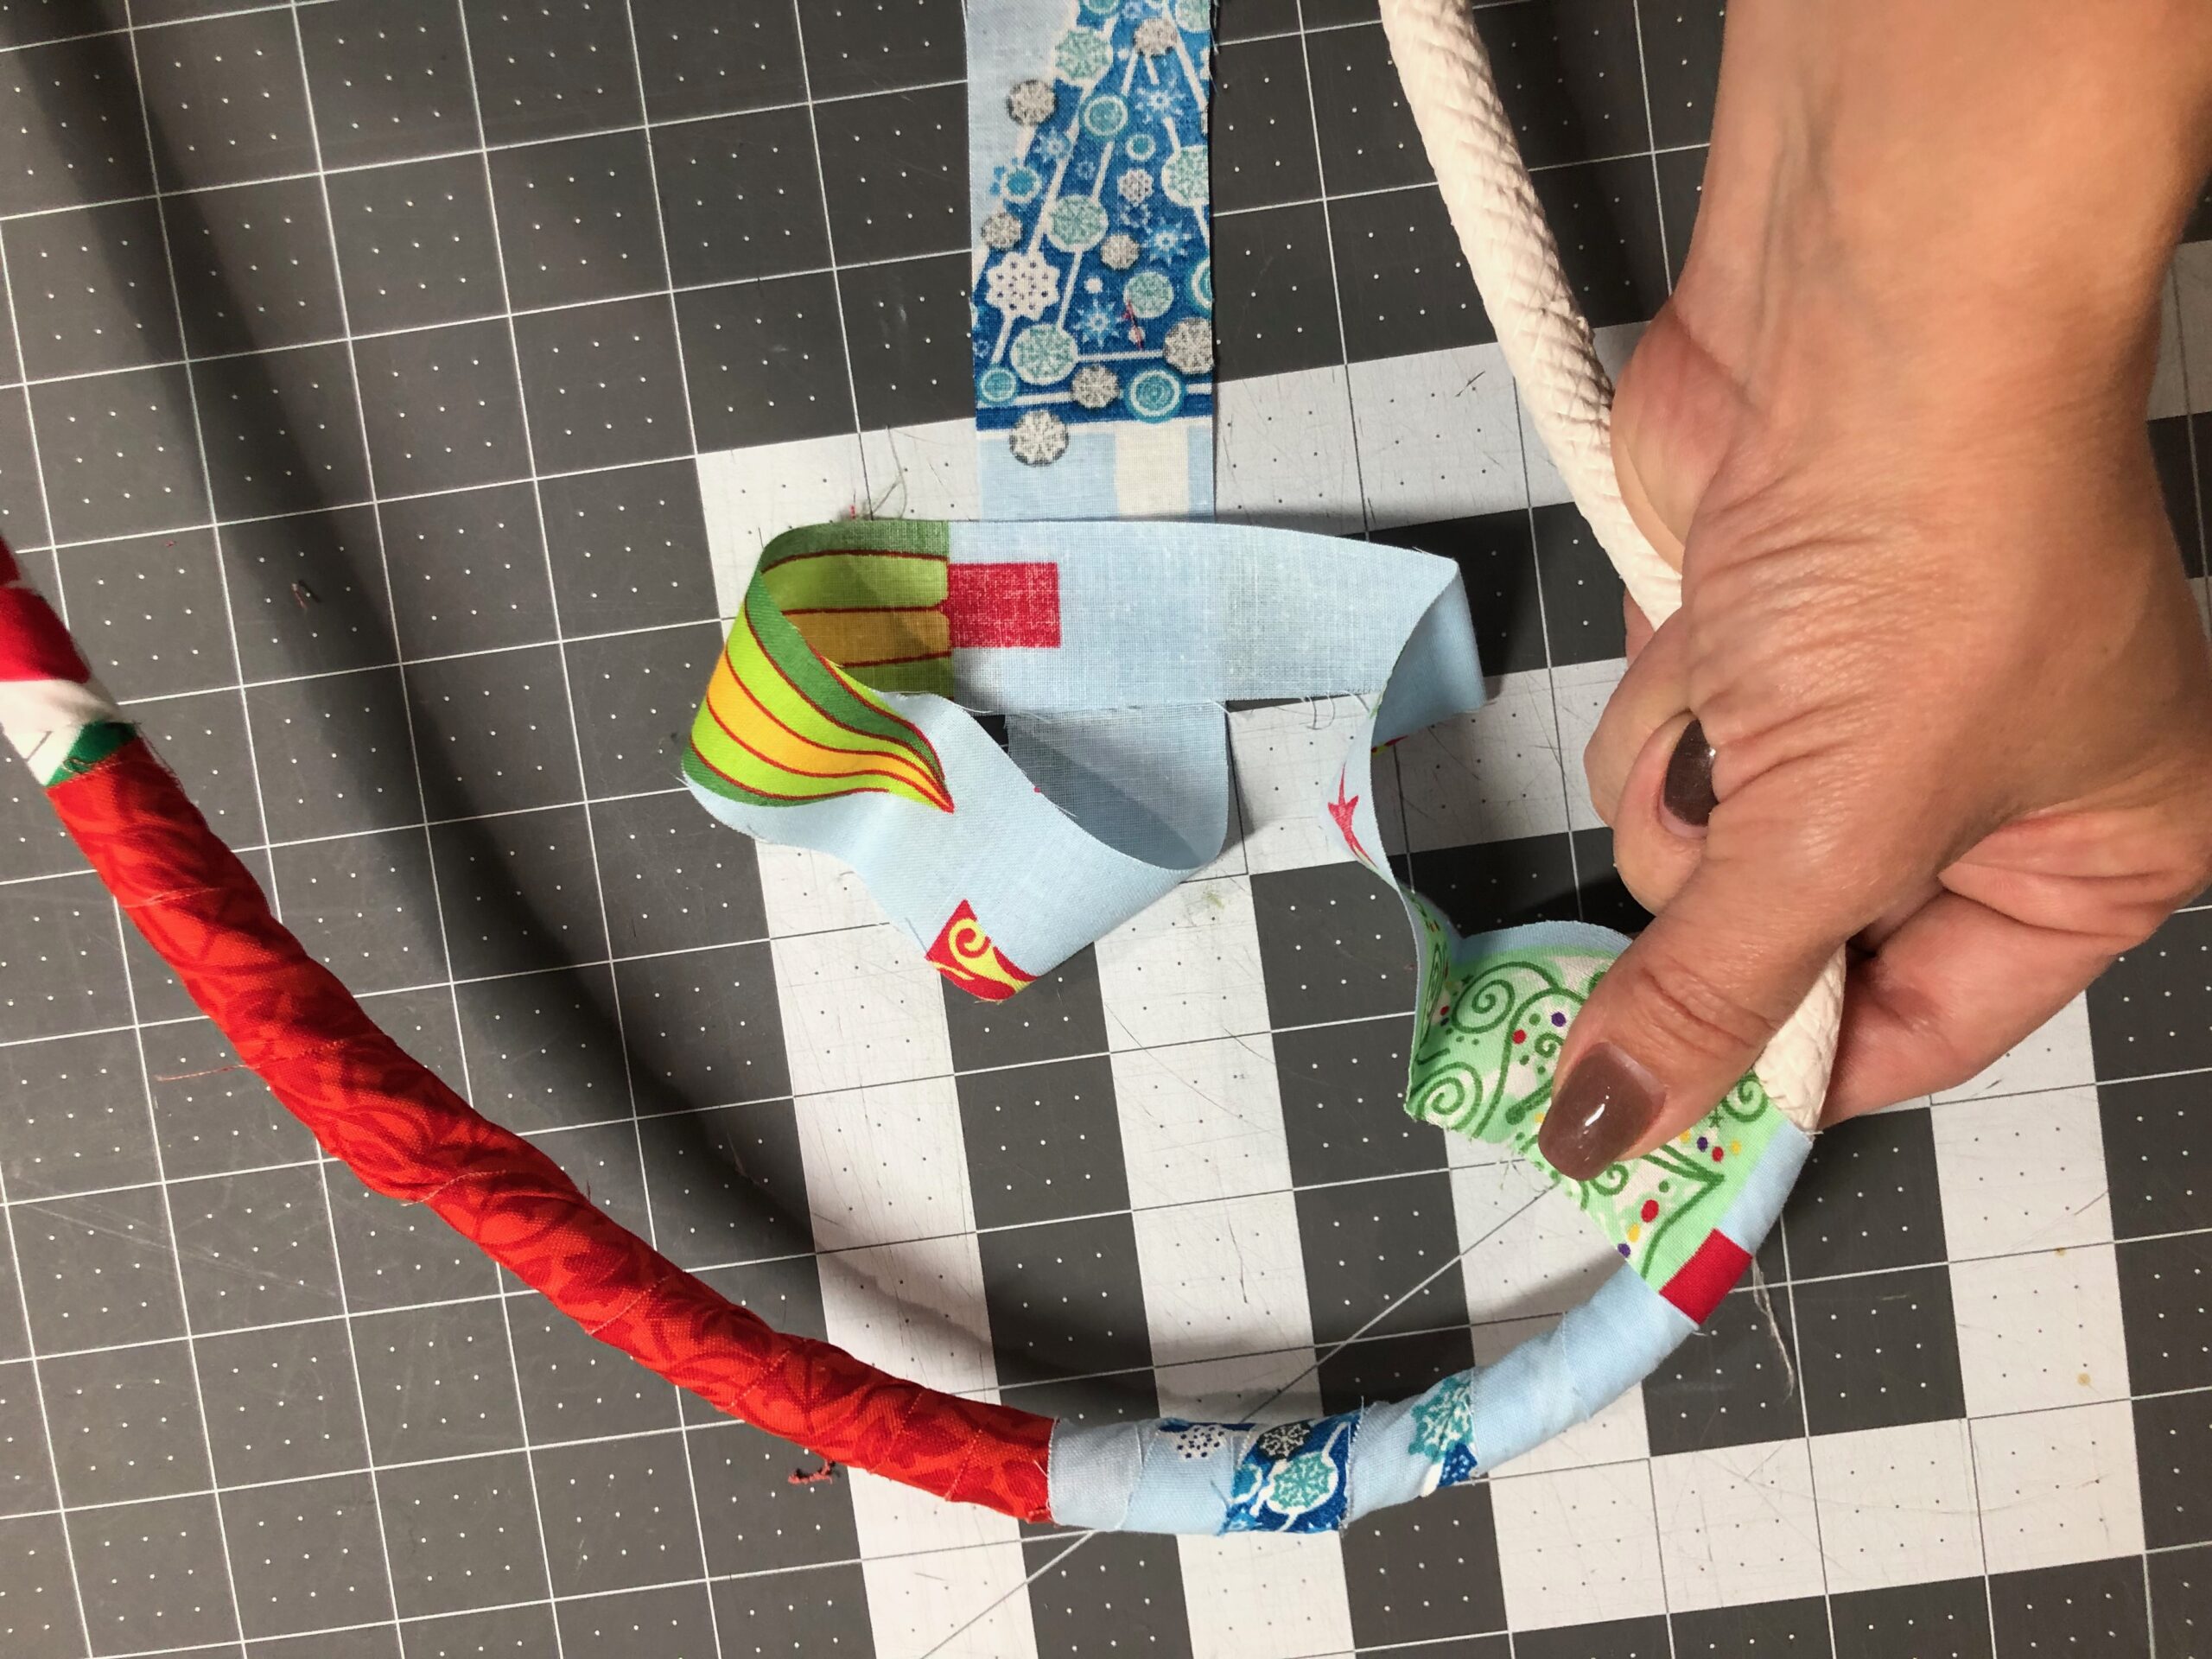
Determine the desired lower-edge circumference of the tree collar. For the featured tree collar, the circumference is 72″. Wrap the cording beginning into a circle according to that circumference. Extend the leftover fabric beyond the cording beginning and the cording end 4″ beyond the cording overlap; clip, creating the first tree-collar circle.
Abut the large cording end and the small cording end. Wrap the fabric tail from the small cording around the large cording, blending it around the pre-wrapped large cording. Clip the cording overlap in a few places. Abut the wrapped large cording with the wrapped small cording circle until you reach the cording join. Unwrap at least 6″ of the large cording end, and then trim the cording so the end blends in with the beginning (it should nestle into the small cording end pretty exactly). Wind the 6″ of fabric beyond the large cording end around the large cording/small cording join. Now you have a large cording circle with one circle layer of small cording clipped to it, with the ends concealed within the fabric wrapping. The end join is a bit bulky, but not noticeable after construction.
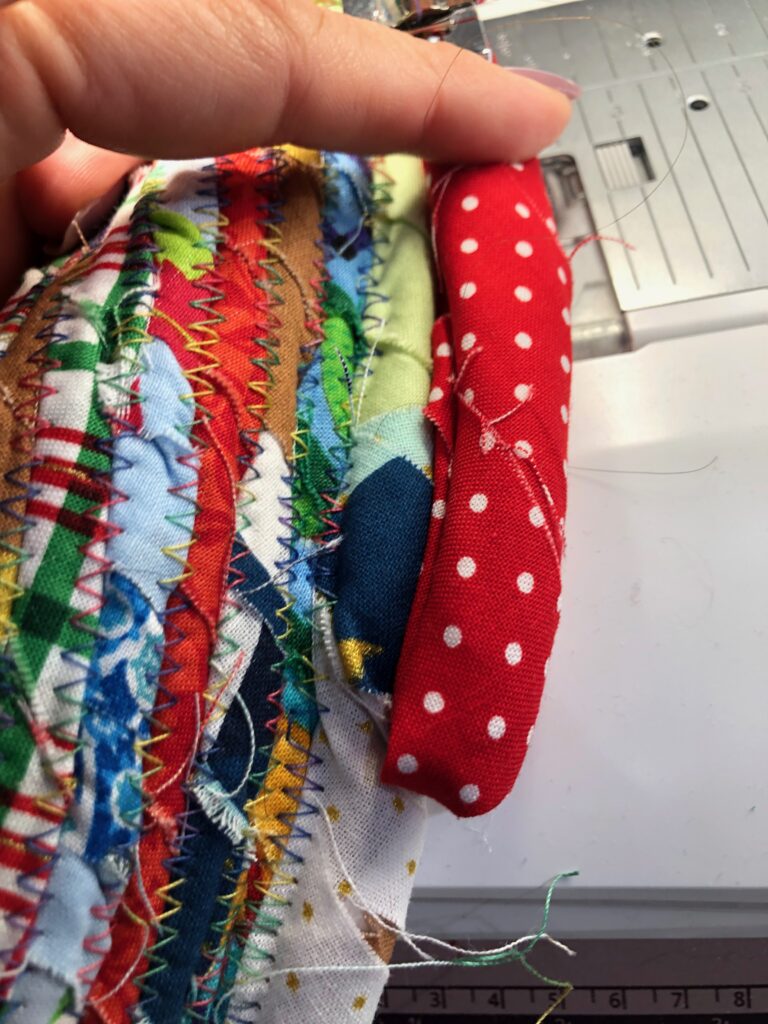
Place the large/small cording circle under the presser foot, so the large cording is to the left under the presser foot and the small cording is to the right. Insert the needle into the small cording edge using the handwheel or “needle down” function on the machine.
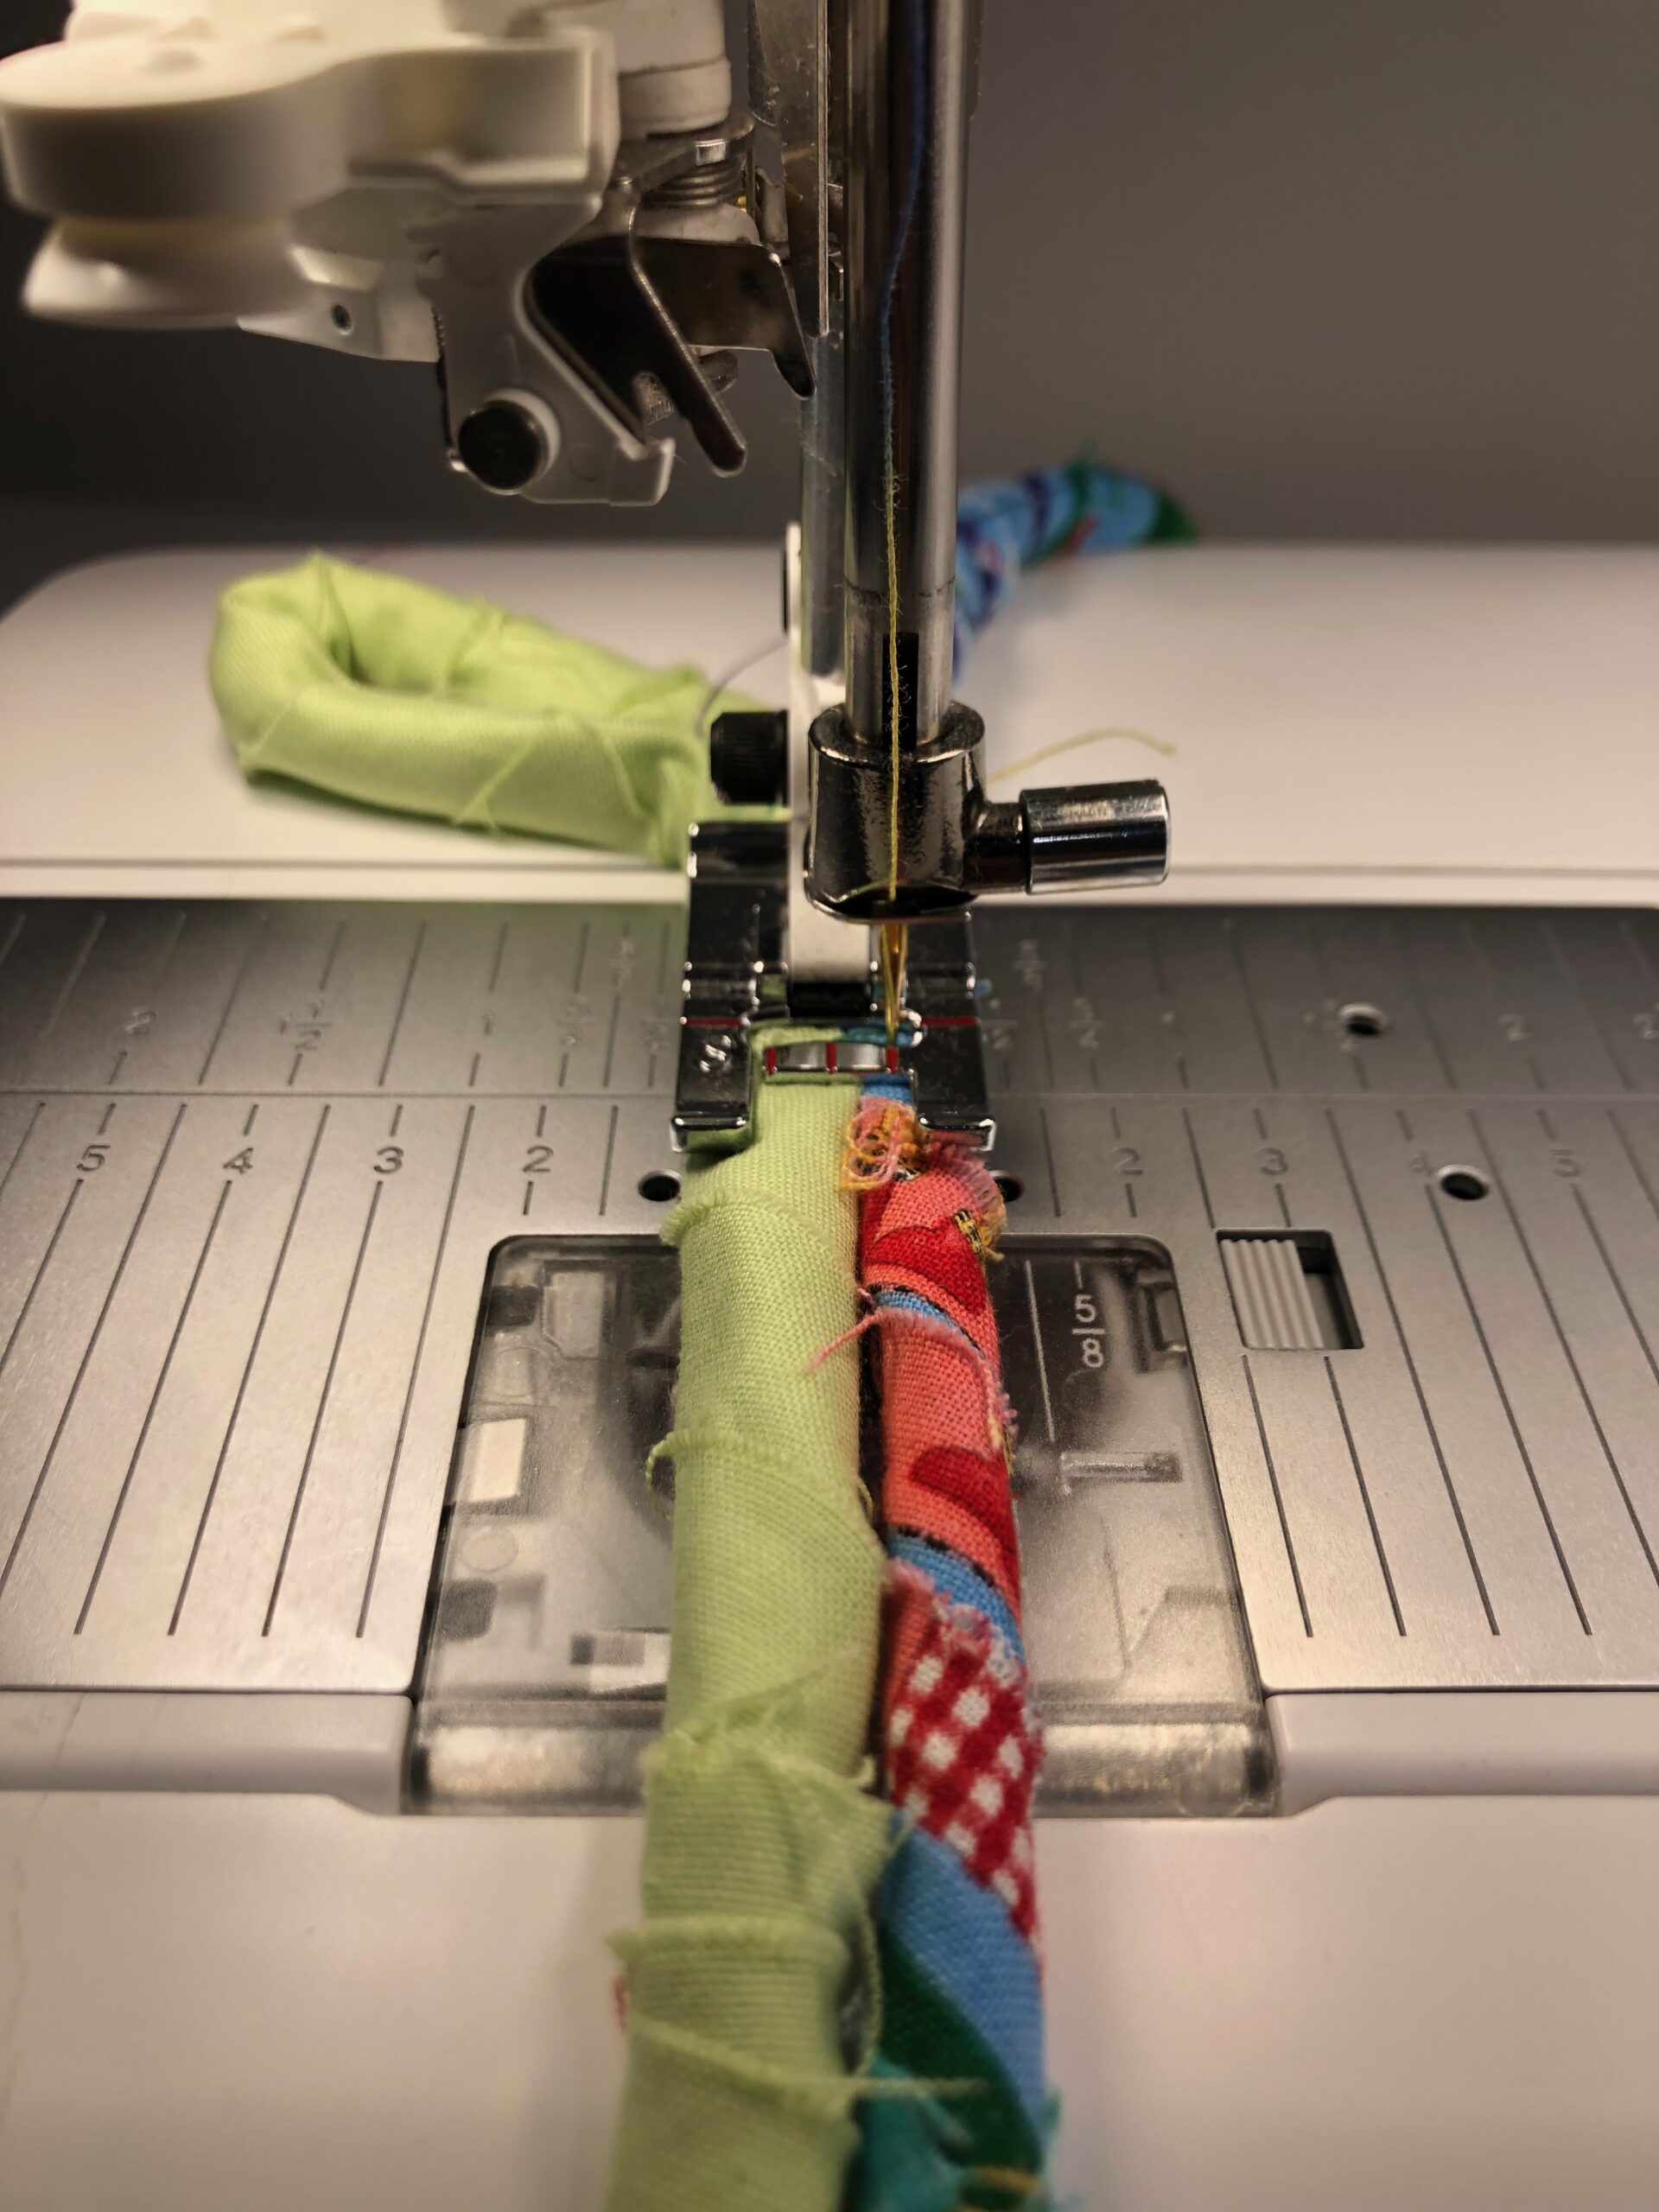
Begin to zigzag stitch, joining the two adjacent cording circles. Make sure the right needle swing is inserted into the right cording and the left needle swing barely penetrates the large cording. It’s quite bulky and your machine may not like the thickness under the presser foot. If this happens, adjust the presser foot pressure, if available, to accommodate the bulk.
After completing one rotation, continue adding the small wrapped cording to create the tree collar.
Make sure the bulk of the tree collar is to the left, away from the machine arm. The tree collar circles will begin to shrink smaller as you add rows; simply tug slightly on the cording as you add rows during sewing.
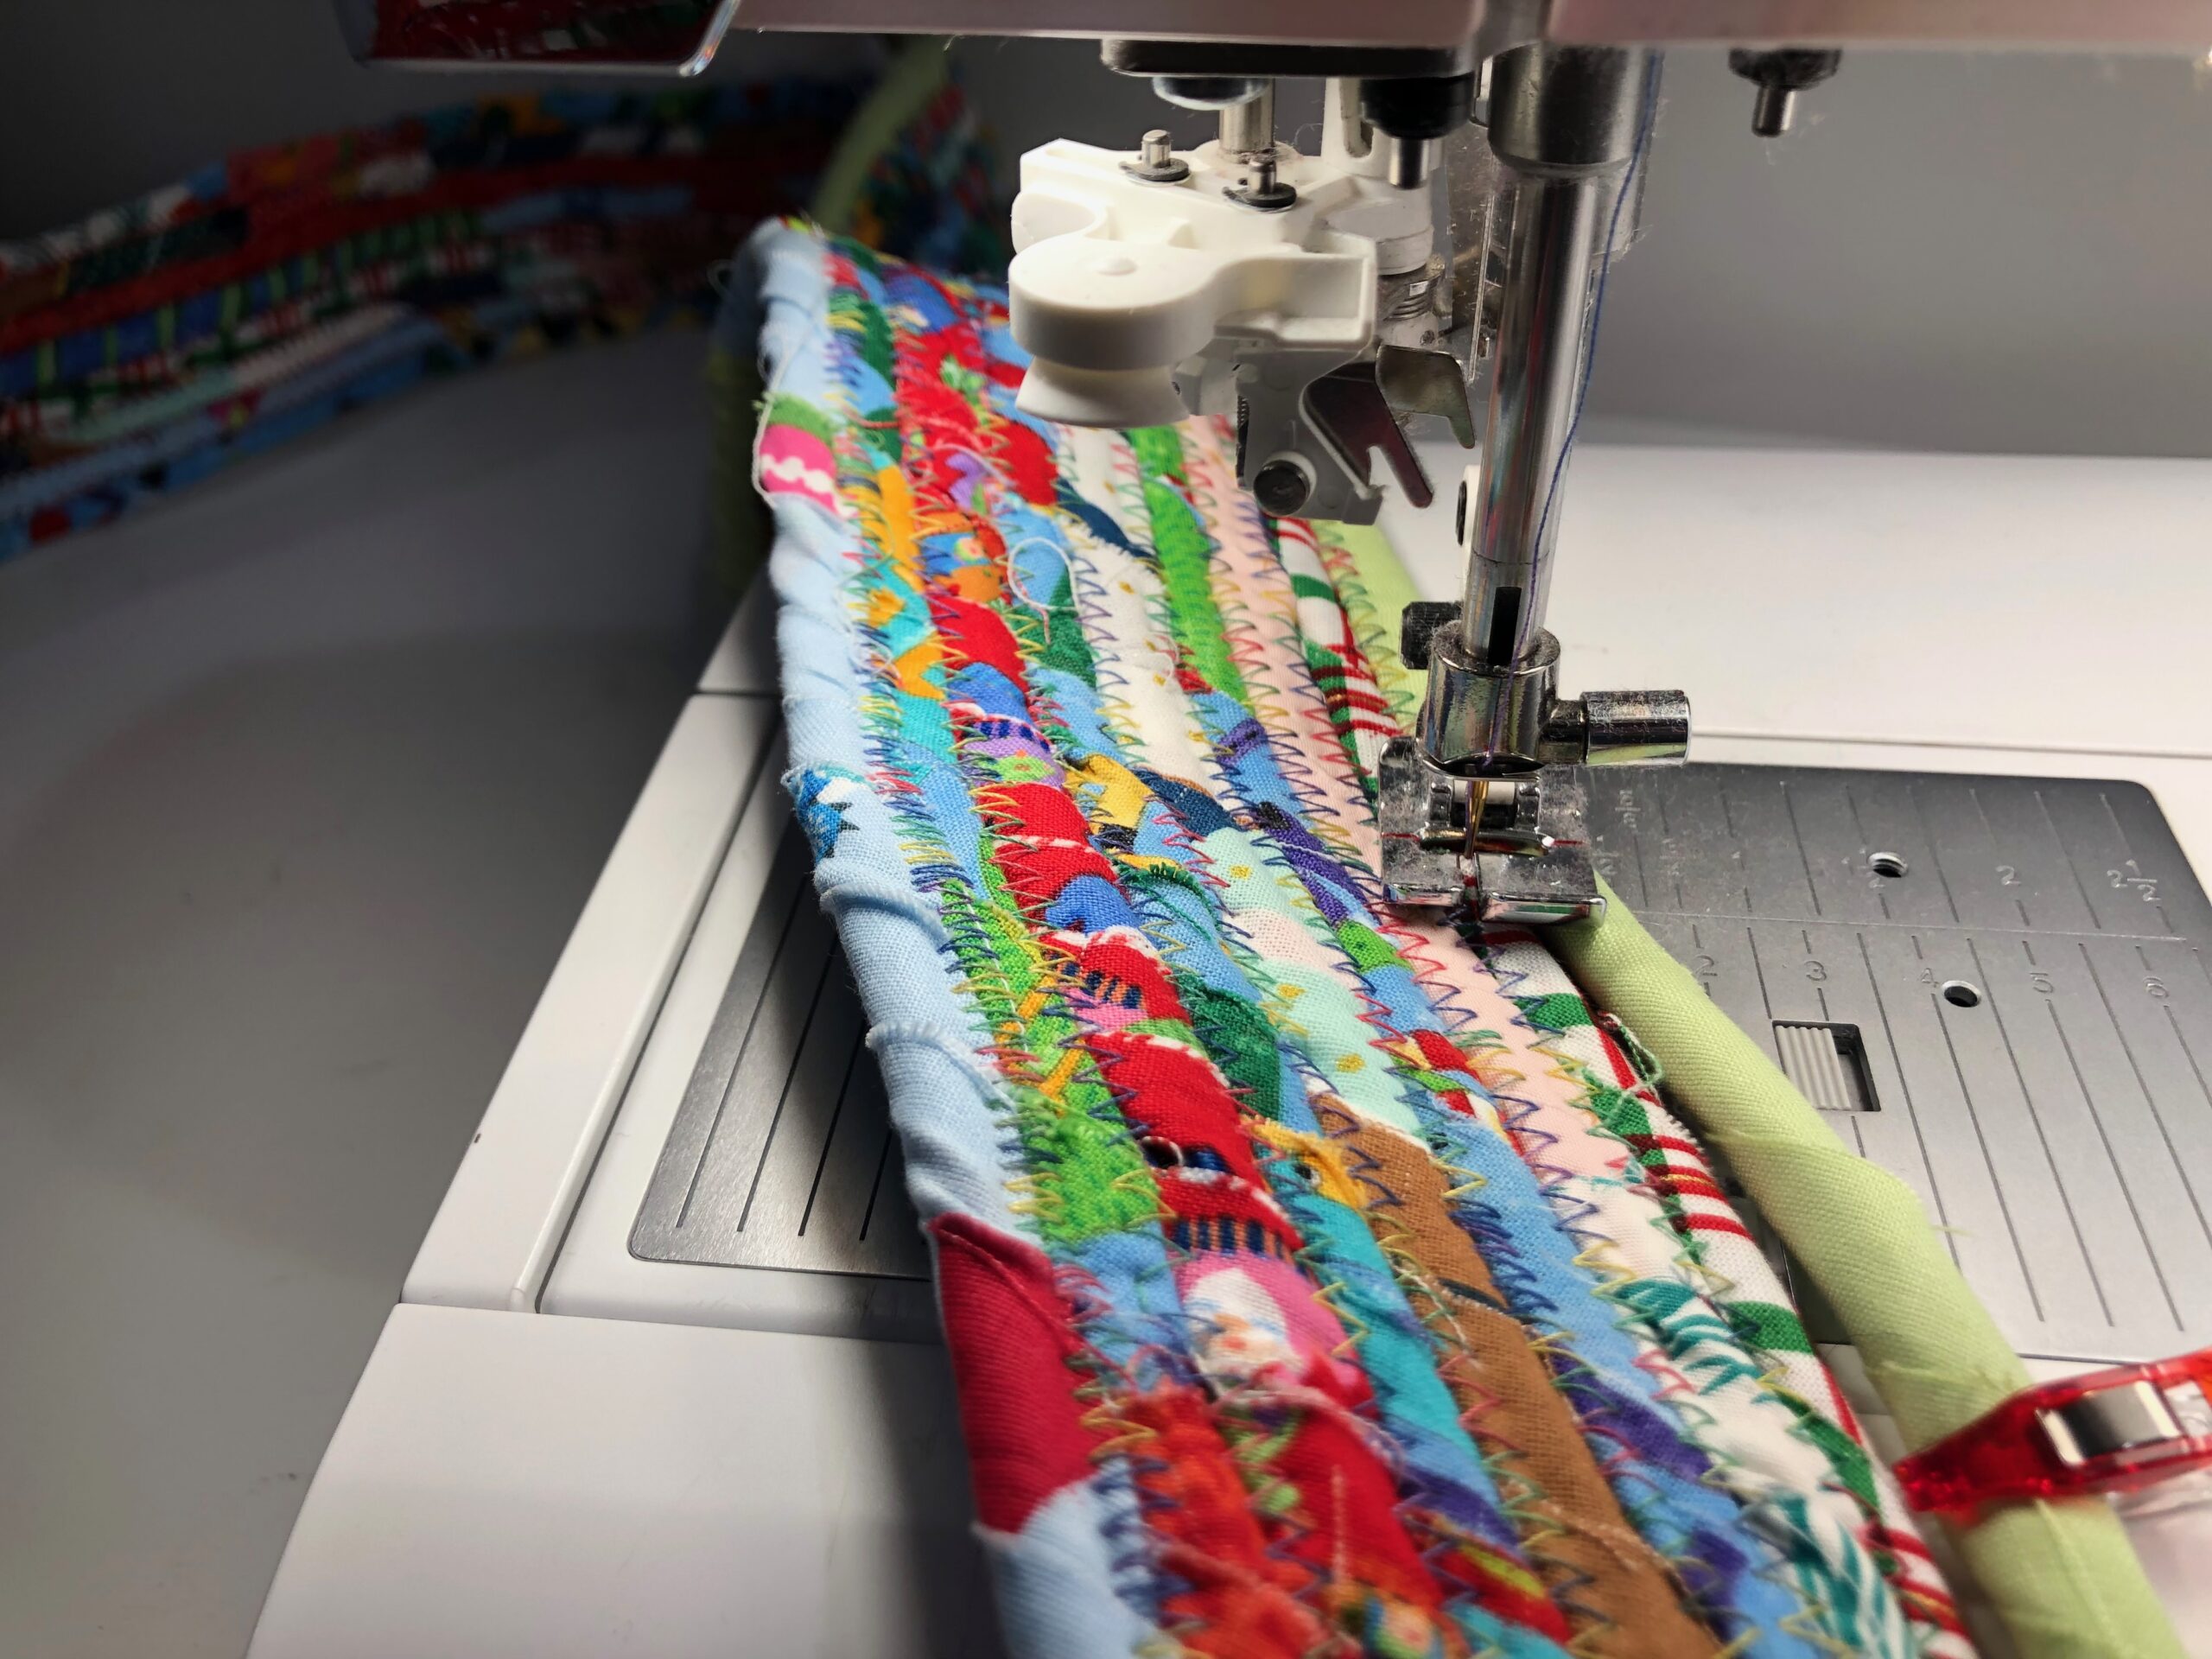
Continue to sew until the small cording almost runs out.
FINISHING TREE COLLAR
Follow the previous instructions to add the large cording to the tree collar upper edge, wrapping the fabric around the join after abutting.
This time, when adding the bulkier cording the large cording is to the right and the tree collar body is to the left under the presser foot.
When you reach the cording join, unwrap the large cording end for at least 6″, and then trim the cording to abut the join. Re-wrap the cording end, and nestle it into the join.
Then, wrap all of the fabric end into a spiral. Fold the end up toward the tree collar body, and “hide” it between the cording rows.
Clip the folded end so it’s flush with the previous row (as close as possible). Zigzag stitch the remaining cording, backstitching along the end to secure.
Stand the tree collar up on its base and stretch it by pulling along the upper and lower edges slightly along the entire perimeter. This helps the tree collar stand proudly on its own.
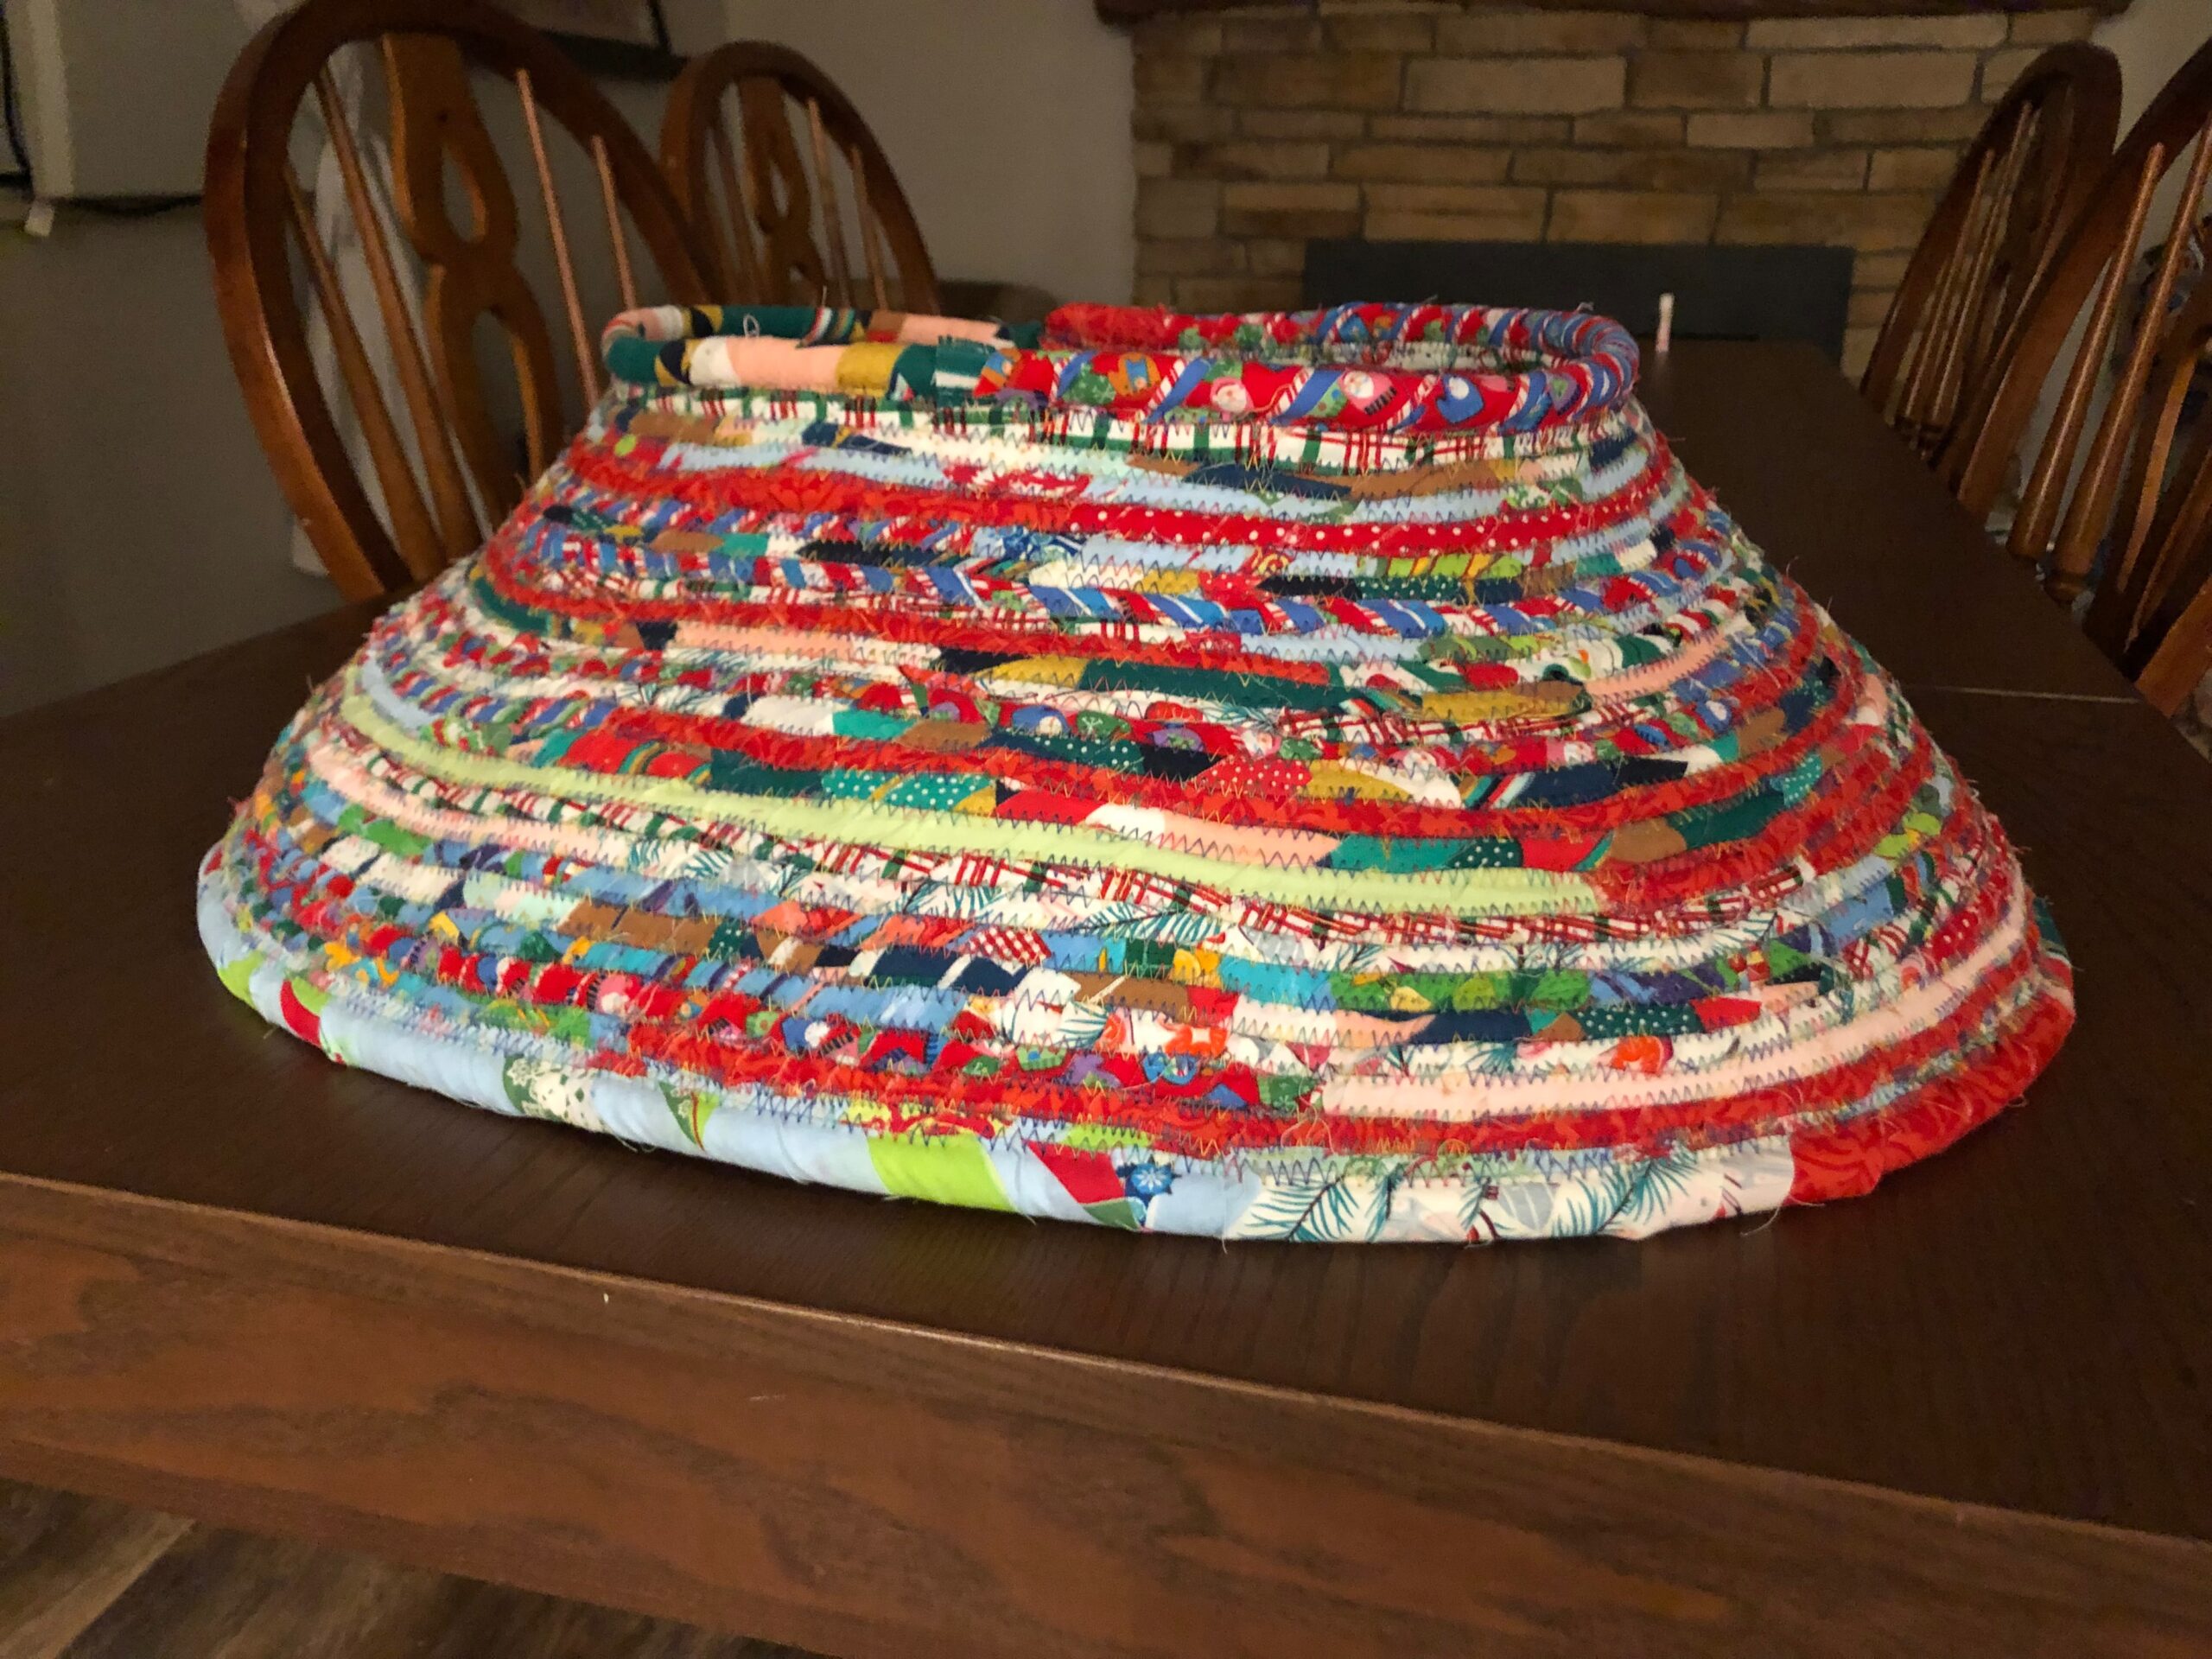
Continue to shape the tree collar to achieve either an oval or circle shape.
Put the tree collar over a tree stand, and then attach the tree.