Quilted Ornament Frames
by Heidi Pridemore

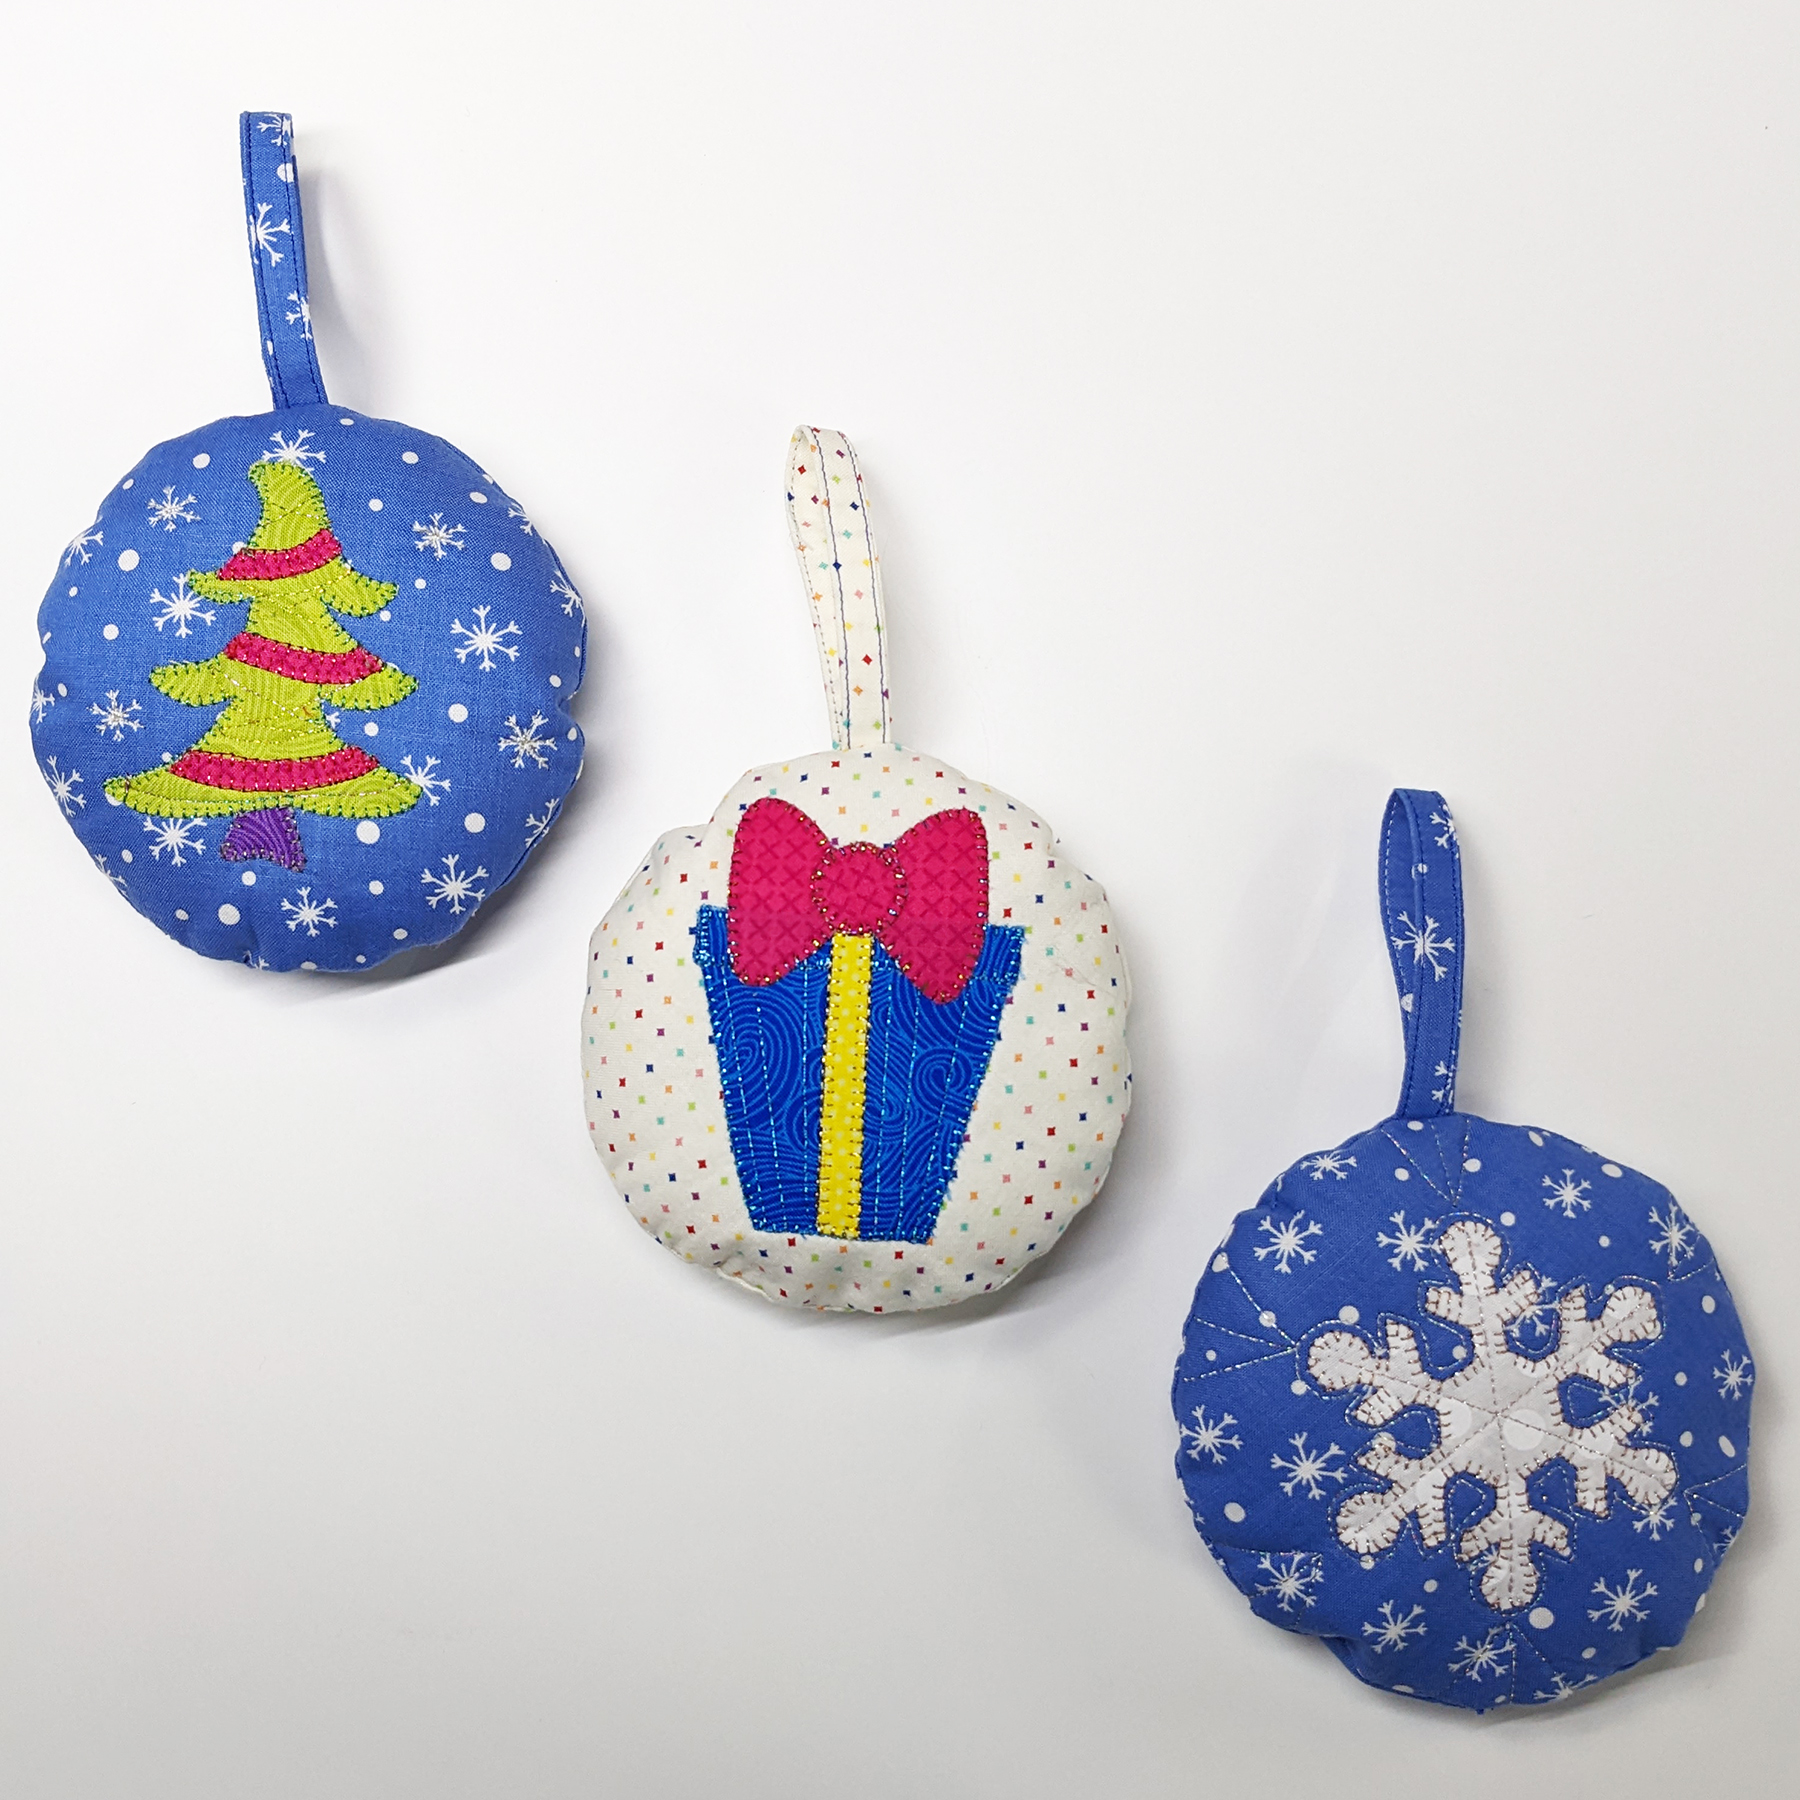
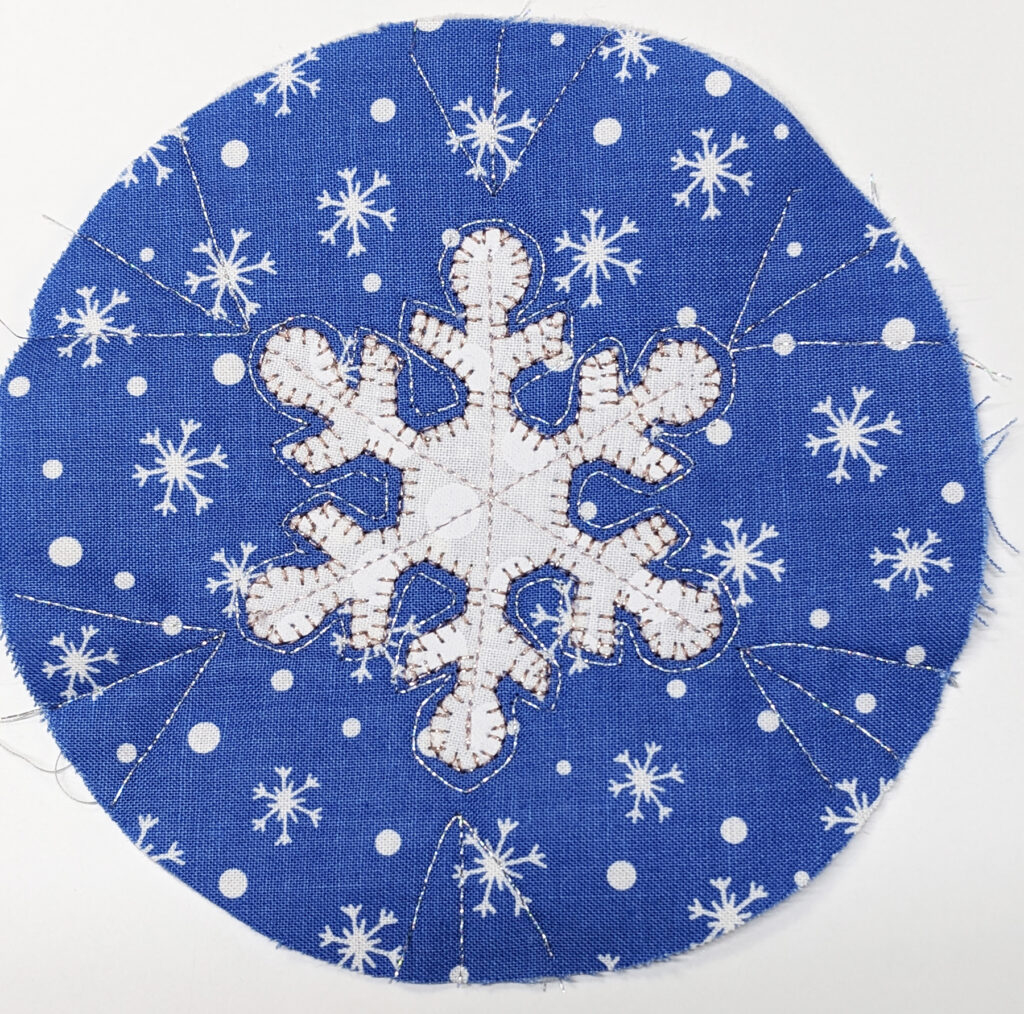
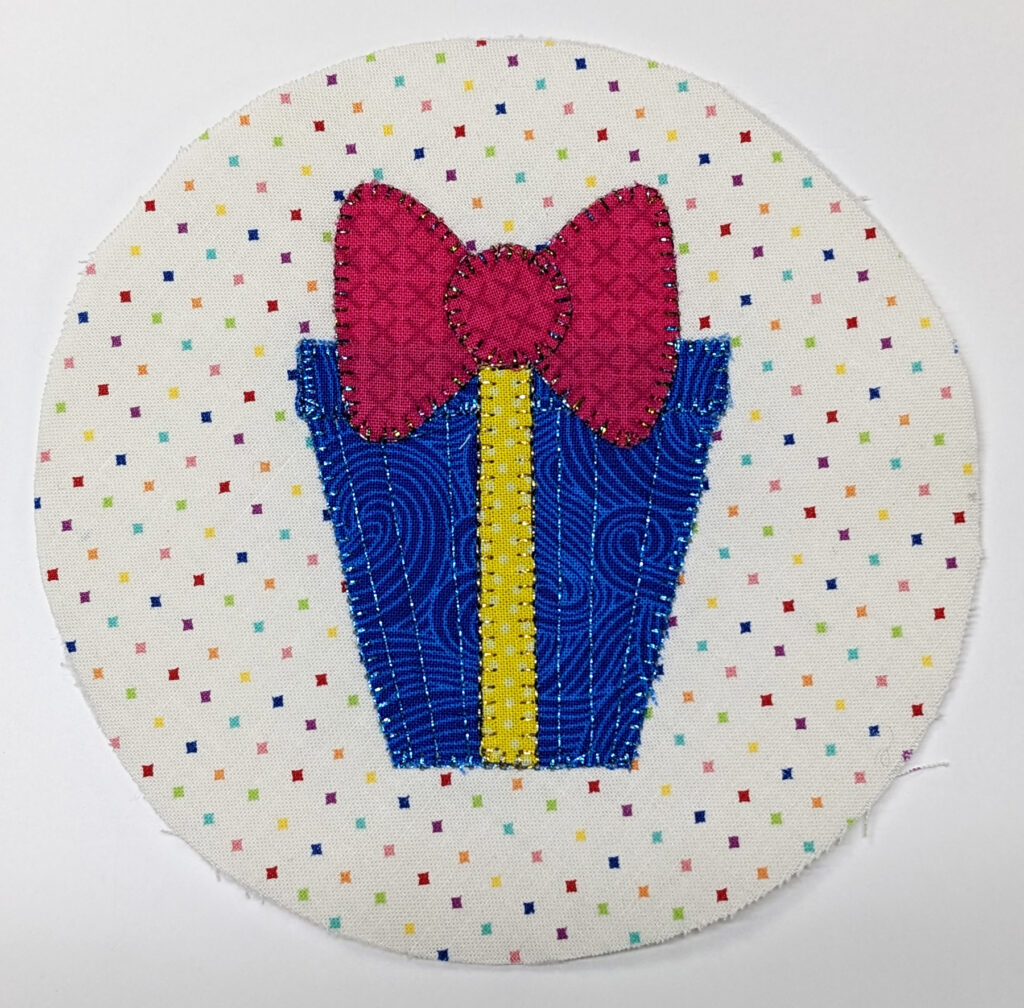
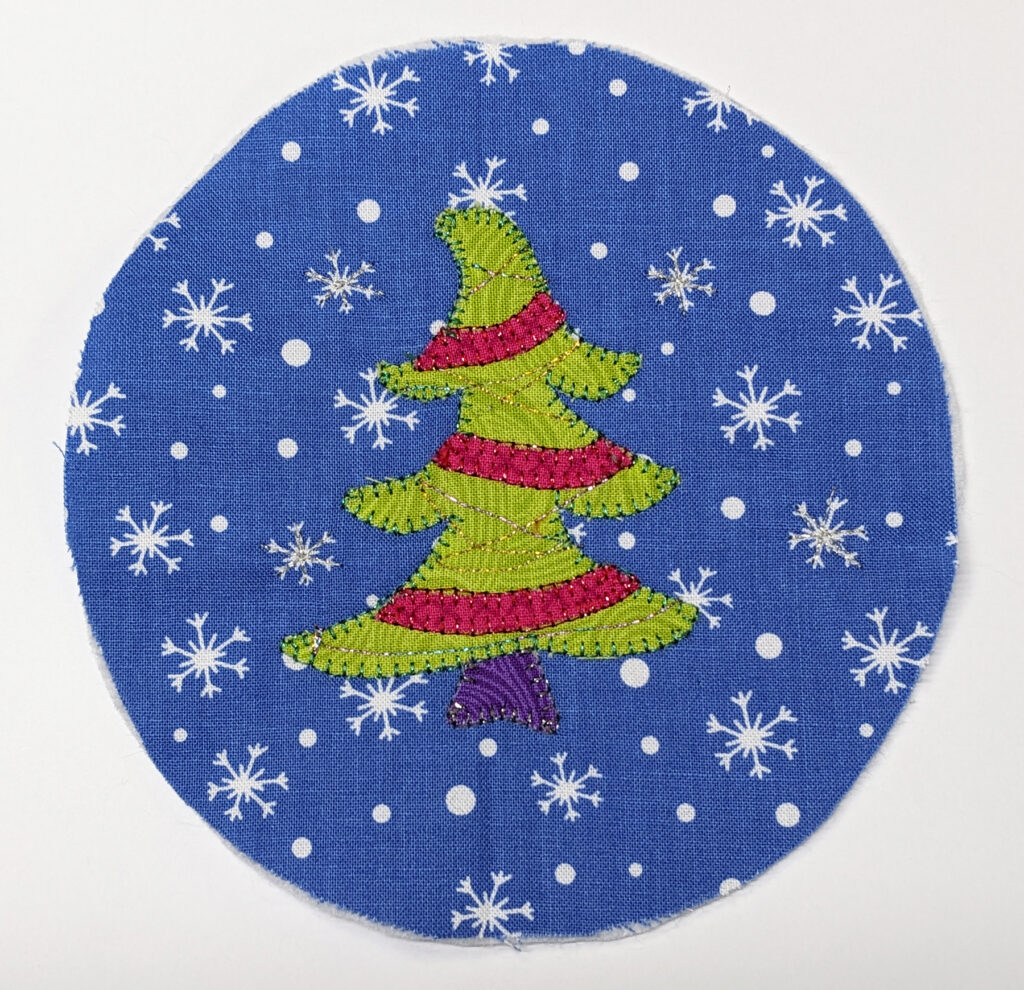
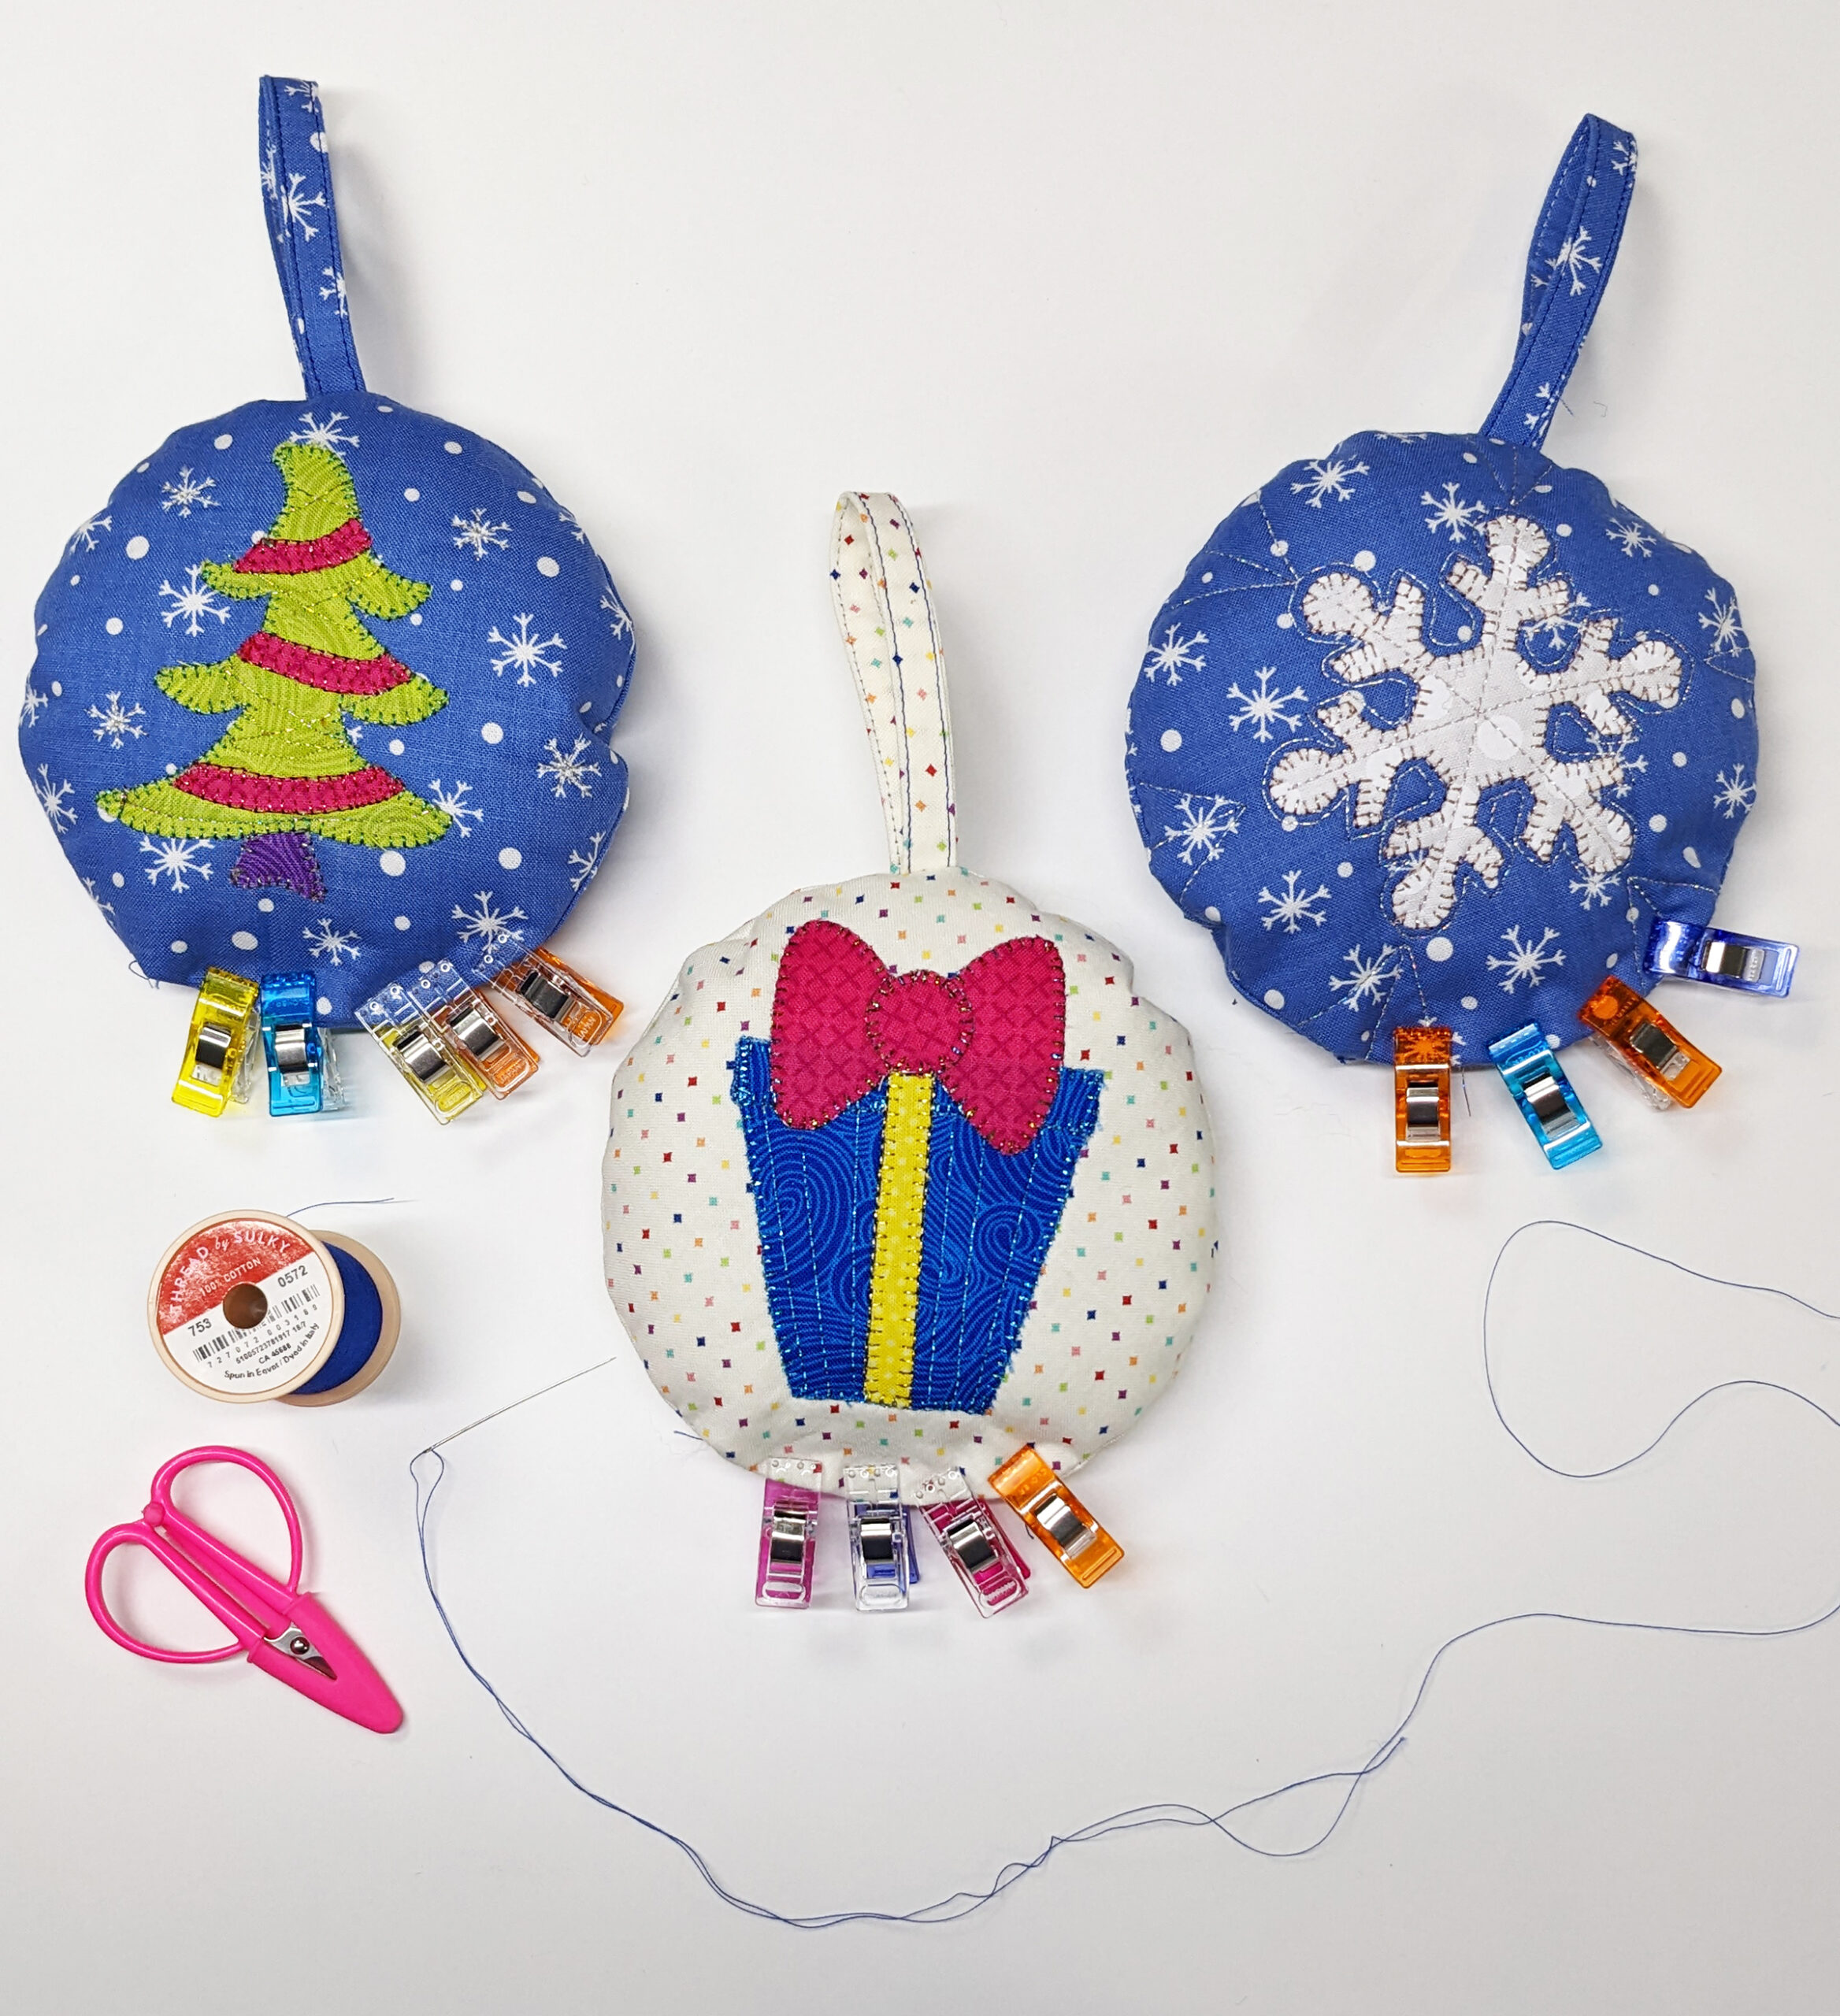
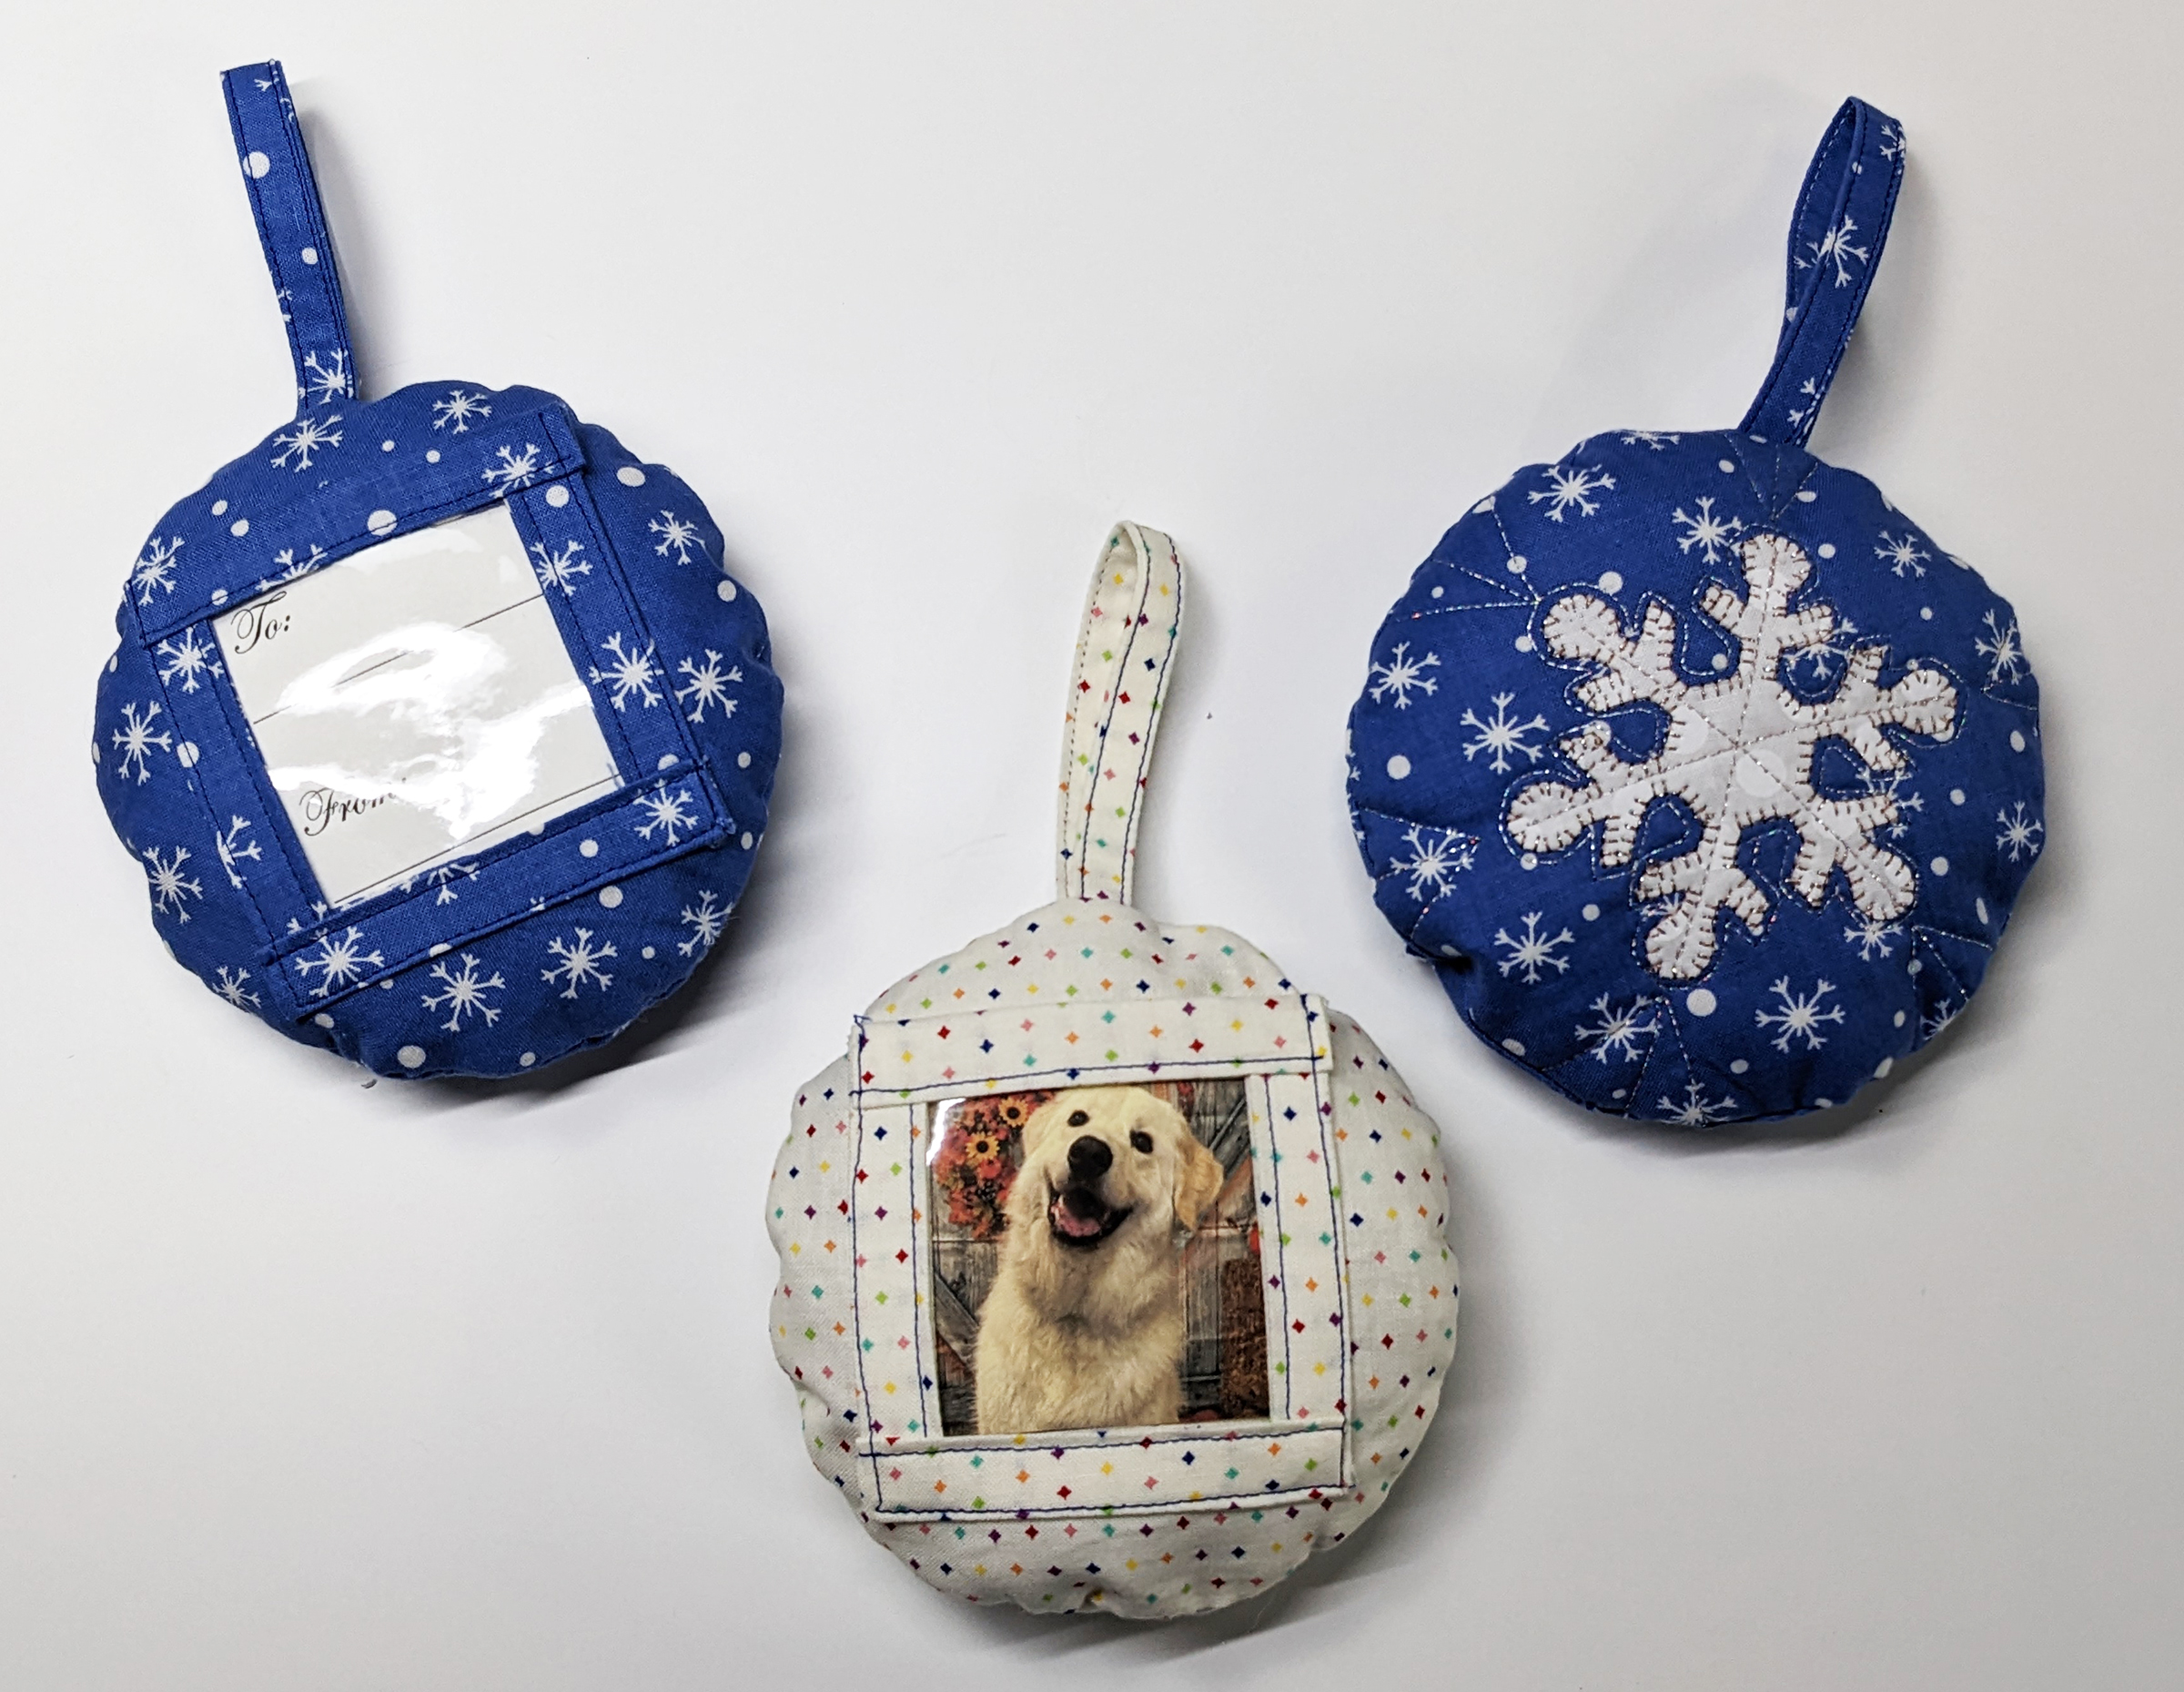
Create fun quilted ornament frames to hang on the tree, use as gift tags, or place at each plate on the table for a holiday feast. These ornaments feature vinyl pockets to hold photos and appliquéd holiday motifs embellished with sparkly metallic threads. The ornaments measure 5″ diameter.
QUILTED ORNAMENT SUPPLIES

FABRIC REQUIREMENTS
- A: 1/4 Yard of Blue Snowflakes or Cream Confetti
- B: 6 square of White
- C: 6 square of Bright Blue
- D: 6 square of Yellow
- E: 6 square of Hot Pink
- F: 6 square of Green
- G: 6 square of Purple
ADDITIONAL ORNAMENT MATERIALS
- Sulky Perfect Appliqué Fusible Web
- Assorted Sulky Poly Sparkle Threads
- Various Sulky Original Metallic Threads
- Sulky 50 wt. Cotton Thread (construction)
- Fiberfill
- 3 piece of 16mm thick vinyl
- ¼ yard of fusible fleece
- Organ® 70/10 Universal Needle (construction) & 90/14 Top Stitch Needle (metallic embellishments)
- Fabric marking pen
- Clover® Wonder Clips
- Optional: Appliqué Pressing Sheet
ORNAMENT CUTTING
Grab the Quilted Ornament Templates and print them out.
Following the manufacturers instructions, trace the appliqué shapes onto the paper side of the fusible web.
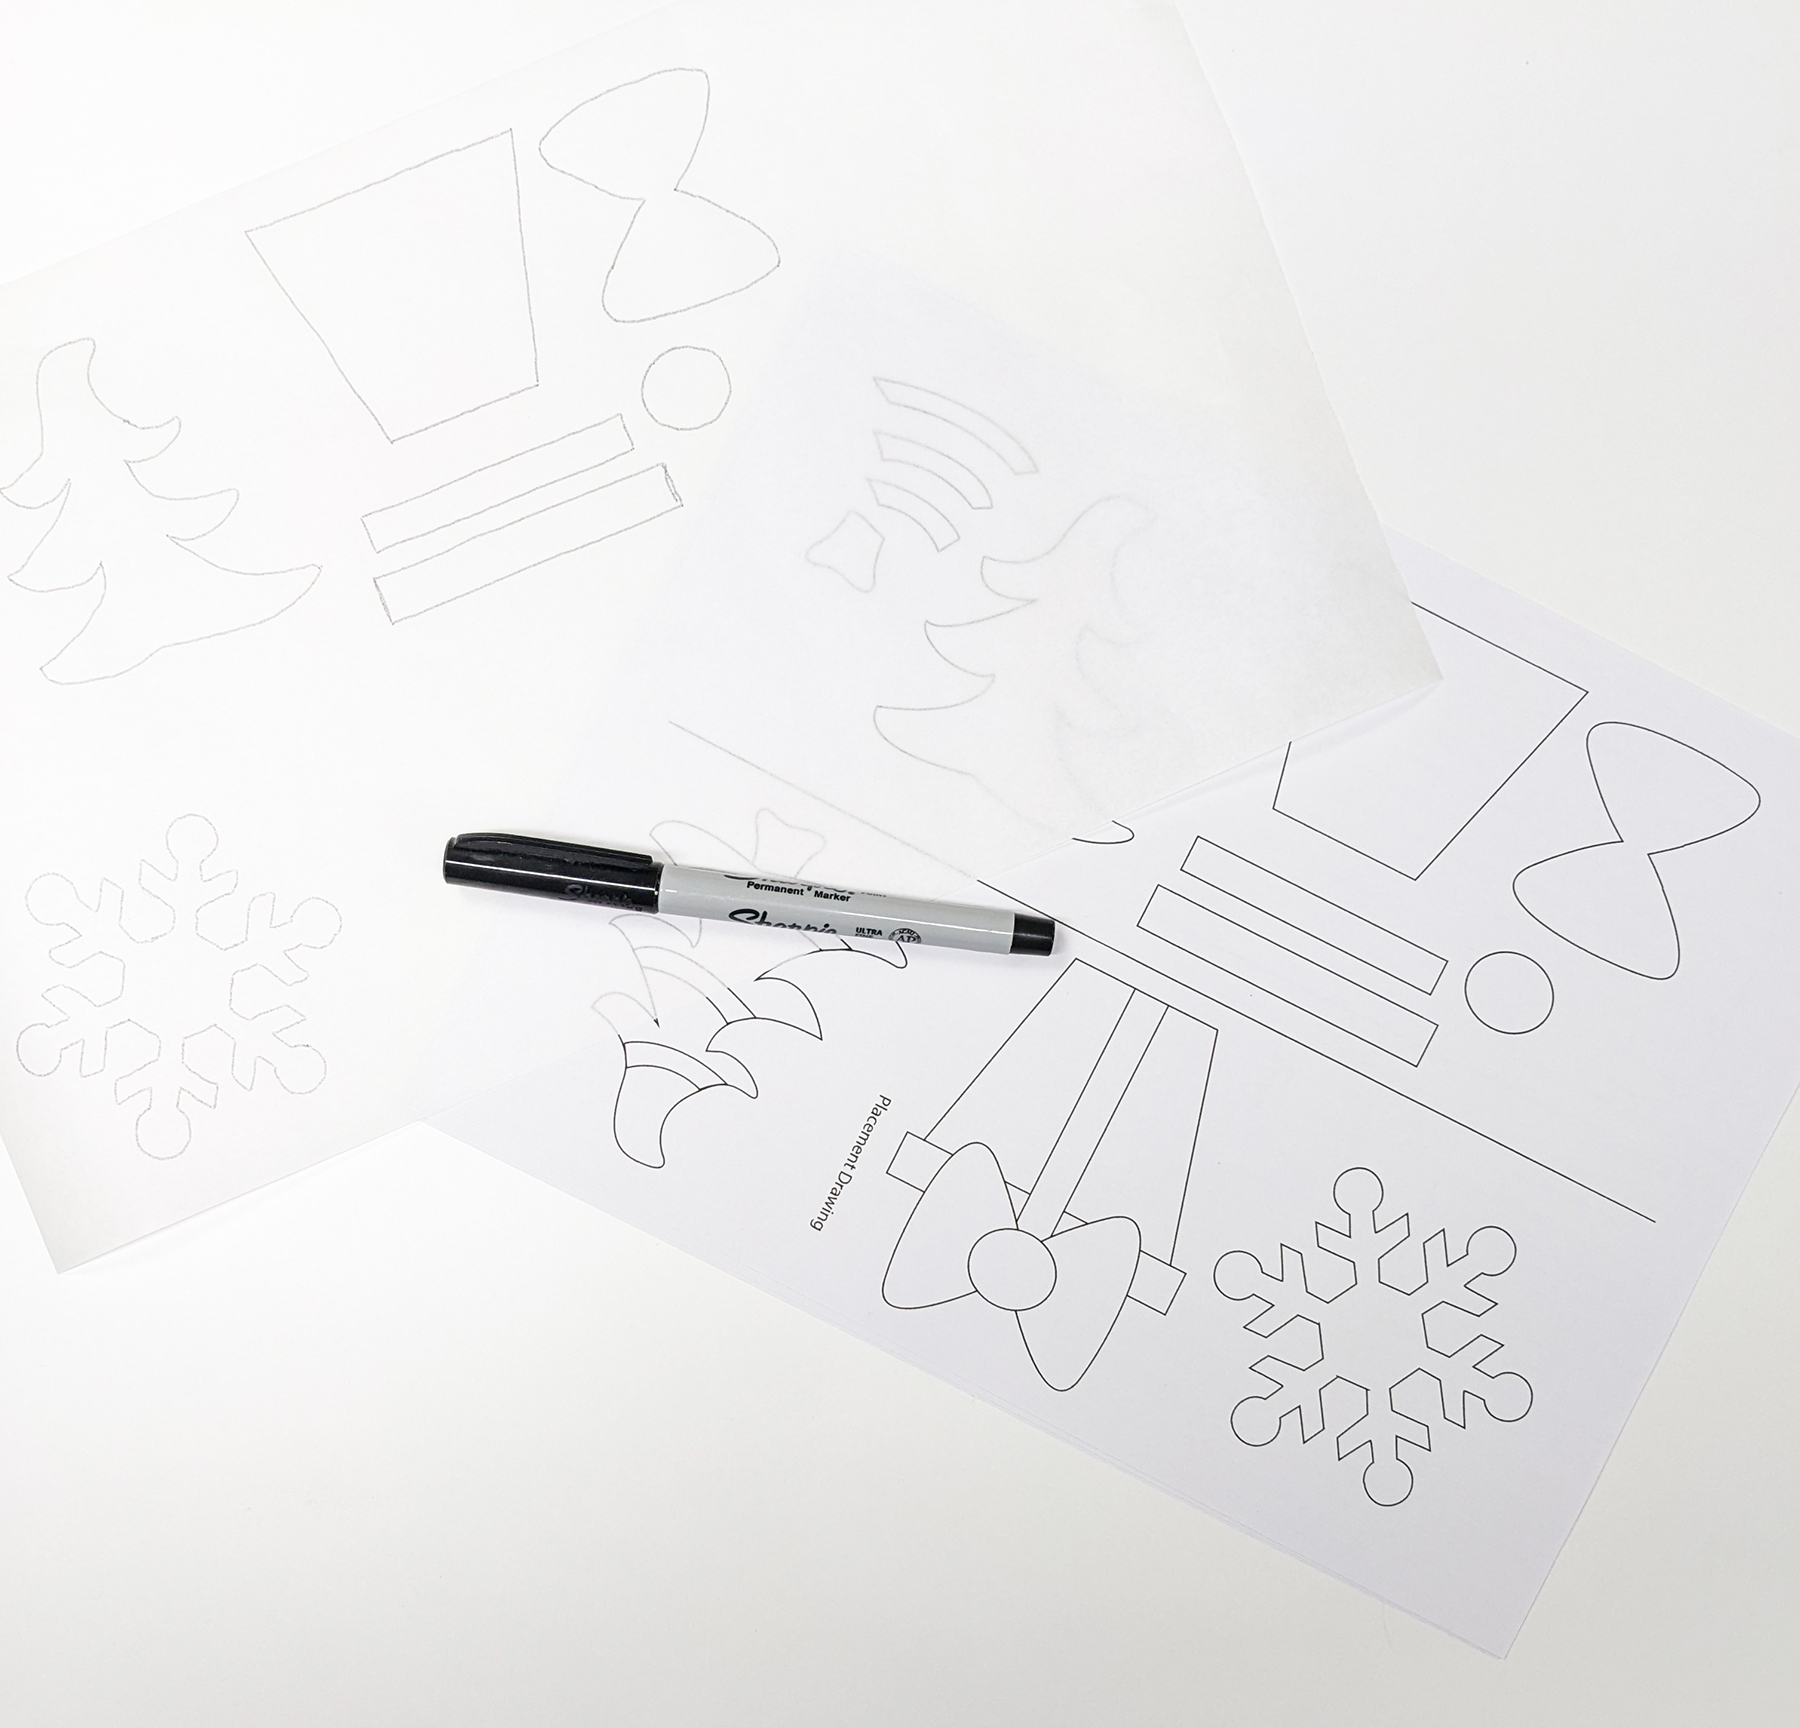
Roughly cut out each shape outside the drawn lines.
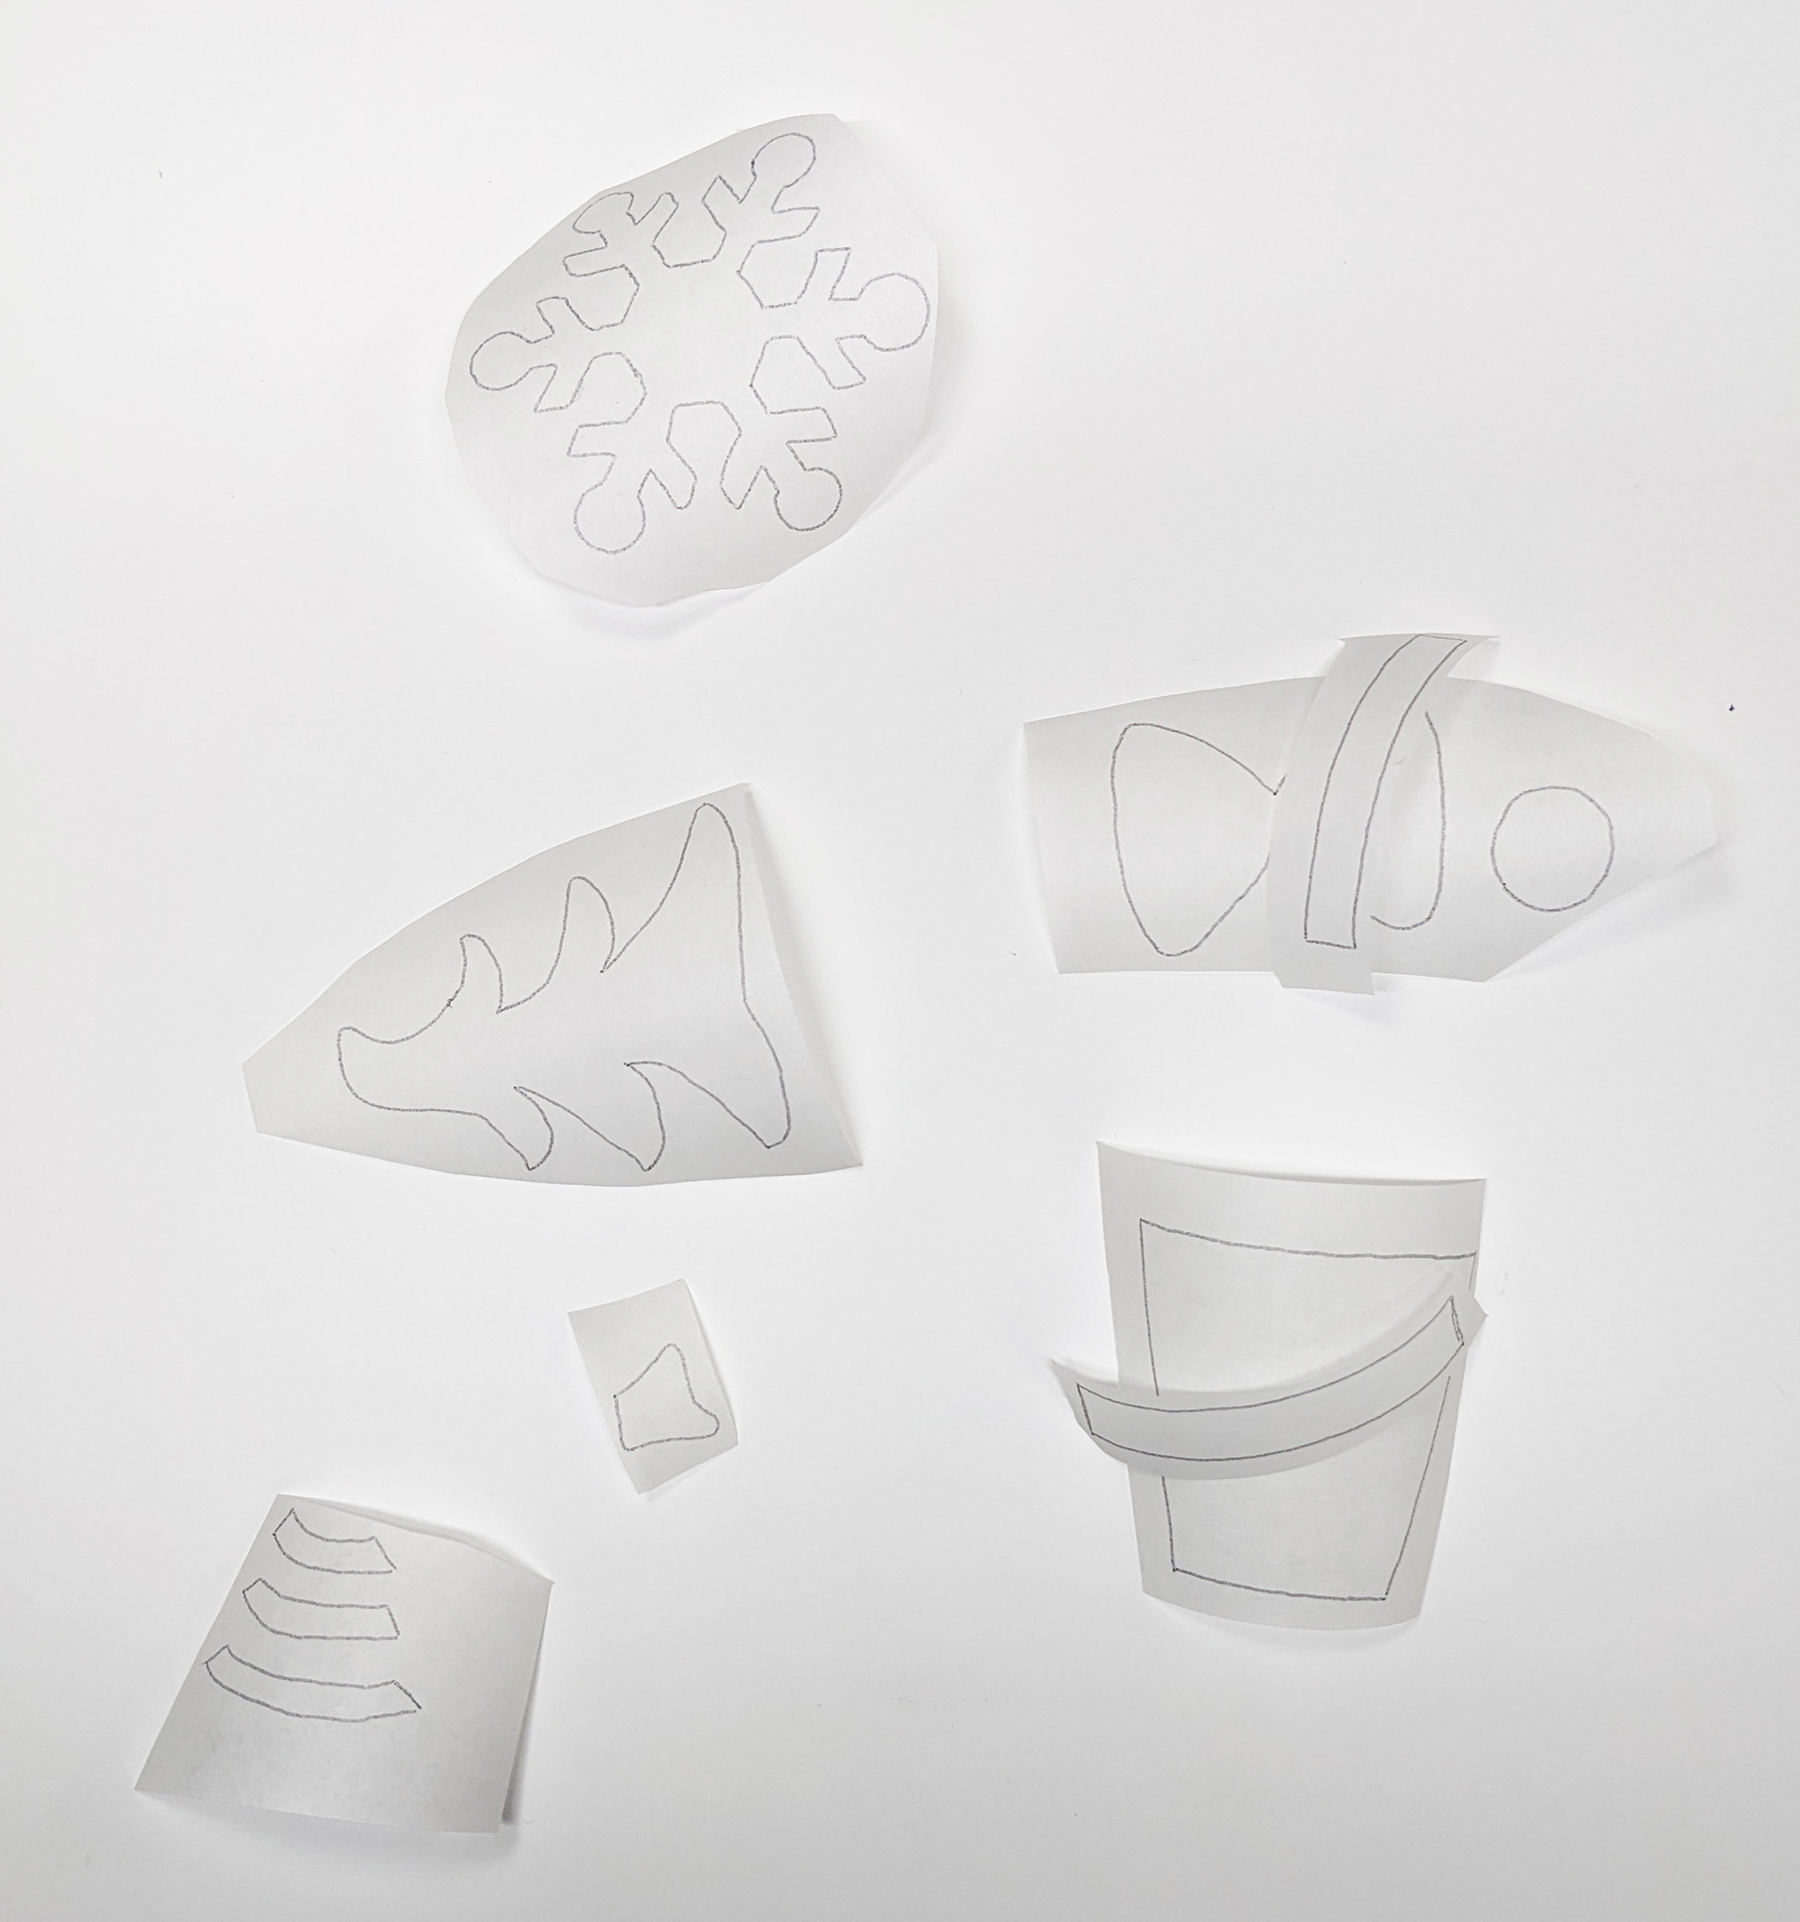
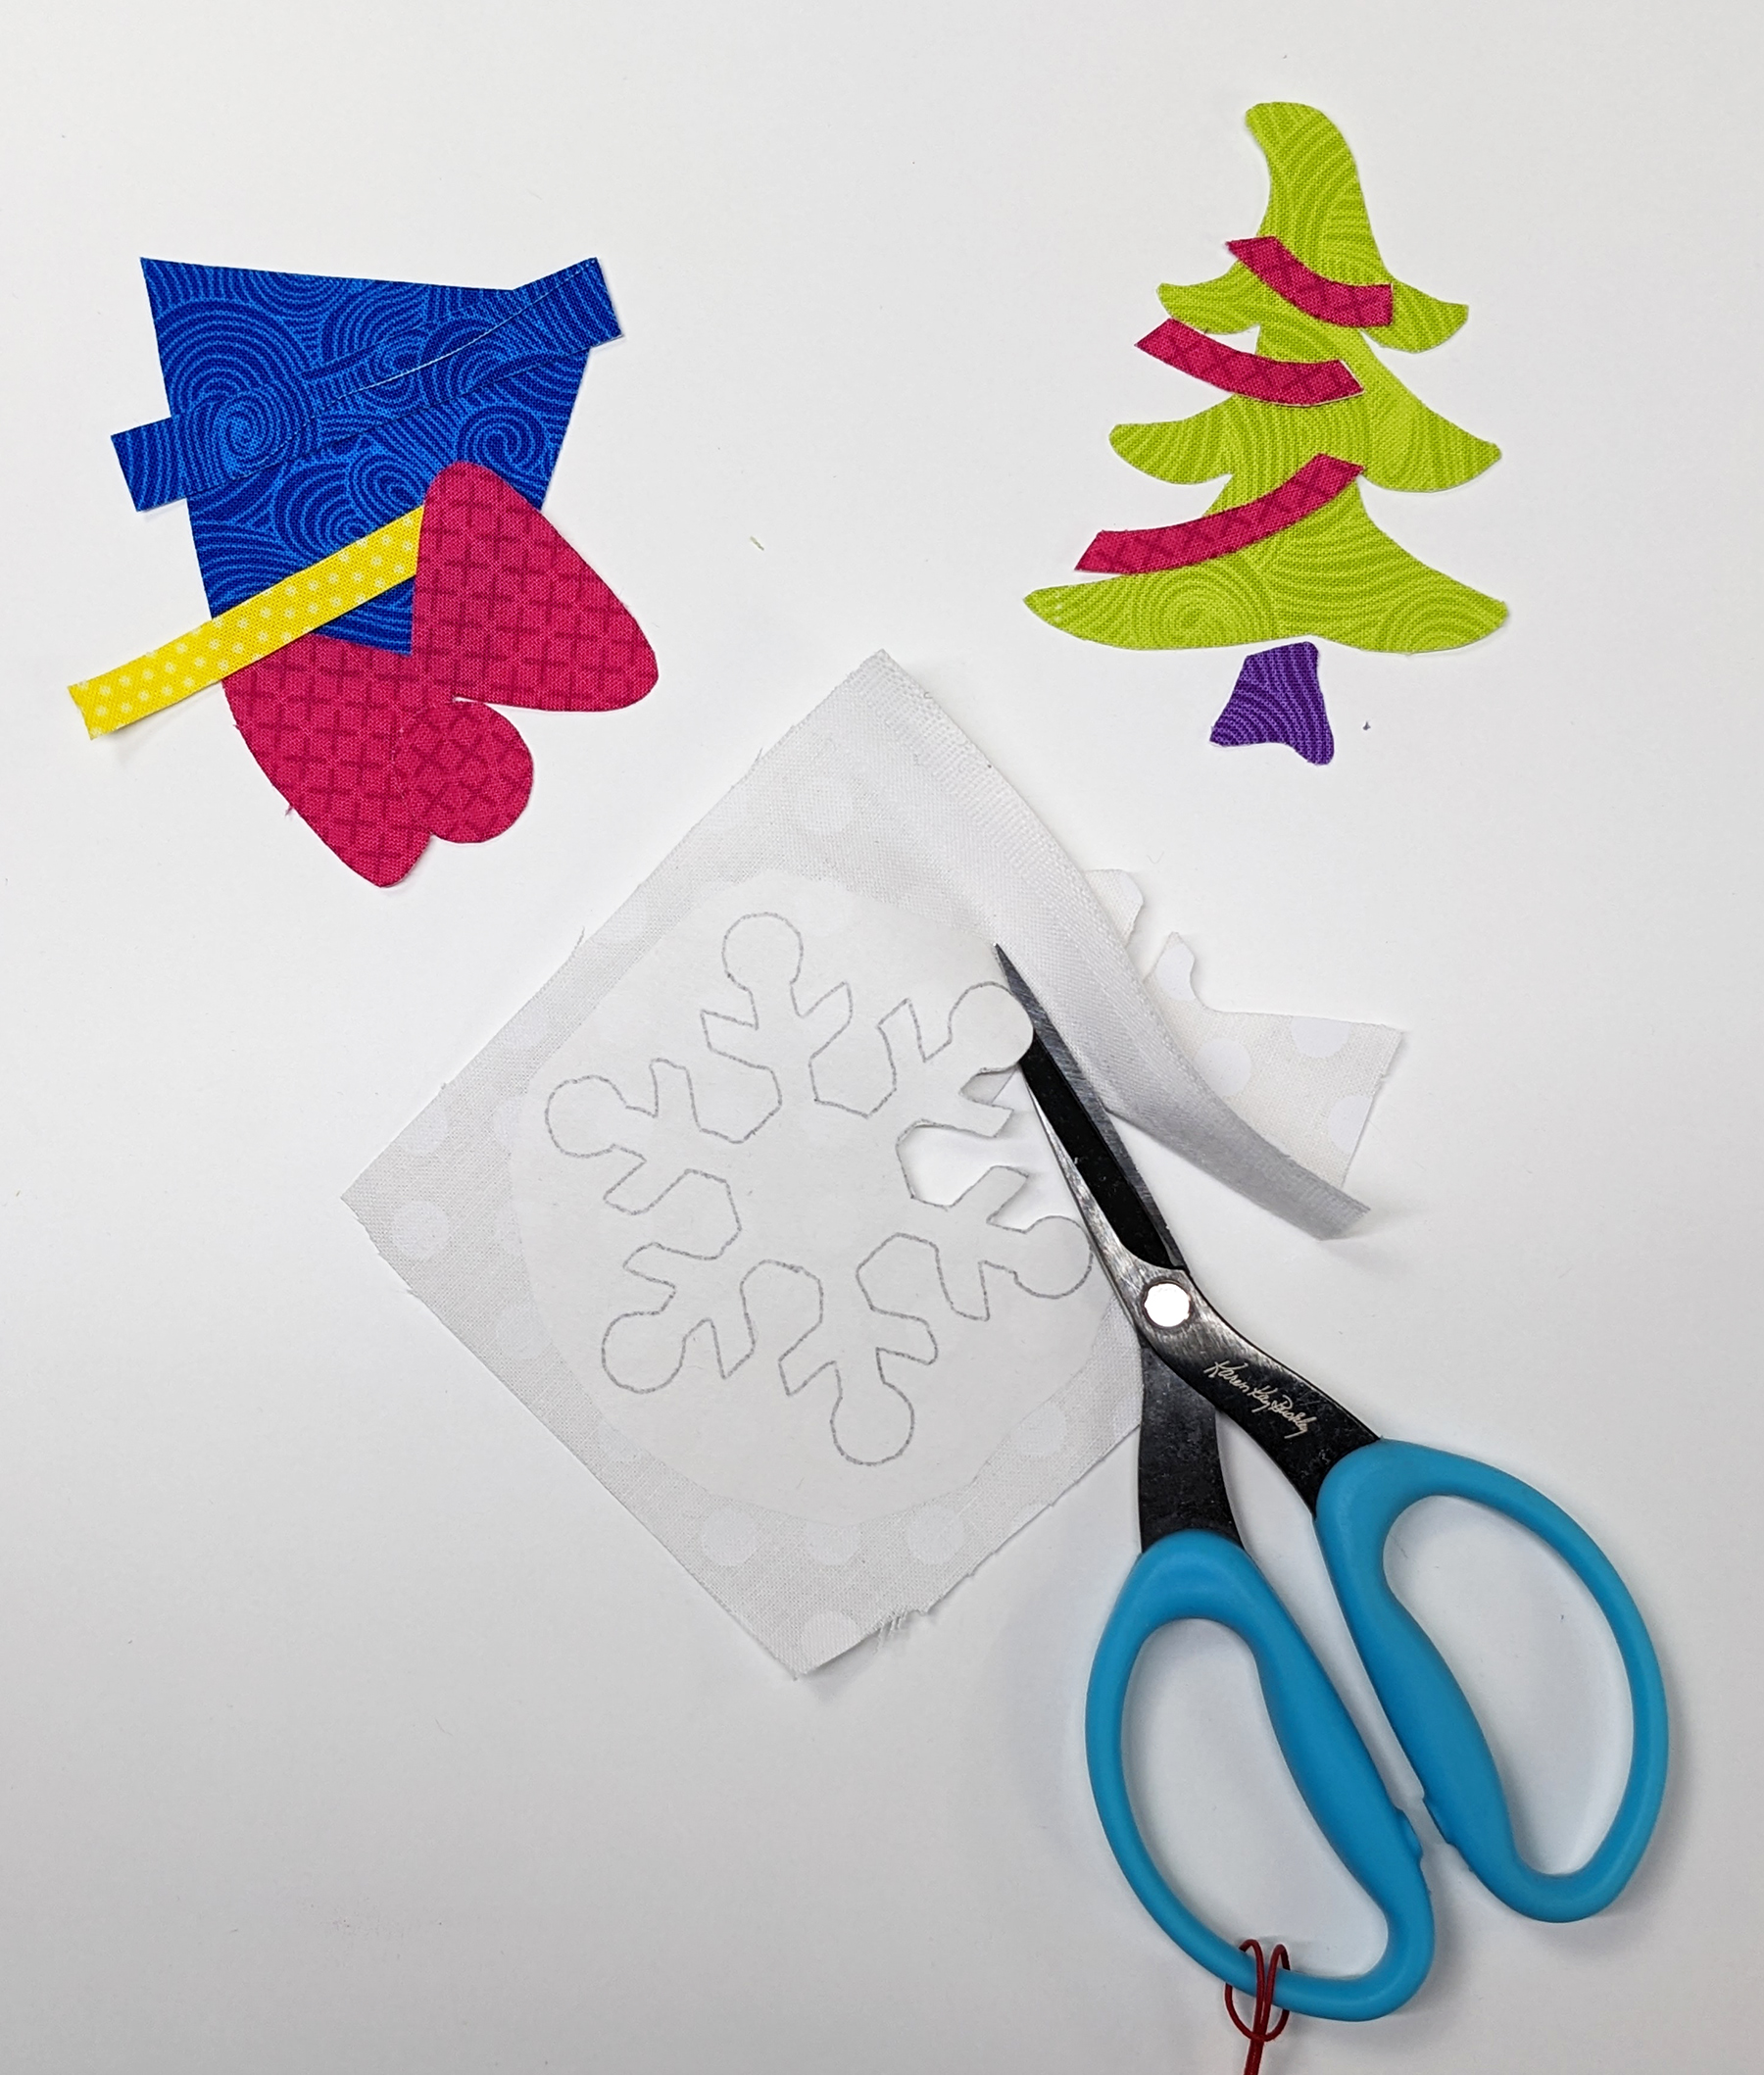
Follow the manufacturer’s instructions to press each fusible shape onto the wrong side of the listed fabrics in the cutting instructions below.

Next, cut out each shape on the drawn lines.
From fabric A, for each ornament, cut: ‘
- (2) Circle Templates
- (1) 2-1/2″ x 8-1/2″ strip
- (2) 2 x 3 strips
- (2) 2 x 3-1/2 strips
From fabric B, cut:
- Cut (1) Snowflake
C, cut:
- Cut (1) Present and (1) Lid
Fabric D, cut:
- Cut (1) Ribbon
E, cut:
- Cut (1) Bow & Center
- Cut (1) set of Tree Trims
Fabric F, cut:
- Cut (1) Tree
G, cut:
- Cut (1) Trunk
ORNAMENT APPLIQUE ASSEMBLY
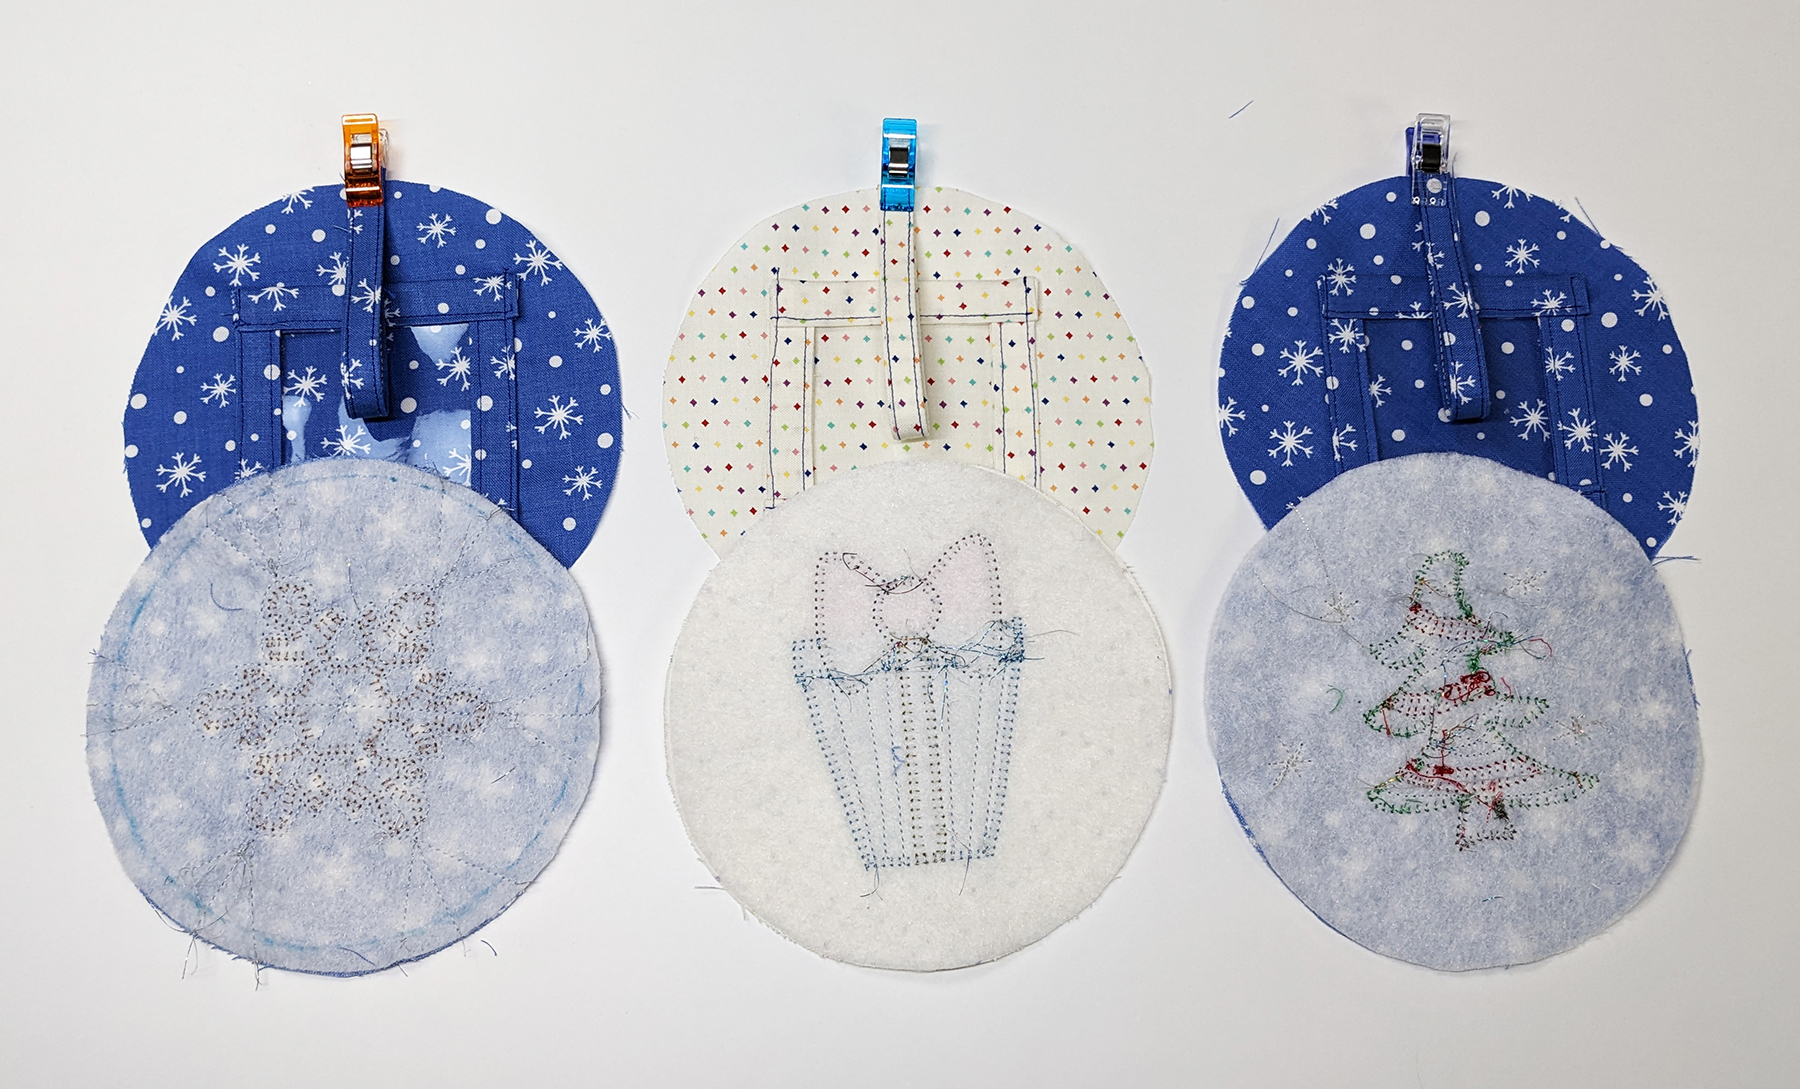
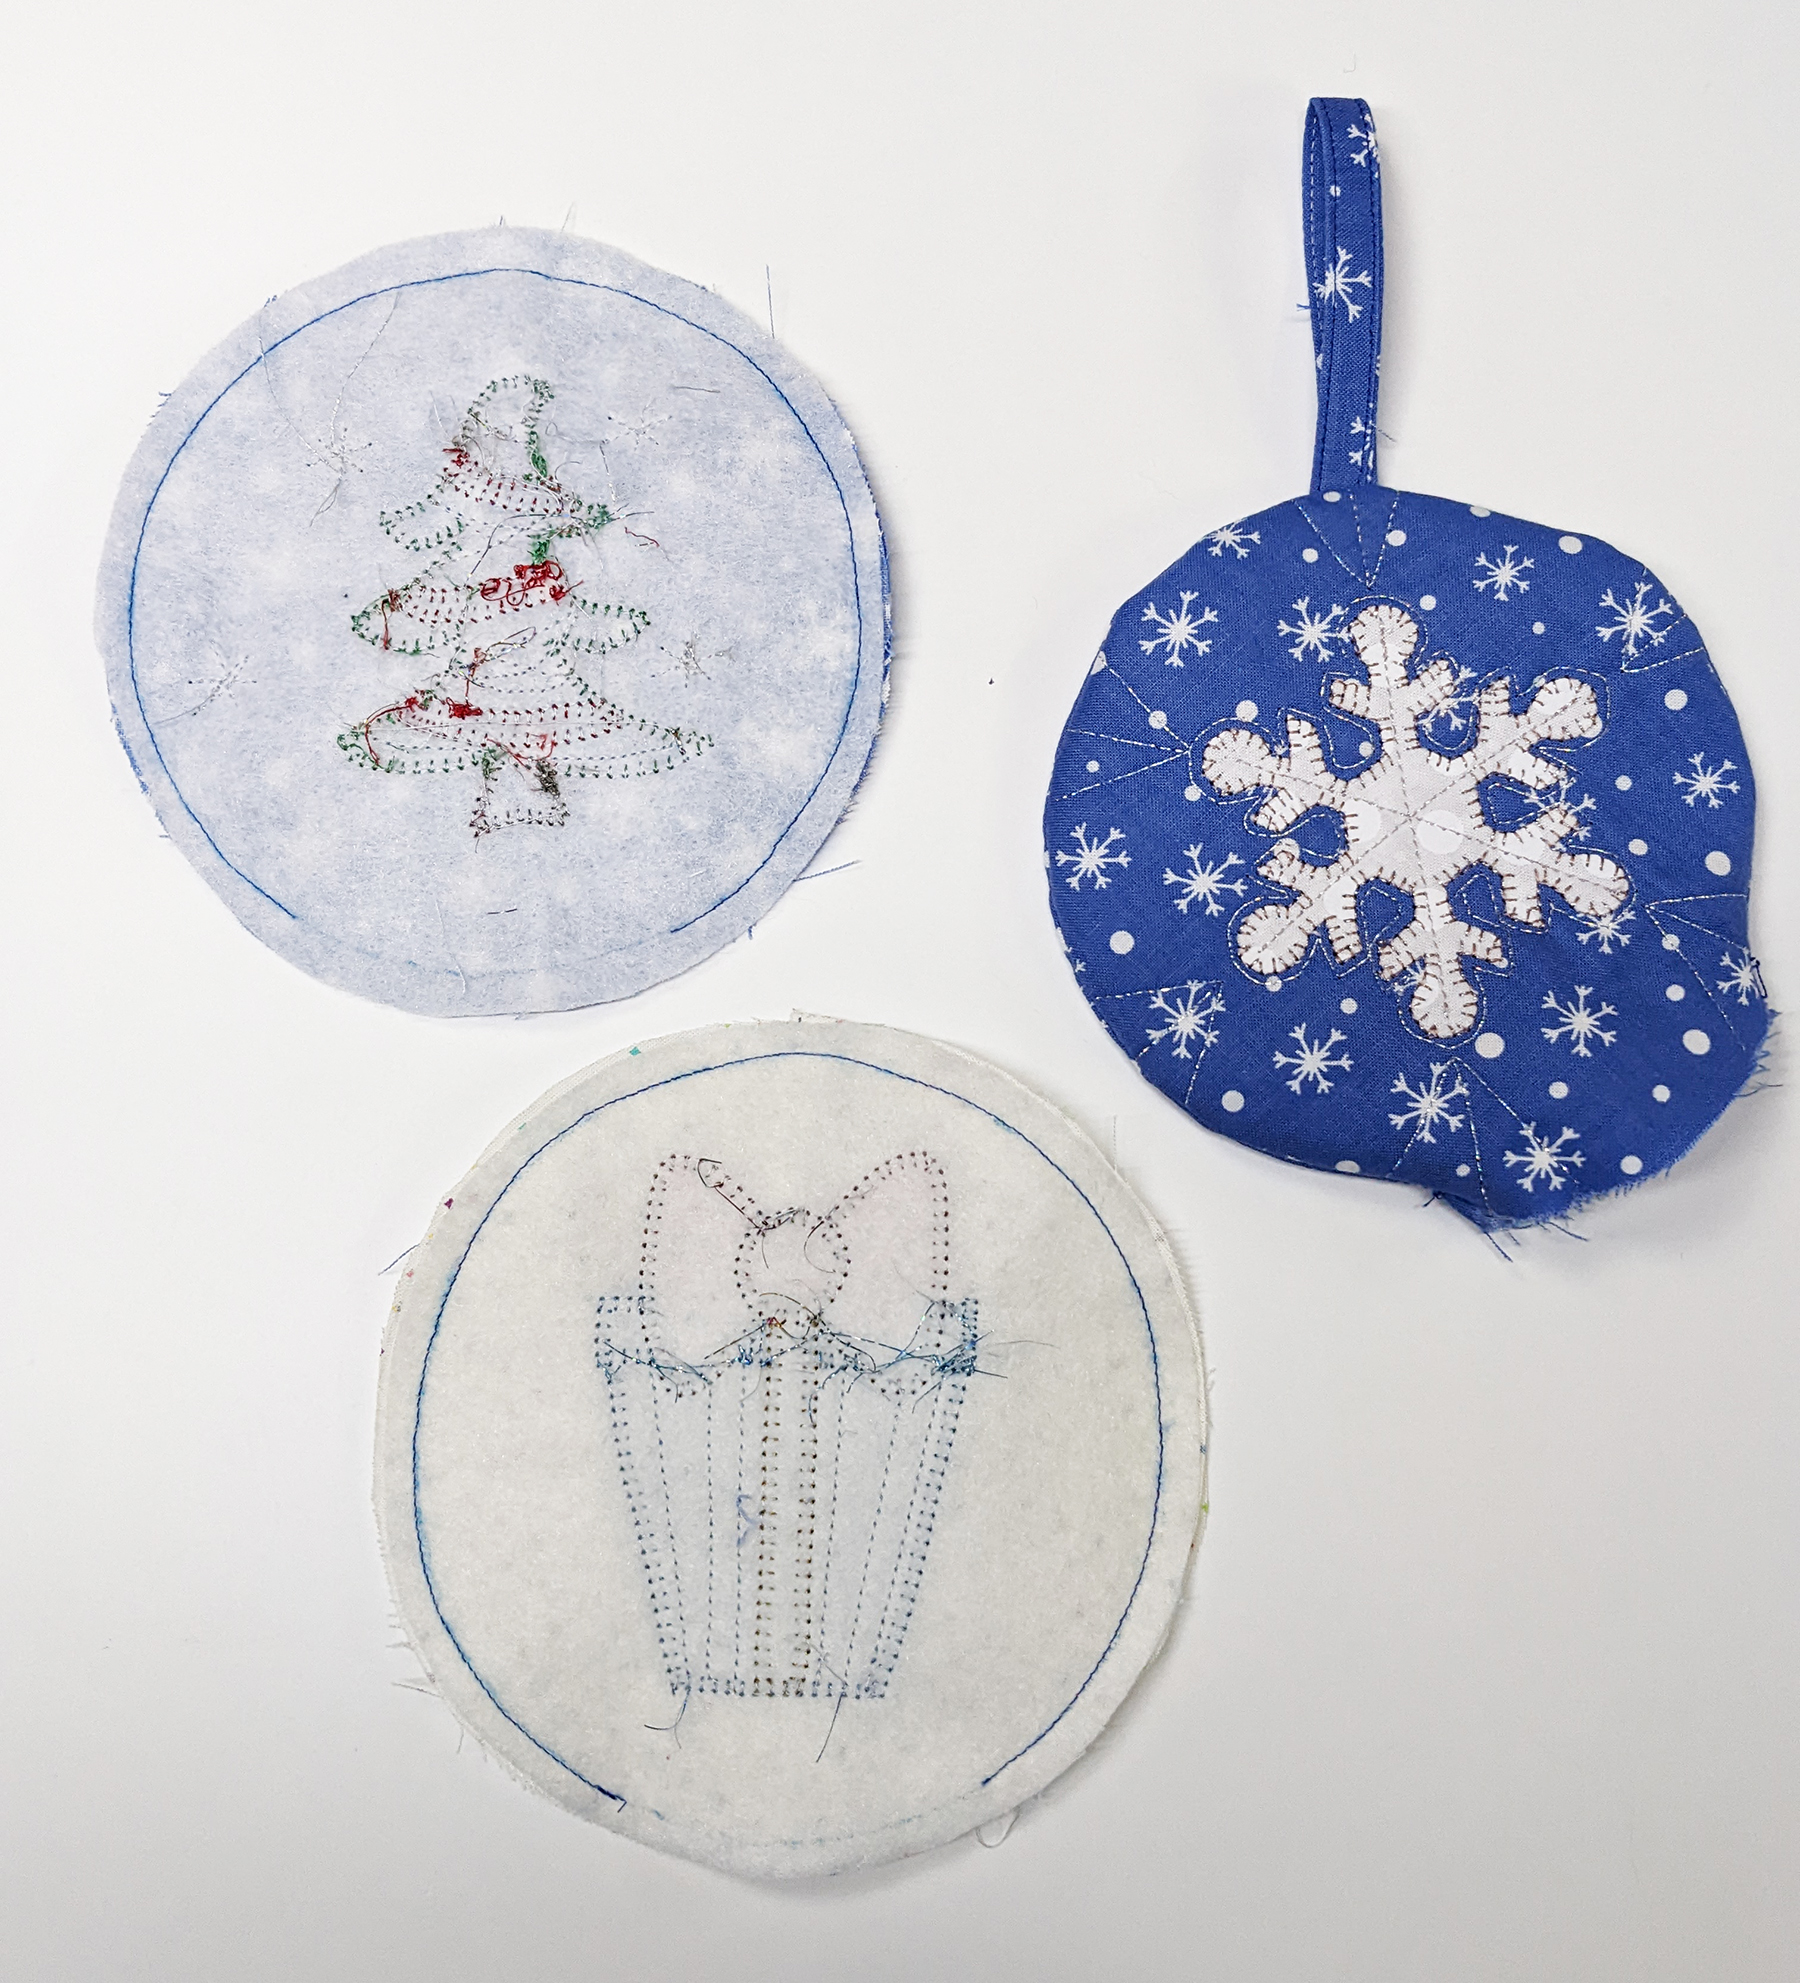
Assemble each design onto the center of one Fabric A circle.

(Optionally use the placement drawing and an appliqué pressing sheet to assemble each design before pressing to the Fabric A circle.)

Using a Top Stitch Needle and the assorted metallic threads, finish the edges of each appliqué shape and to quilt as desired to finish the ornament front. Choose your favorite decorative stitch for the appliqué perimeter, and add detail stitches inside the appliqué shapes. Swap thread colors for interest and fun!
ORNAMENT FRAMES
First, fold one 2 x 3 Fabric A strip in half lengthwise; press. Then, unfold the fabric and fold each long edge to meet at the creased center line; press. Fold the pressed fabric in half along the previous foldline and press to make one ½ x 3 side strip.
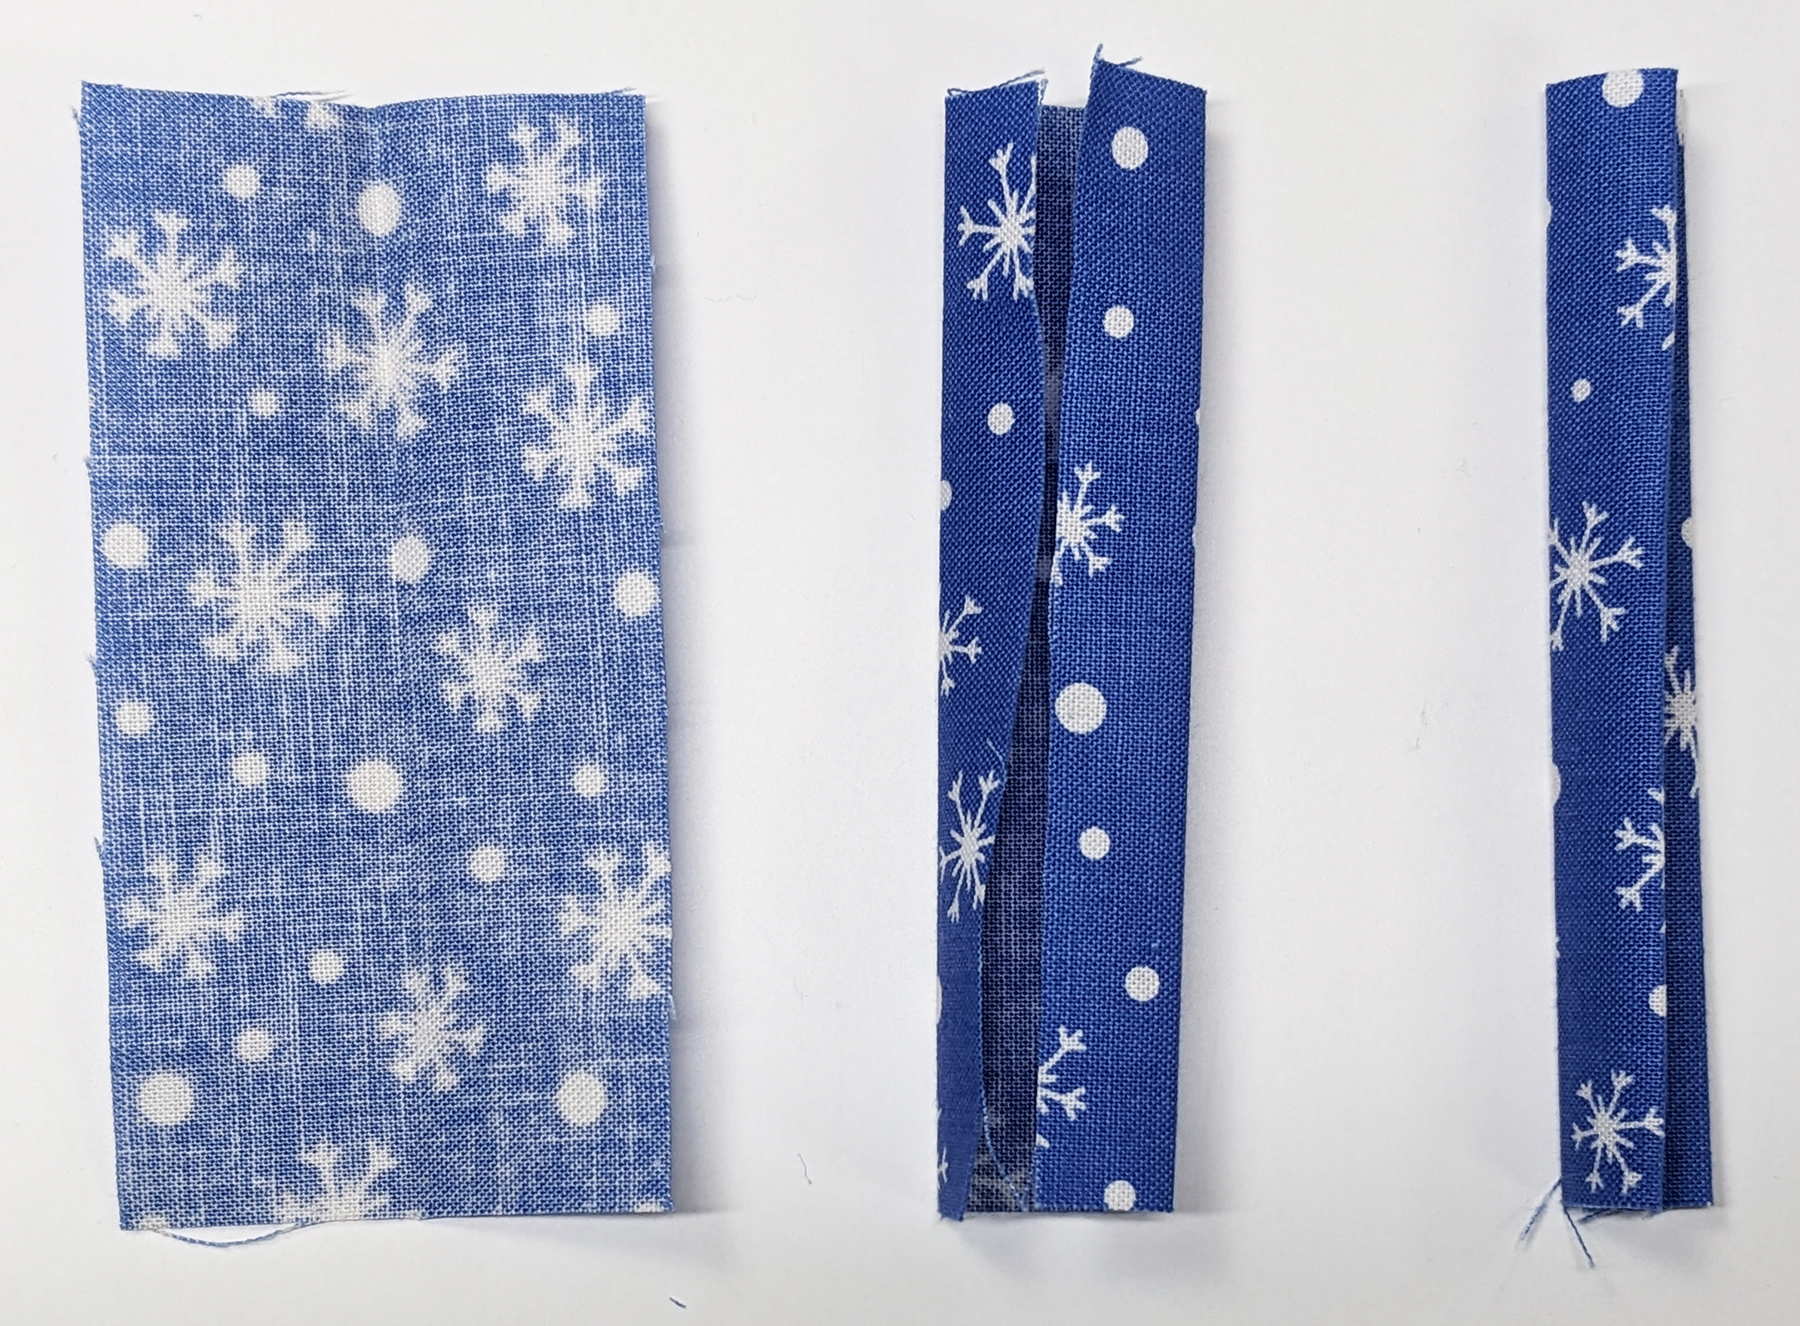
Fold in the short ends of one 2x 3 ½ Fabric A strip a ¼;press. Then, fold the strip in half lengthwise; press. Next, open the folded fabric and fold each long edge to the creased center line and press. Then, fold the pressed fabric in half again and press to make one ½ x 3 top strip. Repeat with the second 2 x 3 ½ Fabric A strip to make one ½ x 3 bottom strip.
Next, slide the 3 piece of vinyl into one folded 3 Fabric A side strip. Make sure the vinyl edge is up against the fold. Then, topstitch down the edge closest to the vinyl to finish one side of the vinyl frame. Repeat, stitching the second folded 3 Fabric A side strip and opposite side of the vinyl.

To make the frame unit, repeat Step 7 with the top and bottom Fabric A strips and the remaining two sides of the vinyl.
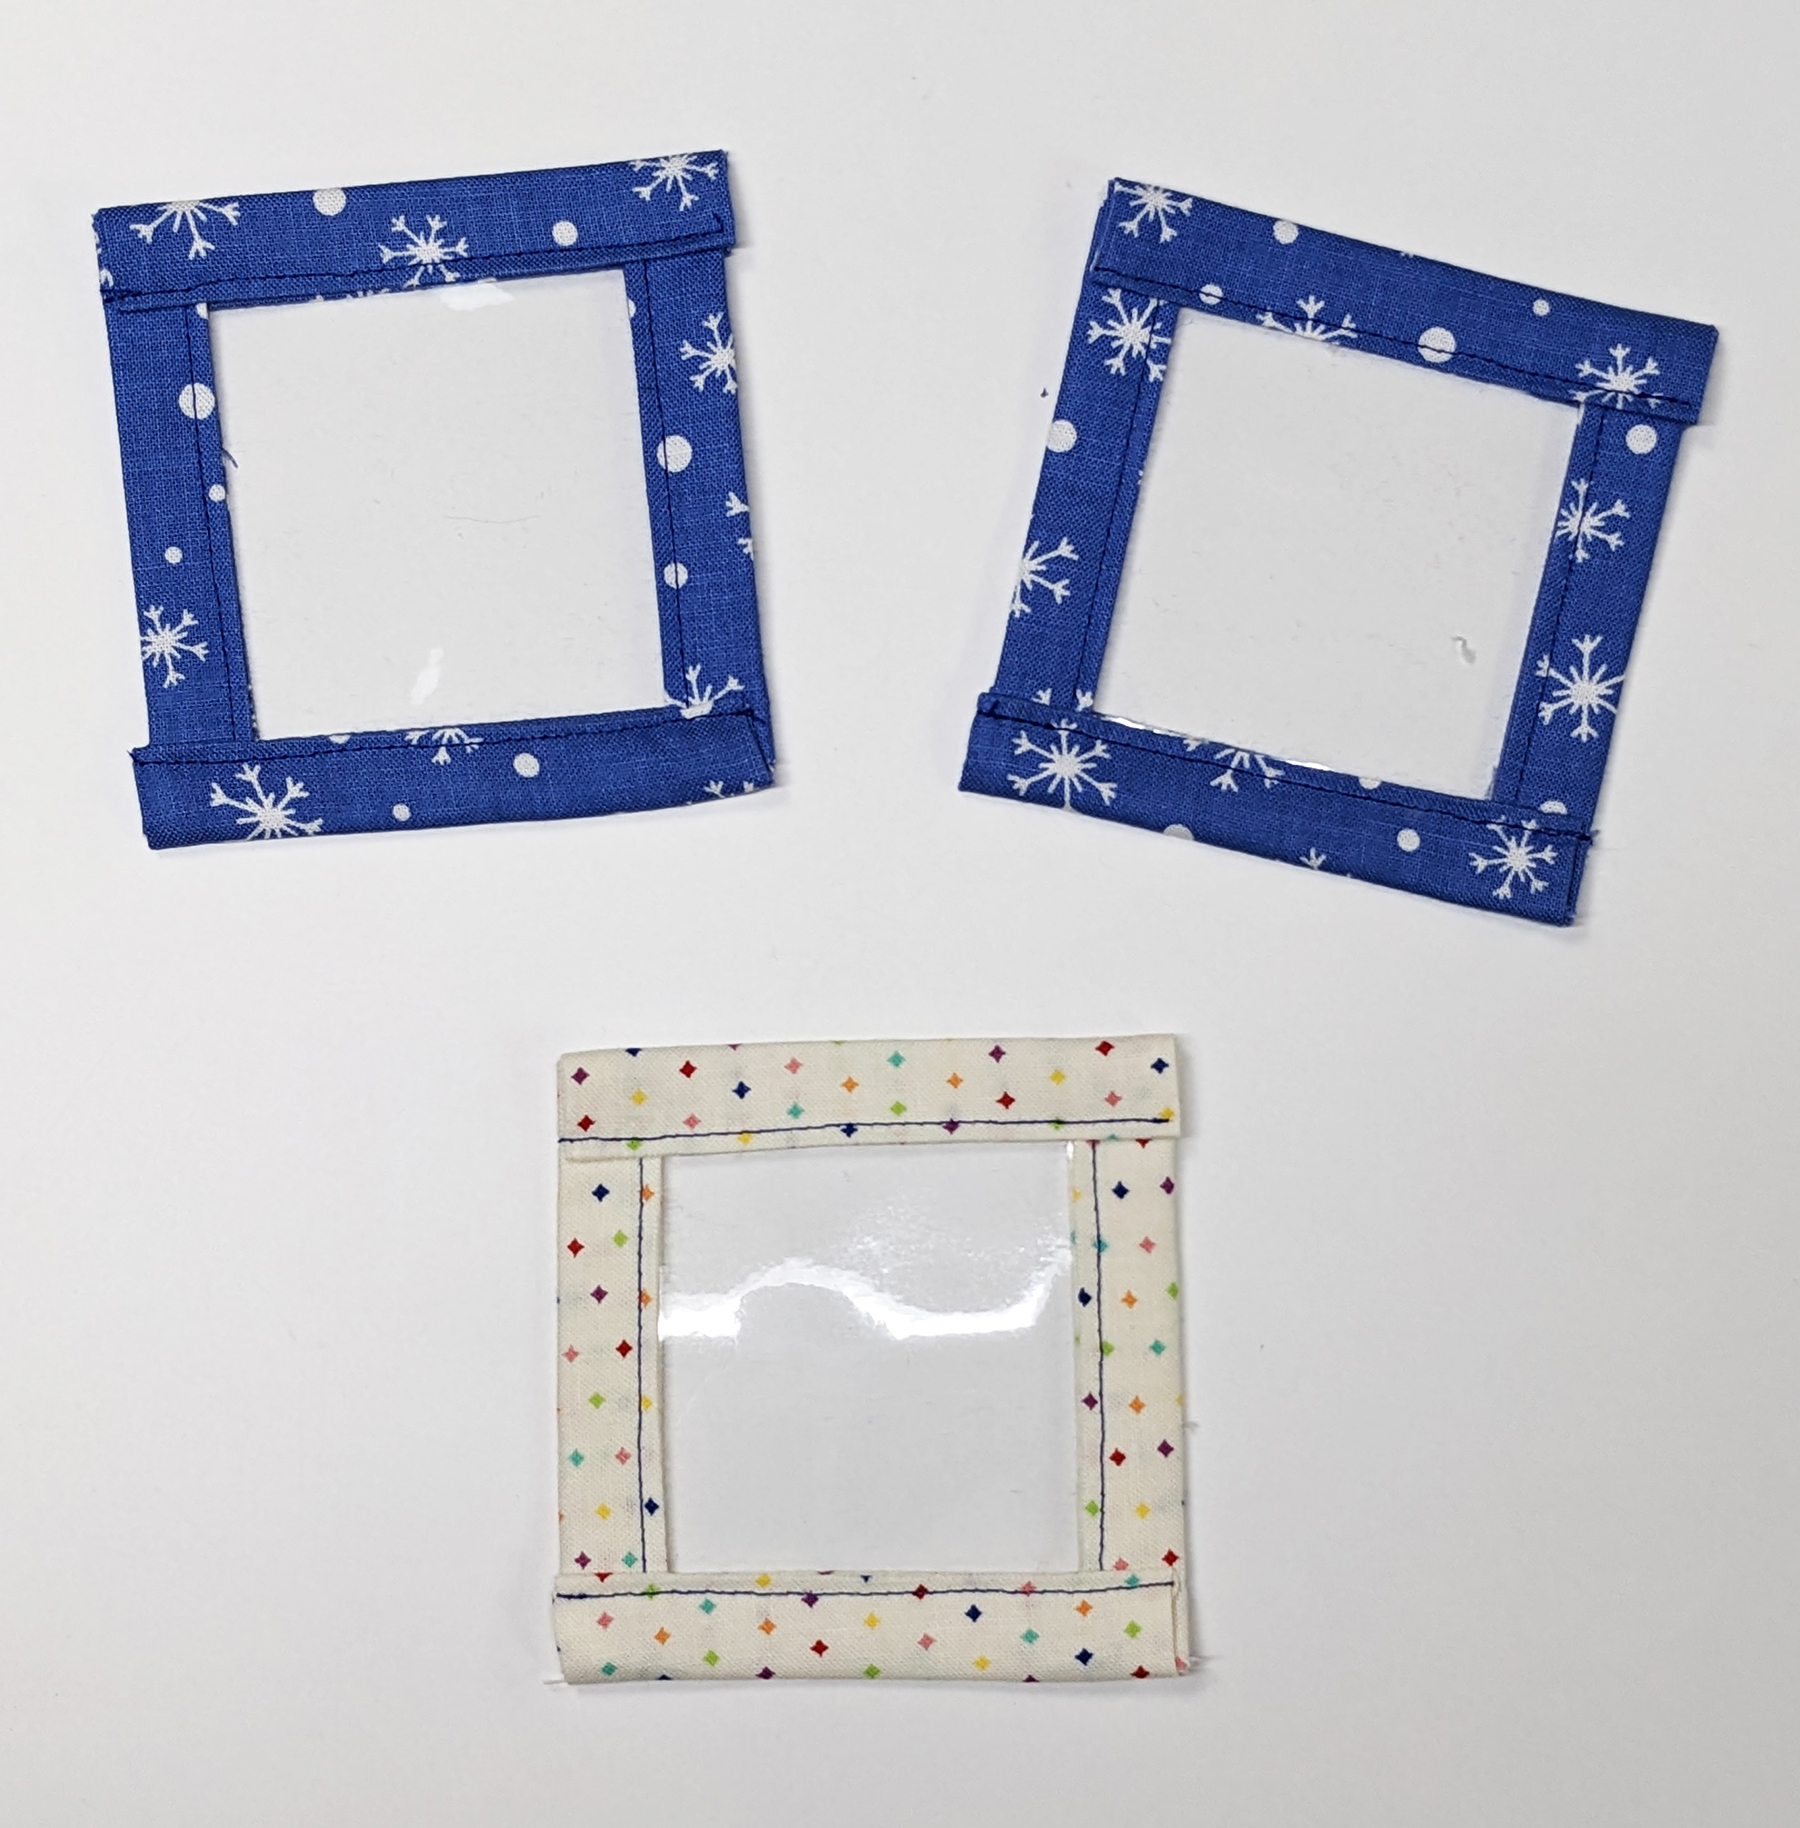
To add the frame to the quilted ornament, center the frame unit onto the center of the second Fabric A circle. Then, topstitch the frame to the circle down each side and across the bottom to make the ornament back.

FINISHING QUILTED ORNAMENT
Repeat Step 5, with the (1) 2 ½ x 8 ½ Fabric A strip. Then topstitch down both long sides 1/8″ in from the edge to make the ornament hanger.
Next, fold the Ornament Hanger in half and center it at the top of each ornament front, aligning the raw edges of the loop with the raw edgers of the circle and clip in place. Place the ornament front on top of the ornament back, right sides together, with the loop in the center. Then, clip the layers together.
Next, stitch the layers along the perimeter, leaving a 3 opening for turning. Finally, turn each ornament right side out through the opening.
Then, lightly stuff each ornament with fiberfill.
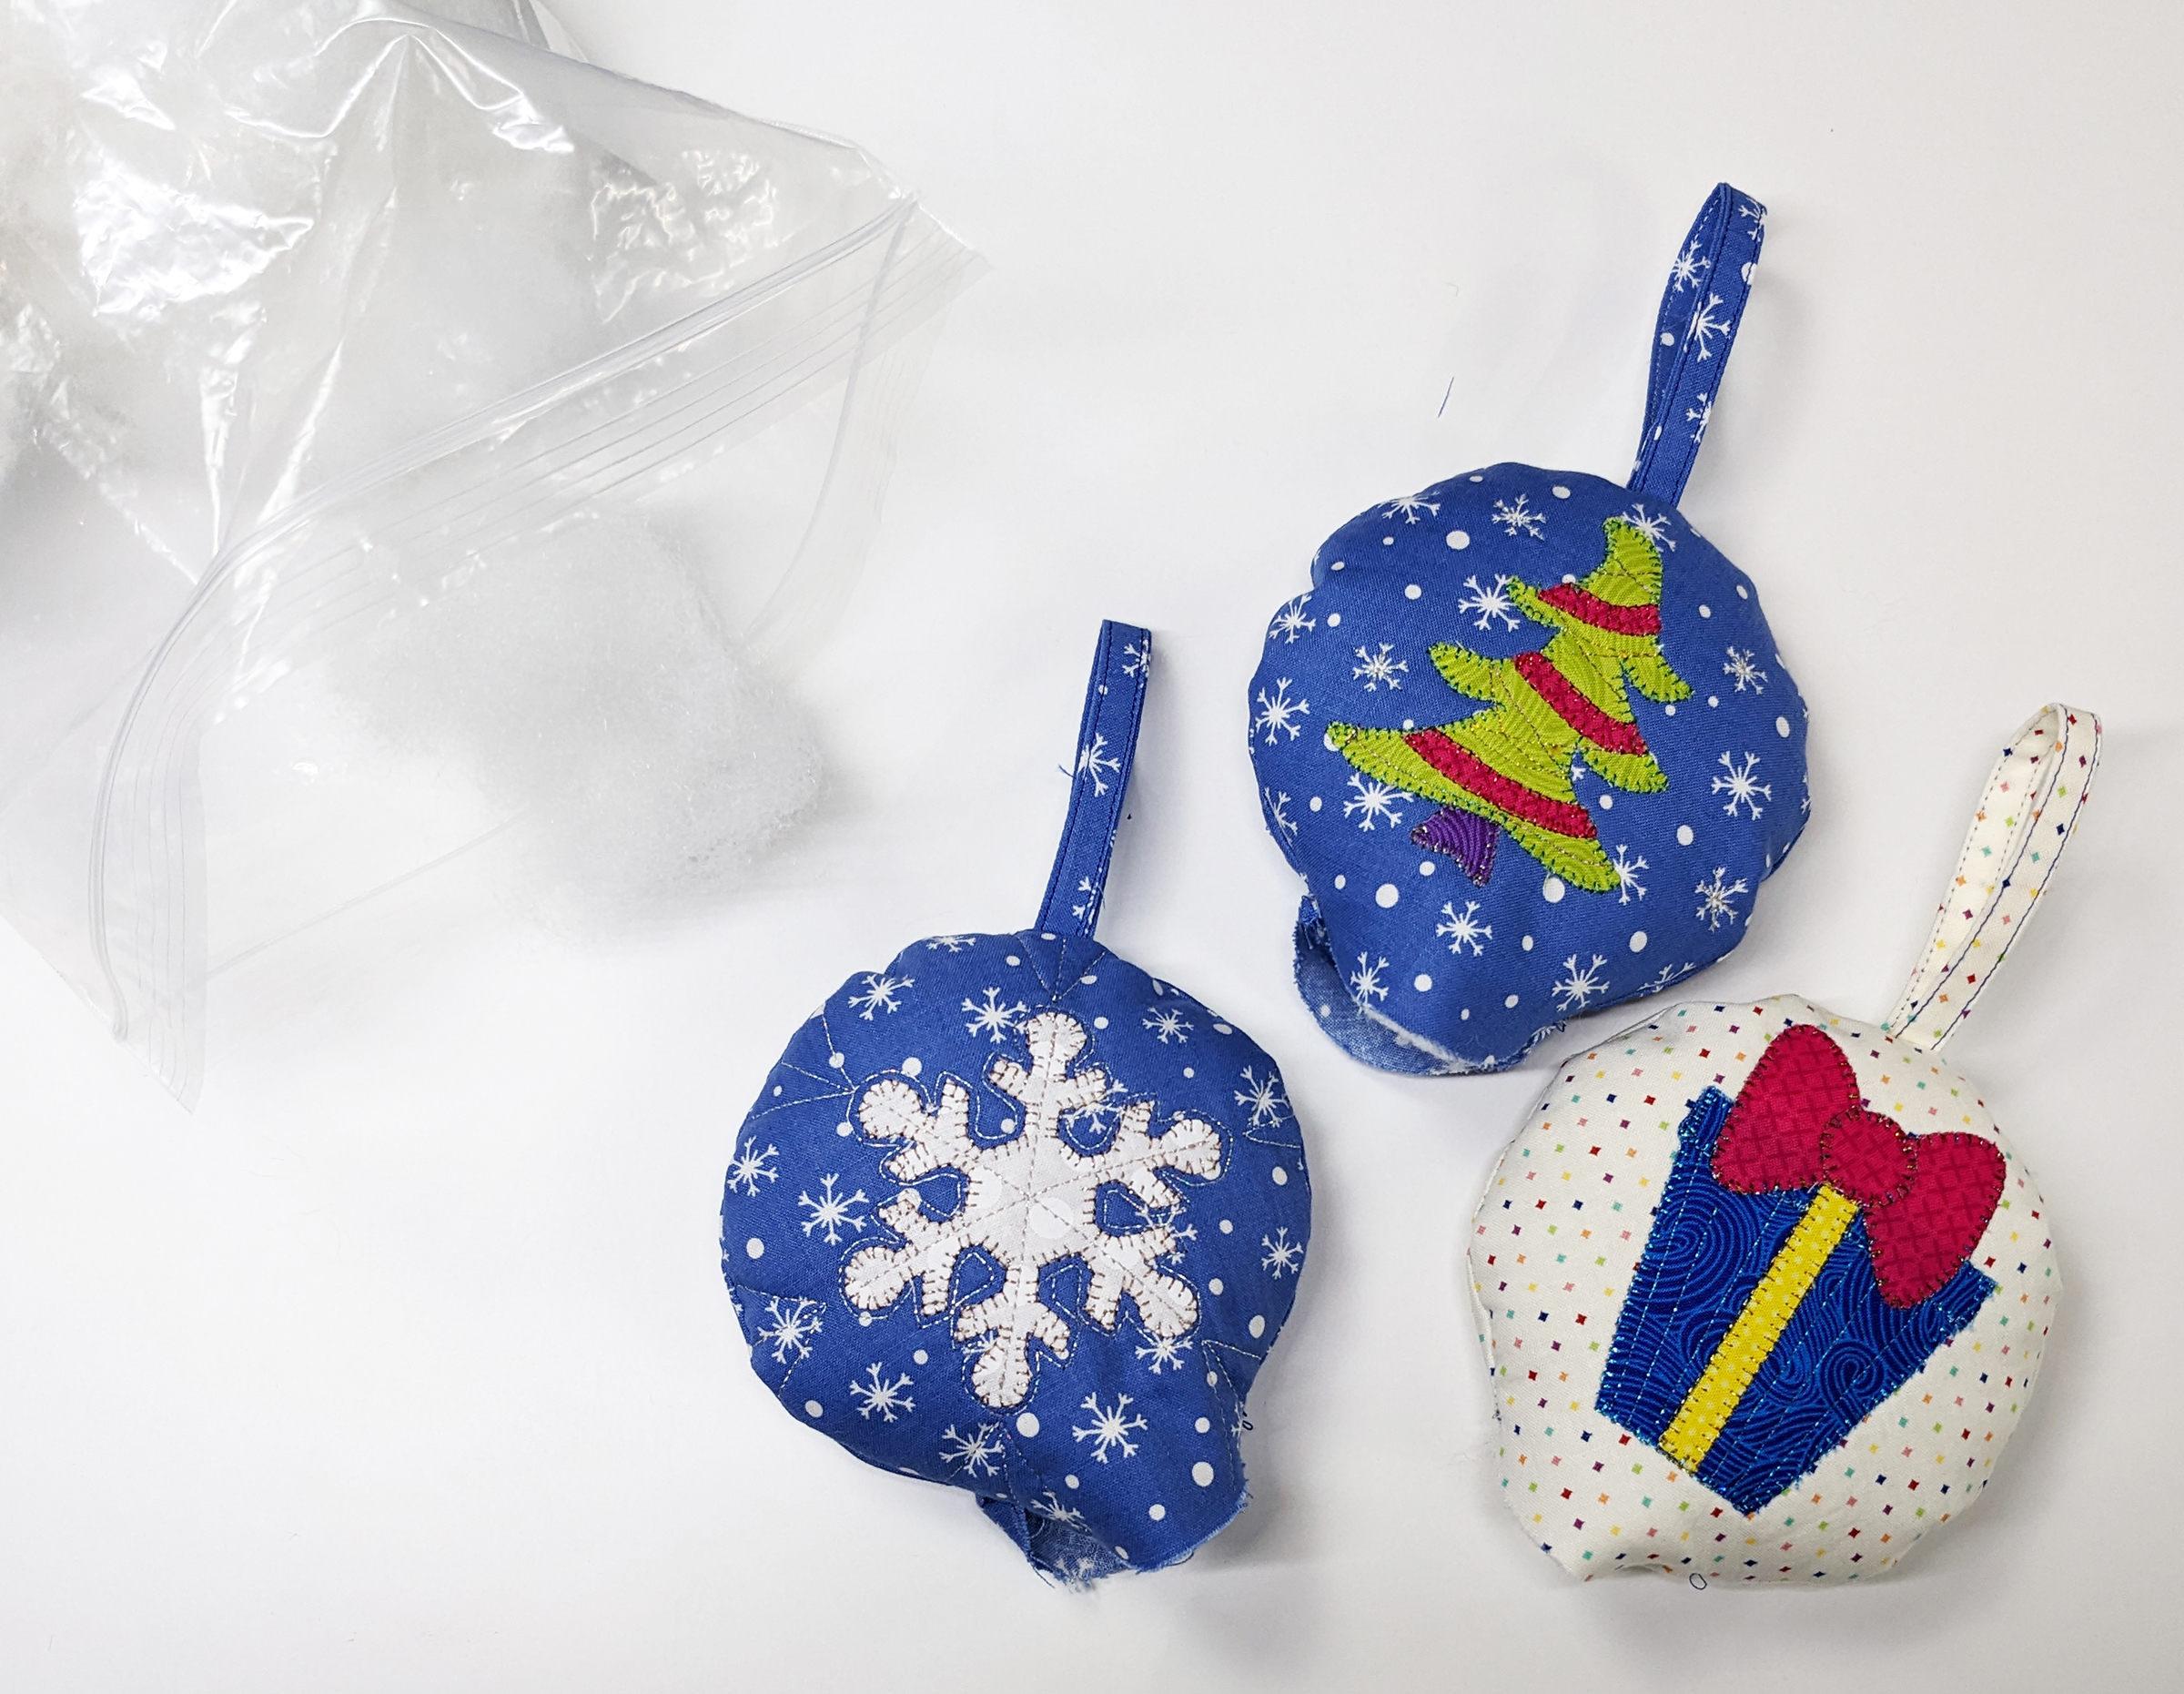
Next, clip the opening closed and hand sew it closed to complete the ornament.
Lastly, insert a photo of your choice or to/from tag into each vinyl frame, and then gift the ornaments to each child, grandchild, friend or family member for the holidays! These make great gift tags that do dual duty as ornaments after gifting, too. Additionally, use the appliqué templates to create a matching tree skirt or pretty napkins to tie the quilted ornament look into your décor.

These are adorable! Thank you!