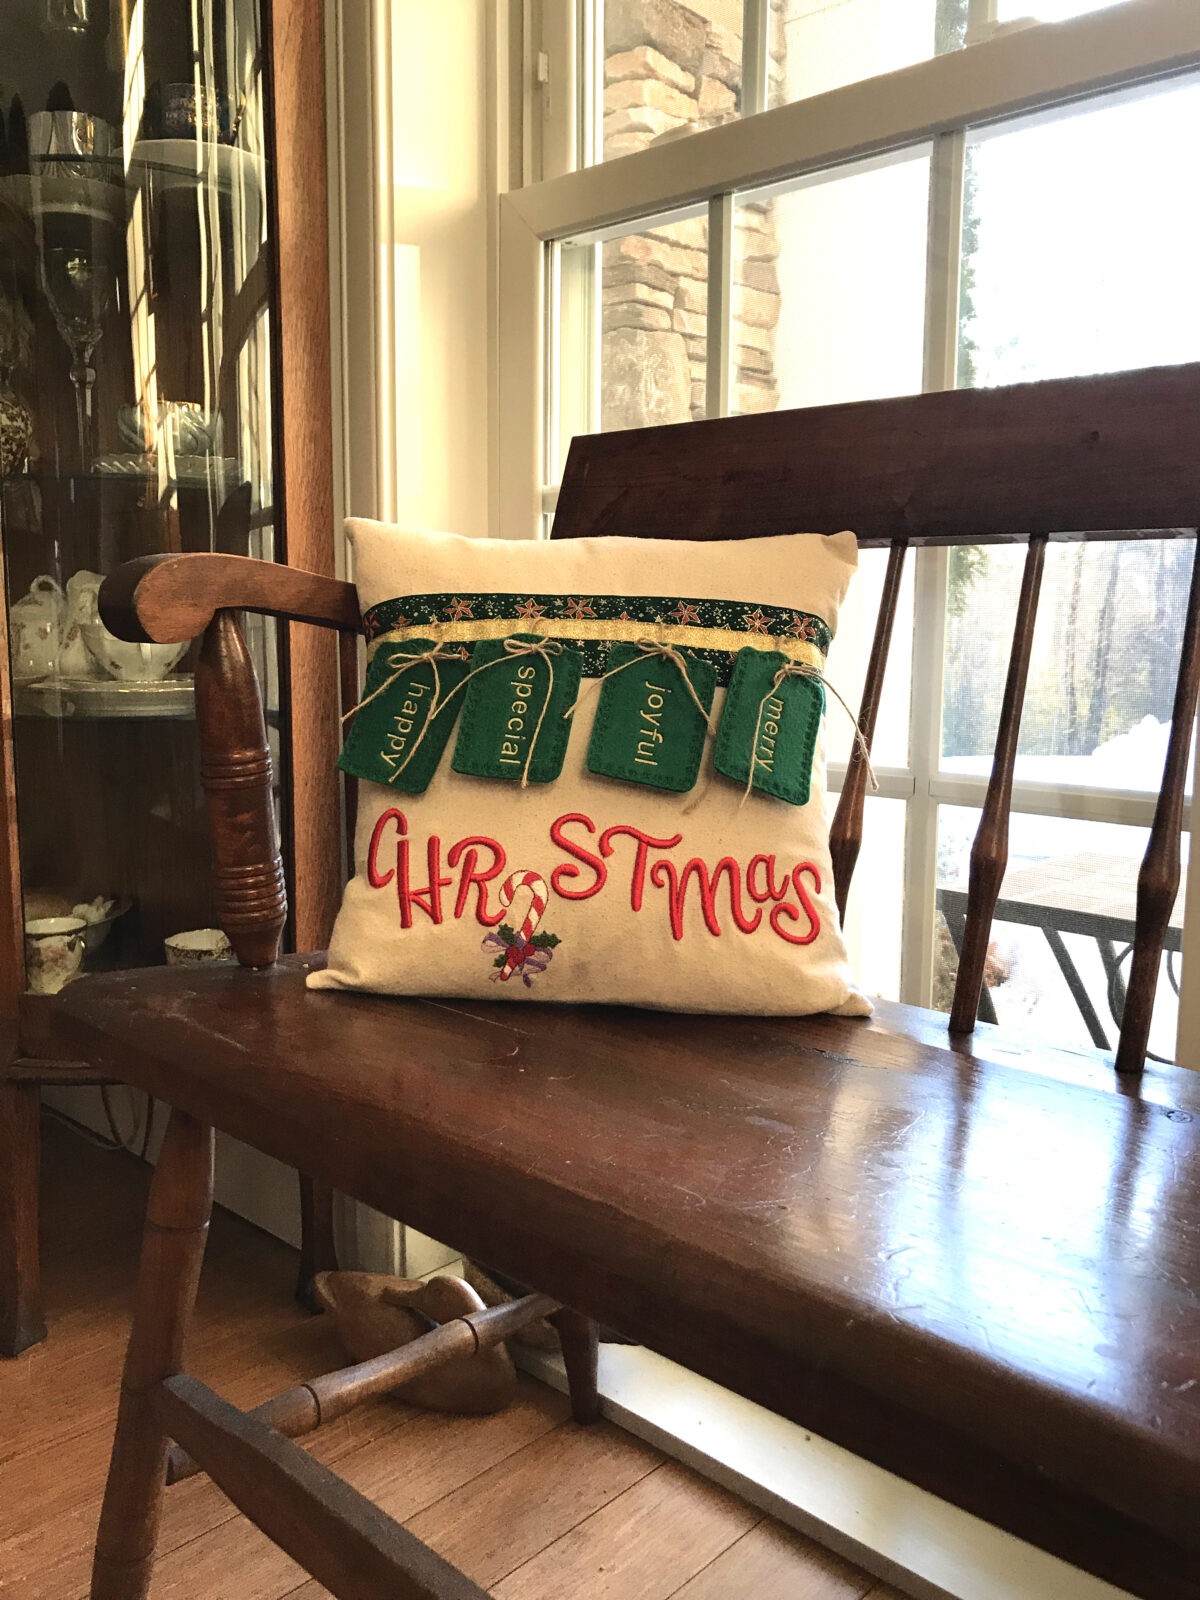
Add some holiday cheer to any room with a simple embroidered Christmas Pillow. After the holidays, slip the pillow form out and easily store the embroidered Christmas pillow sham until next year. Hold on to the pillow form to create a new cover, a new design for every month of the year, for an ever-changing home accent.
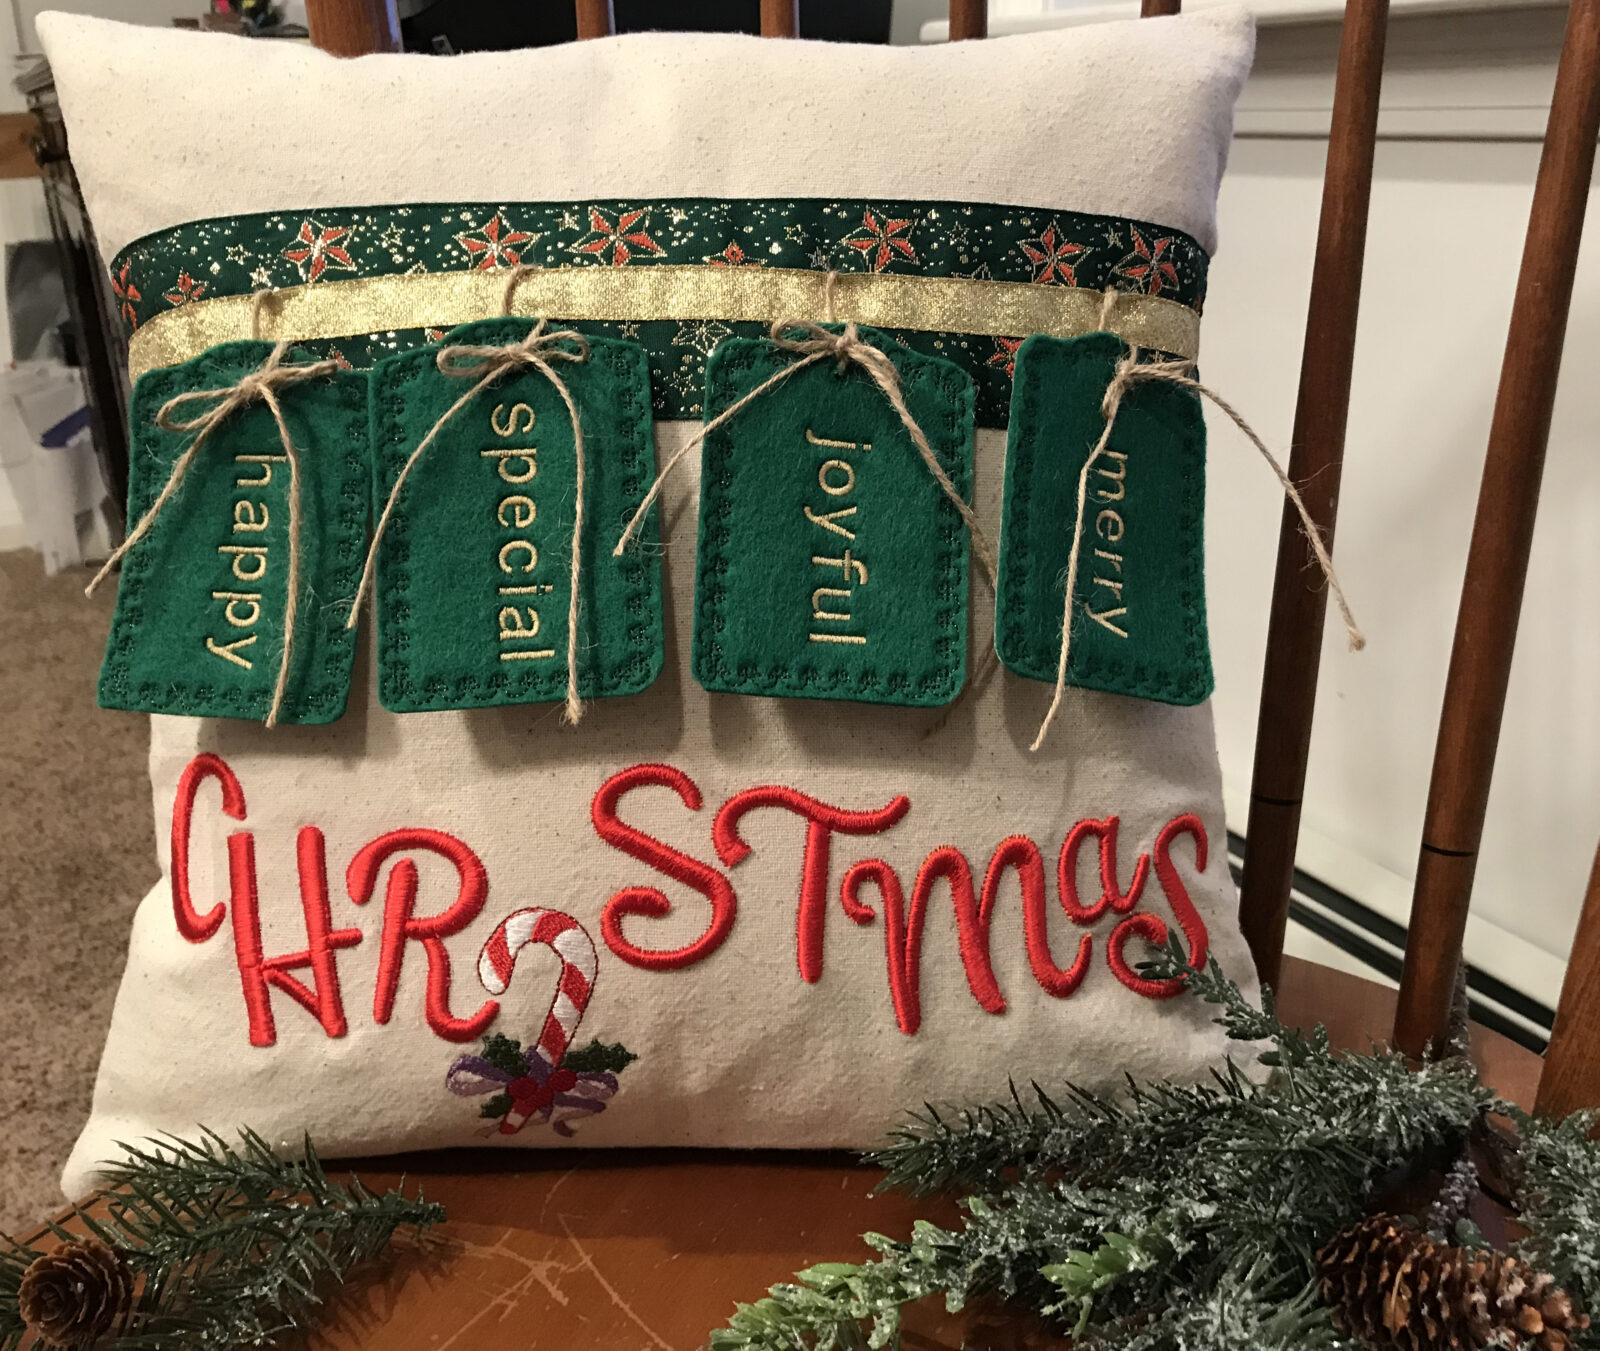
Embroidered Christmas Pillow designed by Pamela Cox.
Supplies
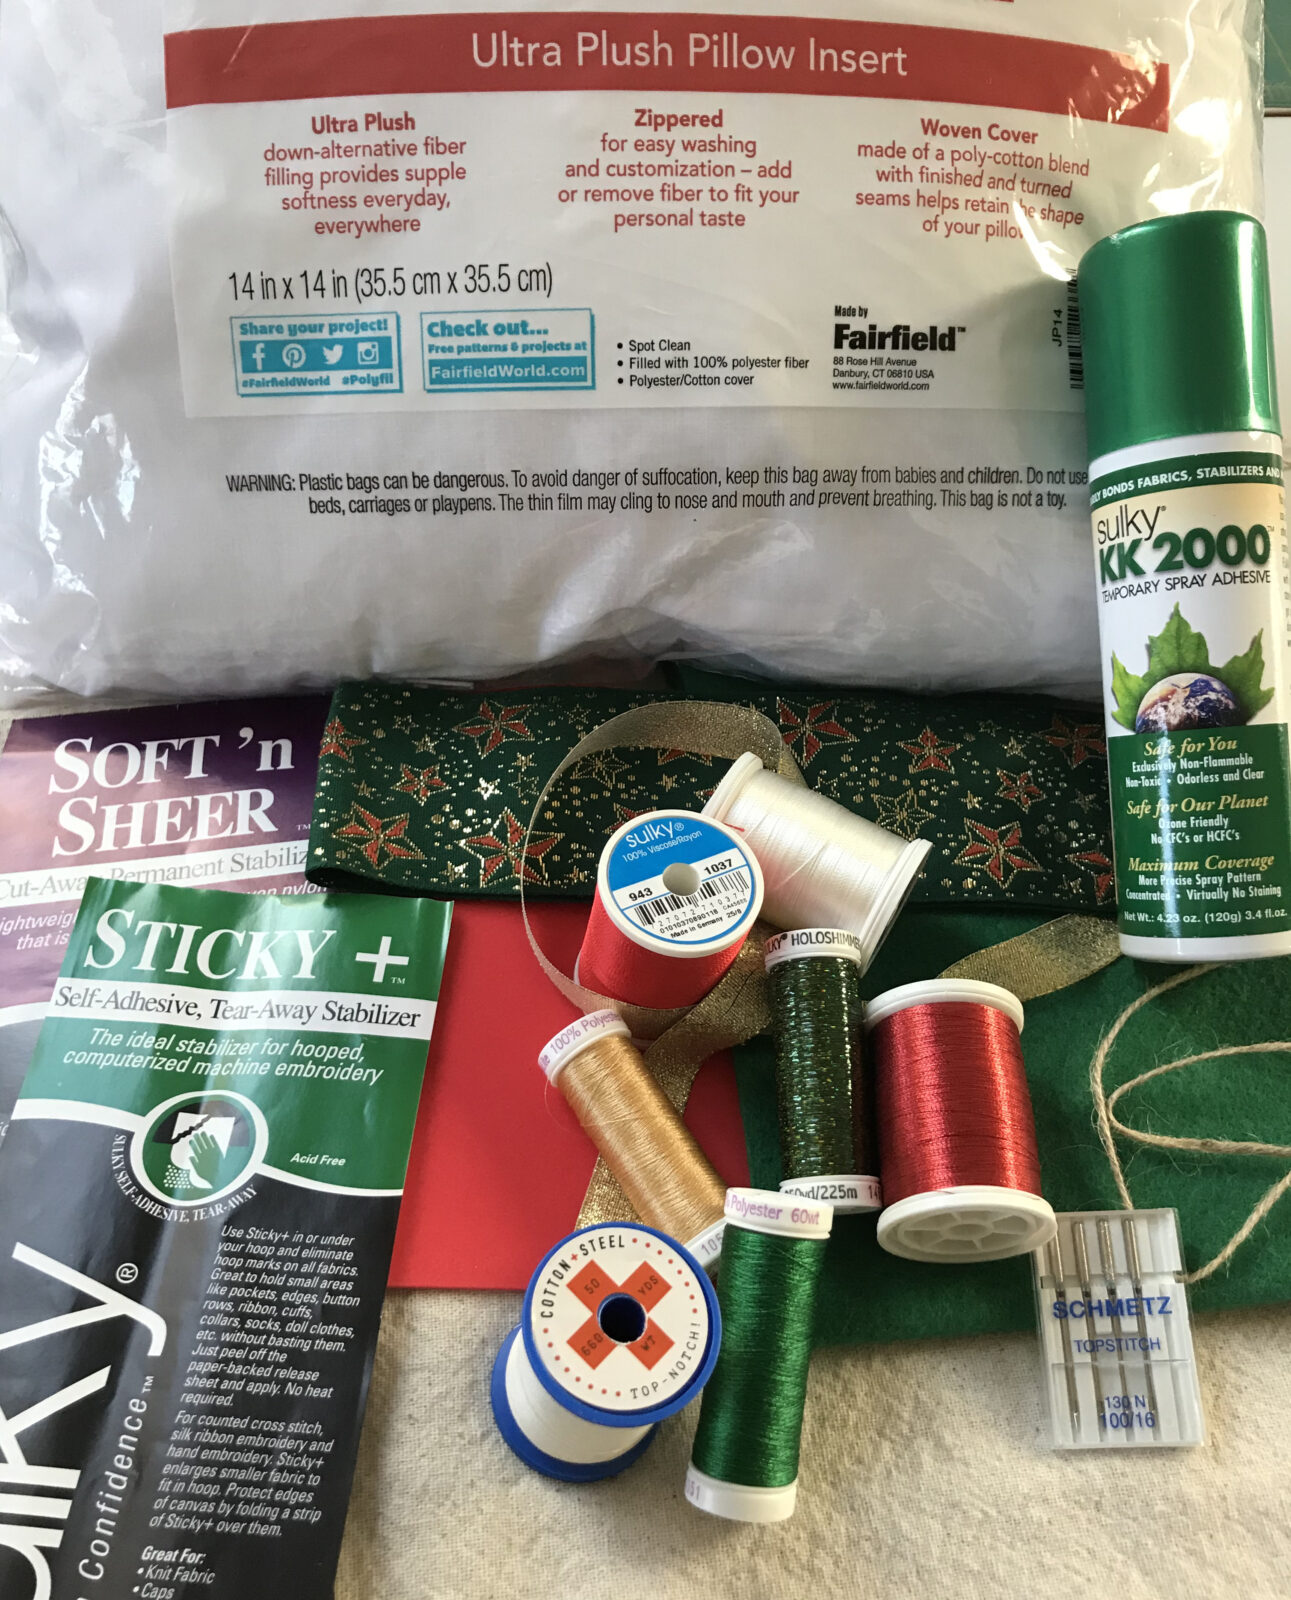
- ⅛ yard – wool felt
- ½ yard of Osnaburg utility fabric (prewash, dry, and press)
- ½ yard of decorative ribbon – 2 3/8” wide
- ½ yard of decorative ribbon – 1/2” wide
- 1½ yards of narrow (1/16”) soft Jute string
- Sulky® Stabilizers:
- KK 2000™ Temporary Spray Adhesive
- Sulky® Puffy Foam (2mm, red)
- Sulky® Threads
- Rayon 40 wt. – “Christmas”
- Holoshimmer™ Metallic – tag outline
- Sliver Metallic – candy cane accent
- PolyLite™ 60 wt. – tag eyelet, words and bobbin thread
- Cotton + Steel 50 wt. Cotton – construction
- Organ Needles
- Universal 100/16
- Universal 90/14 (construction)
- 14” pillow form
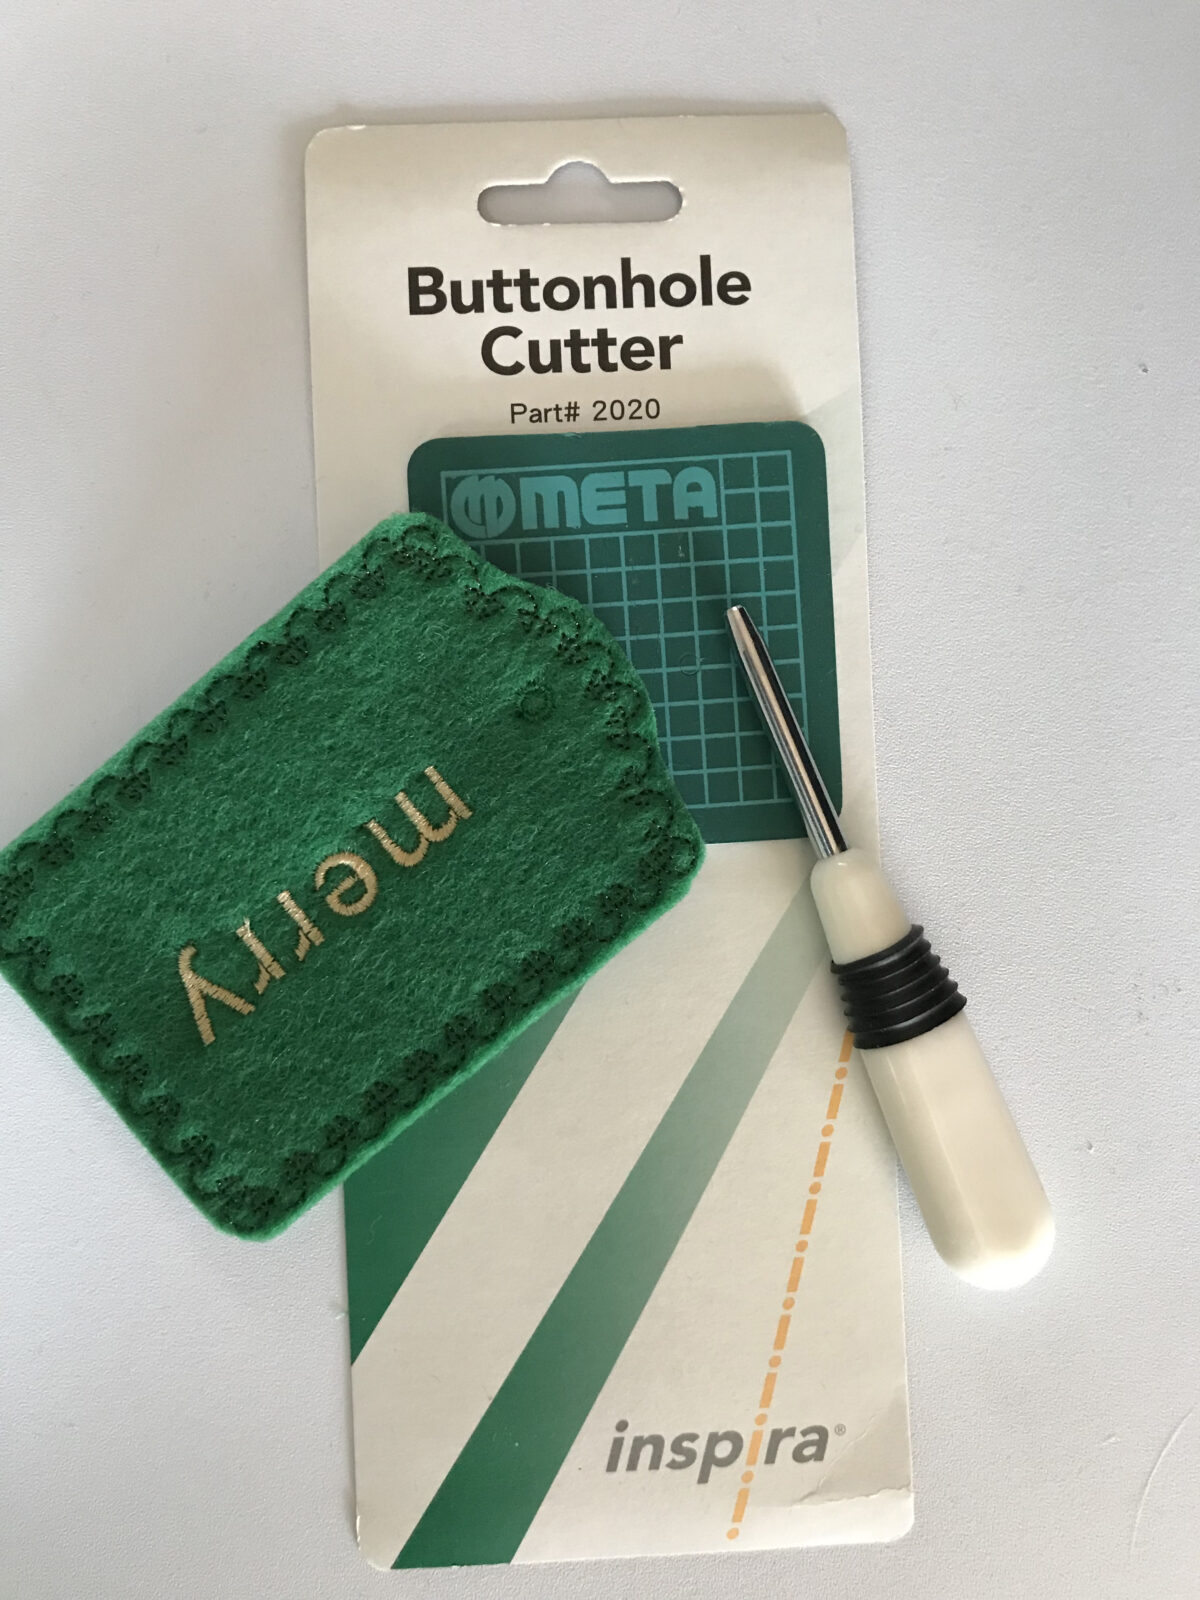
- Buttonhole cutter (optional)
- Embroidery Designs
Although the words “happy”, “special”, “joyful” and “merry” are on the featured embroidered Christmas pillow, you can embroider any descriptive Christmas words on your tags. You might even want to have the year as one of the tags, or your family’s name.
TAG PLANNING
In an embroidery software program, bring the lowercase letters needed for a tag word one at a time, and in the proper spelling order, into the work space.
Place letters in a straight line using the software grid to keep letters on the same plane. Rely on your eye for equal spacing between letters, noting the open areas created by the different silhouettes.

Once satisfied, combine the letters and color-sort.
Bring the tag template design centered in the work space.
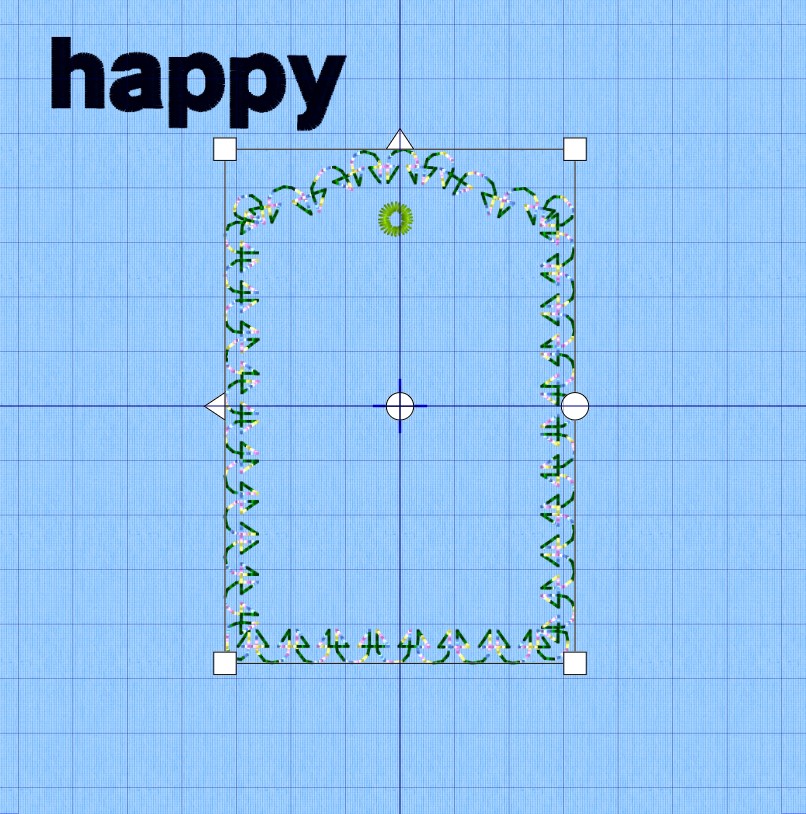
Rotate the word 90° to the right and center it in the work space as well.
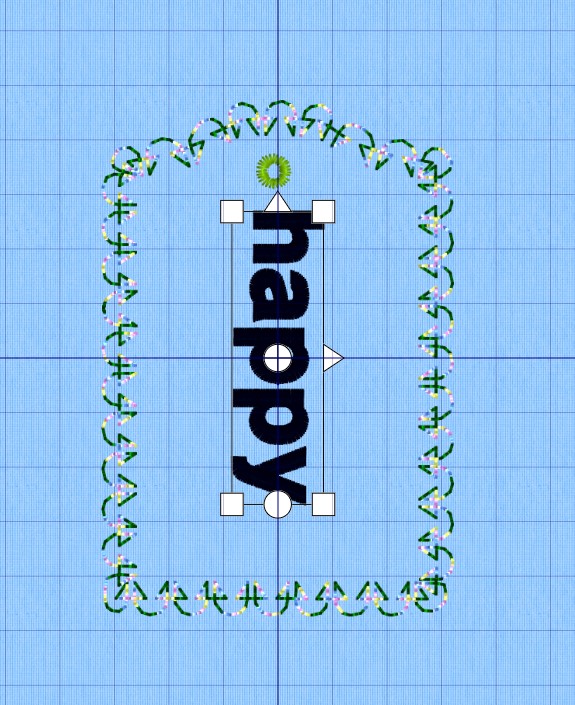
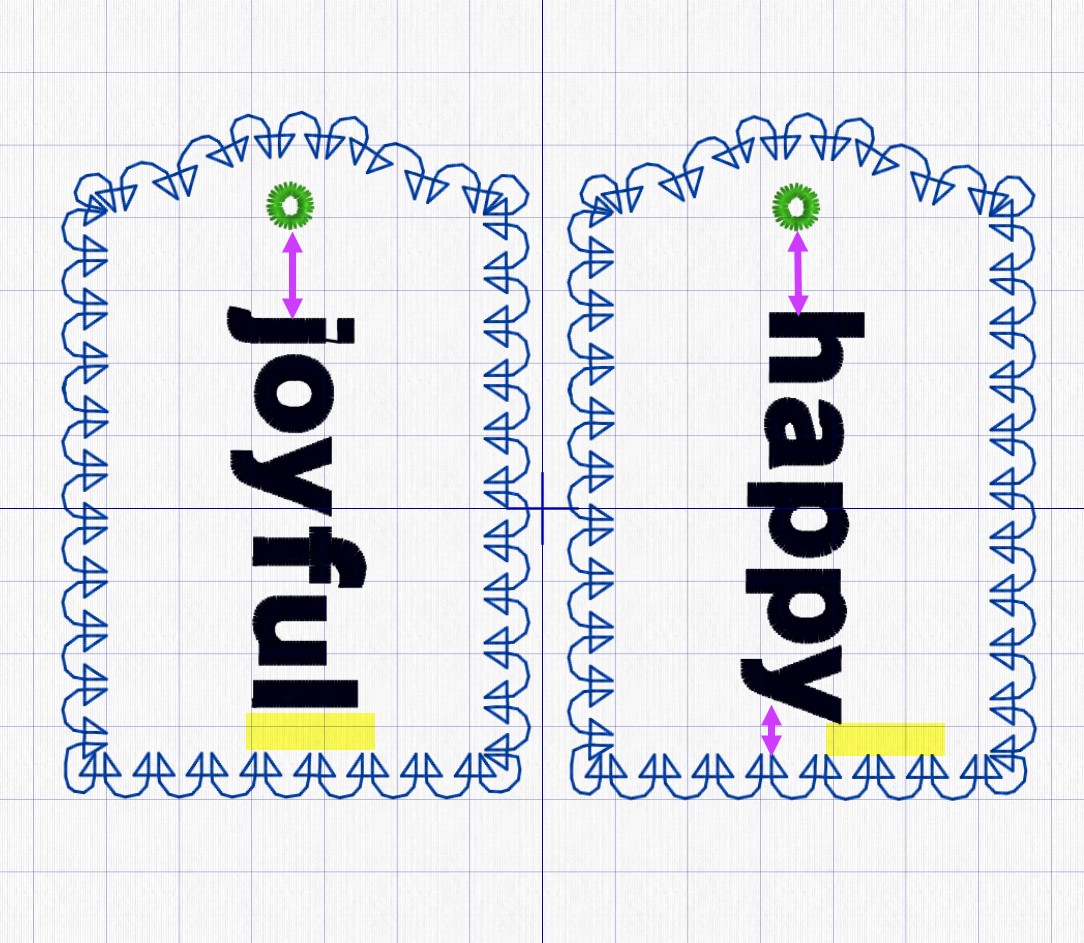
Keep the word centered in the width of the tag, but move it down toward the lower tag edge, stopping about ¼” above the decorative stitches.

The four tags should look uniformed, but they do not have to be, and will not be, carbon copies of each other.
Combine the word and tag design. Save under a new file name, preserving original design files for future projects.
EMBROIDER TAGS for CHRISTMAS PILLOW
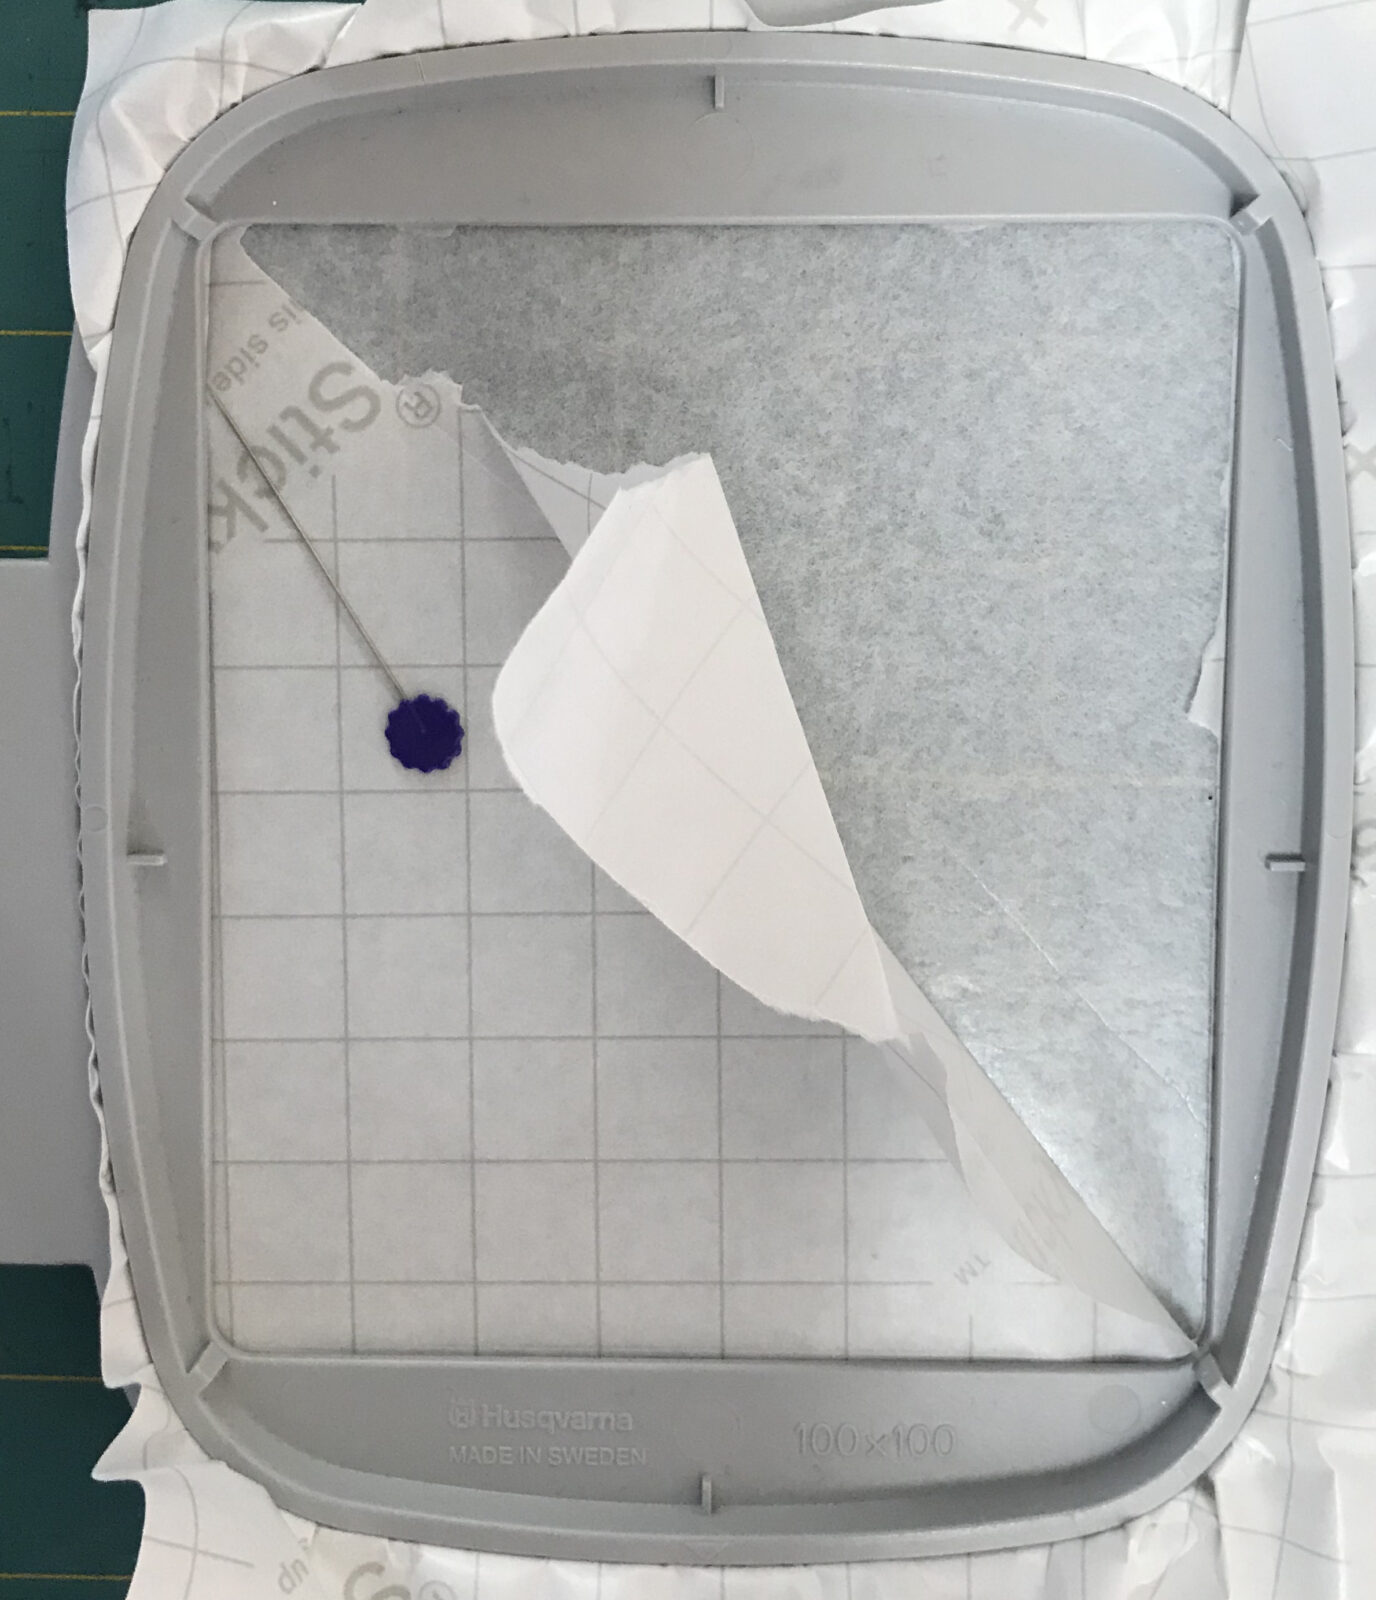
Secure Sticky+ stabilizer directly in a 100mm x 100mm hoop with the gridded paper side facing up. Gently score the paper within the inner hoop ring with a pin and remove, exposing the sticky surface.
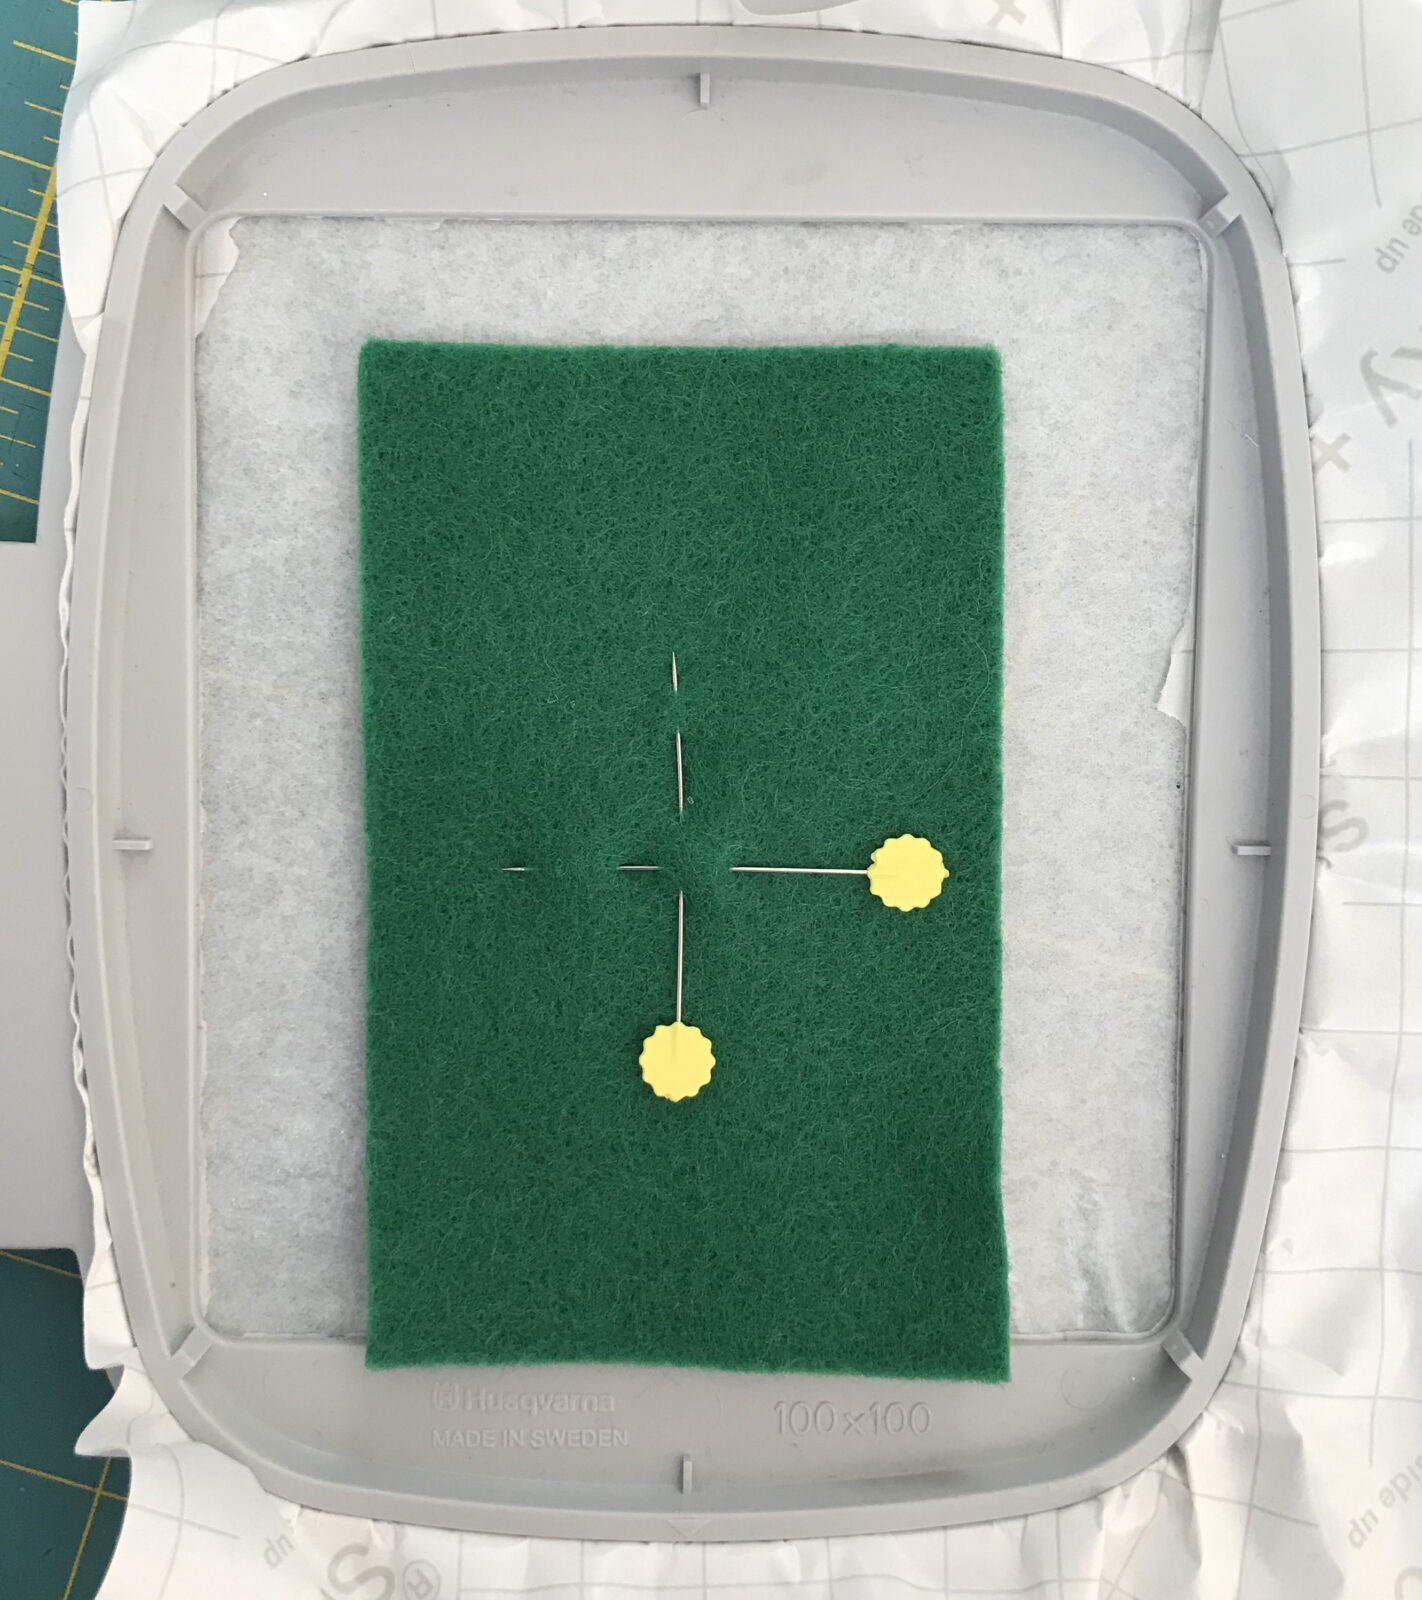
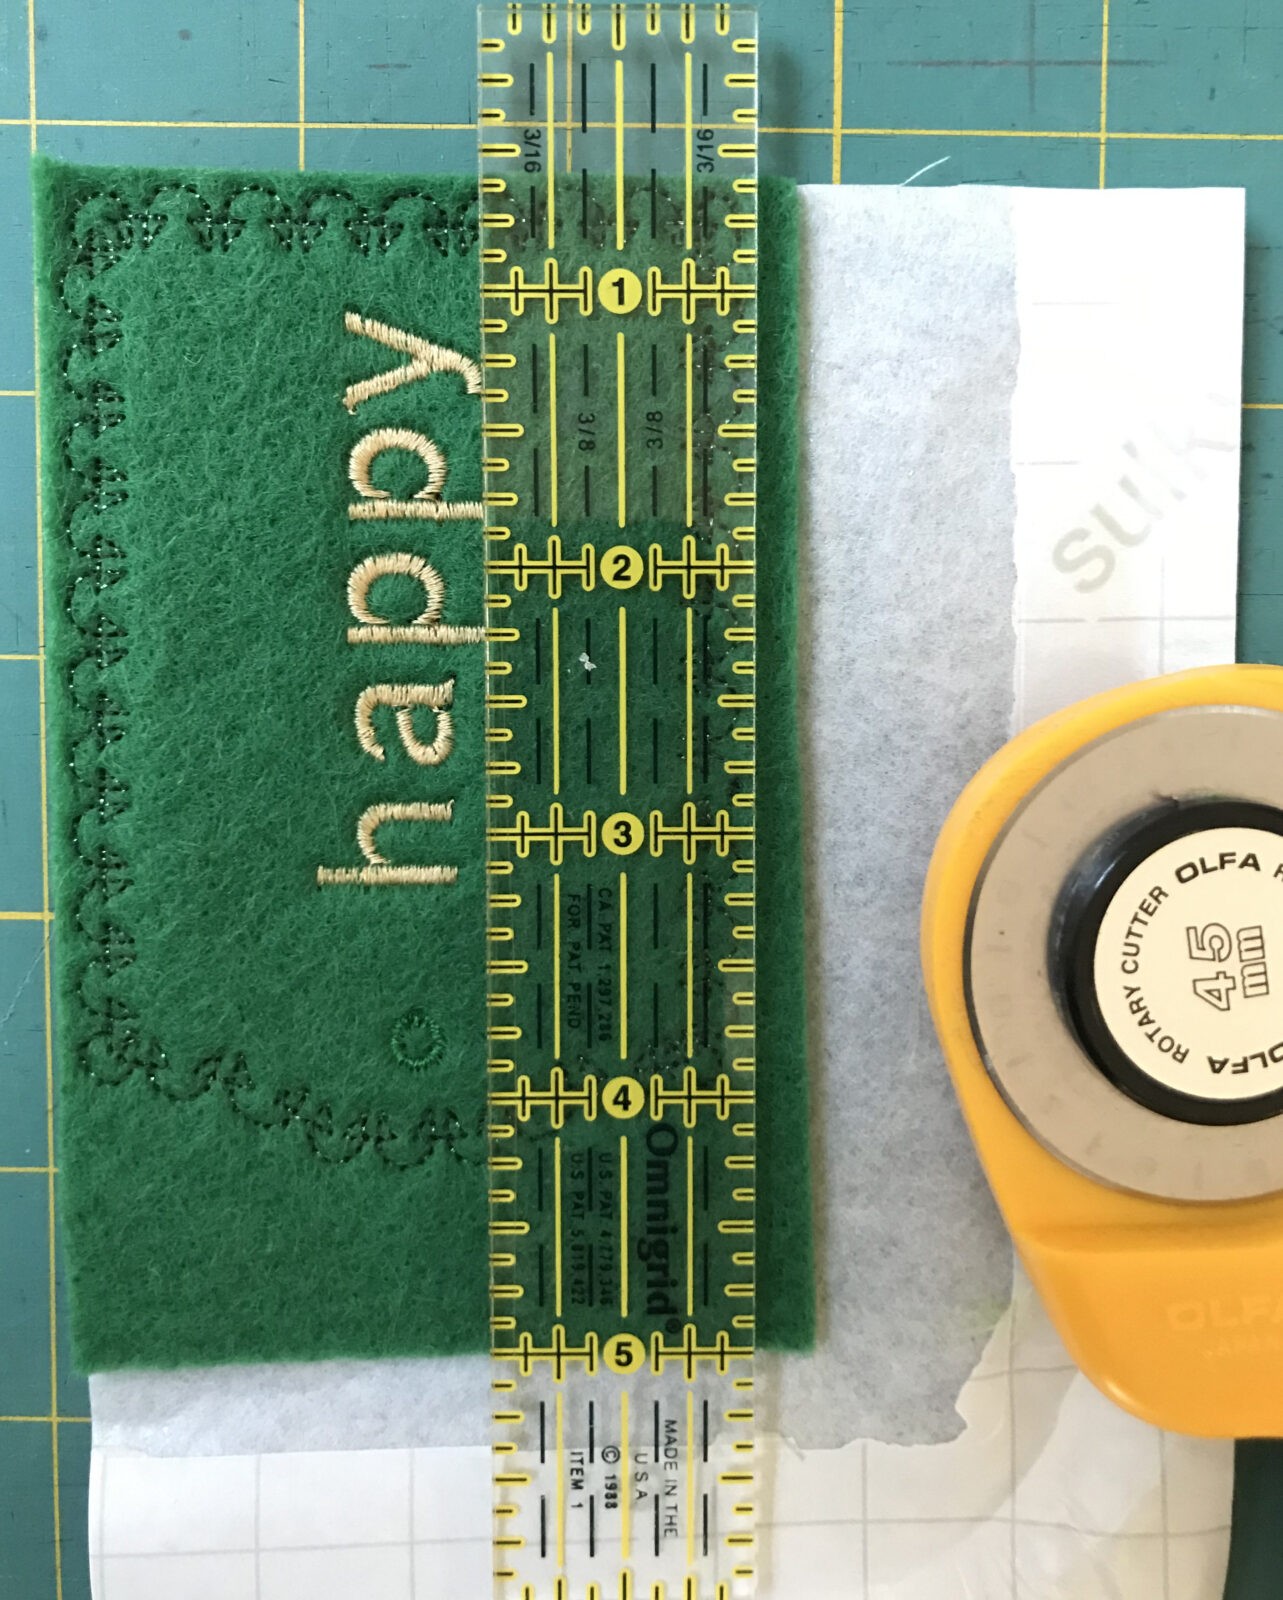
Cut four 4½” x 3¼” pieces of wool felt. Locate the center of each piece.
Match the center of the felt rectangle to the center markings on the hoop. Firmly press the wool fabric onto the sticky surface, keeping it wrinkle-free.
Match center needle position to design center and stitch the tag following the color chart. Repeat the process for the remaining tags. Trim each tag just outside the decorative outline stitch, rounding all four corners.
Cut a hole inside the eyelet using a proper tool if available or the tip of scissors.
Design the word “Christmas”
Bring the following capital letters, “C H R” – in order, into a 360mm x 200mm editing software work space.
Add the candy cane design to the work space.
Add the following capital letters, “S T M” – in order.
Bring in the lowercase letter “a”, followed by a capital “S”.

It is perfectly fine to keep the letters in a straight line, however, if a more whimsical look is preferred, move some letters up and others down, slightly rotate some, or tuck one into another. It really is “trial and error” to achieve a look that pleases you. But it’s also a lot of fun to play around with fitting letters together!

Begin by rotating “R” into the candy cane. Tilt “H” away from “R” with “C” placed above “H” rotated towards it. Keep working in the same manner with the other letters and don’t be afraid to re-adjust your initial movements. Once satisfied, combine the design. Before color sorting, leave the first three letters black and change the last letters “S” thru “S” to a different color such as gray or brown. The entire word will be stitched in red, but it is important that the combined design stitches out in three sections: “CHR”, candy cane, then “STMaS.” Save the design under a new file name.
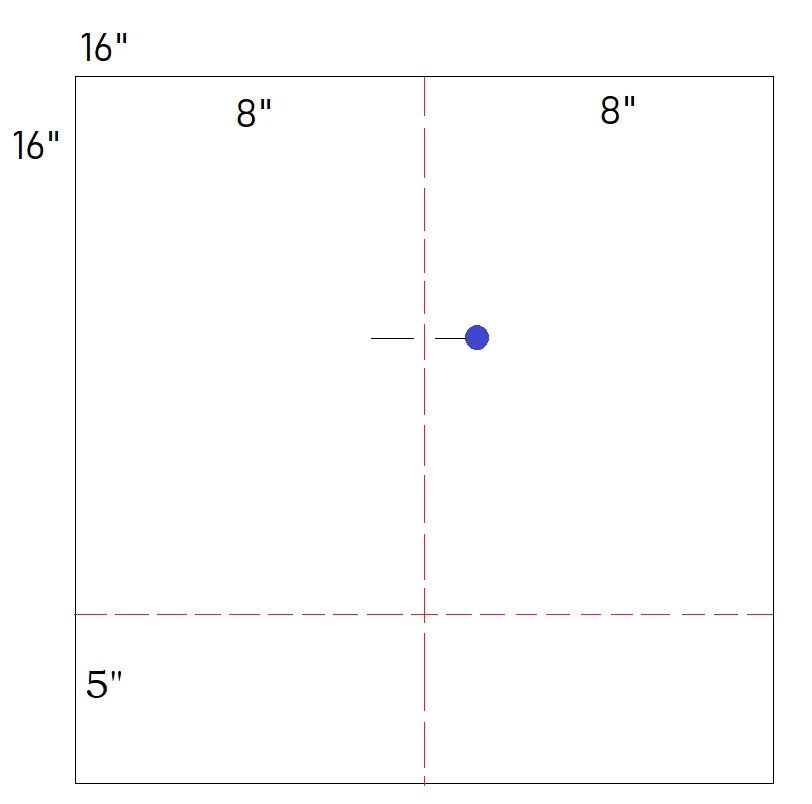
Cut fabric following the layout below.

15” x 10” back along the selvage edge
15” x 8” back along the selvage edge
16” square pillow front
CHRISTMAS PILLOW EMBROIDERY
On the pillow front, hand-baste intersecting lines 5” up from the lower edge and 8” from one side to mark design center. Place a pin to indicate the pillow top.
Secure a piece of Soft ’n Sheer™ directly in a 360mm x 200mm hoop. Lightly spray the fabric with KK 2000™ Temporary Adhesive and place it over the stabilizer, matching the intersecting lines with the center markings on the hoop frame. Press it firmly to the stabilizer, keeping it wrinkle-free.
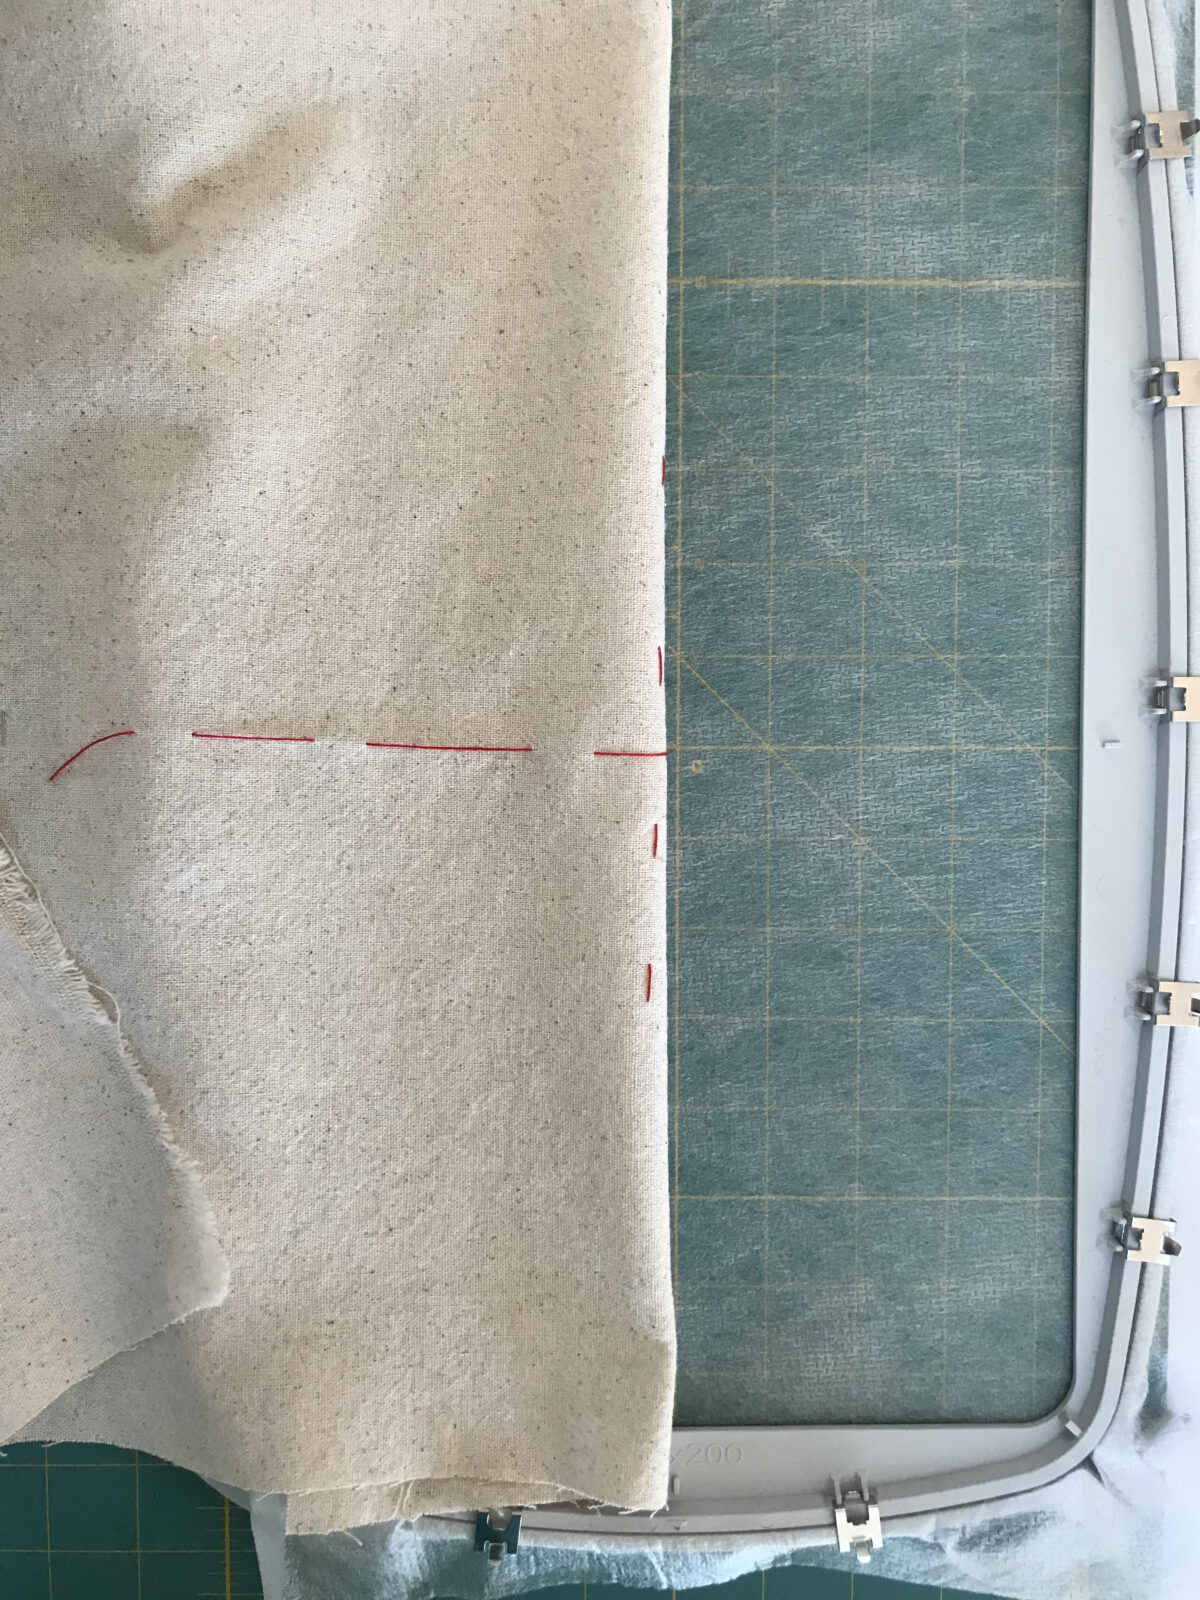
Check that the fabric is hooped in the same direction that the design is loaded into the embroidery machine.
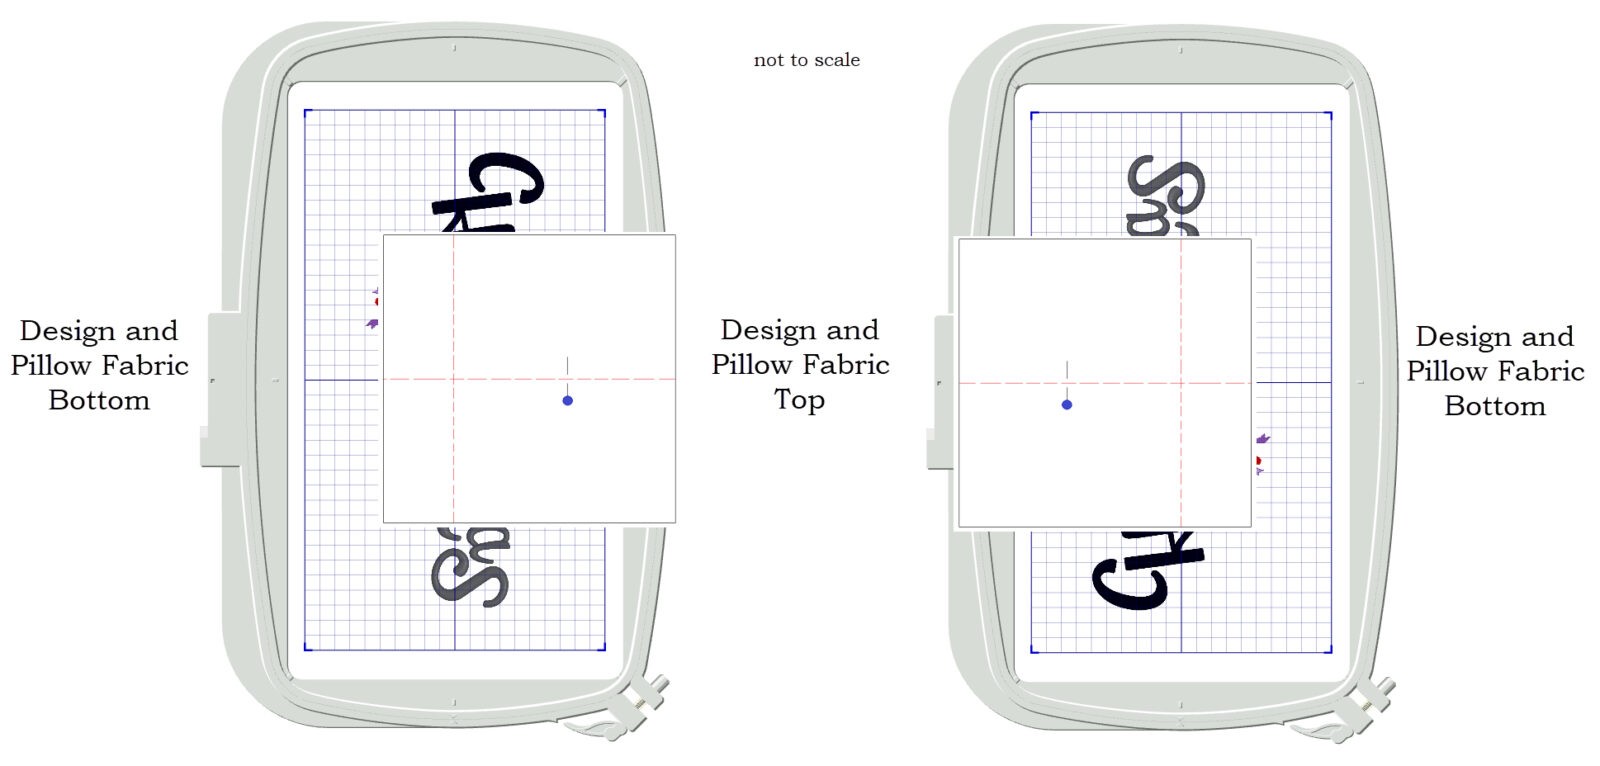
Match center needle position to design placement center. Remove only the basting stitches within the stitching space. If your machine offers a basting function to “fix” the fabric to the stabilizer, stitch this box to further secure fabric in place and to use as a guide with future steps.
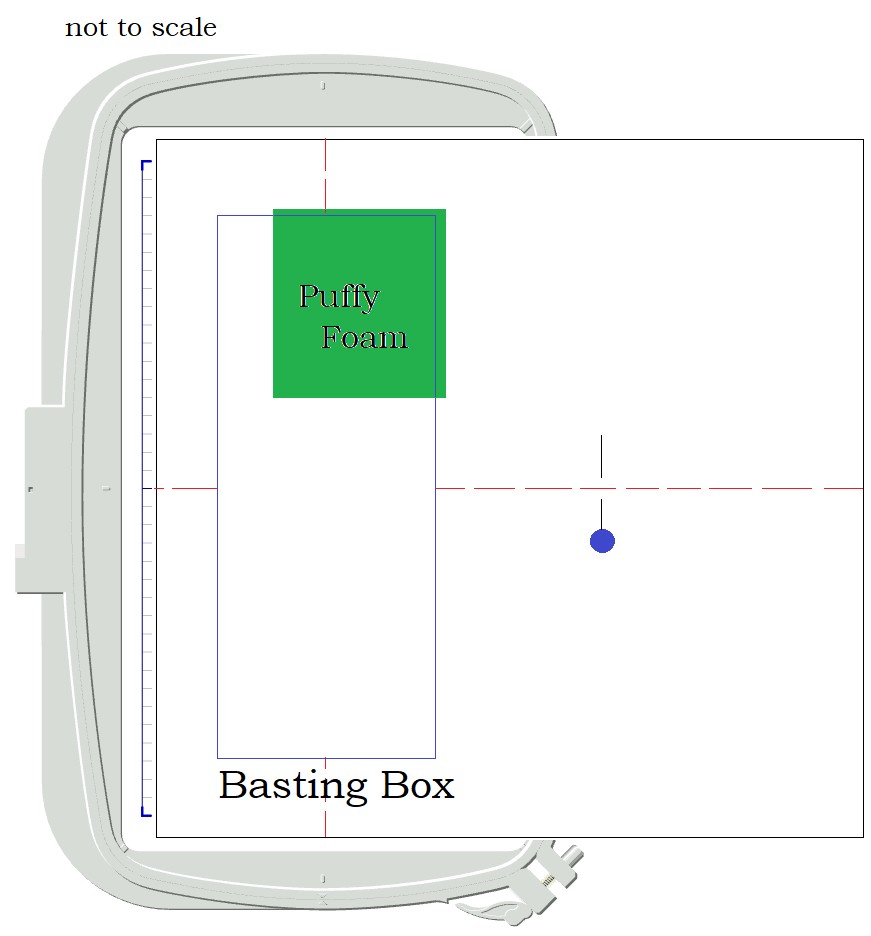
PUFFY FOAM
Cut two 4½” squares and two 3½” x 8” rectangles of puffy foam.
Thread the machine with red Rayon 40 wt. in the needle and matching PolyLite™ in the bobbin. Spray the smaller piece of puffy foam with KK 2000™. Press the Puffy Foam to the fabric, extending it ⅛” outside the basting box to cover the stitching space of “CHR”.
Embroider the first three letters. Remove the excess Puffy Foam before stitching the candy cane.
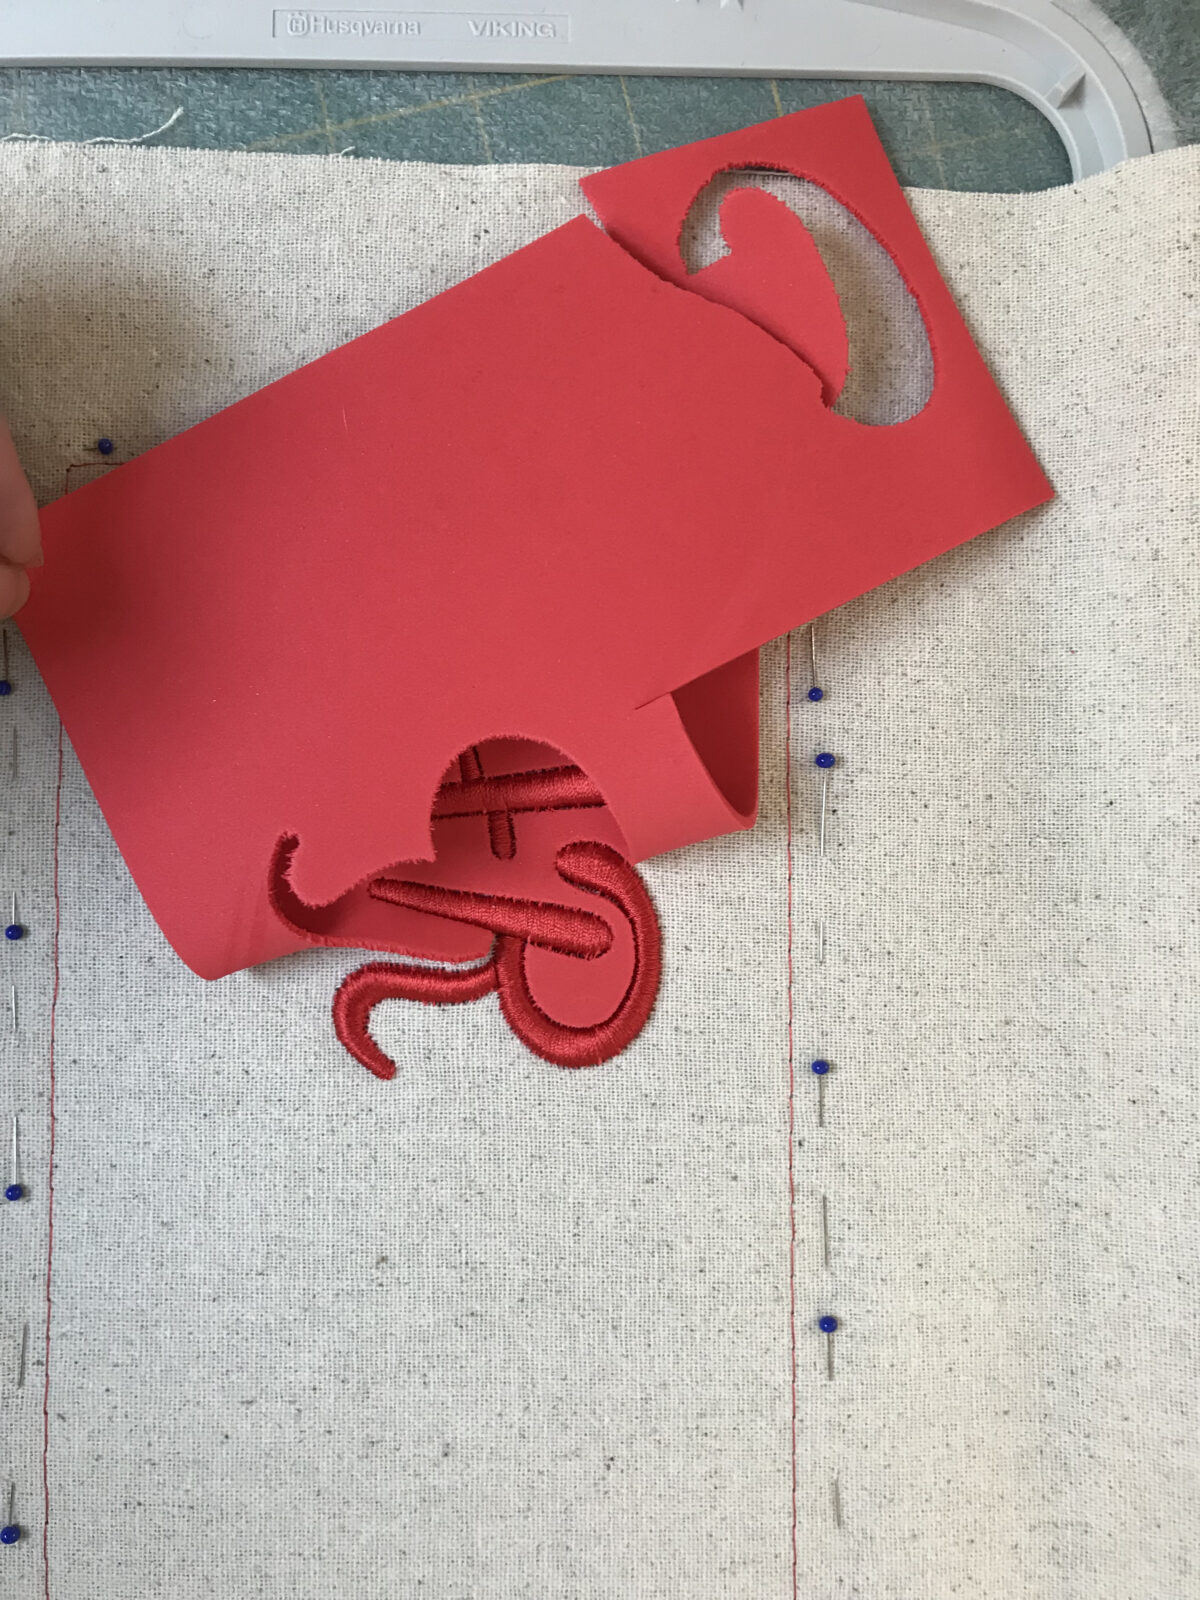
Embroider the candy cane design referring to the PDF Color Chart.
Before stitching the final letters “STMaS”, lightly spray the second piece of Puffy Foam with KK 2000™ and press it to the fabric extending it beyond the basting box.
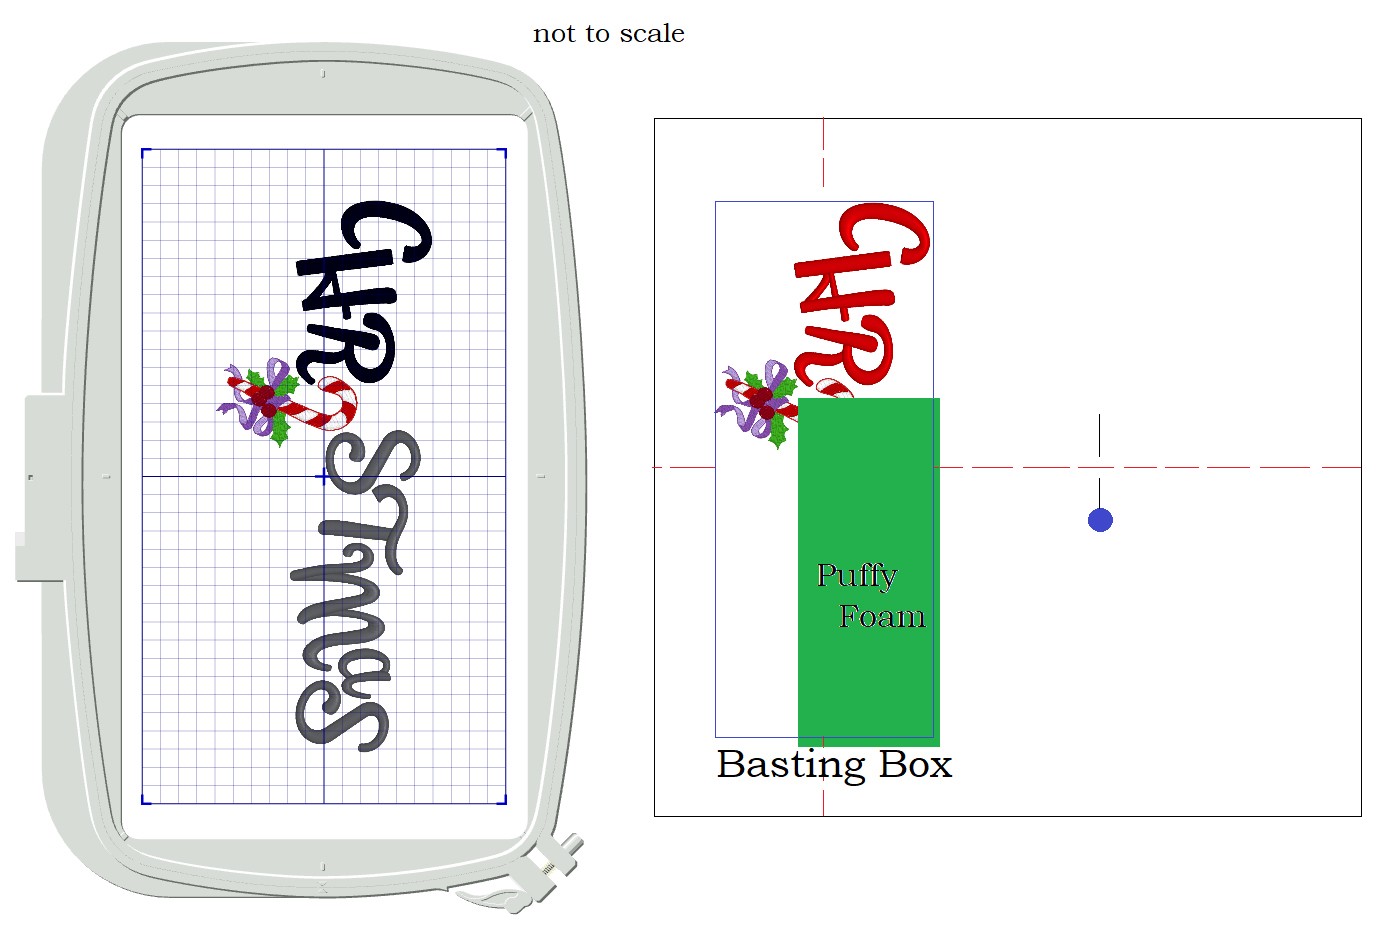
Remove the excess Puffy Foam. Leave the basting box intact. Lightly spray the wrong side of the narrow ribbon. Press it, centered to the wide ribbon. Pin-mark the center of the full 18” length. Place a pin 1½” on each side of the center. From each of those pins, measure over 3” and mark.
Stitch the narrow ribbon close to its edge, stopping ¼” before the first pin. Begin stitching ¼” after the pin. Anchor the entire length in this same manner. There will be about a ½” gap in stitching at each of the four pins. Secure the lower edge of the ribbon following the same stitching pattern.

The goal is to be able to pass a thin jute cord under the narrow ribbon.
Topstitch the wide ribbon to the pillow 3” above the basting box, or 3” above the letter “C”
CONSTRUCTION
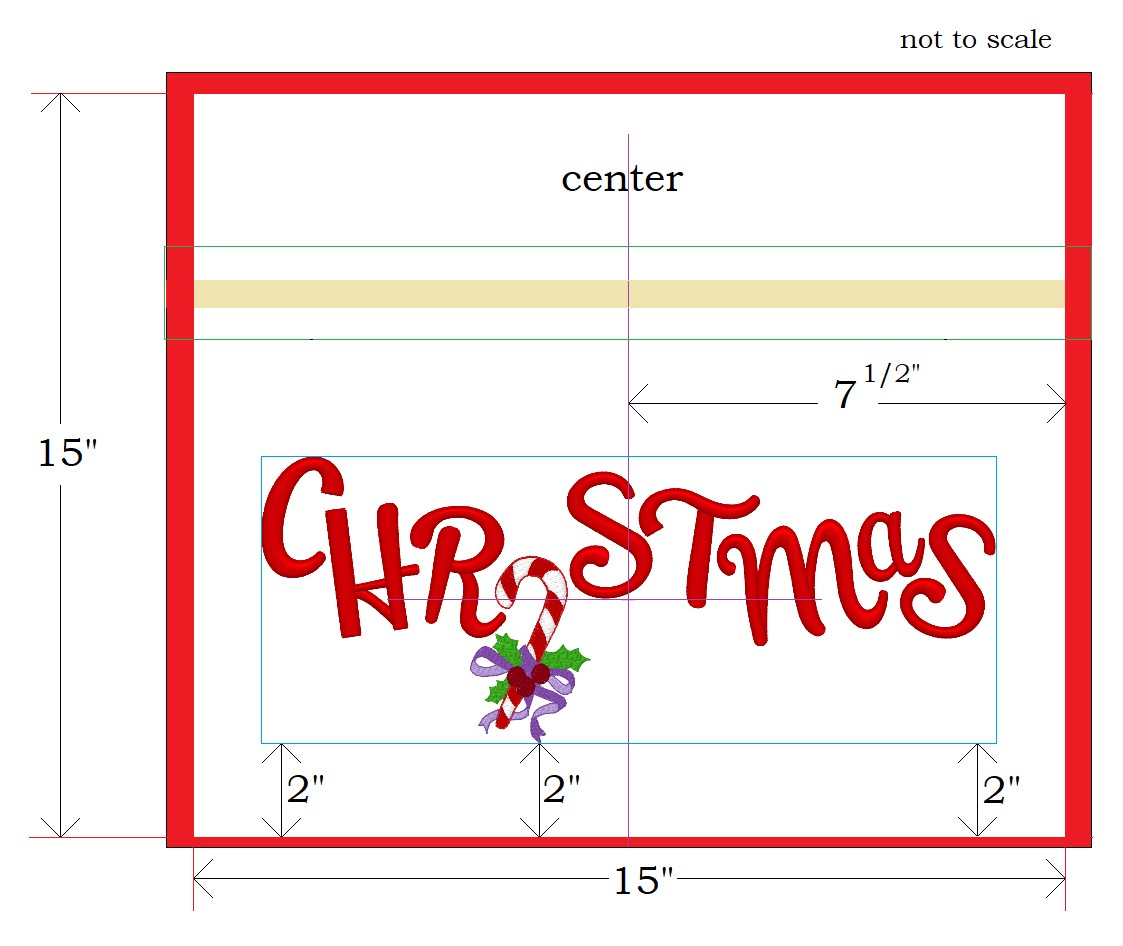
Trim the embroidered Christmas pillow front to 15″ square. Cut 2” below the basting box (or 2” below the lowest point on the candy cane streamer). Keep this cut parallel to the word and the decorative ribbon.
From this first cut line, measure up 15” and square-cut the pillow top.
From the center of the word design (pillow fabric) measure 7½” to the right. Square-cut. Measure over 15” from this side to make the final square cut.
With right sides together, and the selvage edge facing the embroidered Christmas pillow center, stitch one back piece to the front using a ½” seam allowance. Stitch the second back allowing the selvage edges of the two pieces to overlap. Press the seams open. Cut into the seam allowance diagonally in the four corners. Turn right side out. Insert the pillow form into the embroidered Christmas pillow sham.
Cut four 14” lengths of jute cord. Fold each one in half and slide it under the narrow ribbon in each of the four openings.

Pull one cord end completely through. Then thread the end through the eyelet of each tag. Allow the tags to hang from the narrow ribbon but above “Christmas”. Tie bows.
Enjoy your embroidered Christmas pillow!
http://yourcialisrx.com/cialis_soft_tabs.html
