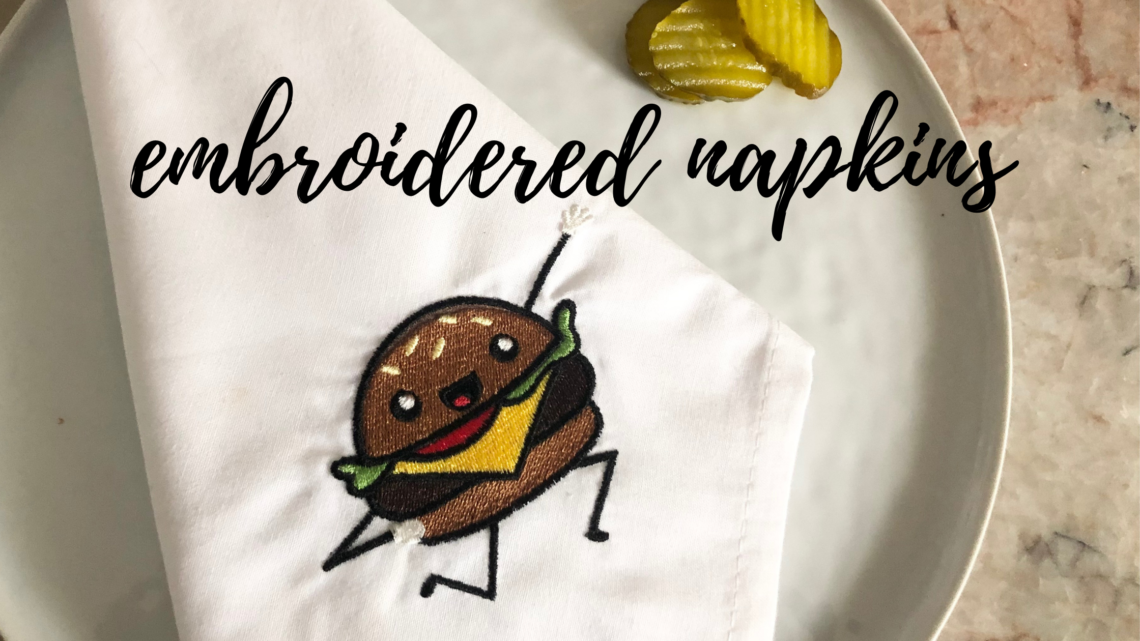
Embroidered Napkins for National Hamburger Day
Embroidered Napkins – Quick & Easy Gifts to Make
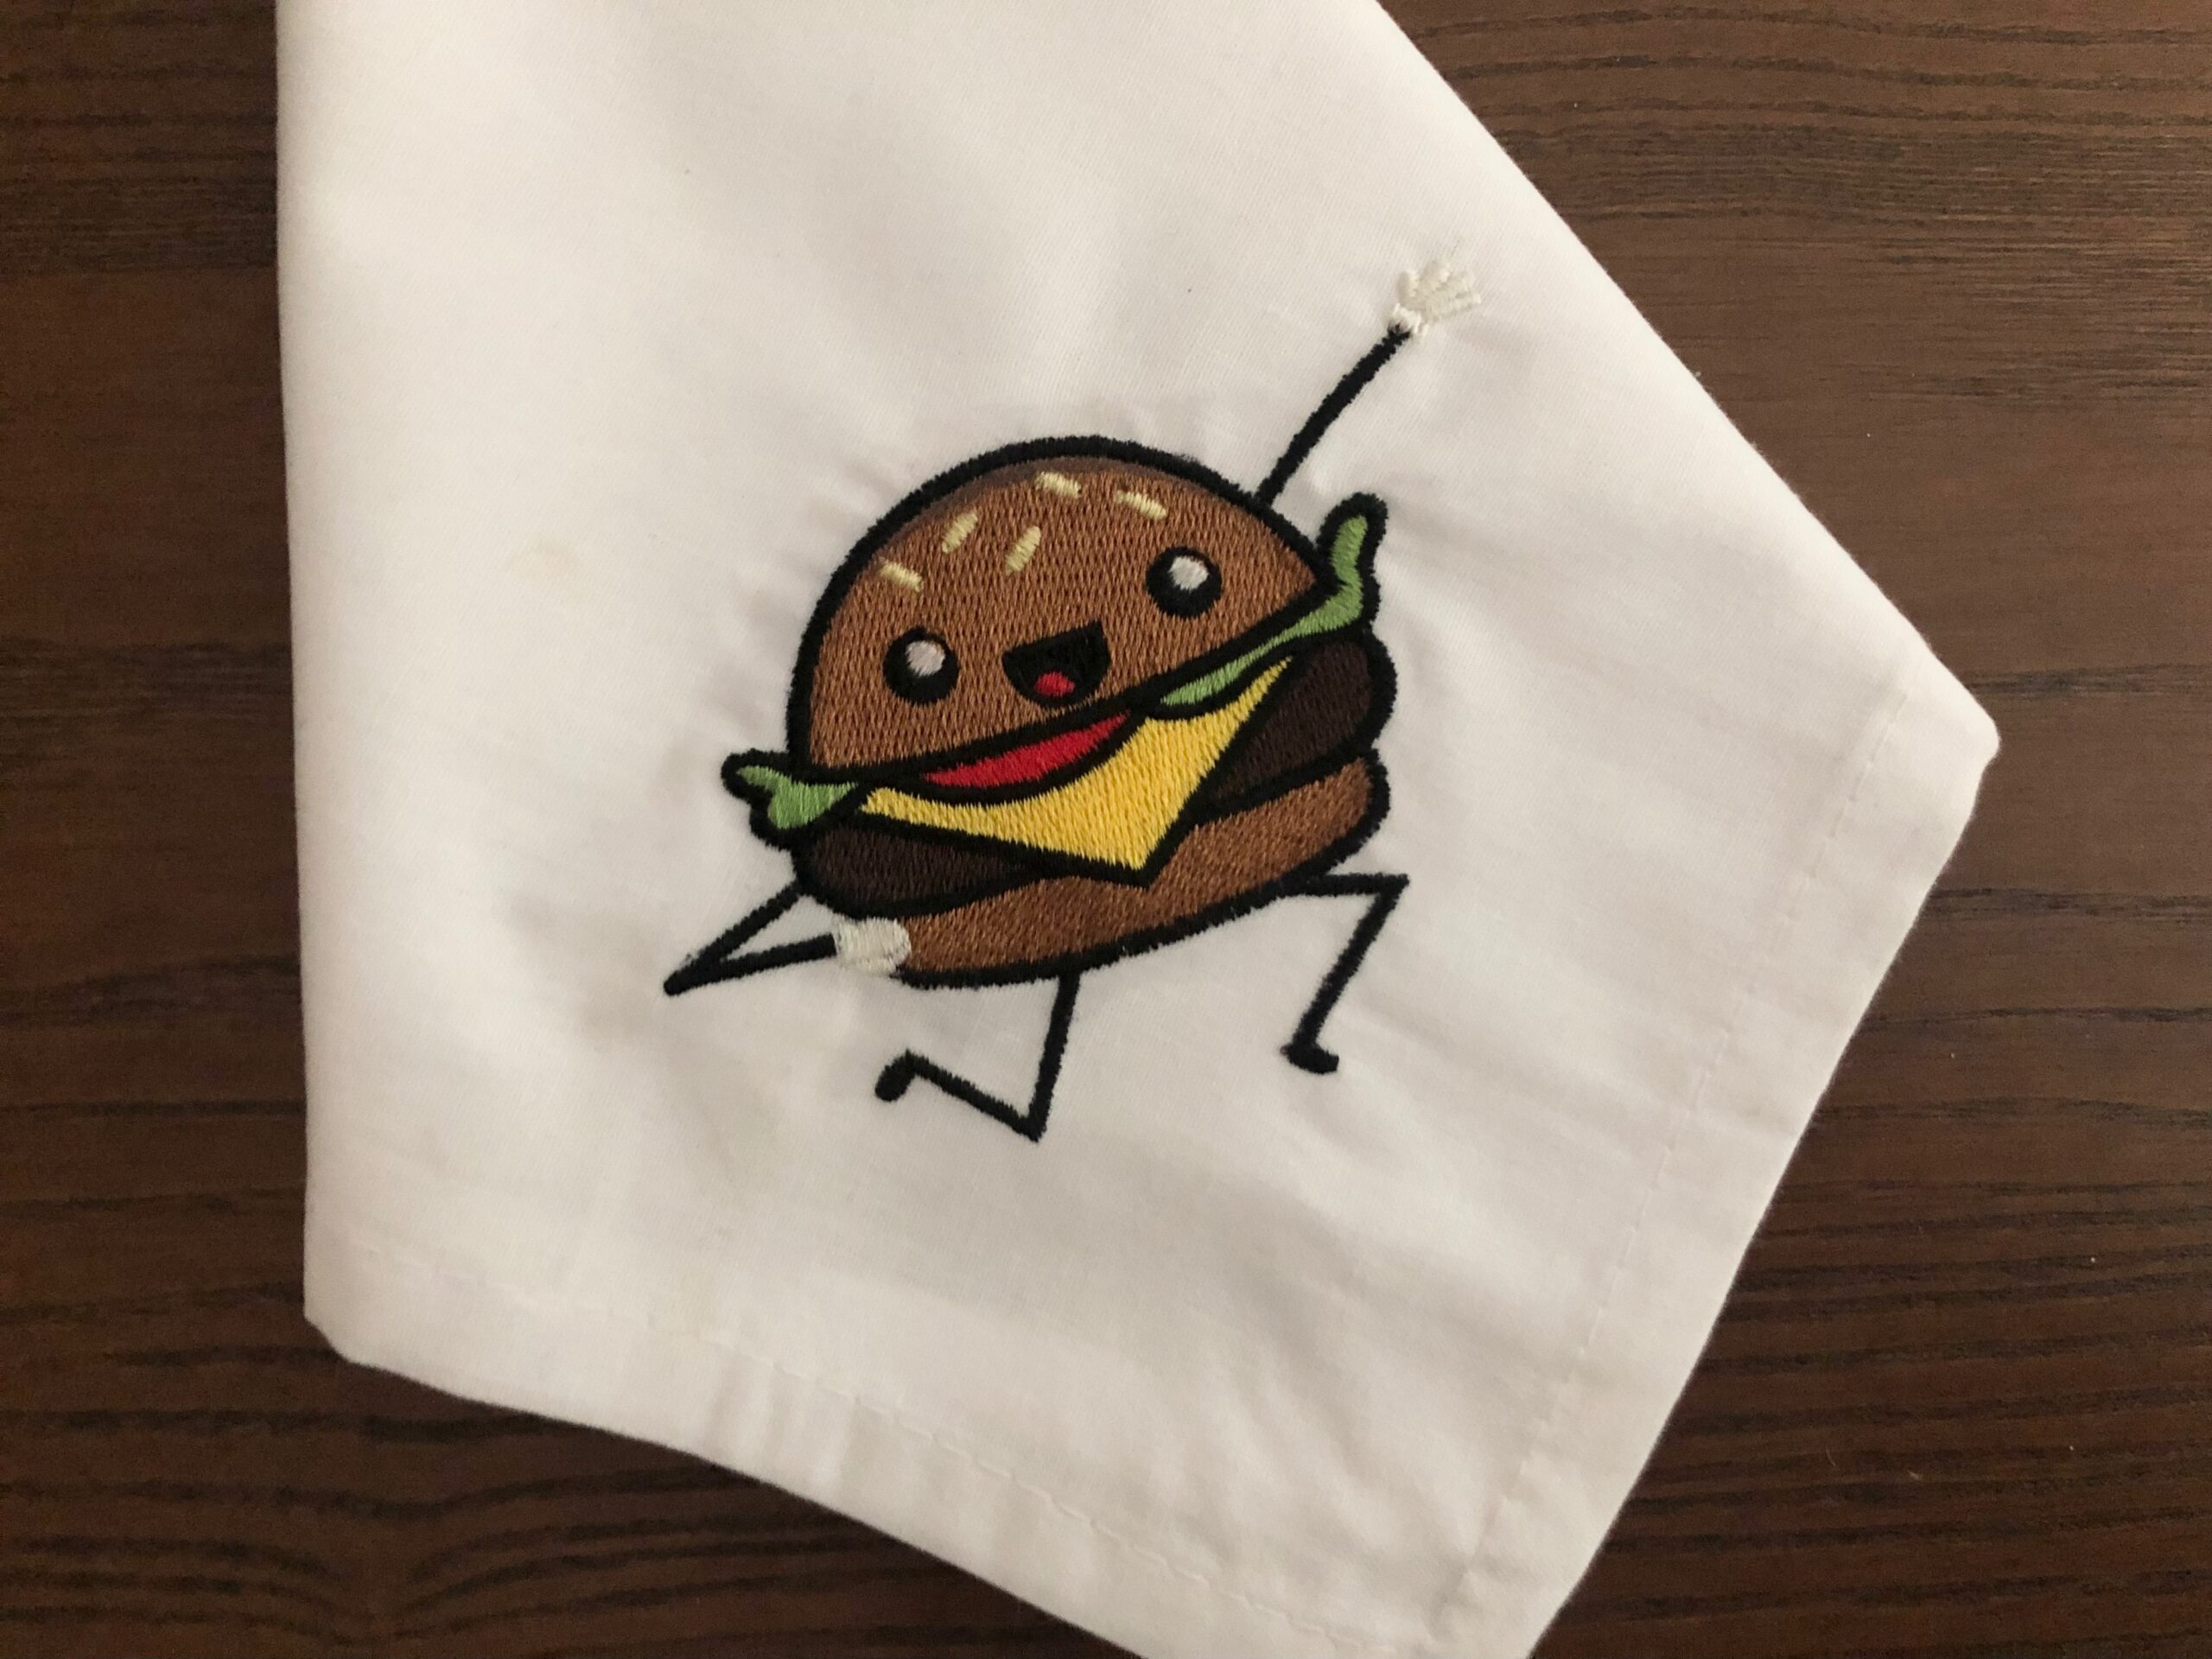
Embroidered napkins make great gifts. Create a set in no time and choose a design for a theme, such as a cookout or luau, to gift to the host. Or create a set for your next get-together this summer, to celebrate National Hamburger Day!
EMBROIDERED NAPKIN SUPPLIES
- Poly Deco™ Thread (for construction& embroidery)
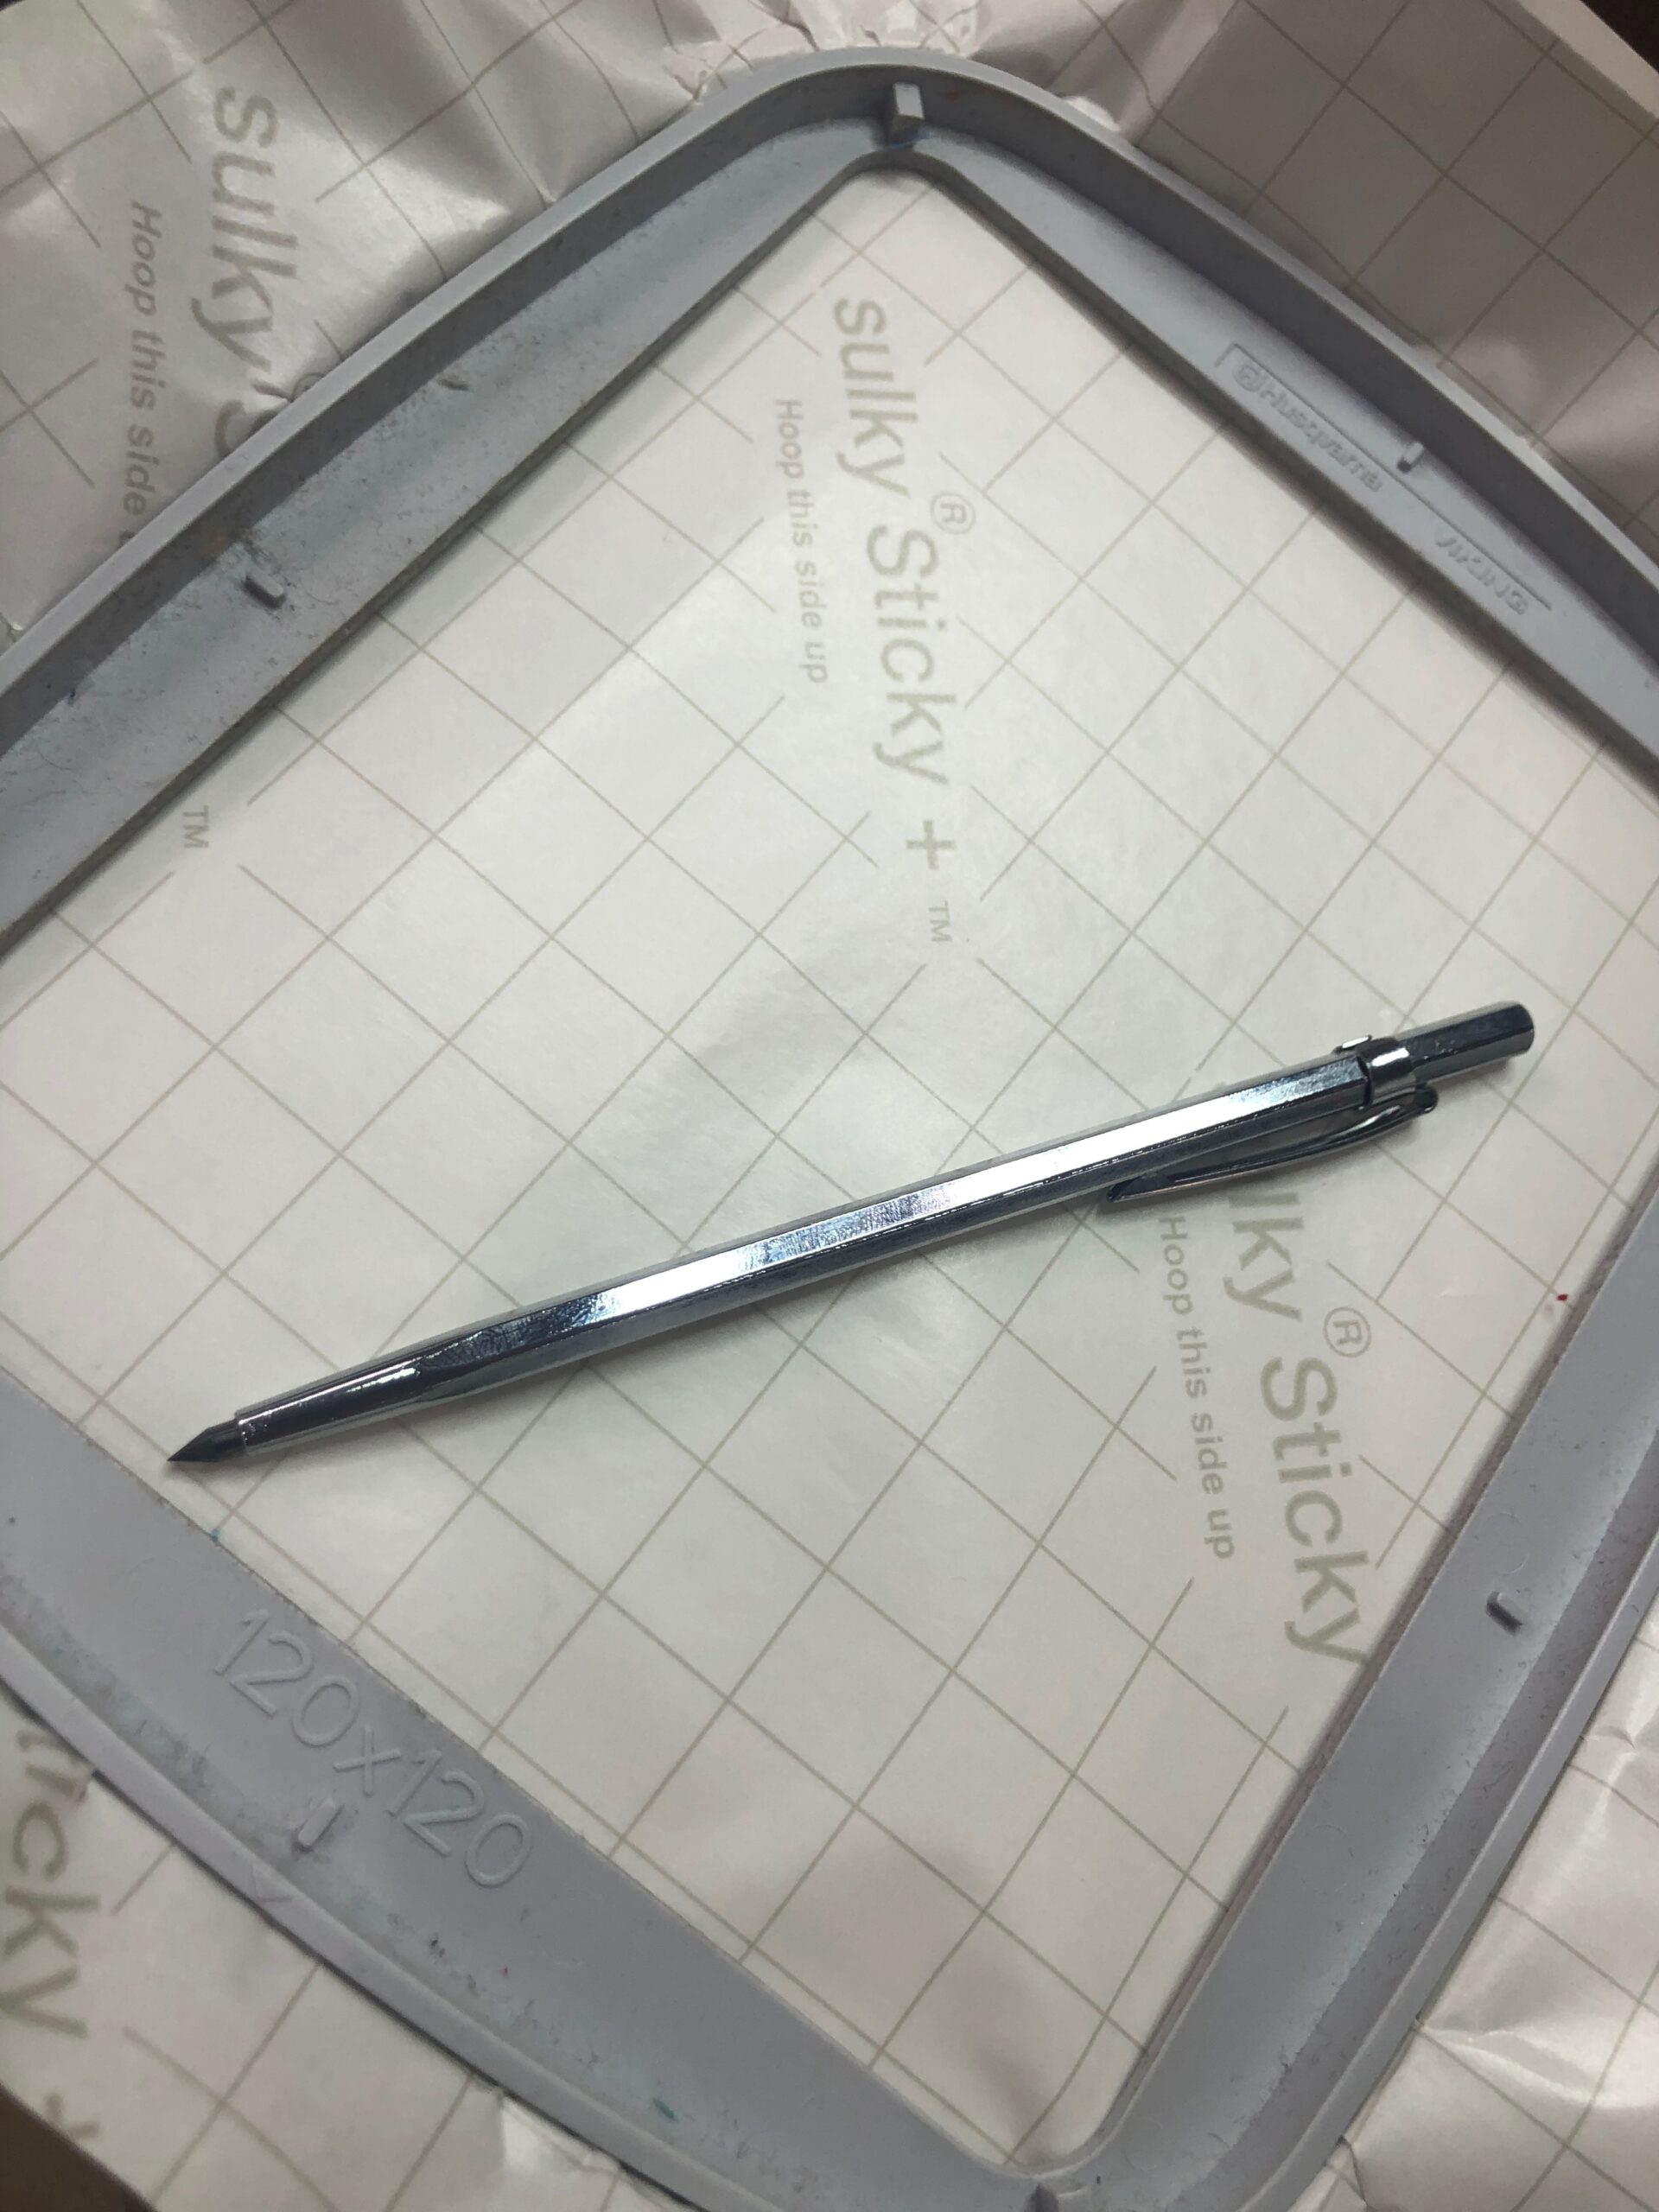
- Sulky Sticky+™ Stabilizer
- Sticky+ Slitting Pen
- KK 2000™ Temporary Spray Adhesive
- Napkin blanks (or create your own napkins from linen or cotton fabric and a rolled hem!)
- Embroidery design (approximately 3″ square or smaller)
Note: The featured design is BBQute Burger from Urban Threads. Choose a design you love, monogram or even ITH appliqué to fit the napkin corner.
ABOUT NAPKIN BLANKS
Purchase inexpensive napkin sets from your local store, or create your own napkins.
The featured napkins came in a set of two, and measure 18″ square. They’re 60% Cotton/40% Polyester, tightly woven and sturdy.
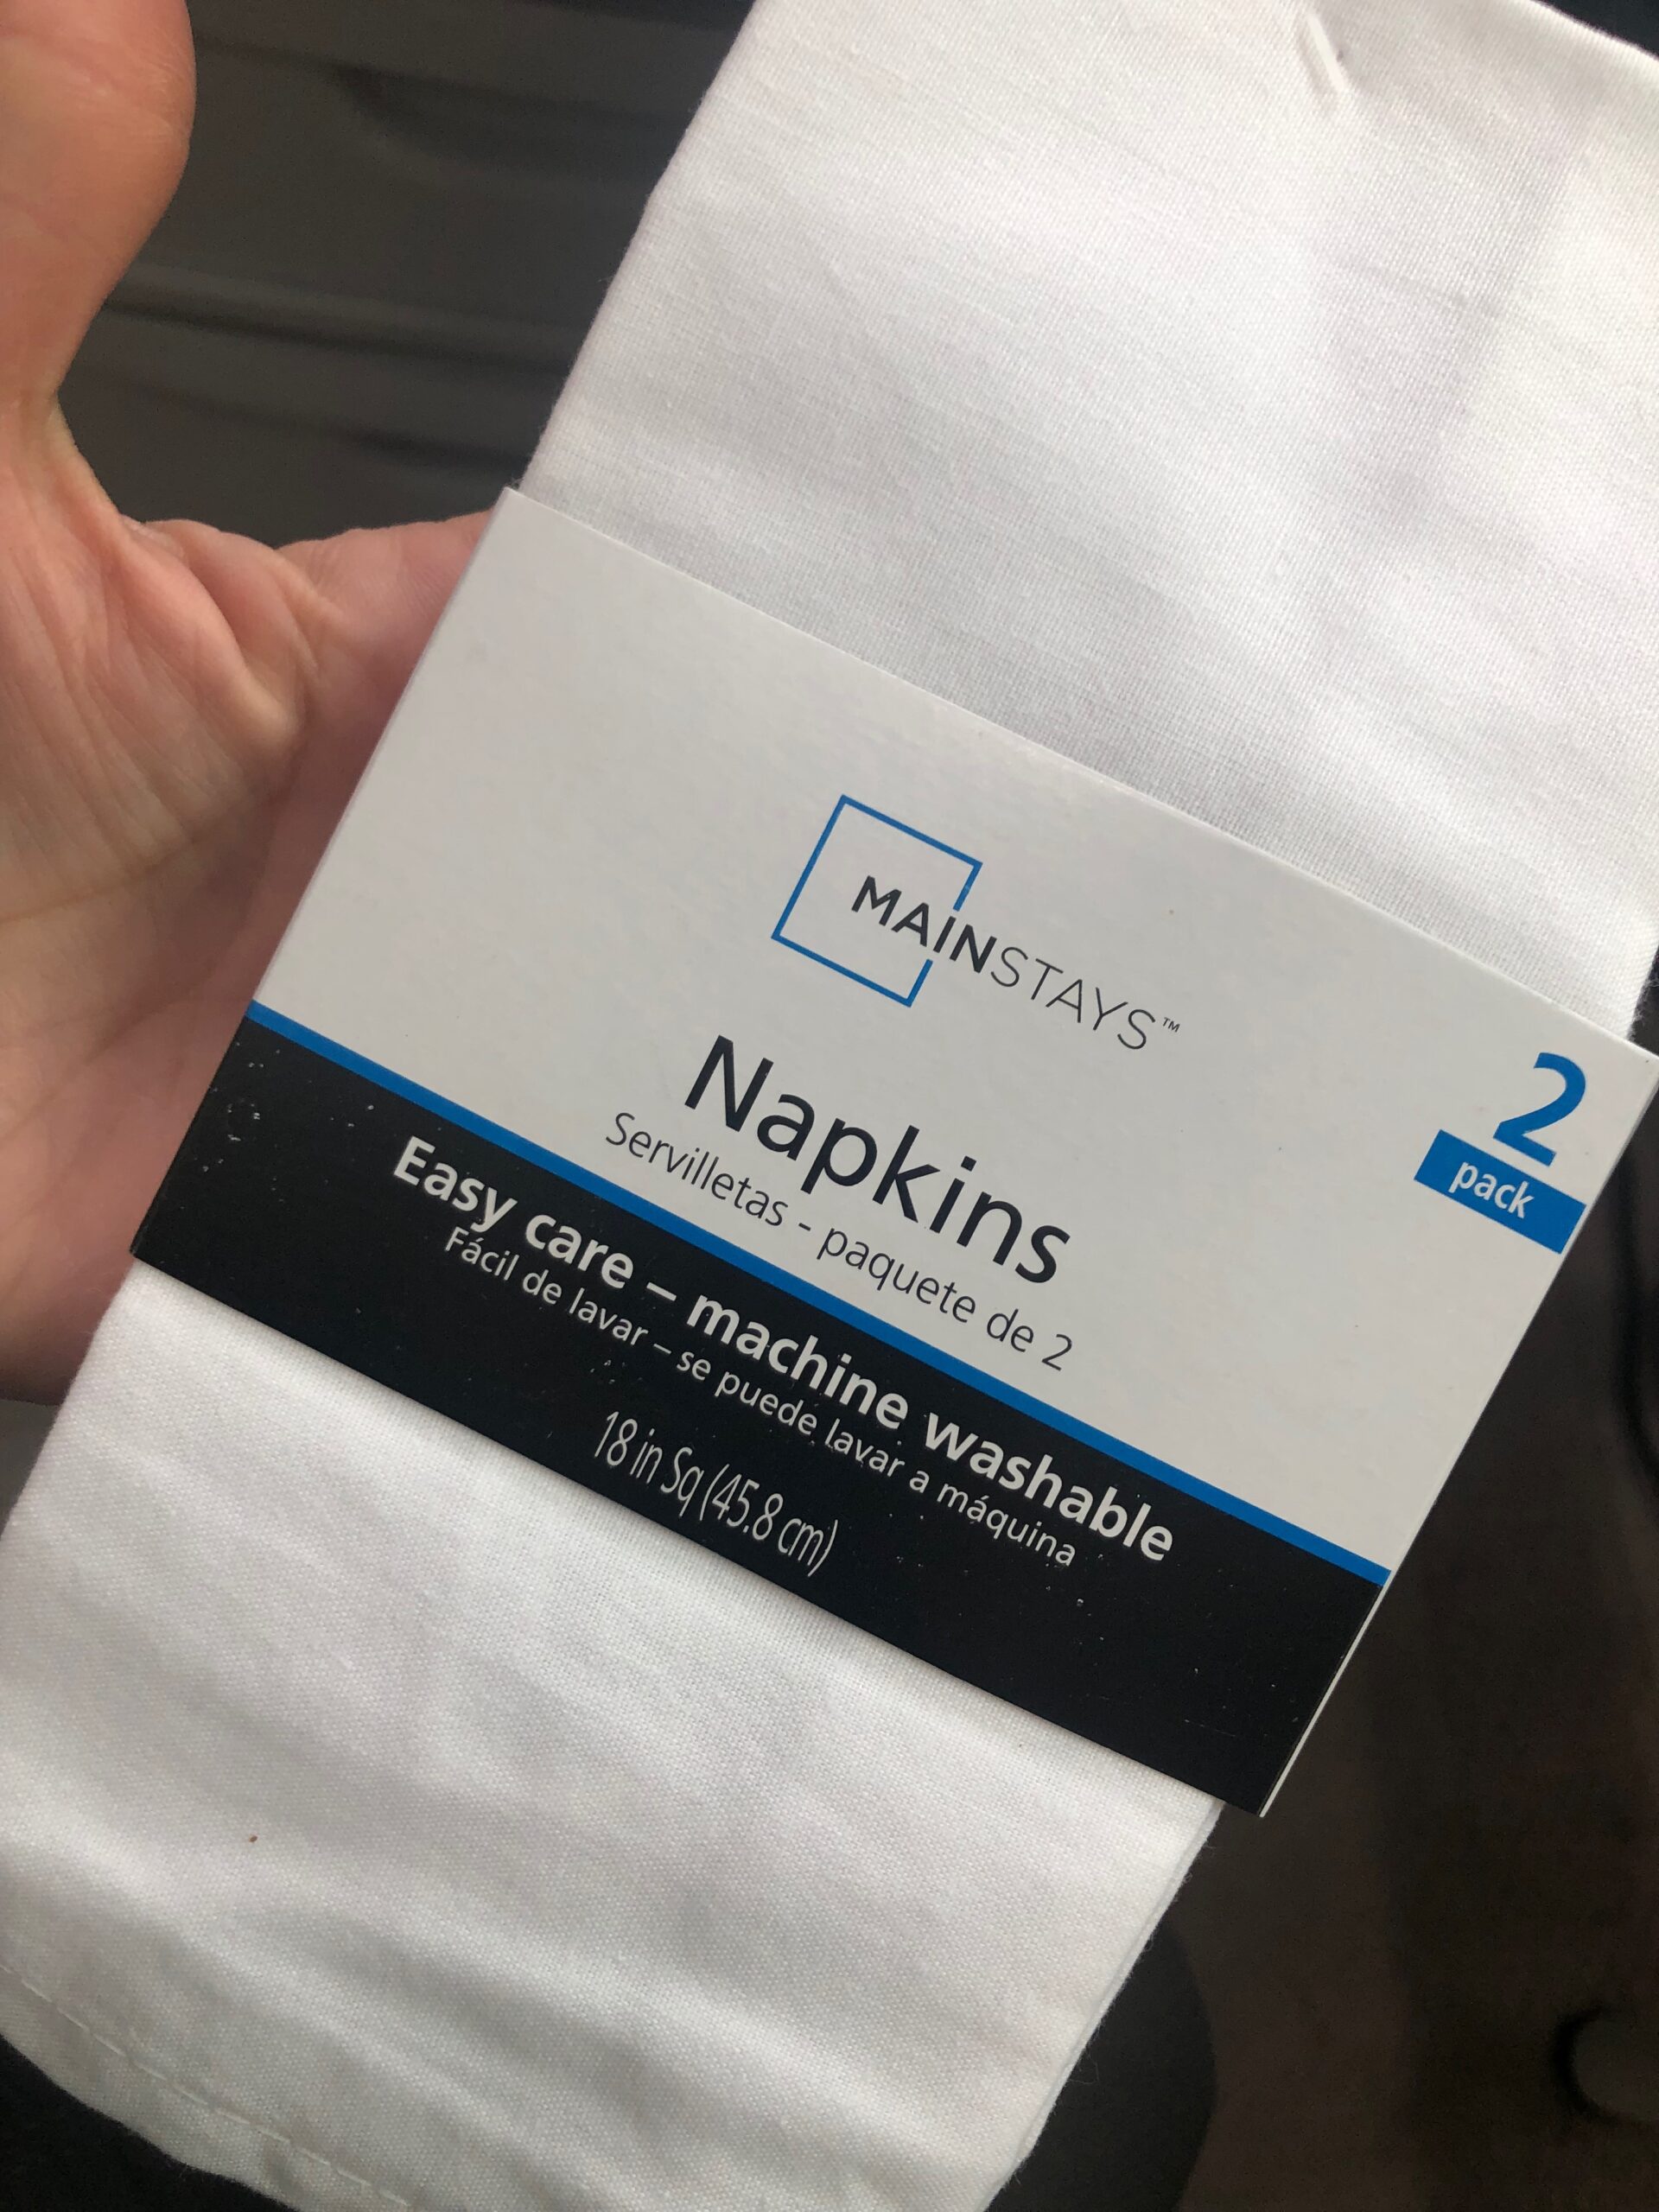
Choose a solid color napkin so the embroidery design pops and is easily readable. If choosing a print instead, make sure the print isn’t too busy to not compete with the threadwork.
DESIGN SPECS
The featured design measures 3.86″ x 2.99″. This is a great size to fit along the corner of a napkin, but a smaller design is also suitable.
If using a smaller design, adjust the placement to fit closer to the corner point.
Depending on how you like to fold your napkins, you may prefer a different embroidery placement. You do you! First, fold the napkin as desired. Then mark the center cross marks of the desired design placement.
EMBROIDERED NAPKINS – THE HOW-TOS
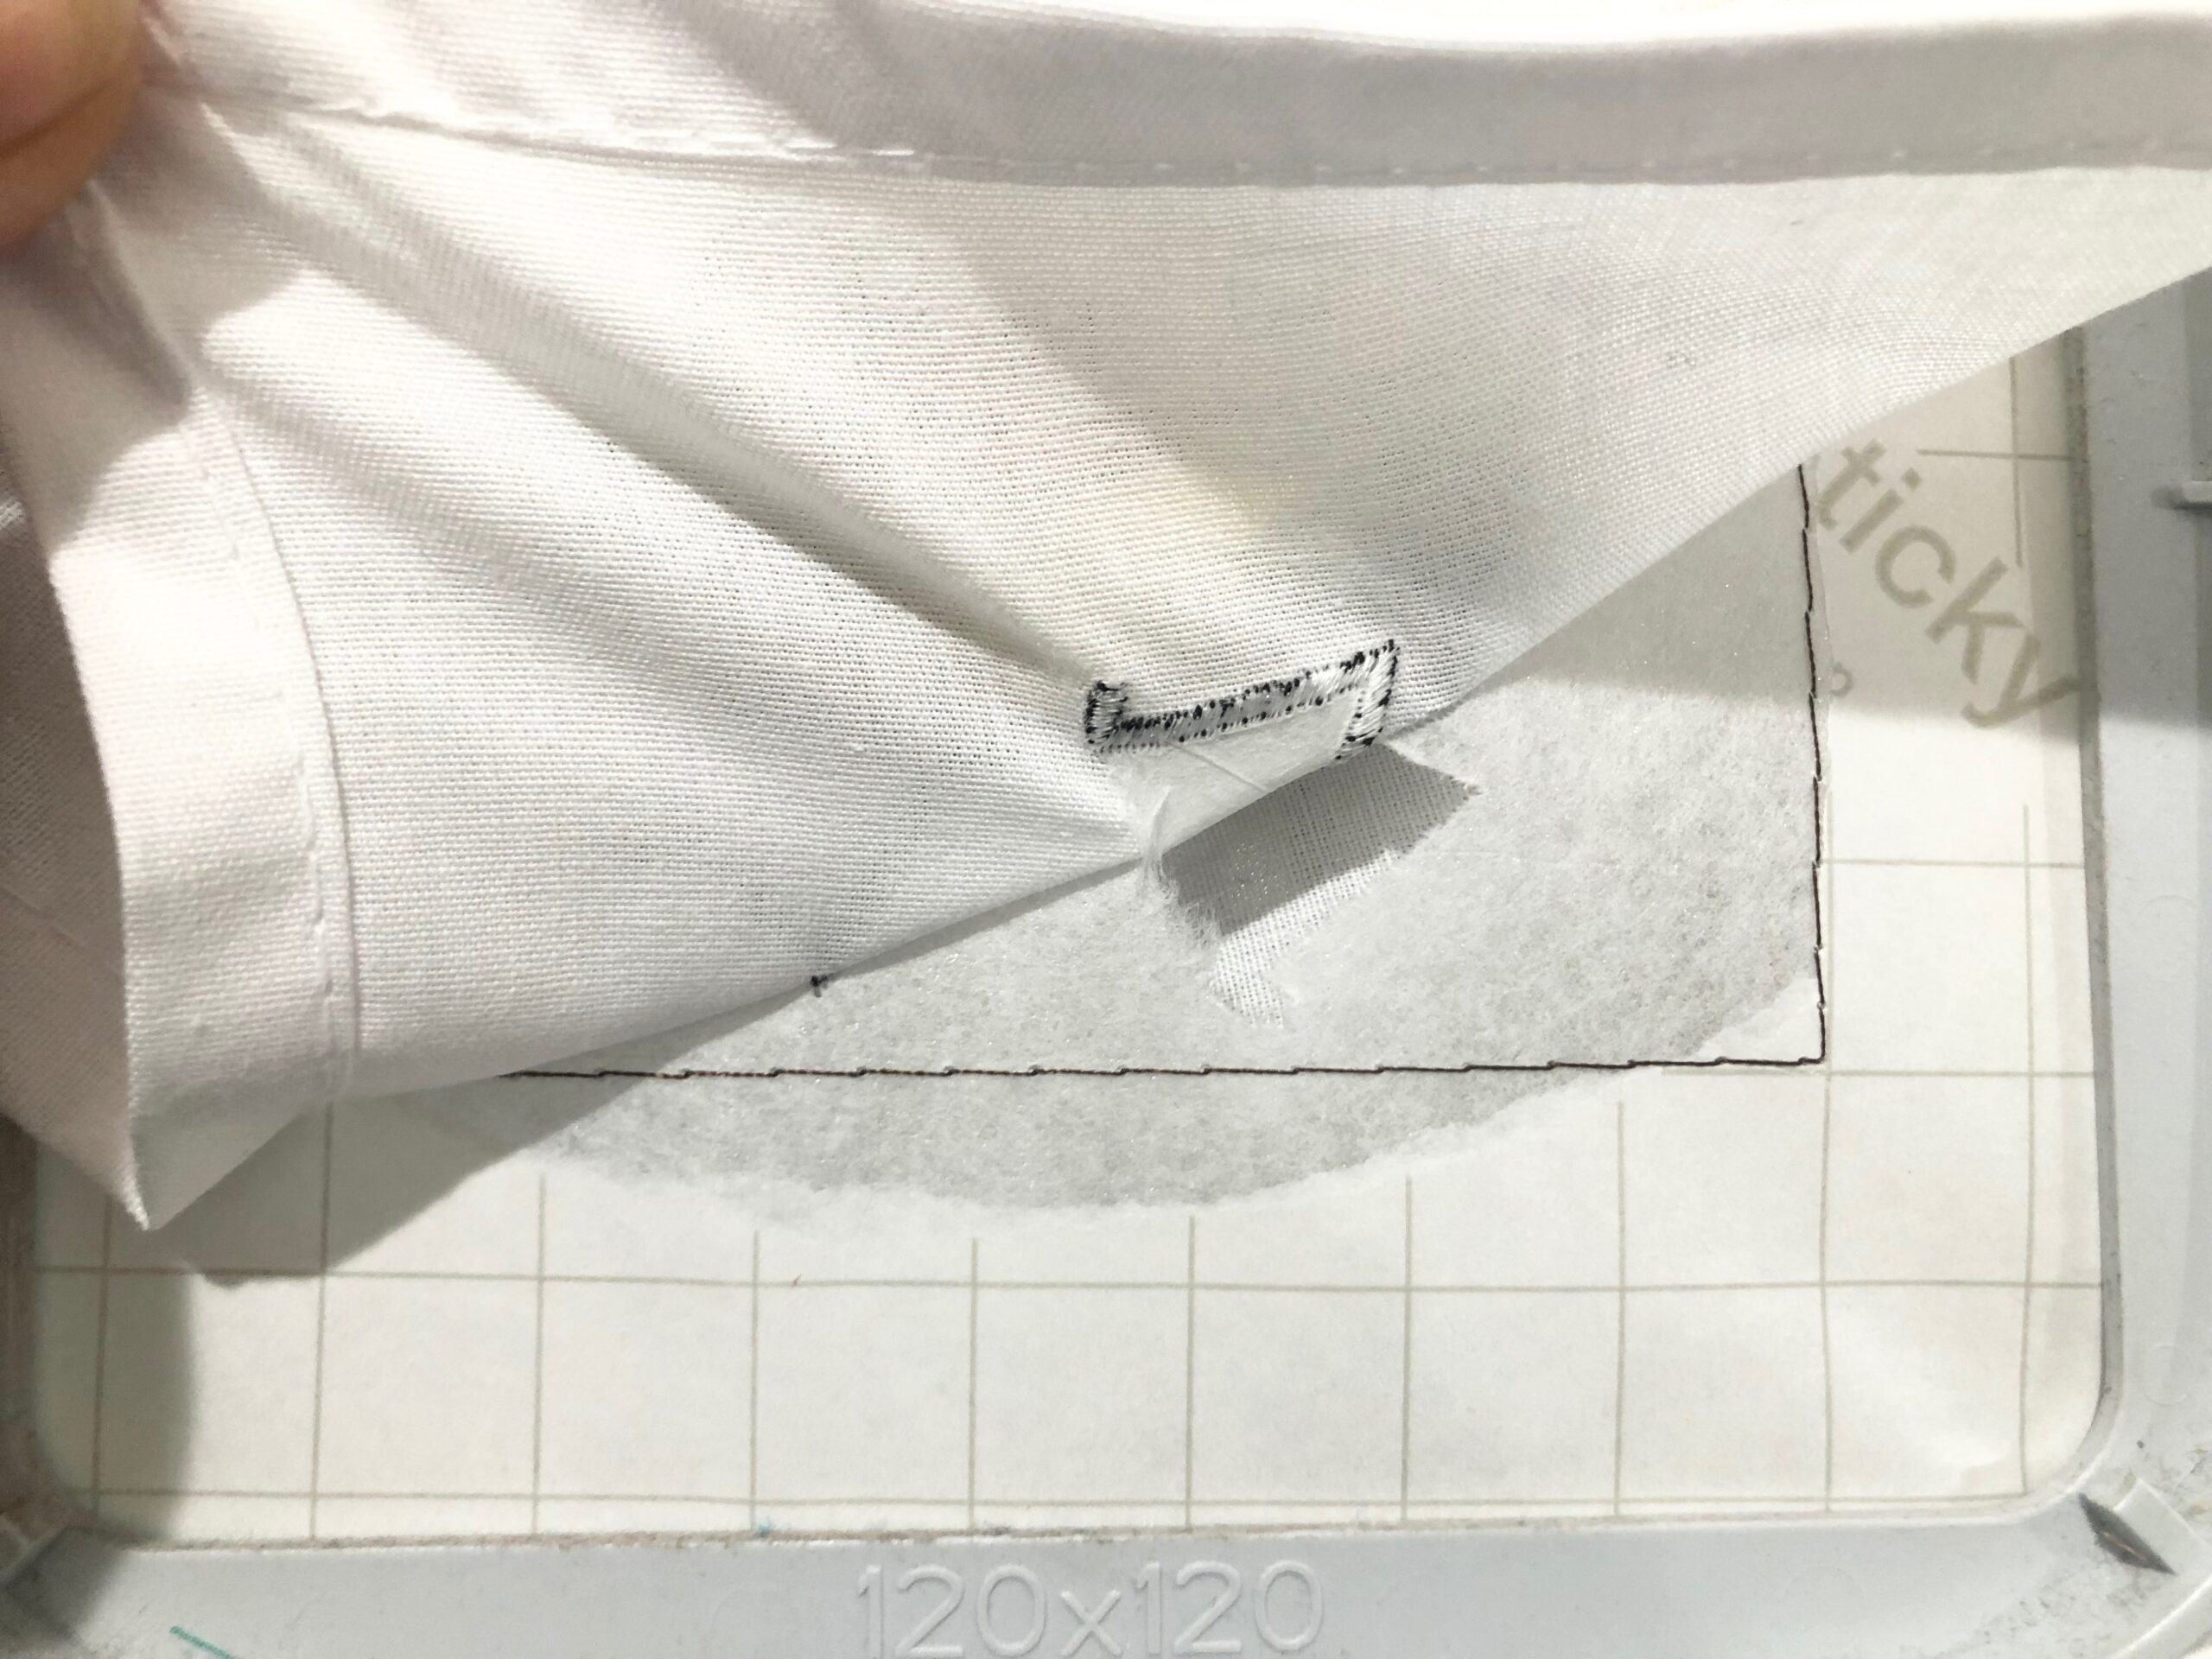
First, hoop a piece of Sulky Sticky+ with the paper side facing up.

Then, score the paper within the inner hoop ring or along the design perimeter, using the Sticky+ Slitting Pen. This tool ensures you only score the paper and not slice through the stabilizer itself.
Peel away the paper backing to reveal the adhesive.
Load the design into the machine. Direct the machine to perform a “design perimeter” function, if applicable. This is a great placement tool for items that don’t fit in the hoop. Stitch the design perimeter directly onto the sticky surface of the stabilizer to make sure enough paper is torn away and provide the placement aid.
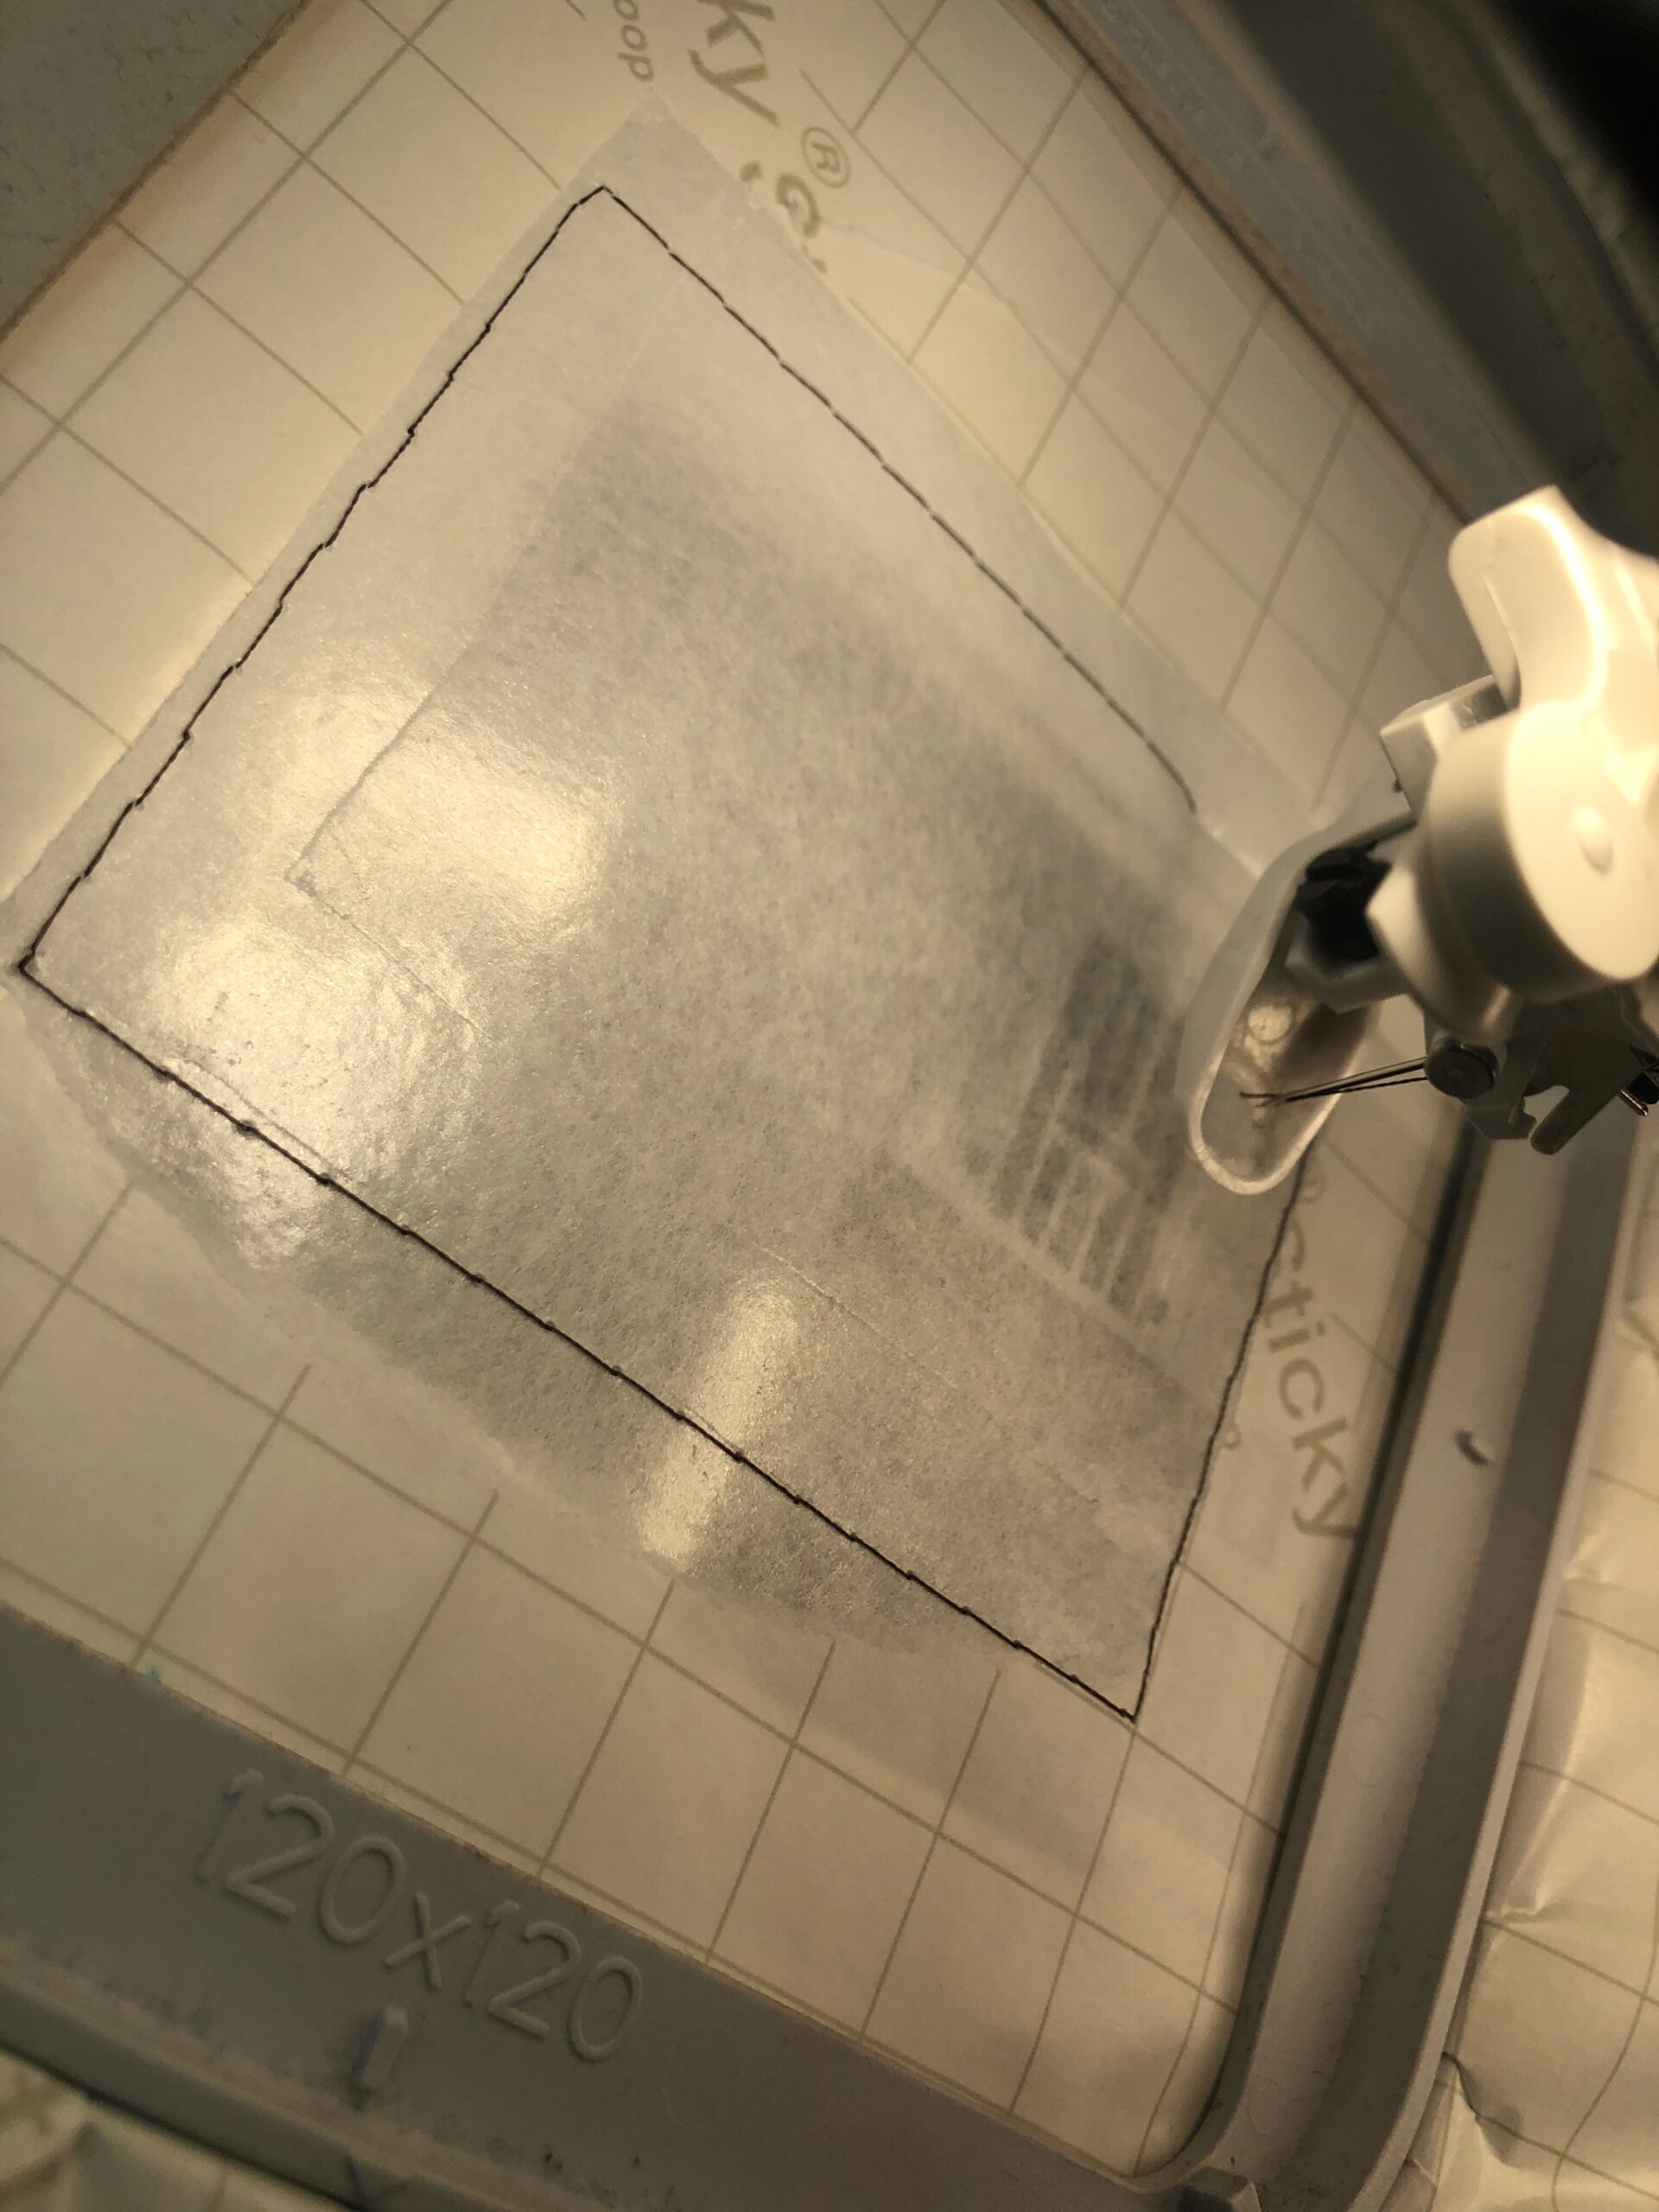
Center the napkin placement lines within the inner hoop ring, aligning the hoop markings with the design markings. And/or use the design perimeter stitching lines to place the napkin as desired. Press lightly with your hand to adhere the napkin to the stabilizer.

EMBROIDERY
Begin the design.
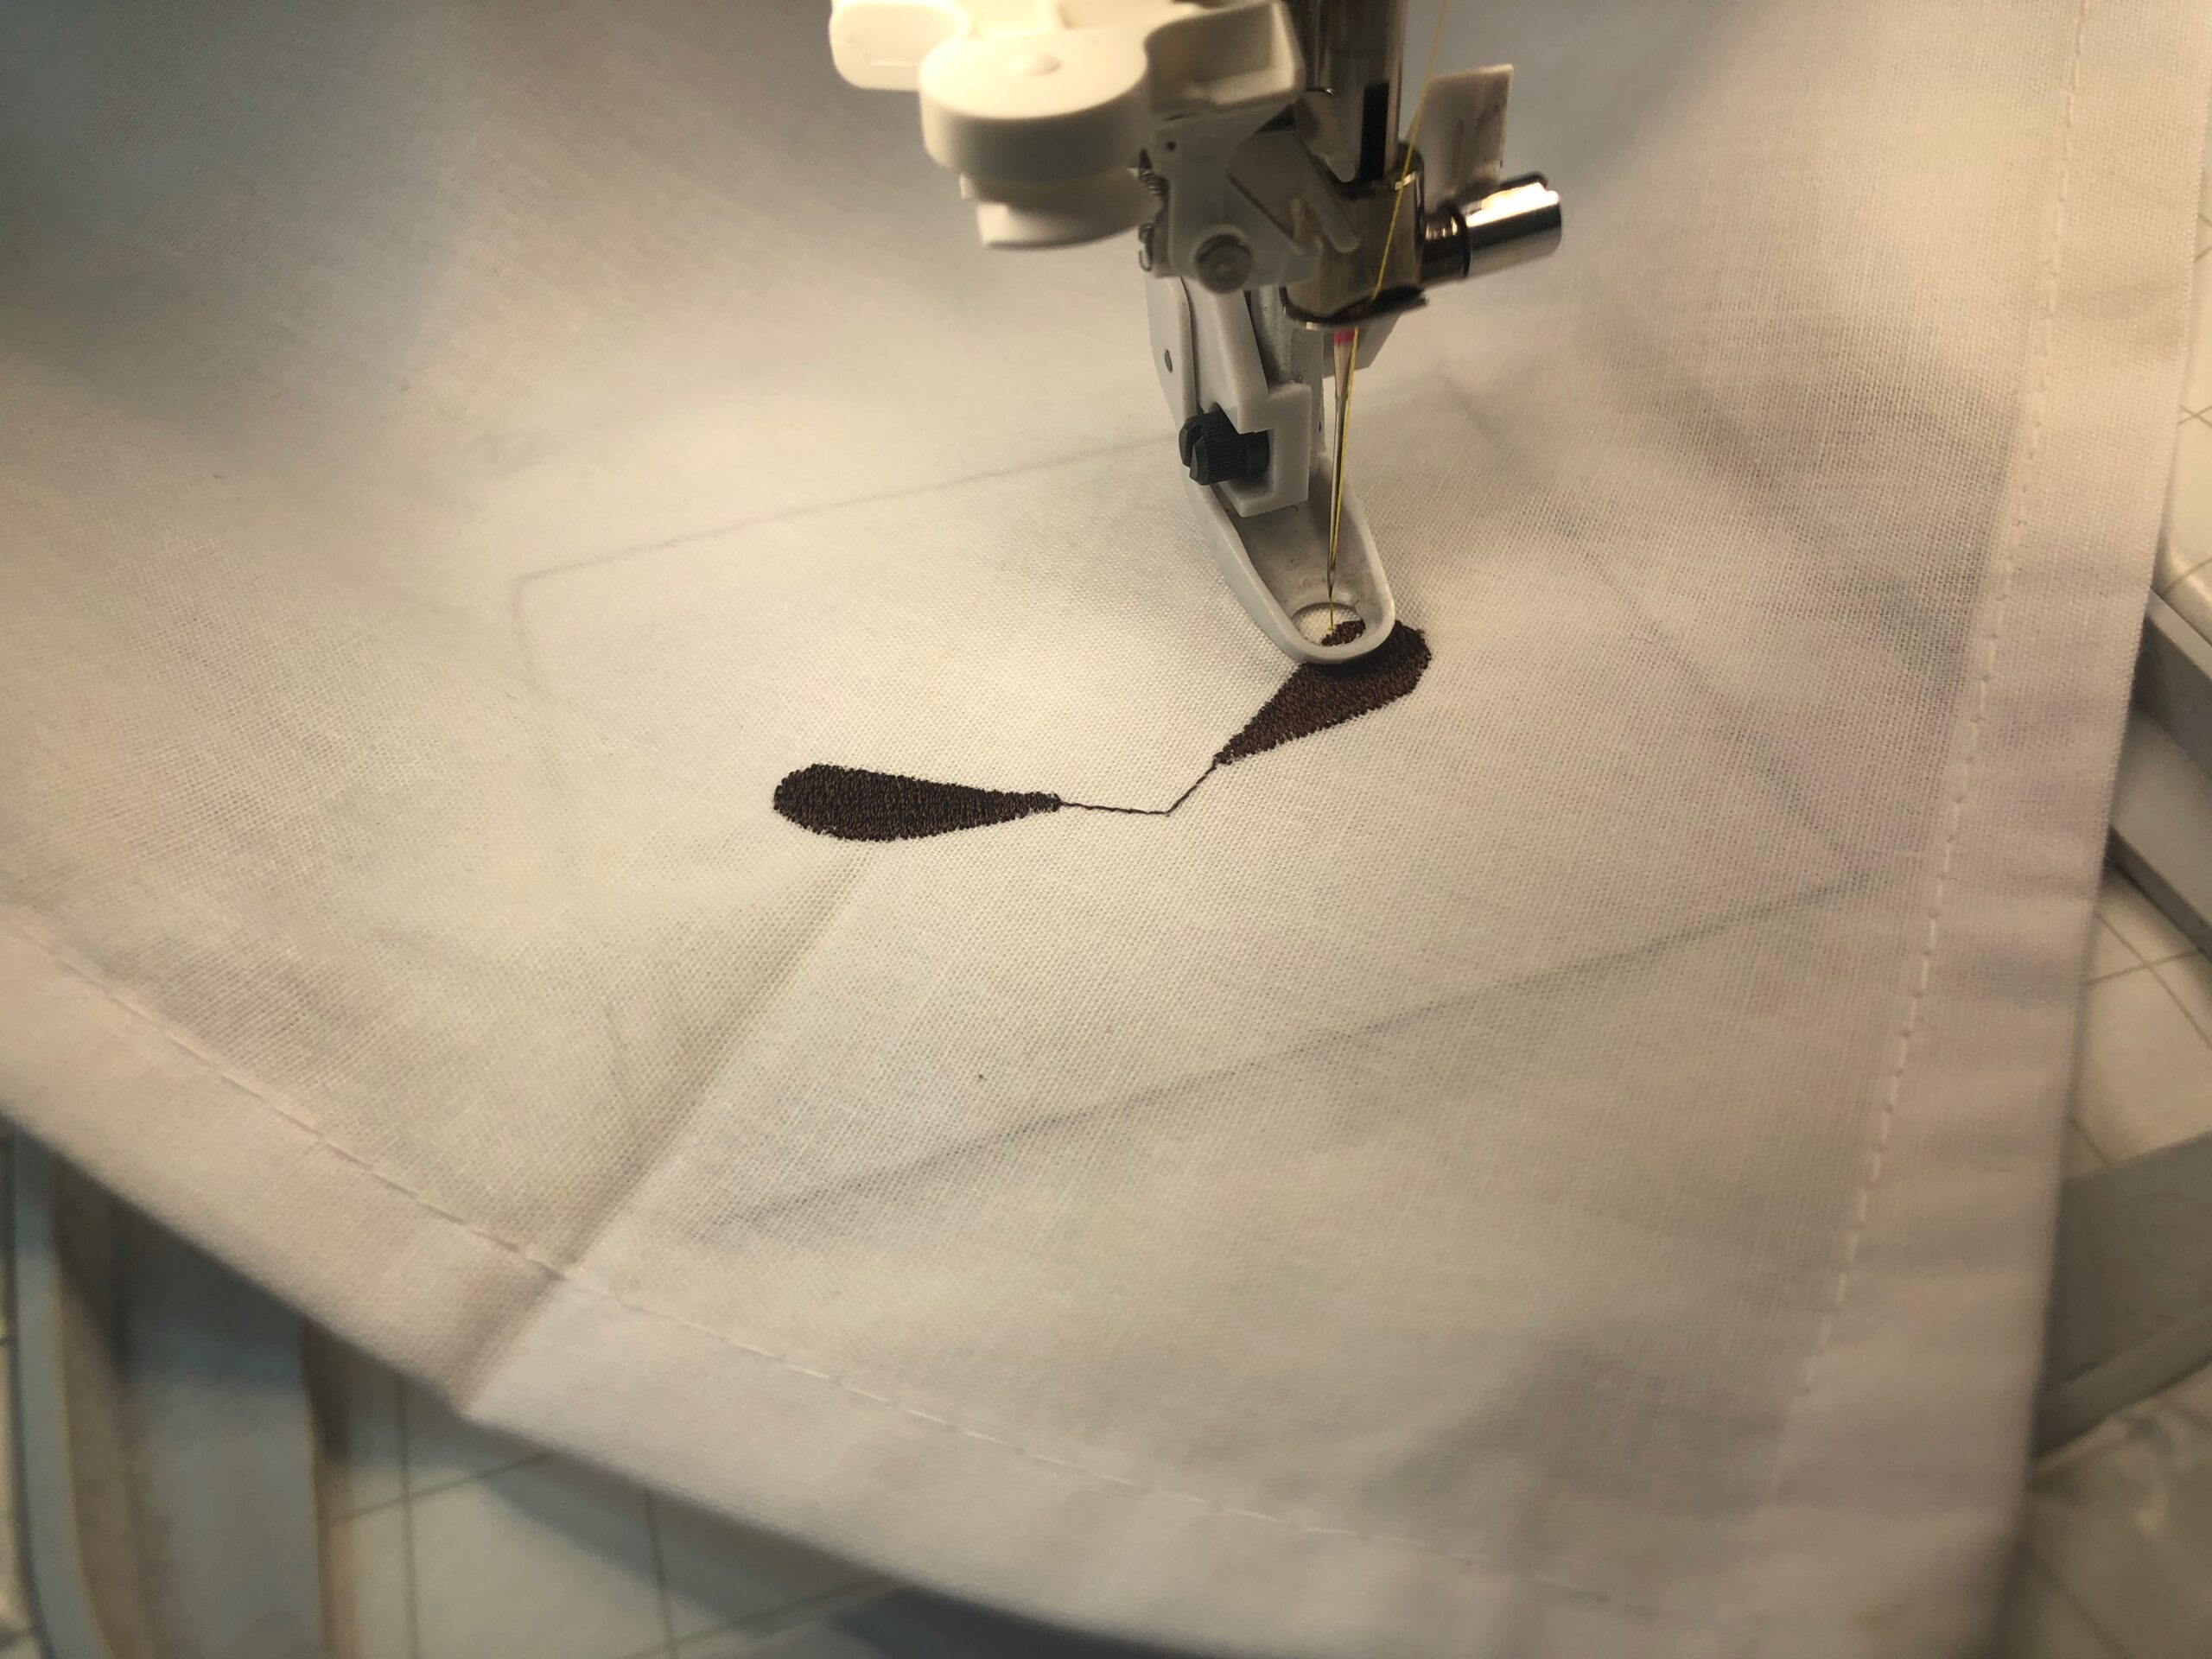
Clip jump threads with each thread change on the napkin front and back. When the machine stops, remove the hoop from the machine, but don’t remove or adjust the stabilizer in the hoop. Turn over the hoop, and then clip the jump threads. Place the hoop back onto the machine and resume the design.

Removing the jump threads on the napkin wrong side results in a much cleaner stabilizer removal process. Plus, it keeps the napkin wrong side looking nice, as it has no lining and will be seen.
When embroidery is complete, remove the hoop from the machine. Then, remove the stabilizer form the hoop and gently tear it away beyond the design perimeter.
Press the napkin from the wrong side to remove any wrinkles caused by stabilizer removal. Keep the iron away from the stitching, if possible.
Repeat to create a napkin set to gift to a friend, party hostess or dress up your next BBQ!


Ellen March
I am the Director of Content for Sulky of America. The former Editor in Chief of Sew News and Creative Machine Embroidery magazines, I hosted Sew it All TV on PBS for nine seasons. I've appeared on It's Sew Easy on PBS, DIY Network's Uncommon Threads, Hallmark's Marie Osmond Show, MacPhee Workshop and more! Come sew with me!