
Fun Embroidered Holiday Apron to Sew, Wear & Give
Embroidered Holiday Apron for You And Yours!
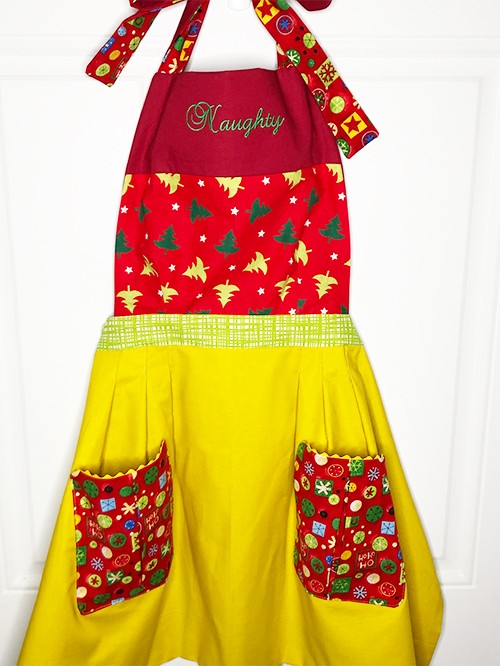
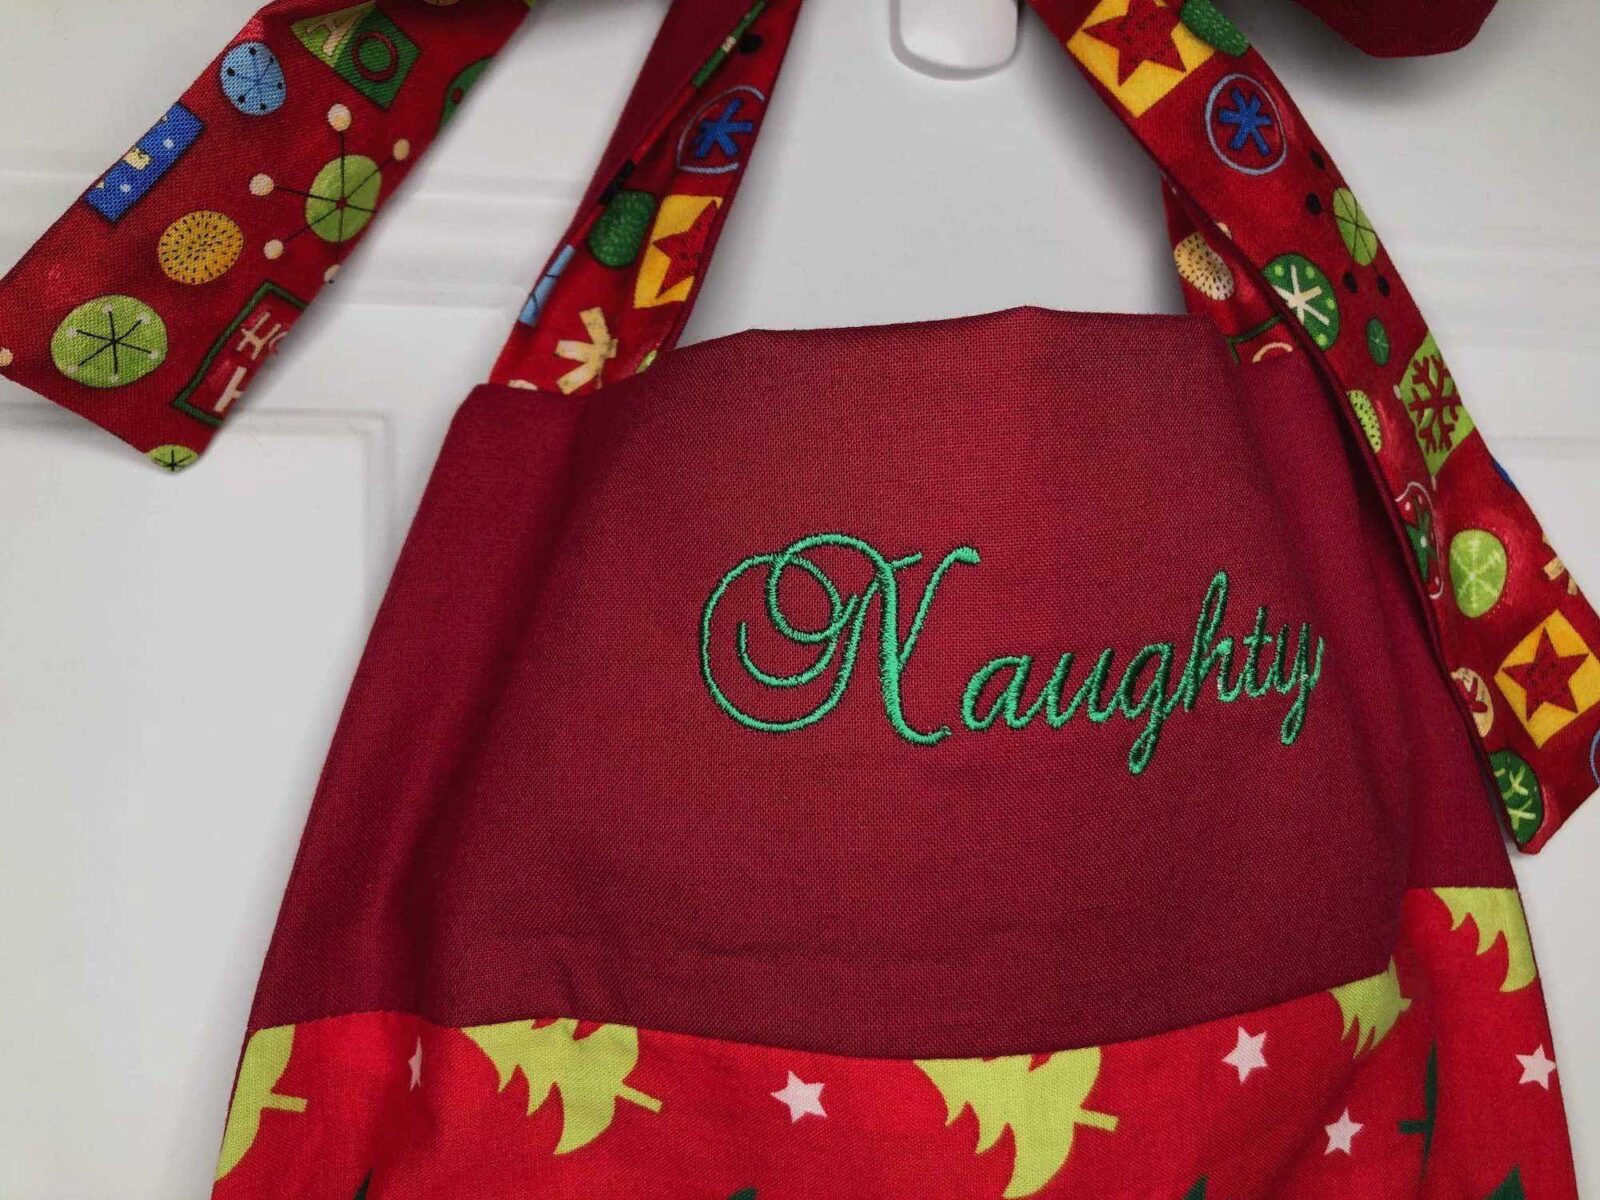
An embroidered holiday apron is a great gift idea to give as the holiday gift-giving season begins. Add a rolling pin, cookie cutter set or cookbook to the gift for a little something special. Or make the embroidered holiday apron for yourself to wear during cookie baking sessions. This embroidered holiday apron is especially cheeky, with “Naughty” embroidered on the front. The design is part of our Christmas Machine Embroidery Palette, which comes with 10 spools of Sulky Rayon and Metallic threads. If “Naughty” isn’t your favorite phrase, go with one of the two “Noel” designs, or combine some of the included snowflakes to make a design unique to you.

SUPPLIES
- Apron Pattern (Such as Pleated Kitchen Confections Apron by Sew4Home)
- Christmas Machine Embroidery Palette (10 spools of Rayon and Metallic threads, plus 20 machine embroidery designs)
- Sulky bobbin thread
- Stabilizer: Sulky Sticky+™ or Sulky Sticky Fabri-Solvy™
- 50 wt Cotton thread
- Fabric & Notions According to Pattern
- Hera Marker
- Needles: 90/14 embroidery & 80/12 universal
- Embroidery software (such as Creative Drawings X1; optional)
DESIGN EDITING
The chosen design has a flourish below the lettering. That little swirl wasn’t going to fit within the Upper Bib parameters, so I needed to remove it using software.
To edit out the stitches, upload the design into the software program of your choice. Go into “edit stitches” mode, if applicable. (This may be called something different, depending on the software brand.) Select the stitches you’d like to remove.


Delete the stitches as a group, making sure to highlight and remove stitches without affecting the portion of the design you want to keep.
When editing is complete, save the design into the format applicable to your machine.


Send the design to your embroidery machine using the Cloud delivery system or a thumb drive.

EMBROIDERED APRON PREPARATION
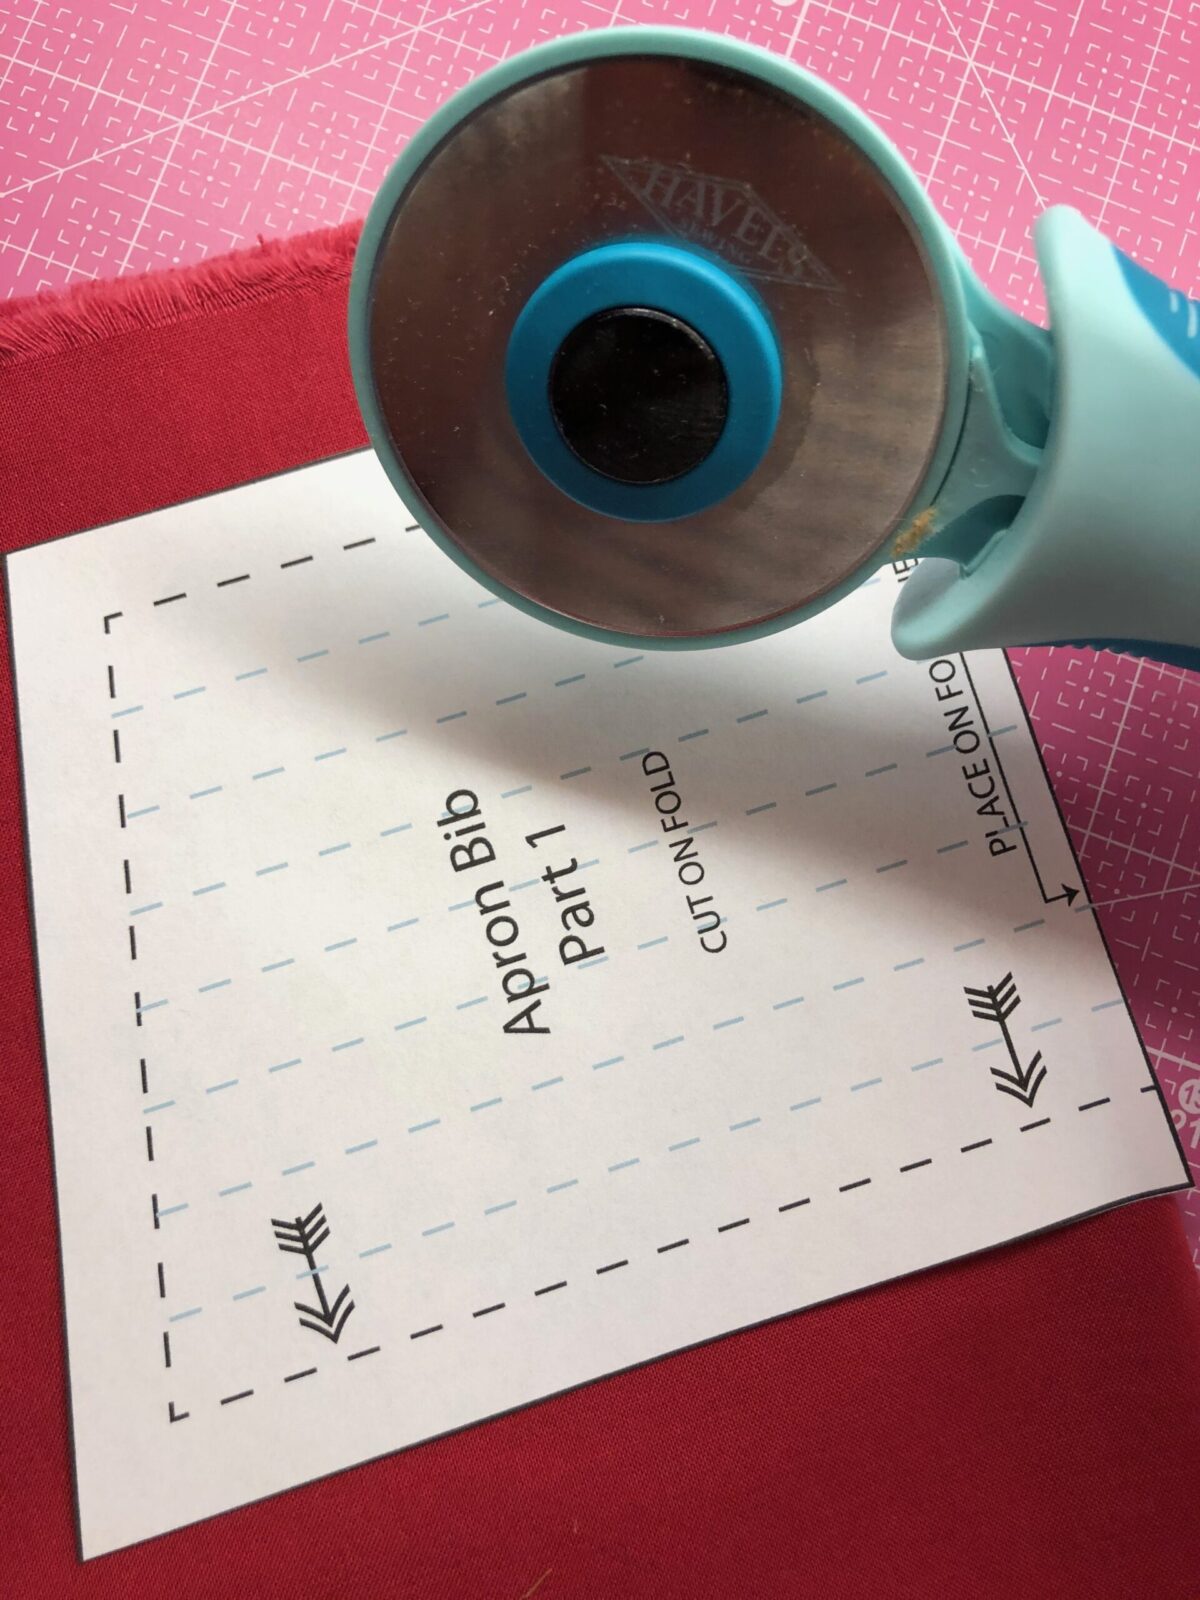
Cut the pattern pieces according to the pattern directions, using a rotary cutter for small pieces. Set aside all pieces except for one Upper Bib.
Load the chosen design onto the machine. The design needs to fit within a 3″x8″ area.
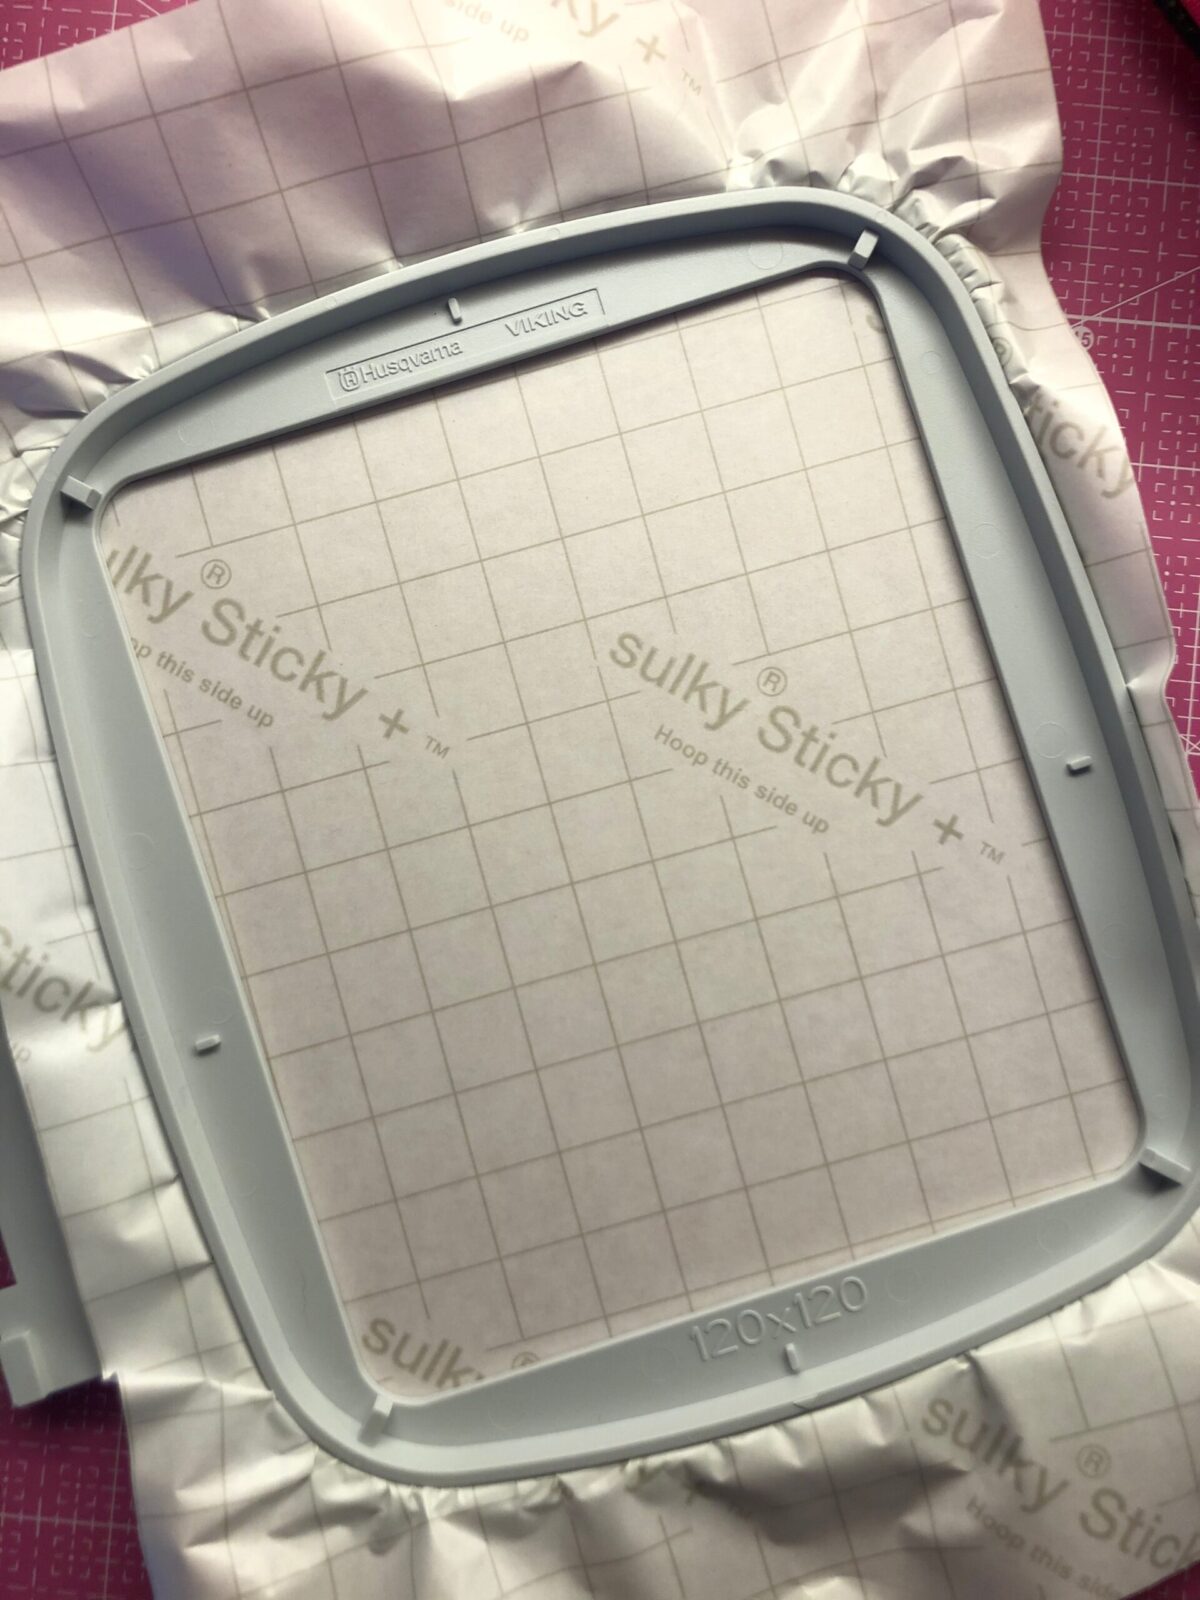
Hoop a rectangle of Sticky+ or Fabri-Solvy stabilizer with the paper side facing up. Score the paper within the inner hoop ring. Then peal away the paper backing to reveal the adhesive.
Center the Upper Bib piece on the hoop, using the hoop center marks as a guide. Fold the piece in half widthwise to aid in placement, and then unfold. Use your hand to smooth the fabric to the stabilizer, sticking it down. Don’t pull or stretch the fabric in any way.

Place the hoop onto the machine. Use the baste-in-the-hoop function to baste the design perimeter and double check the placement. Don’t use thread when basting to avoid having to remove the stitches when embroidery is complete. When using a cotton fabric that’s lightweight, such as the featured quilting cotton, the needle penetrations are visible without the need for thread! Plus, when the stabilizer is removed, the needle holes disappear with the first press.

Once satisfied with the placement, embroider the design. Clip jump threads with each color change, if applicable. For the chosen design, one thread color was used.


When embroidery is complete, trim jump stitches from the wrong side. Remove the stabilizer according to the type of stabilizer used. For Sticky+, tear away the stabilizer beyond the stitching. For Sticky Fabri-Solvy, wash away the stabilizer in running water until completely dissolved; let dry. Press the Upper Bib from the embroidery wrong side without steam.
EMBROIDERED HOLIDAY APRON FINISHING
For the featured apron, or any apron that has pleats or darts, use a Hera Marker to easily transfer the markings without using invisible or water-soluble ink. Run the Hera Marker along the pattern markings, straight through the pattern and onto the fabric. The Hera Marker leaves a temporary “fold” mark in the fabric, which is easily pressed out after the seam is sewn.


If desired, add more embroidery to the apron pockets or along the front lower edge.
When the pattern pieces are embellished to your liking, finish constructing the apron by following the pattern guidesheet. The pockets with box pleats give a nice finishing touch to this apron. I only used rickrack along the upper edge of the pockets, rather than along the entire pocket perimeter.

Note: For the featured apron, many fabric prints were used from my stash. In order to obtain the yardage needed, some were pieced prior to cutting out the pattern pieces. The fabric considerations are merely a suggestion! Have fun with it and delve into YOUR stash to create an embroidered holiday apron that’s fun and unique.
Featured sewing machine: Husqvarna Viking Designer Epic 2
Featured rotary cutter & Rotary Cutting Mat: Havel’s Sewing.

Ellen March
I am the Director of Content for Sulky of America. The former Editor in Chief of Sew News and Creative Machine Embroidery magazines, I hosted Sew it All TV on PBS for nine seasons. I've appeared on It's Sew Easy on PBS, DIY Network's Uncommon Threads, Hallmark's Marie Osmond Show, MacPhee Workshop and more! Come sew with me!


