
This series is written by guest blogger, Pamela Cox. Pamela is an expert embroiderer, designer, digitizer and all around wonderful girl! We are so happy to have her contributing to the Sulky Blog!
Fall is here, bringing cooler temperatures and the kids are back in school!
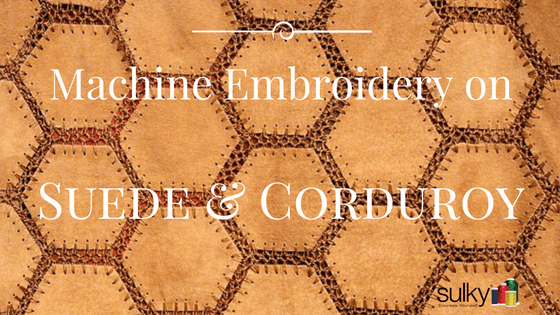
Two of my favorite fabrics for this season are suede cloth and corduroy. Although one might think they are vastly different fabrics, they actually have a lot in common, especially when it comes to machine embroidering.
Both materials are “nap fabrics”; meaning their surface has a texture which reflects light. Different shades of color are evident depending on whether the nap is “down” (surface feels smooth when running a hand over it) or “up” (surface feels slightly rough to the touch). There is no “right way” to the directional use; however, normally for garments, it is best to keep the “nap” (hems of pattern pieces) all facing in the same direction.
Corduroy features rows of tufted fibers with the base fabric showing in between. These parallel rows can be very close together, hardly showing the channel in between the rows (pinwale corduroy), or ranging into prominent spaces in between (wide-wale corduroy). This durable fabric can be found in a variety of colors and prints making it a favorite for children’s clothing and tote bags.
Suede cloth is made from synthetic fibers. The nap depth can vary, usually with a more expensive cloth having a heavier feel, but the surface is fairly short. It is easy to stitch on, and is used in everything from fashion and accessories to home dec projects.
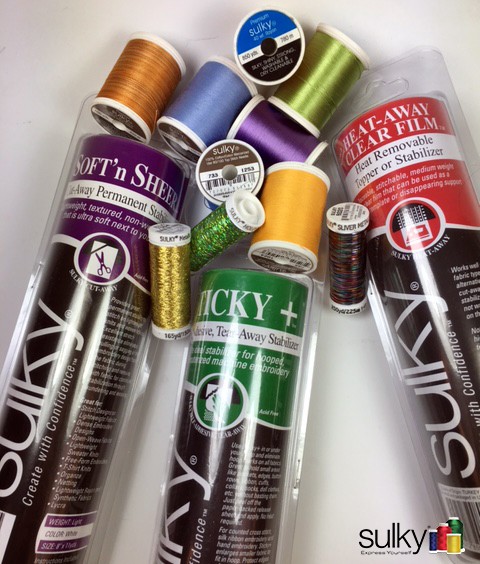
Most types of machine embroidery can be successfully stitched on either surface. Keep in mind that if the surface nap is somewhat dense, and a line design is chosen, it might be best to stitch the design in a heavier thread such as Sulky® 30 wt. Cotton Thread, or even in one of the many 30 wt. Cotton Blendables®. Filled designs will always work, while an applique design offers the opportunity to introduce contrasting textures. It’s all good! I’ll show you a line design further down in the blog.
Fabric of this nature should not be secured directly in the embroidery hoop since the frame will leave marks by crushing the nap, even if only temporarily marred. These marks can often be removed by hovering a steam iron over the fabric’s surface while brushing the nap. It’s simply better to avoid the gamble, especially when Sulky provides so many choices to ensure successful machine embroidering.
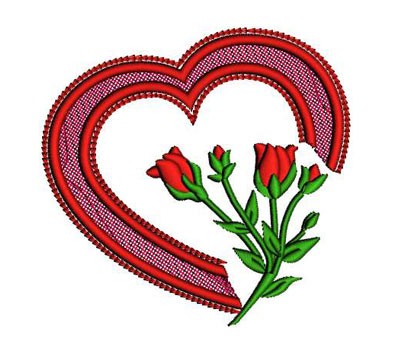 Download design #583 – Hearts and Roses from the Sulky Embroidery Club. Transfer it to your embroidery machine. With the paper still in place and facing up, hoop a piece of Sulky® Sticky+™ Tear-Away Stabilizer into the proper sized hoop.
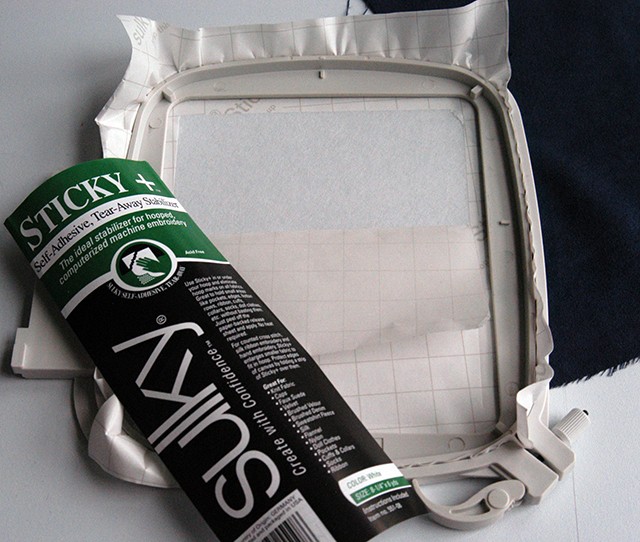
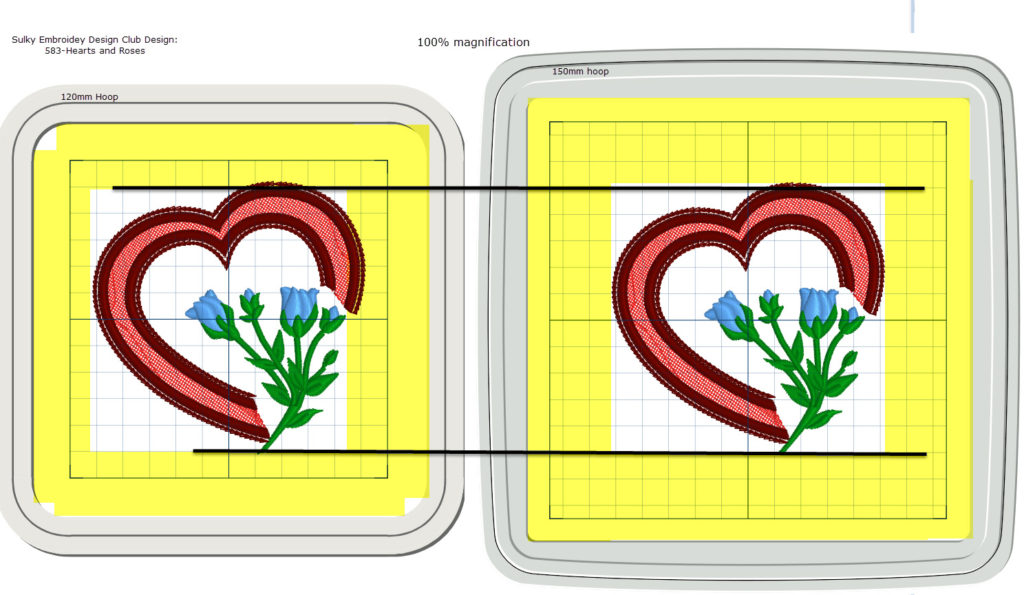
Please keep in mind that although a 120mm square hoop will accommodate the size of the design, if a slightly larger hoop, such as a 150mm square hoop is used, additional “sticky surfaces” can be exposed which will also create additional surface retention, or security, in holding the fabric in place during the stitching process. I know this is contrary to the “smallest hoop possible” rule, but for good reason.
Smooth a piece of suede cloth over the Sticky+ Stabilizer. A top stabilizer is usually recommended when embroidering on a textured surface. In this case, the suede nap is not deep; plus the chosen design is fairly dense. The open lace work within the heart frame will only appear to be “inset” even more if it is allowed to “sink into” the fabric.
Embroider the design. 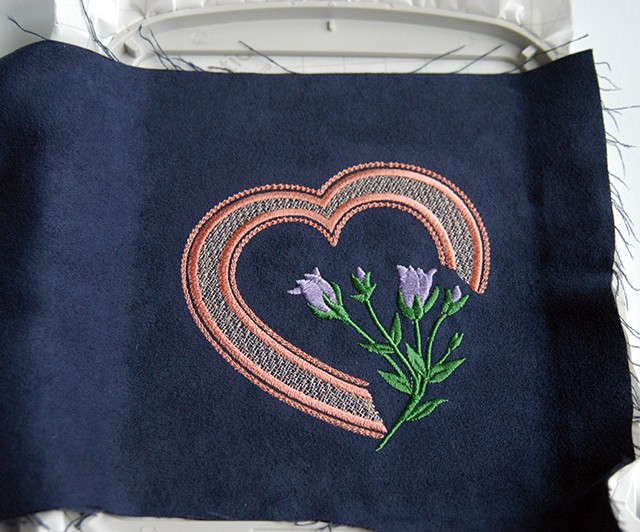
Before releasing the tension on the hoop, gently pull the suede fabric away from the sticky surface towards the design. 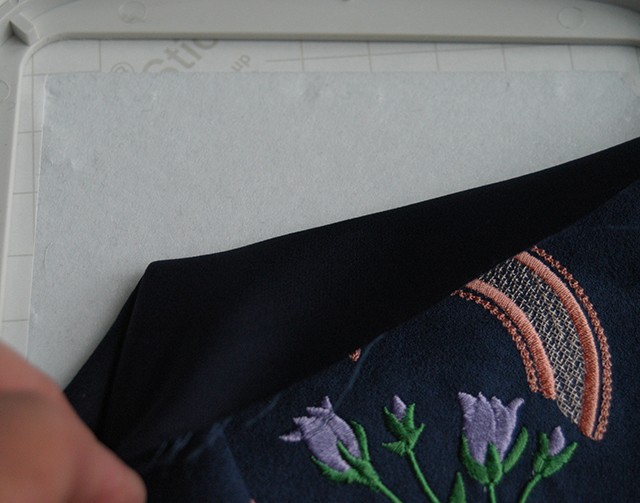
Cut large excess areas of the stabilizer away. On a flat surface, hold the stitching down with your thumb and gently tear the stabilizer from the outside of the heart.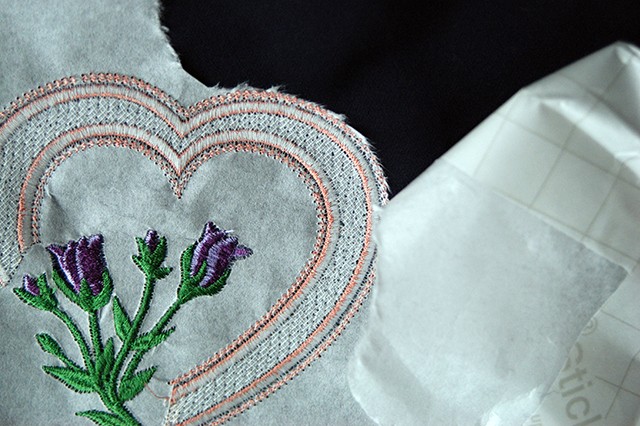
Sulky Sticky+ is easy to remove from inside the heart frame as well. Begin by lifting an area along the edge of a solid element within the design such as a flower or a leaf and work out towards the heart.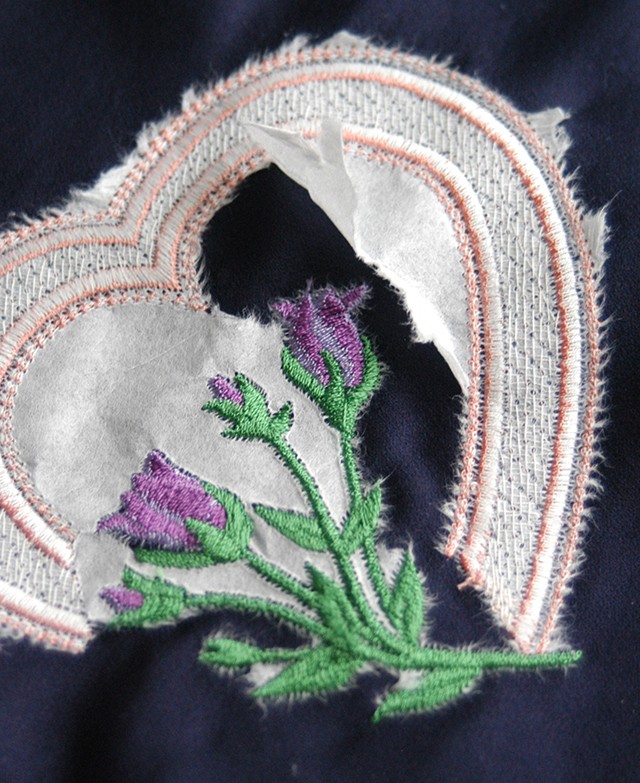
The final result is stunning! Not only was this a beautiful design, but the contrast of silky Sulky 40 wt. Rayon Threads to the rougher surface of suede only enhances the best in both materials.

Finished project.
This shoulder bag is made from suede cloth and features a collection of designs by Graceful Embroidery, “Smoky Mornings” available under the “Elements” category on www.gracefulembroidery.com.
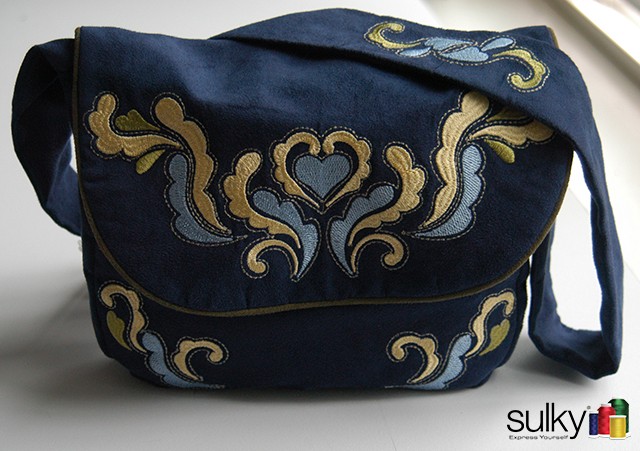
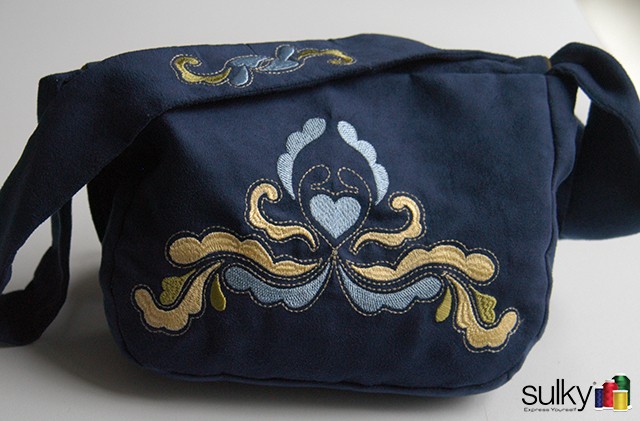
Notice that not only was an embroidery design stitched on the shoulder strap, but a contrasting-colored piping edges the front flap. Piping, although an “extra step”, is not hard to do. Sometimes little details provide the difference between a “project” and a “treasured gift” and a designer look.
Corduroy does have a more textured surface and, therefore, a top stabilizer – either Sulky Heat-Away Clear Film™ (my choice) or Sulky Super Solvy™, is recommended. Both tear away very easily from the outer edges of designs; while smaller, harder-to-remove areas “disappear” by using either heat of an iron (Heat-Away) or water/washing (Solvy).
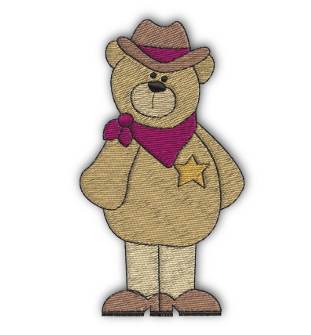 Download #830-Cowboy Bear, a free design from the Sulky Embroidery Club: www.sulkyembclub.com
Transfer it to your embroidery machine. I chose to use Sulky® Soft ’n Sheer™ Cut-Away Stabilizer in the hoop. (Sulky Sticky+ or Sulky Tear-Easy™ are also viable options.) Since a top stabilizer needs to be “secured” to the fabric, the basting function, available on many embroidery machines, secured the fabric and top stabilizer to the hooped one. 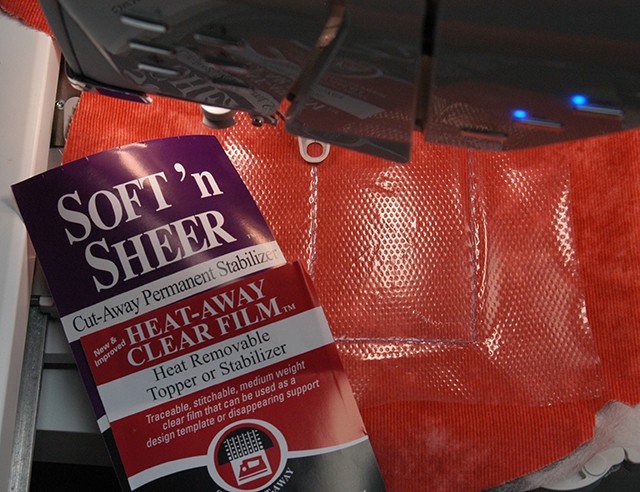
Once the embroidery was completed, the Heat-Away Clear Film was gently torn from around the edges of the filled design. 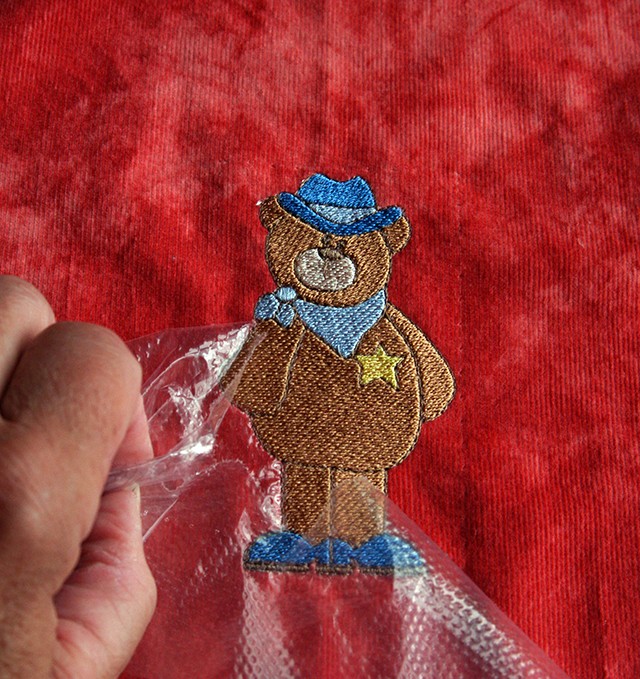
Soft ’n Sheer easily cuts away from the backside of the design using a small sharp pair of scissors. It would not have to be trimmed as closely as I chose to. But it looks pretty on the back this way. 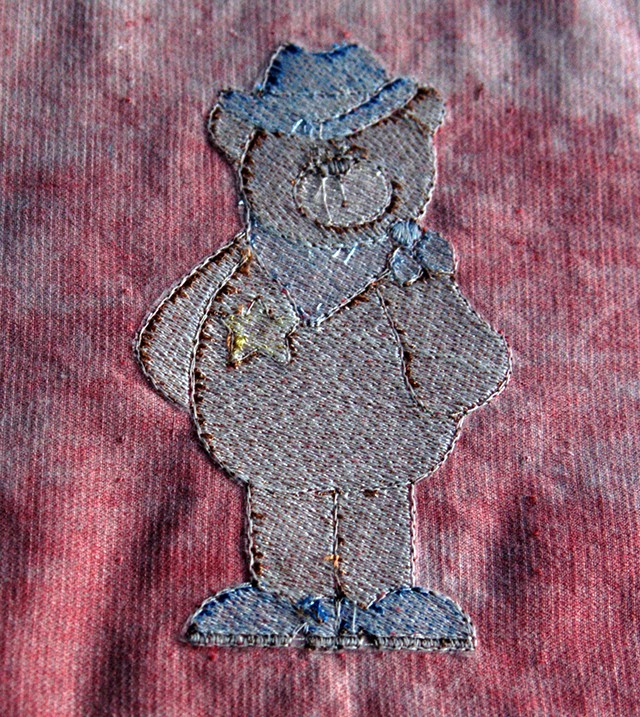
This embellished piece of corduroy is now ready to have a yoke pattern piece centered over the design and used for a pair of children’s overalls! It is always advisable, and just simply fun, to experiment trying different combinations of thread, fabric, stabilizers, plus types of embroidery designs.
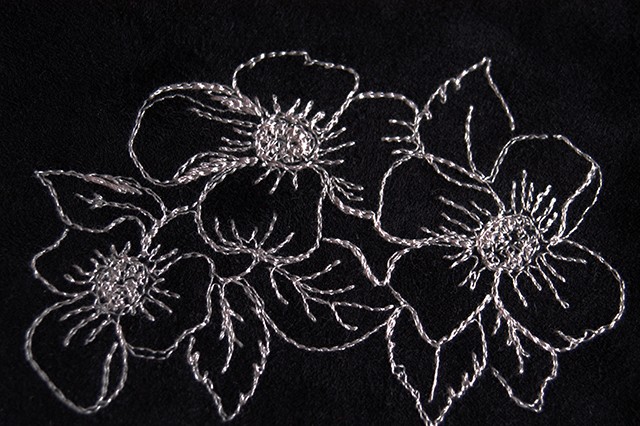
Securing Sulky Soft ’n Sheer™ in the hoop, basting suede cloth to the surface, omitting any top stabilizer and stitching #875-Dogwood (available from Sulky Embroidery Club) in Sulky 30 wt. Cotton Thread produced this wonderful result!!!
A couple of “extra” steps were taken during the stitching process:
- The speed of the machine was reduced by three-fourths to reduce friction when stitching with the heavier cotton thread.
- A Microtex Sharp Needle 70/10 was used during the basting function of securing the fabric to the stabilizer, and a 40 wt. Rayon Thread was used for the basting process.
- The needle was then changed to a 100/16 Topstitch Needle for the embroidery process with the 30 wt. Thread.
- The stitching was monitored. If any “lint” dropped onto the stitching surface, the machine was stopped and a small piece of painter’s tape was used to clean the stitching surface.
This beautifully “sketched design”, stitched on an elegant suede fabric, featuring a seemingly hand-embroidered texture, was created by using Sulky 30 wt. Cotton Thread. It would be a welcomed accent on so many projects!
Don’t be afraid of trying new and unusual techniques, supplies, or combinations thereof.

How did you clean up the edges on the first tear away project? Brush with water?
It tears away pretty cleanly from the wrong side, but does leave a little bit behind. This doesn’t change the hand of the material, as it’s pretty heavy weight. It is not a water-soluble stabilizer, so it won’t disappear with moisture.