Make it Personal
Machine Cross Stitch Journal Cover
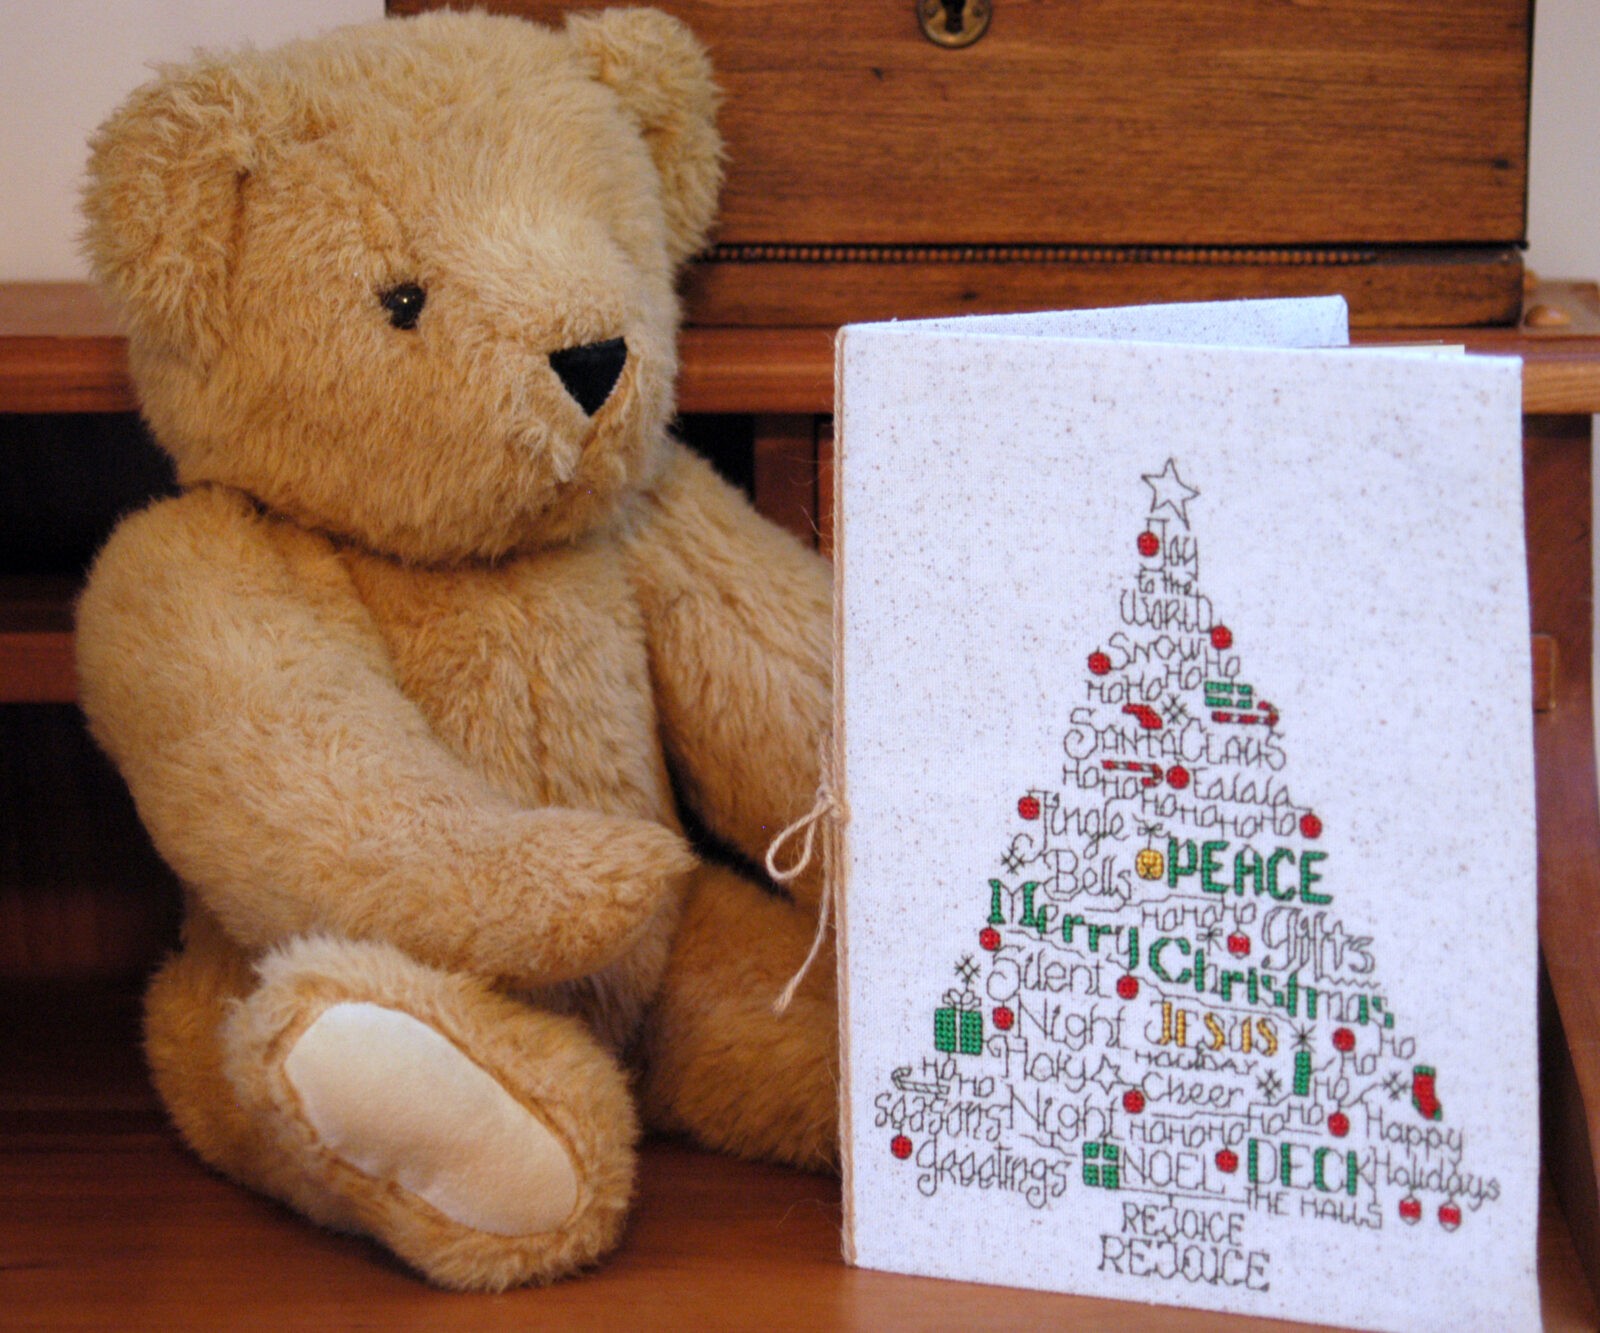
Finished book size: 8-3/8” x 6-5/8”

This series is written by guest blogger, Pamela Cox. Pamela is an expert embroiderer, designer, digitizer and all around wonderful girl! We are so happy to have her contributing to the Sulky Blog!
When my girls were little, I volunteered in their classrooms. I remember an elementary school project, which I was so fortunate to participate in: Helping young authors turn pages of their original stories into a book!
Together, we wrapped cardboard in gift wrap, folded the story pages in half, and hand-stitched down the center to bind these precious thoughts into history. To this day, I have my daughter’s book and she is now 35 years old!
Preserving thoughts…documenting events…capturing expressions…are well appreciated by us in simply remembering special times. However, it is invaluable for our future generations in understanding the lives of the loved ones who came before them.
Sulky’s new “Wordplay” designs unleash a flood of inspirations! These whimsical word-play designs, created by Ursula Michael and digitized by Marcia Manning of Lickity Stitch, manage to capture the best expressions within each theme! And there are usually a couple of designs to choose from within a theme. Plus, the designs are applicable for a variety of projects besides the featured book!
Tote bags:
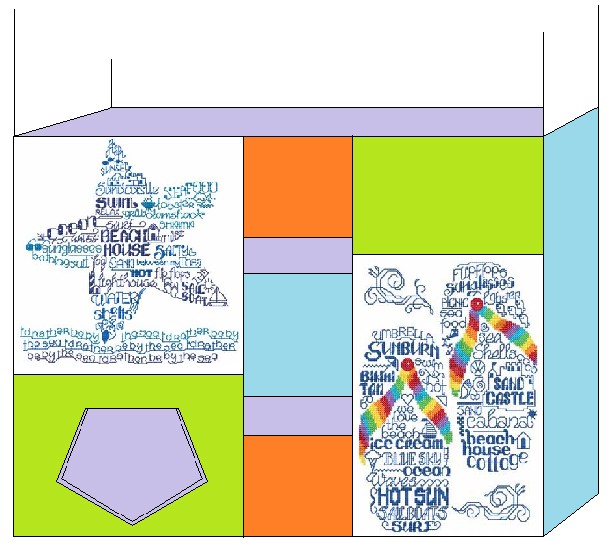
Throw pillows:


Even though I chose to do a “Christmas Book” – tis the season – many other designs offer unique book cover ideas to document a variety of notable occasions.

So let’s get started!
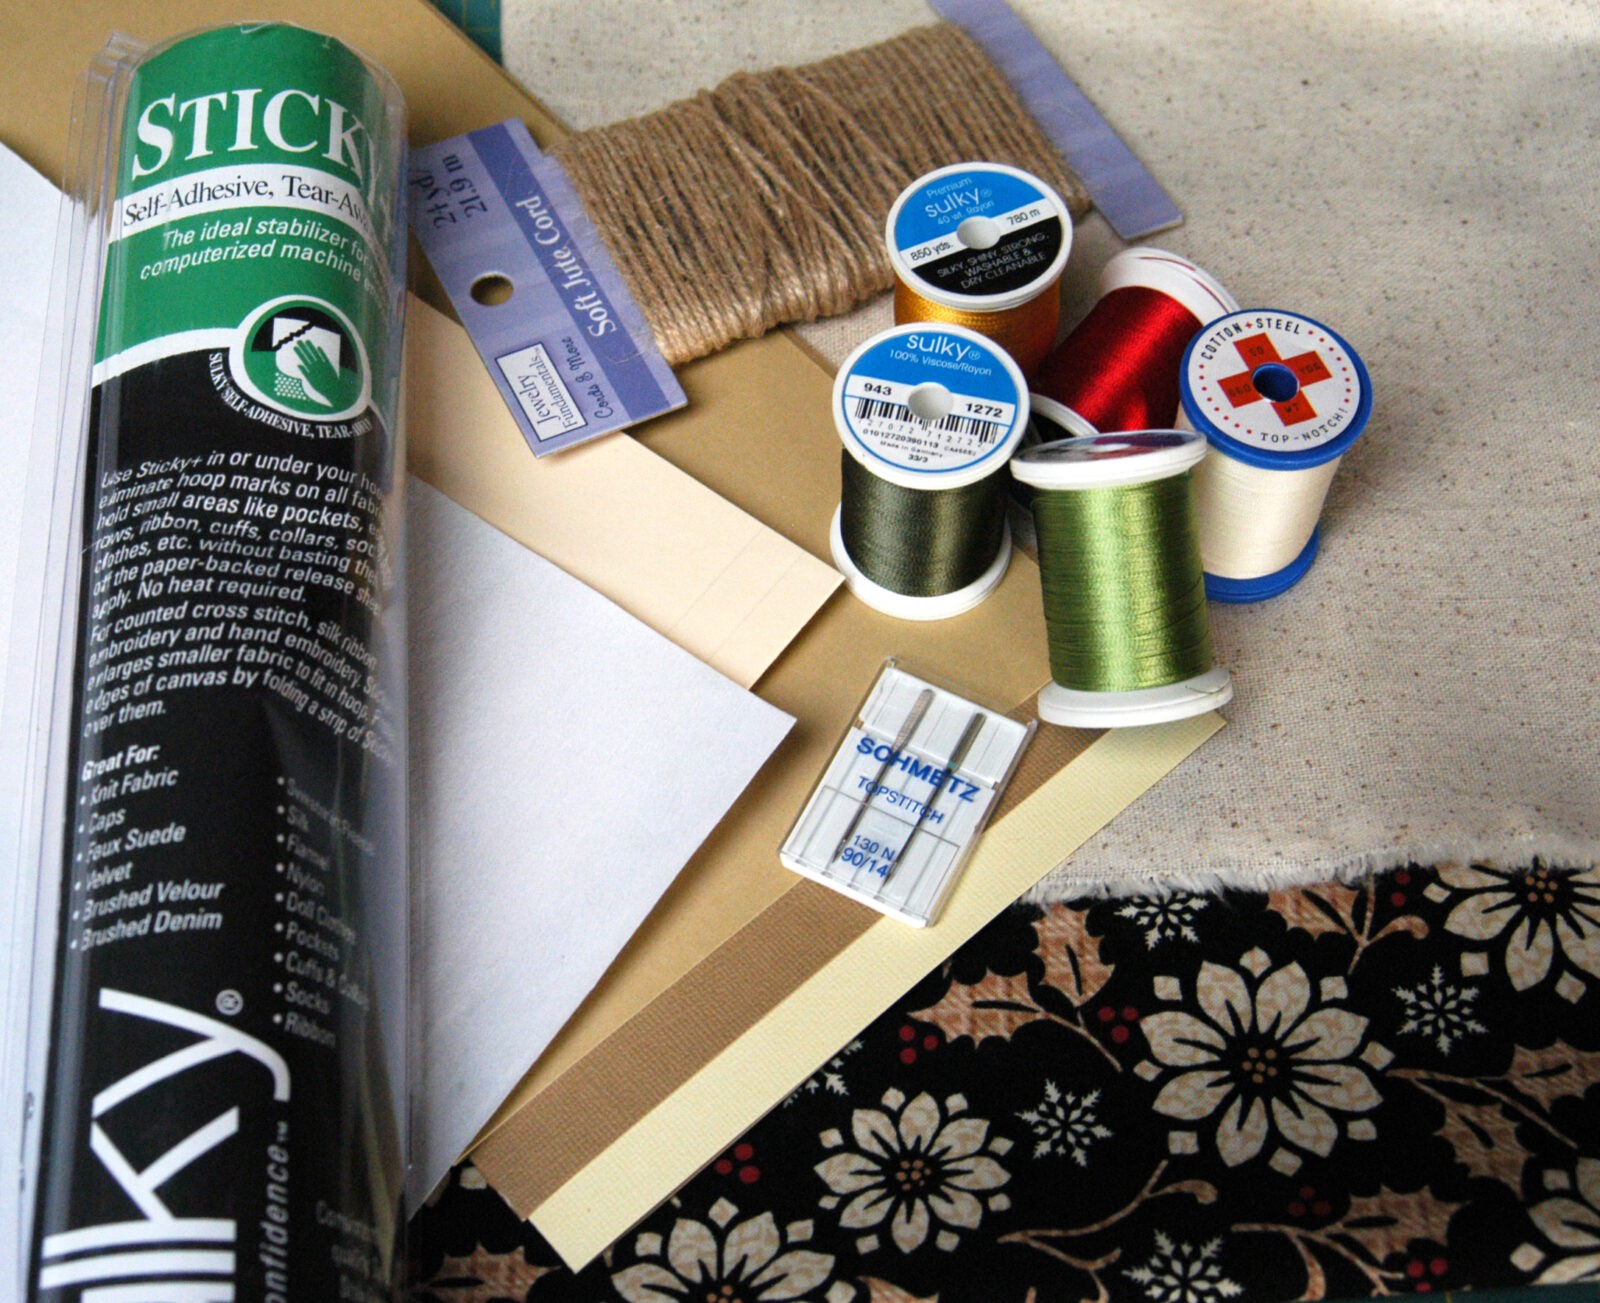
Gather Supplies:
17” x 13” piece of Osnaburg fabric – Osnaburg is a 100% cotton utility fabric resembling coarse linen, is a perfect canvas for cross-stitch. Place the fabric on true grain by pulling threads, until one fiber travels the full length of the piece. This establishes the “straight edge” to begin straight cutting.

8-1/4” x 13-1/4” of Christmas themed cotton fabric
90/14 Topstitch needle
Stabilizers:
- Sulky® Sticky+™
- Fusible web, such as Steam-a-Seam2®
Threads:
#1348 Christmas Tree Word Play Word-Play Design 16.4 count – Available at www.sulkyembclub.com
Cardstock folded in half like a folder for the cover, along with paper for inside pages. Paper can be computer paper, specialty paper, card stock, or themed scrapbook paper.
Jute thread (optional)
How to make it happen:
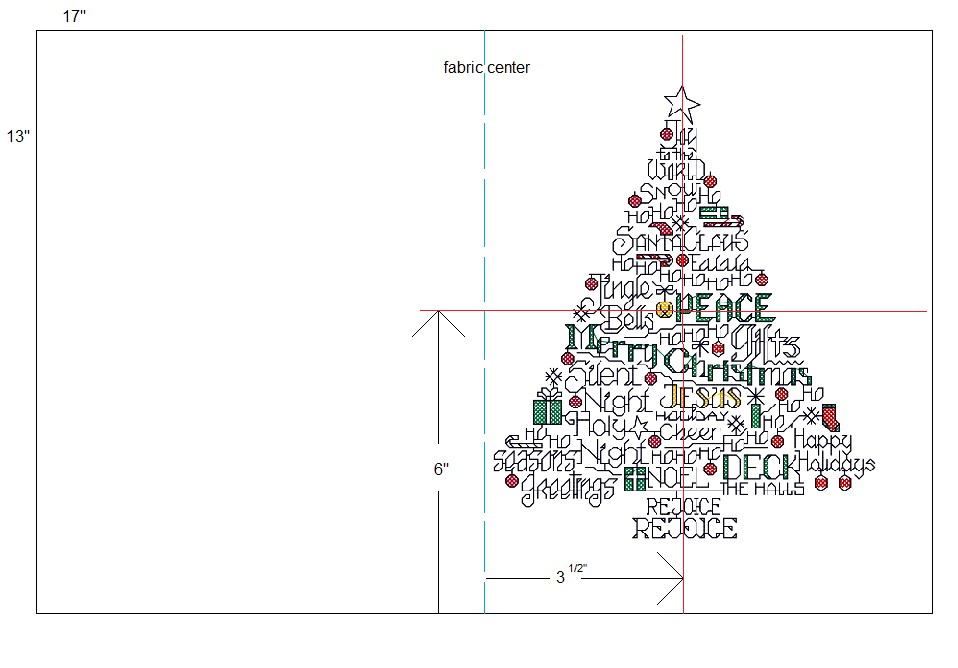 Fold the piece of Osnaburg in half, and hand-baste along the fold, establishing the fabric center. From the fabric center, hand-baste a vertical line 3-1/2” to the right. From the bottom edge, hand baste a horizontal line 6” up. The intersection of the two lines is center design placement. (Shown above.)
Hoop a piece of Sulky Sticky+ Stabilizer, with the gridded release sheet side facing up, and still intact.
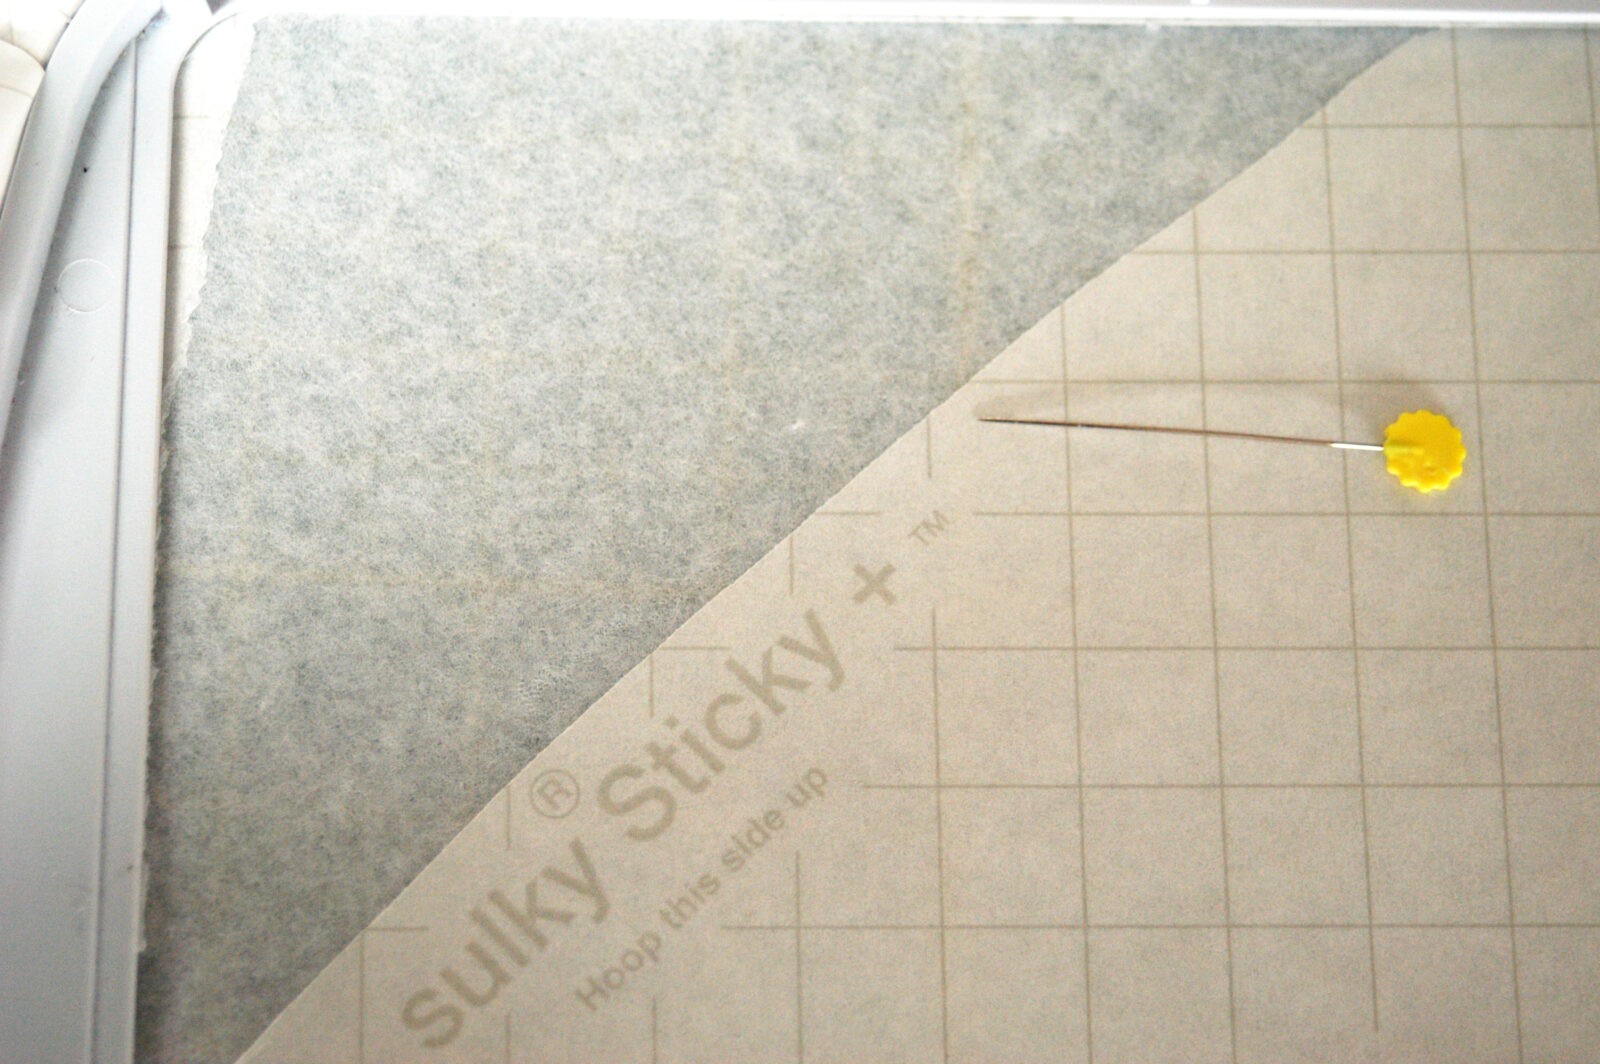
Lightly score the paper inside the hoop and remove it, exposing its sticky surface.
Smooth the fabric, right sides together, along the vertical center, matching the intersecting basted lines with center markings on the hoop. 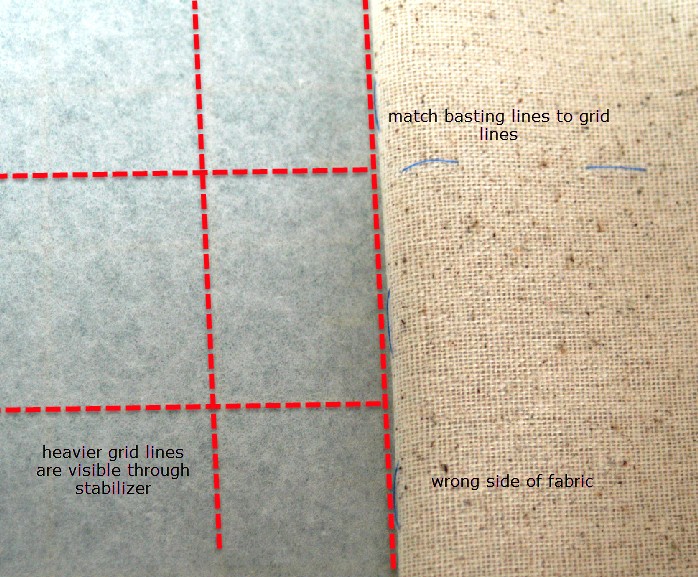 Helpful Hint: If the hoop is squared on a quilter’s mat, the grid lines will be visible underneath the Sticky+, making it easy to keep the fabric straight in the hoop.
Firmly press the fabric into the stabilizer, keeping it taut and wrinkle free. 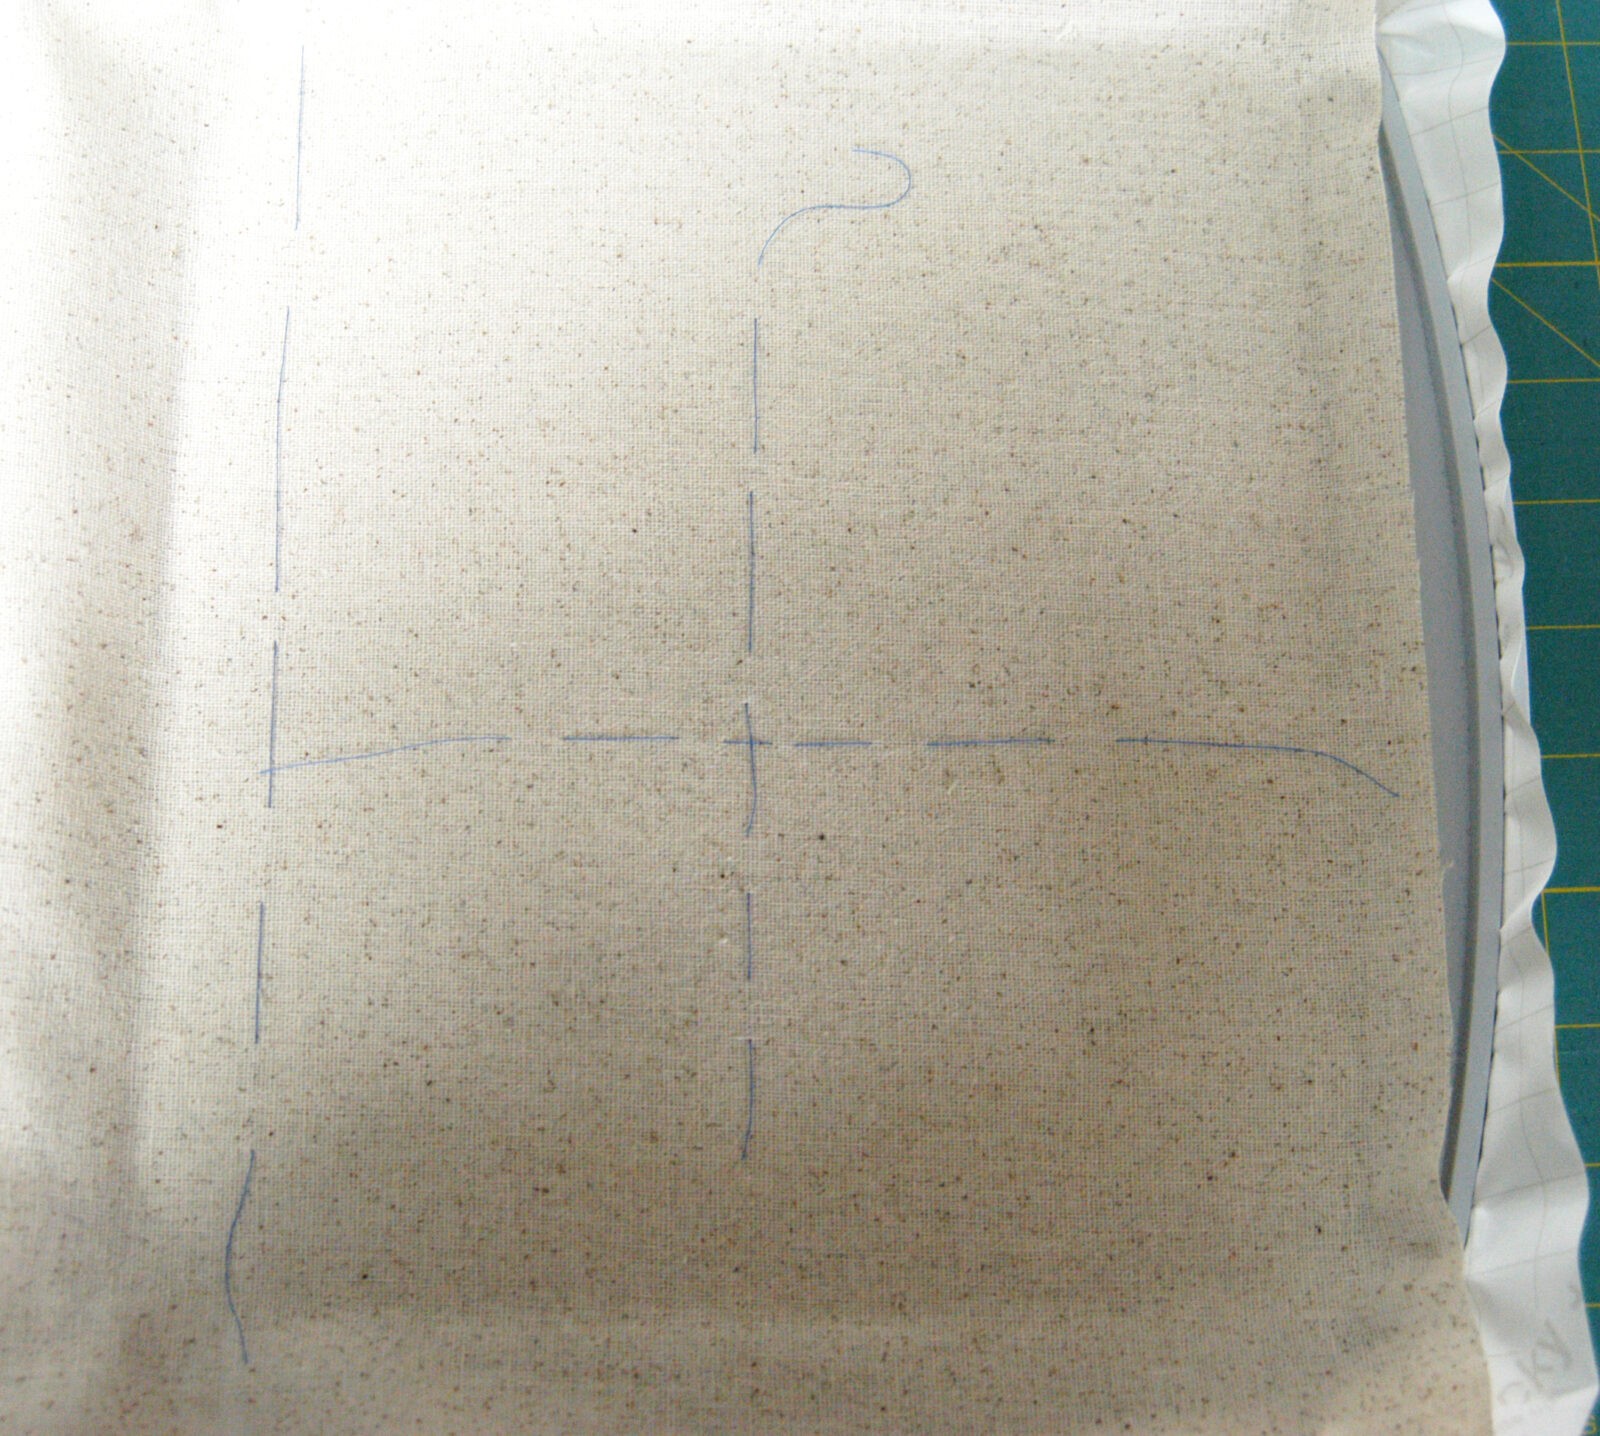
Secure the hoop on the embroidery machine, matching the center needle position to design center.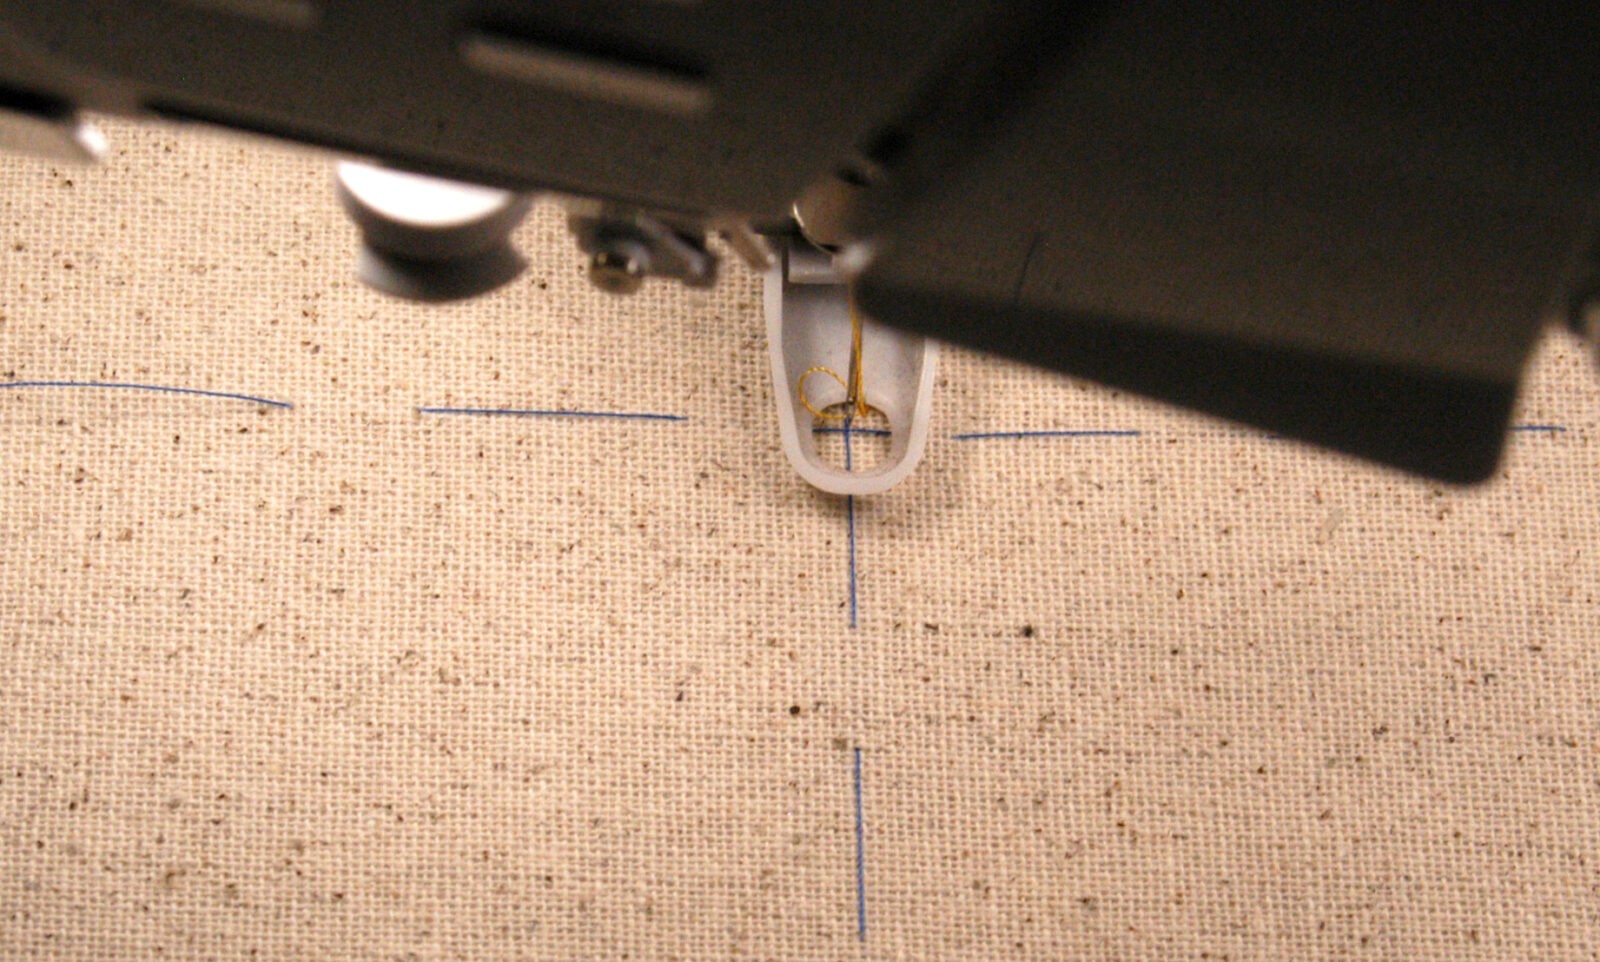
Remove the stitched basting lines.
Slow the machine down by half, and stitch a “fix box” (basting box) around the design. Although this step is optional, a basting box serves as a second method for checking that the fabric is straight in the hoop, and that the design placement is acceptable. 
Once you’re satisfied, stitch the design. Cut the jump threads after each color change, before proceeding to the next color. 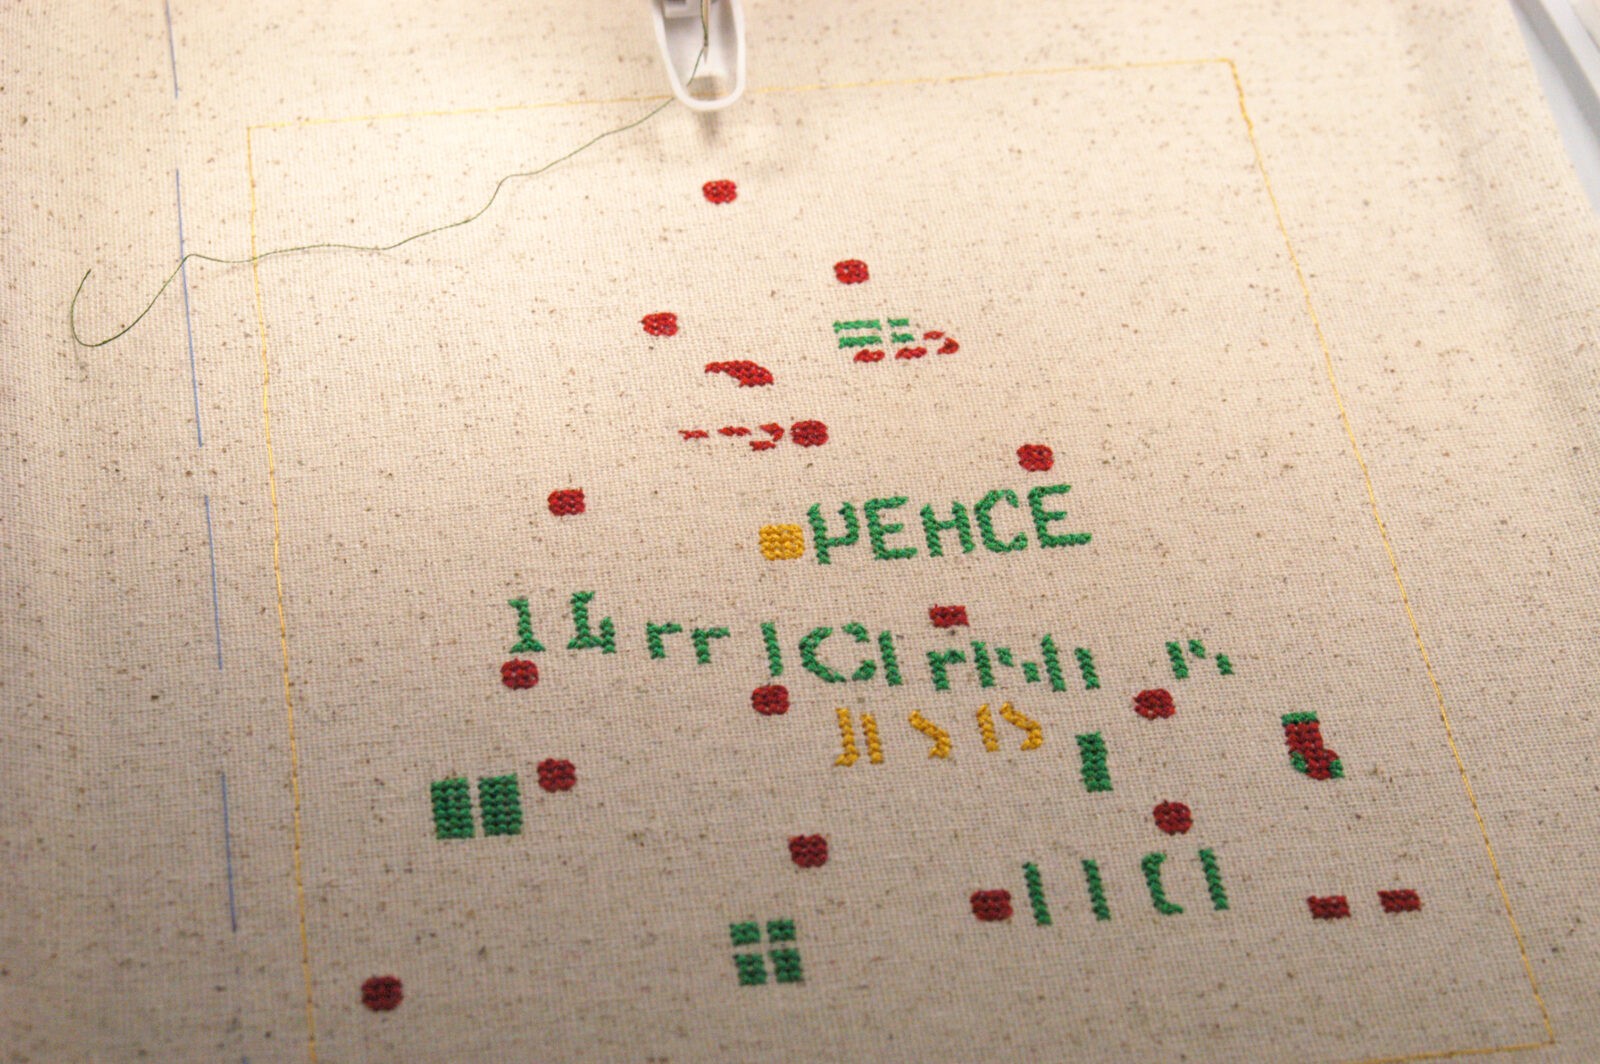
When the embroidery is finished, remove the hoop from the machine. While the fabric is still hooped, use a pin to score through the stabilizer outside the fix box and remove the piece from the hoop. 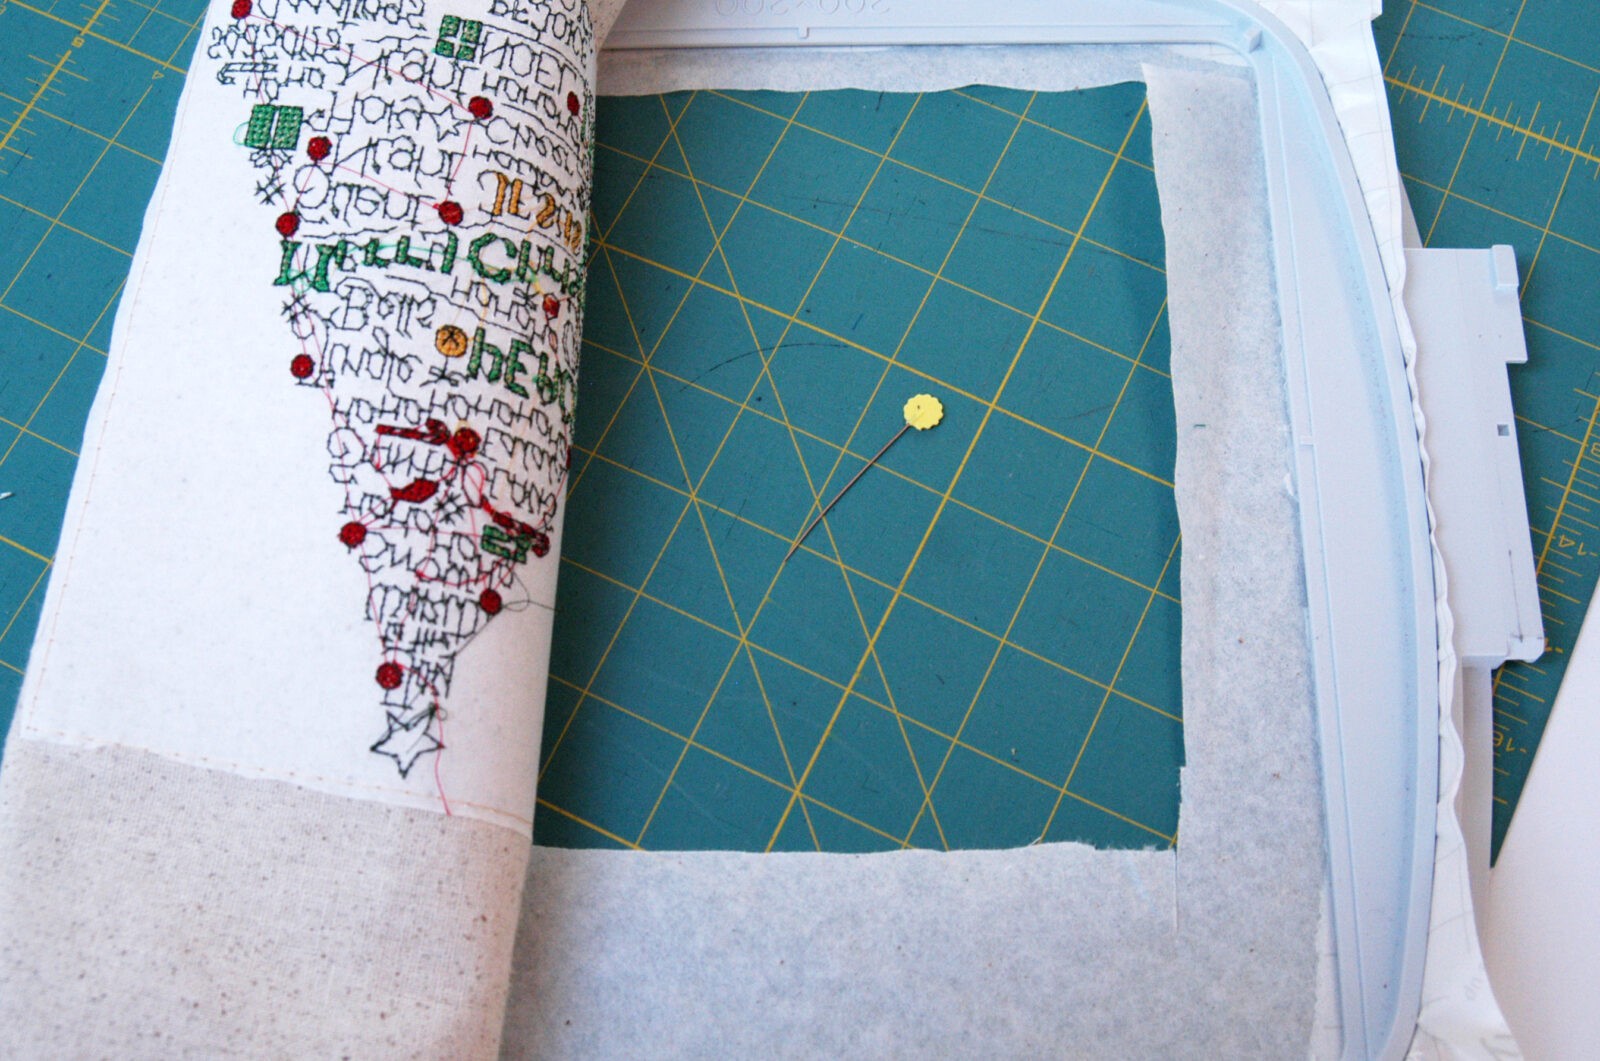
Using the fix box as a guide, fold the embroidered fabric in half, wrong sides together, 1/4” to the left of the fix box. 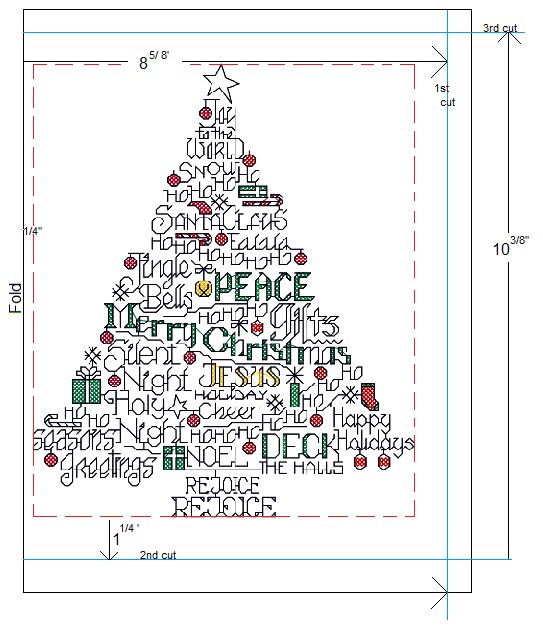 From the fold, measure 8-5/8” to the right, and straight cut. From the bottom of the fix box, measure down 1-1/4” and straight cut. From the bottom cut edge, measure up 10-3/8” and straight cut. Press under a 1” hem on all four sides. Miter corners.
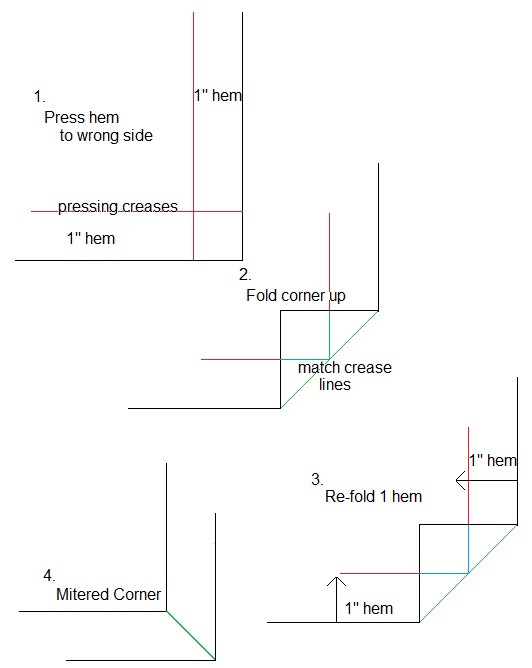
Cut the cardstock 6-5/8” wide x 8-3/8” high and fold it down the center. Check that the fabric cover fits the cut cardstock. 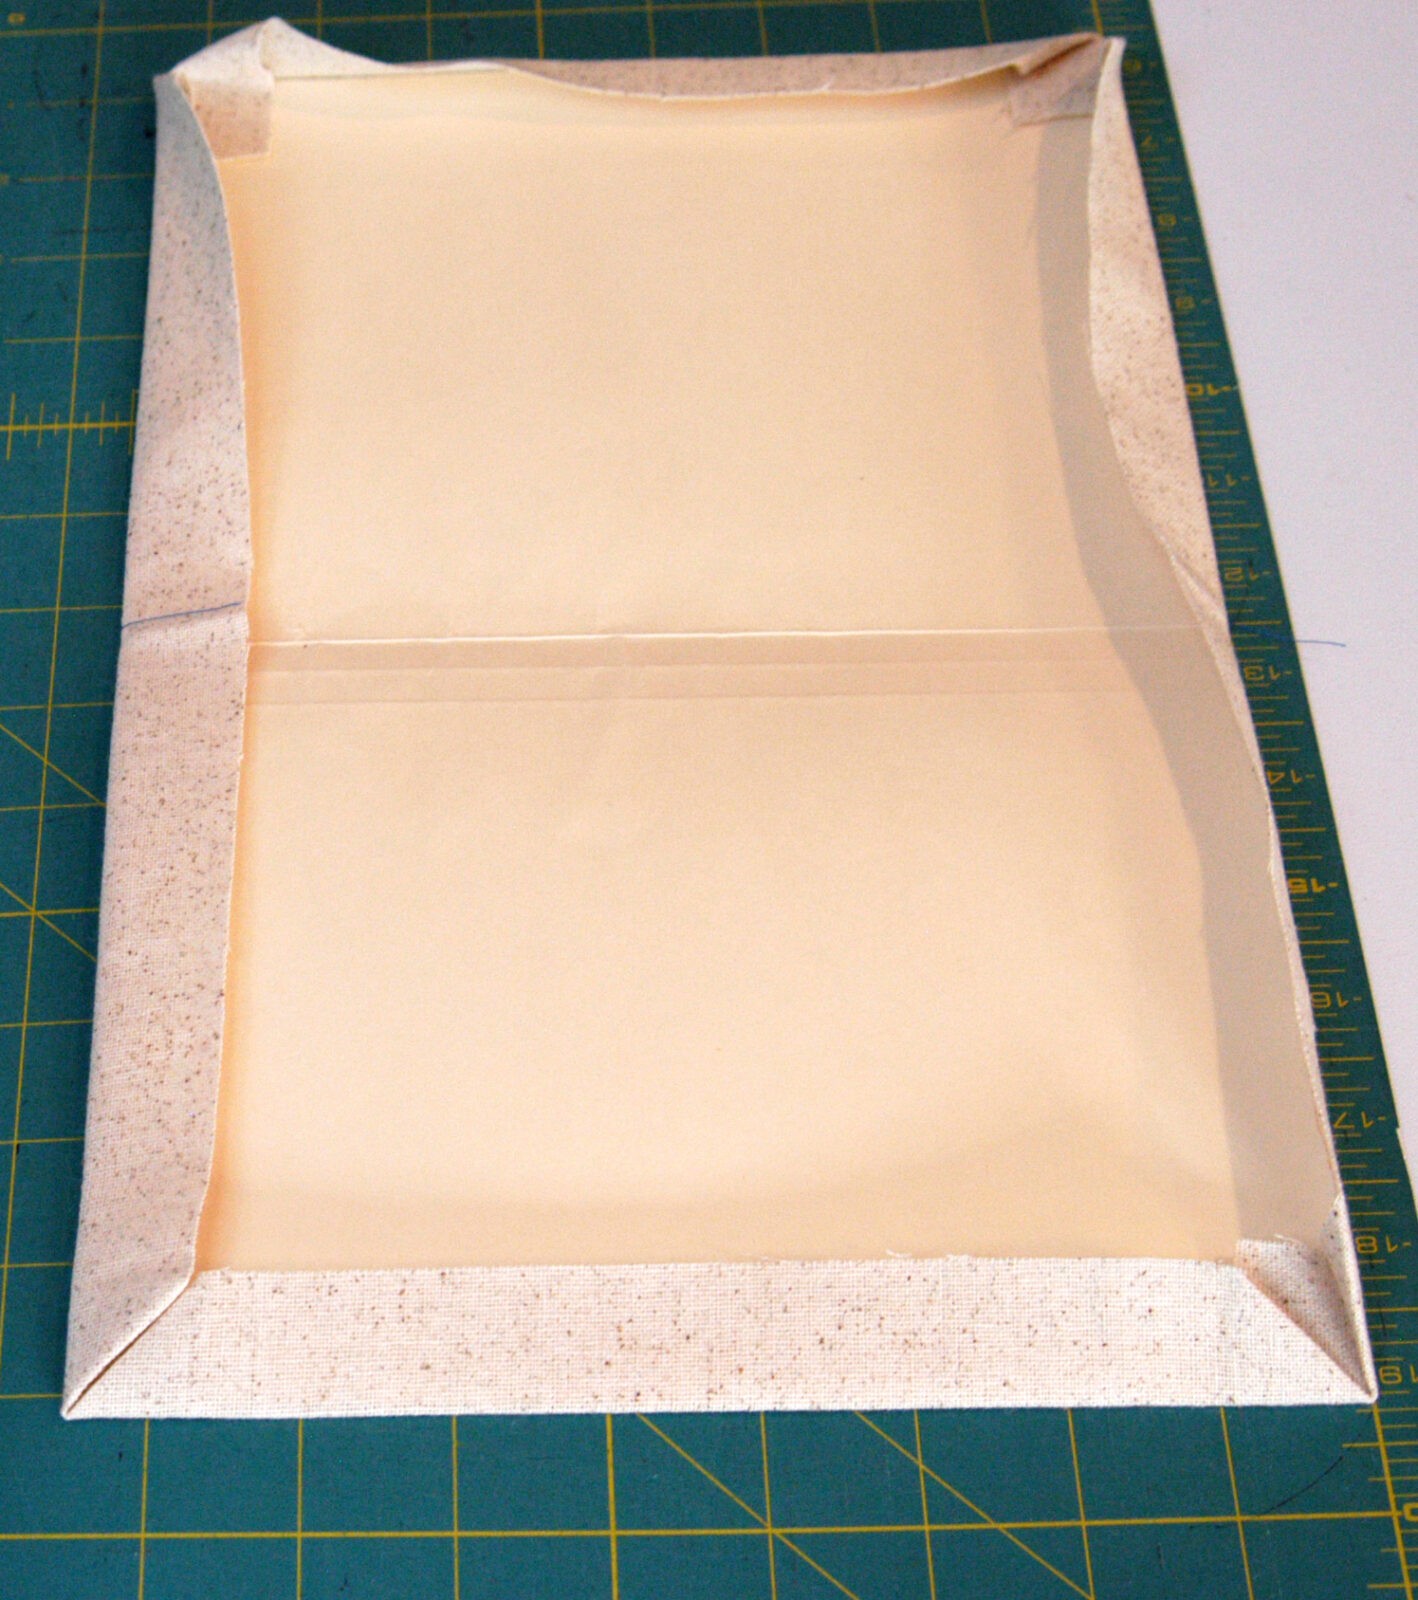
Cut a piece of Steam-a-Seam2 Fusible Web the same size. Fold the fusible web in half, leaving the protective paper covering on one side and removing it from the other to expose one sticky side. Tuck the cardstock folder inside. Keeping the folder folded, first fuse one side and then turn it over and fuse the other side. This permits the fusible enough “give”, allowing the book to close.
Remove the release sheet from the folder’s front cover section. Position the folder behind the wrong side of the embroidered tree using the creased hem lines as a guide, but don’t fuse yet.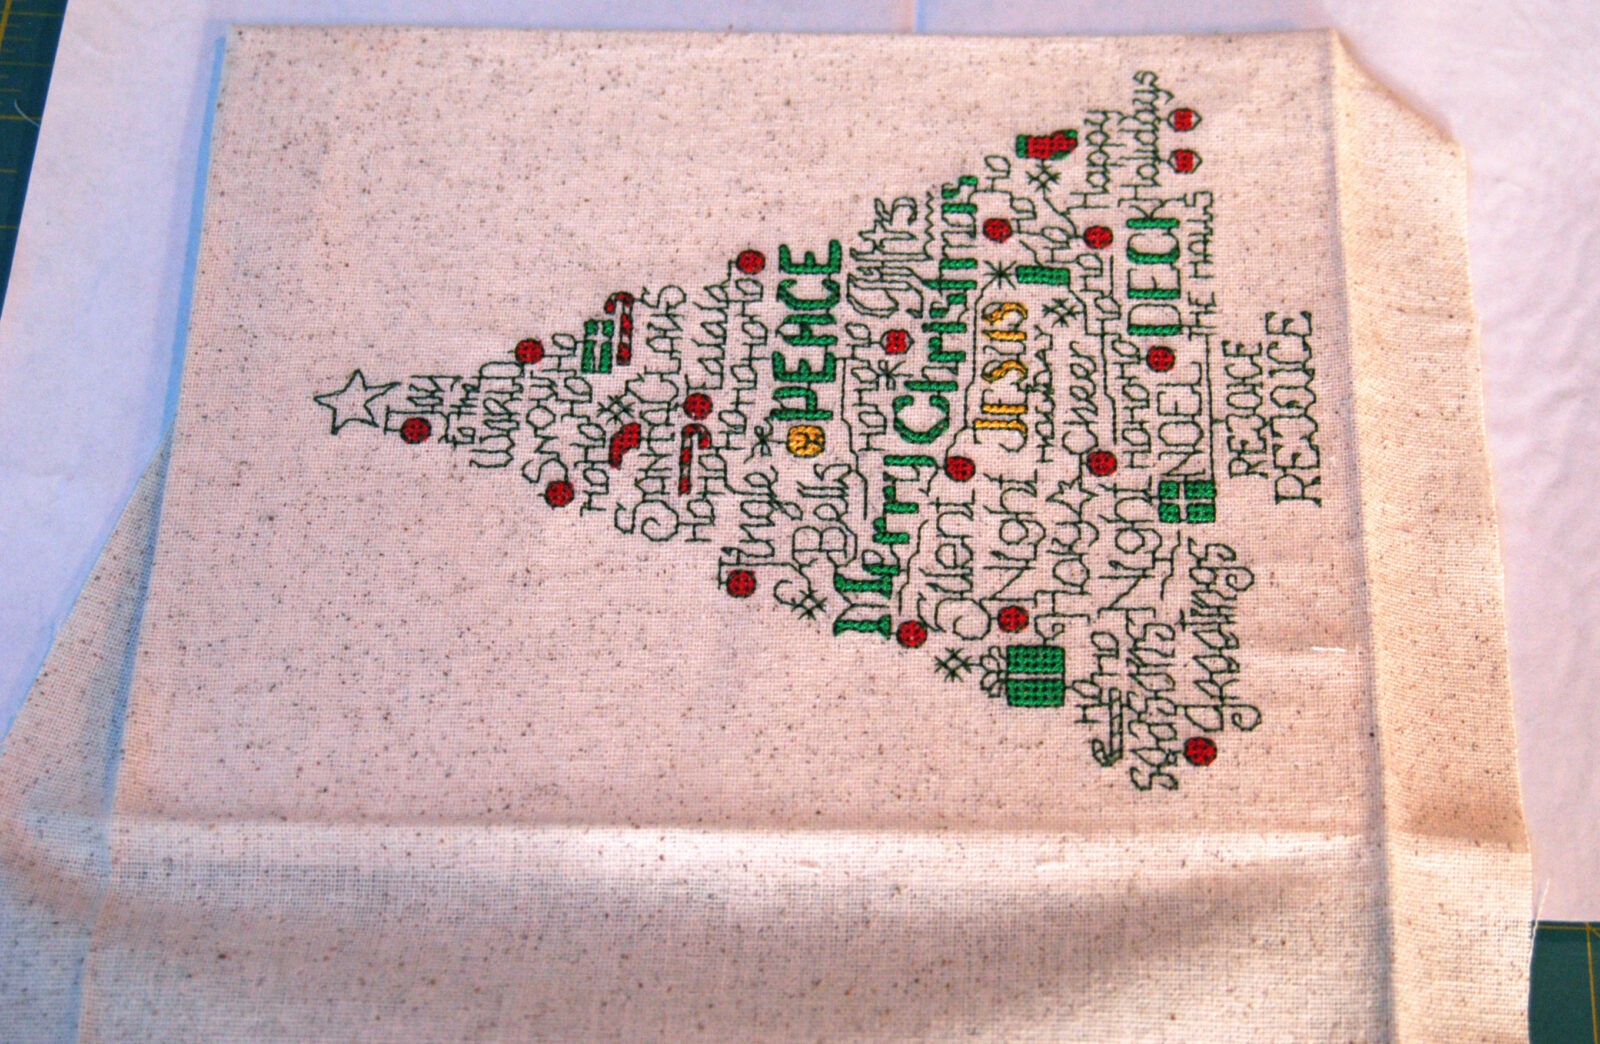
Turn it over to confirm proper placement. Helpful Hint: If you’re not pleased, gently lift the fabric from the sticky surface and re-position it. Once satisfied, smooth the front in place, keeping it taut and wrinkle free. Iron it to fuse in place.
Turn the unit over and continue to cover the back. Once again, keep folder folded.
Turn under a 1/2” hem on all four sides of the lining fabric, mitering corners.
Cut a piece of Steam-A-Seam2. Peel the paper away from the sticky side, and cover the back of the cardstock folder. Helpful Hint: Expose only half of the sheet, securing it before removing the other half.  Keep Osnaburg hems free. Secure the Osnaburg hems to the stabilizer making sure that the iron only touches the 1” fabric hem allowance.
 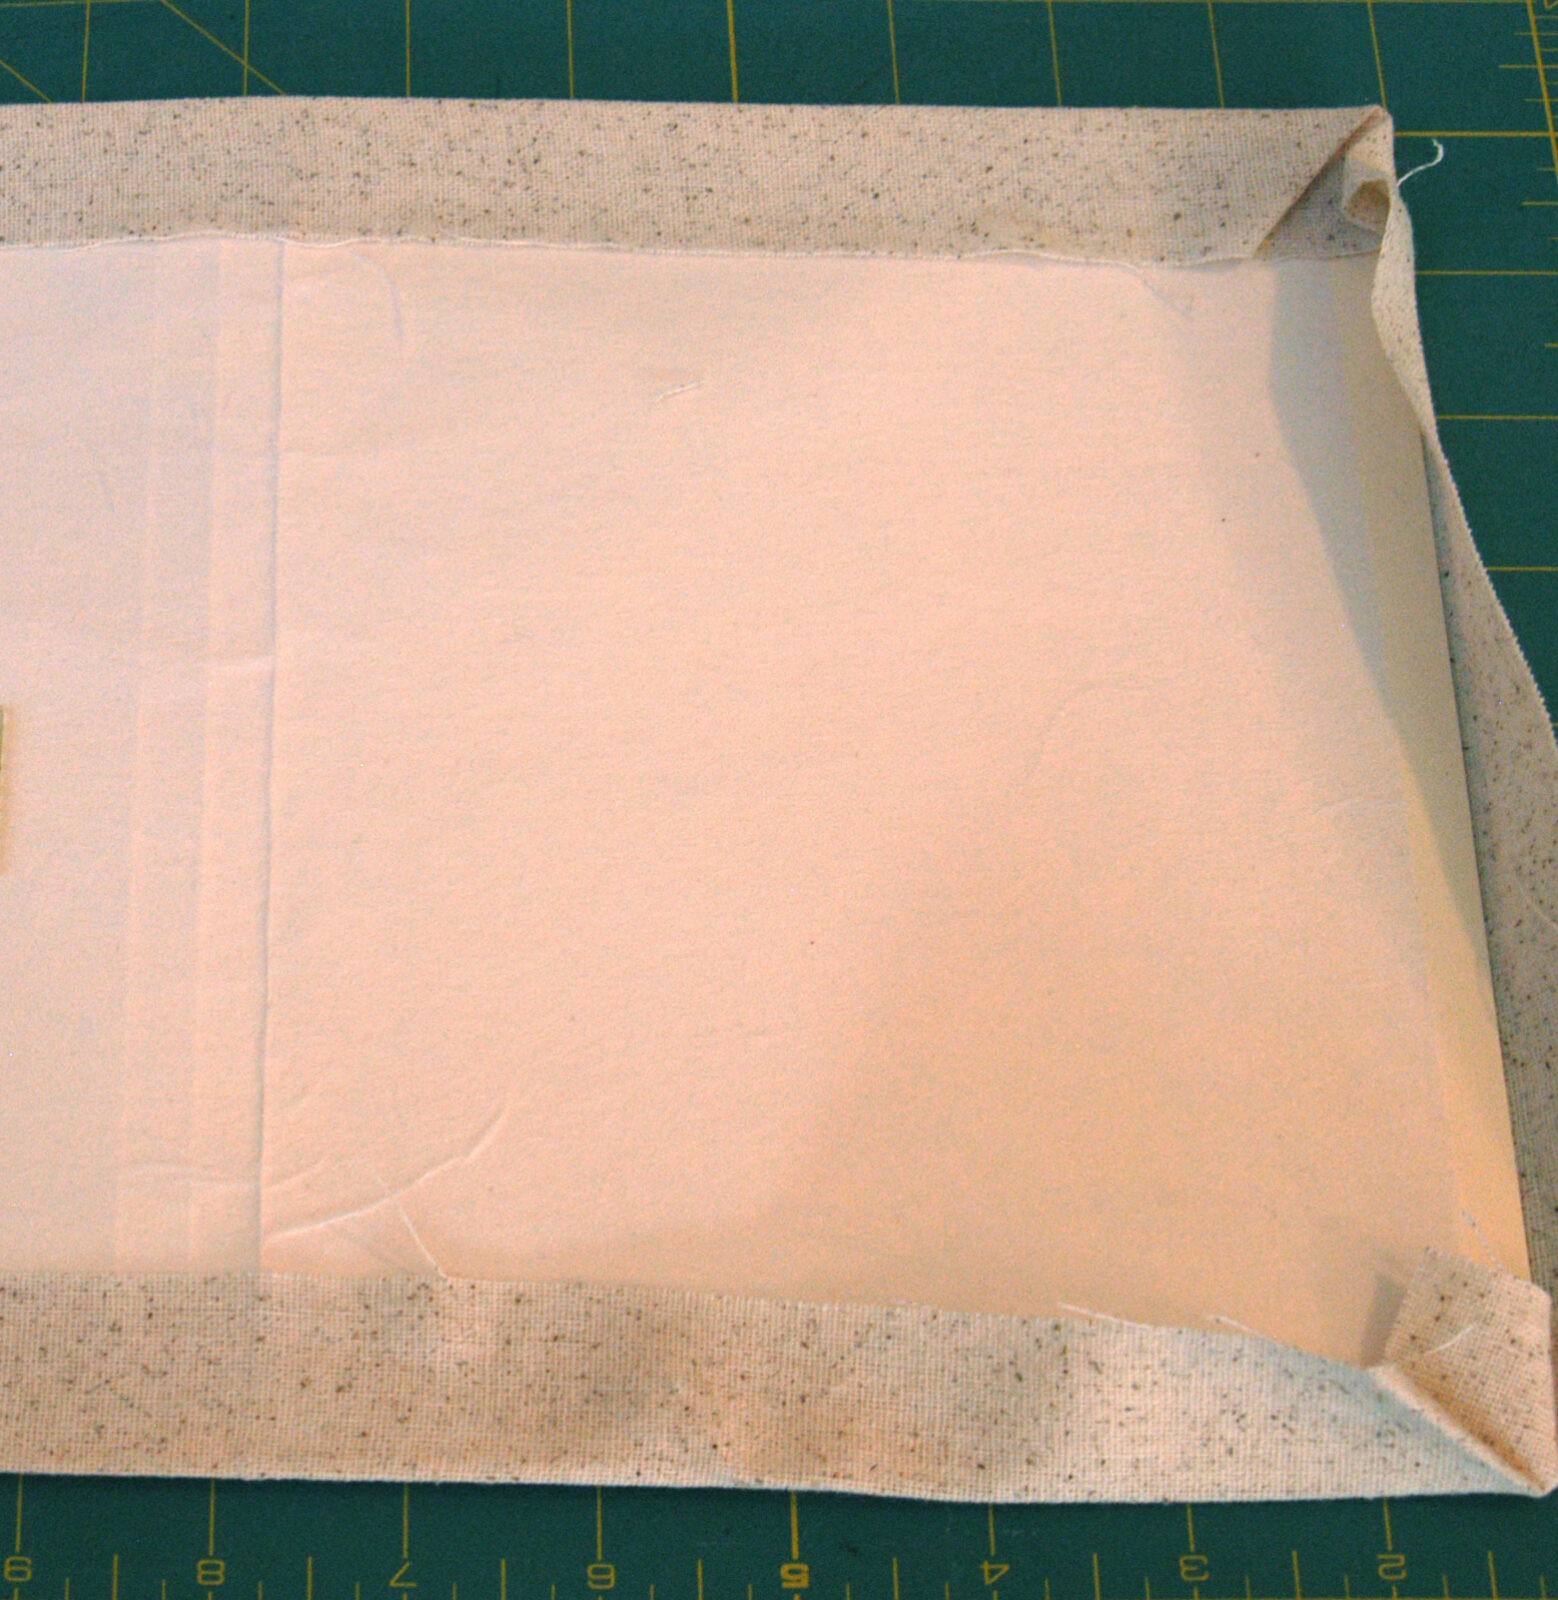 Center the lining inside the cover and fuse.
Using Cotton+Steel Thread by Sulky, hand stitch the edges of the lining to the Osnaburg hem with a slip stitch. 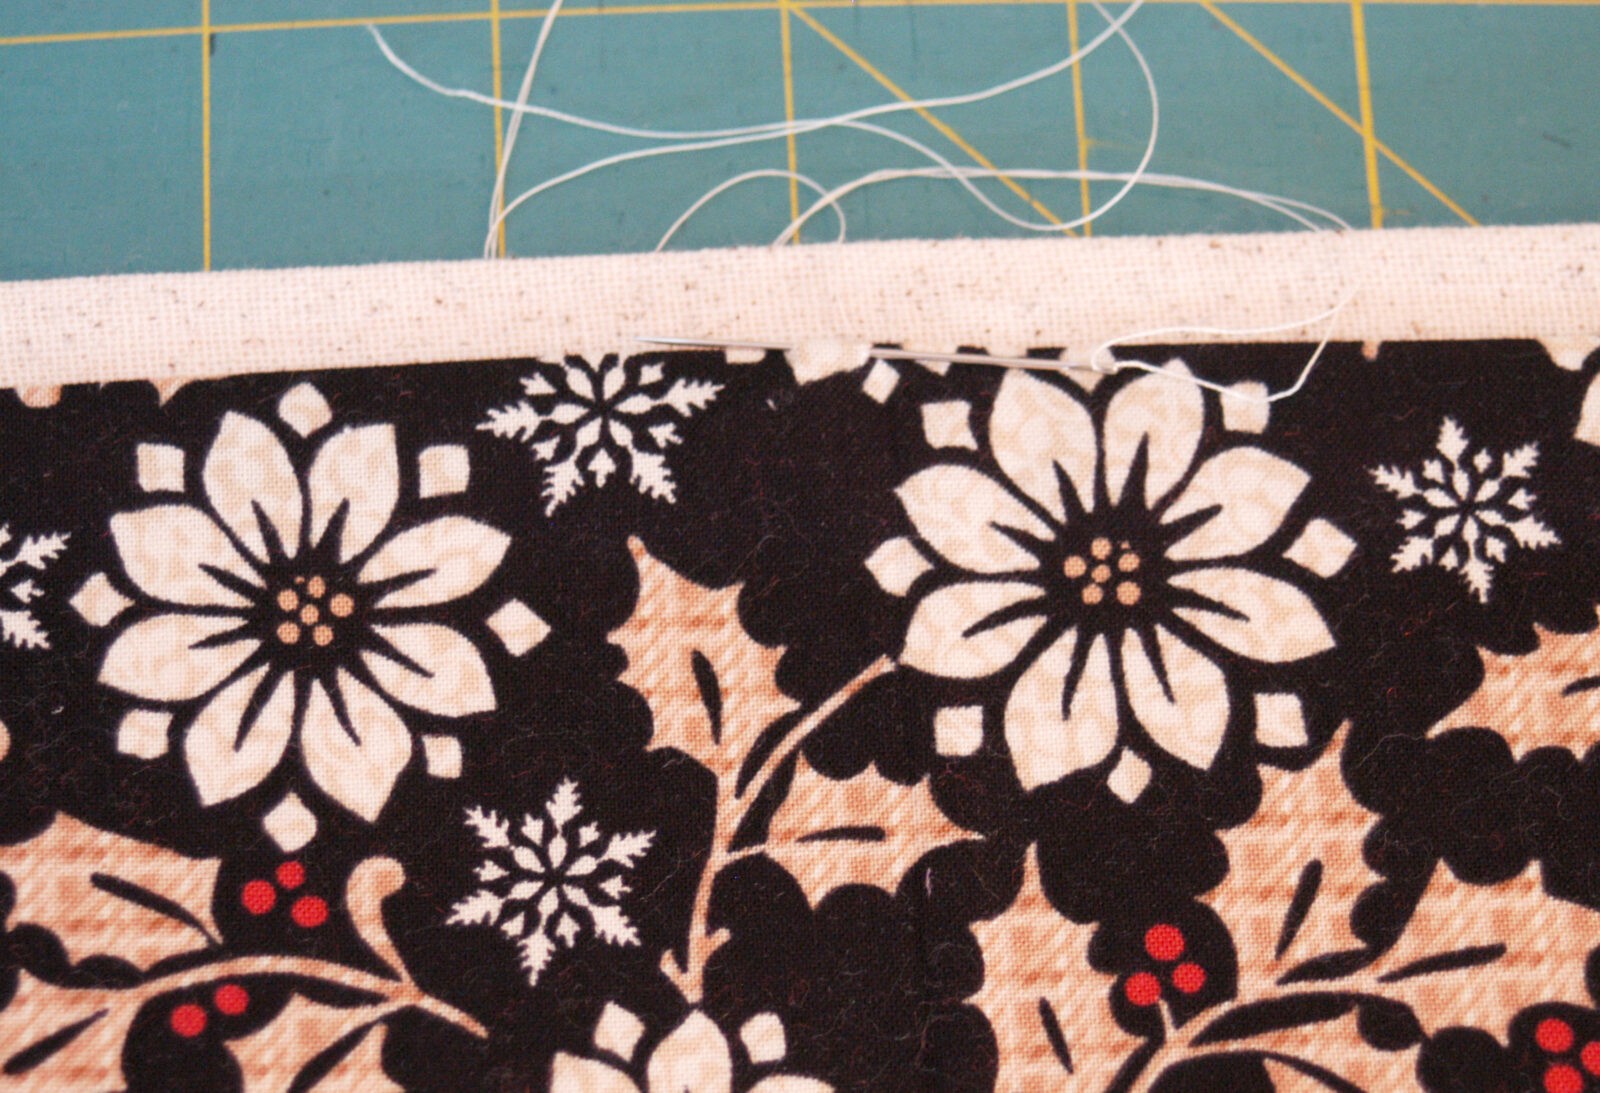
Cut the inside paper to size. Use as many sheets as desired. On the fold, cut 6” x 7-3/8”.
Align the folded paper inside the folded cover. Open the book, and machine stitch with Cotton+Steel Thread, using an elongated straight stitch (about 8 stitches per inch).
Optional:
Wrap the bound edge with a piece of jute and tie into a bow. Pages can be left blank for the receiver to fill in, titled to encourage thoughts; or, if talented with a computer (which I am not), pages can be first printed and then bound into a holiday Christmas book.


Pamela, thank you ever so much for suggesting using Osnaburg for embroidering cross-stitch!!!! YEARS ago when I was the Health Nurse at a local college, I made lined drapes for the clinic from Osnaburg!!!! Don’t reckon that I have used it since!!!! I’ll be sure and get some to use for embroidery!
I have been stitching these designs out on actual aida cloth for many years. I use 14 count and once I get the first stitch lined up in a hole, the rest all stitch out wonderfully. I love Ursula’s designs – always the best cross stitch designer!!